When you click on links to various merchants on this site and make a purchase, this can result in this site earning a commission. Affiliate programs and affiliations include, but are not limited to, the eBay Partner Network.
Hey Hab I cant count the the times Ive had things like the pulley thing happen to me, just part of mechanics. You cought it before it caused any damage to anything and got it took care of. Good job on catching it.
You're being too nice Jason, but I'll take it.
Planning on regreasing the manual hubs this weekend- the left is making a little rubby sound on sharp turns- but it's supposed to be in the 50s. Maybe my wee little brain cells won't get frozen this time!
Left manual Aisin hub was making a moaney groaney sound on harder turns. Further inspection showed the cv shaft was occasionally turning here and there even though free. Locking the hub made the noise cease to give me a couple of days until I could check it out.
In the meantime I found several threads with the same symptom descriptions and a most excellent write-up by space-junk: https://www.yotatech.com/forums/f116...ild-up-158644/
Mine just needed a good cleaning and re-greasing. Done, locks, unlocks and all good.
While I was under there I also noticed the oe boots are getting really tired and cracked. New CV angle, age, yeah. Shouldn't matter while the hubs are free since so far they aren't leaking and now they aren't moving at all. Maybe they'll get me to a warmer time of year and this time I am going to REBOOT. NOT giving up this set of shafts!
Couldn't have asked for a better weekend, Friday was sunny and in the 50s, Saturday was a sunny 71 and today in the upper 60s. Hope you all had excellent weekends too!!!
The innards of the ps pump look pretty fail-proof with all that steel, rw. A bearing in front may have been all I needed to deal with? All I knew was burned fluid and the belt screeching sometimes randomly, odd fighty feeling when turning too, near lock, that changing out the rubber bandy rack bushings did not fix. (bushings did give me more solid steering, you should have seen how much the rack was moving, it was crazy)
It was pretty gummy in there Jason. I was terrified I would loose the stinkin' little tiny ball!
The manual hubs were easy to put in- upper ball joints were the hardest part. I did pull my front abs sensors rather than having abs rings pressed in and thus needed the speed sensor to get my speedo back. I will have abs rings put in when the bearings need changing and put my sensors back in, though I'll leave my speedo the way it is now. At least the boots aren't chewing themselves up (yeah, and still cracking, but age and new angle, age and new angle) without having to be stretched. if the joints break I should be able to unlock the hubs and get home without worries. Those were my decision makers.
Some tacos came with both abs and manual hubs, I am told they are very few and far between though.
Also, some people have testified to having driven 3rd gens after pulling a cv without a problem. Others cry foul. Me? No ideas on the subject.
Nothing big, just replaced the 3/8" ps return line and added a magnafine inline filter to it. It would have been easier to do all at once, but pulling the air box for access and using vacuum caps for plugs to keep fluid spillage to a minimum makes it not bad. I assembled the lines and filter indoors-it's cold and windy out! Approx. 13" overall fits pretty good, 15" is too long.
I never posted these from the 96's rack and pinion r/r...
This is simply how I did it. I am claiming the not-a-mechanic status here. YOU proceed correctly- not necessarily how I did it!
I was able to do this with the wheels still on the truck. I did lift them a little off the ground when reattaching the outer tie-rod ends to the a-arm.
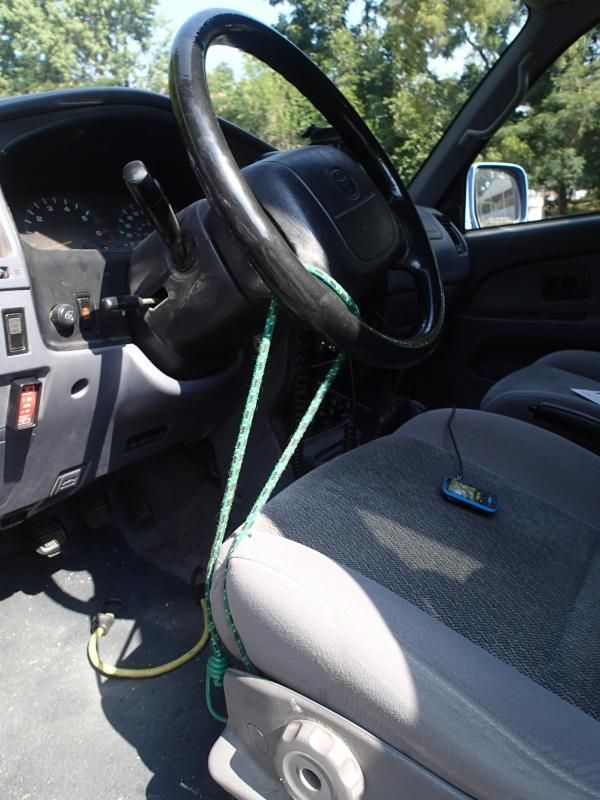
Secure steering wheel. You do NOT want it to turn, you'll mess up the (I think it's called) clockspring. Move is one thing, a little moving is okay. Turning is not.
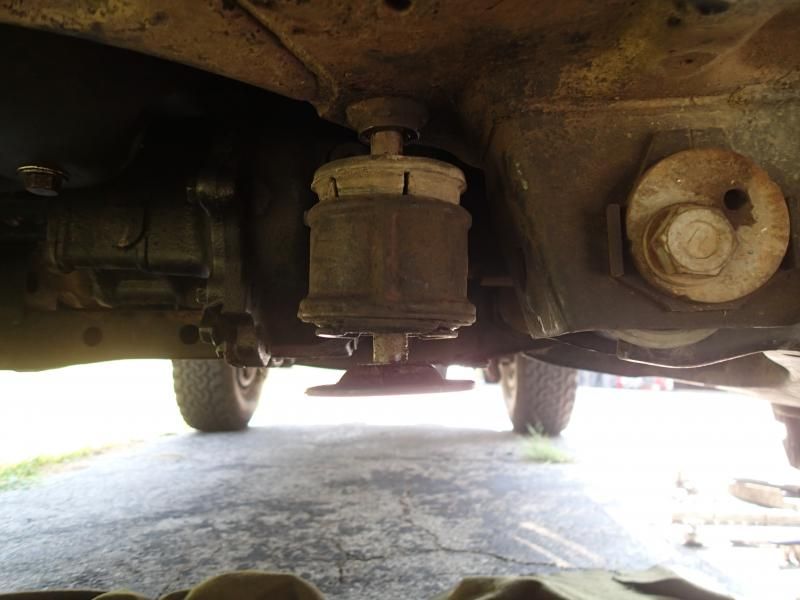
IF you have a diff drop you have to remove it. The long bolt that holds the left side of the rack (driver's) has to come out under the front diff.
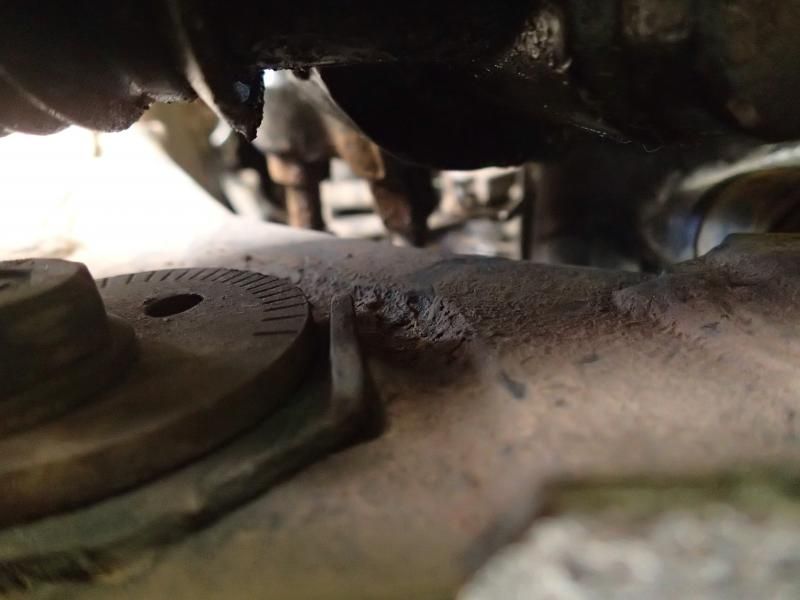
Remove sway bar. The brackets have one nut and one bolt, both are undone from the topside. Illustration of what the bracket looks like. I unbolted the links at the a-arm, it doesn't matter, unbolt them however you can to get the sway bar off and out of the way.
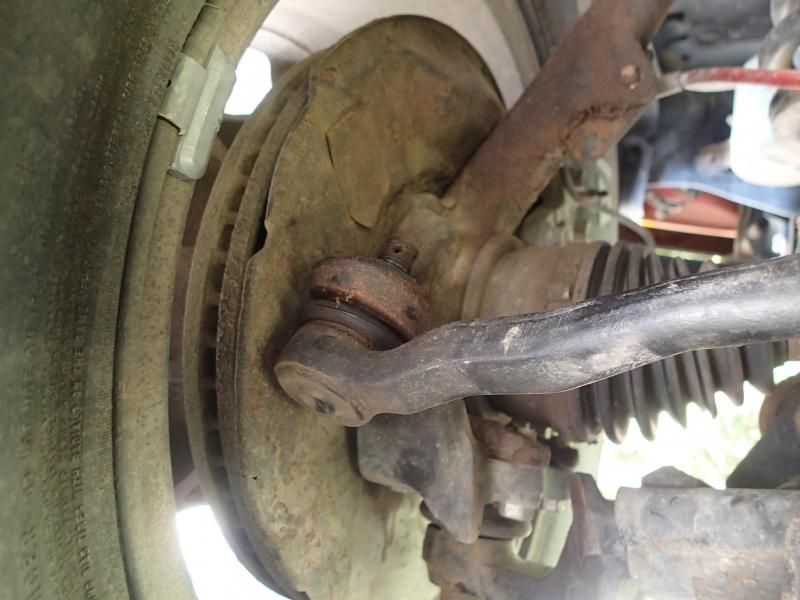
Unbolt and use a truck tie-rod end tool to get the outer tie rod ends off the a-arm. I use the rent-a-tool at Autozone and they always say 'oh, foreign' and try to give me the smaller tool. It won't fit.
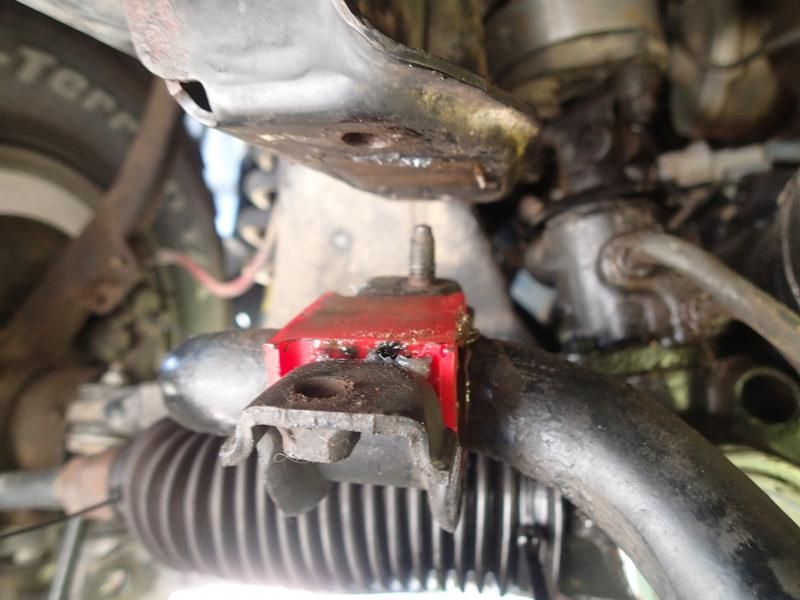
I unbolted the upper bolt that holds the rag joint to the splined shaft on the power steering side. I should have unbolted the lower bolt instead.
Have fun and be patient with it, it's a job getting everything together straight and centered and also those lines. It can be done. You can do it!
Go ahead and put the poly bushings in before you install it. IIRC you have bigger tires too...I'm figuring that's what's not too easy on the stock bushings.
I wouldn't have been able to leave the tires on if I didn't have the 1" wheel adapters- the tie rod was barely accessible as it was.
Flushing the system was easier than I thought it would be. Thinking about you asking me about it the first time I did a rack is what finally goaded me into doing it. It was much needed so thanks!
If you flush/add filter just get some new 3/8" ps return line and put the filter in. Easiest time to do it and I found my return line was pretty degraded after 19 years. Measure, mine fit best at 13" overall (1" body lift).
Other bits to consider based on miles and condition are the outer tie rod ends, the lower ball joints and sway bar bushings and links, just because of where they are and what you'll be unbolting (lbj only because otr, but only if needed).
I know you've got this and have prolly already given the above and more some thought. It's okay to tell me to shut up already.
Are you going with the oe rack as indicated above or the Safari I keep hearing about?
Did I mention have fun?
The world up here is covered in snow and it's supposed to drop to -5 by Weds morning. Miss MO much?
You aren't done yet. The blankety-blank power steering lines must be removed.
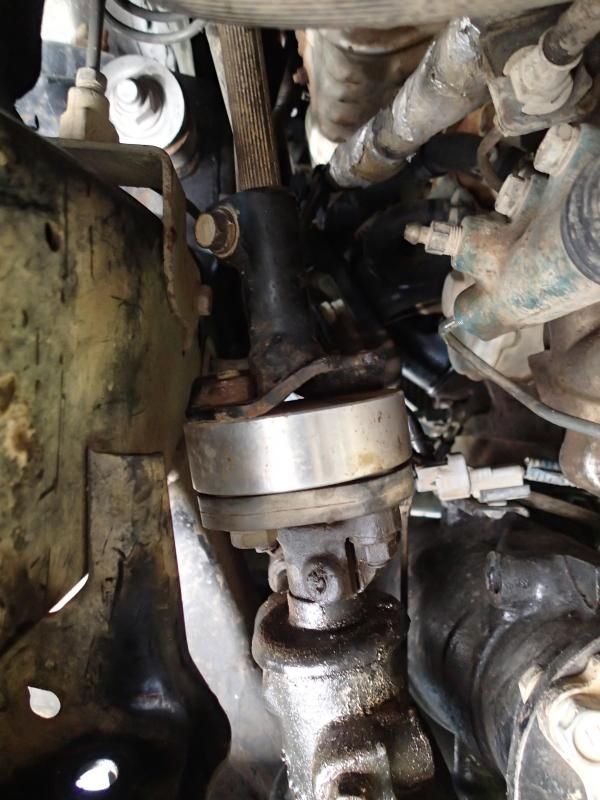
Looking up on the driver's side, between the back of the rack (towards the front of the truck) and the cross member. You can see the lower control arm bolt in the foreground. Look for the 2 blurry lines at the upper mid part of the picture. I loosened the rack and used a bungy to hold it up-ish so I could gain a little more room. The rack is also resting on the center mount. Oh, what a bear this can be, even when they aren't rusted on. Yay me, mine were not. A 17mm flare wrench is very useful here. The nuts are at different angles (refer to your new rack and you'll see) that make it very hard to fit the wrench in and on the nut. It can be done.
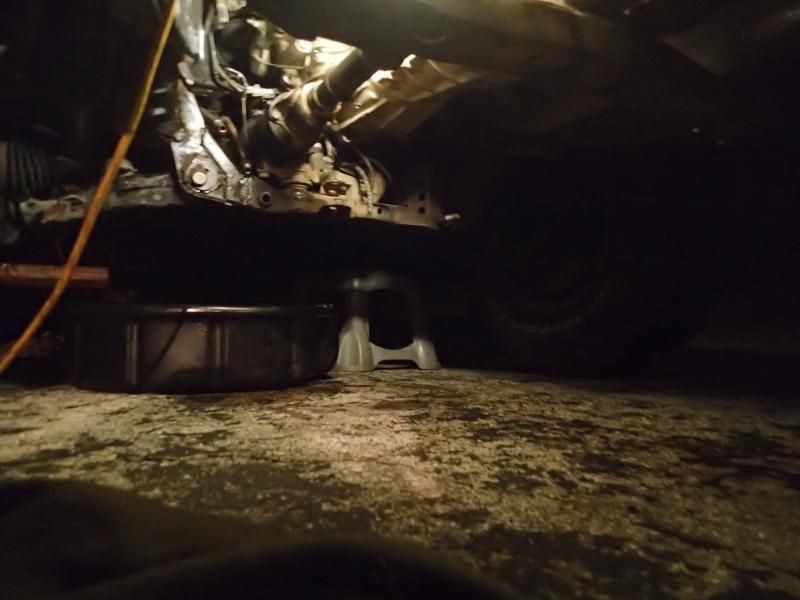
Fluid will come out of the lines, have a pan ready.
Get that sucker out of there!
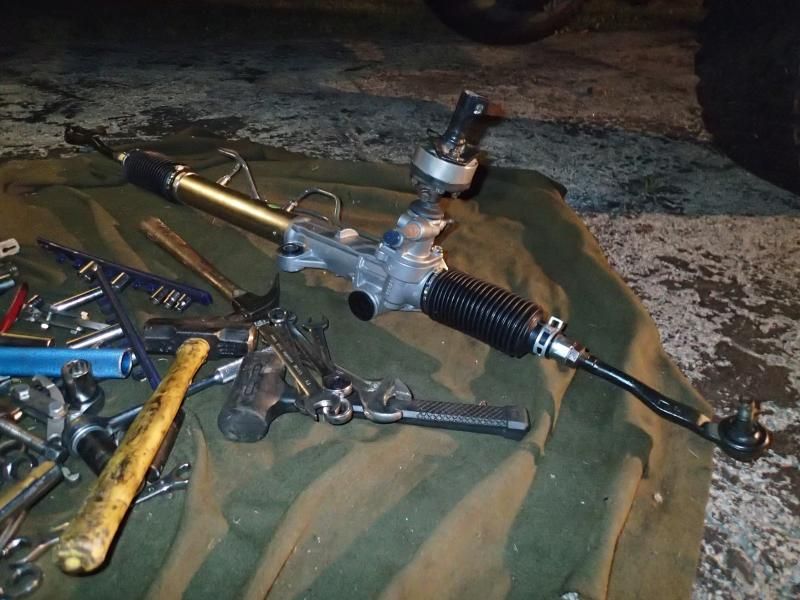
Center the new rack (this one had two useful marks on the rubber dust boot by the splined shaft that helped center it perfectly once it was darned close.
Mark and remove the outer tie rod ends (this one came with inners). Count turns to help get them on the new rack as close as possible. I was able to remove them by putting a wrench on the flat side of the tie rod and one on the hex at the end of the rack. The lock nuts stayed put as the tie rod end came off and I had only to screw the tie-rods into the new rack up to the lock nuts, careful not to let them turn. It worked great for me...
I also put the rag joint on (the aluminum thing in the middle of it is a spacer for the 1" body lift) and that's where I should have left it hanging on the steering shaft. I did end up pulling it back off, making sure the steering wheel was straight and putting it back on the steering shaft in a way that allowed me to reach both upper and lower bolts. I tightened the upper bolt and slid the rack up onto the lower part of the rag joint while maintaining the rack's shaft position and the straight steering wheel. It might have helped to have someone hold the wheel straight rather than rely on the bungee to hold it. Once I got everything lined up I loosely bolted the rack enough that it wouldn't fall out and got to work on those stinkin' power steering lines. After that was done I bolted the rack in and tightened the rag joint bolt too.
Once the rack was in tight I put in the sway bar, the front diff drops, and the tie rod ends. If they refuse to tighten use a jack to push up from underneath and they should hold still for you to get the castle nut on. Don't forget your cotter pins!
Add dex/merc to the reservoir and turn steering wheel back and forth, checking on the fluid level.
I should have flushed it first and need to learn how.
That's pretty much how I did it. Feel free to critique if there's something I could or should have done differently, as I said, I did it logically rather than knowingly.
Have fun and be patient with it, it's a job getting everything together straight and centered and also those lines. It can be done. You can do it!
Go ahead and put the poly bushings in before you install it. IIRC you have bigger tires too... I'm figuring that's what's not too easy on the stock bushings.
I wouldn't have been able to leave the tires on if I didn't have the 1" wheel adapters - the tie rod was barely accessible as it was.
Flushing the system was easier than I thought it would be. Thinking about you asking me about it the first time I did a rack is what finally goaded me into doing it. It was much needed so thanks!
If you flush/add filter just get some new 3/8" ps return line and put the filter in. Easiest time to do it, and I found my return line was pretty degraded after 19 years. Measure, mine fit best at 13" overall (1" body lift).
Other bits to consider, based on miles and condition, are the outer tie rod ends, the lower ball joints and sway bar bushings and links, just because of where they are and what you'll be unbolting (lbj only because otr, but only if needed).
I know you've got this and have prolly already given the above and more some thought. It's okay to tell me to shut up already.
Are you going with the oe rack as indicated above or the Safari I keep hearing about?
Did I mention have fun?
The world up here is covered in snow and it's supposed to drop to -5 by Weds morning. Miss MO much?
Many thanks for the additional tips and inspiration! I do indeed have bigger tires too, but I do not have wheel spacers like you do... I will also consider OTREs and LBJs
I was planning to order the same OEM as you did, but I may explore and further research that Safari you mentioned later...
It is supposed to freeze here in north Texas overnight with snow flurries... that is plenty enough for me, I do NOT miss the cold nor snow of Missouri at all!
Can not blame you! I could shovel some into a box and send it your way...
I'm all out of tips but you've got my digits and I am all high falutin' and texty these days if you need additional commiseration whenever the time comes.
Can not blame you! I could shovel some into a box and send it your way...
I'm all out of tips but you've got my digits and I am all high falutin' and texty these days if you need additional commiseration whenever the time comes.
habanero, I figure because the '96 SR5 is your daily driver, you still run both front and rear sway bars, correct?
habanero, I figure because the '96 SR5 is your daily driver, you still run both front and rear sway bars, correct?
Yep. I drove a few days without (I think it was) the front and it wasn't horrible but I didn't like it, either. If I get any more flex in the rear a spring will prolly fall out!
Yep. I drove a few days without (I think it was) the front and it wasn't horrible but I didn't like it, either. If I get any more flex in the rear a spring will prolly fall out!
I don't run either sway bar, it's kinda floppy on the road I've got used to it. It just kinda fits the rest of the stuff that isn't quite rite on my truck.

 Feb 5, 2015 | 09:42 AM