
rattlewagon's 1992 Pickup Build-Up Thread


 Mar 17, 2014 | 06:17 PM
#383
Thread Starter
Registered User


Joined: Oct 2009
Posts: 4,832
Likes: 332
From: Northfield, Vermont
Thanks guys!!
1 heavy coat of rustoleum Industrial primer, I coat rustoleum industrial , rattle can top coat.
Fiance helped with the paint.
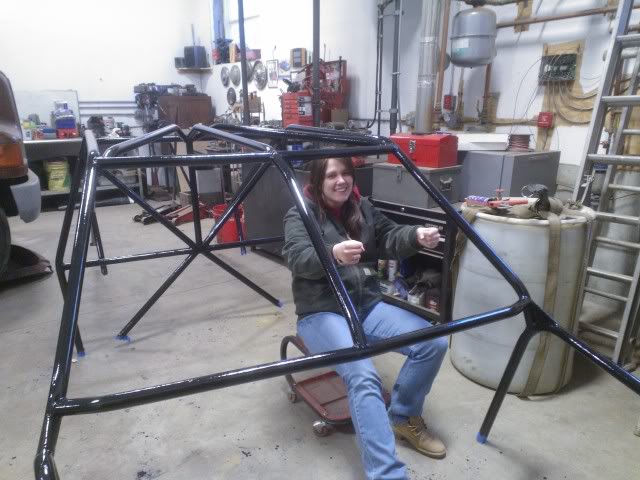
1 heavy coat of rustoleum Industrial primer, I coat rustoleum industrial , rattle can top coat.
Fiance helped with the paint.
Last edited by rattlewagon; Mar 17, 2014 at 06:21 PM.
 Mar 19, 2014 | 05:18 AM
#387

Registered User
Joined: Nov 2013
Posts: 580
Likes: 28
From: Ohio
Wow looks great rattle wagon, I only have one question.
How clean was your truck before you started wheeling it. Because it looks like it was in great shape for that year and I was wondering why it was made into more of a trail rig.
Looks great now and should be a beast I'm just curious , please don't get offended by my question though. Keep up the great work
Mar 19, 2014 | 06:16 AM
#388
Thread Starter
Registered User
Joined: Oct 2009
Posts: 4,832
Likes: 332
From: Northfield, Vermont
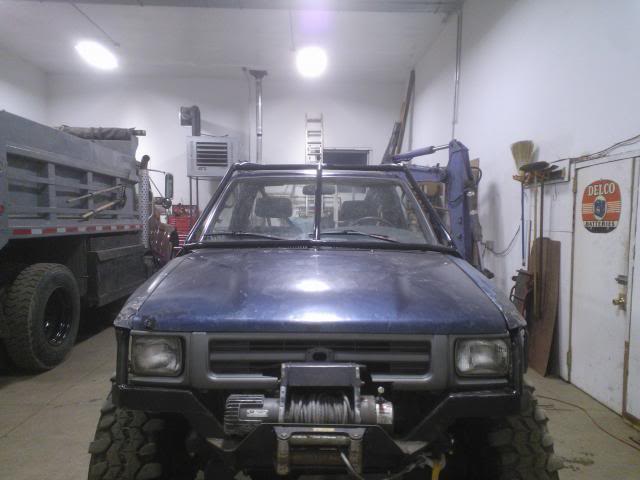
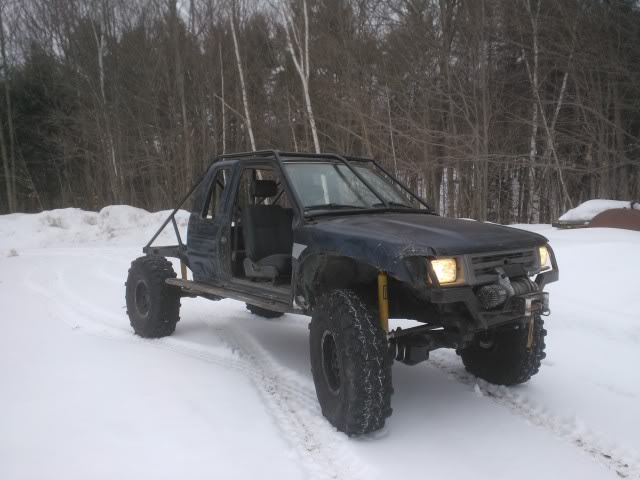
Go to page 1. There are pictures on that page from when I just got it, 7 years ago. I had bought the truck because I liked what my friends were doing with their jeeps, and I wanted to play too, but I just wanted a truck. So it was destined to end up in the woods. It was clean then, but trying to keep up with friends in the woods and VT winters took its tole on the body and frame. I drove it daily for 3 years till the trail rig part of it took over, and it stayed fairly clean for most of that. It was already starting to get rusty and beat. By that time I knew what I wanted out of it, and function took over fashion.
Last edited by rattlewagon; Mar 19, 2014 at 06:19 AM.
Mar 20, 2014 | 11:38 AM
#392
Registered User
Joined: Aug 2011
Posts: 1,507
Likes: 2
From: Fraser Valley, British Columbia
Mar 21, 2014 | 05:02 AM
#393
Thread Starter
Registered User
Joined: Oct 2009
Posts: 4,832
Likes: 332
From: Northfield, Vermont
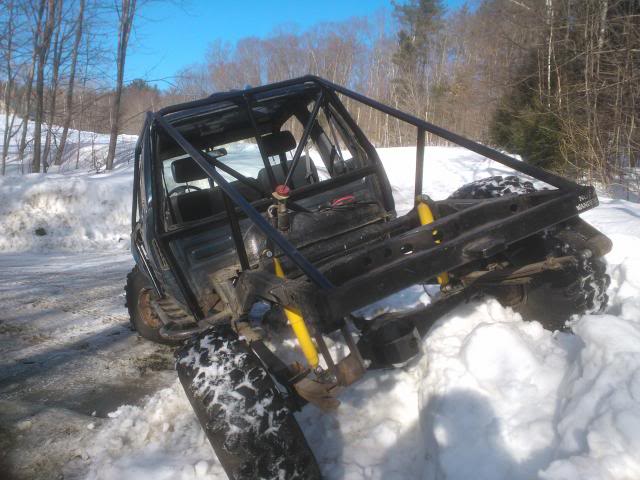
Thanks guys! Hope to have some trail pics soon. Next club run is on April 13th, and there should still be plenty of snow. Hopefully this weekend I can knock out the leaky valve cover gasket (passenger side) and change out the clutch slave cylinder and the short bit of rubber line.
Mar 21, 2014 | 06:41 AM
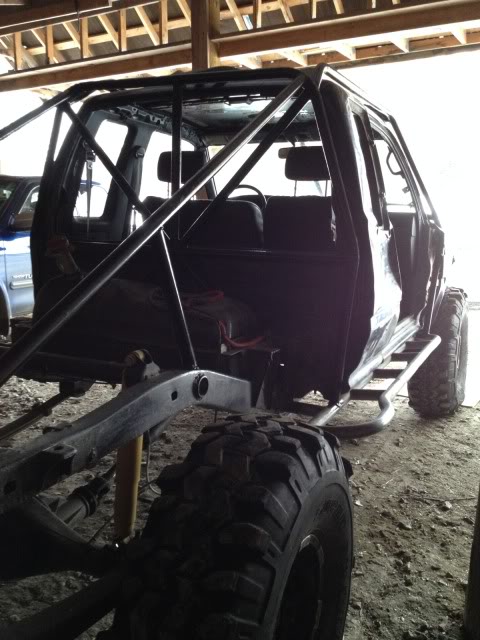
#394
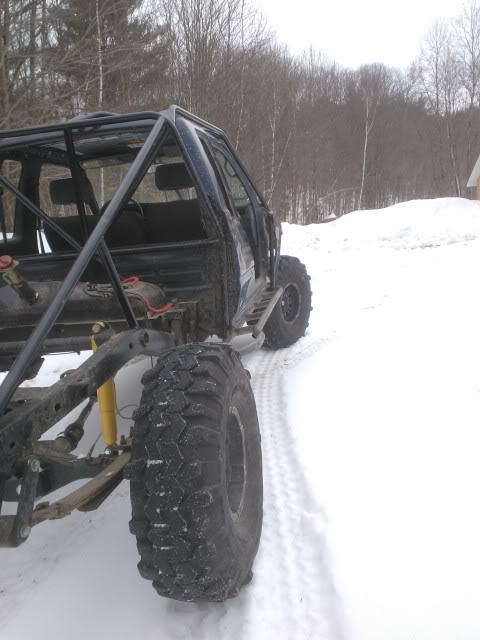
Your cage turned out really good! I like how you tied into the front bumper under the fenders. Can't wait to see some wheeling pics!
Last edited by rustED; Mar 21, 2014 at 06:44 AM.
Mar 23, 2014 | 06:15 PM
#395
Thread Starter
Registered User
Joined: Oct 2009
Posts: 4,832
Likes: 332
From: Northfield, Vermont
Thanks Ed!
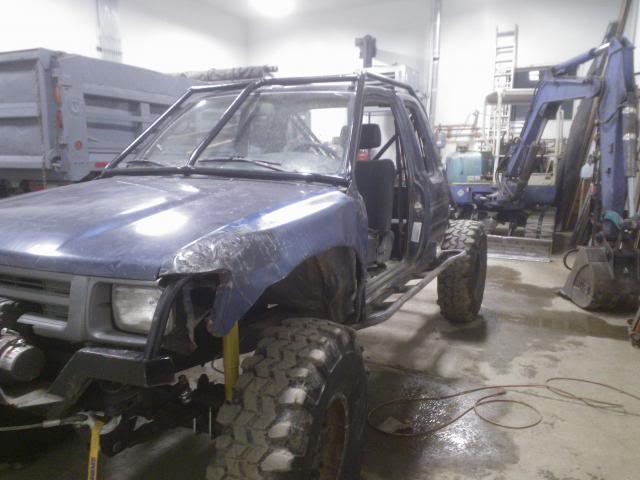
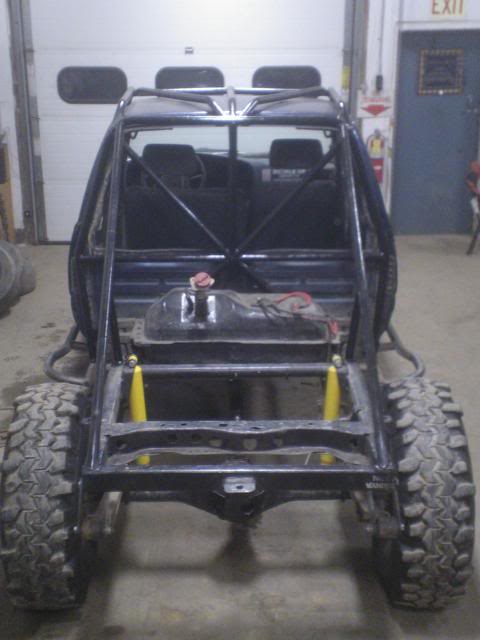
1 step foward, 2 steps back. Changed out the leaky clutch slave cylinder and both valve cover gaskets. Passenger side valve cover gasket still leaks and now front diff sounds crunchy. I sounds more like the locker is ratcheting under load, not a skipping ring gear, but Im gong to pull it out just to make sure, and Ill have another go at the valve cover gasket Thursday night
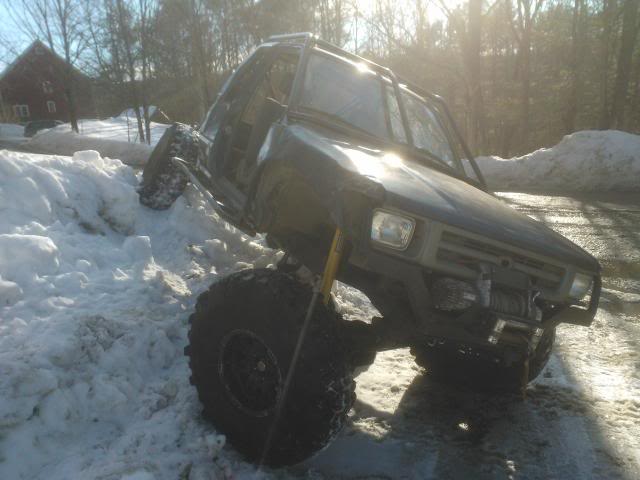

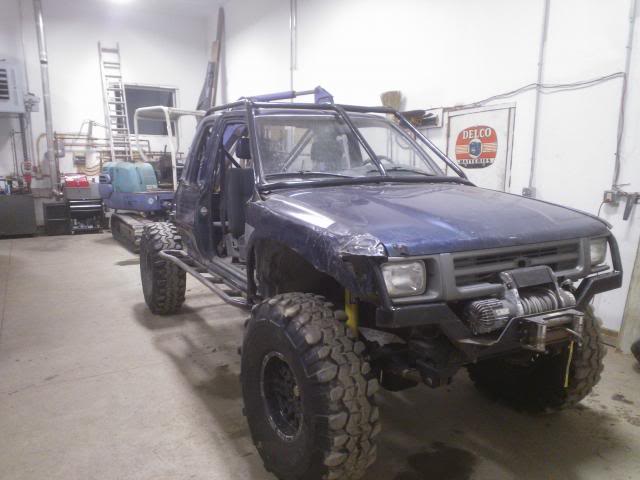
Looking at this next picture, I think I need to re do my re shock mounts for more up travel...
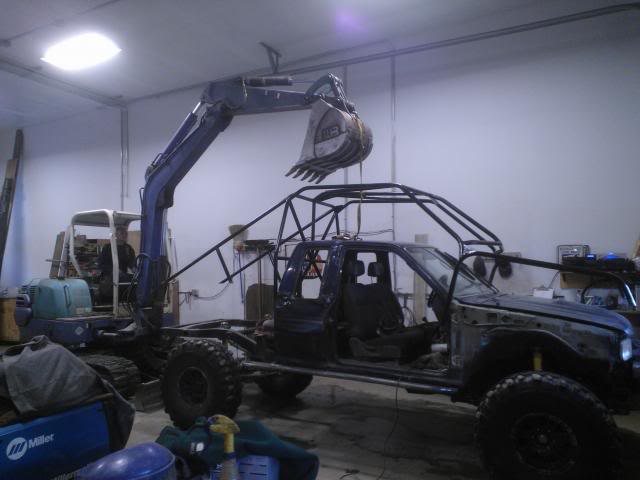
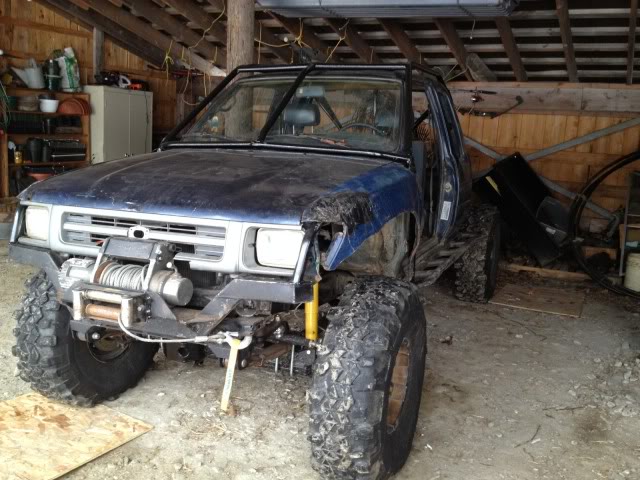
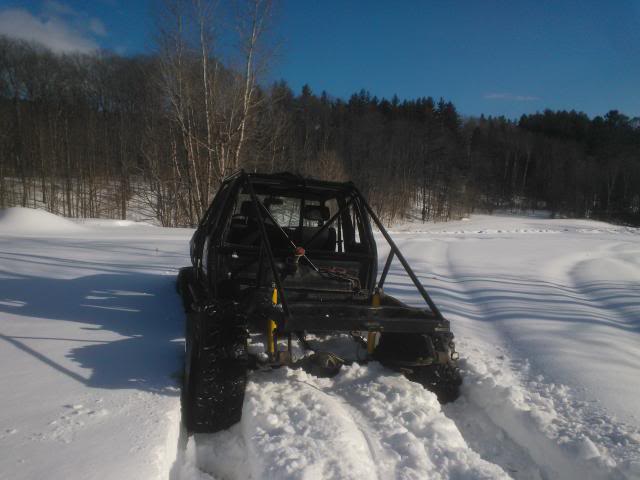
Aaaand stuck.

Sank the second I went off my old trackl. haha. No pics, but step dad pulled me out with the excavator.
1 step foward, 2 steps back. Changed out the leaky clutch slave cylinder and both valve cover gaskets. Passenger side valve cover gasket still leaks and now front diff sounds crunchy. I sounds more like the locker is ratcheting under load, not a skipping ring gear, but Im gong to pull it out just to make sure, and Ill have another go at the valve cover gasket Thursday night
Looking at this next picture, I think I need to re do my re shock mounts for more up travel...
Aaaand stuck.
Sank the second I went off my old trackl. haha. No pics, but step dad pulled me out with the excavator.
Last edited by rattlewagon; Mar 24, 2014 at 04:25 AM.
Mar 26, 2014 | 01:46 PM
#397
Thread Starter
Registered User
Joined: Oct 2009
Posts: 4,832
Likes: 332
From: Northfield, Vermont
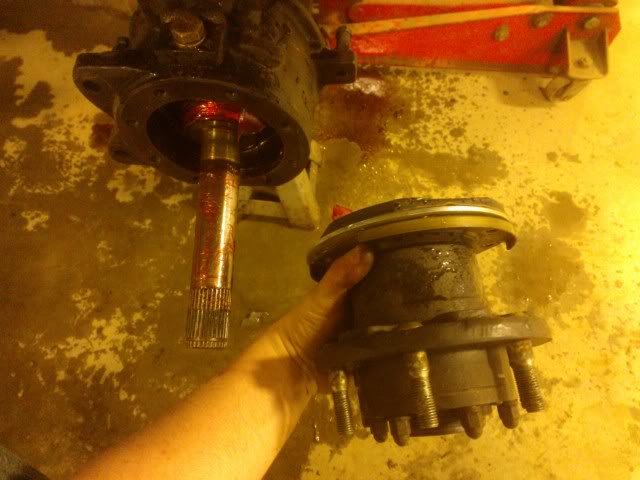
Info is on some of the previous pages. They are Ifs hubs ground down to fit into a 97 Tacoma rotor. You have to take about 1/4 if material off. It requires moving the break caliper to the outside of the ears on the axle and spacing it out with a small washer, and I drilled out the holes to to put a 1/2 in bolt in there. Im running the backing plate eliminators, otherwise you would have to trim that too. Also had to widen the opening of the caliper a bit to fit over the taco rotor.
Some pics here and here
Now I have a matching IFS width without wheel spacers. You could technically still run spacers, but thats putting a lot of stress on the trunnions and would not recommended it.


Early ifs hubs are "flowered" and is easier to grind down, later (like mine) were solid all the way around. I ground both of them with a flap wheel in about 1/2 hour.
Below is a later ifs hub with the outer edge cut down (not my pic) Stock on the left, cut down on the right.
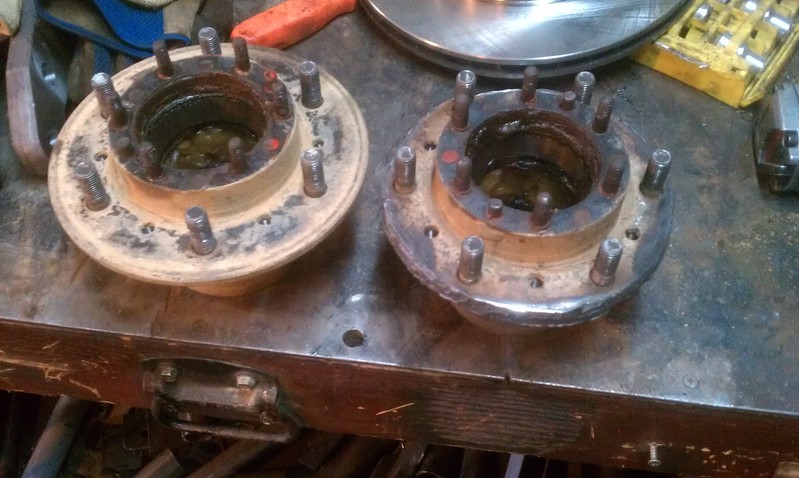
IFS hub on the left, solid on the right. You can see how the overall length is the same, the IFS hub WMS just rides a little farther out on the spindle. Again, not my pic.

Let me know if you have other questions about it, its a pretty simple swap.
Some pics here and here
Now I have a matching IFS width without wheel spacers. You could technically still run spacers, but thats putting a lot of stress on the trunnions and would not recommended it.
Early ifs hubs are "flowered" and is easier to grind down, later (like mine) were solid all the way around. I ground both of them with a flap wheel in about 1/2 hour.
Below is a later ifs hub with the outer edge cut down (not my pic) Stock on the left, cut down on the right.
IFS hub on the left, solid on the right. You can see how the overall length is the same, the IFS hub WMS just rides a little farther out on the spindle. Again, not my pic.
Let me know if you have other questions about it, its a pretty simple swap.
Last edited by rattlewagon; Mar 26, 2014 at 05:12 PM.
Mar 27, 2014 | 07:45 PM
#398
Thread Starter
Registered User
Joined: Oct 2009
Posts: 4,832
Likes: 332
From: Northfield, Vermont
Snugged down the valve cover bolts a bit, seemed to stop the leak? Calling it good for now.
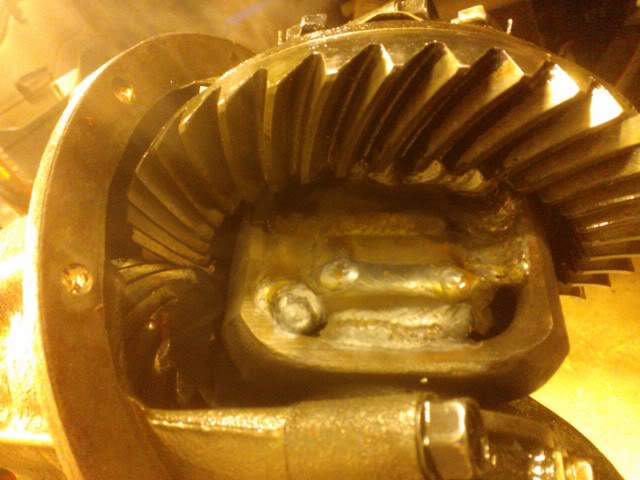
Then pulled it in to check out the front diff. Drained the fluid and it looked like some one poured glitter in the gear oil. So the 3rd needed to come out. One thing I love about the IFS hub swap is I can pull the spindle off as a "unit bearing" took me 20 min per to get this off and shafts out, sort of like a modified "camo method"
Ring and pinion looked great, so I fixed the slipping locker. Ill test it out this weekend.
Last edited by rattlewagon; Mar 28, 2014 at 03:58 AM.
Mar 28, 2014 | 05:57 AM
#400
Thats great info on the IFS hubs!
I really need to do this. The fact that you are able to remove it as a hub unit in 20 minutes it totally worth it!! Looks good.
I really need to do this. The fact that you are able to remove it as a hub unit in 20 minutes it totally worth it!! Looks good.
Last edited by Gizler00; Mar 28, 2014 at 05:58 AM.


