
Redeth's 1989 4Runner Resurrection
 Feb 13, 2013 | 08:51 AM
#1002
Thread Starter
Registered User
Joined: Apr 2012
Posts: 2,817
Likes: 2
From: Los Angeles CA
Haha, got side tracked and lost and had to go back and make sure i was still in the right thread for "insulation issues". You guys all look the same on the Web 
IIRC the older 4runners like the newer ones(95's), are open to the enviromnment in the rear quarter areas. This leads to the rust rust issues due to mud accumulation and condensation. And it's just damned cold.
"Frost King E/O 12 in. x 15 ft. Self-Stick Foam/Foil Duct Insulation" or the Insulated bubble wrap(yeah didn't dig for it's proper name), is available in the HV/AC isle of the big box store.
You want to clean out (probably seal, por15?) and affix this stuff inside the rear quarter, between the outer and inner panels, to the inside wall.
The self adhesive stuff would probably be ok w/o any additional securing if the panel is properly cleaned. For the bubble wrap stuff I'd use a few squares of sheetmetal and rivets for extra bracing, under the upper trim and other hidden/out-of-sight areas. A good foil tape can be used to build the box areas around the storage cut outs. Then seal the rivets with a dab of silicone chaulk.
If you're not using the self adhesive stuff you might be concerned about condensation, a few strips of tyvek or tarred-paper should ease that concern. Or just go whole hog and rubber-ceement/silicone that sucker up too to kill any air gaps.
A little bit of ssheet metal fab and you could close up those holes, almost completely, just don't forget to put in a few drain holes.
Damn sorry I got long winded again. I really just wanted to say that bubble stuff is available as a duct insulation
Good find on that foam, Richard. Similar to what Mark and I did but we used Sears Right Step anti-fatique mat. As for insulation, that foam would provide good noise deadening and also thermal insulation. To fill in those valleys on bed, just put half-inch strips of remnants of same foam to fill valleys.
Re: Keeping warm, instead of bulky, heavy comforters that don't hold heat much, I suggest you look into mummy or rectangular sleeping bags that use synthetic or down insulation - never cotton. Cotton does not insulate well. For couples, there are single sleeping bags with openings facing each other and would zip together. For cushioning, consider backpacking sleeping pads- my favorites are Ridgerest. Low-bulk, Would not mind punctures and lightweight. You would not need much insulation on bottom. I sleep with only my sleeping bag and Ridgerest on snow.
Re: Keeping warm, instead of bulky, heavy comforters that don't hold heat much, I suggest you look into mummy or rectangular sleeping bags that use synthetic or down insulation - never cotton. Cotton does not insulate well. For couples, there are single sleeping bags with openings facing each other and would zip together. For cushioning, consider backpacking sleeping pads- my favorites are Ridgerest. Low-bulk, Would not mind punctures and lightweight. You would not need much insulation on bottom. I sleep with only my sleeping bag and Ridgerest on snow.
 )
)But for this next off road trip i wanted to just use 2 memory foam toppers(4" of foam) with 2-3 nice cushiony comforters on top of that foam so i can get more of a comfortable sleep, Then i wanted to use the sleeping bags with maybe 2-3 nice furry blankets(SUPER WARM) i figured that will probably keep us warm enough; at least for just this trip. I might get to all the insulation stuff after this trip.
EDIT: Oh never mind!!!! you are doing some upgrade/conversion....not stalk
Richard check the prices on Aisin BMT-051 (Make sure that is what you need)
http://www.amazon.com/Aisin-BMT-051-...1&s=automotive
or Check Advics BMT-051
http://www.rockauto.com/catalog/x,ca...2Bfor%2BADVICS
If that is your part, you shouldn't be paying more than $70 for OEM. Even if you choose the Aisin part it will likely come in a Advics box but still might have Aisin stamped on it. That's exactly how my new master cylinder came....advics box but aisin stamped on it. I think once all the Aisin stamped parts are gone they will likely start coming with Advics stamped on them.
Aisin, in name, no longer make brake components. They are now made under the Advics name.

Yesterday based on the info You and Mark gave me i figured i'd get the advics name. I ended up going with the one from NAPA. Here: http://m.napaonline.com/parts/PartsD...401_0257354893
Not bad. It was $85 Well total(tax included) came out to $92
I went to Mark's house to pick up the connector for this Master cylinder last night I'd like to jump on this project ASAP at least before next months trip.
Feb 13, 2013 | 08:55 AM
#1003
Thread Starter
Registered User
Joined: Apr 2012
Posts: 2,817
Likes: 2
From: Los Angeles CA
Now as for problems ive ran into this past week, Obviously my Master Cyl being one of them i also had my rear window motor go out too  We were lucky enough to be able to roll my window back up but i dont think it's gonna work anymore lol.
Now this is also something i wanted to get to work on before the off road trip because i need to get in and out of my truck lol gonna be a pain in the arse loading and unloading everything through the front seats lol
EDIT: (add on)
Another thing i think i might be having a problem with is with my metal brake lines that lead into the master cylinder. It doesnt look like mine will be long enough to be able to mount onto the new location of the new master cylinder.
When i looked at Mark's M.C. I seen that you guys with 4cyl MC's have a bit more brake line to play with and bend to your liking then us people with the 3vze. I really wanna avoid kinking my lines when i install this new MC.
Mark mentioned Flexline or Flexible Brake Line. Ive researched this and ive found a few already, but id really like to just walk into a store and grab it myself then ordering it. So i called Autozone and O'reily auto part stores and none seem to even know wtf im talking about. I also called NAPA and they dont seem to know what i was talking about either. what the heck man. i know these things exist so why cant i find these lines?
We were lucky enough to be able to roll my window back up but i dont think it's gonna work anymore lol. Now this is also something i wanted to get to work on before the off road trip because i need to get in and out of my truck lol gonna be a pain in the arse loading and unloading everything through the front seats
lol EDIT: (add on)
Another thing i think i might be having a problem with is with my metal brake lines that lead into the master cylinder. It doesnt look like mine will be long enough to be able to mount onto the new location of the new master cylinder.
When i looked at Mark's M.C. I seen that you guys with 4cyl MC's have a bit more brake line to play with and bend to your liking then us people with the 3vze. I really wanna avoid kinking my lines when i install this new MC.
Mark mentioned Flexline or Flexible Brake Line. Ive researched this and ive found a few already, but id really like to just walk into a store and grab it myself then ordering it. So i called Autozone and O'reily auto part stores and none seem to even know wtf im talking about. I also called NAPA and they dont seem to know what i was talking about either. what the heck man. i know these things exist so why cant i find these lines?
Last edited by Redeth005; Feb 13, 2013 at 11:51 AM.
Feb 13, 2013 | 09:39 AM
#1004
Feb 13, 2013 | 09:44 AM
#1005
Feb 13, 2013 | 09:47 AM
#1006
Feb 13, 2013 | 10:23 AM
#1008

Peel and seal thread here. I did a quick scan of that thread alot of it is sources and safety info, not a lot of howto, and noticed there is not alot of metal in the older style to attach to on the inner side. The 95's are solid metal begining just in front of the storage/speaker area.
Ive not done it on my pickup truck, there isn't very good access to that area, It could be done I guess maybe with the bed removed. So far the only bolts I've found are for the forward panel, the rest appears to be welded.
Ive not done it on my pickup truck, there isn't very good access to that area, It could be done I guess maybe with the bed removed. So far the only bolts I've found are for the forward panel, the rest appears to be welded.
Feb 13, 2013 | 12:01 PM
#1010
Thread Starter
Registered User
Joined: Apr 2012
Posts: 2,817
Likes: 2
From: Los Angeles CA
Mark, Thanks for those Tailgate window links. Thats gonna come in handy for me.
Co_94 That Peel n Seal thread is gonna be really helpful. Thank you too
I edited the last post and put the new text in Blue
but in case you're laze to scroll upward here it is lol
Another thing i think i might be having a problem with is with my metal brake lines that lead into the master cylinder. It doesnt look like mine will be long enough to be able to mount onto the new location of the new master cylinder.
When i looked at Mark's M.C. I seen that you guys with 4cyl MC's have a bit more brake line to play with and bend to your liking then us people with the 3vze. I really wanna avoid kinking my lines when i install this new MC.
Mark mentioned Flexline or Flexible Brake Line. Ive researched this and ive found a few already, but id really like to just walk into a store and grab it myself then ordering it. So i called Autozone and O'reily auto part stores and none seem to even know wtf im talking about. I also called NAPA and they dont seem to know what i was talking about either. what the heck man. i know these things exist so why cant i find these lines?
---------------------------------------------------------------------------------------
I found this on the NAPA Website just now:
http://www.napaonline.com/Catalog/Re...Dp%3d3%26N%3d0
Are any of these the ones i should be looking for? they seem kind of on the thick side to me.
Edit:
I just spoke to a different guy from NAPA just now. He said they dont have flex line for brakes. But they do have some different length straight ones that we might be able to bend to shape how ever we need. I'm gonna drop by to see what exactly this guy was talking about for those lines. Who knows maybe I might find something that will work.
Also they have the rear window motor. For something like $56 for one. Then the other os $102. So I wanna see which one is the one for my truck too. Ill let you guys know how it goes.
Last edited by Redeth005; Feb 13, 2013 at 01:23 PM.
Feb 13, 2013 | 06:00 PM
#1011
Yep that is the stuff, note the working pressure on the items on the first page are the highest. They also inverse scale with the size,eg smaller hose higher working pressure. For forming hardlines you'll need some "special" equipment, anti kink springs that fit inside the tube. The stuff on the first page is rated for both air and hydraulic brakes.
You can probably get the same piece thats on the tire end and it'll fit right up, or might need some adapters. That would save you having to do the cut and flare on your stock lines, and it's abit more reliable. Don't forget to make flares and double up on the clamps.. Yeah me and compression fittings don't get along, even less so when it's high pressure.
Not sure on the pressure rating required. Anything over the working pressure rating will degrade faster, but the important bit is the burst pressure for sure.
Feb 13, 2013 | 09:49 PM
#1012
Thread Starter
Registered User
Joined: Apr 2012
Posts: 2,817
Likes: 2
From: Los Angeles CA
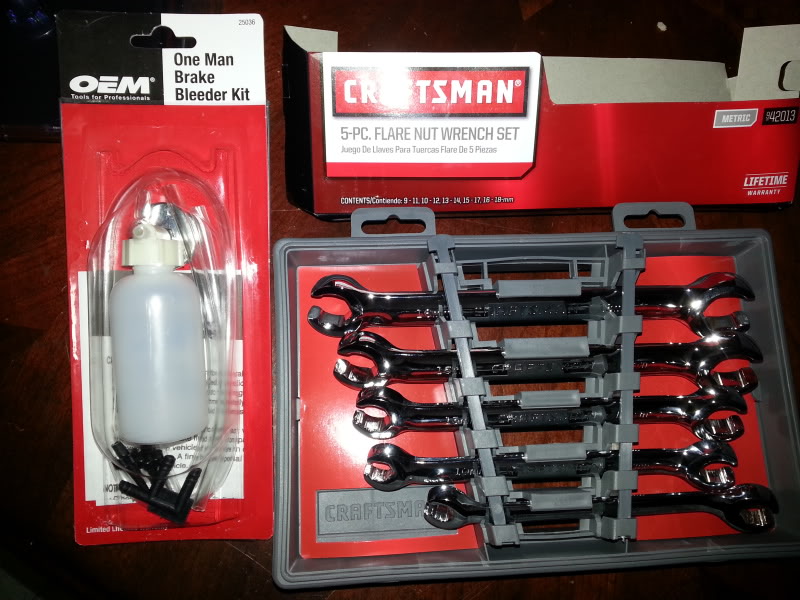
A couple of things i bought today.
Flare Wrench set(Sears) - about time i bought some and a basic Brake bleeder kit for $6(autozone)
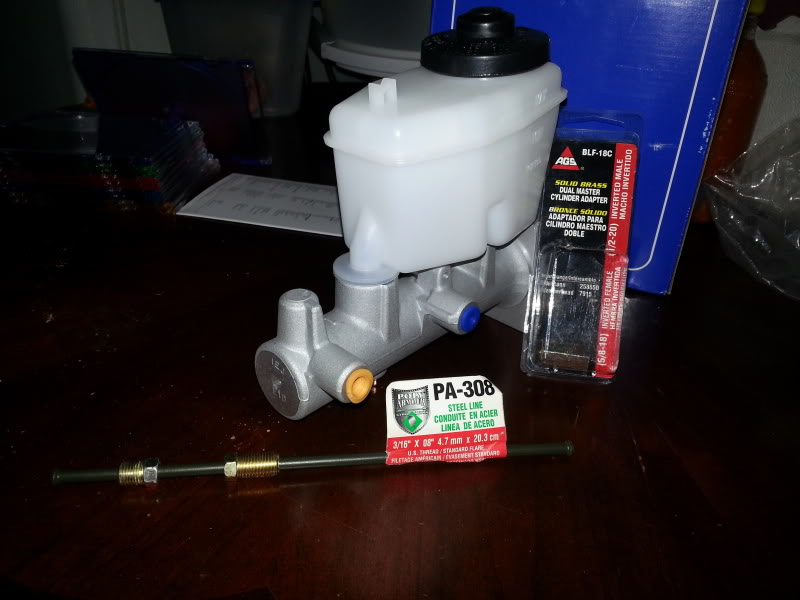
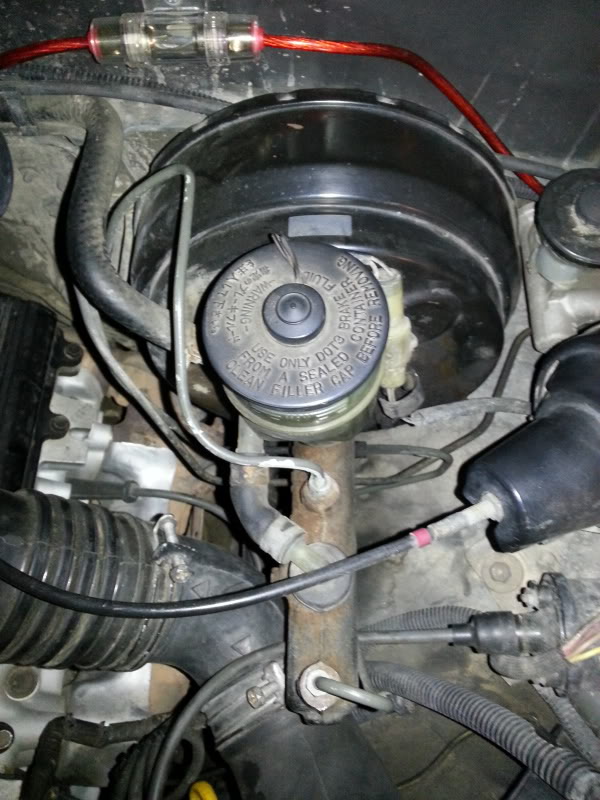
Here is my new Master Cylinder, I bought an extension brake line. It's only about 6" and i also bought the converter or adapter for the brake line(w/e the real name for it is) lol The reason i bought these 2 things is because i dont have to make the line a heck of alot longer. I really only need about 4-6 inches. so with this adapter i will connect my current brake line into one end then the extra 6" into the other side. then that will give me the extra length i need to mold and fit into the new master cylinder.
Note: Keep in mind you see this master cyl has both brake line inputs on the side there.
This is my current MC. See that moth my lines are located on the top part of the MC.
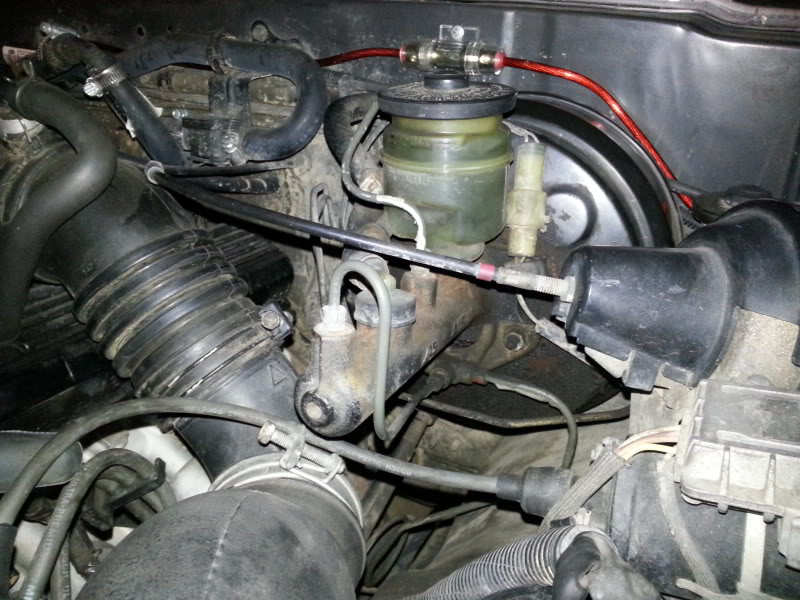
On this picture you can clearly see that the line toward the tip of the MC headed down to the 3way splitter thing on the bottom part will not be a problem for me to bend and because it will pretty much already be where i need it to be.
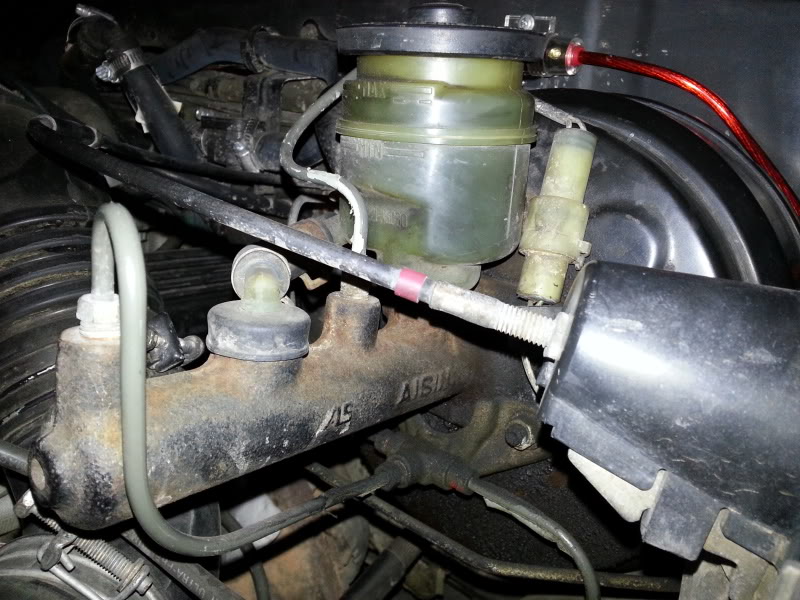
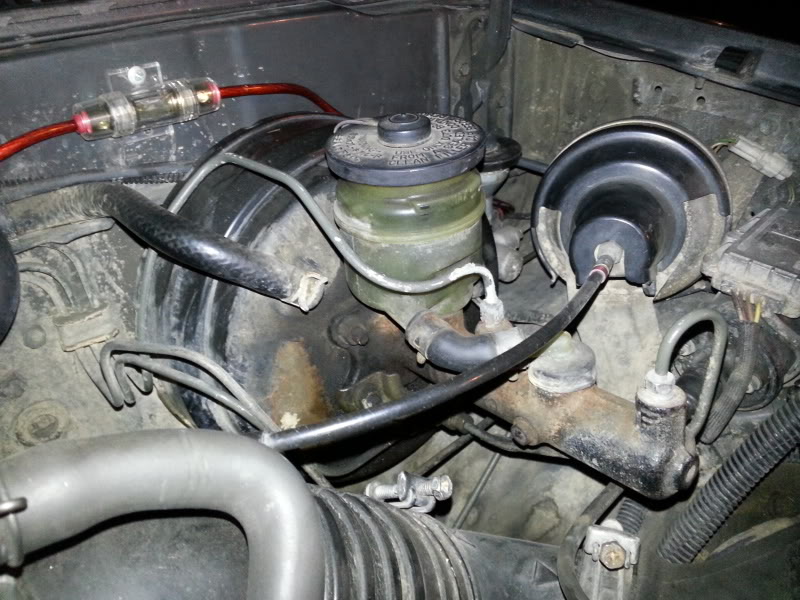
Now as you can see in this next picture you can see that the other line closest to the reservoir will end up being a few inches too short. Which is why i got that extension.
So i just plan to run this brake line a little further to the right side of the booster(according to the picture) and around the new reservoir, then bend it to fit just right.
I figured that going this route isn't too bad. those 2 pieces only costed me about $5-6 at PepBoys auto parts. So if it doesn't work then oh well. but i think doing this route should work for me.
Here is another shot i took. Just to show the other side.
I watched a couple of YouTube videos today on how to bleed a master cylinder and how to brake the brake lines. I think after a few more views i might have a good idea of how to get this done.
Here is one video i liked for bench bleeding the Master Cylinder
Here are a few i liked for bleeding the brakes
Flare Wrench set(Sears) - about time i bought some and a basic Brake bleeder kit for $6(autozone)
Here is my new Master Cylinder, I bought an extension brake line. It's only about 6" and i also bought the converter or adapter for the brake line(w/e the real name for it is) lol The reason i bought these 2 things is because i dont have to make the line a heck of alot longer. I really only need about 4-6 inches. so with this adapter i will connect my current brake line into one end then the extra 6" into the other side. then that will give me the extra length i need to mold and fit into the new master cylinder.
Note: Keep in mind you see this master cyl has both brake line inputs on the side there.
This is my current MC. See that moth my lines are located on the top part of the MC.
On this picture you can clearly see that the line toward the tip of the MC headed down to the 3way splitter thing on the bottom part will not be a problem for me to bend and because it will pretty much already be where i need it to be.
Now as you can see in this next picture you can see that the other line closest to the reservoir will end up being a few inches too short. Which is why i got that extension.
So i just plan to run this brake line a little further to the right side of the booster(according to the picture) and around the new reservoir, then bend it to fit just right.
I figured that going this route isn't too bad. those 2 pieces only costed me about $5-6 at PepBoys auto parts. So if it doesn't work then oh well. but i think doing this route should work for me.
Here is another shot i took. Just to show the other side.
I watched a couple of YouTube videos today on how to bleed a master cylinder and how to brake the brake lines. I think after a few more views i might have a good idea of how to get this done.
Here is one video i liked for bench bleeding the Master Cylinder
Here are a few i liked for bleeding the brakes
Last edited by Redeth005; Feb 13, 2013 at 09:53 PM.
Feb 13, 2013 | 11:10 PM
#1013
What is that sexy shiney bit of kit on your fire wall, looks like maybe a fuse holder. That shiney red caught my eye, it's about what my paint is suppossed to look like, it looks so out of place
So about half way thru that last video I learned something, the assistant is supposed to get the easy clean comfortable job Gonna have to have a few words with some ppl!
Looks like you're all set, remember to have fun!
So about half way thru that last video I learned something, the assistant is supposed to get the easy clean comfortable job
Gonna have to have a few words with some ppl!Looks like you're all set, remember to have fun!
Feb 14, 2013 | 12:24 AM
#1014
Registered User
Joined: Jul 2012
Posts: 2,365
Likes: 4
From: Idaho
heres how mine looks redeth i didnt have to bend the first line at all it was on the side already, the front line i did have to reshape it to line up with the port my old one was leaking from inside the MC like yours i cut the wire off the old MC connected it up to the one for the new type as an adaptor works great an doesnt cut the harness
 Feb 14, 2013 | 01:48 PM
#1015
Thread Starter
Registered User
Joined: Apr 2012
Posts: 2,817
Likes: 2
From: Los Angeles CA
I WAS just! about to ask the same thing LOL
heres how mine looks redeth i didnt have to bend the first line at all it was on the side already, the front line i did have to reshape it to line up with the port my old one was leaking from inside the MC like yours i cut the wire off the old MC connected it up to the one for the new type as an adaptor works great an doesnt cut the harness
heres how mine looks redeth i didnt have to bend the first line at all it was on the side already, the front line i did have to reshape it to line up with the port my old one was leaking from inside the MC like yours i cut the wire off the old MC connected it up to the one for the new type as an adaptor works great an doesnt cut the harness
Hey William, Thanks for the picture. Yours came out pretty clean. Yours is a 4cyl motor though. the metal brake lines are pretty much already there and are long enough to do the job without an extension(At least thats what i noticed when looking at Chefyota's MC) My middle line on the other hand doesnt run along from one side of the Booster to the other side then to the MC like all your 4cyl trucks do. Mine only goes about 1/2 way as portrayed down below. So thats gonna be the one that im going to extend.

Last edited by Redeth005; Feb 14, 2013 at 01:50 PM.
Feb 14, 2013 | 02:14 PM
#1016
Thread Starter
Registered User
Joined: Apr 2012
Posts: 2,817
Likes: 2
From: Los Angeles CA


