
Redeth's 1989 4Runner Resurrection
 Dec 18, 2012 | 08:37 PM
#782
Registered User


Joined: Mar 2012
Posts: 7,125
Likes: 681


I heard from Mark that your Runner had been challenging. Sorry about that. Good that you got your multi-meter; Next to our senses, that's the most important tool to diagnose our rigs.
Re: Window, so busy so haven't read your thread. That DMM will surely help you test you switches. Exposure to elements could oxidize contacts and give them high resistance.
I'm assuming that you have verified that things are wired right. If so, and I were you, I would take the switches out of the equation and check if motor and relay-sensor-limit switches are working first. Have you jumped your motor directly to 12V to test if they're good? Mind posting schematic of your window control?
Regards,
RAD
Dec 18, 2012 | 09:40 PM
#783
Thread Starter
Registered User
Joined: Apr 2012
Posts: 2,817
Likes: 2
From: Los Angeles CA
Hi Richard,
I heard from Mark that your Runner had been challenging. Sorry about that. Good that you got your multi-meter; Next to our senses, that's the most important tool to diagnose our rigs.
Re: Window, so busy so haven't read your thread. That DMM will surely help you test you switches. Exposure to elements could oxidize contacts and give them high resistance.
I'm assuming that you have verified that things are wired right. If so, and I were you, I would take the switches out of the equation and check if motor and relay-sensor-limit switches are working first. Have you jumped your motor directly to 12V to test if they're good? Mind posting schematic of your window control?
Regards,
RAD
As far as wiring goes. I'm a lot certain I have everything wired correctly. Tomorrow(I hope I have time) I will make a video explaining the whole wiring harness that I pulled off my donor and explain what I have down as far as I understand. And which wires I'm not certain about. But I'm almost positive I have the wires wired right.
I tried out my Multi-meter for the first time already. Checking continuity on both driver and passenger switches. And I seen that some of the pins have continuity without pressing the button down. So like you said in your previous post. They might be oxidized. Is that fixable?
I have not tested the relay yet.
Sorry... I know I'm kind of all over the place with this but bare with me, now that I have this multimeter I'm sure thing's will only get better and be easier for me to understand.
As for those schematics here they are. These are the ones mark posted up for me last week.
Btw my switches are the "Door Trim Type" on these schematics. Hope you're able to help.


Last edited by Redeth005; Dec 18, 2012 at 10:21 PM.
Dec 18, 2012 | 10:36 PM
#784
Registered User
Joined: Jul 2012
Posts: 2,365
Likes: 4
From: Idaho
easy on yourself reddeth reading schematics takes time (ive had way too much electronics classes)
ok
now the plug in shows you which pins are getting continuity an which way they the switch are being moved via the O-----O those pins for example
passenger (small switch) door trim type terminal 1 O---O terminal 3 when the switch is at rest or 'off' have continuity
terminals 5 and 4 also have continuity according to the chart
Dec 18, 2012 | 11:47 PM
#785
Registered User
Joined: Mar 2012
Posts: 7,125
Likes: 681
Always a pleasure
Wud have been nice if we're just next door to each other
I recommend testing individual switches first.
Then with relay disconnected, test according to page BE=43
This will verify that your wiring is good and you're getting power & ground to connector.
Also check window limit switches, make sure they close and open in corresponding glass positions (all the way up/ all the way down).
Oxidation or drinks poured into switch would more likely give you high resistance. Might be fixable by taking it apart and cleaning OR flooding with contact cleaner and actuating switch over n over. If drink spiled in it (i.e., coffee on console switches) swish around in warm soapy water actuate switch over n over, repeat. Rinse with fresh water, then contact cleaner or alcohol. Let dry.
But don't do that yet. test them first.
Agree with Cyberhorn.
Gotta catch some ZZZ's now
Wud have been nice if we're just next door to each other
I recommend testing individual switches first.
Then with relay disconnected, test according to page BE=43
This will verify that your wiring is good and you're getting power & ground to connector.
Also check window limit switches, make sure they close and open in corresponding glass positions (all the way up/ all the way down).
I tried out my Multi-meter for the first time already. Checking continuity on both driver and passenger switches. And I seen that some of the pins have continuity without pressing the button down.
They might be oxidized. Is that fixable?
I have not tested the relay yet.
They might be oxidized. Is that fixable?
I have not tested the relay yet.
But don't do that yet. test them first.
easy on yourself reddeth reading schematics takes time (ive had way too much electronics classes)
ok
now the plug in shows you which pins are getting continuity an which way they the switch are being moved via the O-----O those pins for example
passenger (small switch) door trim type terminal 1 O---O terminal 3 when the switch is at rest or 'off' have continuity
terminals 5 and 4 also have continuity according to the chart
ok
now the plug in shows you which pins are getting continuity an which way they the switch are being moved via the O-----O those pins for example
passenger (small switch) door trim type terminal 1 O---O terminal 3 when the switch is at rest or 'off' have continuity
terminals 5 and 4 also have continuity according to the chart
Gotta catch some ZZZ's now
Dec 18, 2012 | 11:54 PM
#786
WOOT! GURU's!!!!!!!!!!!!!!!!!!! hehehe...
RAD, WILLIAM.... thanks, so much, for helping on this. I just can't take the time to 'learn' it all right now... Richard knows that I would were I able to....
Richard, I see the Breaker test right there.... You've been including that in the mix up to now... Might want to just make sure it's working. I mean, you KNOW the door lock one is working... as it's 'clicking' away at the relay, right? What I was saying today on the phone was; Bear with ME, as well, guys, ..... "Maybe find out from the more knowledgeable guys whether or not you can simply wire the switches straight to the motors by jumping the proper pins...."... Looks to me that they are indicated in that diagnosis/testing page.... SO, ... if Dragon or RAD say, "SURE, jumper pins # and # right to the motor pin #..... and it should work"... Then great. I just don't know that it should be done without that relay module. Really sux that they run that thing all the way over to the other side of the dash.... Must not have been room. Come to think of it... THERE'S NO ROOM under the driver side of the dash/far left! hahaa...
See, by doing that, you can KNOW that the switch is working under load... AND, you're that much closer to narrowing things down in your Process of Elimination towar "Relay" or "Switches"..... I mean, WITH POWER, THEY SHOULD OPEN THE GATE TO 'ROLLING DOWN OR UP'VILLE! lol. I saw your video demonstrating NONE of the 2 switches... Neither up nor down... WORK. So it's one of a couple things/maybe more.
1. Your wiring is wrong
2. The Switch is bad
3. The Breaker is bad(See, the testing for that is for when it's all in.. not when 'you' are adding it, lol... Seriously though.. THAT is why it says, "PUT POWER TO MEH AND PRESS MEH AND IT SHOULD MEH", ...ya know? haha... )
4. The Relay is bad........ MAN that would suck.... BUT I BET we could find you a replacement and you could return it for exchange.(Unfortunately it's in Stanton, right? Better for you maybe, actually, hmmmmm...) ANYWAY... not even sure it's bad at all.. and YOU DO hear it clicking via the door lock switch activation, right?
My guess, no offense, is that the wiring... MAYBE EVEN ONE PAIR BEING CRISS CROSSED, is the cause... BUT, could EASILY be the switch..... And as I was saying... '1 by 1 rule them out', right? Trust me,....trying, as a beginner like we are, to 'SOAK IT ALL IN' while you're looking at a CLUSTER DUCK of wiring? OH HECK no! lol. POE is the best way... Tracing back from the end... or working from the beginning forward until you find the culprit!
RAD, WILLIAM.... thanks, so much, for helping on this. I just can't take the time to 'learn' it all right now... Richard knows that I would were I able to....
Richard, I see the Breaker test right there.... You've been including that in the mix up to now... Might want to just make sure it's working. I mean, you KNOW the door lock one is working... as it's 'clicking' away at the relay, right? What I was saying today on the phone was; Bear with ME, as well, guys, ..... "Maybe find out from the more knowledgeable guys whether or not you can simply wire the switches straight to the motors by jumping the proper pins...."... Looks to me that they are indicated in that diagnosis/testing page.... SO, ... if Dragon or RAD say, "SURE, jumper pins # and # right to the motor pin #..... and it should work"... Then great. I just don't know that it should be done without that relay module. Really sux that they run that thing all the way over to the other side of the dash.... Must not have been room. Come to think of it... THERE'S NO ROOM under the driver side of the dash/far left!
hahaa... See, by doing that, you can KNOW that the switch is working under load... AND, you're that much closer to narrowing things down in your Process of Elimination towar "Relay" or "Switches"..... I mean, WITH POWER, THEY SHOULD OPEN THE GATE TO 'ROLLING DOWN OR UP'VILLE! lol. I saw your video demonstrating NONE of the 2 switches... Neither up nor down... WORK. So it's one of a couple things/maybe more.
1. Your wiring is wrong
2. The Switch is bad
3. The Breaker is bad(See, the testing for that is for when it's all in.. not when 'you' are adding it, lol... Seriously though.. THAT is why it says, "PUT POWER TO MEH AND PRESS MEH AND IT SHOULD MEH", ...ya know? haha... )
4. The Relay is bad........ MAN that would suck.... BUT I BET we could find you a replacement and you could return it for exchange.(Unfortunately it's in Stanton, right? Better for you maybe, actually, hmmmmm...) ANYWAY... not even sure it's bad at all.. and YOU DO hear it clicking via the door lock switch activation, right?
My guess, no offense, is that the wiring... MAYBE EVEN ONE PAIR BEING CRISS CROSSED, is the cause... BUT, could EASILY be the switch..... And as I was saying... '1 by 1 rule them out', right? Trust me,....trying, as a beginner like we are, to 'SOAK IT ALL IN' while you're looking at a CLUSTER DUCK of wiring? OH HECK no! lol. POE is the best way... Tracing back from the end... or working from the beginning forward until you find the culprit!
Dec 19, 2012 | 01:34 AM
#787
Just got done watching your video. I would run resistance checks on all of your components. I would suspect the switches are probably dirty before a bad relay. Mark and RAD would have a lot better advise then what I could give.
On the interior paint, I go to Oriellys and you will need to find their main store that mixes paint and use a sample for them to match up to. I like to use a kick panel. The secret is to make sure your inclometer is good and clean. Cleaning takes alot more time then the actual painting. Put one or two light coats of Adhesion Promoter and give it about 30 seconds to flash off and then a couple of coats of interior paint to the desired darkness that you want. Probably take about 3 to 4 coats to cover it.
On your SAS, I would suggest making sure you have all needed parts and have a little stash of cash just for when something that may come up that you werent expecting. It could be anything such as another part or service that maybe needed while swapping axles.
I knew where there was a set of electric mirrors and am curious as to how hard they would be to install. The way I understand is a truck has to be prewired for crusie control, and was wondering the same for mirrors. Looks like the wires have to be added.
Last edited by Terrys87; Dec 19, 2012 at 01:39 AM.
Dec 19, 2012 | 09:36 AM
#788
Thread Starter
Registered User
Joined: Apr 2012
Posts: 2,817
Likes: 2
From: Los Angeles CA
easy on yourself reddeth reading schematics takes time (ive had way too much electronics classes) ok now the plug in shows you which pins are getting continuity an which way they the switch are being moved via the O-----O those pins for example
passenger (small switch) door trim type terminal 1 O---O terminal 3 when the switch is at rest or 'off' have continuity
terminals 5 and 4 also have continuity according to the chart
passenger (small switch) door trim type terminal 1 O---O terminal 3 when the switch is at rest or 'off' have continuity
terminals 5 and 4 also have continuity according to the chart
Always a pleasure
Wud have been nice if we're just next door to each other
I recommend testing individual switches first.
Then with relay disconnected, test according to page BE=43
This will verify that your wiring is good and you're getting power & ground to connector. Also check window limit switches, make sure they close and open in corresponding glass positions (all the way up/ all the way down).
Oxidation or drinks poured into switch would more likely give you high resistance. Might be fixable by taking it apart and cleaning OR flooding with contact cleaner and actuating switch over n over. If drink spiled in it (i.e., coffee on console switches) swish around in warm soapy water actuate switch over n over, repeat. Rinse with fresh water, then contact cleaner or alcohol. Let dry.
But don't do that yet. test them first.
WOOT! GURU's!!!!!!!!!!!!!!!!!!! hehehe...
RAD, WILLIAM.... thanks, so much, for helping on this. I just can't take the time to 'learn' it all right now... Richard knows that I would were I able to....
Richard, I see the Breaker test right there.... You've been including that in the mix up to now... Might want to just make sure it's working. I mean, you KNOW the door lock one is working... as it's 'clicking' away at the relay, right?
See, by doing that, you can KNOW that the switch is working under load... AND, you're that much closer to narrowing things down in your Process of Elimination toward "Relay" or "Switches"..... I mean, WITH POWER, THEY SHOULD OPEN THE GATE TO 'ROLLING DOWN OR UP'VILLE! lol. I saw your video demonstrating NONE of the 2 switches... Neither up nor down... WORK. So it's one of a couple things/maybe more.
1. Your wiring is wrong
2. The Switch is bad
3. The Breaker is bad(See, the testing for that is for when it's all in.. not when 'you' are adding it, lol... Seriously though.. THAT is why it says, "PUT POWER TO MEH AND PRESS MEH AND IT SHOULD MEH", ...ya know? haha... )
4. The Relay is bad........ MAN that would suck.... BUT I BET we could find you a replacement and you could return it for exchange.(Unfortunately it's in Stanton, right? Better for you maybe, actually, hmmmmm...) ANYWAY... not even sure it's bad at all.. and YOU DO hear it clicking via the door lock switch activation, right?
My guess, no offense, is that the wiring... MAYBE EVEN ONE PAIR BEING CRISS CROSSED, is the cause... BUT, could EASILY be the switch..... And as I was saying... '1 by 1 rule them out', right? Trust me,....trying, as a beginner like we are, to 'SOAK IT ALL IN' while you're looking at a CLUSTER DUCK of wiring? OH HECK no! lol. POE is the best way... Tracing back from the end... or working from the beginning forward until you find the culprit!
On the interior paint, I go to Oriellys and you will need to find their main store that mixes paint and use a sample for them to match up to. I like to use a kick panel. The secret is to make sure your inclometer is good and clean. Cleaning takes alot more time then the actual painting. Put one or two light coats of Adhesion Promoter and give it about 30 seconds to flash off and then a couple of coats of interior paint to the desired darkness that you want. Probably take about 3 to 4 coats to cover it.
On your SAS, I would suggest making sure you have all needed parts and have a little stash of cash just for when something that may come up that you werent expecting. It could be anything such as another part or service that maybe needed while swapping axles.
I knew where there was a set of electric mirrors and am curious as to how hard they would be to install. The way I understand is a truck has to be prewired for crusie control, and was wondering the same for mirrors. Looks like the wires have to be added.
Another thing about the paint that you told me to get at O'Reillys. I called the closest one to my house. And they said that they don't mix paints for cars. He said they never have. They only refill cans. And the guy hung up on me I was like wth.... so I called back and the other guy told me the same thing. I'm wondering if maybe it's different over here in C.A. maybe I'll try if another location does it.
As for the SAS. That's pretty my mind set too. I'm just gathering and gathering the parts I need and once I have everything I don't wanna start on the work till I have a good $400-500 more saved up just in case. That's probably the project I'm most anxious for out of all the others.
Last edited by Redeth005; Dec 19, 2012 at 12:34 PM.
Dec 19, 2012 | 11:28 AM
#789
Registered User
Joined: Jul 2012
Posts: 2,365
Likes: 4
From: Idaho
Hi William, I pretty much understood that much from the diagram. From what i tested yesterday i seen that some of those contacts dont have coninuity and some have a constant coninuity even without pressing on my window buttons. i found that kind of weird.maybe i'm doing it wrong. I'm gonna recheck them when i get out of work.
check again if its the same issue your switches need cleaning an or replacement so clean first recheck same issue bad switch if theres improvement keep cleaning youd be surprised how well sugar conducts electricity
Dec 19, 2012 | 12:41 PM
#790
Thread Starter
Registered User
Joined: Apr 2012
Posts: 2,817
Likes: 2
From: Los Angeles CA
ok that's a sign if your getting any continuity where you shouldn't thats your culprit your getting power redirected where you don't need it! and could even damage things
check again if its the same issue your switches need cleaning an or replacement so clean first recheck same issue bad switch if theres improvement keep cleaning youd be surprised how well sugar conducts electricity
check again if its the same issue your switches need cleaning an or replacement so clean first recheck same issue bad switch if theres improvement keep cleaning youd be surprised how well sugar conducts electricity
Hey btw wanna know something funny. I bought my Digital Multimeter yesterday at full price which came out to just over $43. And I just received a 20% off coupon for anything in the store valid from now to Sunday. Lol
Gonna return it and buy it again lol. I know I'm cheap. But hey I gotta do it. Need to save me some $$$ any way I can yay know. Hahaha : hillbill:
Last edited by Redeth005; Dec 19, 2012 at 12:54 PM.
Dec 19, 2012 | 04:14 PM
#791
Registered User
Joined: Mar 2012
Posts: 7,125
Likes: 681
Richard,
To be safe, I recommend making sure all wires go to the right places before you hook up to power. Unless your donor harness came from exactly same year-model, do not trust wire color.
Mark and I saw that when we were "looking" at some switch wire colors over the phone.
Physically trace them or take continuity checks between connector going to switches or limit switches to wide connector that plugs into relay module.
more...
Switch contacts are more likely to get high resistance than to get shorted. This is either from oxidation, dirt or sugar from coffee/soda/beer you spilled on it LOL!
Good way to fix is disassemble switch, wash/rinse contacts, find good lint-free cloth, put alcohol, sandwich between contacts, pull through contacts. If too hard to disassemble, just switch in hot soapy water method as suggested above.
LOL. That happens
To be safe, I recommend making sure all wires go to the right places before you hook up to power. Unless your donor harness came from exactly same year-model, do not trust wire color.
Mark and I saw that when we were "looking" at some switch wire colors over the phone.
Physically trace them or take continuity checks between connector going to switches or limit switches to wide connector that plugs into relay module.
more...
Good way to fix is disassemble switch, wash/rinse contacts, find good lint-free cloth, put alcohol, sandwich between contacts, pull through contacts. If too hard to disassemble, just switch in hot soapy water method as suggested above.
full price which came out to just over $43. And I just received a 20% off coupon for anything in the store valid from now to Sunday. Lol
Gonna return it and buy it again lol. I know I'm cheap. But hey I gotta do it.
Gonna return it and buy it again lol. I know I'm cheap. But hey I gotta do it.
Last edited by RAD4Runner; Dec 19, 2012 at 04:44 PM.
Dec 19, 2012 | 04:26 PM
#792
Thread Starter
Registered User
Joined: Apr 2012
Posts: 2,817
Likes: 2
From: Los Angeles CA
Well it's officially gone dark outside. I didn't have a chance to really check anything. But now that you mention it I think I am going to do as you say and check each and every wire for continuity. I can at least do that inside the house. I'll post my findings later on.
Last edited by Redeth005; Dec 20, 2012 at 04:48 AM.
Dec 20, 2012 | 01:41 AM
#793
It will be a few days but I will ask the Orielly store here about a store in LA that can do it. They have a way of finding out what stores can mix it up. Unfortunately alot of the hired up realy dont try to go out of their way to find the info in alot of business anymore. Autozone might could do it as well.
I have done alot of harness swapping and repairs and RAD is right about the wiring colors. Even one years difference and they change some things. The only true way of using the same wire is behind the speedo bezel and not sure if it is easy to be seen from there, is the harness part number like in the pic below.
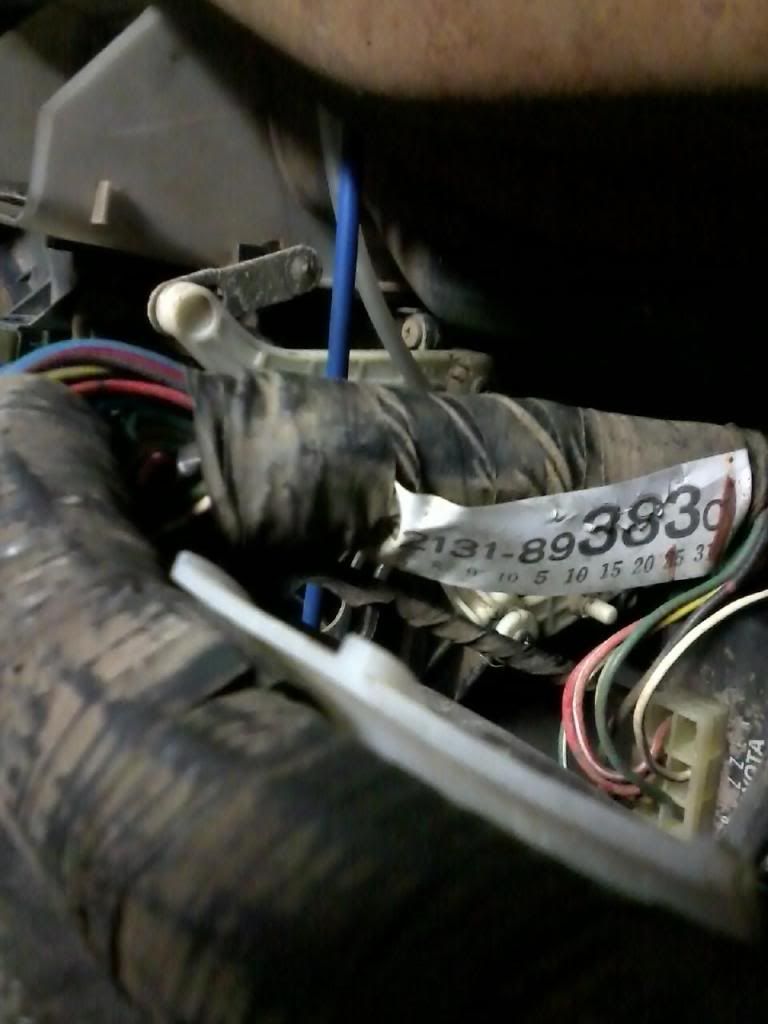
I have done alot of harness swapping and repairs and RAD is right about the wiring colors. Even one years difference and they change some things. The only true way of using the same wire is behind the speedo bezel and not sure if it is easy to be seen from there, is the harness part number like in the pic below.
Dec 20, 2012 | 11:47 AM
#794
Richard....
Just one point of curiousity... * Are you saying that the mirrors wiring is wired into THE WINDOW relay as well? I know the Door Lock ones are... BUT, MIRRORS? Can't be.... right? I mean,.... there's only 10 wires IN the connector, right? Maybe 8? Hmmmmmmm, ..... I SO WISH I could figure this out witcha... Just need more time.
Just one point of curiousity... * Are you saying that the mirrors wiring is wired into THE WINDOW relay as well? I know the Door Lock ones are... BUT, MIRRORS? Can't be.... right? I mean,.... there's only 10 wires IN the connector, right? Maybe 8? Hmmmmmmm, ..... I SO WISH I could figure this out witcha... Just need more time.
Dec 20, 2012 | 01:30 PM
#795
Thread Starter
Registered User
Joined: Apr 2012
Posts: 2,817
Likes: 2
From: Los Angeles CA
We'll maybe they don't go into the relay. But I know for a fact that the mirror wires have a connector on set of wires that hook up into my window wires. Oh god just 're reading this sounds confusing cool. But yes I can show you where they connect if you'd like to see.
Dec 21, 2012 | 10:23 AM
#796
Cool... Cuz I might grab more(will for sure if I see them) at the PYP's or other yards... Got lots of ppl asking me for em, ya know? So I might as well keep my eyes open... and might as well go beyond the switch/connector. I've disconnected them through, Richard.....At the door anyhow. lol. I know how it runs INTO the door.... BUT, it's running off the behind the gauge cluster area and down into behind the kick panel area and then into the door... So, just curious on all the routing in the MAIN harness... Cuz those wires went into a HUGE cluster, at least 1.5" diameter of wiring! lol.... You know, this is GREAT though, Richard... You're going to have a better and better understanding of things that are BY FAR the most likely 'FUTURE CULPRITS' with our rigs! This stuff is OLD and breaking all day. Got LOTS of orders for switches/wiring connectors/sensors... They just break after 25 years, ya know?
lol.... You know, this is GREAT though, Richard... You're going to have a better and better understanding of things that are BY FAR the most likely 'FUTURE CULPRITS' with our rigs! This stuff is OLD and breaking all day. Got LOTS of orders for switches/wiring connectors/sensors... They just break after 25 years, ya know?
Dec 23, 2012 | 02:40 PM
#797
Thread Starter
Registered User
Joined: Apr 2012
Posts: 2,817
Likes: 2
From: Los Angeles CA
So we had a pretty good day yesterday.
Grego and I met up at the Wilmington pick your part. there were 2 4Runners and both were pretty gutted. But i did however find a couple of things that would be very helpful.
I removed 2 "Door Control relays" off both to Toyota's. I took 2 just in case the one i have at home turns out to be broken. Both of mine were in very decent condition and i took them with the connector along with about 8-10" of wire slack on both. I also found a new indoor lighter. Mine never had the green circle light around the lighter. So i will be installing that soon too. One of those toyota's apparently used to have an Altimeter. and i seen the dash on the truck was all cracked and mangled to hell, but i figured i could cut out the piece where the altimeter sits on and use that as tracing outline for when i cut the holes into my dash it will fit exact.
After that we went to Mark's house where we met up with both Mark and Rad4Runner. Talked about trucks and troubleshooting and problems we have been having with our trucks and selling and what not. You know yota talk. I ended up buying Mark's power mirrors the buttons for it which then wire into all the power window wiring/relay that i already have. I also bought his Toyota 4runner jack along with the metal piece to jack it up. And got the little plastic pieces that mount onto the 4runner seat lever to adjust the back piece.
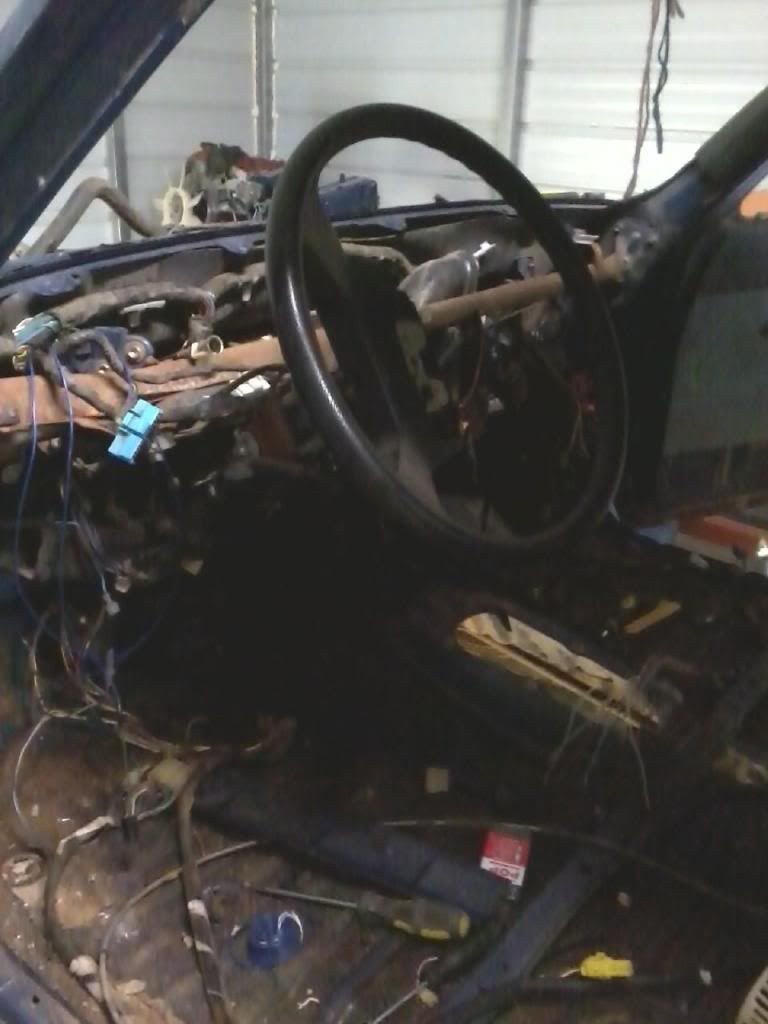
We took a picture of us with our trucks shown below:


After much talking we got to business and class began. Rad4Runner to me how the power window switches work, why they wernt working correctly due to the contacts not getting connectivity, then showed me how to read the wiring diagram/schematics and once he was done he quizzed me to make sure i understood. lol Sounds funny but i gotta admit i think doing that made me understand it a hell of a lot more.
Went to eat a feast of Mexican food at a local restaurant which was delicious btw RAD thanks you for dinner.
Spent many hours with these guys yesterday and got to know Rad really really well and i gotta say he's definitely a very helpful guy. Was nice to meet you and thank you all so much for your help in teaching me some very helpful skills and thanks for the parts! Was very appreciated guys.
------------------------------------------------------------------------------------
After getting home last night i deep cleaned the contacts on my buttons very well. Due to all corrosion the copper had i went ahead and soaked the buttons in CLR for 2 min. then scrubbed with some q-tips. Rinsed it all off with clean water. Used a blow drier on warm heat to dry out any left over water. I let the rest dry over night and this morning i used some very fine grit (1000 i think) sand paper to shave off the little corrosion left over and expose those metal contacts once again the way they should be. Then polished it with some really really REALLY fine grit sand paper stuff that RAD gave me to use. and i just got done testing each and every one of those pins. and i gotta say ALL that cleaning helped out every bit. Every contact has really good connectivity. I'm very happy with it. And we tested my passenger side button and we found that one is in perfect working condition. So as of now my buttons are all set. Now i can get with the spaghetti soup of wires and track where each one goes and see that they all get connectivity. Then test them with my buttons. and once i get that down i will then test everything out with 12 volts to make sure all works well. WOO HOO!!! Finally getting the buttons to work really made my day! Cant wait to get the windows working!
Now with all this new knowledge i really do look forward to finally getting down to business and being able to wire up my windows/mirrors.
Grego and I met up at the Wilmington pick your part. there were 2 4Runners and both were pretty gutted. But i did however find a couple of things that would be very helpful.
I removed 2 "Door Control relays" off both to Toyota's. I took 2 just in case the one i have at home turns out to be broken. Both of mine were in very decent condition and i took them with the connector along with about 8-10" of wire slack on both. I also found a new indoor lighter. Mine never had the green circle light around the lighter. So i will be installing that soon too. One of those toyota's apparently used to have an Altimeter. and i seen the dash on the truck was all cracked and mangled to hell, but i figured i could cut out the piece where the altimeter sits on and use that as tracing outline for when i cut the holes into my dash it will fit exact.
After that we went to Mark's house where we met up with both Mark and Rad4Runner. Talked about trucks and troubleshooting and problems we have been having with our trucks and selling and what not. You know yota talk. I ended up buying Mark's power mirrors the buttons for it which then wire into all the power window wiring/relay that i already have. I also bought his Toyota 4runner jack along with the metal piece to jack it up. And got the little plastic pieces that mount onto the 4runner seat lever to adjust the back piece.
We took a picture of us with our trucks shown below:
After much talking we got to business and class began. Rad4Runner to me how the power window switches work, why they wernt working correctly due to the contacts not getting connectivity, then showed me how to read the wiring diagram/schematics and once he was done he quizzed me to make sure i understood. lol Sounds funny but i gotta admit i think doing that made me understand it a hell of a lot more.
Went to eat a feast of Mexican food at a local restaurant which was delicious btw RAD thanks you for dinner.
Spent many hours with these guys yesterday and got to know Rad really really well and i gotta say he's definitely a very helpful guy. Was nice to meet you and thank you all so much for your help in teaching me some very helpful skills and thanks for the parts! Was very appreciated guys.
------------------------------------------------------------------------------------
After getting home last night i deep cleaned the contacts on my buttons very well. Due to all corrosion the copper had i went ahead and soaked the buttons in CLR for 2 min. then scrubbed with some q-tips. Rinsed it all off with clean water. Used a blow drier on warm heat to dry out any left over water. I let the rest dry over night and this morning i used some very fine grit (1000 i think) sand paper to shave off the little corrosion left over and expose those metal contacts once again the way they should be. Then polished it with some really really REALLY fine grit sand paper stuff that RAD gave me to use. and i just got done testing each and every one of those pins. and i gotta say ALL that cleaning helped out every bit. Every contact has really good connectivity. I'm very happy with it. And we tested my passenger side button and we found that one is in perfect working condition. So as of now my buttons are all set. Now i can get with the spaghetti soup of wires and track where each one goes and see that they all get connectivity. Then test them with my buttons. and once i get that down i will then test everything out with 12 volts to make sure all works well. WOO HOO!!! Finally getting the buttons to work really made my day! Cant wait to get the windows working!
Now with all this new knowledge i really do look forward to finally getting down to business and being able to wire up my windows/mirrors.
Dec 23, 2012 | 07:18 PM
#798
Registered User
Joined: Mar 2012
Posts: 7,125
Likes: 681
Yeah, great times guys, and you're most welcome, Redeth
I really like that version of switches that can be easily unscrewed and taken apart, compared to snapped or glued together. I think that for things we take to remote places, there should be an easy way to disassemble clean/inspect/repair on the field. Guns that people have trusted their lives on
for decades are the same way. Something must be right about that idea. I wish more parts and vehicles are like that.
Richard, I hope you could take pics of switches taken apart and post them.
I also think it's best to go by physical layout of window control harness, instead of using the FSM- color codes and pin-outs just don't match your harness.
Best if you can find schematic exactly for your model. Do you or Grego remember what model-year you got the harness from? I hope other members have schematic for it.


