
Redeth's 1989 4Runner Resurrection
 Aug 10, 2013 | 11:30 PM
#2021
Thread Starter
Registered User
Joined: Apr 2012
Posts: 2,817
Likes: 2
From: Los Angeles CA
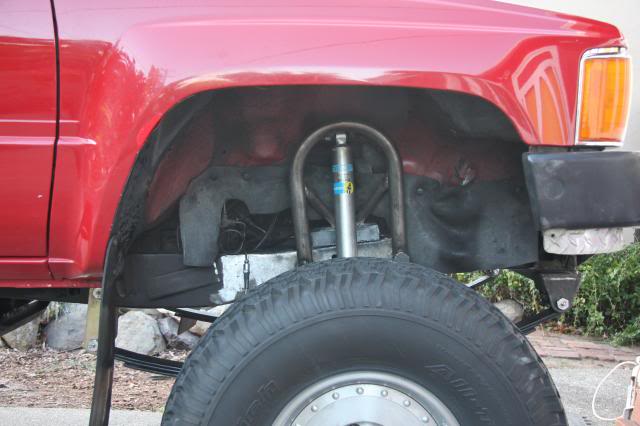
As for the bump stops I mentioned. We did get one installed; the passenger side rubber bump stop and the tower. Since we got started to a super late start today due to Faby's truck we didn't have time to do both bump stops.
Since I was taking the tire and shock off to grind down the area where I plan to weld I decided to take the liberty of further cleaning up my frame since Ruben and I necer got a chance to sand the frame after grinding when we did my SAS. So when we did paint we had a lot of deep scratches on the frame from the grinder and also lumps from the Acetylene torch. So I took this time to go over it with both 60 & 120 grit metal sand papers. And clean up those lumps from meting steel.
So here's how it turned out. Not professional looking but damn that is a heck of a lot better then before!
Primed

Repainted matt black instead of that glossy black crap I used the first time.

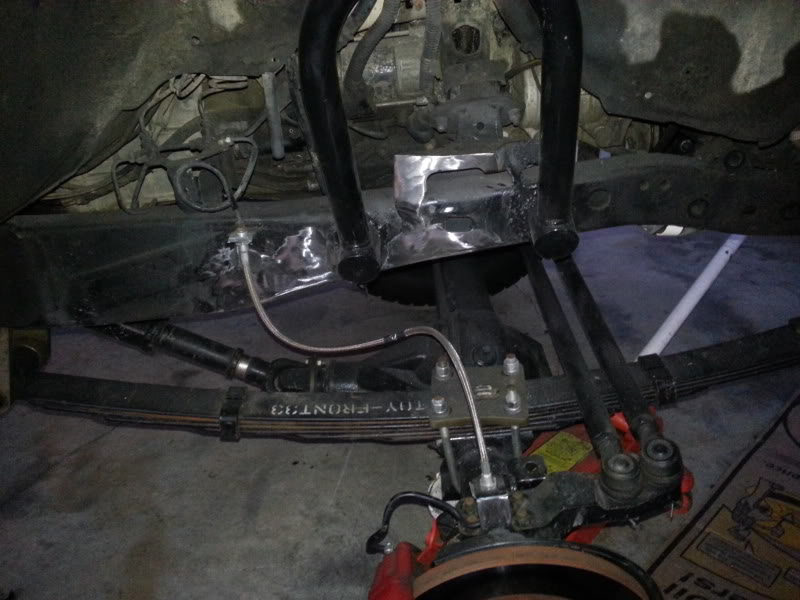
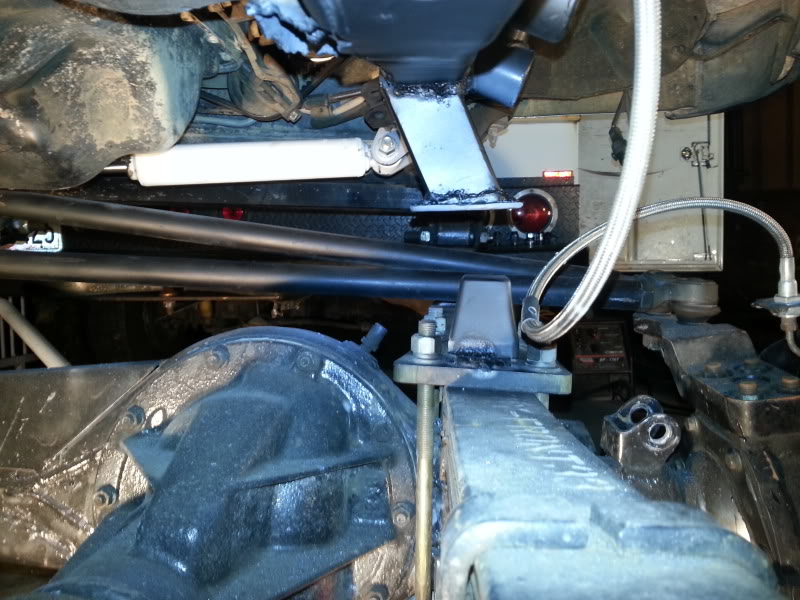
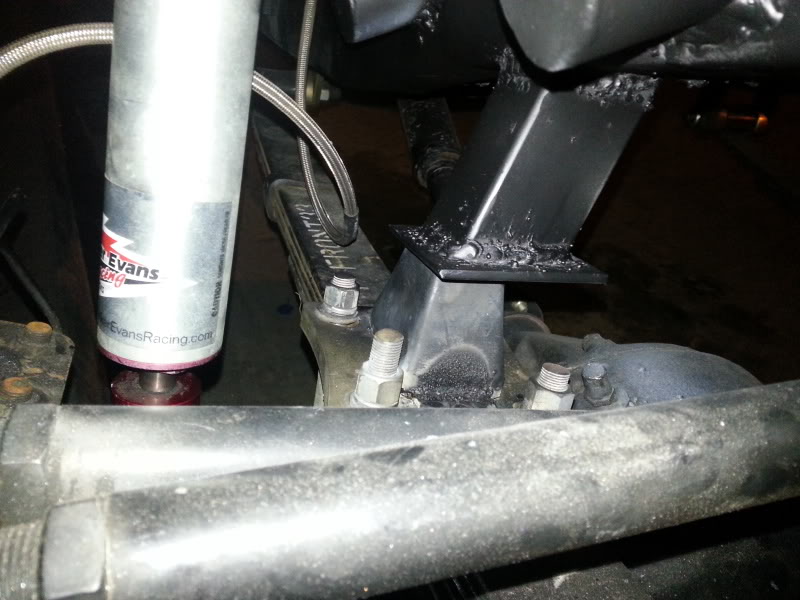
Btw the actual rubber bump stop was welded to the ubolt plate. The towers to the frame. Check it out.
Fabys finger pointing to the rubber bump.

Time to clean up and mount everything back in place. Shock in place. Dang don't that look beautiful?
Once the tire was mounted we drove up my invention of the side walk/ ramp to co press the shock. I think I did a good job. It doesn't sit perfectly flat with the tower's plate but it works and that's what matters. I made it so the rubber bump will leave my shock with 1/2" of travel before it compresses all the way.
That is all folks. I know its 1/2 of an update. But its a good one. Nice to know I I'm getting it done finally. My shocls will thank me for them! Im going to get that driver side ine installed tomorrow morning.
Good night all!
Since I was taking the tire and shock off to grind down the area where I plan to weld I decided to take the liberty of further cleaning up my frame since Ruben and I necer got a chance to sand the frame after grinding when we did my SAS. So when we did paint we had a lot of deep scratches on the frame from the grinder and also lumps from the Acetylene torch. So I took this time to go over it with both 60 & 120 grit metal sand papers. And clean up those lumps from meting steel.
So here's how it turned out. Not professional looking but damn that is a heck of a lot better then before!
Primed
Repainted matt black instead of that glossy black crap I used the first time.
Btw the actual rubber bump stop was welded to the ubolt plate. The towers to the frame. Check it out.
Fabys finger pointing to the rubber bump.
Time to clean up and mount everything back in place. Shock in place. Dang don't that look beautiful?
Once the tire was mounted we drove up my invention of the side walk/ ramp to co press the shock. I think I did a good job. It doesn't sit perfectly flat with the tower's plate but it works and that's what matters. I made it so the rubber bump will leave my shock with 1/2" of travel before it compresses all the way.
That is all folks. I know its 1/2 of an update. But its a good one. Nice to know I I'm getting it done finally. My shocls will thank me for them! Im going to get that driver side ine installed tomorrow morning.
Good night all!
Aug 10, 2013 | 11:51 PM
#2022
Registered User
Joined: Jul 2012
Posts: 2,365
Likes: 4
From: Idaho
looks awesome all round rich!
one suggestion with fabys coil packs single layer of electrical tape if they are dry cracking an allowing spark to jump that will stop it till you can replace them not a permanent fix but a good temporary one
had that issue once with a coil wire popping to the ground terminal due to cracked rubber fixed it till i could do a tuneup an wire replacement
 Aug 11, 2013 | 01:23 PM
#2024
Thread Starter
Registered User
Joined: Apr 2012
Posts: 2,817
Likes: 2
From: Los Angeles CA
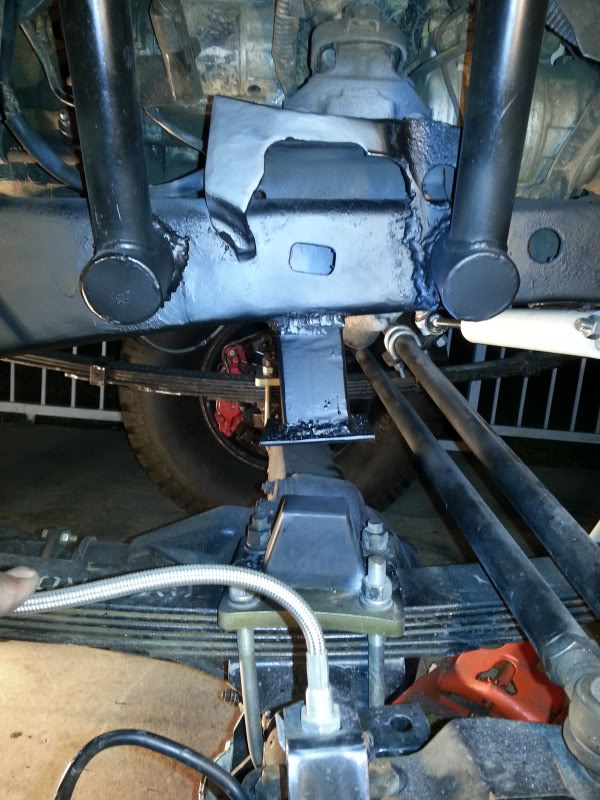
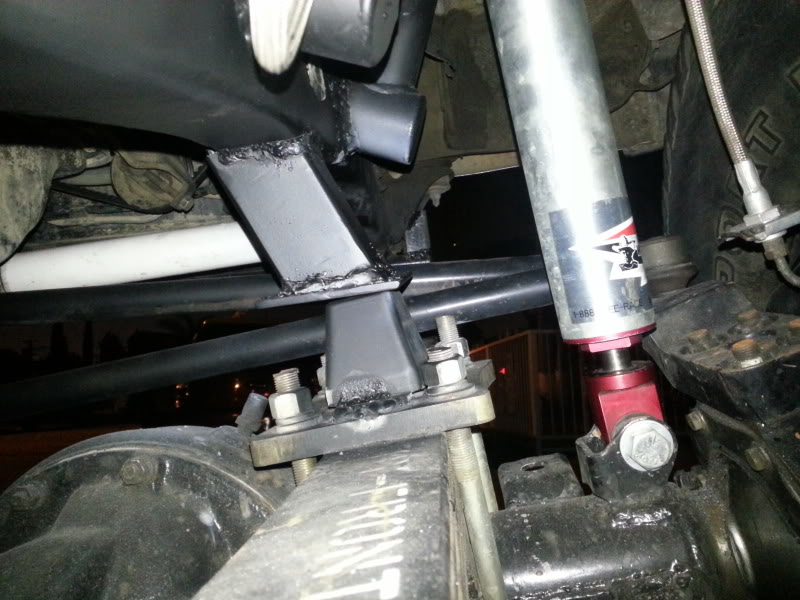
Just finished doing the driver side bump stop. I cleaned up the frame here too. Looks much much nicer now that I sanded everything down. I even took the time to remove the exhaust cover or header cover I should say to clean up and paint that up nicely too. This is how it should have been done from the beginning. But I wanted to hurry up and finish the SAS to avoid taking anymore time in my next door neighbors back yard. Just glad I finally got around to doing these bump stops and frame clean up.

I had to go back to the passenger side and use the wire wheel to clean up a bit further and repaint. It looks just as clean as this side now.
I had to go back to the passenger side and use the wire wheel to clean up a bit further and repaint. It looks just as clean as this side now.
Last edited by Redeth005; Aug 11, 2013 at 01:57 PM.
Aug 13, 2013 | 07:52 PM
#2026
Thread Starter
Registered User
Joined: Apr 2012
Posts: 2,817
Likes: 2
From: Los Angeles CA
Hey guys got a great update for you all.
I squeezed enough time in today to pull out the ol' wiring harness for the windows and mirrors and looky here! The video shows everything. But point is I got the windows to work! Both sides!
And Faby came over today cuz she needed someone's(mine) tools to use. This is Faby's first time working on her Tacoma's motor. She had to replace the gasket to the metal piece that connects the top radiator hose to the engine block. She did good. And she learned something new. Yay! Good job Faby
Aug 13, 2013 | 08:16 PM
#2027
HAHAHA! That was great, congrats! but I really couldn't stop cracking up at the very end when she says, "Bahyeeee". Hehehe.
Seriously, I'm really stoked for you man! you are going to love having that option, and as long as you look through every wire and make sure nothing is exposed or going to ground out on something, things like that? They should be good to go for a long time! Now if you could just squeeze that air conditioning job into there as well... You wouldn't hit that one either! Hahaha. You'll get to that too... Freaking excited for you!
Also, congratz Faby! Nice work fixing your own truck... Maybe time to start a thread? Really happy for you getting that truck, period, but then seeing your working on it too? That's just cool! Lol
Aug 13, 2013 | 10:58 PM
#2028
Registered User
Joined: Jul 2012
Posts: 2,365
Likes: 4
From: Idaho
ya need one switch for the passenger door to operate the passenger side OR for the power door locks if its not that no clue what the wires are for
yay fabby thermostat housing gasket replacement good starting spot!
waves BuhBYE!!
yay fabby thermostat housing gasket replacement good starting spot!
waves BuhBYE!!
Aug 17, 2013 | 07:22 PM
#2029
Thread Starter
Registered User
Joined: Apr 2012
Posts: 2,817
Likes: 2
From: Los Angeles CA
I went on the Azusa "Bridge to Nowhere" hike today. Took my little bro and Faby on this 10. Mile hike. Once we got to about half way I realized that I didn't put my year parking pass on my rear view mirror! I had left it in the glove compartment. Daaaaarn it! So we only got about 3 miles in and ran the the 3 miles back in a hurry trying yo beat the park rangers so I don't get a ticket.
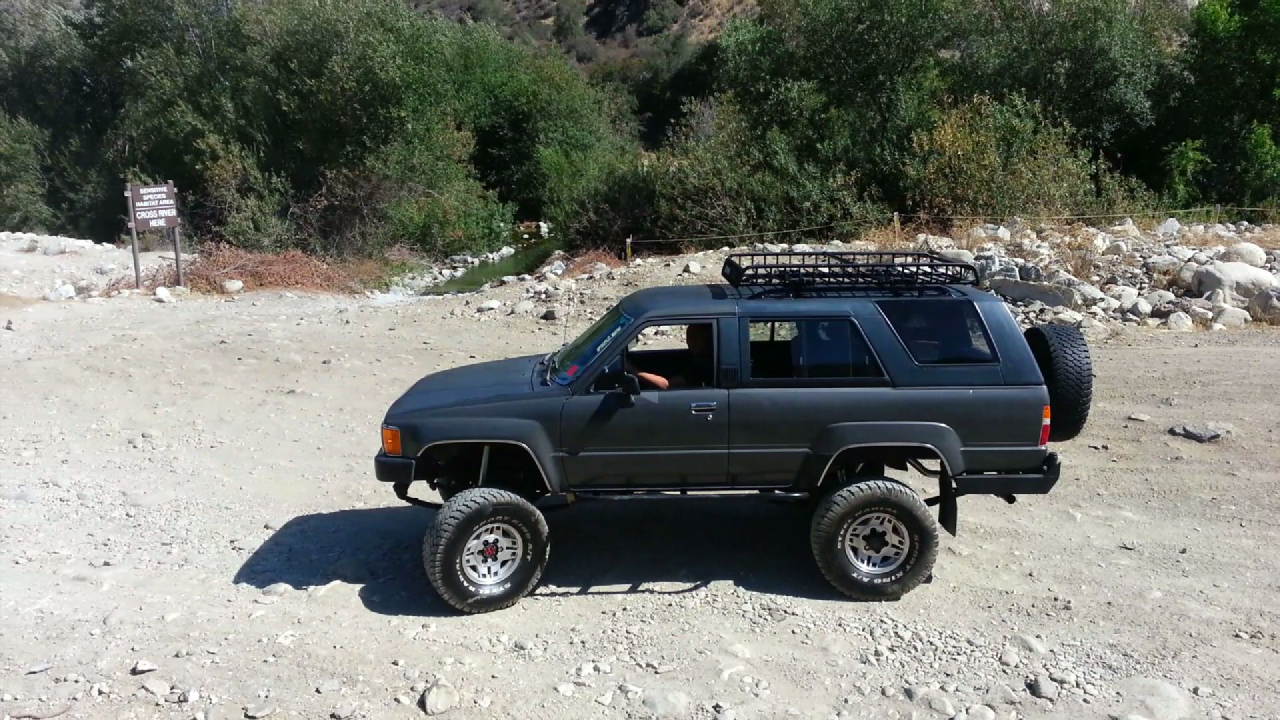
We made it back in time. The Ranger was writing out the parking tickets when ee arrived and he was about 10 cars away before reaching my truck. And rather then just calling the hike quits for the day I decided to take them exploring on the Offroad obstical they have. I always pass it but I never go. So curiosity got the best of me this time. Paid the $8 entrance fee and went exploring. Here are all the pictures I took. I was surprised that the Sport King A/T's were able to handle. Not bad for what they are I guess.
Video. Sorry for the side view. Faby didn't tilt my phone enough for it to record horizontally.
Bump stops working like a charm at full flex.

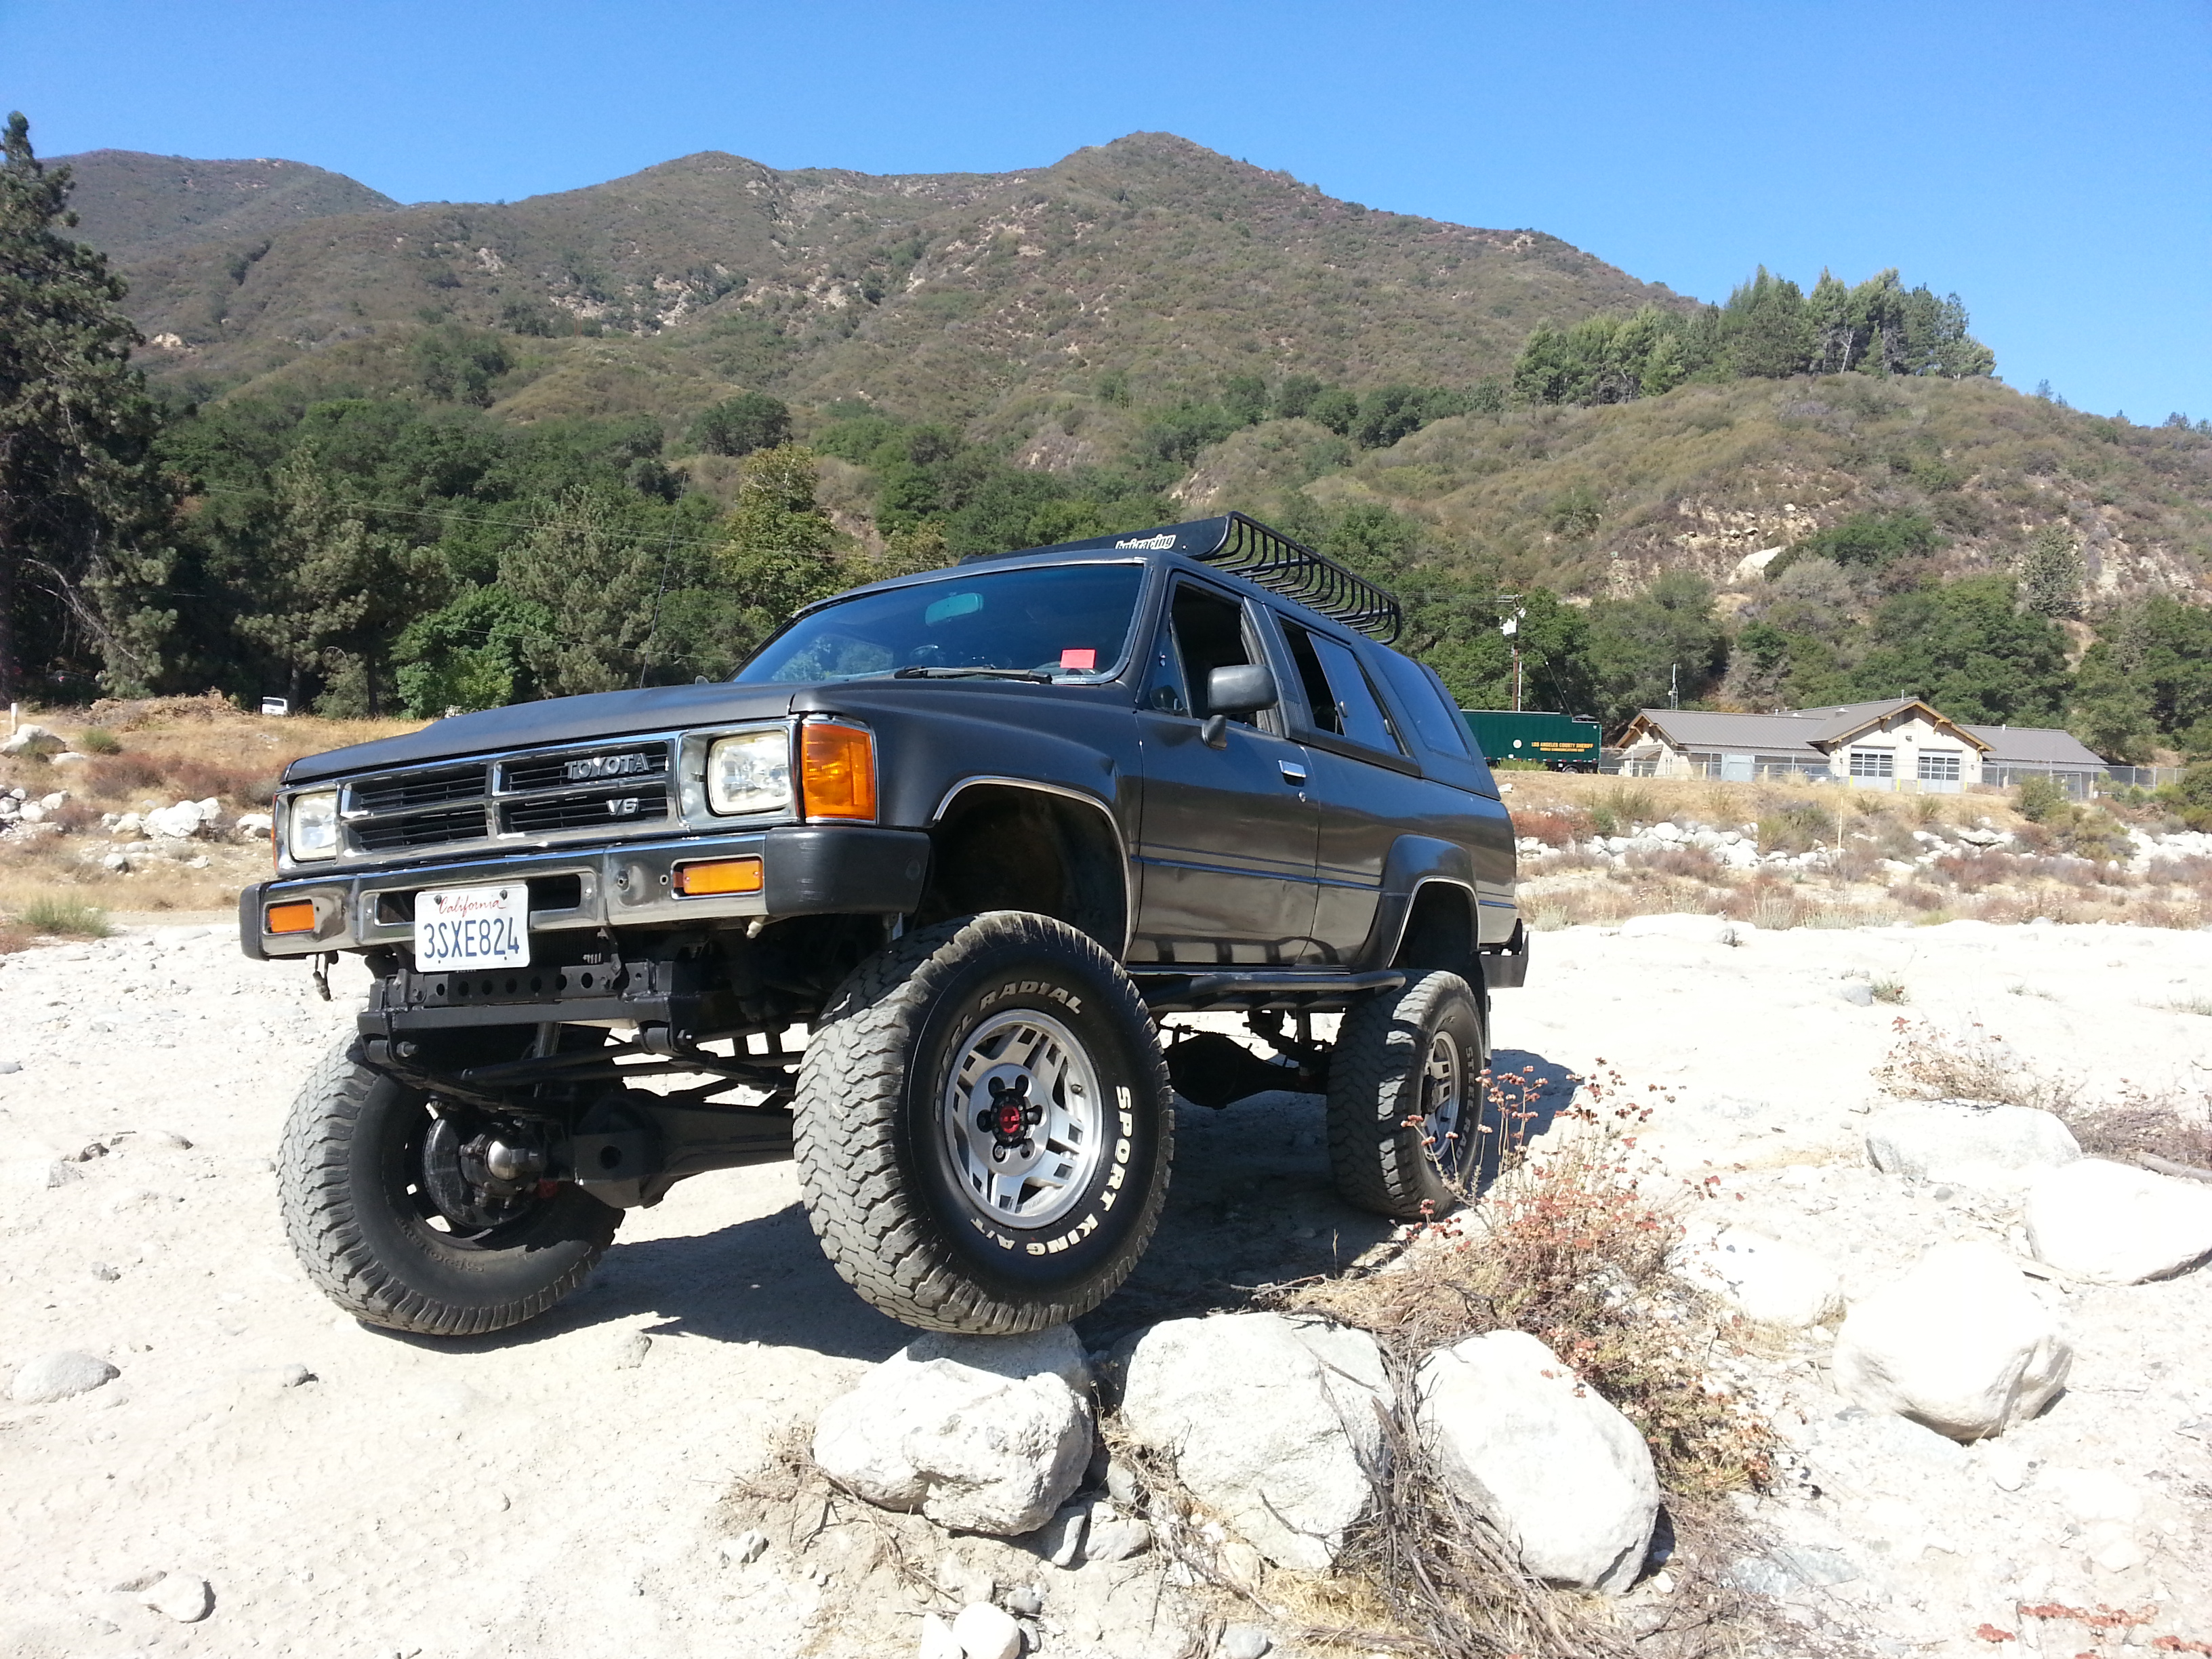
At the edge of the off road area they have a huge water reservoir. Almost looks like a beach.
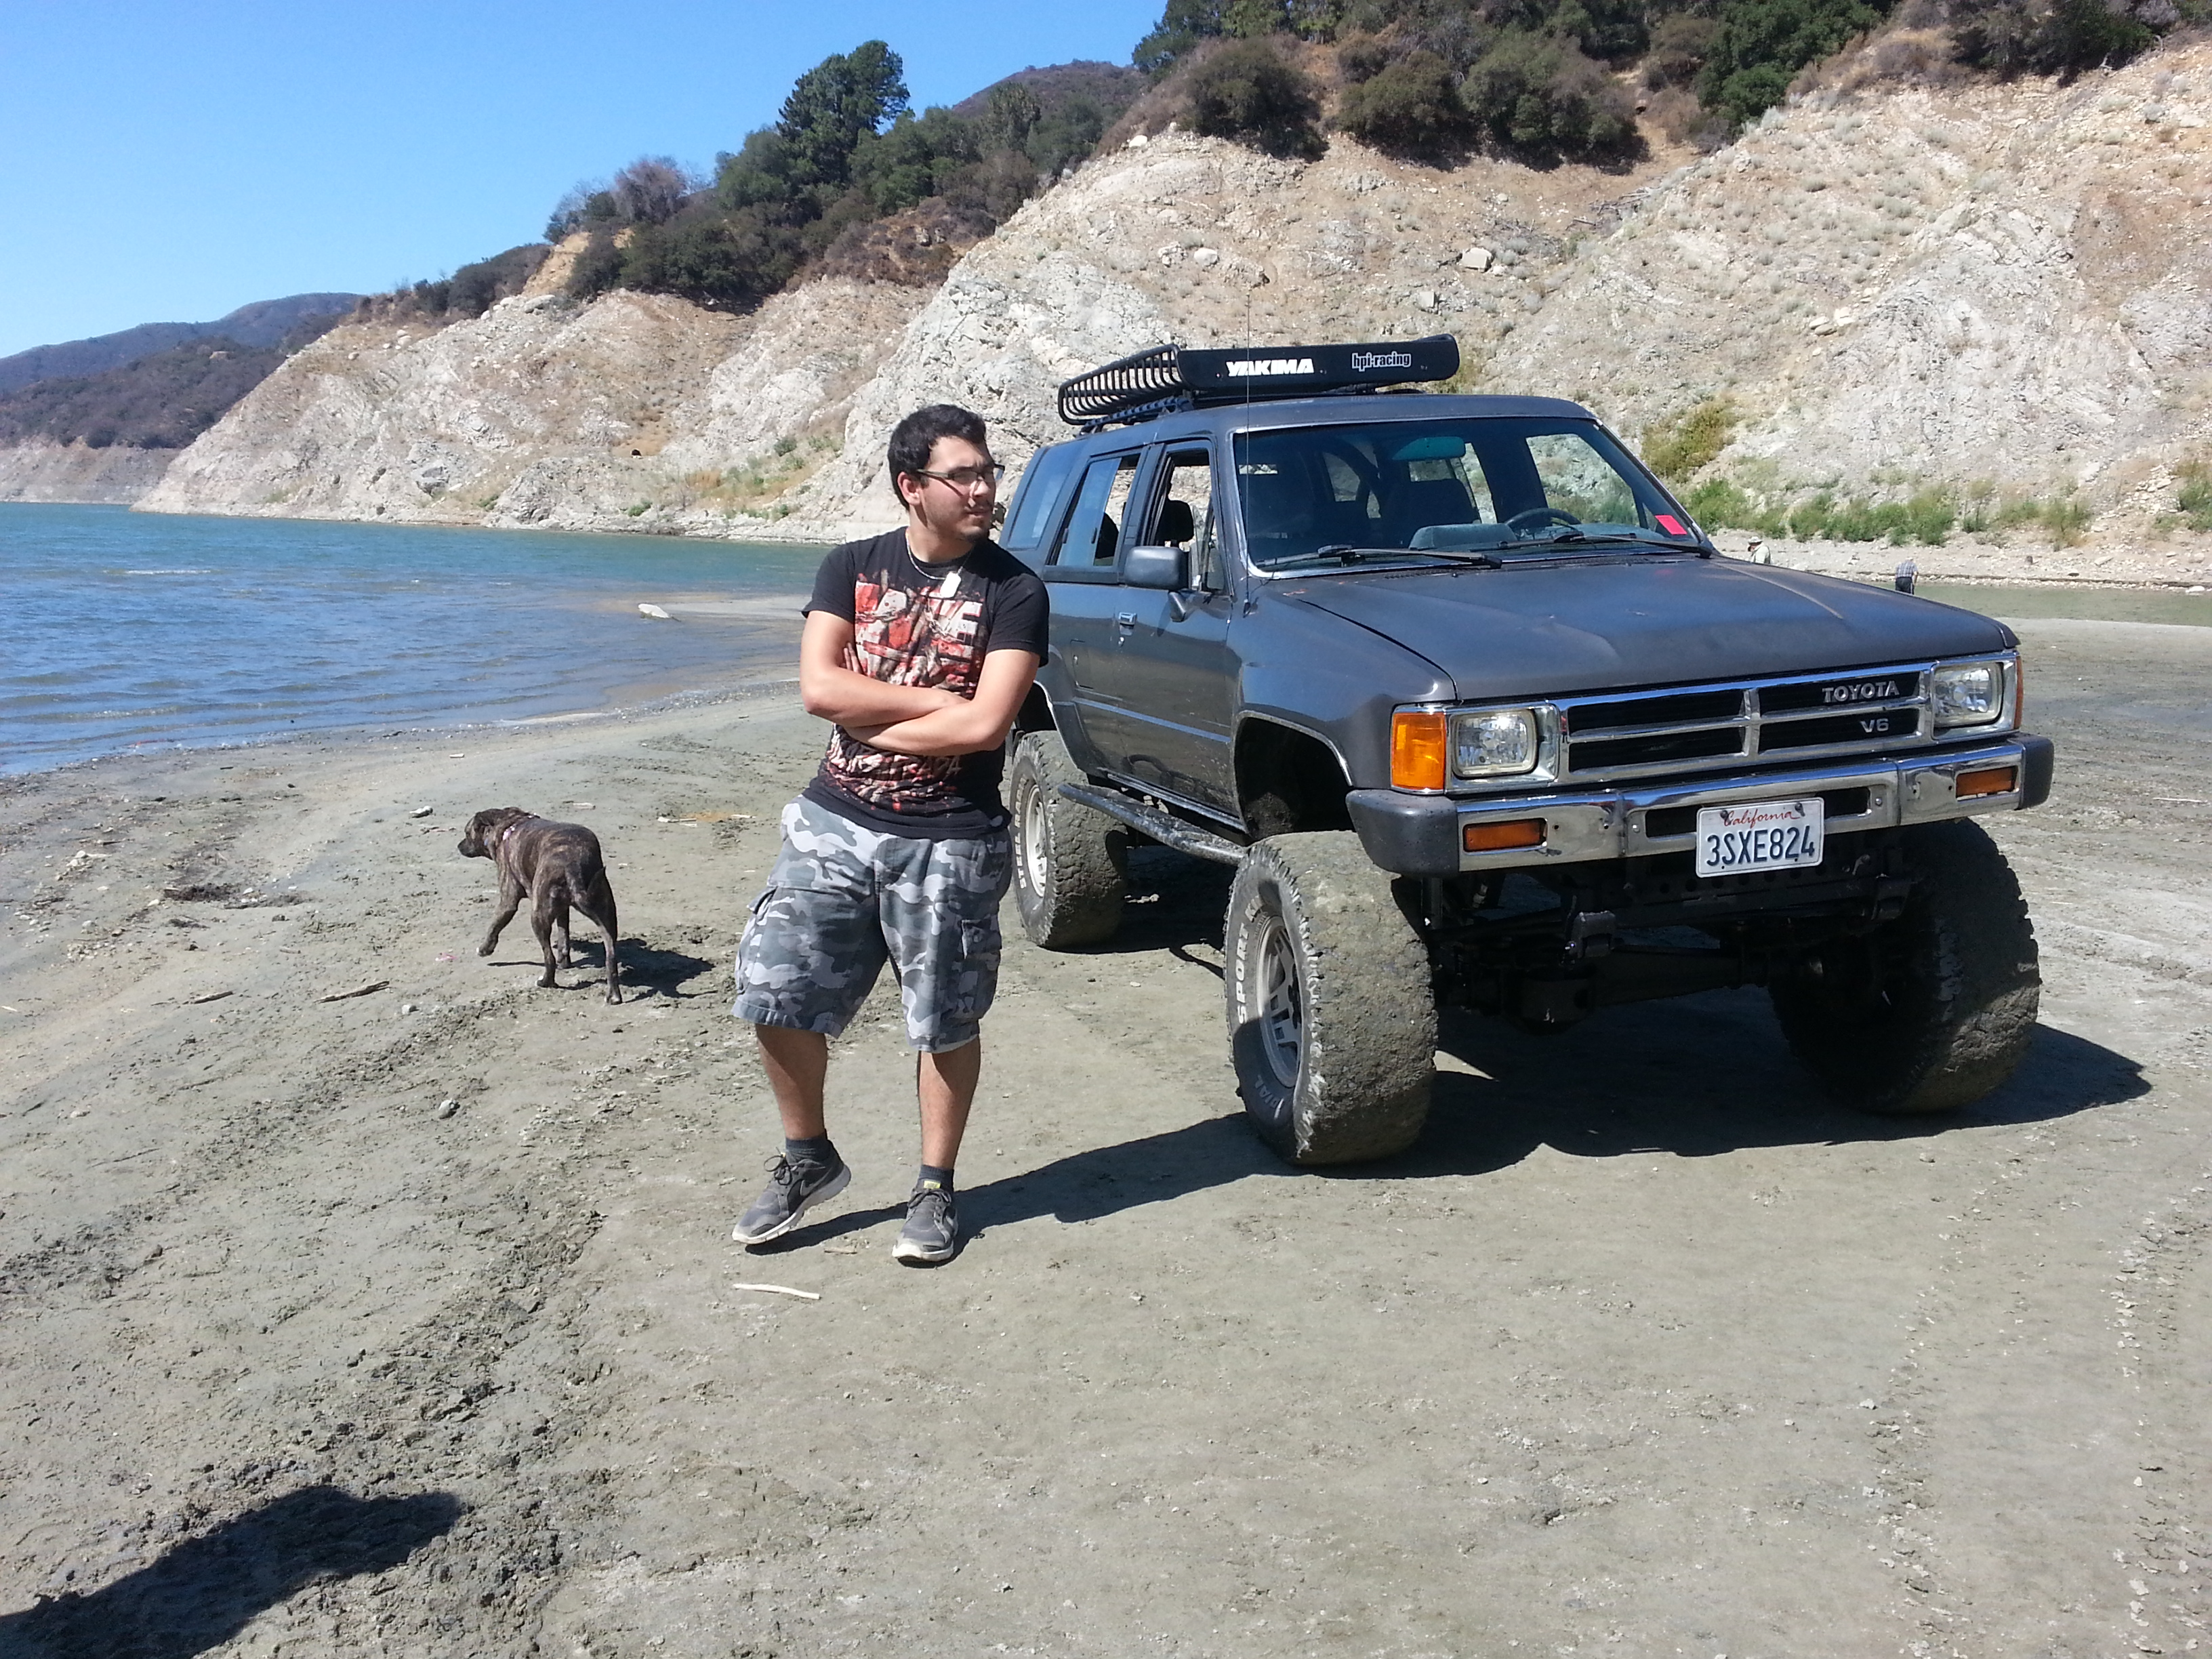
When you enter the park they tell you feel free to explore just make sure you don't go into obvious areas that have signs that state not to go through no drinking alcoholic beverages and do not go into the reservoir.
This dumb ass didn't listen to the park rules and went in for a closer look and with just a few seconds his whole front end sunk in through the soft clay floor. When we arrived these 3 guys were trying to pull him out. With snapping 3 tow lines it looks like this guys truck would get sucked into the water for sure. Lol we didn't stick around to see it get pulled out or whatever so we didn't see what happened in the end.

A couple of nice shots near the water.

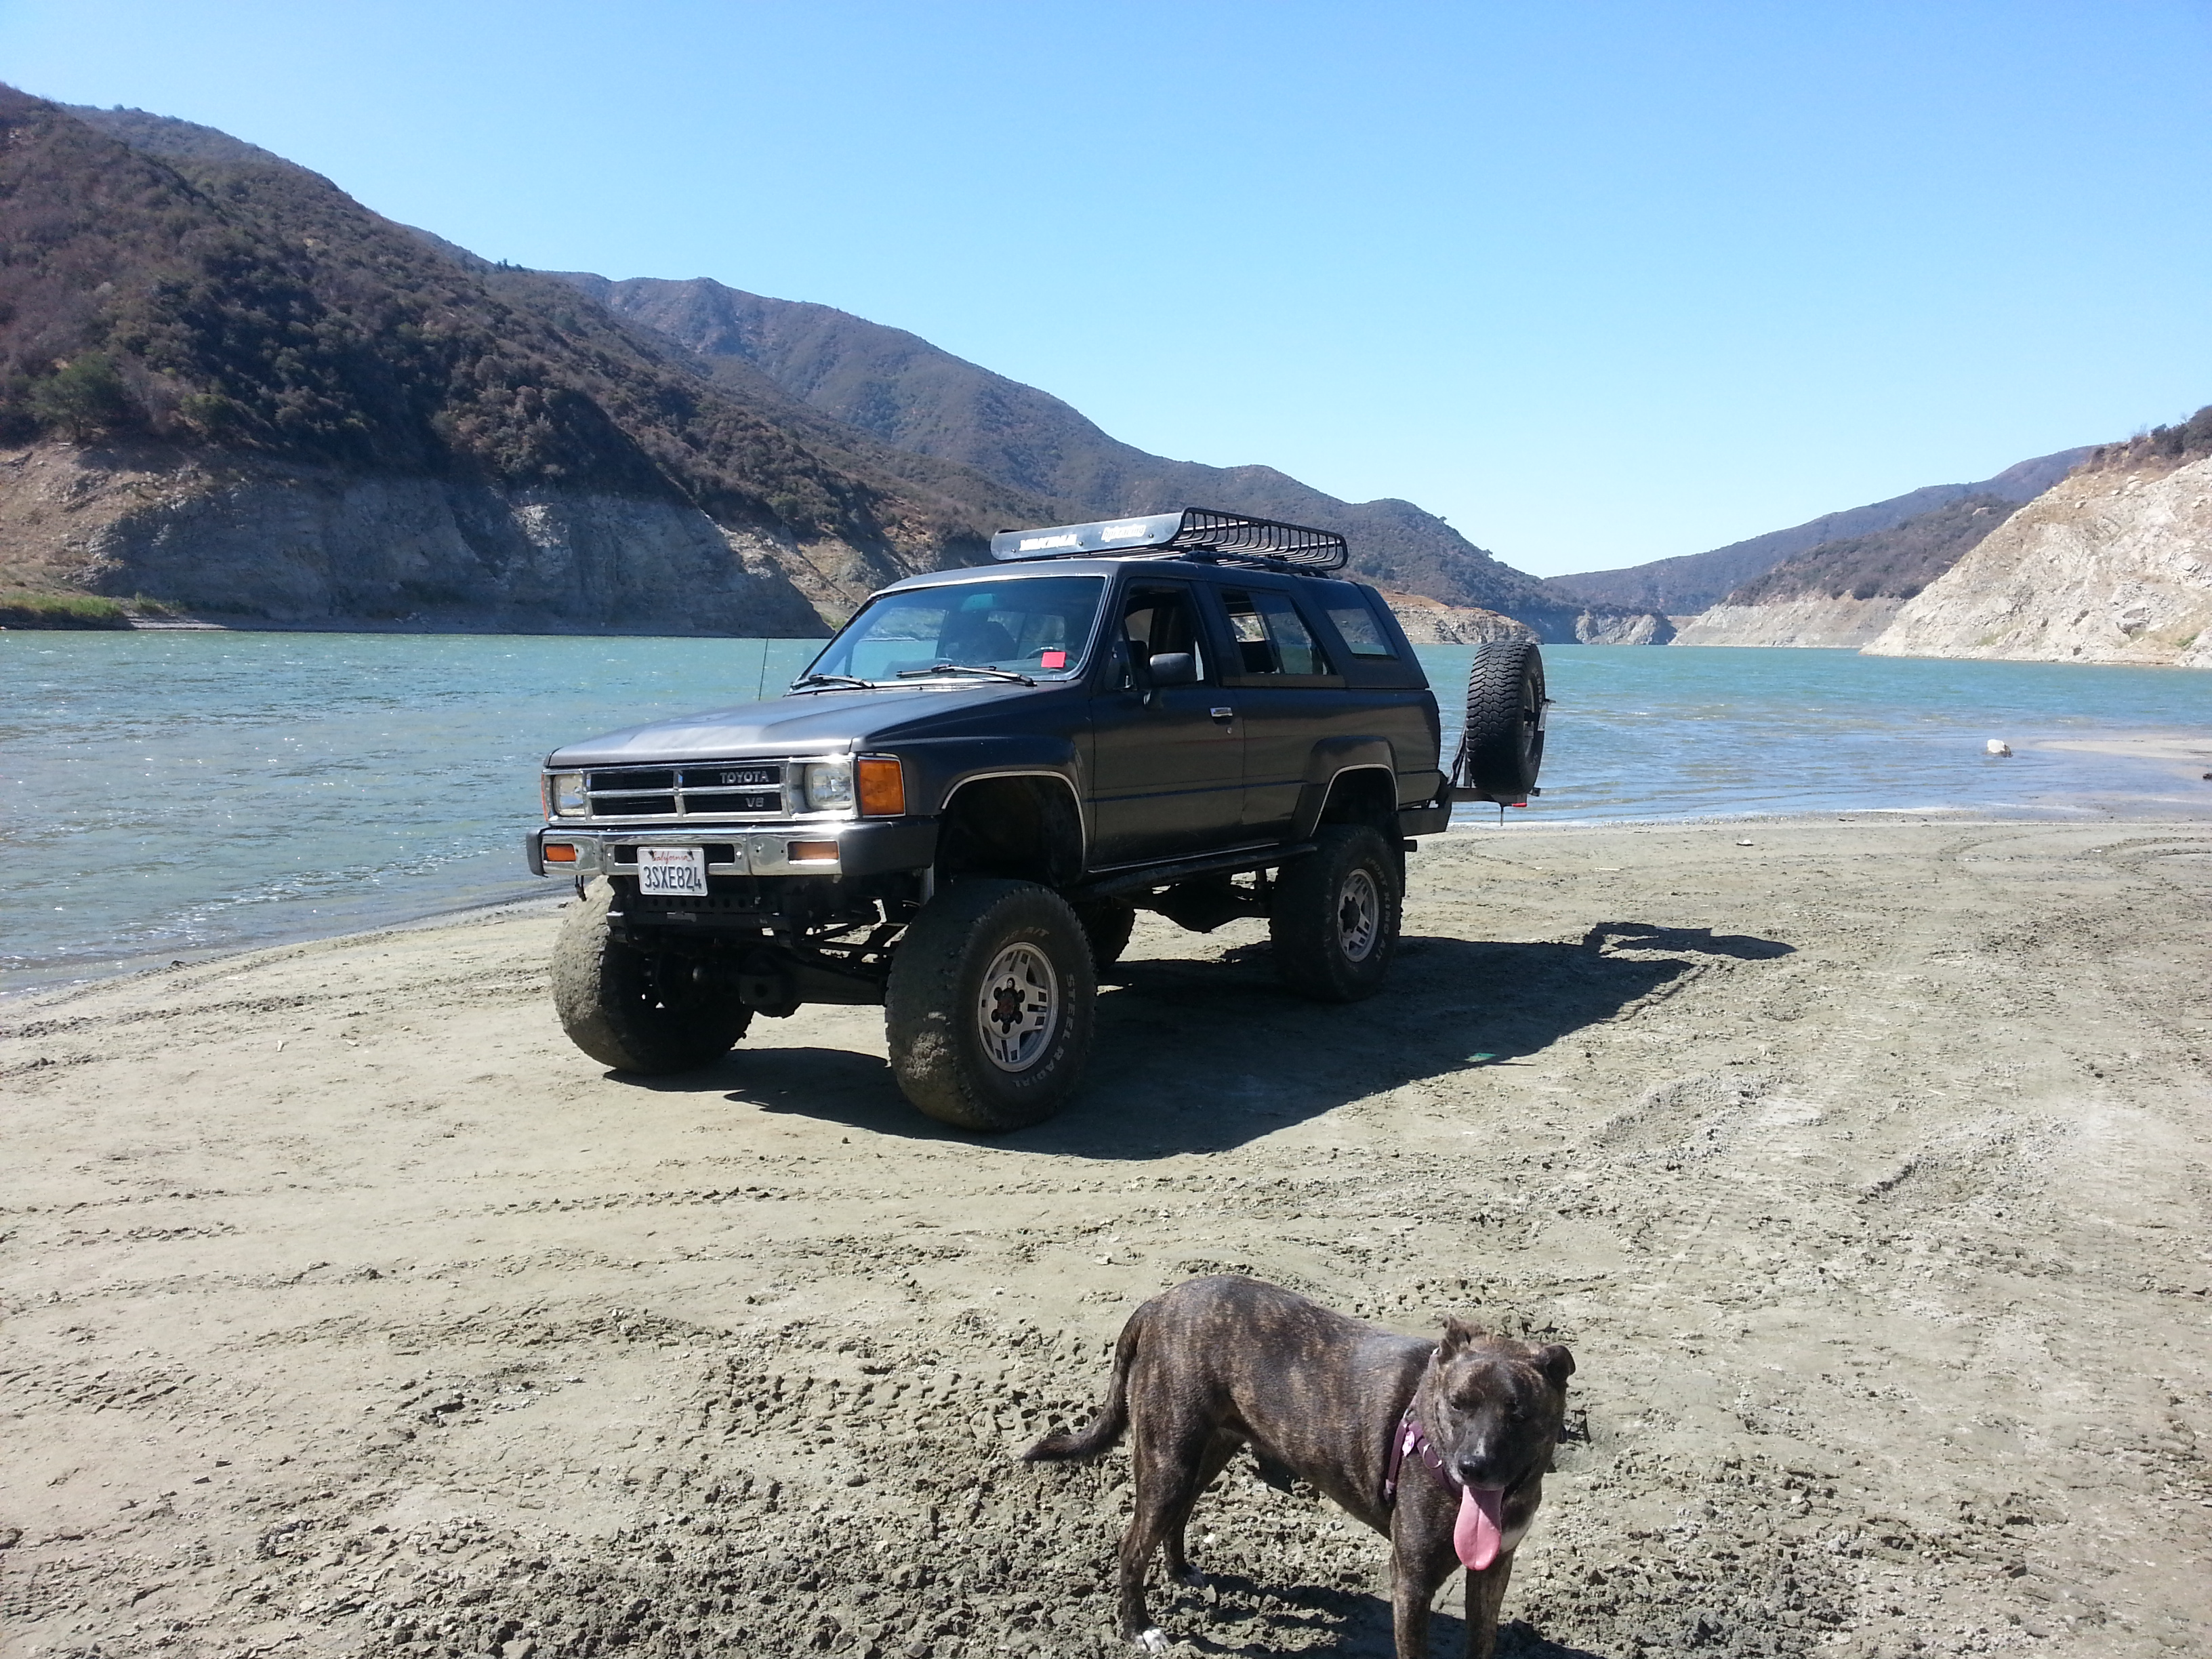
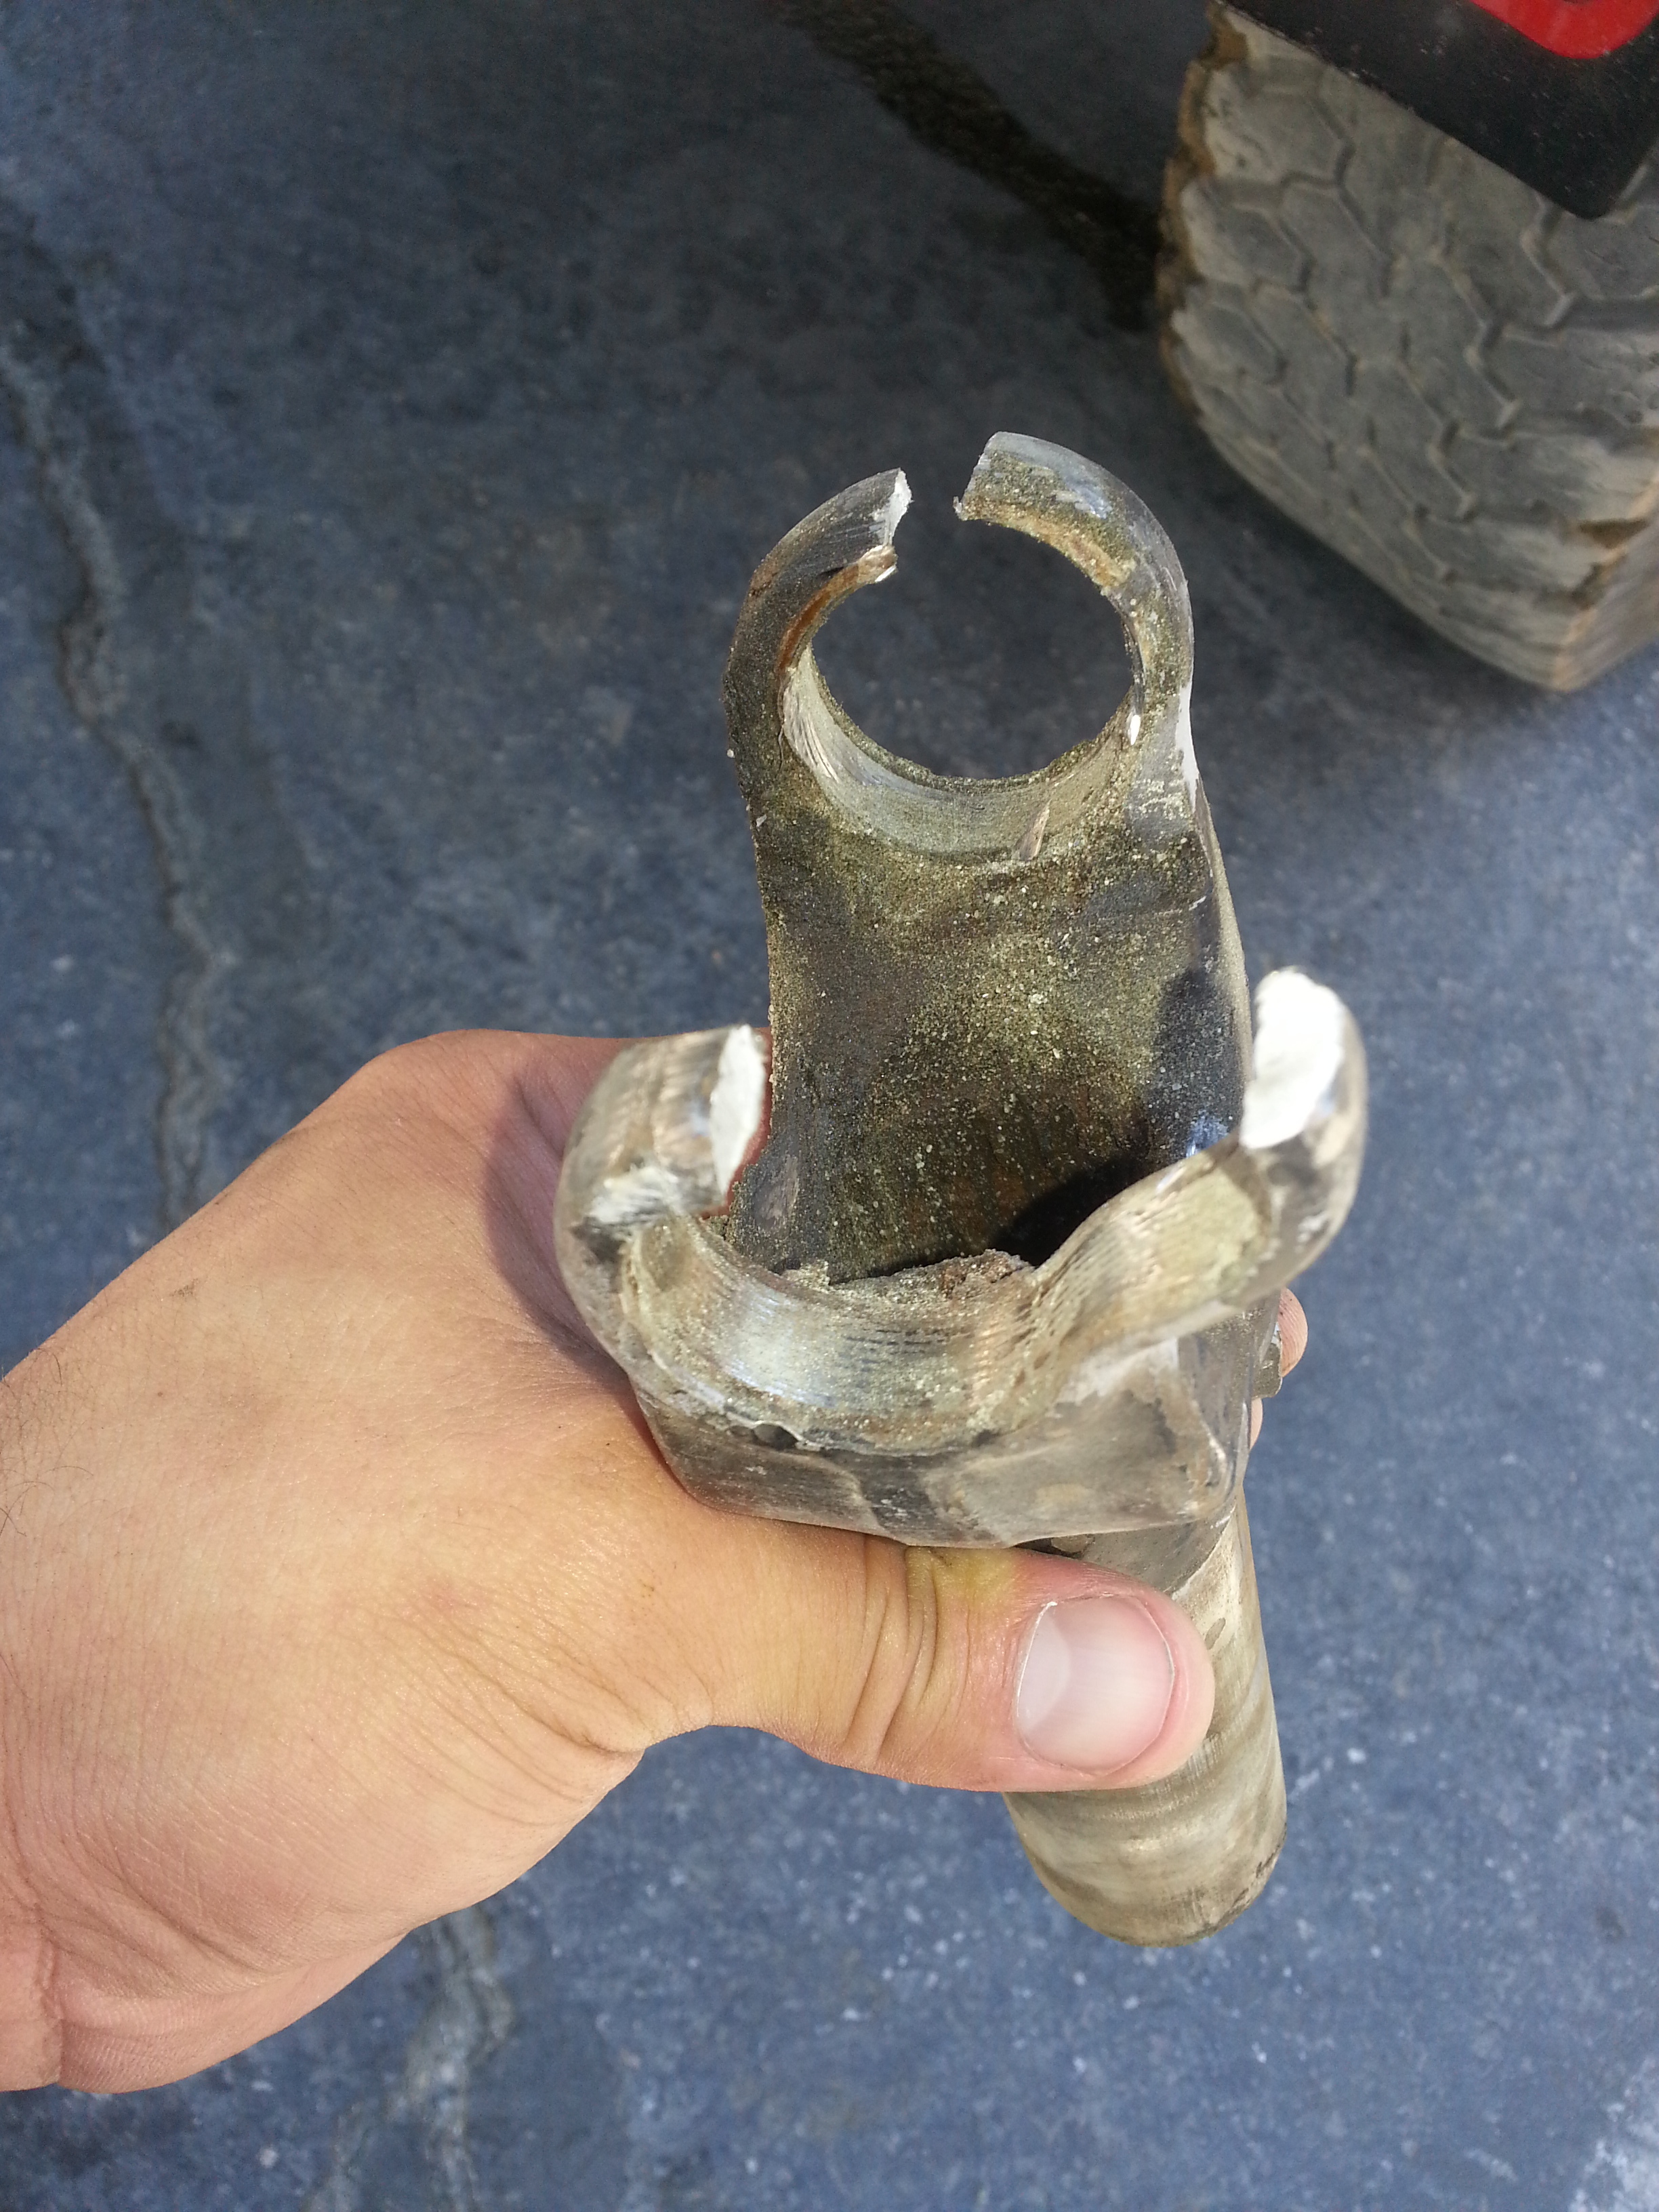
Everything was going peaches and cream until this happened. Dun dun duun!
Hit a ditch a bit too hard while accelerating and I guess thats where the driveshaft got all jacked up. At least that's where I noticed the noise. Literally sounded like it was the axle. I was more concerned for my 3rd then anything else.
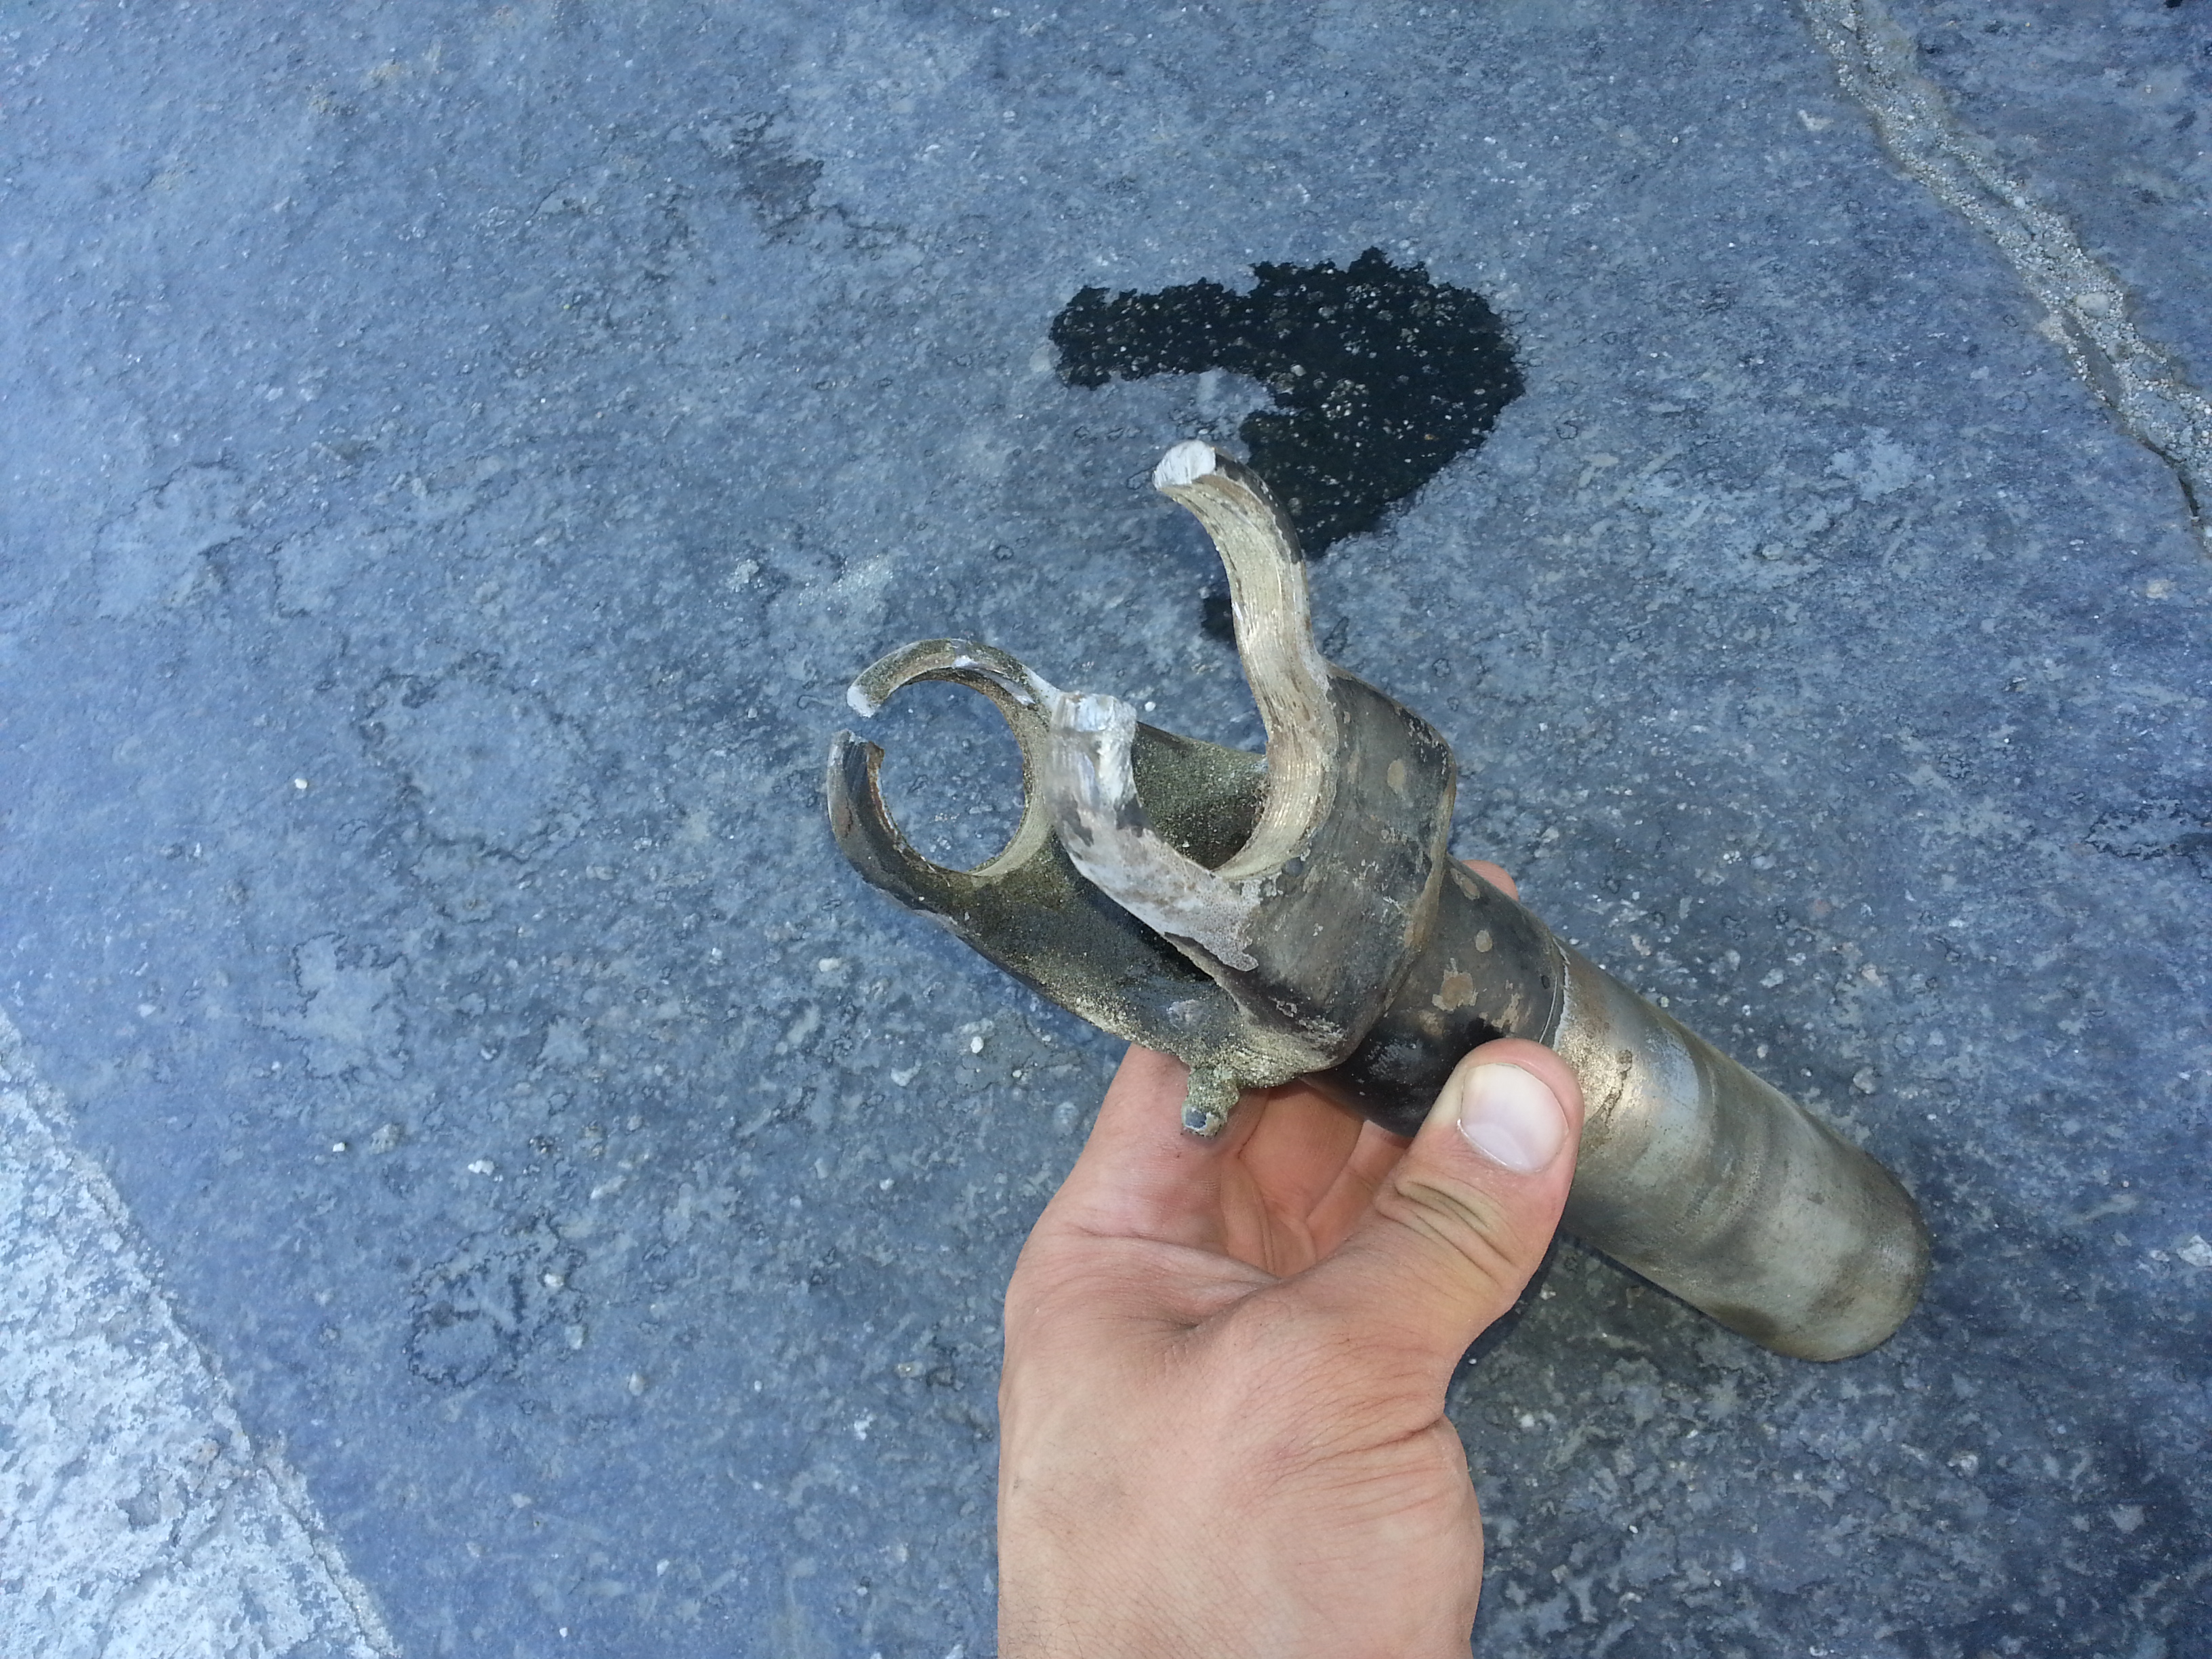
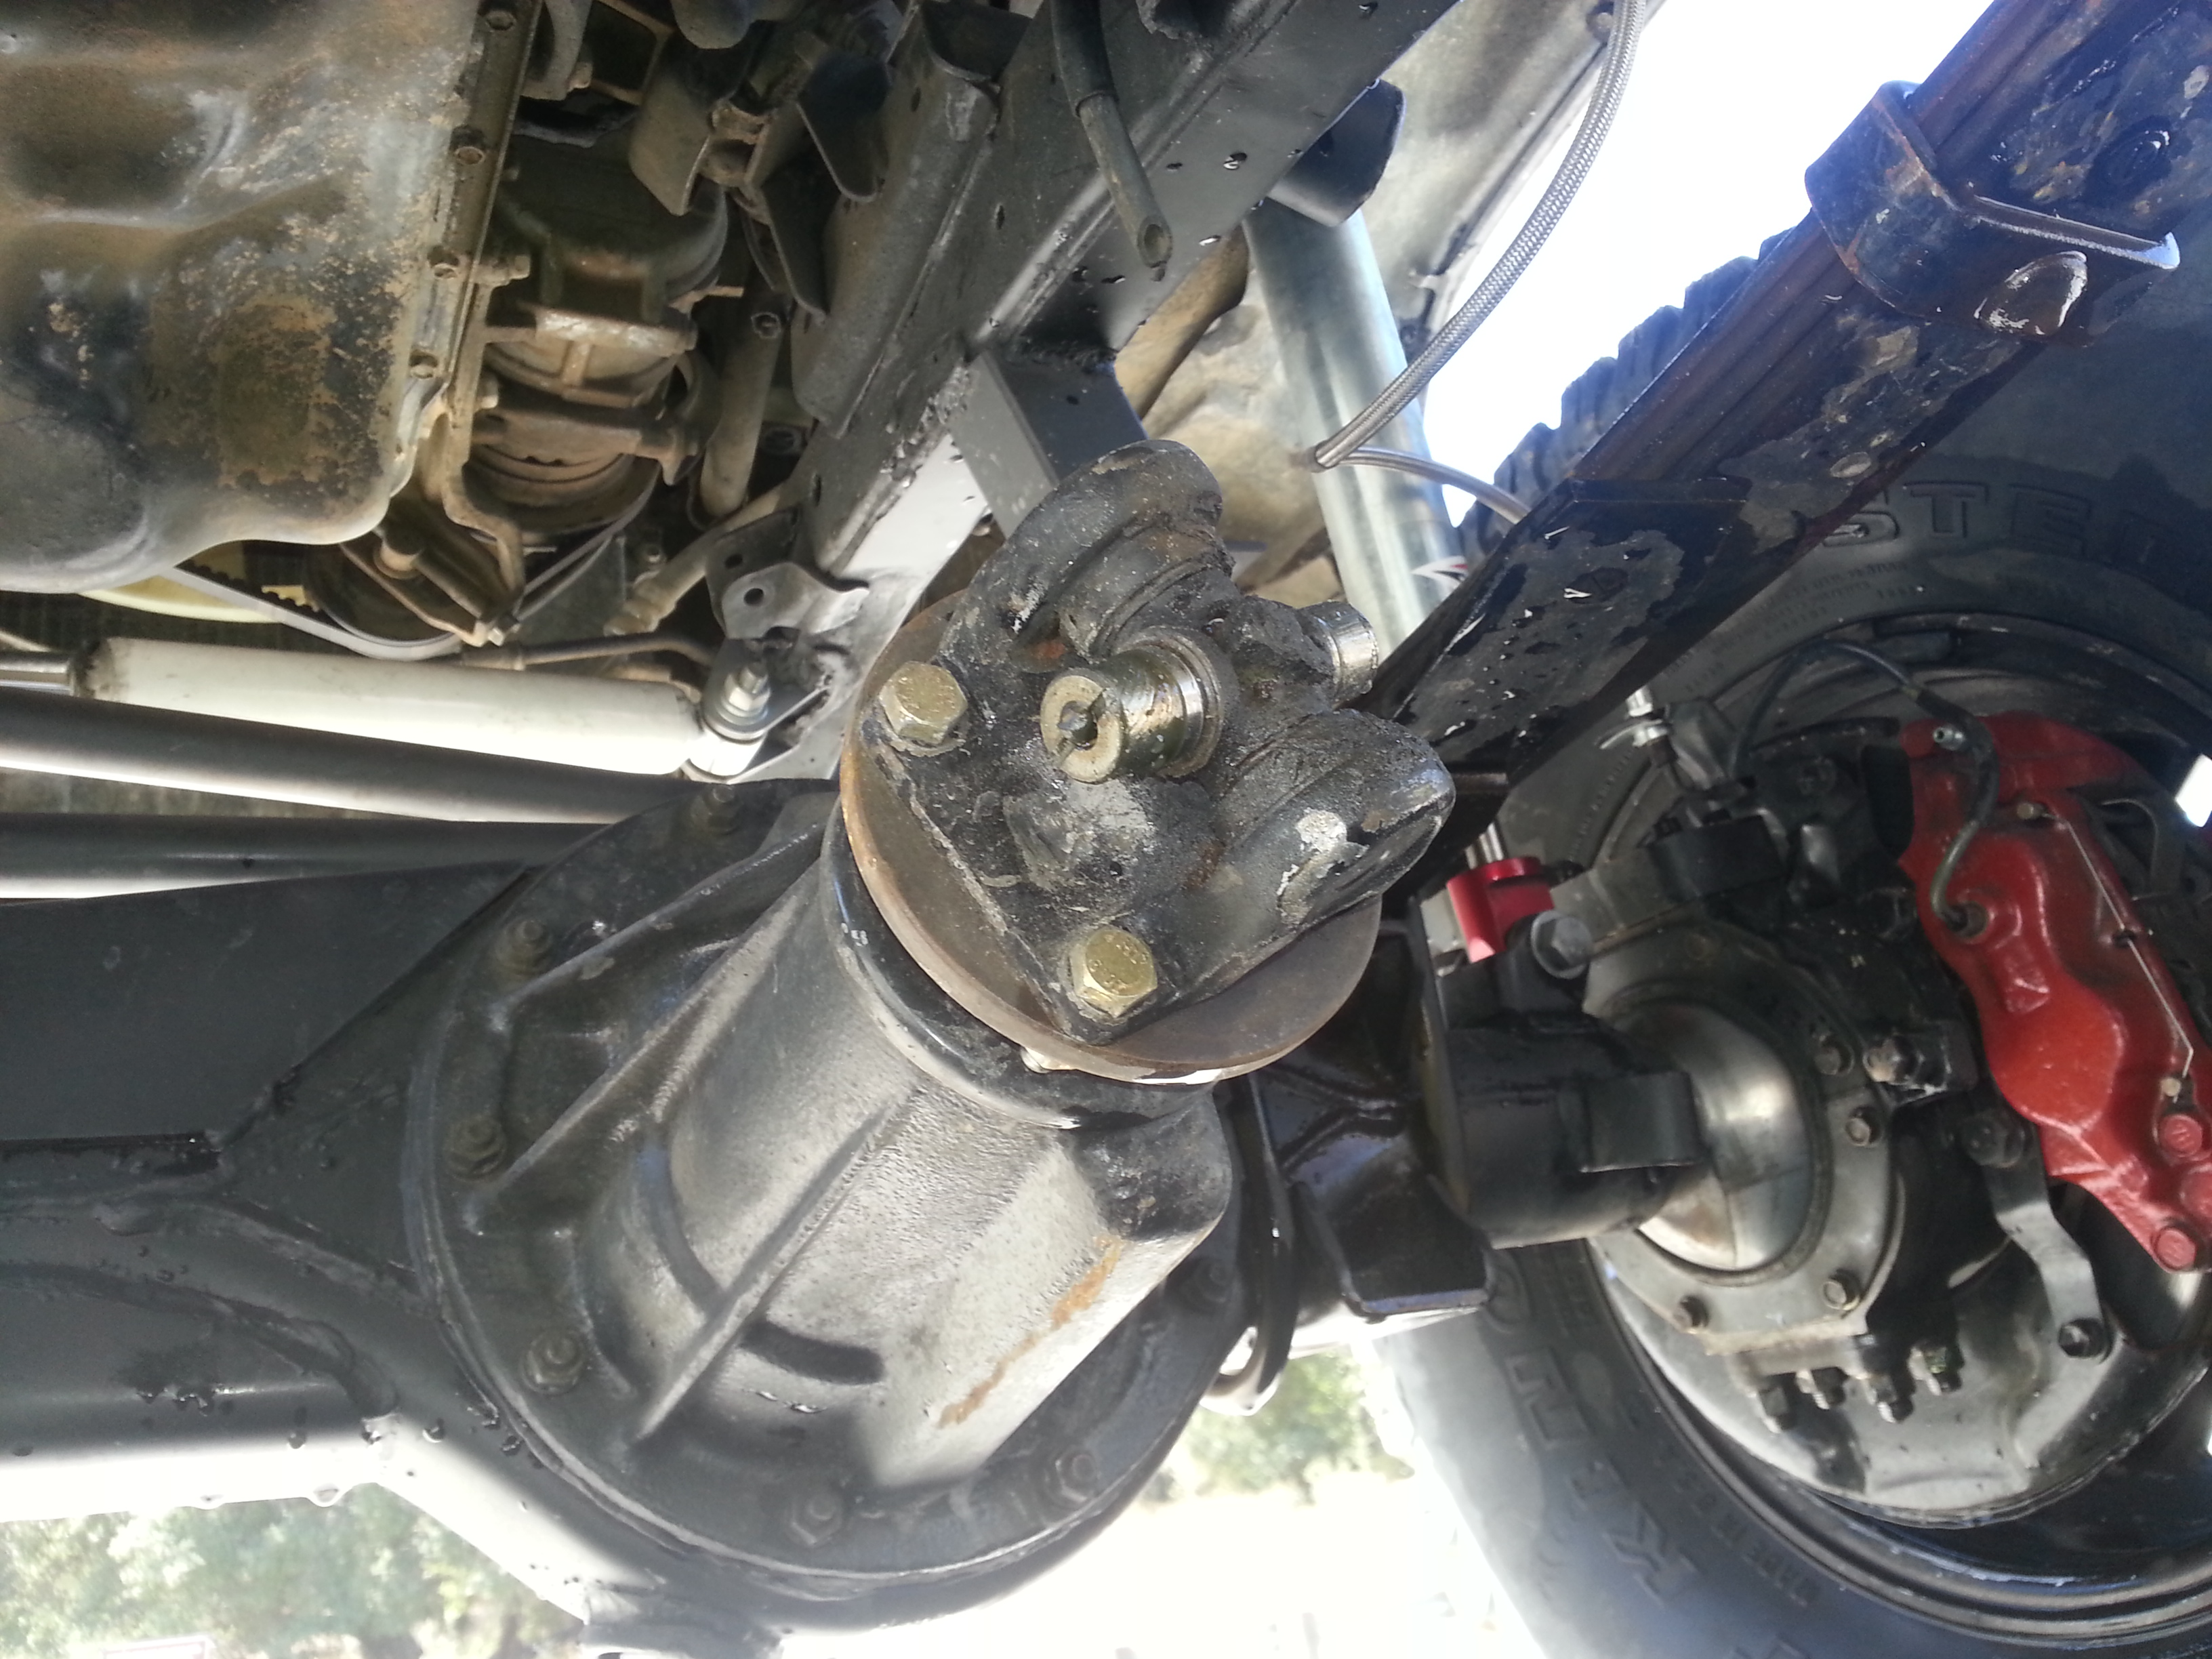
And because this was am unexpected trip I didn't go prepared with tools so I had to leave yhe drive shaft in tact. I used a wire hold the the drive shaft in place. And
Drove back from the off road area to the parking lot in 2wd picking my lines very carefully to be sure I wouldn't get stuck.
When we got to the parking lot of the park I secured it really good and used some tie down straps.
Lucky for me I kept my old drive shaft and it should still be compatible with my current drive shafte. But I'm gonna need to swap out the Ujoints because the IFS one isn't the same bolt pattern as my SFA drive shaft
I also have a dent where the female side of the driveshaft is. On the exterior of the splines.
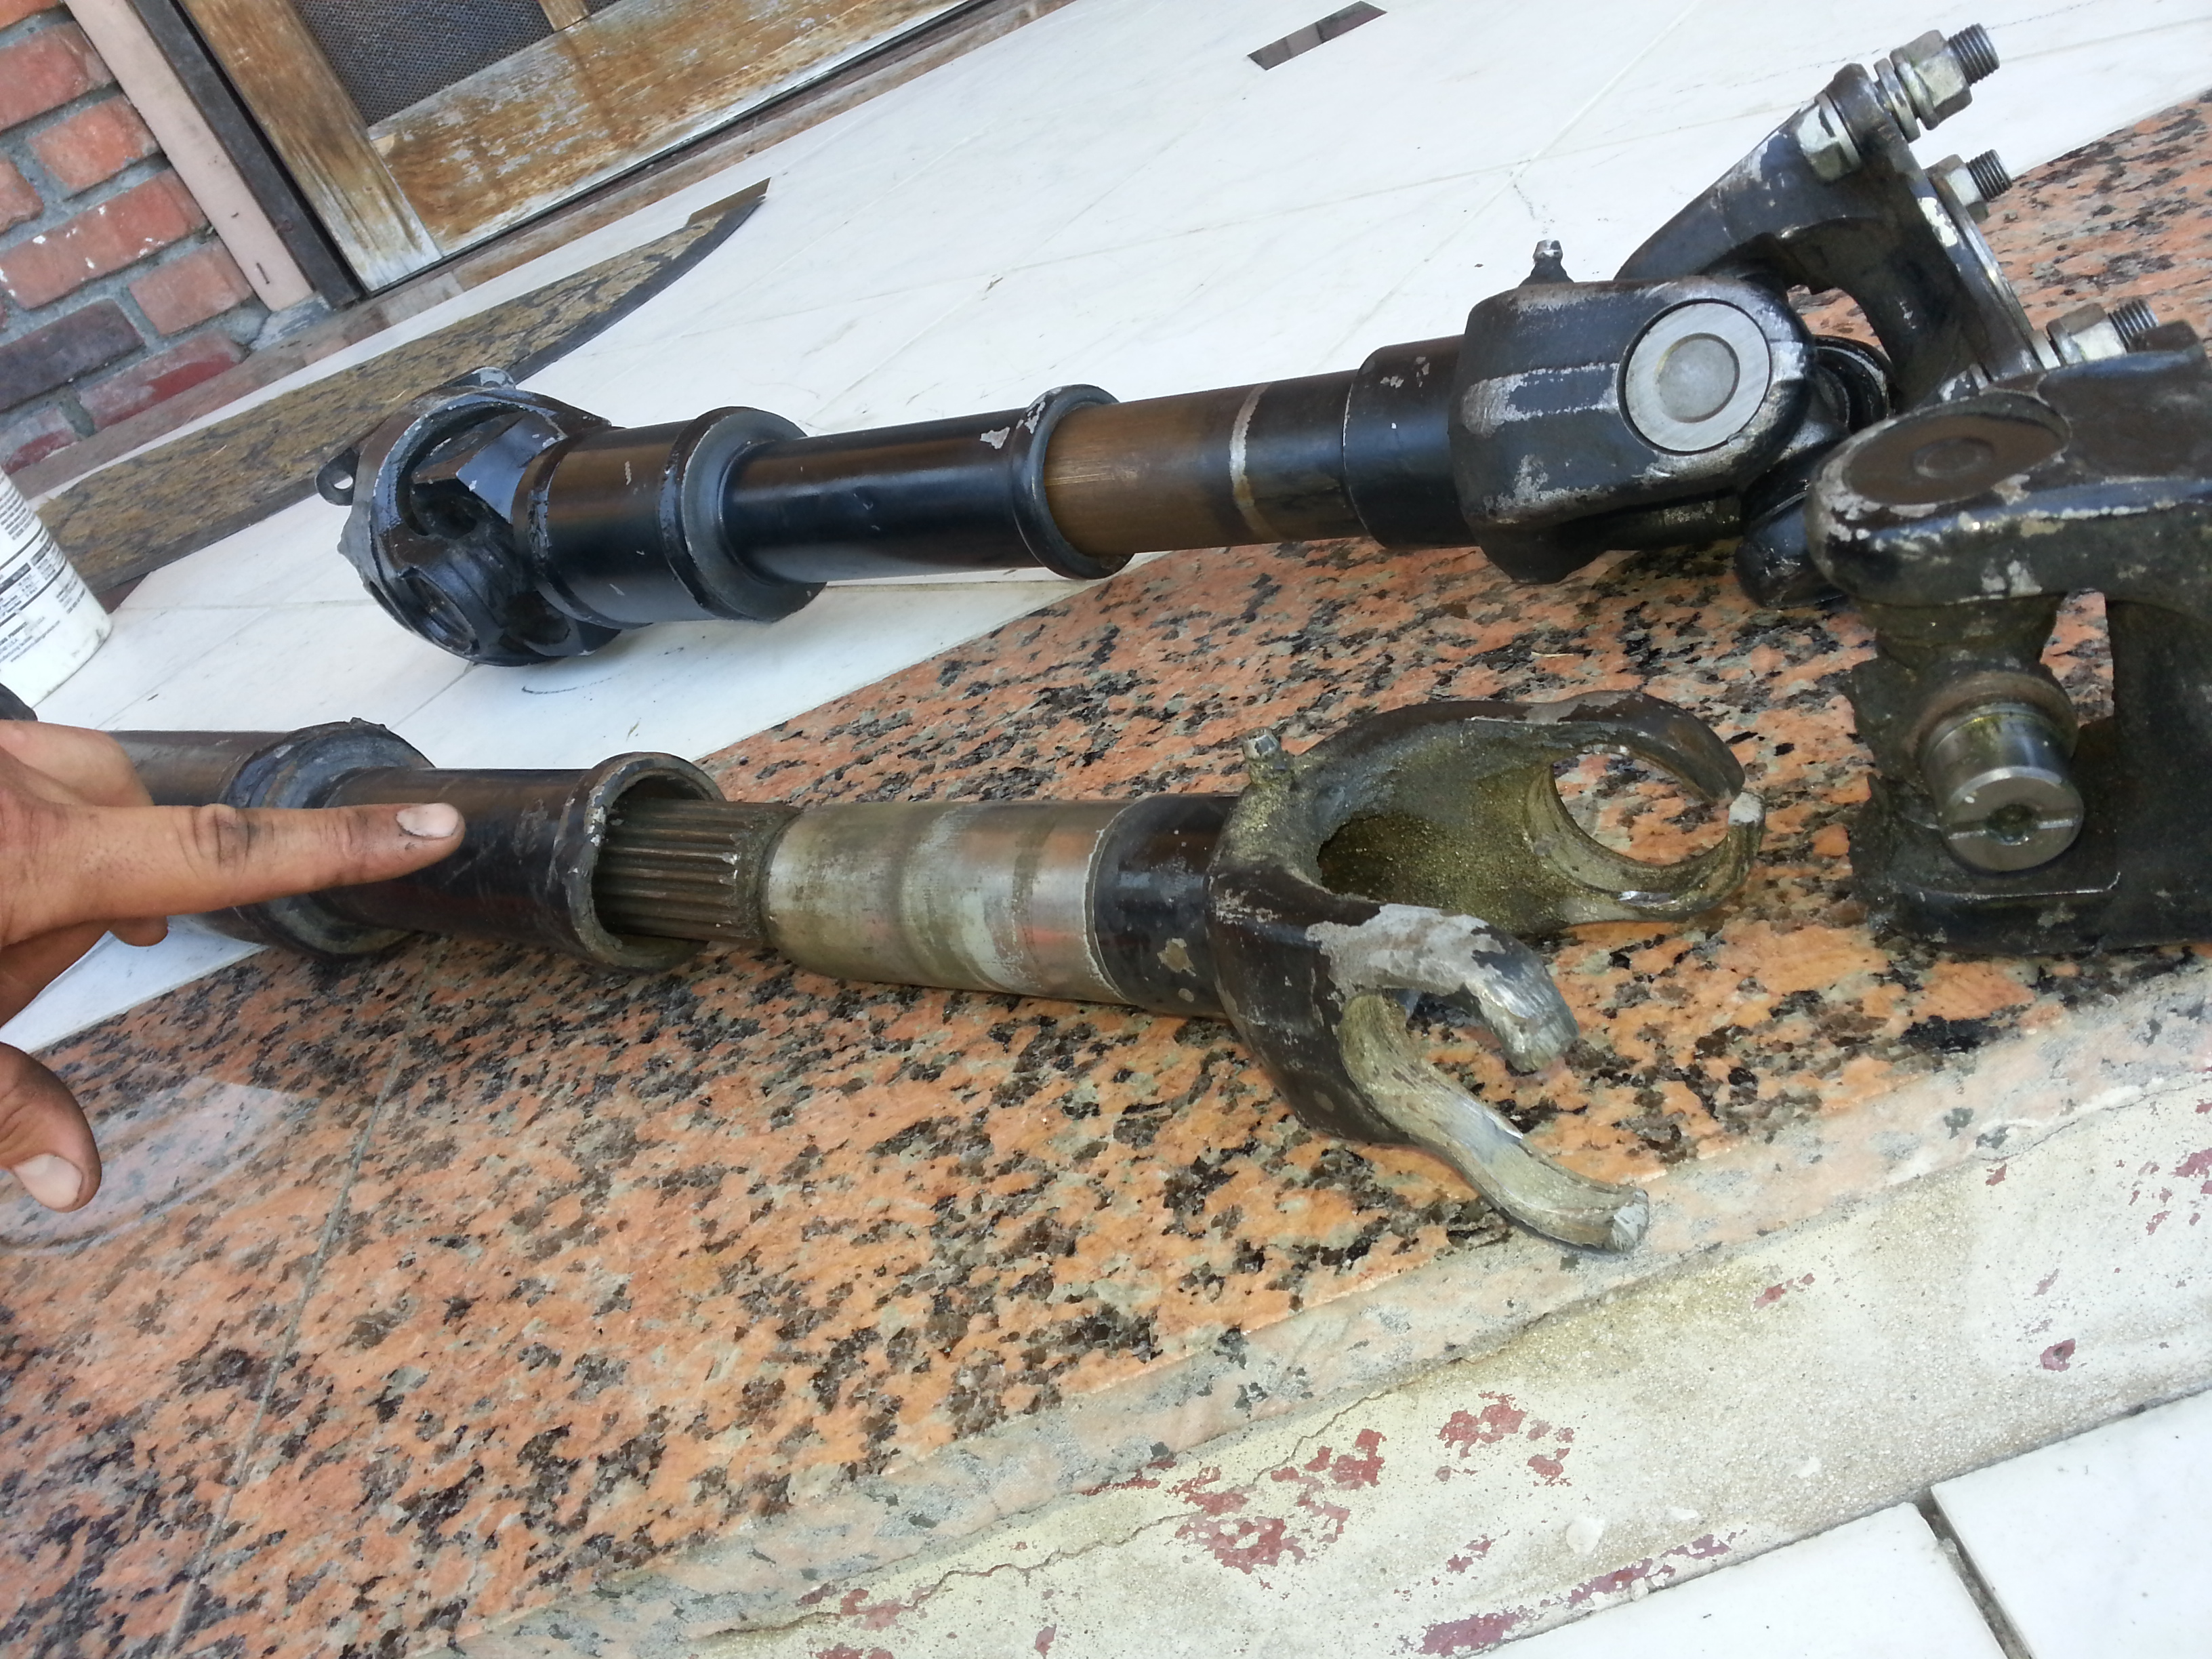
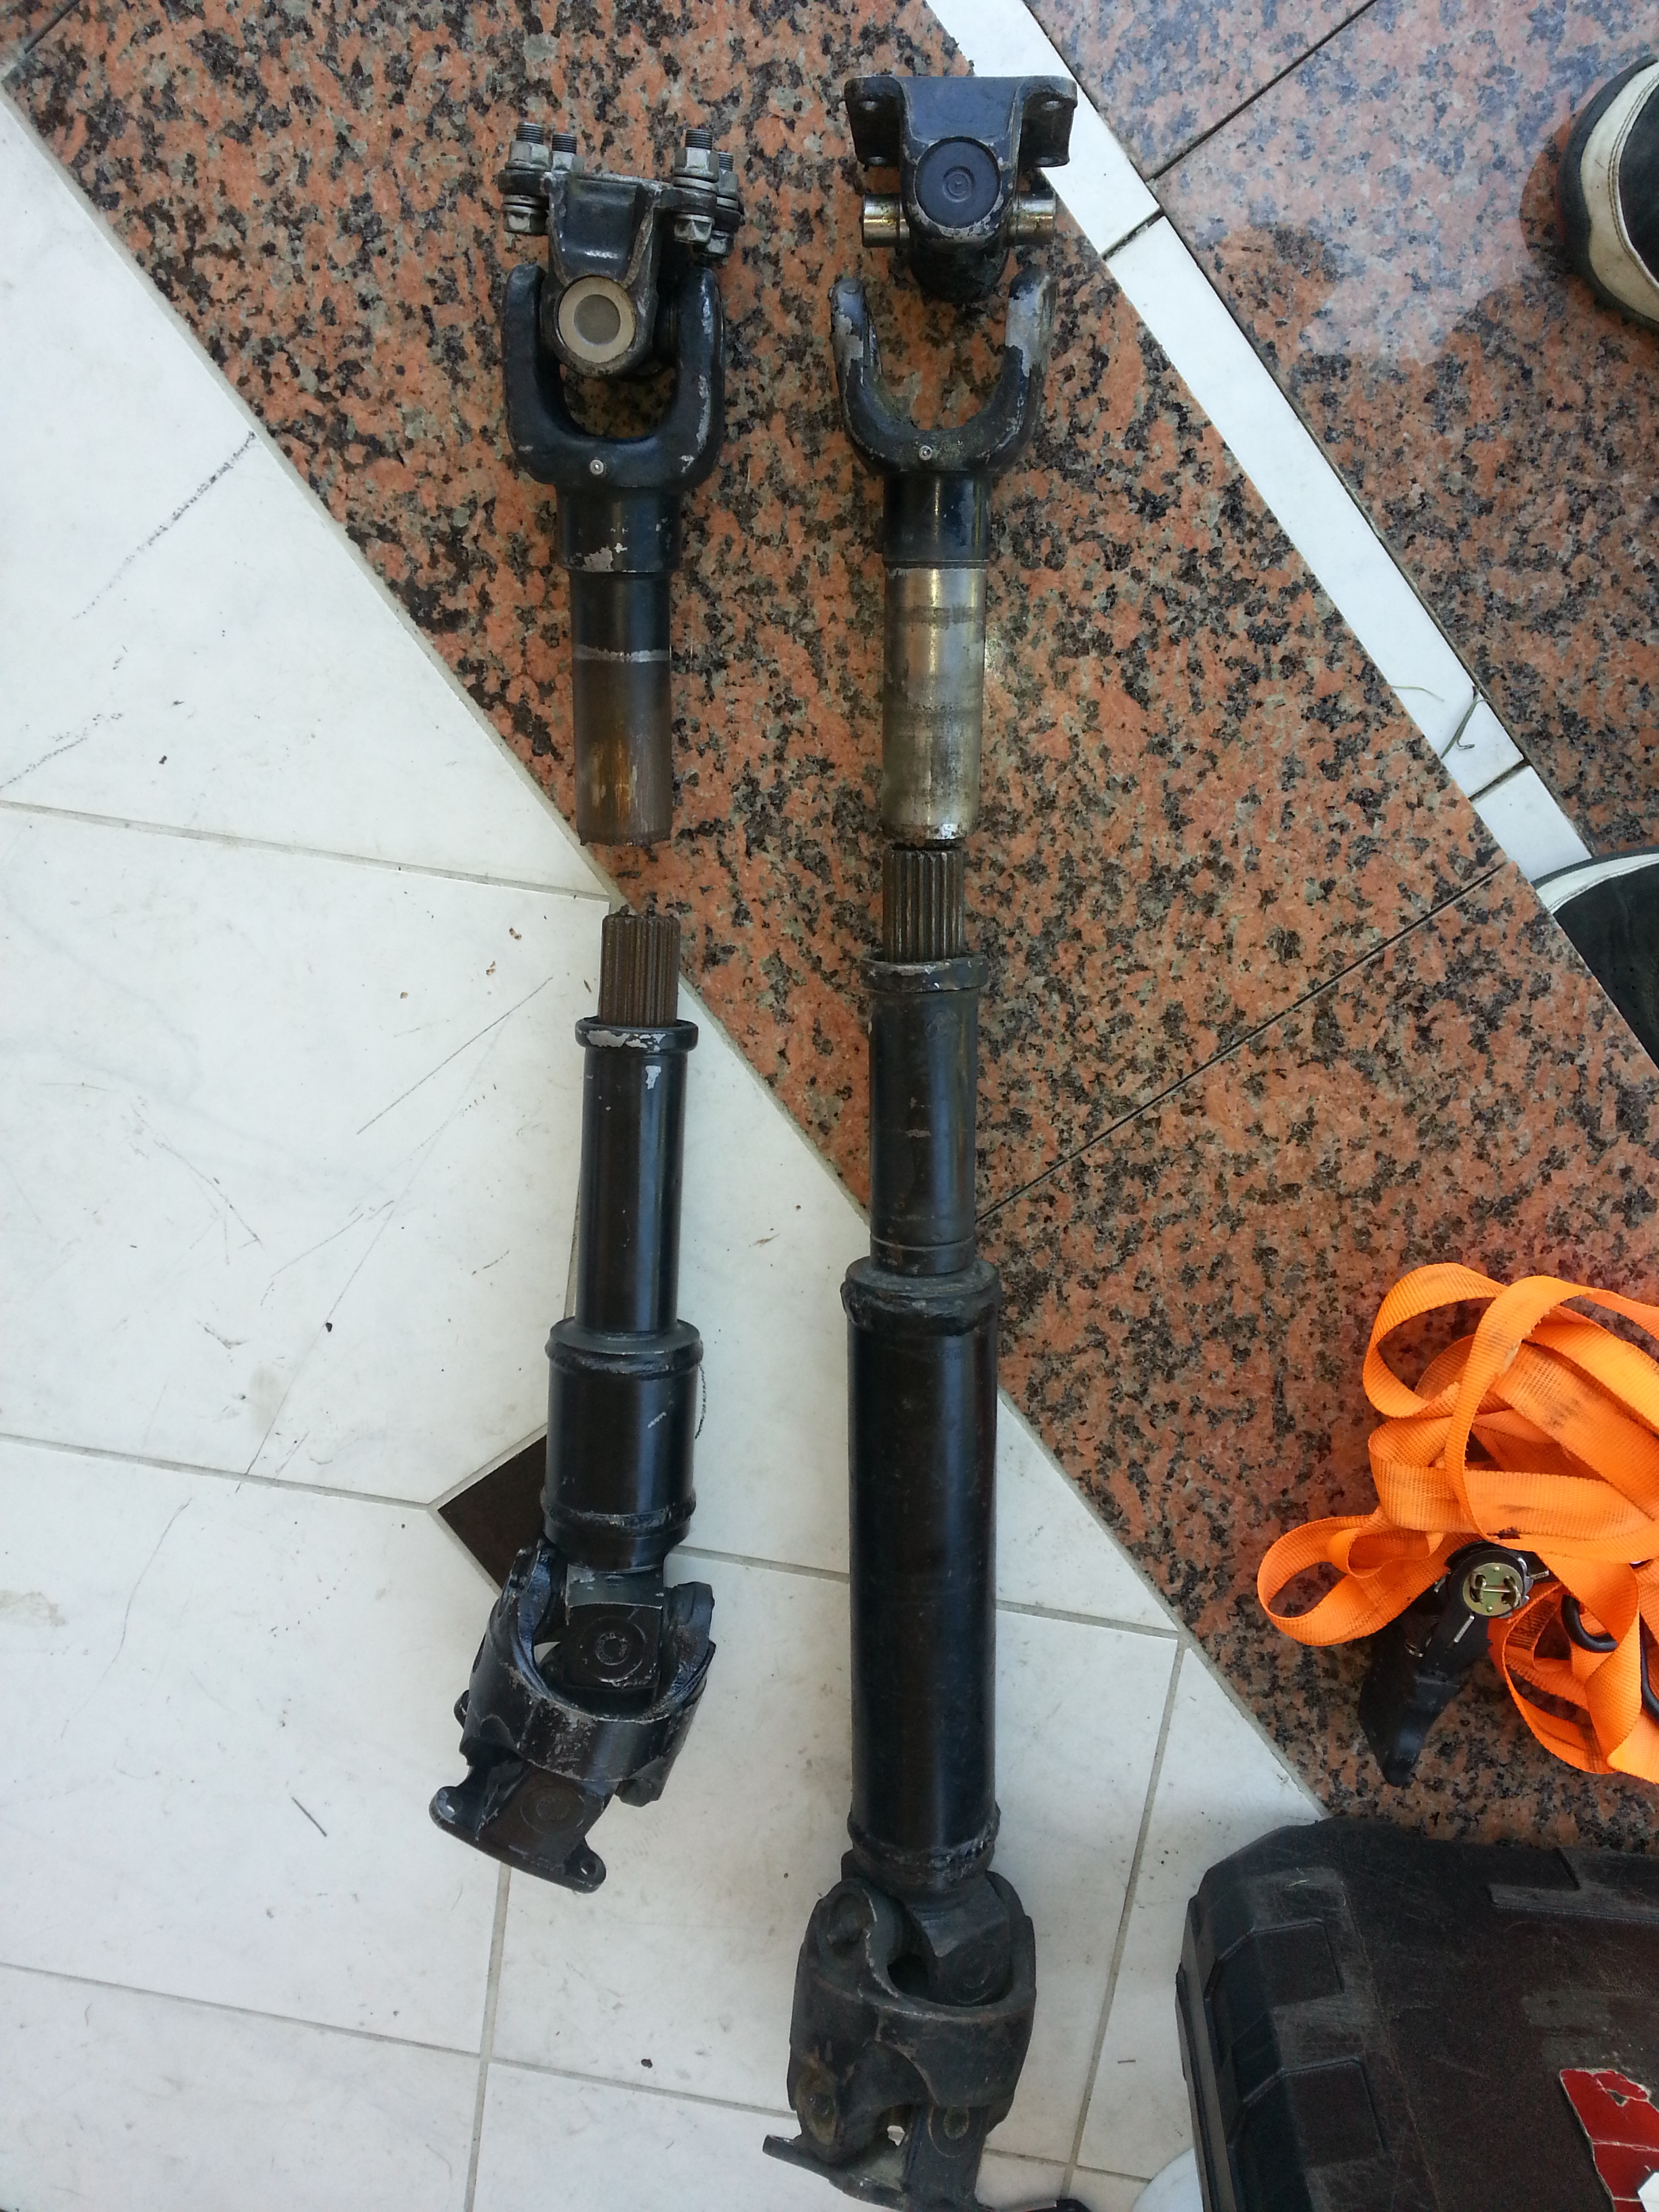
I plan to just do this shaft/ujoint swap temporarily. But I am just gonna bite the bullet eventually and get myself the 10" spline drive shaft from trail gear. Like Mark's truck has.
We made it back in time. The Ranger was writing out the parking tickets when ee arrived and he was about 10 cars away before reaching my truck. And rather then just calling the hike quits for the day I decided to take them exploring on the Offroad obstical they have. I always pass it but I never go. So curiosity got the best of me this time. Paid the $8 entrance fee and went exploring. Here are all the pictures I took. I was surprised that the Sport King A/T's were able to handle. Not bad for what they are I guess.
Video. Sorry for the side view. Faby didn't tilt my phone enough for it to record horizontally.
Bump stops working like a charm at full flex.
At the edge of the off road area they have a huge water reservoir. Almost looks like a beach.
When you enter the park they tell you feel free to explore just make sure you don't go into obvious areas that have signs that state not to go through no drinking alcoholic beverages and do not go into the reservoir.
This dumb ass didn't listen to the park rules and went in for a closer look and with just a few seconds his whole front end sunk in through the soft clay floor. When we arrived these 3 guys were trying to pull him out. With snapping 3 tow lines it looks like this guys truck would get sucked into the water for sure. Lol we didn't stick around to see it get pulled out or whatever so we didn't see what happened in the end.
A couple of nice shots near the water.
Everything was going peaches and cream until this happened. Dun dun duun!
Hit a ditch a bit too hard while accelerating and I guess thats where the driveshaft got all jacked up. At least that's where I noticed the noise. Literally sounded like it was the axle. I was more concerned for my 3rd then anything else.
And because this was am unexpected trip I didn't go prepared with tools so I had to leave yhe drive shaft in tact. I used a wire hold the the drive shaft in place. And
Drove back from the off road area to the parking lot in 2wd picking my lines very carefully to be sure I wouldn't get stuck.
When we got to the parking lot of the park I secured it really good and used some tie down straps.
Lucky for me I kept my old drive shaft and it should still be compatible with my current drive shafte. But I'm gonna need to swap out the Ujoints because the IFS one isn't the same bolt pattern as my SFA drive shaft
I also have a dent where the female side of the driveshaft is. On the exterior of the splines.
I plan to just do this shaft/ujoint swap temporarily. But I am just gonna bite the bullet eventually and get myself the 10" spline drive shaft from trail gear. Like Mark's truck has.
Last edited by Redeth005; Aug 17, 2013 at 07:40 PM.
Aug 17, 2013 | 08:26 PM
#2032
Thread Starter
Registered User
Joined: Apr 2012
Posts: 2,817
Likes: 2
From: Los Angeles CA
It was. It was a really fun day. Till that happened at least.
I think my neighbor knows how to take apart the drive shafts. If he knows ill ask if he could help me swap the parts out. Just for the mean time. At least I'll have a drive shaft to use for the time being till I get the Trail Gear replacement one.
I think my neighbor knows how to take apart the drive shafts. If he knows ill ask if he could help me swap the parts out. Just for the mean time. At least I'll have a drive shaft to use for the time being till I get the Trail Gear replacement one.
Aug 17, 2013 | 08:58 PM
#2033
Registered User


Joined: Mar 2012
Posts: 7,125
Likes: 681
Glad you got the power windows sorted out. Could those extra wires be for passenger side control or power locks?
Aug 18, 2013 | 11:19 AM
#2034
Registered User
Joined: Apr 2009
Posts: 5,592
Likes: 24
From: Dixon, Ca
Just finished doing the driver side bump stop. I cleaned up the frame here too. Looks much much nicer now that I sanded everything down. I even took the time to remove the exhaust cover or header cover I should say to clean up and paint that up nicely too. This is how it should have been done from the beginning. But I wanted to hurry up and finish the SAS to avoid taking anymore time in my next door neighbors back yard. Just glad I finally got around to doing these bump stops and frame clean up.

I had to go back to the passenger side and use the wire wheel to clean up a bit further and repaint. It looks just as clean as this side now.
I had to go back to the passenger side and use the wire wheel to clean up a bit further and repaint. It looks just as clean as this side now.
Aug 18, 2013 | 12:08 PM
#2036
Thread Starter
Registered User
Joined: Apr 2012
Posts: 2,817
Likes: 2
From: Los Angeles CA
Actually no. Their still in the box haha.
My neighbor and his son don't have any on their trucks so we dodnt do them on mine lol. I still think we should have added them though.
Did you put yours in?
Tell me about it. I don't mind tinkering with things. I just hate the expensive repair bills that's all. Lol

 Aug 19, 2013 | 05:58 AM
#2038
Thread Starter
Registered User
Joined: Apr 2012
Posts: 2,817
Likes: 2
From: Los Angeles CA
Got ya Tuef thanks. Gonna need to get around to that.
I'm still looking for replacement jobs at the moment. Probably won't be doing much to the truck these next 2 weeks.
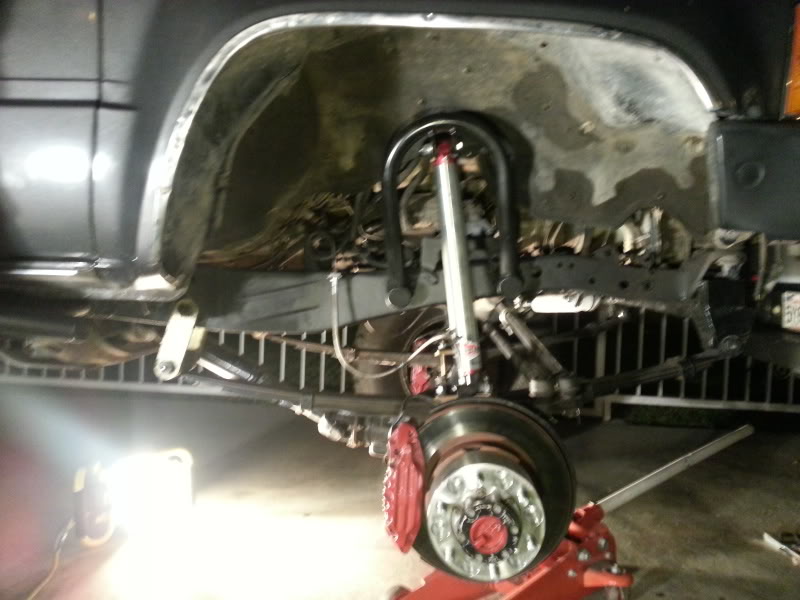
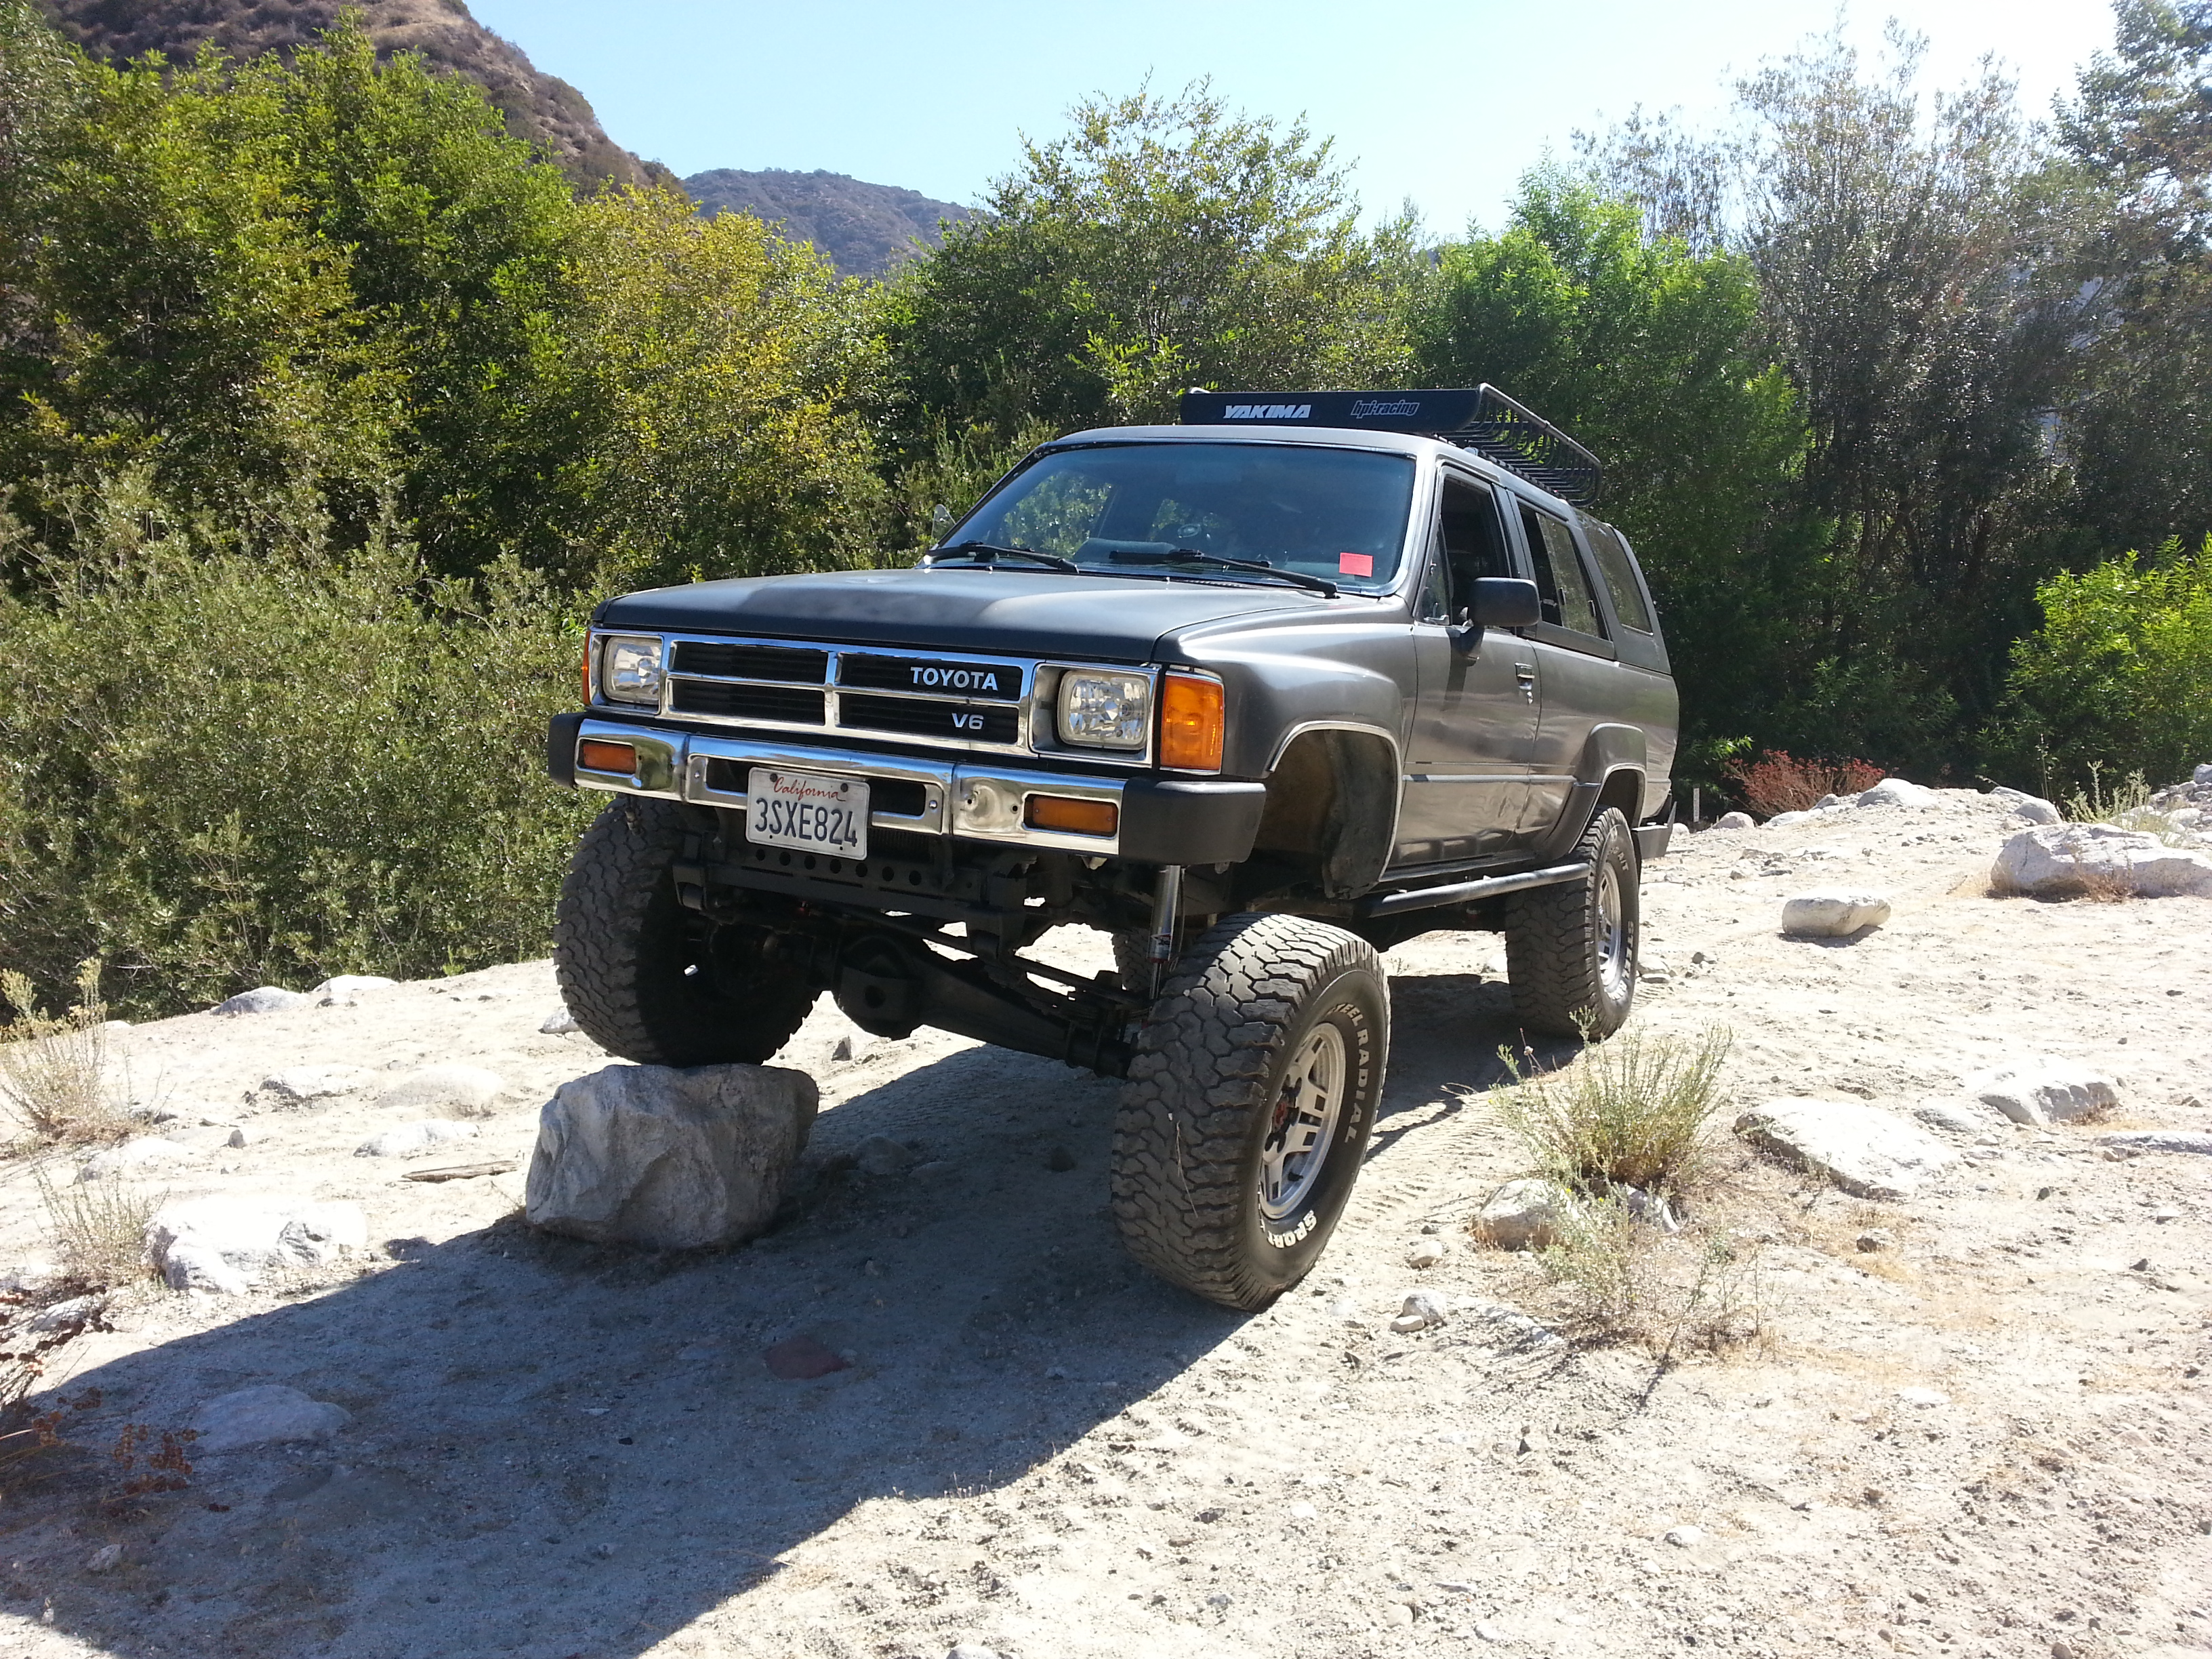
I'll try to get around to that drive shaft problem soon though. If it's fixable with that dent that is. The gussets shouldn't be too hard. And might be able to get around to that this weekend. But I would like to move my shock hoops up just a bit higher toward the top of the frame. I don't like how compressed the shocks always are. They're supposed to be 12" travel and I only have 3" exposed. I don't think I've ever seen more then approx 7 out at full droop. Its either gonna have to be exchange the front shocks for some 10" travel. Or move the hoops up slightly. But exchanging them is gonna be such a pain to make the long drive out to hemet CA again. Seems like more work to move the hoops but it'll probabky save me money to do that instead.
I dunno. We'll see how it goes. I'm still stuck in this awkward situation at work. And priority #1 right now is find something else. And this time something that would be flexible with school. Dont care too kuch for working full time anymore. Its definitely gonna be a sacrifice in the amount I get paid bi weekly but in the long run it'll be so much better because ill be working in something fun and getting paid 3-3.5x what I'm currently getting paid.
I'm still looking for replacement jobs at the moment. Probably won't be doing much to the truck these next 2 weeks.
I'll try to get around to that drive shaft problem soon though. If it's fixable with that dent that is. The gussets shouldn't be too hard. And might be able to get around to that this weekend. But I would like to move my shock hoops up just a bit higher toward the top of the frame. I don't like how compressed the shocks always are. They're supposed to be 12" travel and I only have 3" exposed. I don't think I've ever seen more then approx 7 out at full droop. Its either gonna have to be exchange the front shocks for some 10" travel. Or move the hoops up slightly. But exchanging them is gonna be such a pain to make the long drive out to hemet CA again. Seems like more work to move the hoops but it'll probabky save me money to do that instead.
I dunno. We'll see how it goes. I'm still stuck in this awkward situation at work. And priority #1 right now is find something else. And this time something that would be flexible with school. Dont care too kuch for working full time anymore. Its definitely gonna be a sacrifice in the amount I get paid bi weekly but in the long run it'll be so much better because ill be working in something fun and getting paid 3-3.5x what I'm currently getting paid.
 Aug 19, 2013 | 09:43 AM
#2040
Hey bubba,...
Moving the hoops up on the frame might not be the best way to go. The ideal location is where they are with the frontmost hole cut obviously slightly staggered up a little more due to the direction of travel of the front axle,..... which puts the shock hoops at 10 degrees most often.
One of the reasons I might be leery of doing that is because, well, cutting further upward at a 10 degree angle and creating a larger somewhat oblong hole in the frame and then filling in the portion where the shock hoop frame tube previously was..... Well, I'm not sure you want to do that to the frame. The strongest portion of something metal as a reinforced type of structure, which a frame surely is, is by the corners.
I'm very curious as to why you are seeing such a close to contact situation like that. It doesn't make any sense at all to me.
Last time you when you were over here and I looked at the top portion of your shock hoops, which go up into the fender, I can't remember how close to the fender they came. The reason I ask is because I know there are different shock hoops for different applications... But usually, wherever you are sitting still/resting on the ground, the ideal situation is to have exactly half of your shock shaft exposed.(standing level/6" showing). You can get the tire to come up 8 to 10 inches into the wheel well with the stuff side shock only moving up 4 to 6 inches ...
Obviously that is part of your problem, because you need to definitely have more up travel available... It's going to push your center of gravity up too high not being able to get the front tires to stuff more. There will be point where you have the same amount of articulation in regards to the angle of the front axle in relation to the ground or level with the truck... But, it will always require that you go to 8 inches of droop and maybe 4 inch of stuff. I just can't understand how the shocks are so compressed, standing still/level, unless you possibly have the wrong shock hoops. You're frame placement of the shock hoop tubes( where he plasma cut the holes for them ).... It looks pretty close to standard/looks seemingly the same as most with 4" front lift, man. And having the axle moved forward should bring the shock down even further... Not much, but a little.
Do me a favor and take a measurement from just above the frame-through portion of the tube to the top of the shock hoop. I will measure mine and let you know. Maybe not enough lift up front?.......I'm not sure about that... The thing is looking pretty tall. Do me a favor also, and measure the distance from the top of the rim to the top of the wheel well in the middle. Not the top of the tire. You need to know the distance from the top of the rim anyway because that's your base measurement as you might change tire size right?
I'm really sorry you're having these problems and little odd things like the shock length. I know it's kind of far, as far as returning the shock, but I don't think you want to do that anyway. On a 4 inch lift, I'm pretty sure 12 inch travel shocks are pretty much the standard.


