
KawaZX636's 1983 Toyota Pickup Restoration
 Jan 17, 2015 | 06:27 PM
#1101
Thread Starter
Super Moderator
iTrader: (3)
Joined: Jan 2012
Posts: 3,218
Likes: 26
From: Salisbury, MD
Big ole update for you all...
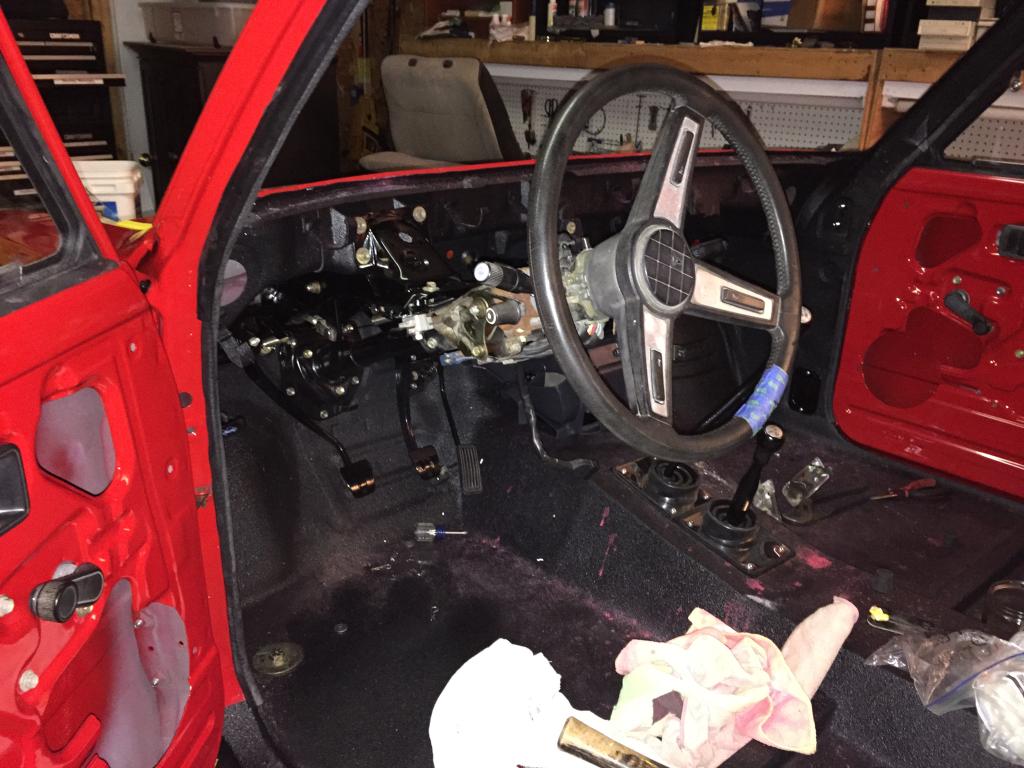
Steering column installed:
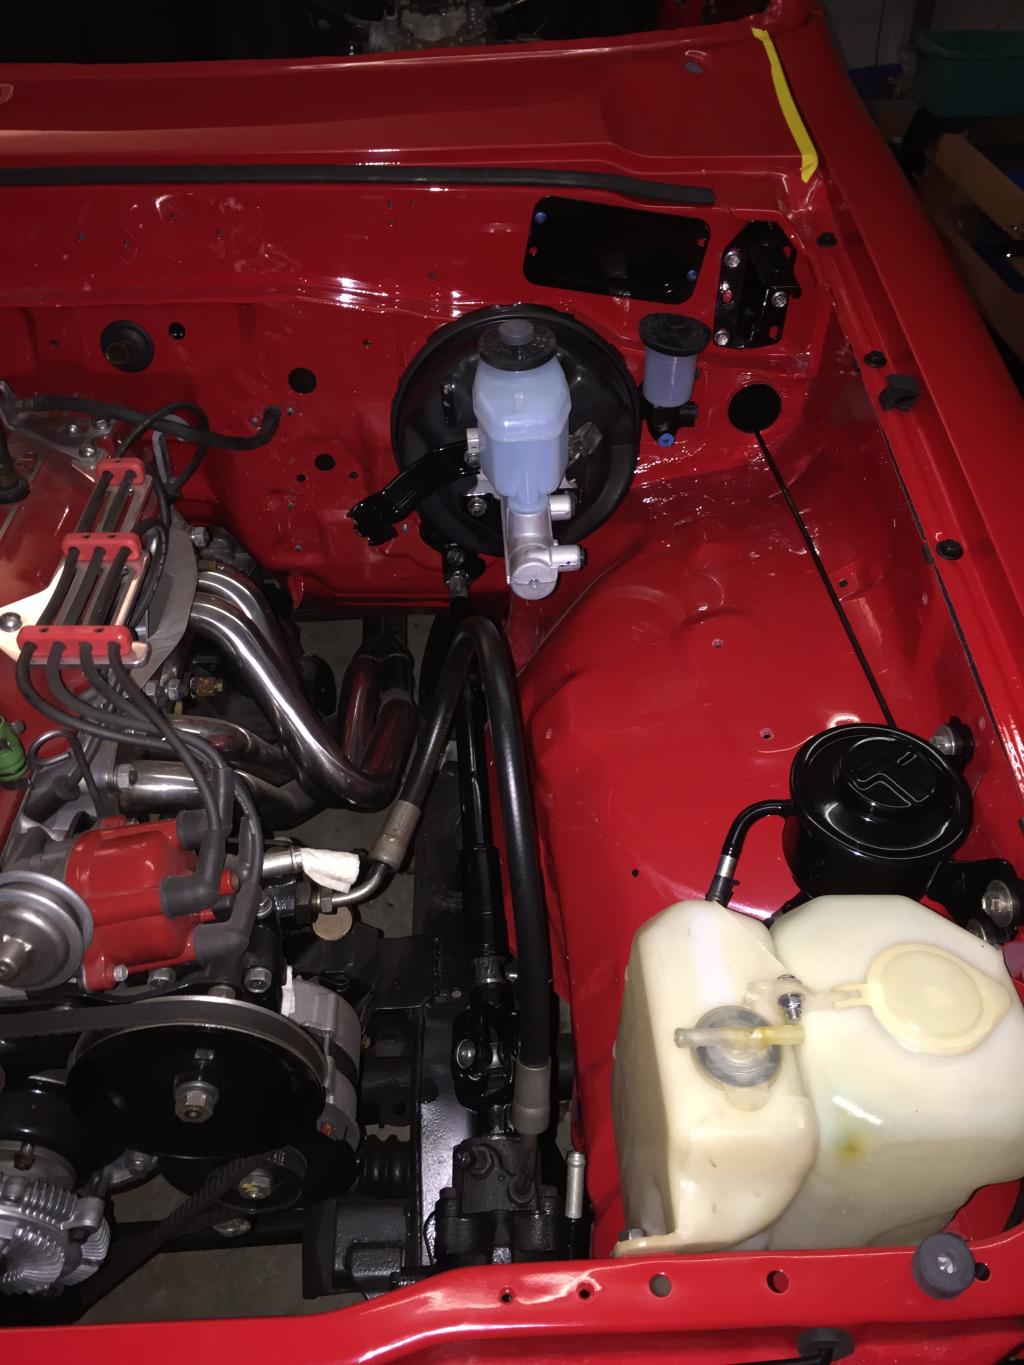
Steering shaft installed (I powedercoated it and installed new u-joints a while back) and coolant/washer reservoirs installed:
Chrome cab louvers/vent thingies installed:
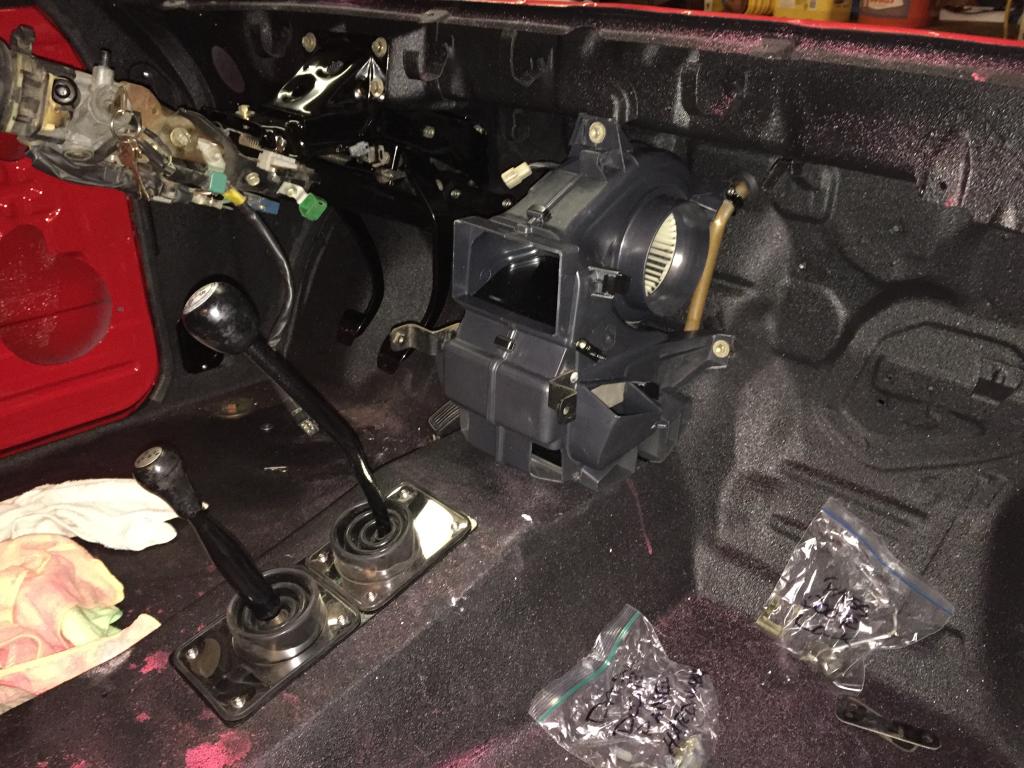
Heater core installed:
Bumper stays and hood prop installed:
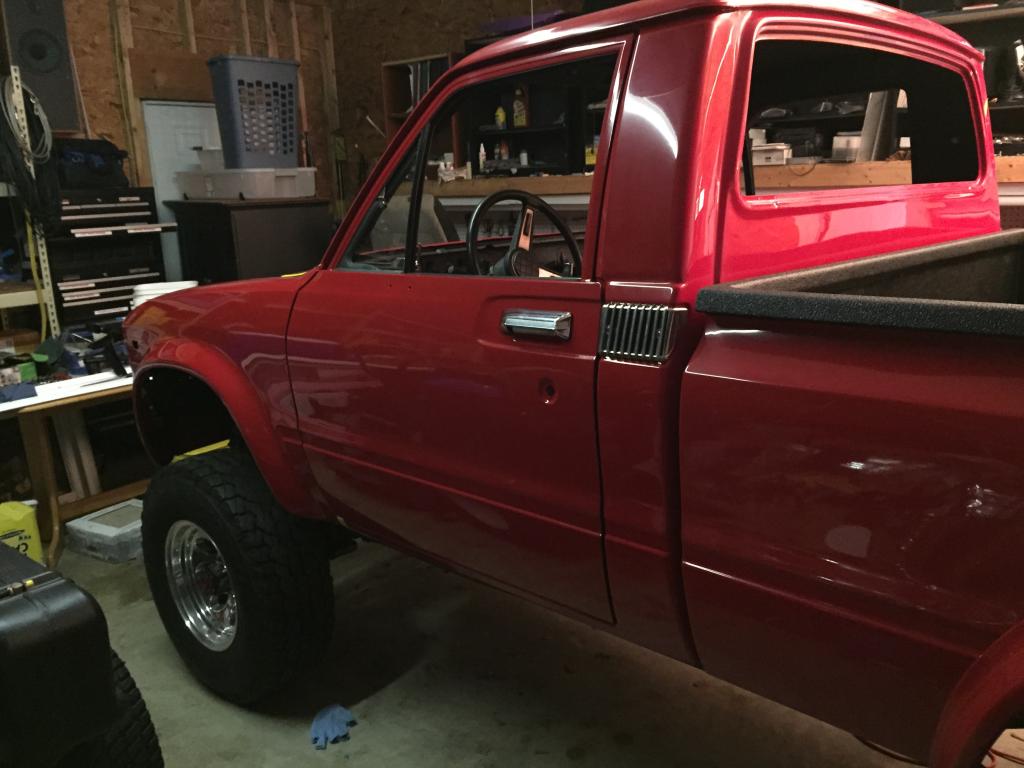
Annnd I got the doors and fenders gapped better so I installed the hood, headlight doors, grille, side markers and bumper:
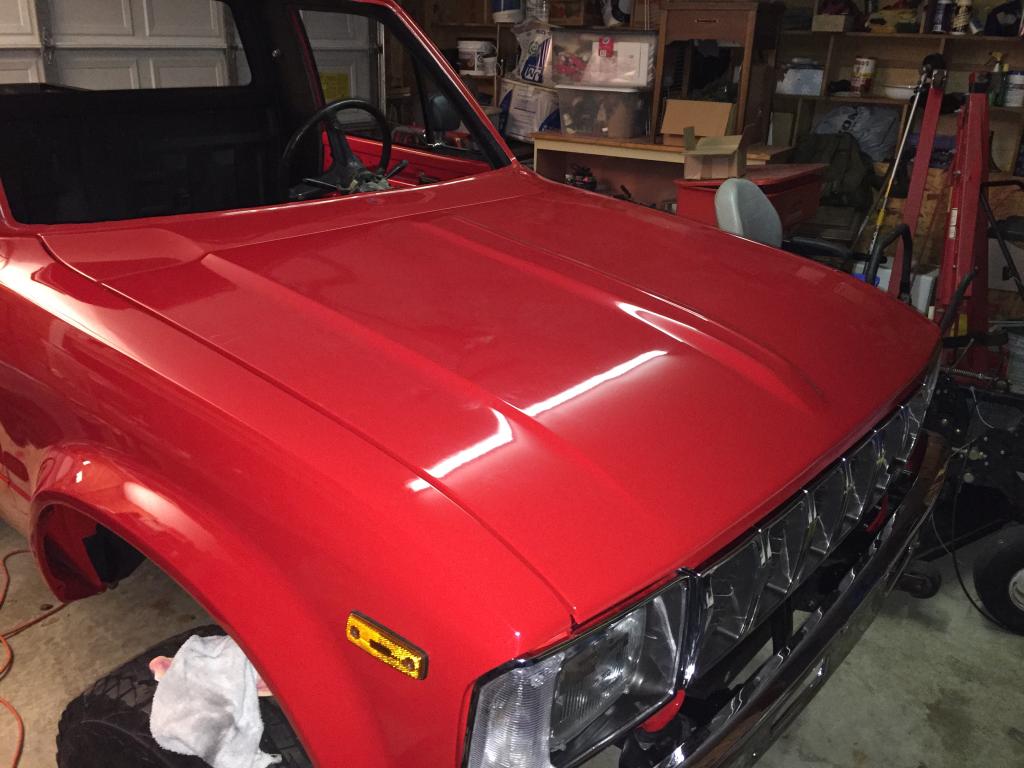
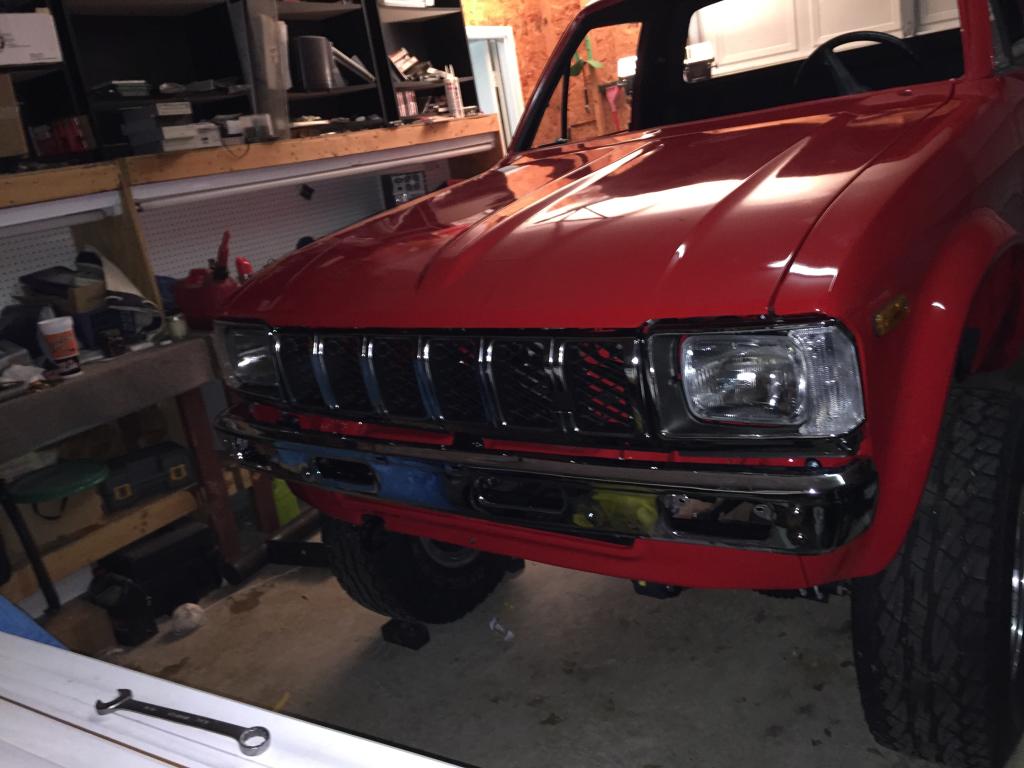
I need to get some body shims to raise the passenger side fender about an 1/8" and I need to make a slight adjustment to get the passenger side of the bumper to slide back about a 1/4" but it is looking good so far! Now if only my radiator would finally show up then I'd have everything I need to get it running. Up next I'm going to finish up my brake lines, electric and start the coolant plumbing.
Steering column installed:

Steering shaft installed (I powedercoated it and installed new u-joints a while back) and coolant/washer reservoirs installed:

Chrome cab louvers/vent thingies installed:

Heater core installed:

Bumper stays and hood prop installed:

Annnd I got the doors and fenders gapped better so I installed the hood, headlight doors, grille, side markers and bumper:


I need to get some body shims to raise the passenger side fender about an 1/8" and I need to make a slight adjustment to get the passenger side of the bumper to slide back about a 1/4" but it is looking good so far! Now if only my radiator would finally show up then I'd have everything I need to get it running. Up next I'm going to finish up my brake lines, electric and start the coolant plumbing.


 Jan 19, 2015 | 07:51 PM
#1106
Thread Starter
Super Moderator
iTrader: (3)
Joined: Jan 2012
Posts: 3,218
Likes: 26
From: Salisbury, MD
Thanks guys!
I got the new brake and clutch lines bent up and the ends flared today. Hopefully tomorrow night I can have them installed. My wife and I came across some tax issues last week that is likely going to put my build on a tiight budget in the home stretch. It sucks, but I really don't have much more to buy - mostly small parts like hoses and hardware, but it will certainly push balk my "desireables" like new seats, door panel fabrication, dash mods,, decals and other cosmetics. Hoepfully it all works out well,but my priority is to get it running, rolling and stopping by the time the baby comes in April. I'll be grinding out some of the little stuff over the next few days so stay tuned.
I got the new brake and clutch lines bent up and the ends flared today. Hopefully tomorrow night I can have them installed. My wife and I came across some tax issues last week that is likely going to put my build on a tiight budget in the home stretch. It sucks, but I really don't have much more to buy - mostly small parts like hoses and hardware, but it will certainly push balk my "desireables" like new seats, door panel fabrication, dash mods,, decals and other cosmetics. Hoepfully it all works out well,but my priority is to get it running, rolling and stopping by the time the baby comes in April. I'll be grinding out some of the little stuff over the next few days so stay tuned.


 Jan 22, 2015 | 10:12 PM
#1108
Thread Starter
Super Moderator
iTrader: (3)
Joined: Jan 2012
Posts: 3,218
Likes: 26
From: Salisbury, MD
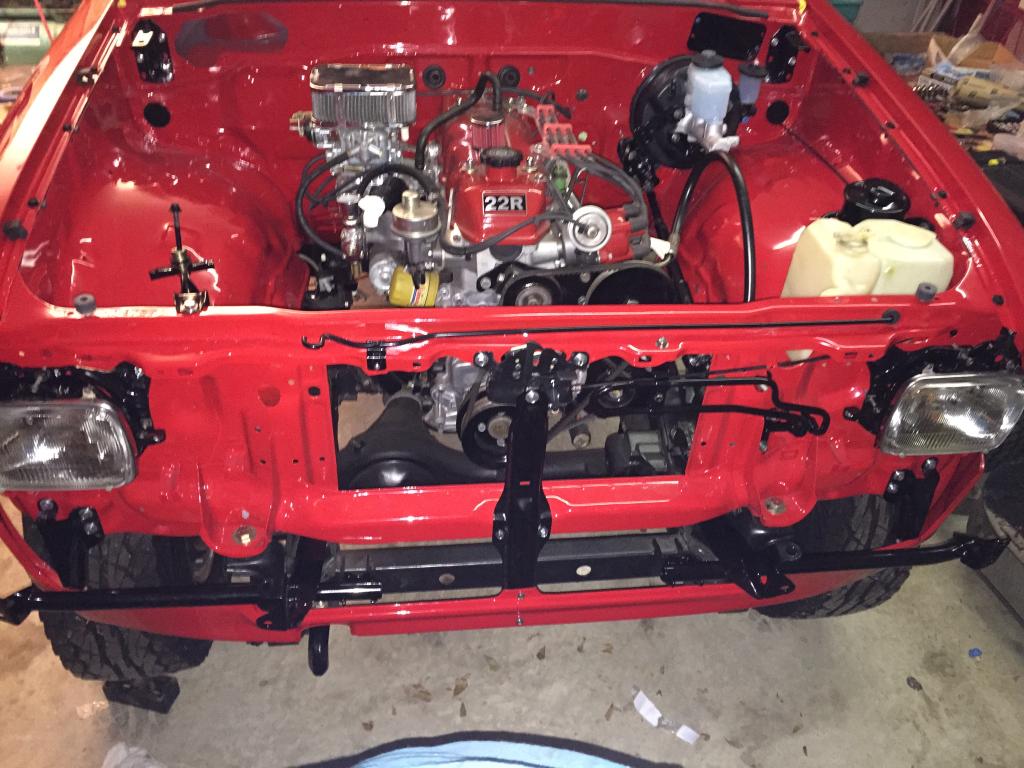
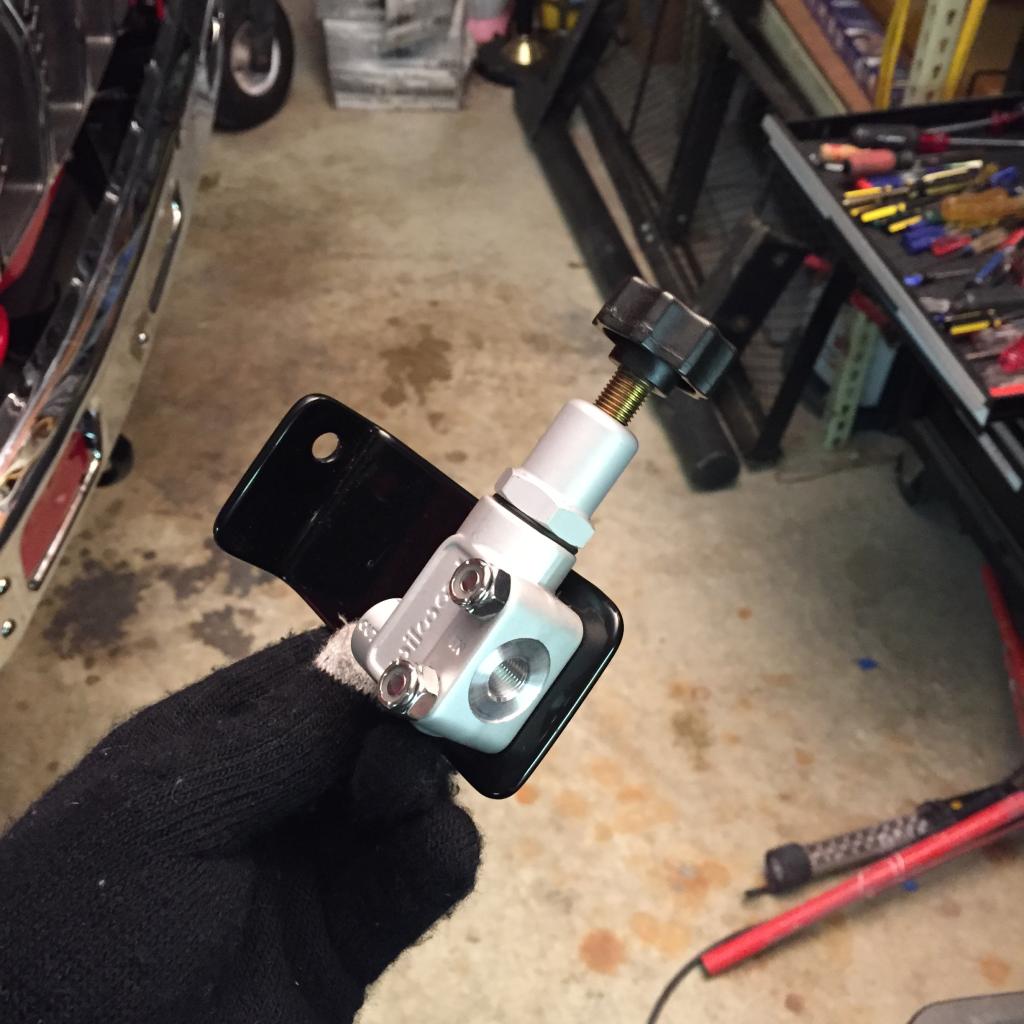
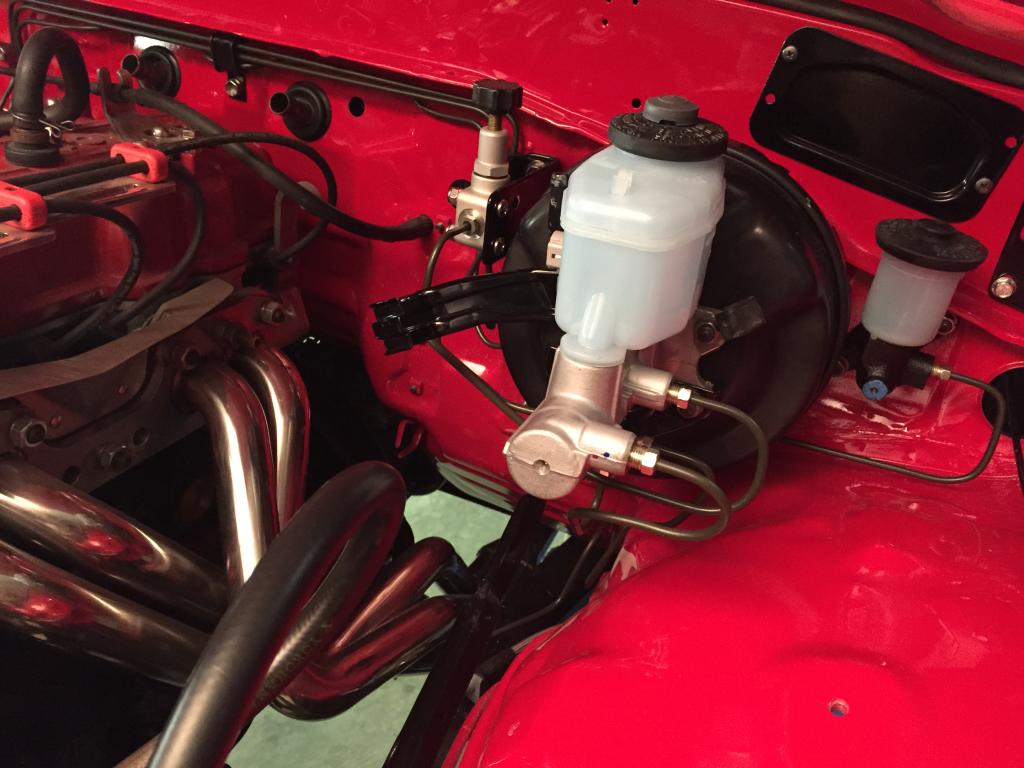
I plumbed the hardlines for the brakes and clutch and finished plumbing the fuel hoses and filter to the carb. With the rear disc brakes I upgraded to a 1" bore master cylinder and had to add a manual rear brake proportioning valve (Wilwood). I decided to mount the valve next to the master cylinder on the firewall so I had to make a bracket. Ended up bending a piece of aluminum, drilled a few holes and powdercoated it to make it purrrrdy.
The brake and clutch lines went fairly well since I have kept the factory lines and used them as a template to bend and flare the new ones. It's a tedious task, but the factory look (perhaps better) in the end was worth it.

All I need now to finish up my hydraulics is the clutch slave cylinder hose which should be here Saturday. Then I'll bench bleed the master cylinders, bleed the lines and pray that there are no leaks. So now my truck will be able to stop and shift... Now I just need to "go" part! Radiator should be here tomorrow so I should be getting the coolant plumbing done this weekend then on to electric... My weakest skill set so hopefully I don't have any problems with that.

The brake and clutch lines went fairly well since I have kept the factory lines and used them as a template to bend and flare the new ones. It's a tedious task, but the factory look (perhaps better) in the end was worth it.


All I need now to finish up my hydraulics is the clutch slave cylinder hose which should be here Saturday. Then I'll bench bleed the master cylinders, bleed the lines and pray that there are no leaks. So now my truck will be able to stop and shift... Now I just need to "go" part! Radiator should be here tomorrow so I should be getting the coolant plumbing done this weekend then on to electric... My weakest skill set so hopefully I don't have any problems with that.
Last edited by kawazx636; Jan 22, 2015 at 10:14 PM.
Jan 23, 2015 | 02:54 PM
#1109
Registered User
Joined: Oct 2014
Posts: 239
Likes: 1
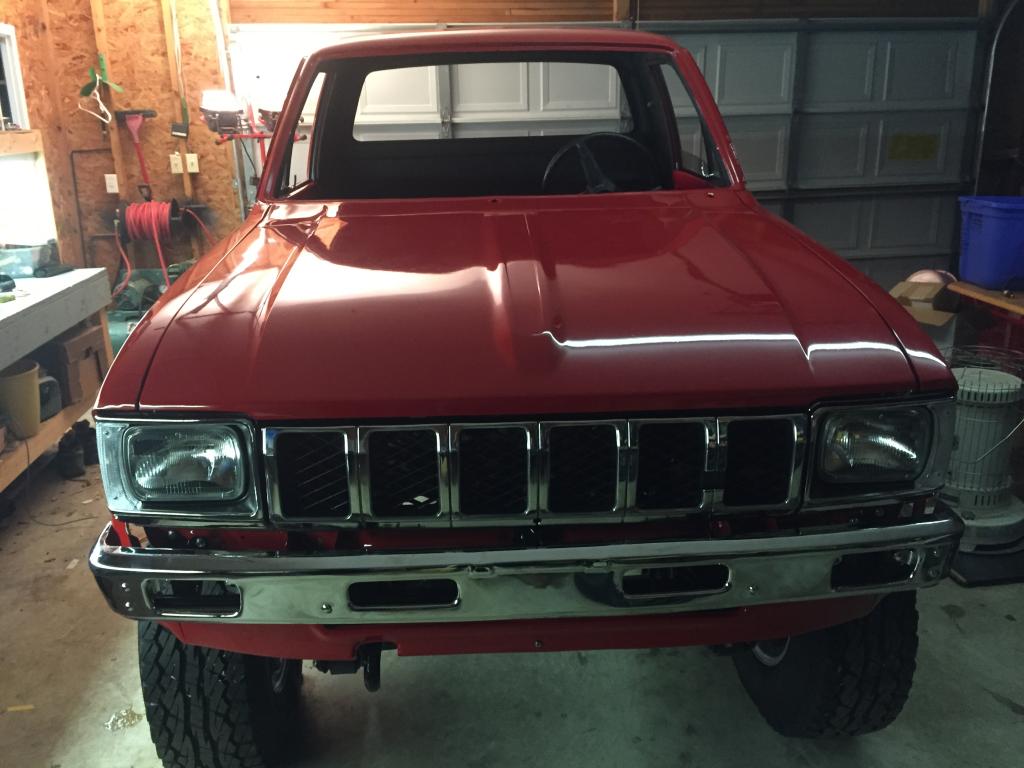
It's official: this truck is TOO GOOD!
I wanted to ask, how much would you value this truck at? How do you translate that to an insurance company? I just wanted to know because I've been putting money into my truck that I'd like to get back if something bad happened to it. I know I can't get my time back, but could I find a way to get that time reimbursed if the unknown event were to occur!
It would seem too scheisty to write myself receipts for the labor I did, but then again, I'm very proficient in the work I do, and I do it efficiently. I wouldn't be able to do that kind of stuff for full-time money work (and be at my happiest), but something is different about how I work when it's for my own personal vehicle and personal payoff. I think it's worth it for me, it's like getting paid mechanic's wage for the same result plus the bonus of doing it at my own pace and no waiting around. Dealing with my own mistakes over the years, I've been able to learn and self-teach.
So do you or anyone know about negotiating with insurance companies to make sure you're insured for what you've got in a project? I don't mean to be ominous or foreboding, I just see a perfect truck like that and think, damn, I've now got to get some white gloves on before I check the oil level. I admire the work, therefore I wonder about how it's protected. I aspire to similar levels of perfection and protection!
Looking incredibly good.
Last edited by zombie_stomp; Jan 23, 2015 at 02:58 PM.
Jan 23, 2015 | 03:17 PM
#1110
In my opinion, I don't think you can get parts AND labour back on a trucks like these at the moment, you can't put a price on your labour for insurance, but these trucks will eventually gain in value and I'm pretty sure will be worth a lot in 10-15 years, at that moment you might get your money back, like people buying and restoring muscle cars in the 80's which are now worth 5-10 times more.
But yeah, Dave's truck looks 1st place at show worthy, priceless stuff.
But yeah, Dave's truck looks 1st place at show worthy, priceless stuff.
Last edited by gillesdetrail; Jan 23, 2015 at 03:18 PM.
Jan 27, 2015 | 11:07 PM
#1111
Thread Starter
Super Moderator
iTrader: (3)
Joined: Jan 2012
Posts: 3,218
Likes: 26
From: Salisbury, MD
Zombie, I'll start off by saying that you will NEVER get back what you put into any restoration whether it be by selling the vehicle or through an insurance claim. For example my Pops' friend had a 57 Bel Air Coupe with a 572 and custom EVERYTHING. He's a body man and the best in this area so this thing was done up to standards thay would blow your mind - absolutely perfect. Well one day somebody decided that they wanted to sideswipe him and put the car into a tree. He had the vehicle well insured (like 6 figures insured) and he still took a loss. While the monetary loss (ie parts and expenses) wasn't all that signification, the time loss was huge. He spent thousands of hours on that car that he will never get back and that something that you can't insure. He turned around and built another one nearly identical to it anyway because that is what he does.
Bottomline is that you can only insure a vehicle for what an insurance company is willing to insure it for. Typically, that amount is a "receipt value." Is an insurance company going to insure an old Toyota truck for $30-40K?? Likely not, because they also look at the competive market valve of such vehicles. You're also not going to get your time back and if you ever figure out how to put a price tag on your time then let me know because any time that I spend on my truck is time that I steal from my wife and son which I don't like to do - thus the reason why you see me posting updates at 2 or 3:00 in the morning because I steal time away from my sleep rather than my family.
So for my insurance... Right now, my truck is insured with Progressive as a classic auto under restoration, but that will change. I basically put it on the policy of with my other vehicles so that it would be insured in the event that it was stolen, the garage burnt down or something crazy while I was working on it. I salo kept it insured so I didn't have to turn in my tags and go through all the registration BS again. I will likely be insuring it with Hagerty once I am finished. If you want your truck to be treated like a classic auto then you have to go with a classic auto insurance provider. Progressive does a declared value, but in the fine print is basically says "screw you, we'll pay you what the book value is" and we all know what the book value says... If your policy is approved by Hagerty then you'll be guaranteed that value in the event of a total loss. My only concern with going with classic insurance is any mileage limits - If I have a restrictive mileage limit then I'll just throw all the insurance crap out the window and risk it all. I'm building this thing to drive, not sit in the garage. I plan on taking my son on road trips this summer while my wife is home with the baby so we'lll easily put several hundred on the clock in a weekend and I'm not going to have the insurance company keep me from doing that. I also want to do a cross country trip and back at some point so that would be over 6K on the clock.
To get back to your point, if want to restore your truck and not lose then you're in for a rude awakening - you'd be better off throwing all that money on Red in a casino. I've got over 20grand in my truck already and I know I'll never see that money again, but I'm in it for the hobby and experience as well.
Jan 27, 2015 | 11:12 PM
#1112
Thread Starter
Super Moderator
iTrader: (3)
Joined: Jan 2012
Posts: 3,218
Likes: 26
From: Salisbury, MD
Lil update...
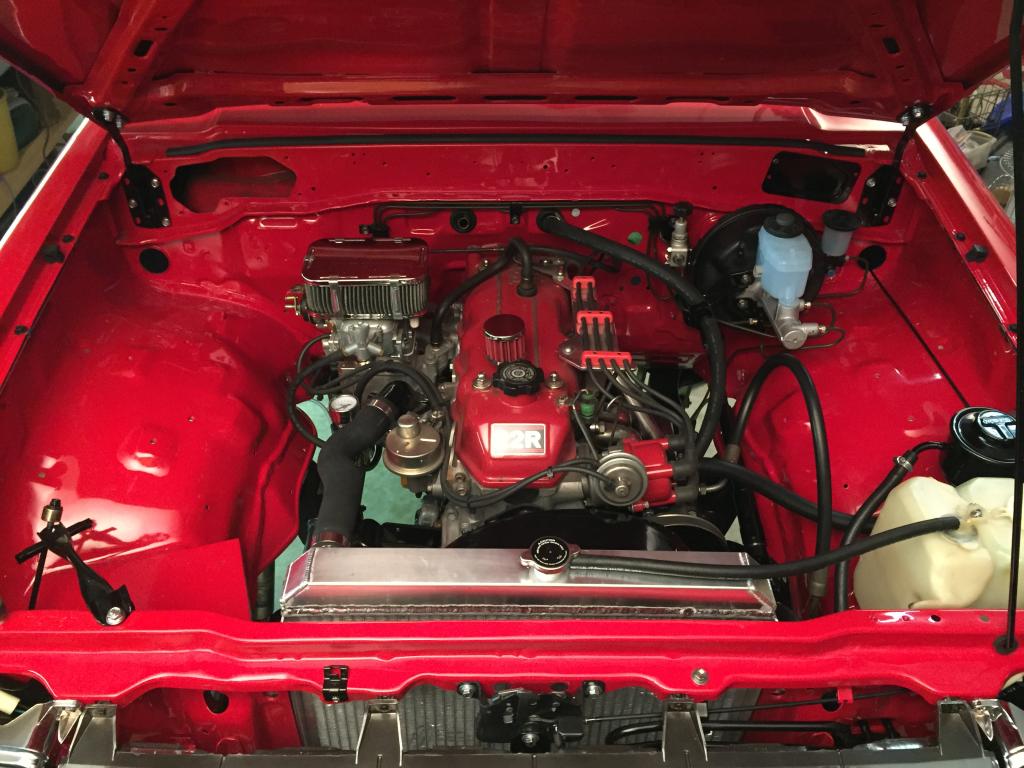
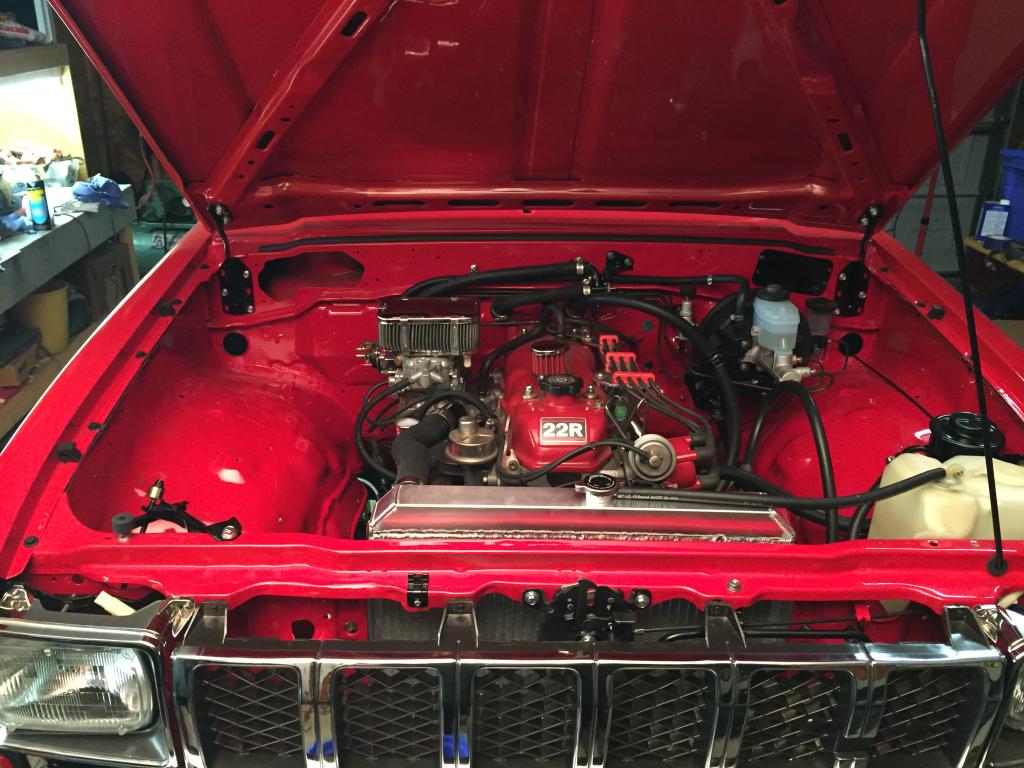
Aluminum radiator installed (sexy...):
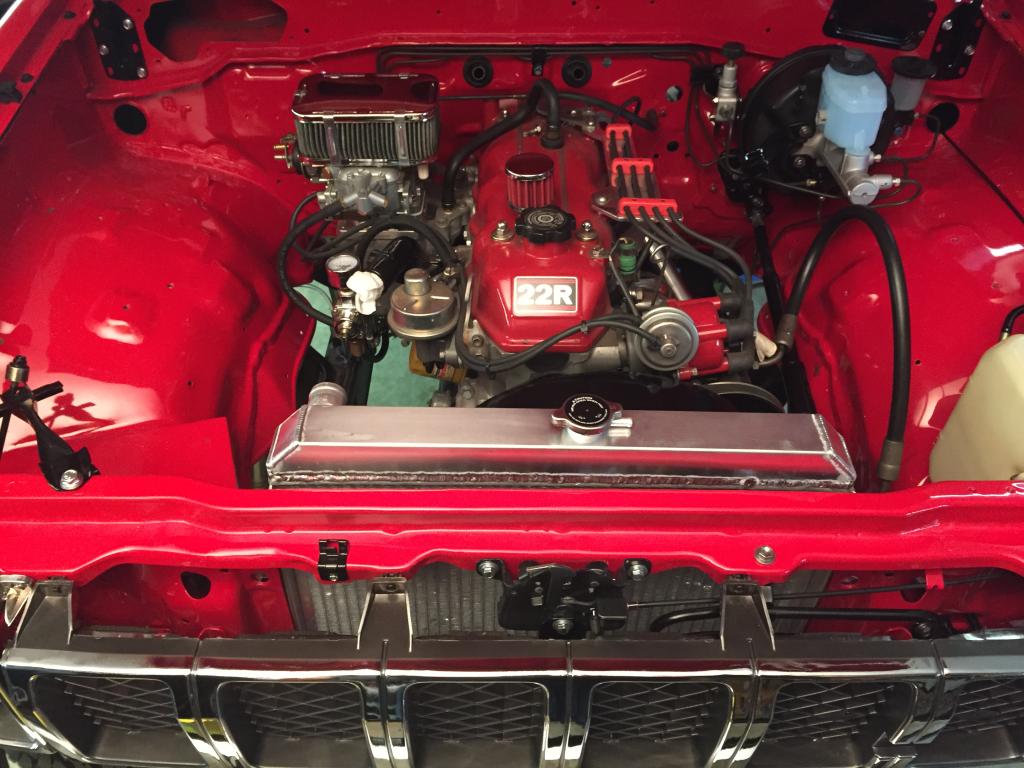
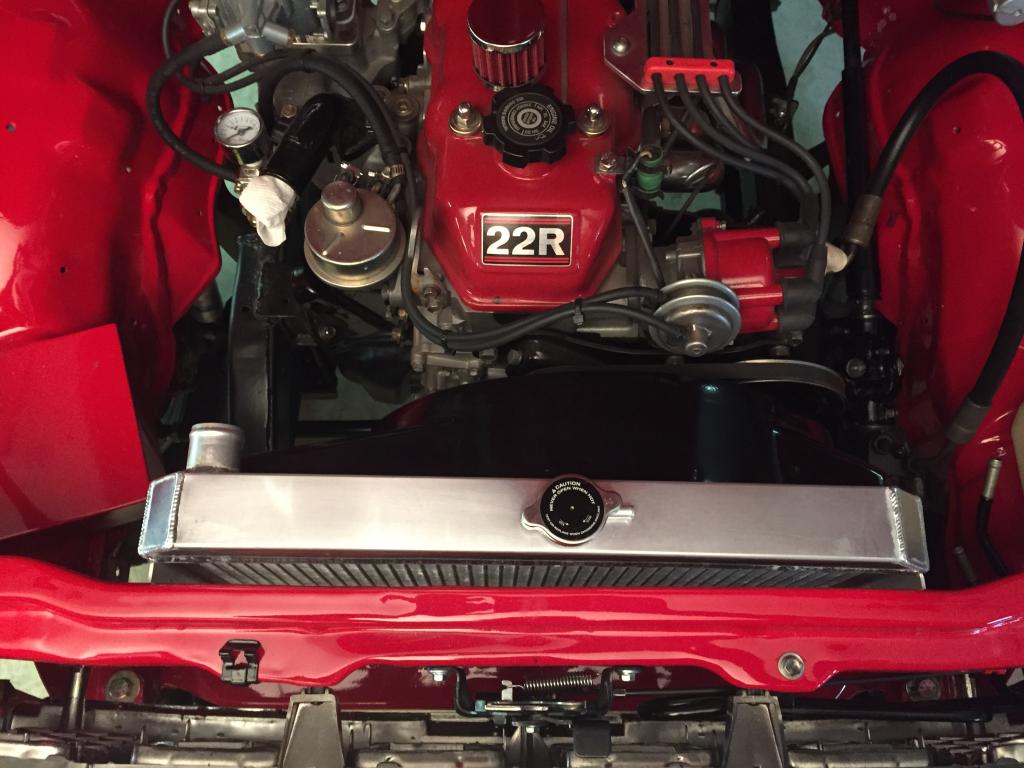
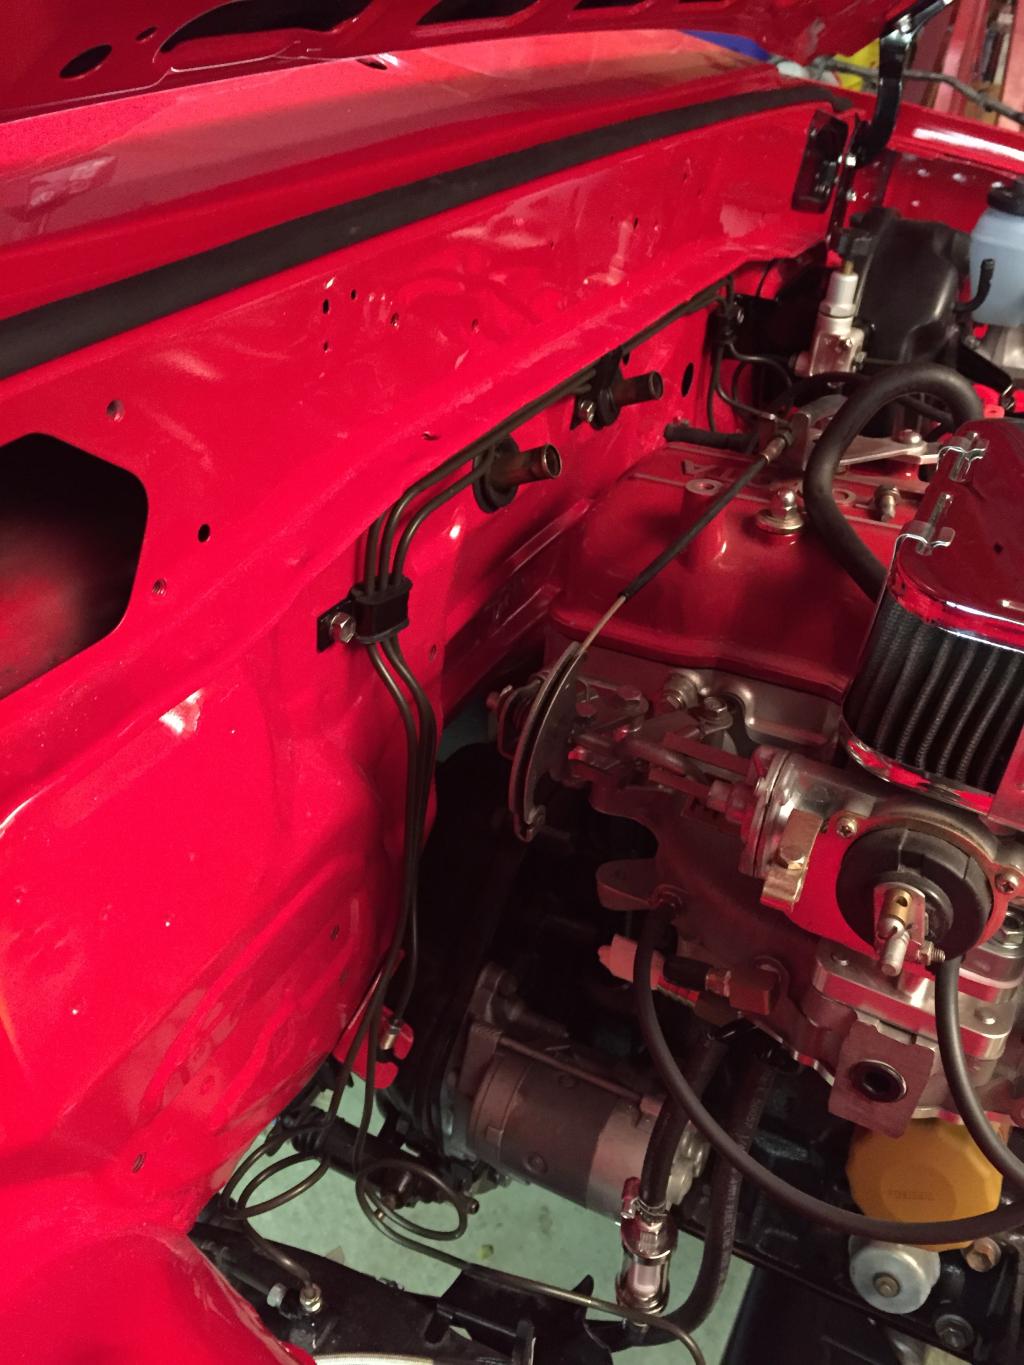
And I finished all my hydraulics and most of the coolant plumbing. I lost a heater hose and I grabbed the wrong brake booster hose so I'll get those tomorrow to get my fluids wrapped up. Rad hoses, powersteering hoses and all the brake lines are plumbed at ready to bleed:
Aluminum radiator installed (sexy...):


And I finished all my hydraulics and most of the coolant plumbing. I lost a heater hose and I grabbed the wrong brake booster hose so I'll get those tomorrow to get my fluids wrapped up. Rad hoses, powersteering hoses and all the brake lines are plumbed at ready to bleed:

 Jan 28, 2015 | 05:18 PM
#1115
Jan 28, 2015 | 10:27 PM
#1116
Thread Starter
Super Moderator
iTrader: (3)
Joined: Jan 2012
Posts: 3,218
Likes: 26
From: Salisbury, MD
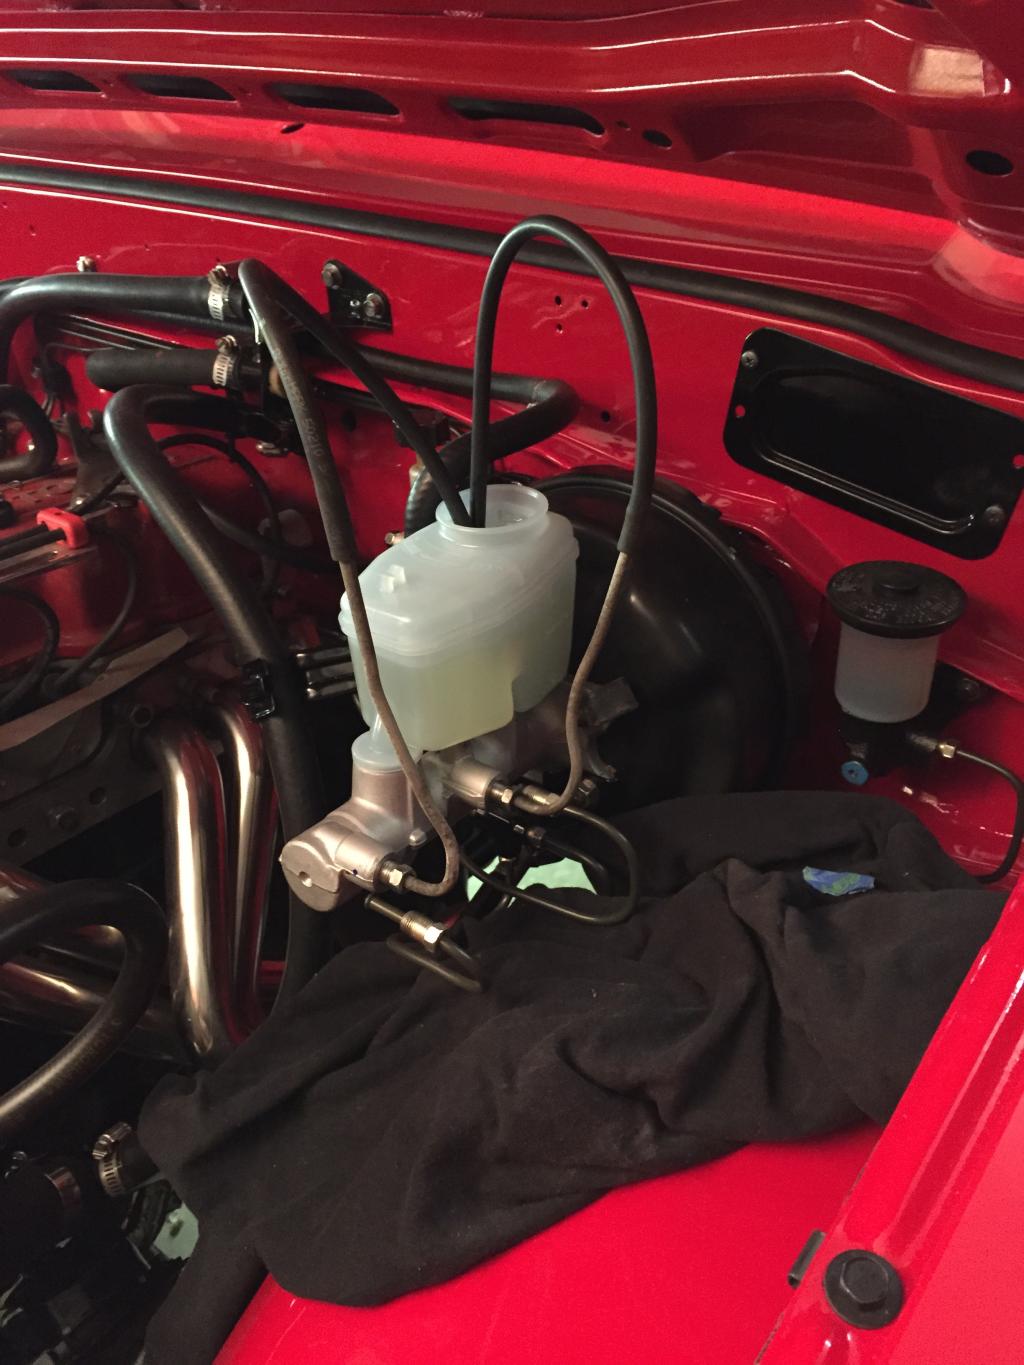
I got the rest of my heater hoses and my brake booster plumbed up tonight. I got the clutch hydraulics bled with no problems. Bench bled the brake master cylinder - this is a must! It is crazy how much air was in the MC alone! Then I hooked it up to the brake lines and started bleeding the rest of the system. I was using a vacuum pump bleeder to suck the air out. I managed to bleed the entire system, but then when I pumped up the brakes, I found a leak in the worst possible spot - at the union next to the tank on the passenger side frame rail. That was the ONE place I was hoping not to have a leak! So I lifted the bed up a bit to tighten it down and it just wouldn't seal up. Turns out that the union was damaged thus damaging my flares and I don't have enough line to cut and reflare the lines so I'm going to have to rebend the brake line to the rear end. This time I'm going to just do it all in one section of line and nix the union. Plus side is that I tested my porportioning valve during this event - I was able to close it all the way down and cut off all pressure to the rear end. Pretty nifty in the circumstance so I don't have to worry about my MC draining out of the line I took out. Tomorrow is another day so I'll get it all worked up properly.
Jan 29, 2015 | 10:04 PM
#1118
Registered User
Joined: Nov 2014
Posts: 16
Likes: 0
Properly crimped brake lines are a black art. I have seen grown men reduced to tears trying to get them right. You're a better man than me, I ended up sourcing decent used ones that cleaned up OK. I feel you pain 
Jan 30, 2015 | 09:55 PM
#1119
Thread Starter
Super Moderator
iTrader: (3)
Joined: Jan 2012
Posts: 3,218
Likes: 26
From: Salisbury, MD
I hear you on that Crumpy. Lucky for me, out of 12 flares that I had to make only one leaked! And two of them had to be bubble flares for my proportioning valve. I'd say that's pretty impressive for anybody! It's not difficult to flare brake lines, but there are three crucial and simple things that have to be done to get them right to avoid leaks.
1) Get a GOOD brake flaring tool. The cheap ones are garbage. This a prime example of getting what you pay for. Besides, if you are about to run into something because you can't stop then you'll be thinking "damn, a better brake flaring tool would have been a lot cheaper than my repair and medical bills are about to be..."
2) Properly prep the lines before you flare. Get a nice even and straight cut, chamfer the line well (I actually use a bullet shell casing chamfer tool that I use for reloading my bullets), and make sure the line is clear of any burrs on the inside and outside of the would be flare surface
3) And most important, TAKE YOUR TIME! No need to rush it. Just go through the steps with confidence and your flares will turn out great!
So yesterday I fixed my leak. I ended up buying and bending a new brake line to replace the leaking one. So instead of having two 6' sections with a union between them, I have one 12' line. This also reduces the amount of ossible flare failures from 4 to 2 on thst particular section. I should have done this to begin with but you live and learn...
Here's my on-the-truck bench bleeding process/setup. It's just two old brake lines with some vacuum hose attached to them to route the fluid back to the reservoir:
Hooked everything back up and finished bleeding the brake system with my vacuum bleeder. NO LEAKS! Wahooooo! Now all the plumbing is done, I'll move on to electric (dun dun dun!!)
Tonight I took my son to the monster truck jam tonight. He was in heaven!
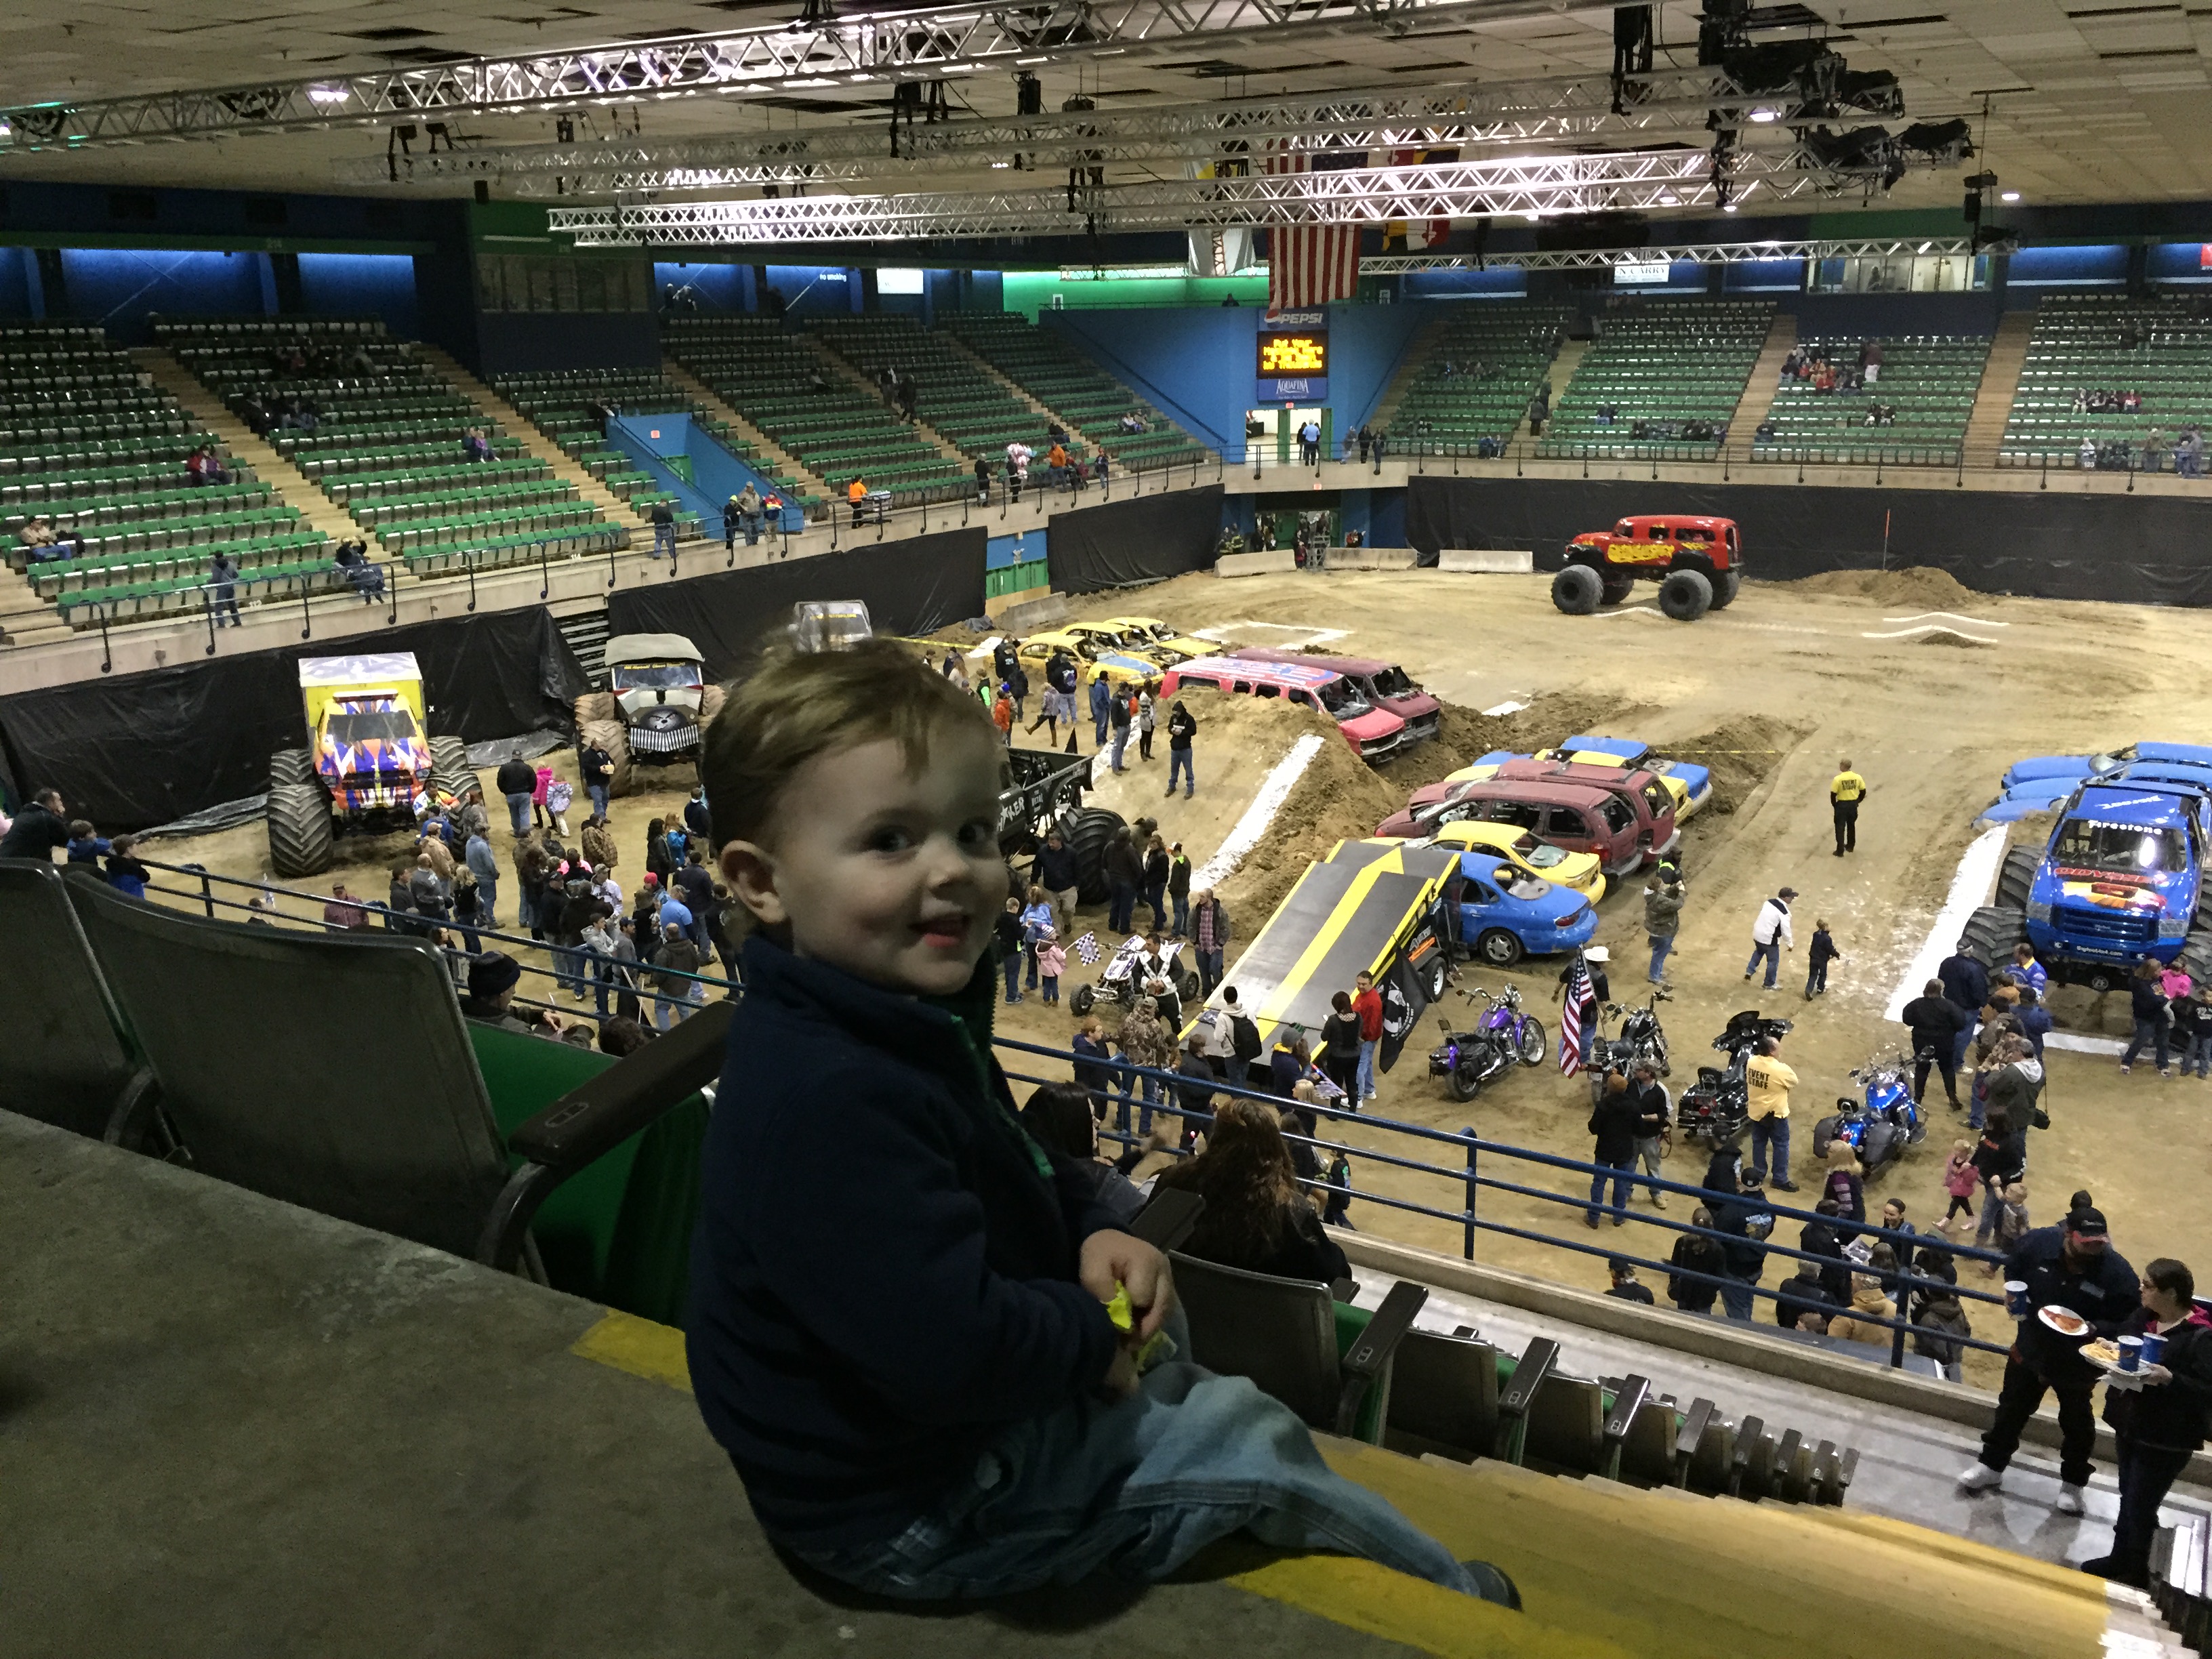
Bigfoot was there:
(click for video)

And then there's this local crew from about 10 miles north of me at "The Metal Shop" that built the Saigon Shaker. This guy goes all out every time! Managed to flip the truck in this video, but they flipped him right side up and he was at it again. It really says something about their work - if they can build something that gets beat as hard as a monster truck and doesn't break then they must really know what they are doing on other metal projects. The Saigon Shaker should be on the Monster Jam tour full time soon.
(Click for video)

1) Get a GOOD brake flaring tool. The cheap ones are garbage. This a prime example of getting what you pay for. Besides, if you are about to run into something because you can't stop then you'll be thinking "damn, a better brake flaring tool would have been a lot cheaper than my repair and medical bills are about to be..."
2) Properly prep the lines before you flare. Get a nice even and straight cut, chamfer the line well (I actually use a bullet shell casing chamfer tool that I use for reloading my bullets), and make sure the line is clear of any burrs on the inside and outside of the would be flare surface
3) And most important, TAKE YOUR TIME! No need to rush it. Just go through the steps with confidence and your flares will turn out great!
So yesterday I fixed my leak. I ended up buying and bending a new brake line to replace the leaking one. So instead of having two 6' sections with a union between them, I have one 12' line. This also reduces the amount of ossible flare failures from 4 to 2 on thst particular section. I should have done this to begin with but you live and learn...
Here's my on-the-truck bench bleeding process/setup. It's just two old brake lines with some vacuum hose attached to them to route the fluid back to the reservoir:

Hooked everything back up and finished bleeding the brake system with my vacuum bleeder. NO LEAKS! Wahooooo! Now all the plumbing is done, I'll move on to electric (dun dun dun!!)

Tonight I took my son to the monster truck jam tonight. He was in heaven!

Bigfoot was there:
(click for video)
And then there's this local crew from about 10 miles north of me at "The Metal Shop" that built the Saigon Shaker. This guy goes all out every time! Managed to flip the truck in this video, but they flipped him right side up and he was at it again. It really says something about their work - if they can build something that gets beat as hard as a monster truck and doesn't break then they must really know what they are doing on other metal projects. The Saigon Shaker should be on the Monster Jam tour full time soon.
(Click for video)
Last edited by kawazx636; Jan 30, 2015 at 10:20 PM.
Jan 30, 2015 | 10:56 PM
#1120
Registered User
Joined: May 2013
Posts: 400
Likes: 0
From: San Antonio, Tx.
Im planning to go to monster jam here in Jax, Fl. in feb! fantastic show (still), i hope. this will be my old ladys first time going. I don't think we'll be bringing the little one though, he's still a wee bit small for this.
Your truck looks so damn good... I just found a near pristine 83 cab that I will be using to cheapen my rustoration (by FAR). now all I have to do is strip it and paint it. my 8 gal comp is going to be working so hard!
Your truck looks so damn good... I just found a near pristine 83 cab that I will be using to cheapen my rustoration (by FAR). now all I have to do is strip it and paint it. my 8 gal comp is going to be working so hard!
Last edited by Rowdydudeman; Jan 30, 2015 at 10:58 PM.


