
KawaZX636's 1983 Toyota Pickup Restoration


 Mar 14, 2014 | 06:54 PM
#542
Thread Starter
Super Moderator
iTrader: (3)
Joined: Jan 2012
Posts: 3,218
Likes: 26
From: Salisbury, MD
Nice! Lookin' good! Now slap it all together an ship it out! Haha! I working on finishing up a commercial renovation project for my brother right now so I should see a check from that soon. I'll get up with you on final cost for the bed and I'll mail you out a check so we can settle up. Thanks again, Corey! I'm so stoked to see bed on my truck!
 Mar 17, 2014 | 06:27 PM
#544
Nice! Lookin' good! Now slap it all together an ship it out! Haha! I working on finishing up a commercial renovation project for my brother right now so I should see a check from that soon. I'll get up with you on final cost for the bed and I'll mail you out a check so we can settle up. Thanks again, Corey! I'm so stoked to see bed on my truck!
progress today on your NEW bed , and I do hope to have things almost completed by months end
I will be in touch
.
Mar 24, 2014 | 07:03 AM
#545
Thread Starter
Super Moderator
iTrader: (3)
Joined: Jan 2012
Posts: 3,218
Likes: 26
From: Salisbury, MD
Sorry for the inactivity guys. I'm finishing up a renovation job for my brother this week and then I should be back at it on my truck. Although, I had another idea of something I want to do before I move on to filler and paint... I think that I am going to weld up and shave the rear cab seam that is seam sealed from the factory. I'm going to have to strip out the seam sealer regardless, so I figured that I might as well put a weld in it to keep it from flexing and fill it smooth. I'll definitely look better than seam sealer in there.
Last edited by kawazx636; Mar 24, 2014 at 07:07 AM.
Mar 24, 2014 | 08:48 AM
#546
Just got off of work and was scanning the home page and seen the yellow truck on ebay and you mentioning about what goes into a restore and checked out your build. I am on page 5 and have read every word. Great job on what you are doing and enjoy seeing the details. Got to get to sleep but looking forward to seeing what is next. I havent went to the end of your thread, other then to post this. Great Work and Subscribed!!!
Mar 25, 2014 | 06:35 PM
#547
Registered User
Joined: Feb 2014
Posts: 351
Likes: 0
HighLux, patience my friend, It will come. Toyota time isn't super abundant in my household, I'm at the whim of my wife and son. I have to dance a very fine line between trying to get as much done as possible without pissing off my wife (who absolutely hates my truck!) Yoda, email sent with the template. Let me know if you need any help.
Mar 26, 2014 | 07:41 AM
#549
Registered User
Joined: Feb 2014
Posts: 351
Likes: 0
not sure if my app works correctly it says wait 15 sec to send so here it is
1975c93@gmail.com
1975c93@gmail.com
Mar 28, 2014 | 06:26 PM
#550
Registered User
Joined: Feb 2014
Posts: 351
Likes: 0
Apr 3, 2014 | 09:03 PM
#551
Thread Starter
Super Moderator
iTrader: (3)
Joined: Jan 2012
Posts: 3,218
Likes: 26
From: Salisbury, MD
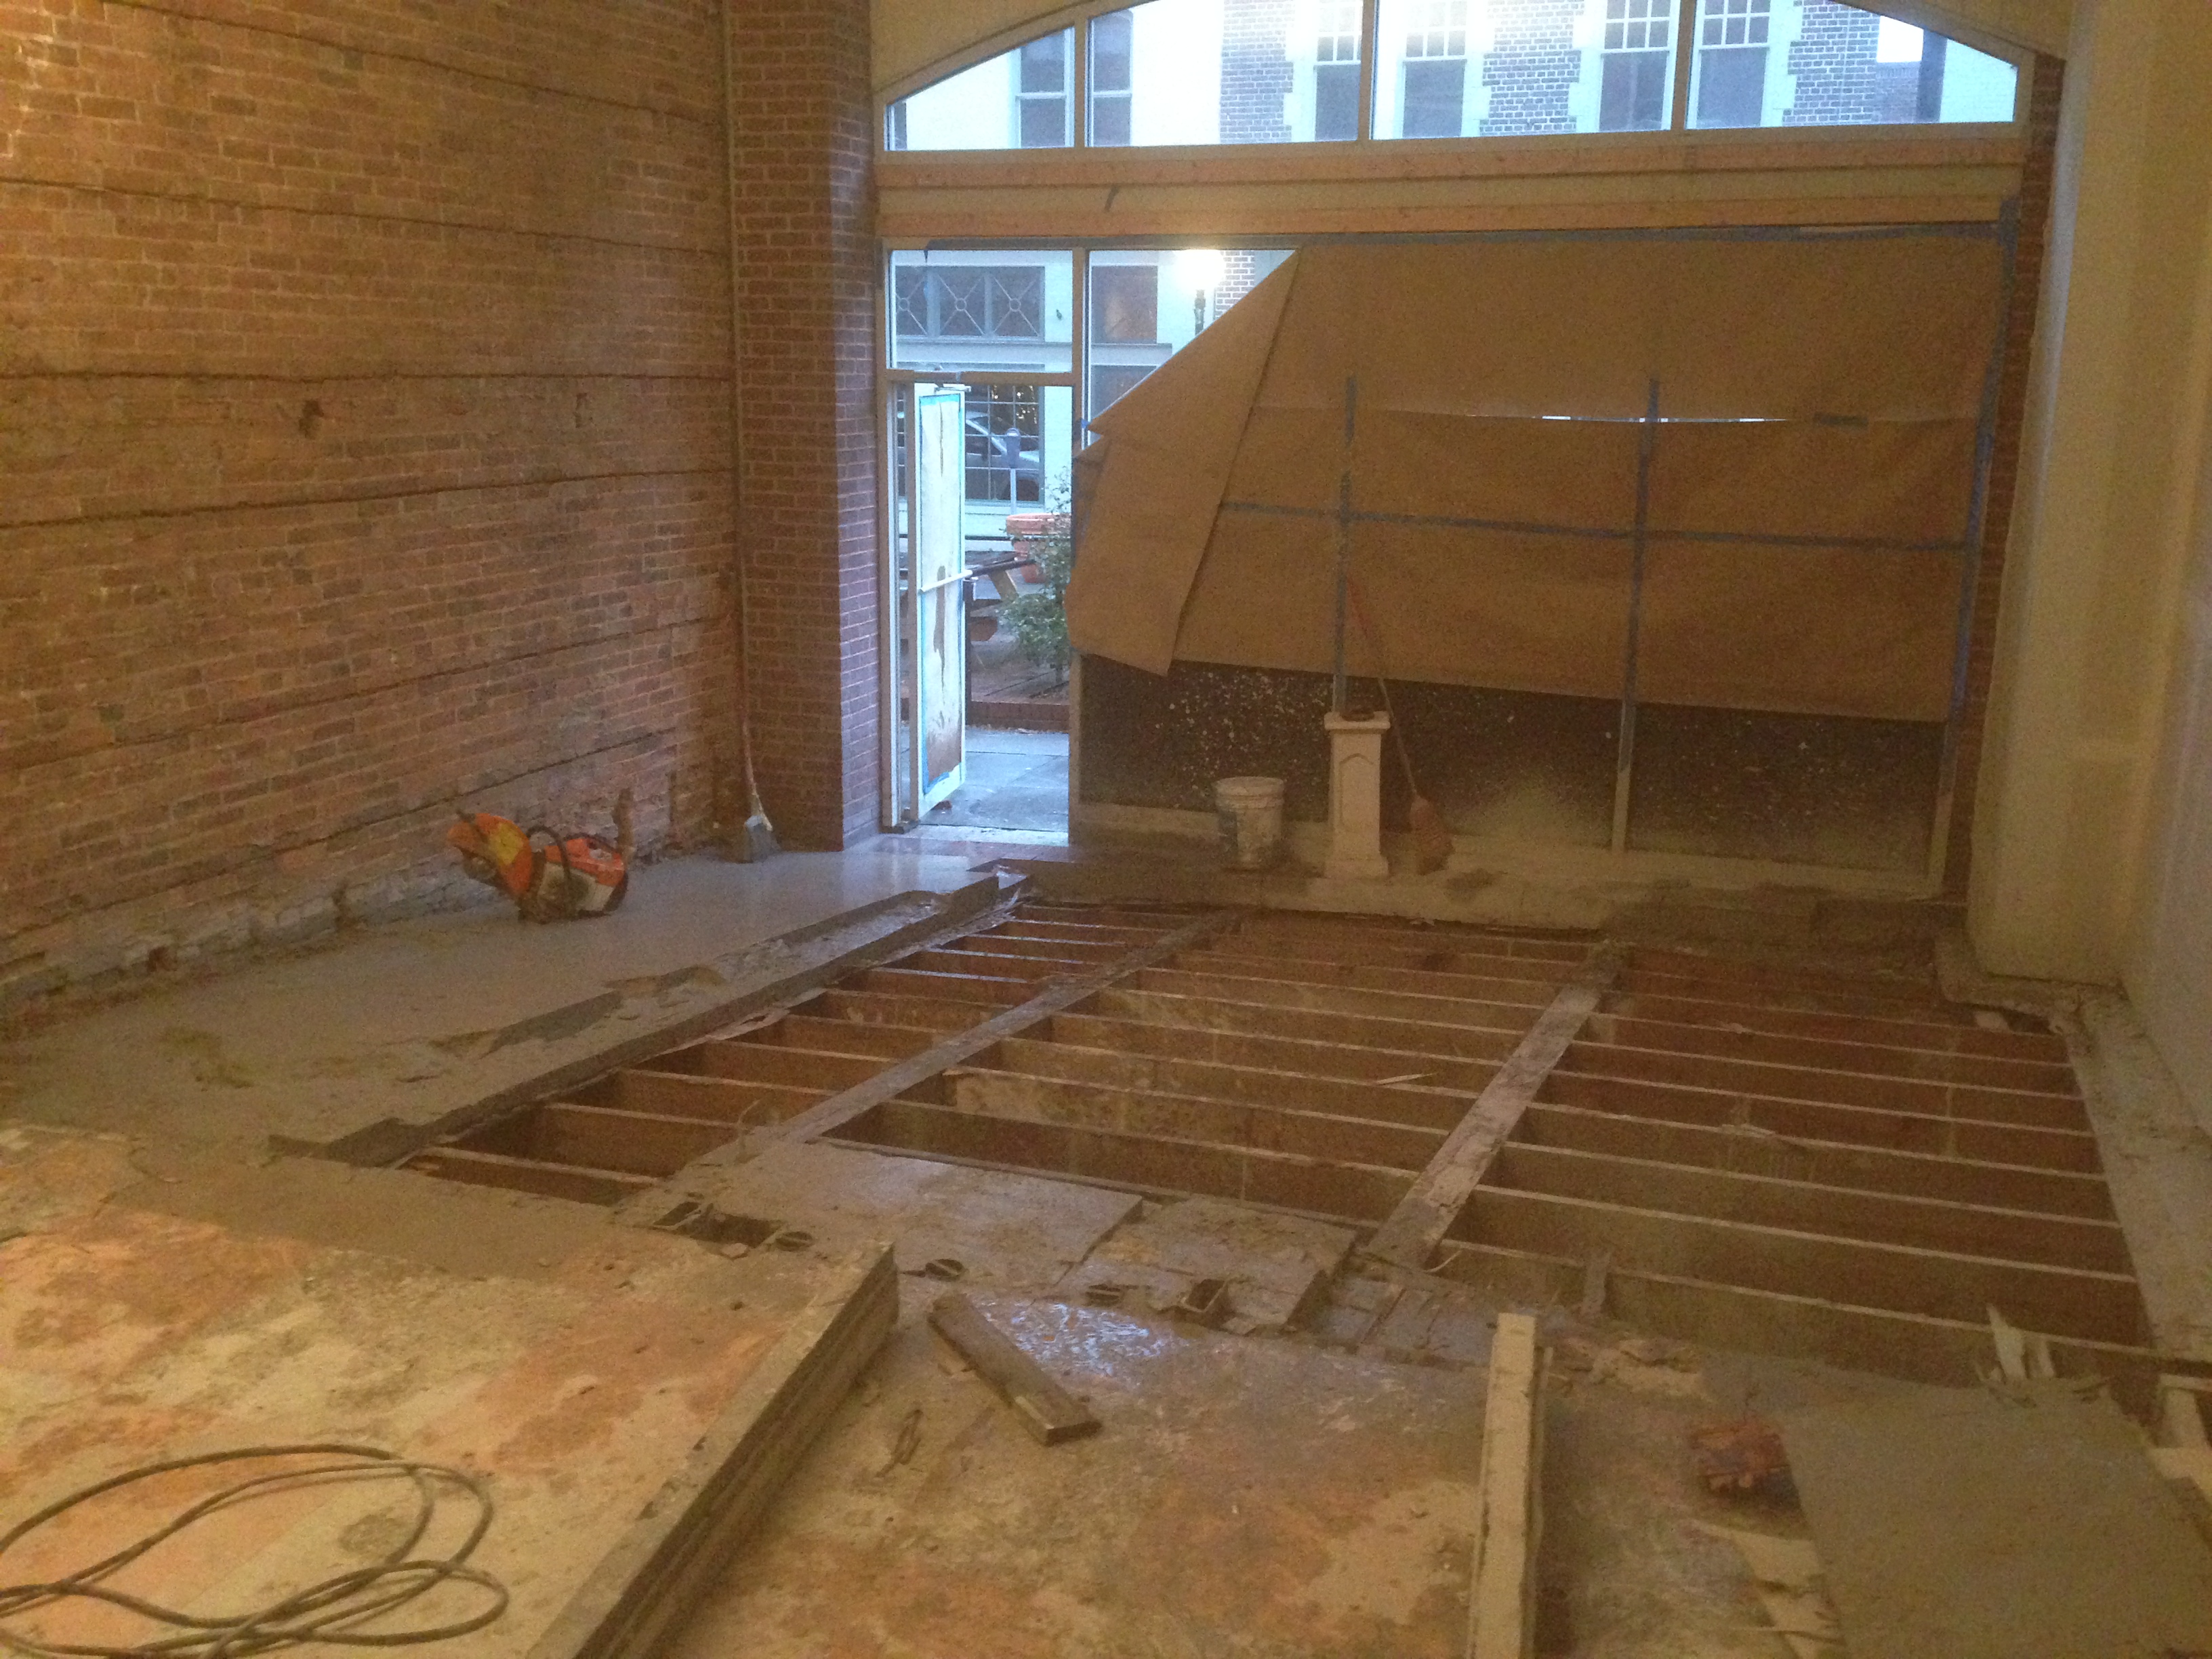
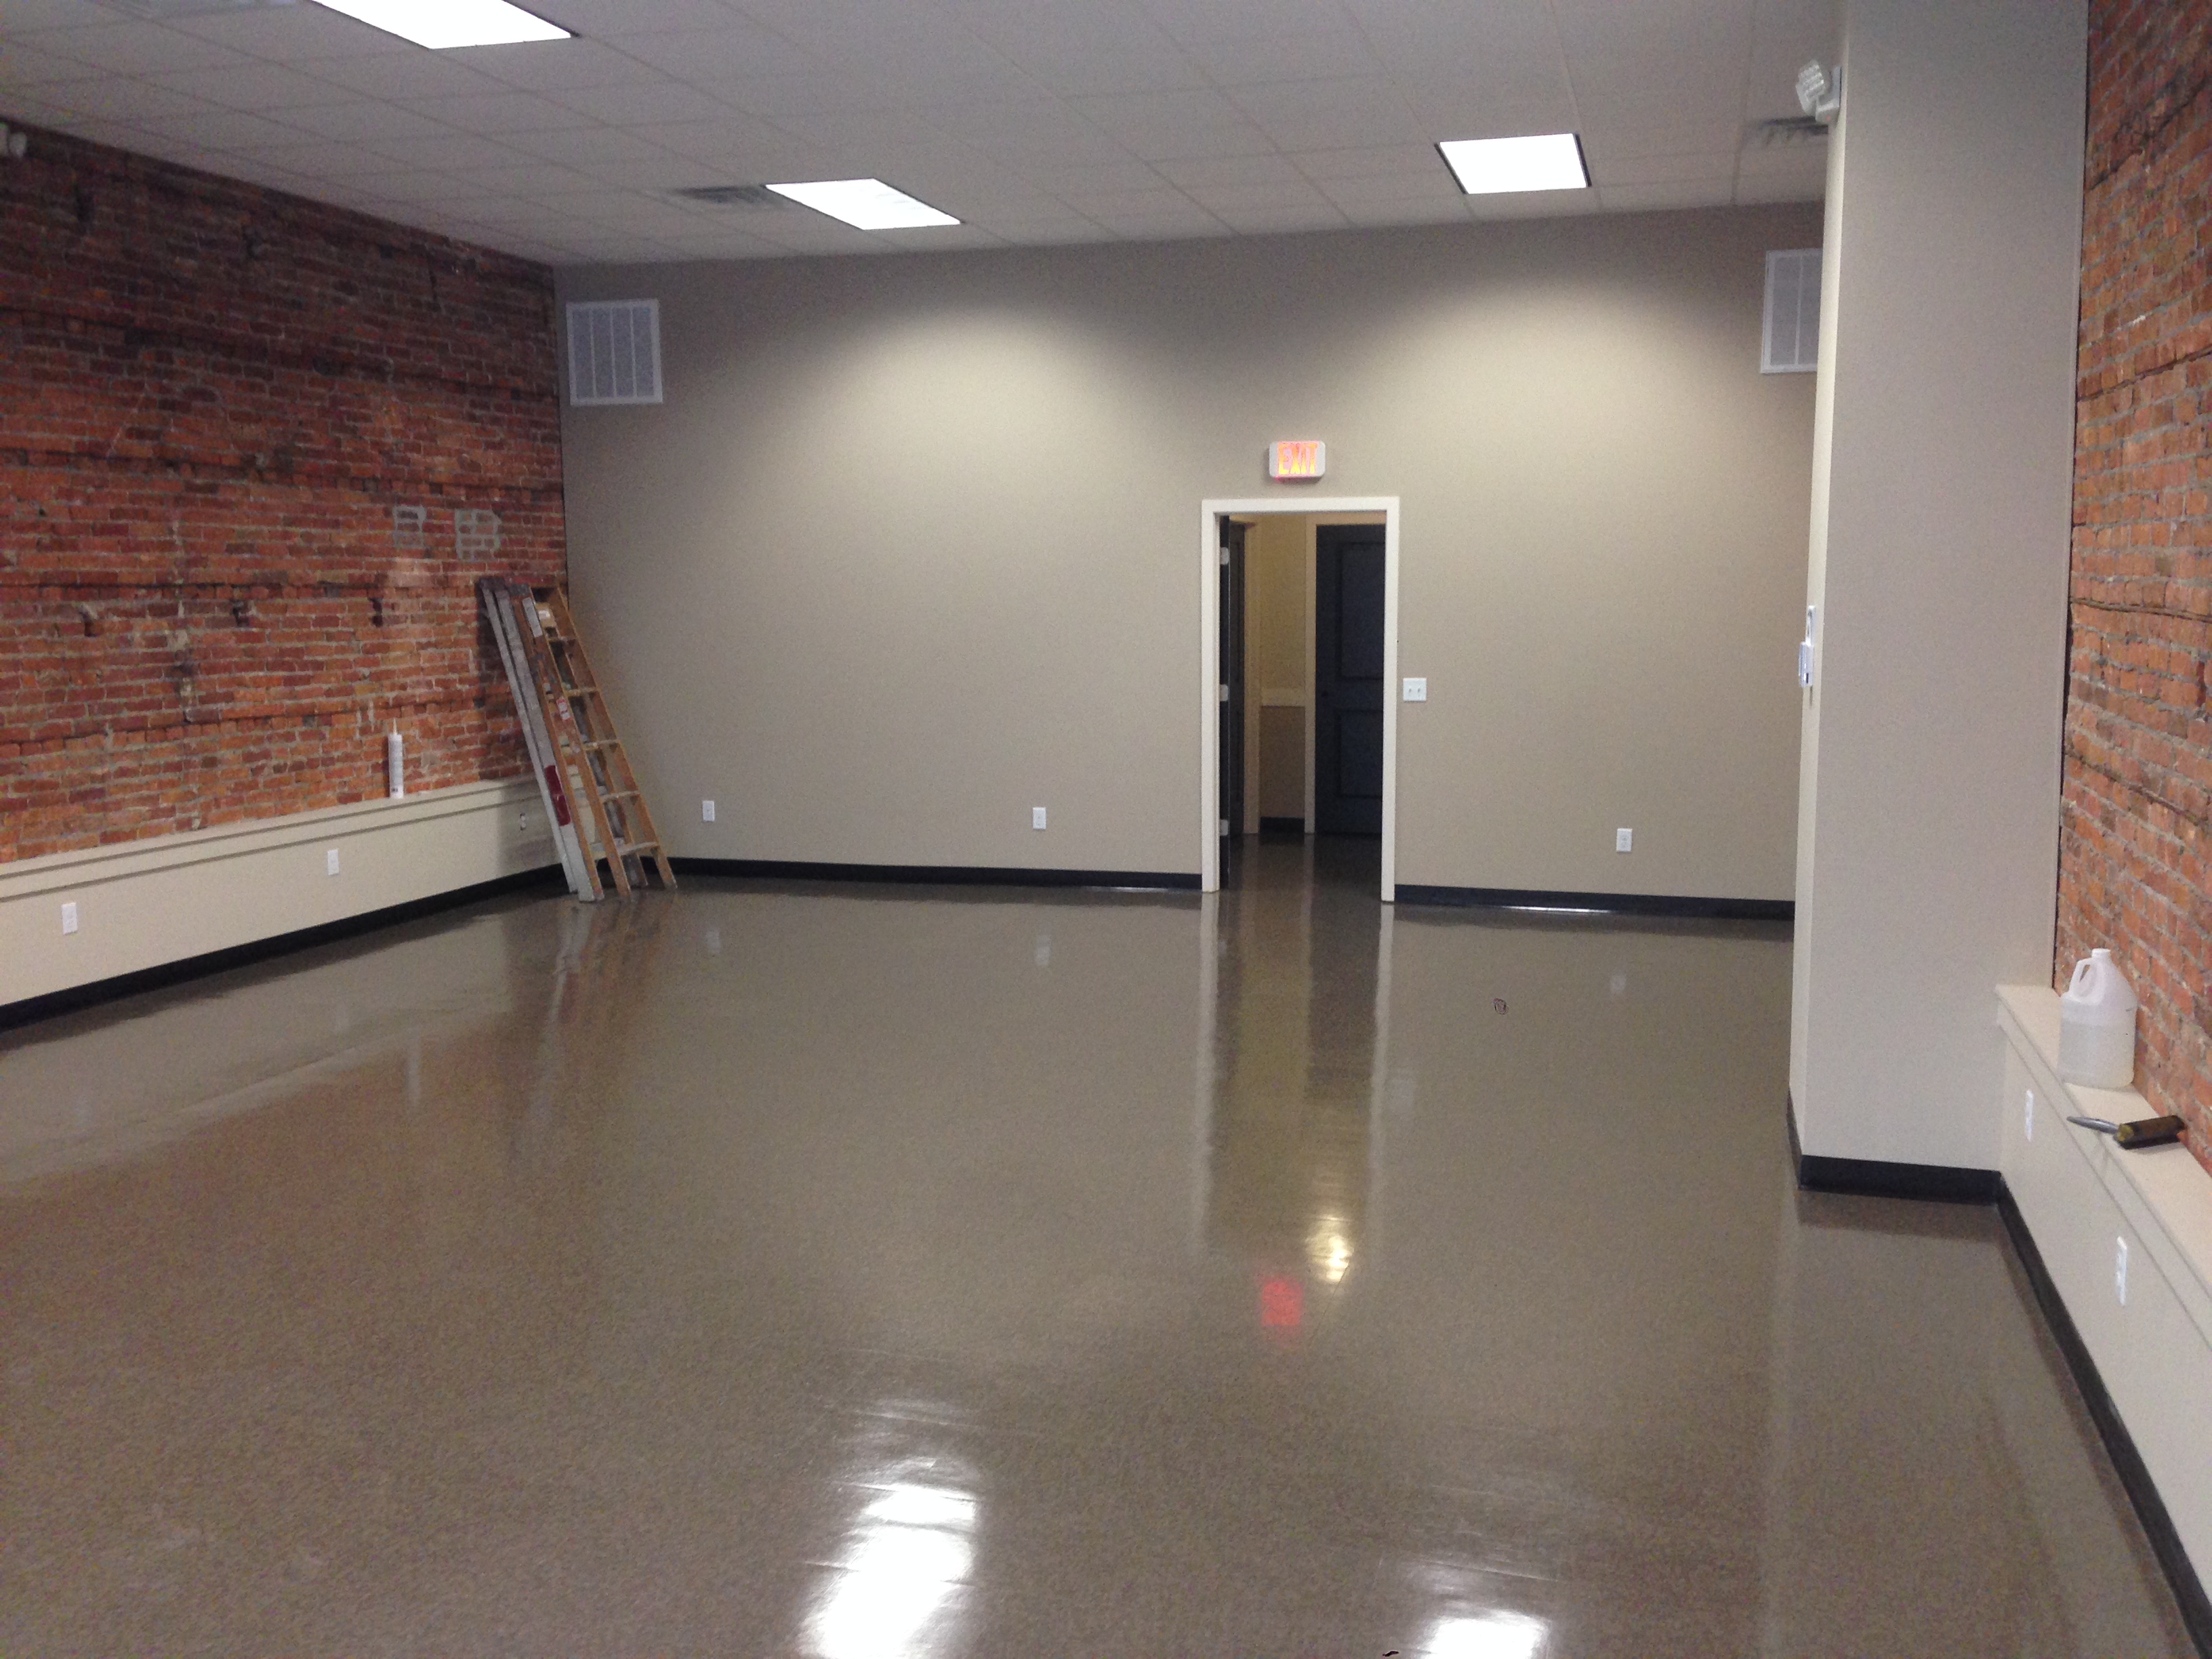
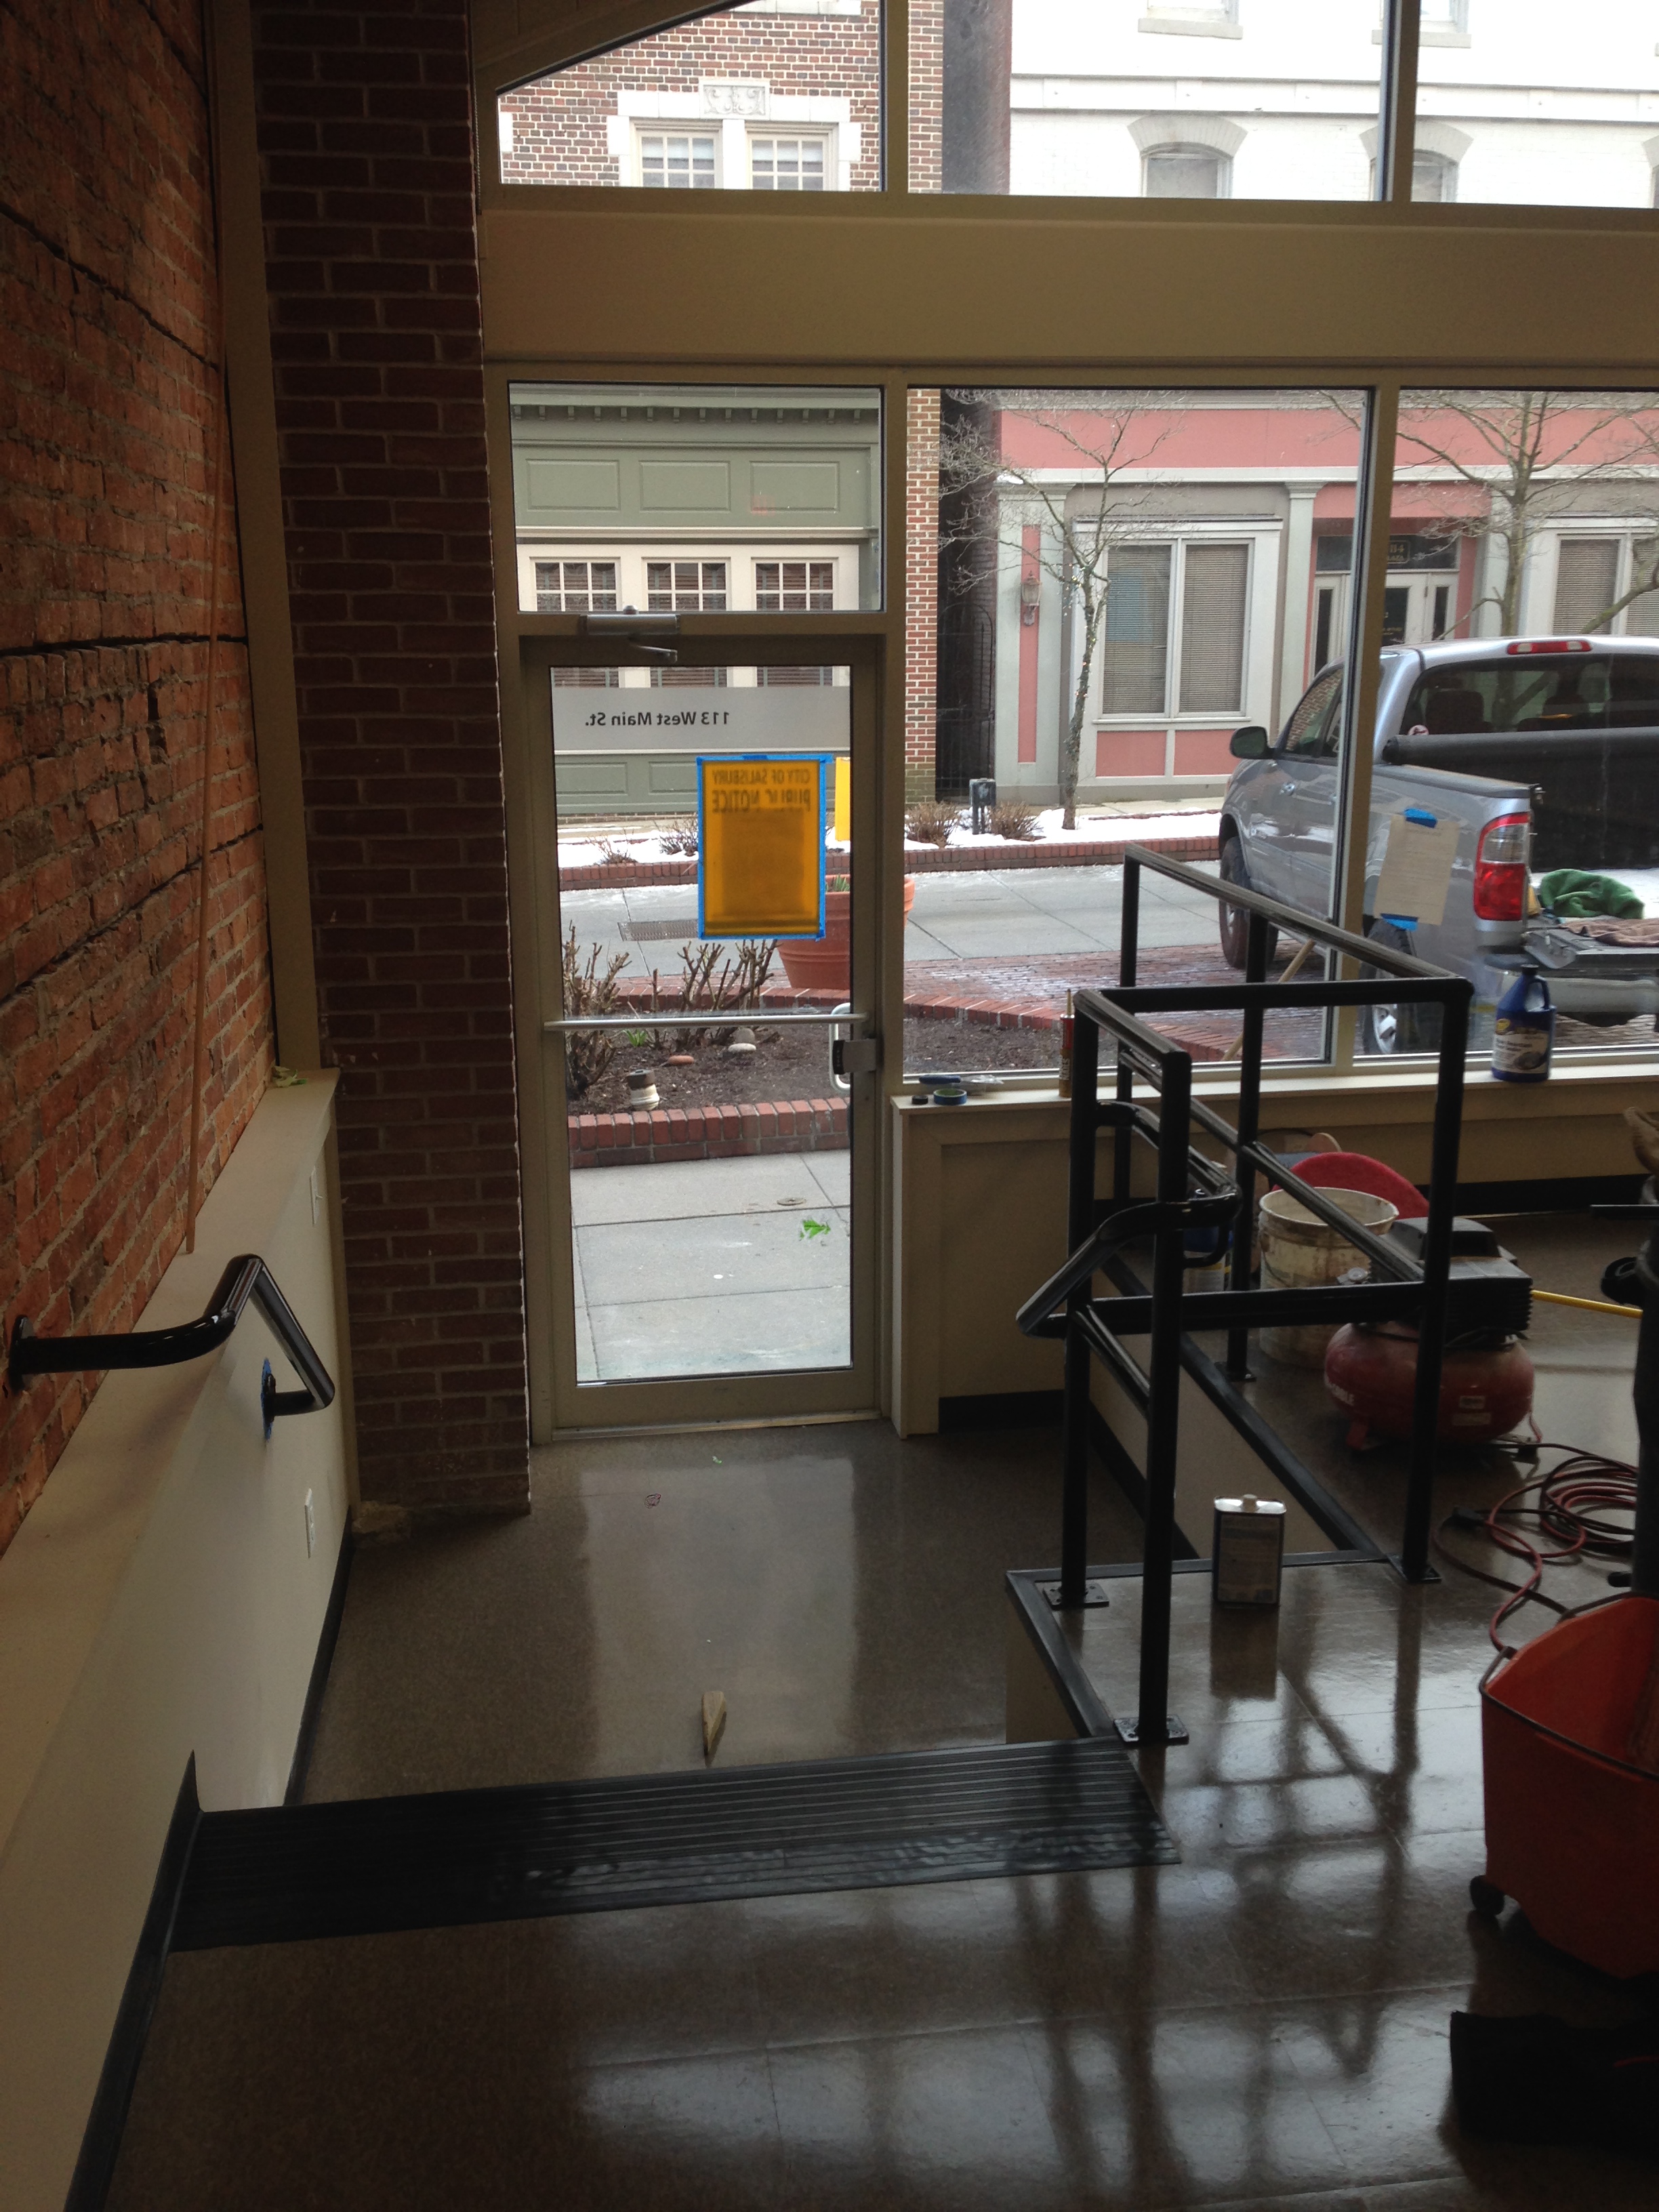
Well I'm back from my little renovation hiatus. Just wrapped up my brother's commercial storefront and the tenant is already moving in. Here are some shots of the job:
The whole place had to be gutted and re-framed. There was originally a sloped concrete area that lead up to a recessed door in the unit (we moved the windows and door to the front of building last summer). All the concrete had to be cut up and hauled out. It was 8-12" thick and the tippage at the concrete recycler was around 7 tons. I got in pretty good shape loading it all up but luckily I have a hydraulic dump trailer.
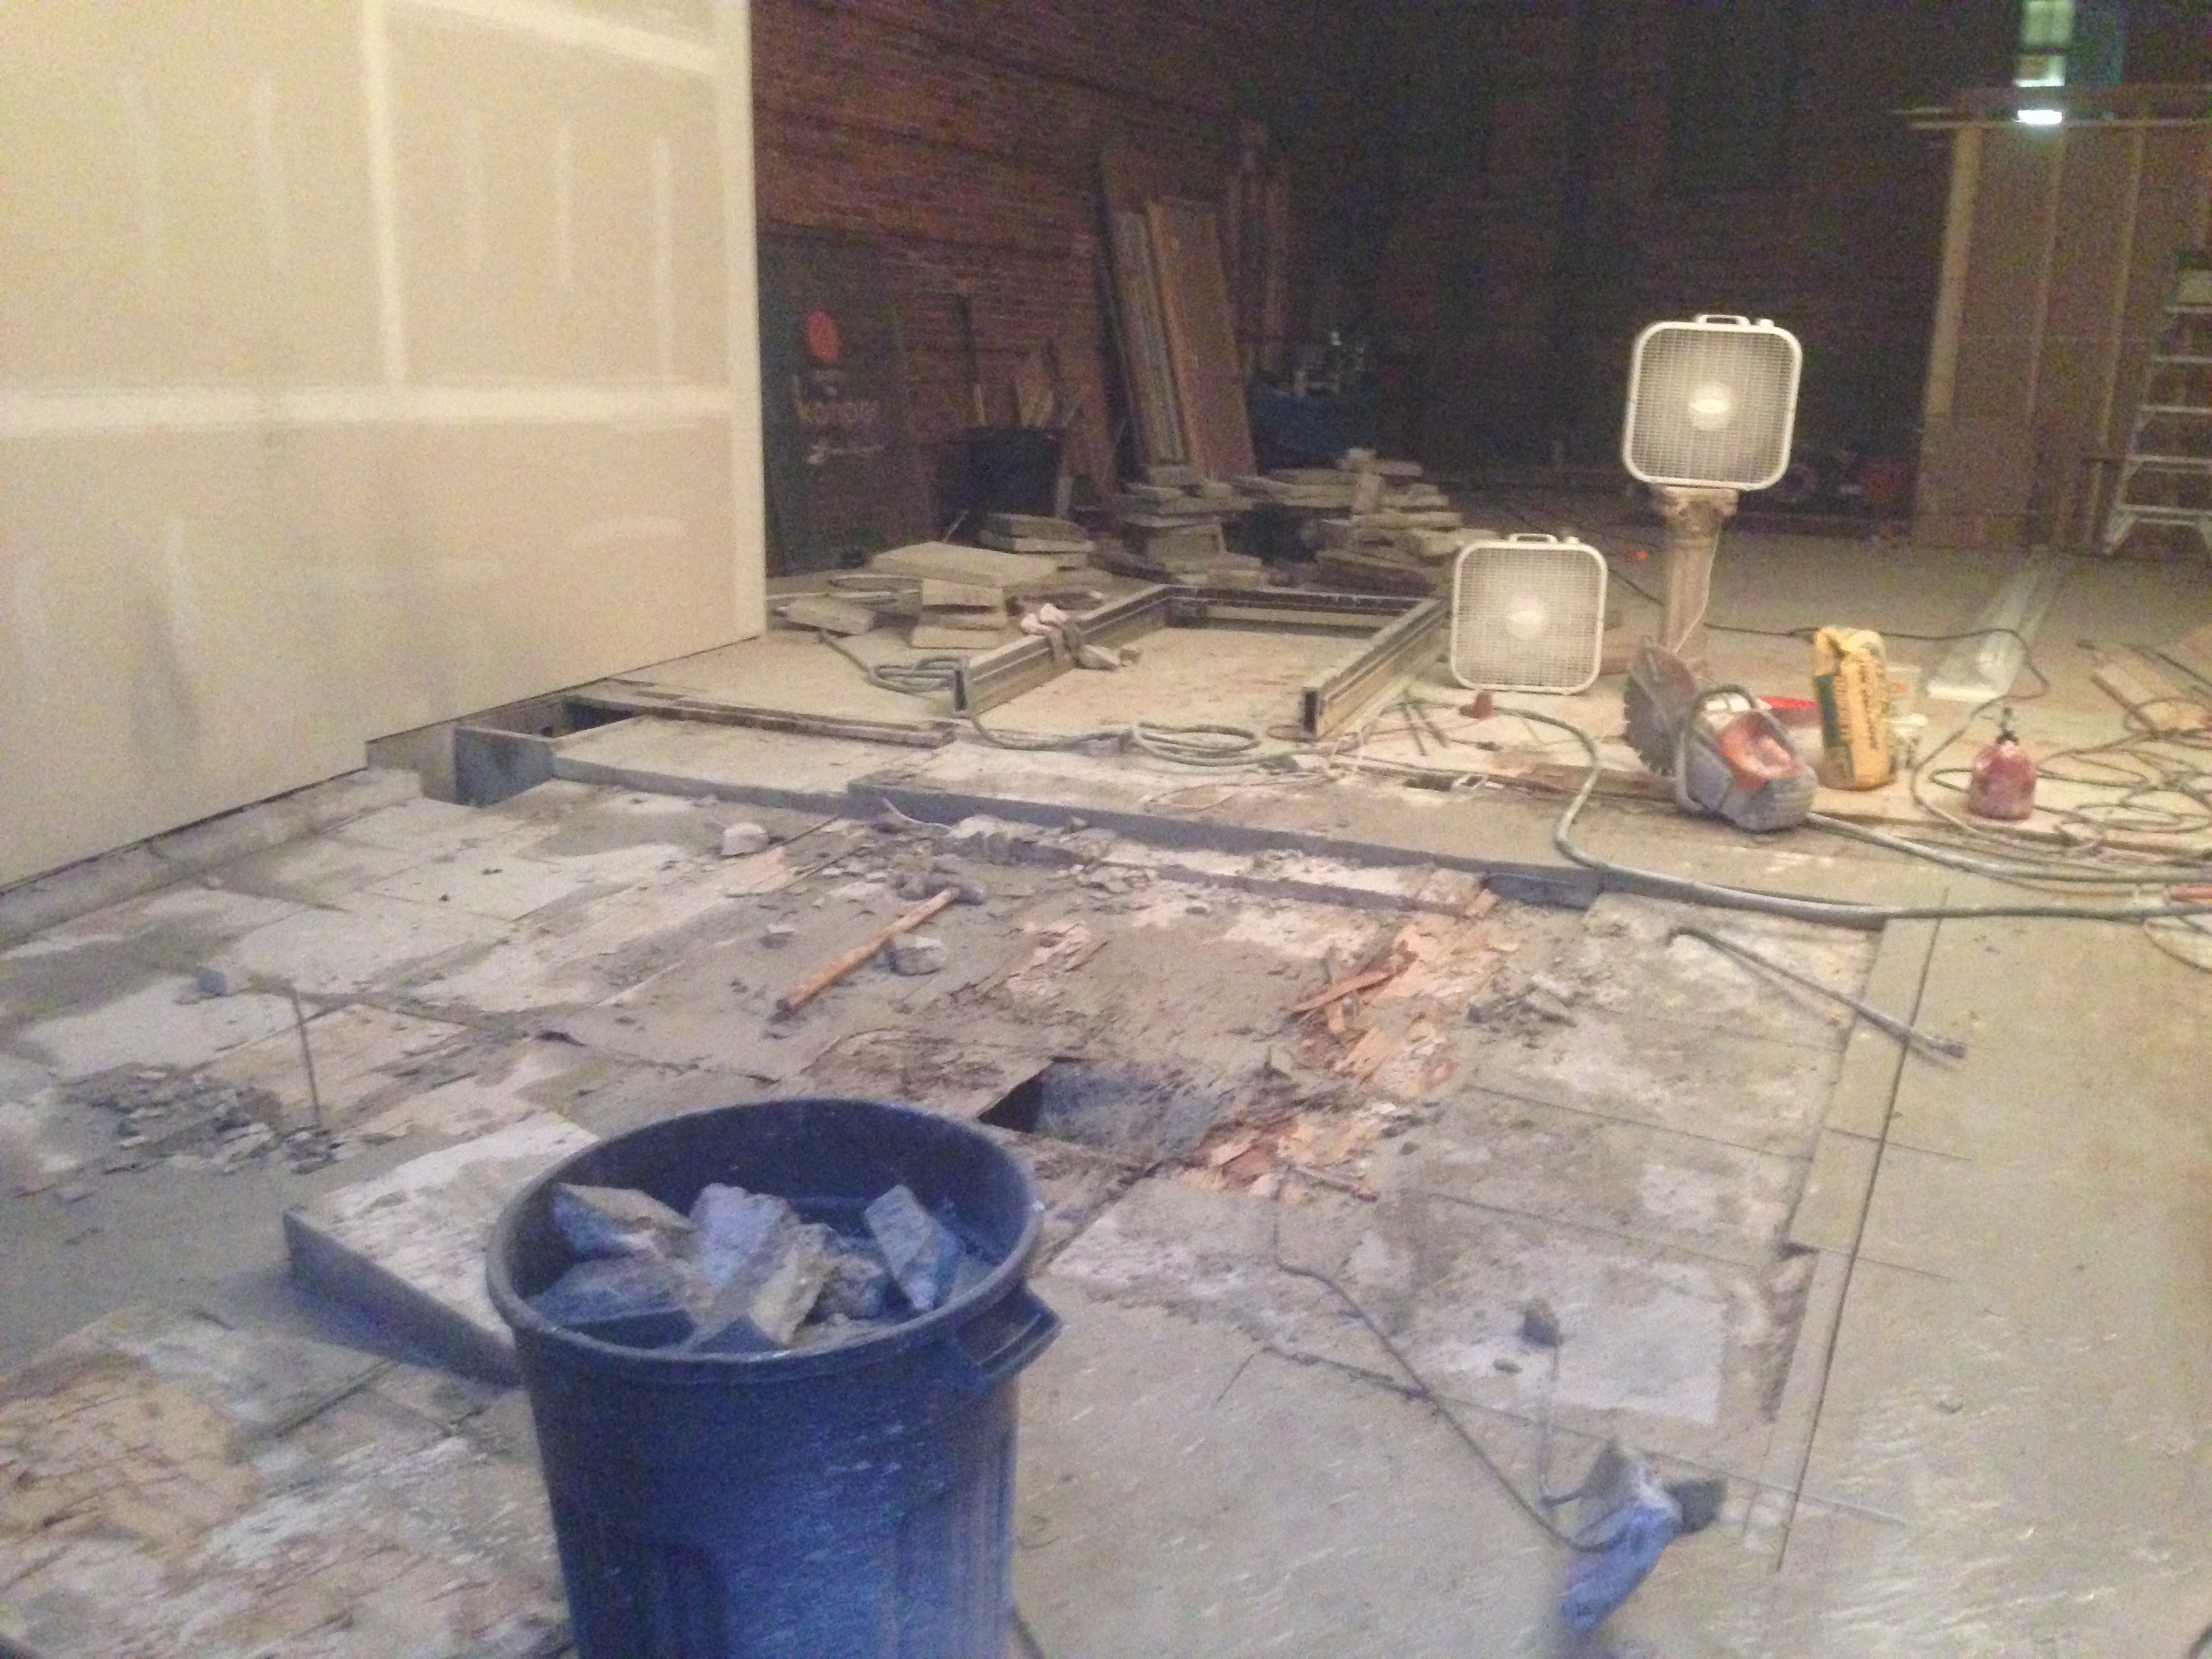

Once the concrete was removed and the old floor joists and posts supporting it were removed, I had to frame up a new floor system that came out level with the existing floor. A section of the old concrete was poured over a granite foundation so it wasn't going to come out. I had a guy come in to remove as much as possible with a jackhammer so that I could pour new concrete to make a level floor even with the new floor system - that was a major PITA, but it came out ok.
My brother wanted to retain as much of the exposed brick walls as possible so I built knee walls to house the electric. There is a small office and storage area in the rear of the unit and a hallway that connects to the adjacent building/unit which he owns as well. A little electric, HVAC, drywall, drop ceiling, trim, paint, tile and it's done!
The office hallway in the rear of the unit (that's my son flashing through the photo):

The main area of the storefront:
The front entrance with a custom welded railing by yours truly! The landing at the front of the door as well as about 12 feet back from the top of the steps is where all the concrete had to be poured to level the floor:
And a shot of the front windows (photo bombed by my Trundra):
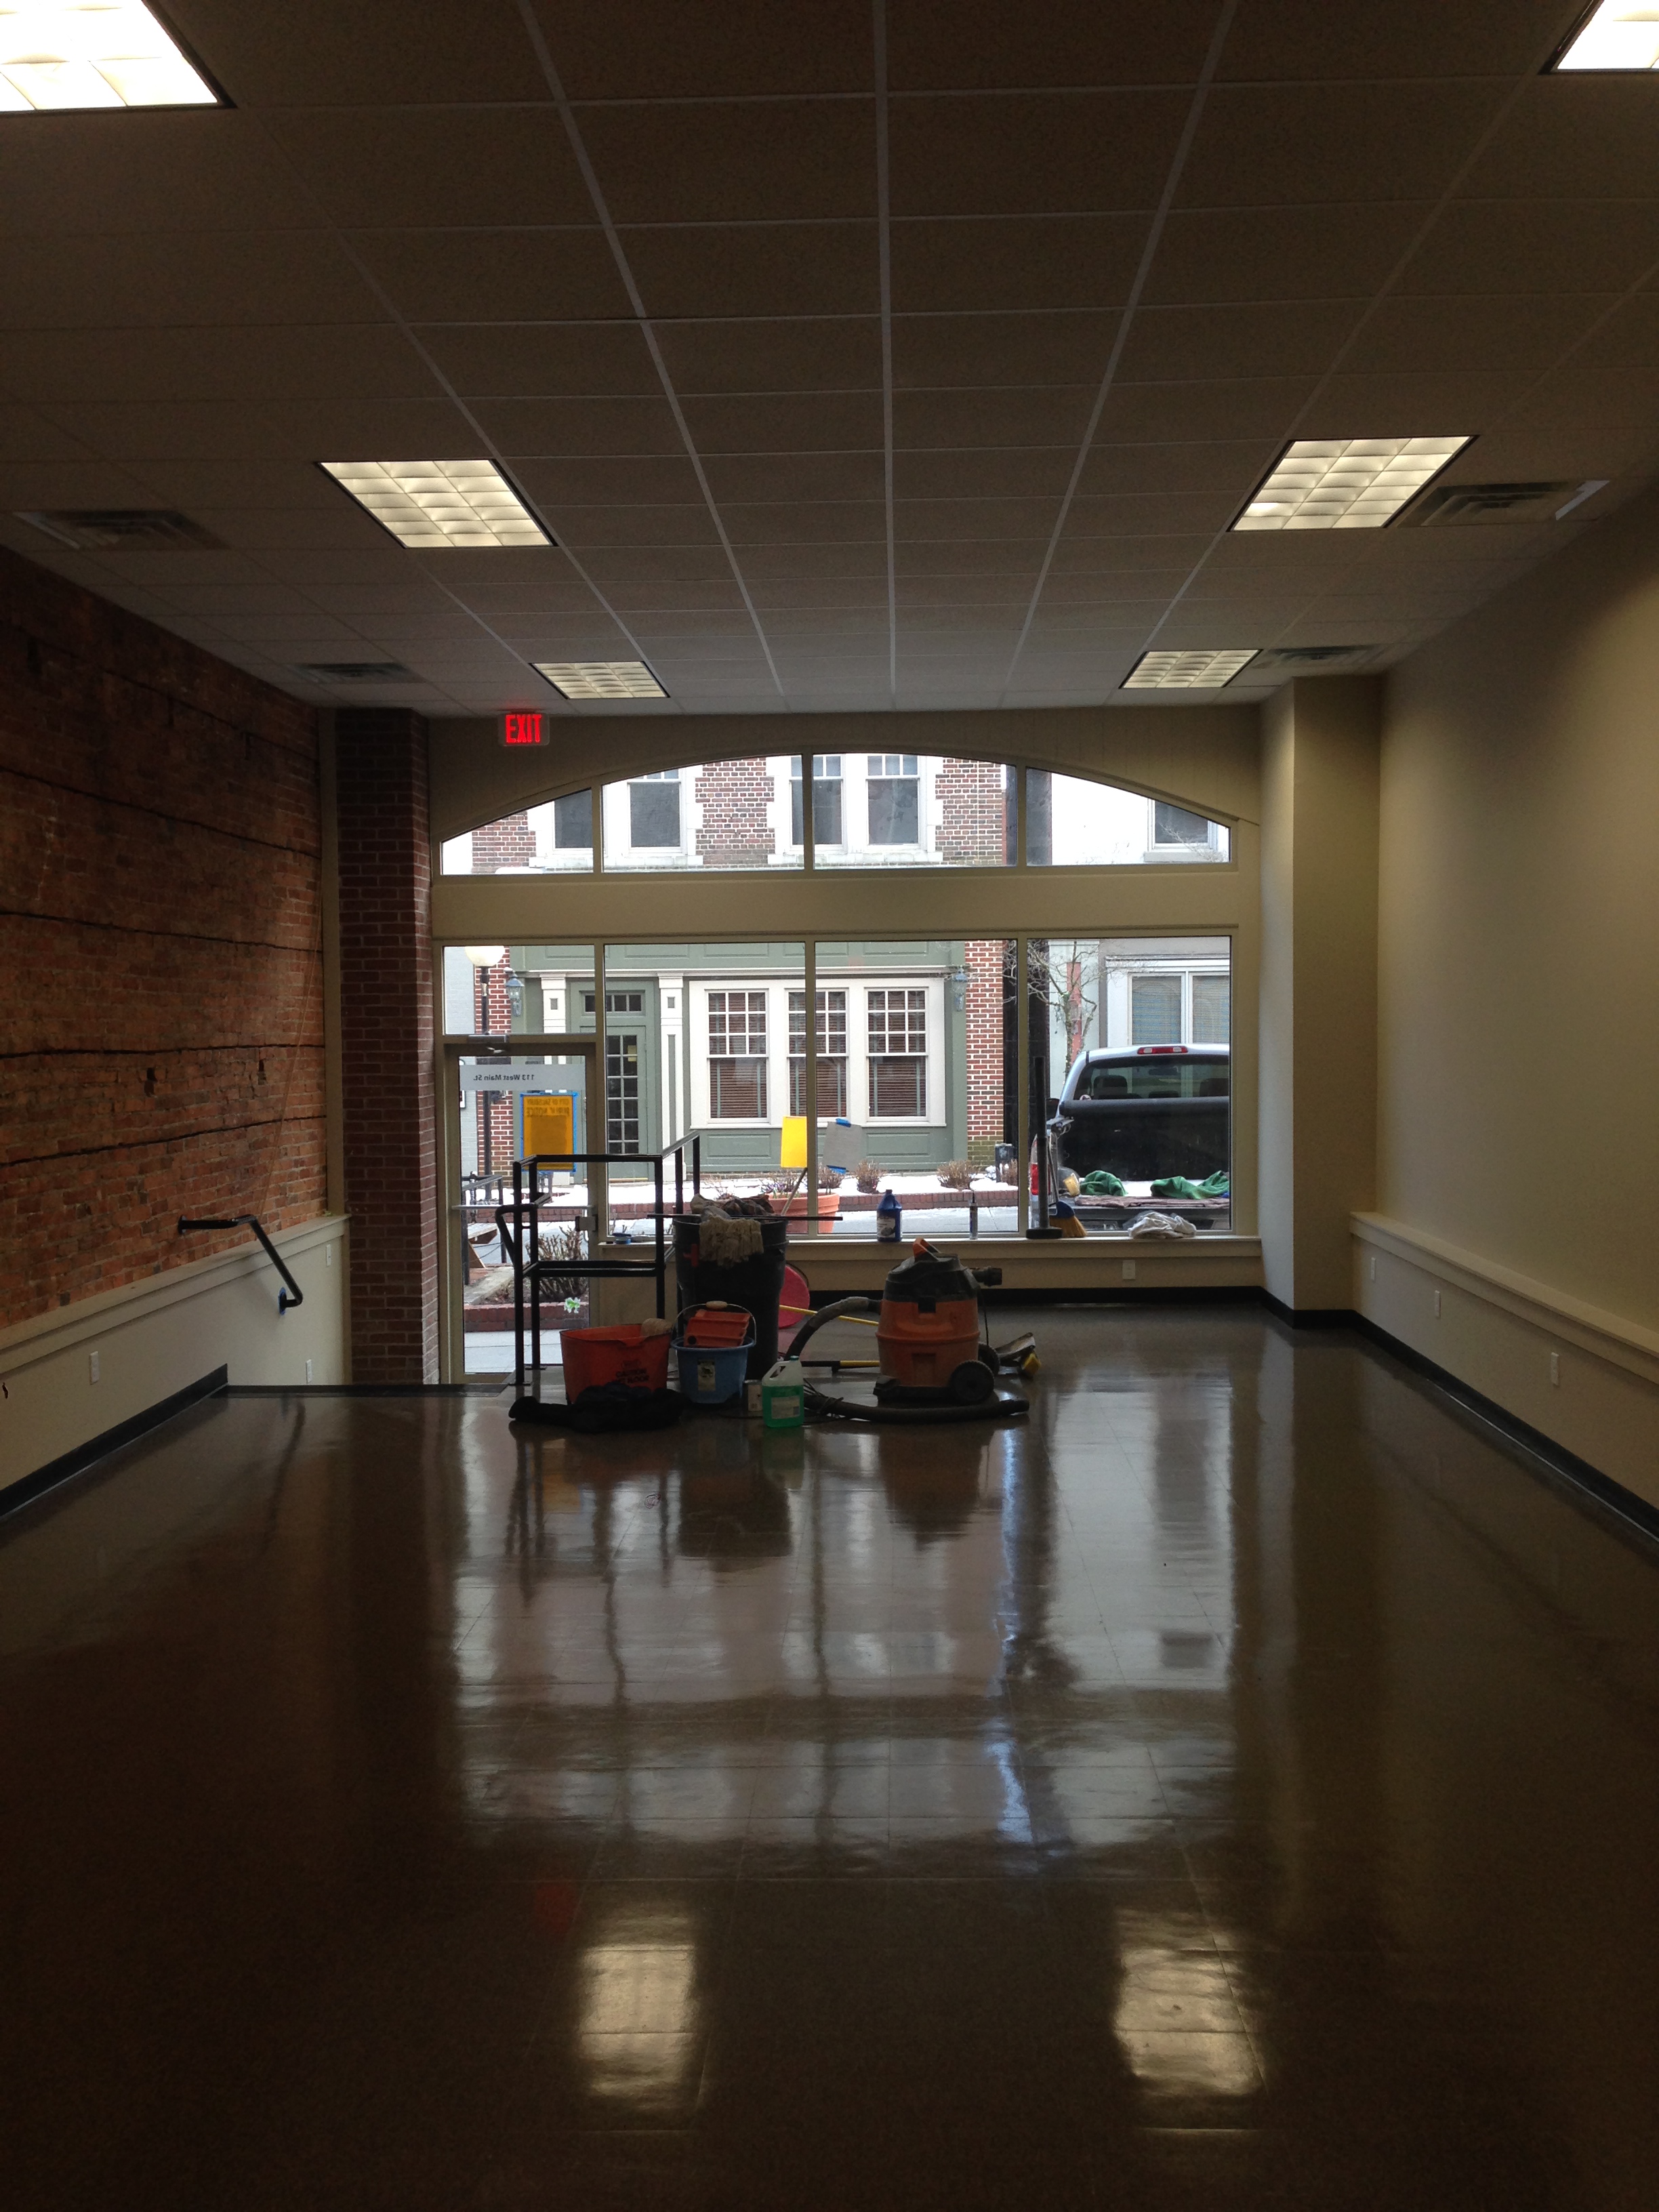
It turned out pretty good, but boy am I glad to be done with that project!!!
The whole place had to be gutted and re-framed. There was originally a sloped concrete area that lead up to a recessed door in the unit (we moved the windows and door to the front of building last summer). All the concrete had to be cut up and hauled out. It was 8-12" thick and the tippage at the concrete recycler was around 7 tons. I got in pretty good shape loading it all up but luckily I have a hydraulic dump trailer.


Once the concrete was removed and the old floor joists and posts supporting it were removed, I had to frame up a new floor system that came out level with the existing floor. A section of the old concrete was poured over a granite foundation so it wasn't going to come out. I had a guy come in to remove as much as possible with a jackhammer so that I could pour new concrete to make a level floor even with the new floor system - that was a major PITA, but it came out ok.
My brother wanted to retain as much of the exposed brick walls as possible so I built knee walls to house the electric. There is a small office and storage area in the rear of the unit and a hallway that connects to the adjacent building/unit which he owns as well. A little electric, HVAC, drywall, drop ceiling, trim, paint, tile and it's done!
The office hallway in the rear of the unit (that's my son flashing through the photo):

The main area of the storefront:

The front entrance with a custom welded railing by yours truly! The landing at the front of the door as well as about 12 feet back from the top of the steps is where all the concrete had to be poured to level the floor:

And a shot of the front windows (photo bombed by my Trundra):

It turned out pretty good, but boy am I glad to be done with that project!!!
Last edited by kawazx636; Apr 3, 2014 at 09:07 PM.
Apr 3, 2014 | 09:20 PM
#552
Thread Starter
Super Moderator
iTrader: (3)
Joined: Jan 2012
Posts: 3,218
Likes: 26
From: Salisbury, MD
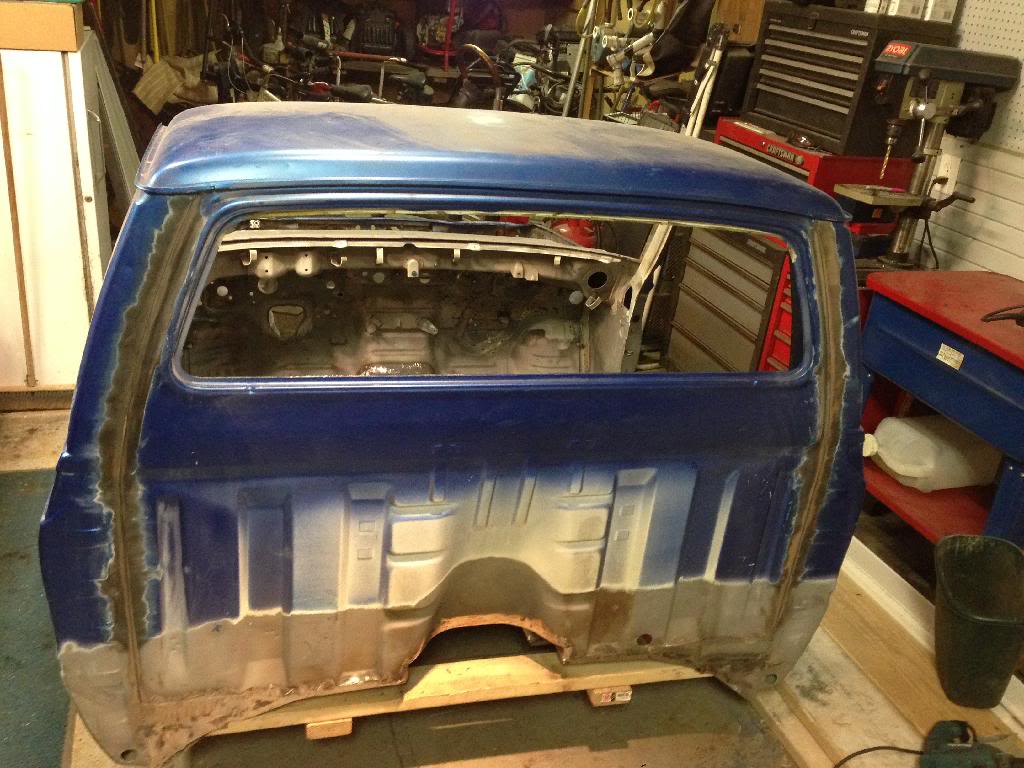
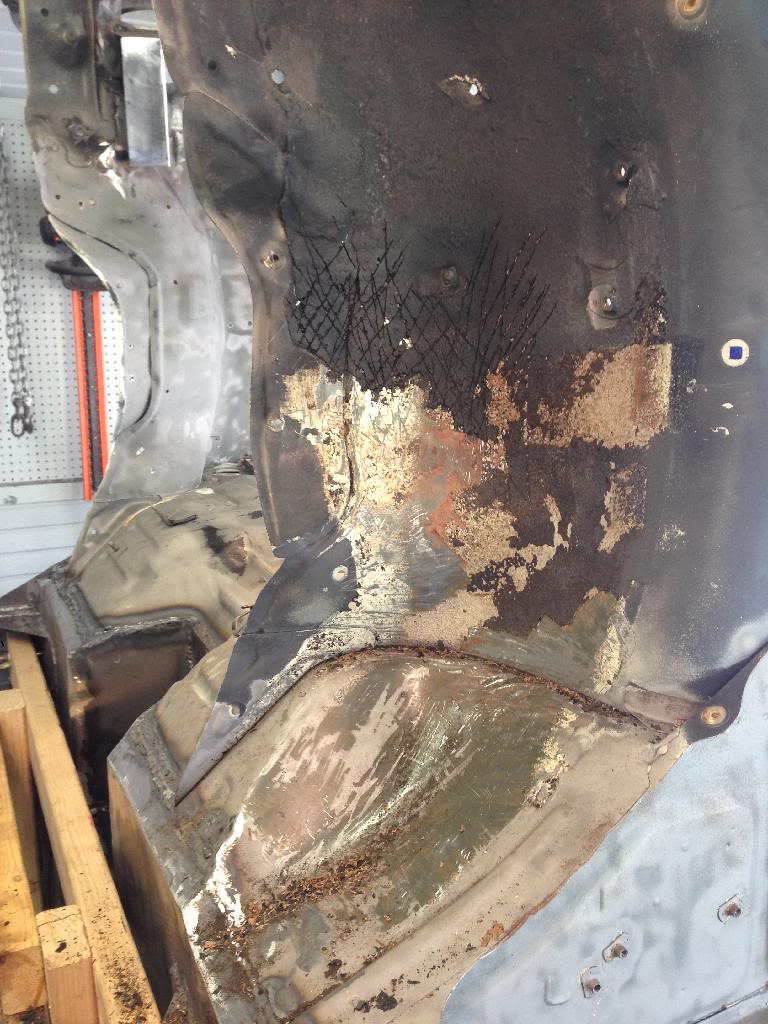
Now on to my truck! I decided that I didn't like the seam sealer on the rear corners of the cabs so I decided to shave the seam tonight.
Cut out all the seam sealer and hit it really good with a wire wheel.
Before removal:
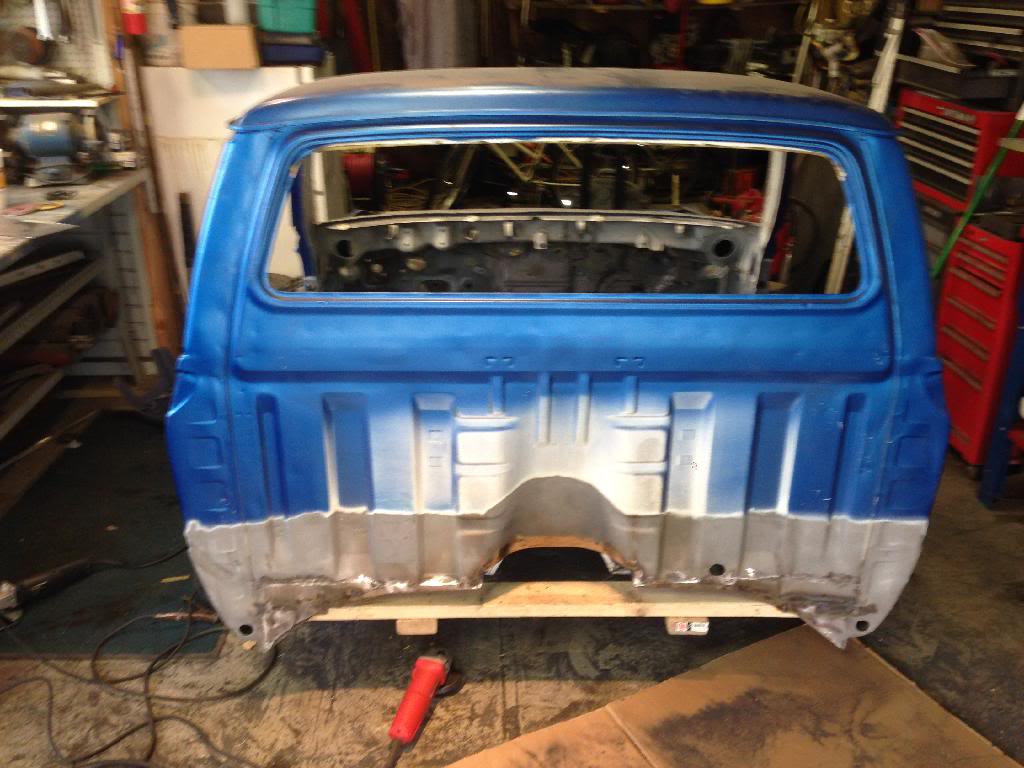
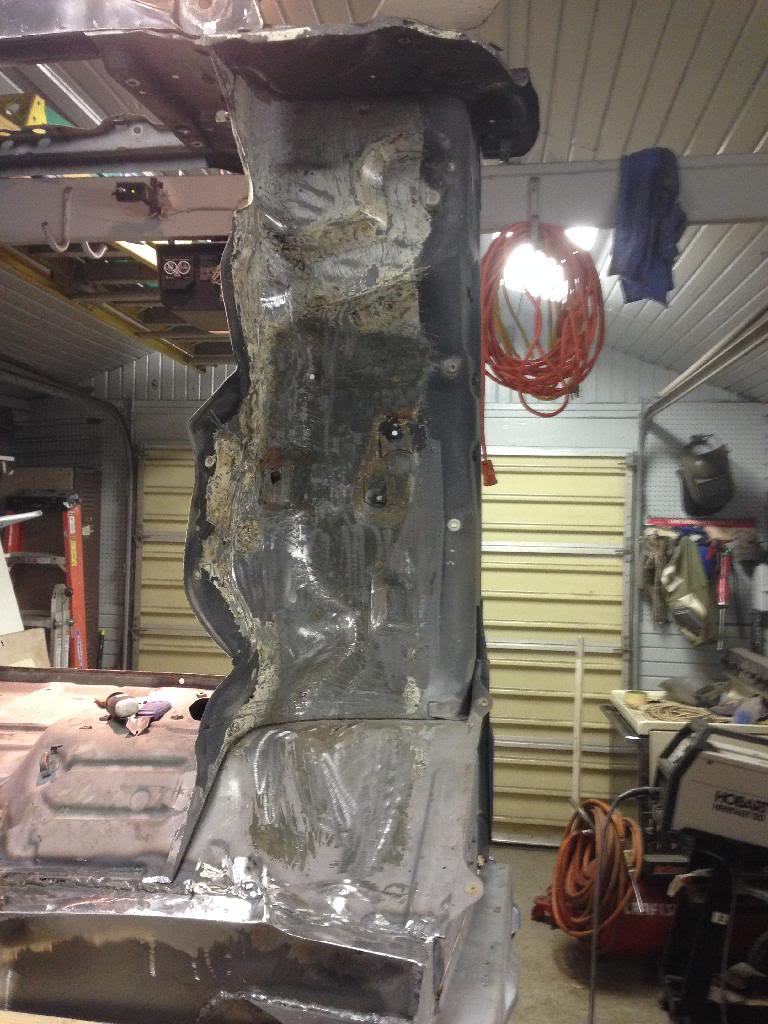
After removal:
I tacked the seam up:
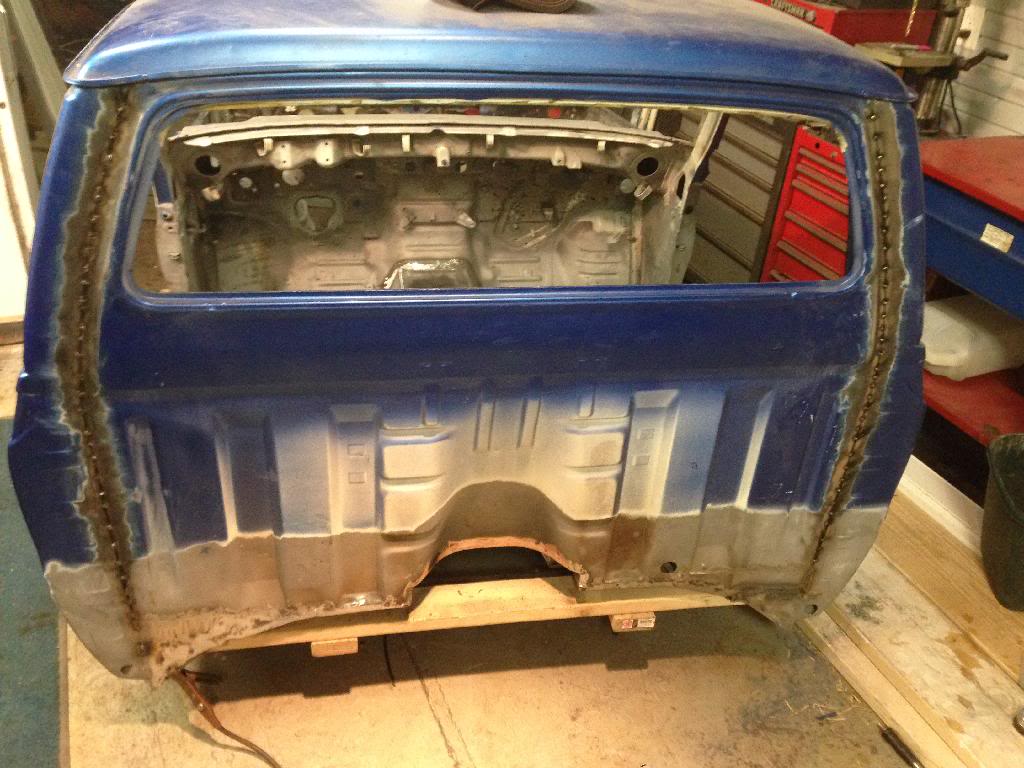
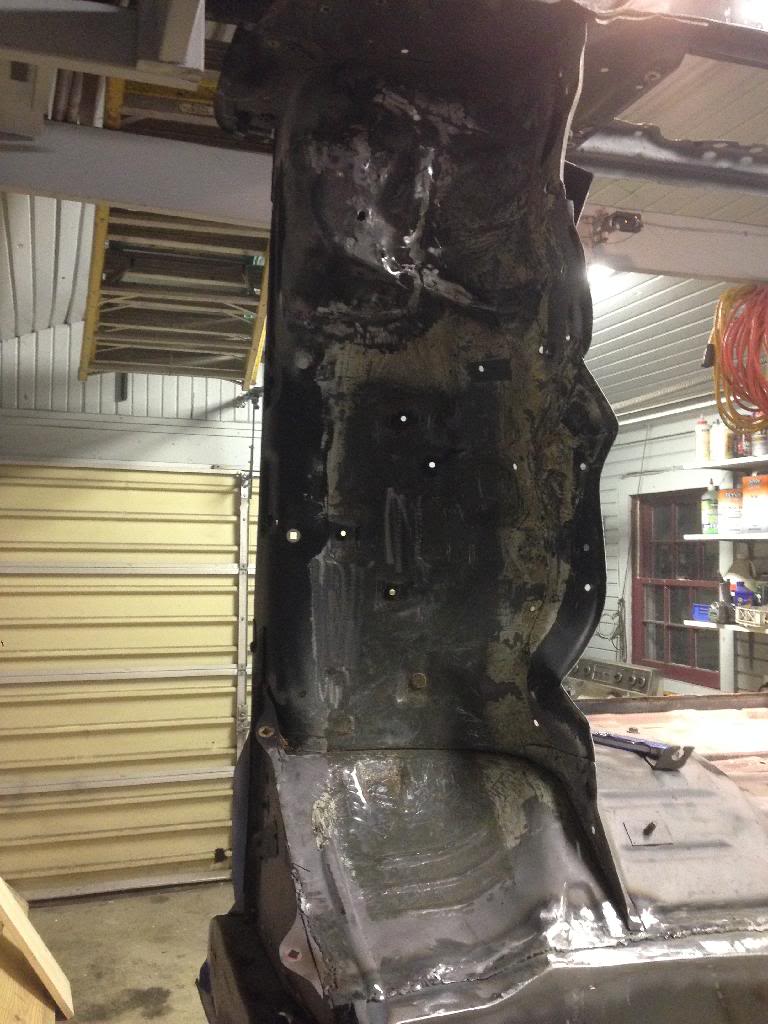
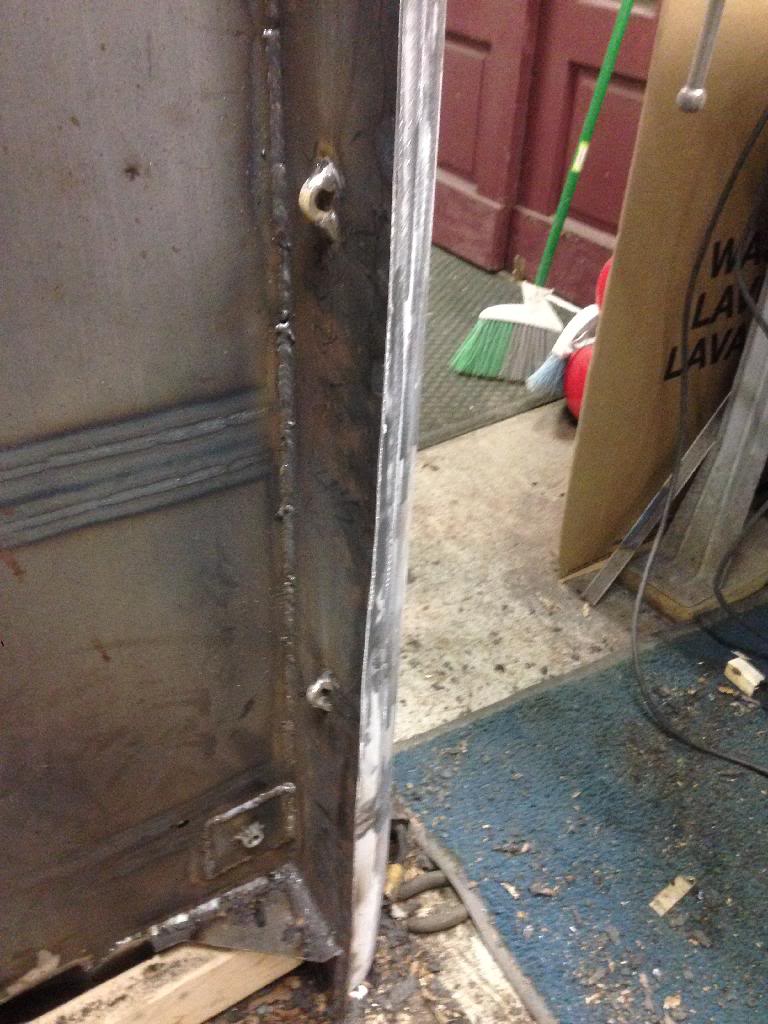
I was originally going to just tack it together and fill the rest with body filler since all I really needed to do is make sure that the seam doesn't flex and crack the body filler, but I decided to quit being lazy and fill the rest in with welds.
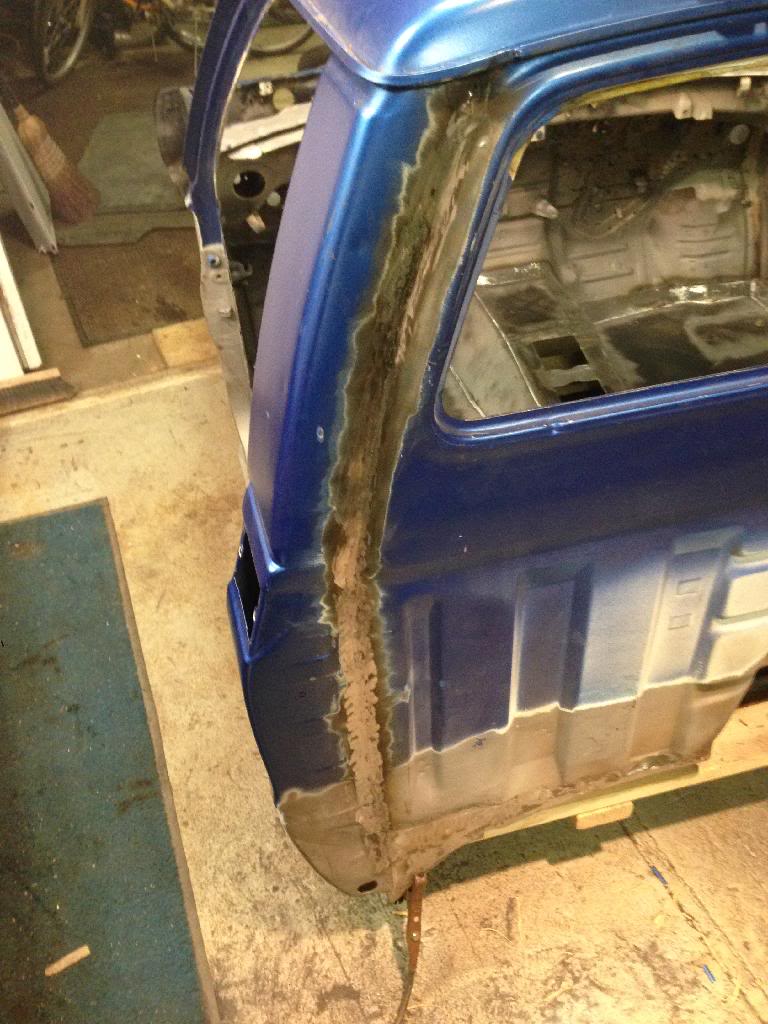
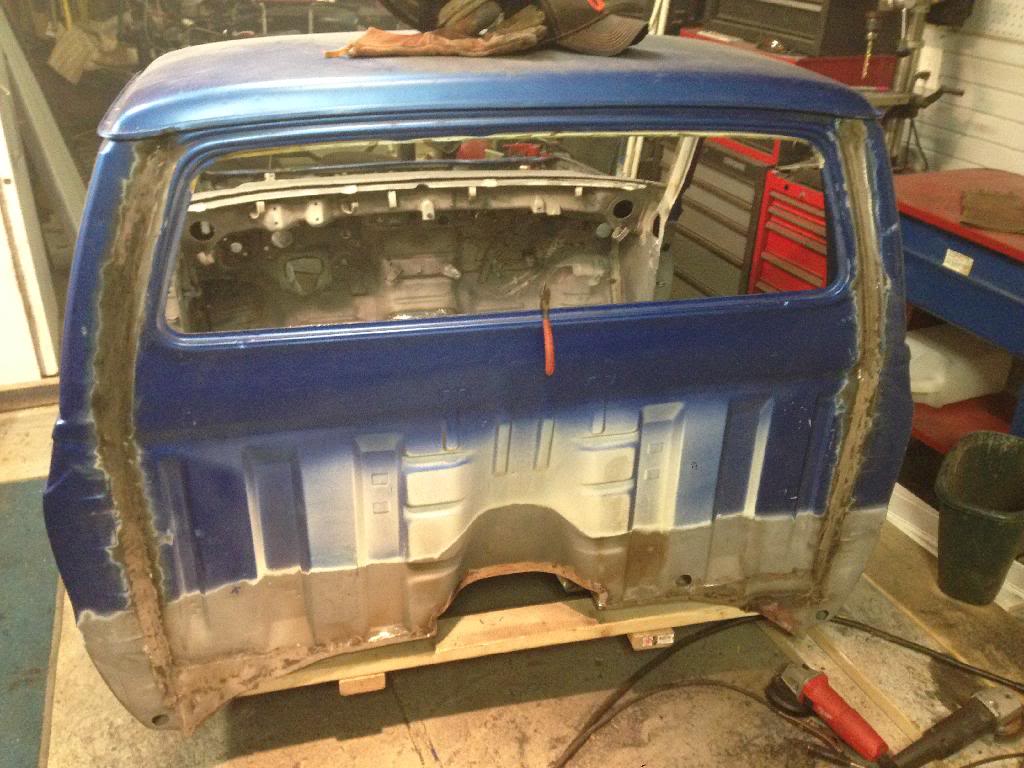
The welding went rather smooth but as some of you already know, welling on these damn truck bodies can be a bit of a challenge. I've never had such a difficult time welding on sheet metal as I have on this cab. I don't know what it is, perhaps the Japs used some retarded metal to build these trucks. A little more time with the finishing wheel and it will be ready for filler. Hopefully the weather will cooperated this weekend and I can do the final sandblasting and start the body filling!
Cut out all the seam sealer and hit it really good with a wire wheel.
Before removal:

After removal:

I tacked the seam up:

I was originally going to just tack it together and fill the rest with body filler since all I really needed to do is make sure that the seam doesn't flex and crack the body filler, but I decided to quit being lazy and fill the rest in with welds.


The welding went rather smooth but as some of you already know, welling on these damn truck bodies can be a bit of a challenge. I've never had such a difficult time welding on sheet metal as I have on this cab. I don't know what it is, perhaps the Japs used some retarded metal to build these trucks. A little more time with the finishing wheel and it will be ready for filler. Hopefully the weather will cooperated this weekend and I can do the final sandblasting and start the body filling!
Last edited by kawazx636; Apr 3, 2014 at 09:22 PM.
Apr 3, 2014 | 10:22 PM
#553

Registered User
Joined: Dec 2013
Posts: 20
Likes: 0
From: Orange County, CA
I'm happy to see progress once again! I am also happy to see that you removed that ugly seam sealer. I was just looking at that on my truck. I really don't like the look of the back of the cab. I would love to weld mine smooth as well and get a solid rear window to clean up the look back there.
Have you figured out a paint scheme yet?
Have you figured out a paint scheme yet?
Apr 4, 2014 | 04:10 AM
#555
Registered User
Joined: Feb 2014
Posts: 351
Likes: 0
I've never even given the seal a thought
Till now
I will also mess with mine when the time comes
Your right it's so ugly and should be smooth
They used scrap metal from ww2 (not good millitary scrap just from bombing and and the h bombs) and tried to keep them as light as possible for shipping and steel shortage
Even though we gave them millions of tons of mothballed ships after the war
They used the good steel on their infrastructure
Apr 5, 2014 | 08:02 PM
#559
Thread Starter
Super Moderator
iTrader: (3)
Joined: Jan 2012
Posts: 3,218
Likes: 26
From: Salisbury, MD
I went to battle today against all the undercoating in the wheel wells. My sandblaster won't even come close to removing it so I had to do it the old fashion way with some putty knives and paint scrappers.
Half way done one side:
And all removed:
I even decided to weld on a couple of wire retainers too. I just cut a few chain links in half and welded them on both inside rockers and along the tranny tunnel. They are primarily there just so that I have something to zip tie wires and such to.
Touched up a few odds and ends too because Tomorrow is a sandblasting day!
Half way done one side:

And all removed:


I even decided to weld on a couple of wire retainers too. I just cut a few chain links in half and welded them on both inside rockers and along the tranny tunnel. They are primarily there just so that I have something to zip tie wires and such to.

Touched up a few odds and ends too because Tomorrow is a sandblasting day!
Apr 5, 2014 | 08:27 PM
#560
Thread Starter
Super Moderator
iTrader: (3)
Joined: Jan 2012
Posts: 3,218
Likes: 26
From: Salisbury, MD
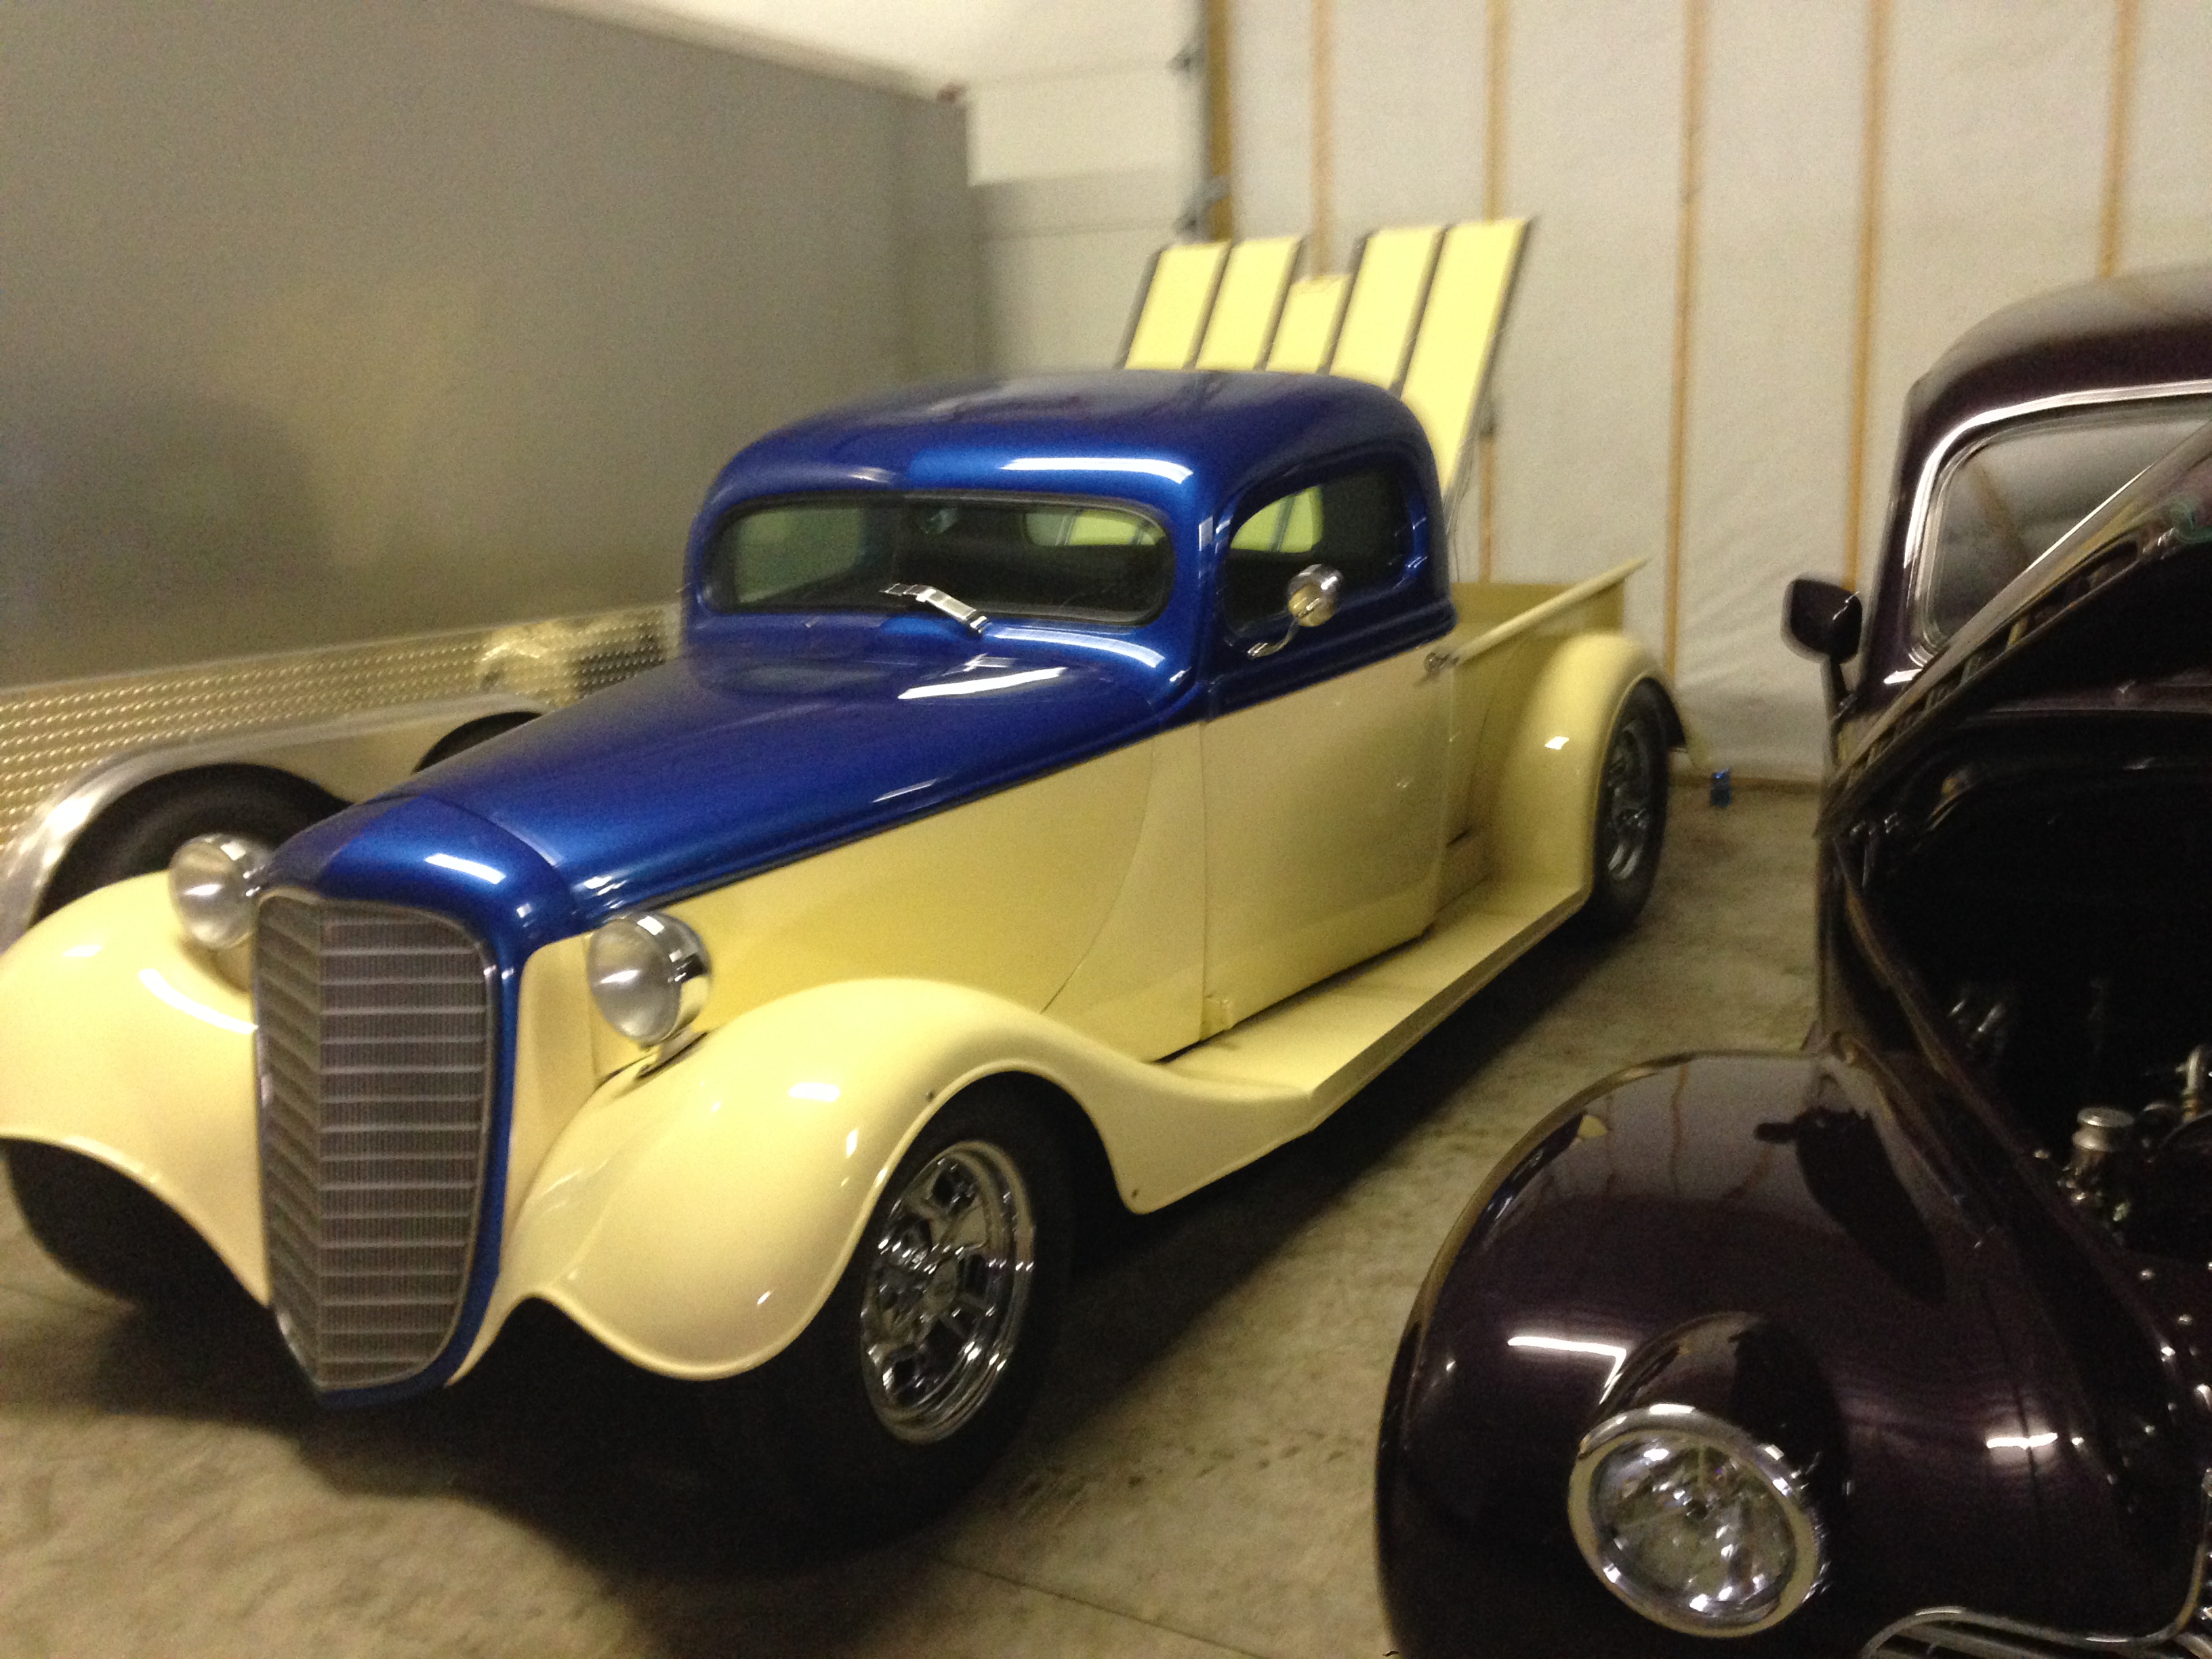
I almost forgot to mention, I went my my Pop's friend's garage (more like a warehouse) today to help him drop his new engine in his '67 Camaro - He went with a fully built 455. I did 't get any pictures of the engine going in, but I did snap some of his garage and other cars. This garage is is my ultimate dream garage - I think it something like 80'x140'
Here's his son's "32 Chevy Pickup." This thing is completely custom - chopped, 2000 S-10 extreme chassis, 327 engine, the grille is off a 30's Lincoln continental, fenders are off a later model Chevy. The thing is sick.
Here are some more:
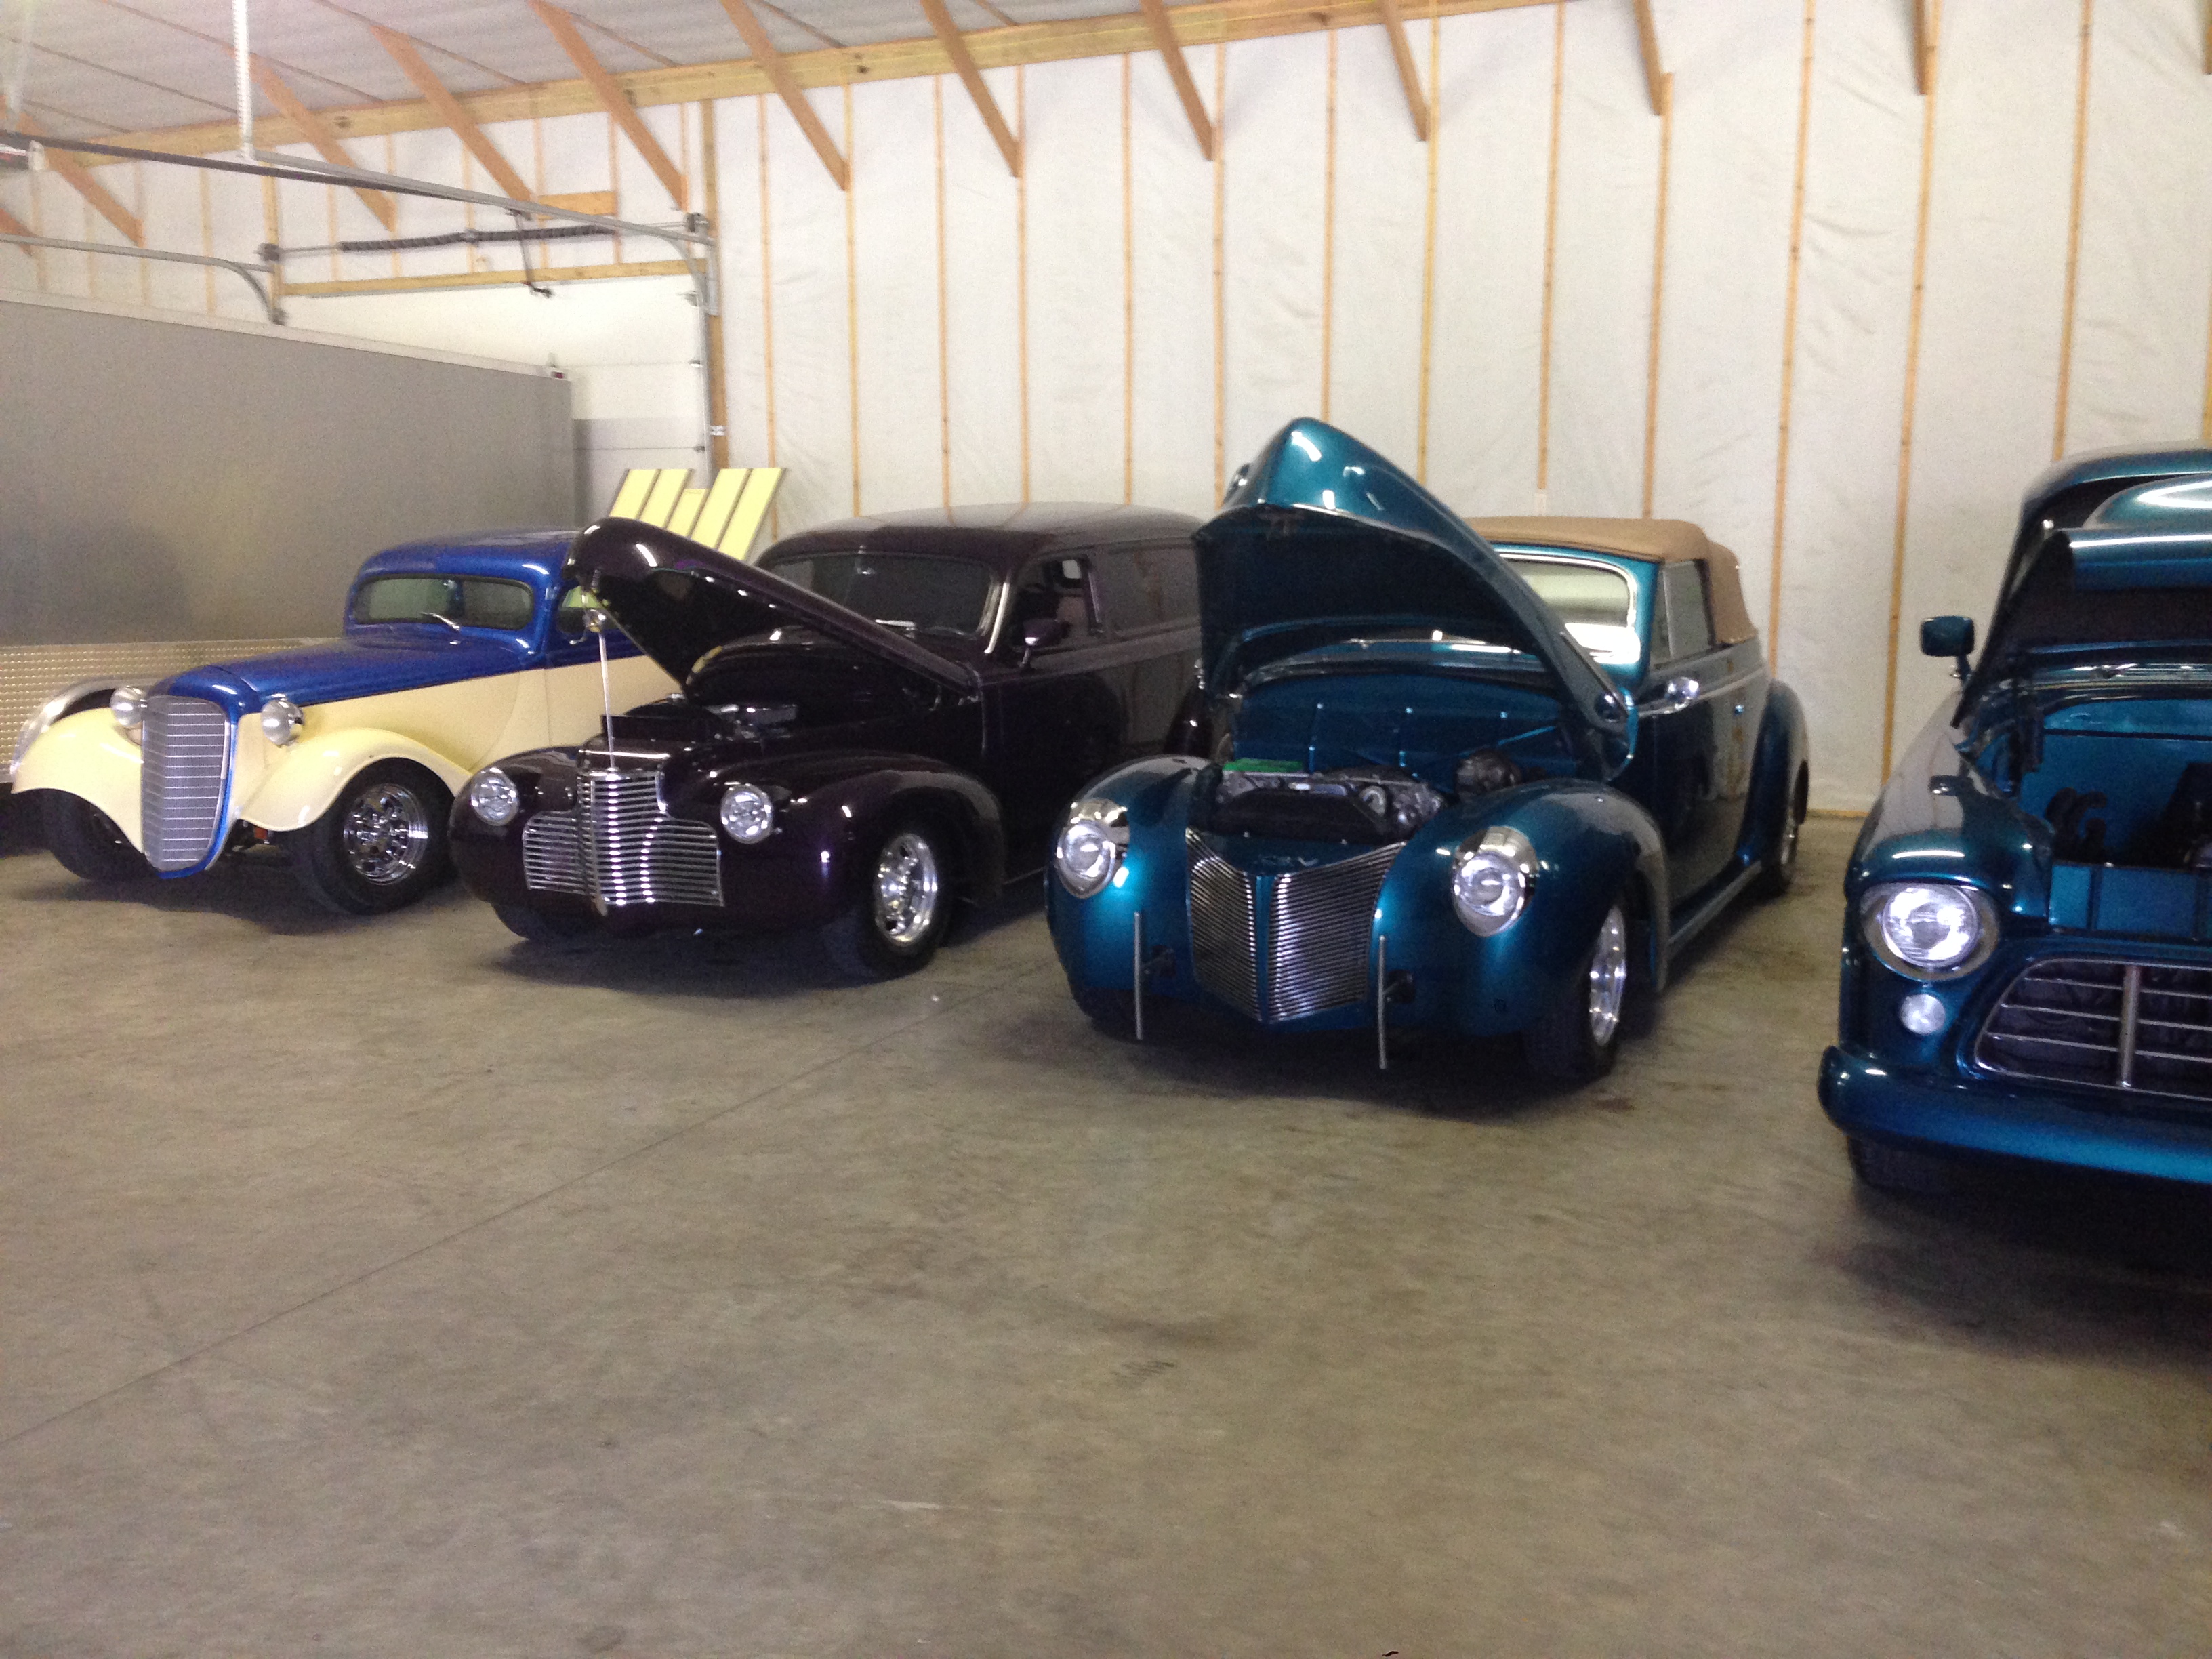

Annnnnd more... That's actually my Pop's green '68 RS Camaro (he stores it there during the winter)
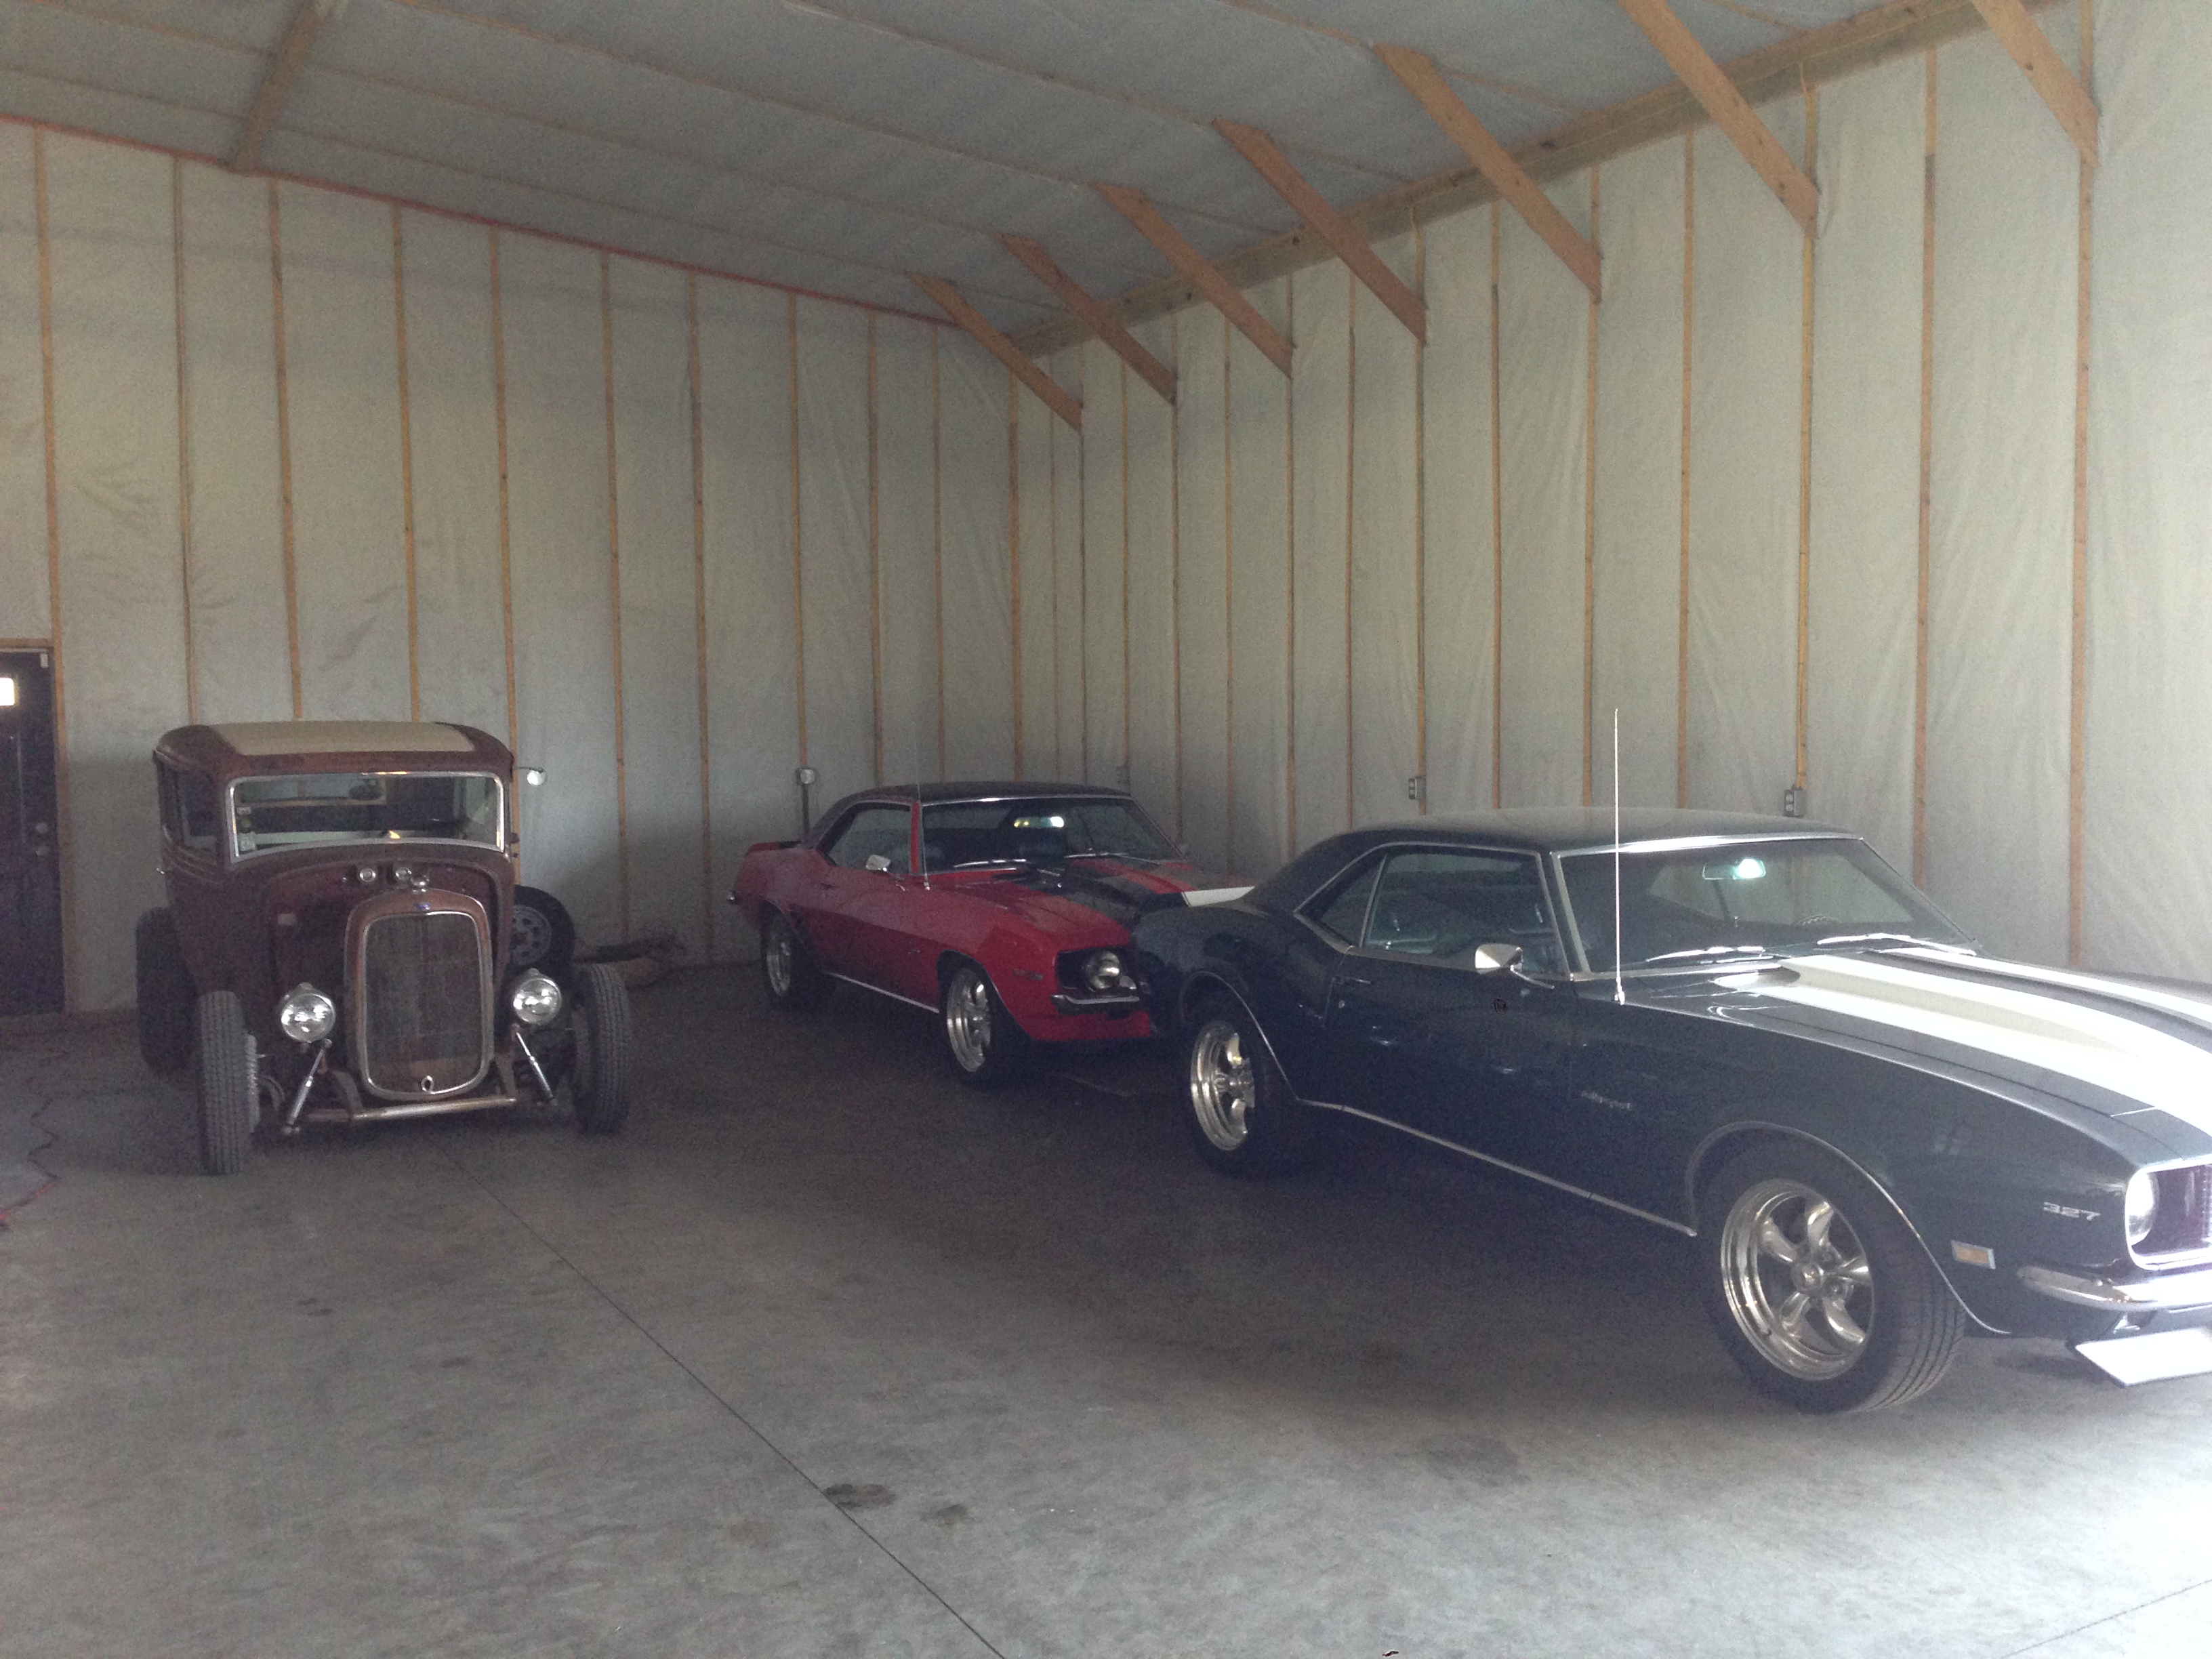
And here is the '67 Camaro that we dropped the 455 in:
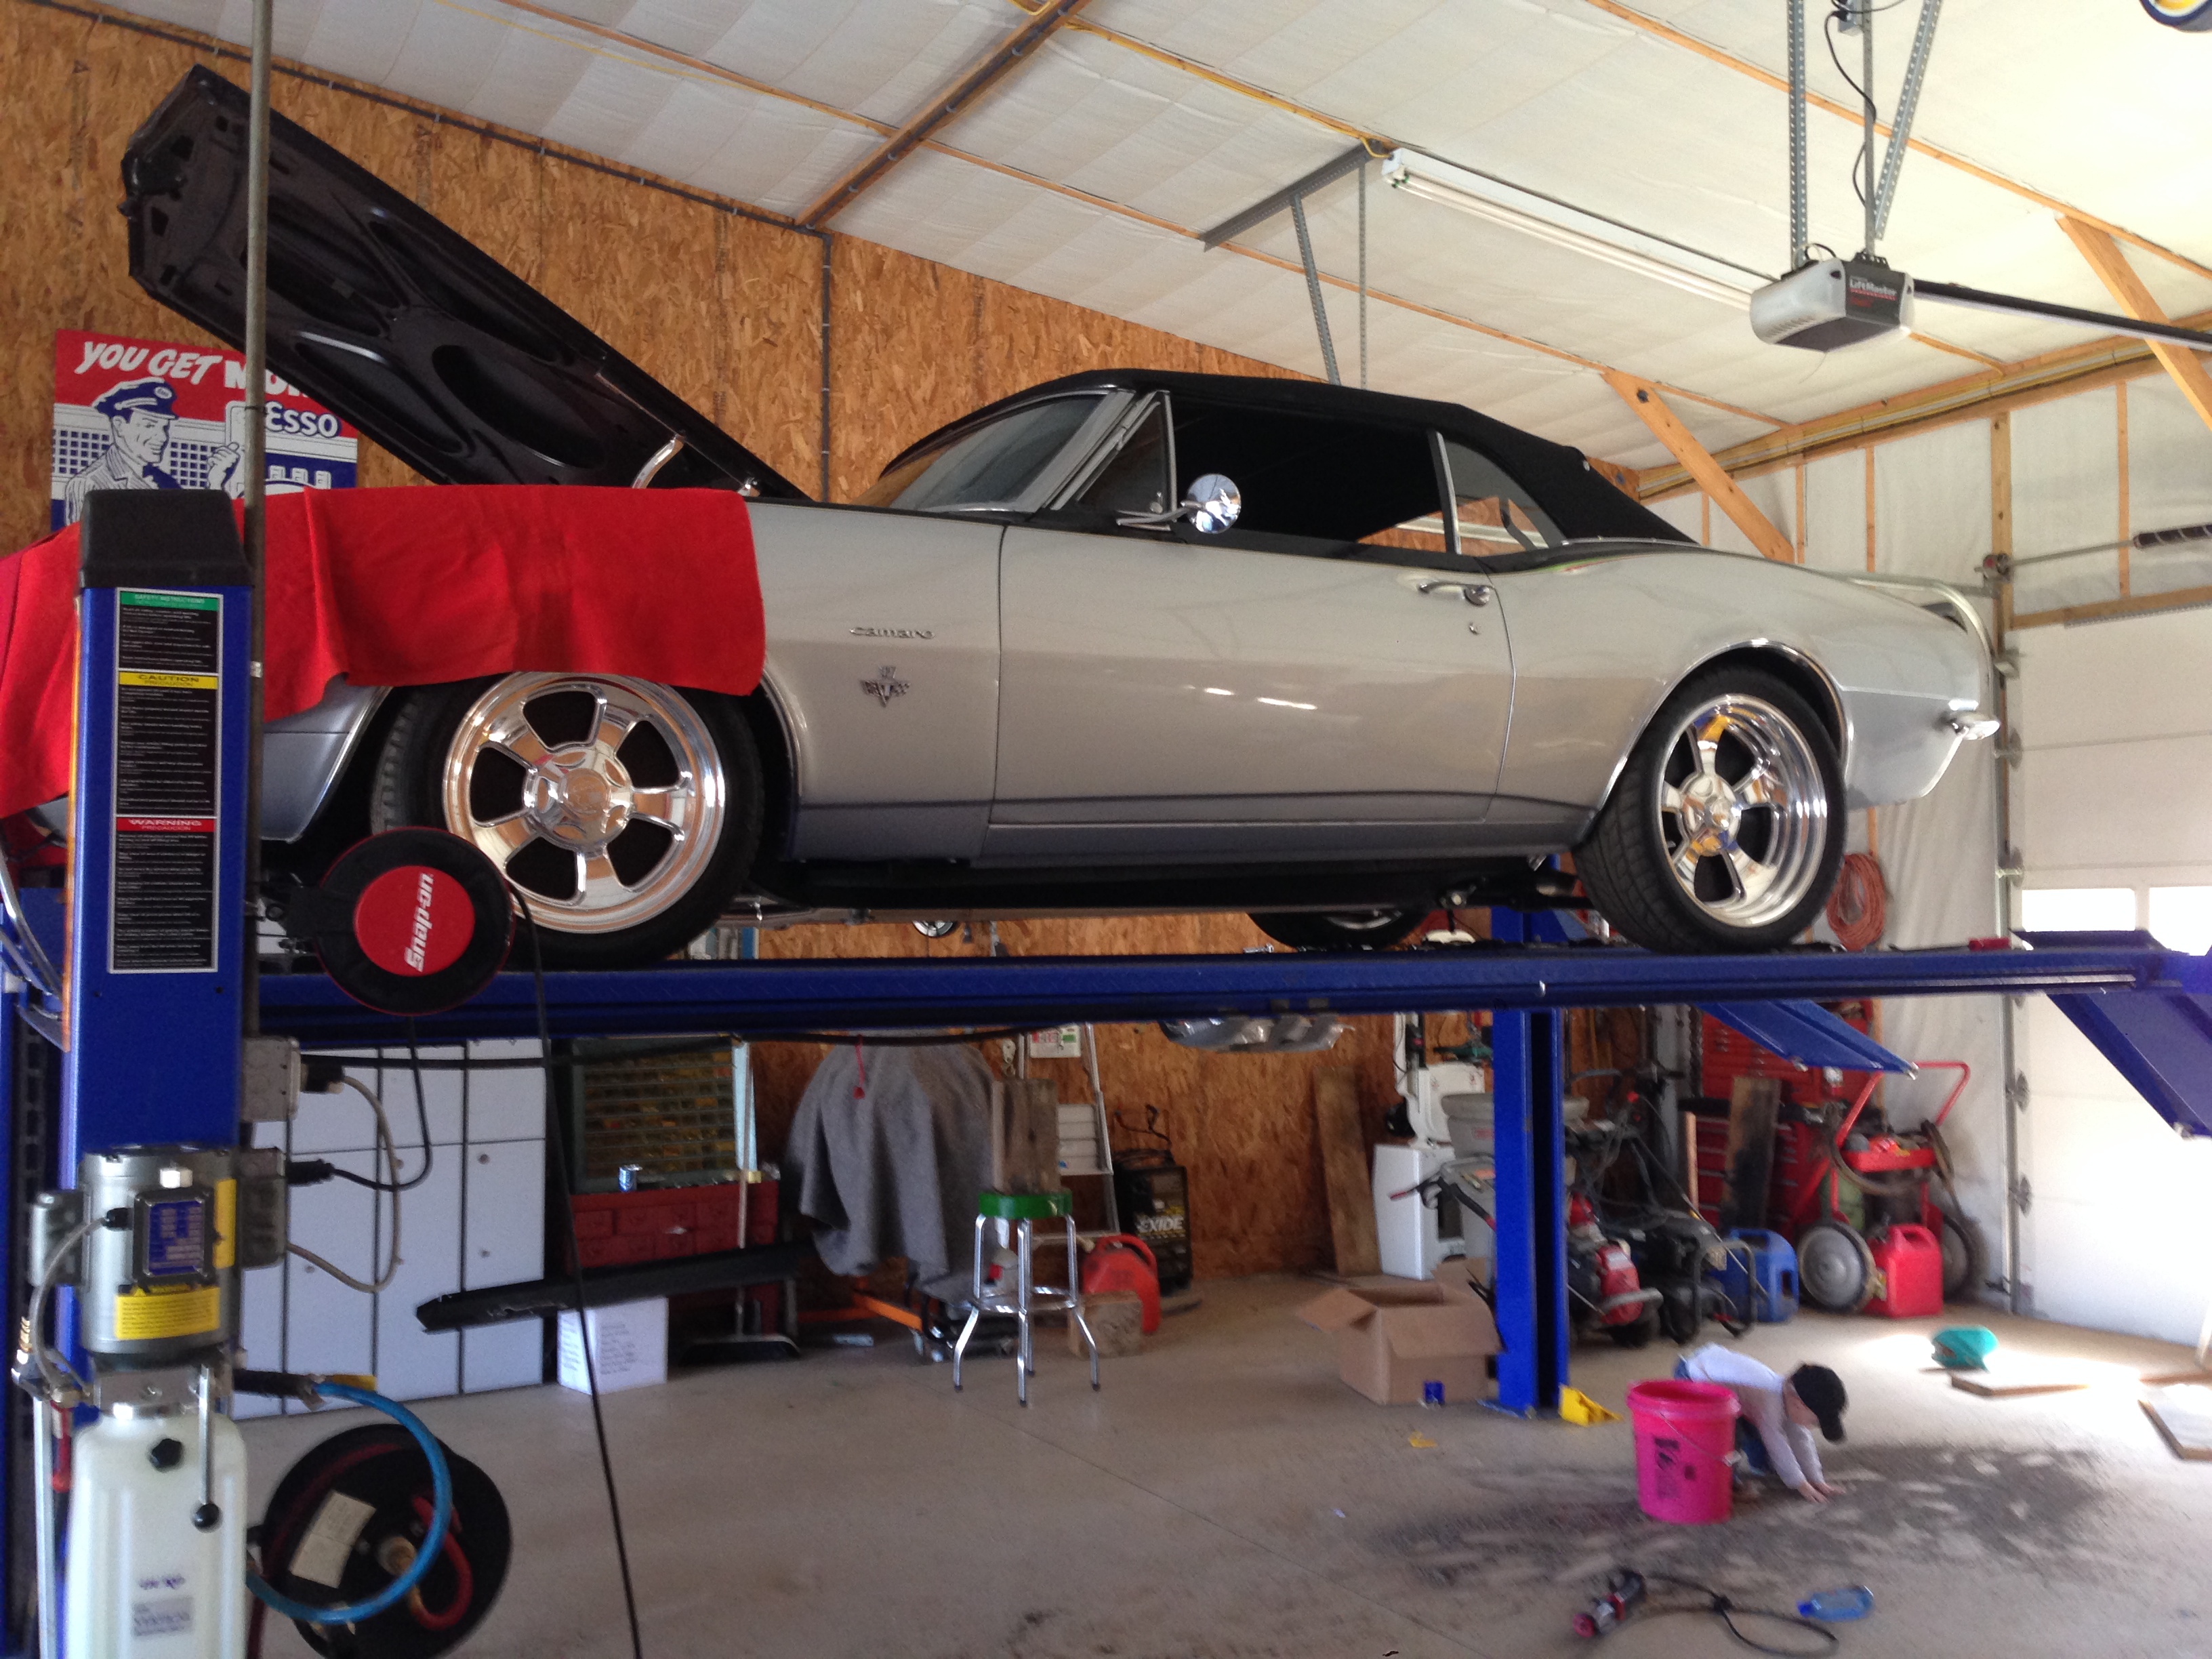
I figured some of you guys would appreciate these.
Here's his son's "32 Chevy Pickup." This thing is completely custom - chopped, 2000 S-10 extreme chassis, 327 engine, the grille is off a 30's Lincoln continental, fenders are off a later model Chevy. The thing is sick.

Here are some more:


Annnnnd more... That's actually my Pop's green '68 RS Camaro (he stores it there during the winter)

And here is the '67 Camaro that we dropped the 455 in:

I figured some of you guys would appreciate these.
Last edited by kawazx636; Apr 5, 2014 at 08:31 PM.


