
KawaZX636's 1983 Toyota Pickup Restoration
 Jan 20, 2014 | 11:52 AM
#501
Thread Starter
Super Moderator
iTrader: (3)
Joined: Jan 2012
Posts: 3,218
Likes: 26
From: Salisbury, MD
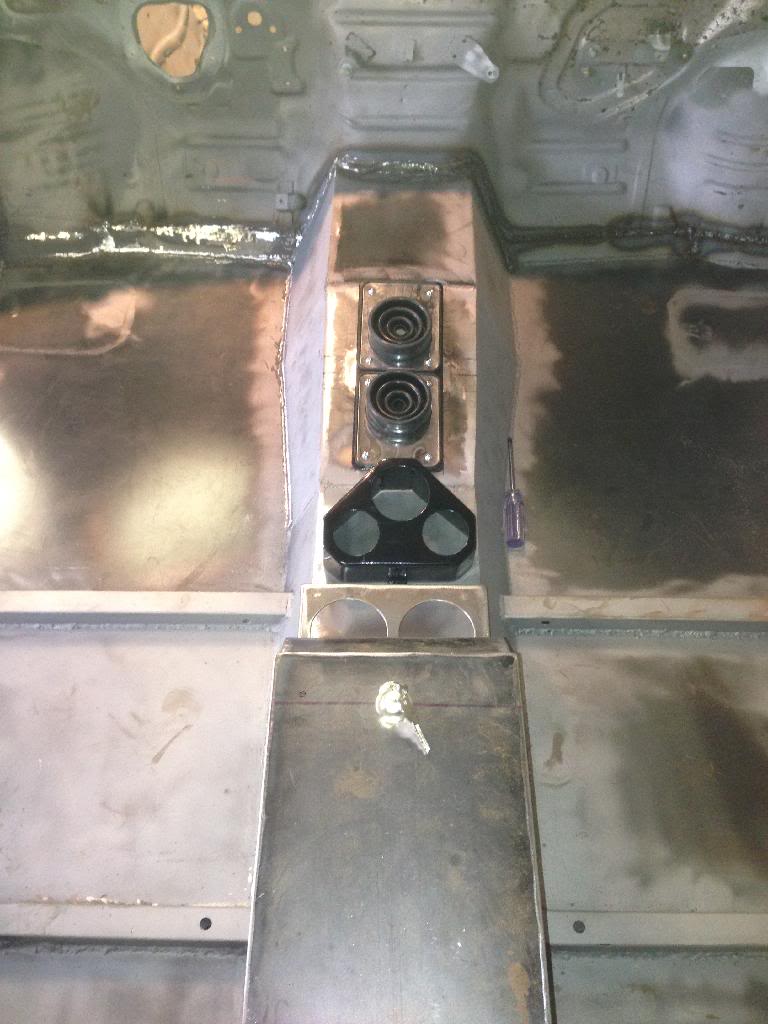
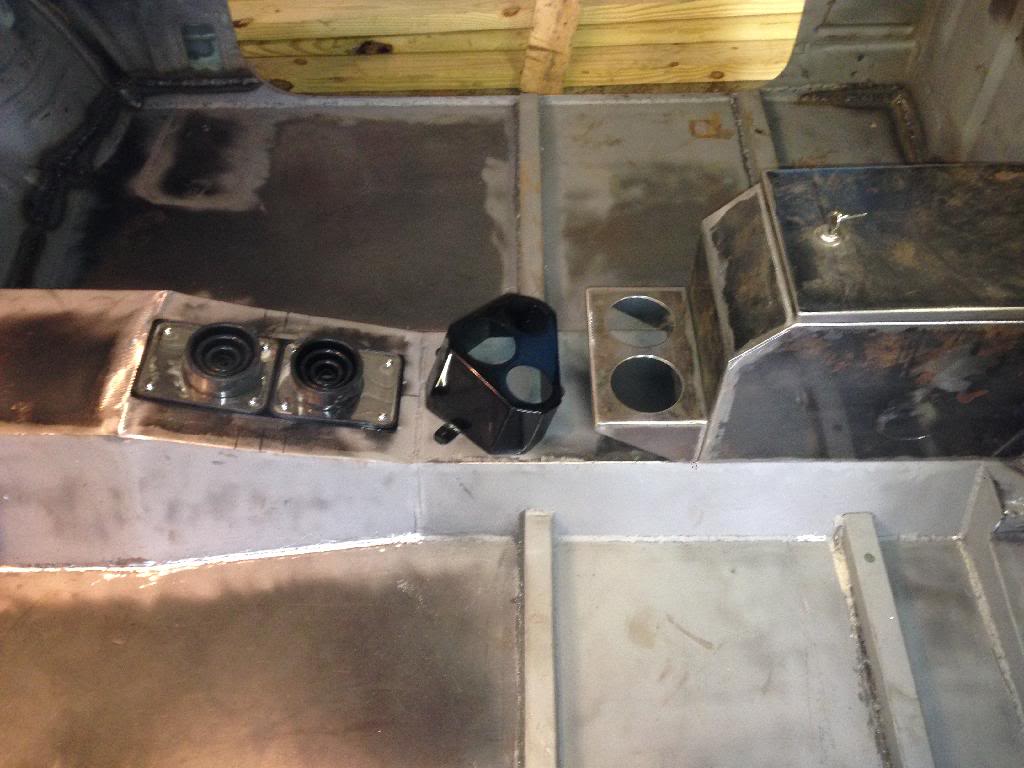
Finished mocking up the shift boots and plate today. Powdercoated the plate:
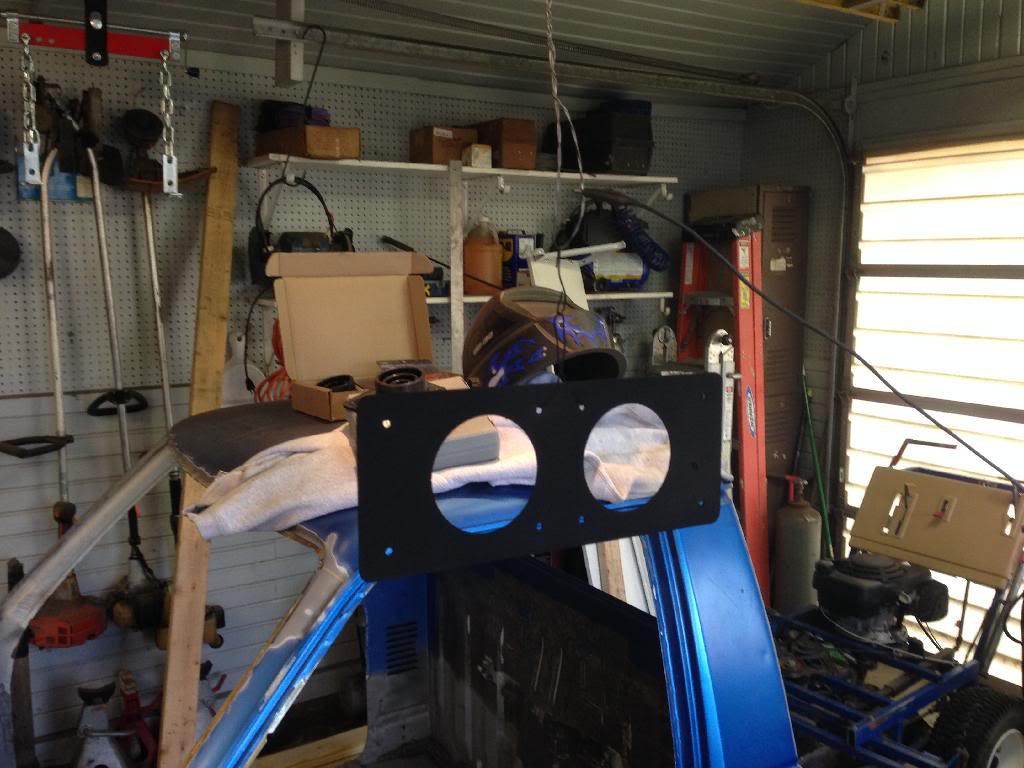
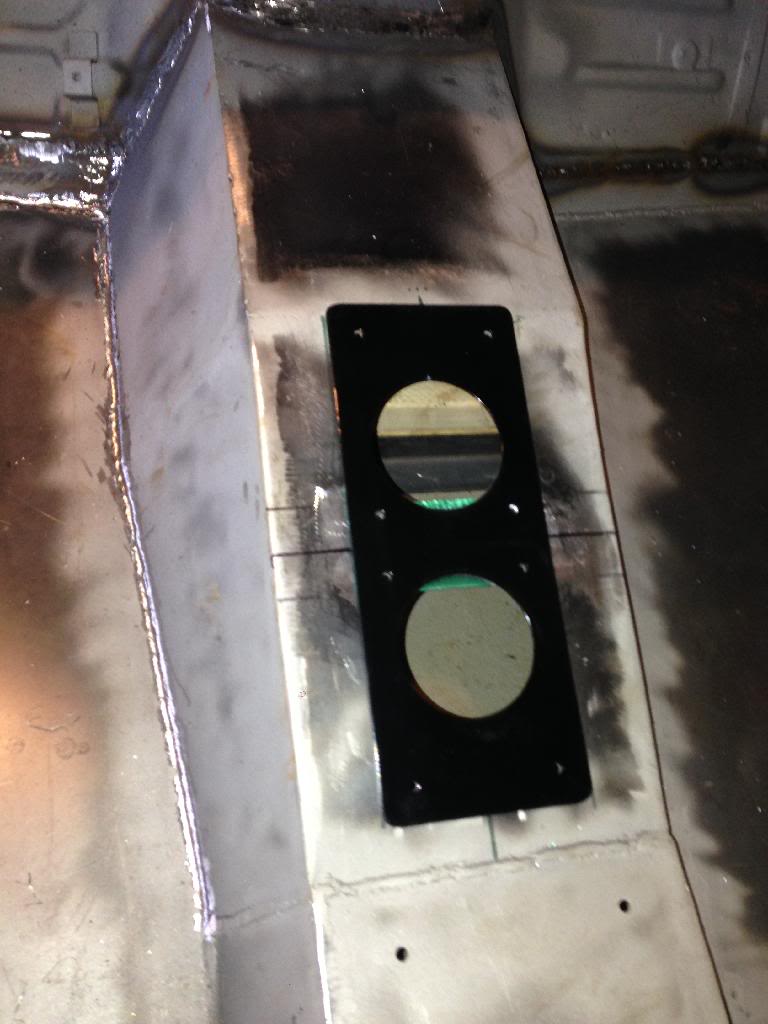
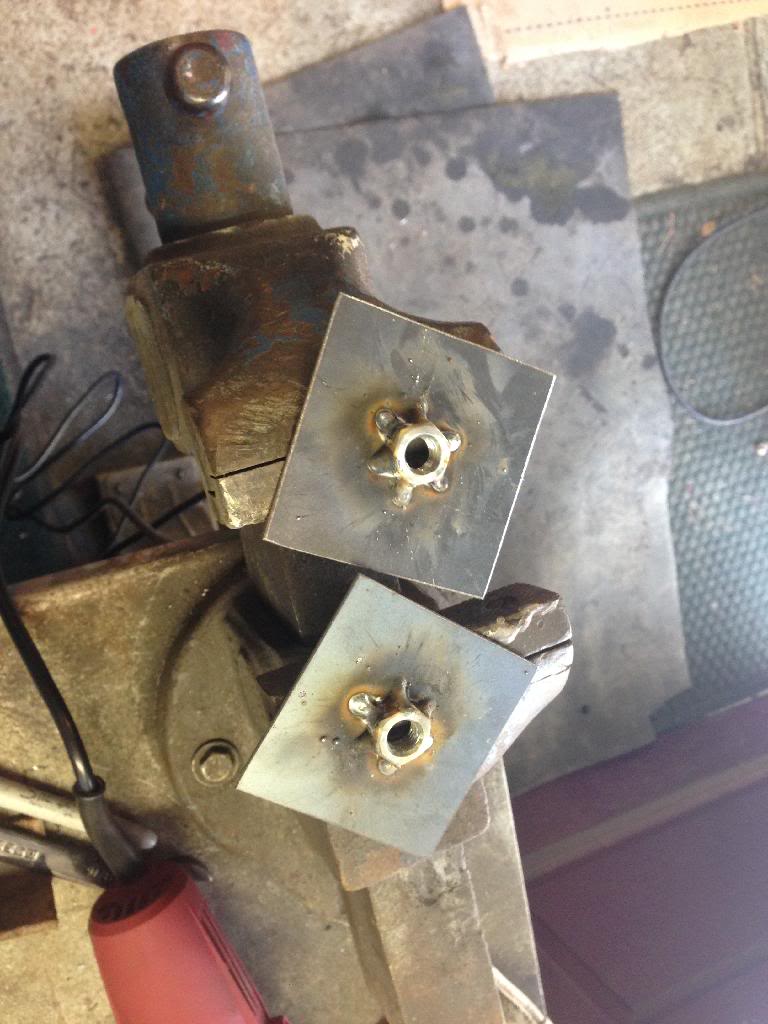
Drilled the holes in the tunnel and welded in some square nuts underneath

Used some chrome allen bolts and nylon washers to bolt down the shift boots and plate:
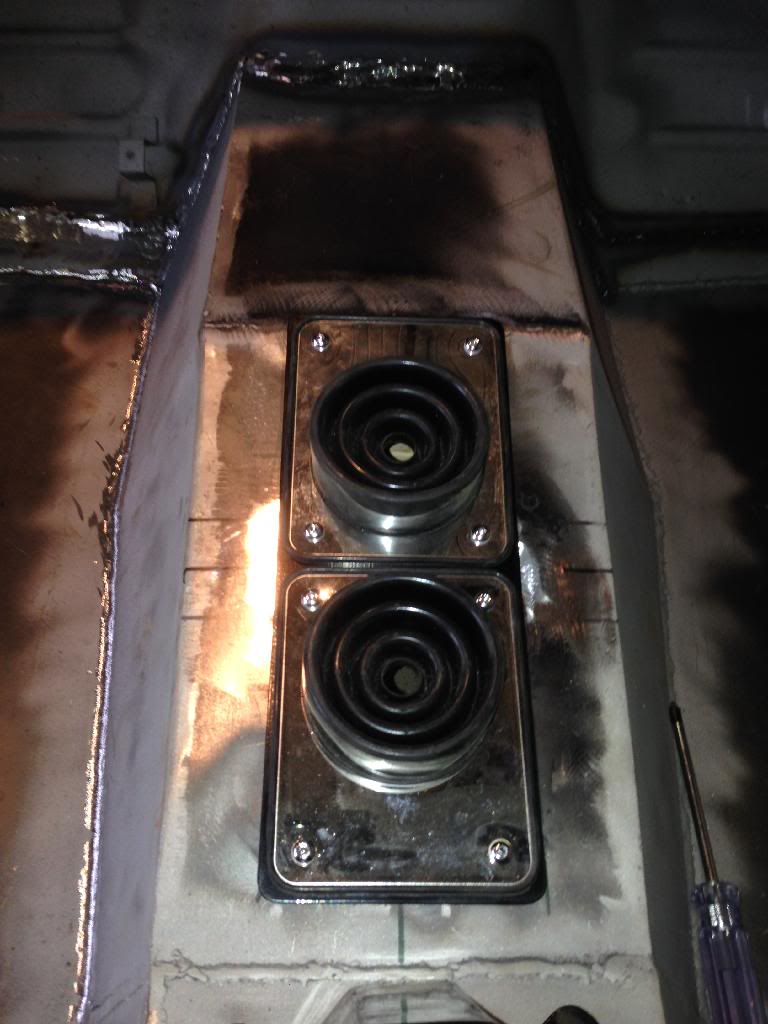
Turned out pretty good looking, let's just hope my measurements are correct so that the shifters actually come through the boots like they are supposed to....
There's 6-12" of snow forecasted tomorrow and no heat in the garage (unless I fire up my powdercoating over and leave it open) so I doubt I'll get to more weld dressing this week.


Drilled the holes in the tunnel and welded in some square nuts underneath

Used some chrome allen bolts and nylon washers to bolt down the shift boots and plate:

Turned out pretty good looking, let's just hope my measurements are correct so that the shifters actually come through the boots like they are supposed to....


There's 6-12" of snow forecasted tomorrow and no heat in the garage (unless I fire up my powdercoating over and leave it open) so I doubt I'll get to more weld dressing this week.
 Jan 21, 2014 | 08:51 PM
#503
Thread Starter
Super Moderator
iTrader: (3)
Joined: Jan 2012
Posts: 3,218
Likes: 26
From: Salisbury, MD
I have a little FYI for some of you guys out there that may mess with your seat belts at some point in time. Obviously since I cut out my floorpan with it went the bottom seat belt mounts near the doors and the buckle mounts near the tunnel. Luckily, the bolts that fasten down the retractor and the the upper shoulder strap mount were good; However the bottom 4 bolts that bolt to the floor pan were in rough shape - one actually snapped during removal. I took one of the good bolts that I had left to the local hardware store to match it up with some new bolts and nuts to weld into the floorpan. To my surprise, they ended up being 7/16x20 grade 8 flange bolts. Immediately this threw up a red flag since I have yet to pull a single standard fastener off the truck. So I went home to do some research... Turns out that a M11 x 1.25 (the correct size) bolt is nearly identical to a 7/16x20 bolt - in fact the nuts will cleanly thread on to each other. For me this isn't a problem as I will be buying new nuts to weld into the floorpan and using the matching bolts, but if any of you are looking to replace your seat belt bolts BEWARE! Like, I said they aren't much different, but when it comes to seatbelts I'm not one to take a gamble since I've had them save my life twice.
Tomorrow I plan on grabbing some 7/16x20 x1.25" bolts and some 7/16x20 nuts so that I can get my seat belt mounts welded in. I'll weld the nuts to some steel flat bar to give the mounting points extra reinforcement prior to welding to the floorpan from underneath. Just another little step that I have somehow neglected this whole time!
Tomorrow I plan on grabbing some 7/16x20 x1.25" bolts and some 7/16x20 nuts so that I can get my seat belt mounts welded in. I'll weld the nuts to some steel flat bar to give the mounting points extra reinforcement prior to welding to the floorpan from underneath. Just another little step that I have somehow neglected this whole time!


 Jan 31, 2014 | 05:41 AM
#507
Thread Starter
Super Moderator
iTrader: (3)
Joined: Jan 2012
Posts: 3,218
Likes: 26
From: Salisbury, MD
Again, it's been a little too cold to work on my truck lately - it hasn't been above freezing for well over a week now and it's been snowing on it off for the past two weeks. But I was trolling the interweb last night for some parts and managed to score a nice set of headlight doors, headliner trim (the little L-shaped plastic pieces in the rear corners near the upper seat belt mounts) and factory grill clips. I also got the new steering shaft u-joints earlier this week - perfect match! So maybe I'll get the steering shaft cleaned up, powdercoated and re-assembled this weekend.
Jan 31, 2014 | 07:19 PM
#509
Thread Starter
Super Moderator
iTrader: (3)
Joined: Jan 2012
Posts: 3,218
Likes: 26
From: Salisbury, MD
Got them from RockAuto.com
They are Beck Arnley part #1020288 but act quick, they are on closeout for $6.00 right now
They are Beck Arnley part #1020288 but act quick, they are on closeout for $6.00 right now
Last edited by kawazx636; Jan 31, 2014 at 07:22 PM.
Feb 2, 2014 | 08:30 PM
#510
Thread Starter
Super Moderator
iTrader: (3)
Joined: Jan 2012
Posts: 3,218
Likes: 26
From: Salisbury, MD
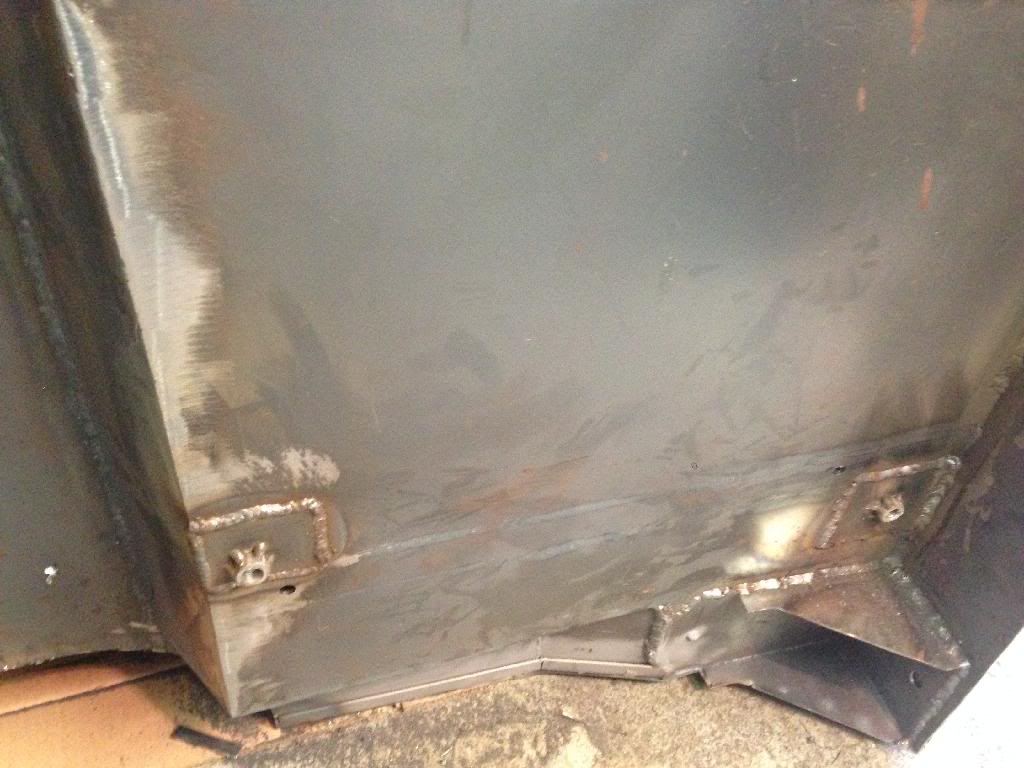
Weather was in the upper 40's today so I got out to do some work on the truck. I buttoned up all the seat belt mounting points today. Welded some 7/16-20 grade 8 nuts to 4 pieces of steel to weld to the floorpan:
Burned them in:
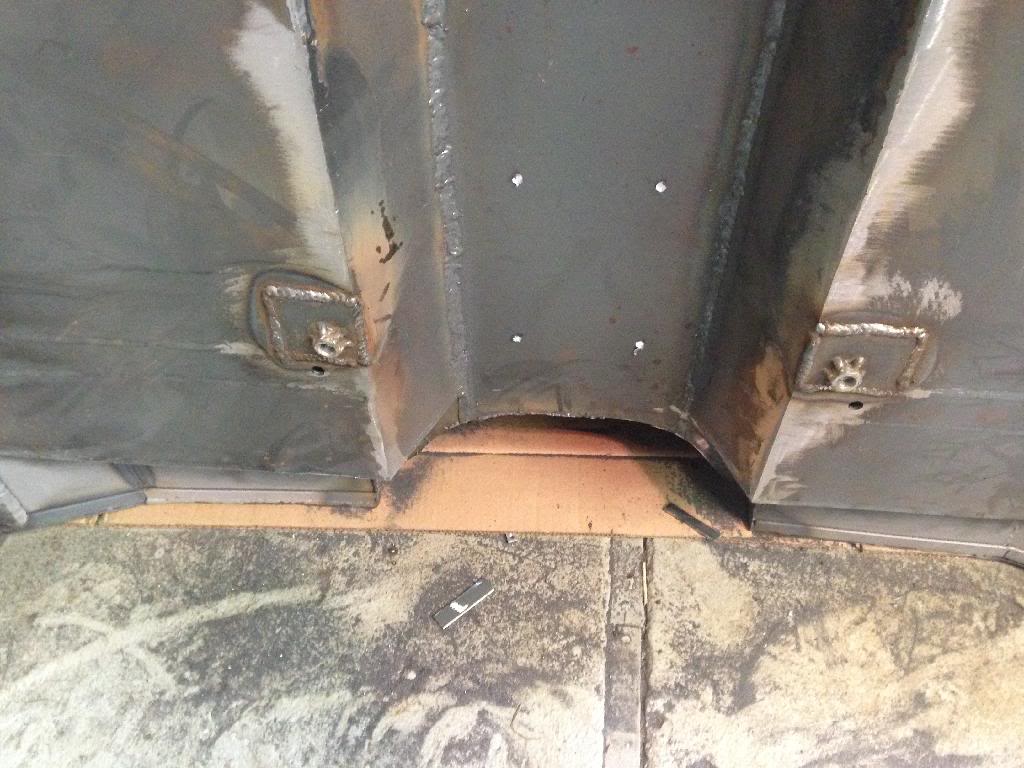
Then mounted the seat belts to check the fit around the seats and center console. I place the buckle side almost exactly where it was originally, but the outside lower mount had to be located about an inch inside of where it was originally because of the way I did the floors so the lap belt fits a little more snug around the seats on the door side, but still functions just as well.
I also media blasted the steering column shaft and powdercoated it.
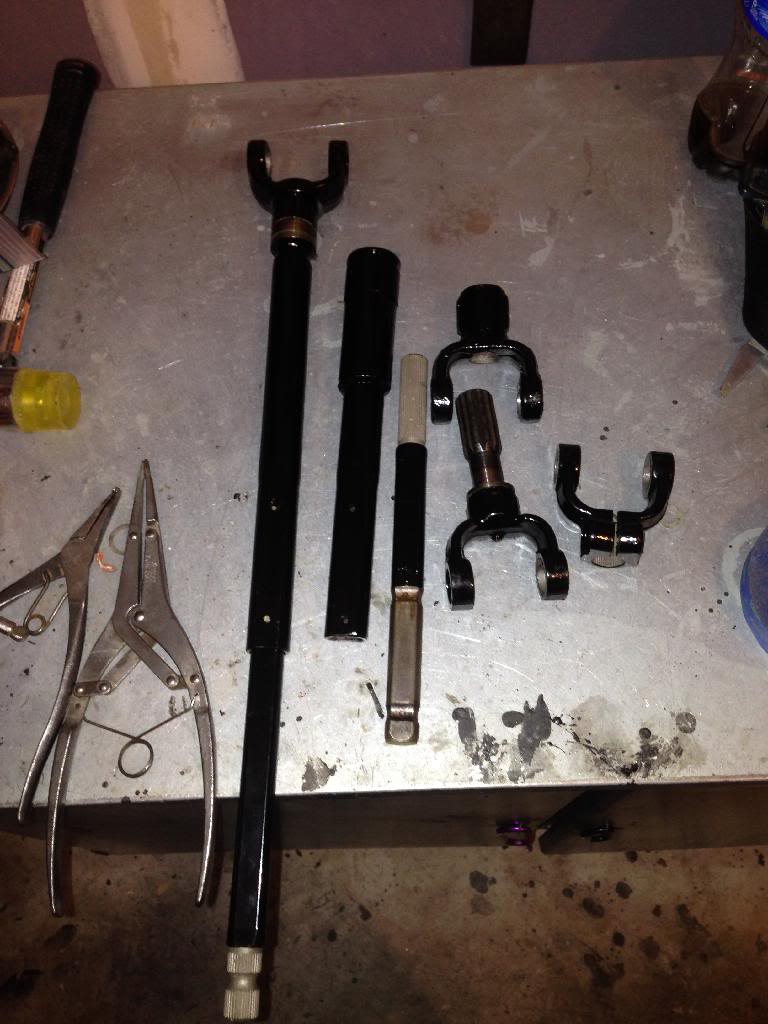
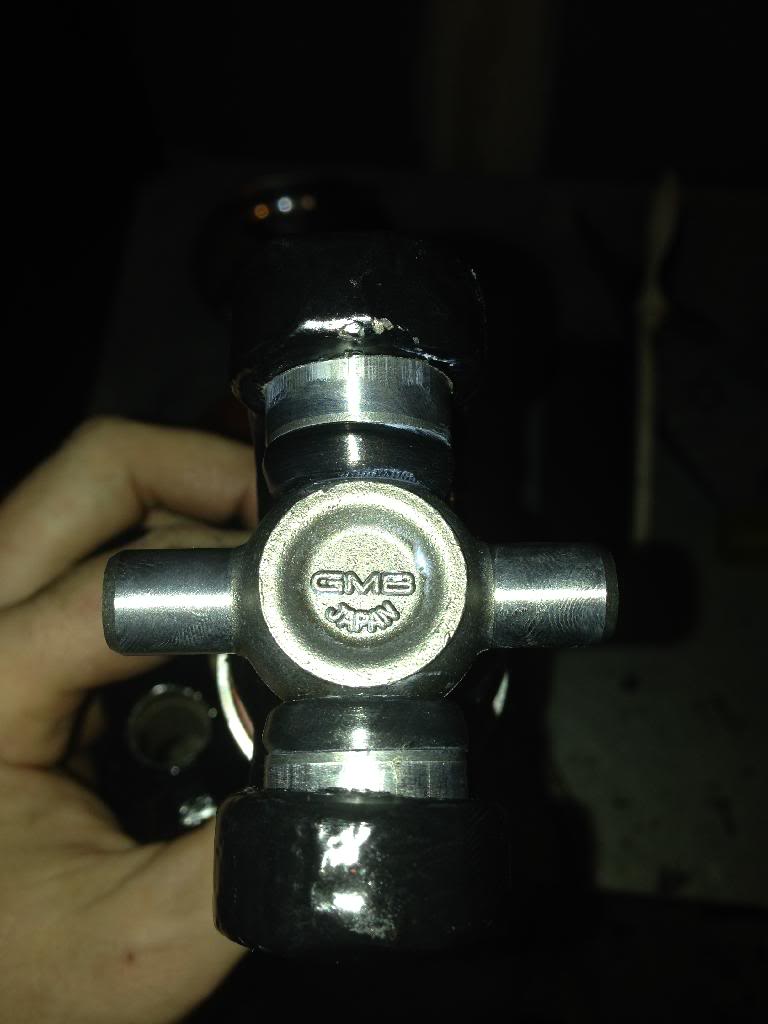
Then about half way through pressing in the u-joints I noticed that the u-joints that i got from Rock Auto were actually Japanese! Woot woot! Good stuff
They pressed in real easily and the steering column shaft turned out great
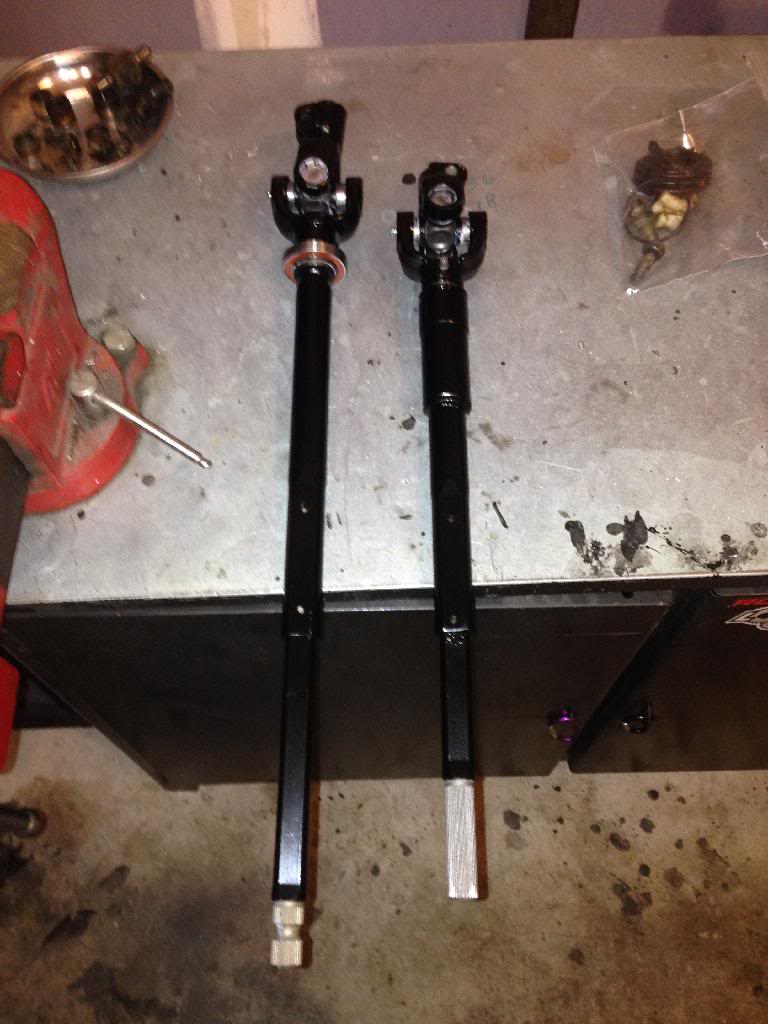
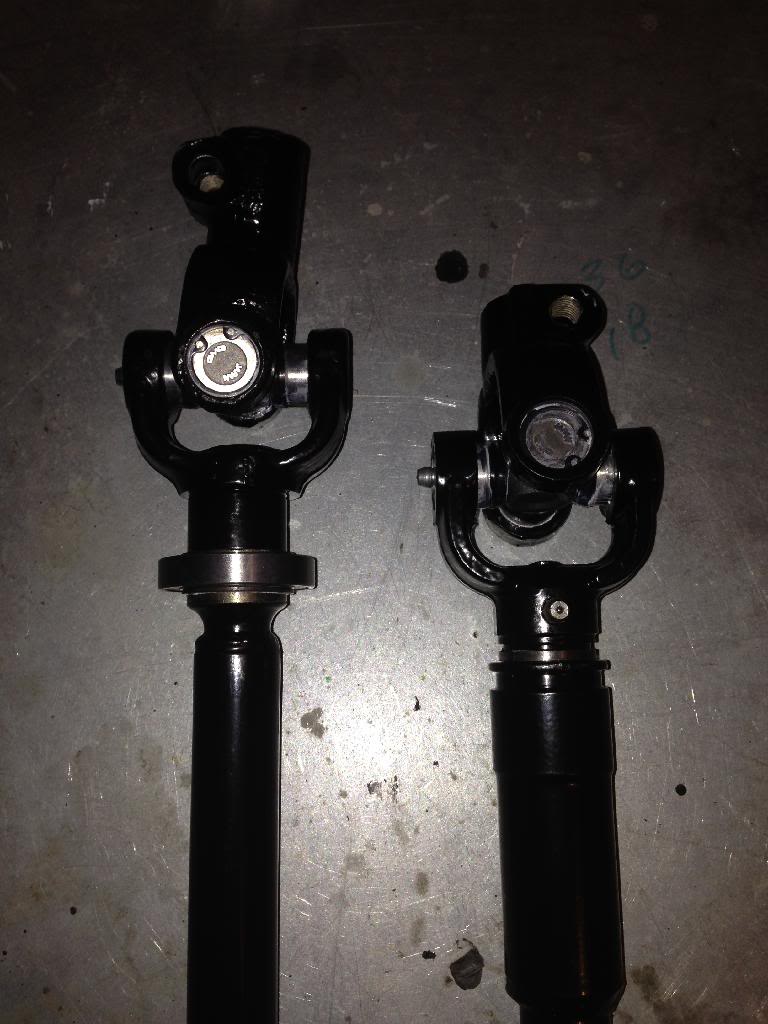
In fact, it is better than brand new since most of the shaft isn't even painted from the factory. All I need to do is find some sort of bellow to replace the one that came off the slip joint since it is ripped up a little.
It sure did feel good to get back at it today! Hopefully the weather stays up for a little while.
Burned them in:
Then mounted the seat belts to check the fit around the seats and center console. I place the buckle side almost exactly where it was originally, but the outside lower mount had to be located about an inch inside of where it was originally because of the way I did the floors so the lap belt fits a little more snug around the seats on the door side, but still functions just as well.
I also media blasted the steering column shaft and powdercoated it.
Then about half way through pressing in the u-joints I noticed that the u-joints that i got from Rock Auto were actually Japanese! Woot woot! Good stuff
They pressed in real easily and the steering column shaft turned out great
In fact, it is better than brand new since most of the shaft isn't even painted from the factory. All I need to do is find some sort of bellow to replace the one that came off the slip joint since it is ripped up a little.
It sure did feel good to get back at it today! Hopefully the weather stays up for a little while.
 Feb 4, 2014 | 01:21 PM
#515
Registered User
Joined: Jan 2012
Posts: 325
Likes: 2
From: Kansas City, Missouri
Your motivation is amazing Dave. On the chassis... The frame work (and drivetrain) done in just a few months was remarkable to see. Thanks for the photos. And the big brown events have also been astonishing! The chassis is eye popping. ...everything including brakelines and full fuel tank restore is exceptional. But the rear disc brake conversion is over the top. And working when it's ~40 degrees? Well, need I say more?
You are cruising towards a 2014 ('83) Toyota 4x4. I cannot wait to see the cab painted. What about a bed? Thinking about flatbed? Stickin' with the blue paint? It will all be worth your effort, and an inspiration to all of your friends here.

You are cruising towards a 2014 ('83) Toyota 4x4. I cannot wait to see the cab painted. What about a bed? Thinking about flatbed? Stickin' with the blue paint? It will all be worth your effort, and an inspiration to all of your friends here.
Last edited by 83pingpong; Feb 4, 2014 at 01:25 PM.
Feb 4, 2014 | 05:34 PM
#517
Thread Starter
Super Moderator
iTrader: (3)
Joined: Jan 2012
Posts: 3,218
Likes: 26
From: Salisbury, MD
Thanks guys, I appreciate the compliments. Pingpong, no flatbed here. I ordered a new bed from Toyota Fiberglass which should be completed sometime this spring. As for paint, I'm still a little on the fence. I was originally going to do black, but I'm starting to lean towards a grey or creme white. Definitely won't be the blue that it is now - it may look good in pictures, but it was really awful.
Feb 4, 2014 | 06:24 PM
#518
Registered User
Joined: Nov 2012
Posts: 698
Likes: 0
From: florida
Thanks guys, I appreciate the compliments. Pingpong, no flatbed here. I ordered a new bed from Toyota Fiberglass which should be completed sometime this spring. As for paint, I'm still a little on the fence. I was originally going to do black, but I'm starting to lean towards a grey or creme white. Definitely won't be the blue that it is now - it may look good in pictures, but it was really awful.
Last edited by Stetson_md; Feb 4, 2014 at 06:28 PM.
Feb 4, 2014 | 06:41 PM
#519
Thread Starter
Super Moderator
iTrader: (3)
Joined: Jan 2012
Posts: 3,218
Likes: 26
From: Salisbury, MD
I want to stick with a single stage paint that I can easily buff out or respray if I mess it up - I don't plan on giving it hell, but I'm also not one to completely baby a vehicle. The only metallic color that I was considering is a metallic grey like my wife's Camry, primarily to piss her off because she hates my truck and she doesn't want it to match her car LOL! I'm not looking to do anything flashy. I'm a conservative dude and I just want it to look like the simple truck that it is.


