
KawaZX636's 1983 Toyota Pickup Restoration
 Apr 10, 2014 | 04:16 PM
#583


If my memory serves me , Tacoma was in the 96-99 area . I do know the 90's pick ups and 4 Runners will also work .
I believe I just removed my original hardware , and replaced it with the donors ..
 .. I used a bar to knock off the big chunks and a screw driver for the little stuff .. once it was all clean , I used a scuff pad to prep . for paint .
 also just rated your thread bud .. 5 Stars for you

.
Apr 10, 2014 | 09:09 PM
#584
Thread Starter
Super Moderator
iTrader: (3)
Joined: Jan 2012
Posts: 3,218
Likes: 26
From: Salisbury, MD
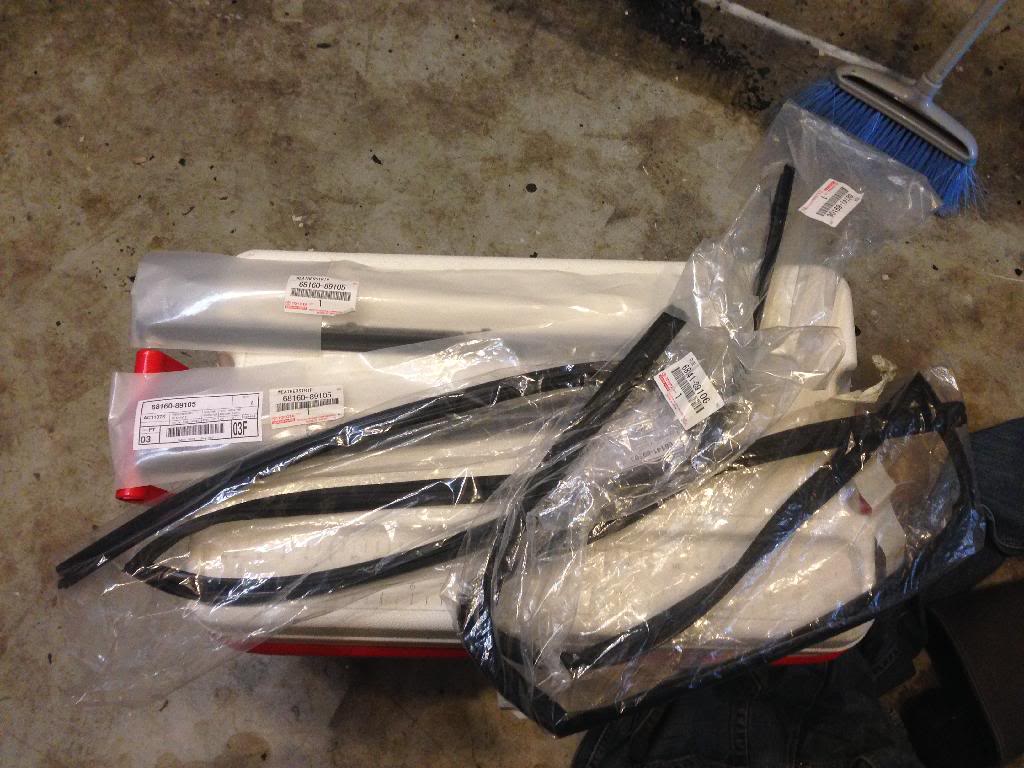
I just ordered a bunch of Genuine Toyota new-old stock tonight! It's not really anything that I need right now but they were original and available so I snagged up the stuff that I knew I probably wouldn't be able to get later and it is important stuff that makes a difference in overall quality of my build. Here's what I got:
-Driver and passenger vent window seals
-Corner marker lenses (the clear ones on the headlight doors)
-Driver and passenger window reveal trim (goes on the base of the window on the outside of the door)
-Driver and passenger window run channel (runs around the window frame and guides the window up and down)
-Tailgate cable stays for my Tundra (I had one snap on me a couple weeks ago and I tweaked my tailgate slightly)
Again, all original Toyota parts! There are a few other parts available that I want, but they are less rare and he has a bunch still in stock. If anybody wants any of my old parts listed above let me know. They are all still good and definitely useable, just not quite up to my build standard.
 Apr 13, 2014 | 07:50 PM
#586
Thread Starter
Super Moderator
iTrader: (3)
Joined: Jan 2012
Posts: 3,218
Likes: 26
From: Salisbury, MD
Got caught up fixing my wife's car this weekend. She whacked a curb and needed a new tire so I took care of that. Her struts were wearing out so i replaced them. While I was doing the struts, I noticed that the sway bar links were bad too so I replaced them as well. The allen head on the joint shaft was stripped out so I had to cut the links off with a die grinder. Total PITA since they are located in an awkward position.
I did do a little sand blasting today. Got the hood done and a little bit of one door before my water separator on my compressor decided to take a dump on me. My blaster kept getting clogged with the water in the line. I'll run out and get a new separator sometime this week.
Here's the hood (still no rust or PO BS repair surprises yet):
Apr 18, 2014 | 05:47 PM
#587
Thread Starter
Super Moderator
iTrader: (3)
Joined: Jan 2012
Posts: 3,218
Likes: 26
From: Salisbury, MD
Got a bunch of stuff done this week, let's start with the fun stuff first.... PARTS DELIVERY!!! My son was pretty excited to open them up:
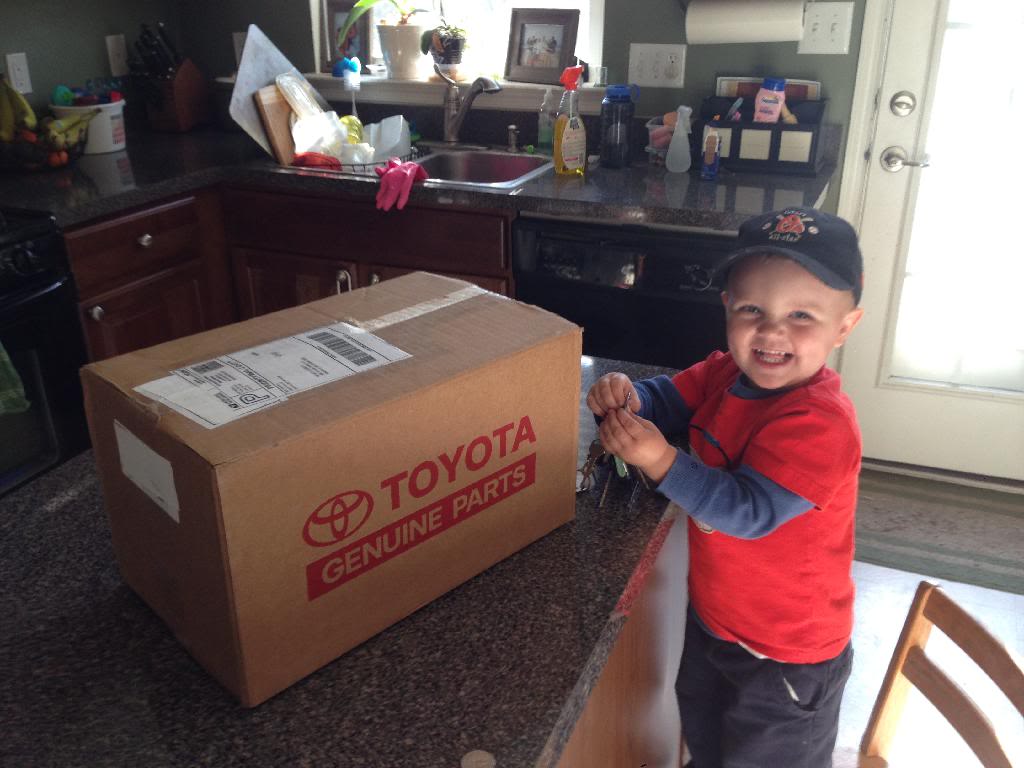
I got the vent window seals, corner marker lenses and tail gate cable stays for my Tundra. All original Toyota parts!
Took apart my vent windows. Took a picture for reference when re-assembling:

And shined up the chrome on the vent windows:
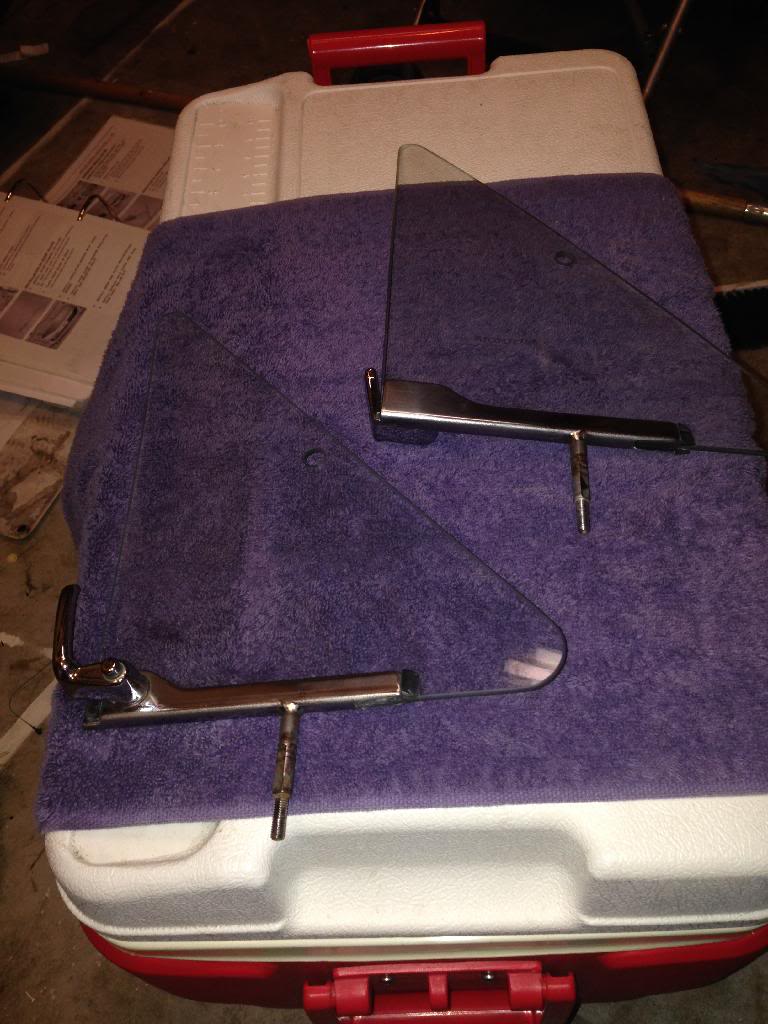
Cleaned up the windows too:
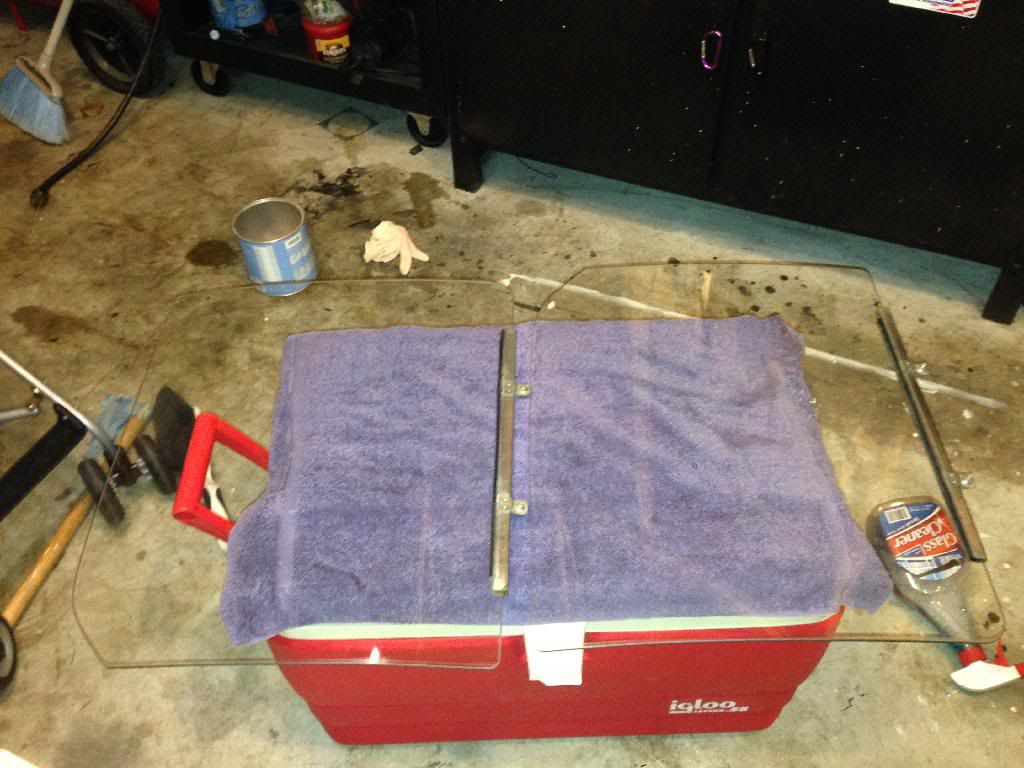
Removed the vent window frames:
And sandblasted them (I'm planning on powdercoating them):
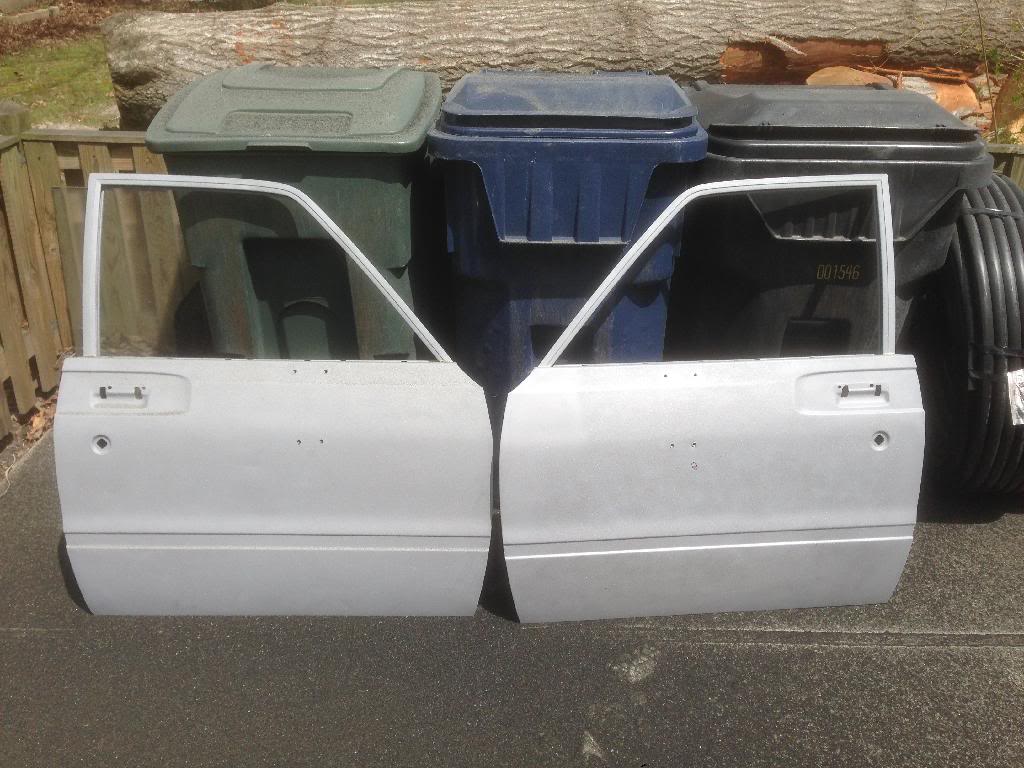
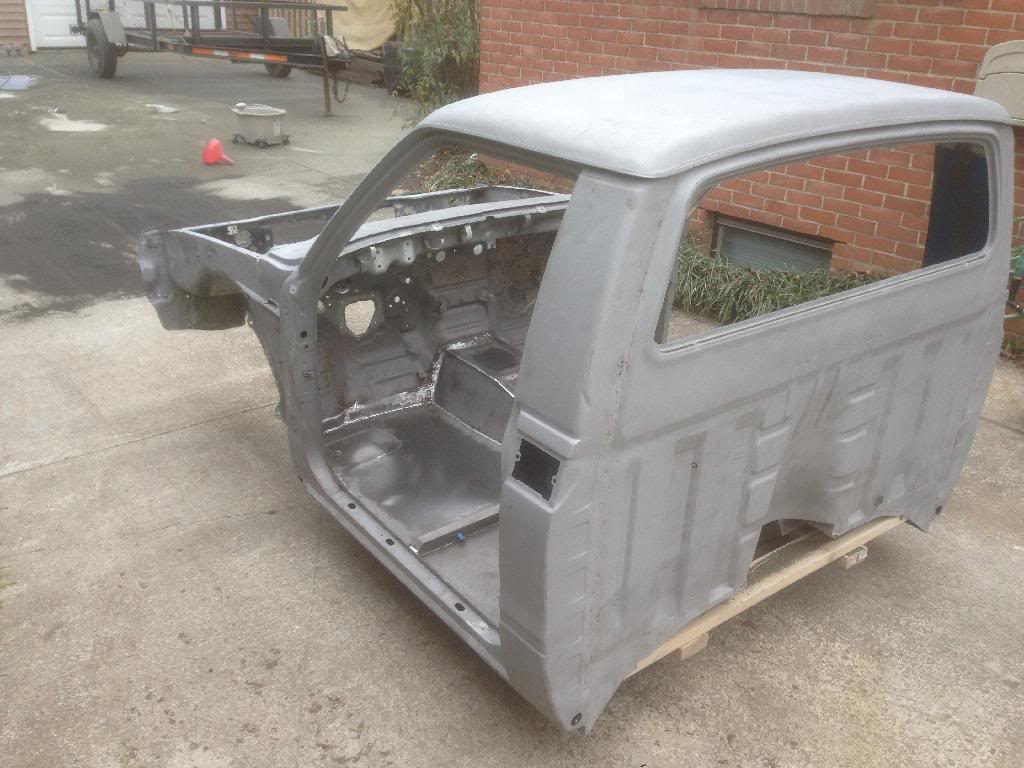
Sandblasted the doors:
Had my little helper scraping off seam sealer - he wasn't very efficient, but he was happy trying to help so that's all that matters.
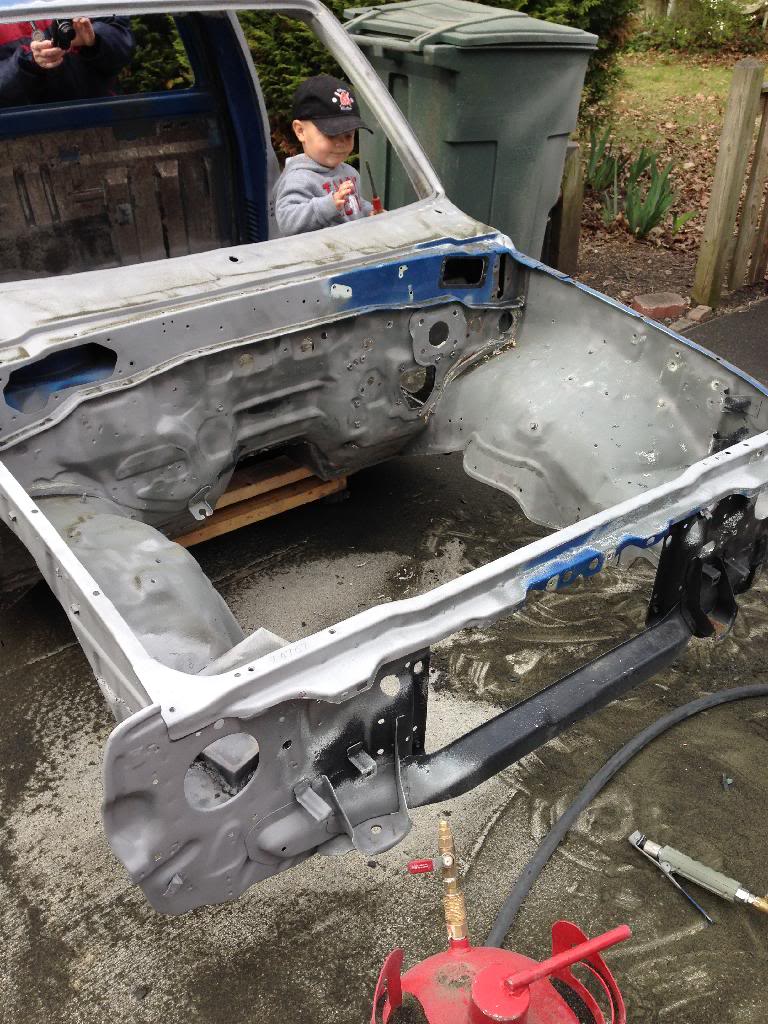
Got pretty much all of the exterior of the cab blasted:
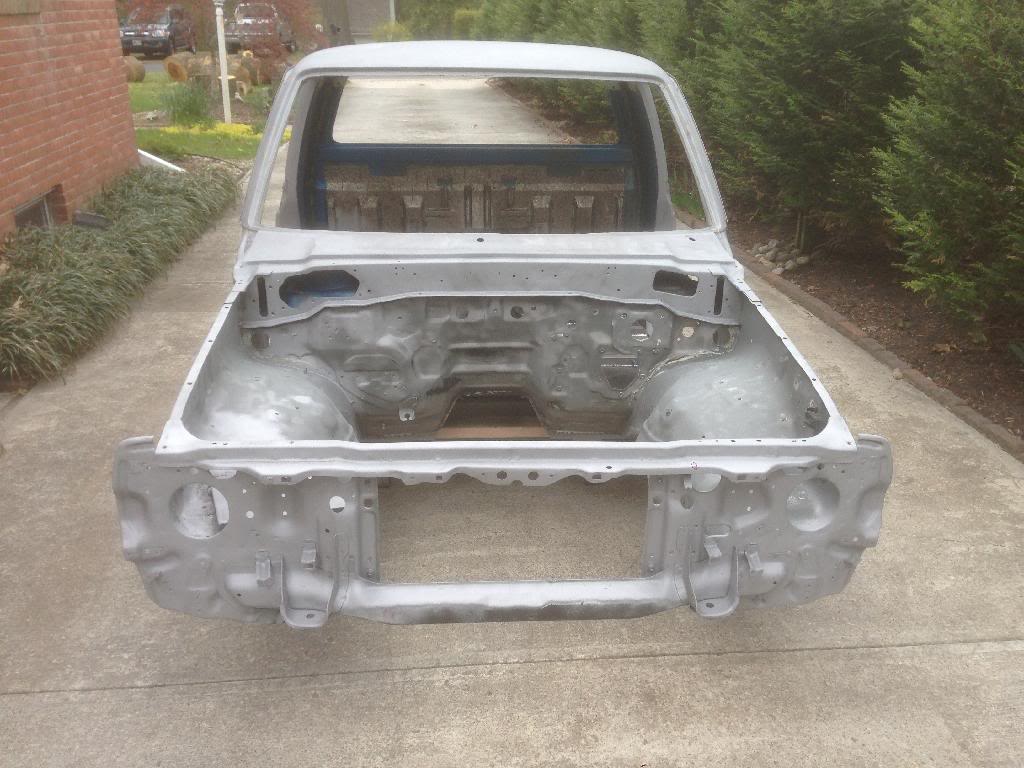

All I have left to sandblast would be some of the engine bay, the interior and underneath the cab. Shouldn't be too bad since I have a lot of the nitty gritty done already. A little bit of seam sealer left to scrape off and it should go smoothly. By the way, if you ever get the notion to use rubberized undercoating, do the next owner a favor and DON'T!!! That stuff is a pain in the ass!!!!
In other news, I got a phone call from Corey on my bed. Should be ready to ship shortly so I dropped a check in the mail for the balance I owe him. SOOOOOO stoked to get the bed, can't wait!!!
I got the vent window seals, corner marker lenses and tail gate cable stays for my Tundra. All original Toyota parts!
Took apart my vent windows. Took a picture for reference when re-assembling:
And shined up the chrome on the vent windows:
Cleaned up the windows too:
Removed the vent window frames:
And sandblasted them (I'm planning on powdercoating them):
Sandblasted the doors:
Had my little helper scraping off seam sealer - he wasn't very efficient, but he was happy trying to help so that's all that matters.
Got pretty much all of the exterior of the cab blasted:
All I have left to sandblast would be some of the engine bay, the interior and underneath the cab. Shouldn't be too bad since I have a lot of the nitty gritty done already. A little bit of seam sealer left to scrape off and it should go smoothly. By the way, if you ever get the notion to use rubberized undercoating, do the next owner a favor and DON'T!!! That stuff is a pain in the ass!!!!
In other news, I got a phone call from Corey on my bed. Should be ready to ship shortly so I dropped a check in the mail for the balance I owe him. SOOOOOO stoked to get the bed, can't wait!!!
Apr 18, 2014 | 09:03 PM
#588

It might be a bit too late, but to remove my undercoating I found it easy to remove by laying down a thick layer of aircraft paint remove, then after about 10 mins I used my grinder with a coarse brush and it came off like butter. I just found that out this week too. Your cab looks great sand blasted and it is very clean too, also nice to see you building memories with your kid working on the truck, priceless stuff!
 Apr 21, 2014 | 06:07 AM
#591
Thread Starter
Super Moderator
iTrader: (3)
Joined: Jan 2012
Posts: 3,218
Likes: 26
From: Salisbury, MD
It might be a bit too late, but to remove my undercoating I found it easy to remove by laying down a thick layer of aircraft paint remove, then after about 10 mins I used my grinder with a coarse brush and it came off like butter. I just found that out this week too. Your cab looks great sand blasted and it is very clean too, also nice to see you building memories with your kid working on the truck, priceless stuff!
$3,500? Or whatever Corey plans on putting his fiberglass cab reproductions on the market for.... LOL Nice try Rob!
Apr 21, 2014 | 10:14 PM
#593
Thread Starter
Super Moderator
iTrader: (3)
Joined: Jan 2012
Posts: 3,218
Likes: 26
From: Salisbury, MD
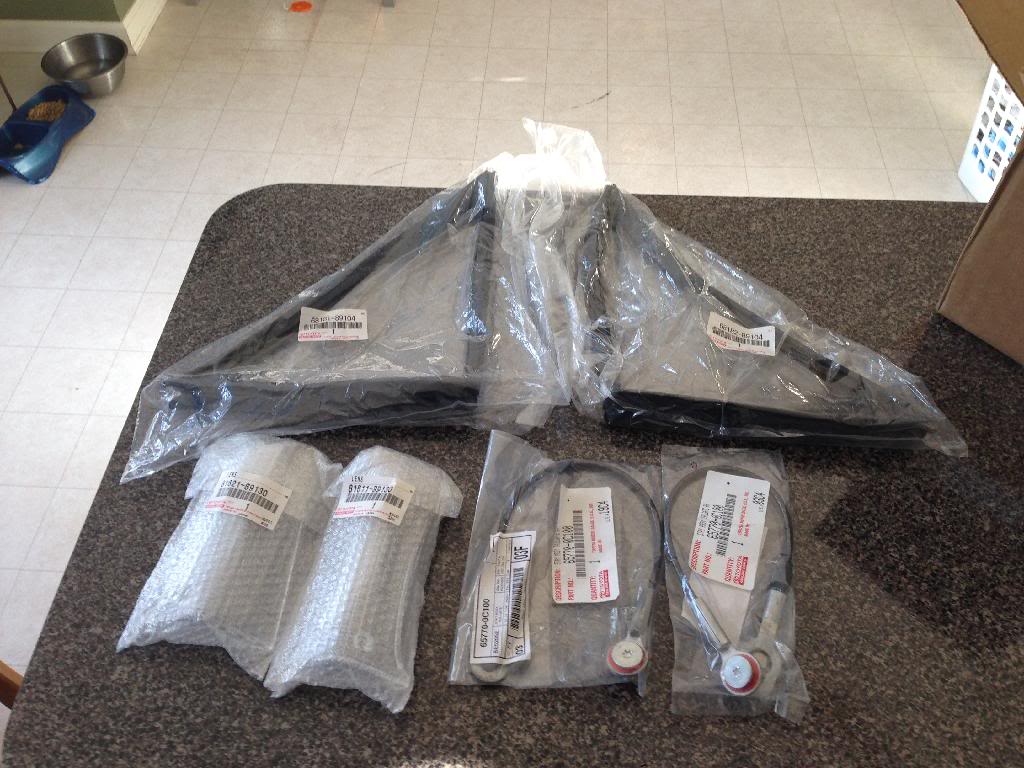
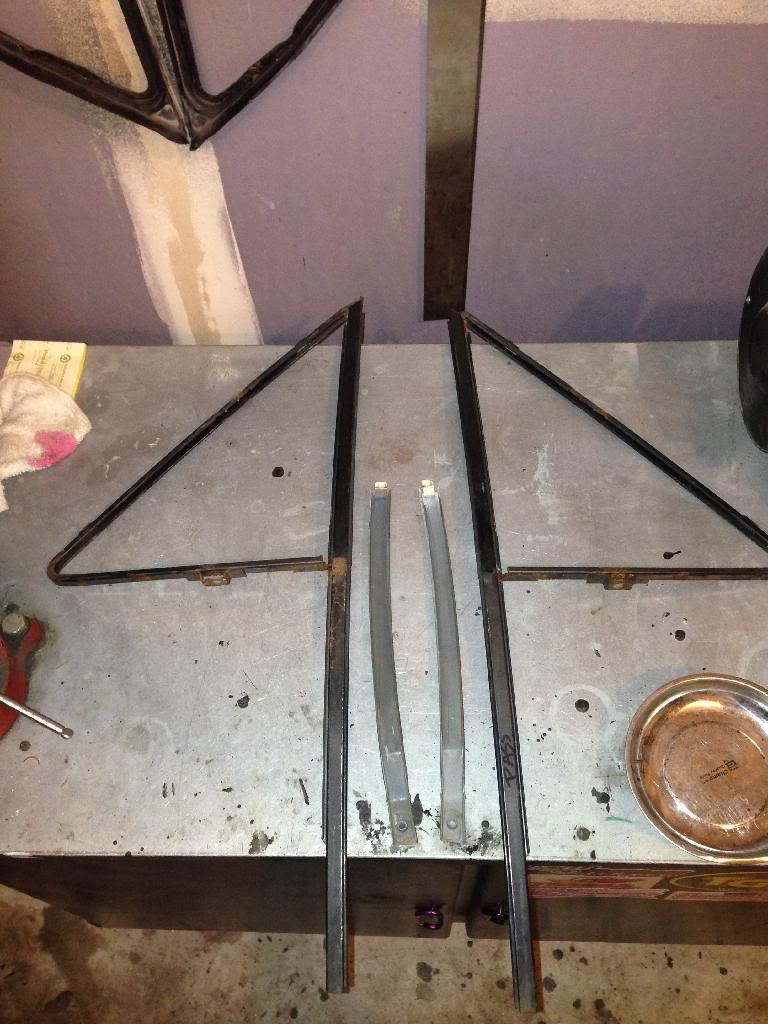
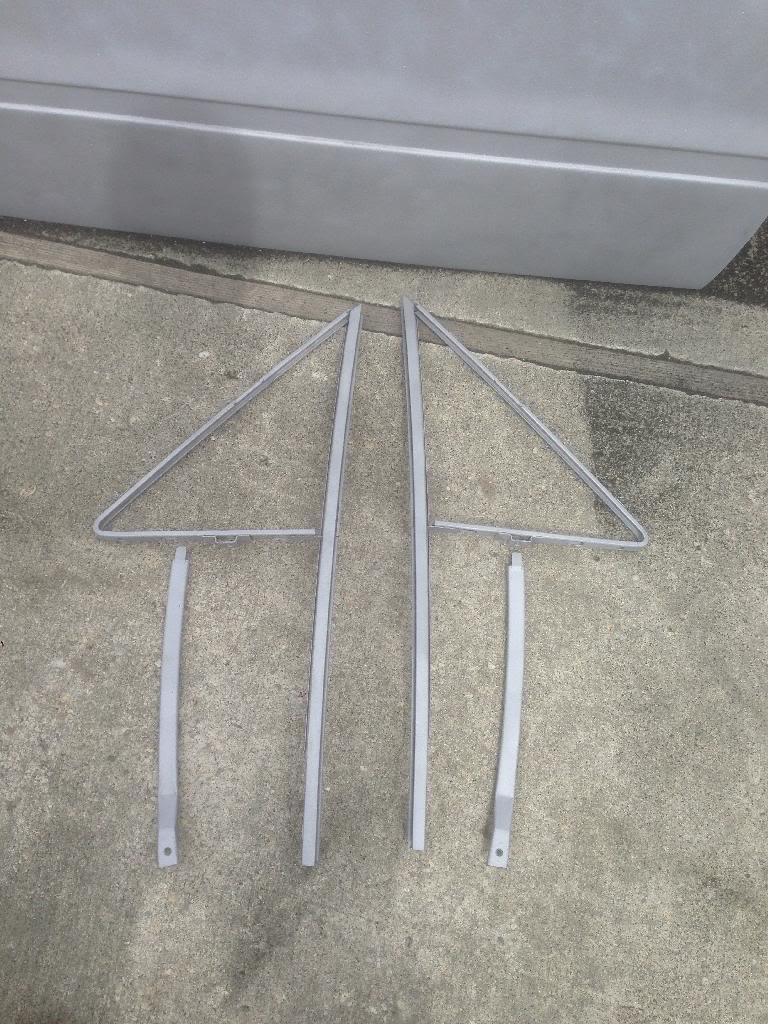
More parts came in this weekend. Toyota original window channels/seals and the outside window reveal trim:
Also powdercoated the vent window frames tonight:
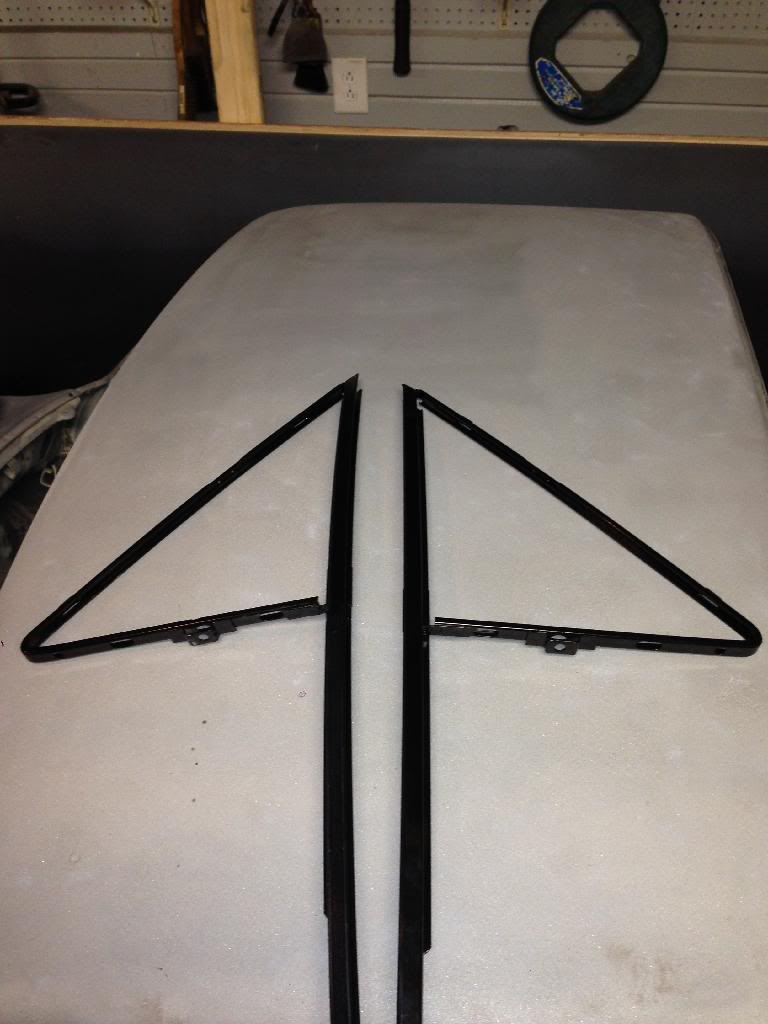
And of course I had to put at least one back together, so after fiddling with the new vent window seal for about a hour I got one of the vent windows assembled:
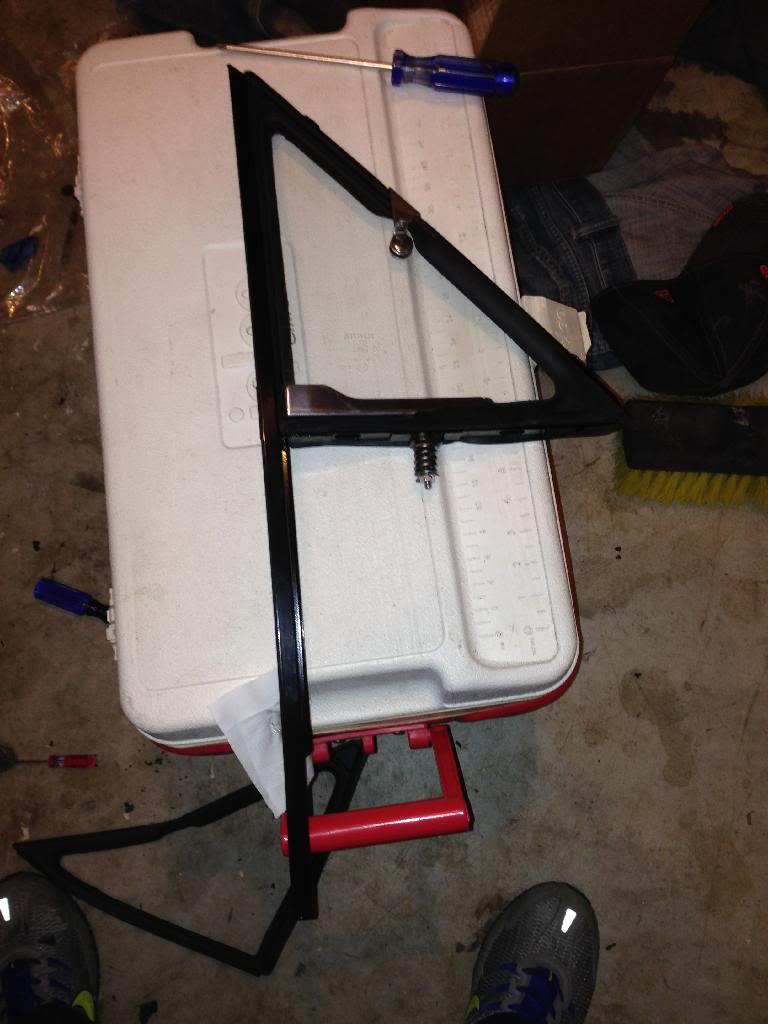
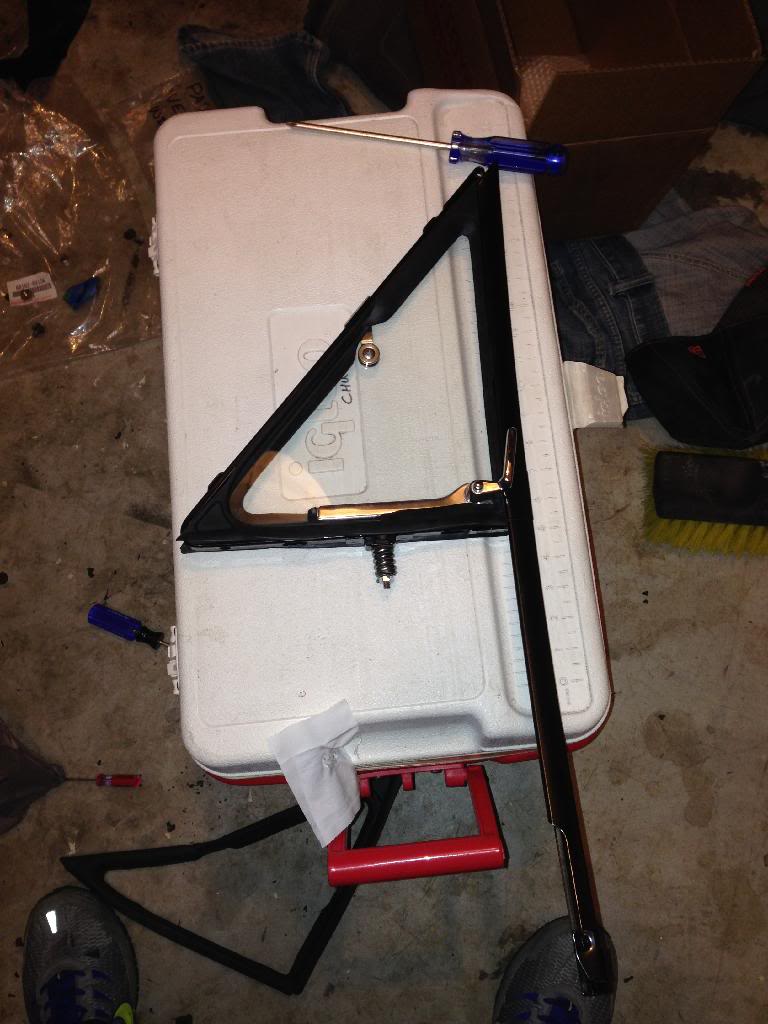
Still have the driver side to do, but just to warn anybody looking to refurb their vent windows, I would HIGHLY recommend getting the frames powdercoated or chromed. The new seals are pretty tough to get in the frame channels and I imagine that if I just painted them they would have been fairly scratched up in the end. Powdercoat is tough as nails so I had no worries. Now, if only I had some painted doors to install them on....
Apr 22, 2014 | 05:50 AM
#595
Thread Starter
Super Moderator
iTrader: (3)
Joined: Jan 2012
Posts: 3,218
Likes: 26
From: Salisbury, MD
 Apr 22, 2014 | 06:14 AM
#596
Registered User
Joined: Feb 2014
Posts: 351
Likes: 0
I have done the same with my vw's back in the day till she decided to get interested in them also she brought one home and started shopping for parts she said it's going to cost her over ten grand to fix it up and I and my father had her convinced they where cheap to fix up lol
When she passed I got rid of all my vw's and parts which I had been collecting since high school two years ago I decided to do my favorite pickup bought it drove it tore it apart research and slowly build this almost daily driver/go almost anywhere trail truck / I am hoping to do an across country thing when it's finished meet up with the local 4wheel community along the way also in mind was a good camera for video logs and laptop
Ps tundra goes for recall next week undercoat lol and I still haven't done my wheel bearings
Apr 22, 2014 | 08:29 AM
#597
Thread Starter
Super Moderator
iTrader: (3)
Joined: Jan 2012
Posts: 3,218
Likes: 26
From: Salisbury, MD
Unless your truck really needs it, I wouldn't do the recall. The dealership just slaps that stuff on there, looks like crap and it took over a week to dry. I picked it up the day after I dropped it off and it was pretty much still dripping off the frame! And forget about parking it in a garage for a couple weeks because that stuff STINKS! They also apparently had to lift my tranny to get the top side of the cross member because when I picked it up the tranny mount bolts were barely threaded on and my transmission was sliding all over the place when I was driving! I was so pissed, that I went back to the dealership and raised hell. They said "we'll tighten everything down for you." I said "no need to, I already did it, but this is EXACTLY why I am the only one that ever works on my vehicles!" Slammed the door and left. This comes right after my wife took her Camry in for diagnostics on a steering noise because I didn't have time to fix it. I told them that the noise was coming from the pivot bearing bushing in the upper strut mount. They came back saying that it was the sway bar end links and that they would replace them for $110 in parts and $210 for 2 hours of labor (We had already paid $110 for the diagnostic service). I said FU, you guys are ridiculous and left. Got home, checked the links and they were worn so I replaced them. I had my wife time me to show how far off the dealer's time estimate was...wait for it...wait for it... EXACTLY 28 minutes and 31 seconds to do both links, in my driveway, with one jack AND I actually had to cut one off with a die grinder because it was seized on! I guess they figure in a 90 minute break during each service. Then the noise was still there (because the links weren't the problem like I had told them) so I popped out the struts and removed the caps to find out the the pivot bushings on both sides weren't seated properly when the DEALERSHIP did the warranty work on the strut replacements about a year ago. The wife timed this one too... 1 hour 23 minutes to remove both struts, compress both springs, re-seat both bushings and re-assemble. Perhaps I should get a job at the dealership???
Last edited by kawazx636; Apr 22, 2014 at 08:33 AM.


