
KawaZX636's 1983 Toyota Pickup Restoration

 Jun 25, 2014 | 10:03 PM
#782
The detail in your cab work is outstanding. A re paint is not nearly as rugged as the factory paint since it was applied in the best enviroment and so forth. I have seen both schools of thought were filler is applied on factory paint and bare metal. Myself, if it isnt put on at the factory, I take it to bare metal to apply filler.
Covering the cowls is just a good idea as that is one big dirt trap and the first gens dont have an easy access to clean out. Great job on those by the way.
Covering the cowls is just a good idea as that is one big dirt trap and the first gens dont have an easy access to clean out. Great job on those by the way.
Jun 26, 2014 | 05:00 AM
#783
Thread Starter
Super Moderator
iTrader: (3)
Joined: Jan 2012
Posts: 3,218
Likes: 26
From: Salisbury, MD
Thanks Terry! I just wished that I had a solid week with nothing else to do so I can get all this body work wrapped up, but life seems to get in the way of that sometimes
Jun 26, 2014 | 05:08 AM
#784
Registered User
Joined: Feb 2014
Posts: 351
Likes: 0
ha at my age it's hard to find a free minute that I don't just want to relax BY MY SELF . Of course that's a major player in this build isn't it
Jun 26, 2014 | 09:42 PM
#785
Thread Starter
Super Moderator
iTrader: (3)
Joined: Jan 2012
Posts: 3,218
Likes: 26
From: Salisbury, MD
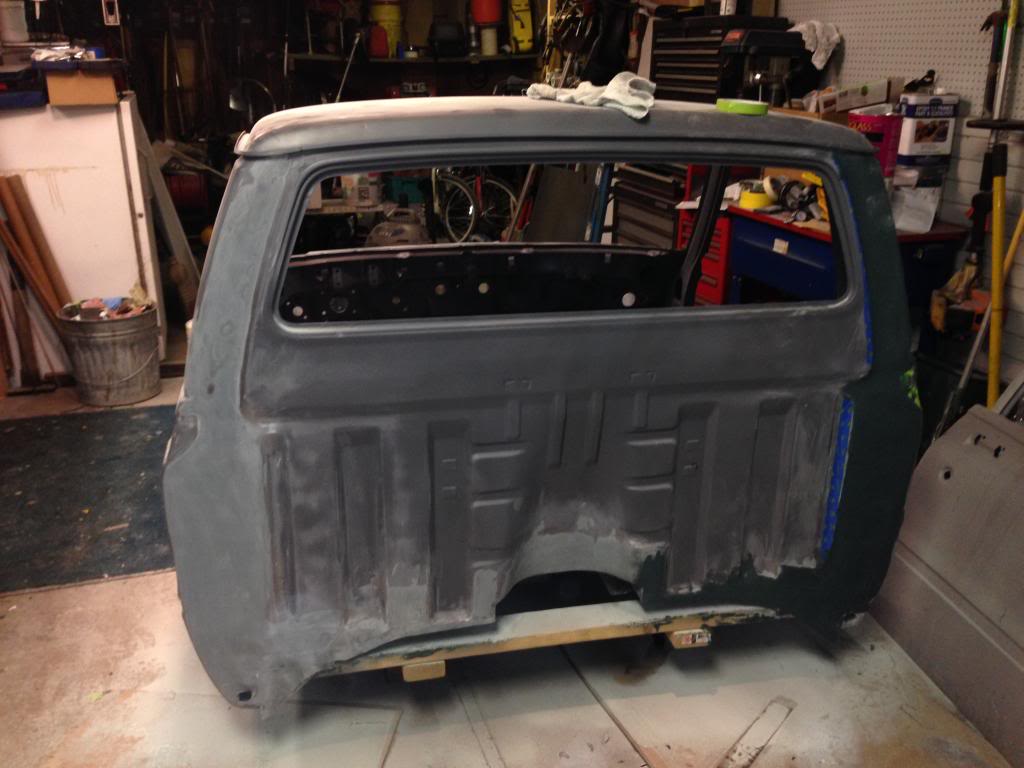
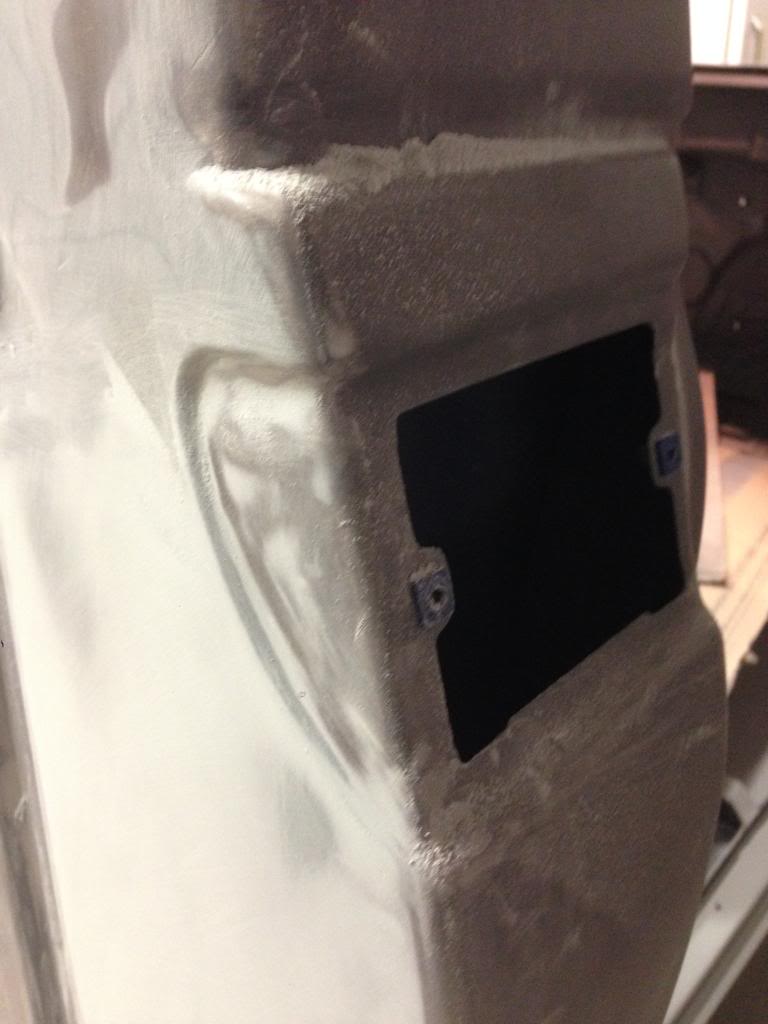
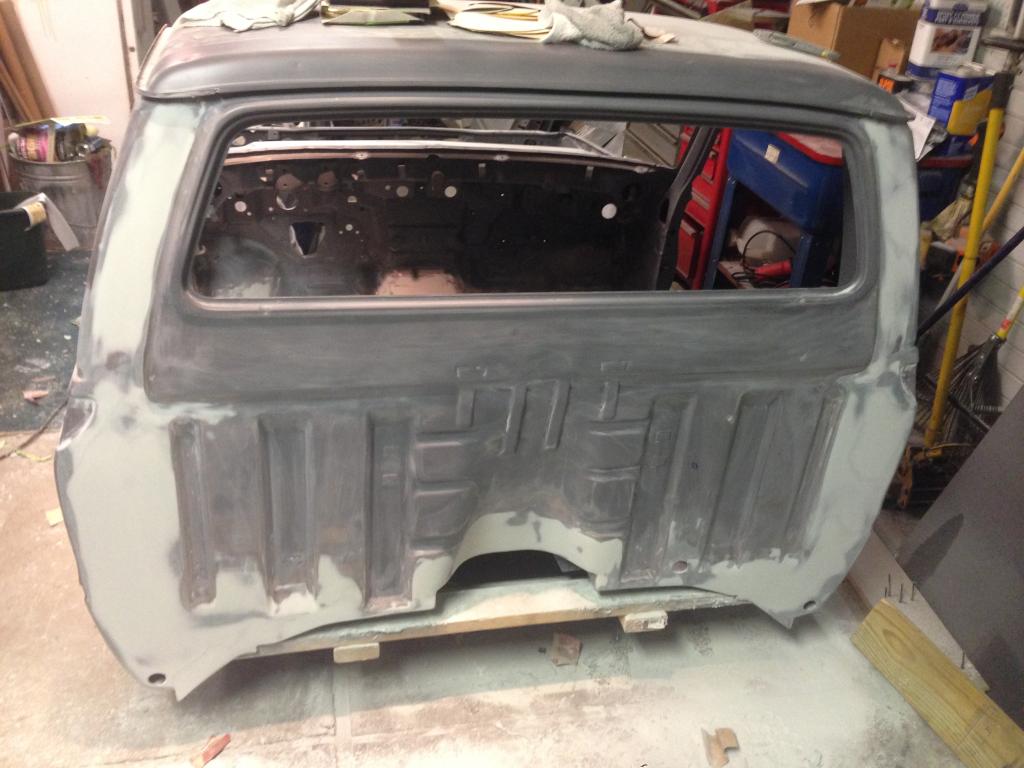
Moving right along, I started the rear cab seams tonight where I decided to shave the seam sealer bead.
What used to look like this:

Was scraped out:

Welded up:

And now getting filled:


So far I've got the bulk of it filled and shaped with some short strand Everglass, but I still need to go back with the filler to get it completely straight and smooth. Blending in the bottom may turn out to be a little difficult, but at least it won't be an area that will be easily seen since the bed will cover it plus I plan on doing bed liner on the rear cab wall. Nonetheless, I still strive to make everything as straight as possible, even if it is hidden.
Jun 27, 2014 | 09:09 AM
#788
Thread Starter
Super Moderator
iTrader: (3)
Joined: Jan 2012
Posts: 3,218
Likes: 26
From: Salisbury, MD
They certainly are not! Unfortunately I won't have much time to work on it over the weekend - my Mom and step father are taking my son camping so my wife is making me take her out to dinner tonight, we have our annual neighborhood BBQ tomorrow and I have some yard work to do on Sunday DOH!! Maybe I can sneak away at dinner tonight - "hey honey, I have to use the bathroom" (three hours later I return covered in filler dust)
Jun 30, 2014 | 08:55 PM
#790
Thread Starter
Super Moderator
iTrader: (3)
Joined: Jan 2012
Posts: 3,218
Likes: 26
From: Salisbury, MD
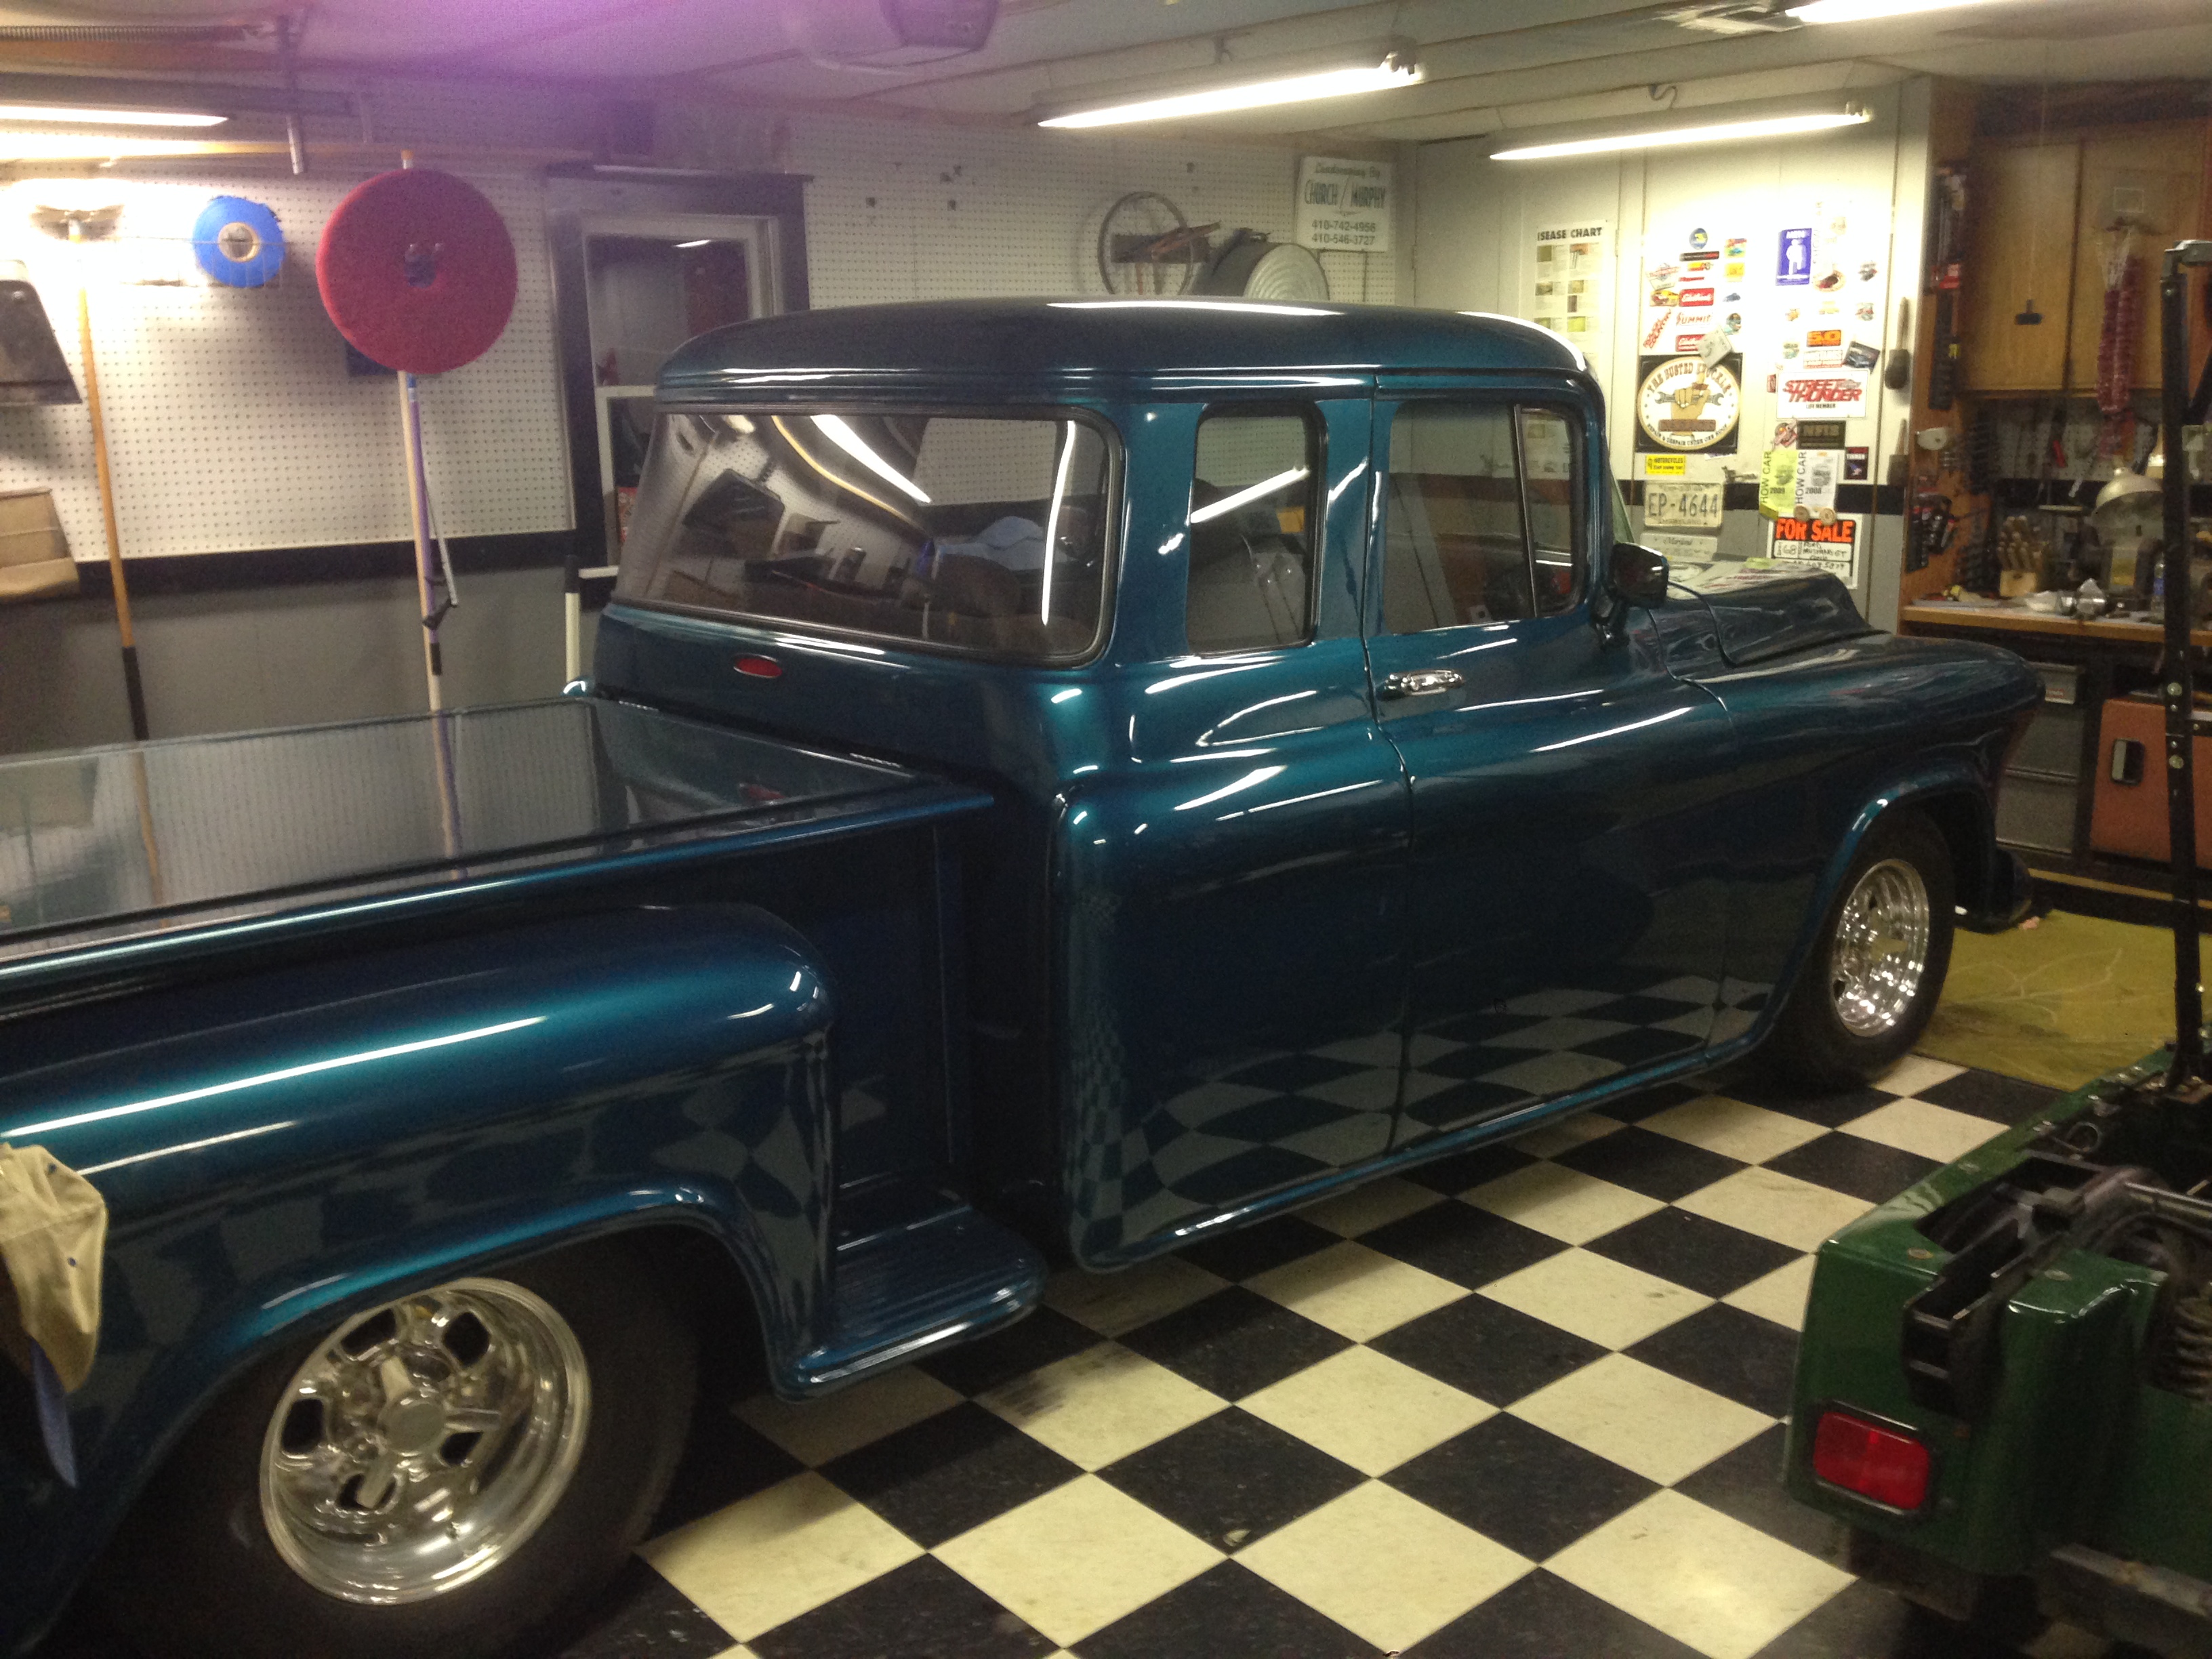
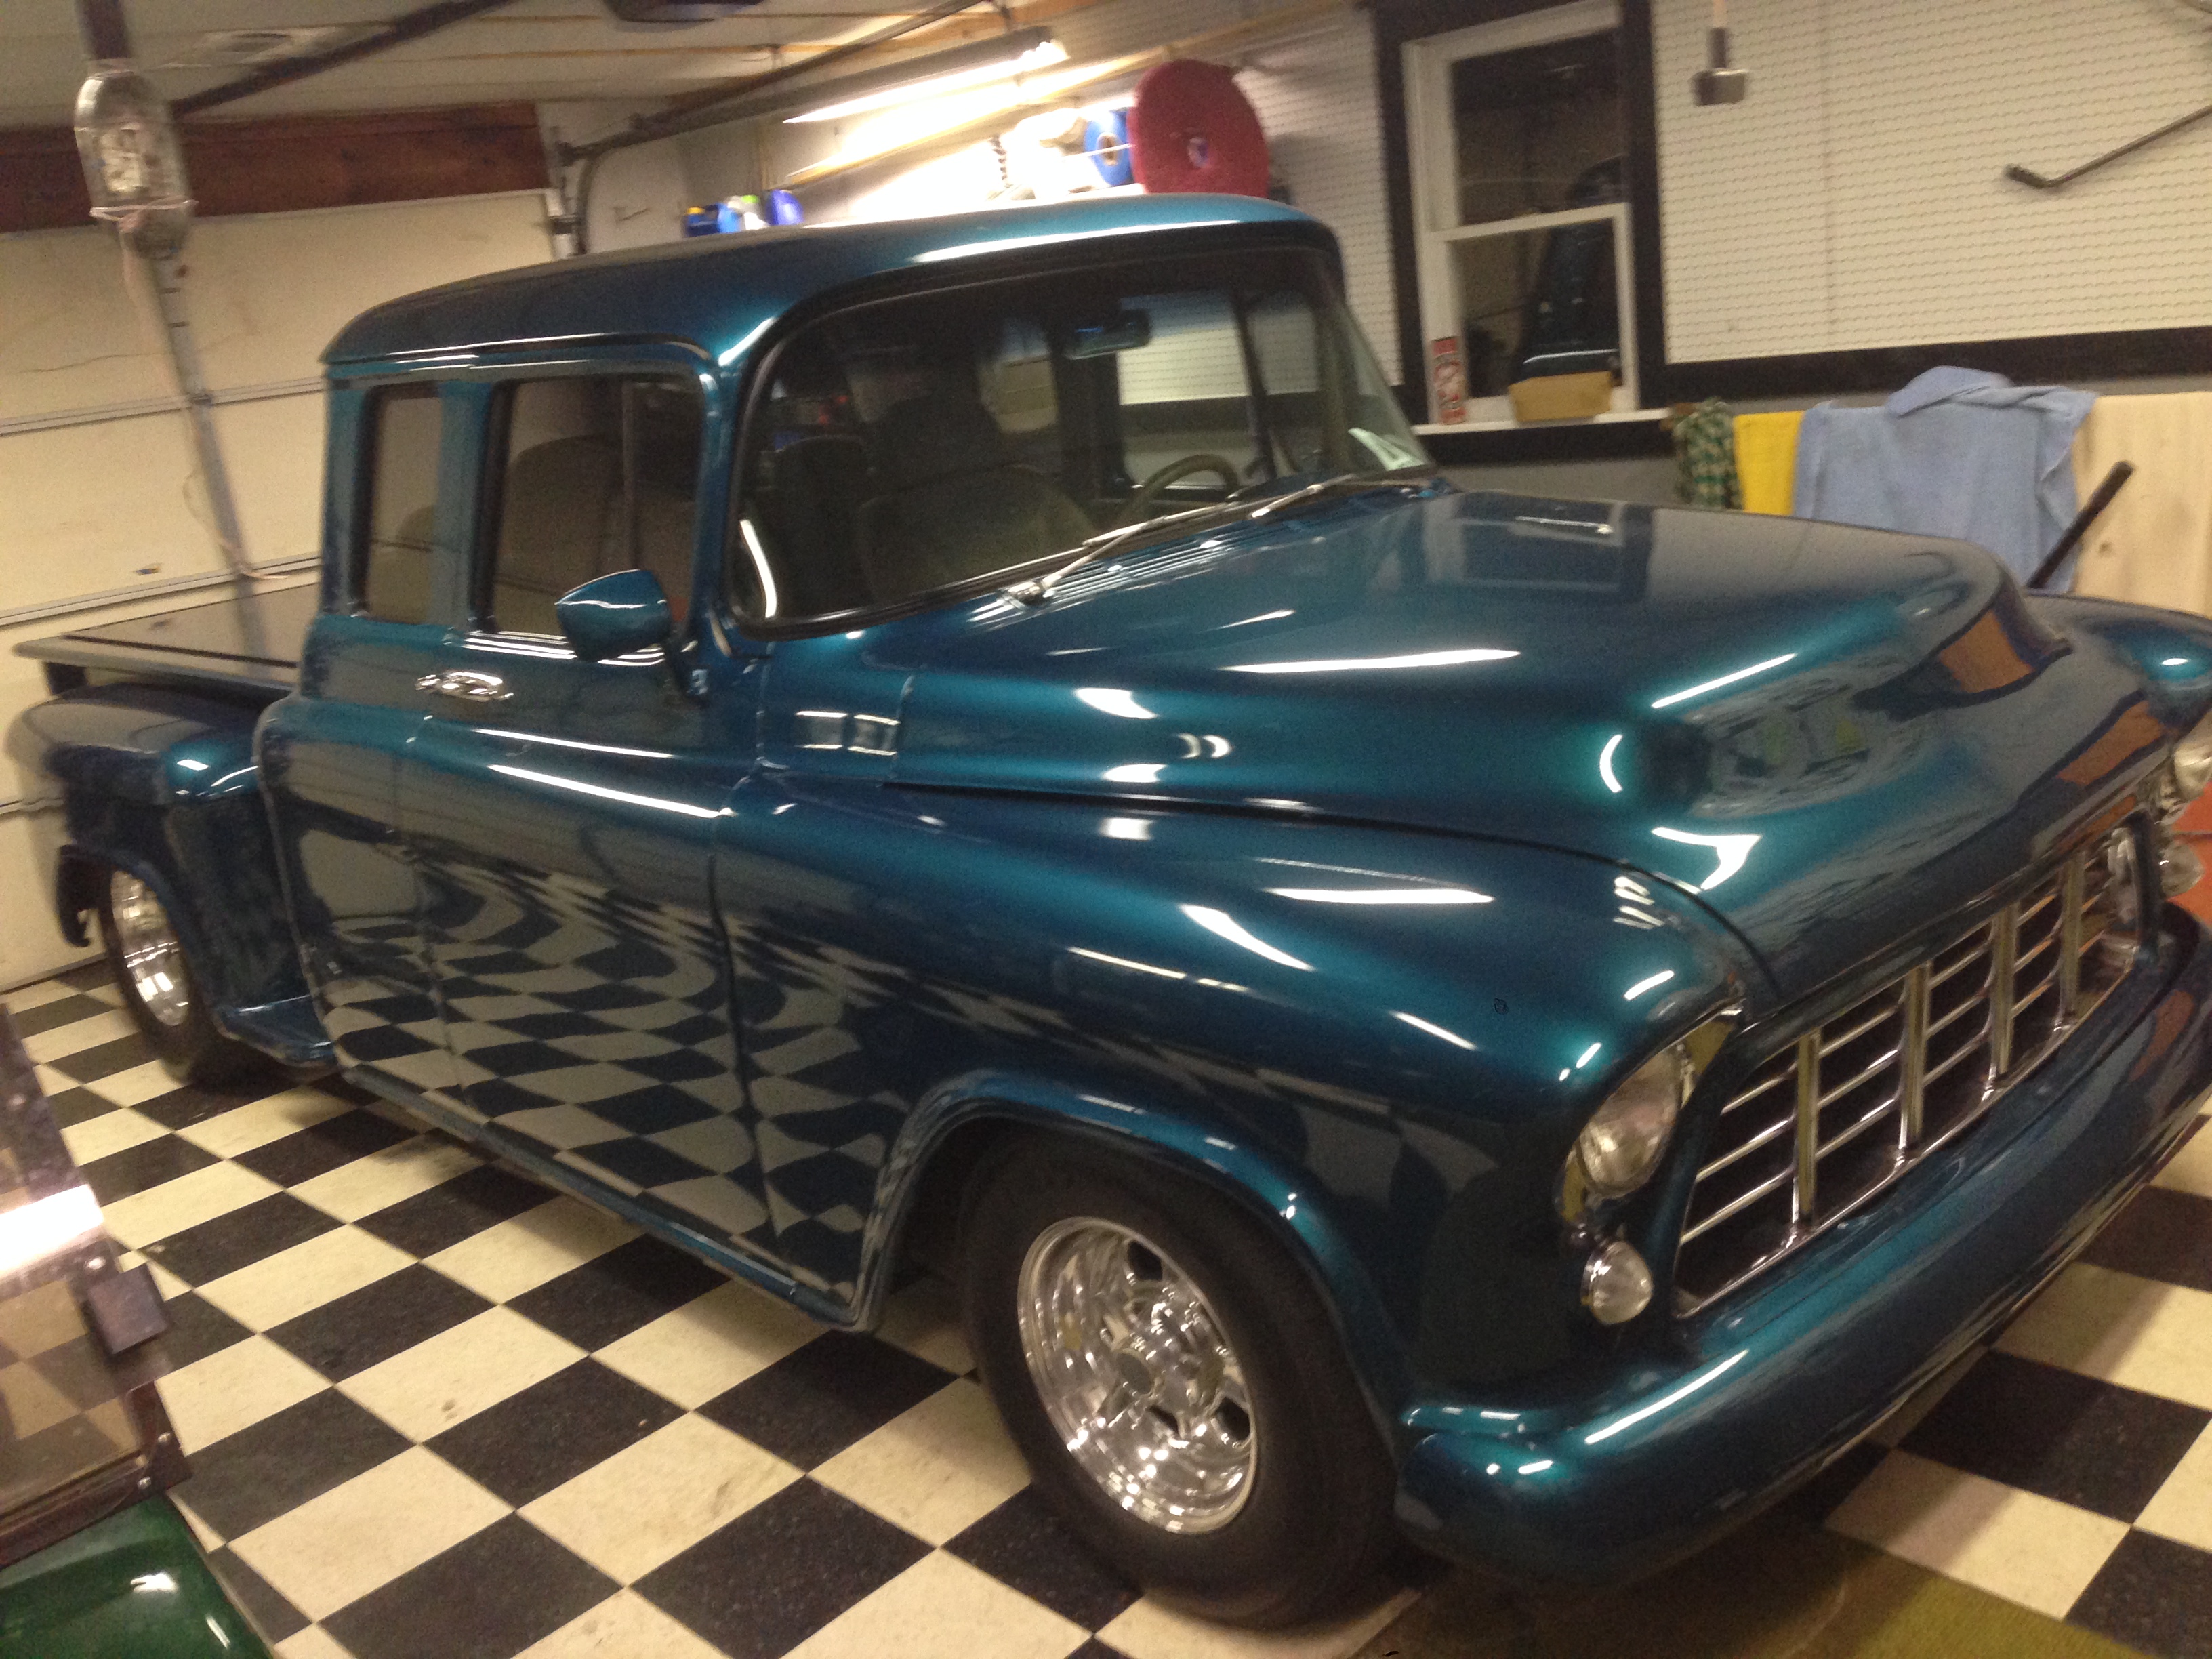
Well I went over to my Pop's house to work on my truck tonight and got a little side tracked... He went to the car show up in Harrington, DE this weekend and decided to sell his '68 Camaro RS. With the money burning a hole in his pocket, he turned right around and bought his friend's father's (who recently passed away) '55 Chevy pickup. In case you don't know what one is supposed to look like, here is one I found online:

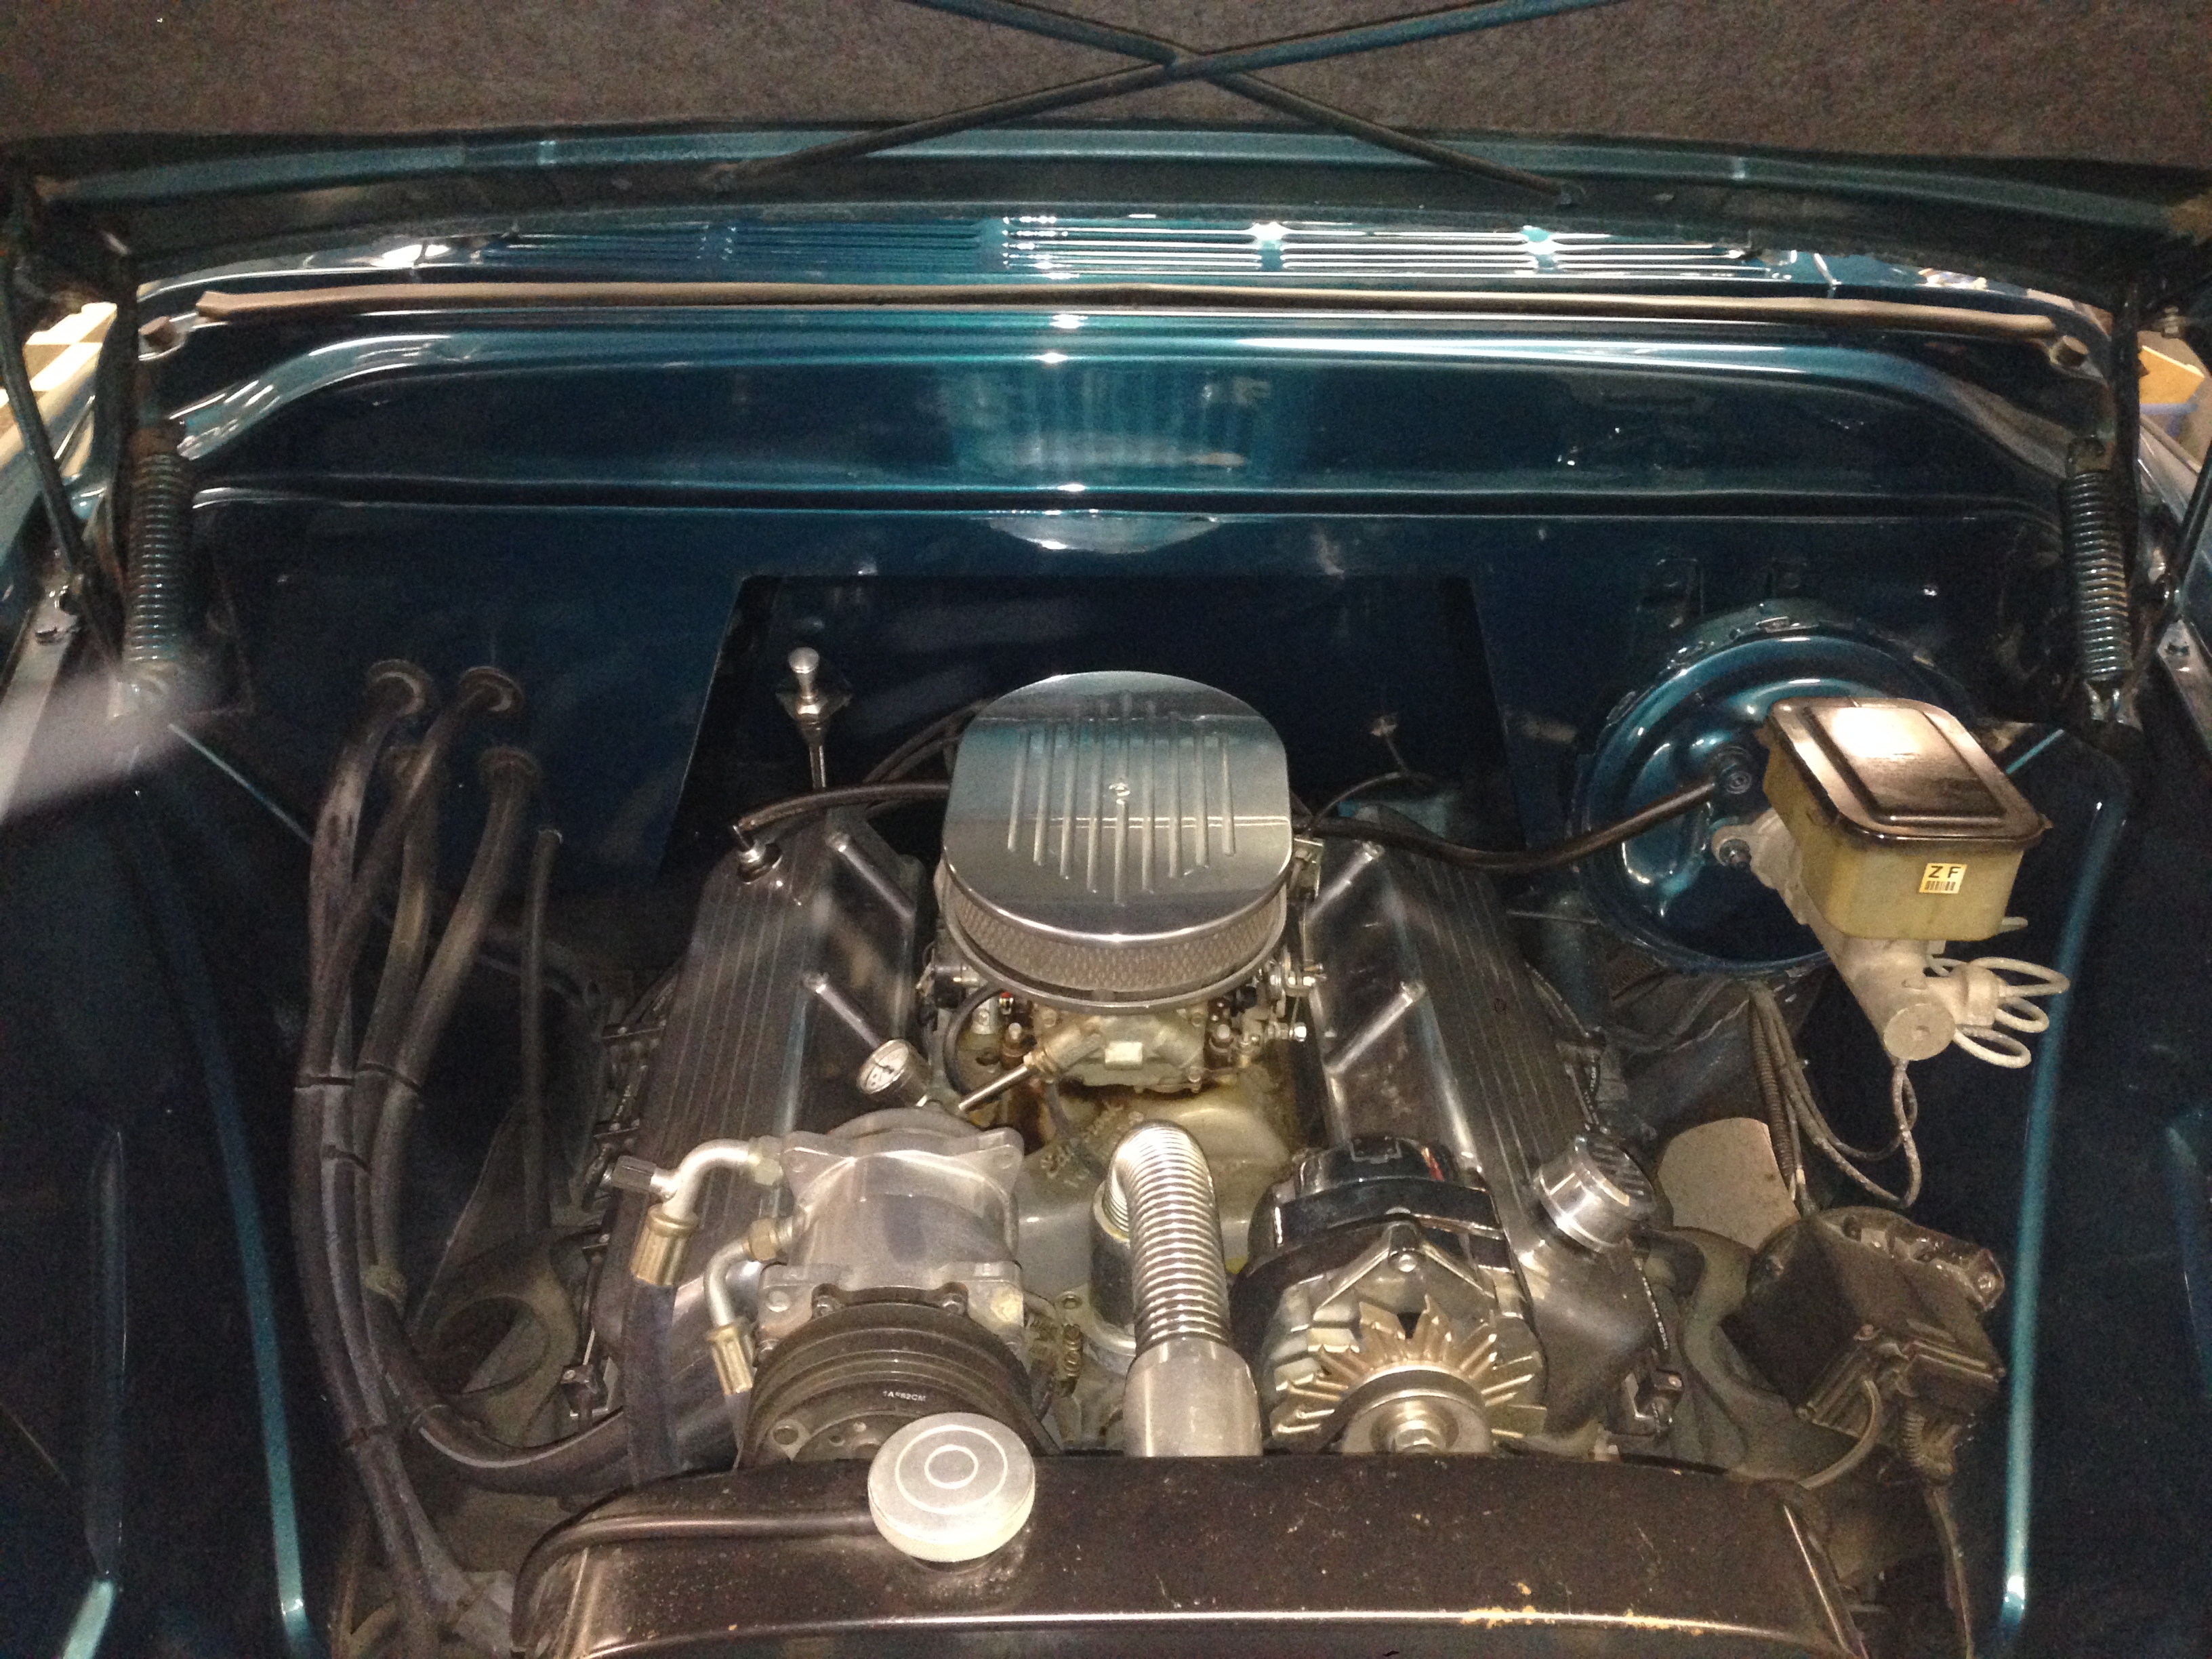
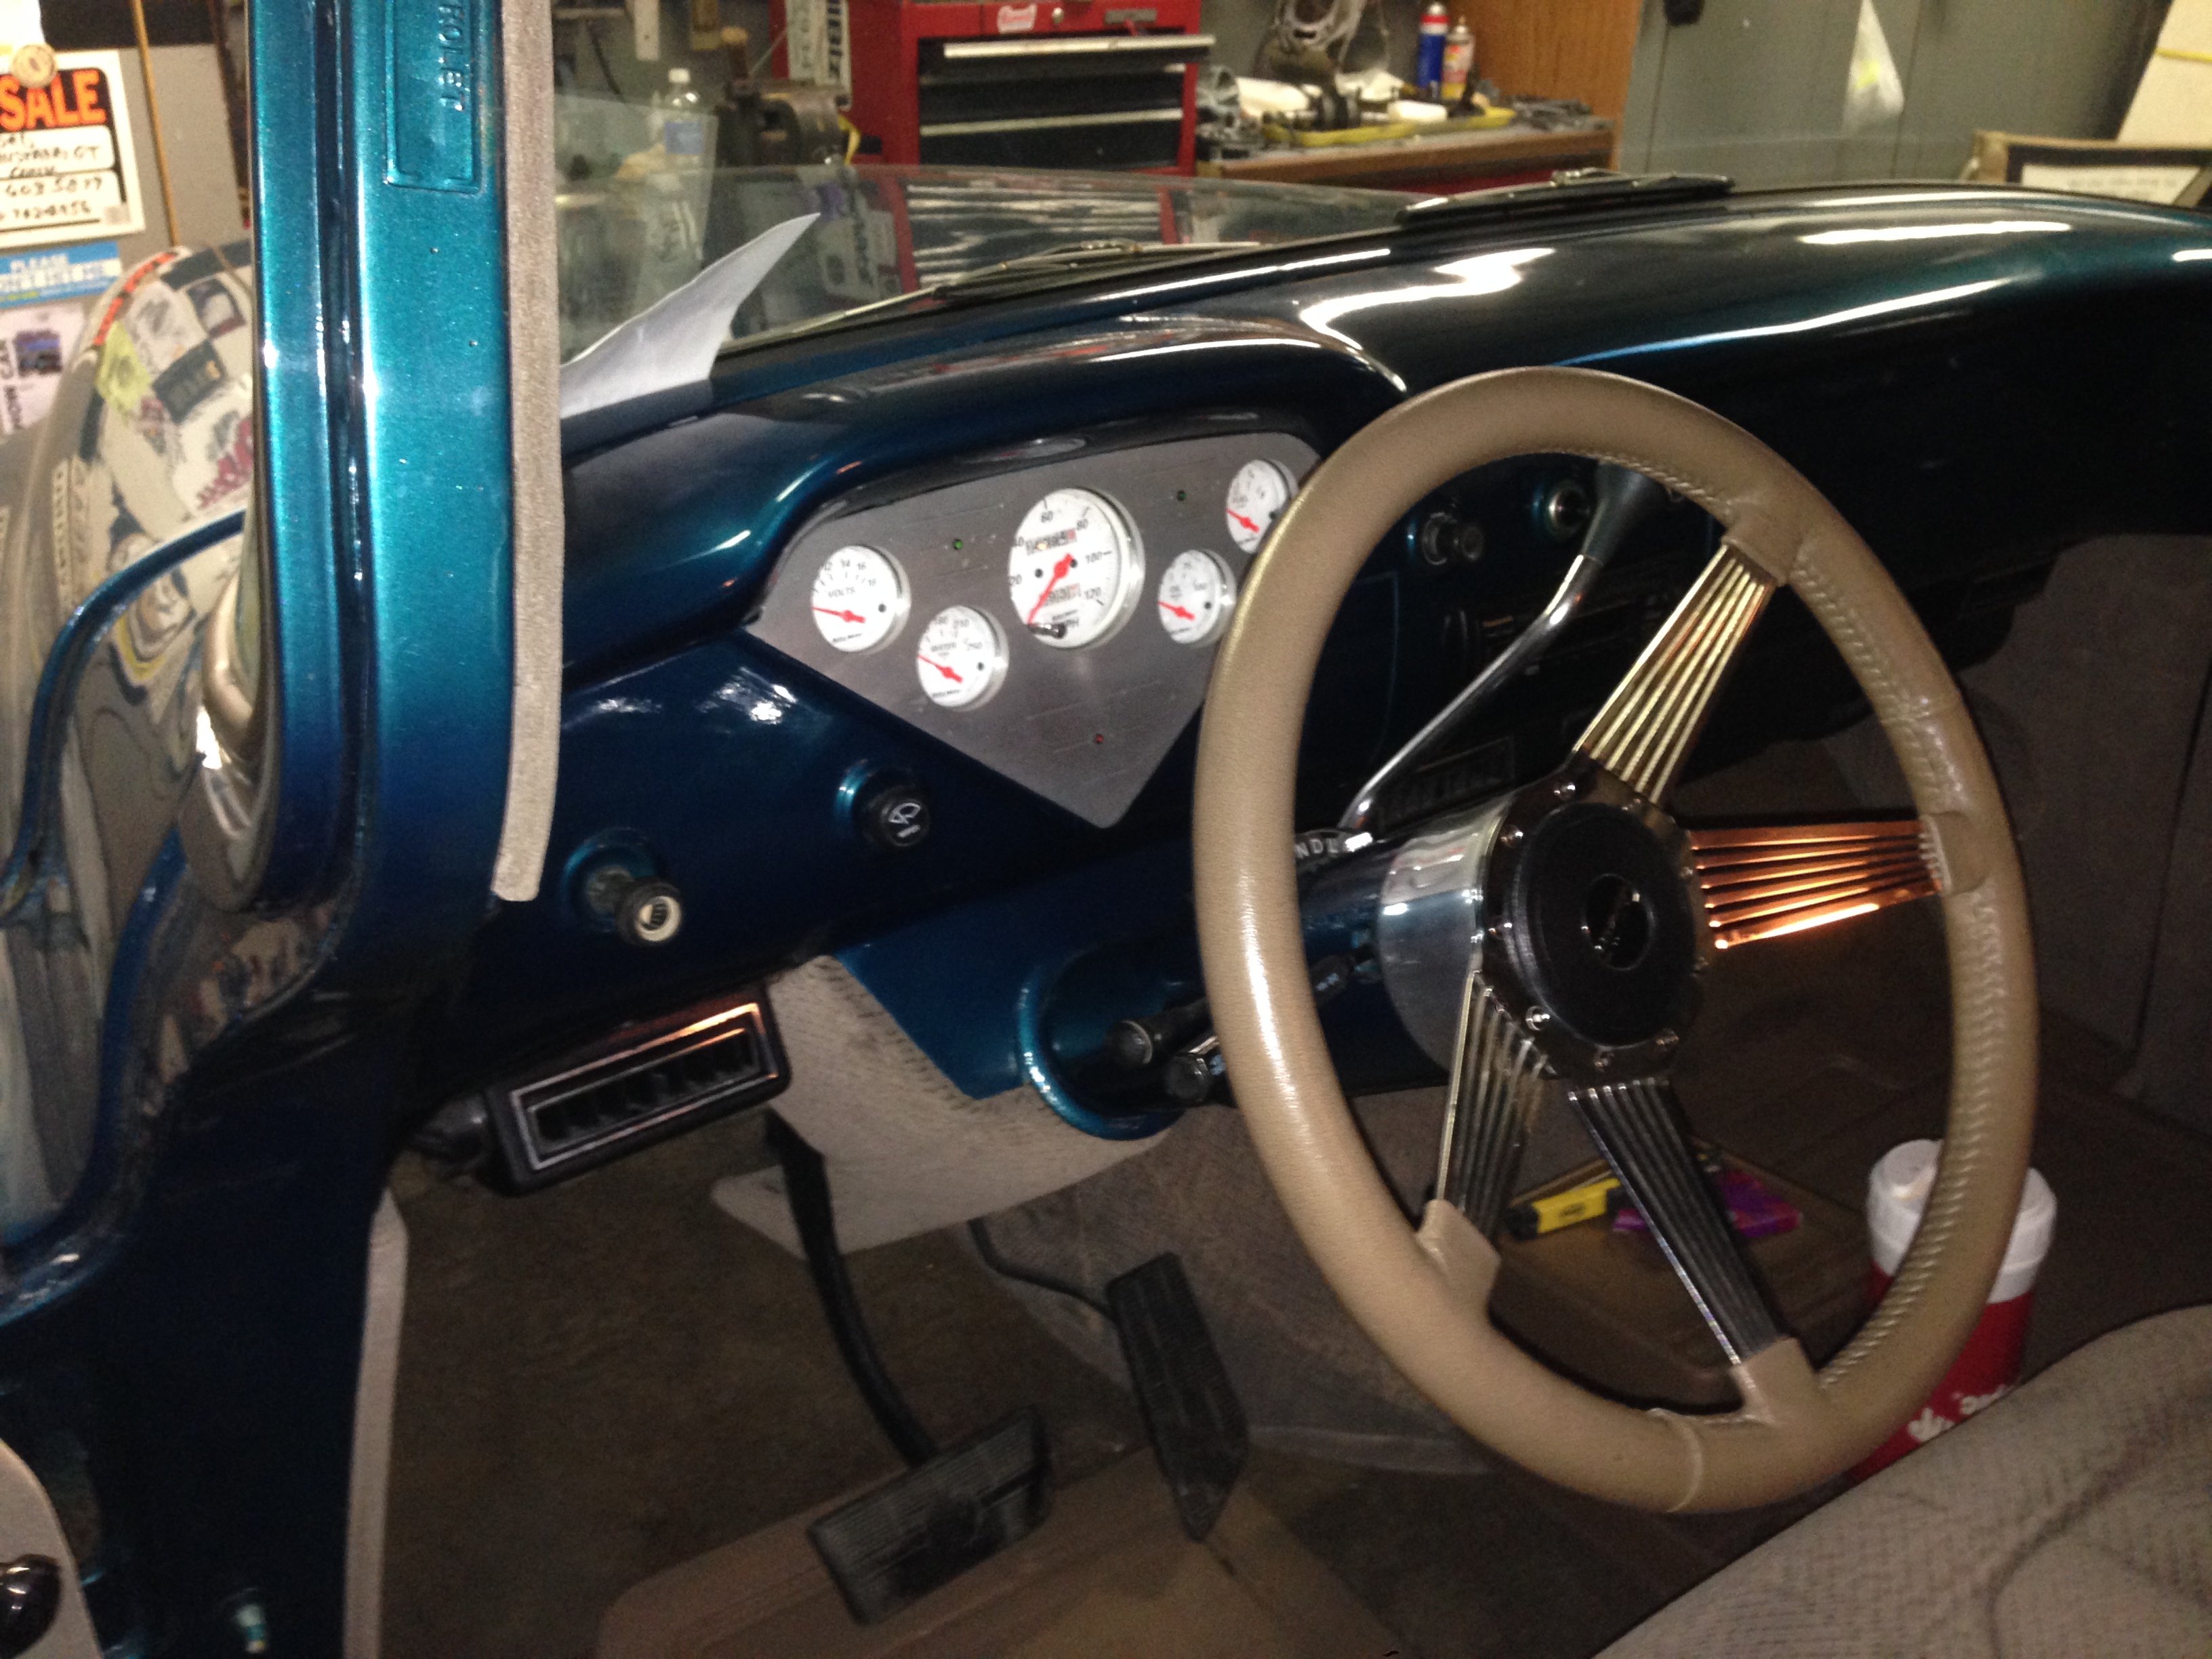
This one is a bit different though.... The family he bought it from has been building cars for decades and they really know how to build some rather unique vehicles. Chevy didn't make an extended cab on this particular model so they sectioned the cab and found another pair of doors to chop up and weld in to extend the cab. It was originally a long bed so they were able to just shorten the front section of the bed to avoid having to extend the frame. Not much other flare on the exterior other than shaving the drip rail, frenching the antenna and building a flat toneau cover. They swapped out the solid front axle for an independent suspension (I believe off of a Chevelle), disc brakes all around, massive rear end, aluminum 18s up front and 20s in the rear. Under the hood is a built 454 Big Block that fills the rather spacious engine compartment quite well - it certainly doesn't lack power. Inside it has '98 Silverado seats in the front and rear with a custom dash and gauges. While it's not exactly my style (I was trying to convince him to get a 40's Ford pickup), it's sill a pretty slick, one of a kind truck - you'll likely never see another on like it on the road. Here are some pics:

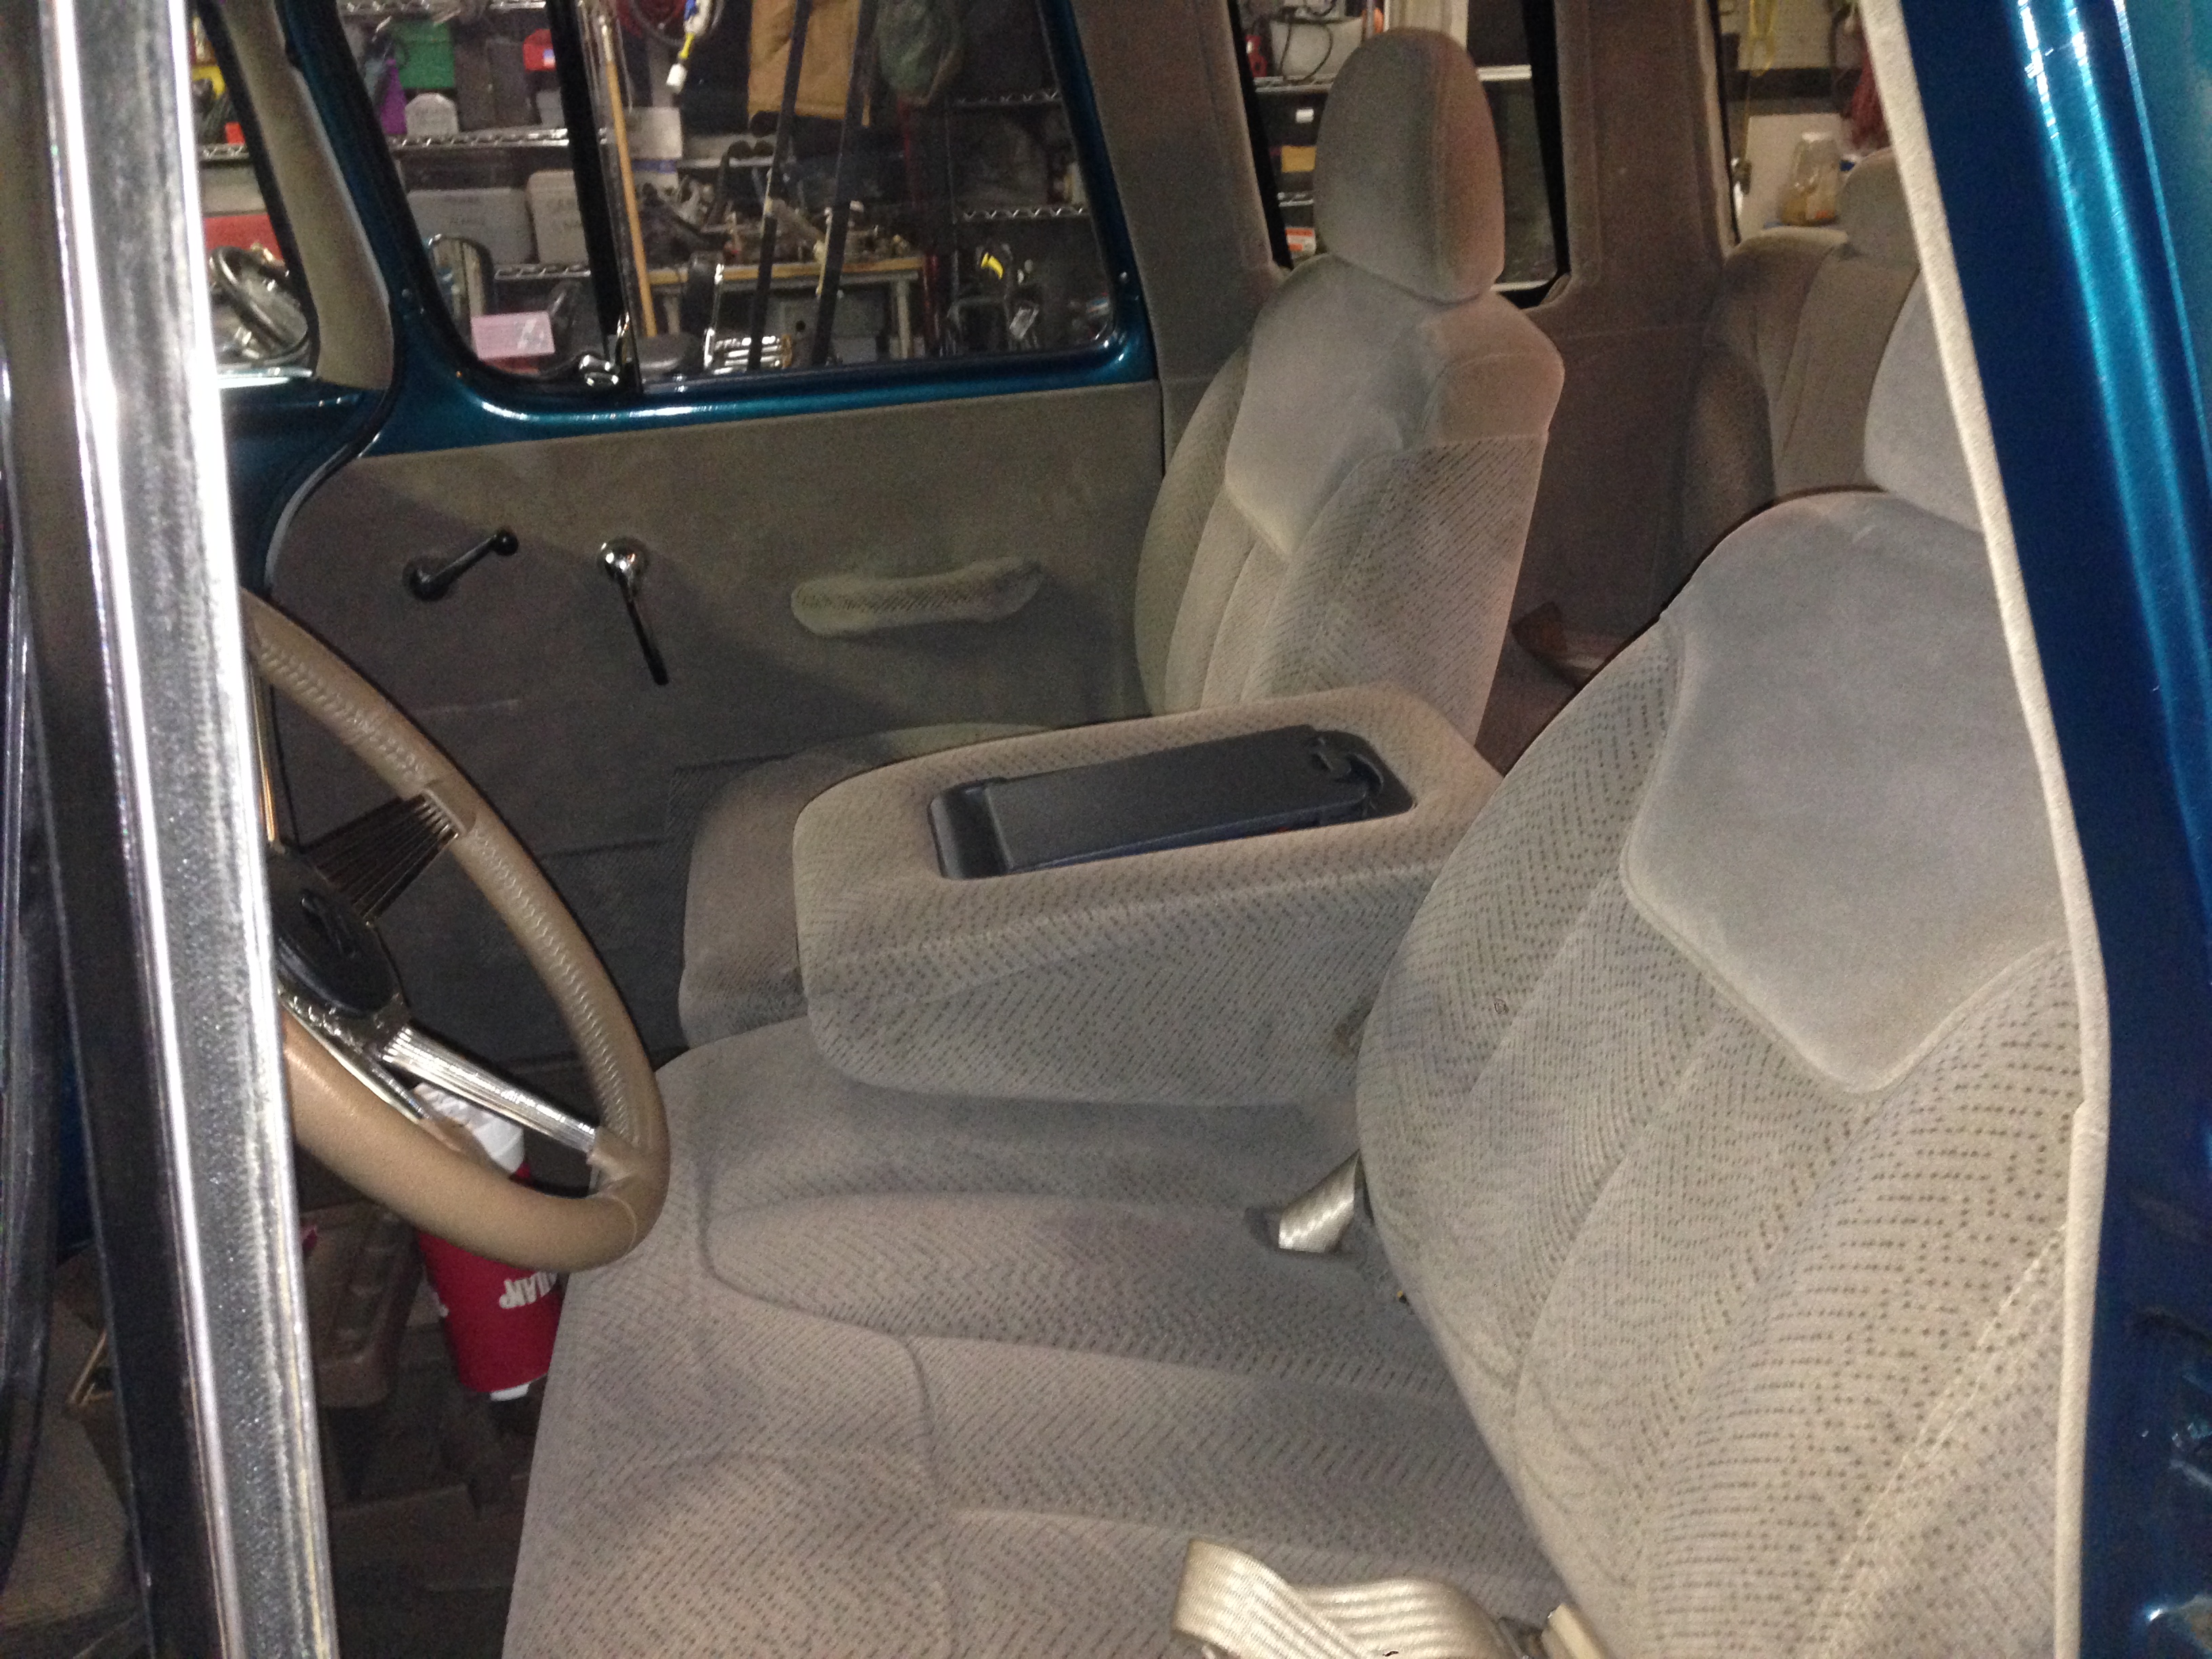
I'm trying to convince him to get chrome mirrors and bumpers for it - looks like I know what he'll be getting for his next birthday and Christmas...
This one is a bit different though.... The family he bought it from has been building cars for decades and they really know how to build some rather unique vehicles. Chevy didn't make an extended cab on this particular model so they sectioned the cab and found another pair of doors to chop up and weld in to extend the cab. It was originally a long bed so they were able to just shorten the front section of the bed to avoid having to extend the frame. Not much other flare on the exterior other than shaving the drip rail, frenching the antenna and building a flat toneau cover. They swapped out the solid front axle for an independent suspension (I believe off of a Chevelle), disc brakes all around, massive rear end, aluminum 18s up front and 20s in the rear. Under the hood is a built 454 Big Block that fills the rather spacious engine compartment quite well - it certainly doesn't lack power. Inside it has '98 Silverado seats in the front and rear with a custom dash and gauges. While it's not exactly my style (I was trying to convince him to get a 40's Ford pickup), it's sill a pretty slick, one of a kind truck - you'll likely never see another on like it on the road. Here are some pics:
I'm trying to convince him to get chrome mirrors and bumpers for it - looks like I know what he'll be getting for his next birthday and Christmas...
Last edited by kawazx636; Jun 30, 2014 at 08:58 PM.
Jul 1, 2014 | 01:48 AM
#791
Really like the Camaros but having a truck like that is a lot more unique. I really wish I had those kind of skills to do an extended cab on a truck that didn't exist. Not really will apply to this truck but www.stovebolt.com will have a ton of information for your dad, but it might come in useful. My brother had a 58 years ago and I have a 64 I need to finish up.
Those wrap around back glasses can be a trick to find. That is a cool place to put the 3rd brake light. Never would of thought of that. I like that and is just a great idea.
Those wrap around back glasses can be a trick to find. That is a cool place to put the 3rd brake light. Never would of thought of that. I like that and is just a great idea.
Last edited by Terrys87; Jul 1, 2014 at 01:51 AM.
Jul 1, 2014 | 01:42 PM
#792
Thread Starter
Super Moderator
iTrader: (3)
Joined: Jan 2012
Posts: 3,218
Likes: 26
From: Salisbury, MD
Thanks Terry, I'll shoot the website over to him. His Camaro was really cherry, I wish he didn't sell it but how can you pass up $45,000 cash?! He's getting old and wanted a more mellow truck so this will do I suppose
Last edited by kawazx636; Jul 1, 2014 at 01:54 PM.
Jul 1, 2014 | 08:59 PM
#794
Thread Starter
Super Moderator
iTrader: (3)
Joined: Jan 2012
Posts: 3,218
Likes: 26
From: Salisbury, MD
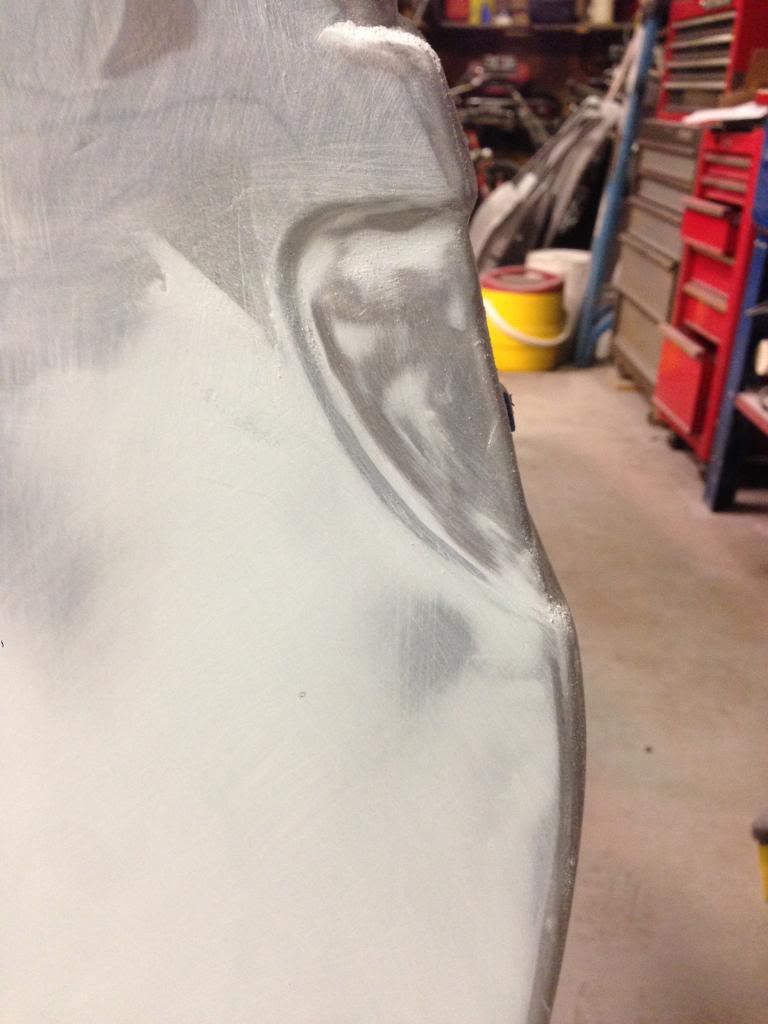
More progress... I got the rest of the shaping done with short strand filler on the rear cab seams:
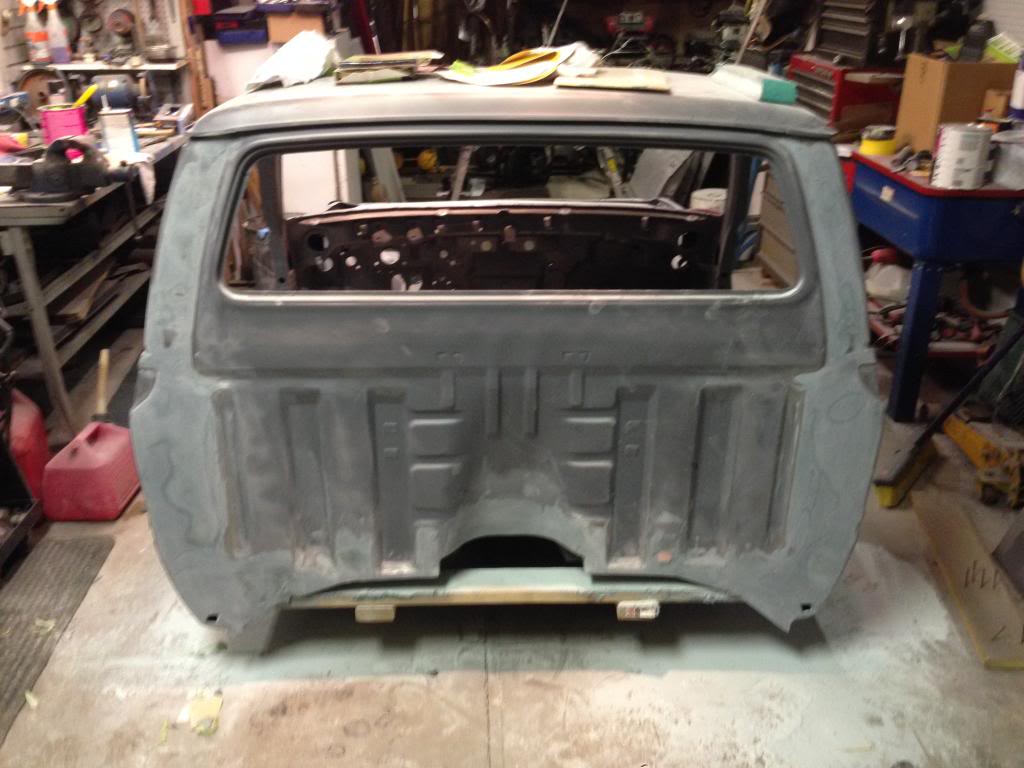
Started moving on to the final smoothing with light weight filler (still a lot left to do):
I also decided to make the contour around the cab vents a little more pronounced. I stumbled across this modification by accident - in order to get the seam level, I had to build up the short strand filler by about a 1/16 of an inch in that area so I thought that I'd add a little more contour to the vents. It's not quite shaped out completely, but I think it'll be a nice subtle touch:
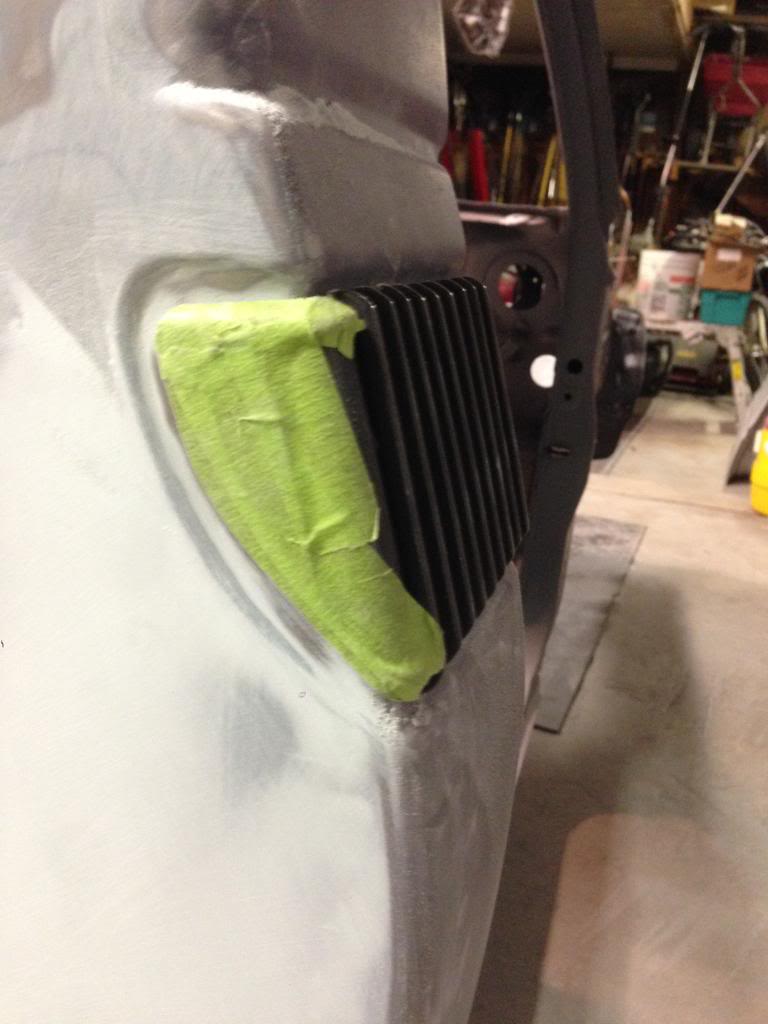
Things are coming along well - fortunately I started with the more difficult and time consuming tasks first: the smoothie cowl, battery tray and cab seams. But I will say, I do not regret the extra work. I think they are going to be a great modifications and I would highly recommend them to others. Once I get this buttoned up, I think the rest will cruise on by.

Started moving on to the final smoothing with light weight filler (still a lot left to do):

I also decided to make the contour around the cab vents a little more pronounced. I stumbled across this modification by accident - in order to get the seam level, I had to build up the short strand filler by about a 1/16 of an inch in that area so I thought that I'd add a little more contour to the vents. It's not quite shaped out completely, but I think it'll be a nice subtle touch:


Things are coming along well - fortunately I started with the more difficult and time consuming tasks first: the smoothie cowl, battery tray and cab seams. But I will say, I do not regret the extra work. I think they are going to be a great modifications and I would highly recommend them to others. Once I get this buttoned up, I think the rest will cruise on by.
Last edited by kawazx636; Jul 1, 2014 at 09:01 PM.
Jul 7, 2014 | 09:25 PM
#796
Thread Starter
Super Moderator
iTrader: (3)
Joined: Jan 2012
Posts: 3,218
Likes: 26
From: Salisbury, MD
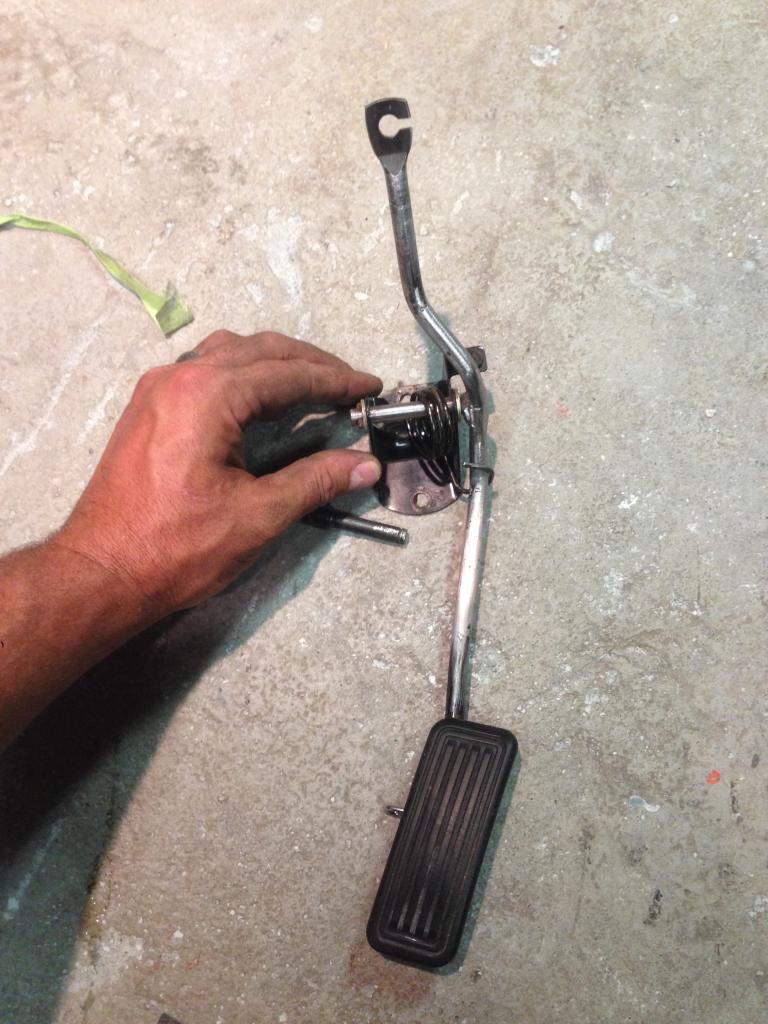
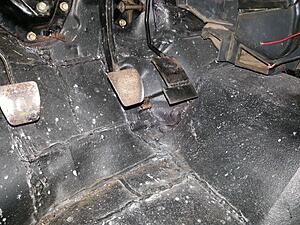
I took a bodywork break tonight to handle something I've been meaning to do for a while - the gas pedal mod with a 2000 Tacoma gas pedal to eliminate the annoying stock pivoting pedal. Again, I took another page from Corey's book in doing this mod, but I did it slightly different with my own little twist. Unfortunately, I neglected to take a picture of the pedal before modification so I'm also stealing one of Corey's photos. Here's what it starts like:
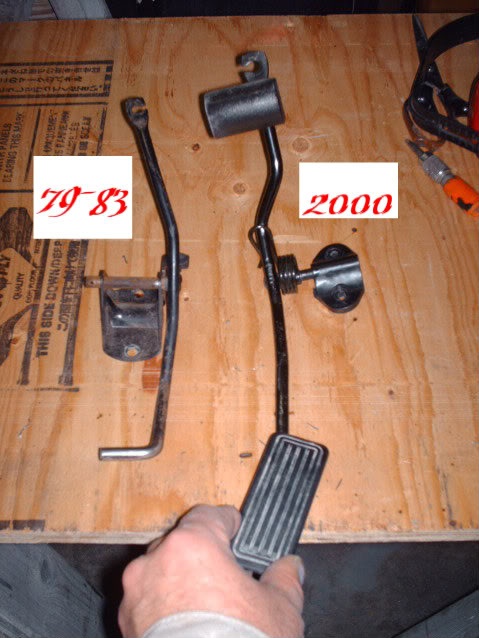
As you can see, the stock pedal has the post on the left and the 2000 pedal has the post on the right - this needs to be flipped around or else the pedal won't clear the ebrake handle shaft. The pedal would also be a little too far to the left in an already limited floor board. You'll also notice that the top of the pedal lever is bent differently on both, this is where Corey and I differ in our mods. Corey relocated the throttle cable mount on the firewall. Instead of doing that I cut the pedal just above the pivot point, flipped the top portion over and welded it back together. Doing so made the bend in the top half of the pedal assembly line up nearly perfectly with the opening for the throttle cable in the firewall. I then cut the pivot post off the stock assemble and welded it on to the 2000 assembly. The post on the 2000 assembly won't work because it is too short to fit into the stock mounting bracket (plus it will be used to make a post for the return spring later). This is what it came out looking like:
In order to make sure that the pedal has enough travel and was located properly, I tweaked the lower half of the assemble a few times in the vise to get it to where I wanted it. I still need to fabricate a spring retaining post, but I'll get to that later. Here's the installed pics:
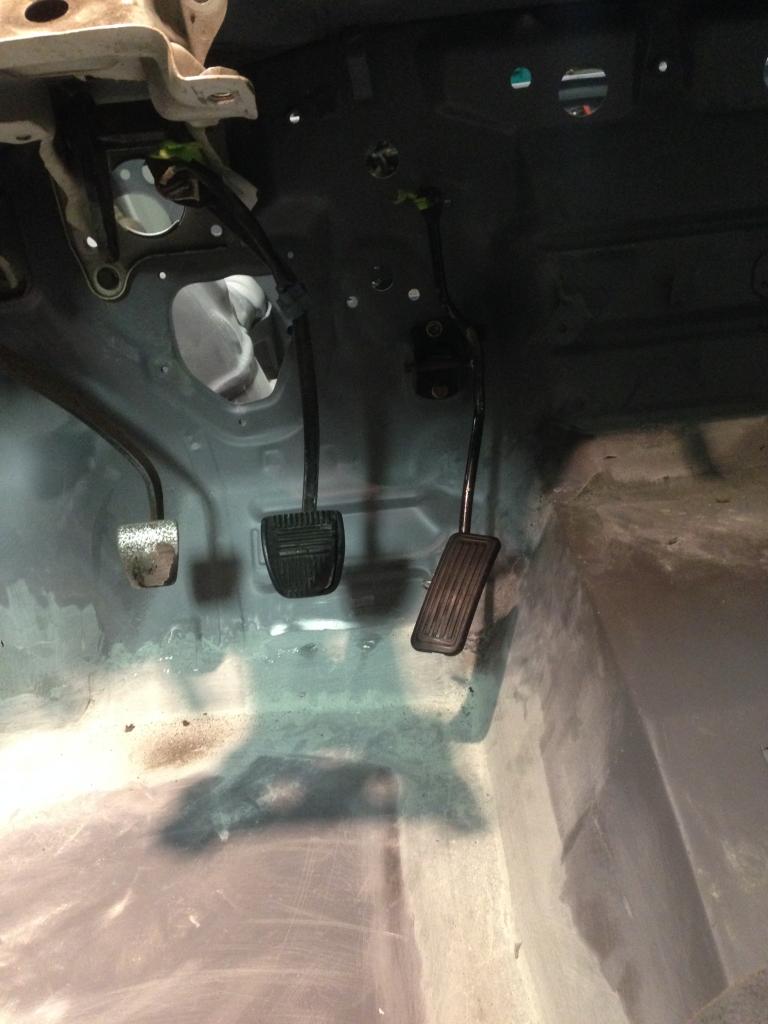
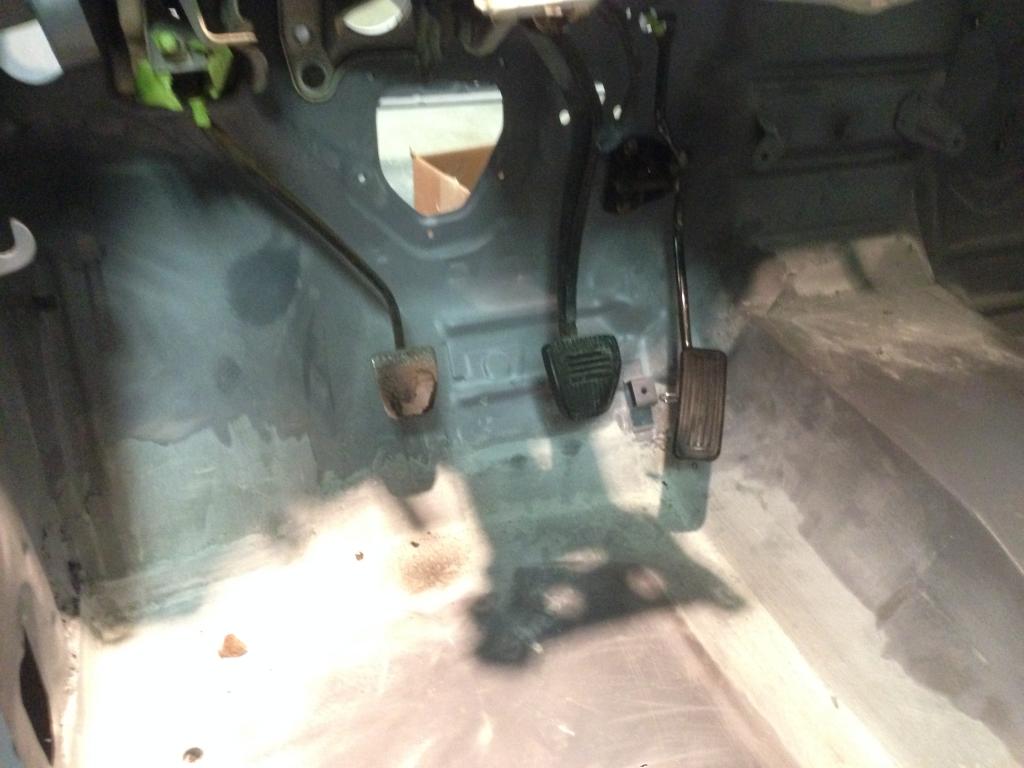
It may look a bit funky and tight in the pictures, but I put a seat in the truck to sit in to test to make sure everything felt right. Even went out a couple times to compare the feel to my Tundra. It feels GREAT!! Really easy and comfortable transition from the brake pedal to the gas and back on the pivot of my heel. There are several little things that I have done on my truck that have really made a bit difference and I have a feeling that this is going to be another one (Thanks for the idea Corey!). Total time invested was about an hour and $20 for the pedal off ebay. I was also looking at other pedals that may work and I think that the 92-96 Lexus ES300 pedal may be a good candidate as well.

As you can see, the stock pedal has the post on the left and the 2000 pedal has the post on the right - this needs to be flipped around or else the pedal won't clear the ebrake handle shaft. The pedal would also be a little too far to the left in an already limited floor board. You'll also notice that the top of the pedal lever is bent differently on both, this is where Corey and I differ in our mods. Corey relocated the throttle cable mount on the firewall. Instead of doing that I cut the pedal just above the pivot point, flipped the top portion over and welded it back together. Doing so made the bend in the top half of the pedal assembly line up nearly perfectly with the opening for the throttle cable in the firewall. I then cut the pivot post off the stock assemble and welded it on to the 2000 assembly. The post on the 2000 assembly won't work because it is too short to fit into the stock mounting bracket (plus it will be used to make a post for the return spring later). This is what it came out looking like:

In order to make sure that the pedal has enough travel and was located properly, I tweaked the lower half of the assemble a few times in the vise to get it to where I wanted it. I still need to fabricate a spring retaining post, but I'll get to that later. Here's the installed pics:


It may look a bit funky and tight in the pictures, but I put a seat in the truck to sit in to test to make sure everything felt right. Even went out a couple times to compare the feel to my Tundra. It feels GREAT!! Really easy and comfortable transition from the brake pedal to the gas and back on the pivot of my heel. There are several little things that I have done on my truck that have really made a bit difference and I have a feeling that this is going to be another one (Thanks for the idea Corey!). Total time invested was about an hour and $20 for the pedal off ebay. I was also looking at other pedals that may work and I think that the 92-96 Lexus ES300 pedal may be a good candidate as well.
Last edited by kawazx636; Jul 7, 2014 at 09:28 PM.
Jul 8, 2014 | 12:32 PM
#798

Sweet pedal! perfect for heal and toe, I also hated the stock pivot pedal (mine was broken anyway) so I made this, it was one of those small details that made a big difference for me for driving pleasure so I'm sure it'll be the same for you. Keep on keepin on, once paint is done it will go really fast.
Last edited by gillesdetrail; Jul 8, 2014 at 12:45 PM.
Jul 9, 2014 | 10:17 PM
#799
Thread Starter
Super Moderator
iTrader: (3)
Joined: Jan 2012
Posts: 3,218
Likes: 26
From: Salisbury, MD
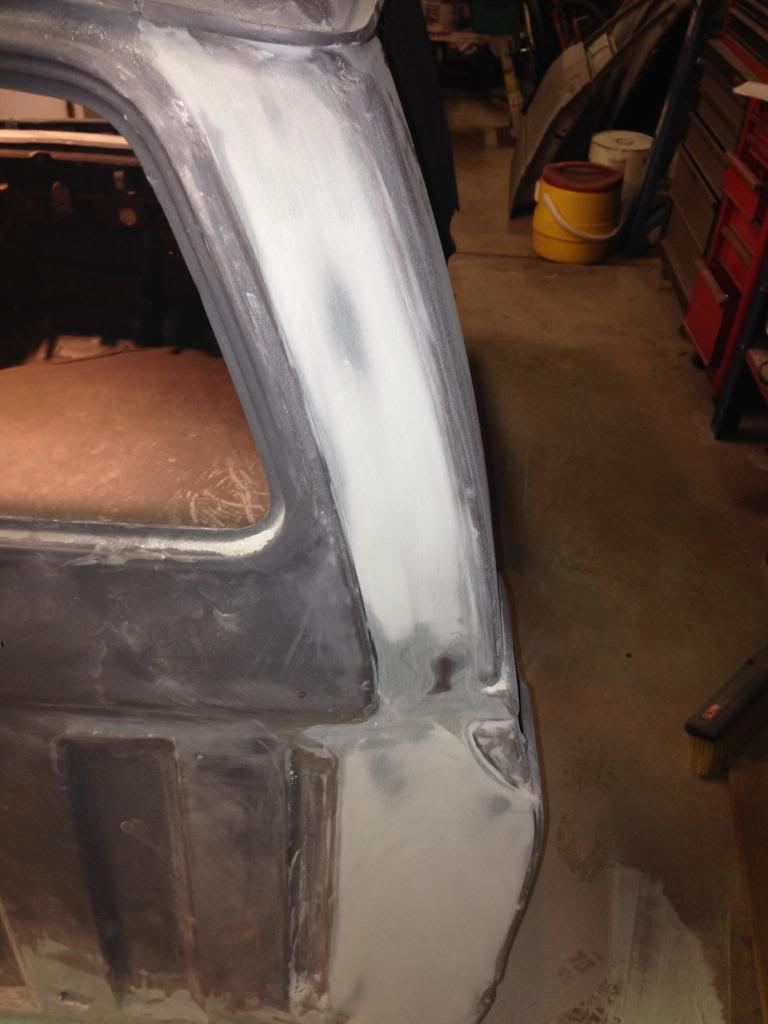
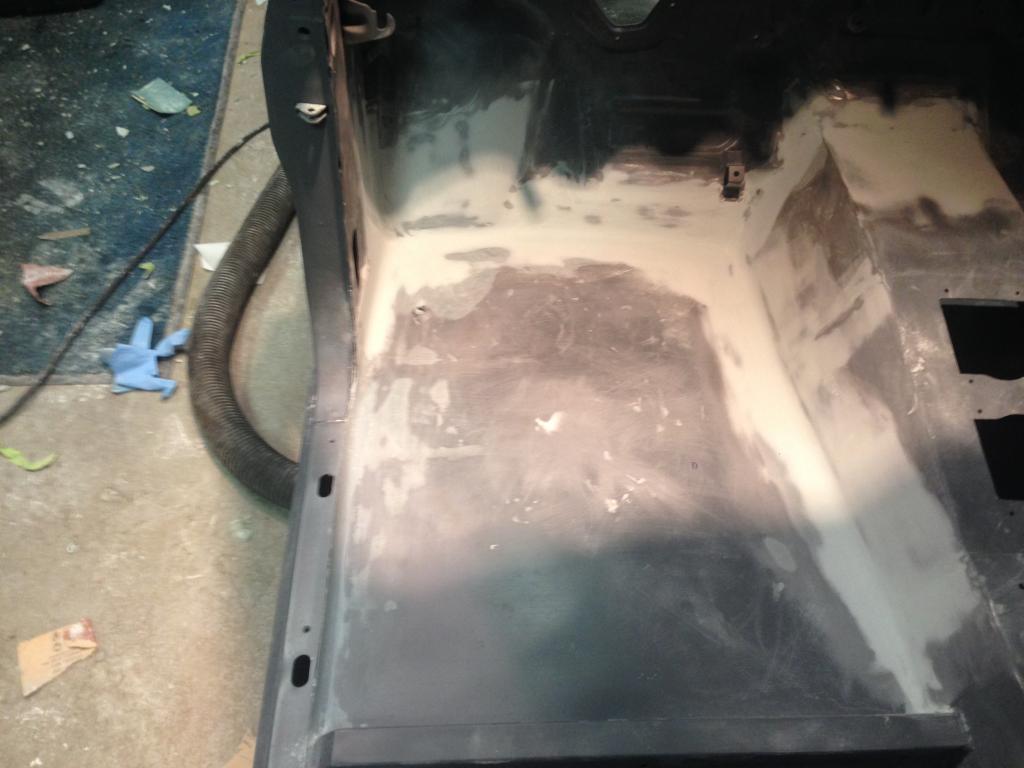
Pretty much finished up the back of the cab tonight. Everything is shaped up, blocked and straight. I'm going to hit it once more with 120 grit just to make sure that I got all of the heavier 80 grit scratches out and then I'll shoot another coat of epoxy over it. Being that the lower portion will be Raptor Lined and covered by the bed, I really didn't have to go the extra mile to get everything so straight, but I don't like taking shortcuts. Again, I am soooo glad that I took the extra time and effort to shave those body seams!
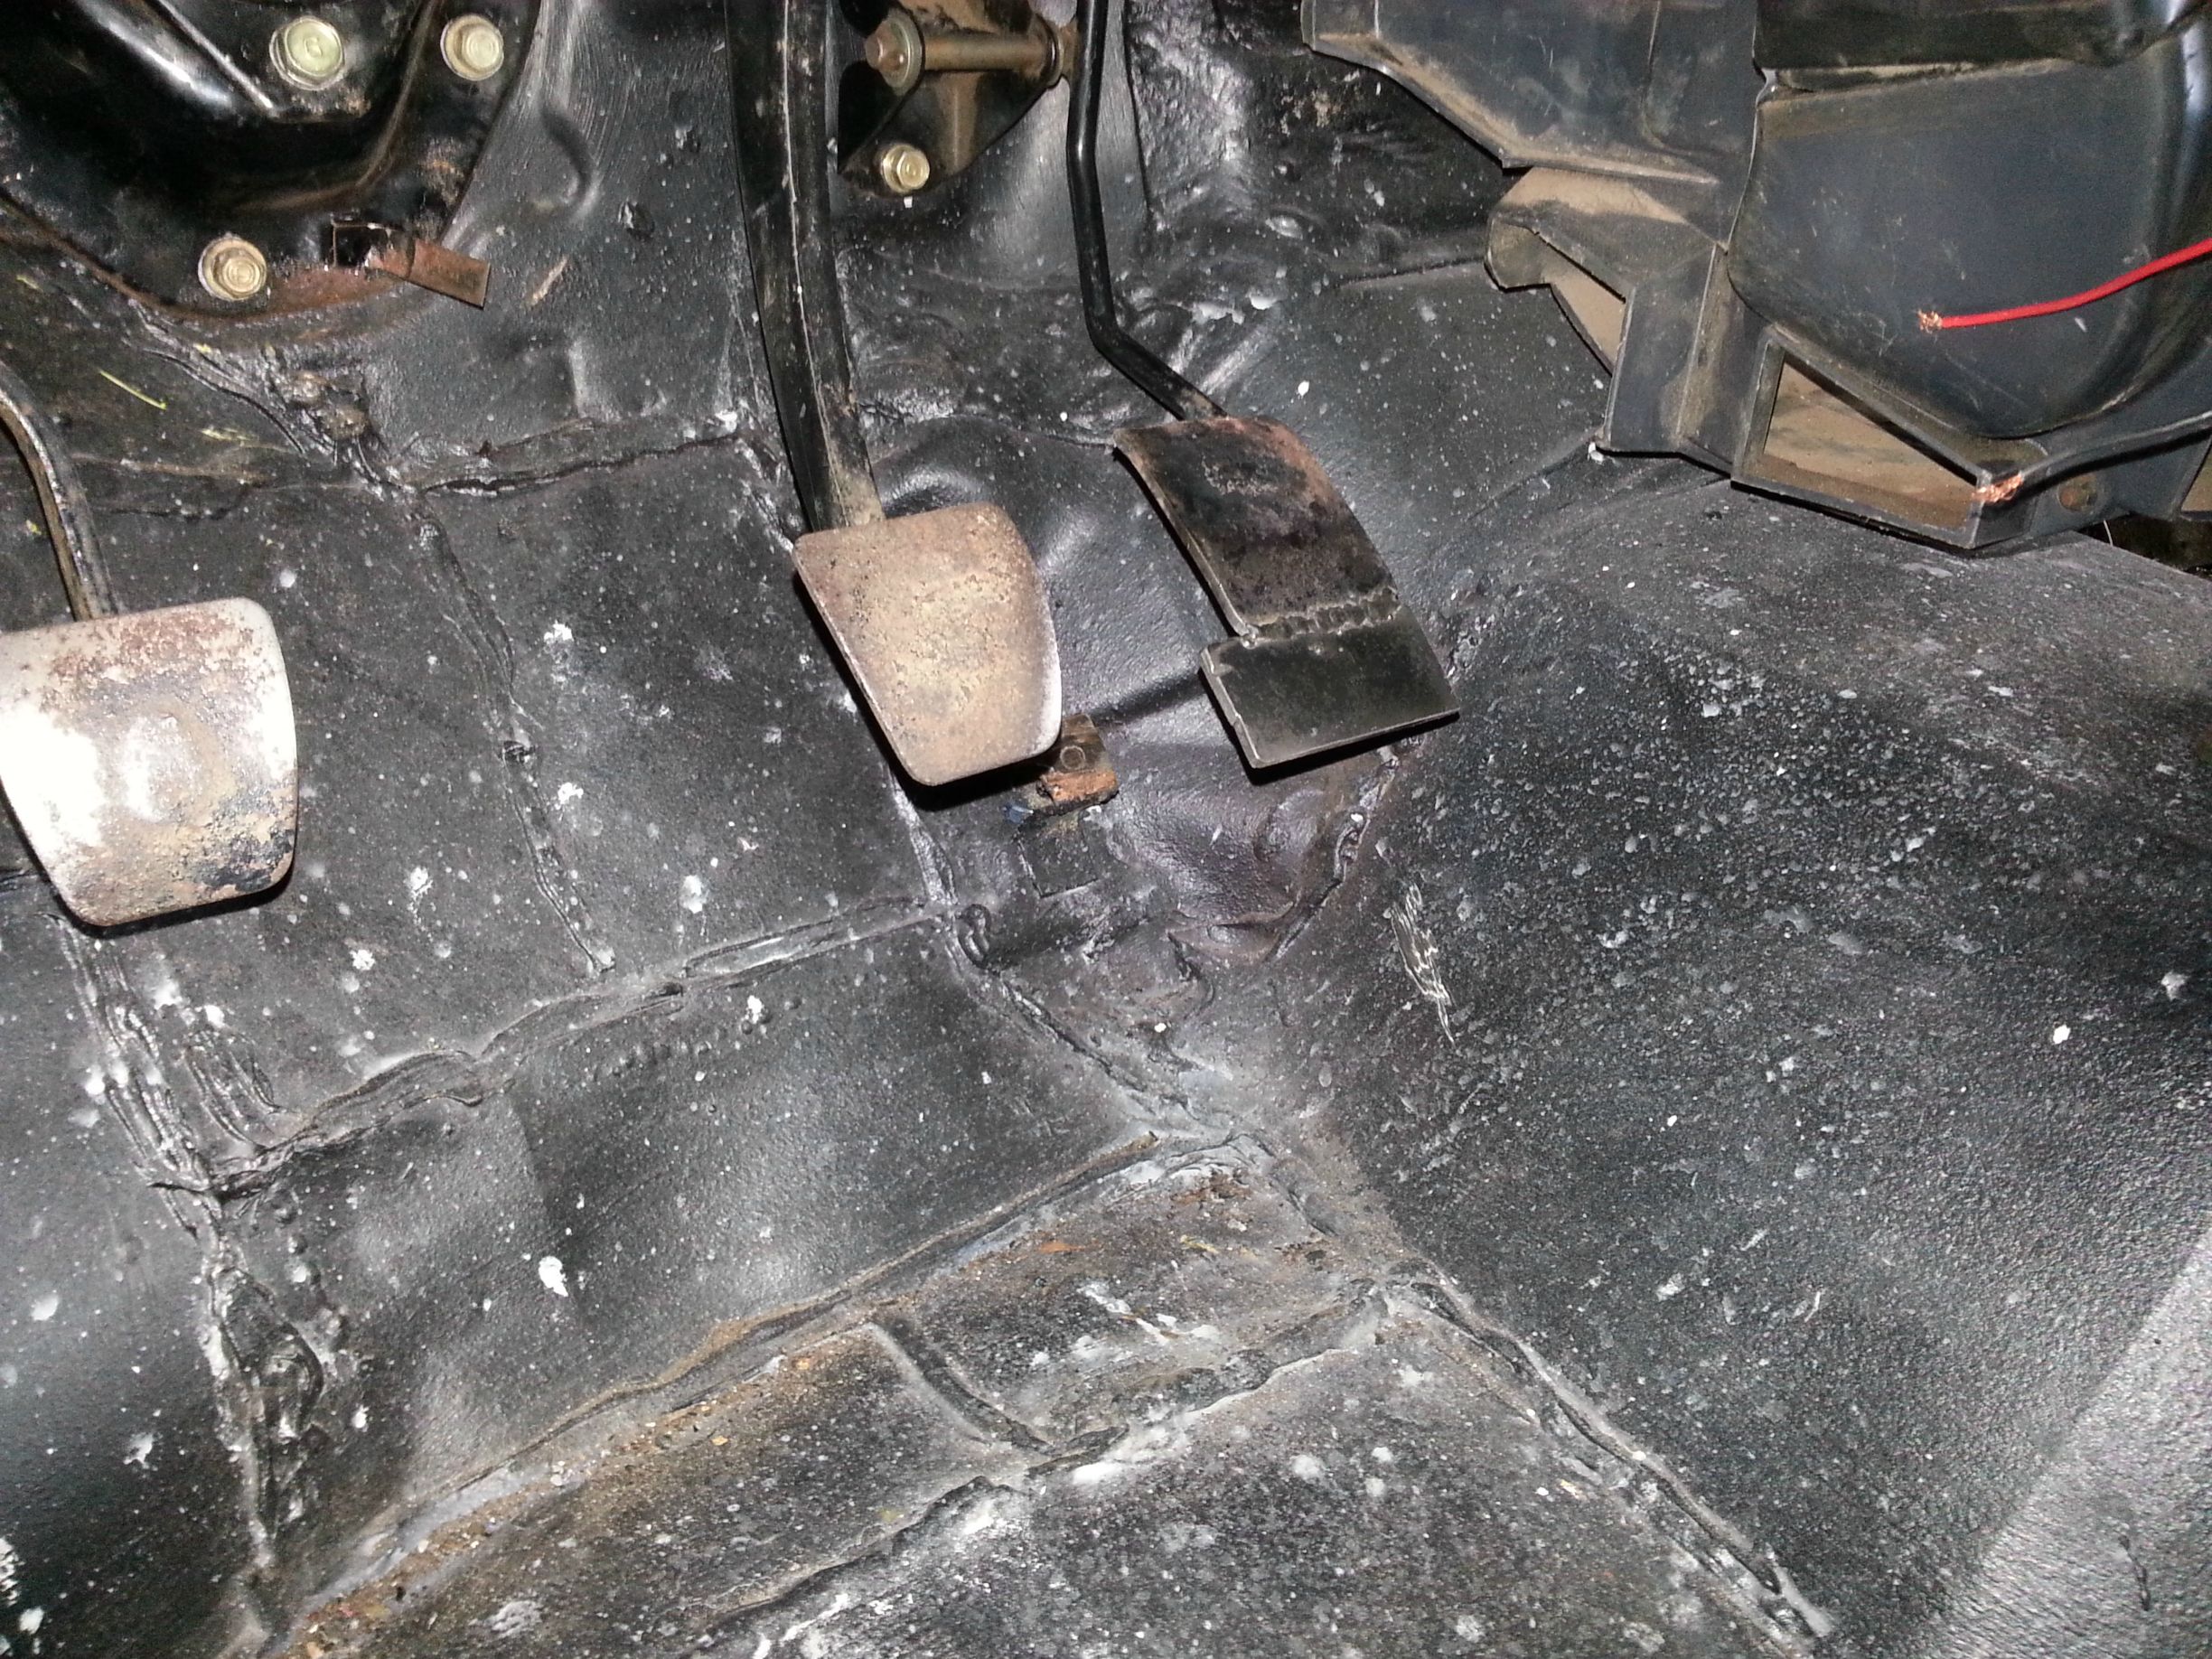
I also got the driver side floor pan clean up. Since I'm going to Raptor Line the interior, I won't have the luxury of "hiding" the welds and fabrication work under carpet. I did a fair amount of cleaning up when I used my carbide deburring bits to dress the welds, but that wasn't enought for my liking. I wanted the firewall and tranny tunnel to look like it flows right into the floor pan. So I basically used short strand filler to round the inside corners and contour the transition into one of the beads in the original firewall. It's kind of hard to see how good it turned out in the picture below, but once I shoot another coat of epoxy over it I think you all will get the picture.
What used to look like this:
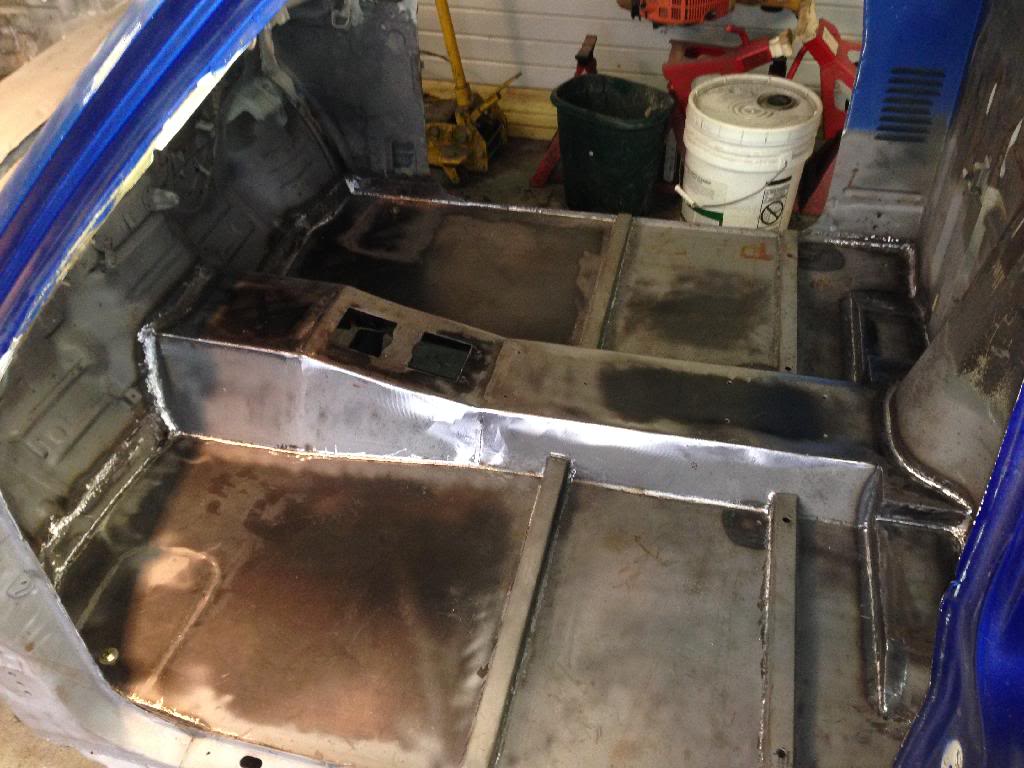
Now looks like this:
On to the passenger side next. After that, a quick coat of epoxy over the body work I've completed so far to prevent flash rust then on to the underside of the cab. The underside will just get a couple coats of epoxy, seam sealer, urethane primer and Raptor Liner. Once the bottom is wrapped up, the cab should never have to be flipped up ever again! Then I'll epoxy the doors, fenders, hood and valance so I can mount them on the cab to do the final bodywork on all the panels. Then.... PAINT!

I also got the driver side floor pan clean up. Since I'm going to Raptor Line the interior, I won't have the luxury of "hiding" the welds and fabrication work under carpet. I did a fair amount of cleaning up when I used my carbide deburring bits to dress the welds, but that wasn't enought for my liking. I wanted the firewall and tranny tunnel to look like it flows right into the floor pan. So I basically used short strand filler to round the inside corners and contour the transition into one of the beads in the original firewall. It's kind of hard to see how good it turned out in the picture below, but once I shoot another coat of epoxy over it I think you all will get the picture.
What used to look like this:

Now looks like this:

On to the passenger side next. After that, a quick coat of epoxy over the body work I've completed so far to prevent flash rust then on to the underside of the cab. The underside will just get a couple coats of epoxy, seam sealer, urethane primer and Raptor Liner. Once the bottom is wrapped up, the cab should never have to be flipped up ever again! Then I'll epoxy the doors, fenders, hood and valance so I can mount them on the cab to do the final bodywork on all the panels. Then.... PAINT!
Last edited by kawazx636; Jul 9, 2014 at 10:19 PM.


