
KawaZX636's 1983 Toyota Pickup Restoration
 Aug 2, 2014 | 11:09 PM
#821
Thread Starter
Super Moderator
iTrader: (3)
Joined: Jan 2012
Posts: 3,218
Likes: 26
From: Salisbury, MD
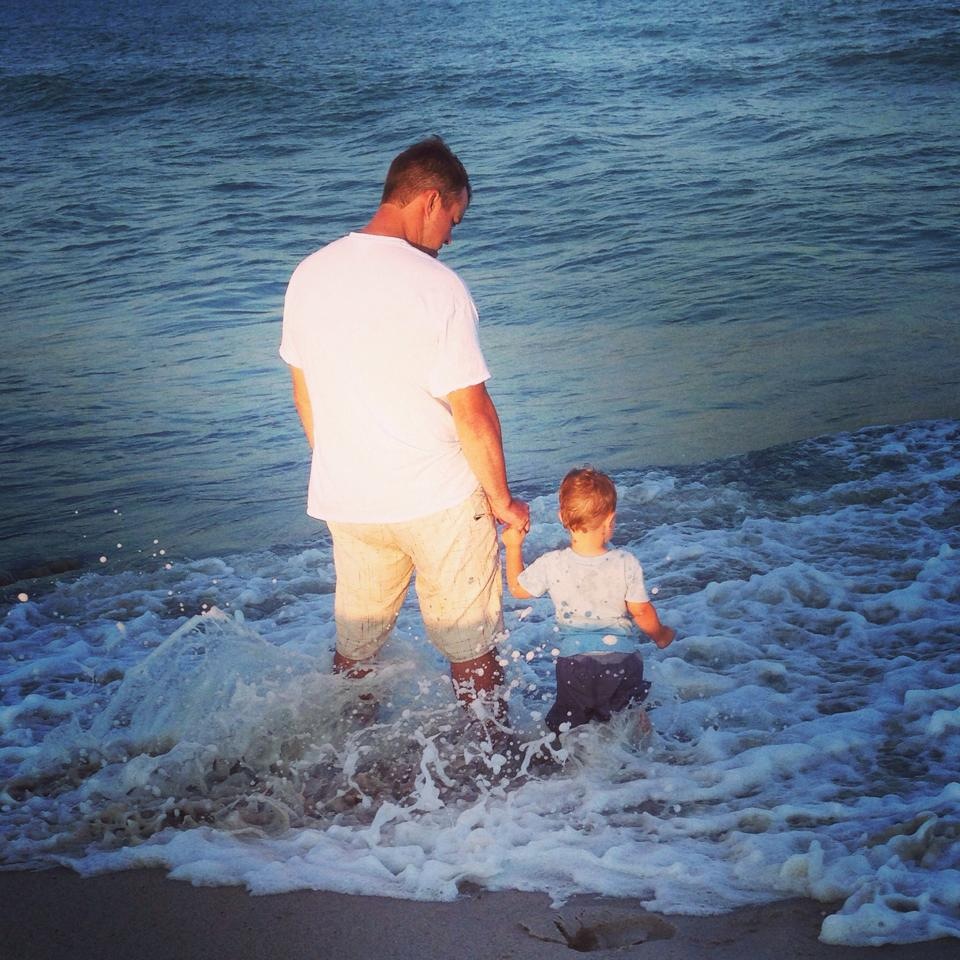
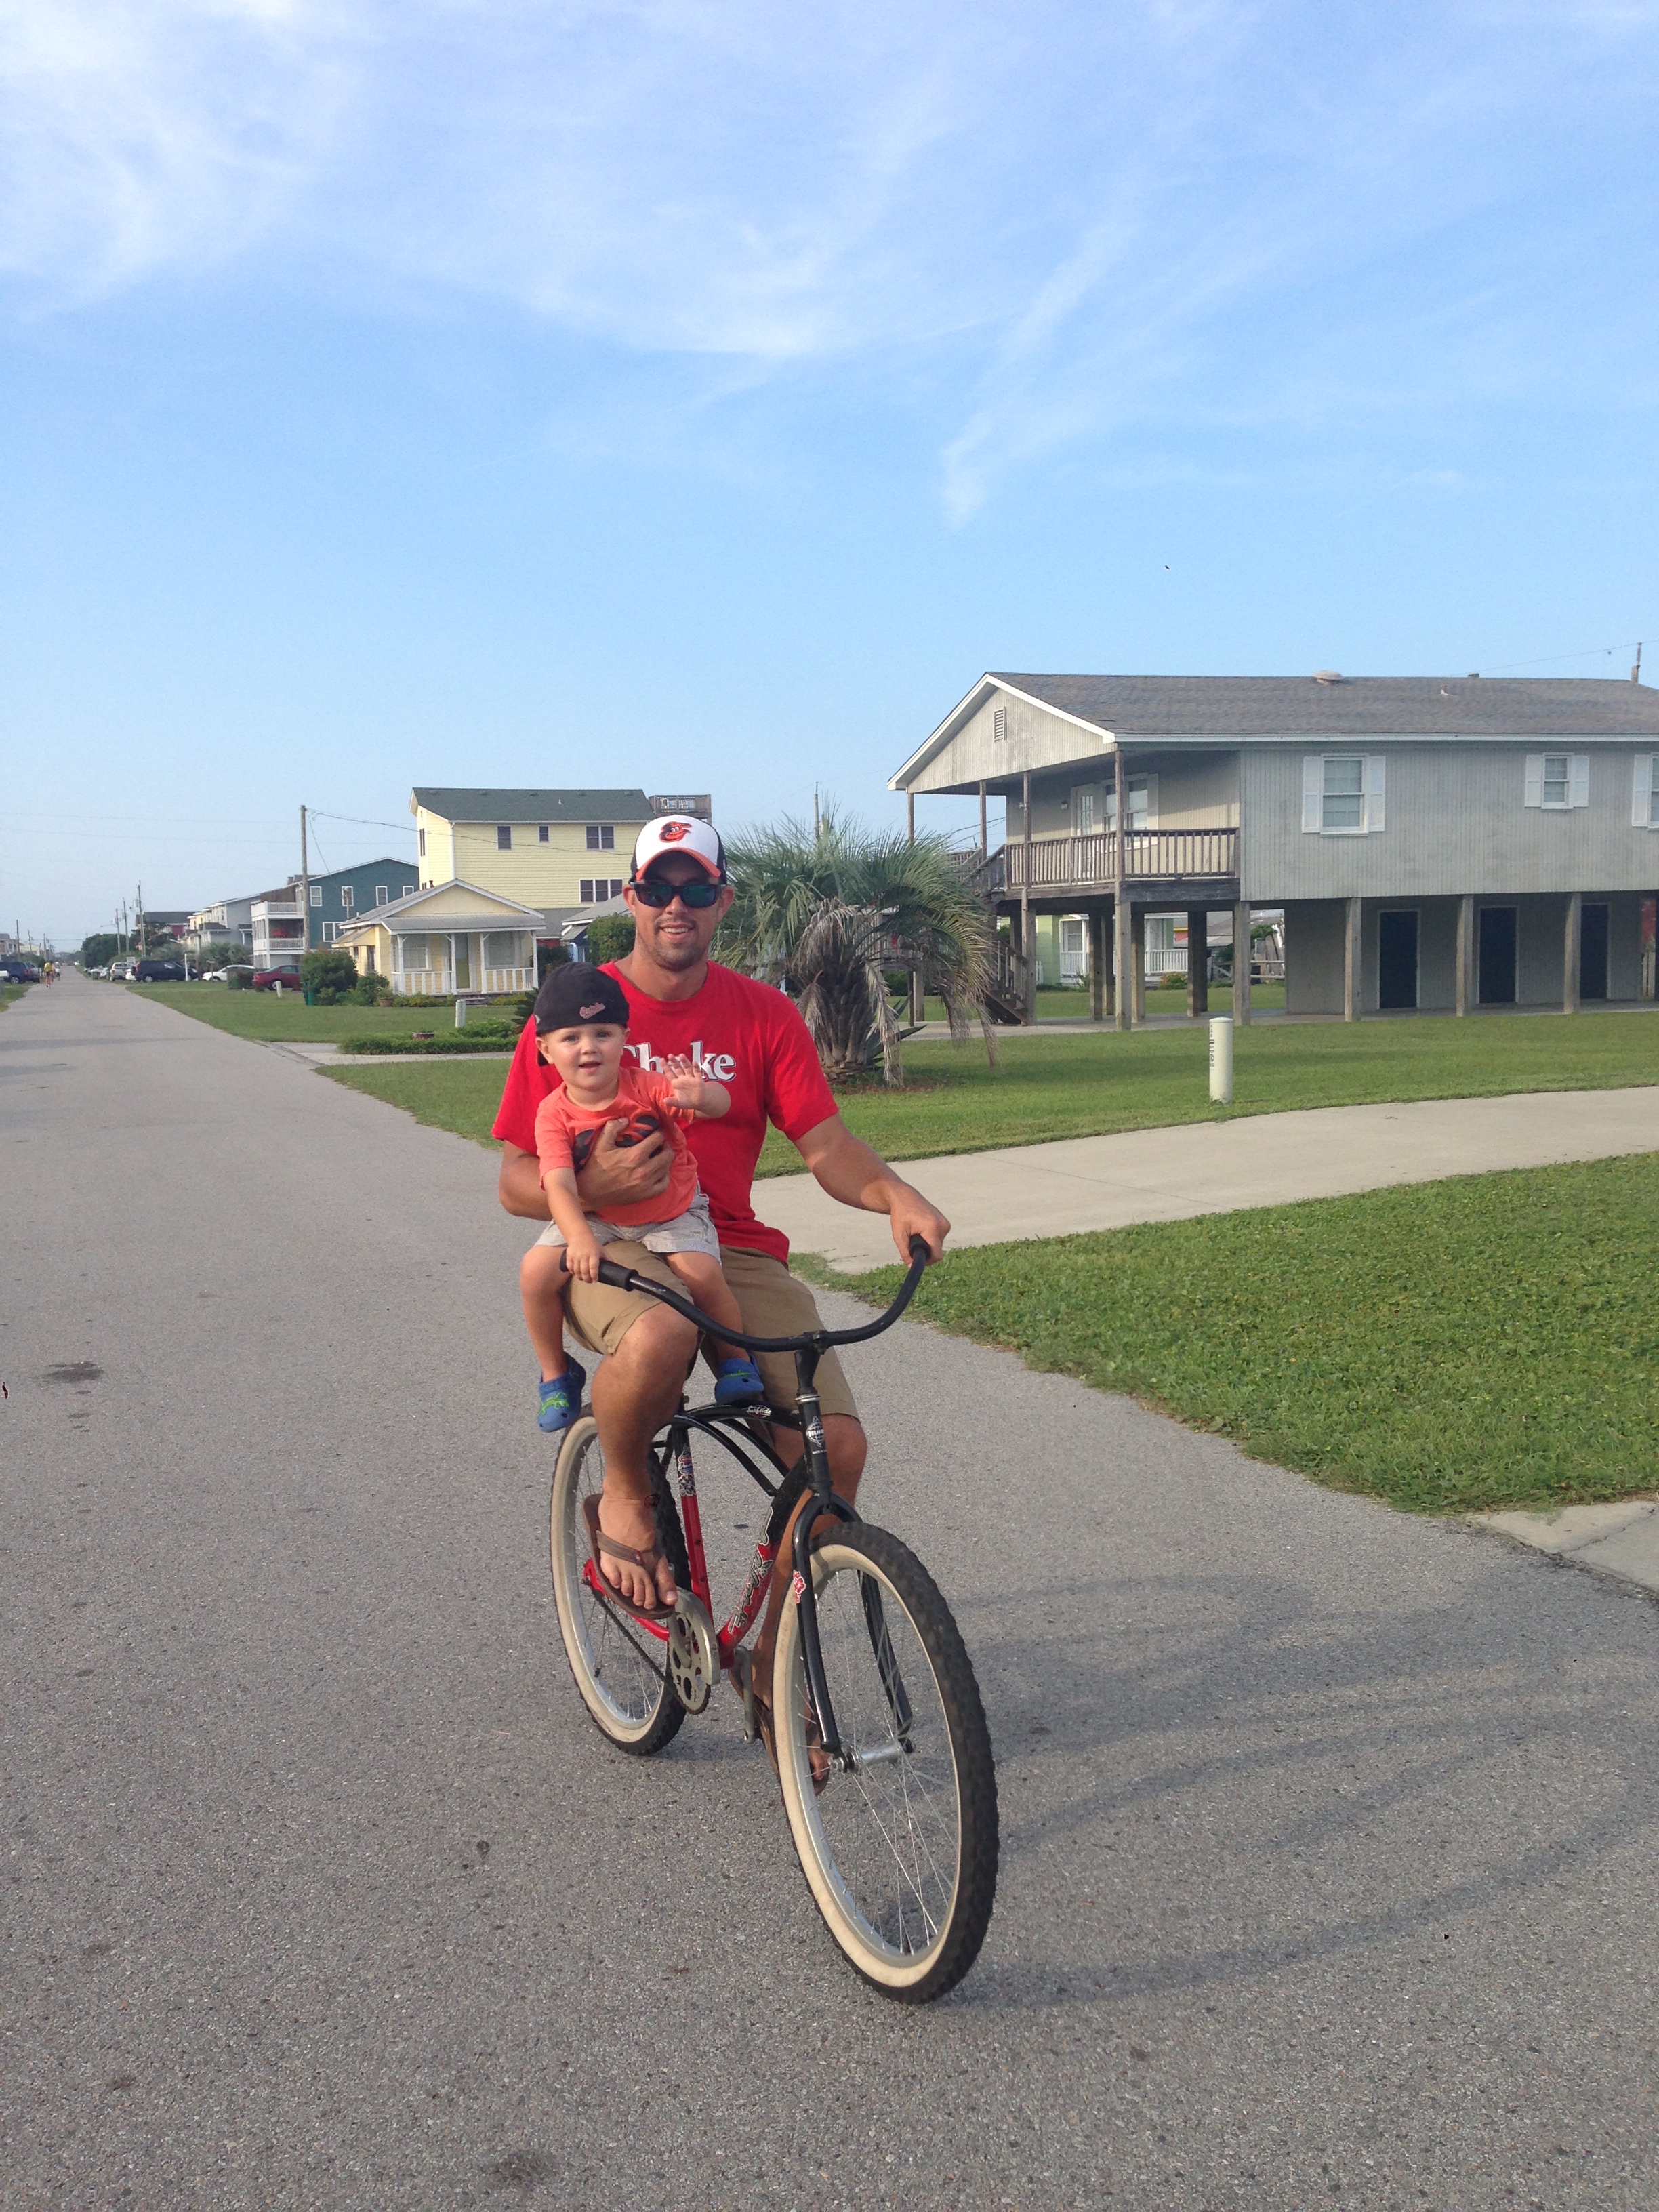
I'm baaaaaaaack!!!! Just got home from a much needed vacation. My wife banned me from YT while we were gone, thus my temporary hiatus.... My wife, son and I went down to Kure Beach, NC for my wife's annual family renunion/vacation. . We rented a monster house right on the beach and there were some decent waves the whole week so I got plenty of surfing in and my wife got plenty of time in the sun on the beach. Great food all week - crabs, lobsters, fresh tuna, crawfish, clams, oysters, shrimp and more. It put a hell of a dent on my wallet, but you can't put a price on that kind of quality family time. My wife got some great surfing photos ripping it on my new toy (I bashed a fin box in my Mt Woodgee a couple weeks ago so I snagged a new 6'6" Firewire swallow tail with a 5/4/3 fin set up). She even got some shots of me riding waves on my Laird paddleboard with my son sitting on the nose of my board (I'm getting one of those framed). She's hoarding the photos right now so I only have a few to share, but I throw up some more later.
Little family photo:

My boy and me:

Now it's back to reality. I have to handle a few things like the lawn, test driving my brother's new boat and catching up at the office then I'm getting hard back at it on my truck. Vacation really got me motivated again to wrap this thing up!
Little family photo:
My boy and me:
Now it's back to reality. I have to handle a few things like the lawn, test driving my brother's new boat and catching up at the office then I'm getting hard back at it on my truck. Vacation really got me motivated again to wrap this thing up!
Aug 3, 2014 | 12:33 AM
#822
Welcome back. Vacations don't come often enough and I swear that time goes by faster then any other week does. Family time is great and your kid wont be small for long. They grow fast. Wish we had access to such great seafood, yummmm.
Aug 11, 2014 | 07:48 PM
#825
Thread Starter
Super Moderator
iTrader: (3)
Joined: Jan 2012
Posts: 3,218
Likes: 26
From: Salisbury, MD
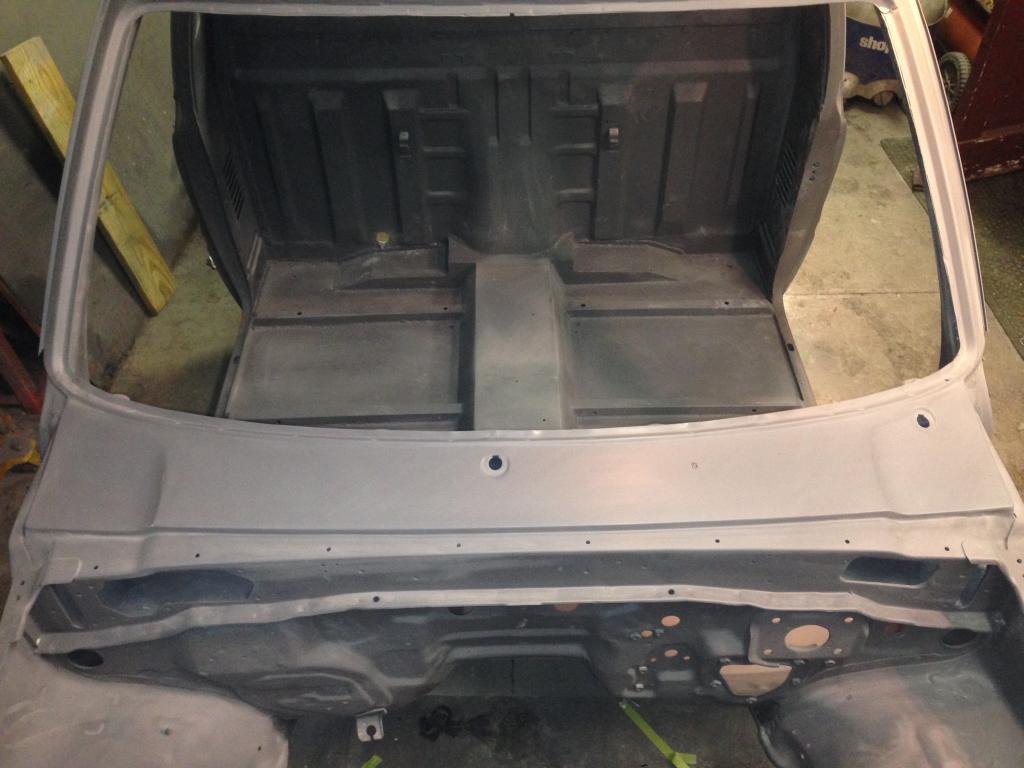
I finished shaping the passenger floorpan tonight and shot it with a couple coats of epoxy:
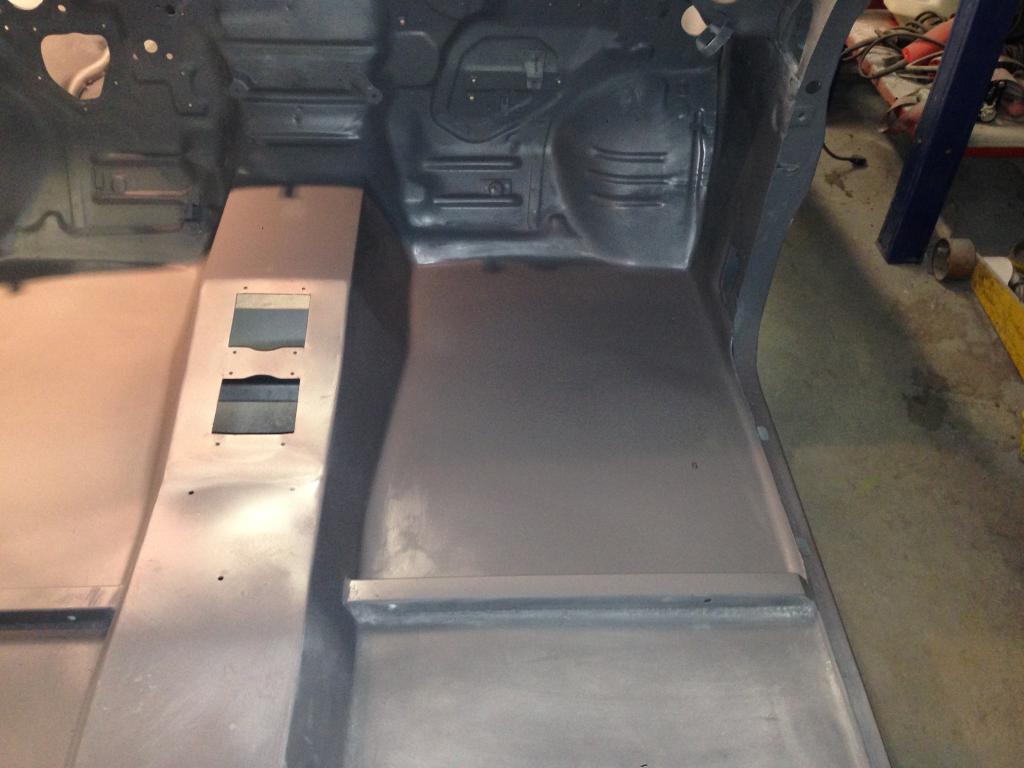
Floors turned out pretty good and now I'm pretty much done with the interior bodywork.
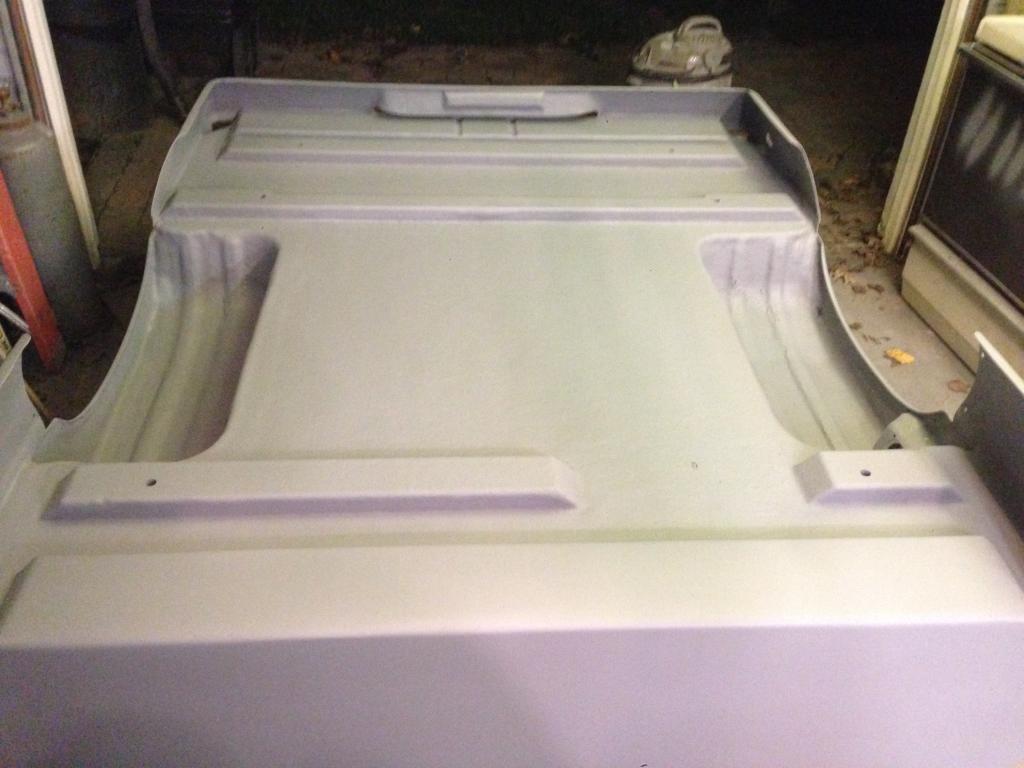
I also took another stab at the bed undercoating process to tonight. This time around I completely removed everything down to raw fiberglass and gave it a really good scuffing before trying round 2. I wiped it down with some SemSolve and then a thorough swipe with tack cloth before shooting it with two coats of epoxy primer.
I will give it about 3 days to "half cure" then do a light scuffing before shooting a 2K urethane primer. Since it will still be in the epoxy top coat "window" I'll have a chemical and mechanical bond to the epoxy. I have some black 2K urethane single stage black that I have left over from shooting friend's dirt bike last month that I will top coat it with before the Raptor Liner. I know is seems unneccessary to go through the entire process of a paint job just to scuff it and spray Raptor Liner, but I know for a fact that the Raptor will stick to it since I've done it that way before with no issues. I also read that Raptor doesn't really "like" fresh epoxy, but it can supposedly be done on fully cured epoxy. I'm not taking any chances so I'll just run through the steps. Wish me luck...


Floors turned out pretty good and now I'm pretty much done with the interior bodywork.
I also took another stab at the bed undercoating process to tonight. This time around I completely removed everything down to raw fiberglass and gave it a really good scuffing before trying round 2. I wiped it down with some SemSolve and then a thorough swipe with tack cloth before shooting it with two coats of epoxy primer.


I will give it about 3 days to "half cure" then do a light scuffing before shooting a 2K urethane primer. Since it will still be in the epoxy top coat "window" I'll have a chemical and mechanical bond to the epoxy. I have some black 2K urethane single stage black that I have left over from shooting friend's dirt bike last month that I will top coat it with before the Raptor Liner. I know is seems unneccessary to go through the entire process of a paint job just to scuff it and spray Raptor Liner, but I know for a fact that the Raptor will stick to it since I've done it that way before with no issues. I also read that Raptor doesn't really "like" fresh epoxy, but it can supposedly be done on fully cured epoxy. I'm not taking any chances so I'll just run through the steps. Wish me luck...
Last edited by kawazx636; Aug 11, 2014 at 07:51 PM.


 Aug 12, 2014 | 03:55 PM
#829
good luck Dave. I admire your tenacity on your build...one of the more ambitious builds I have been following.
Glad you have had a good vacation. I go back to work tomorrow after being on vacation for the last 17 days. I could use another 17 days off
Glad you have had a good vacation. I go back to work tomorrow after being on vacation for the last 17 days. I could use another 17 days off
Aug 12, 2014 | 08:12 PM
#830
Thread Starter
Super Moderator
iTrader: (3)
Joined: Jan 2012
Posts: 3,218
Likes: 26
From: Salisbury, MD
Thanks Rob! Gotta do it right or you'll eventually be doing again.
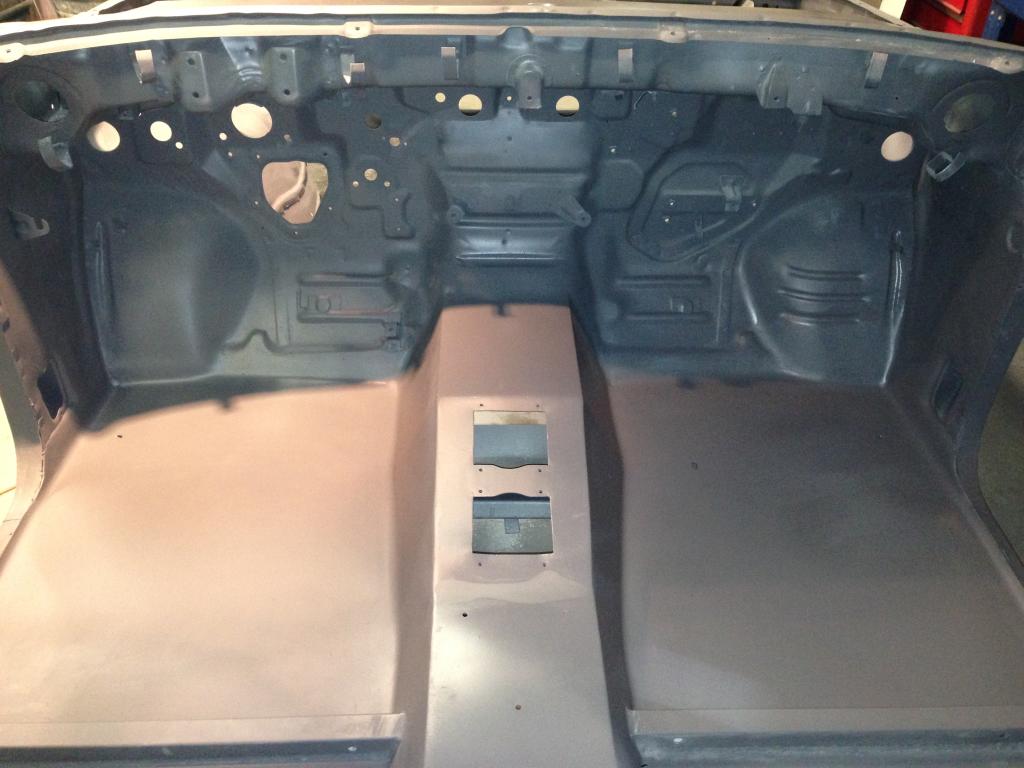
So I'm essentially watching paint dry... Well watching epoxy fully cure so my options were limited for what I could do tonight. I ended up breaking out the maroon scuff pads and started prepping some of the areas that I previous sprayed with epoxy so they will be ready for surfacer when I get there - hey, it has to get done eventually so now is as good as later. Got the roof, cowl and rear cab wall all scuffed and ready to go. Here are some shots of the roof and cowl:
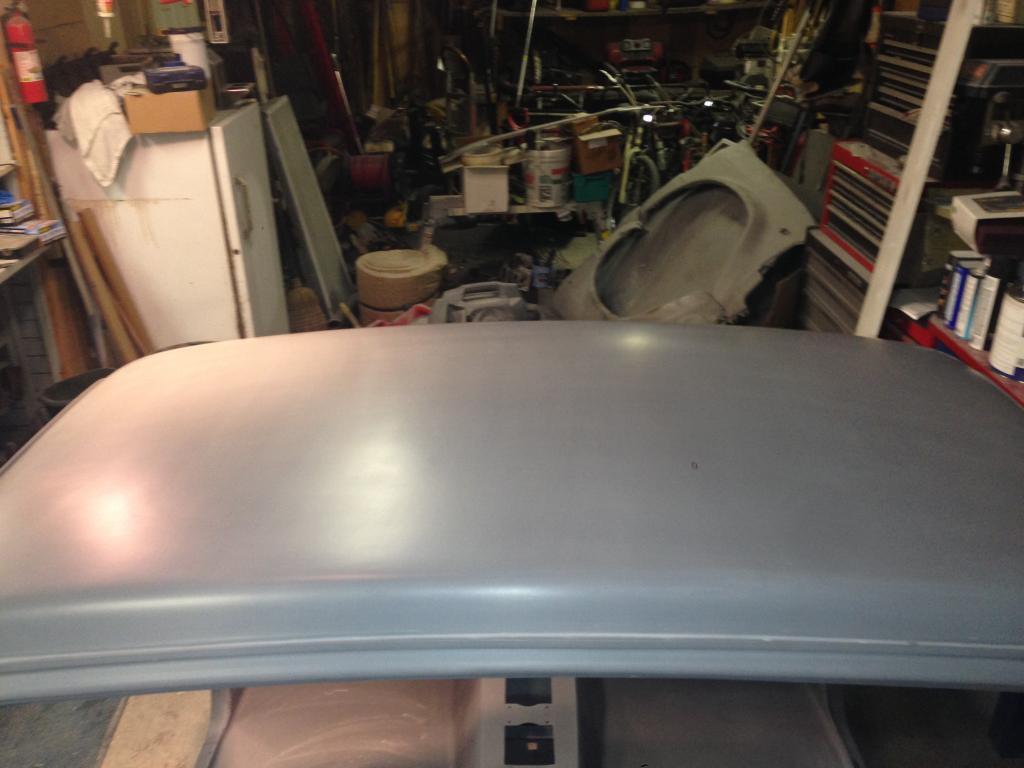
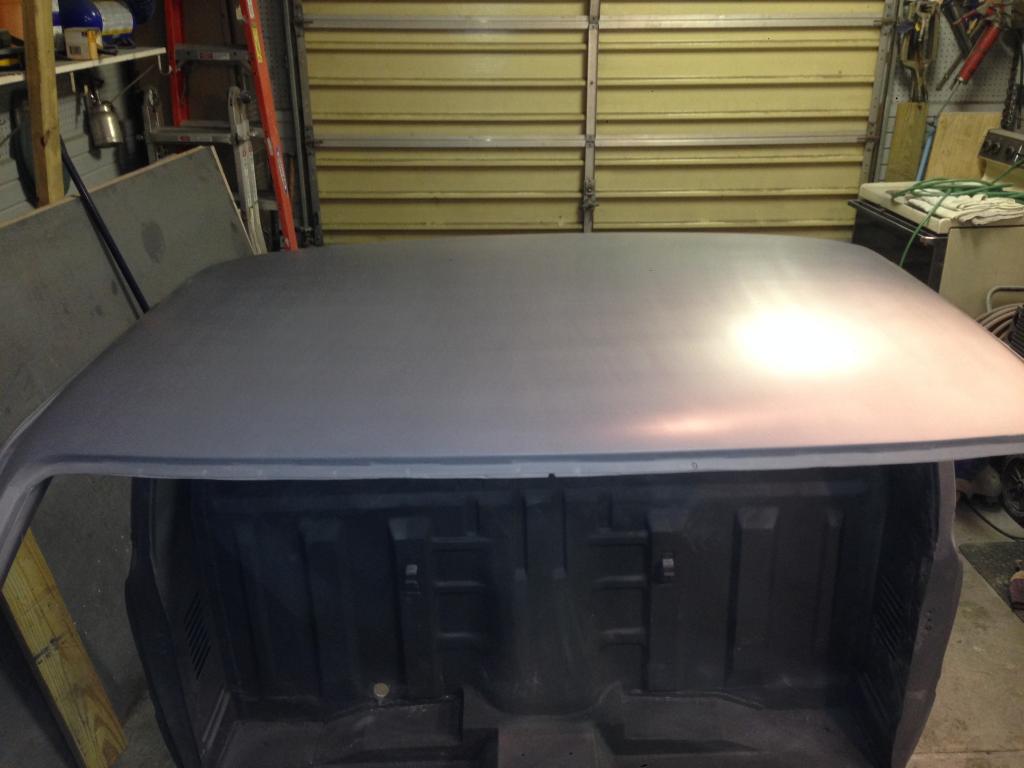
Everything appears to be pretty straight, but I suppose I'll find out for sure when I long block the surfacer.
The temperatures around here are going to be in the 70-80* range for the next week; perfect for painting so I want to get the flash rust blasted off the fenders, doors and hood and get them into epoxy so I can get the body work going on those. I also simultaneously need to get the undercoating done on the bed. Should be an interesting and busy week and weekend coming up for me.
So I'm essentially watching paint dry... Well watching epoxy fully cure so my options were limited for what I could do tonight. I ended up breaking out the maroon scuff pads and started prepping some of the areas that I previous sprayed with epoxy so they will be ready for surfacer when I get there - hey, it has to get done eventually so now is as good as later. Got the roof, cowl and rear cab wall all scuffed and ready to go. Here are some shots of the roof and cowl:
Everything appears to be pretty straight, but I suppose I'll find out for sure when I long block the surfacer.
The temperatures around here are going to be in the 70-80* range for the next week; perfect for painting so I want to get the flash rust blasted off the fenders, doors and hood and get them into epoxy so I can get the body work going on those. I also simultaneously need to get the undercoating done on the bed. Should be an interesting and busy week and weekend coming up for me.
Aug 13, 2014 | 08:39 PM
#831
Thread Starter
Super Moderator
iTrader: (3)
Joined: Jan 2012
Posts: 3,218
Likes: 26
From: Salisbury, MD
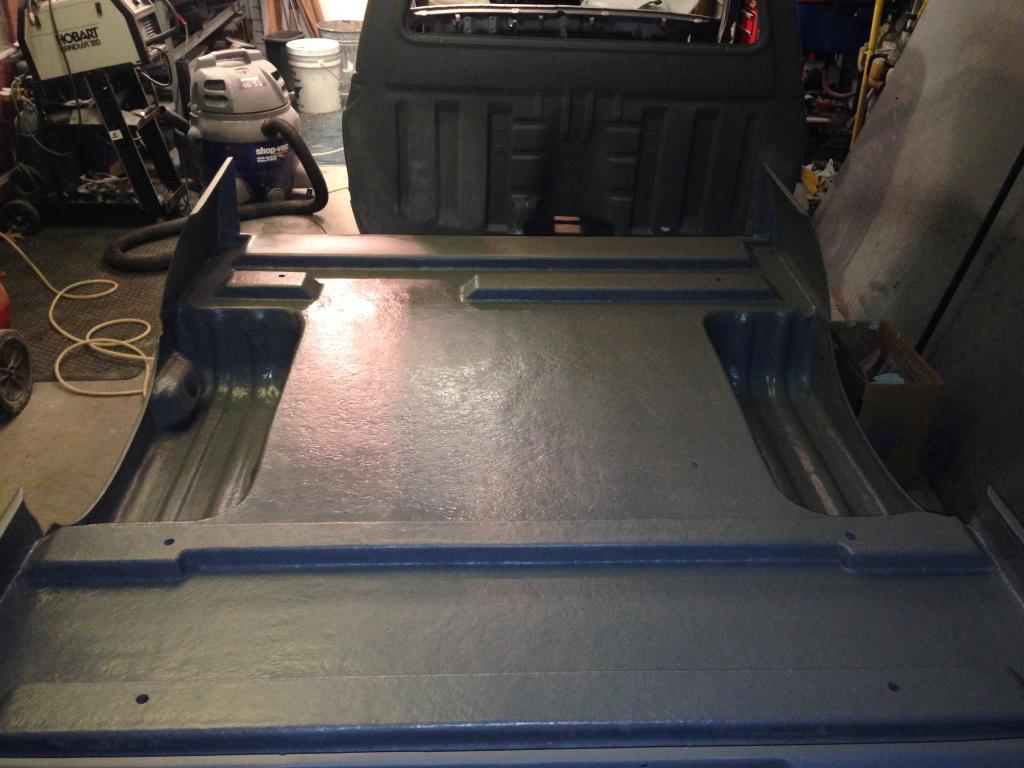
In continuing my relentless efforts to undercoat the bed, I gave the epoxy primer that I shot earlier this week a good scuffin' and tacked clothed it. Then shot 2 medium wet coats of 2K urethane primer surfacer. The stuff builds like crazy! I can't wait to see what it does on the body panels, but at least doing this "extra" process in an obscure location will help me dial in my gun setup before I get to the important stuff. Here's how it sits now... Still grey:
I cracked open the can of base coat that I had from my friend's project and it was pretty clumpy from the can not sealing so it doesn't look like I'm going to be able to use it. Looks like I'm going to order my base coat color sooner than I had thought. At least this way I can feather the edges out away from my Raptor Liner edge so that I don't end up with a hard edge of color. This actually works out better, but it'll cost me a few days on the undercoating process.
In other news... I found the full chrome bumper that I was looking for from Al (njtrekker). It's for a 79-81 4WD Pickup so I ended up ordering the appropriate 79-81 bumper brackets. They mount the same on the frame, but have different hole locations for the actual bumper. The brackets actually arrived today:
Now I just need to get a set of 79-81 turn signals to fit the new bumper since they are different as well. Personally, I think that they look better because they are slightly taller and bolt on from behind instead of through the front (I believe). I'll start the search for them tomorrow.

I cracked open the can of base coat that I had from my friend's project and it was pretty clumpy from the can not sealing so it doesn't look like I'm going to be able to use it. Looks like I'm going to order my base coat color sooner than I had thought. At least this way I can feather the edges out away from my Raptor Liner edge so that I don't end up with a hard edge of color. This actually works out better, but it'll cost me a few days on the undercoating process.
In other news... I found the full chrome bumper that I was looking for from Al (njtrekker). It's for a 79-81 4WD Pickup so I ended up ordering the appropriate 79-81 bumper brackets. They mount the same on the frame, but have different hole locations for the actual bumper. The brackets actually arrived today:

Now I just need to get a set of 79-81 turn signals to fit the new bumper since they are different as well. Personally, I think that they look better because they are slightly taller and bolt on from behind instead of through the front (I believe). I'll start the search for them tomorrow.


 Aug 15, 2014 | 08:26 PM
#835
Thread Starter
Super Moderator
iTrader: (3)
Joined: Jan 2012
Posts: 3,218
Likes: 26
From: Salisbury, MD
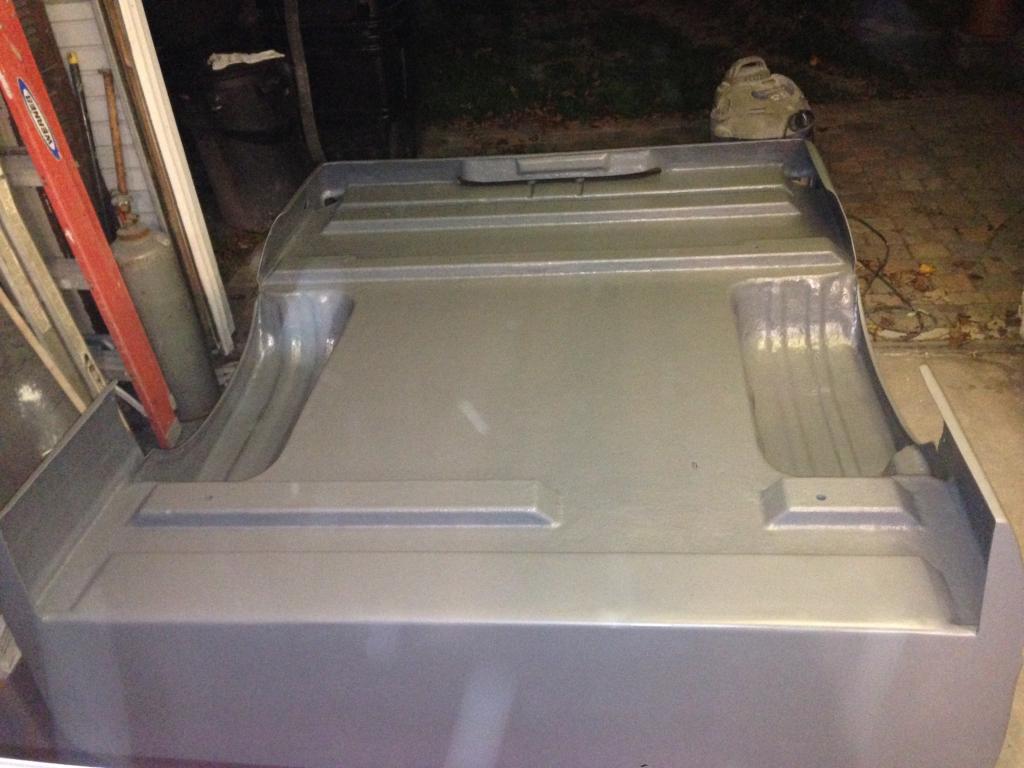
Well, the cat is out of the bag... Went with Pin-Up Lipstick Red
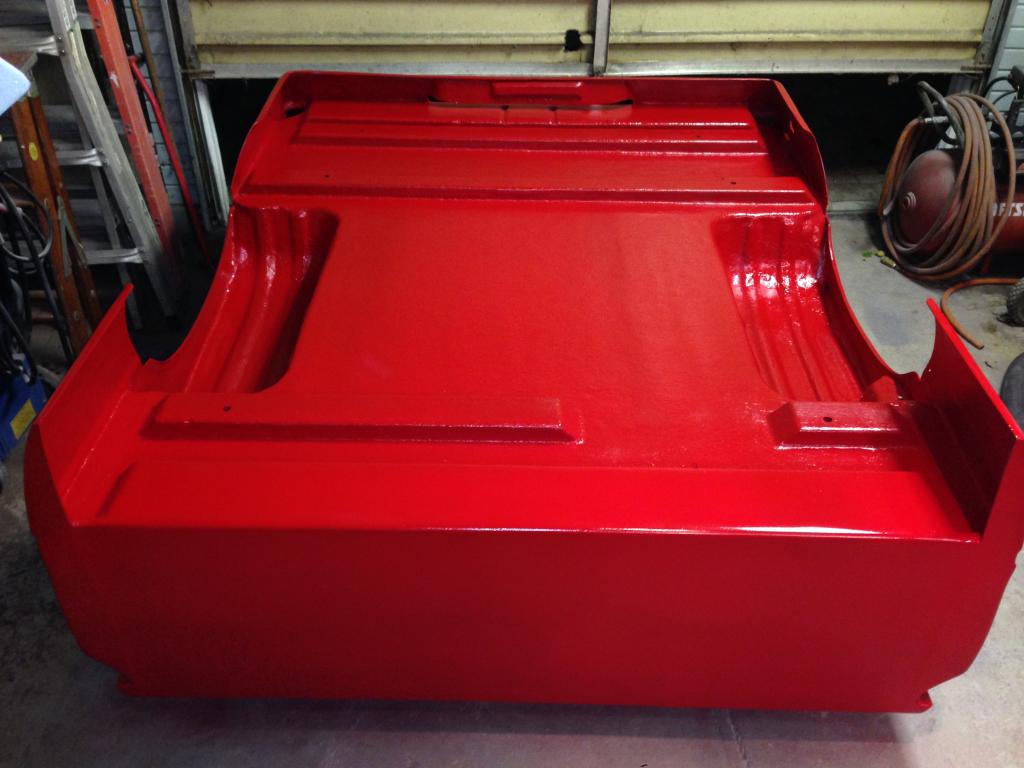
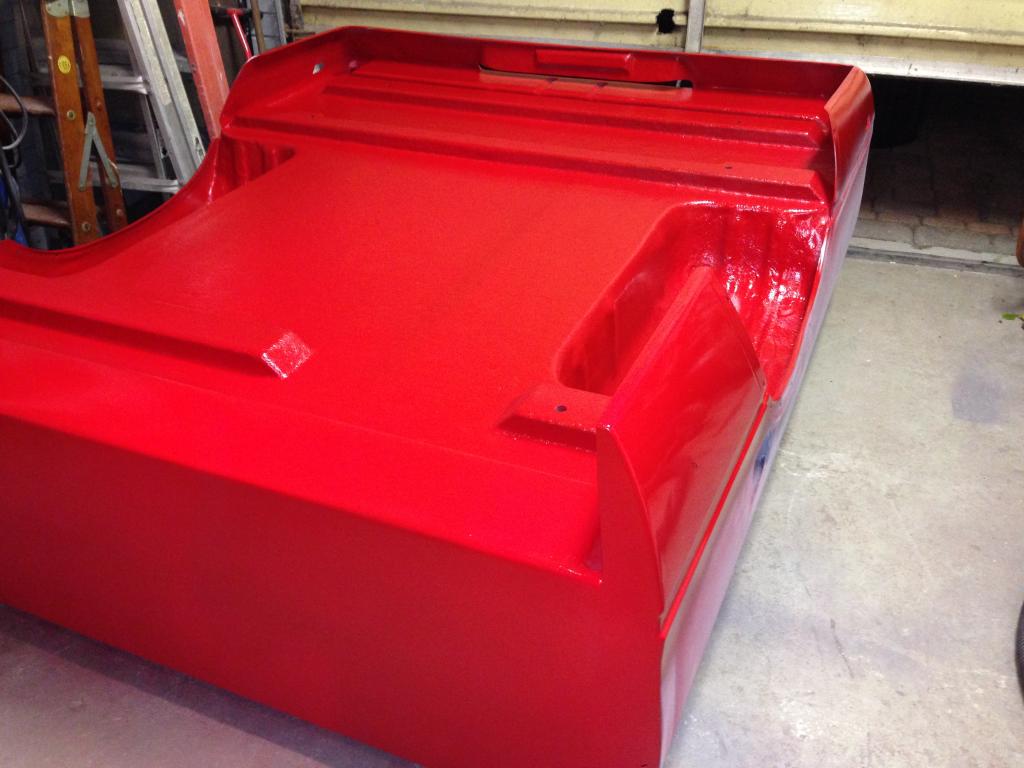
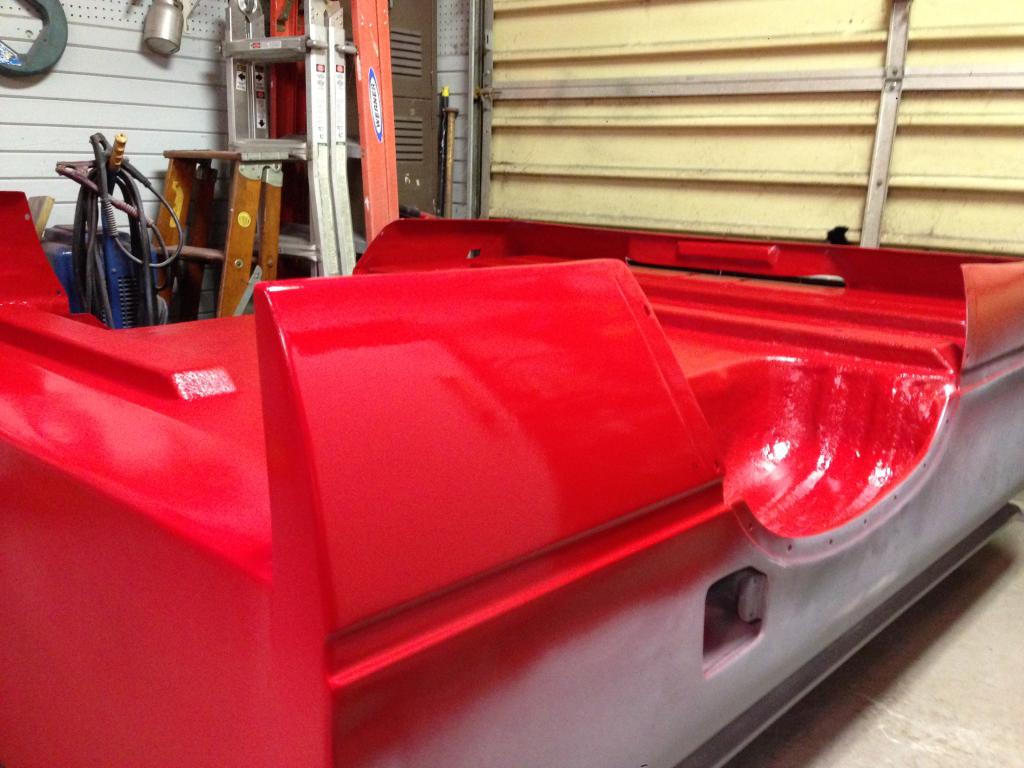
Shot two medium coats on the underside of the bed. Since its raw fiberglass mat, I decided to shoot a couple medium wet coats on the skirts to see how it flowed out. Turned out great even though I hadn't even properly sanded the skirts yet! Now I have to go back and scuff the top coat and shoot the Raptor **fingers crossed that it sticks this time around**


Shot two medium coats on the underside of the bed. Since its raw fiberglass mat, I decided to shoot a couple medium wet coats on the skirts to see how it flowed out. Turned out great even though I hadn't even properly sanded the skirts yet! Now I have to go back and scuff the top coat and shoot the Raptor **fingers crossed that it sticks this time around**
Aug 16, 2014 | 03:21 AM
#837
Looks great. Paint kind of hides all of the other work that you did underneath it, but that is the way you it to be. Even as good as it looks on the bottom side, probably getting you eager to get the rest done now. This is where patience is a virtue.


