
KawaZX636's 1983 Toyota Pickup Restoration
 Jul 10, 2014 | 10:46 AM
#802
Thread Starter
Super Moderator
iTrader: (3)
Joined: Jan 2012
Posts: 3,218
Likes: 26
From: Salisbury, MD

I'll stick with the Raptor - I want some build up thickness and durability, both of which Raptor has the edge over trunk liner
Jul 10, 2014 | 02:13 PM
#803
Registered User
Joined: Feb 2014
Posts: 351
Likes: 0
Have you ever tried it
Great sound dead
The speckled stuff is very thick and durable
Comes in multi colors or solid colors
I think you should grab a can and try it on a piece of scrap
Sent from my iPhone using YotaTech
Great sound dead
The speckled stuff is very thick and durable
Comes in multi colors or solid colors
I think you should grab a can and try it on a piece of scrap
Sent from my iPhone using YotaTech
Jul 10, 2014 | 09:56 PM
#804
Thread Starter
Super Moderator
iTrader: (3)
Joined: Jan 2012
Posts: 3,218
Likes: 26
From: Salisbury, MD
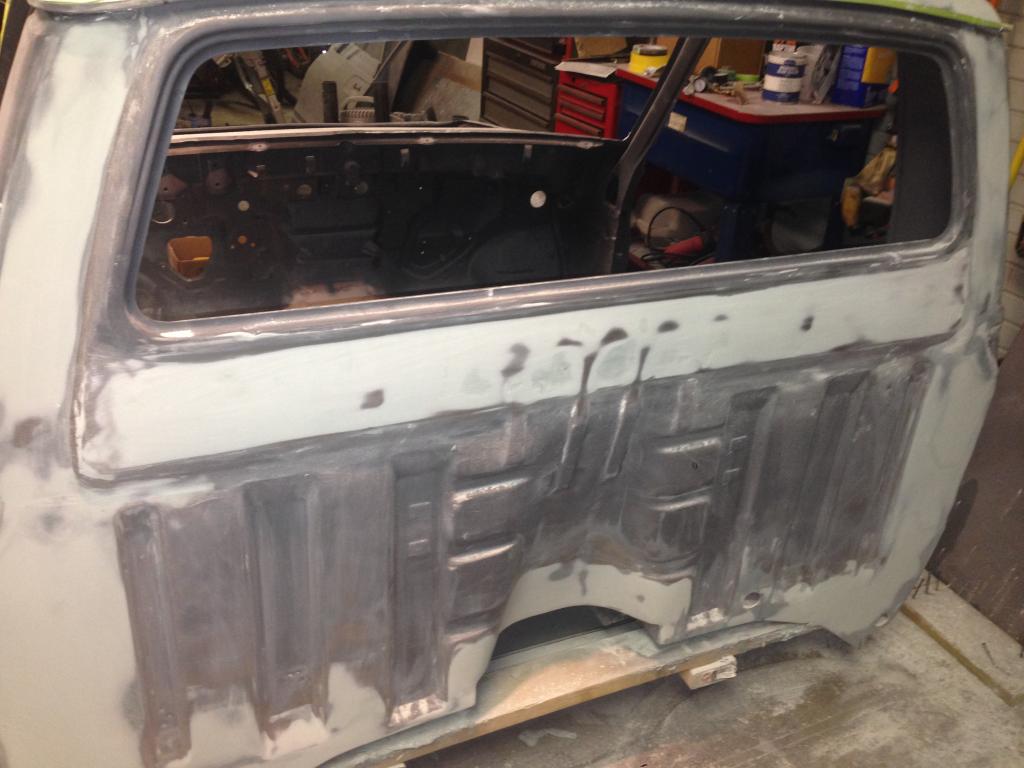
At it again tonight. In shaving the rear cab seams, I completely forgot to straighten out the sheet metal right below the rear window that is still exposed even with the bed on. It wasn't that bad but it did have some dings in it and some waviness from the factory welds to the support crossmember on the inside. I only filled it once so I still need to swipe the low spots again and block it.
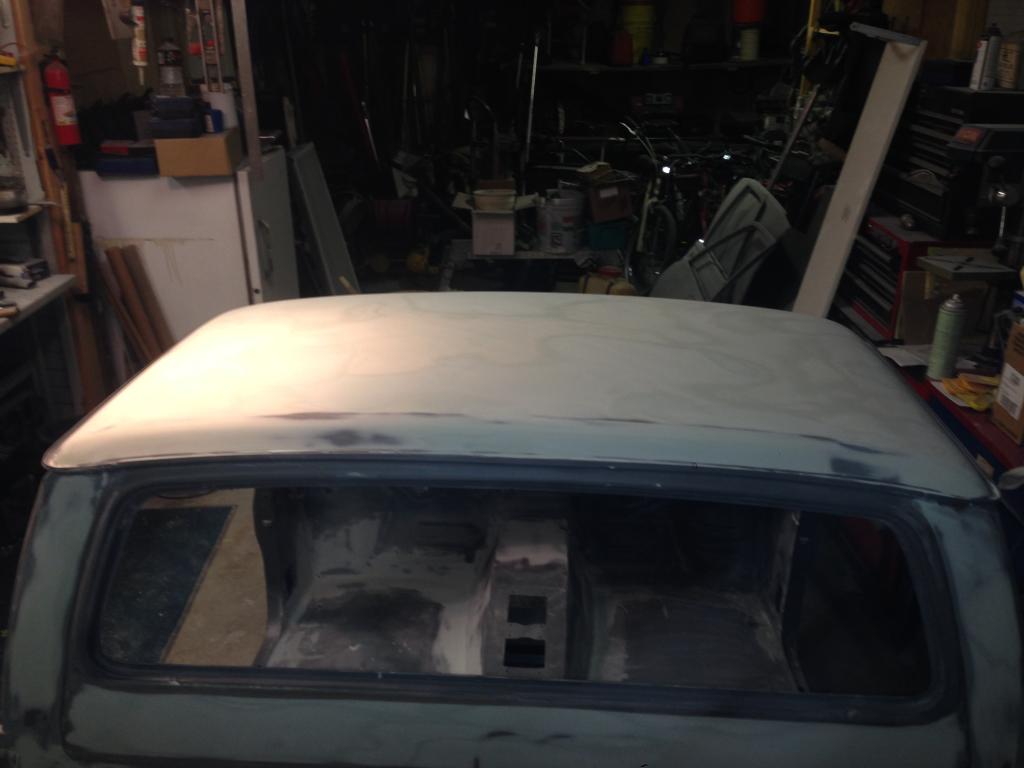
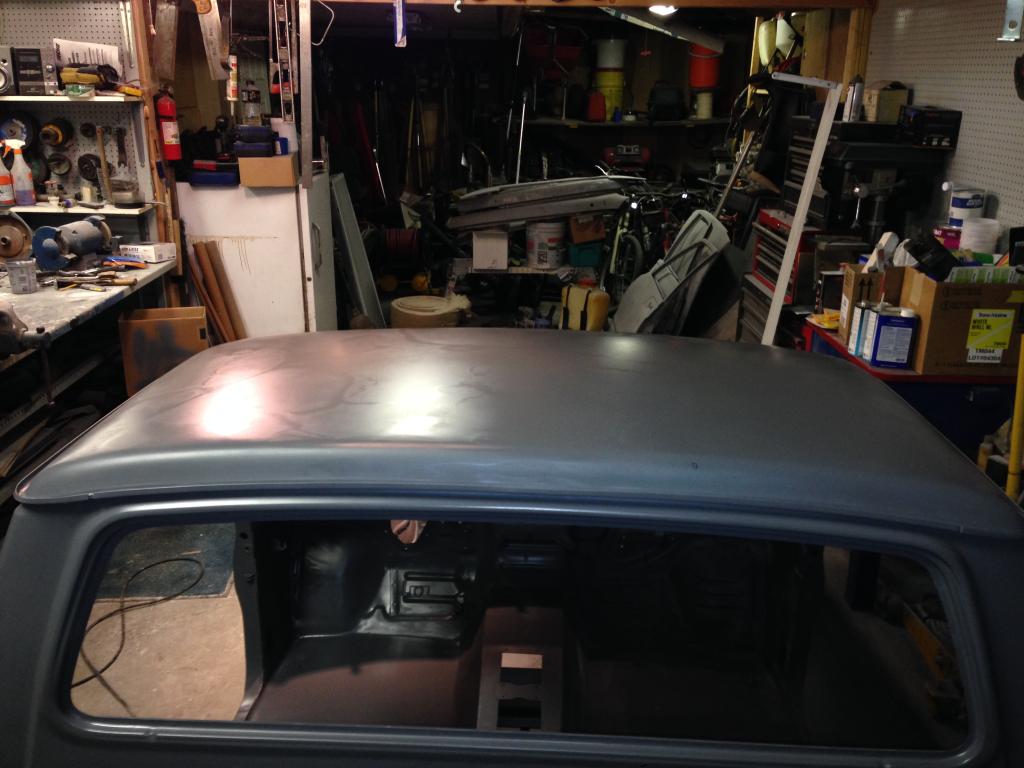
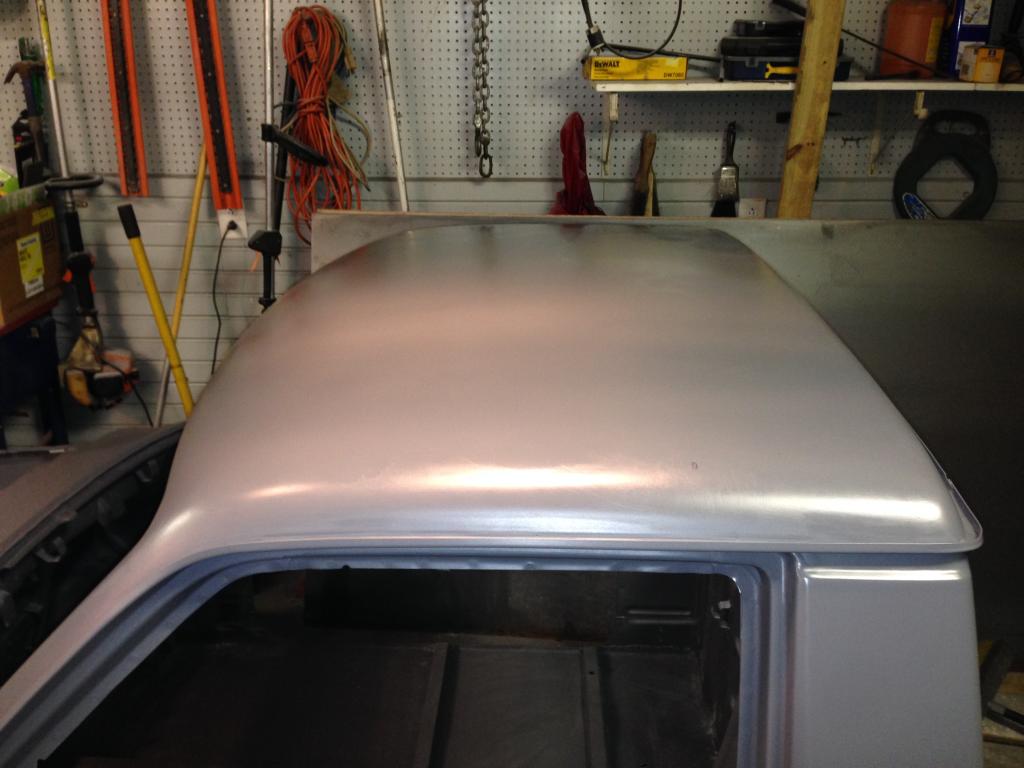
I didn't feel like doing the passenger side floor pan so I decided to tackle the roof. I think at one point it got rocked with some hail because there was a considerable amount of low spots that I noticed when I was toothing the epoxy primer. I guess the truck was always high enough that I never really noticed it before. I hammered and dollied some the more pronounced dings, but I had to be careful because the metal is so thin on these trucks. I went ahead and gave it a good skim coat:
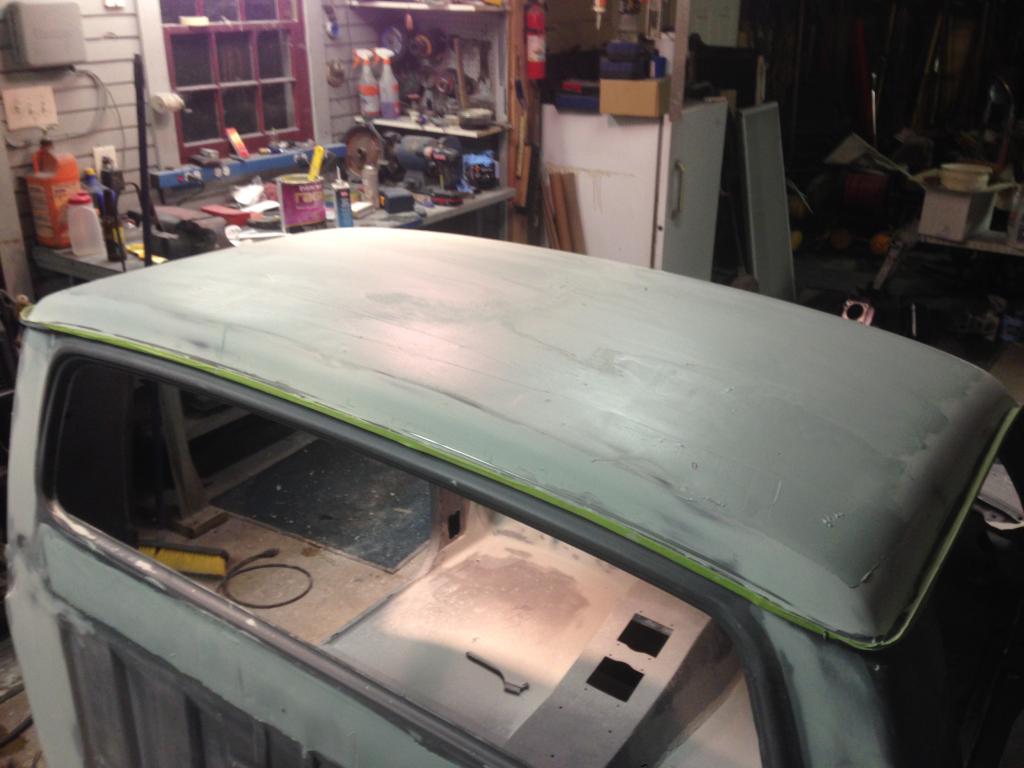
Blocked it down with a flexible long board and wouldn't ya know, I ALMOST got the panel completely straight with one skim coat!!!
I have just a few small low spots to fill and it's good to go!
On a side note, has anybody ever filled a drip rail with short strand fiberglass filler before? I know it's not the "right" way to do it and that seam sealer is preferred, but the idea came across my mind to fill the drip rail about 3/4 of the way to the lip and give it a nice rounded contour in the channel and blend it right into the roof. This way it's still functional, but looks better. Shaving it would obviously look better, but in a truck without A/C you often find yourself driving with the window cracked on a 90* day during a rain shower so you don't get baked. Without a drip rail, those days would be hot AND wet. I'm looking for experience and knowledge, not guesses. And I'm not about to sacrifice longevity and durability just to make something look good so let me know what you think.

I didn't feel like doing the passenger side floor pan so I decided to tackle the roof. I think at one point it got rocked with some hail because there was a considerable amount of low spots that I noticed when I was toothing the epoxy primer. I guess the truck was always high enough that I never really noticed it before. I hammered and dollied some the more pronounced dings, but I had to be careful because the metal is so thin on these trucks. I went ahead and gave it a good skim coat:

Blocked it down with a flexible long board and wouldn't ya know, I ALMOST got the panel completely straight with one skim coat!!!


I have just a few small low spots to fill and it's good to go!
On a side note, has anybody ever filled a drip rail with short strand fiberglass filler before? I know it's not the "right" way to do it and that seam sealer is preferred, but the idea came across my mind to fill the drip rail about 3/4 of the way to the lip and give it a nice rounded contour in the channel and blend it right into the roof. This way it's still functional, but looks better. Shaving it would obviously look better, but in a truck without A/C you often find yourself driving with the window cracked on a 90* day during a rain shower so you don't get baked. Without a drip rail, those days would be hot AND wet. I'm looking for experience and knowledge, not guesses. And I'm not about to sacrifice longevity and durability just to make something look good so let me know what you think.
Last edited by kawazx636; Jul 10, 2014 at 10:01 PM.
Jul 11, 2014 | 06:15 AM
#805
Registered User
Joined: Feb 2014
Posts: 351
Likes: 0
Dave I spoke with two very expensive hot rod body guys on your drip edge question
They both said close to the same thing
This truck ( with the time and effort put into it ) will probably be your baby and for years should be which would be taken care of cleaned and problems addressed on the spot , there for you won't have the same problems as a normal sit outside in storms , crap stacked hillbilly high across the cab or drunkin mud runs that leave your truck in muddy mess for days if not weeks
If you take time in your prep you should be fine and extreme heat / cold will eventually crack any foreign materials bonded to steel
Sent from my iPhone using YotaTech
Jul 15, 2014 | 05:41 PM
#807


rear drip rail is part of the roof , stamped in 1 piece , so I woulnt worry about that , I'm sure it would be ok to fill it as long as you gave it good "tooth" .. don't know if I would do it though !
It's the side rails that are the problem ..
as you have probably read in my build ? , I cut the side drip rails off specifically for the rust reason , and long term .
filling the side rails would not help elevate the rust issues the traditionally happen though .
on another note .. have you figure out the stripe colors yet ? .. kind of need my chart back please
.
Jul 15, 2014 | 05:58 PM
#808
Thread Starter
Super Moderator
iTrader: (3)
Joined: Jan 2012
Posts: 3,218
Likes: 26
From: Salisbury, MD
Crap! I completely forgot about the vinyl chart!! I'll drop it in the mail ASAP.
As fo the drip rails, I'm just going to do self leveling seam sealer to eliminate any potential issues with a less conventional technique.
As fo the drip rails, I'm just going to do self leveling seam sealer to eliminate any potential issues with a less conventional technique.
Jul 17, 2014 | 08:32 PM
#810
Thread Starter
Super Moderator
iTrader: (3)
Joined: Jan 2012
Posts: 3,218
Likes: 26
From: Salisbury, MD
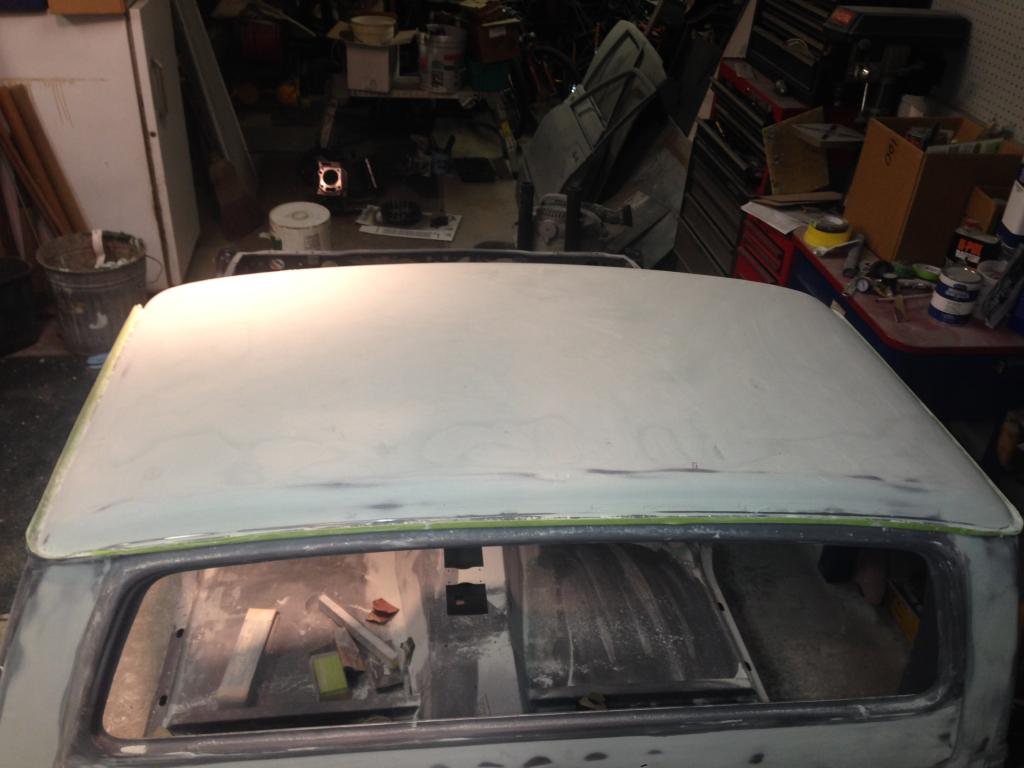
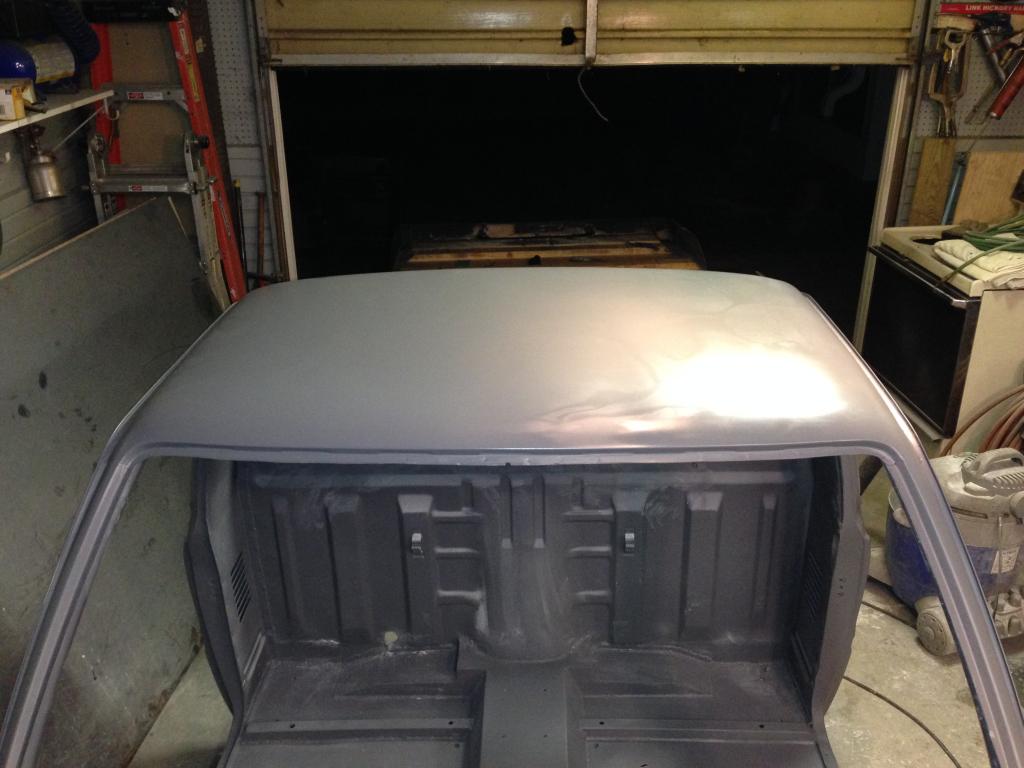
Pretty much finished uo the roof tonight. I got it damn near laser straight, but I still want to long block it with some 120grit before I shoot it with epoxy again. Then the surfacer should straighten out the rest.
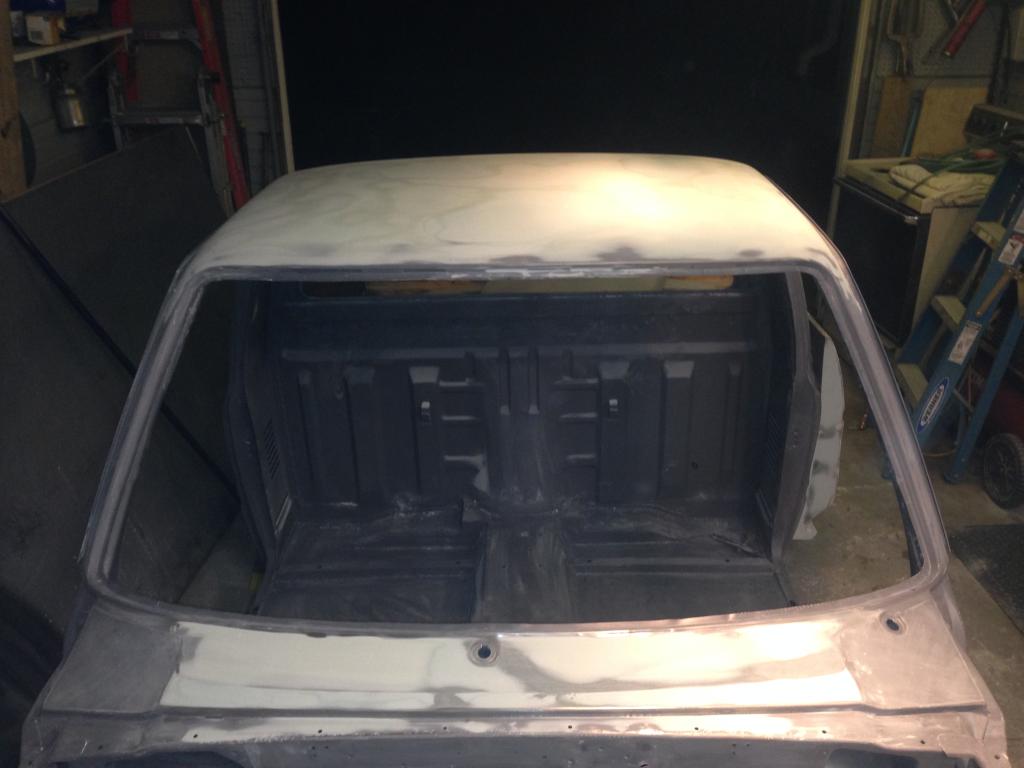
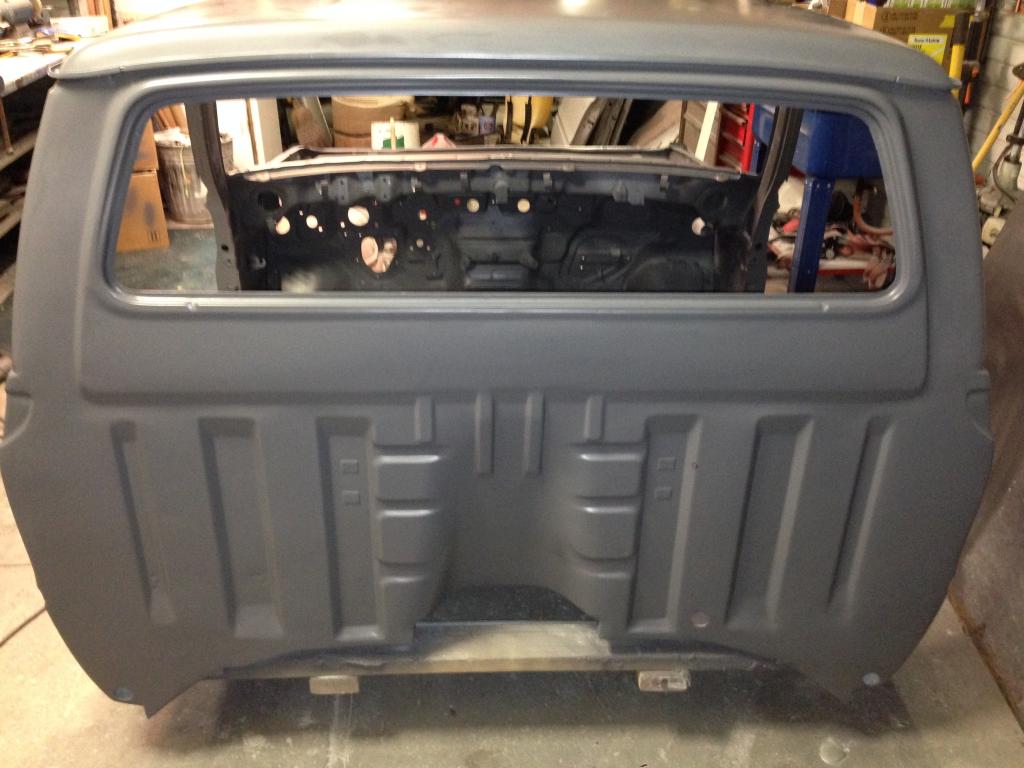
I also wrapped up the rear of the cab below the window. Same thing, just need to long block it with 120 then shoot it with epoxy.


I also wrapped up the rear of the cab below the window. Same thing, just need to long block it with 120 then shoot it with epoxy.

Last edited by kawazx636; Jul 17, 2014 at 08:34 PM.
Jul 18, 2014 | 01:52 PM
#811
Registered User
Joined: Feb 2014
Posts: 351
Likes: 0
Pretty much finished uo the roof tonight. I got it damn near laser straight, but I still want to long block it with some 120grit before I shoot it with epoxy again. Then the surfacer should straighten out the rest. I also wrapped up the rear of the cab below the window. Same thing, just need to long block it with 120 then shoot it with epoxy.
It's looking sharp Dave are you going to let us in on the colors
Sent from my iPhone using YotaTech
Jul 22, 2014 | 10:08 PM
#812
Thread Starter
Super Moderator
iTrader: (3)
Joined: Jan 2012
Posts: 3,218
Likes: 26
From: Salisbury, MD
Being that I am going on vacation for 9 days starting Friday night, I decided that it would be a good idea to shoot the body work that I have done so far with some epoxy to seal it up and prevent any potential flash rust while I'm gone. So that's what went down tonight. You'll get a better idea of what it will all look like instead of a bunch of patchy looking body filler.
Battery tray - turned out great! Super satisfied with molded in look it has:
The schmooooothie cowl - again, turned out great but I have a slight adjustment to do on the driverside where it dips down, but that's no biggie:
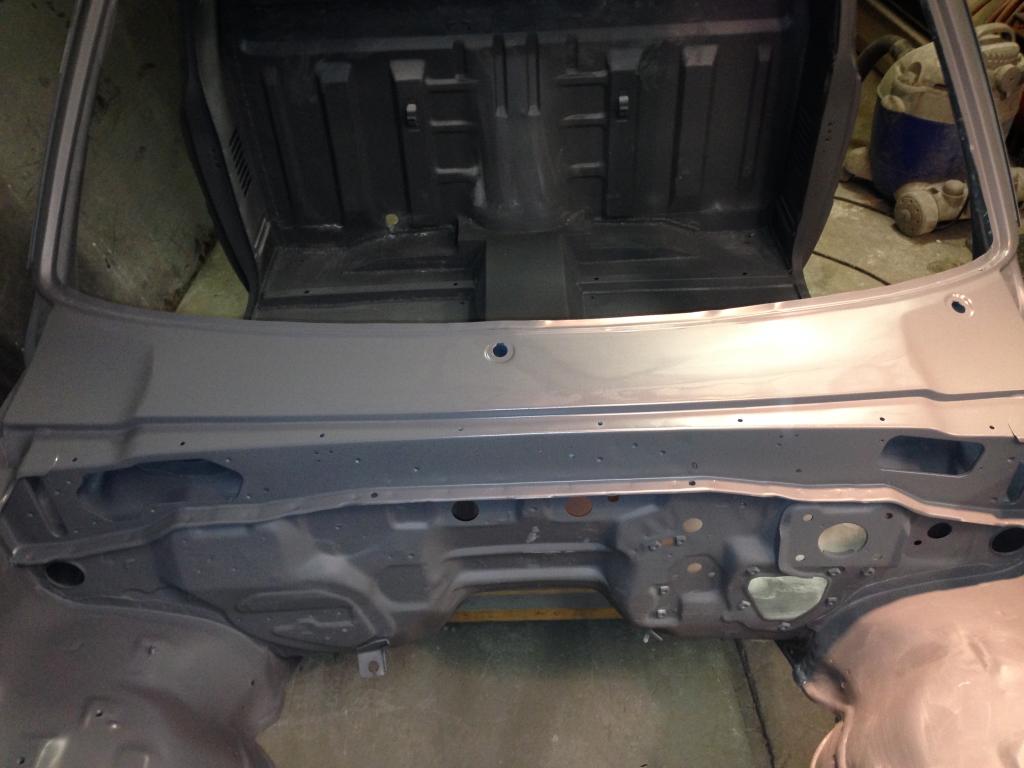
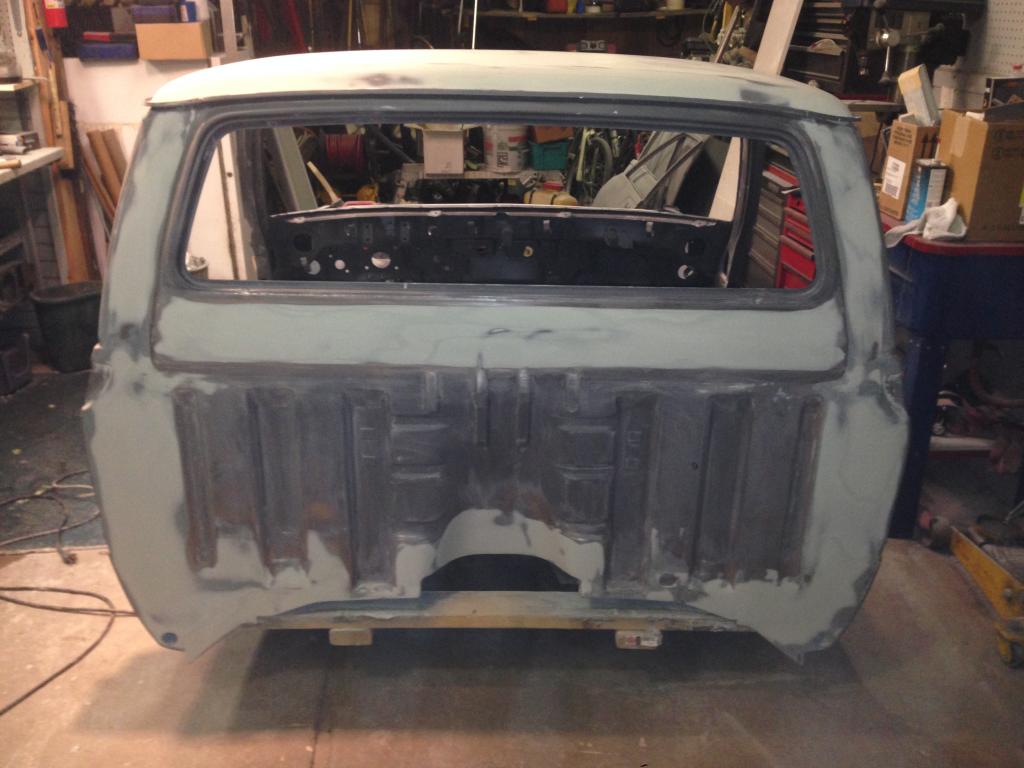
The rear cab wall with shaved corner seams - some very minor adjustments are needed here and there and I managed to put a couple runs in the epoxy when I got my air hose tangled. You can't even tell where I had to weld in new steel patches in the lower right and left corners behind where the new body mounts are. Overall I am extremely pleased with the way this turned out!!:
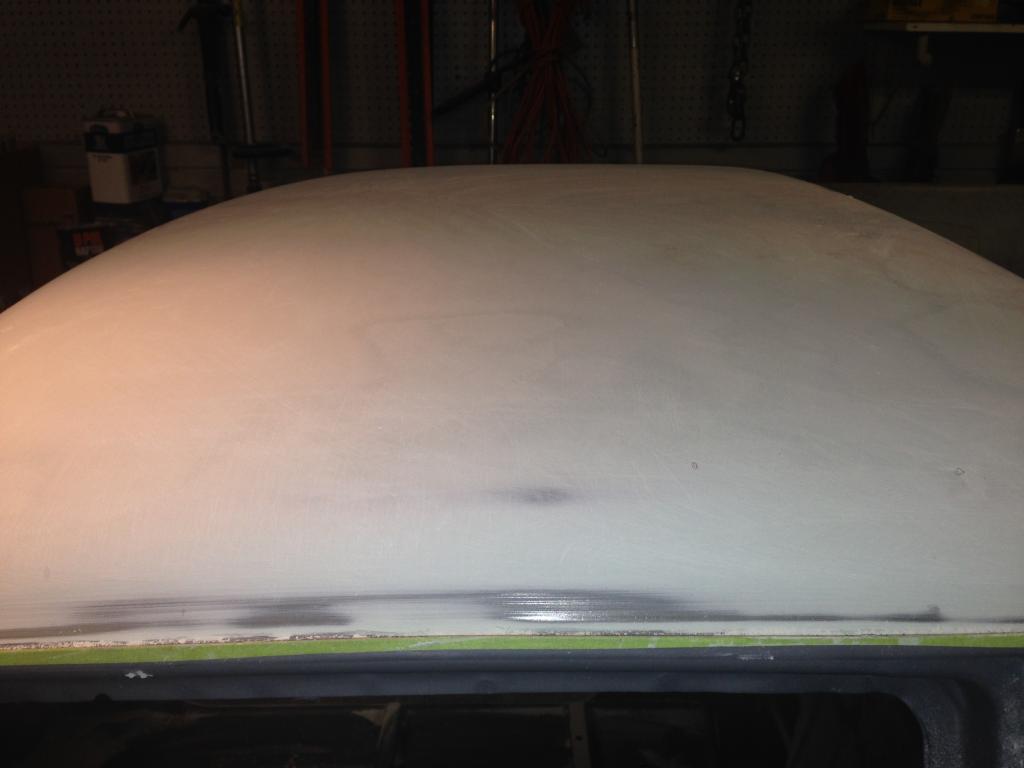
The roof - all is pretty much good here. I got a few pin holes that I need to hit with some glazing putty, but it's about as straight as you can get a flimsy old cab roof. I hit it with two medium coats and you can really see how much that body filler sucks it up:
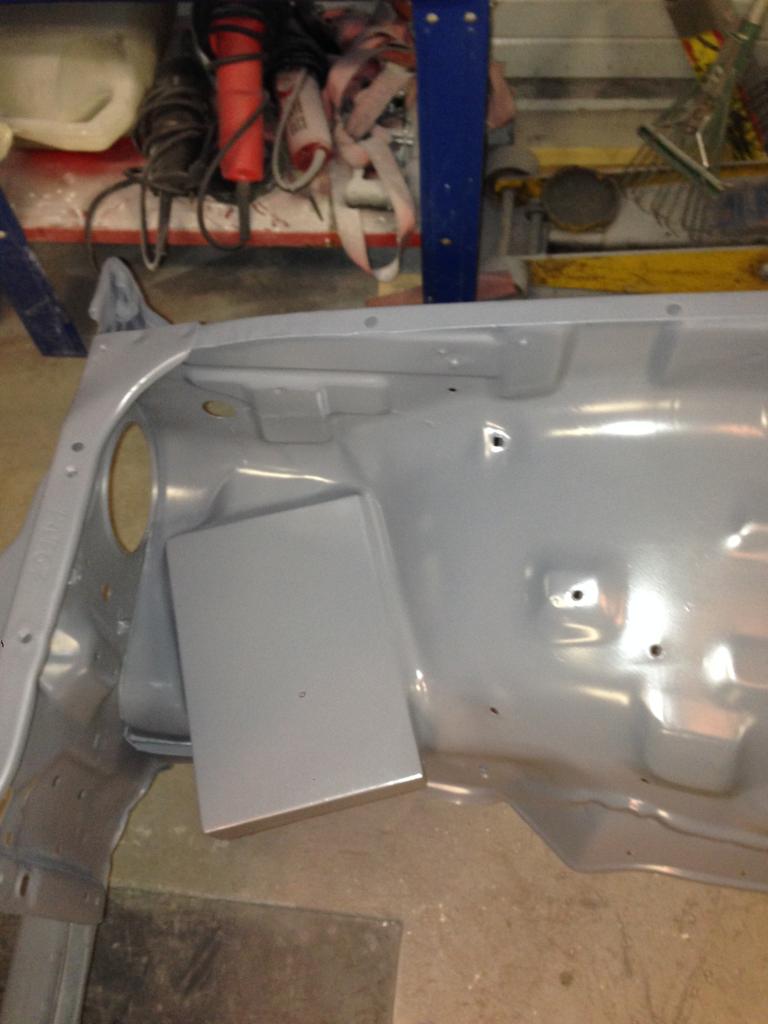
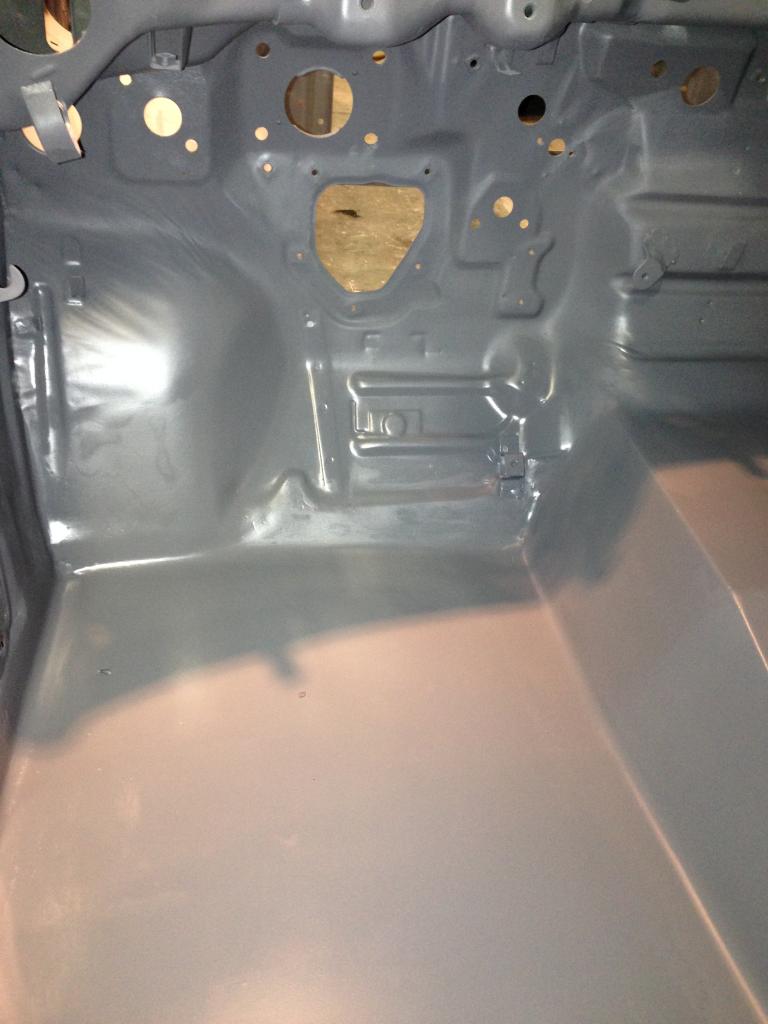
And the driverside cab floor - this didn't need to turn out absolutely perfect since I'm going to be Raptor Lining the interior and any bodywork imperfections would be essentially hidden. My main goal here was to make the transition from the floor to the firewall look seamless, especially considering that I had to use about a 2" section of 14ga steel to fill the gap between the floor and the firewall from where I had to cut out some rotted metal at the base of the firewall. My goal was to use the factory beads in the firewall to make the transition look smooth and to make that 2" filler "disappear." I think it turned out just fine:
Hopefully before I leave Friday night I'll get the underside of the bed wrapped up so I can flip it over and tuck it away in storage until I'm ready for color because it has really been in the way lately. Hopefully this time around I'll the the undercoating right!
Battery tray - turned out great! Super satisfied with molded in look it has:

The schmooooothie cowl - again, turned out great but I have a slight adjustment to do on the driverside where it dips down, but that's no biggie:

The rear cab wall with shaved corner seams - some very minor adjustments are needed here and there and I managed to put a couple runs in the epoxy when I got my air hose tangled. You can't even tell where I had to weld in new steel patches in the lower right and left corners behind where the new body mounts are. Overall I am extremely pleased with the way this turned out!!:

The roof - all is pretty much good here. I got a few pin holes that I need to hit with some glazing putty, but it's about as straight as you can get a flimsy old cab roof. I hit it with two medium coats and you can really see how much that body filler sucks it up:


And the driverside cab floor - this didn't need to turn out absolutely perfect since I'm going to be Raptor Lining the interior and any bodywork imperfections would be essentially hidden. My main goal here was to make the transition from the floor to the firewall look seamless, especially considering that I had to use about a 2" section of 14ga steel to fill the gap between the floor and the firewall from where I had to cut out some rotted metal at the base of the firewall. My goal was to use the factory beads in the firewall to make the transition look smooth and to make that 2" filler "disappear." I think it turned out just fine:

Hopefully before I leave Friday night I'll get the underside of the bed wrapped up so I can flip it over and tuck it away in storage until I'm ready for color because it has really been in the way lately. Hopefully this time around I'll the the undercoating right!
Last edited by kawazx636; Jul 22, 2014 at 10:16 PM.
 Jul 24, 2014 | 07:22 PM
#816
 Jul 25, 2014 | 04:57 AM
#817
Thread Starter
Super Moderator
iTrader: (3)
Joined: Jan 2012
Posts: 3,218
Likes: 26
From: Salisbury, MD
Damnit! I forgot about the mud flaps!! I just barely dropped the color chart in the mail this morning on my way to work (again, I'm pretty forgetful). I leave for vacation tonight, but when I get back I'll take a picture of my mud flaps and shoot it over to you to make sure it is what you want. I'm fairly certain that they are in good enough condition for your Trekker. I also still have to find them in the parts bunker that I occasionally call a garage...
 Jul 26, 2014 | 03:17 AM
#820
You have done some great work on the cab and I can see this is what it would of looked like in '82 going down the assembly line. Body work on roof tops is a pain as they do like to flex alot. You are doing a great job!!!


