
KawaZX636's 1983 Toyota Pickup Restoration
 Nov 3, 2014 | 06:36 PM
#1001
Thread Starter
Super Moderator
iTrader: (3)
Joined: Jan 2012
Posts: 3,218
Likes: 26
From: Salisbury, MD
Thanks guys! I appreciate the compliments.
Corey, the bed is up next. I was going to haul the cab back to my garage and take the bed back to my Pop's shop, but when I went to grab my trailer I discovered that my Dad had cleaned up his yard and filled my trailer full of leaves. So tomorrow I have to dump the leaves so I can get things moved around tomorrow night.
Corey, the bed is up next. I was going to haul the cab back to my garage and take the bed back to my Pop's shop, but when I went to grab my trailer I discovered that my Dad had cleaned up his yard and filled my trailer full of leaves. So tomorrow I have to dump the leaves so I can get things moved around tomorrow night.
Nov 4, 2014 | 09:47 PM
#1003
Thread Starter
Super Moderator
iTrader: (3)
Joined: Jan 2012
Posts: 3,218
Likes: 26
From: Salisbury, MD
I had perhaps one of the most stressful tows if my life (about as stressful as towing my friend's 13,000lb $180,000 parasail boat from Jersey to Maryland with my Tundra). I had to load up and haul my cab from my Pop's house:
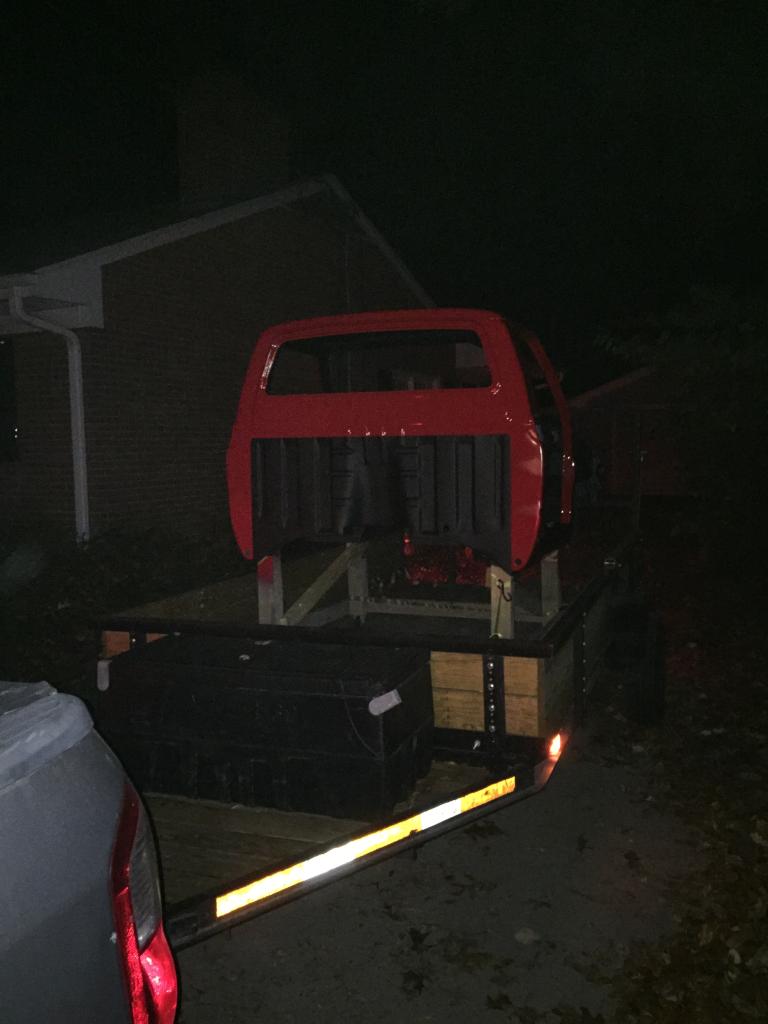
To my house about 3 miles down the road:
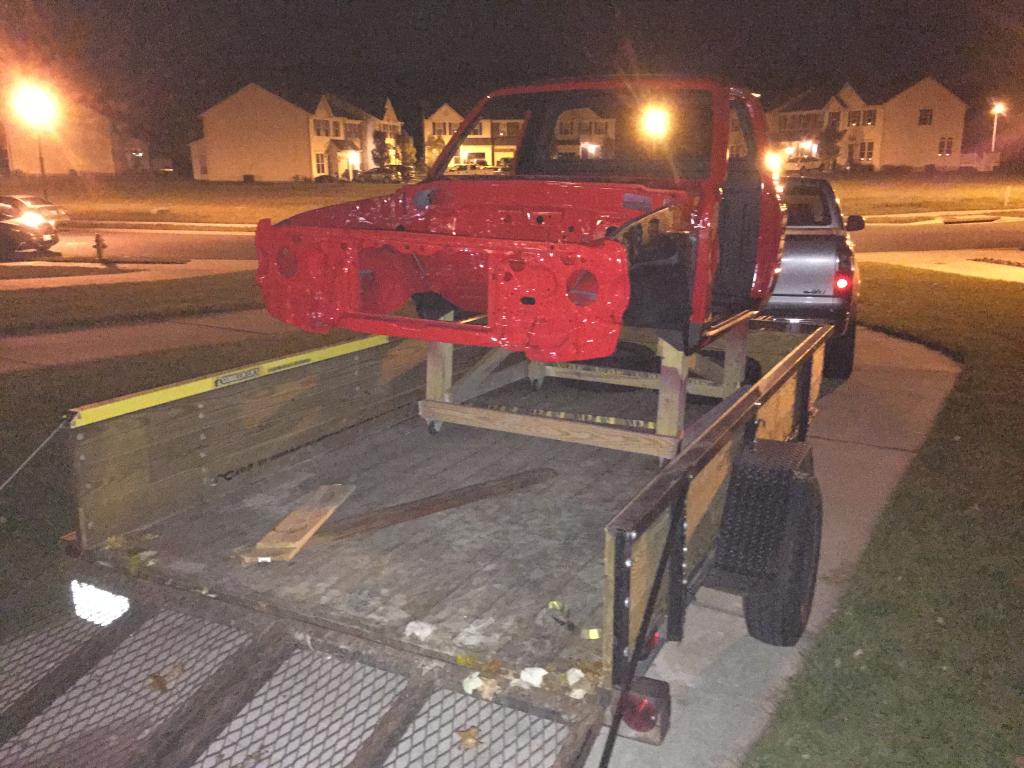
I doubt I broke 15mph on the whole way home! LOL Just the thought that somebody could pull out or a deer could run out in front of me and ruin all my time and money invested in this project really had me worked up. Nonetheless, it got to where it needed to be and then I hauled my bed back to my Pop's shop.
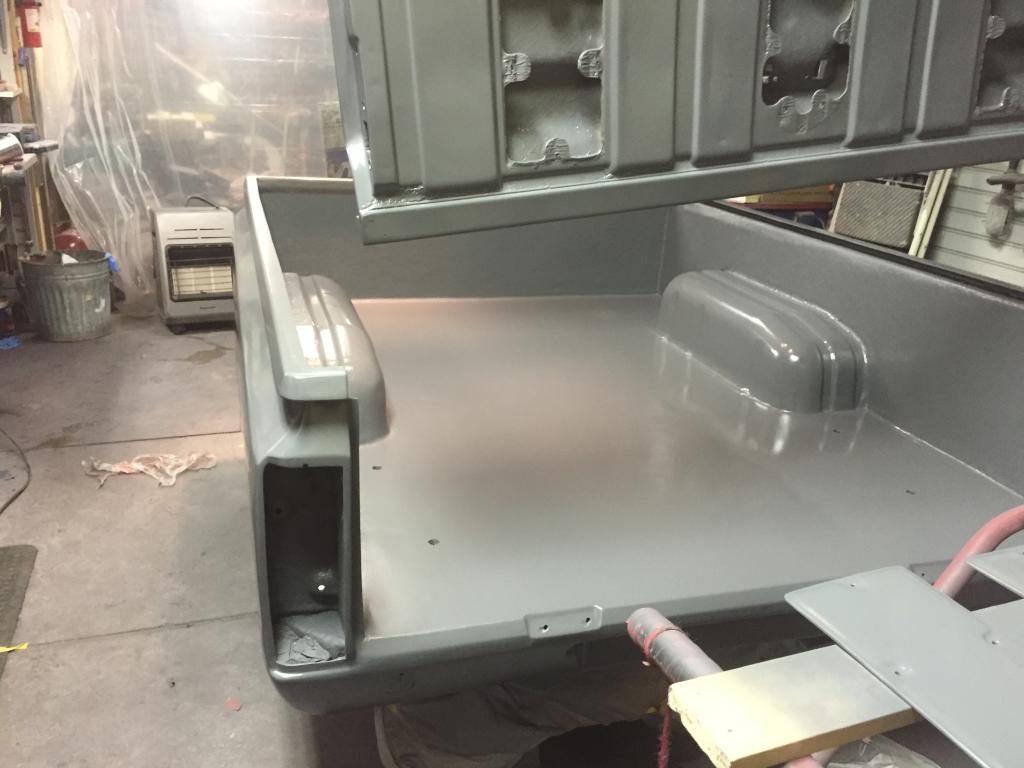
I wanted to get my tail lights fitted up to the new bed tonight so I tackled that task. They didn't quite sit in the tail light pockets properly (or at least not to my liking) so I needed to fill a little bit of a gap and shave back a couple areas to make them sit perfectly flush. This is a combined issue as a result of not quite perfect aftermarket tail light (we all know how things like that don't always fit perfectly) and perhaps a slight deviation in the fiberglas bed which I would expect. A couple swipes of filler and a little shaping and I got them fitting properly in no time! I forgot to take before pictures but here are the afters:
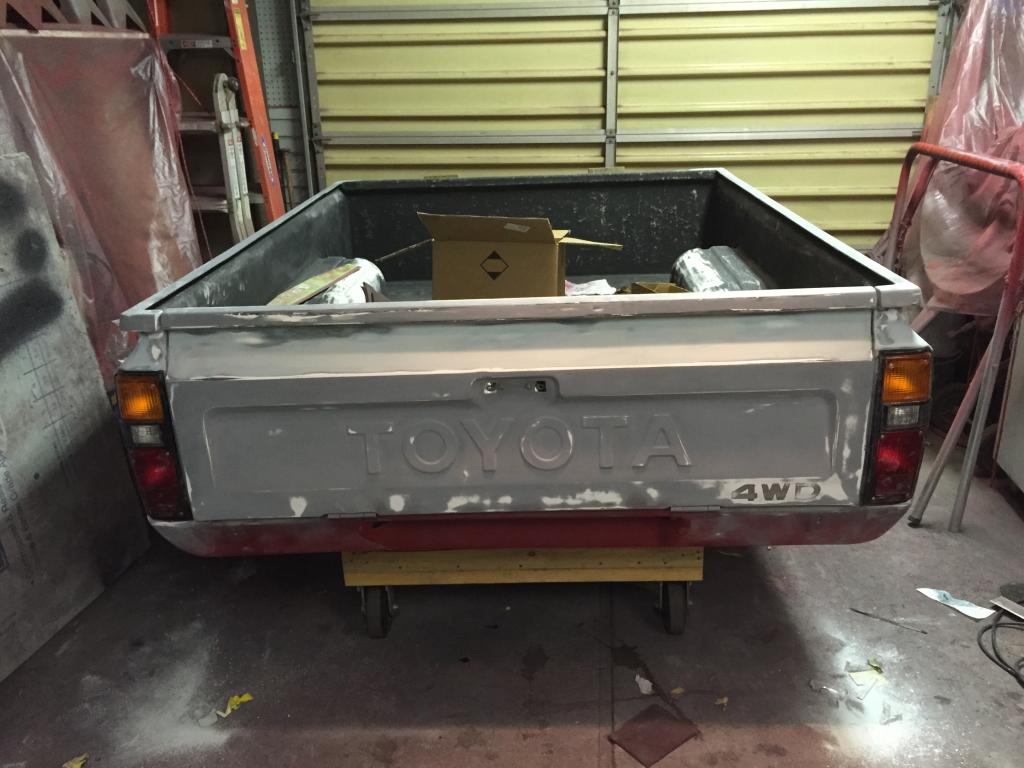
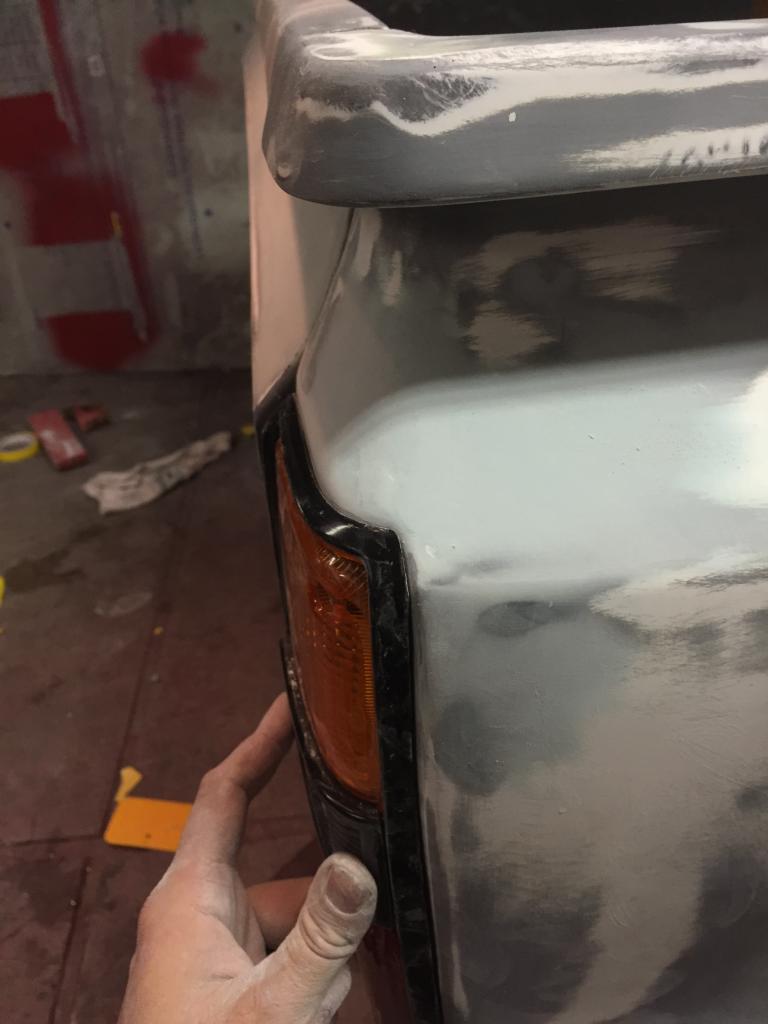
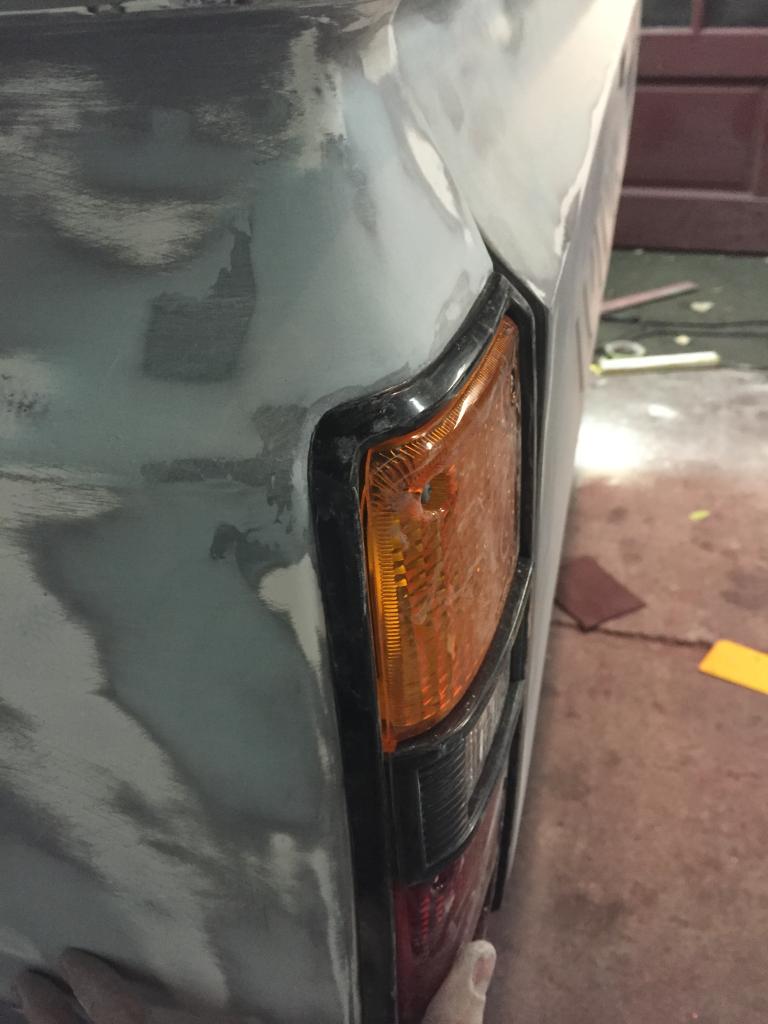
I still have some smoothing to do and a little bit of glazing putty, but that won't take anytime. Also, I the bed photographs terribly so it isn't anywhere near as bad as it looks. I have a little my prep to do, but I'd say that 85% is ready for primer.
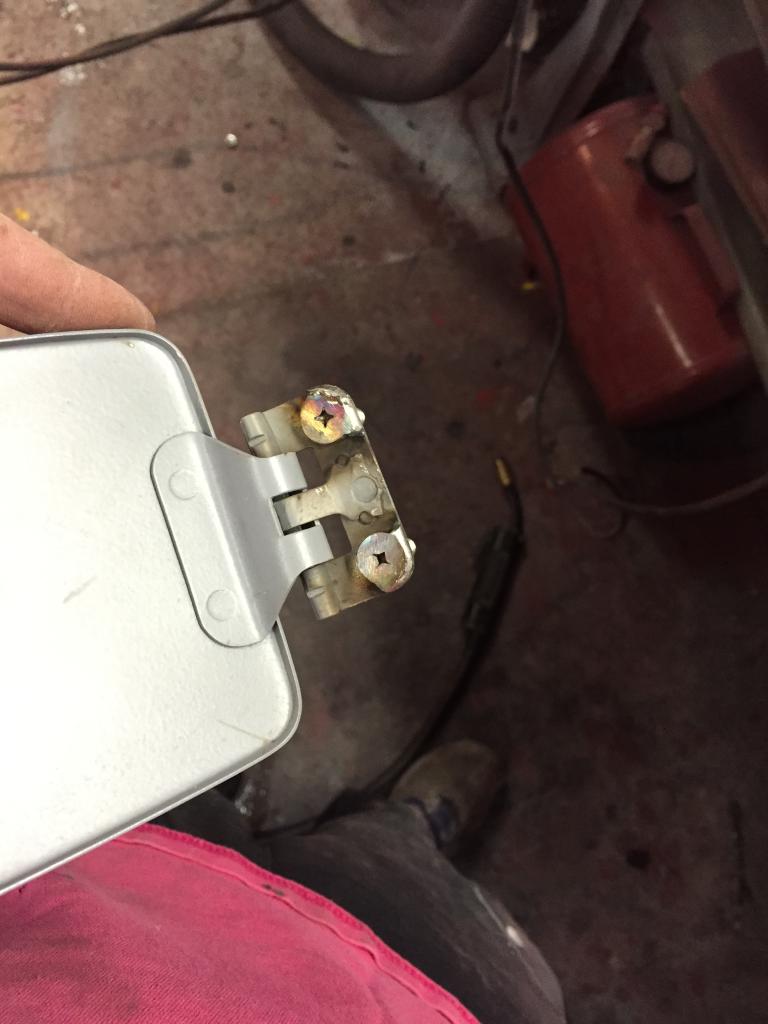
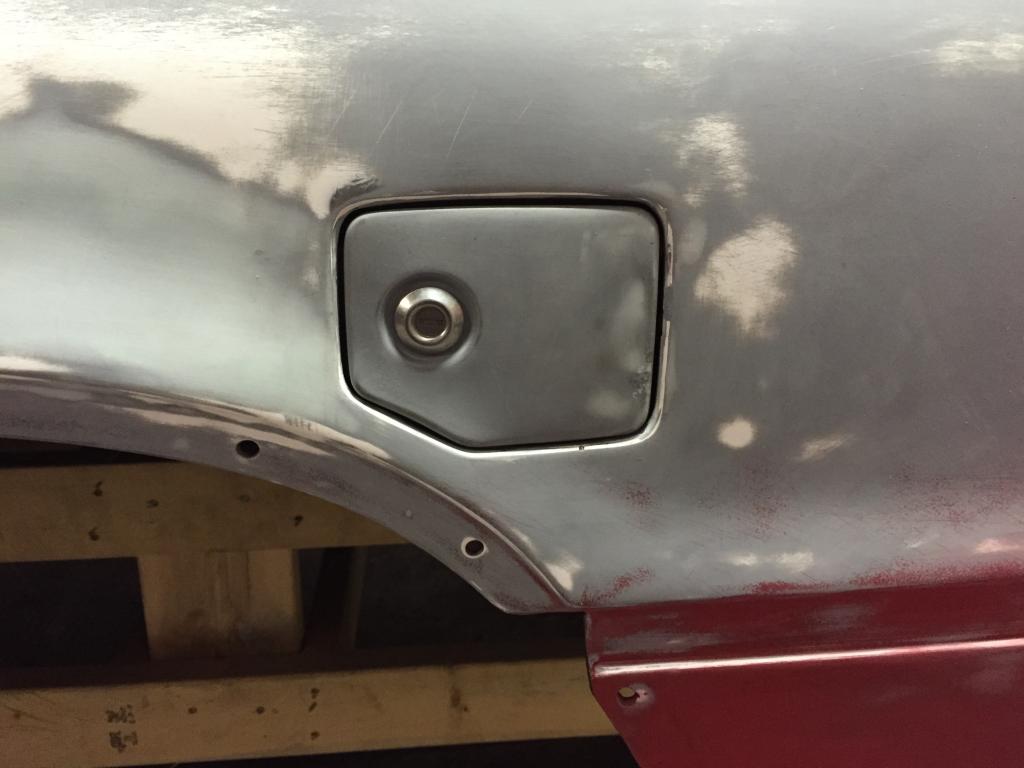
Next on the to-do list is my fuel door mod where I want to weld some bolts onto the hinge so I can nut it on from the back side of fuel filler pocket to make alignment easier and lessen the possibility of the screws backing out or stripping out of the fiberglass. I'll likely get to that tomorrow night.

To my house about 3 miles down the road:

I doubt I broke 15mph on the whole way home! LOL Just the thought that somebody could pull out or a deer could run out in front of me and ruin all my time and money invested in this project really had me worked up. Nonetheless, it got to where it needed to be and then I hauled my bed back to my Pop's shop.
I wanted to get my tail lights fitted up to the new bed tonight so I tackled that task. They didn't quite sit in the tail light pockets properly (or at least not to my liking) so I needed to fill a little bit of a gap and shave back a couple areas to make them sit perfectly flush. This is a combined issue as a result of not quite perfect aftermarket tail light (we all know how things like that don't always fit perfectly) and perhaps a slight deviation in the fiberglas bed which I would expect. A couple swipes of filler and a little shaping and I got them fitting properly in no time! I forgot to take before pictures but here are the afters:


I still have some smoothing to do and a little bit of glazing putty, but that won't take anytime. Also, I the bed photographs terribly so it isn't anywhere near as bad as it looks. I have a little my prep to do, but I'd say that 85% is ready for primer.
Next on the to-do list is my fuel door mod where I want to weld some bolts onto the hinge so I can nut it on from the back side of fuel filler pocket to make alignment easier and lessen the possibility of the screws backing out or stripping out of the fiberglass. I'll likely get to that tomorrow night.
Nov 5, 2014 | 07:52 PM
#1004
Thread Starter
Super Moderator
iTrader: (3)
Joined: Jan 2012
Posts: 3,218
Likes: 26
From: Salisbury, MD
Fuel door mod done.
Welded some pancheese bolts to the hinge:
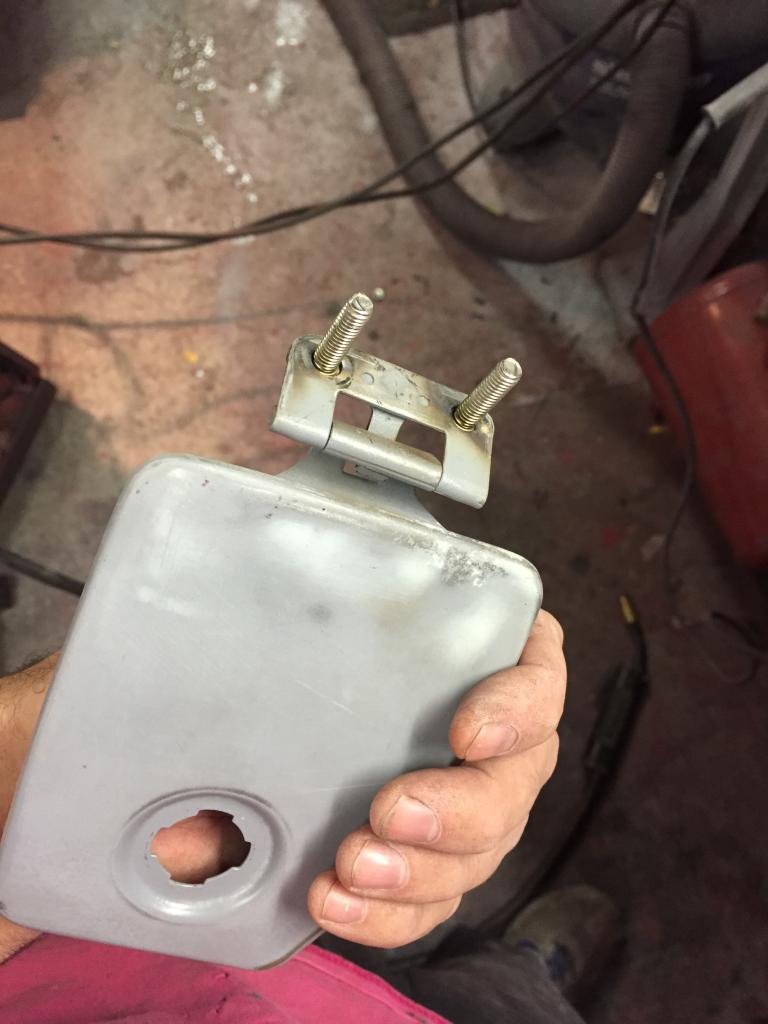
Expanded the holes in the pocket for adjustment and slid it in:
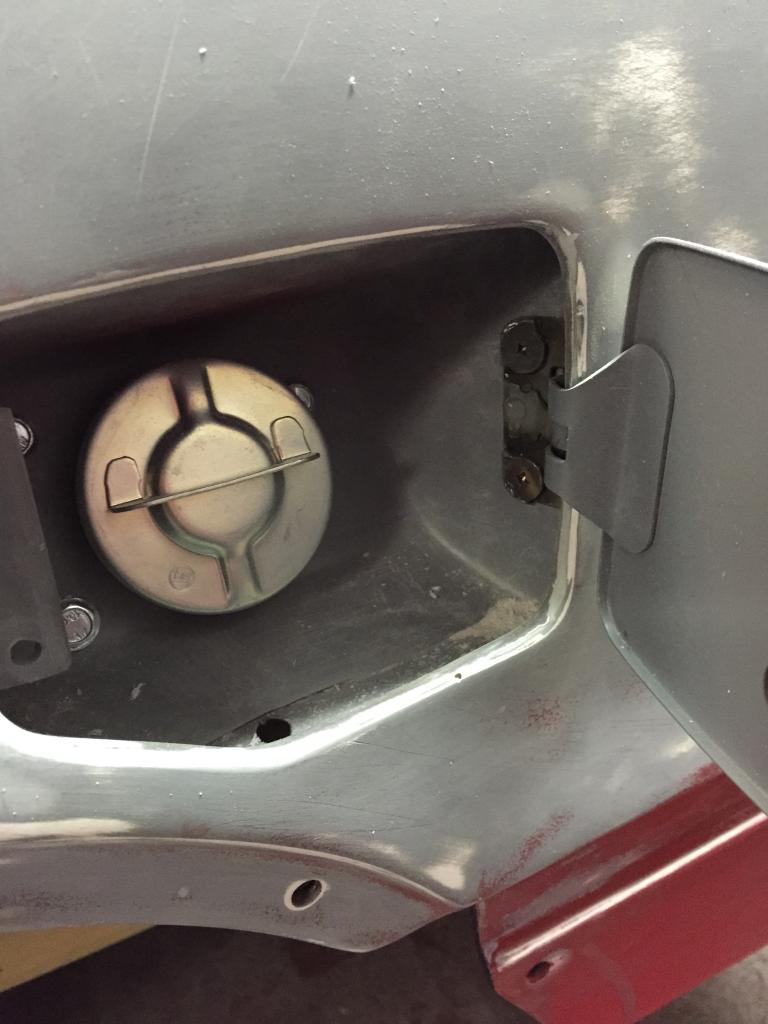
Nutted it on from behind with stainless nylon lock nuts and this was the first bolt on without adjustment. Sure beats the hell out of opening, adjusting, closing, check fit, repeat...over and over. It's the simple things...
Decided to call it quits early tonight (midnight is early for me). I just wasn't into it tonight and when that happens I do shoddy work - that's not a good thing when you are doing anything with filler. It'll be there tomorrow night...
Welded some pancheese bolts to the hinge:


Expanded the holes in the pocket for adjustment and slid it in:

Nutted it on from behind with stainless nylon lock nuts and this was the first bolt on without adjustment. Sure beats the hell out of opening, adjusting, closing, check fit, repeat...over and over. It's the simple things...

Decided to call it quits early tonight (midnight is early for me). I just wasn't into it tonight and when that happens I do shoddy work - that's not a good thing when you are doing anything with filler. It'll be there tomorrow night...


 Nov 11, 2014 | 06:09 PM
#1009
Thread Starter
Super Moderator
iTrader: (3)
Joined: Jan 2012
Posts: 3,218
Likes: 26
From: Salisbury, MD
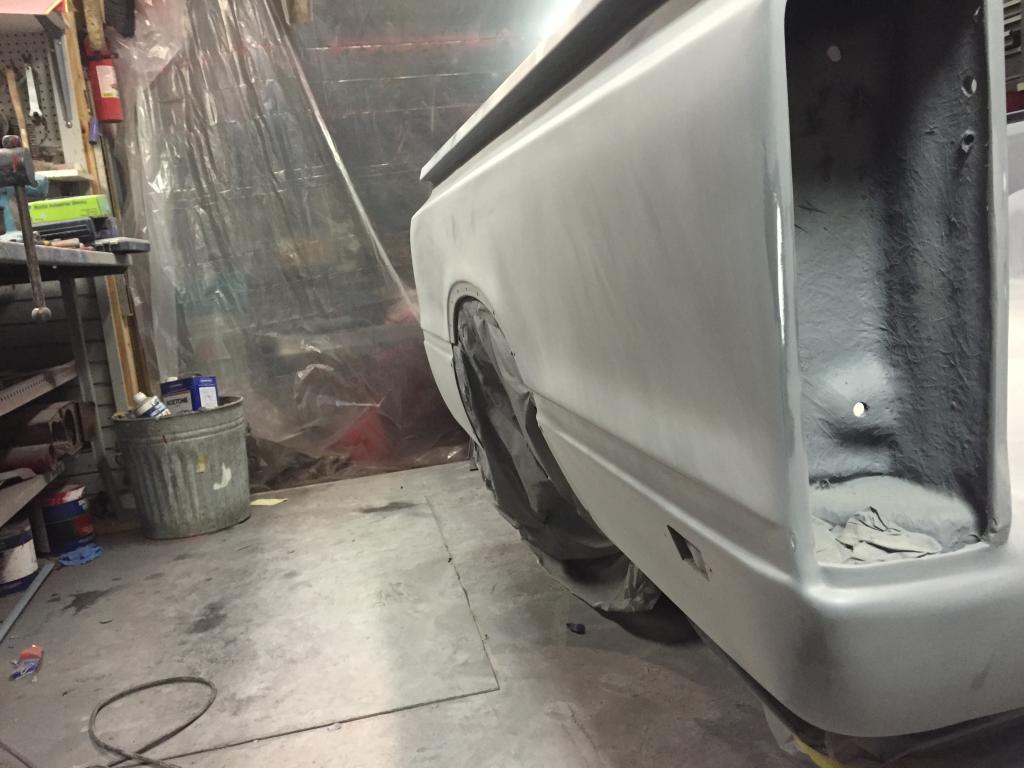
Got everything masked off and ready for epoxy today - much more time consuming than I thought it would be. Also prepped the fender flares for paint too. They were a big PITA too since they had an extra coat of paint and primer on them. Once I got them sanded down a bit, I realized that they were likely off of a Mojave edition truck since they appeared to have that factory metalic goldish brown paint on them (I think that color was exclusive to a Majave or some sort of limited edition truck - I'll research it later). Then I shot a couple coats of epoxy on the bed, tailgate, fuel door and fender flares.
I was hoping to shoot the surfacer tonight, but The epoxy hasn't quite flashed off enough to do such so I may just get back to the surfacer tomorrow morning. I'm in a tight pinch because there is suppose to be a heavy cold snap moving through the area and I want to get this primer down well before it hits. I got a propane heater in the shop, but I don't like leaving it on while I'm not around so I may be babysitting the shop to maintain a decent temperature for a few days while the primer cures.


I was hoping to shoot the surfacer tonight, but The epoxy hasn't quite flashed off enough to do such so I may just get back to the surfacer tomorrow morning. I'm in a tight pinch because there is suppose to be a heavy cold snap moving through the area and I want to get this primer down well before it hits. I got a propane heater in the shop, but I don't like leaving it on while I'm not around so I may be babysitting the shop to maintain a decent temperature for a few days while the primer cures.
Last edited by kawazx636; Nov 11, 2014 at 06:11 PM.
Nov 12, 2014 | 12:52 PM
#1010
Thread Starter
Super Moderator
iTrader: (3)
Joined: Jan 2012
Posts: 3,218
Likes: 26
From: Salisbury, MD
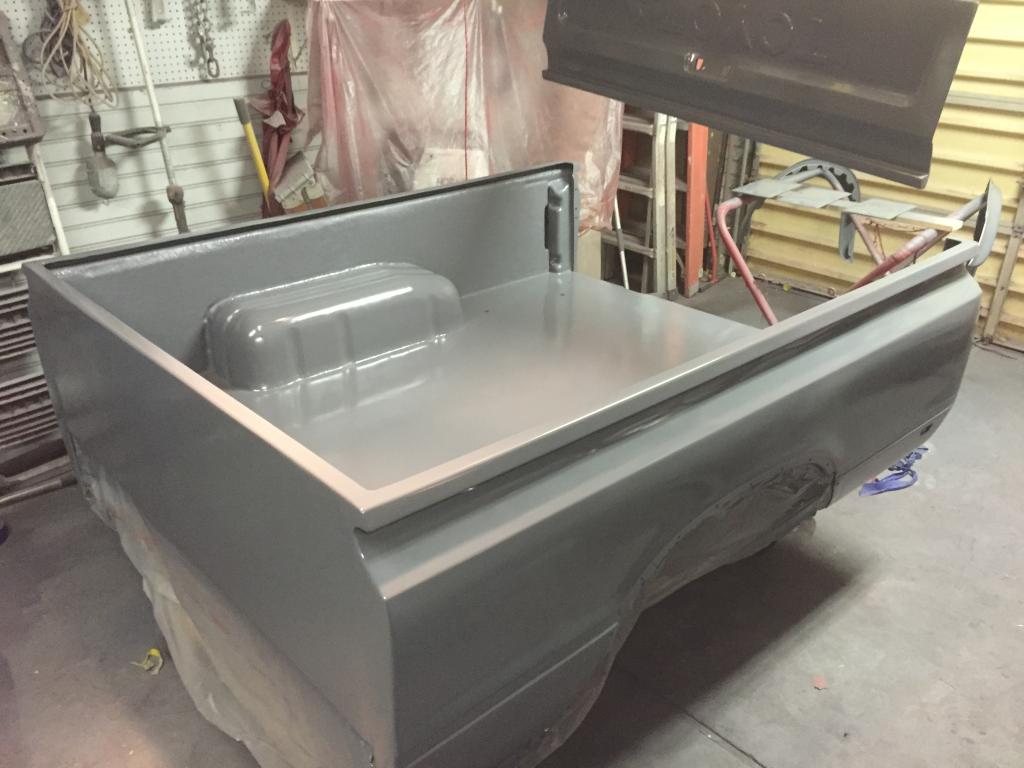
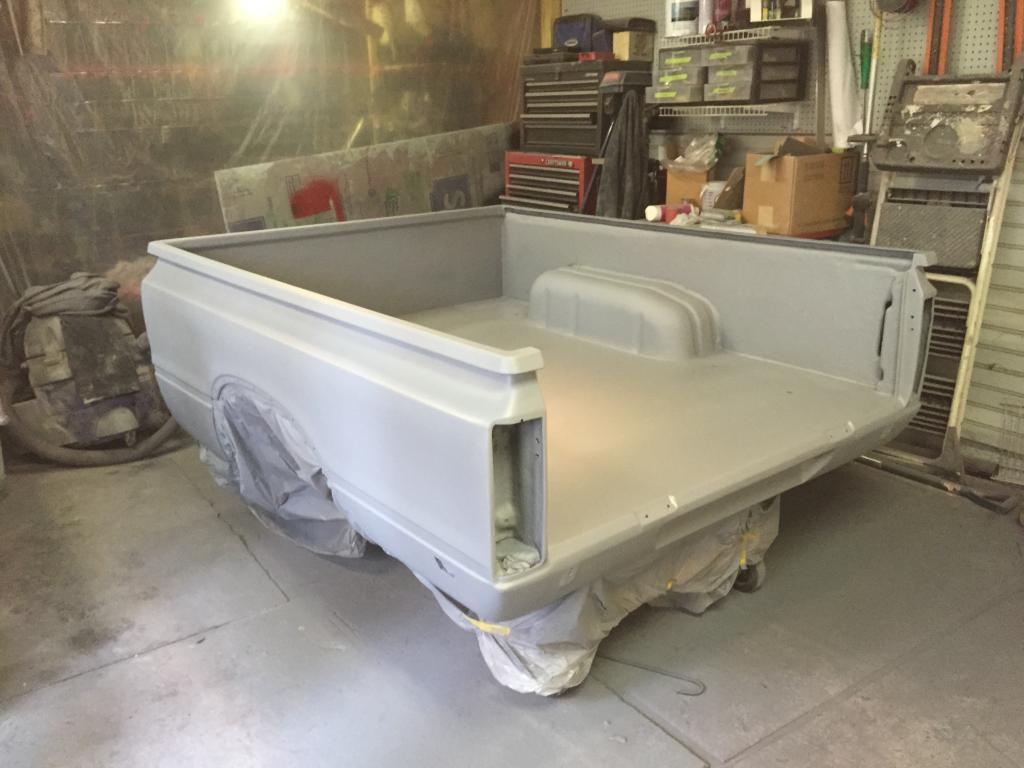
Woke up early and shot a couple coats of surfacer on the bed and tailgate this morning.
Now, the cold is supposed to set in over night so I will be babysitting the temperature in the shop for a couple days while the primer fully cures. Stupid cold!!! And to think, just a couple months ago I was complaining about the heat and humidity...

Now, the cold is supposed to set in over night so I will be babysitting the temperature in the shop for a couple days while the primer fully cures. Stupid cold!!! And to think, just a couple months ago I was complaining about the heat and humidity...


 Nov 12, 2014 | 08:39 PM
#1012
Thread Starter
Super Moderator
iTrader: (3)
Joined: Jan 2012
Posts: 3,218
Likes: 26
From: Salisbury, MD
Thanks Corey! Not that cold here yet, but it will certainly get here. I suppose it's better to be cold than hot since it's easier to heat the shop than it is to cool it.
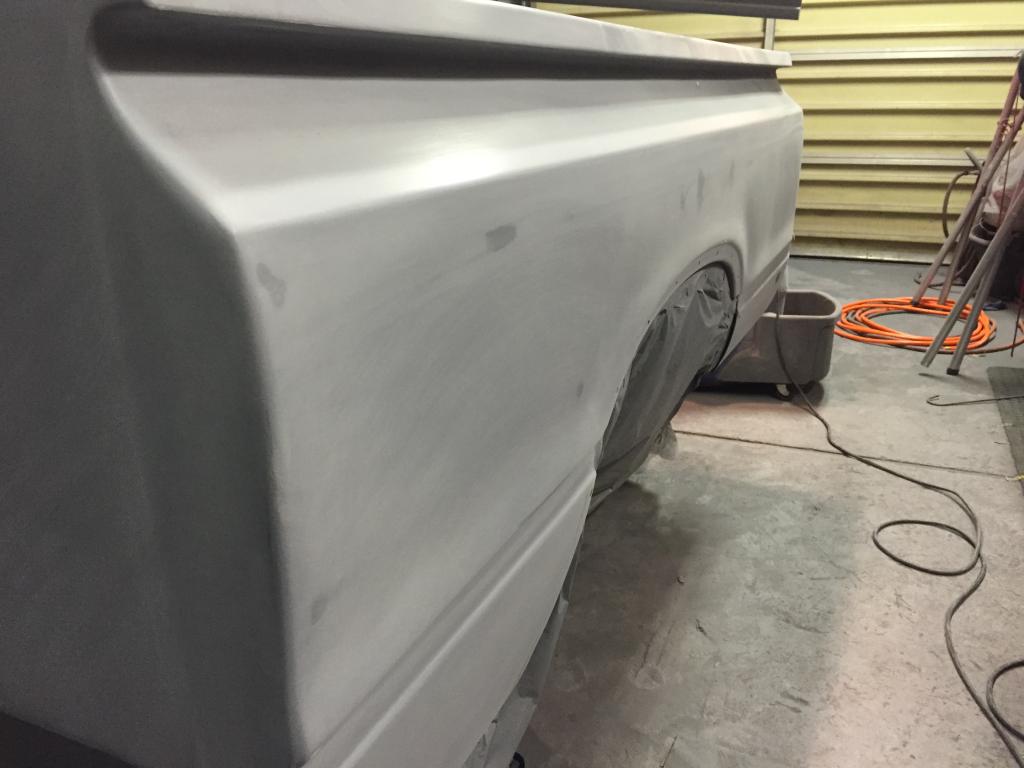
Started blocking and sandihg the surfacer tonight. I reduced it pretty good when I sprayed it so it laided down pretty good. Started with 320 grit to knock down the high spots and moved on to a maroon then grey scotch pad. Everything seems pretty straight so I'll move on to the 600 grit tomorrow on the bed and it will be ready for color. Fender flares and tail gate should only take a night so I should be spraying color on the next semi warm streak we get around here (hopefully the first of next week).
Started blocking and sandihg the surfacer tonight. I reduced it pretty good when I sprayed it so it laided down pretty good. Started with 320 grit to knock down the high spots and moved on to a maroon then grey scotch pad. Everything seems pretty straight so I'll move on to the 600 grit tomorrow on the bed and it will be ready for color. Fender flares and tail gate should only take a night so I should be spraying color on the next semi warm streak we get around here (hopefully the first of next week).


 Nov 13, 2014 | 09:52 PM
#1014
Thread Starter
Super Moderator
iTrader: (3)
Joined: Jan 2012
Posts: 3,218
Likes: 26
From: Salisbury, MD
Exciting is an understatement! I can't wait until my days of body filler, priming, painting and sanding are over with! I'm pretty sure that I no longer have finger prints from all the sanding - it's bad enough that the fingerprint touch ID on my iPhone won't work right now!
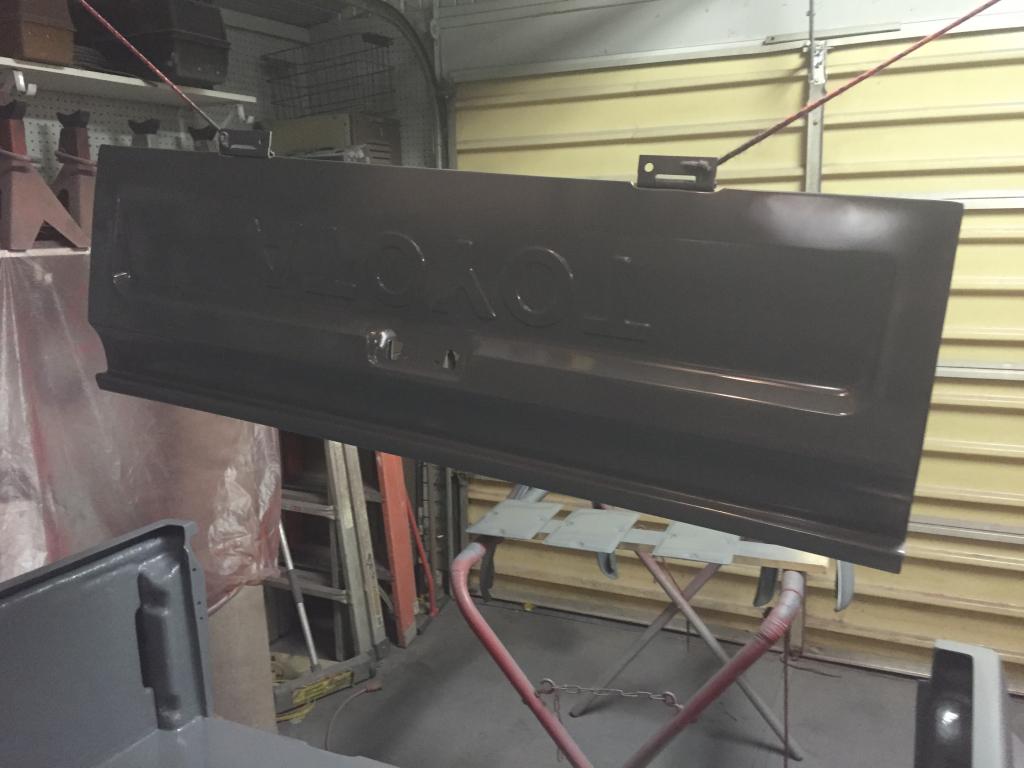
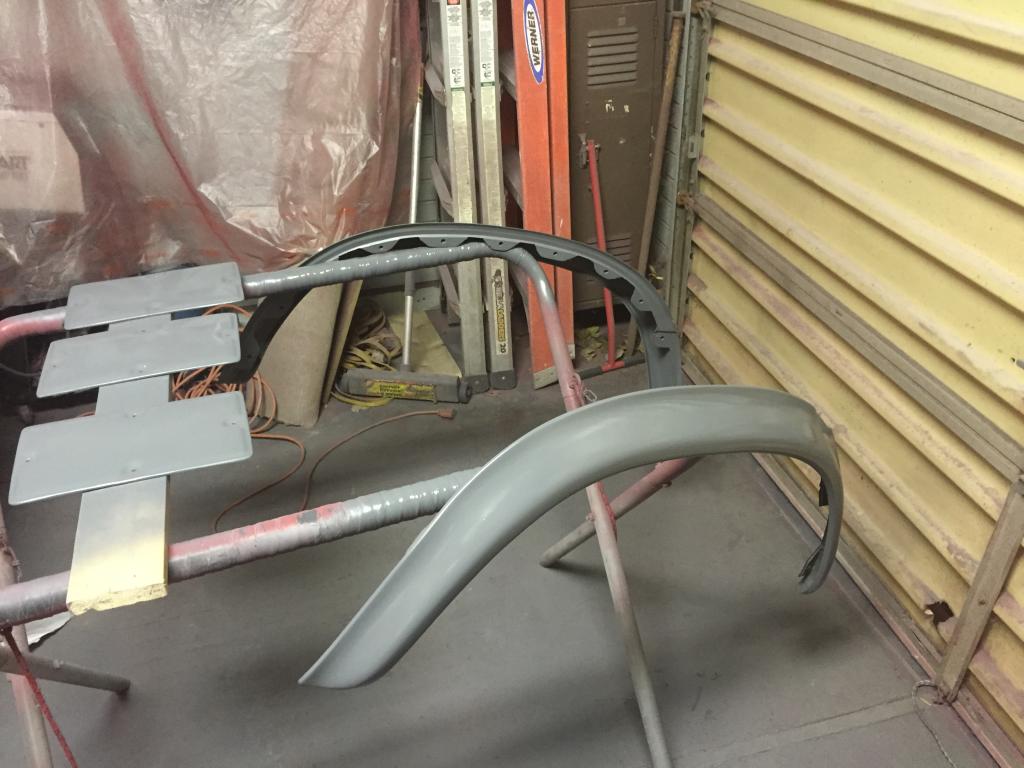
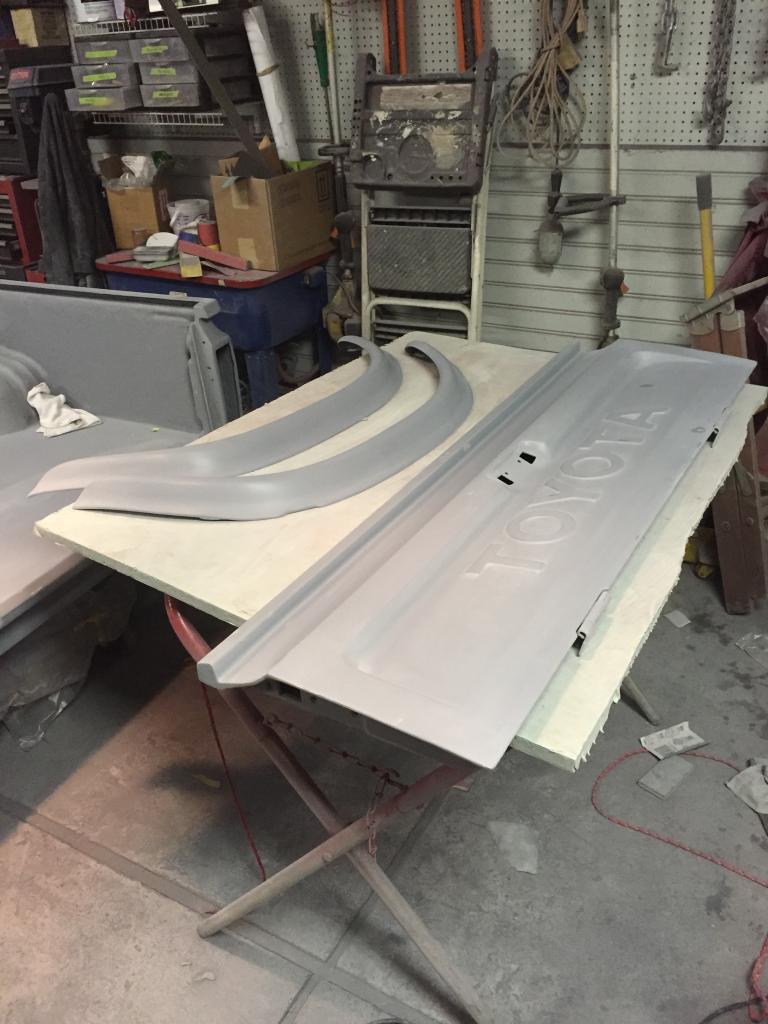
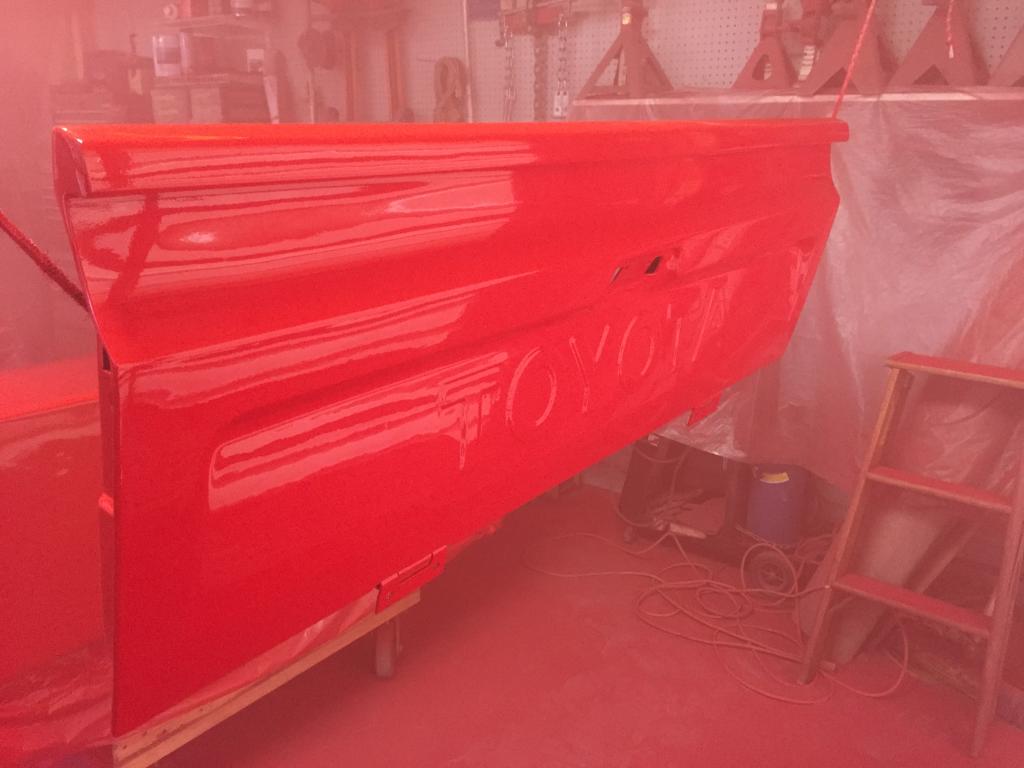
Finished all the 320 and grey scotch brite padding tonight on everything. I have a couple of places where I sanded through to spot prime and then it's on to 600 grit before paint. I could get away without going to 600, but it will help the paint flow out better and minimize any color wet sanding. Here are the finished tailgate and fender flares:
One more evening of prep and then I'm just waiting a decently warm day to paint! Woot woot!!!
Finished all the 320 and grey scotch brite padding tonight on everything. I have a couple of places where I sanded through to spot prime and then it's on to 600 grit before paint. I could get away without going to 600, but it will help the paint flow out better and minimize any color wet sanding. Here are the finished tailgate and fender flares:

One more evening of prep and then I'm just waiting a decently warm day to paint! Woot woot!!!
Nov 14, 2014 | 11:50 AM
#1015

Keep it up Dave, I've been looking everyday to see your updates, I've been saying it for a while now but you haven't even started the best part of a rebuild yet, your work is very inspiring, good luck with the rest.
Nov 15, 2014 | 08:38 PM
#1016
Thread Starter
Super Moderator
iTrader: (3)
Joined: Jan 2012
Posts: 3,218
Likes: 26
From: Salisbury, MD
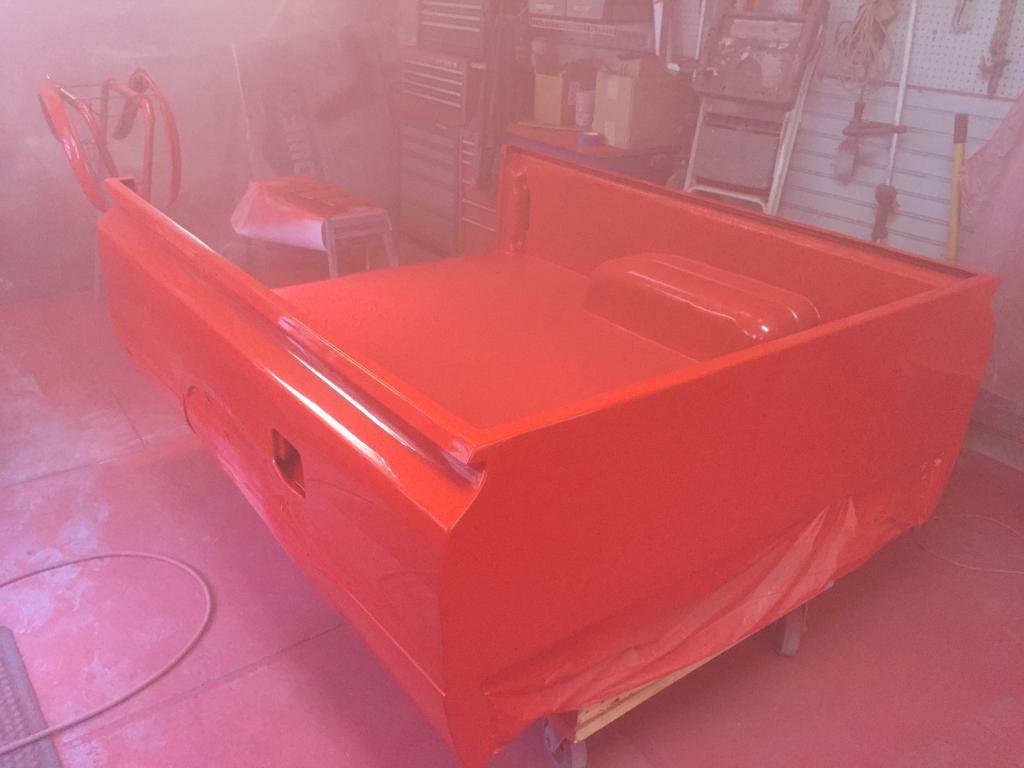
Everything has been sanded down to 600 grit. Need to blow off all the dust with an air hose, degrease, tack cloth, mask off the underside of the bed, clean up the shop a little and it's ready for color! Tomorrow is supposed to get up to the mid 50's so I'm going to leave the heater on in the shop over night and hopefully I can keep it warm enough to spray tomorrow afternoon *fingers crossed*
Here are some pics for you pic hungry folks out there... It's still grey LoL
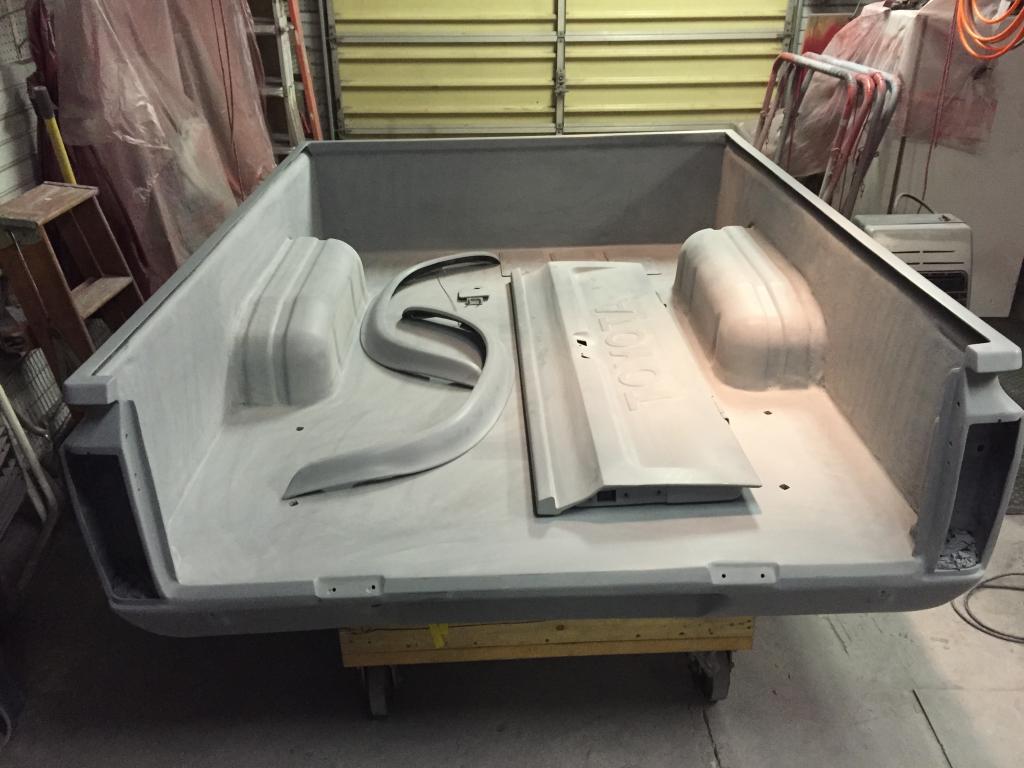
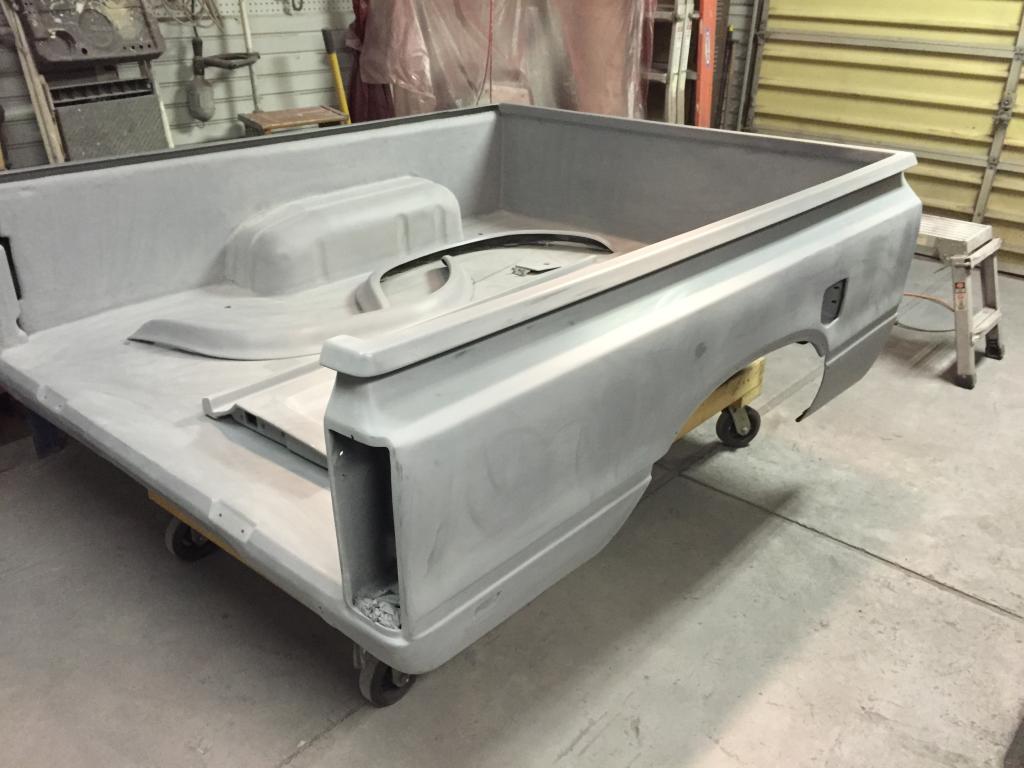
Here are some pics for you pic hungry folks out there... It's still grey LoL

 Nov 16, 2014 | 02:19 PM
#1018
Thread Starter
Super Moderator
iTrader: (3)
Joined: Jan 2012
Posts: 3,218
Likes: 26
From: Salisbury, MD
Nah, I'm going to get Line-X to do the bed. I'm running out of time to do it myself and I want the extra durability of the Line-X.
I got a little more color in my life today. The photos were fresh after painting so they are a little "cloudy" from the spray so I'll take more later, but here they are for your viewing pleasure:
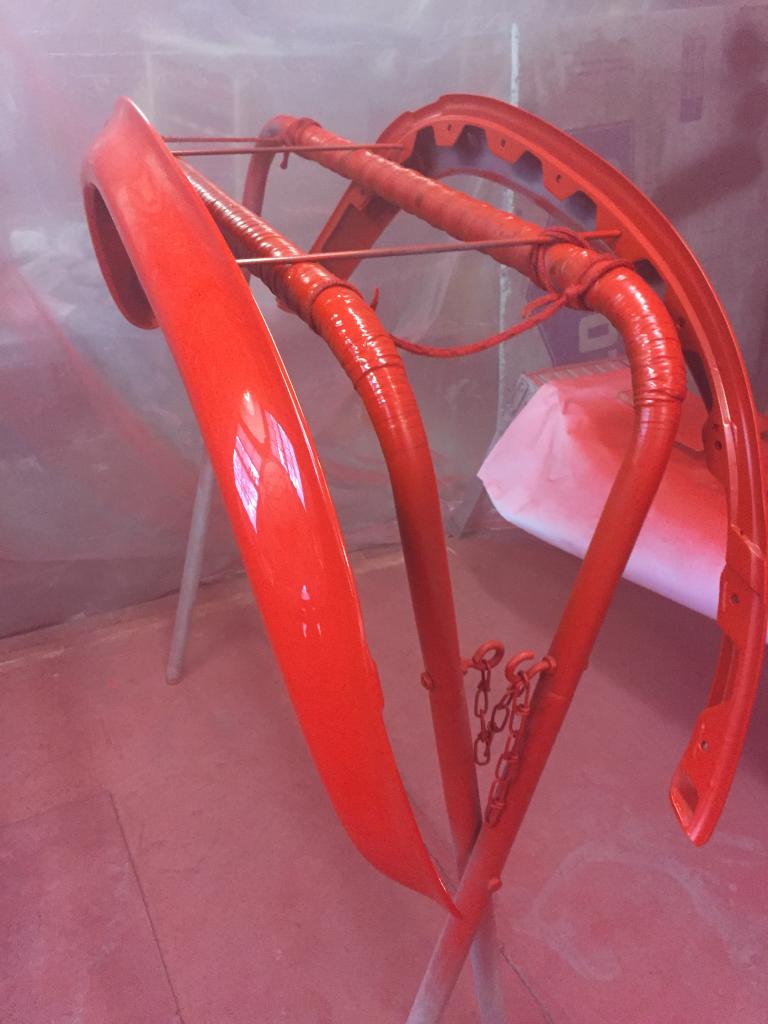
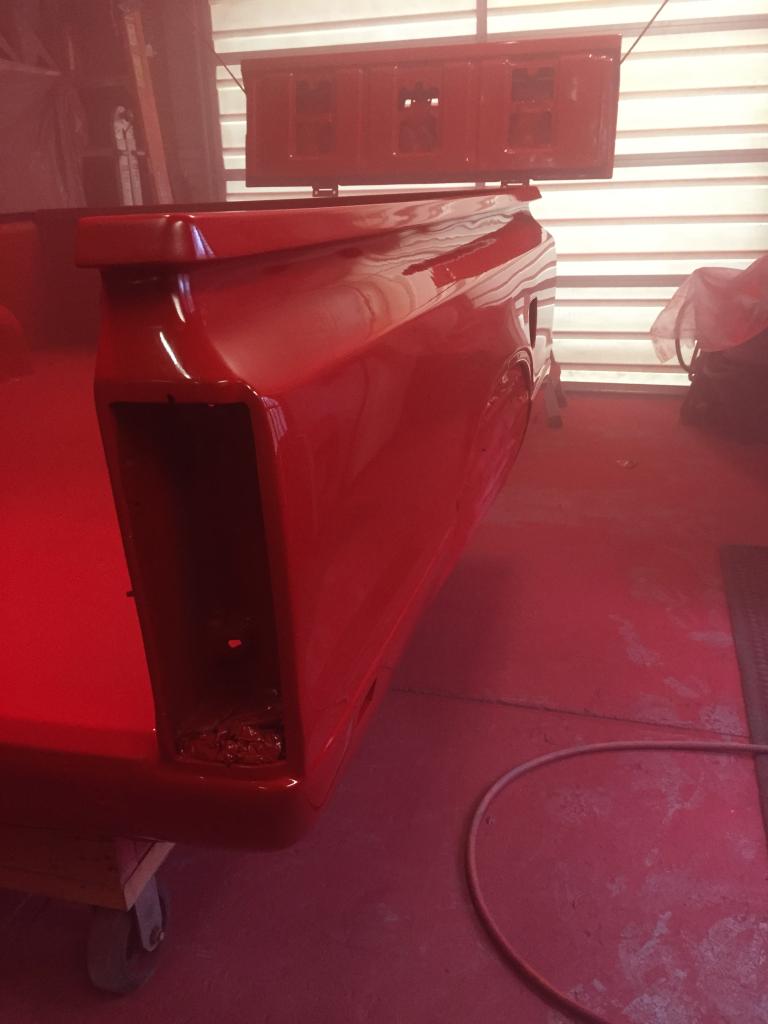
I got a little more color in my life today. The photos were fresh after painting so they are a little "cloudy" from the spray so I'll take more later, but here they are for your viewing pleasure:


