
KawaZX636's 1983 Toyota Pickup Restoration
 Aug 17, 2014 | 06:17 PM
#841
Thread Starter
Super Moderator
iTrader: (3)
Joined: Jan 2012
Posts: 3,218
Likes: 26
From: Salisbury, MD
Thanks guys! I was thinking about going with the FJ Cruiser "quicksand" tan color, but I didn't want my truck to disappear on the road. I'm doing all this work and I want it to be noticed damnit!! So red it was!
I noticed that I was having some pressure issues while was spraying the red so I decided to correct that issue tonight. I was using some poly flex hose with typical 1/4" couplings. The hose was expanding causing my pressure to surge then fall off and the 1/4" couplings were restricting my volume. So I went out and grab some 3/8" PVC hose and 3/8" coupling this afternoon. Got it all plumbed up tonight and tested the pressure and volume with a dry gun. PERFECT! Solved my problems right away. Turns out that this undecoating issue has actually benefitted me with a good test run on my paint and equipment.
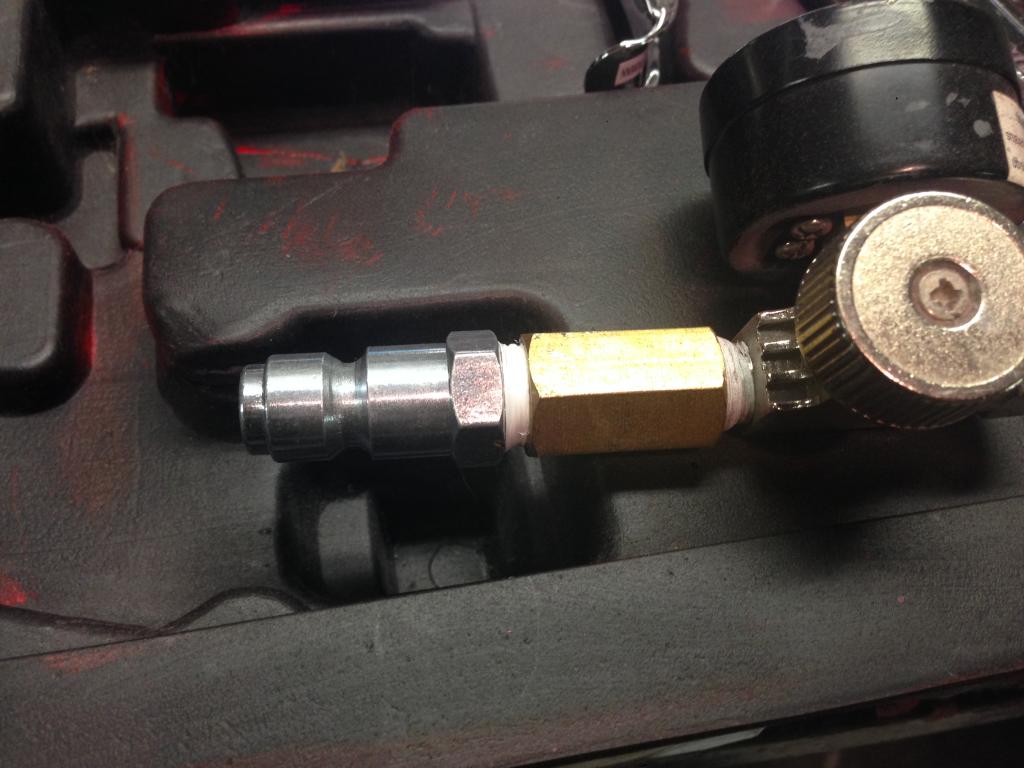
Here's my bright shiny new orange hose and my beefy couplings:
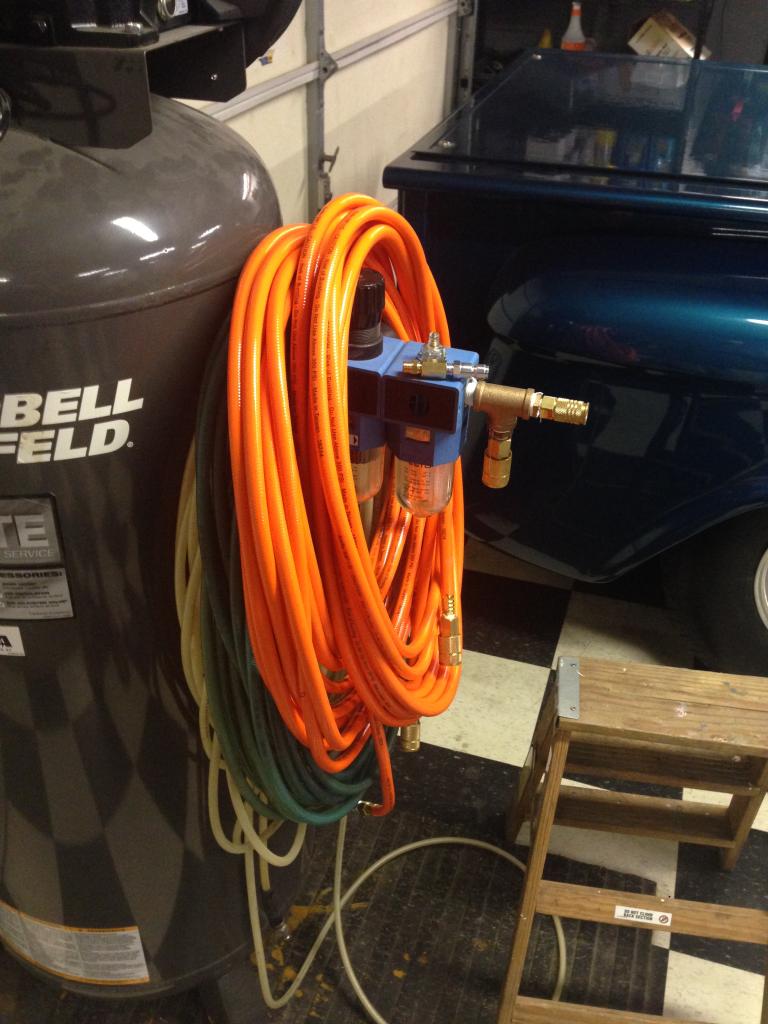
Hopefully I'll get the Raptor Liner shot tomorrow night. Then it's on to the fenders, doors and hood! Getting exciting around here...
I noticed that I was having some pressure issues while was spraying the red so I decided to correct that issue tonight. I was using some poly flex hose with typical 1/4" couplings. The hose was expanding causing my pressure to surge then fall off and the 1/4" couplings were restricting my volume. So I went out and grab some 3/8" PVC hose and 3/8" coupling this afternoon. Got it all plumbed up tonight and tested the pressure and volume with a dry gun. PERFECT! Solved my problems right away. Turns out that this undecoating issue has actually benefitted me with a good test run on my paint and equipment.
Here's my bright shiny new orange hose and my beefy couplings:


Hopefully I'll get the Raptor Liner shot tomorrow night. Then it's on to the fenders, doors and hood! Getting exciting around here...
Aug 18, 2014 | 07:55 PM
#843
Thread Starter
Super Moderator
iTrader: (3)
Joined: Jan 2012
Posts: 3,218
Likes: 26
From: Salisbury, MD
Dave vs Raptor Liner round 2
Here we go again... This time around I basically did a complete paint job with full cure of each step to prevent chemical delamination - Epoxy, urethane primer/surfacer and urethane topcoat. I scuffed everything with a grey (coarse) scotch brite pad to make sure that I scuffed the low spots of the fiberglas mat. Then I went over all that with some 120 grit paper. U-Pol recommends 120-180 grit as "lightly" scuffed. I wouldn't call that lightly scuffed but who am I to critique their terminology? Anyway, here's the prep work and everything masked off:
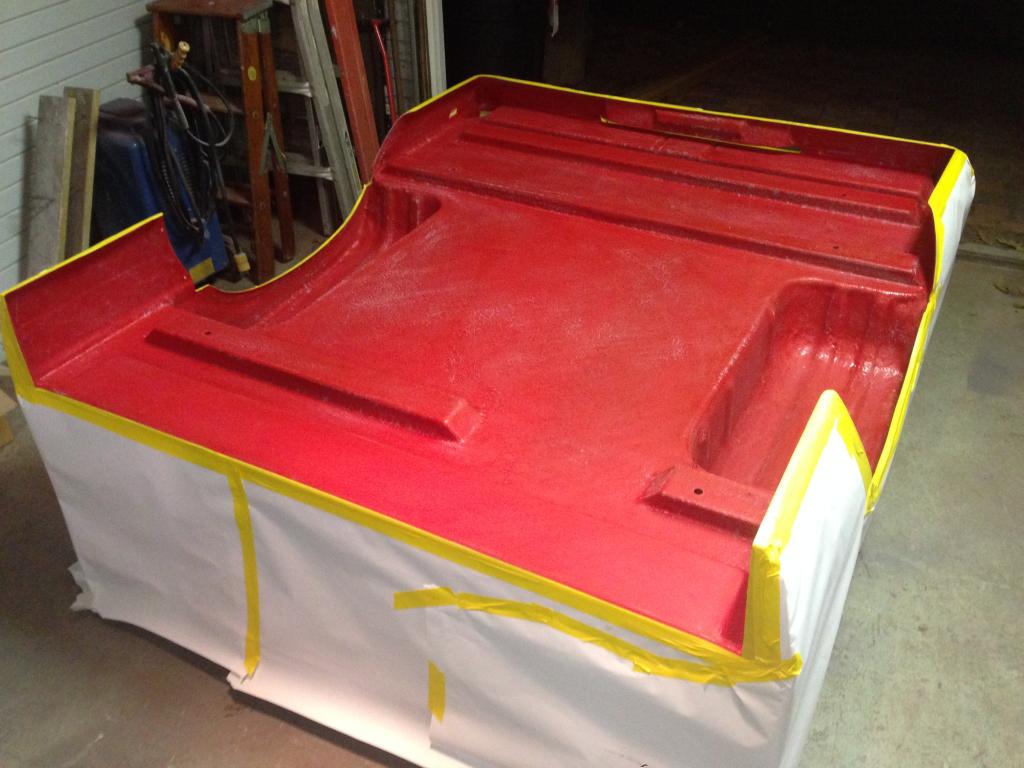
I'm leaving the front of the bed unlined for now so I can make sure that I get a good finish coat of color before I hit it with Raptor to prevent a "hard" edge in the paint.
Then the first coat of Raptor. Man this stuff goes on nicely!
Now I'm waiting out the 60 minute flash time before the second coat. Fingers crossed, send up some prayers to whom ever you believe in and hope that it sticks this time around... Pleeeeeease stick....
Here we go again... This time around I basically did a complete paint job with full cure of each step to prevent chemical delamination - Epoxy, urethane primer/surfacer and urethane topcoat. I scuffed everything with a grey (coarse) scotch brite pad to make sure that I scuffed the low spots of the fiberglas mat. Then I went over all that with some 120 grit paper. U-Pol recommends 120-180 grit as "lightly" scuffed. I wouldn't call that lightly scuffed but who am I to critique their terminology? Anyway, here's the prep work and everything masked off:

I'm leaving the front of the bed unlined for now so I can make sure that I get a good finish coat of color before I hit it with Raptor to prevent a "hard" edge in the paint.
Then the first coat of Raptor. Man this stuff goes on nicely!

Now I'm waiting out the 60 minute flash time before the second coat. Fingers crossed, send up some prayers to whom ever you believe in and hope that it sticks this time around... Pleeeeeease stick....
Aug 18, 2014 | 09:30 PM
#844
Thread Starter
Super Moderator
iTrader: (3)
Joined: Jan 2012
Posts: 3,218
Likes: 26
From: Salisbury, MD
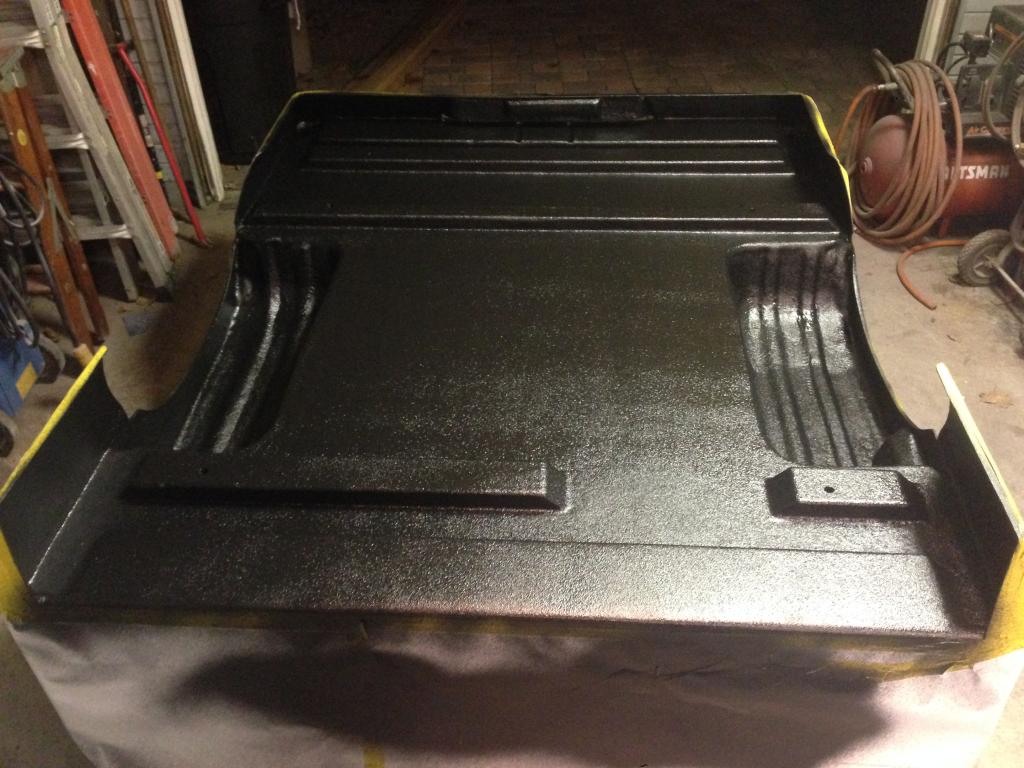
Second coat of Raptor applied and tape removed:
Now the wait begins... Last time it took 4 days before it started peeling. If this doesn't work I have no idea what I'm going to do :o/


Now the wait begins... Last time it took 4 days before it started peeling. If this doesn't work I have no idea what I'm going to do :o/
Aug 19, 2014 | 06:43 AM
#846
Thread Starter
Super Moderator
iTrader: (3)
Joined: Jan 2012
Posts: 3,218
Likes: 26
From: Salisbury, MD
Checked it this morning and there's no sign of delamination, but it hasn't even been 24 hours yet... Man this has got me so damn nervous! By far, this undercoating task has been the most stressful part of my build so far - spent over $3k on a bed and all I want to do it protect it and make sure it looks purrrty for a long time. Tick tock tick tock...


 Aug 19, 2014 | 08:50 PM
#848
Thread Starter
Super Moderator
iTrader: (3)
Joined: Jan 2012
Posts: 3,218
Likes: 26
From: Salisbury, MD
I sure hope you're right Corey. By the way, I mailed those spare mud flaps out your way today. USPS said 2-3 weeks. I hope they work out well for you!
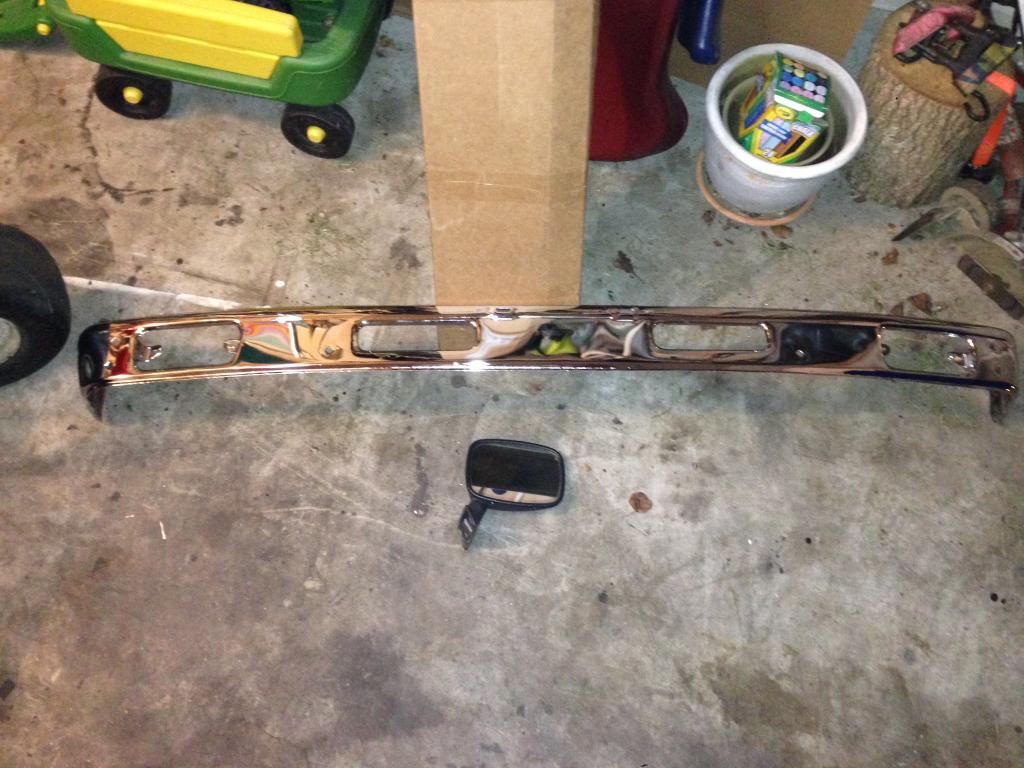
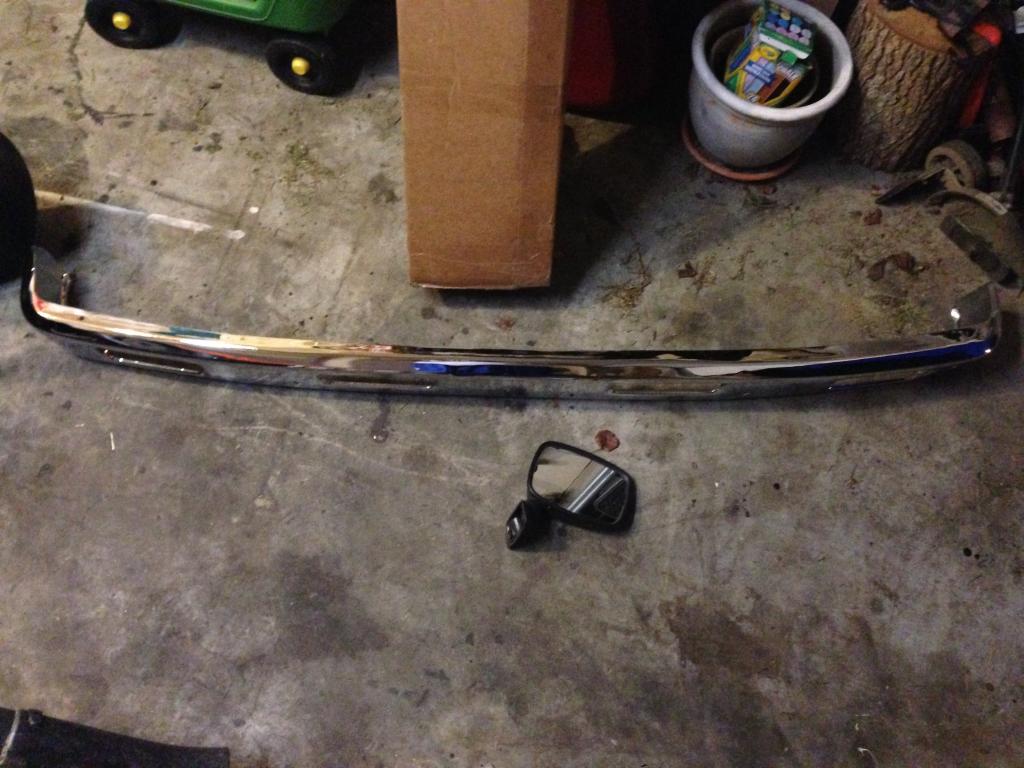
Got a couple parts today; full chrome bumper for 79-81 4WD and a passenger side mirror. Al (NJtrekker) hooked me up. Thanks again Al!
Tonight I got some more panels in epoxy. Shot two coats on the doors, back side of the fenders and back side of the valance.
Doors prepped:
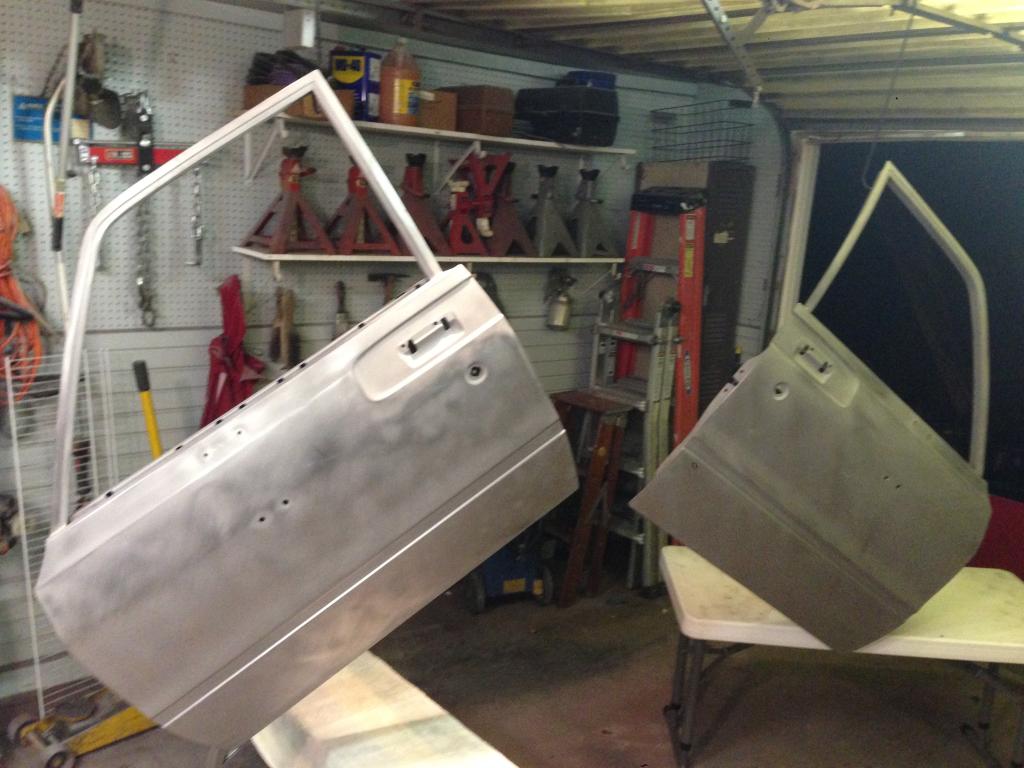
And shot:
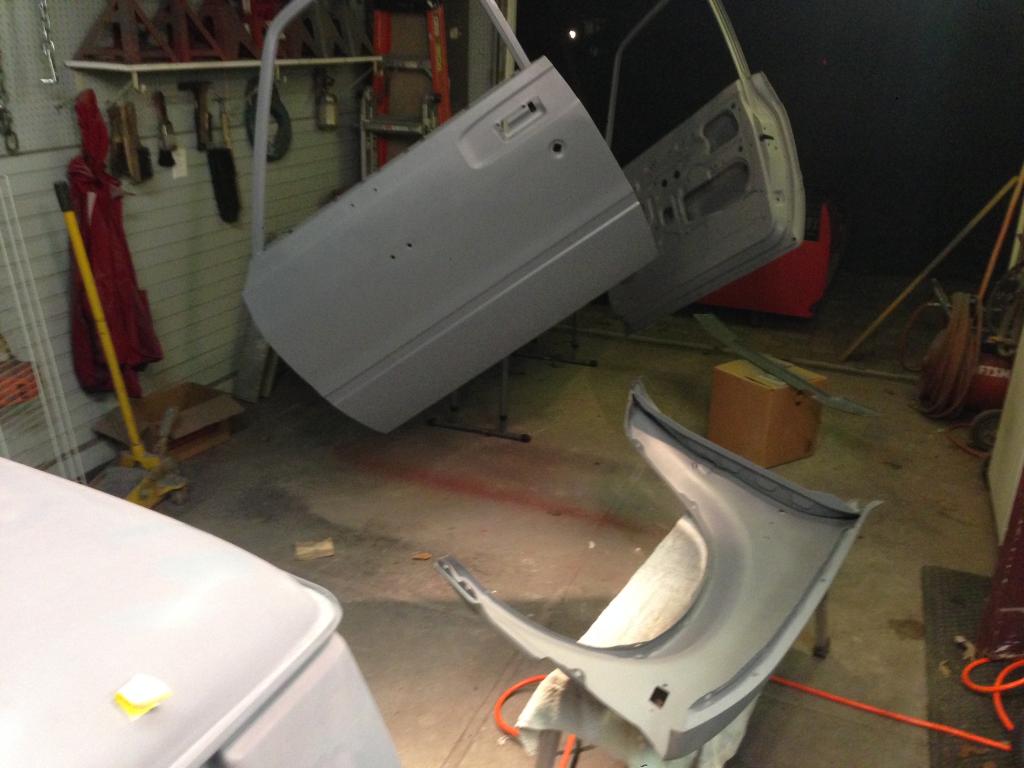
I just need to shoot the hood and the outsides of the fenders and valance, but I'm a little limited on space until I get the bed hauled off for a couple weeks to free up some space - I'm just waiting for the Raptor to fully cure so I can flip it over for good. The fenders, doors and hood are pretty straight so it should just take a quick skim coat of filler to take care of the low spots.
Got a couple parts today; full chrome bumper for 79-81 4WD and a passenger side mirror. Al (NJtrekker) hooked me up. Thanks again Al!
Tonight I got some more panels in epoxy. Shot two coats on the doors, back side of the fenders and back side of the valance.
Doors prepped:
And shot:
I just need to shoot the hood and the outsides of the fenders and valance, but I'm a little limited on space until I get the bed hauled off for a couple weeks to free up some space - I'm just waiting for the Raptor to fully cure so I can flip it over for good. The fenders, doors and hood are pretty straight so it should just take a quick skim coat of filler to take care of the low spots.
Aug 20, 2014 | 03:08 AM
#849
Are you going to use sealer between the primer and paint? Some say no and some say yes. I really like it. It helps to fill in sand paper scratches and is a good step to do as it to will show flaws and gives you one last chance before applying paint. When I apply sealer, I do good to get a 50% coating on it as it will make the first layer of paint to run. To me the sealer feels like plastic, or a PVC pipe when it is dry. It is a slicker surface. Just mist the first coat on and give it a few minutes to tack up before applying the next coat until I get full coverage.
Slacker will know more about this stage. The fiberglass bed and metal cab can possibly give it two different shades. I have seen it on other projects that I have helped on, but I haven't painted a fiberglass bed.
Thing that I do like about sealer, it only takes about 30 minutes to set up and if I find a flaw, I can repair the damage, and then recoat it with sealer and let it set up again and then paint. Also unless you really apply the primer heavy, you can see thru the primer and see bondo which can possibly make the paint a different shade as well. Sealer makes everything one color and avoids that.
Last edited by Terrys87; Aug 20, 2014 at 03:12 AM.
Aug 20, 2014 | 05:02 AM
#850
Thread Starter
Super Moderator
iTrader: (3)
Joined: Jan 2012
Posts: 3,218
Likes: 26
From: Salisbury, MD
Terry, the epoxy I'm using is a sealer. I shoot the epoxy to seal the metal and prevent flash rust. Then do the filler on top of the epoxy and then another coat of epoxy to seal up any spots where I sanded through to bare metal and to provide a little build-up. Then I shoot a 2K Urethane surfacer primer which has a medium to high build. That fills the slightly low spots and allows me to block everything straight with 320-400 grit. Then one more coat of surfacer that I sand to 600 grit before color. I'm also planning on shooting at least 4 coats of single stage color so that I have plenty of color build to wet sand and polish. It also will enable me to do future touch-up easier when I get a scratch.
The fiberglass shouldn't shade the paint on me. It has gel coat to seal the fiberglass and then I'll go through the same paint steps as I do on the rest of the truck. With the amount of build-up that I'll have, I can't see having any potential color matching issues.
The fiberglass shouldn't shade the paint on me. It has gel coat to seal the fiberglass and then I'll go through the same paint steps as I do on the rest of the truck. With the amount of build-up that I'll have, I can't see having any potential color matching issues.
Aug 20, 2014 | 08:55 PM
#852
Thread Starter
Super Moderator
iTrader: (3)
Joined: Jan 2012
Posts: 3,218
Likes: 26
From: Salisbury, MD
Prepped the hood and outside of the fenders for epoxy tonight:
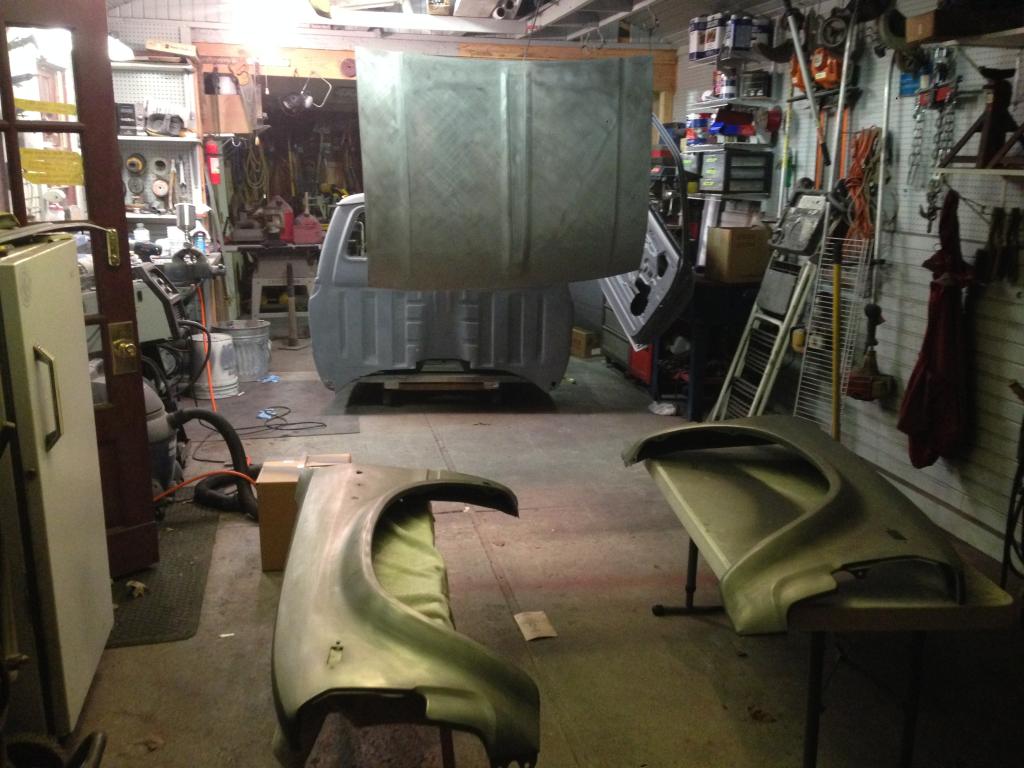
And shot them:
Now time for (hopefully) a quick skim coat of filler to straighten everything out.
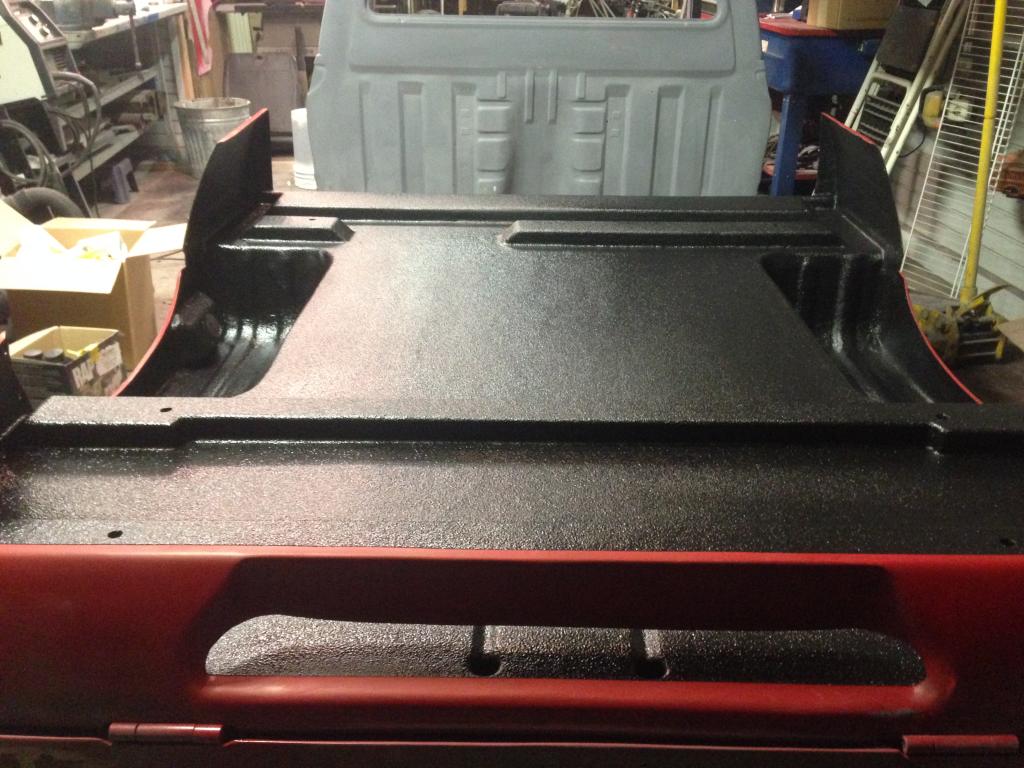
By the way, 48 hours down and the Raptor Liner is still holding on! Full cure is approximately 7 days so I'm waiting until Monday to flip it.
And shot them:
Now time for (hopefully) a quick skim coat of filler to straighten everything out.
By the way, 48 hours down and the Raptor Liner is still holding on! Full cure is approximately 7 days so I'm waiting until Monday to flip it.
Aug 21, 2014 | 05:20 PM
#853
and thanks bud for the flaps , I will post on my thread when I get them and install them ..
.
Aug 22, 2014 | 09:06 PM
#855
Thread Starter
Super Moderator
iTrader: (3)
Joined: Jan 2012
Posts: 3,218
Likes: 26
From: Salisbury, MD
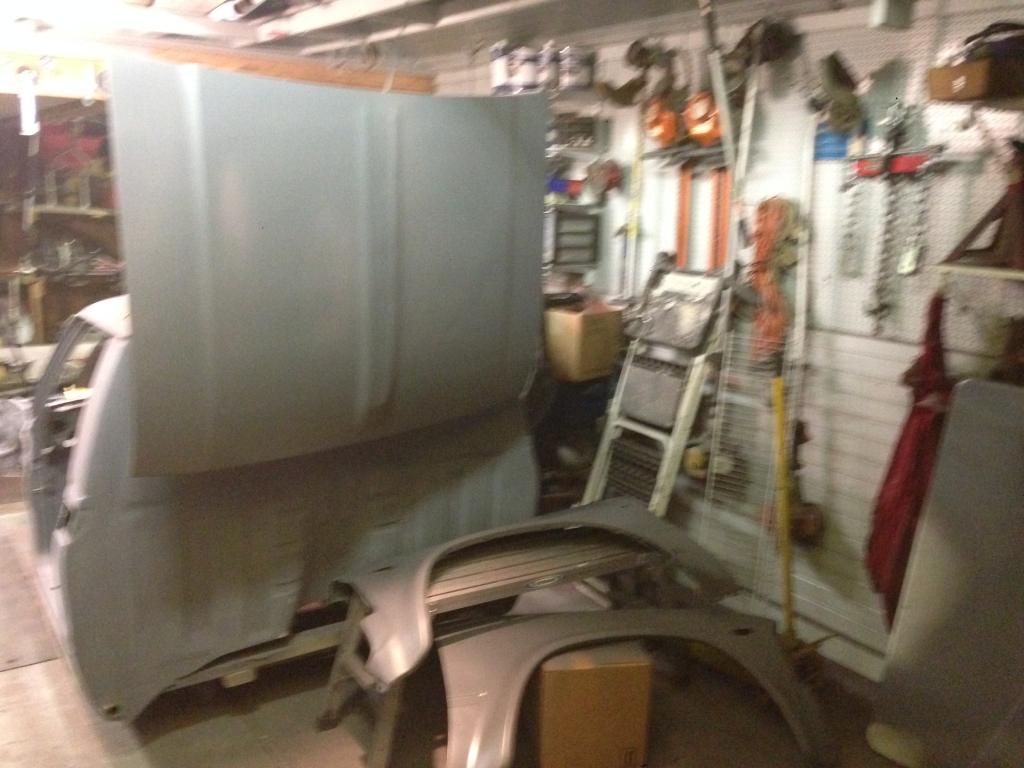
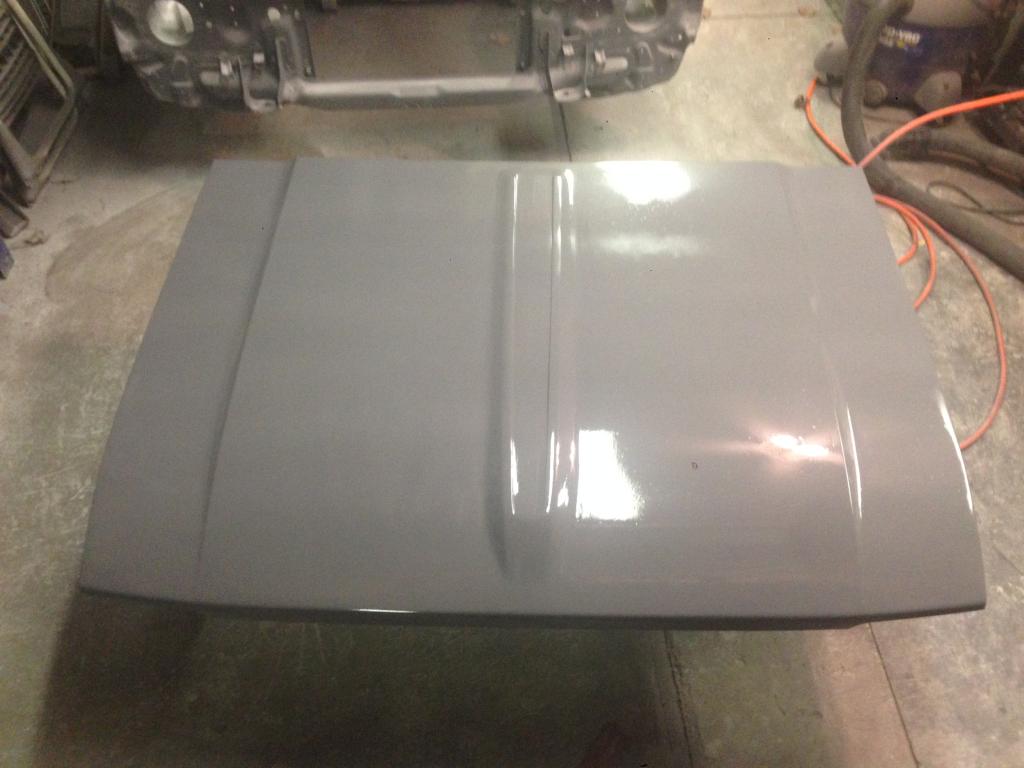
Skim coated the hood tonight
First coat:
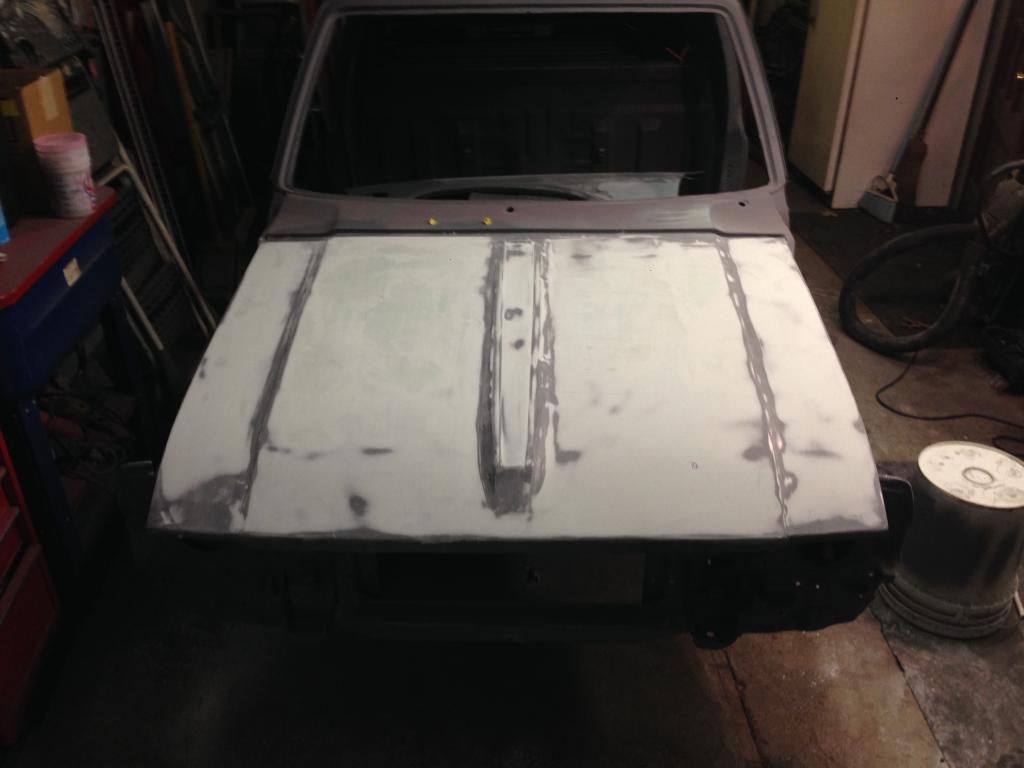
Apparently my hood was a little more off that I had originally thought. Since there isn't much support under the hood I had some dips in the hood that you couldn't really see because the blue paint on it before I started was flat. So a could more coats and it was straightene out:
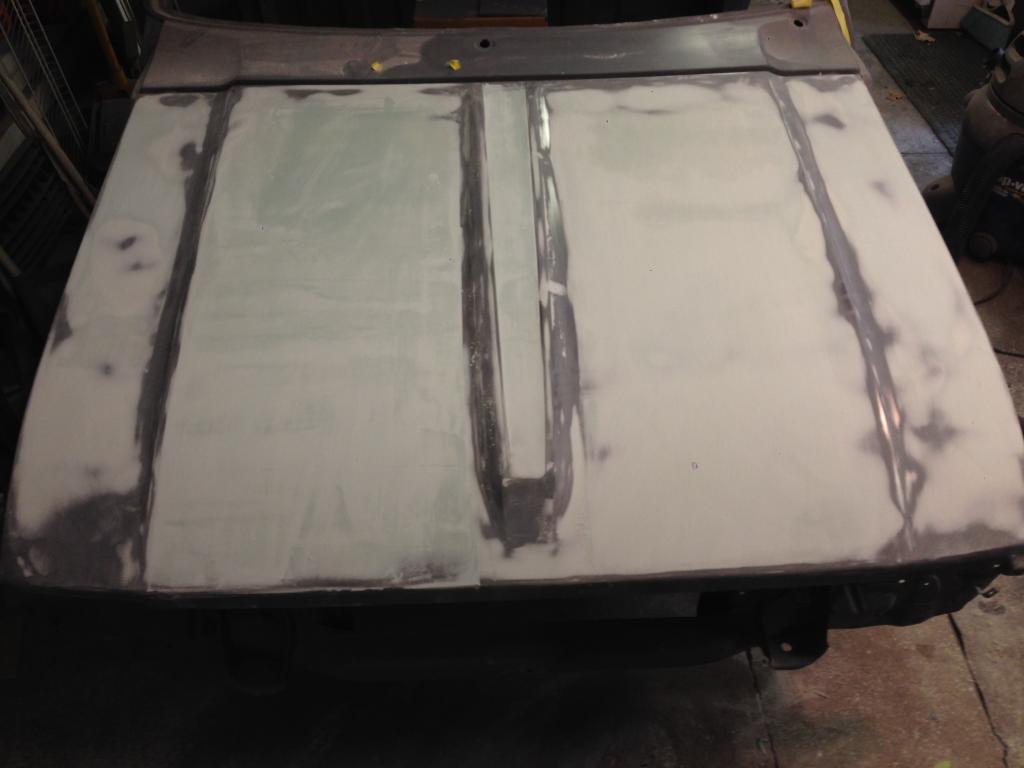
Then I had to make some adjustment to the center beads since there were a couple small dings screwing with me. I laid some tape to make an edge and then knocked it down and straightened it out:
And now the hood should be done and ready for another coat of epoxy. A couple minor adjustments may pop up, but it should't be anything major:
Even started a fender too. I just smoothed out some pitting that was on it. I'm shaving the render emblem holes as well. I have a little emblem idea that may do, but that will be a finishing touch that I'll reveal later. I'll mount the fenders and do the rest of the bodywork on the truck to make sure the lines match up:
I have some of my old college friends coming to town this weekend and I'm taking them out on the boat for some wakeboarding, playing some golf and getting into other shannanigans so I likely won't get much QT with my truck until next week.
First coat:
Apparently my hood was a little more off that I had originally thought. Since there isn't much support under the hood I had some dips in the hood that you couldn't really see because the blue paint on it before I started was flat. So a could more coats and it was straightene out:
Then I had to make some adjustment to the center beads since there were a couple small dings screwing with me. I laid some tape to make an edge and then knocked it down and straightened it out:
And now the hood should be done and ready for another coat of epoxy. A couple minor adjustments may pop up, but it should't be anything major:
Even started a fender too. I just smoothed out some pitting that was on it. I'm shaving the render emblem holes as well. I have a little emblem idea that may do, but that will be a finishing touch that I'll reveal later. I'll mount the fenders and do the rest of the bodywork on the truck to make sure the lines match up:
I have some of my old college friends coming to town this weekend and I'm taking them out on the boat for some wakeboarding, playing some golf and getting into other shannanigans so I likely won't get much QT with my truck until next week.
Last edited by kawazx636; Aug 22, 2014 at 09:09 PM.
Aug 25, 2014 | 09:09 PM
#856
Thread Starter
Super Moderator
iTrader: (3)
Joined: Jan 2012
Posts: 3,218
Likes: 26
From: Salisbury, MD
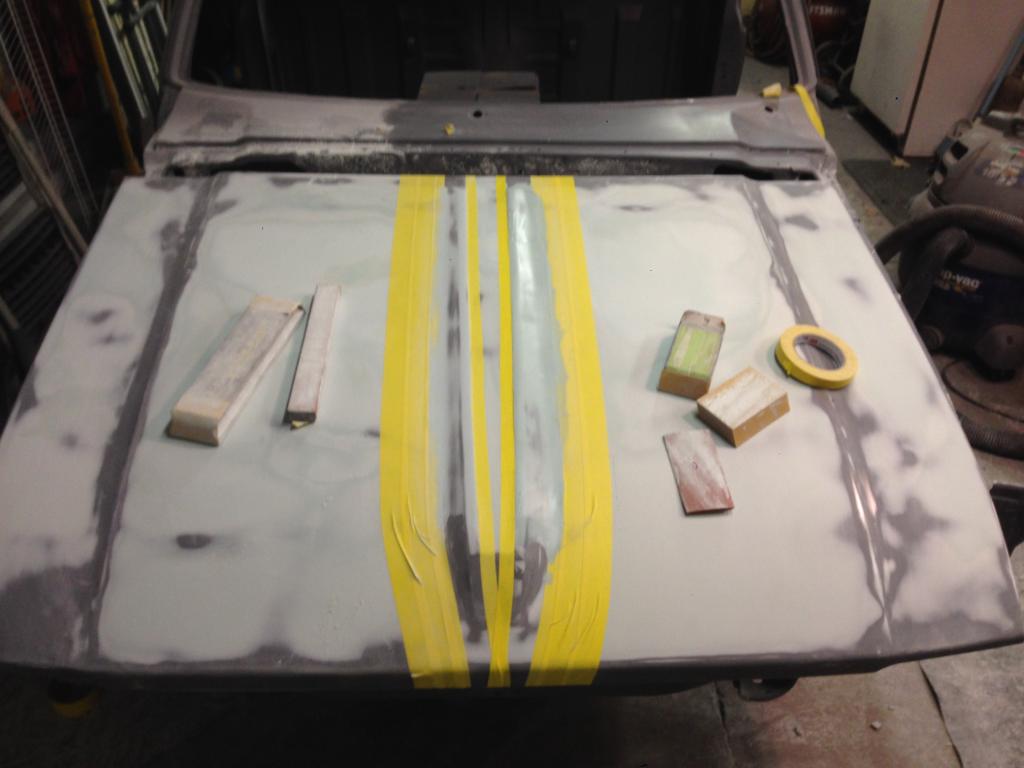
Slapped another coat of epoxy on the hood tonight. It's hard to see problem areas when it's just filler. It "felt" good, but after shooting the epoxy I noticed a few adjustments that I need to make - mainly with the ridge running down the middle. No big deal, I'll fix it up right when I mock it up with the fenders on.
In other news, today was day 7 of the Raptor Liner - it is now technically fully cured. After about day 4 I noticed a couple problem areas where it delaminated. One was in the passenger side fender well and the other was in the front driver side cornerr. I ended up trimming out the areas with a razor blade to about a 3"x5" area. I abraded the surface really well and laid down some adhesion promoter before touching up the areas again with Raptor. There were no problems with the rest of the undercoat and I was able to blend in the repair areas really well so it's hardly noticeable at all. It was clear that I had not properly abraded the problem areas which caused the failure - Folks, PREP IS KEY With any paint/coating work!! I'm stoked to have this little detour out of the way so I can stash the bed aside for now and have more room to finish up the cab. Next task will be to flip the cab up one last time, to paint and undercoat the bottom.
In other news, today was day 7 of the Raptor Liner - it is now technically fully cured. After about day 4 I noticed a couple problem areas where it delaminated. One was in the passenger side fender well and the other was in the front driver side cornerr. I ended up trimming out the areas with a razor blade to about a 3"x5" area. I abraded the surface really well and laid down some adhesion promoter before touching up the areas again with Raptor. There were no problems with the rest of the undercoat and I was able to blend in the repair areas really well so it's hardly noticeable at all. It was clear that I had not properly abraded the problem areas which caused the failure - Folks, PREP IS KEY With any paint/coating work!! I'm stoked to have this little detour out of the way so I can stash the bed aside for now and have more room to finish up the cab. Next task will be to flip the cab up one last time, to paint and undercoat the bottom.
Aug 27, 2014 | 09:21 PM
#859
Thread Starter
Super Moderator
iTrader: (3)
Joined: Jan 2012
Posts: 3,218
Likes: 26
From: Salisbury, MD
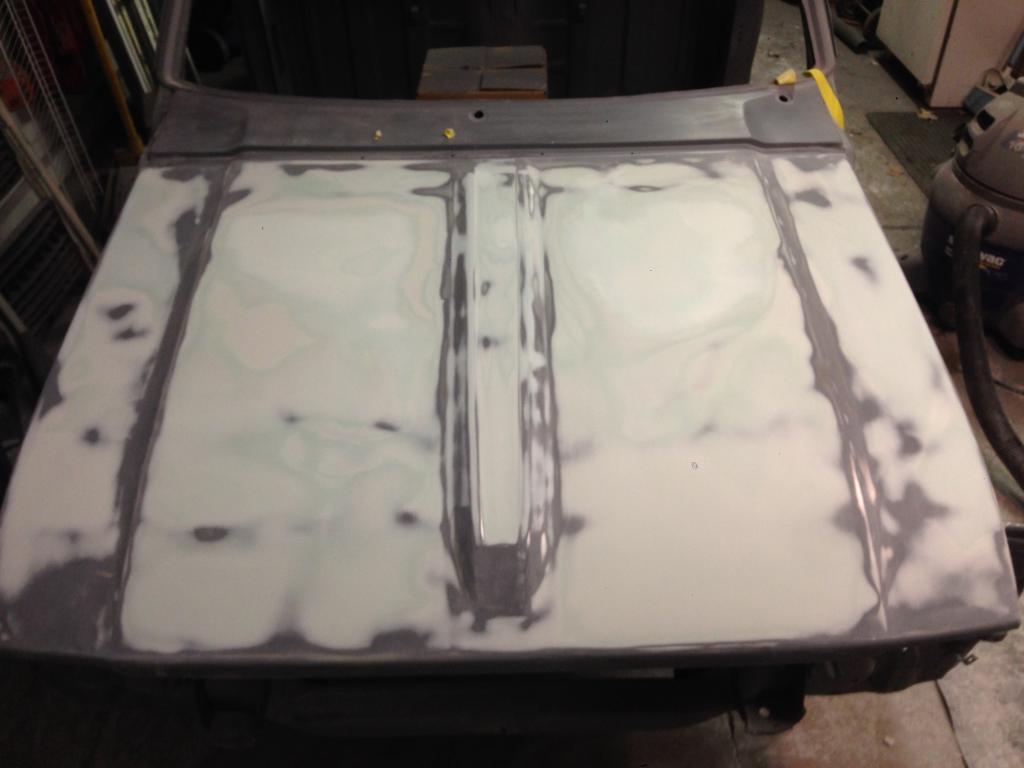
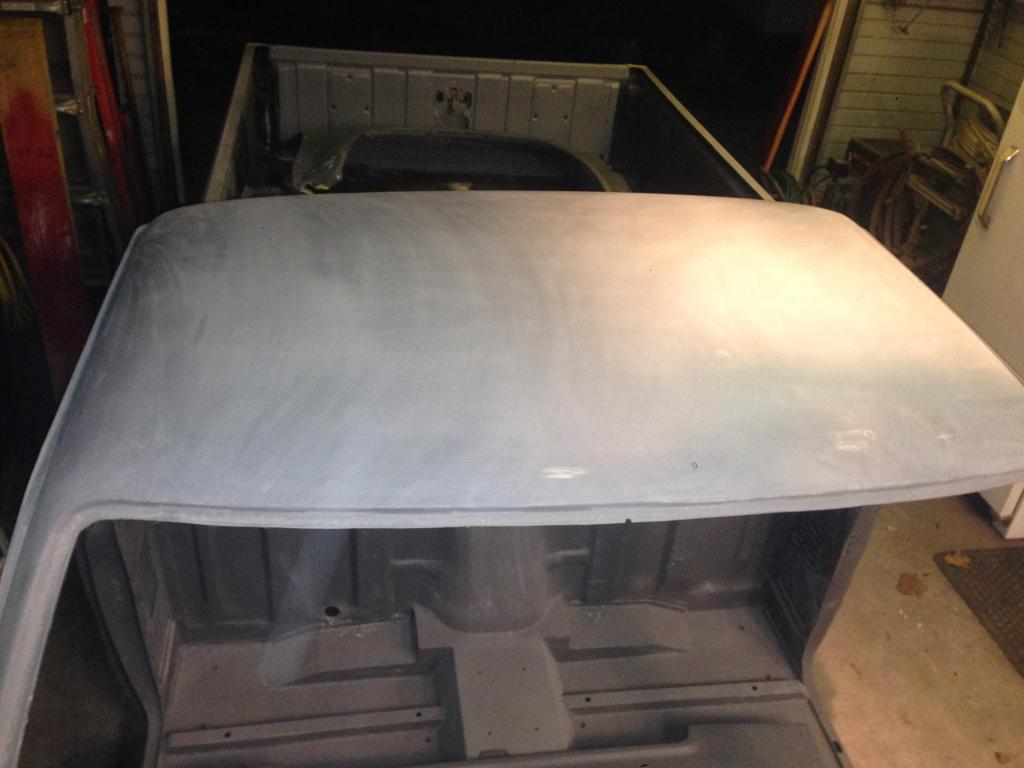
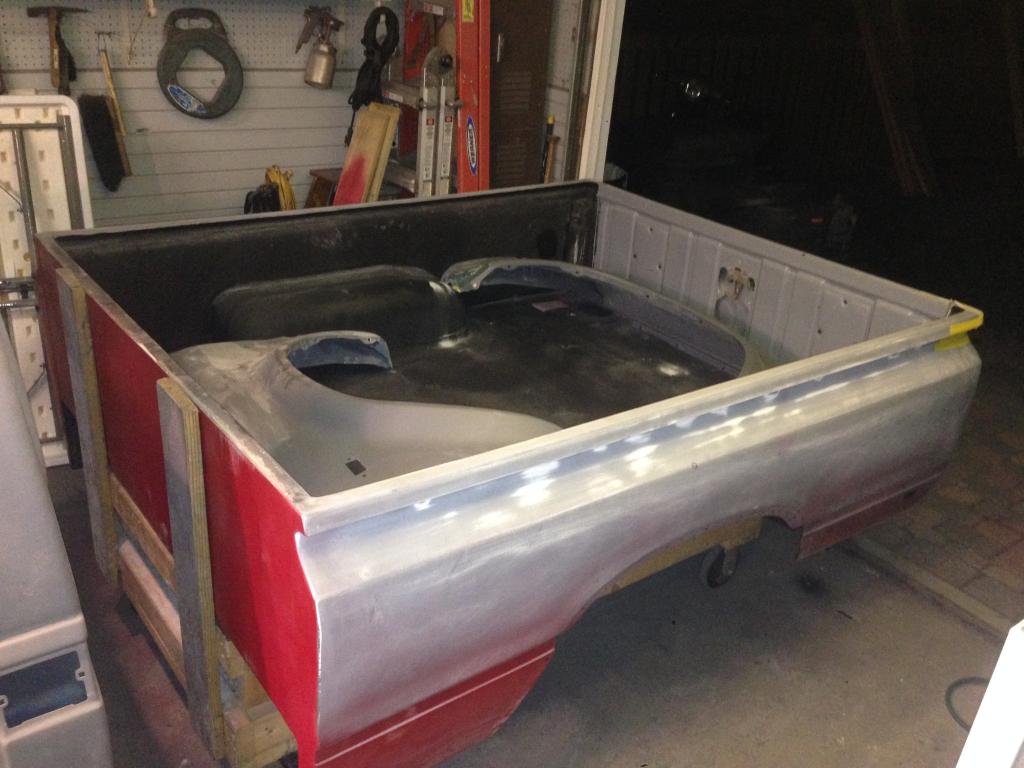
I finished up the hood tonight and gave it a thorough sanding with 220 on a block followed by a maroon scotch pad. Also did the roof and cowl so those are currently ready for surfacer:
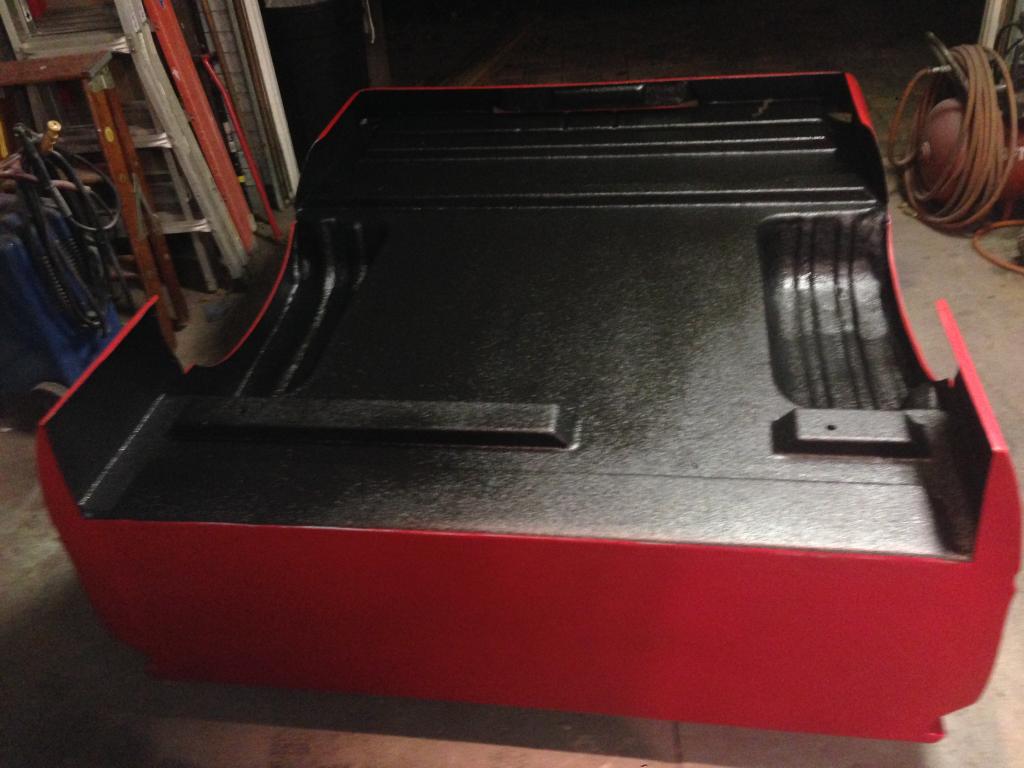
I also flipped the bed right side up on the dollie and I should be able to get around to hauling it off to my "storage facility" until I'm ready for it again:
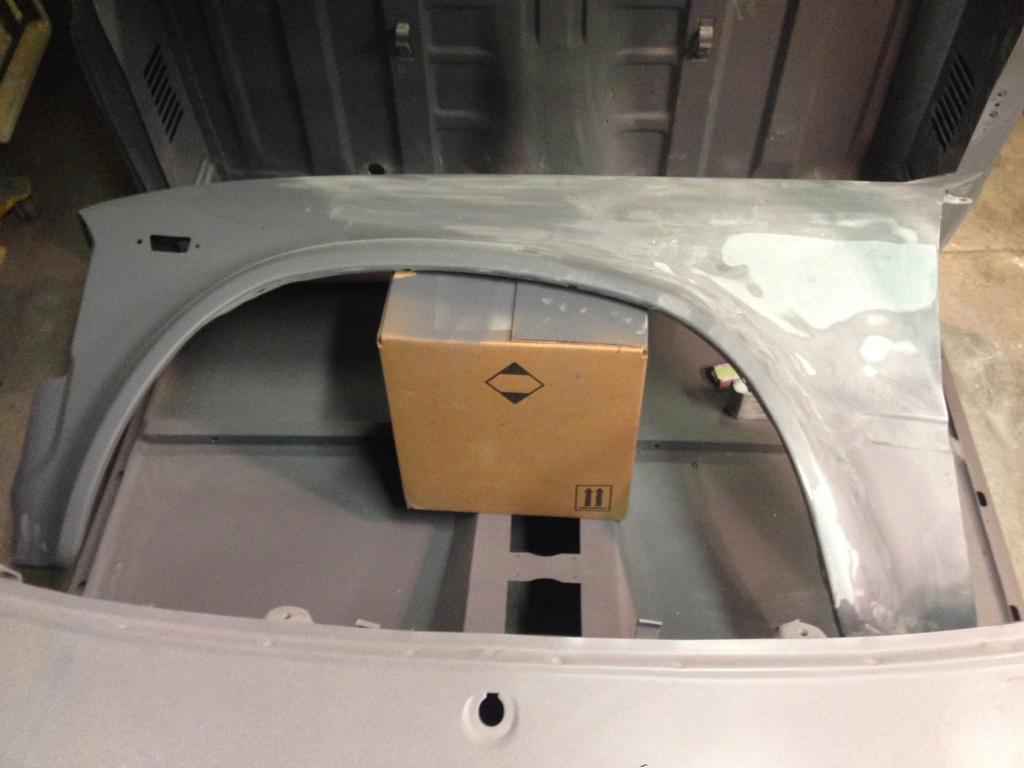
I also took a peak under the cab for the first time in a while tonight and to my surprise there was no surface rust to deal with. So that should be a fairly quick process to tidy up. Only thing that I need to address is a littlw body work when the new cab floors meet the firewall. I just was to give it a light filling since it can be partially seen with the hood open. Should be relatively minimal... Famous last words...
Today, I was also convinced to do another project for a friend. He wants me to rebuild his Chevy 350 for his truck. I kind of owe it to him because he's the GM at my locals Ace Hardware and he has saved me a bundle in hardware so far on my build. He's yanking it and dropping it by tomorrow. My machine shop stocks GM rebuild kits so all I have to do is break it down and take it to them. They'll take some measurements and cut everything to match the pistons and valves that they have in stock. This is just a simple rebuild so I won't be wasting time cleaning parts while I'm putting it back together. The last time I rebuilt a 350 I had it built and installed within one day of getting everything back from the machinist.
I also flipped the bed right side up on the dollie and I should be able to get around to hauling it off to my "storage facility" until I'm ready for it again:
I also took a peak under the cab for the first time in a while tonight and to my surprise there was no surface rust to deal with. So that should be a fairly quick process to tidy up. Only thing that I need to address is a littlw body work when the new cab floors meet the firewall. I just was to give it a light filling since it can be partially seen with the hood open. Should be relatively minimal... Famous last words...
Today, I was also convinced to do another project for a friend. He wants me to rebuild his Chevy 350 for his truck. I kind of owe it to him because he's the GM at my locals Ace Hardware and he has saved me a bundle in hardware so far on my build. He's yanking it and dropping it by tomorrow. My machine shop stocks GM rebuild kits so all I have to do is break it down and take it to them. They'll take some measurements and cut everything to match the pistons and valves that they have in stock. This is just a simple rebuild so I won't be wasting time cleaning parts while I'm putting it back together. The last time I rebuilt a 350 I had it built and installed within one day of getting everything back from the machinist.


