
KawaZX636's 1983 Toyota Pickup Restoration


 Jun 18, 2014 | 04:40 AM
#762


Looks great! That's how I shoot the raptor liner down. Higher psi to get a smooth texture that dirt doesn't want to stick to.
I think you will be happy with how it holds up and performs.
I think you will be happy with how it holds up and performs.
Jun 18, 2014 | 05:11 AM
#763
Thread Starter
Super Moderator
iTrader: (3)
Joined: Jan 2012
Posts: 3,218
Likes: 26
From: Salisbury, MD
Thanks Gizler! I just hope that it adheres well. I was reading in several hot rod and customs forums that the stuff sticks extremely well to fresh epoxy primer - as most coatings do. By fresh, I mean immediately after it dries. My only concern is that when I removed the masking tape the epoxy had sweat under the tape in some places. It was certainly dry to the touch when I taped it and none of the epoxy pealed off when I removed the tape. The the epoxy application sheet says it can be top coated within 30 to 60 minutes after application and I waited 90+ minutes so I'm hoping that everything will be ok.
Jun 18, 2014 | 08:30 AM
#765
Thread Starter
Super Moderator
iTrader: (3)
Joined: Jan 2012
Posts: 3,218
Likes: 26
From: Salisbury, MD
I took the tape off as soon as I finished the second coat of Raptor Liner so it was still soft. I didn't have any problems with it peeling, but I have to admit that I certainly was worried at the time.
 Jun 19, 2014 | 04:43 AM
#767
Slacker is my all time favorite build with all of the details and complete tear down that he did with his. It took me a while to read thru your whole thread and what an amazing job you are doing. Like seeing your kid helping you out. Some times you just have to bring the professionals in on some task, they grow up quick. Great job!!! This is the kind of builds I like to follow. I am going to do one in a few years as complete as this. Still getting shop and parts ready and yours and Slackers is ones that I will use as a guide. Thanks for all the information you have posted on several things as that will make it easier.
Jun 21, 2014 | 05:27 AM
#770
Thread Starter
Super Moderator
iTrader: (3)
Joined: Jan 2012
Posts: 3,218
Likes: 26
From: Salisbury, MD
Welllllllll... I was trying to give the Raptor Liner at least 7 days to fully cure before I flipped the bed back over, but fate had other plans... I hadn't planned on working on my truck last night, but I had to drop some tools off at my Dad's shop where my bed was. As I walked in I noticed a wrinkle in the bed liner. Upon further inspection, I discovered that the Raptor Liner had completely failed and I was able to easily peel it off:

So I peeled it all off:
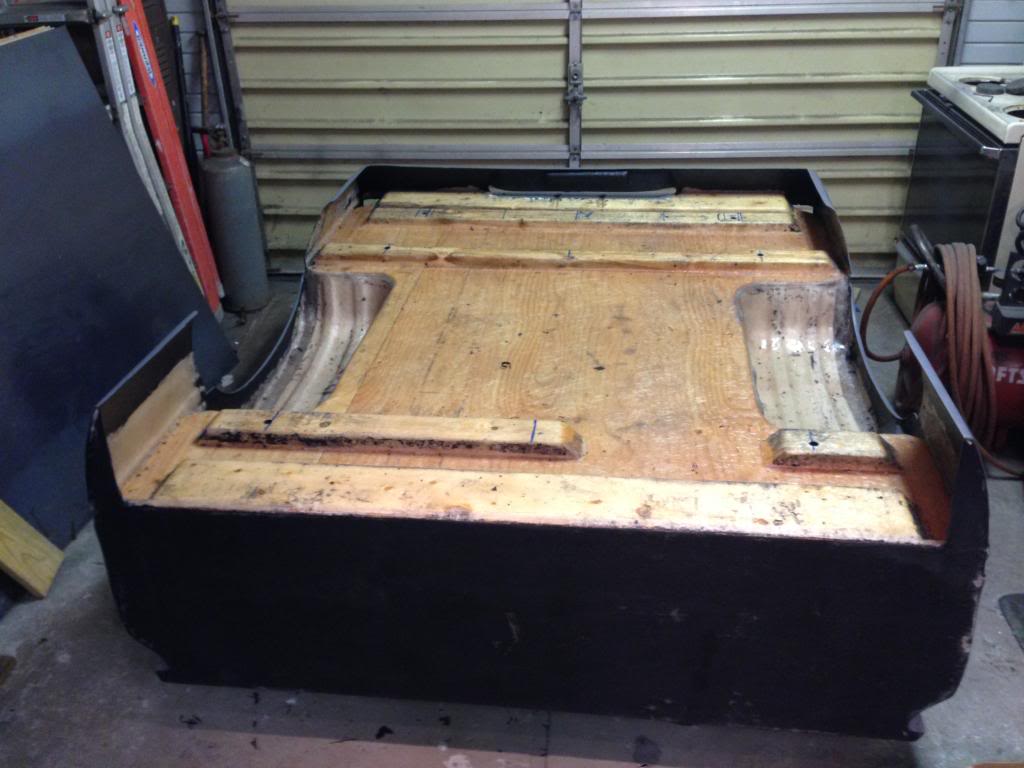
The Raptor liner itself didn't fail, it is clear that there was a compatibility issue between the acrylic coating that Corey put on and the epoxy that I put on. The only places where I got a good bond and it didn't peal are where I had the epoxy over body filler towards the rear of the bed. You can also see how it completely removed all the acrylic when pealed and exposed the fiberglass which I suppose is good since I won't have to go back and remove it. It does however raise some concerns for the otherside of the bed since I need to spray that with liner as well.
This pretty much sucks. Wasting the $130 on failed liner doesn't bother me as much as the wasted time and effort. Now I'm going to have to figure out what I need to do to prep the surface again since it will clearly need to be clean to remove the residue left behind and then abraided as well. I've even thought about applying a couple brush coats of fiberglass resin before I go at it again. I don't know, just kind of lost and frustrated right now with the whole ordeal
Jun 23, 2014 | 06:58 AM
#773
Thread Starter
Super Moderator
iTrader: (3)
Joined: Jan 2012
Posts: 3,218
Likes: 26
From: Salisbury, MD
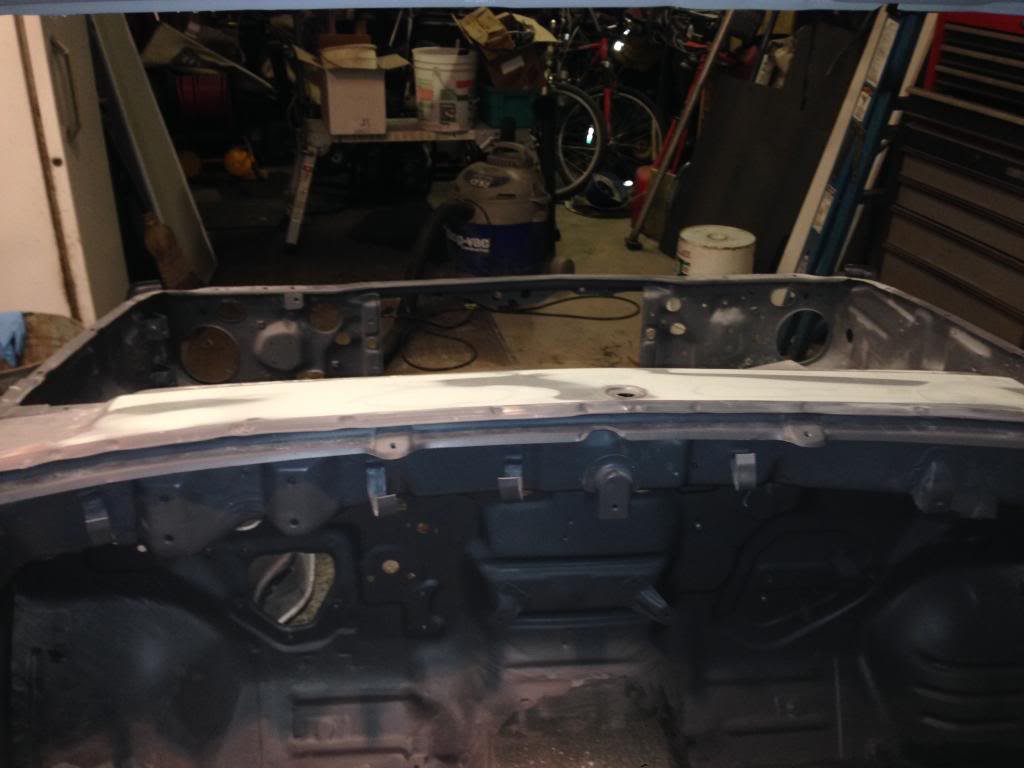
I got sick of trying to keep the flash rust down so I changed my bodywork approach. I would prefer to apply body filler on direct metal, but keeping the flash rust to a minimum has become quite the challenge so yesterday I did a final media blasting of the cab, cleaned it up with some pre-paint prep and shot it with two wet coats of epoxy primer. I'll apply the body filler over the epoxy which isn't bad, it just isn't what I prefer. You can run out and ask a bunch of body shop guys and half of them will say to apply filler direct to metal and the other half will say over epoxy - it's just the two schools of thought.
Here are some shots after final media blasting:
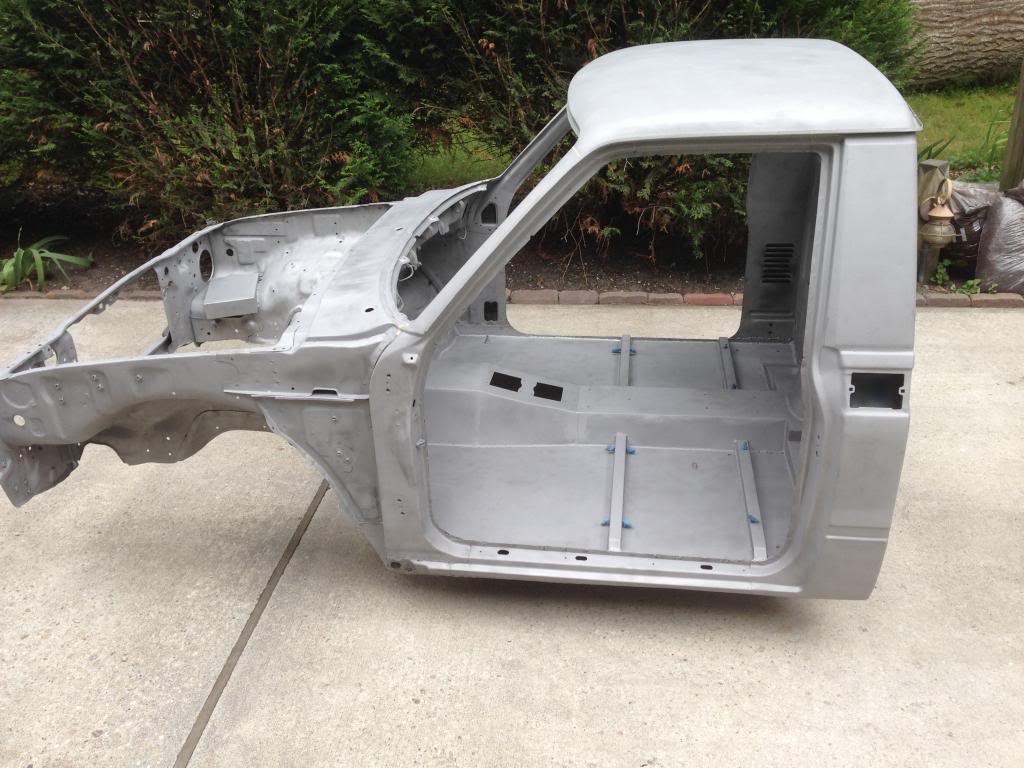
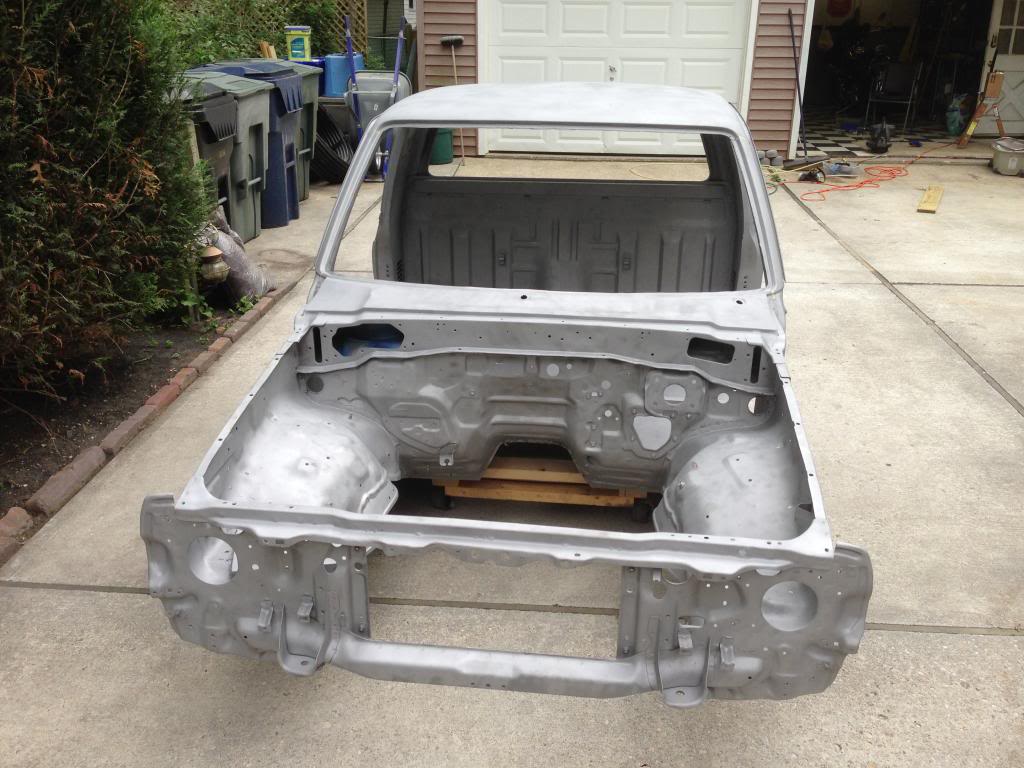
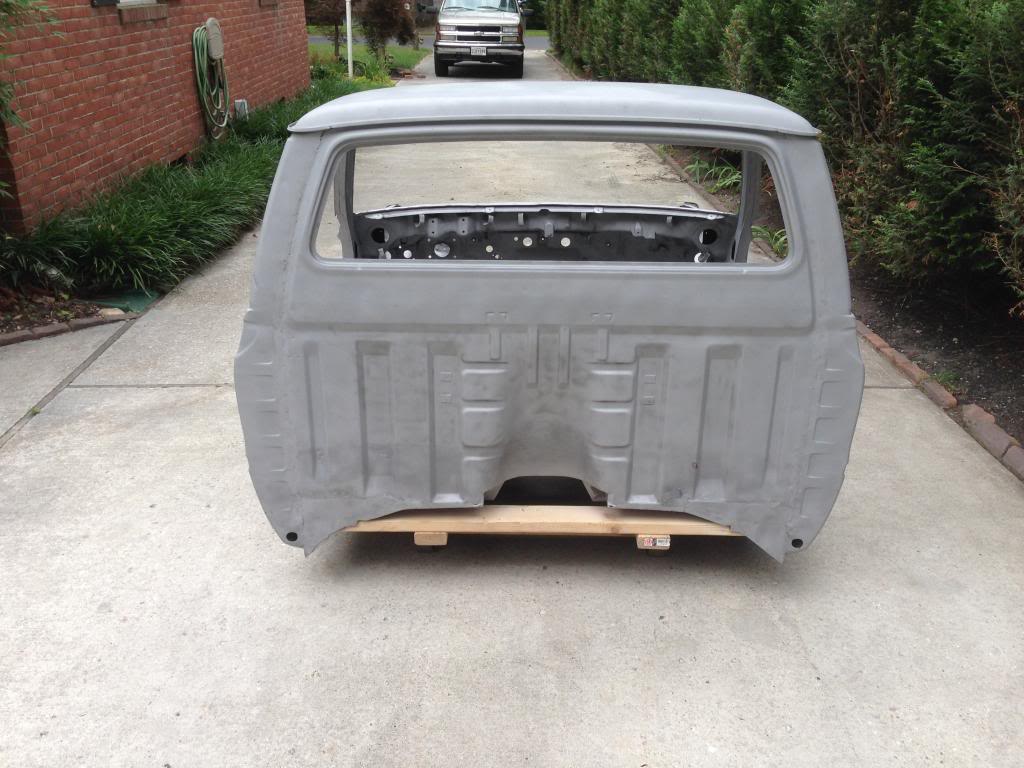
And here are some after epoxy:
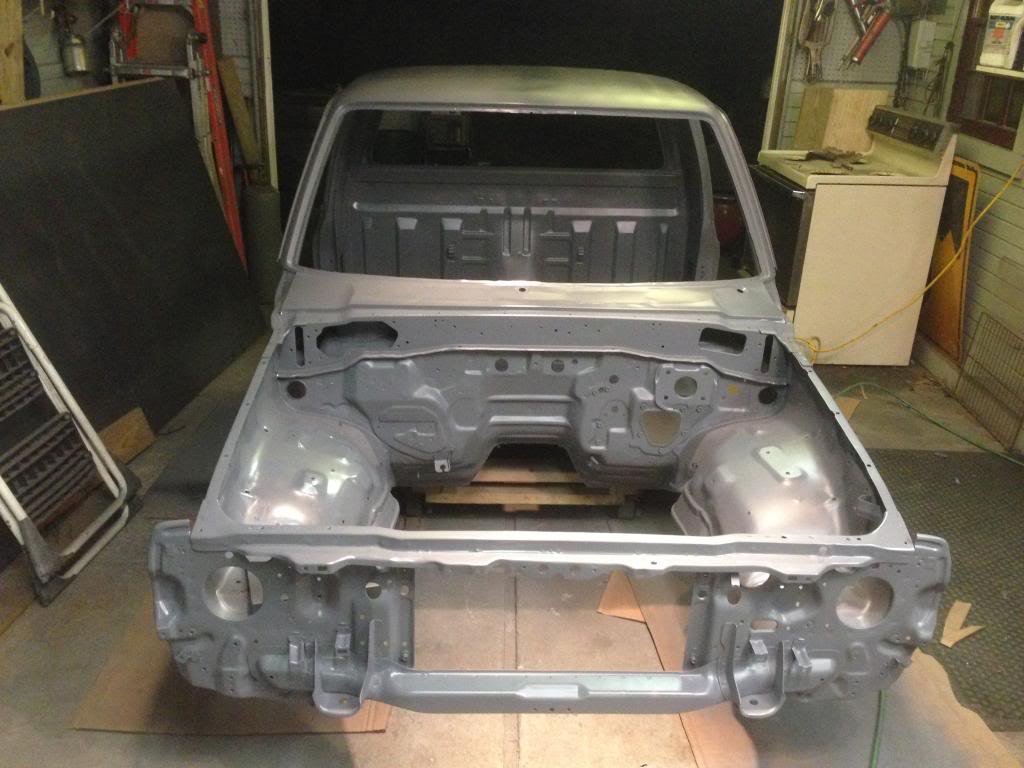
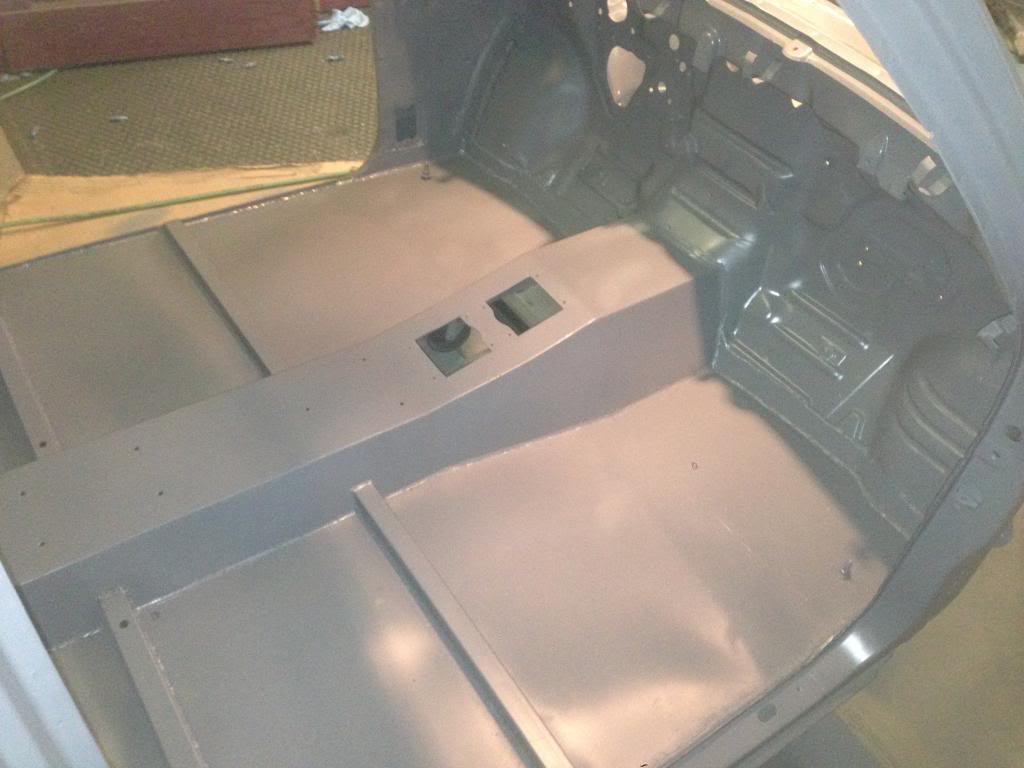
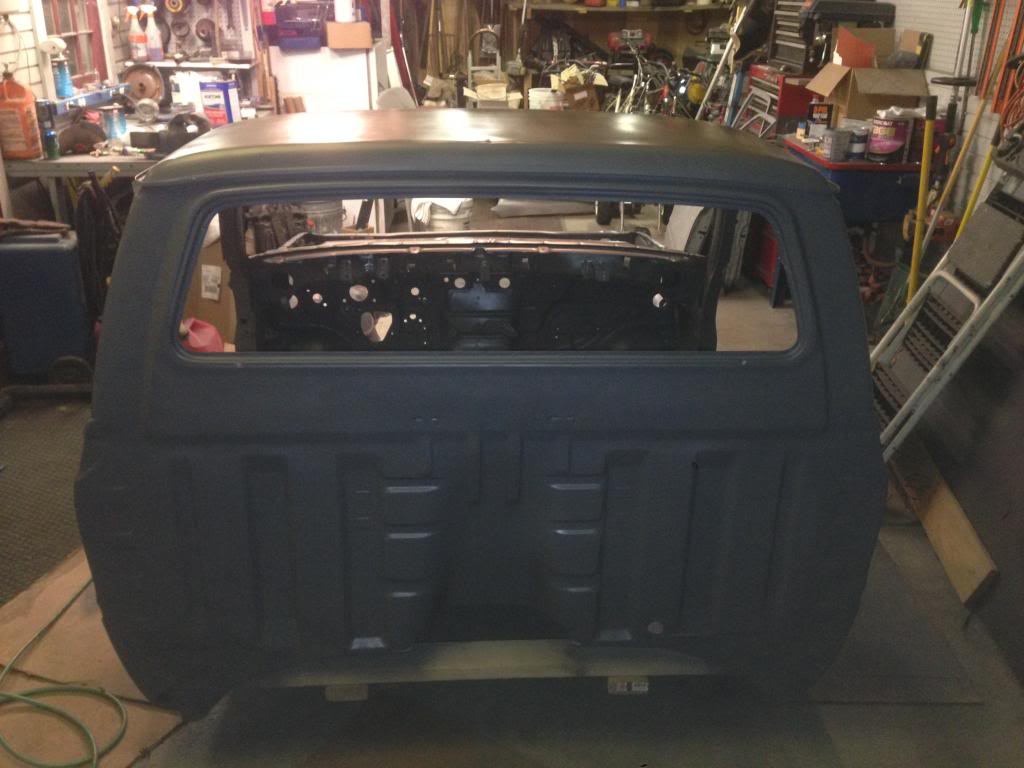
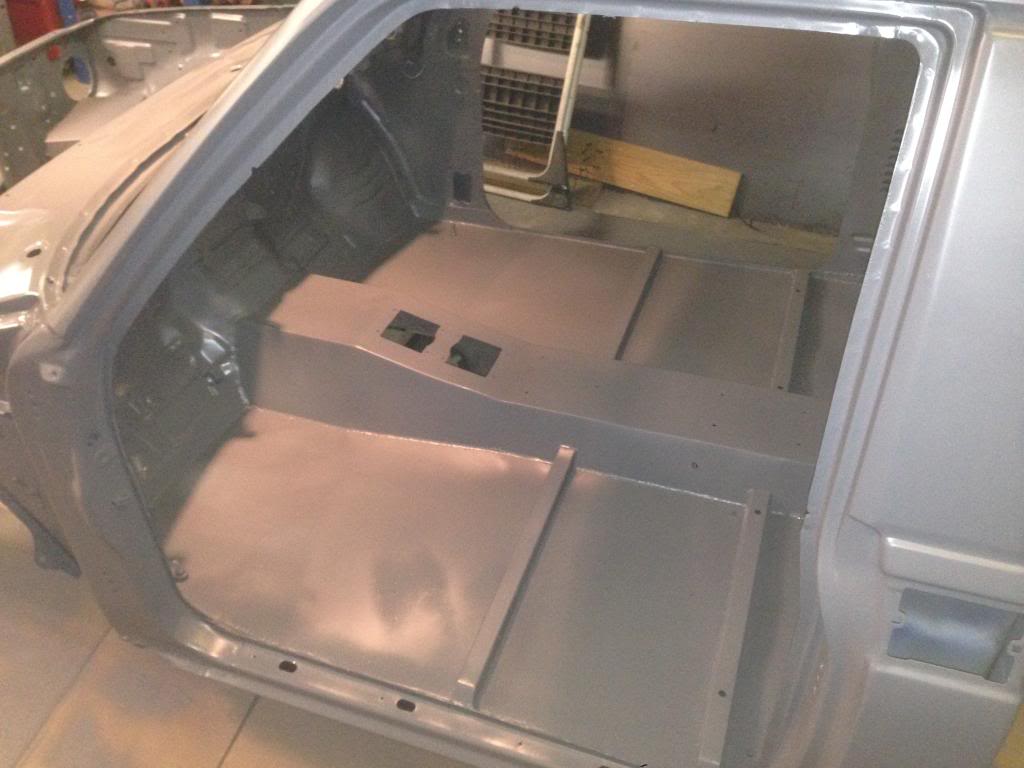
I still need to shoot the underside of the cab with epoxy, but I'm not as concerned with that as much as I am the top side since it is flat and I can easily sand off any flash rust that my pop up. Epoxy has about a 5 day window for filler or top coating before I would need to abrade the surface so ideally I'd like to apply at least one coat of filler on the majority the cab this week. I'll likely start with the harder to sand areas so that my sanding efforts will be minimized if I run out of that 5 day window.
Here are some shots after final media blasting:


And here are some after epoxy:


I still need to shoot the underside of the cab with epoxy, but I'm not as concerned with that as much as I am the top side since it is flat and I can easily sand off any flash rust that my pop up. Epoxy has about a 5 day window for filler or top coating before I would need to abrade the surface so ideally I'd like to apply at least one coat of filler on the majority the cab this week. I'll likely start with the harder to sand areas so that my sanding efforts will be minimized if I run out of that 5 day window.
Jun 23, 2014 | 04:25 PM
#776
that set back with the liner really blows. sounds like a bunch of time with an 80 grit wheel on the plywood to remove the residue and give it a good bonding surface.
did you have the same problem with the top of the bed floor too?
Side note the cab looks factory. I admire your attention to detail.
did you have the same problem with the top of the bed floor too?
Side note the cab looks factory. I admire your attention to detail.
Jun 23, 2014 | 05:13 PM
#777
hey Dave .. good chattin' with you today .. as always  ..
..
I talked to a few piers , and as you have already deduced , the acrylic and the epoxy wont bond .
we don't do any "liner" in our shop , so I'm not up on the process .. but hopefully with our talk today , you have some good direction ?
.
..I talked to a few piers , and as you have already deduced , the acrylic and the epoxy wont bond .
we don't do any "liner" in our shop , so I'm not up on the process .. but hopefully with our talk today , you have some good direction ?
.
Jun 24, 2014 | 06:32 AM
#778
Thread Starter
Super Moderator
iTrader: (3)
Joined: Jan 2012
Posts: 3,218
Likes: 26
From: Salisbury, MD
Thanks Corey, I think I've got it figured out well enough to move forward. Like I said on the phone, a couple of tests and we'll find out soon enough - I'll keep you posted on my discoveries.
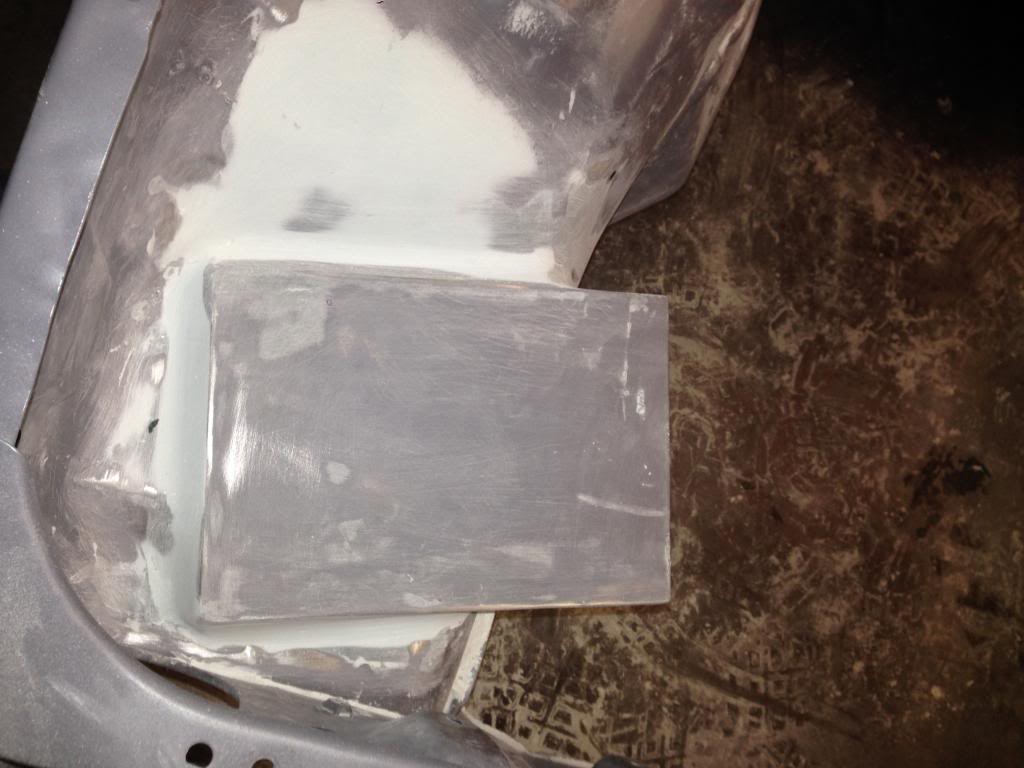
Started on some filler last night. Pretty much got the battery tray worked up to where I want it. If you saw the tray going in, it was a tight fit to get the welder in there and I wasn't able to weld a continuous bead around the perimeter so I did the best I could with the anticipation that I could go back and fill my gaps. There was also the typical battery acid corrosion under and around it so I treated it with rust encapsulated after it was media blasted really well. I did the initial filling with some Everglass short strand filler to get the general shape that I wanted - basically nice rounded corners that all slope towards the engine bay to ensure proper drainage if it were ever to get soaked with battery acid or something wet. Then went over that with Evercoat Rage Ultra filler to smooth and feather it out. It turned out great even though it is something that doesn't necessarily have to look good since it likely won't be seen much. A little bit of glazing putty and the battery tray will be put to rest. Body filler always photographs like crap, but here are some pics anyway:

Then I moved on to the smooooooooothie cowl. In case you forgot, it used to look like this:
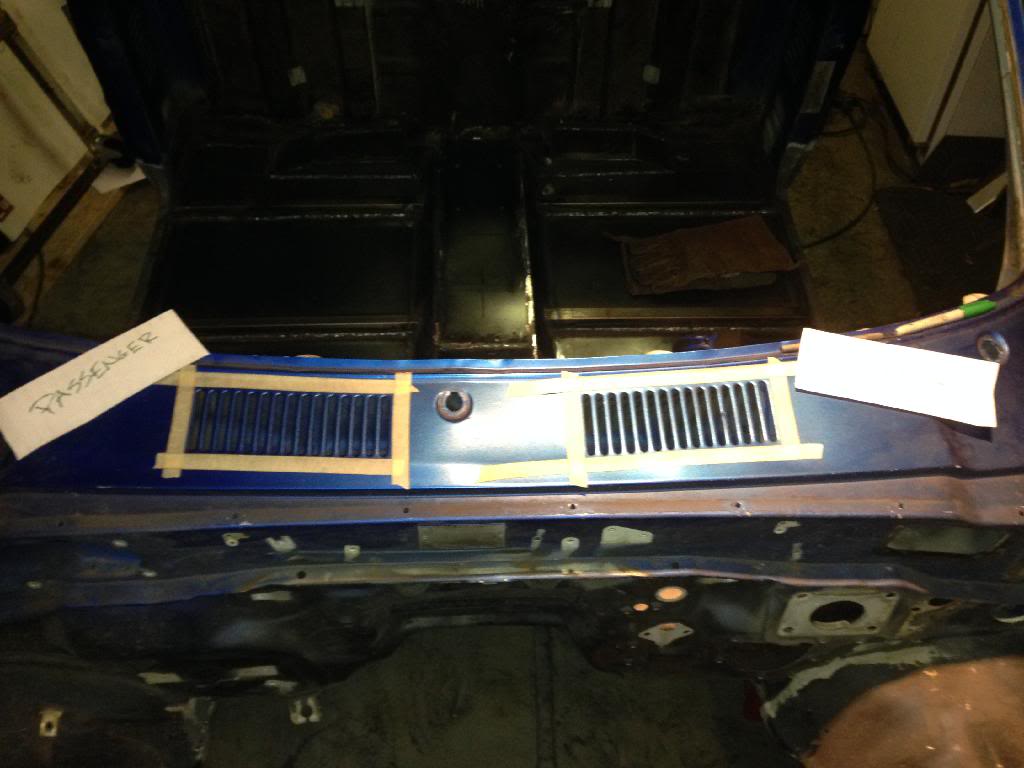
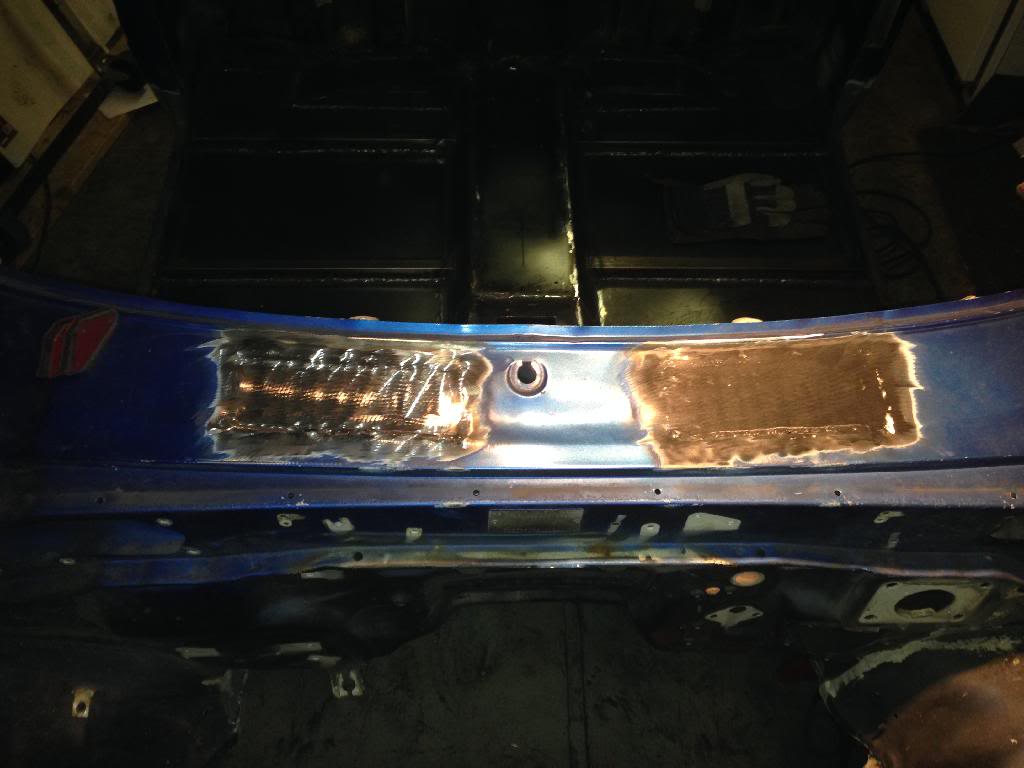
Then it looked like this:
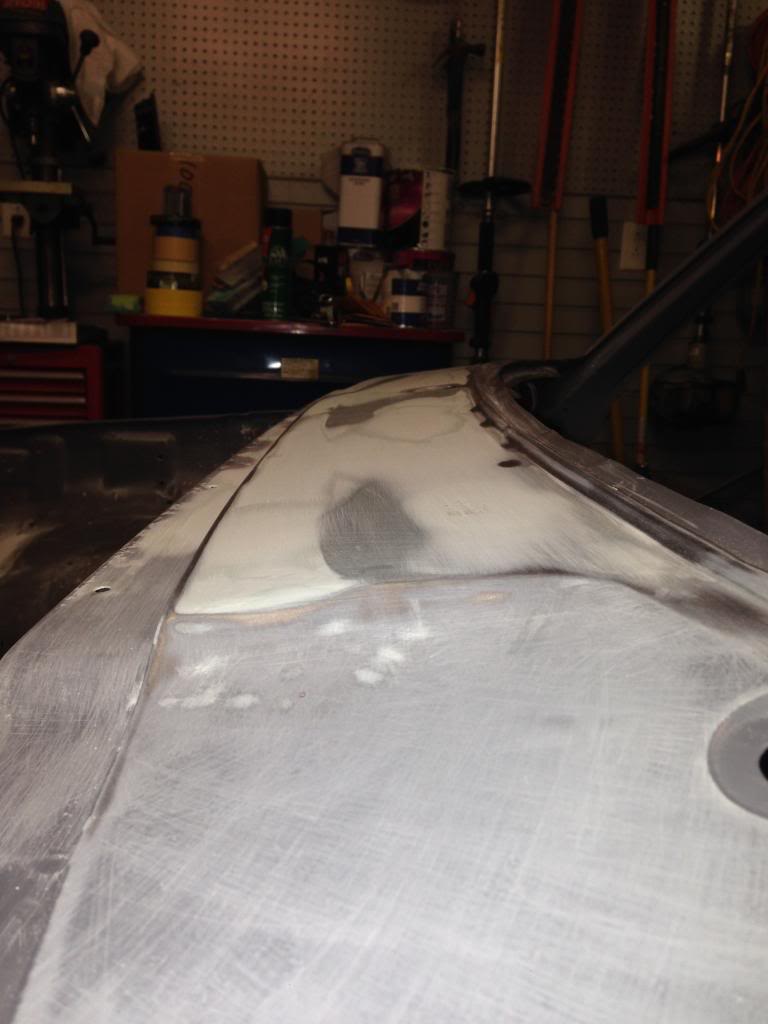
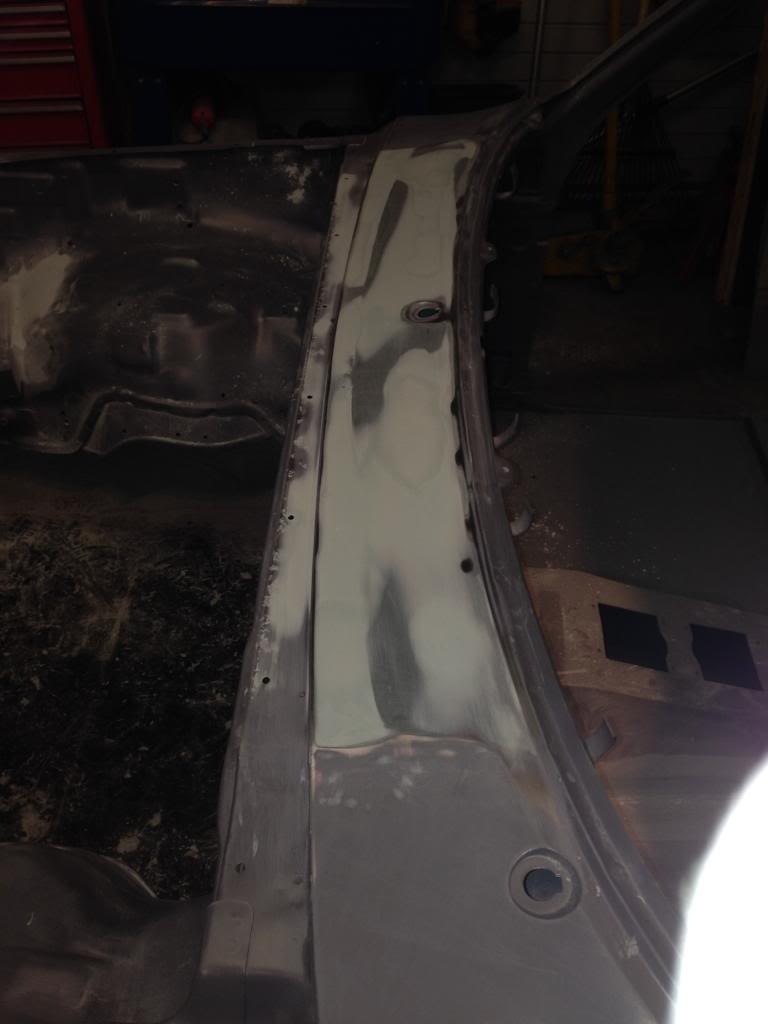
There was originally a dent in the center of the cowl and then the welding also warped the metal a little more so I got the metal straightened out as much as I could, but it's a tough area to work in so the rest will have to be done with filler - not a big deal. The hardest part is trying to get the contour back into it. Luckily, the left and right side of the cowl where it "steps up" didn't warp at all so I am using that as a base point to straighten the rest out. There are three slopes on the cowl 1) about a 1/2" straight out from the windshield, 2) about a 3" downward slope and 3) about a 1" slope down to the hood. I'll be doing this in three steps with Everglass short strand since the buildup required is slightly too much for polyester filler. 1) get the contour of the 3" middle slope straightened out close to where it needs to be, 2) level out the 1/2" section around the windshield and 3) straighten out the 1" slope down near the hood. Then I'll go back and dress it all with polyester filler. Should be a piece of cake (famous last words). I only got one picture last night, but I did get a lot farther than this:

Since I need a little bit of build up, I'm using masking tape to create my "edge" where it needs to be reformed to slope down towards the hood. It's a great trick to use, but remember two very important things 1) Remove the tape BEFORE your filler kicks and 2) use thin layers to avoid chipping at the edge. The warpage in the metal isn't uniform, so it's really key to "feel" it when blocking. By the time I wrapped up for the night, I nearly got the middle slope to where I want it so the other two lines should go fairly easily.
More to come soon!
Started on some filler last night. Pretty much got the battery tray worked up to where I want it. If you saw the tray going in, it was a tight fit to get the welder in there and I wasn't able to weld a continuous bead around the perimeter so I did the best I could with the anticipation that I could go back and fill my gaps. There was also the typical battery acid corrosion under and around it so I treated it with rust encapsulated after it was media blasted really well. I did the initial filling with some Everglass short strand filler to get the general shape that I wanted - basically nice rounded corners that all slope towards the engine bay to ensure proper drainage if it were ever to get soaked with battery acid or something wet. Then went over that with Evercoat Rage Ultra filler to smooth and feather it out. It turned out great even though it is something that doesn't necessarily have to look good since it likely won't be seen much. A little bit of glazing putty and the battery tray will be put to rest. Body filler always photographs like crap, but here are some pics anyway:


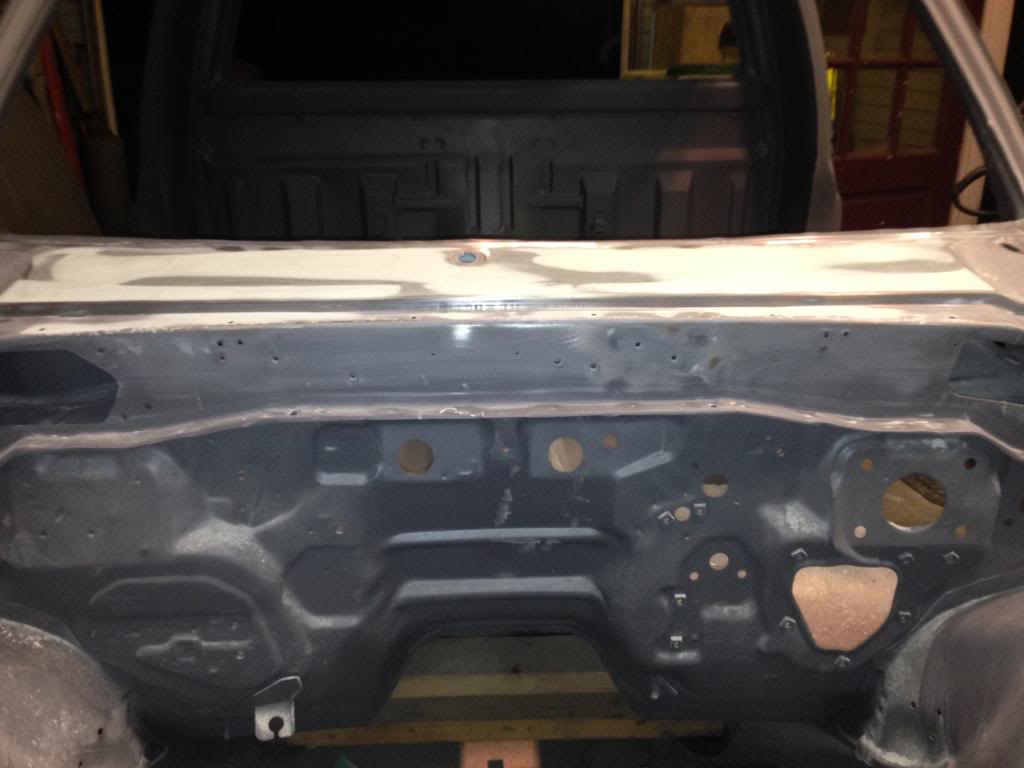
Then I moved on to the smooooooooothie cowl. In case you forgot, it used to look like this:

Then it looked like this:

There was originally a dent in the center of the cowl and then the welding also warped the metal a little more so I got the metal straightened out as much as I could, but it's a tough area to work in so the rest will have to be done with filler - not a big deal. The hardest part is trying to get the contour back into it. Luckily, the left and right side of the cowl where it "steps up" didn't warp at all so I am using that as a base point to straighten the rest out. There are three slopes on the cowl 1) about a 1/2" straight out from the windshield, 2) about a 3" downward slope and 3) about a 1" slope down to the hood. I'll be doing this in three steps with Everglass short strand since the buildup required is slightly too much for polyester filler. 1) get the contour of the 3" middle slope straightened out close to where it needs to be, 2) level out the 1/2" section around the windshield and 3) straighten out the 1" slope down near the hood. Then I'll go back and dress it all with polyester filler. Should be a piece of cake (famous last words). I only got one picture last night, but I did get a lot farther than this:

Since I need a little bit of build up, I'm using masking tape to create my "edge" where it needs to be reformed to slope down towards the hood. It's a great trick to use, but remember two very important things 1) Remove the tape BEFORE your filler kicks and 2) use thin layers to avoid chipping at the edge. The warpage in the metal isn't uniform, so it's really key to "feel" it when blocking. By the time I wrapped up for the night, I nearly got the middle slope to where I want it so the other two lines should go fairly easily.
More to come soon!
Last edited by kawazx636; Jun 24, 2014 at 06:38 AM.
Jun 25, 2014 | 08:37 PM
#780
Thread Starter
Super Moderator
iTrader: (3)
Joined: Jan 2012
Posts: 3,218
Likes: 26
From: Salisbury, MD
Doesn't seem like much but I got the smoothie cowl finished up tonight. It was actually quite a bit of work to get it symmetrical and contoured properly due to the warping of the metal when I welded in the vent plates. I did a slightly different contour from the stock contour - instead of having the two different slopes with that harder edge near the hood, I went with a softer more rounded edge and blended it into the existing outside contours. Turned out pretty good, but I think that I may have a slight high spot near the center hole for the wipers. I should be able to tell better once I shoot the surfacer primer and block it. If it isn't noticeable then I'll leave it as is, but it is then I may have to build up the surrounding areas a bit more since I'm down to the steel in that area. We shall see what happens. Here's the pics:
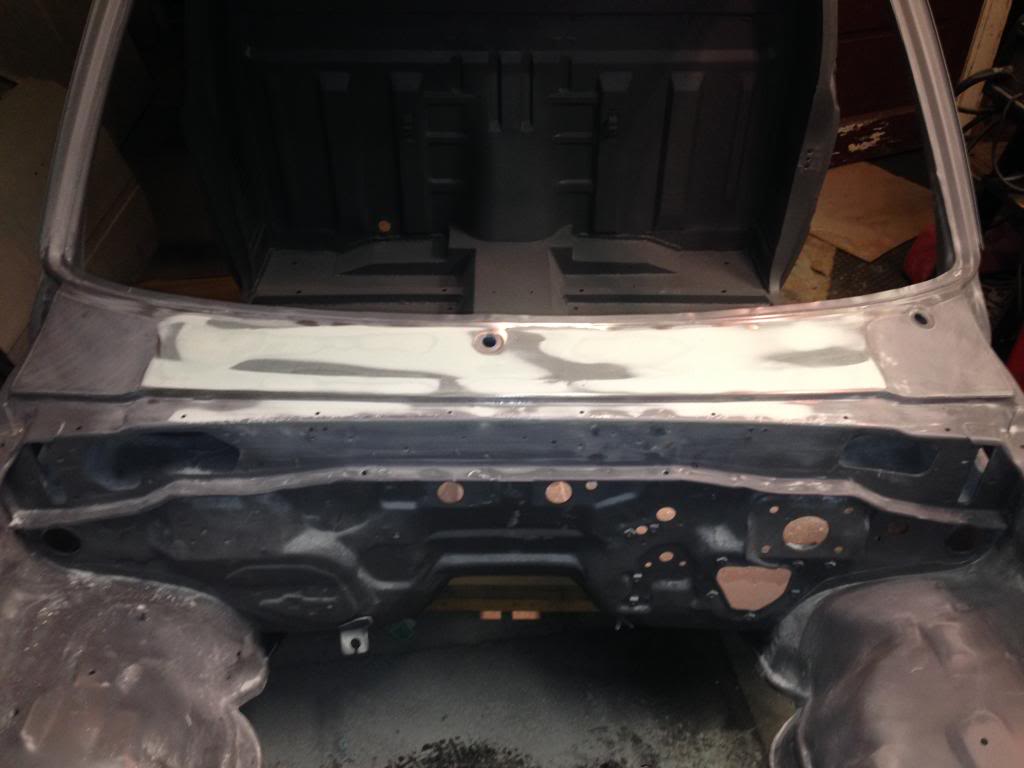
I will tell you all this much, it is definitely worth doing the smoothie cowl for both asthetics and functionality. It's going to look sharp and prevent future rust issues inside the cowl and down near the rockers. I'm definitely satisfied with the effort so far!


I will tell you all this much, it is definitely worth doing the smoothie cowl for both asthetics and functionality. It's going to look sharp and prevent future rust issues inside the cowl and down near the rockers. I'm definitely satisfied with the effort so far!


