
KawaZX636's 1983 Toyota Pickup Restoration

 Jun 8, 2014 | 05:24 AM
#745
Thread Starter
Super Moderator
iTrader: (3)
Joined: Jan 2012
Posts: 3,218
Likes: 26
From: Salisbury, MD
When you have as many as I do, one doesn't hurt. Besides, it was a 16 year old 6'6" Channin squash tail thruster that used to be my old faithful so it was beat all to hell already. It was a valiant sacrifice
Jun 8, 2014 | 06:03 AM
#746
Registered User
Joined: Feb 2014
Posts: 351
Likes: 0
Yep board hoarder
Jun 12, 2014 | 08:29 AM
#749
Thread Starter
Super Moderator
iTrader: (3)
Joined: Jan 2012
Posts: 3,218
Likes: 26
From: Salisbury, MD
Next on my list is a JC Hawaii Custom. My friend bought a house on Sunset Beach in Haleiwa and has become pretty good friends with John Carper. We're planning a trip to the North Shore in February so I'm going to order a custom 7" mini gun to be ready for when I get down there. It'll be pretty much worthless to me for my East Coast surf spots so I'll likely just leave it down there for my HI vacation board.
Jun 12, 2014 | 08:49 AM
#750
Thread Starter
Super Moderator
iTrader: (3)
Joined: Jan 2012
Posts: 3,218
Likes: 26
From: Salisbury, MD
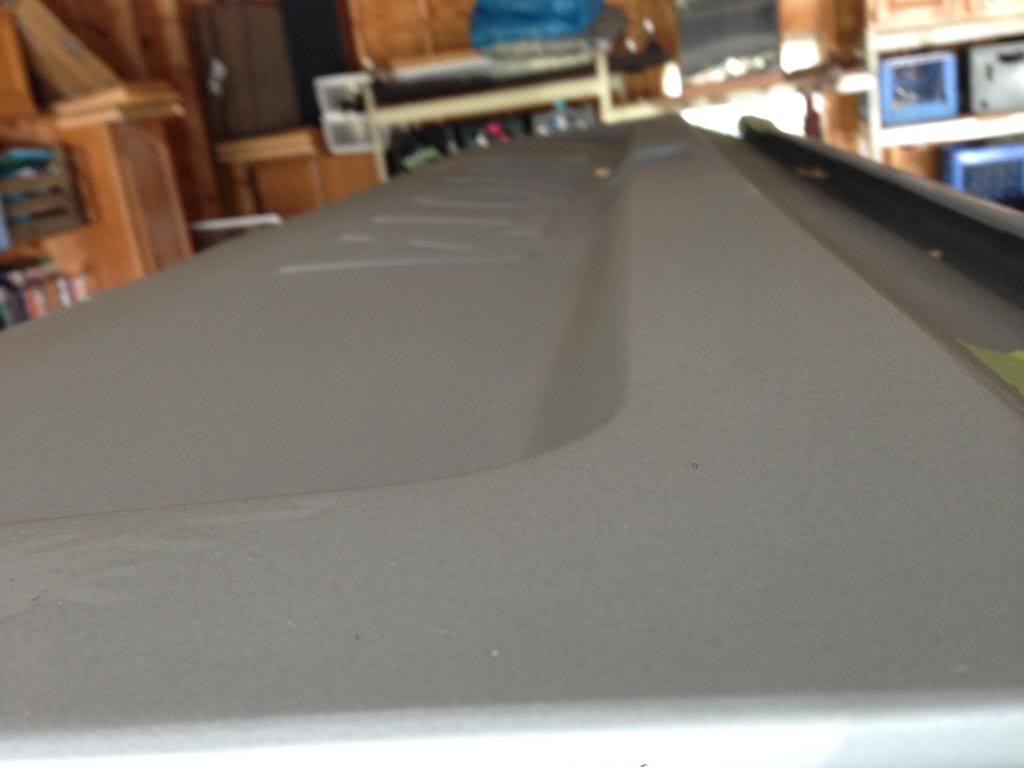
Ok, so back to the truck... I did a little bodywork last night and pretty much got the bed wrapped up in terms of filler and fine tuning. I finished filling the deeper voids of the tailgate lip with short strand glass and then skimmed it with Evercoat Rage Ultra body filler.
Here's the original "lip" underneath the tailgate rail that I filled (To the right in the picture):
And here it is filled:
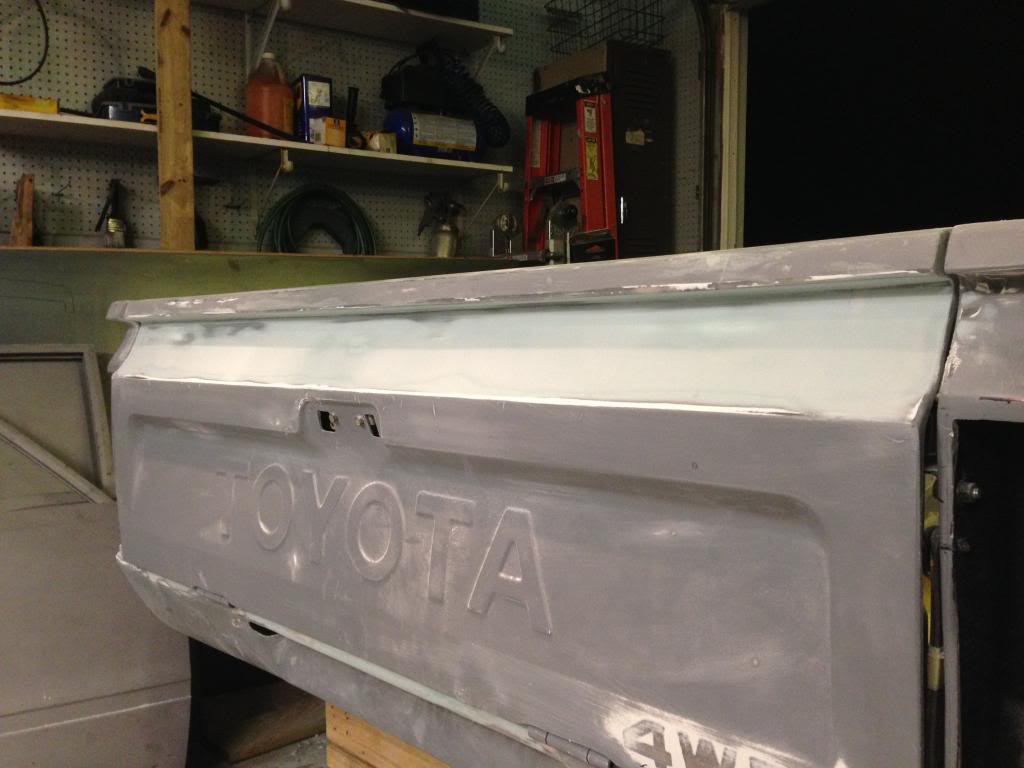
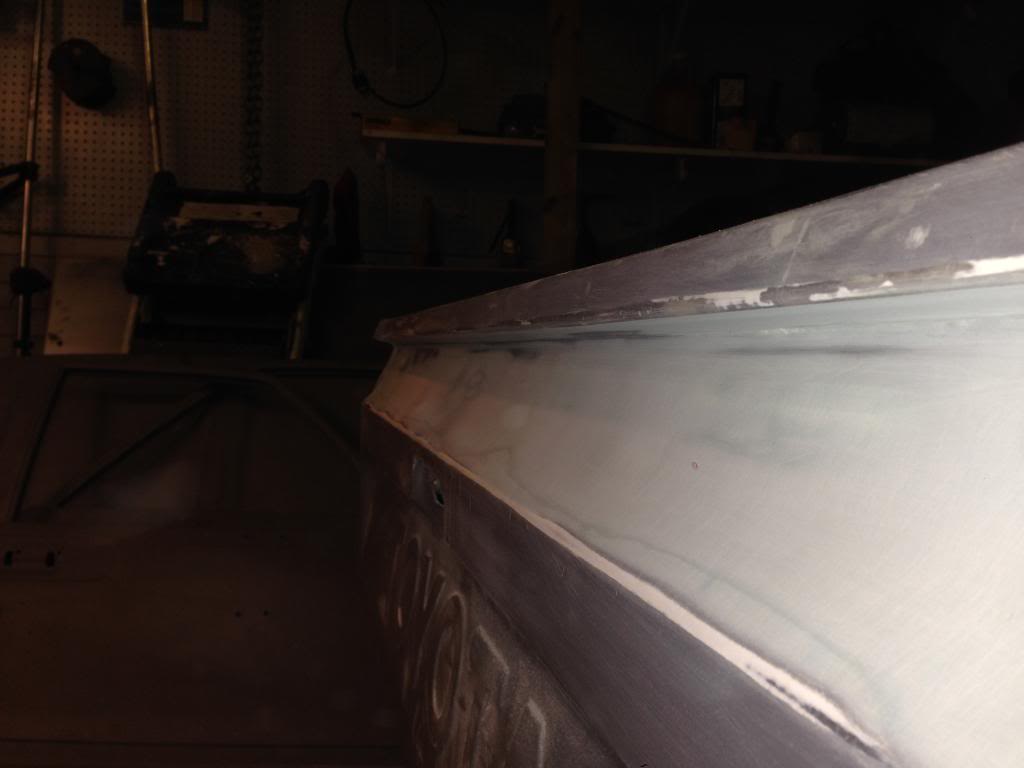
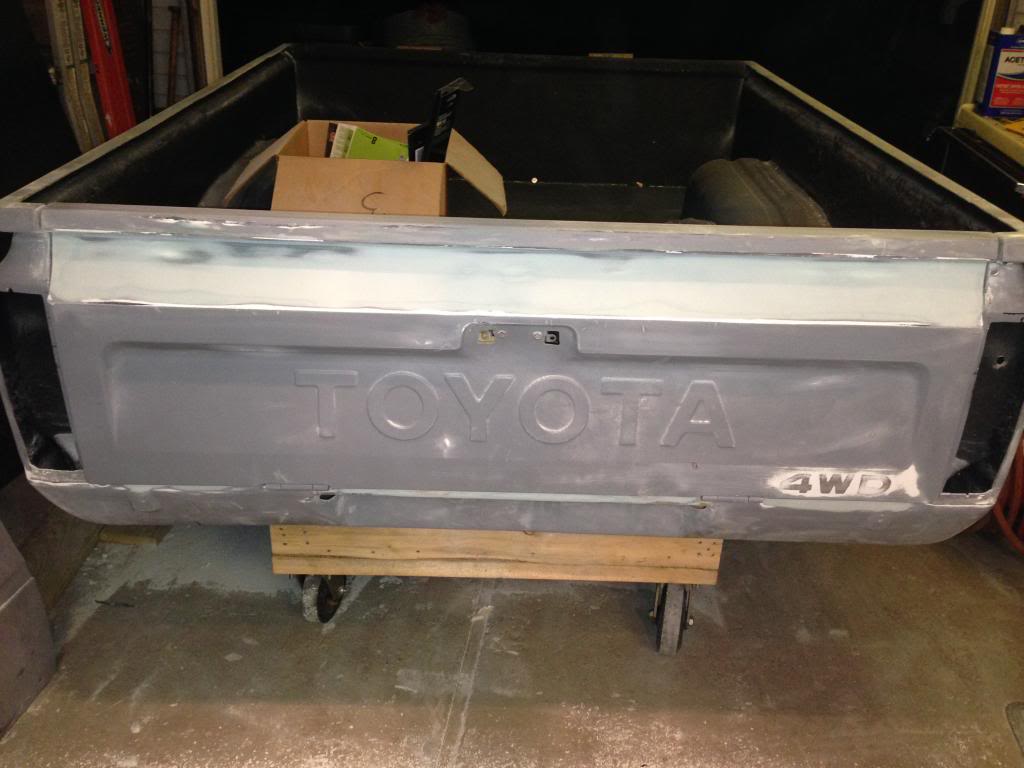
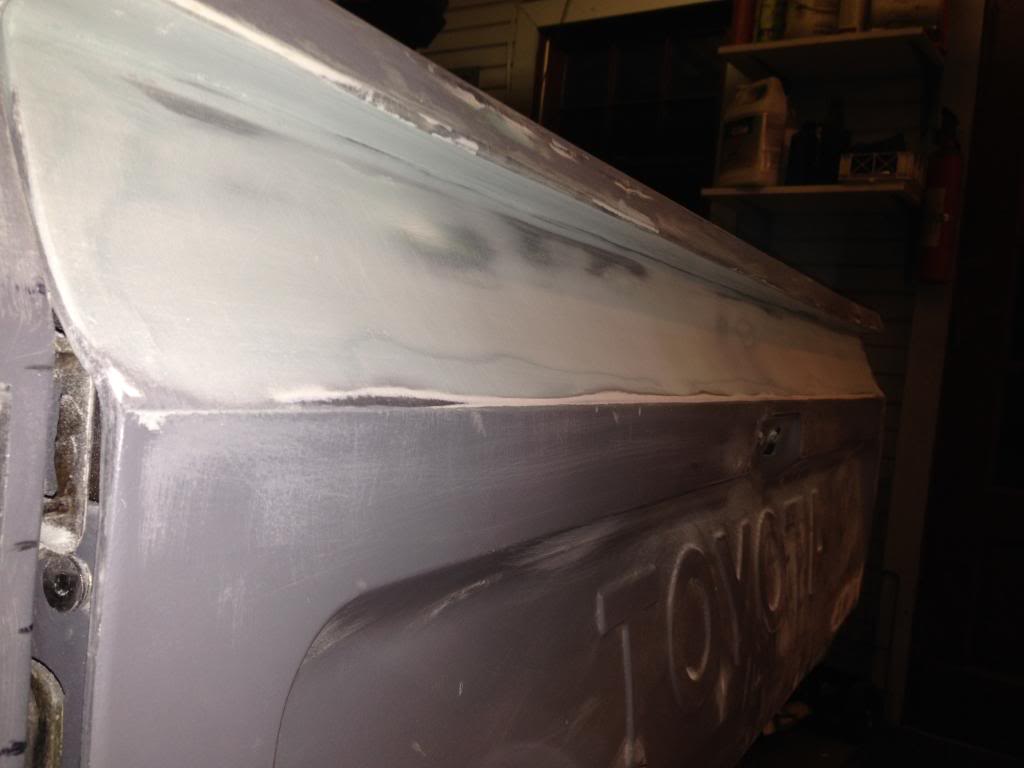
The rail of the tailgate now matches the rails of the bed better. The pictures don't really do it justice, but it's pretty much flat and straight all the way across. I still have just little bit of blocking to do on it, but I want to shoot it with some guide coat first to make sure I don't have any high/low spots. Other than that, the bed it pretty much done. Well actually... the bed was done when it got here, I'm just ridiculously picky! Next I want to shoot the underside of the bed with Epoxy followed by Raptor Liner so I never have to flip the bed up again. Then Epoxy and high build prime the rest of the bed, block it and stash it aside until I have the rest of the body ready for color. It's getting there....
Here's the original "lip" underneath the tailgate rail that I filled (To the right in the picture):

And here it is filled:


The rail of the tailgate now matches the rails of the bed better. The pictures don't really do it justice, but it's pretty much flat and straight all the way across. I still have just little bit of blocking to do on it, but I want to shoot it with some guide coat first to make sure I don't have any high/low spots. Other than that, the bed it pretty much done. Well actually... the bed was done when it got here, I'm just ridiculously picky! Next I want to shoot the underside of the bed with Epoxy followed by Raptor Liner so I never have to flip the bed up again. Then Epoxy and high build prime the rest of the bed, block it and stash it aside until I have the rest of the body ready for color. It's getting there....
Jun 12, 2014 | 01:03 PM
#752
Thread Starter
Super Moderator
iTrader: (3)
Joined: Jan 2012
Posts: 3,218
Likes: 26
From: Salisbury, MD
I'll definitely let you know the next time I'm down there. My friend has a couple dirt bikes that we ride on the motocross track in Haleiwa - if you're into that kind of thing, you'll definitely want to come hang out. My cousin recently move to Hilo so I also have to hit up Big Island the next time I'm there
Jun 12, 2014 | 01:10 PM
#753
Registered User
Joined: Feb 2014
Posts: 351
Likes: 0
I got lots a friends on big I
My two cousins want me back on the island real bad but I told them I need a few more years on the mainland to do my build work save money do the main wagon trails across the U S then I'll be home till then I'm in Ohio this year
My two cousins want me back on the island real bad but I told them I need a few more years on the mainland to do my build work save money do the main wagon trails across the U S then I'll be home till then I'm in Ohio this year
 Jun 13, 2014 | 05:20 AM
#755


Nice job on the bodywork. I really like, and have had good luck, with evercoat products. The raptor liner will be nice on the underside of the bed. Crank up the PSI to make it a nice fine texture that dirt won't stick to. That's how I always spray it. Check out my build thread if you want to see how it looks afterwards.
Dirt just washed or wiped off with a rag
Dirt just washed or wiped off with a rag
Jun 13, 2014 | 06:10 AM
#756
Thread Starter
Super Moderator
iTrader: (3)
Joined: Jan 2012
Posts: 3,218
Likes: 26
From: Salisbury, MD
Nice job on the bodywork. I really like, and have had good luck, with evercoat products. The raptor liner will be nice on the underside of the bed. Crank up the PSI to make it a nice fine texture that dirt won't stick to. That's how I always spray it. Check out my build thread if you want to see how it looks afterwards.
Dirt just washed or wiped off with a rag
Dirt just washed or wiped off with a rag
I've sprayed Raptor Liner before and it works - I did my Tundra about 5 years ago and it just started wearing through (never pealed) about a year ago, but it has been through hell and back so I'm rather impressed that it held up that long. I want to spray the underside of the bed and cab before I do my color coat on the rest of the body but my only fear is that the the color coat may flake back where it meets up to (not on) the Raptor Liner in those places. I would paint the whole truck and then Raptor Line the underside of the cab and bed, but then I risk damaging the paint and bodywork by flipping the cab and bed over to shoot the Raptor Liner - I know... if I had a rotisserie that wouldn't be an issue, but I do not. The Raptor Liner will have epoxy under it so it will certainly adhere well, but I'm going to have to mask it off and shoot my paint up to it as close as possible and hope it sticks. My other thought would be to spray the Raptor Liner about an inch or two short of where I want it to be, shoot the color coat, then scuff the color, smooth the hard edge of the liner and shoot some more Raptor Liner to overlap that last inch or two. That should ensure that it won't peal back from the edges later on down the road. I think that I'm going to try some test shots before I get rolling on it.
I also plan on doing a light coat of Raptor Liner on the inside of the fenders, under the hood, behind the valance and the outside of the front clip of the cab to reduce noise, vibrations and the potential for future corrosion issues. I still haven't decided if I want the do the engine bay yet, but I likely will.
Jun 17, 2014 | 11:20 AM
#758
Thread Starter
Super Moderator
iTrader: (3)
Joined: Jan 2012
Posts: 3,218
Likes: 26
From: Salisbury, MD
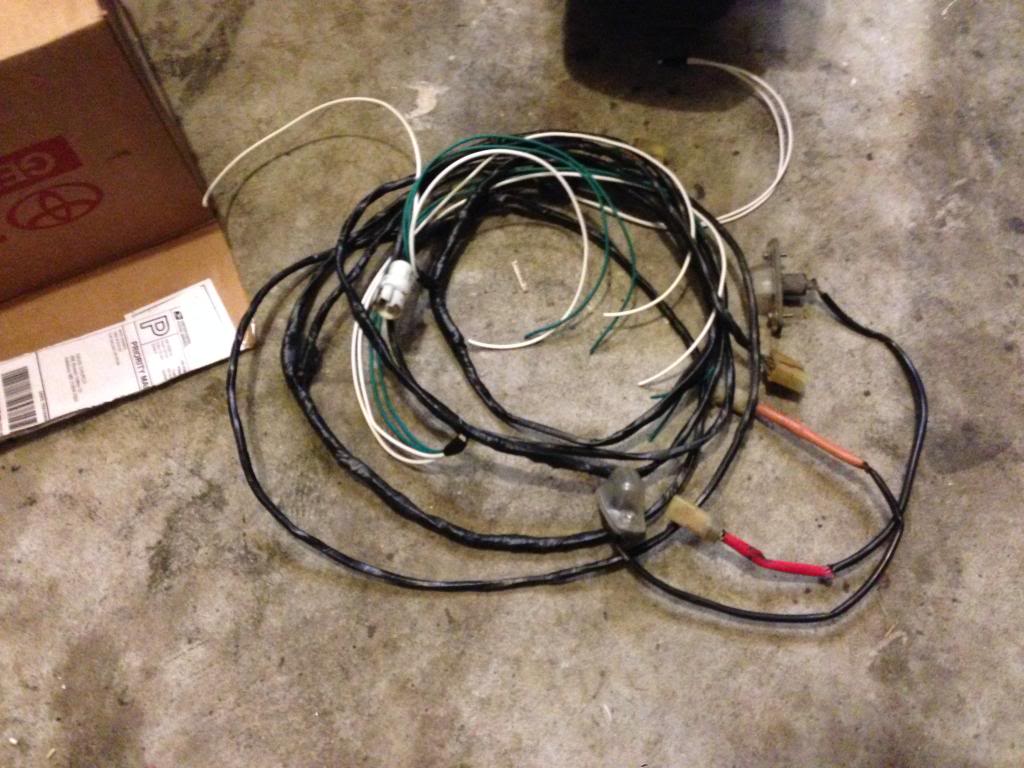
It's been a little humid around here lately so I've been putting of spraying the underside of the bed with epoxy and Raptor Liner until the moister drops around here. For now, it's just odd jobs that I'm trying to get done. Re-organized my parts bins so I can grab bins of parts in the order that I will need them and cleaned up my work areas a bit. Last night I managed to get my rear wiring harness figured out. Thanks to Jrheingans for the harness and Stephen (83Toyota88) for the license plate lights I think I have everything settled for all my lighting on my truck. The harness that I bought from Jrheingans was for a 79-81 so the plugs for the rear side markers and the fuel sending unit are different. No biggie though - I had just enough of my old harness with the correct fuel sending unit plug so I spliced that in and I have some plugs for the front markers that I can splice into the harness for the rear markers. Originally, the license plate lights used two separate plugs so I wanted to consolidate them into one single plug to run to both lights. I ended up pulling and replacing all the old grounds with fresh new wire and ground terminals. I also re-spliced all the crappy factory splices, soldered them together and heat shrank them. Basically took two hacked up harnesses and made one good one. I'm going to battery test the functionality tonight to make sure that everything is connected and working properly then wrap it all up in some wire sheathing so it's ready for installation.
Here's a pic of the harness while I was working on it:
Here's a pic of the harness while I was working on it:
 Jun 17, 2014 | 09:29 PM
#759
Thread Starter
Super Moderator
iTrader: (3)
Joined: Jan 2012
Posts: 3,218
Likes: 26
From: Salisbury, MD
Let some of the fun stuff begin! I am literally watching paint dry as I type this so I figured I'd kill some flash time by posting a few pics. The humidity dropped tonight so I wanted to get the underside of the bed wrapped up tonight.
Flipped the bed up, cleaned it off with some SEM paint prep and shot the first coat of epoxy primer:
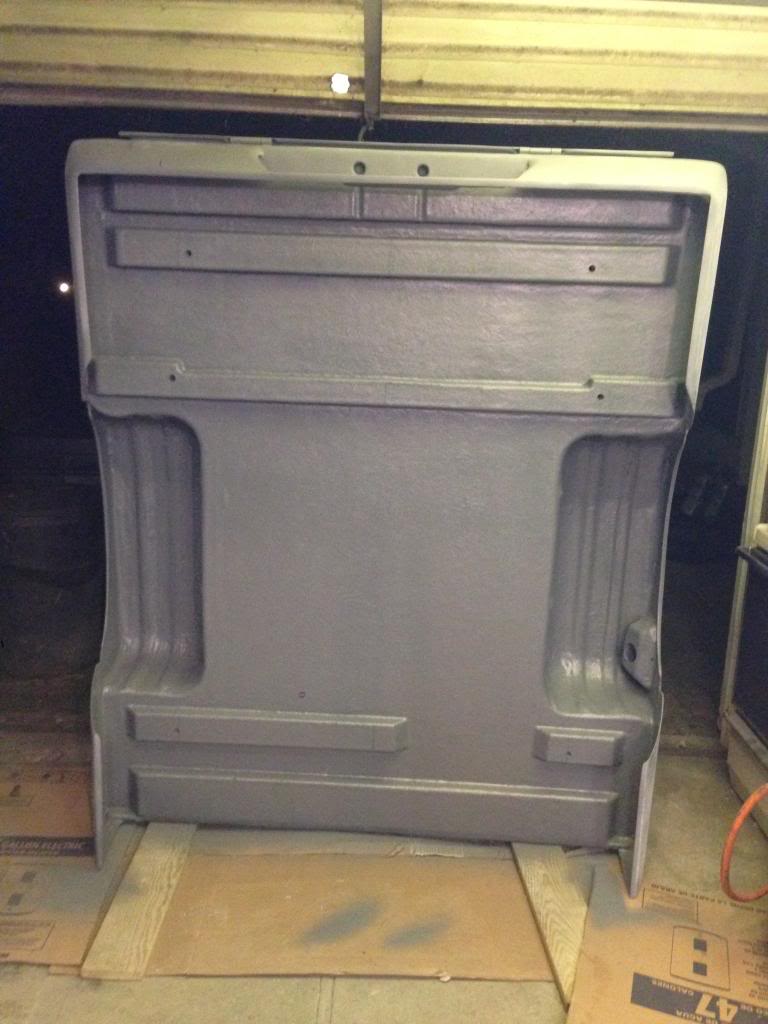
Then after about a 40 minute flash I shot a second coat of epoxy and flipp the bed over for the last time (hopefully). Both coats of epoxy medium to wet coats. Supposedly, Raptor grabs reallu well to fresh epoxy, I suppose I'll be finding out soon enough!

The second coat set up after about 90 minutes so I masked it off:

Now the really fun stuff, Raptor Liner!! RAWR!!!!
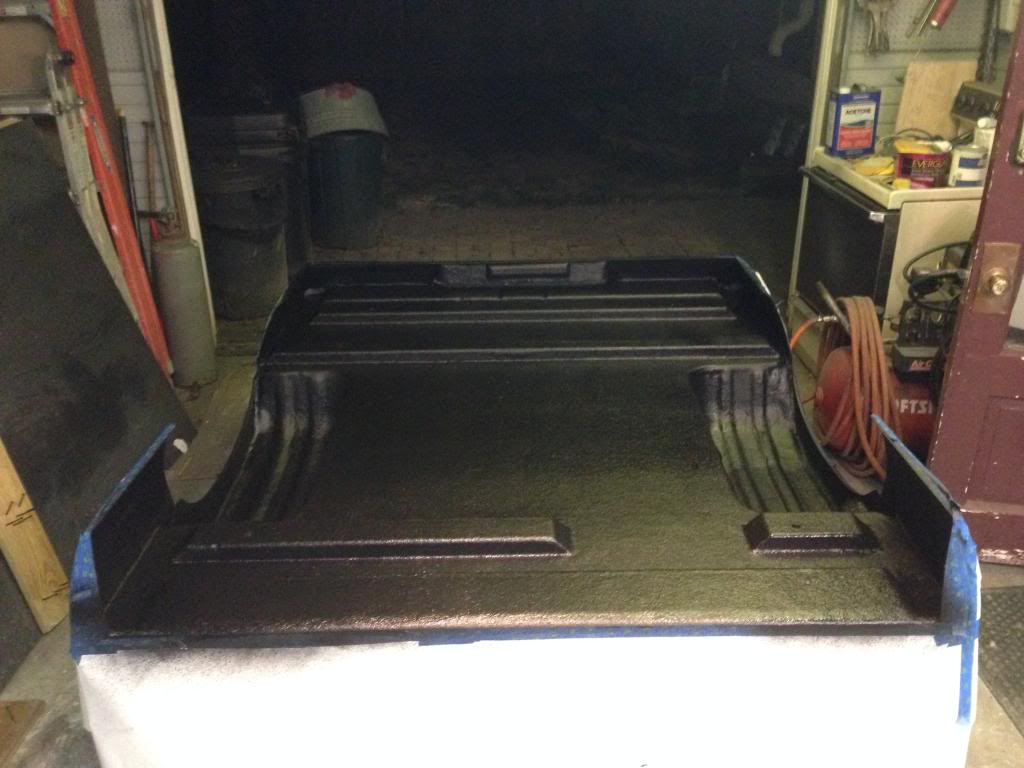
Sprayed it with the Shutz gun at about 60 PSI and about 12" away to get a smoother finish. Max recommended PSI is 70. First coat came out really well except for the spot that I tagged with my air hose, but that will disappear with the second coat. I'll probably shoot the second coat closer to 65 PSI at 12" to get it slightly smoother.
The hour flash time is up so it's on the the second coat!!
Last edited by kawazx636; Jun 17, 2014 at 09:31 PM.


