
KawaZX636's 1983 Toyota Pickup Restoration
 Oct 14, 2014 | 09:12 AM
#943
Great write up , Dave. I use basically all the same steps in painting guitars, my other hobby. Prep work is the key to any project, and you passed on more definitive information to help us get to a sucessfull end product. My build is on hold due to health problems, but hopefully get back to it during the winter. Thanks for your documentation of your build
Oct 15, 2014 | 05:53 PM
#945
Registered User
Joined: Jan 2011
Posts: 1,051
Likes: 0
From: Memphis, TN
Oct 15, 2014 | 06:00 PM
#946
Registered User
Joined: Jan 2011
Posts: 1,051
Likes: 0
From: Memphis, TN
Also PS, I've ridden a Ninja 250 for a while now, and I've been considering the 636 or R6 as a replacement.
If the detail and precision of your engine build and this truck build in general is any hint, your username is the final clue.
The 636 HAS to be the better bike! Haha, keep up the amazing work!!
If the detail and precision of your engine build and this truck build in general is any hint, your username is the final clue.
The 636 HAS to be the better bike! Haha, keep up the amazing work!!
Oct 16, 2014 | 11:18 AM
#947
Thread Starter
Super Moderator
iTrader: (3)
Joined: Jan 2012
Posts: 3,218
Likes: 26
From: Salisbury, MD
Yep, I was a Kawa-Freak. I used to race the ZX-6RR (636) in the amateur GP circuit until they outlawed them and I had to go to the ZX-6R. By far, the 636 is the best bang or your buck on the market. I didn't keep any of my 636's street legal for very long, but I would run a muck doing things that I now think were rather unintelligent when they were:

Which would quickly lead to this:

My street bike was a ZX-10R - I don't think there was a better production bike at the time. Not as bulky as the GSX-R but not as narrow as the R-1 and lighter and more powerful. Very well balanced and handled wonderfully. My ZX10 was my baby - I never abused her and to make sure I didn't I dropped the rear, strapped the front and stretched it 10" before I ever even rode it once. Then obviously a teensy bit of engine work and I broke into the 8's on it. My best 1/4 time was 8.89 at 162mph. Those days have been long gone. I saw a couple friends get killed while riding so I hung it all up. The guy I sold my ZX10 to still lets me ride it every once in a while since I still do all the engine work on it.
In other news, you need to see the new H2R! It is by far the sexiest bike I have ever seen and makes me want to get back on the track! Supercharge 998 putting out over 300 horses...RIDICULOUS! I can't even imagine throttling out of turns with that much power! Scope it out:
http://www.cycleworld.com/2014/09/30...torcycle-show/
Last edited by kawazx636; Oct 16, 2014 at 11:20 AM.
Oct 16, 2014 | 11:28 AM
#948
Registered User
Joined: Jan 2011
Posts: 1,051
Likes: 0
From: Memphis, TN
I've heard that the 636 is best bang for buck from many people. I think this time next year I'll have one in my garage 
I agree that the ZX-10 is a great street bike. My dad rode a 79 Kz1000 LTD for years before upgrading to a ZX-10. He rides that thing rain or shine and loves it!
And about the H2R, it looks OUTRAGEOUS!! I'd be interested in the H2, whenever that comes out, but it brings up the debate about how much power is too much power, for the street.
This guy said it pretty well:
Oct 16, 2014 | 01:37 PM
#949
Thread Starter
Super Moderator
iTrader: (3)
Joined: Jan 2012
Posts: 3,218
Likes: 26
From: Salisbury, MD
Well the H2R is a track only bike - not street legal. And I can tell you this much, throttling out of turns with too much power can drive you wide and put you in the arrester or worse, lose your front end weight and high-side it... I've actually had to tone down bikes before because I was getting too much response in my turn exits.
Oct 16, 2014 | 03:56 PM
#950
Registered User
Joined: Jan 2011
Posts: 1,051
Likes: 0
From: Memphis, TN
I've seen a couple guys high side their R1's and S1000rr's from pinning it through a short corner.. No thanks!
That's actually one of the reasons why I love riding a Ninjette.. I can brake almost to the apex of a corner and full throttle out faster than a lot of 600cc guys. Only on the straights do I lose that advantage.. LOL
That's actually one of the reasons why I love riding a Ninjette.. I can brake almost to the apex of a corner and full throttle out faster than a lot of 600cc guys. Only on the straights do I lose that advantage.. LOL
Oct 16, 2014 | 03:58 PM
#951
Registered User
Joined: Jan 2011
Posts: 1,051
Likes: 0
From: Memphis, TN
Oh yeah, the H2 I was referring to is the street legal version of the H2R. Don't know much about it, though, it's probably tuned down to compete with other street legal liter bikes.
http://www.cycleworld.com/tag/kawasaki-ninja-h2/
http://www.cycleworld.com/tag/kawasaki-ninja-h2/
Oct 16, 2014 | 10:42 PM
#952
Thread Starter
Super Moderator
iTrader: (3)
Joined: Jan 2012
Posts: 3,218
Likes: 26
From: Salisbury, MD
I sanded through to metal in a few places while I was doing body work so I shot a couple coats of epoxy on the cab tonight to seal it for good measure. Masked off everything that was Raptor Lined really well too so I don't hit it with any overspray:
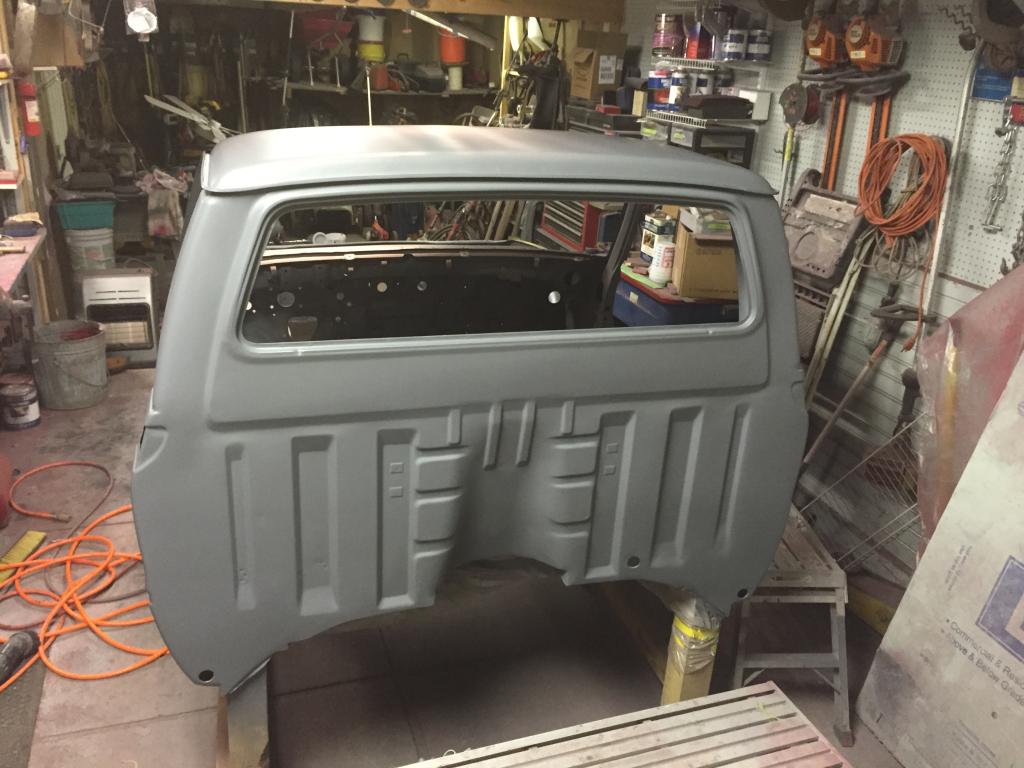
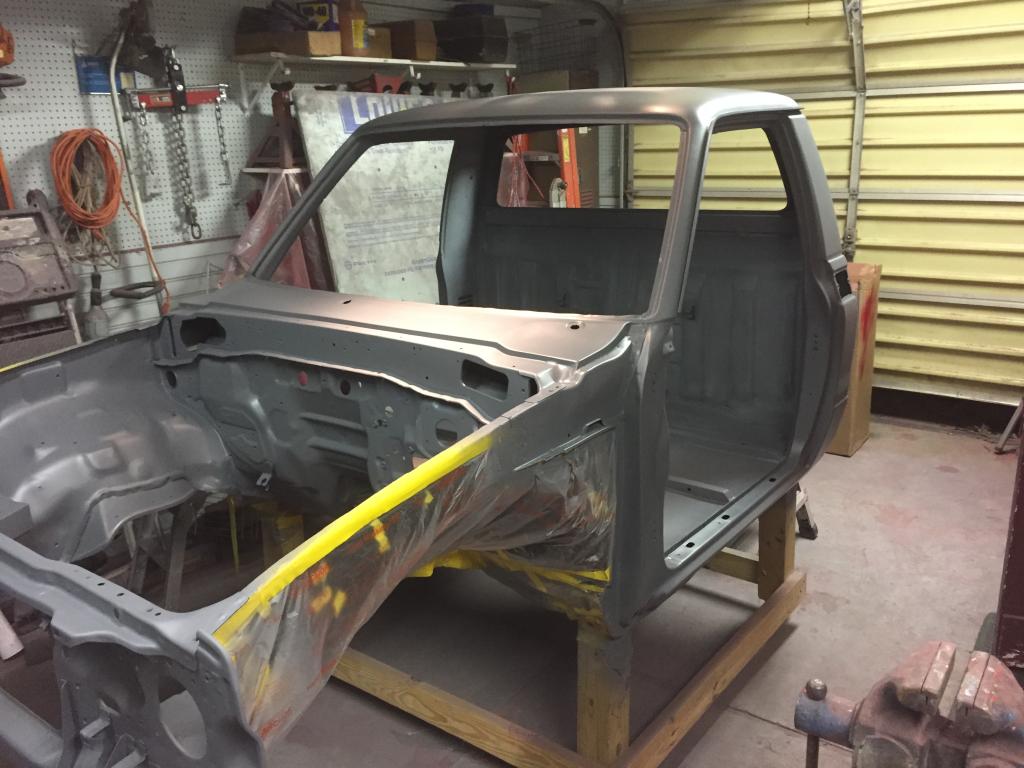
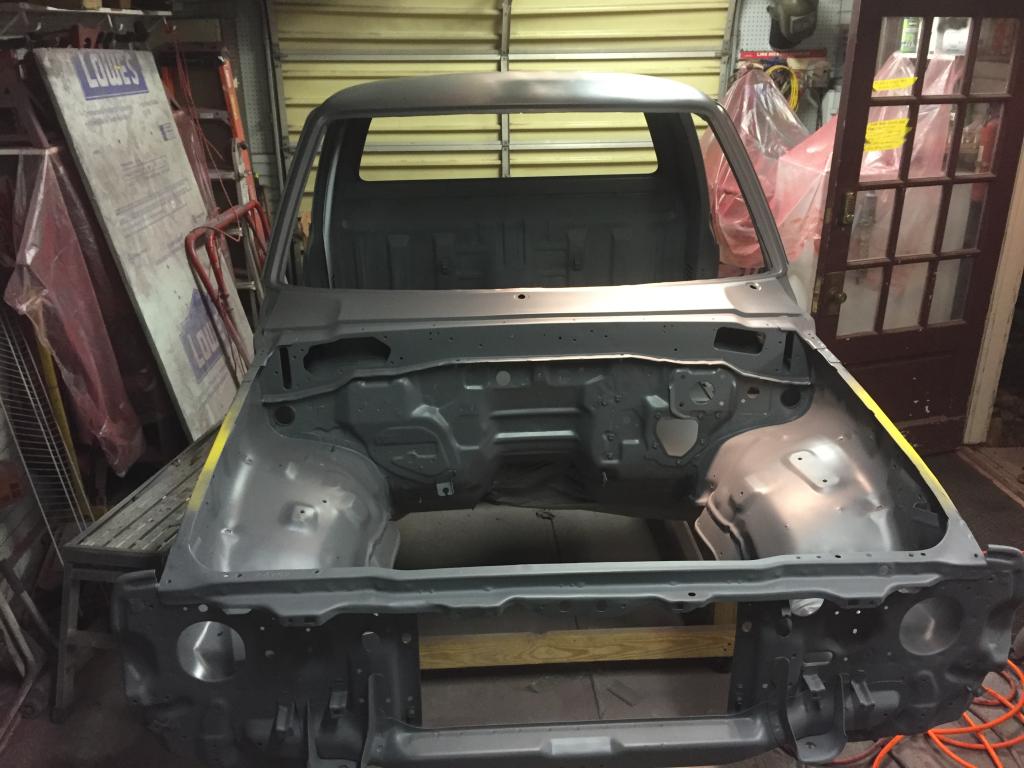
It's a little late tonight (2:30am) so first thing in the morning I'll spray the surfacer. Then it's a bunch of block sanding and seam sealer from there before color. I also noticed a small ding right below the driver side cab vent that like came from my clumsy Pops poking around the shop. It's really small but in an extremely noticeable spot so I'll hit it with some glazing putty tomorrow before I shoot the surfacer tomorrow.
It's getting there... Baby steps!
Last edited by kawazx636; Oct 16, 2014 at 10:43 PM.

 Oct 20, 2014 | 09:47 AM
#956
Thread Starter
Super Moderator
iTrader: (3)
Joined: Jan 2012
Posts: 3,218
Likes: 26
From: Salisbury, MD
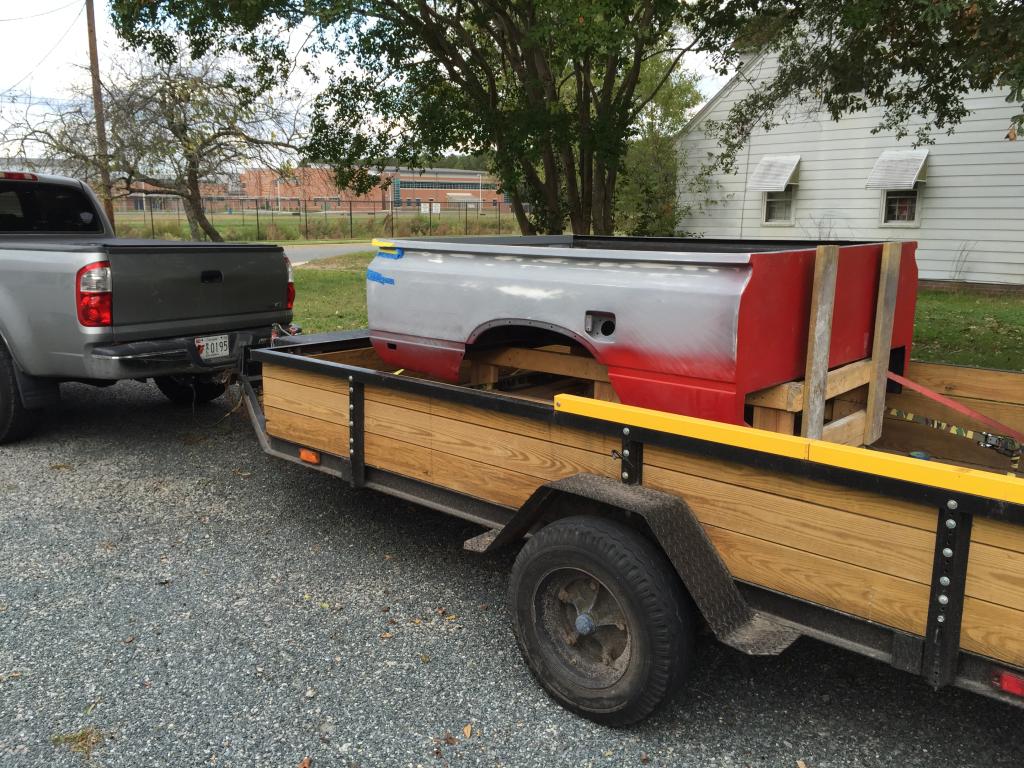
This weekend was (hopefully) the last weekend that I will have to mow the grass in my neighborhood. Our HoA went a little defunct when the developer pulled out of our neighborhood so I offered to do the lawn maintenance for the entire neighborhood since I already had a bunch of commercial lawn equipment. It wasn't a big job to do (only took me about 5-6 hours each week), but it helped out my community a bit and put a little extra cash in my pockets (which usually went into my truck). Now that I'm done with the lawn maintenance, I now have room in my garage for more important things since I don't have to keep my zero turn mower, push mower, edger, string trimmer, blower, etc in my garage anymore. I spent yesterday cleaning off and winterizing my equipment for storage and cleaned out the garage. Hauled all the equipment over to my cousin's garage and brought my bed back home where it belongs. Here she is ready to go for a ride:
So now I will be finishing up the cab (final sanding, seam sealer and paint) in my Pops' shop while I get the bed ready for primer and paint in my garage. Not much to do to the bed, but I do need to do some detail work before it is ready to paint. I have already blocked out the majority of the waviness in the fiberglass so I just need to sand out all of the heavier scratches down to around 220 grit before I shoot it with another coat of epoxy. Then surfacer, final blocking to 600 grit and color.
I'm sure I'll be back at it tonight, stay tuned...
Oct 20, 2014 | 09:03 PM
#957
Thread Starter
Super Moderator
iTrader: (3)
Joined: Jan 2012
Posts: 3,218
Likes: 26
From: Salisbury, MD
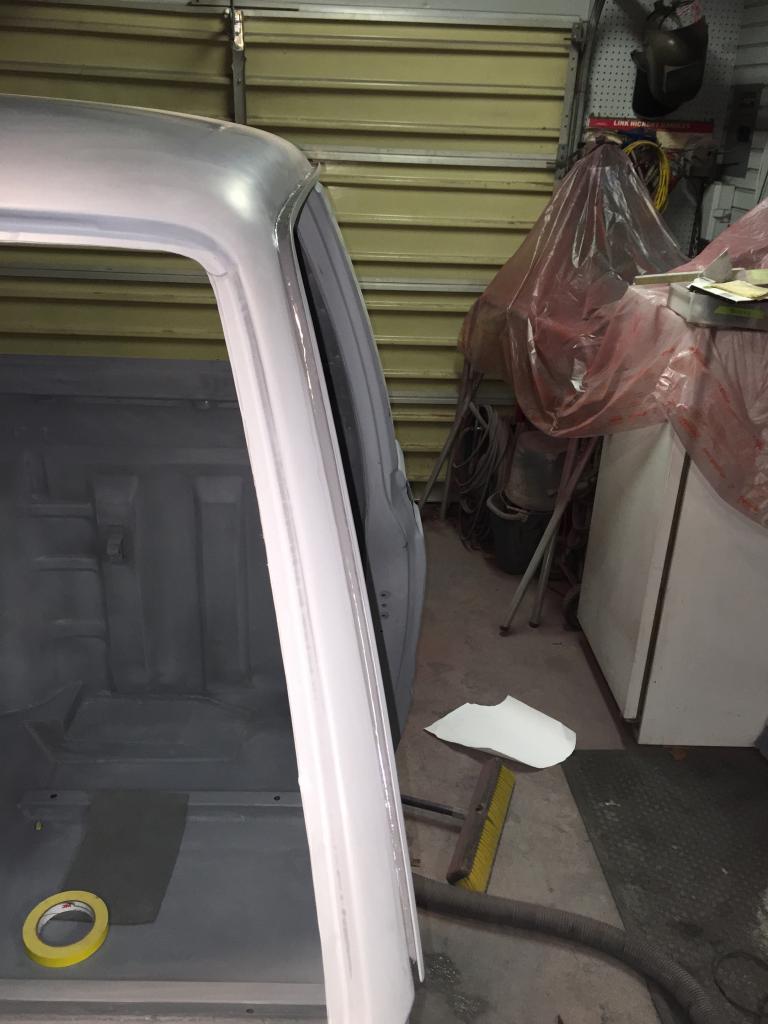
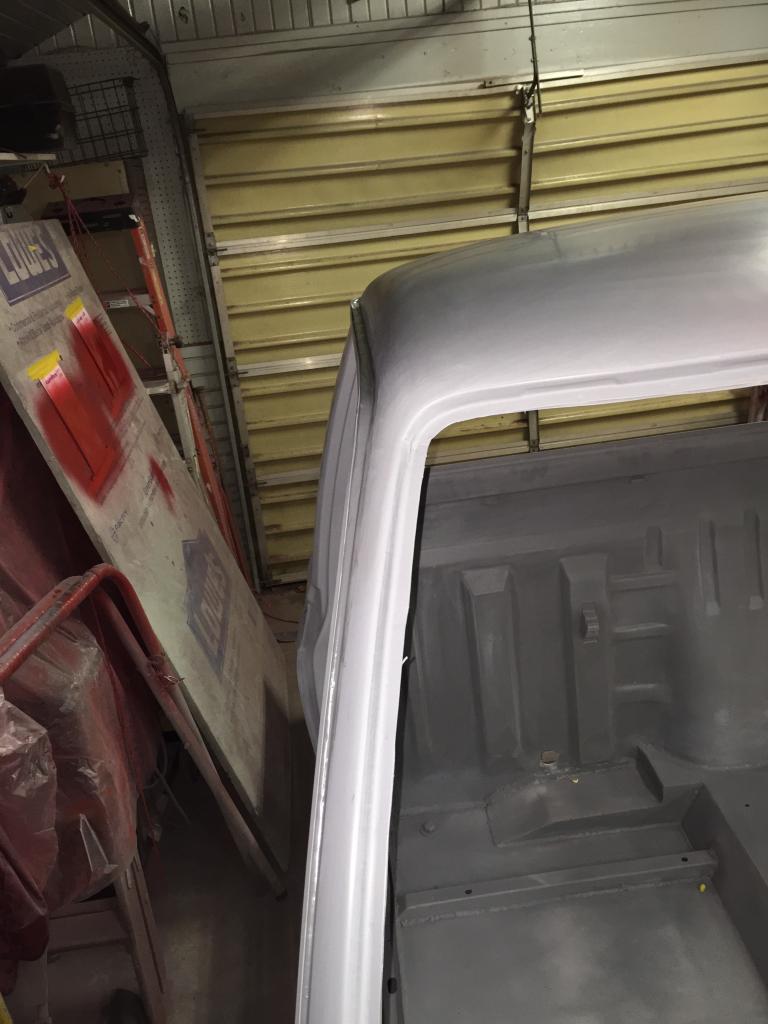
Lots of sanding tonight. Got the whole cab blocked down to 320 grit. This surfacer is great! It sands extremely well and does a great job of filling slight dips in the metal and fills feathered edges of the filler really well. It also shows exactly what has been sanded well enough and what hasn't. Tomorrow night I'll take everything down to 600 grit to get a final paintable surface and maybe get to the seam sealer too.
Oct 22, 2014 | 09:15 AM
#959
Thread Starter
Super Moderator
iTrader: (3)
Joined: Jan 2012
Posts: 3,218
Likes: 26
From: Salisbury, MD
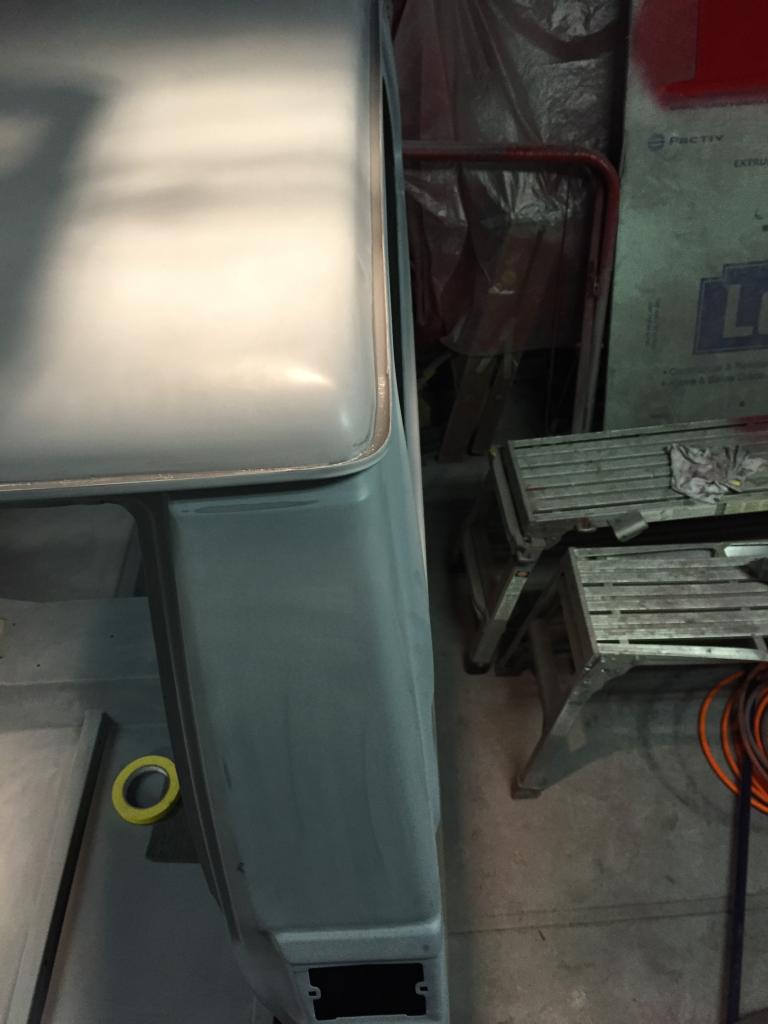
Last night I finished the bulk of the 600 grit sanding on the cab and started some seam sealing. There is A LOT of seam sealing to do so I started with the hard stuff first... the drip rail. I probably should have spent the $25-30 to get a tube of self leveling seam sealer instead of the brushable stuff that I already have, but I figured that I give it a go using some masking tape, acid brushes and pop-sickle sticks. The drip rail is pretty much the only seam sealer that will visible from the exterior (and really not all that visible unless you're 7ft tall) so I wanted it to come out as clean and smooth as possible. I masked off the edges really good and slathered the stuff on the channel making sure to press it down into the seam really well. At first I thought it looked like crap (basically looked like the factory seam sealer, but not my standard) so I wet my finger with some SEMsolve and wiped it smooth and feathered the hard edge a bit. Ended up coming out pretty good, but I just hope that the solvent doesn't yield any adverse affects - I probably should have tested it on something since seam sealer is not fun nor easy to remove. Right about now I sort of wish I would have shaved the drip rail, but it's a little too late to do it now... Here's how it turned out:
Hopefully, I get the rest of the seam sealer done tonight so I can get it painted by the end of the week or this weekend.


Hopefully, I get the rest of the seam sealer done tonight so I can get it painted by the end of the week or this weekend.
Oct 22, 2014 | 02:12 PM
#960

To me the drip rails are an important part of the cab, they don't make them like that anymore and haven't for a long time! I'm sure you won't notice the sealer when it's done, the protection is more important, keep it up can't wait to see it painted and reassembled.


