
KawaZX636's 1983 Toyota Pickup Restoration
 Apr 28, 2014 | 03:55 AM
#621

Registered User
Joined: Oct 2012
Posts: 46
Likes: 0
I'm looking at Raptor lining the tub (fiberglass) of my Trekker. What PSI do you suggest it be sprayed at? Also, any suggestions as far as making it bond properly to the fiberglass?
Build is looking great by the way!!
We just finished the paint on my trekker, it's not too bad for my first paint job. Especially since it was outside, and it'll be more of a rig. Cheap summit 1 stage flat red

Build is looking great by the way!!
We just finished the paint on my trekker, it's not too bad for my first paint job. Especially since it was outside, and it'll be more of a rig. Cheap summit 1 stage flat red
Apr 29, 2014 | 07:40 AM
#624
Thread Starter
Super Moderator
iTrader: (3)
Joined: Jan 2012
Posts: 3,218
Likes: 26
From: Salisbury, MD
50-60 PSI about 12-18" away from the surface tends to provide a relatively smooth surface. Typically, I have applied 3 coats in the past, using to first 2 coats to dial in the desired texture that I want. Usually by the time I start my second coat, I have my pressure and distance figured out so I know how my second and third coat will turn out. As for prep, just follow the instructions on the can - I've always scuffed the paint with 50grit sand paper and used a de-waxer/de-greaser on the surface before I shoot it.
Apr 29, 2014 | 10:02 AM
#625
Thread Starter
Super Moderator
iTrader: (3)
Joined: Jan 2012
Posts: 3,218
Likes: 26
From: Salisbury, MD
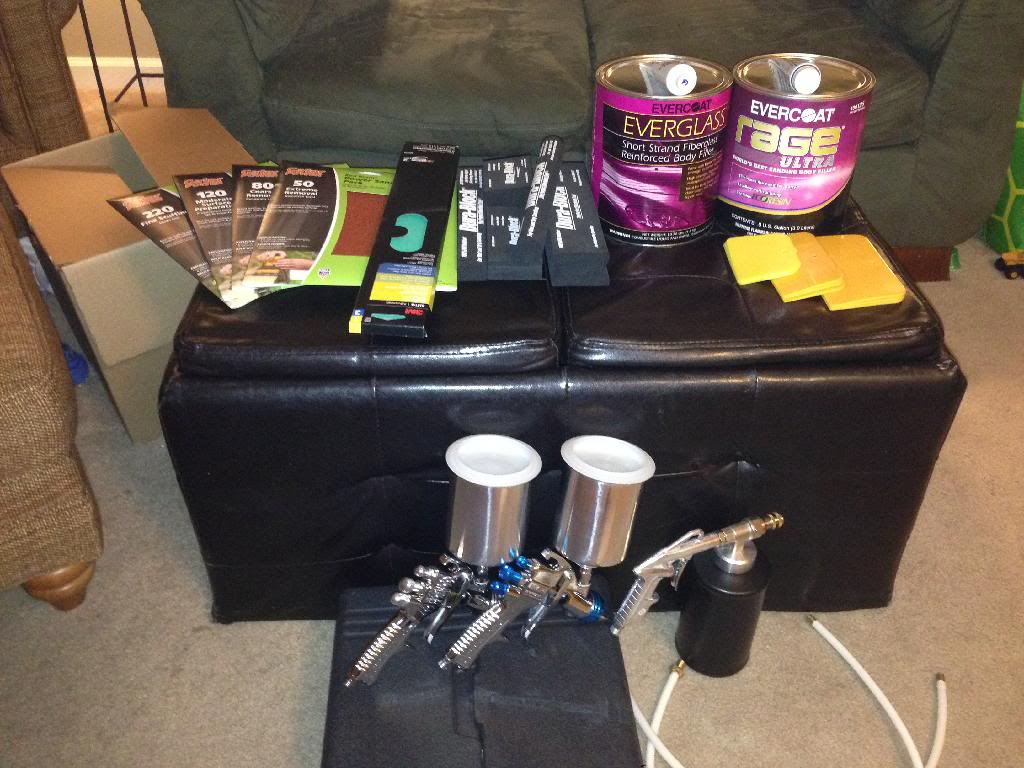
Well fellas, just ordered some more bodywork/paint supplies - EverCoat Everglass (For smoothing out around my battery tray and some other areas I couldn't get the metal work straight), seam sealer, a few more pounds of gloss black powdercoat, epoxy sealer and 2K urethane primer. I already have the EverCoat Rage Ultra bodyfiller and a bunch of sand paper so hopefully I'll be able to get to some "fun" stuff soon! All I should have left to get is the 2K Urethane single stage top coat and some Raptor Liner and I'll have all I need to get this thing looking like a real truck!
In other news, I was paying my bills today and saw that my check to Corey clears so hopefully my BRAND NEW fiberglass bed isn't too far out! I'm sooo ridiculously stoked to see that thing!!!
In other news, I was paying my bills today and saw that my check to Corey clears so hopefully my BRAND NEW fiberglass bed isn't too far out! I'm sooo ridiculously stoked to see that thing!!!


 Apr 29, 2014 | 05:33 PM
#627

Banned
iTrader: (7)
Joined: Apr 2014
Posts: 292
Likes: 0
From: I ship from New London Connecticut I PriceMatch
Your build has came a long way. can't wait to get my custom california fiberglass fenderflare bed on
I couldn't have gotten as far without the help of my friends, including the online crowd ^_^
I couldn't have gotten as far without the help of my friends, including the online crowd ^_^
Apr 29, 2014 | 07:27 PM
#628
Thread Starter
Super Moderator
iTrader: (3)
Joined: Jan 2012
Posts: 3,218
Likes: 26
From: Salisbury, MD
Shoot Corey, I forgot to tell you that I solved my battery tray woes already.˟˟As much as I appreciate your offer, don't sweat sending out the battery tray. I ended up cutting out the factory tray and fabricating a steel "platform" for the battery to bolt down on.˟˟Made a perfect fit! I just need to clean it up a bit around the edges with some short strand fiberglass and it should be good to go. Here are some shots of it so you don't have to scroll back:
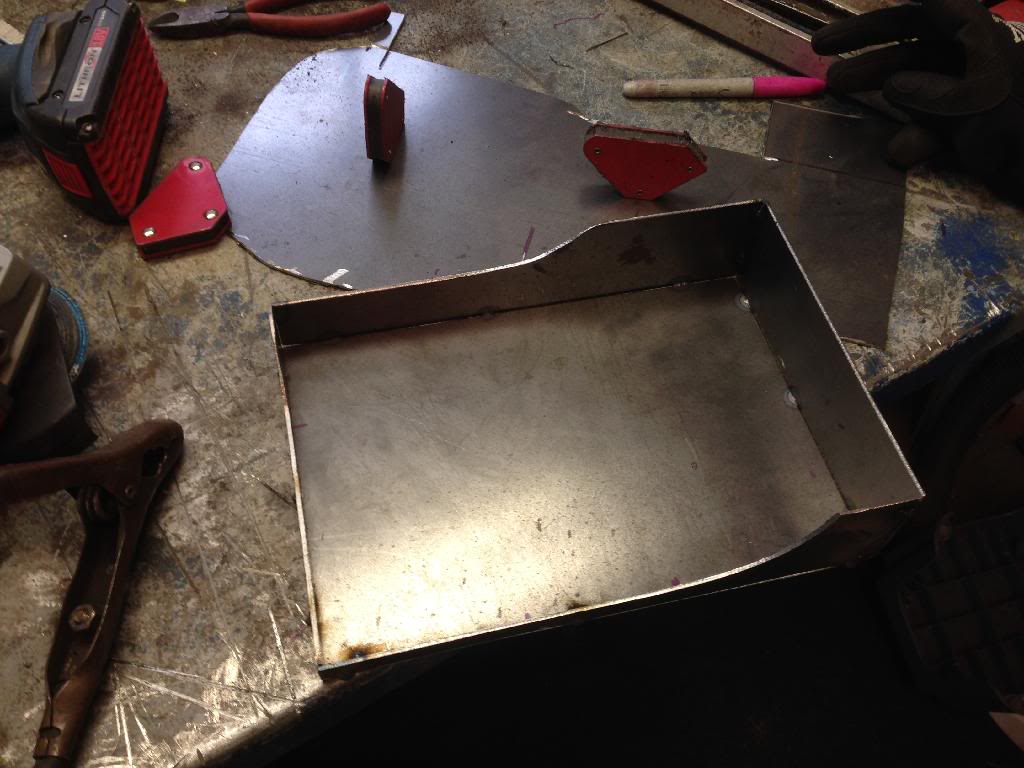
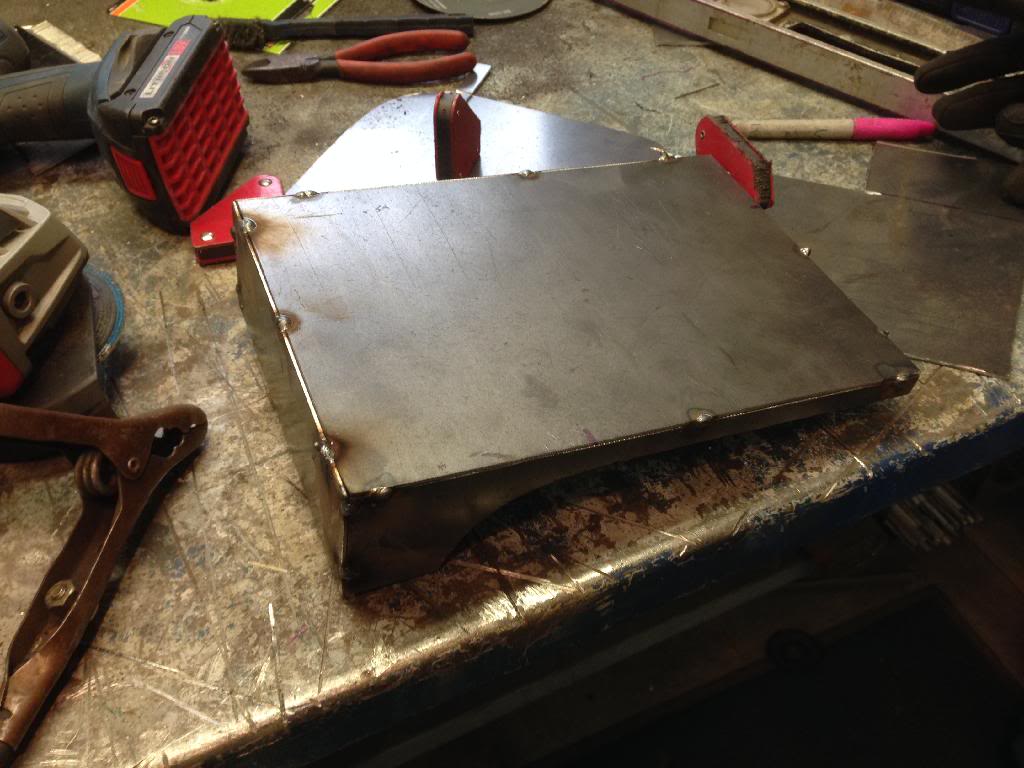
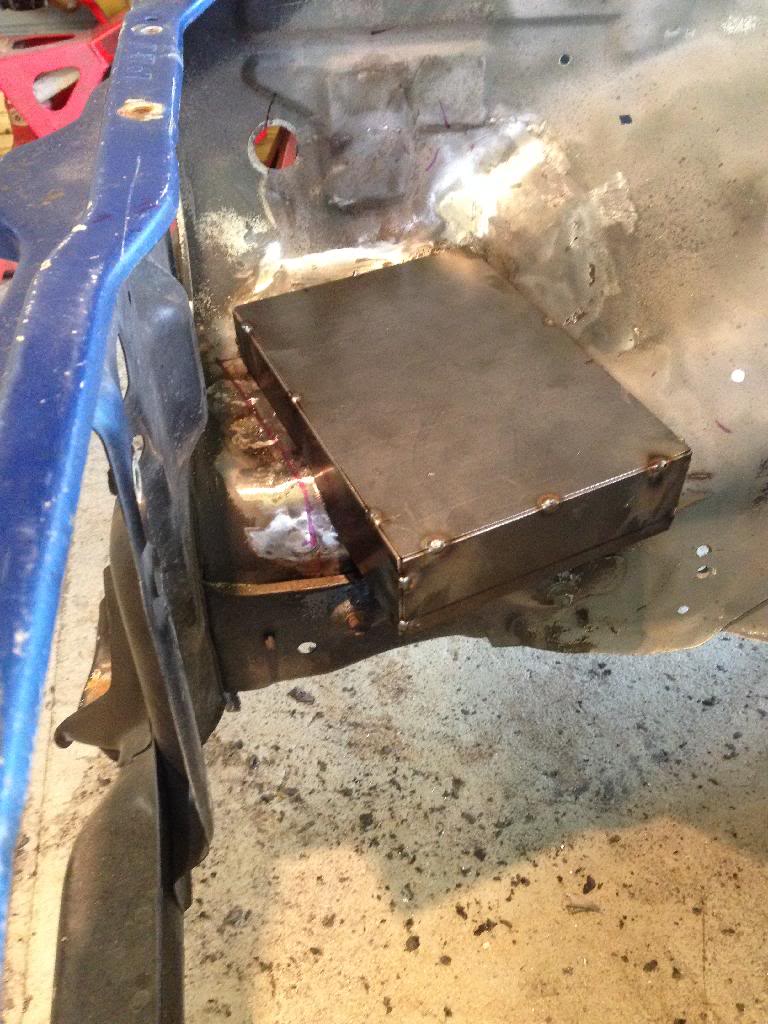
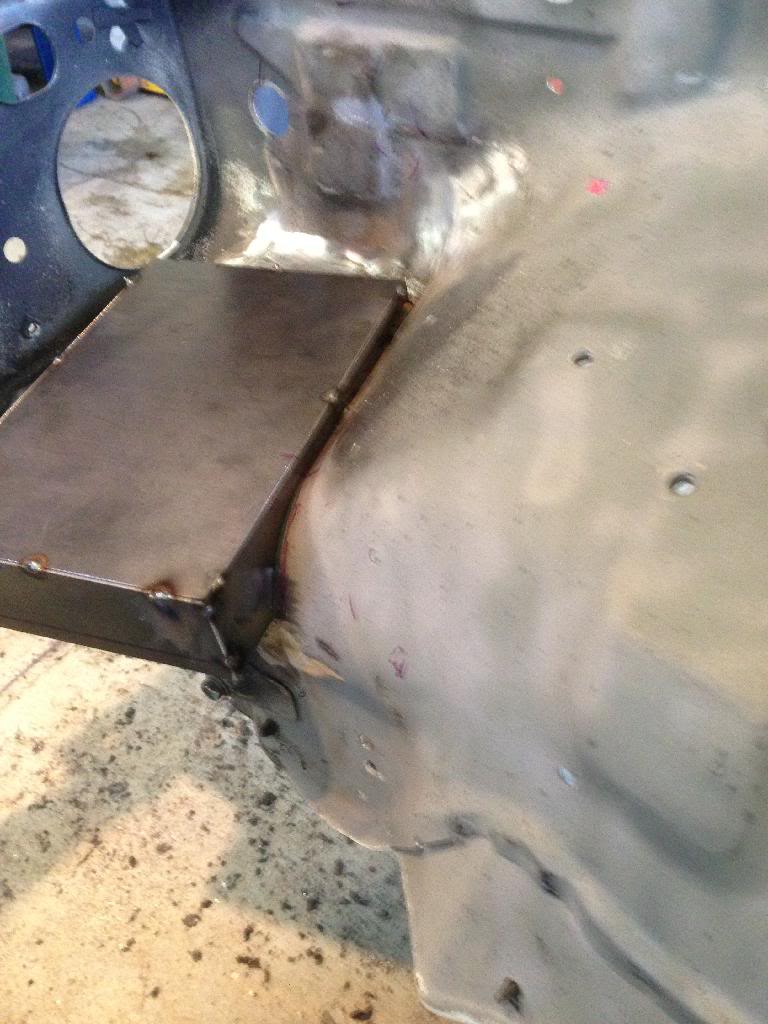
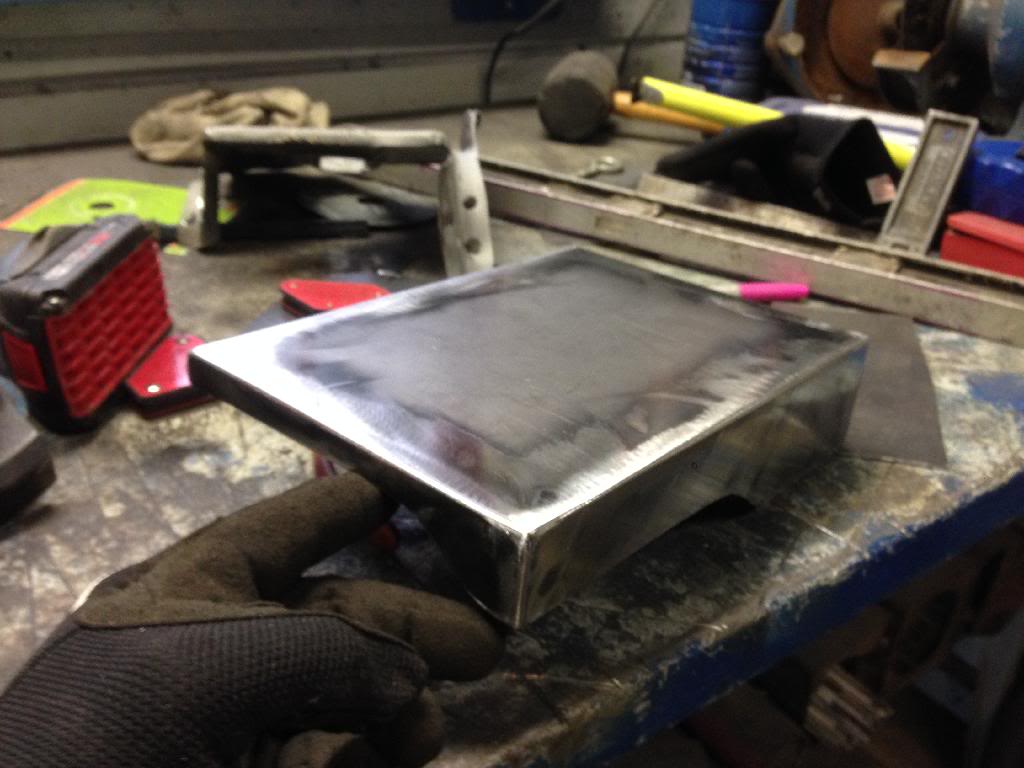
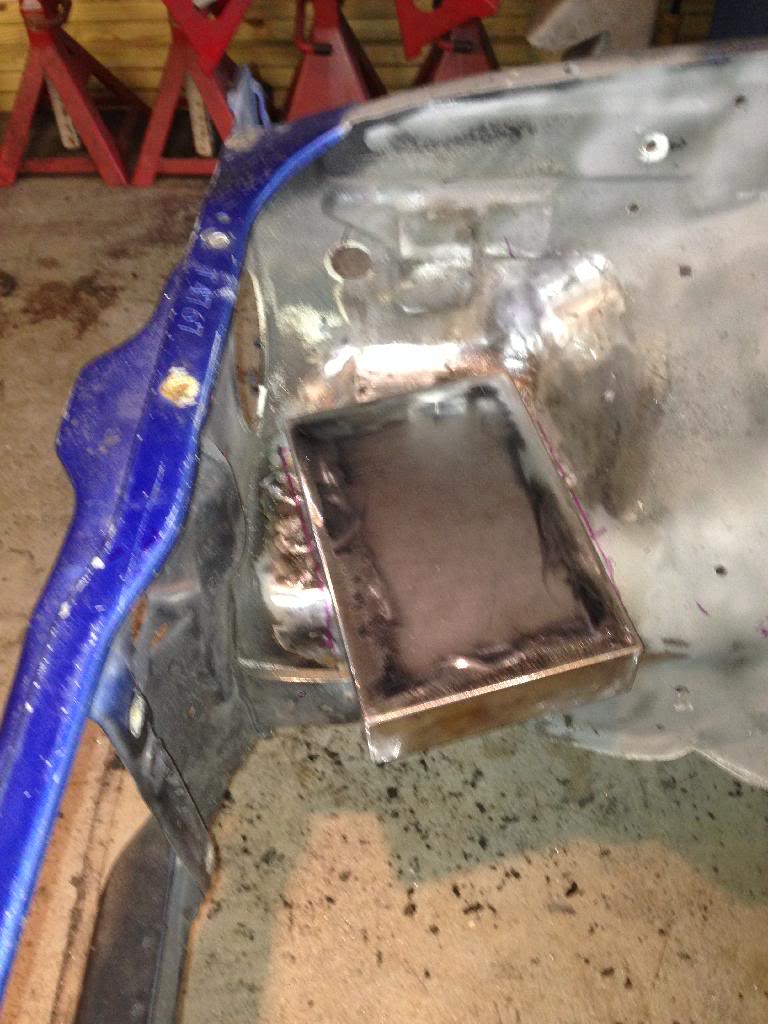
No doubt that your FRP tray would have done the job well, but I enjoyed the problem solving and fabrication on this one!
I also collected some of my body work materials and tools today!˟˟Epoxy and 2K Primer/surfacer are on the way too!
No doubt that your FRP tray would have done the job well, but I enjoyed the problem solving and fabrication on this one!
I also collected some of my body work materials and tools today!˟˟Epoxy and 2K Primer/surfacer are on the way too!
 Apr 30, 2014 | 05:32 PM
#631
hey , no worries Dave .. free part I don't have to send out ..
I get it , I love to solve the problems and make a "replacement" as well this is the core of my business .
your trey looks GREAT ! but what about the J bolt hold down ?
.
I get it , I love to solve the problems and make a "replacement" as well
this is the core of my business . your trey looks GREAT ! but what about the J bolt hold down ?
.
Last edited by slacker; Apr 30, 2014 at 05:34 PM.
 May 1, 2014 | 10:37 AM
#635
Thread Starter
Super Moderator
iTrader: (3)
Joined: Jan 2012
Posts: 3,218
Likes: 26
From: Salisbury, MD
I figured that you'd notice that. I originally intended to weld a nut on the back side of the tray so I could bolt down the battery instead of using the J-Bolt, but I got carried away and forgot to do it before I welded it on. So now I'm either going to nutcert it or I'm going to drill a couple holes in the tray for the J bolt to route down and back up through. I donated my battery to my brother's CJ7 (what a lucky Jeep to have a once Toyota battery!) so I'm going to wait until I have the new battery before I drill the holes so it's mocked up properly.
I'd love to see some paint too! Copyright infringe all you want, I've done my fair share off of Corey and still have a little more to do... like that smoothie valance that I haven't got to yet!
Nah, he definitely got paid plenty and I'm getting one hell of a product. He's just being a good businessman and treating his customers well because he knows that I'll be back whenever I need something in the future.
Sure, go here: http://www.toyotafiberglass.com/truck_12.html
They are about $45
Nah, he definitely got paid plenty and I'm getting one hell of a product. He's just being a good businessman and treating his customers well because he knows that I'll be back whenever I need something in the future.
Sure, go here: http://www.toyotafiberglass.com/truck_12.html
They are about $45
May 1, 2014 | 05:43 PM
#637
Registered User
Joined: Feb 2014
Posts: 351
Likes: 0


