
KawaZX636's 1983 Toyota Pickup Restoration
 Nov 26, 2013 | 08:42 PM
#422
Thread Starter
Super Moderator
iTrader: (3)
Joined: Jan 2012
Posts: 3,218
Likes: 26
From: Salisbury, MD
It would be a tight squeeze. Not going to lie though, doing the tunnel, floorpan, console and gauge pod have been some of the easiest things I have done on my truck. It may look difficult and complicated, but it's really just more time consuming than anything. I planned it out really thoroughly so it has gone extremely smooth.
Nov 27, 2013 | 09:59 AM
#424
Thread Starter
Super Moderator
iTrader: (3)
Joined: Jan 2012
Posts: 3,218
Likes: 26
From: Salisbury, MD
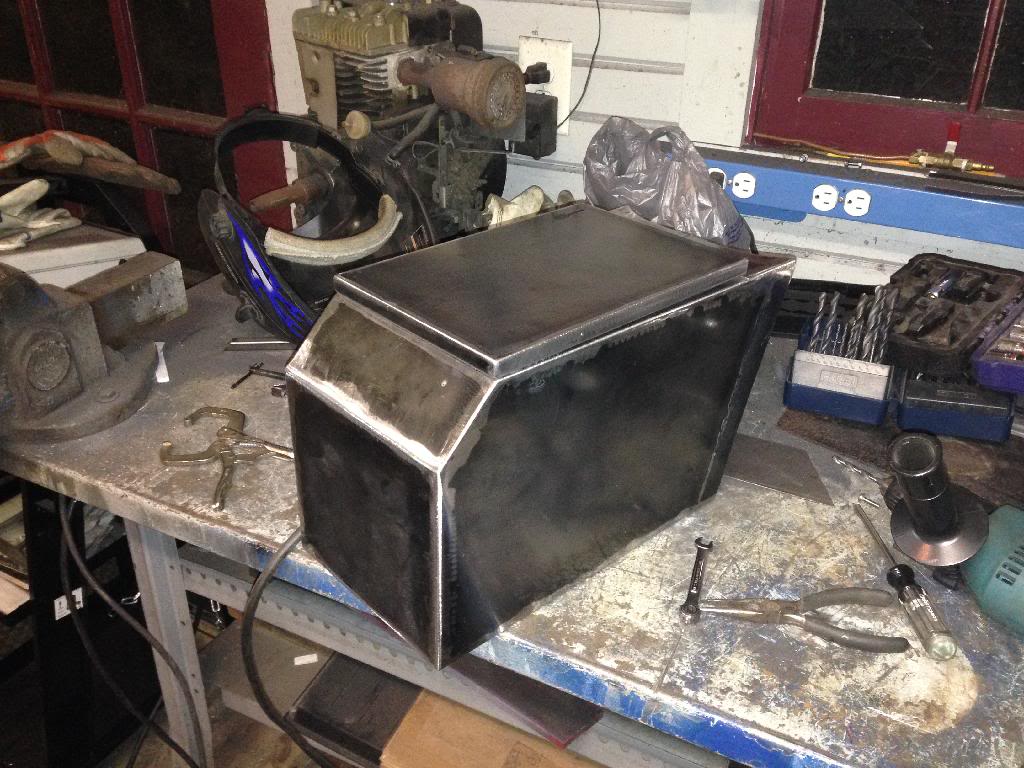
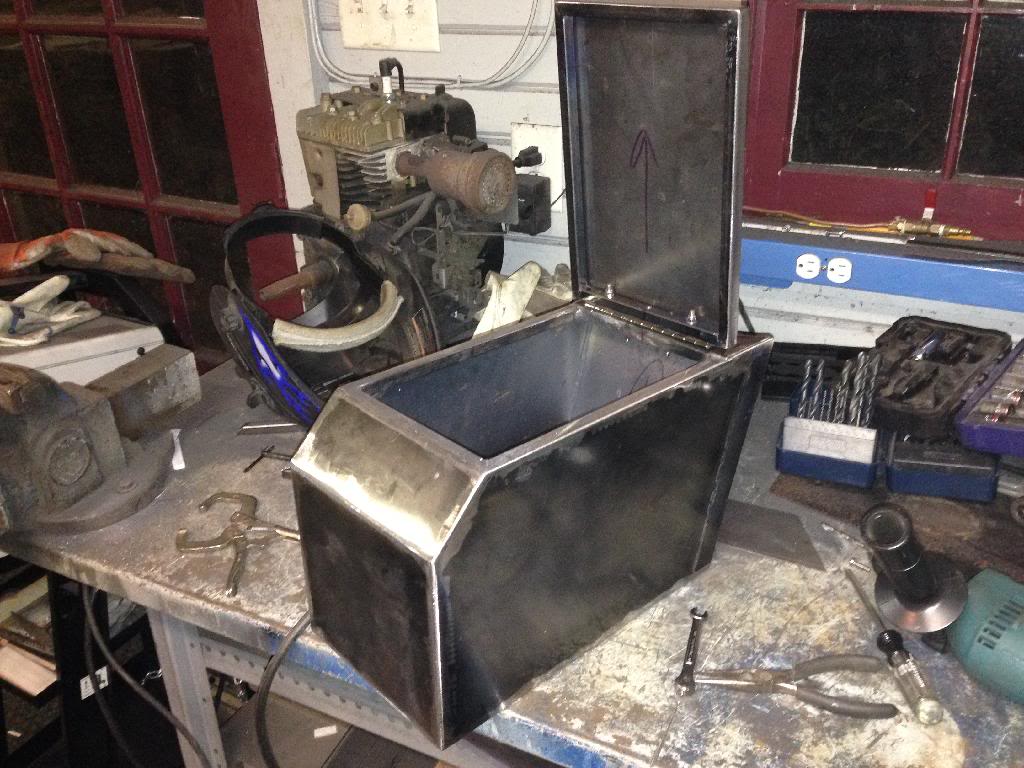
The console is just small enough to fit in the oven so I'm going with my mantra of "if it can fit in the oven, it will be powdercoated." I'm figuring that I will be making a lid for it out of steel and then powdercoating that too. If I decided that I want a nice fluffy upholstered top on it, I can always do that later.
Nov 27, 2013 | 08:36 PM
#425
Thread Starter
Super Moderator
iTrader: (3)
Joined: Jan 2012
Posts: 3,218
Likes: 26
From: Salisbury, MD
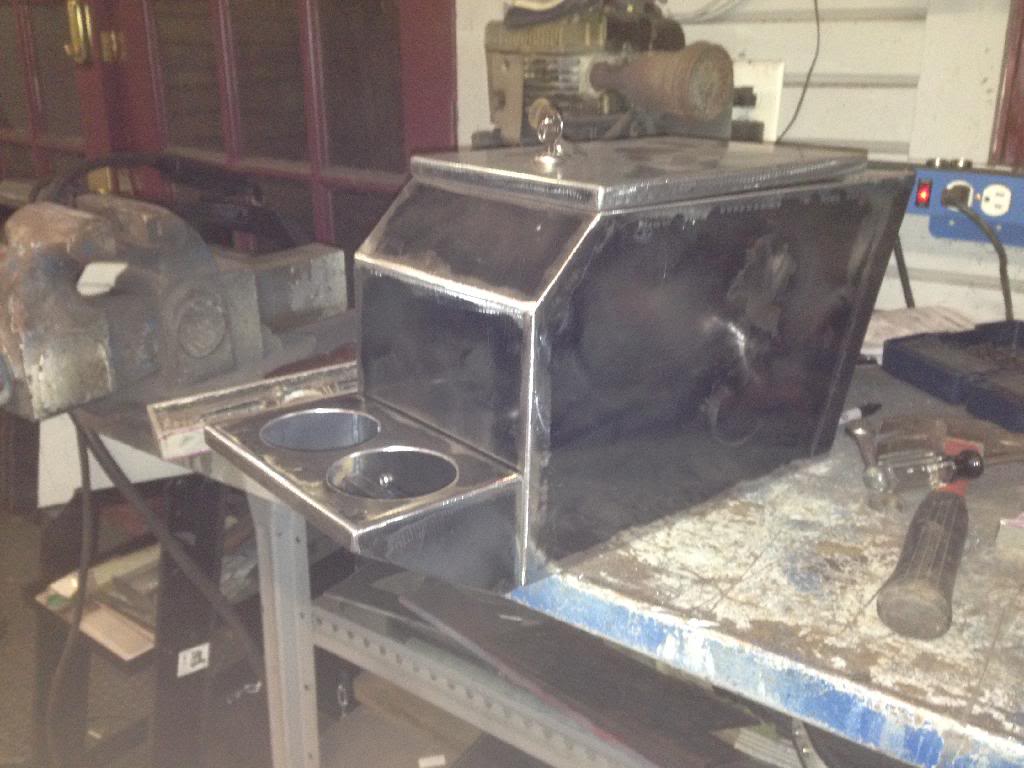
Fabricated my console lid tonight. I used some 3/4" steel square tube to make a frame for the lid. I then welded a sheet of 14 gauge sheet steel on top and ground the welds flat and slightly rounded the corners.

I mounted it to the console using a continuous hinge and stainless pancheese bolts and lock nuts. I mounted the lid about 1/8" high so I can put some type of foam stripping to cushion the lid so it doesn't bang shut or rattle.
Here's how it looks in the cab (I even mounted a little lock cylinder)
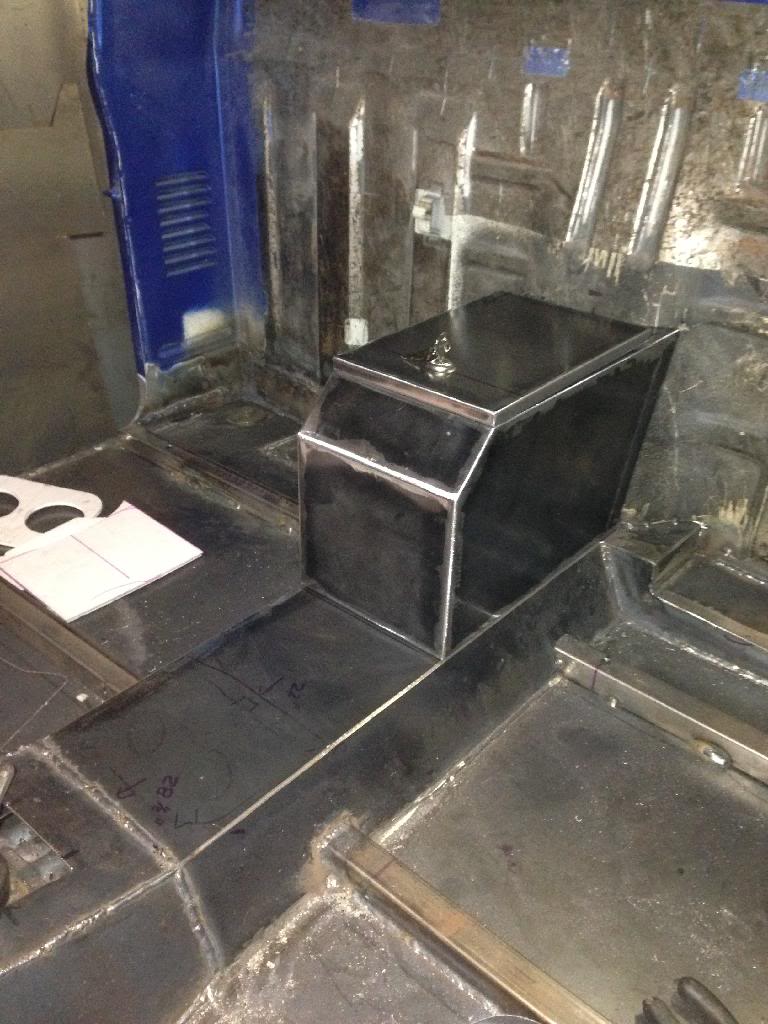

I'm pretty satisfied with the outcome. While it is a custom piece, it looks like it belongs there. Just have to powdercoat it and it's done. I think I'm going to come up with a alternative idea for the cupholder though - I've got some thinking to do...

I mounted it to the console using a continuous hinge and stainless pancheese bolts and lock nuts. I mounted the lid about 1/8" high so I can put some type of foam stripping to cushion the lid so it doesn't bang shut or rattle.


Here's how it looks in the cab (I even mounted a little lock cylinder)


I'm pretty satisfied with the outcome. While it is a custom piece, it looks like it belongs there. Just have to powdercoat it and it's done. I think I'm going to come up with a alternative idea for the cupholder though - I've got some thinking to do...
Nov 30, 2013 | 12:56 PM
#426
Thread Starter
Super Moderator
iTrader: (3)
Joined: Jan 2012
Posts: 3,218
Likes: 26
From: Salisbury, MD
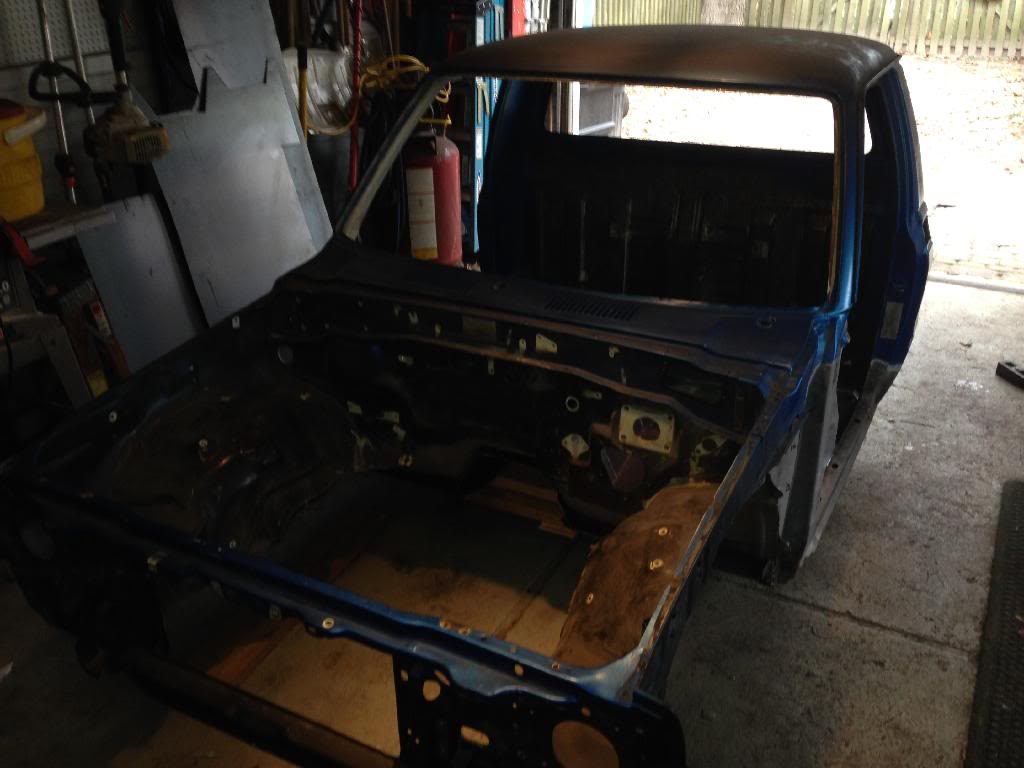
I popped the cab back off again today. Went a little smoother this time using my engine hoist with my Pops' help. Just hoisted up the front by the body mounts and I lifted the rear while my Pops rolled the chassis out from underneath the cab. Then just lowered it onto my dolly and rolled it back in the garage. Got lots of welding still to do, but it should be easier now. I did get a little freaked out because it has been a little cold here lately so when I start heating up the garage when I am welding and grinding, I have been causing condensation to accumulate on the cold metal. So a lot of my bare metal on the chassis got some surface rust on it. My front and rear calipers (I was planning on powdercoating them), rotors, t-case base plate, etc got hit up with some light surface rust. While those things aren't really a big deal, I was mostly concerned with thinking that my cylinder walls in my freshly rebuilt engine were affected. When I parked it in storage, I cranked the engine a couple times and didn't feel anything abnormal so I think everything is ok.
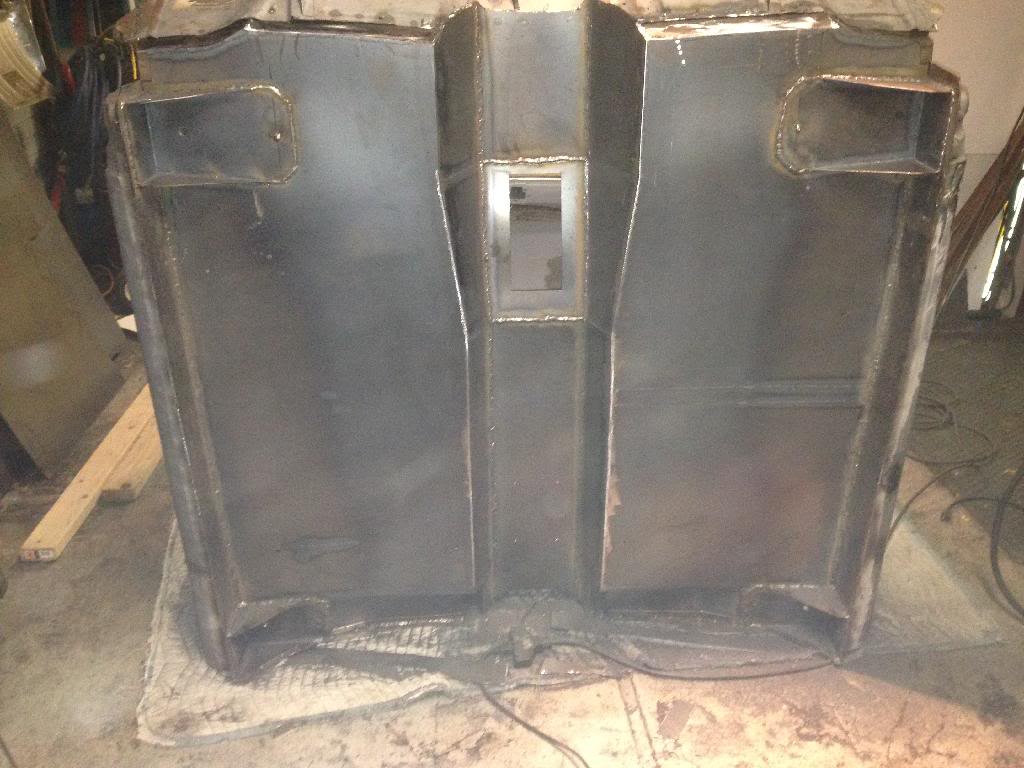
He's some shots of the dismounted body:
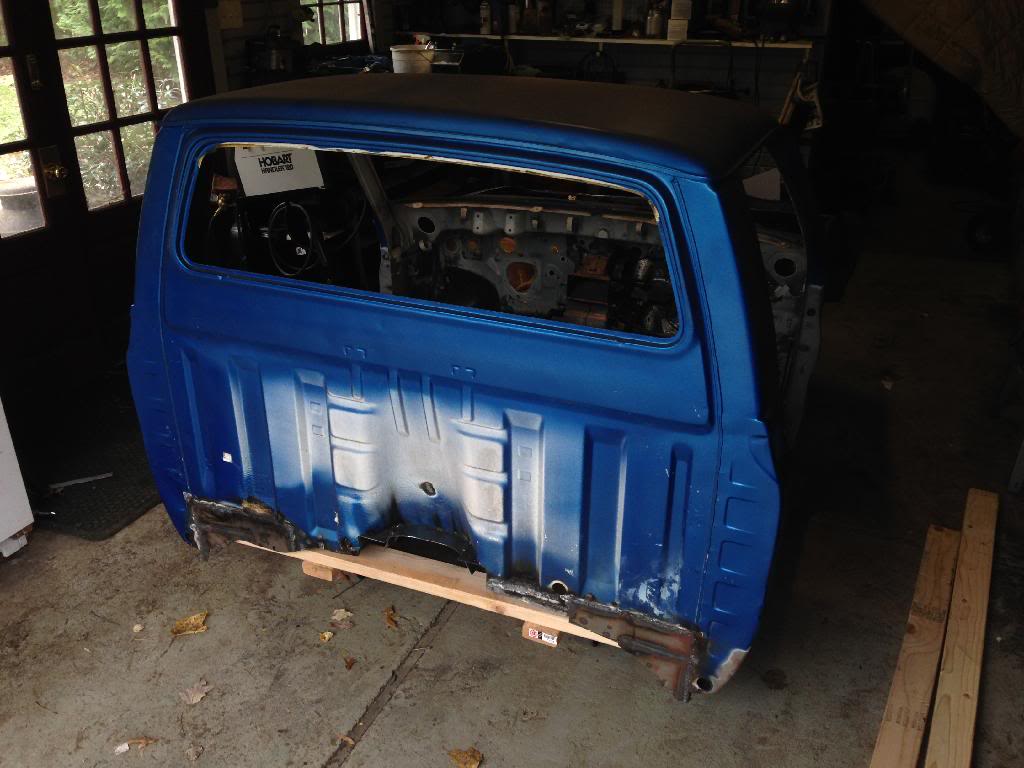
And the chassis back to storage:
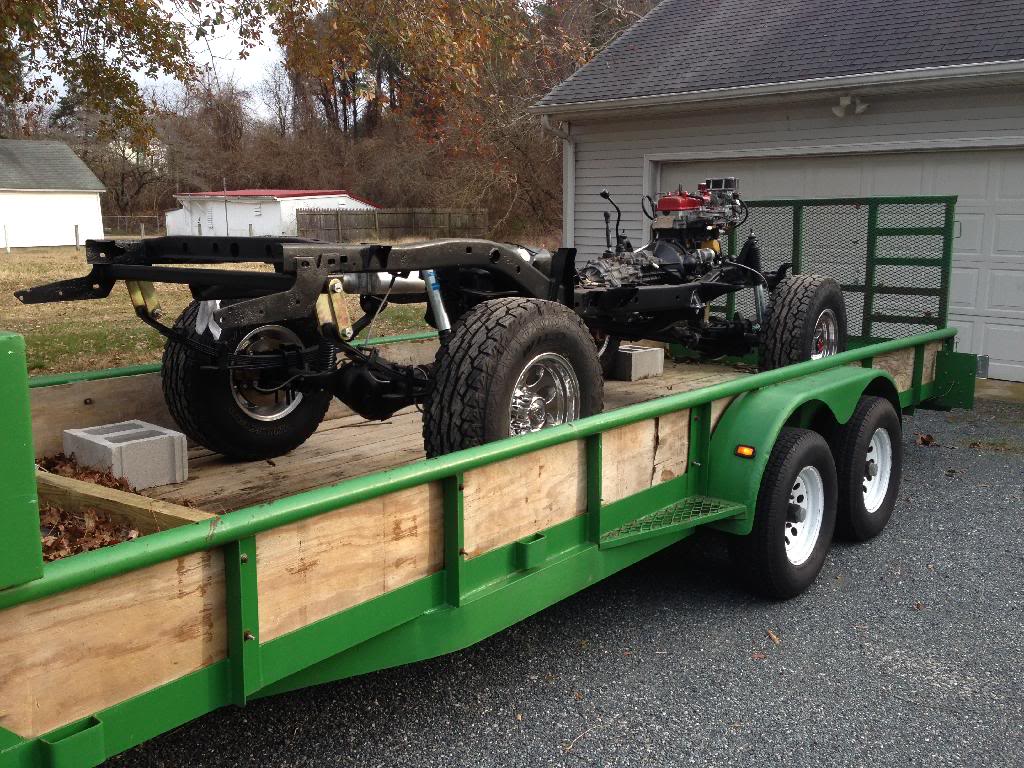
Now for some serious welding sessions...
He's some shots of the dismounted body:


And the chassis back to storage:

Now for some serious welding sessions...
Last edited by kawazx636; Nov 30, 2013 at 12:59 PM.
Nov 30, 2013 | 09:24 PM
#427
Thread Starter
Super Moderator
iTrader: (3)
Joined: Jan 2012
Posts: 3,218
Likes: 26
From: Salisbury, MD
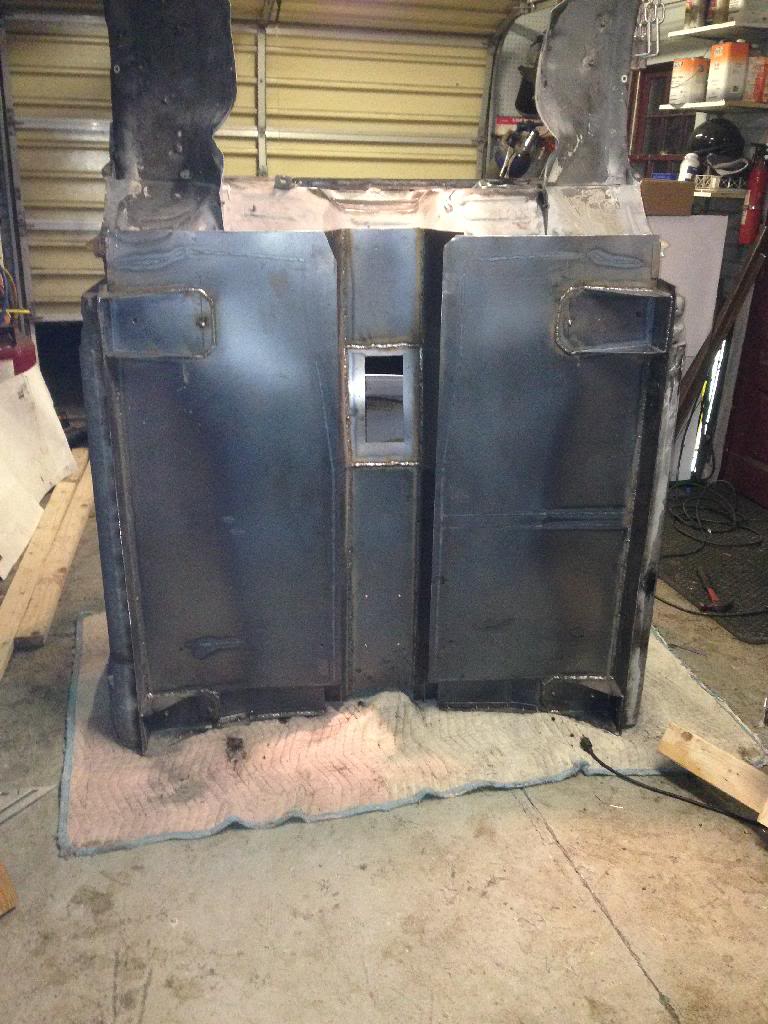
I welded on mounting tabs and powdercoated the gauge pod tonight. Turned pretty good.

Also started welding up the bottom of the floorpan. I got the body mounts, the floorpan where it meets the back of the rock panels and part of the tunnel burned in. I still have to trim back the floorpan where it meets up to the tunnel and firewall and the tunnel where it meets the firewall and rear cab wall.
I beginning to think that my welder is starting to kick the bucket. It seems like the amperage is surging or something while I'm welding - my weld pool is traveling up my wire as if my wire speed is too slow causing me to lose my arc. I've tried changing the heat and speed, but it isn't helping. Not too sure what is causing it, but I might head out tomorrow to invest in a new one. I'll probably look for a good 220V Miller so I have more options.


Also started welding up the bottom of the floorpan. I got the body mounts, the floorpan where it meets the back of the rock panels and part of the tunnel burned in. I still have to trim back the floorpan where it meets up to the tunnel and firewall and the tunnel where it meets the firewall and rear cab wall.

I beginning to think that my welder is starting to kick the bucket. It seems like the amperage is surging or something while I'm welding - my weld pool is traveling up my wire as if my wire speed is too slow causing me to lose my arc. I've tried changing the heat and speed, but it isn't helping. Not too sure what is causing it, but I might head out tomorrow to invest in a new one. I'll probably look for a good 220V Miller so I have more options.
Nov 30, 2013 | 10:10 PM
#428
Registered User
Joined: May 2010
Posts: 2,587
Likes: 7
From: Ofallon Missouri
Superb as usual. I can actually see your welds getting better and better and better...after this is done you will have your Yotatech welding certificate.
Im shopping welders right now as well. Probably go Hobart again. We will see.
Im going to look at a 79 in the morning and bringing a freind to harvest parts. Maybe it will have a solid floor.
Im shopping welders right now as well. Probably go Hobart again. We will see.
Im going to look at a 79 in the morning and bringing a freind to harvest parts. Maybe it will have a solid floor.
Dec 3, 2013 | 09:24 PM
#429
Thread Starter
Super Moderator
iTrader: (3)
Joined: Jan 2012
Posts: 3,218
Likes: 26
From: Salisbury, MD
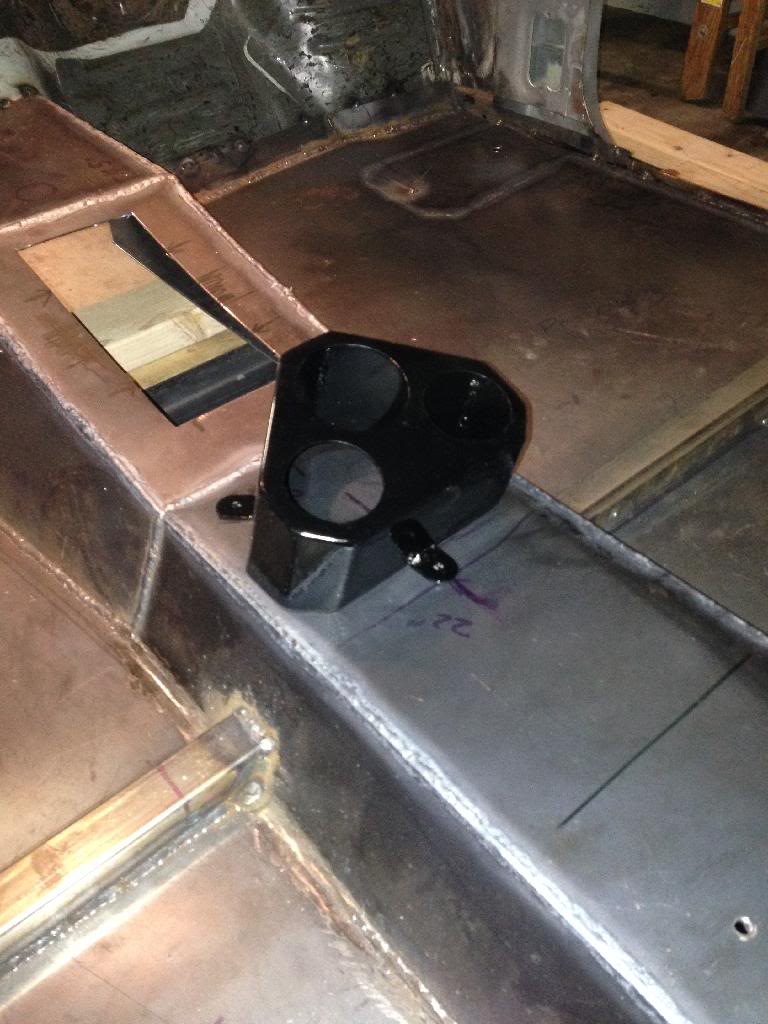
What's the biggest problem with first gen Toyota pickup interior design?! NO CUP HOLDERS!! Fixed that tonight. Came up with a different design than what I initially came up with, but I think this will work better:
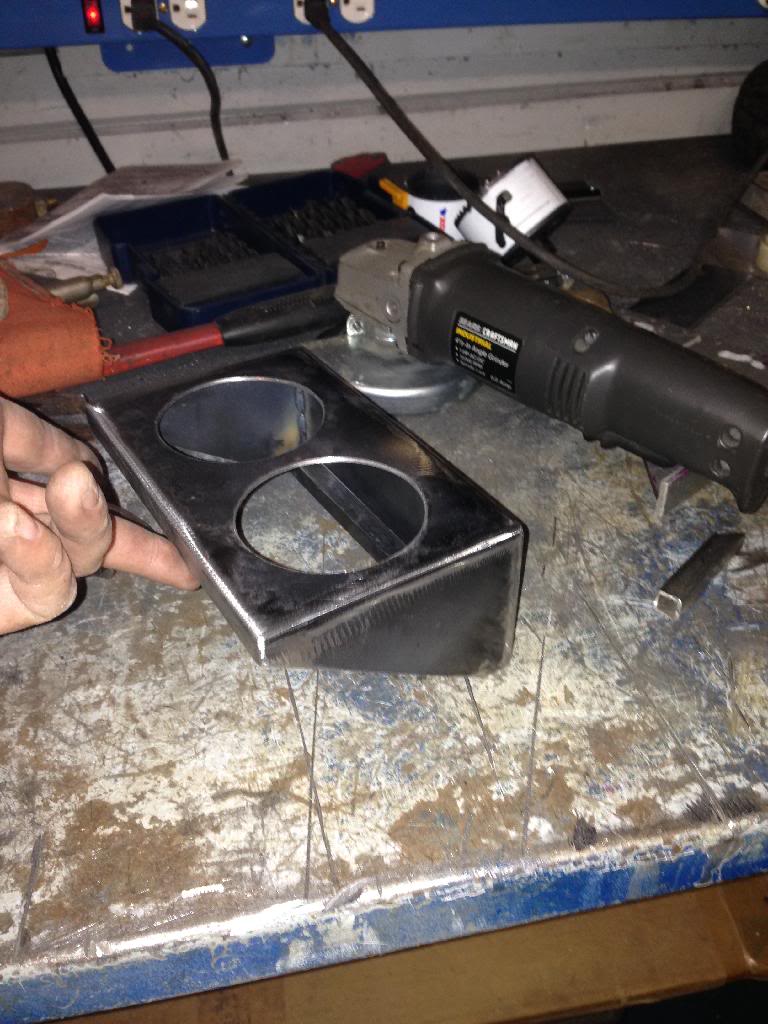
I decided not to weld the cup holder to the console so I mounted to console using M5x15 stainless pancheese bolts and lock nuts. Turned out pretty slick looking and should look even better when everything is painted or powdercoated:
Console, cup holder and gauge pod all plopped into place:

Cupholder test (didn't have a beer handy):
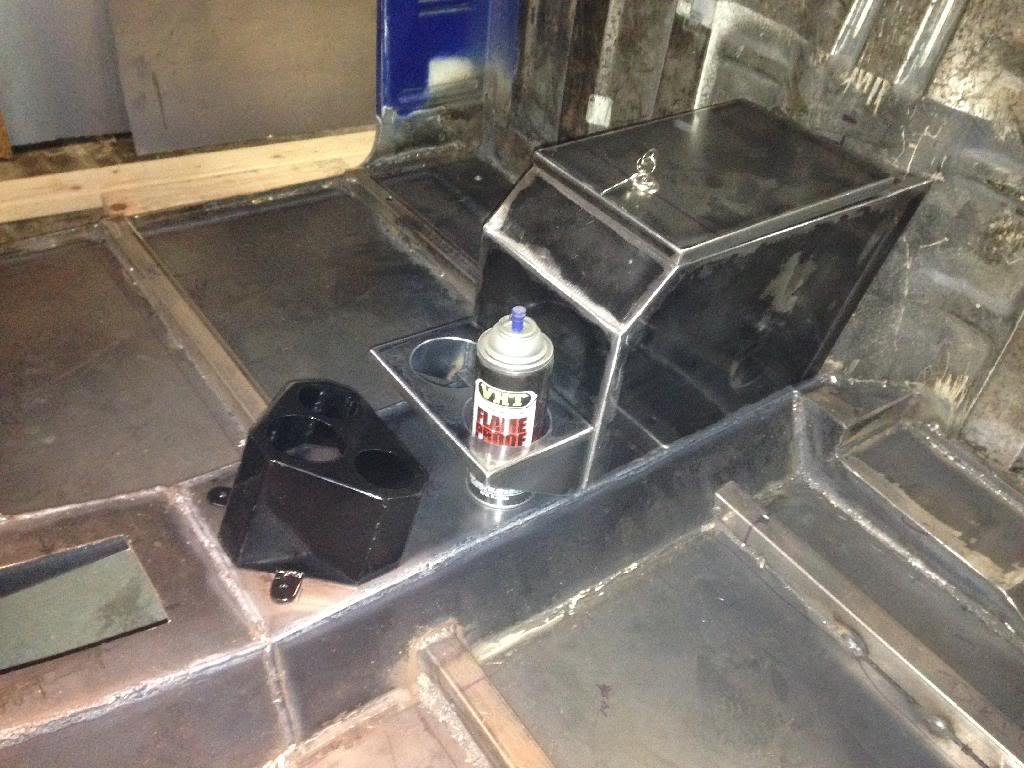
Floorpan trimmed up around the tunnel and firewall:
I started to lay down some of the final welds, but simultaneously ran out of wire and argon so I have to head to the welding supply shop tomorrow to re-up. I also figured out what was wrong with my welder (I hope). Turns out that the ground in the box was loose causing me to get a bad ground on my welding. I still want to get a 220v welder, but I can wait for a little bit now. Sooooo...instead I went out and bought a new 64gb iPad Air with that money. Now I can post my progress from anywhere, like I am now from the shop!
I decided not to weld the cup holder to the console so I mounted to console using M5x15 stainless pancheese bolts and lock nuts. Turned out pretty slick looking and should look even better when everything is painted or powdercoated:
Console, cup holder and gauge pod all plopped into place:
Cupholder test (didn't have a beer handy):
Floorpan trimmed up around the tunnel and firewall:
I started to lay down some of the final welds, but simultaneously ran out of wire and argon so I have to head to the welding supply shop tomorrow to re-up. I also figured out what was wrong with my welder (I hope). Turns out that the ground in the box was loose causing me to get a bad ground on my welding. I still want to get a 220v welder, but I can wait for a little bit now. Sooooo...instead I went out and bought a new 64gb iPad Air with that money. Now I can post my progress from anywhere, like I am now from the shop!
Last edited by kawazx636; Dec 3, 2013 at 09:27 PM.
Dec 5, 2013 | 05:46 AM
#430
Just got caught up on your thread, awesome work, really impressed by your fab skills! Just wondering where you got the lock cylinder for your console, is that something you just picked up at the hardware store? I need to find one, I'm building a replacement console for my 86' 4runner, if it turns out good, might have to do one for my 83' too, lol. Again, amazing job!
Dec 5, 2013 | 06:52 AM
#431
Thread Starter
Super Moderator
iTrader: (3)
Joined: Jan 2012
Posts: 3,218
Likes: 26
From: Salisbury, MD
The lock cylinder is just something I picked up at the hardware store. It worked out perfectly. If you want a console like mine, I have a template drawn up that I can send to you. It was a relatively easy piece to make if you know how to cut steel and weld.
Dec 5, 2013 | 07:18 AM
#432
Thread Starter
Super Moderator
iTrader: (3)
Joined: Jan 2012
Posts: 3,218
Likes: 26
From: Salisbury, MD
I got some more Argo/CO2 and wire yesterday so last night I cut a couple pieces of steel for the sections where the rocker panels meet up with the fender wells and welded them in. The only fabrication that I have left to do is to address the smoothie cowl and the kick panels. I have about a 1" gap where the kick panels should meet up with the floor because I had some rusted metal to cut out. I should be able to just cut a sheet of steel to fit in there over the gap and weld it in.
I also laid the final welds on the floorpan and seat mounts - I still have a little bit to burn in where the firewall meets the floorpan/tunnel, but most of the welding is done.
Here's my note to self of my to-do list:
-Fix kick panels
-Weld in patches for smoothie cowl
-Inspect battery tray for PO stupidity
-Trim floorpan even with rear cab wall
-Finish welding floorpan to rear cab wall
-Weld in seat belt nuts
-Final spot weld and clean up of rocker panels
-Clean up & grind down interior welds
I think that is it, and then I can sandblast it and prep it for some epoxy sealer

 Dec 6, 2013 | 11:50 AM
#437
Thanks, I appreciate the offer, but I'm still running the bench seat in mine, so I'll probably have to change the design a bit. It will probably be awhile till I get to my 83' I got just enough 14ga sheet metal to do the console in my 86 4runner. Anyway, look forward to seeing more pics of your build!


 Dec 6, 2013 | 05:28 PM
#439
Thread Starter
Super Moderator
iTrader: (3)
Joined: Jan 2012
Posts: 3,218
Likes: 26
From: Salisbury, MD
Thanks Corey! I was always told to shoot epoxy sealer and then seam seal it. Do you do it differently? If so, any particular reason? I'm going to need a bed soon too, is it done yet!? LOL I'm probably going to drop another check in the mail with your name on it soon, just have to get my wife to wrap up Christmas shopping to see where I stand financially.


