
KawaZX636's 1983 Toyota Pickup Restoration
 Oct 26, 2013 | 07:07 PM
#342
Thread Starter
Super Moderator
iTrader: (3)
Joined: Jan 2012
Posts: 3,218
Likes: 26
From: Salisbury, MD
Sometimes I do! LOL
I got some garage time today, but got cut short when my friend stopped by and convinced me to go play golf with him. So instead of getting a lot of work done on my truck, I got half of what I wanted to get done, lost a dozen golf balls and raised more speculation as to why I still TRY to play golf...
I did manage to finish fabbing up the back side of the rocker panels and the "Ledge" for the floor pan. The back side of the rockers got tacked in and I just clamped up the body mounts for now; I wanted to do some measuring before I tacked them in. The panels that I tacked in still need to be trimmed back even with the rocker panels so they still hang over an inch or so for now.
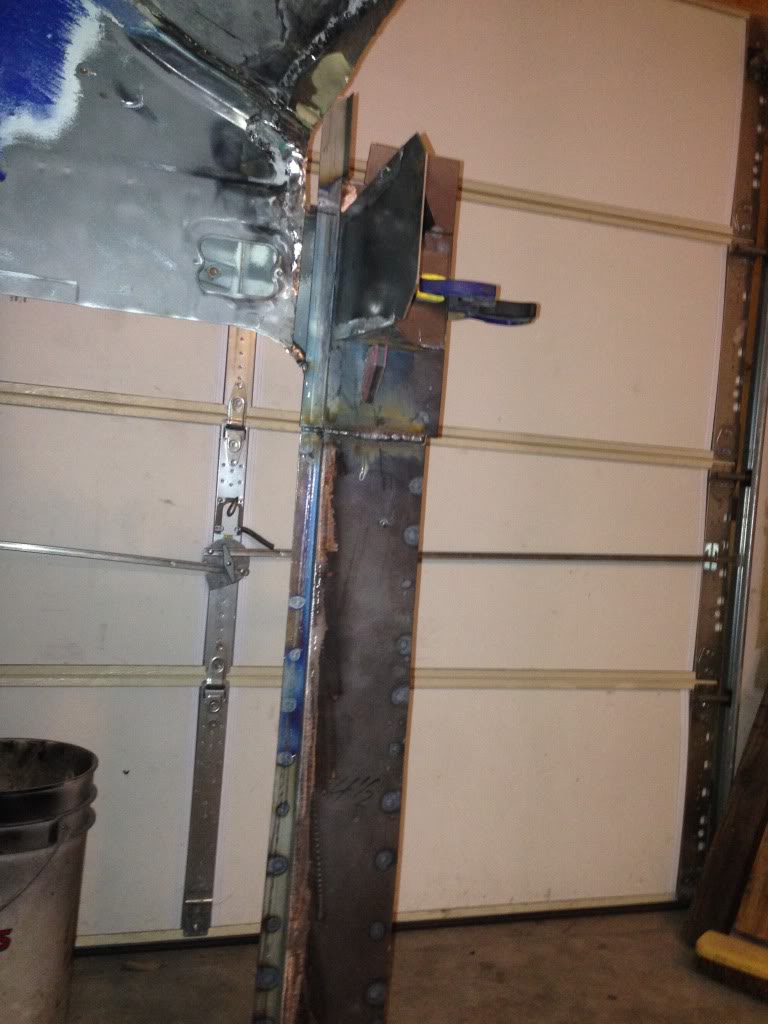
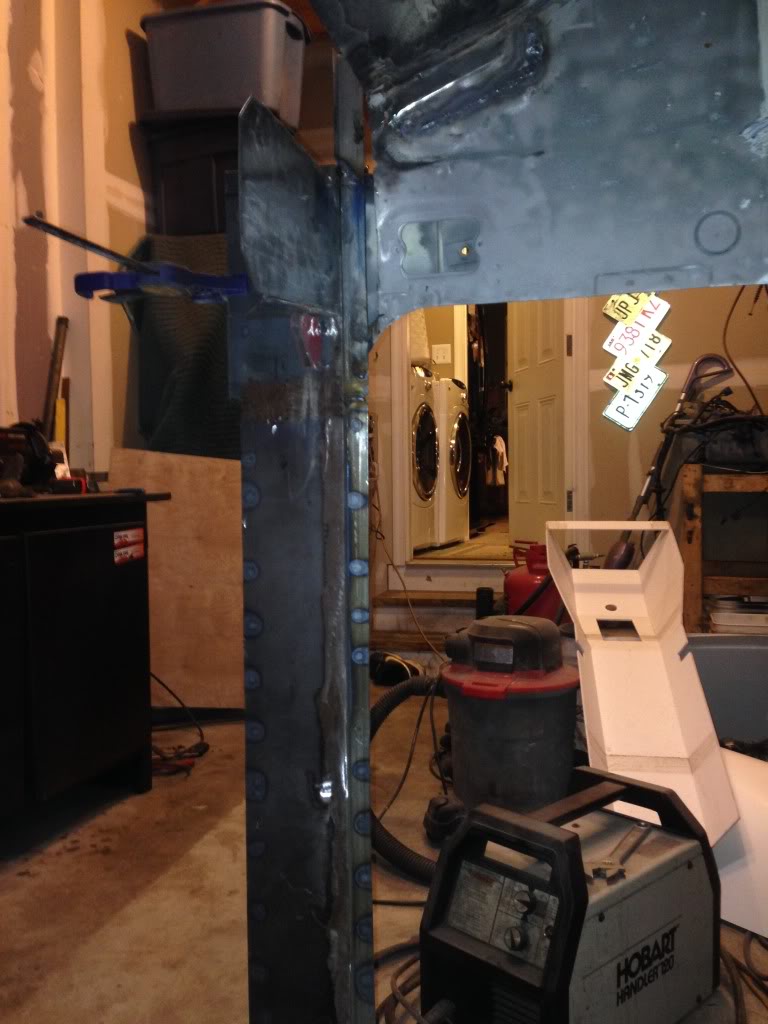
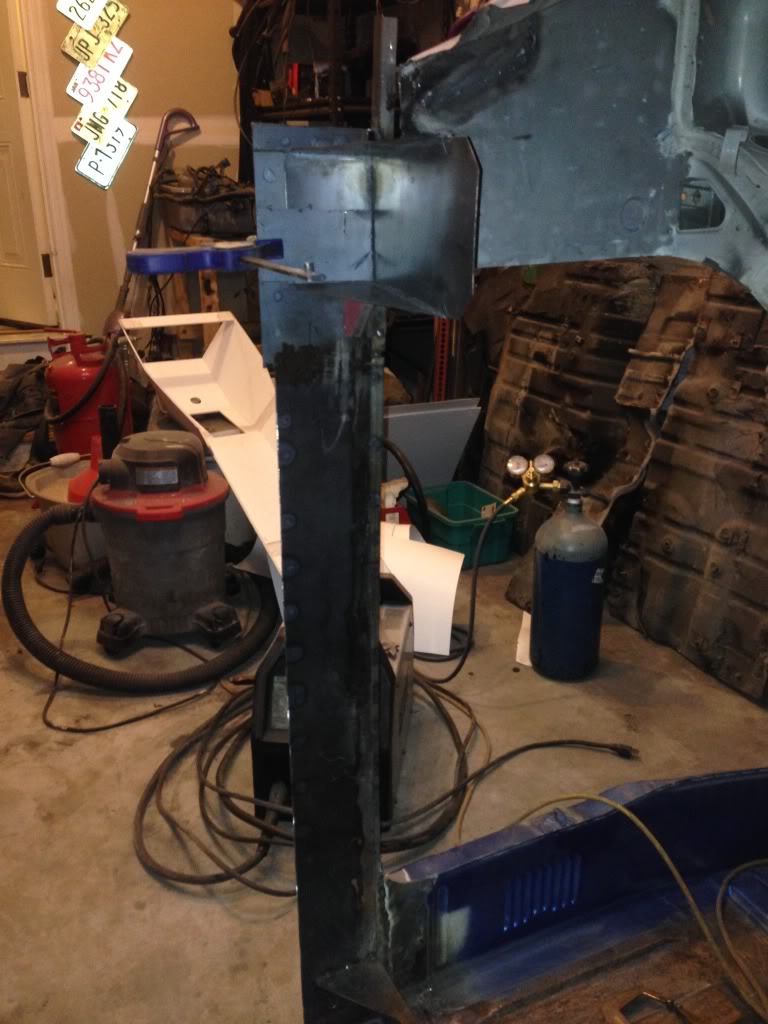
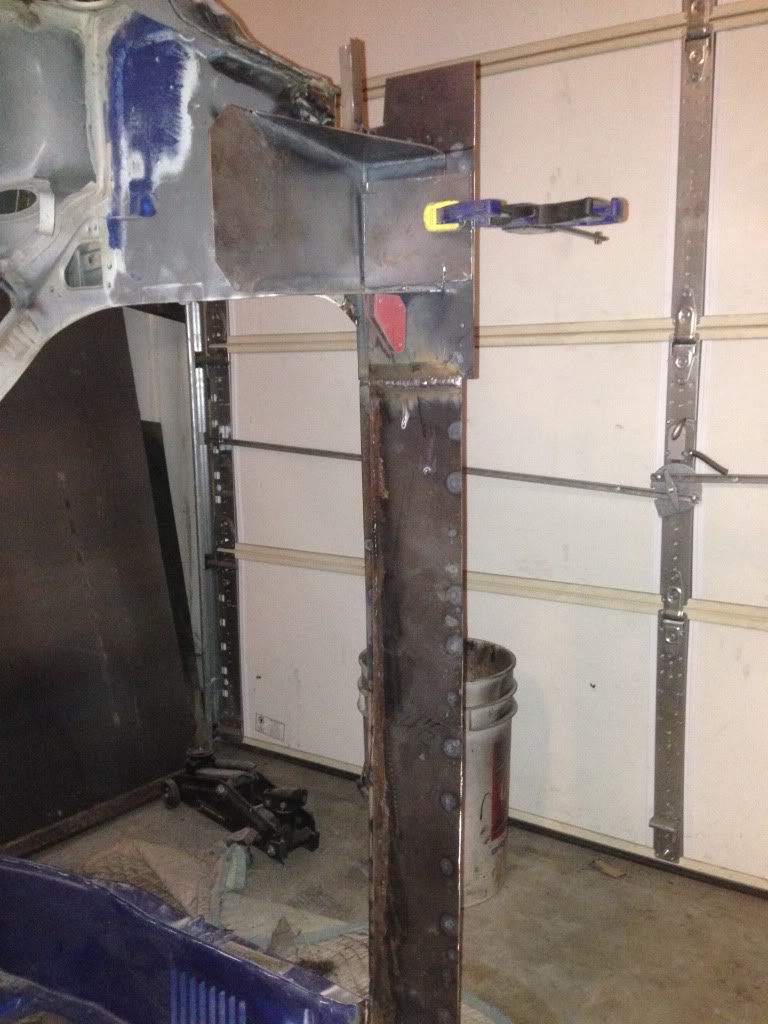
Next step now is to tack on the front body mounts and trim back/clean up the sheet steel on the back side of the rockers. Then I'll plop the cab on the frame for a quick test fit so I can drill the holes for the body mount bolts and mock up some sheet steel for the floorpan. I also have to cut some steel to replace the cancer that I cut out of the kick panels. It seems for right now that the harder and more tedious fab work is complete...I hope...

I got some garage time today, but got cut short when my friend stopped by and convinced me to go play golf with him. So instead of getting a lot of work done on my truck, I got half of what I wanted to get done, lost a dozen golf balls and raised more speculation as to why I still TRY to play golf...
I did manage to finish fabbing up the back side of the rocker panels and the "Ledge" for the floor pan. The back side of the rockers got tacked in and I just clamped up the body mounts for now; I wanted to do some measuring before I tacked them in. The panels that I tacked in still need to be trimmed back even with the rocker panels so they still hang over an inch or so for now.


Next step now is to tack on the front body mounts and trim back/clean up the sheet steel on the back side of the rockers. Then I'll plop the cab on the frame for a quick test fit so I can drill the holes for the body mount bolts and mock up some sheet steel for the floorpan. I also have to cut some steel to replace the cancer that I cut out of the kick panels. It seems for right now that the harder and more tedious fab work is complete...I hope...

 Oct 28, 2013 | 04:51 PM
#345
Thread Starter
Super Moderator
iTrader: (3)
Joined: Jan 2012
Posts: 3,218
Likes: 26
From: Salisbury, MD
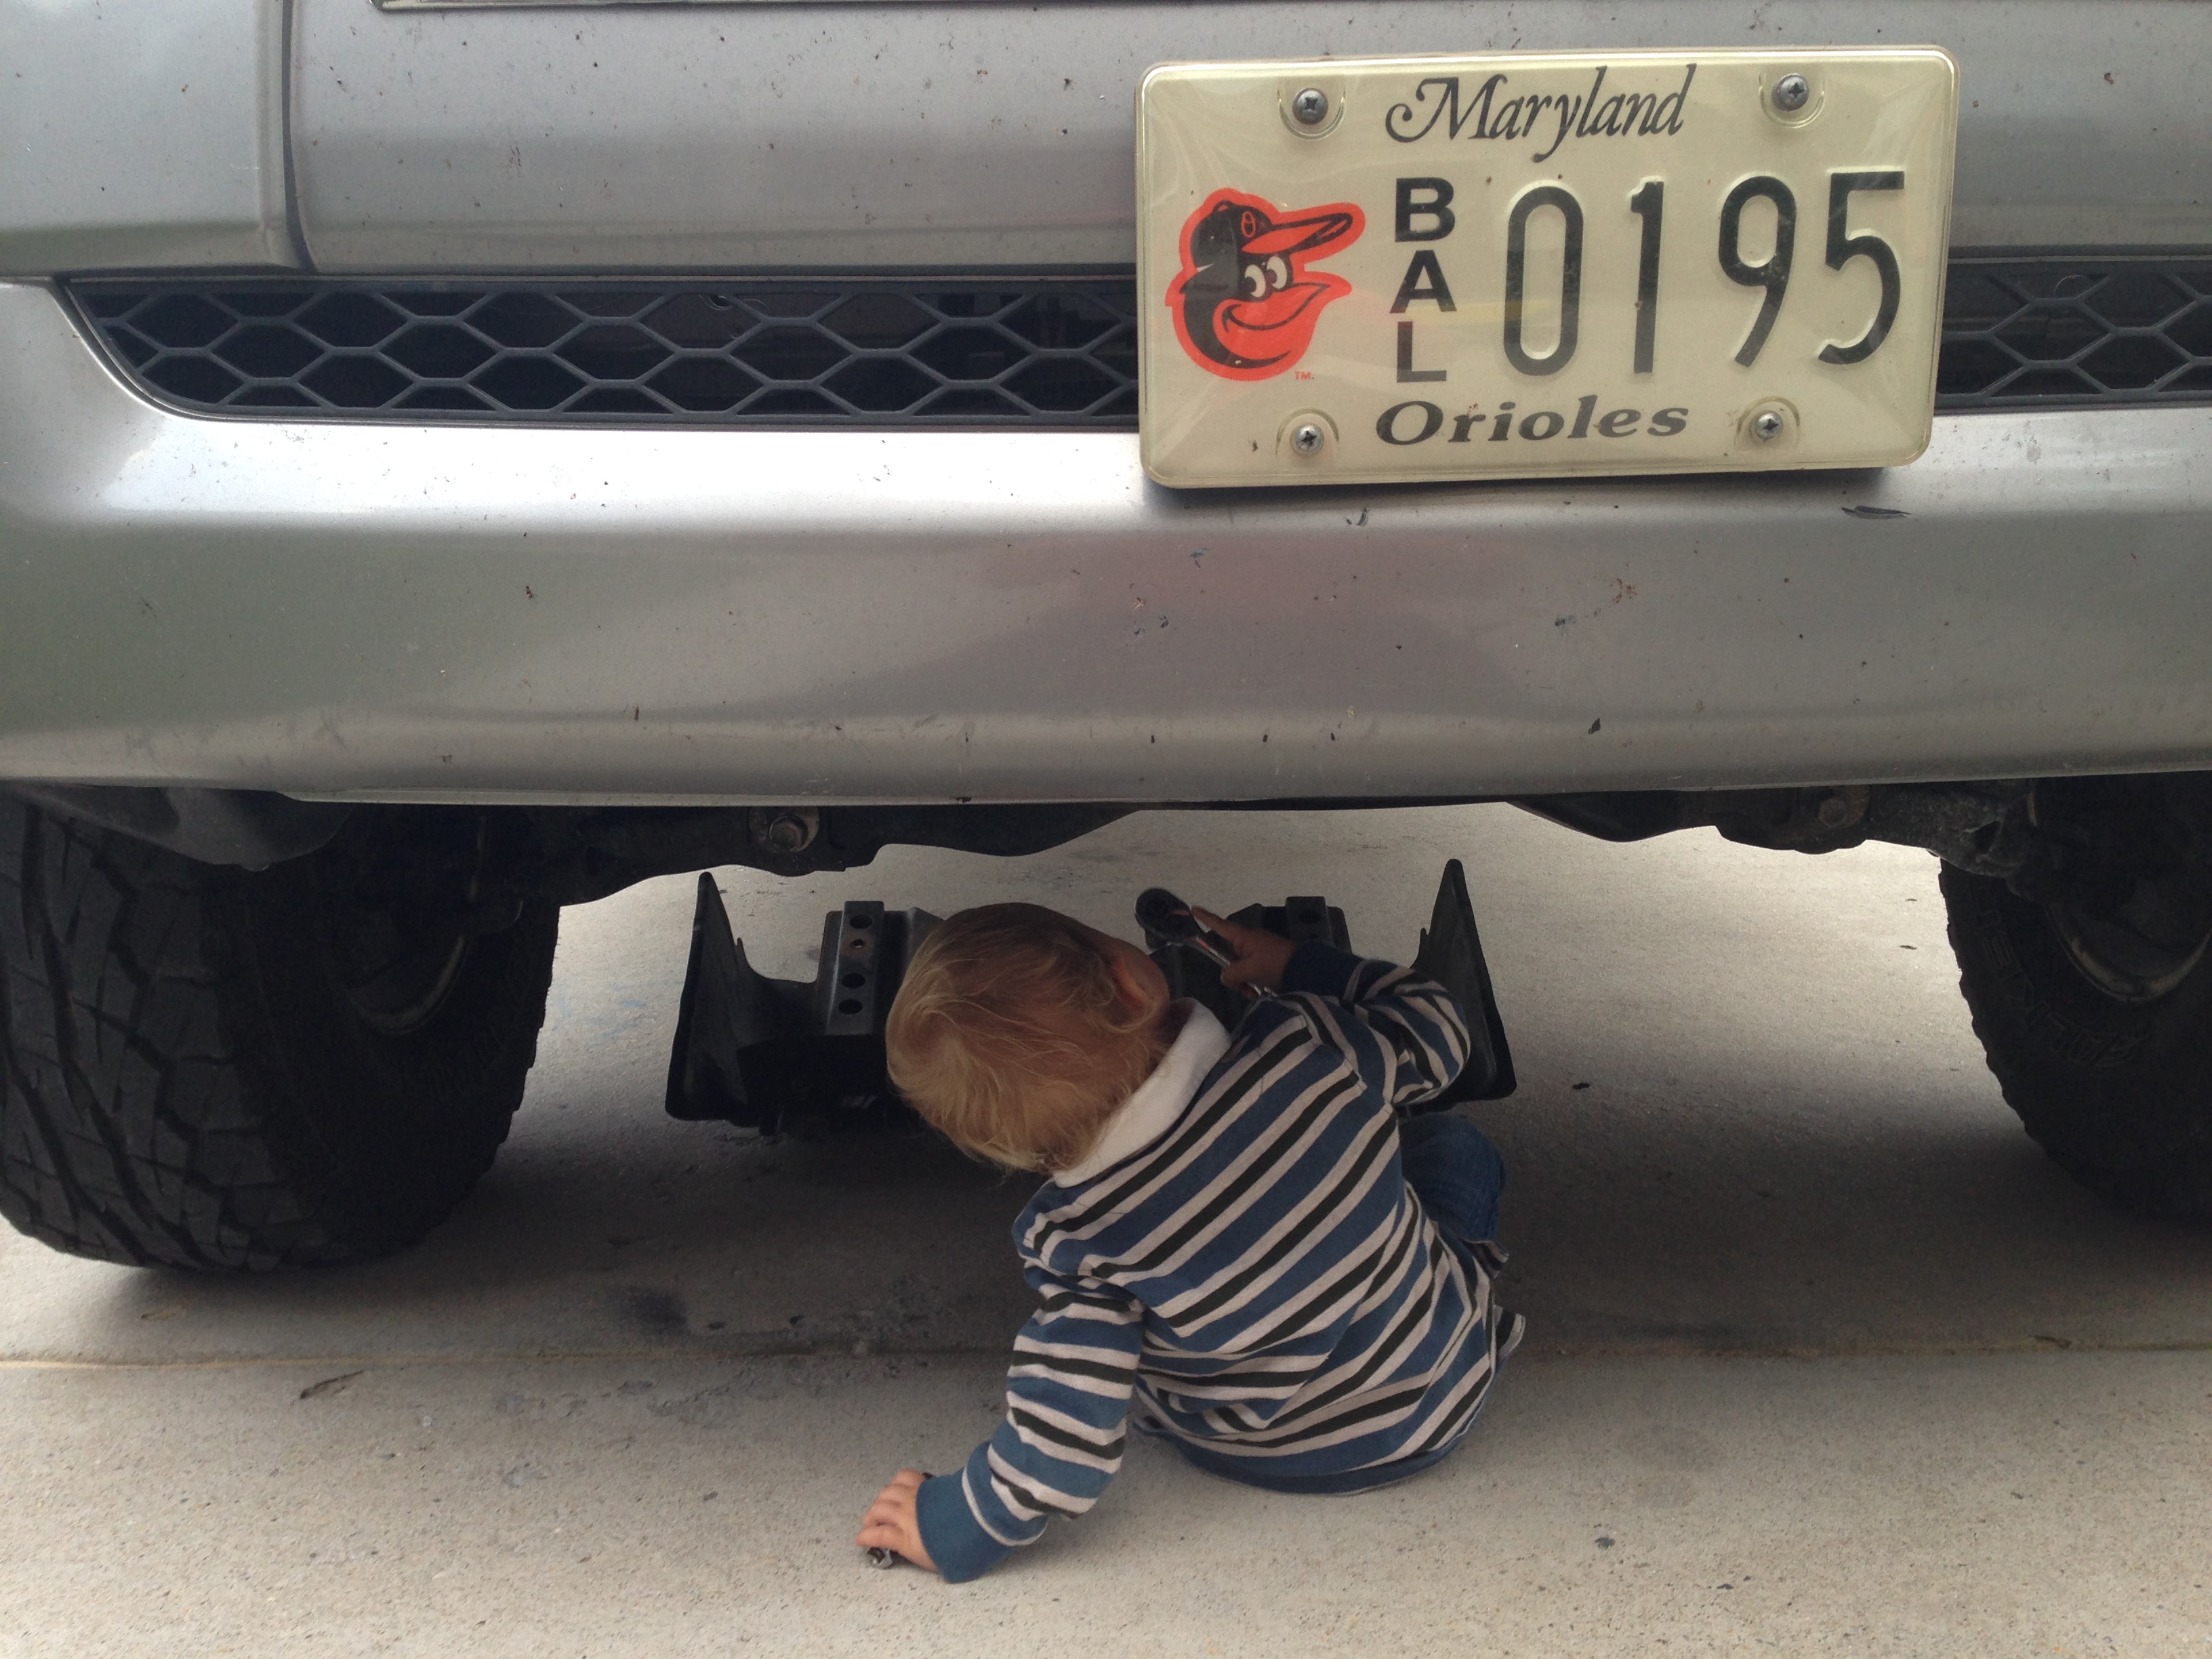
Had to change the oil in my Tundra tonight so I figured that I'd teach my son how to do it. 19 months old and I think he's pretty much got it... can never start too young!


 Oct 30, 2013 | 08:56 PM
#347
Thread Starter
Super Moderator
iTrader: (3)
Joined: Jan 2012
Posts: 3,218
Likes: 26
From: Salisbury, MD
I was doing a little rough mock up tonight to prepare for fabbing the floorpans. Luckly I thought of quickly installing the heater core to check for clearance with the tunnel. My orginal tunnel design was almost an inch too tall and interfered with the heater core. So I shortened it by about an inch to make a new mock up template.
Here's the 3D renderings (even threw in a old school toyota logo that I may try to fabricate):
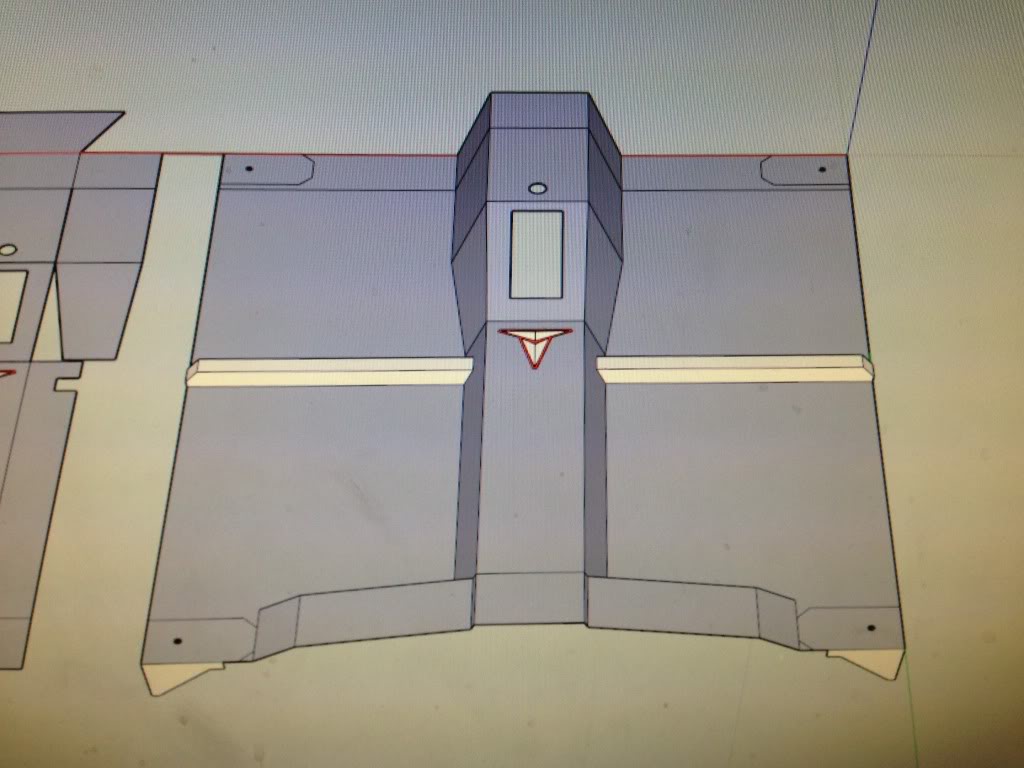
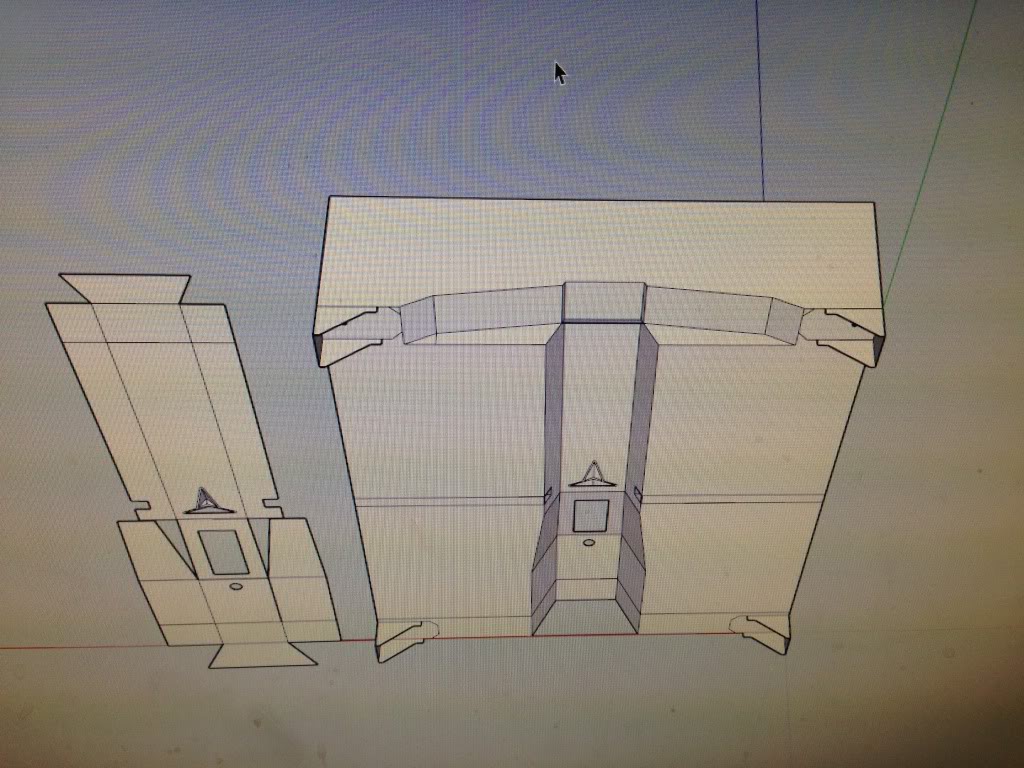
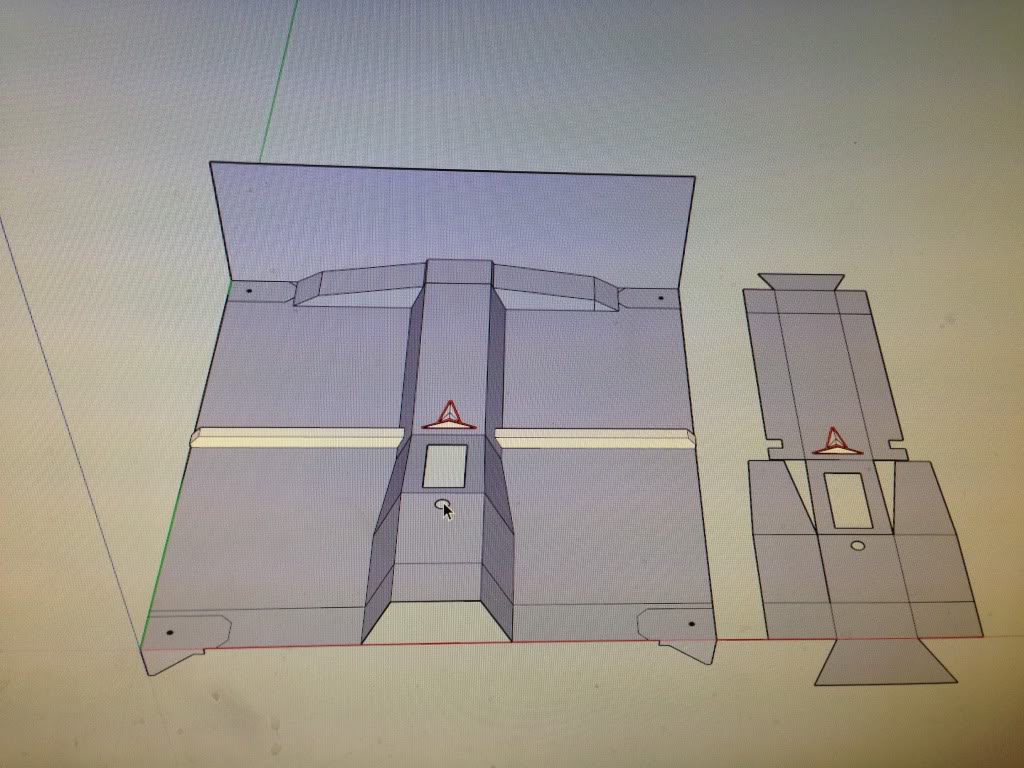
In the pictures above you can also see how I plan on doing the rear of the floorpan in order to clear the middle cross member of the frame. I slapped the template onto some foamcore and cut it out to assemble the tunnel mock up (sorry, no pictures yet), but this time I made it in two pieces - one is the front wider portion around the shifters and one is the rear narrow portion. I did this so that I can cut the front of the tunnel to match up with the firewall and line up around the tranny. I can then cut the rear section to the right length to take the guess work out of forming both ends into the cab.
I'm hoping to bargain with my wife again this weekend to get some time to grab my chassis so that I can test fit the body so that I can mock up the floorpans and tunnel. Problem is my chassis is in my cousin's garage and my cab is in my garage, but I need to haul both of them over to my Pop's house - he has exposed overhead beams in his garage that I plan on hoisting my cab up on so that I can simply roll the chassis underneath and lower the cab into place... fingers crossed!
Here's the 3D renderings (even threw in a old school toyota logo that I may try to fabricate):


In the pictures above you can also see how I plan on doing the rear of the floorpan in order to clear the middle cross member of the frame. I slapped the template onto some foamcore and cut it out to assemble the tunnel mock up (sorry, no pictures yet), but this time I made it in two pieces - one is the front wider portion around the shifters and one is the rear narrow portion. I did this so that I can cut the front of the tunnel to match up with the firewall and line up around the tranny. I can then cut the rear section to the right length to take the guess work out of forming both ends into the cab.
I'm hoping to bargain with my wife again this weekend to get some time to grab my chassis so that I can test fit the body so that I can mock up the floorpans and tunnel. Problem is my chassis is in my cousin's garage and my cab is in my garage, but I need to haul both of them over to my Pop's house - he has exposed overhead beams in his garage that I plan on hoisting my cab up on so that I can simply roll the chassis underneath and lower the cab into place... fingers crossed!
Last edited by kawazx636; Oct 30, 2013 at 08:58 PM.
Oct 30, 2013 | 09:18 PM
#349
Thread Starter
Super Moderator
iTrader: (3)
Joined: Jan 2012
Posts: 3,218
Likes: 26
From: Salisbury, MD
I would do it in 3D - raised just like the real logo. It's about 6 inches wide and 8 inches tall so I could probably make a template for each angle and make it out of sheet metal that I could just bolt into place. It'll be tough, but I'll probably try it out. Not a priority now though

 Nov 1, 2013 | 07:35 PM
#352
Thread Starter
Super Moderator
iTrader: (3)
Joined: Jan 2012
Posts: 3,218
Likes: 26
From: Salisbury, MD
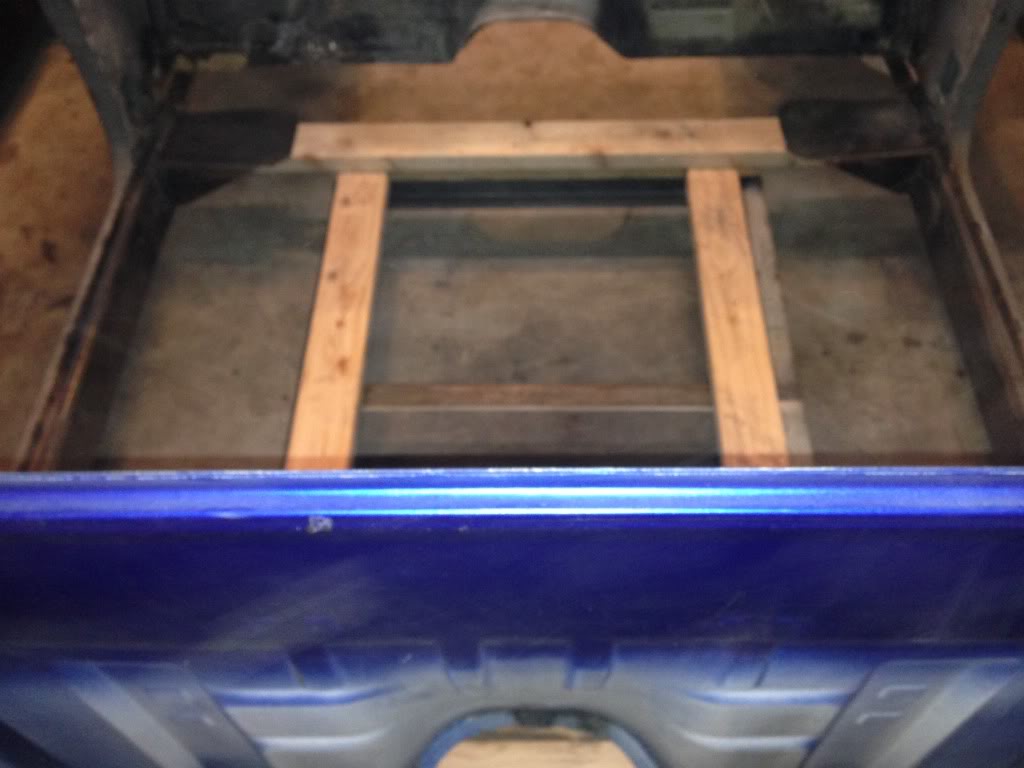
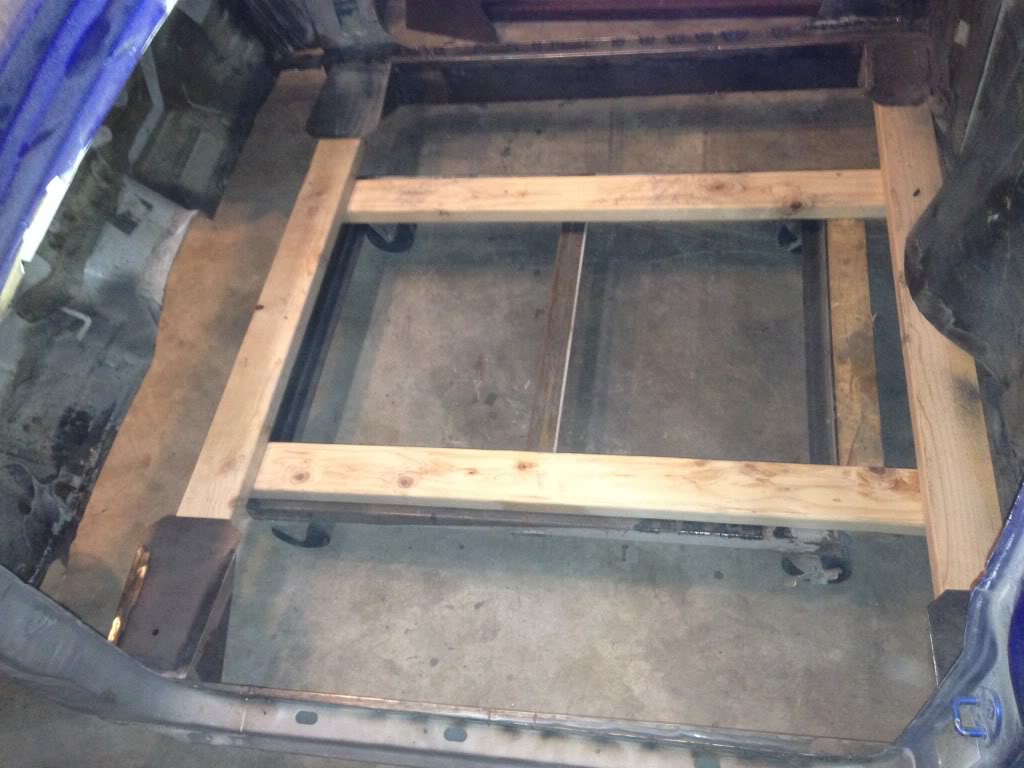
Bargained with the wife again so I can get another full day of work in on my truck tomorrow (I'm either getting really good at this or extremely lucky!). I'm planning on plopping the cab on the frame tomorrow to drill out the body mount holes and to begin mocking up the floorpan and tunnel. So tonight I built a jig to sit on my dolly so I can roll the body around a little easier, especially as I get closer to finishing the body work. It's nothing crazy, just a 2x4 frame that sit inside the body mounts and fits snug on my dolly.
I'll grab my trailer to haul my chassis back to my house first thing in the morning. Then hopefully round up some troops to help me mount the cab.


I'll grab my trailer to haul my chassis back to my house first thing in the morning. Then hopefully round up some troops to help me mount the cab.
Nov 2, 2013 | 05:50 PM
#353
Thread Starter
Super Moderator
iTrader: (3)
Joined: Jan 2012
Posts: 3,218
Likes: 26
From: Salisbury, MD
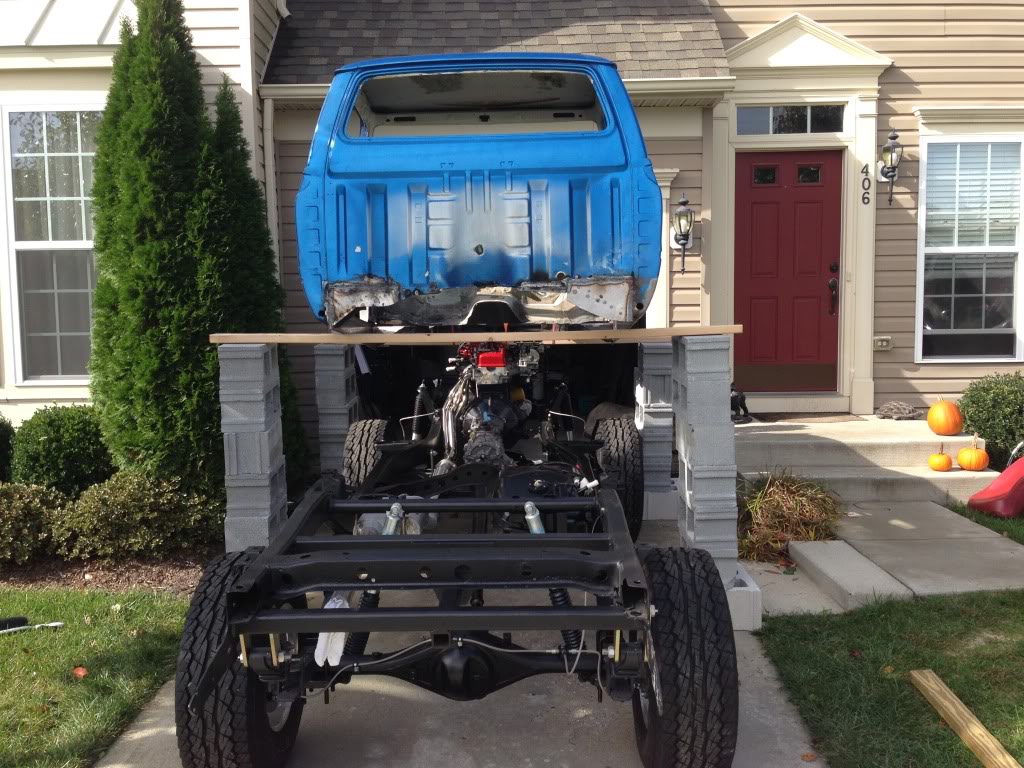
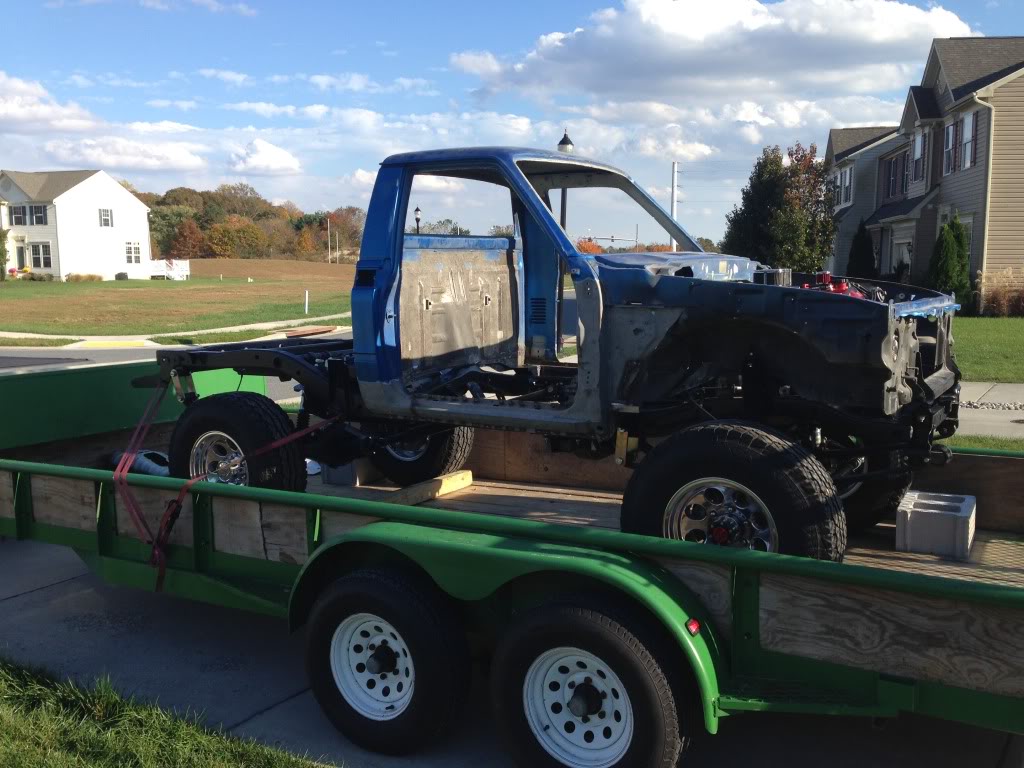
So you know those days when you REEEEEALLY need a couple of friends to help you out and nobody can be found?? (Yet you're always available when they need something) Welp, today was one of those days! So it's about time to get creative. Ran down to Lowe's and bought 28 cinder blocks and a couple 2x4's and...well, I'll let the pictures do the talking:
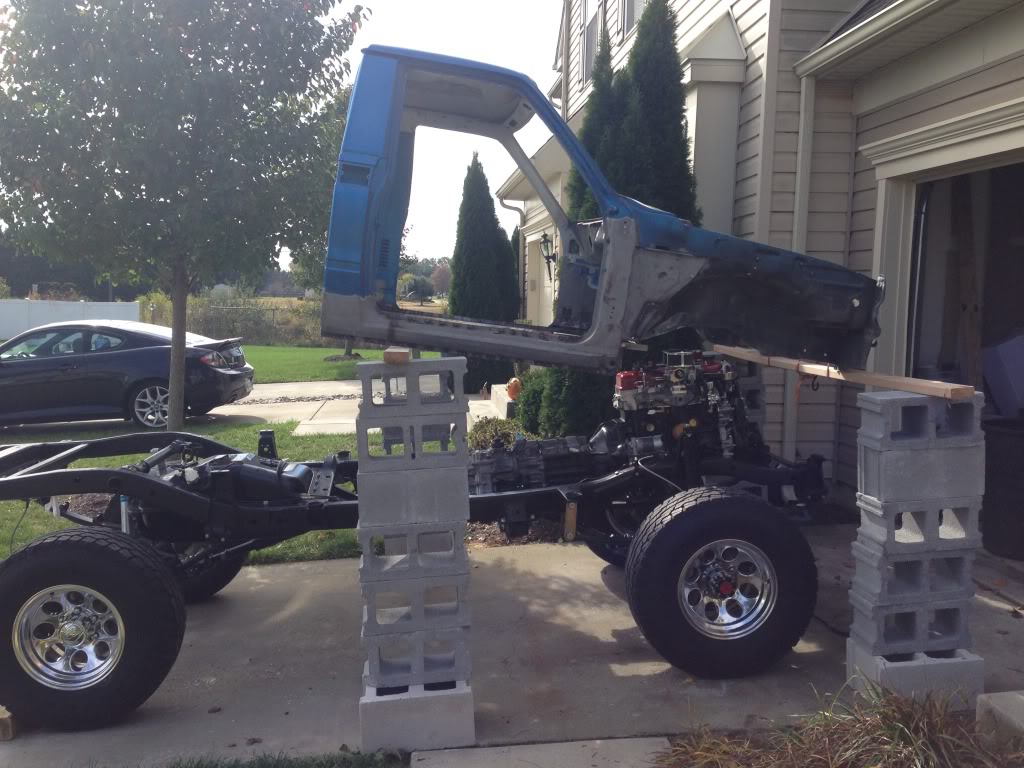
How about that body lift huh??
I think I need some step rails...
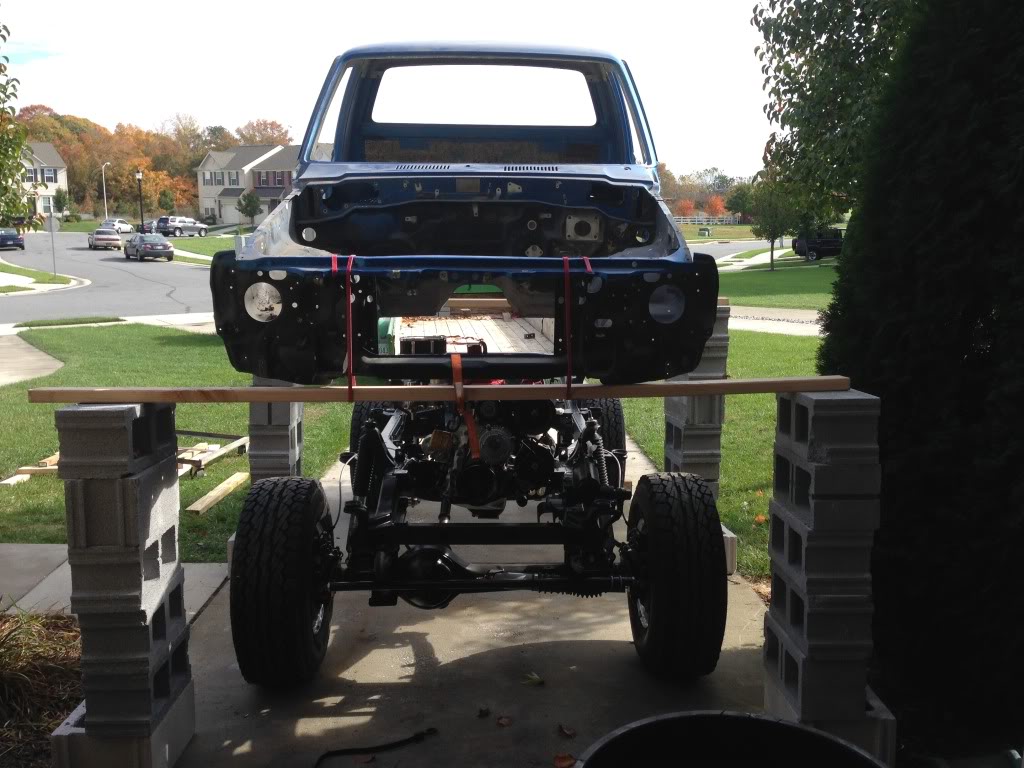
At this point I'm rather shocked that this worked with out completely FUBAR'ing something:
TADA!!!!
I basically put the cab on a couple 2x4's and slowly lifted it up block by block, corner by corner. Then rolled the chassis underneath the cab that was suspended 56" up in the air. Then slowly lowered it down block by block, corner by corner. So next time you think you've got nobody to help you remove or put on your cab...well, now you know what to do! Now if my cab was freshly painted I wouldn't even consider doing this - you better bet that I would grab at least 6 of the strongest friends I know!! After getting the cab on, I think it may sit a little high. I'm considering going back to stock length shackles instead of the +2" shackles that I used just to bring it down slightly. But I'll wait until I get the rest of the weight on it and the suspension finishes settling.
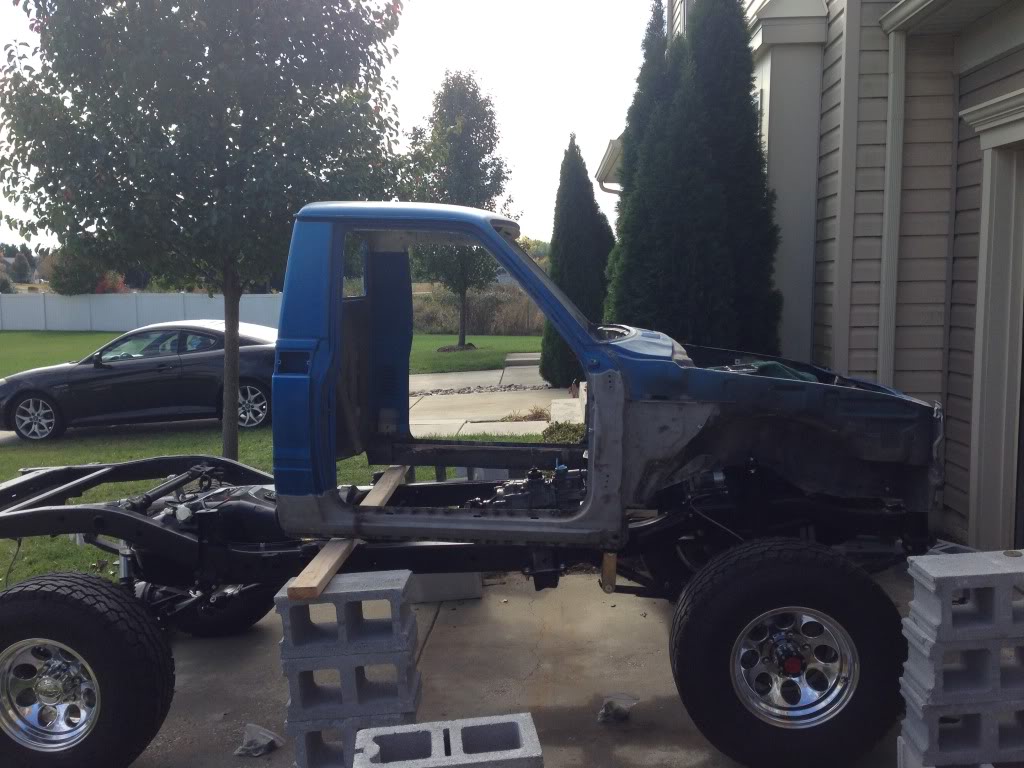
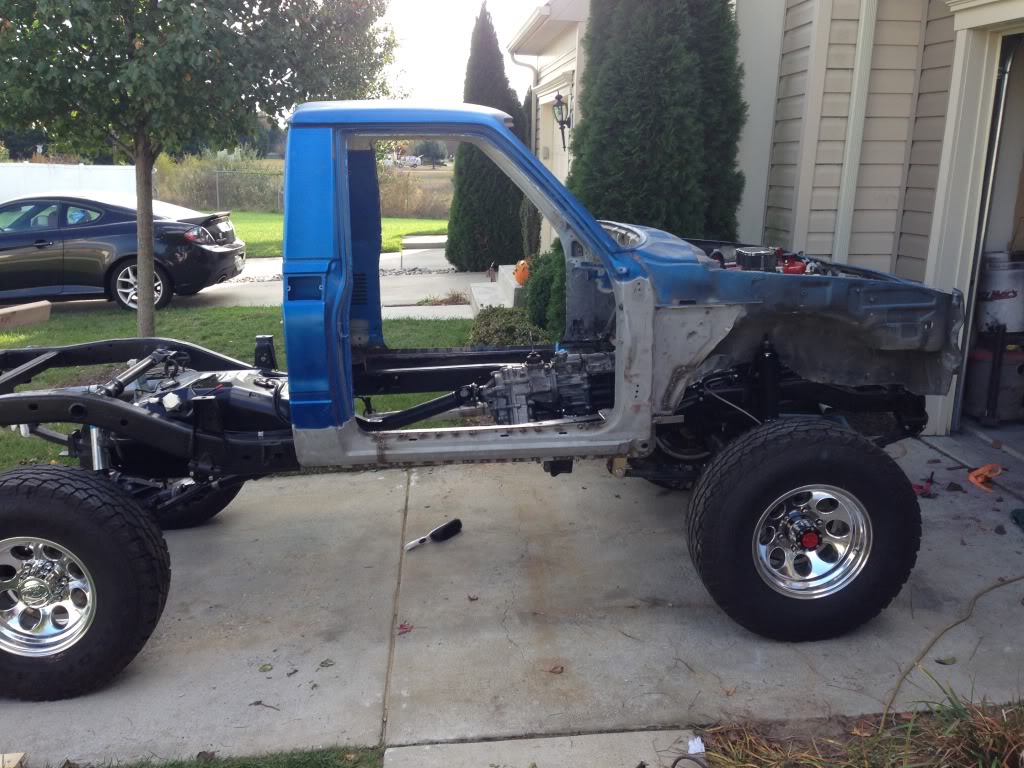
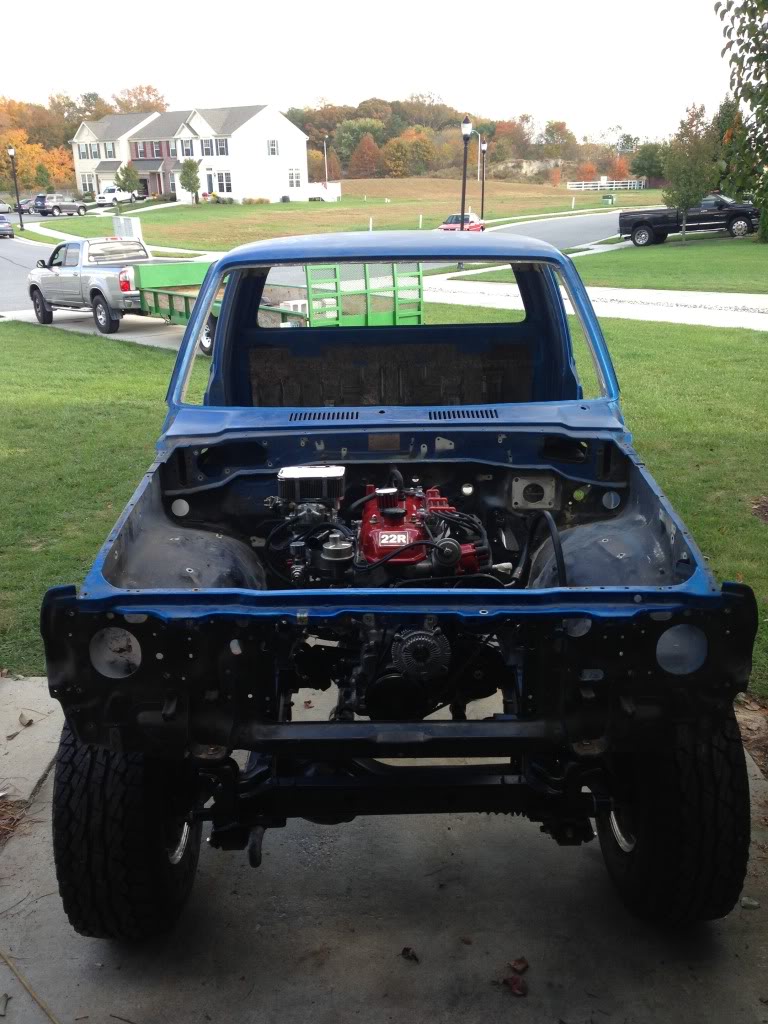
Also lined up the body on the frame and drilled out the body mounts. Miraculously, all of my body mounts lined up really well, but my middle mounts were mounted slightly high (a little less than 1/8") so I just used a thick fender washer between the mount and the bushing to bring it level (I'll weld it on later). Bolted it down and here it is:
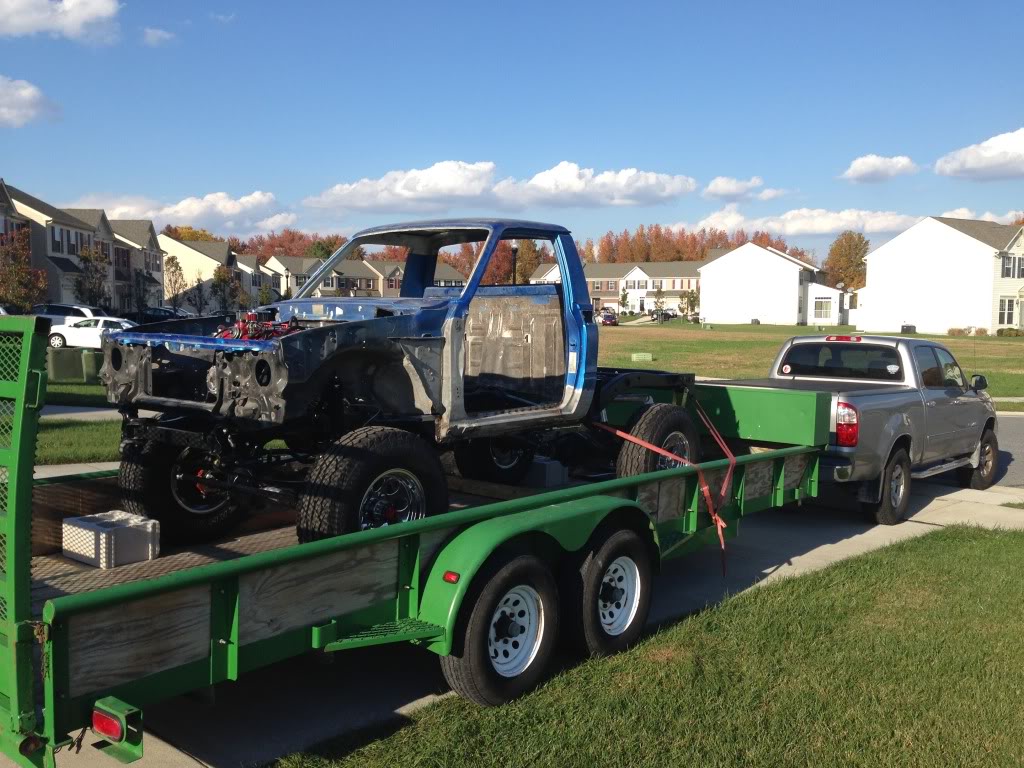
I worked out a deal with my Pops to clear out his garage so I can have a little more space so I loaded it up to haul it a couple miles down the road to his house. It'll also be able to work on it a little more there since I won't have to quit making noise early in the evenings when my son goes to bed.
Next... Floorpan mock up! FINALLY!

How about that body lift huh??

I think I need some step rails...

At this point I'm rather shocked that this worked with out completely FUBAR'ing something:

TADA!!!!


I basically put the cab on a couple 2x4's and slowly lifted it up block by block, corner by corner. Then rolled the chassis underneath the cab that was suspended 56" up in the air. Then slowly lowered it down block by block, corner by corner. So next time you think you've got nobody to help you remove or put on your cab...well, now you know what to do! Now if my cab was freshly painted I wouldn't even consider doing this - you better bet that I would grab at least 6 of the strongest friends I know!! After getting the cab on, I think it may sit a little high. I'm considering going back to stock length shackles instead of the +2" shackles that I used just to bring it down slightly. But I'll wait until I get the rest of the weight on it and the suspension finishes settling.
Also lined up the body on the frame and drilled out the body mounts. Miraculously, all of my body mounts lined up really well, but my middle mounts were mounted slightly high (a little less than 1/8") so I just used a thick fender washer between the mount and the bushing to bring it level (I'll weld it on later). Bolted it down and here it is:

I worked out a deal with my Pops to clear out his garage so I can have a little more space so I loaded it up to haul it a couple miles down the road to his house. It'll also be able to work on it a little more there since I won't have to quit making noise early in the evenings when my son goes to bed.


Next... Floorpan mock up! FINALLY!
Nov 2, 2013 | 07:57 PM
#355
Registered User
Joined: May 2010
Posts: 2,587
Likes: 7
From: Ofallon Missouri
Very creative with the cab lifting. I bet that was a good feeling to step back and look at the cab on. You saw a truck there didnt you?
Looking awesome as always. Definatley a big help and inspiration.
And yes. Freinds rarey show up when needed for a simple thing like that.
One of Murphy's laws I think. Allthough I had a great weekend thanks to Terry.
Looking awesome as always. Definatley a big help and inspiration.
And yes. Freinds rarey show up when needed for a simple thing like that.
One of Murphy's laws I think. Allthough I had a great weekend thanks to Terry.
 Nov 5, 2013 | 07:55 PM
#358
Thread Starter
Super Moderator
iTrader: (3)
Joined: Jan 2012
Posts: 3,218
Likes: 26
From: Salisbury, MD
I finished welding up the top portion of the body mounts (along the inside top of the rockers) and ground the welds down flat so I can lay the floor pan on top of them. I'll do the bottom and sides of the body mounts when I get to the final welding throughout the cab after a thorough sandblasting.
Then the fun begain! I grabbed some heavy weight poster board and made a floor pan template. I finished the driver side and began to do the passenger side when I thought to myself, "in theory both sides should be the same." I flipped the driverside template over and low and behold, it fit the passenger side perfectly!! I'm a bad mamma jamma! So one template it is!

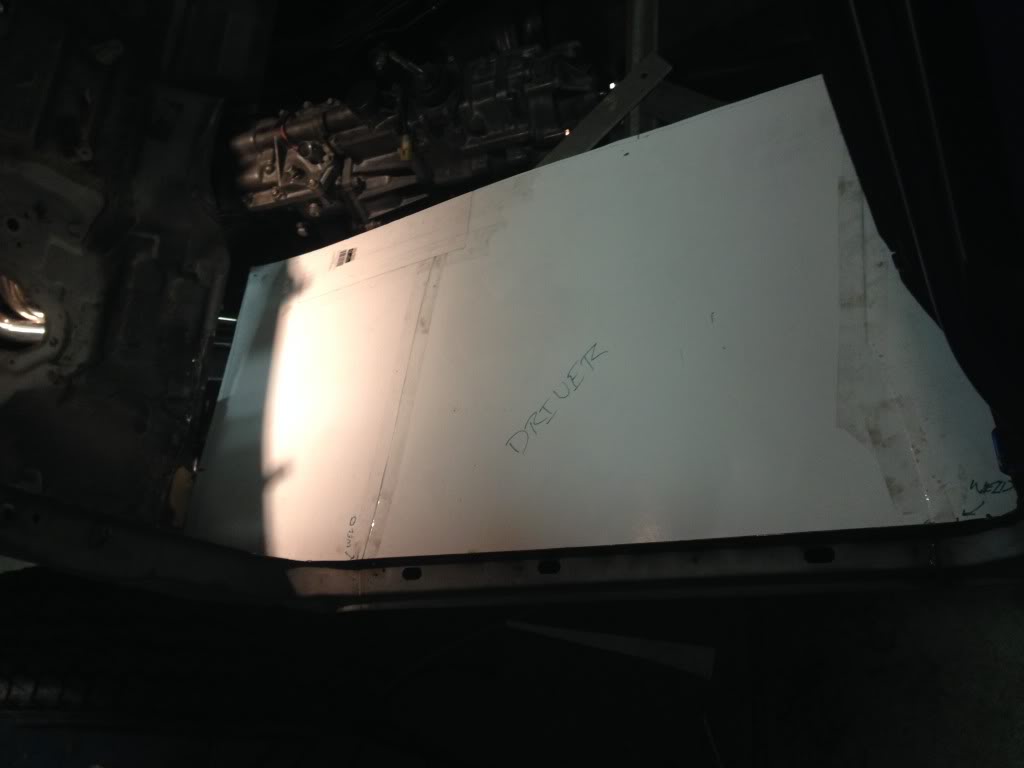
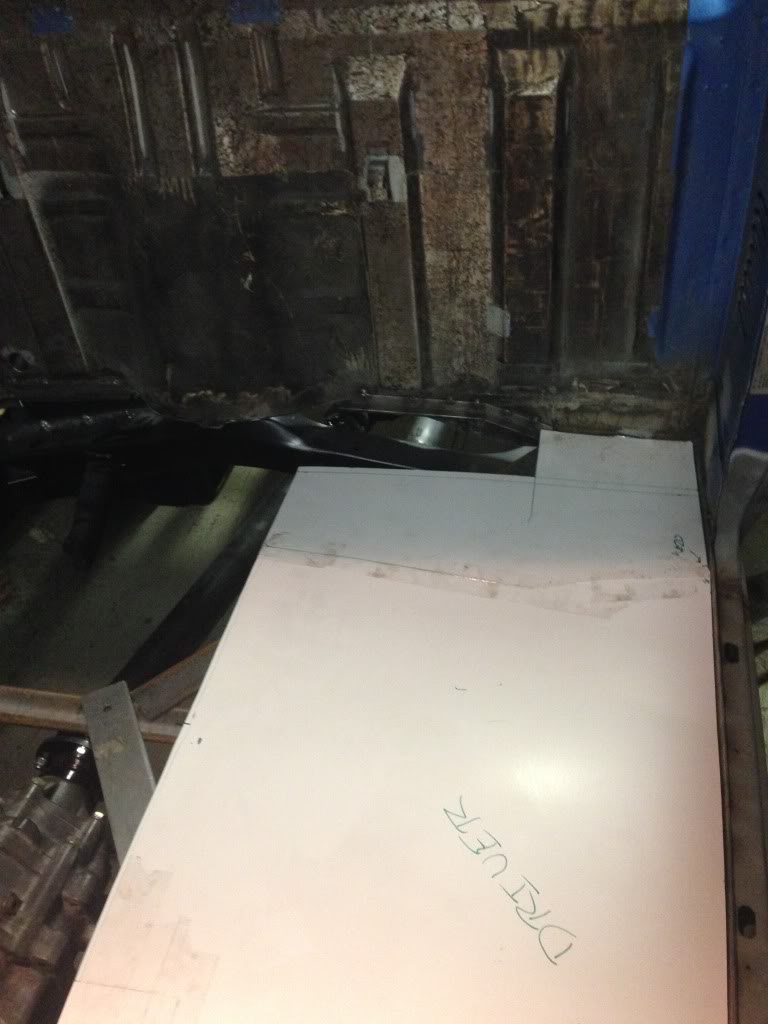
I also began to trim out the rear section of the tunnel to sit flush with the rear of the cab (the hump in the rear cab wall). Looks to fit pretty well so far, but I want to get the driver and passenger floorpans tacked in and leveled up prior to mocking up the rest of the tunnel since the poster board is to flimsy to use for a level surface. I also need to ensure that the heater core willl fit properly over the tunnel.

Hopefully tomorrow night I'll be able to cut up some steel and get started tacking the driver and passenger sides in!
Then the fun begain! I grabbed some heavy weight poster board and made a floor pan template. I finished the driver side and began to do the passenger side when I thought to myself, "in theory both sides should be the same." I flipped the driverside template over and low and behold, it fit the passenger side perfectly!! I'm a bad mamma jamma! So one template it is!


I also began to trim out the rear section of the tunnel to sit flush with the rear of the cab (the hump in the rear cab wall). Looks to fit pretty well so far, but I want to get the driver and passenger floorpans tacked in and leveled up prior to mocking up the rest of the tunnel since the poster board is to flimsy to use for a level surface. I also need to ensure that the heater core willl fit properly over the tunnel.

Hopefully tomorrow night I'll be able to cut up some steel and get started tacking the driver and passenger sides in!
Nov 6, 2013 | 07:51 AM
#360
Thread Starter
Super Moderator
iTrader: (3)
Joined: Jan 2012
Posts: 3,218
Likes: 26
From: Salisbury, MD
Thanks Moose! I'm not sure why a lot of folks are afraid to fabricate their own parts - it just takes some innovative thinking, good measuring and simple geometry. It seems to come easy to me, but I think it helps that I don't rush things and I prepare really well. I trashed two tunnel templates before I came up with one that I think will work well. Mock up is the number one key to success with doing things like this. I also try to keep everything as simple as possible so there is less margin for error - we shall see tonight! LOL


