
Dropzone's 1981 Trekker Build-Up Thread
 Mar 12, 2008 | 10:37 PM
#102
thanks for the idea on the brackets. I may upgrade to some 1/4" material for the brackets though...Hoping to get the floor done soon. Not a lot of free time lately , between a remodeling project and work haven't had a ton of time lately....
, between a remodeling project and work haven't had a ton of time lately....
Mar 21, 2008 | 08:37 AM
#103
Finally got my tax refund from Mr. Bush...now just need the tax rebate 
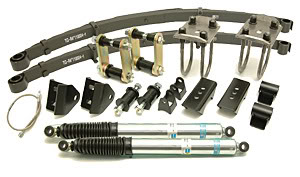
with that I was able to place an order with Brian (waskillywabbit) at WabFab for a 5" rear lift kit:
and a flat pitman arm to help correct a snafu with the angle of my IFS steering box

first time doing most of this so bound to make a few mistakes:
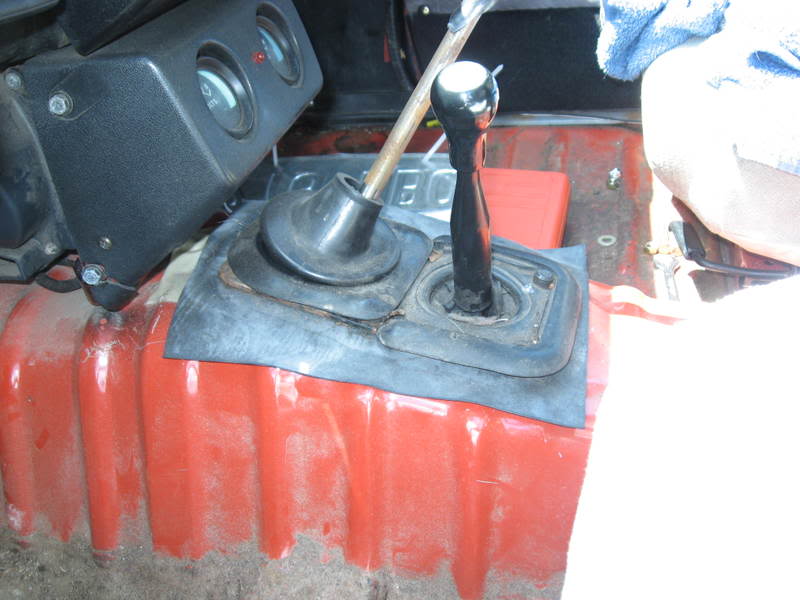
With the rear suspension kit going on it looks like a good time to throw the dual cases in and make a trip to the driveshaft shop for some lengthening up front and shortening the rear
Slowly this thing is coming together but I doubt it will ever be done...
with that I was able to place an order with Brian (waskillywabbit) at WabFab for a 5" rear lift kit:
and a flat pitman arm to help correct a snafu
with the angle of my IFS steering box first time doing most of this so bound to make a few mistakes:
With the rear suspension kit going on it looks like a good time to throw the dual cases in and make a trip to the driveshaft shop for some lengthening up front and shortening the rear
Slowly this thing is coming together but I doubt it will ever be done...
Mar 27, 2008 | 02:52 AM
#104
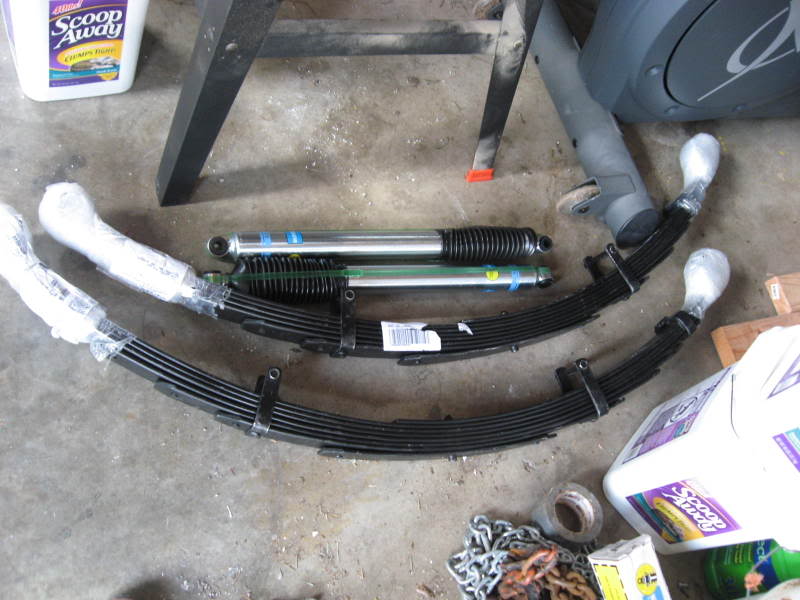
the rear lift kit came in yesterday, the springs look great.
I was digging around in my crap I need to get on the truck and found that the extra transfer case mount I had is shot, the one on my truck is kind of had it two so I went ahead and placed on order for 2 of these from 4xinnovations:


significantly cheaper than what I could find elsewhere and they seem to be made very well. The design allows for easy installation etc.
Hope to get this over to my friend's shop and get the suspension finished soon
I was digging around in my crap I need to get on the truck and found that the extra transfer case mount I had is shot, the one on my truck is kind of had it two so I went ahead and placed on order for 2 of these from 4xinnovations:
significantly cheaper than what I could find elsewhere and they seem to be made very well. The design allows for easy installation etc.
Hope to get this over to my friend's shop and get the suspension finished soon
Mar 27, 2008 | 07:43 AM
#106
Hope to have it together so I can actually wheel it this summer
 Mar 29, 2008 | 11:19 PM
#109
So looking under the truck to see if I might run into any other surpises when I go to do the rear end kit, I remembered the old bumper mounts that will need to be cut off.

The Trail Gear kit requires that the rear shackle mount needs to be moved back 3" so the stock bracket is a goner. With that the frame back there is just 'C' channel, not boxed so I am thinking that a 0.25"x3"x3" crossmember back there is necessary to strengthen the frame...
any thoughts or recommendations?
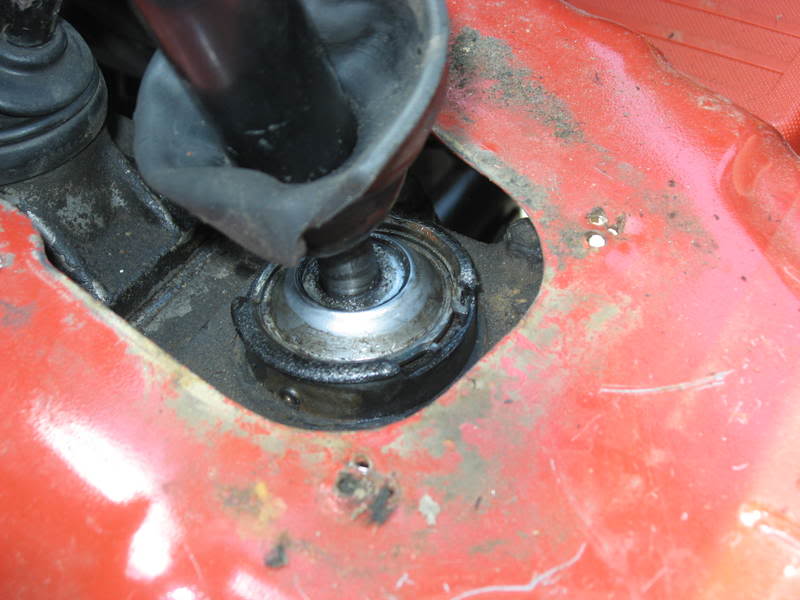
The stock front spring perch is also going to be a victim soon. a new mount will go 6" C to C of the front mount..crappy picture but you can kind of tell that my slider mount is just about dead center of where I need to mount the front spring perch.

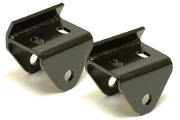
The kit came with these mounts which I like (already have them) plus with their desigh it is easy to get the mount on straight:
An Option to keep from having to redo the slider mounting bracket would be to find a set of brackets like this:
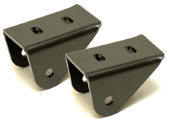
they would just mount to the bottom of the frame.....
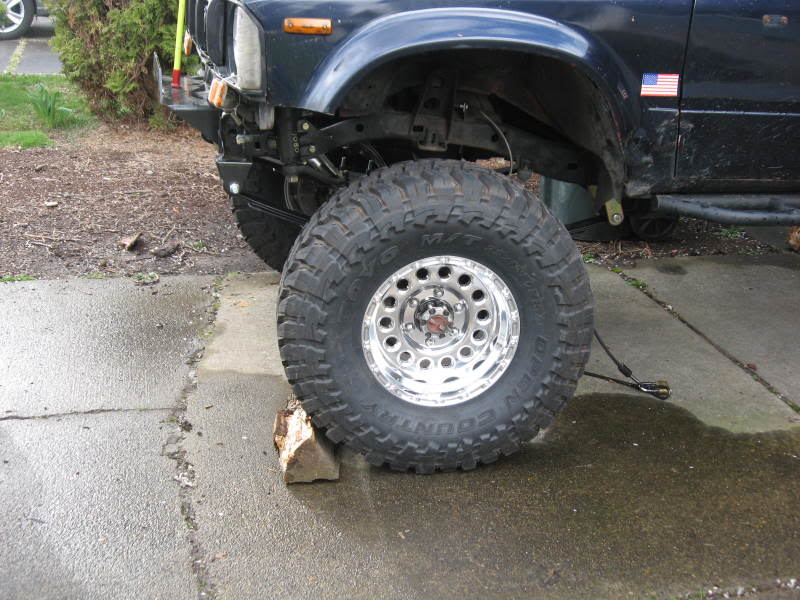
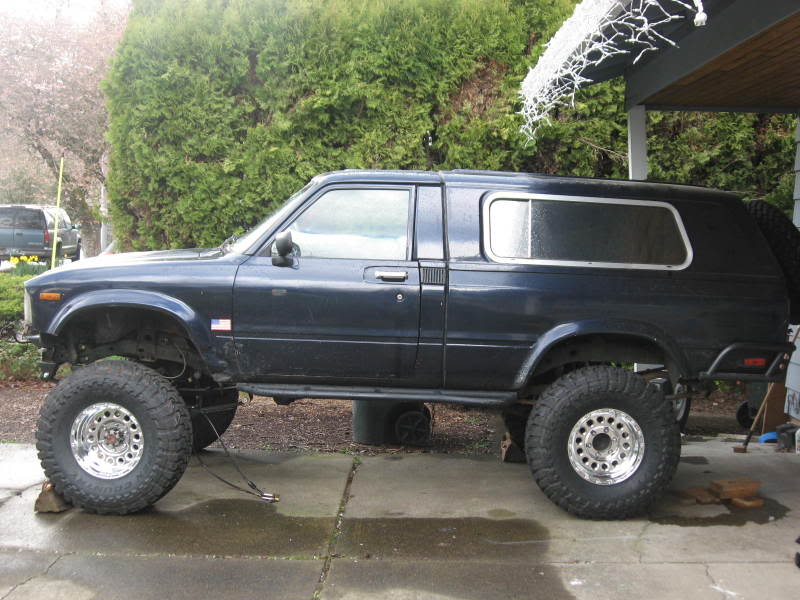
Also something happened to my wheels and tires?!?!

ok, got an ok deal on some unnecessary bling for the trekker

The Trail Gear kit requires that the rear shackle mount needs to be moved back 3" so the stock bracket is a goner. With that the frame back there is just 'C' channel, not boxed so I am thinking that a 0.25"x3"x3" crossmember back there is necessary to strengthen the frame...
any thoughts or recommendations?
The stock front spring perch is also going to be a victim soon. a new mount will go 6" C to C of the front mount..crappy picture but you can kind of tell that my slider mount is just about dead center of where I need to mount the front spring perch.
The kit came with these mounts which I like (already have them) plus with their desigh it is easy to get the mount on straight:
An Option to keep from having to redo the slider mounting bracket would be to find a set of brackets like this:
they would just mount to the bottom of the frame.....
Also something happened to my wheels and tires?!?!
ok, got an ok deal on some unnecessary bling for the trekker

 Apr 5, 2008 | 06:46 PM
#113
Kind of thought that I might catch a little  for the new wheels
They are sitting in the garage. Thought I would keep them around for maybe some RockStomper DIY beadlocks and 36's or 37's down the road
for the new wheelsThey are sitting in the garage. Thought I would keep them around for maybe some RockStomper DIY beadlocks and 36's or 37's down the road
Apr 7, 2008 | 01:33 PM
#114
was talking with one of the Roadster guys at Church this weekend about trying to get my rear seat done (i can't weld) and he suggested I try the boneyard for some seats that might bolt in. I was thinking that the 38" between the rear wheel wells would limit me. But thought I would try the U pull it. Checked some sports cars and found these out of a '91 Mitsubishi Eclipse. They measure right at 38" ;D

I will need to work on the mounts a little but is should be pretty straight forward. The kids were asking for something with some more support than the stock Winnebago stuff.
I looked at a Corbeau back seat, but the $299 + shipping I thought forget that and try the $15 junk yard seats...

Keep in mind that the stock seat back is still in there.
One thing I like is that I think once I get the mount thought out the Hook will be more secure than the sheet metal holder that Winnebago came up with...

I think I can rework the frame so that I can add a set of head rests.
It may not fold down totally flush with the floor of the bed but I think I can work around that for something that will be more comfortable for the kids on a longer trip. I did get a seat bottom too with some firmer foam that I will see how that works out
I will need to work on the mounts a little but is should be pretty straight forward. The kids were asking for something with some more support than the stock Winnebago stuff.
I looked at a Corbeau back seat, but the $299 + shipping I thought forget that and try the $15 junk yard seats...
Keep in mind that the stock seat back is still in there.
One thing I like is that I think once I get the mount thought out the Hook will be more secure than the sheet metal holder that Winnebago came up with...
I think I can rework the frame so that I can add a set of head rests.
It may not fold down totally flush with the floor of the bed but I think I can work around that for something that will be more comfortable for the kids on a longer trip. I did get a seat bottom too with some firmer foam that I will see how that works out
Apr 21, 2008 | 01:39 PM
#115
Trekker Back seat option c
Can't seem to make up my mind on the back seat for the Trekker. I was going to fab something up with a new steel frame. Than I found an Eclipse back seat (no headrest)that I could probably make work...
I was at the boneyard just looking for miscellanious crap and happened upon a '93 Pathfinder. Took a measurement and low and behold. They fit. Advantages-
- headrests,
- higher seat back for the kids in the bac
- removeable armrests.
- less work getting the mounts to work.
- much more comfortable than the 2" foam and plywood in there now
- easily tweakable seat bottom to get to fit the fiberglass seat well.
-was only $24 with money I found in the laundry
Disadvantages
- won't lay totally flush like existing seats, but close enough and can still crash in the back on a weekend run.


Should have some time next week to get to work on the seats.
Than in a couple of weeks the rear suspension goes under the knife for some increased flex
I was at the boneyard just looking for miscellanious crap and happened upon a '93 Pathfinder. Took a measurement and low and behold. They fit. Advantages-
- headrests,
- higher seat back for the kids in the bac
- removeable armrests.
- less work getting the mounts to work.
- much more comfortable than the 2" foam and plywood in there now
- easily tweakable seat bottom to get to fit the fiberglass seat well.
-was only $24 with money I found in the laundry
Disadvantages
- won't lay totally flush like existing seats, but close enough and can still crash in the back on a weekend run.
Should have some time next week to get to work on the seats.
Than in a couple of weeks the rear suspension goes under the knife for some increased flex
Last edited by dropzone; Apr 21, 2008 at 01:41 PM.
May 5, 2008 | 01:20 PM
#116
Got the idea for this one from another forum:
Put the turn signal in with the parking light.
1) Remove the turnsignal and Headlight Bezel

2) cut out the turnsignal bulb socket, I used a 1" butterfly bit to drill just under the parking light (drill slowly-this plastic is old and brittle)
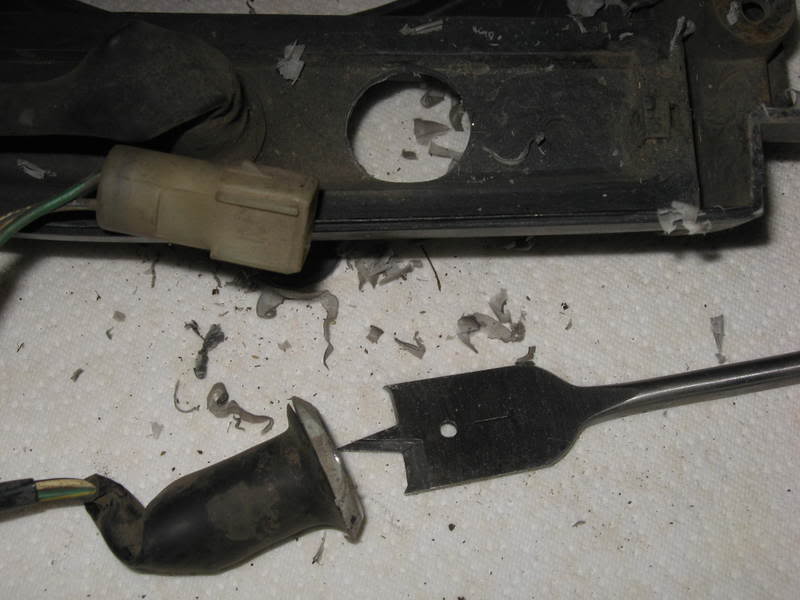
3) I ground down the sides to allow to fit in the edges of the bezel and left a lip to allow the plasti weld to bond to (clean all the old dirt and junk out) my lenses were due for a cleaning anyway

4) apply liberal amounts of plasti weld or epoxy:

5) installed just replace the parking light lense:

cheap easy and it actually allows the signal to be seen from the side...
Put the turn signal in with the parking light.
1) Remove the turnsignal and Headlight Bezel
2) cut out the turnsignal bulb socket, I used a 1" butterfly bit to drill just under the parking light (drill slowly-this plastic is old and brittle)
3) I ground down the sides to allow to fit in the edges of the bezel and left a lip to allow the plasti weld to bond to (clean all the old dirt and junk out) my lenses were due for a cleaning anyway
4) apply liberal amounts of plasti weld or epoxy:
5) installed just replace the parking light lense:
cheap easy and it actually allows the signal to be seen from the side...
May 6, 2008 | 03:36 PM
#117
I have been toying around with a few different options for a back seat and i think I finally found one that meets most of my goal.
My pathfinder seat plan was not going to fit and with out a metal shop making the brackets was going to be a pain in the butt.
I was at a U Pull it wrecking yard today and found some cool stuff out of an Isuzu Amigo:
Back seat is a fold and tumble. fit is just about right. Rear visibility sucks with the seat up but I have a Costco rear view camera to install and I can't see with the spare tire on the back anyway. With my vise, drill press and favorite BFH I feel I can come up with brackets very easy:

Integrated head rests, decent comfort for the kids, easy install and cheap It has got a couple of tears but am planning on making a soft seat cover for it (actually know how to sew  )
)
Folded forward I will be able to make a small storage area under the seat and be able to sleep in the back still (am short):

Also Picked up the rear seat belt mounts out of the amigo and some rear shoulder (3 point) seat belts out of a pathfinder. I will need mod the brackets a little and cut 1.25" off longer tube in the rear but it should make for some better mounts than just the stock lap belts. Some stout backing plates are also in the works .


The seat needs a little more cleaning up and it sits up a little higher than I would like and I don't think any body over 5'5" would really be able to sit in the back but the majority of the time it will be the kids in the back and for and the foreseeable future it work....
My pathfinder seat plan was not going to fit and with out a metal shop making the brackets was going to be a pain in the butt.
I was at a U Pull it wrecking yard today and found some cool stuff out of an Isuzu Amigo:
Back seat is a fold and tumble. fit is just about right. Rear visibility sucks with the seat up but I have a Costco rear view camera to install and I can't see with the spare tire on the back anyway. With my vise, drill press and favorite BFH
I feel I can come up with brackets very easy:Integrated head rests, decent comfort for the kids, easy install and cheap
It has got a couple of tears but am planning on making a soft seat cover for it (actually know how to sew )Folded forward I will be able to make a small storage area under the seat and be able to sleep in the back still (am short):
Also Picked up the rear seat belt mounts out of the amigo and some rear shoulder (3 point) seat belts out of a pathfinder. I will need mod the brackets a little and cut 1.25" off longer tube in the rear but it should make for some better mounts than just the stock lap belts. Some stout backing plates are also in the works .
The seat needs a little more cleaning up and it sits up a little higher than I would like and I don't think any body over 5'5" would really be able to sit in the back but the majority of the time it will be the kids in the back and for and the foreseeable future it work....
Jun 15, 2008 | 07:52 PM
#119
Finally got to spend some time doing something worthwhile on the truck. Father's Day working on the truck and having my teenage daughter help me wrench on it, doesn't get better than that.
Goal was to prep the truck for getting the dual cases in:
first step was to go from this:
to this:
Make sure you use good pliers, that snap ring can fly

With my kid getting wrenches for me only took a half an hour or so to have this pile:

Now it is No wheel drive:
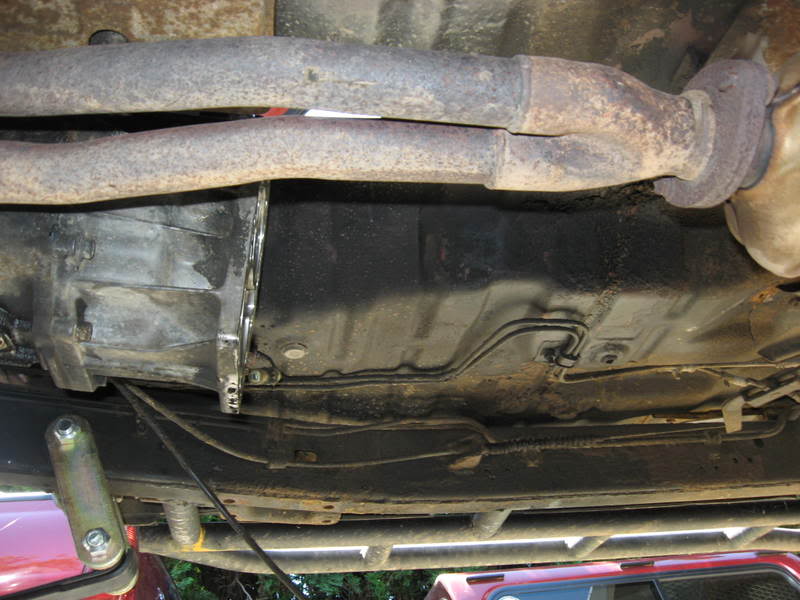
The transmission is held up with a couple of ratchet straps...just have to push the junk around for now.
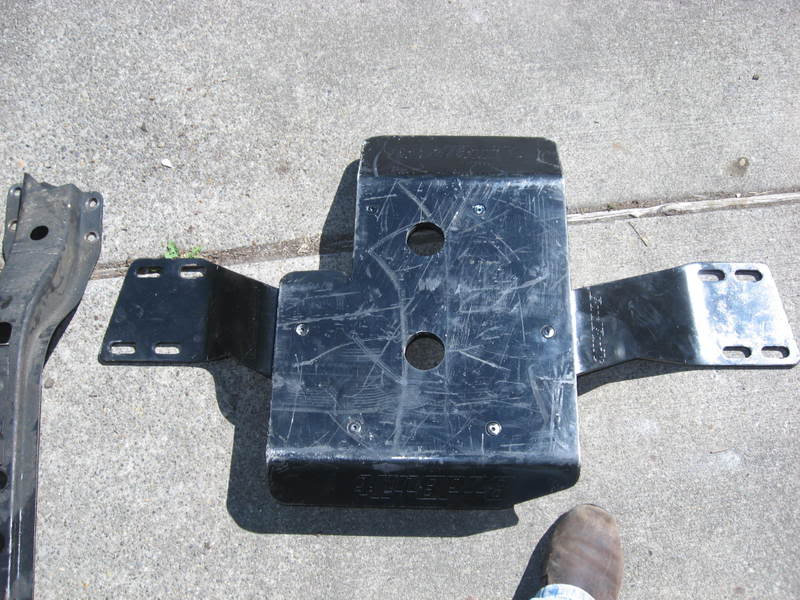
I had bought this Budbuilt skid plate off ebay last year dirt cheap ($31 plus shipping and the only bidder) and thought I got the killer deal, it was listed as "BudBuilt Dual Transfercase mount/crossmember 79-83 Toyota Truck:
With stock transfercase mount I had about 19.5" of clearance:
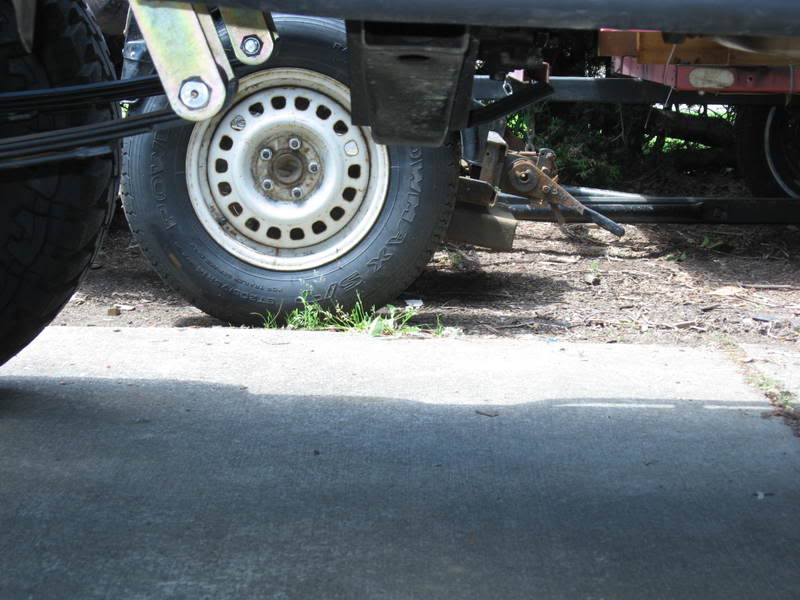
19.5 inches to the ground with stock skidplate
Thought I would do a test fit to see how much ground clearance I was going to gain:
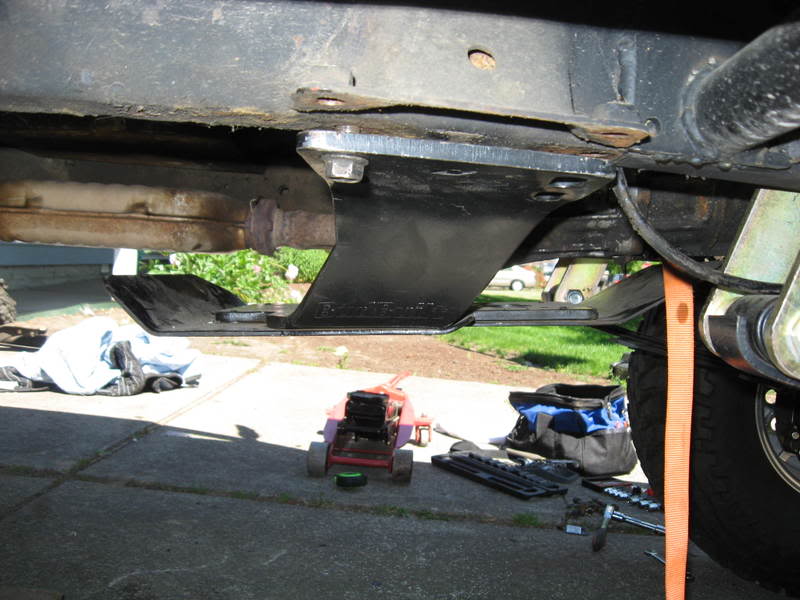
I would have gained 2" of clearance if the FRigging thing would have been wide enough
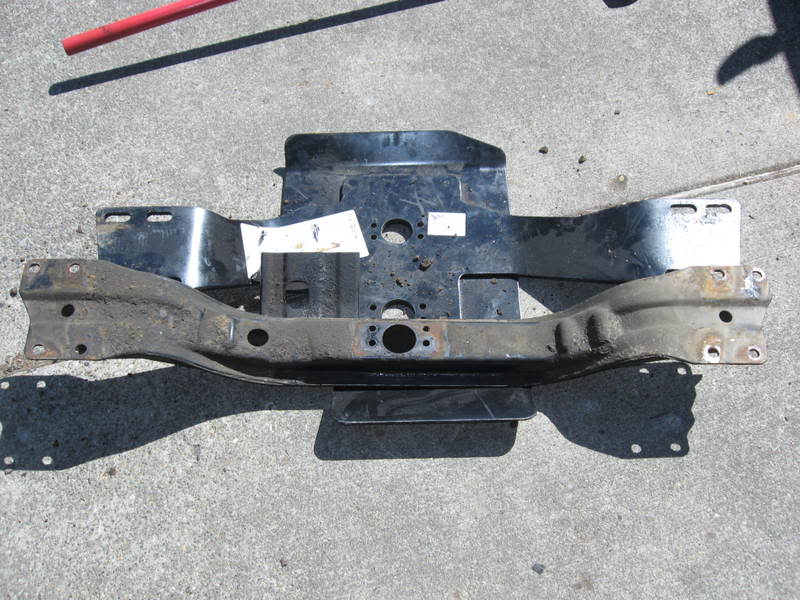
budbuilt skidplate: the stock crossmember:
Front inside holes: 31" Ctr to ctr 34.5" Ctr to ctr
Front outside holes: 36" Ctr to ctr 39" Ctr to ctr
Rear inside holes: 33" ctr to ctr 37" ctr to ctr
rear outside holes 38" ctr to ctr 42" ctr to ctr
Anybody got a clue as to what this thing is suppsed to fit? Maybe a samurai
Not out a ton of money obviously was hoping to save a few bucks on this part of the build. Now out a delay of getting the cases put in and having to talk my wife into some cash to order a crossmember from someone....
hopefully tomorrow I can at least get this pile of parts:

To look something like this:
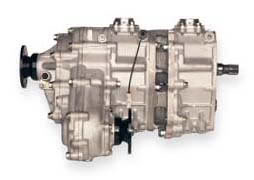
Might even be able to go wheeling sometime this summer...
Goal was to prep the truck for getting the dual cases in:
first step was to go from this:
to this:
Make sure you use good pliers, that snap ring can fly
With my kid getting wrenches for me only took a half an hour or so to have this pile:
Now it is No wheel drive:
The transmission is held up with a couple of ratchet straps...just have to push the junk around for now.
I had bought this Budbuilt skid plate off ebay last year dirt cheap ($31 plus shipping and the only bidder) and thought I got the killer deal, it was listed as "BudBuilt Dual Transfercase mount/crossmember 79-83 Toyota Truck:
With stock transfercase mount I had about 19.5" of clearance:
19.5 inches to the ground with stock skidplate
Thought I would do a test fit to see how much ground clearance I was going to gain:
I would have gained 2" of clearance if the FRigging thing would have been wide enough
budbuilt skidplate: the stock crossmember:
Front inside holes: 31" Ctr to ctr 34.5" Ctr to ctr
Front outside holes: 36" Ctr to ctr 39" Ctr to ctr
Rear inside holes: 33" ctr to ctr 37" ctr to ctr
rear outside holes 38" ctr to ctr 42" ctr to ctr
Anybody got a clue as to what this thing is suppsed to fit?
Maybe a samurai Not out a ton of money obviously was hoping to save a few bucks on this part of the build. Now out a delay of getting the cases put in and having to talk my wife into some cash to order a crossmember from someone....
hopefully tomorrow I can at least get this pile of parts:
To look something like this:
Might even be able to go wheeling sometime this summer...
Last edited by dropzone; Jun 15, 2008 at 08:21 PM. Reason: forgot a picture
Jun 16, 2008 | 11:01 AM
#120
So I just got an email reply from Bud at Budbuilt:

The skidplate I got is for an 84-94, the passenger side mount is inside the frame Thanks to the ebay seller for listing it wrong...oh well. He said he would give a good deal on just the crossmember. I can use the skidplate...
Hat's off to Bud for the quick reply....
The skidplate I got is for an 84-94, the passenger side mount is inside the frame
Thanks to the ebay seller for listing it wrong...oh well. He said he would give a good deal on just the crossmember. I can use the skidplate...Hat's off to Bud for the quick reply....


