
Dropzone's 1981 Trekker Build-Up Thread
 Feb 3, 2008 | 05:48 AM
#81
---yeah would have been easier, thought he had a plasma cutter and his torch was out of fuel but at least the parts that have been collecting dust in the garage are finally getting install. Just need a couple of more 1099's and I can get the taxes done (GET THE REFUND) and order the rear kit/front shocks from you...
I forgot mine and he had the 3/4 bit, slow but got the job done
 --forgot the camera on last monday...hopefully head out there today to finish if not, monday
.--still not sure about it but want to come up with something cheaper and more secure than having to spring for new tail light lenses every few months when some low life oxygen thief thinks he needs the lenses more than I do
just got home from work, guess I should get off this thing and get some sleep so I can get the truck done....
but at least the parts that have been collecting dust in the garage are finally getting install. Just need a couple of more 1099's and I can get the taxes done (GET THE REFUND) and order the rear kit/front shocks from you...
Drilling 3/4" holes in frame - hole saw. 
Personally, I do not like that LED

just got home from work, guess I should get off this thing and get some sleep so I can get the truck done....
Last edited by dropzone; Feb 3, 2008 at 05:49 AM.
Feb 3, 2008 | 07:46 PM
#82
So got everything done (finally!) pictures are dark, batteries were low so no flash. Will take some pictures tomorrow with the tires back on etc..
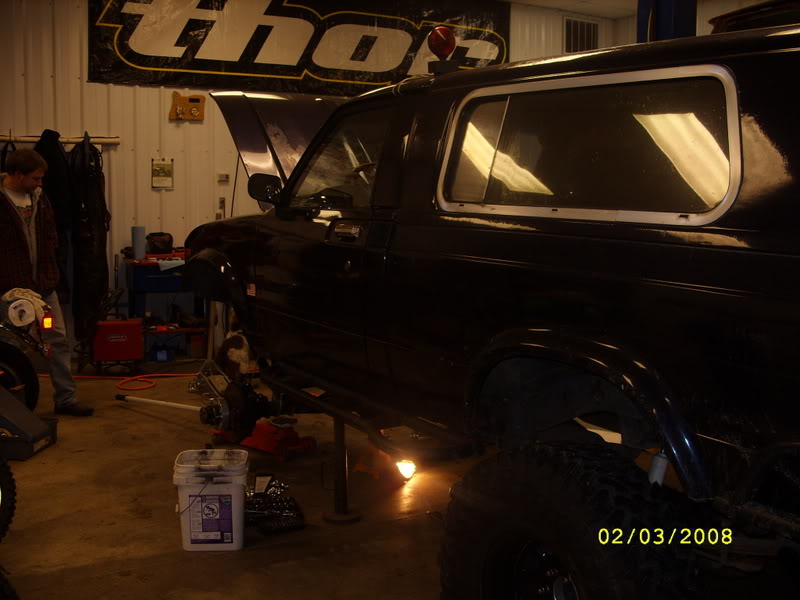
Need to hook up power steering lines.
Truck is gonna be 2WD till I get the Dual cases in...don't want to have to buy 2 front driveshafts..
Need to hook up power steering lines.
Truck is gonna be 2WD till I get the Dual cases in...don't want to have to buy 2 front driveshafts..
Feb 4, 2008 | 12:27 PM
#83
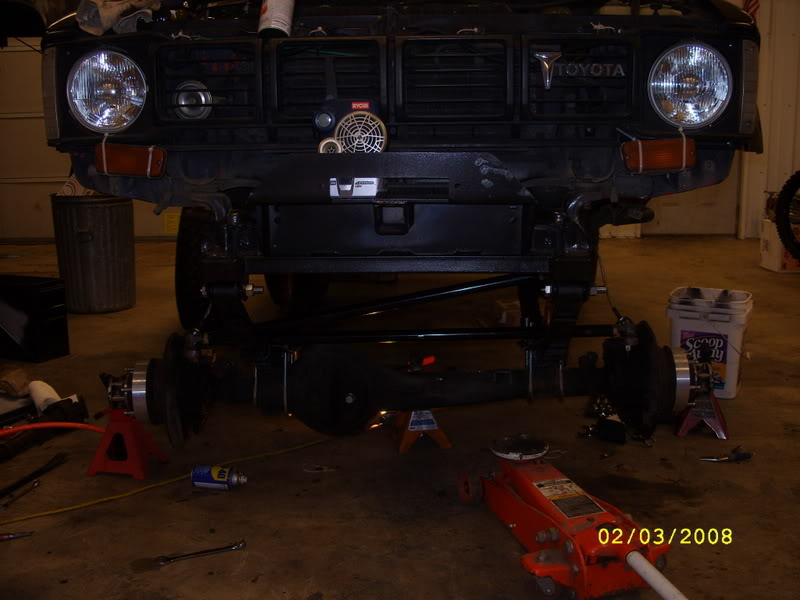
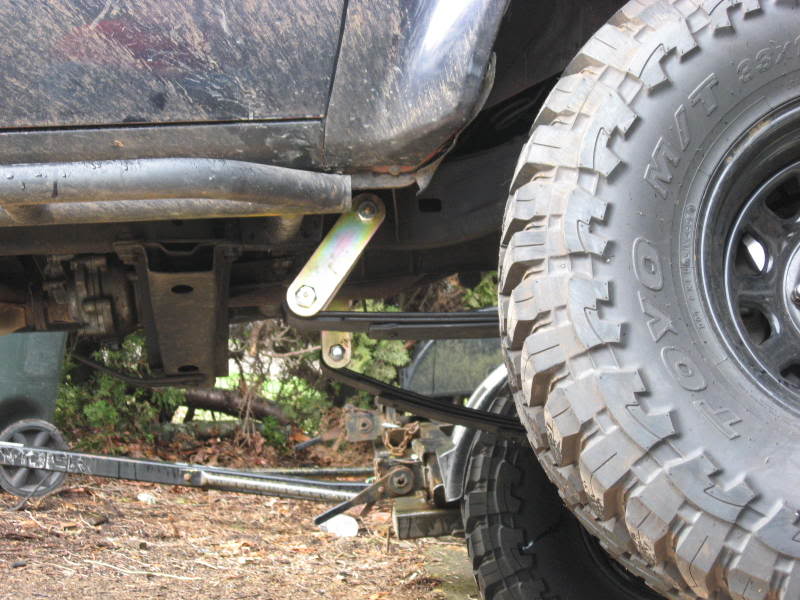
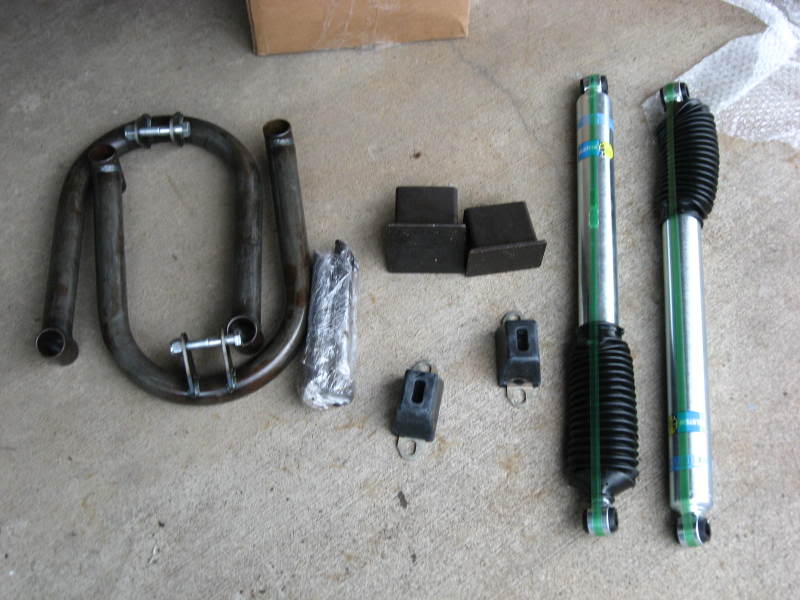
front suspension just about done...
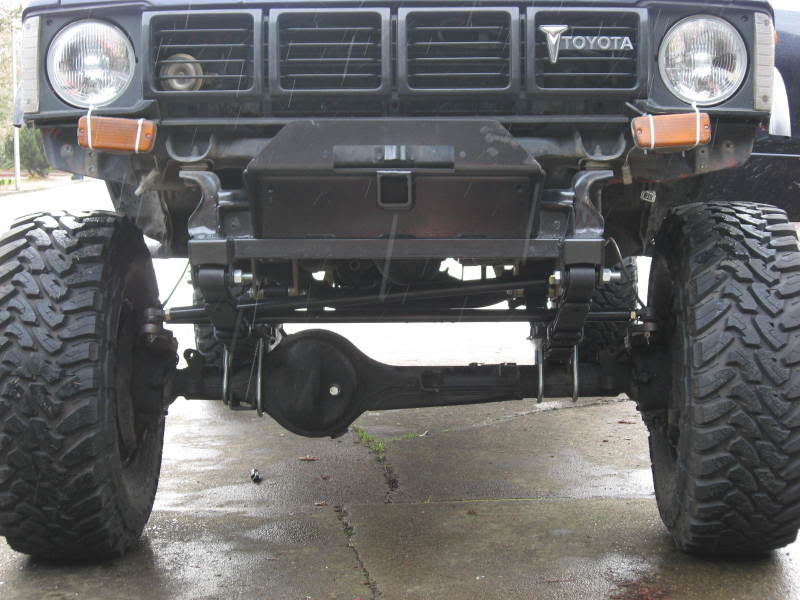
OK, finally got the regular 33's back on. I still need to do bump stops and front shocks but need to wait for the tax refund for that one...but the old beast has some new spring in her step she didn't have before
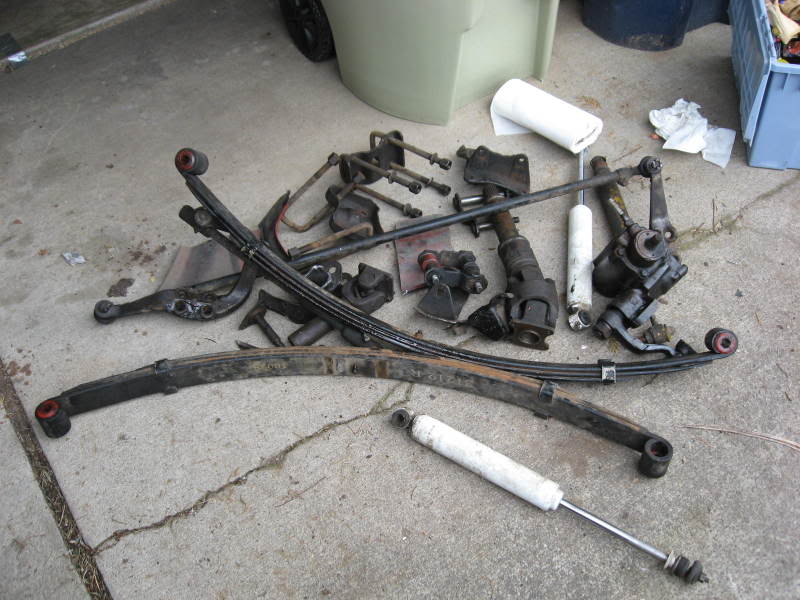
Old stuff that was removed...probably lost 20 pounds and 27 years of road dirt too:
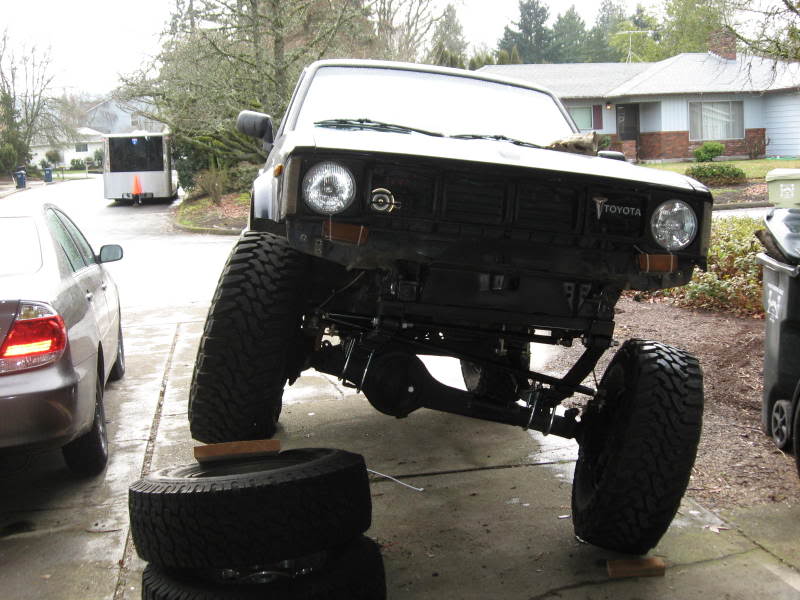
Before High steer:

With High steer, everything up above the axle, nice and protected. The 94 IFS box sure has a lot more positive feel to it...
Old front end flex:
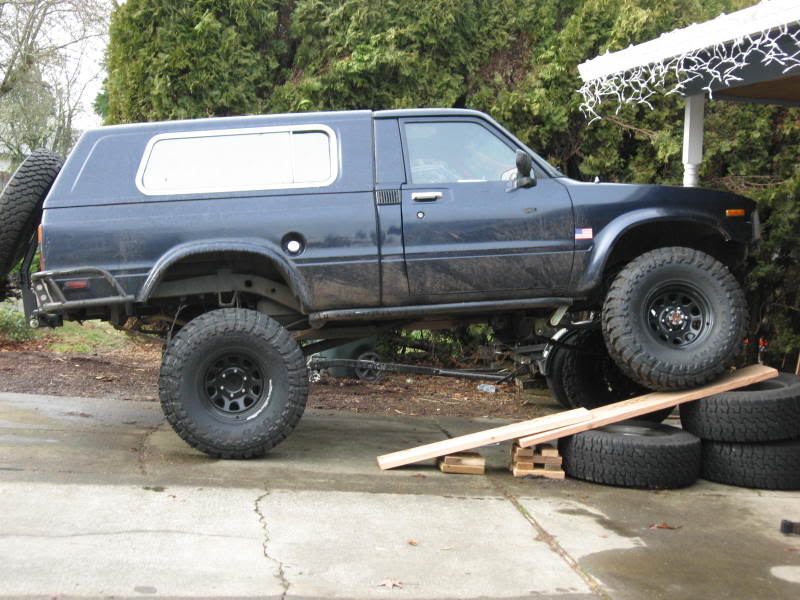
New (could have gone up a bit farther but want to get bump stops in there just in case)...Yeah I know I need to flip the driver's side front spring bolt around
poser ramp:
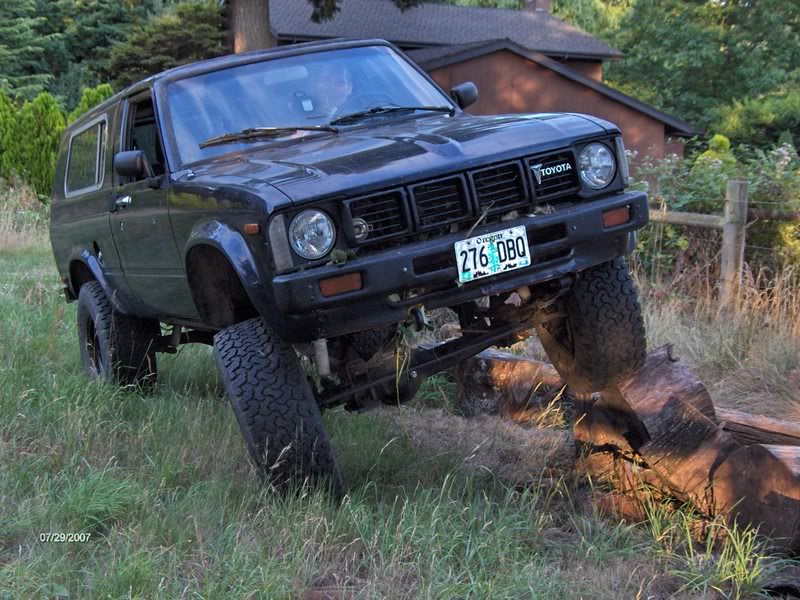
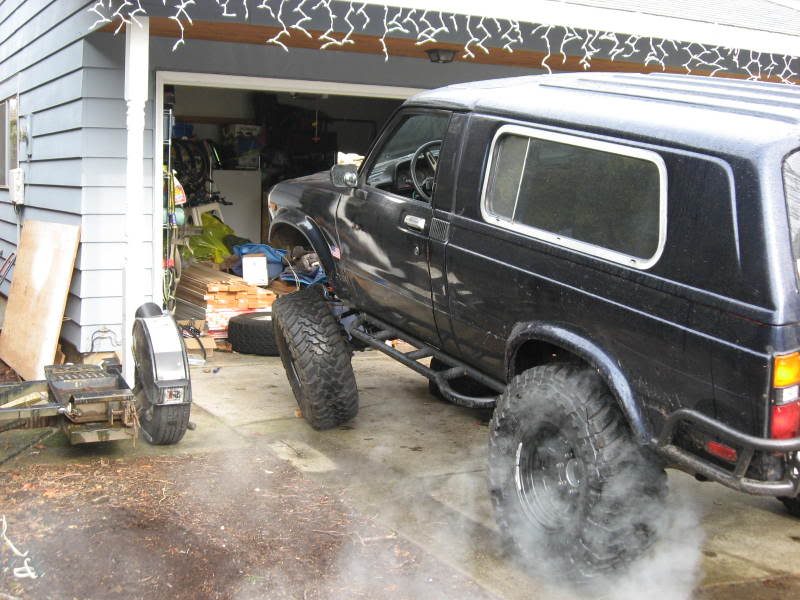
it looks like it is smoking but truck is warming up and 35*...
Front shackle angle, I think it looks ok..if someone else thinks otherwise from experience let me know...
Hangs a bit (ok A LOT) low in the rear end like a 1st gen 4Runner but the springs should settle a little bit:
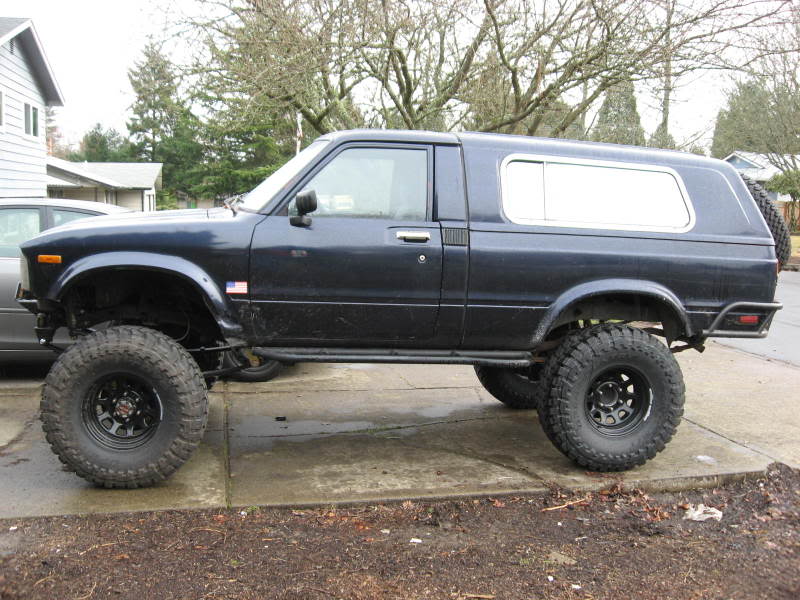
and the plan is to replace the rear springs with a 5" Trail Gear Kit:

Truck will be 2WD for a little while till I get the dual cases in. No way the stock drive shaft would work and I don't want to pay for a drive shaft twice
Old stuff that was removed...probably lost 20 pounds and 27 years of road dirt too:
Before High steer:
With High steer, everything up above the axle, nice and protected. The 94 IFS box sure has a lot more positive feel to it...
Old front end flex:
New (could have gone up a bit farther but want to get bump stops in there just in case)...Yeah I know I need to flip the driver's side front spring bolt around
poser ramp:
it looks like it is smoking but truck is warming up and 35*...
Front shackle angle, I think it looks ok..if someone else thinks otherwise from experience let me know...
Hangs a bit (ok A LOT) low in the rear end like a 1st gen 4Runner but the springs should settle a little bit:
and the plan is to replace the rear springs with a 5" Trail Gear Kit:
Truck will be 2WD for a little while till I get the dual cases in. No way the stock drive shaft would work and I don't want to pay for a drive shaft twice
Last edited by dropzone; Feb 4, 2008 at 12:29 PM.
Feb 4, 2008 | 12:31 PM
#84
modified the tire carrier...
Modified the CBI rear tire carrier from this:
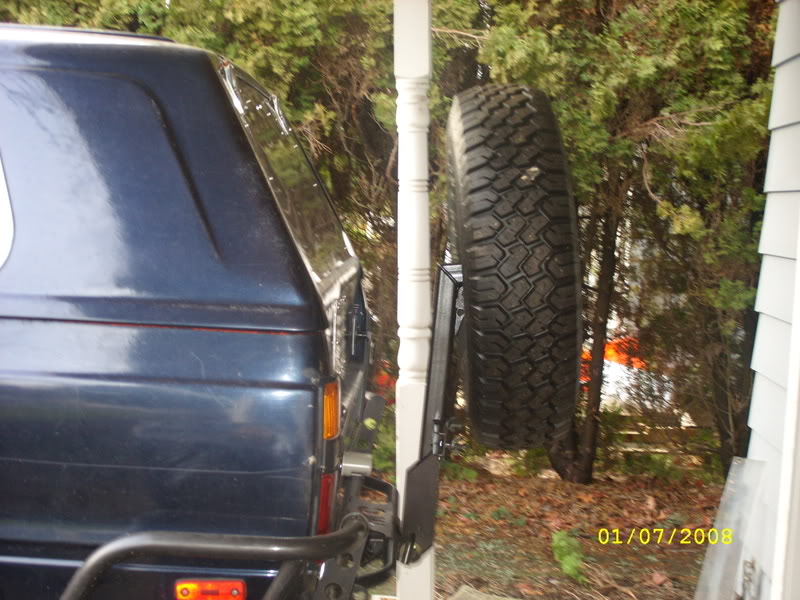
To this:
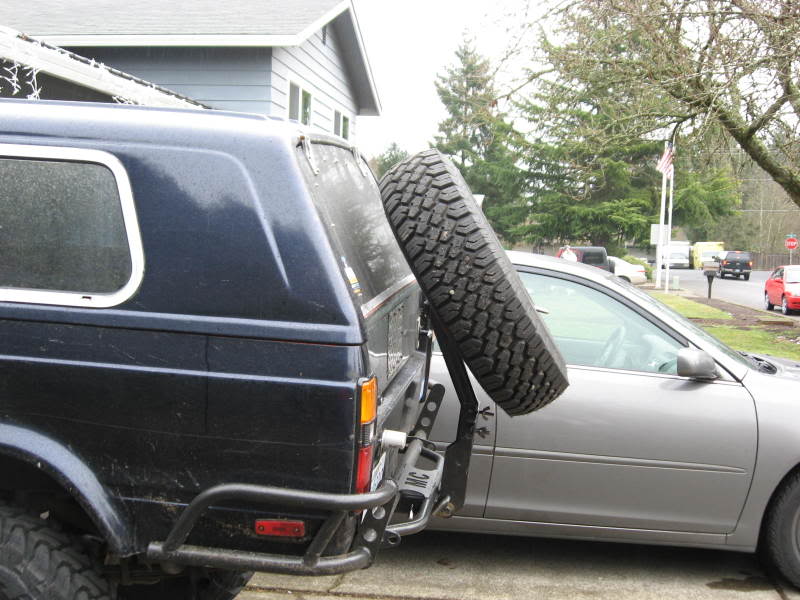
Rear View:

Not sure if I totally like how the angle came out, but the welding work was free (THANKS Todd ) it is still better than straight up...
To this:
Rear View:
Not sure if I totally like how the angle came out, but the welding work was free (THANKS Todd
) it is still better than straight up...
Feb 4, 2008 | 01:03 PM
#86
Thanks 4Bangin..The front springs were some TG 4" springs I bought off ebay, about $200 cheaper than list price. there is a TG employee that sells them periodically. I kind of peiced the rest of it together as cash was available...
I need to fine tune the alignment before I take it more than around the block...but just the little I have driven it the steering response I feel is awesome. My old steering box was pretty warn. Having all new tie rods and an IFS box is a world of difference.
I need to fine tune the alignment before I take it more than around the block...but just the little I have driven it the steering response I feel is awesome. My old steering box was pretty warn. Having all new tie rods and an IFS box is a world of difference.
Last edited by dropzone; Feb 4, 2008 at 01:05 PM.
Feb 5, 2008 | 03:52 PM
#87
UPS dropped off the Aussie locker yesterday, very reasonably prices and fast shipping:
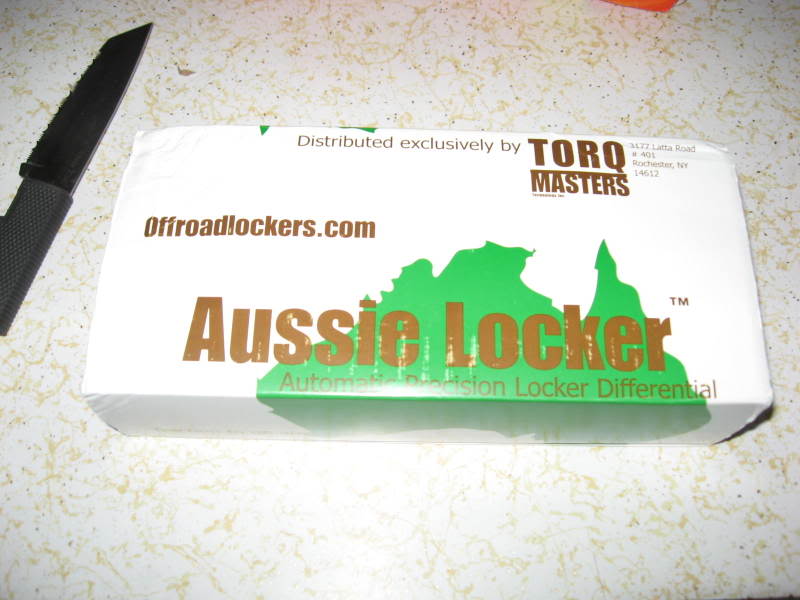
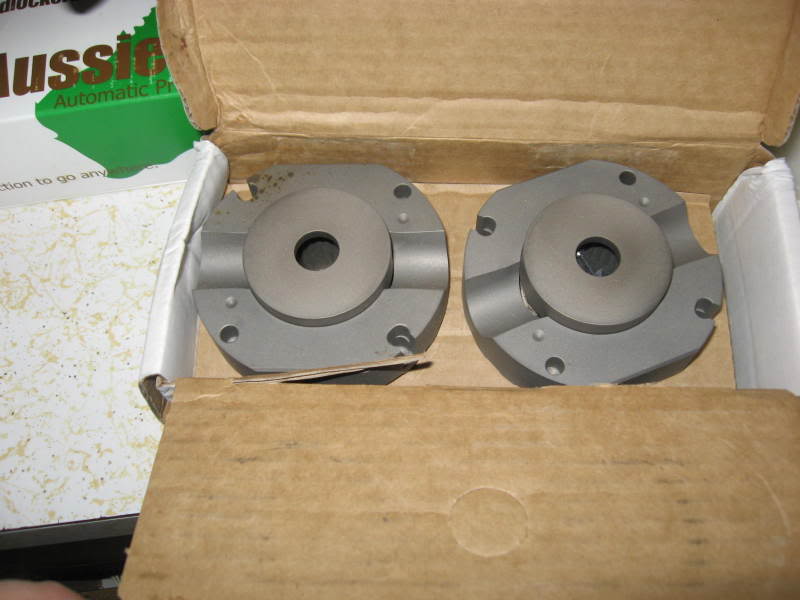
Only thing is there is some slight discoloration on one half, probably a little rust. Am waiting on a response from Aussie to see what they say. I am pretty sure that a little bit work with some fine steel wool would clear it up..
Now my quandary is to put it in the back or the front?? I should have ordered them both a the same time. I have got all the stuff to rebuilt the front end and go throw it in now or put it in the rear. Than take it all apart next fall when I plan on putting in 5.29's
When I do I will be following the install guidance at http://gearinstalls.com/aussielocker09.htm
Feb 5, 2008 | 05:52 PM
#88
Registered User
Joined: Jan 2003
Posts: 1,705
Likes: 0
From: El Paso, TX
Put it in the rear. I think I'm the only one around here who ran the auto locker in the front like Aussie recommends. I had a Lockright in the front only at the time. It was good going up hills - affected steering downhills - sometimes scary- and my worst stuck is when the ground broke away under my left front tire. As I tried to steer right the truck went almlost exactly sideways because I had no traction in the rear to keep pushing me so that I could continue to steer out of the obstacle. I can get into a lot of places with the rear locker and 2wd that I had a hard time getting to in 4wd before the lockers. BTW - putting the locker up front later is pretty straightforward. Since you reuse the carrier you won't ruin the gear setup.
Last edited by Victor; Feb 5, 2008 at 05:54 PM.
Feb 10, 2008 | 08:17 PM
#89
Put it in the rear. I think I'm the only one around here who ran the auto locker in the front like Aussie recommends. I had a Lockright in the front only at the time. It was good going up hills - affected steering downhills - sometimes scary- and my worst stuck is when the ground broke away under my left front tire. As I tried to steer right the truck went almlost exactly sideways because I had no traction in the rear to keep pushing me so that I could continue to steer out of the obstacle. I can get into a lot of places with the rear locker and 2wd that I had a hard time getting to in 4wd before the lockers. BTW - putting the locker up front later is pretty straightforward. Since you reuse the carrier you won't ruin the gear setup.
Victor--thanks for the advice
 , I did not even think about the locker steering characteristic..It will go in the rear and the front will get one when $$$ allows it.
Feb 12, 2008 | 01:27 PM
, I did not even think about the locker steering characteristic..It will go in the rear and the front will get one when $$$ allows it.
Feb 12, 2008 | 01:27 PM
#90
Was out driving around trying to find something for my wifey for Valentine's Day. Dunno if the U Pull it was really on the way or not but thought what the heck, I will pull in and see what they had.
Found a set of 93-94 Integra seats that were a little dirty but overall excellant shape:

Spent a little time with some Woolite or whatever was under the sink and they cleaned up pretty good. I am sure they will need another cleaning, but maybe not--it is a trail truck
They fit the bill as far as being narrow enough to clean my planned internal cage (someday) and the brackets actually allow the seats to slide forward, something the current 4Runner seats did not allow--broken sliders
Not sure when I will get them in and thinking about some seat covers, but for the money I am happy..
Order from Brian at Wabfab also showed up today, hope to be able to get the front end done suspensionwise soon too..
but thought what the heck, I will pull in and see what they had.Found a set of 93-94 Integra seats that were a little dirty but overall excellant shape:
Spent a little time with some Woolite or whatever was under the sink and they cleaned up pretty good. I am sure they will need another cleaning, but maybe not--it is a trail truck
They fit the bill as far as being narrow enough to clean my planned internal cage (someday) and the brackets actually allow the seats to slide forward, something the current 4Runner seats did not allow--broken sliders
Not sure when I will get them in and thinking about some seat covers, but for the money I am happy..
Order from Brian at Wabfab also showed up today, hope to be able to get the front end done suspensionwise soon too..
Feb 12, 2008 | 03:47 PM
#92

 Feb 12, 2008 | 07:22 PM
#94
 :
Feb 19, 2008 | 11:05 AM
:
Feb 19, 2008 | 11:05 AM
#95
Been gutting the basement to get rid of some crappy old paneling and to insulate it and the dumpster was getting picked up this morning so thought I should take out my 4Runner seats that would not slide etc and toss them in the dumpster..
A couple of reasons to replace the seats:
1) get something that will slide forward and back to make it easier for the kids to climb in the back
2) I plan on putting a full cage in sometime and the 4runner seats did not allow enough clearance.
Old seat were very close to the edge of the door sill:


Acura Integra seats are narrower and allow the clearance I will need for the eventual cage:


The seats are not actually mounted yet, I need to fix the floor. I plan on using grade 8 bolts/washers and 3/16" or 1/4" material (have got both in the garage) for the seat mounting area following the floor repair.
Surprisingly the position of the driver's seat/view feels better than with the 4Runner seats, not too bad for $40 out of a junk yard.
Saved the old head rests to try to come up with a way to use them in the back for the kids. Will be making a new rear folding seat soon, the stock Winnebago frame has just about had it.. Guess that is to be expected on a 27 year old truck with umpteen owners...
A couple of reasons to replace the seats:
1) get something that will slide forward and back to make it easier for the kids to climb in the back
2) I plan on putting a full cage in sometime and the 4runner seats did not allow enough clearance.
Old seat were very close to the edge of the door sill:
Acura Integra seats are narrower and allow the clearance I will need for the eventual cage:
The seats are not actually mounted yet, I need to fix the floor. I plan on using grade 8 bolts/washers and 3/16" or 1/4" material (have got both in the garage) for the seat mounting area following the floor repair.
Surprisingly the position of the driver's seat/view feels better than with the 4Runner seats, not too bad for $40 out of a junk yard.
Saved the old head rests to try to come up with a way to use them in the back for the kids. Will be making a new rear folding seat soon, the stock Winnebago frame has just about had it.. Guess that is to be expected on a 27 year old truck with umpteen owners...
Last edited by dropzone; Feb 19, 2008 at 11:21 AM.
Feb 25, 2008 | 12:55 PM
#97
In the interest of getting my seats installed properly some time soon a friend of mine said there was a couple of first gen trucks over at the local U Pull it.
Went over there to check out them out, took a some tools with me about 1/2 hour or so using these things and $15:

Netted me this hunk of junk and an extra set of door hinges.

to replace this:
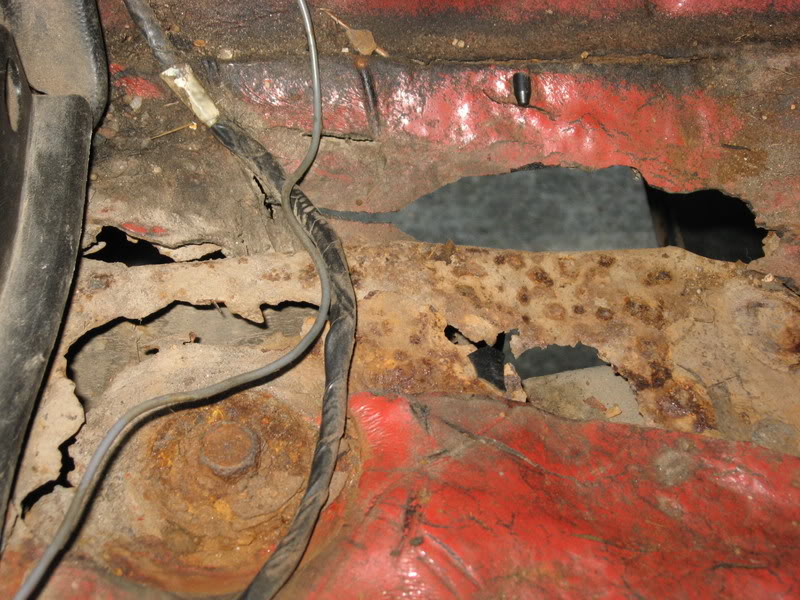
Wanted to cut out the whole side but this was the good part, so it will replace the worst of my rust
I would have loved to have grabbed the doors as they were in great shape, but extra space at my house is getting scarce.
Went over there to check out them out, took a some tools with me about 1/2 hour or so using these things and $15:
Netted me this hunk of junk and an extra set of door hinges.
to replace this:
Wanted to cut out the whole side but this was the good part, so it will replace the worst of my rust
I would have loved to have grabbed the doors as they were in great shape, but extra space at my house is getting scarce.
Mar 4, 2008 | 03:42 PM
#99
93 Integra Seats installed--finally
Finally had a little time to get my Integra seats installed.
These things are great, there is a second hole about 1.25" over from the stock front outside mounting hole that lined up just about right, enlarged it just a hair and was able to use the inside front stock mount:

just had to cut off about the lower .25" or so of the stock bracket to allow it to sit flat on the floor.
I think that being able to use the stock front holes makes the install much more stable and install went very fast...
outside rear mount came up with something similar to WSUWeston's brackets:


The rear inside mount is flat, so ended up using the old stack of washers install method. Used grade 8 fender washers on the underside so that should help spread the load. After cutting out of floor section on a donor truck, I am pretty impressed at how well built these old trucks are...
They will have to come back out though when it fix the rust, needed to get them mounted though so I could still drive the old beast around
These things are great, there is a second hole about 1.25" over from the stock front outside mounting hole that lined up just about right, enlarged it just a hair and was able to use the inside front stock mount:
just had to cut off about the lower .25" or so of the stock bracket to allow it to sit flat on the floor.
I think that being able to use the stock front holes makes the install much more stable and install went very fast...
outside rear mount came up with something similar to WSUWeston's brackets:
The rear inside mount is flat, so ended up using the old stack of washers install method
. Used grade 8 fender washers on the underside so that should help spread the load. After cutting out of floor section on a donor truck, I am pretty impressed at how well built these old trucks are...They will have to come back out though when it fix the rust, needed to get them mounted though so I could still drive the old beast around


