
Dropzone's 1981 Trekker Build-Up Thread
 Aug 11, 2008 | 02:23 PM
#141
my weld's look like a drunken booger weld (I don't trust them) so I am dependent on some friends to help me out with it. I am hoping to have the rear kit on soon when my schedule and
Al, thanks, I hope to have it in a wheelable condition one of these days...
 Aug 12, 2008 | 09:31 AM
#142
Registered User
Joined: May 2008
Posts: 775
Likes: 0
From: Portland, OR
 Aug 25, 2008 | 03:46 PM
#143
did a little interior work on the Trekker today...still need to get off my butt and get my rear third in, dunno why i have not done it yet guess I have been hoping the 5.29 Gear Fairy will show up someday soon...
Had a little time to kill this morning so I headed out to the Sherwood U Pullit off of 99W to do some boneyard exploring...which I had more than $50, there were 3-4 79's and 80's in the yard (2wd's) but could have scored some great doors...I would love to get an extra cab too...by I digress..
I have been trying different back seat combinations in hope of finding something that would be good for the kids, have adjustable headrests and best thing would be split rear seats...I had an Isuzu Amigo rear seat that I thought would work but it must have been wet or something it never smelled right so I went searching again...was kind of looking for a Volvo Wagon back seat, Samurai backseat..something that would measure 36" wide (width of the seat tray in the bed of the trekker).
took a look inside a Mitsubishi Montero, looked like a couple of people pushed the ejector seats through the windshield..anyway found that that it was a '94 with jumpseats...trusty tapemeasure showed they were about 18.5" wide, a few minutes later they were in the wheel barrow on the way to the cash register with a pair of these:

they had kind of a wing for the bracket that attached inside the montero, would have been cool to adapt that but it was not in the cards with the Trekker bed--
started to get all the brackets and crap off:

U bolts from the rear u bolt flip kit worked great for keeping the fabric out of the way of the sawzall:

after a few minutes of playing with tools of destructions I had this pile of junk:

reinstalled the seat fabric around the bracket area that was cut off, just kind of folded it under and tightend it with the split rings (i will get it a little tighter when I make the brackets):

Did a test fit:

fits pretty good, I need to make some brackets that will hold the seat up about 1.5" or so...
Meets the objective of having split seats, the kids are comfortable--these montero seats even recline about 30 Degrees or so...and doesn't smell like something dead like the AMigo seat

they are about 3-4" above the floor of the bed when folded down, I am pretty happy with that...it was a good hour playing with tools ..
..

If the front seats of the Montero had not been sliced by some oxygen thieve I would have grabbed them too, they look like they would fit in a 1st gen cab, have got some cool adjustments, an adjustable armrest would be cool for road trips ...and matched the rear...
Had a little time to kill this morning so I headed out to the Sherwood U Pullit off of 99W to do some boneyard exploring...which I had more than $50, there were 3-4 79's and 80's in the yard (2wd's) but could have scored some great doors...I would love to get an extra cab too...by I digress..
I have been trying different back seat combinations in hope of finding something that would be good for the kids, have adjustable headrests and best thing would be split rear seats...I had an Isuzu Amigo rear seat that I thought would work but it must have been wet or something it never smelled right so I went searching again...was kind of looking for a Volvo Wagon back seat, Samurai backseat..something that would measure 36" wide (width of the seat tray in the bed of the trekker).
took a look inside a Mitsubishi Montero, looked like a couple of people pushed the ejector seats through the windshield..anyway found that that it was a '94 with jumpseats...trusty tapemeasure showed they were about 18.5" wide, a few minutes later they were in the wheel barrow on the way to the cash register with a pair of these:
they had kind of a wing for the bracket that attached inside the montero, would have been cool to adapt that but it was not in the cards with the Trekker bed--
started to get all the brackets and crap off:
U bolts from the rear u bolt flip kit worked great for keeping the fabric out of the way of the sawzall:
after a few minutes of playing with tools of destructions I had this pile of junk:
reinstalled the seat fabric around the bracket area that was cut off, just kind of folded it under and tightend it with the split rings (i will get it a little tighter when I make the brackets):
Did a test fit:
fits pretty good, I need to make some brackets that will hold the seat up about 1.5" or so...
Meets the objective of having split seats, the kids are comfortable--these montero seats even recline about 30 Degrees or so...and doesn't smell like something dead like the AMigo seat
they are about 3-4" above the floor of the bed when folded down, I am pretty happy with that...it was a good hour playing with tools
..If the front seats of the Montero had not been sliced by some oxygen thieve I would have grabbed them too, they look like they would fit in a 1st gen cab, have got some cool adjustments, an adjustable armrest would be cool for road trips ...and matched the rear...
Last edited by dropzone; Aug 25, 2008 at 03:47 PM. Reason: i can't spell very good
 Sep 8, 2008 | 12:41 PM
#145
slowest locker install in history continues..
So to continue what has got to be one of longest locker installs in history I finally had some time to a little further on get the third back together..
Ring gear bolts to 75 lbs, I choice to use the original bolt retainers instead of loctite:
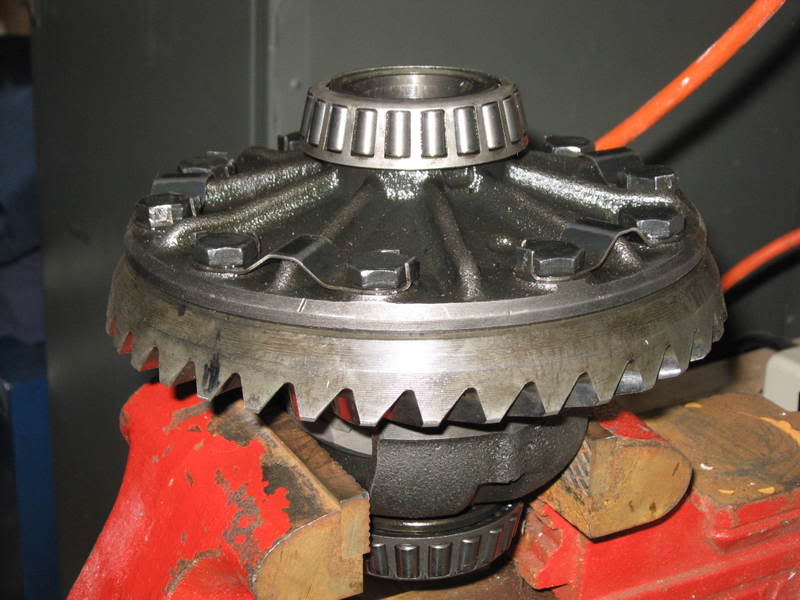
Cleaned out the pinion housing to make sure no crap fell in there:

Trying to get the carrier back in holding was a pain in the butt so I made a disposable version of what Zuk has:

Made this little doo hickey to adjust the carrier bearings

....now they say you are supposed to just put this things back in if you are smarter than me and mark the sides...well I was a bonehead (YT polite version and failed to do that --so I tried to go through the whole procedure...I hope it is close to being right
here is all back together...whatever coast/load pattern I had, it looked OK to my uneducated guestimate...it got smeared when I was working it back and forth

...things seem to be tight with no noticeable noises...guess I will find out when I finally drive this thing...If not I am hoping I can use a grenaded ring gear to convince my wife I need 5.29's instead of 3.90's
Gotta pick up my Rugrat, Hailey, from school. Need to pick up some RTV or something to seal the diff and get this POS back on 4 wheels
If that comes to be I hope to get ahold of Ganoid, he is kind of local and does differential set ups...
first time doing this I have a new appreciation for the guys that know what the heck they are doing..part of this project is for me to learn stuff
Ring gear bolts to 75 lbs, I choice to use the original bolt retainers instead of loctite:
Cleaned out the pinion housing to make sure no crap fell in there:
Trying to get the carrier back in holding was a pain in the butt so I made a disposable version of what Zuk has:
Made this little doo hickey to adjust the carrier bearings
....now they say you are supposed to just put this things back in if you are smarter than me and mark the sides...well I was a bonehead (YT polite version and failed to do that
--so I tried to go through the whole procedure...I hope it is close to being right here is all back together...whatever coast/load pattern I had, it looked OK to my uneducated guestimate...it got smeared when I was working it back and forth
...things seem to be tight with no noticeable noises...guess I will find out when I finally drive this thing...If not I am hoping I can use a grenaded ring gear to convince my wife I need 5.29's instead of 3.90's
Gotta pick up my Rugrat, Hailey, from school. Need to pick up some RTV or something to seal the diff and get this POS back on 4 wheels
If that comes to be I hope to get ahold of Ganoid, he is kind of local and does differential set ups...
first time doing this I have a new appreciation for the guys that know what the heck they are doing..part of this project is for me to learn stuff
Last edited by dropzone; Sep 8, 2008 at 12:46 PM.
Sep 9, 2008 | 04:17 PM
#146
Well, it is back on all fours finally..I did not realize that I pull the third out on June 23rd...only took 10 Weeks...I work at a sloth pace, but a little faster than Congress
Got the sealant on, maybe too much but wanna make sure it seals:

Third back in finally after being out since June 23rd

Axles back in:

Made sure it had enough fluid:
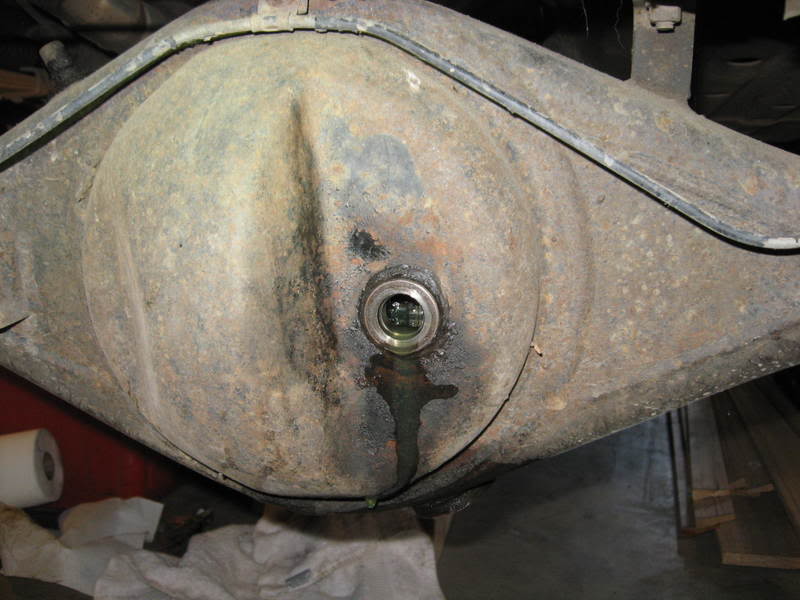
Back on all fours:
Thought this part of the project was only going to take a week...it only took me about 45 minutes to get the third and axles back in when I finally got off my butt...
Since the transmission has been feeling so lonely:

This thing should be here tomorrow....
figured since the transfer cases have sitting out for so long I might has well get this ordered and installed at the same time....
Got the sealant on, maybe too much but wanna make sure it seals:
Third back in finally after being out since June 23rd
Axles back in:
Made sure it had enough fluid:
Back on all fours:
Thought this part of the project was only going to take a week...it only took me about 45 minutes to get the third and axles back in when I finally got off my butt...
Since the transmission has been feeling so lonely:
This thing should be here tomorrow....
figured since the transfer cases have sitting out for so long I might has well get this ordered and installed at the same time....
Sep 10, 2008 | 01:47 PM
#147
Registered User
Joined: May 2008
Posts: 775
Likes: 0
From: Portland, OR
hey, 10 weeks isn't bad in my mind, i'm at 14 months on my jeep!  i haven't risked touching the suspension on the toy yet for fear of another long project!
looking good though! if you ever need a hand (or motivation), give me a shout....
Al
i haven't risked touching the suspension on the toy yet for fear of another long project!looking good though! if you ever need a hand (or motivation), give me a shout....
Al
Sep 30, 2008 | 02:06 PM
#148
Trekker is off to Revenge Fab for a nose job and some butt work
Hey Al: I hadn't checked my own thread in awhile, but I will definitely keep you in mind, might need a hand getting the transfer cases back in (hopefully before the end of the year)
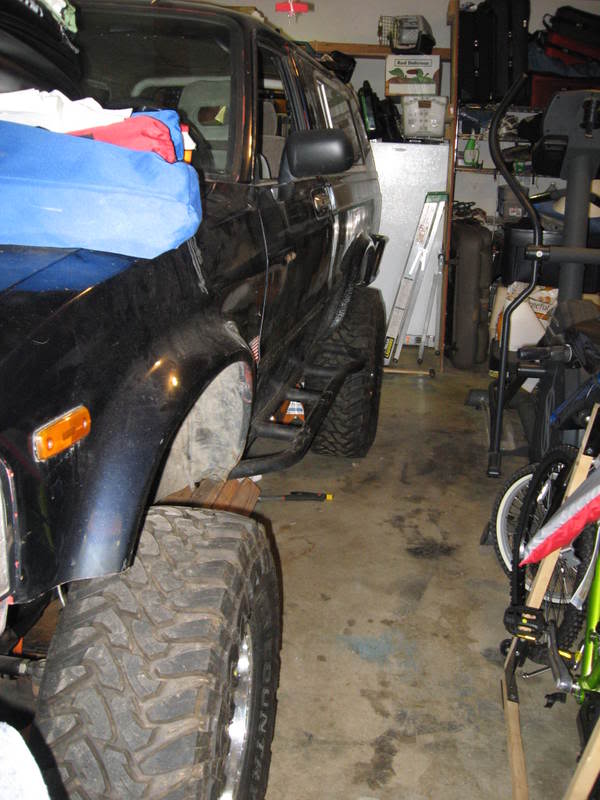
Dragged the Trekker out of the Garage (1st time since June )
)
Pulled out my 15-20 year old More Power Puller...it has come in handy for self extraction and crap like this over the years:

All hooked up and ready to go:

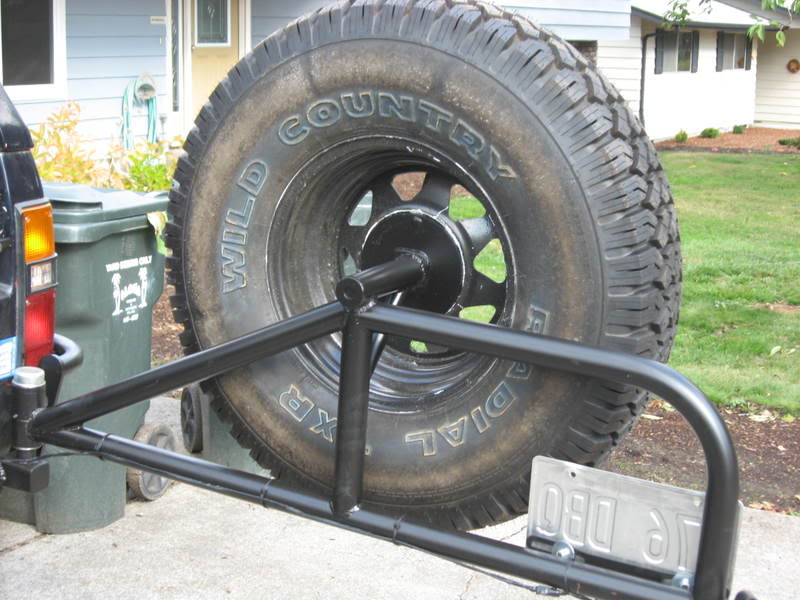
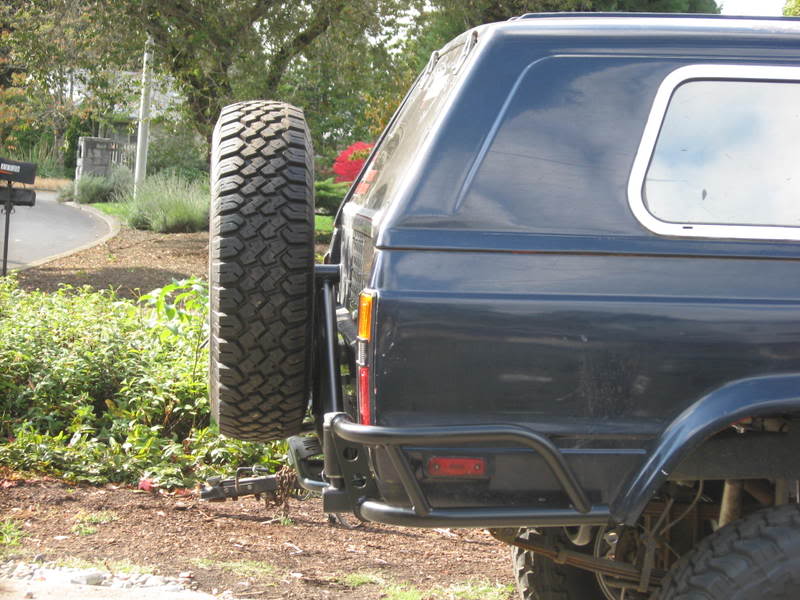
Trekker is now at Revenge Fab in Mt. Angel, OR for a nose job and work on rear end. Derek is gonna make front bumper for me and use parts of my CBI tire carrier to convert the Rear Marlin Bumper to a swing out tire bumper.
I hope to pick it up next tuesday. I am anxious to see what he comes up with
Dragged the Trekker out of the Garage (1st time since June
)Pulled out my 15-20 year old More Power Puller...it has come in handy for self extraction and crap like this over the years:
All hooked up and ready to go:
Trekker is now at Revenge Fab in Mt. Angel, OR for a nose job and work on rear end. Derek is gonna make front bumper for me and use parts of my CBI tire carrier to convert the Rear Marlin Bumper to a swing out tire bumper.
I hope to pick it up next tuesday. I am anxious to see what he comes up with
Oct 7, 2008 | 01:12 PM
#151
Well, here is a work in progress picture, not quite done.
If I ever flop the truck , the stinger should help keep the engine/radiator from getting hosed too bad...
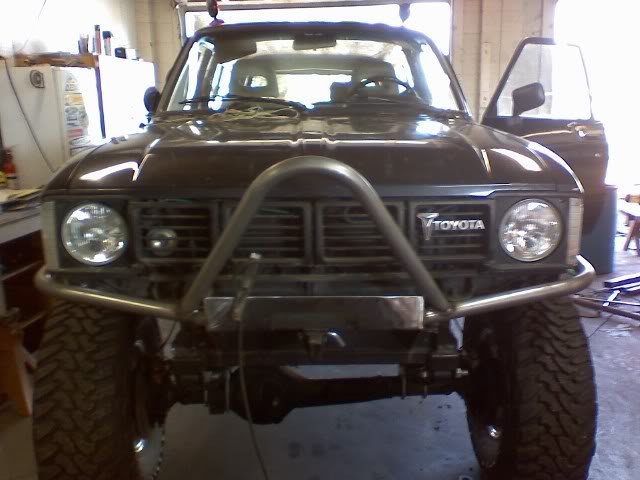

I am hoping to head down tomorrow to pick up the Trekker...
Now I just need to get off my butt and rebuilt the front end
If I ever flop the truck
, the stinger should help keep the engine/radiator from getting hosed too bad...I am hoping to head down tomorrow to pick up the Trekker...
Now I just need to get off my butt and rebuilt the front end
Last edited by dropzone; Oct 7, 2008 at 01:23 PM. Reason: added pic
Oct 8, 2008 | 08:37 PM
#156
I do know it will be a combination of tube and a little bit of square tubing...
Looksl like you have a new Toy?
 Oct 9, 2008 | 03:17 AM
#158
Registered User
Joined: Dec 2005
Posts: 2,024
Likes: 6
From: Souderton, PA
Oct 10, 2008 | 01:47 PM
#159

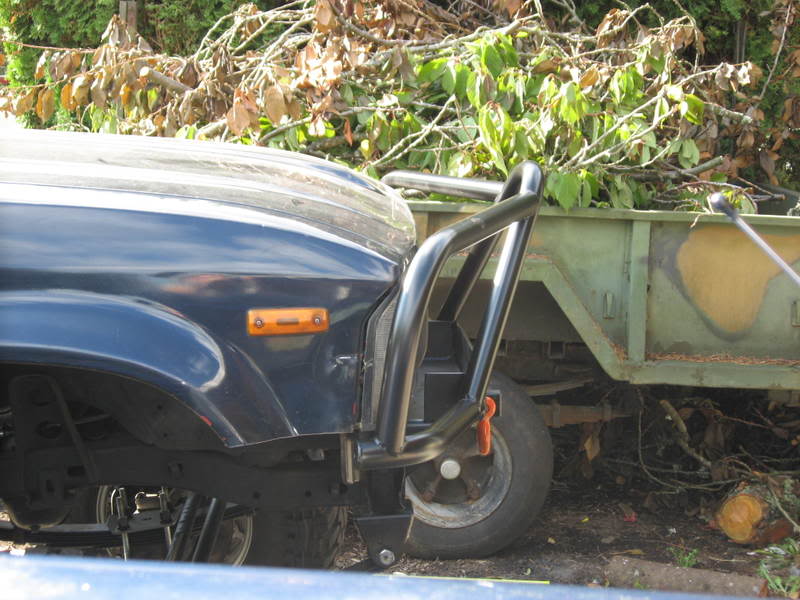
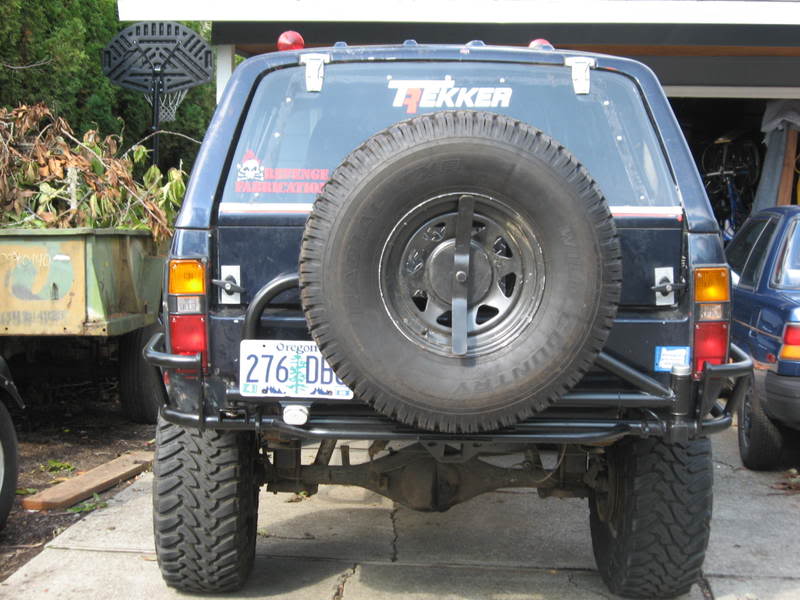
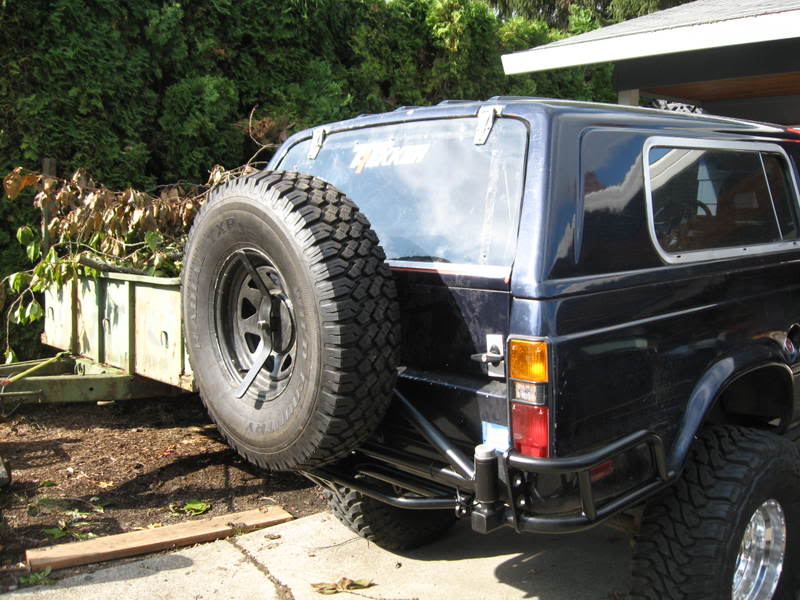
Went down today and picked up the Trekker from Derek. I am really happy with what he came up with for the bumpers. Thanks for the awesome deal!!
Front:

It doesn't stick out too much like some I have seen:
Modified the rear Marlin bumper to a swing out

And since I have been wanting the holes in the floor fixed, he hooked me up on those too...

tight fit welding in there by the fiberglass tub

I no longer can see the road


