
OEM mini header install for 2.7L*(Pics)*
 Mar 13, 2012 | 06:44 PM
#141


Joined: Jan 2003
Posts: 17,692
Likes: 58
From: Marysville, WA
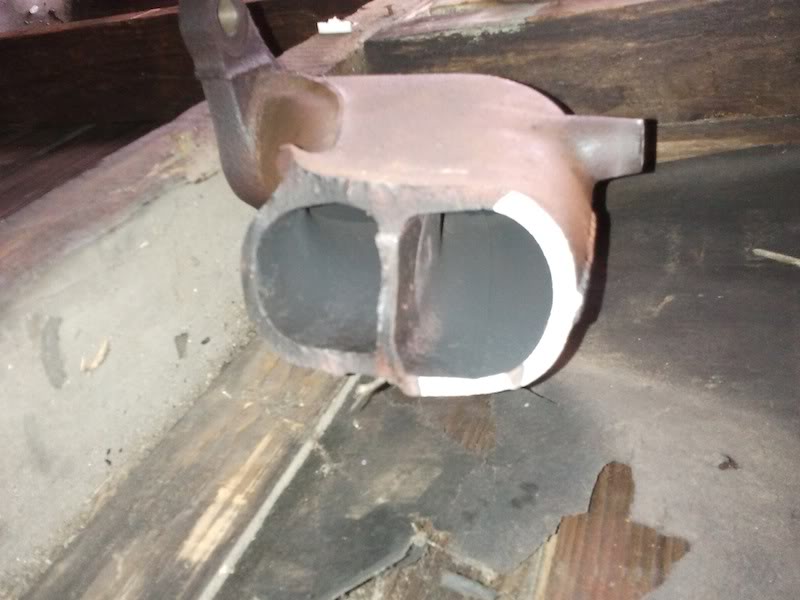
So, much thanks to all of the posters in this thread. It's been a great help! So, my 1995 Tacoma 3RZ (2.7l) cast iron header is badly cracked. I researched on this thread, and thought the consensus was that a 2001-2004 2RZ (2.4l) mini header would bolt right on my engine. I found one in a junkyard, and had it mailed to me. Upon inspection, it has a different (triangular) flange, and only one opening. Mine, and all the other ones I saw online, had two openings, and used two donut gaskets.
How did I screw up? Did I get a CALI header, which is somehow different than a federal header? Are they not actually interchangeable? Any advice would be greatly appreciated. Thanks!
My newly purchased header:

How did I screw up? Did I get a CALI header, which is somehow different than a federal header? Are they not actually interchangeable? Any advice would be greatly appreciated. Thanks!
My newly purchased header:
You need one from a federal emissions vehicle.
I sell them here: https://www.yotatech.com/forums/f37/...ilable-179930/
Mar 23, 2012 | 06:48 AM
#142

Registered User
Joined: Mar 2012
Posts: 108
Likes: 0
From: Denver, CO
ill be ordering one soon just noticed a crack in my header...this whole time i thought it was a vaccum leak but on the vaccum lines  oh well these look good.
i was looking around in denver, co but cant find a single one of these. Found a few 2001-4 4runners with the 3rz engine yet they had the same cast iron manifold that my truck has.
Ill get some money saved up and order soon
oh well these look good.i was looking around in denver, co but cant find a single one of these. Found a few 2001-4 4runners with the 3rz engine yet they had the same cast iron manifold that my truck has.
Ill get some money saved up and order soon
Apr 7, 2012 | 06:42 PM
#143

Registered User
Joined: Apr 2012
Posts: 2
Likes: 0
Hey all, my first post here at Yotatech. I'm glad I found this site - I was able to find DeathCougars ad for the "mini header" kit and ordered one up for my '99 3RZ Prerunner. I was considering a long tube header, but I really didn't think the extra cost was worth it. I mean, they are cool and all, but considering I don't pull anything with my truck, and in an attempt to save gas, I rarely go over 2000 rpms anyway, so I don't know that I'd take advantage of any possible gain a full long tube would provide.
Anyway, the install wasn't too bad; it was pretty straight forward, common sense stuff, if you've ever played around with cars and trucks before. I had no problem loosening the rusty nuts and bolts, but I did shoot them with PB Blaster the night before. You can do this with typical handyman type tools, although I wish someone would have told me to pick up some of these "reverse torx" sockets first.

Very handy, especially considering that the old manifold has torx-head bolts pointing in 3 directions - made it a little tricky to take apart. I also didn't disconnect the downpipe bracket from the trans, something else that would have made the job easier. I'm convinced I could have done this in 1/3 the time with those two simple tips.
After the install, my truck immediately ran smoother and idled a lot lower. I've only filled up the tank once since then, and the mpg is slightly better than average, but we'll see how that plays out over time. I can't say it sounds cool now, but at least it doesn't sound as bad.
A few pics and a telling video from my install. I didn't know how bad the crack was until my "kick test." This was not done with steel toed boots either...
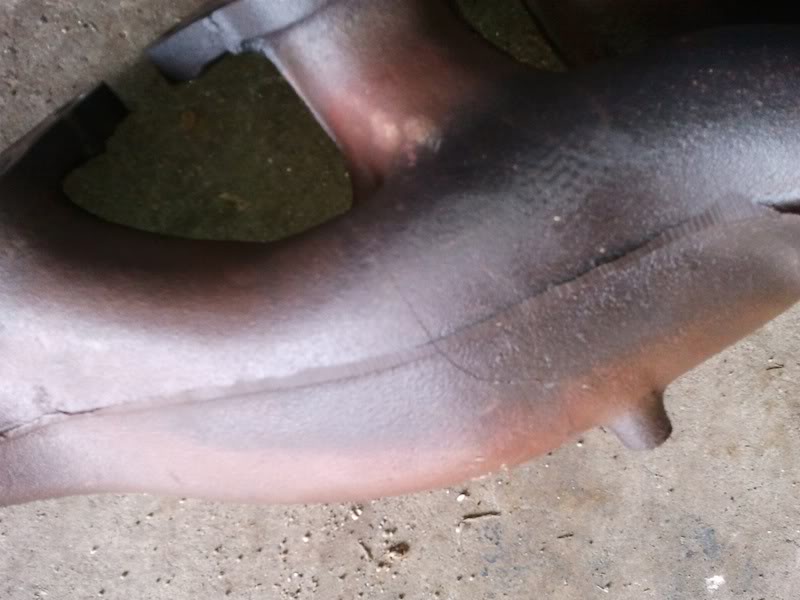
The stock mani, with the telltale crack

The crack went all the way around the casting
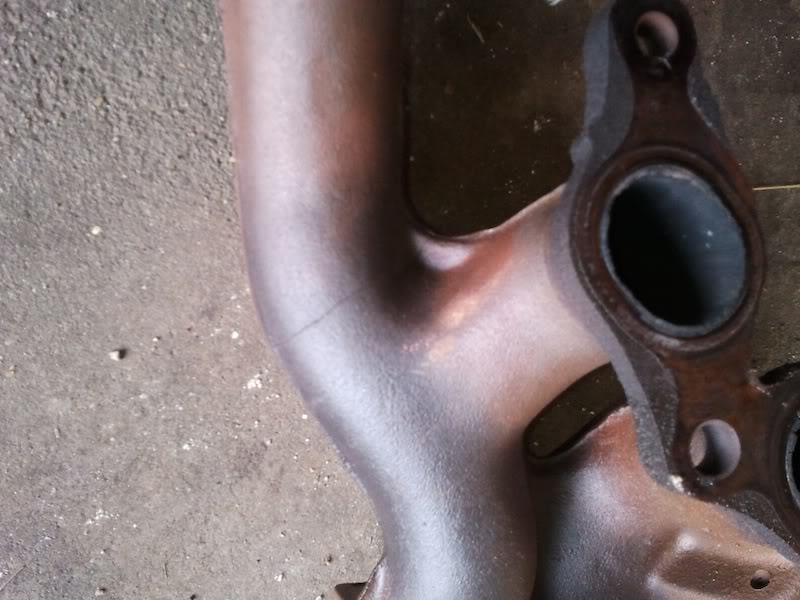
My "how cracked was it" demo
[YOUTUBE]http://www.youtube.com/watch?v=SDxx2vC5Uq8[/YOUTUBE]
Look how much of it was cracked and leaking. The bright "clean" part is what I just broke. The dark / dirty rest of it had been leaking for who knows how long.
So if you are thinking about doing this, just do it. The tips and advice on this site are great!
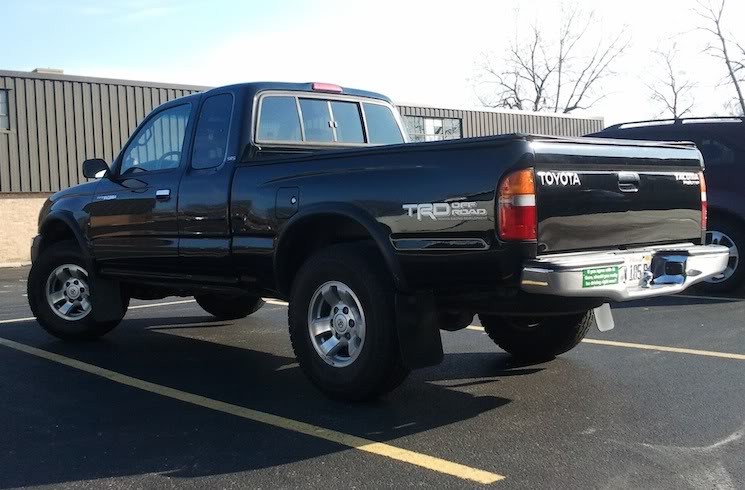
And, the gratuitous shot of my truck...
Anyway, the install wasn't too bad; it was pretty straight forward, common sense stuff, if you've ever played around with cars and trucks before. I had no problem loosening the rusty nuts and bolts, but I did shoot them with PB Blaster the night before. You can do this with typical handyman type tools, although I wish someone would have told me to pick up some of these "reverse torx" sockets first.
Very handy, especially considering that the old manifold has torx-head bolts pointing in 3 directions - made it a little tricky to take apart. I also didn't disconnect the downpipe bracket from the trans, something else that would have made the job easier. I'm convinced I could have done this in 1/3 the time with those two simple tips.
After the install, my truck immediately ran smoother and idled a lot lower. I've only filled up the tank once since then, and the mpg is slightly better than average, but we'll see how that plays out over time. I can't say it sounds cool now, but at least it doesn't sound as bad.
A few pics and a telling video from my install. I didn't know how bad the crack was until my "kick test." This was not done with steel toed boots either...
The stock mani, with the telltale crack
The crack went all the way around the casting
My "how cracked was it" demo
[YOUTUBE]http://www.youtube.com/watch?v=SDxx2vC5Uq8[/YOUTUBE]
Look how much of it was cracked and leaking. The bright "clean" part is what I just broke. The dark / dirty rest of it had been leaking for who knows how long.
So if you are thinking about doing this, just do it. The tips and advice on this site are great!
And, the gratuitous shot of my truck...
Dec 12, 2012 | 01:44 PM
#144
Registered User
Joined: Oct 2011
Posts: 17
Likes: 0
hey just noticed you out your 3rz back together without a heat shield on the manifold. has this been an issue for you? as i am about to put mine back togther and the heat shield wont line up/fit without some modifications that i do not wish to do right now!
Dec 12, 2012 | 01:54 PM
#146
Registered User
Joined: Oct 2011
Posts: 17
Likes: 0
hey so i noticed you put the intake back on without putting the heat shield back on? have you had any issues with this? I am about to put mine back together and the heat shield wont fit/line up without some modifications I do not want to do right now. any input would be appreciated. thanks!
Dec 12, 2012 | 01:59 PM
#147
Registered User
Joined: Oct 2011
Posts: 17
Likes: 0
heat shield
hey so i noticed you put your intake back on without the heat shield on the exhaust manifold, have you had any issues with this? i am putting mine back together and the heat shield wont line up /fit with the new header with out some mods that i do not wish to do! any input would be appreciated. thanks
Dec 12, 2012 | 03:15 PM
#148
Joined: Jan 2003
Posts: 17,692
Likes: 58
From: Marysville, WA
hey so i noticed you put your intake back on without the heat shield on the exhaust manifold, have you had any issues with this? i am putting mine back together and the heat shield wont line up /fit with the new header with out some mods that i do not wish to do! any input would be appreciated. thanks
A. Modify your heat shield
B. Buy the 2001+ heat shield which will bolt straight on
C. Header wrap
D. Forget about heat shielding alltogether
I have seen it done all 4 ways. Obviously the cleanest is getting the 01+ heatshield. It doesn't get terribly hot under there, just make sure all wires and rubber hoses are up and out of the way.
Dec 12, 2012 | 08:01 PM
#149
Registered User
Joined: Apr 2012
Posts: 2
Likes: 0
hey so i noticed you put the intake back on without putting the heat shield back on? have you had any issues with this? I am about to put mine back together and the heat shield wont fit/line up without some modifications I do not want to do right now. any input would be appreciated. thanks!
Jan 29, 2013 | 06:03 PM
#150

Registered User
Joined: Feb 2008
Posts: 29
Likes: 0
From: portland, or
hey all, I just finished doing this to my newly acquired 95.5. after scouring the options, I found the manifold for $179 @ mid atlantic toyota parts. best deal I could find. plus, the service I got over the phone was great. I swear I don't work for them 
Get it here.
Get it here.
Apr 9, 2013 | 12:10 PM
#152
Joined: Jan 2003
Posts: 17,692
Likes: 58
From: Marysville, WA
Usually, by the time you buy all new gaskets, studs, and nuts, you are equal to or EXCEED the cost of our kit
Apr 9, 2013 | 12:19 PM
#153

Registered User
Joined: Sep 2012
Posts: 20
Likes: 0
Yeah, thats kinda what I figured. Hassle if you've got it torn apart and then frantically trying to find a buddy to give you a ride to the parts store sunday nite so you can drive it monday morning etc.
Anxious to get it
Anxious to get it
Apr 10, 2013 | 02:13 PM
#156
Joined: Jan 2003
Posts: 17,692
Likes: 58
From: Marysville, WA
If you have a cast manifold, you have a crack 99.9% of the time.
Apr 11, 2013 | 12:17 AM
#158
Joined: Jan 2003
Posts: 17,692
Likes: 58
From: Marysville, WA
Apr 11, 2013 | 09:58 PM
#160
Joined: Jan 2003
Posts: 17,692
Likes: 58
From: Marysville, WA
The ones going into the head are the only ones that really matter. Since the kit comes with all new hardware besides studs in the head, you can break/round/cut/drill everything else off. Or, hopefully it just unbolts nicely
Not sure what proper torque is off the top of my head.
Not sure what proper torque is off the top of my head.


