
Redeth's 1989 4Runner Resurrection
 May 18, 2013 | 10:42 PM
#1522
Registered User
Joined: Dec 2009
Posts: 2,762
Likes: 1

also helps when you run big tires. when the axle compresses on leaf springs, the wheel moves to the rear. if centered with large tires. fender rubbing happens
May 18, 2013 | 10:51 PM
#1523
Thread Starter
Registered User
Joined: Apr 2012
Posts: 2,817
Likes: 2
From: Los Angeles CA
it allows the tires to hit the rocks and start climbing sooner. that way your bumper doesnt hit 1st and than tires
also helps when you run big tires. when the axle compresses on leaf springs, the wheel moves to the rear. if centered with large tires. fender rubbing happens
also helps when you run big tires. when the axle compresses on leaf springs, the wheel moves to the rear. if centered with large tires. fender rubbing happens
May 18, 2013 | 10:57 PM
#1524
Registered User
Joined: Jul 2012
Posts: 2,365
Likes: 4
From: Idaho
LOL do ya want military surplus or new LOL
i hope ya get to feeling better
i think ive confused mark with my joking around im taking a pain pill after the foot surgery an my humor button is stuck lol
 May 18, 2013 | 11:29 PM
#1525
Thread Starter
Registered User
Joined: Apr 2012
Posts: 2,817
Likes: 2
From: Los Angeles CA
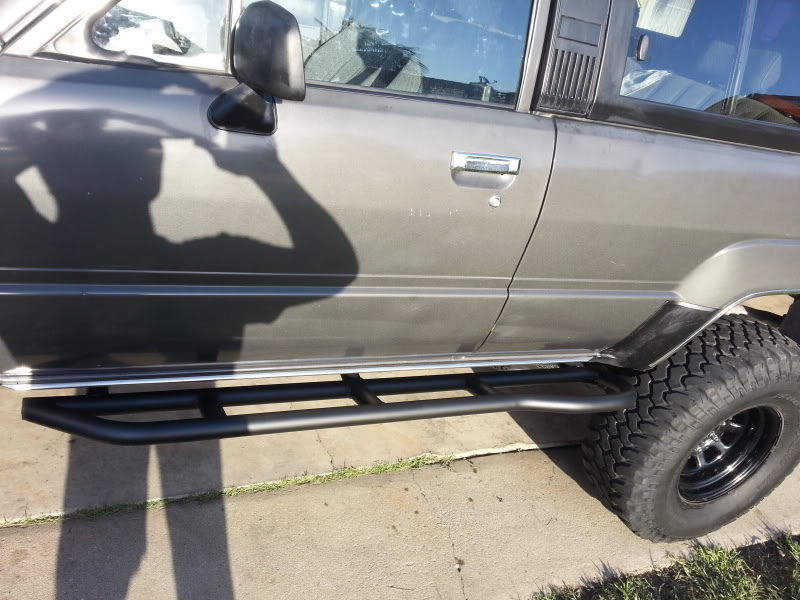
Sliders.
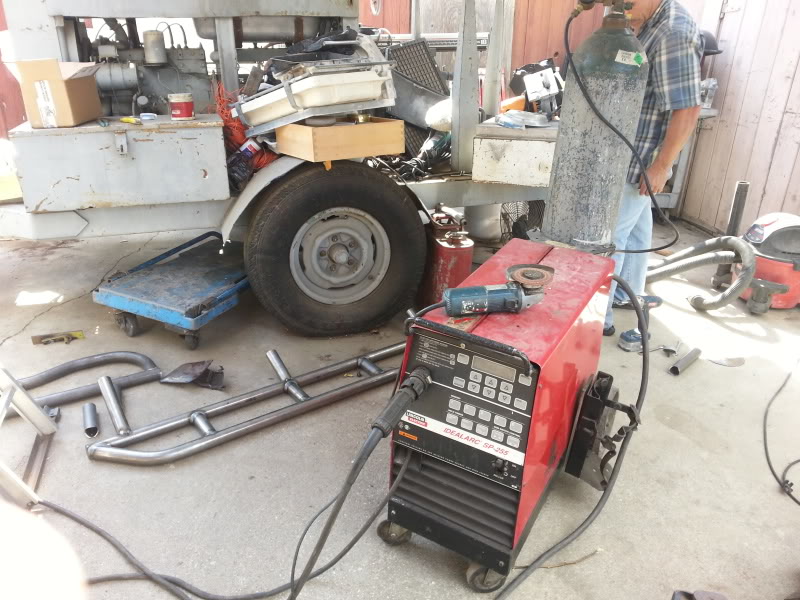
So my dad brought out one of his medium sized welding machines today. Also a Lincoln.
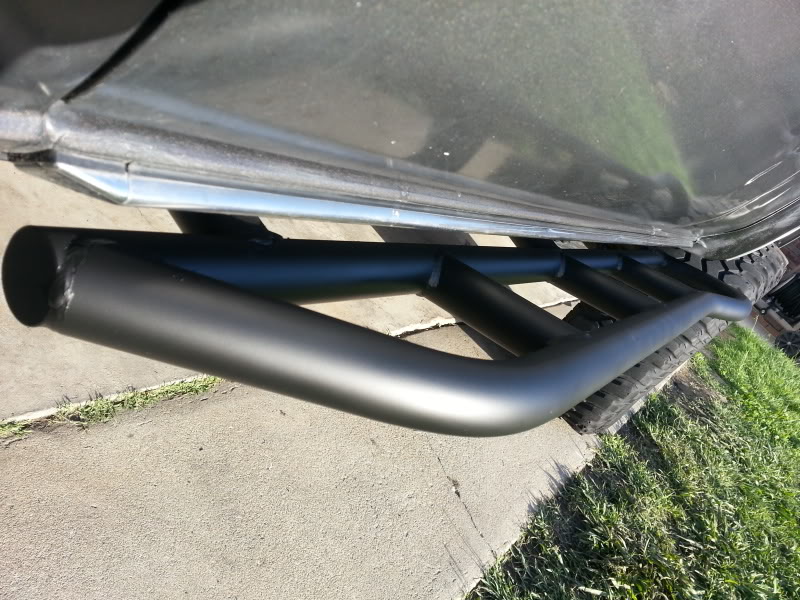
Dad welding it all together:
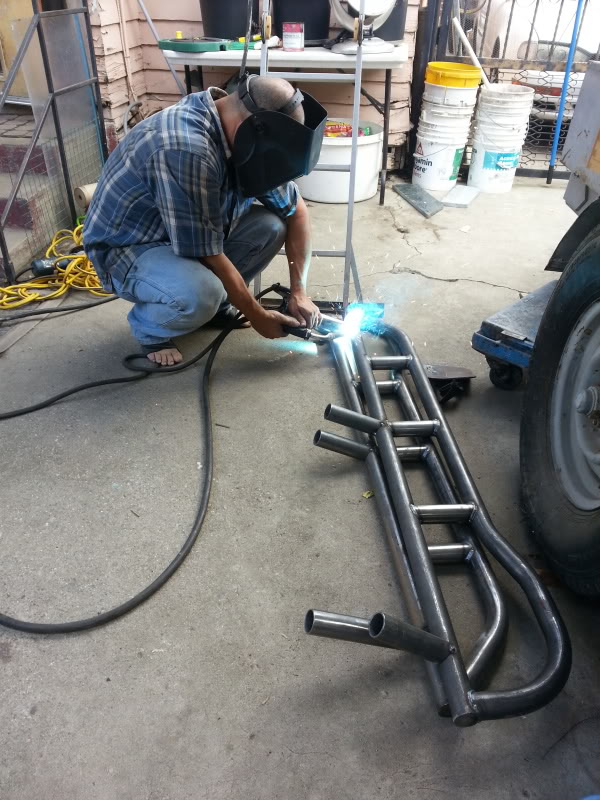
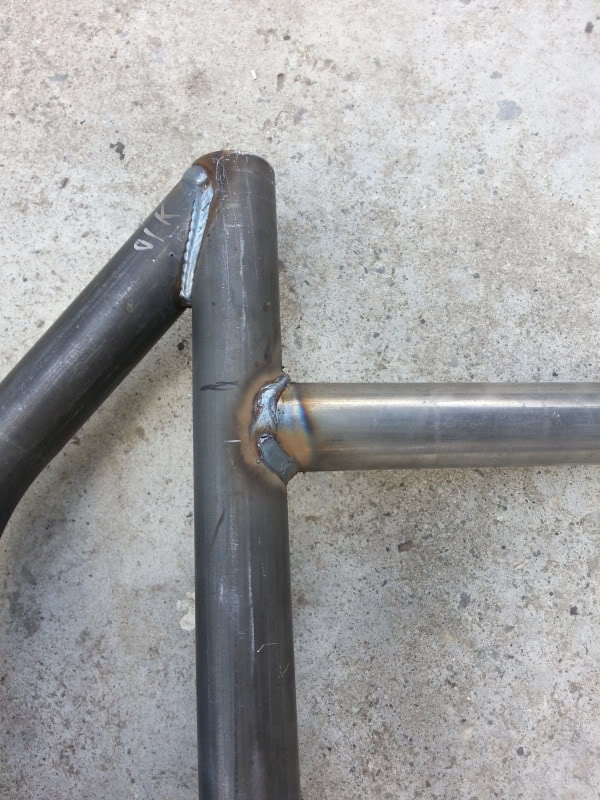
Some of the welds he did. The part that feeds the wire kept getting jammed so he had a hard time getting it done right without little balls.

I primed it before the installation. If you have time to kill i would highly recommend you guys primering it and painting it before you put it on the truck. If i knew this before the installaion it would have been much muhc more easy to do. but Whatever its still doable.
Welding them on finally!

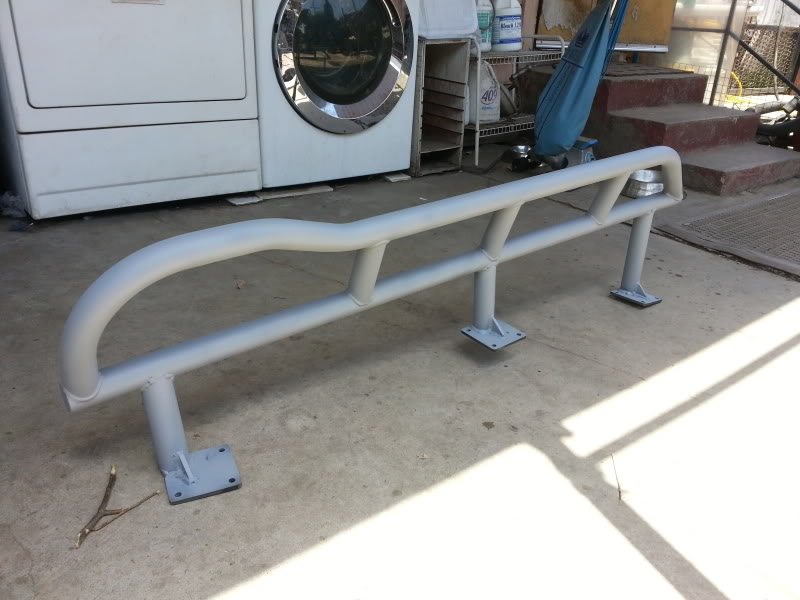
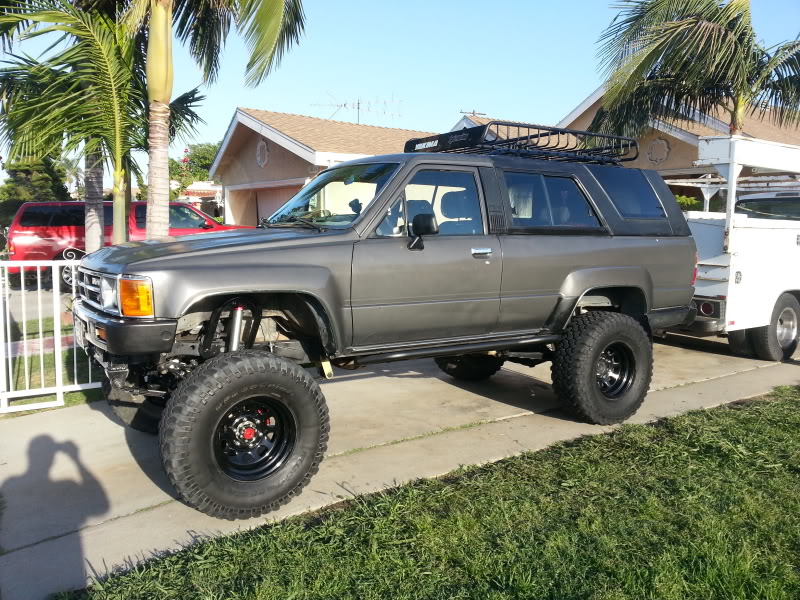
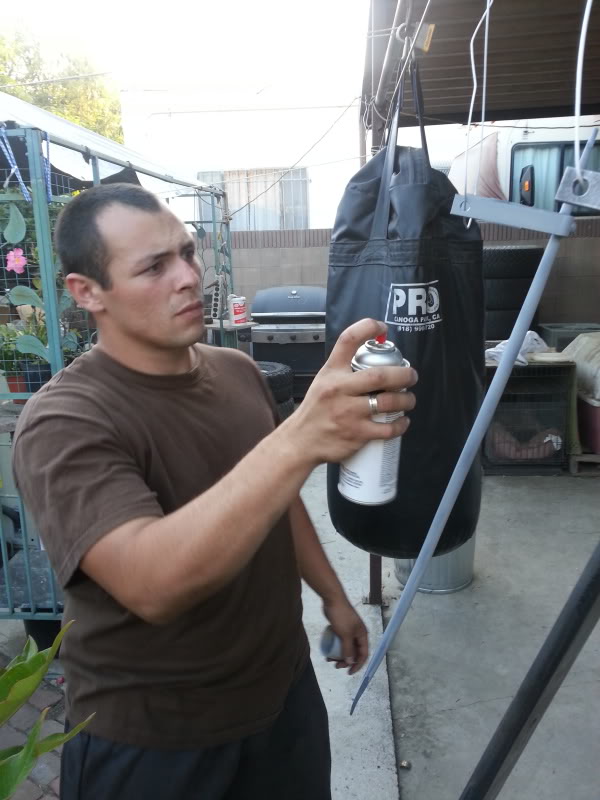
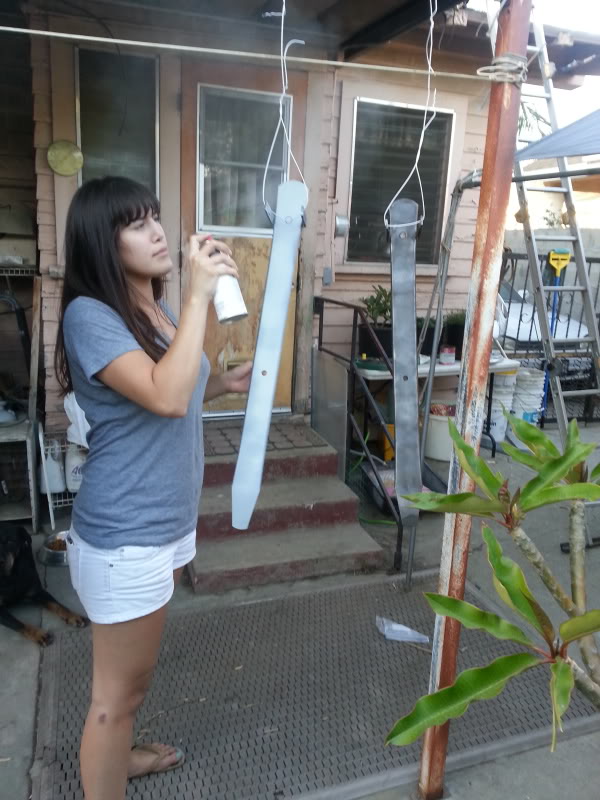
Got both sides installed already. Time to start painting the sliders! I went with 2.5 cans of primer for each slider and frame mounts. Gave it multiple coats. As for the color i decided to go with Matt Black. I wasnt fully satisfied with the shiney black color that i used on my front axle. So i wanted something that didnt shine too much. And boy am i happy i went with this matt black color because it looks sick! Still looks clean but it also looks really sharp and stylish.

[URL=http://s10.photobucket.com/user/esamadre/media/SAS%20Lift%20Locker%20gearing%20project/20130518_170641_zps40869972.jpg.html]
And i kind of went picture crazy; Mehhhh.... Who cares I know you guys like an occasional picture whoring lol Here are the pix of them all finished.

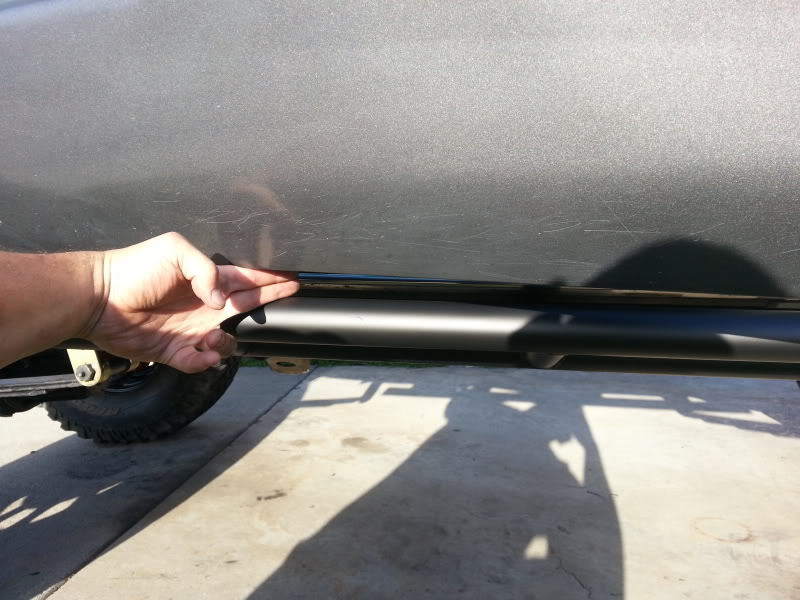
It's about 1" away from where the door opens
[URL=http://s10.photobucket.com/user/esamadre/media/SAS%20Lift%20Locker%20gearing%20project/20130518_183157_zps43a1e7a8.jpg.html]
Oh yea btw i washed my truck and car and i went over the hard sop with some armorall like stuff and damn it worked really good. Here are both my beauties!
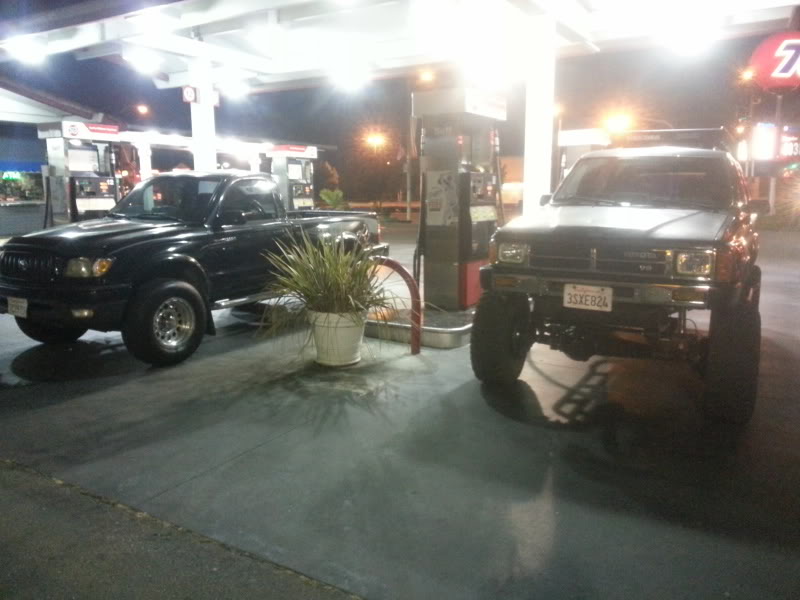
And this picture is from about 1 hour ago at a local gas station. Faby and i Filling up our gas tanks
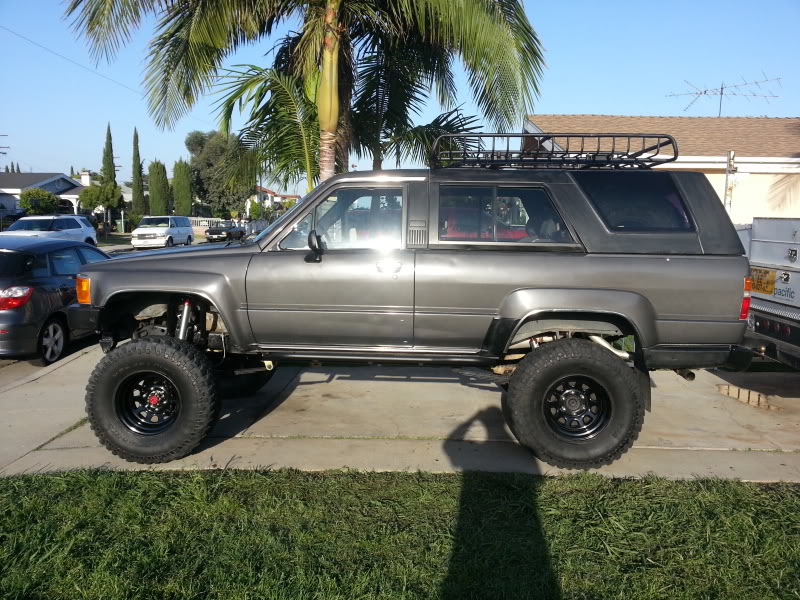
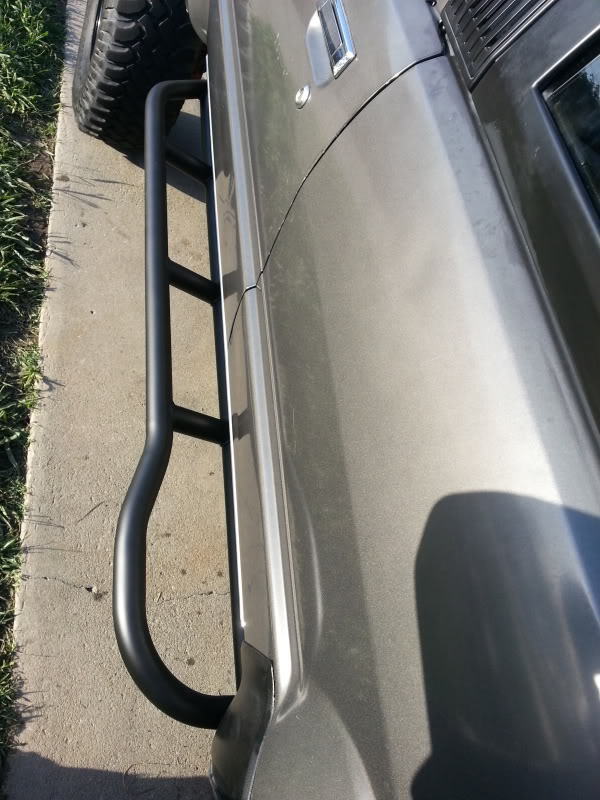
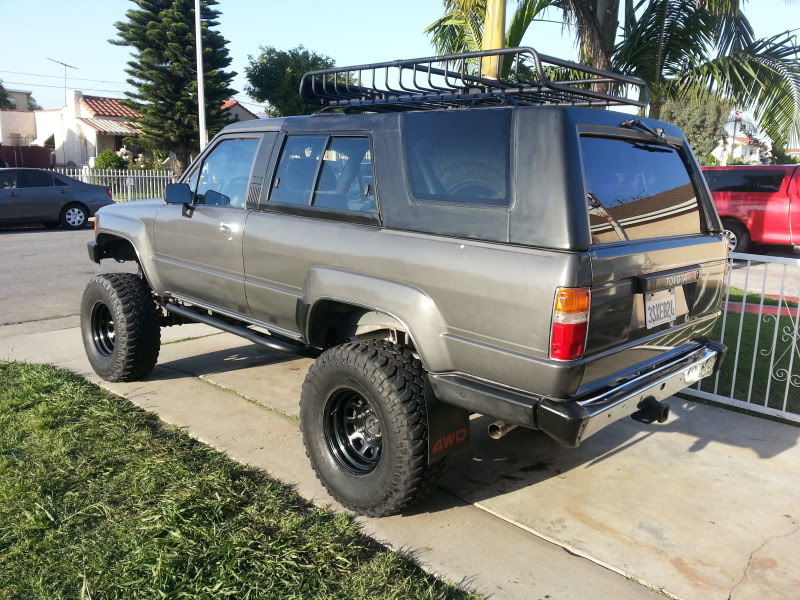
I am very satisfied with the job my dad did. It came out really solid. I absolutely love the outcome of these sliders. They completely gave the truck a whole different look. looks really beefy now.
I cant wait to see one of those jerks at the supermarket who swing their doors out just to see them damage their car lol.

Dad welding it all together:

Some of the welds he did. The part that feeds the wire kept getting jammed so he had a hard time getting it done right without little balls.


I primed it before the installation. If you have time to kill i would highly recommend you guys primering it and painting it before you put it on the truck. If i knew this before the installaion it would have been much muhc more easy to do. but Whatever its still doable.

Welding them on finally!

Got both sides installed already. Time to start painting the sliders!
I went with 2.5 cans of primer for each slider and frame mounts. Gave it multiple coats. As for the color i decided to go with Matt Black. I wasnt fully satisfied with the shiney black color that i used on my front axle. So i wanted something that didnt shine too much. And boy am i happy i went with this matt black color because it looks sick! Still looks clean but it also looks really sharp and stylish.
[URL=http://s10.photobucket.com/user/esamadre/media/SAS%20Lift%20Locker%20gearing%20project/20130518_170641_zps40869972.jpg.html]
And i kind of went picture crazy; Mehhhh.... Who cares I know you guys like an occasional picture whoring lol Here are the pix of them all finished.


It's about 1" away from where the door opens


[URL=http://s10.photobucket.com/user/esamadre/media/SAS%20Lift%20Locker%20gearing%20project/20130518_183157_zps43a1e7a8.jpg.html]
Oh yea btw i washed my truck and car and i went over the hard sop with some armorall like stuff and damn it worked really good. Here are both my beauties!

And this picture is from about 1 hour ago at a local gas station. Faby and i Filling up our gas tanks

I am very satisfied with the job my dad did. It came out really solid. I absolutely love the outcome of these sliders. They completely gave the truck a whole different look. looks really beefy now.
I cant wait to see one of those jerks at the supermarket who swing their doors out just to see them damage their car lol.
Last edited by Redeth005; May 18, 2013 at 11:40 PM.
May 19, 2013 | 01:32 AM
#1527
Registered User
Joined: Jul 2012
Posts: 2,365
Likes: 4
From: Idaho
sweet PICTURES!! eye candy!
an wow those sliders look good are ya gona put some no slip tape up near the doors? maybe some at the kickout so ya can step up an reach the rack?
they are one thing once i get my body work done i am investing it an mine isnt going up
an wow those sliders look good are ya gona put some no slip tape up near the doors? maybe some at the kickout so ya can step up an reach the rack?
they are one thing once i get my body work done i am investing it an mine isnt going up
May 19, 2013 | 11:10 AM
#1528
Super sickness!
I was curious if you thought about coming down to 1 & 1/2 inch wheel spacers ? I'm not insulting the look of Mr Kingsford! Hahahahaha, and actually I just thought you had said that... See you mentioned my brakes not giving me any problems.... But that 1 & 1/2 inch extra spacer you have on each side might very well be why you're having no contact... Then again you haven't had a chance to test yours out yet, but I'm willing to bet you won't have any problems and yet I very well may, unless I use the i.f.s hubs... Or do a little work... We will see but I'm not worried about it at this moment.
Anyway, I gotta say honestly dude you did a great job it looks excellent! your dad the man that was very cool of them both! I'm very grateful to you as well for hooking me up buddy! Can't wait to get out there man, not just a wheel but to be able to we'll to places but I've had two previously either hike into or avoid... Take care buddy and give me a dang text soon! Hahahahaha
May 19, 2013 | 12:49 PM
#1529
Thread Starter
Registered User
Joined: Apr 2012
Posts: 2,817
Likes: 2
From: Los Angeles CA
1.5" spacers in front will clear your V6 calipers. They they are meant to. Thats why they include the spacers and v6 rotors in the SAS/IFS eliminator kit. You'll be just fine. As for me. I kinda like the wider look. Lol. I was actually thinkibg to still buy the 1.5 spacers but to install them in the rear to even it all out. It won't look as wide as Chris's truck. But it will look sufficient enough to give it a nicer macho look. Just makes it look like its ready for rigorous off roading like that lol
Last edited by Redeth005; May 19, 2013 at 12:51 PM.
May 19, 2013 | 01:53 PM
#1530
Thread Starter
Registered User
Joined: Apr 2012
Posts: 2,817
Likes: 2
From: Los Angeles CA
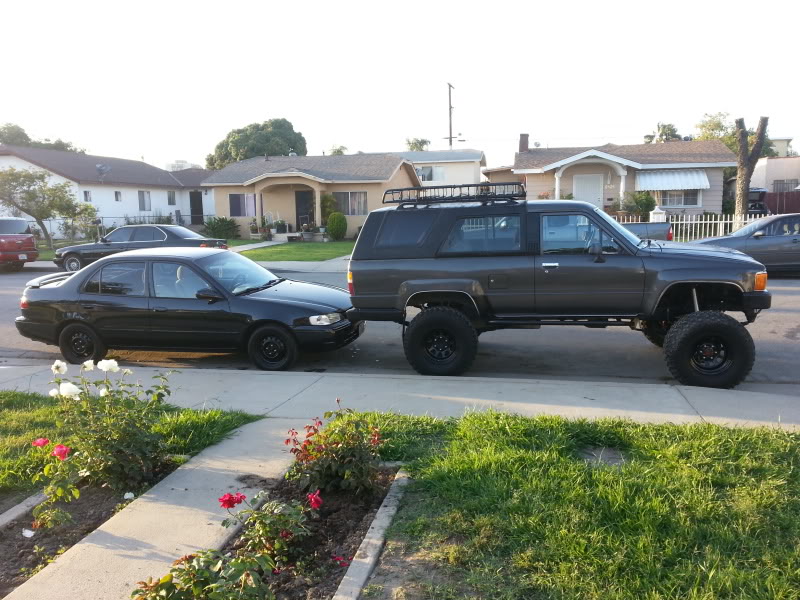
A few pic from today. My girlfriend pulled up next to my 4Runner today and I wanted to take some pix. Here's my 4Runner with her 2003 Toyota Tacoma PreRunner.
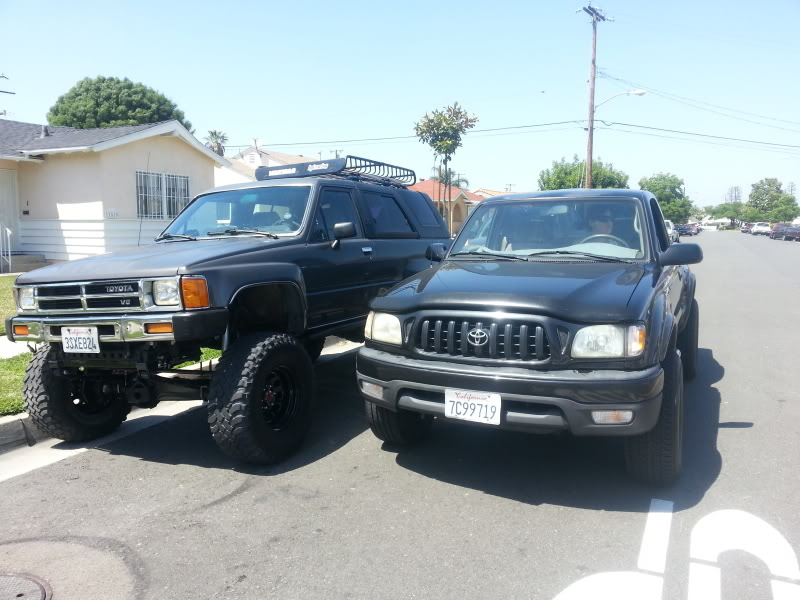
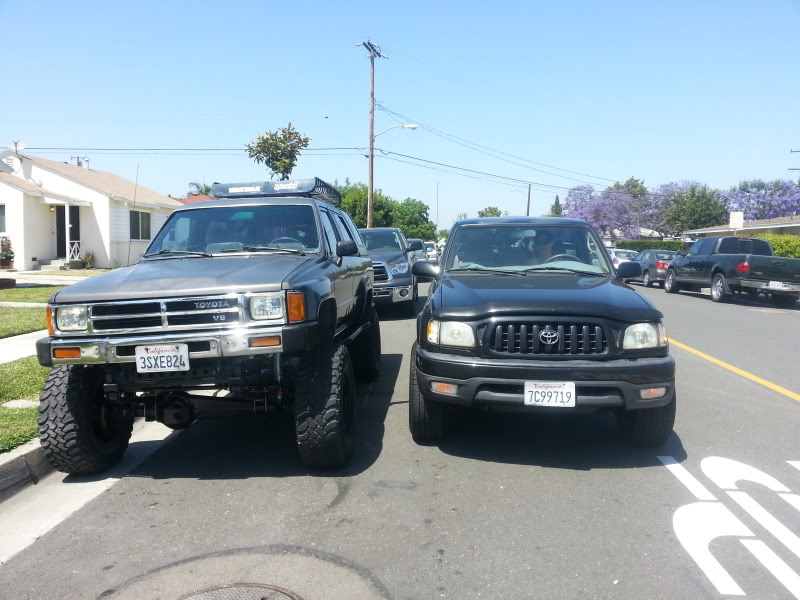
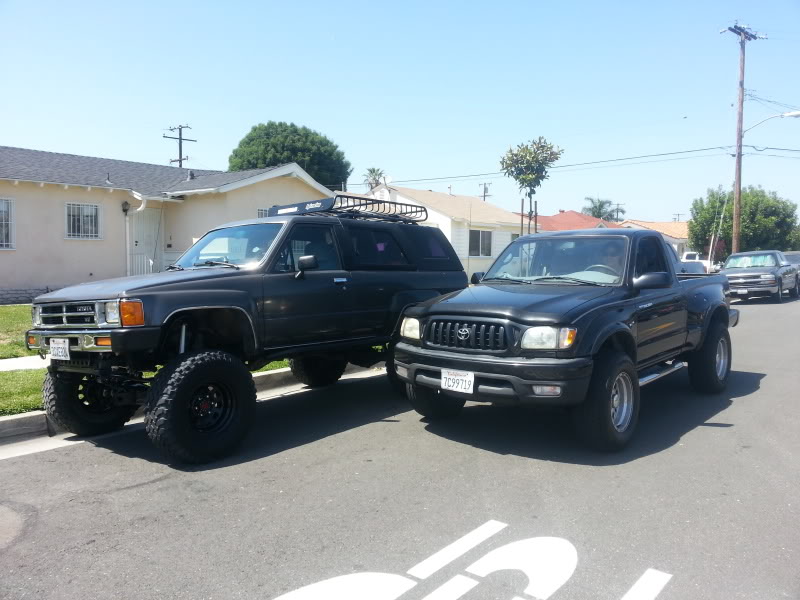
Major size difference hahaha
Major size difference hahaha
May 19, 2013 | 02:14 PM
#1531
Edit, ooops, all over the place and not all in order I originally had been told. ... So I will update on the caliper thing. .... but as long as I use the spacers and eliminator kit, I wont need to shave the inside of the calipers any.
Super stoked to get started.......
Keep in touch if u can come by buddy, k? No worries if u can't, just enjoy tye company and the shaving of a lil time off the whole deal, haha.
Super stoked to get started.......
Keep in touch if u can come by buddy, k? No worries if u can't, just enjoy tye company and the shaving of a lil time off the whole deal, haha.
Last edited by ChefYota4x4; May 19, 2013 at 11:16 PM.
May 19, 2013 | 03:06 PM
#1532
Registered User
Joined: Jul 2012
Posts: 752
Likes: 2
From: Austin, TX
One benefit of painting the sliders while on the truck: You get good at masking off the body. You'll be touching up the paint once you get some rock rash on them anyway.
Looks great. I really want to get some on mine, bad.
Looks great. I really want to get some on mine, bad.
May 21, 2013 | 07:30 AM
#1533
Thread Starter
Registered User
Joined: Apr 2012
Posts: 2,817
Likes: 2
From: Los Angeles CA
I had a pretty busy day yesterday. Unfortunately I had to call off work to go to court for a ridiculous moving violation with the city of Redondo beach. I really don't think I should have gotten the ticket but whatever what's done is done. My total came out to $237 + $64 for 8hours of traffic school. Oh god... not again. I hate traffic school. Lol
------------------------------------------
After that I went to go to a few auto electricians and too many of them turned me down in letting me know what's wrong due to me not wanting them to do the full install. All I need from them is to fix my master switch.... and to connect my wires to the main fuse box at the kick pannel. But since I would rather do that to save me money these A-holes woulf rather not do any of it. So f* them and finally I found one guy that told me the master switch would need to be replaced or the contacts would need to be replaced and the black wires should only be ground wires.
Thank you very much. Thats all I needed to know lol. That guy looked really shady. Amd I don't hink ill be taking my truck to him for the power windows but at least I got my questions answered.
------------------------------------------
After that I went to pick up my driveshaft whih was extended an extra 3&1/4" came home and got it installed.
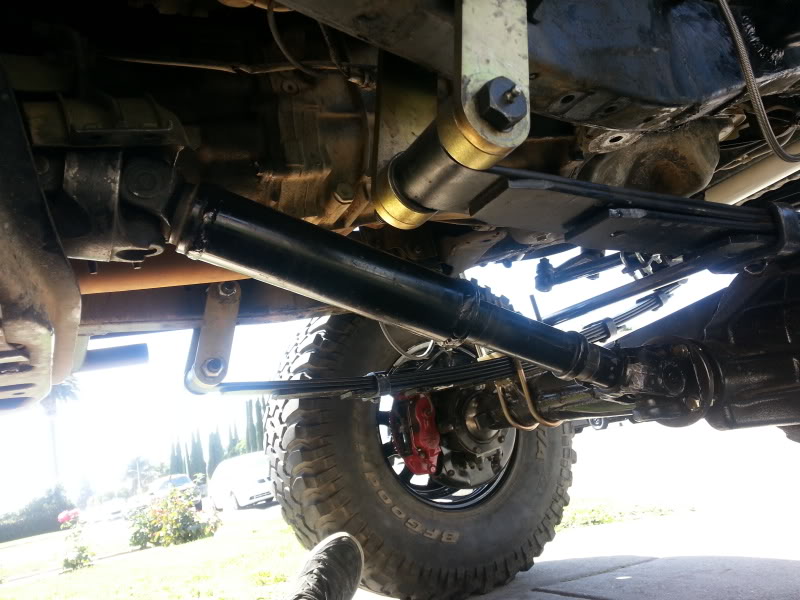
Then I installed the valance and just driving the truck out of the drive way I realized I won't be able to use it because of some massive tire rubbage going on against it. So I just removed it.
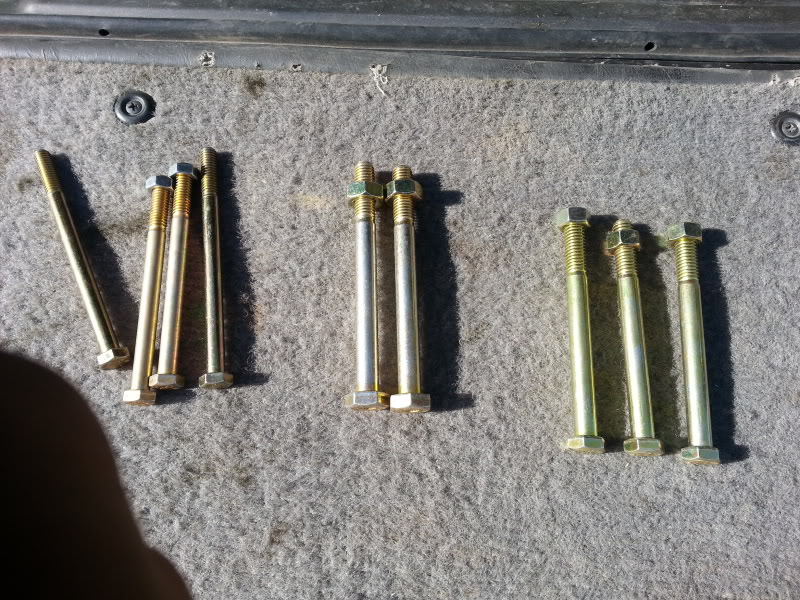
After that I went to Smith Fastener. Its a local bolt store. They sell all types of bolts nuts screws lock nuts of different grades etc etc. Its a really handy store to have especially when looking for something specific.

So I bought myelf some Grade 8 bolts and lock nuts for when I swap in the overload leaf spring on to my All Pro leafs. Gonna need it a bit longer. I actually had to go back 2ce because the 1st time I wemt I got the wrong bolts. And the lady just let me keep all the bolts and nuts she gave me on the first time lol. So that was nice of her.
I will be using 2 of the ones on the right hand side for my leaf springs.
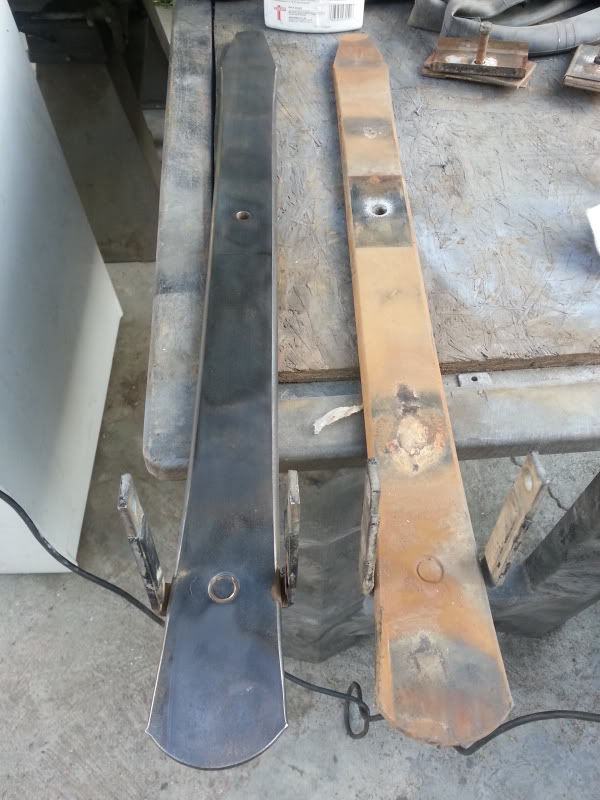
Took apart my stock leaf springs and removed the overload leafs. The one on the left has already been cleaned with the wire wheel. They both looked as bad as the right one to begin with.
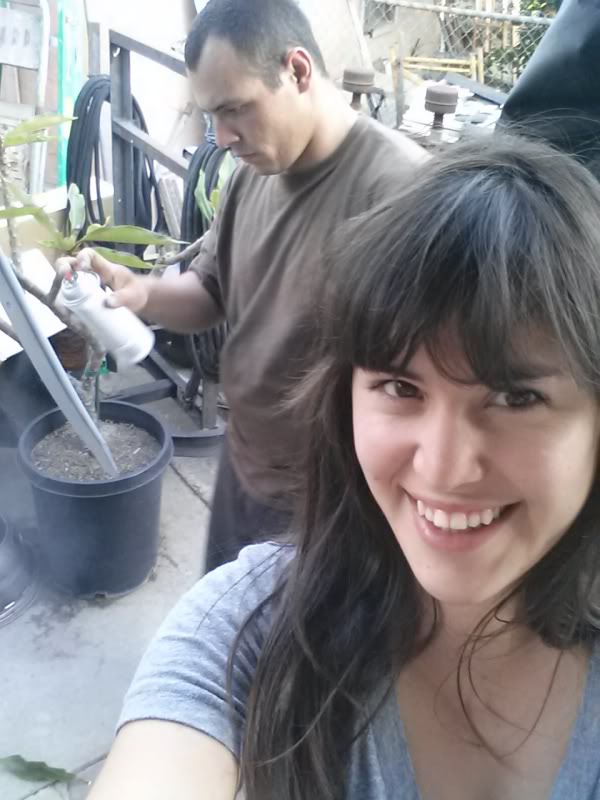
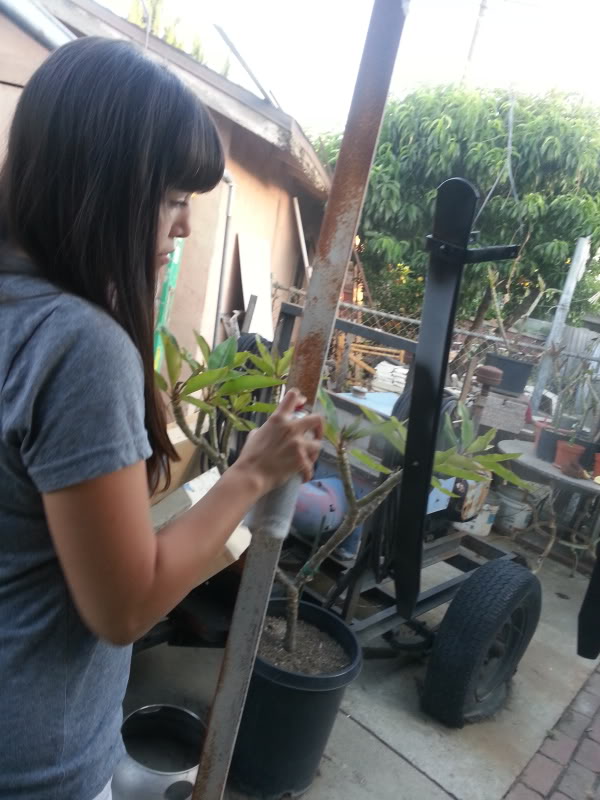
After sanding everything down my girl surprised me at home so I made us some yummy strawberry smoothies. Home made obviously. Very tastey stuff.

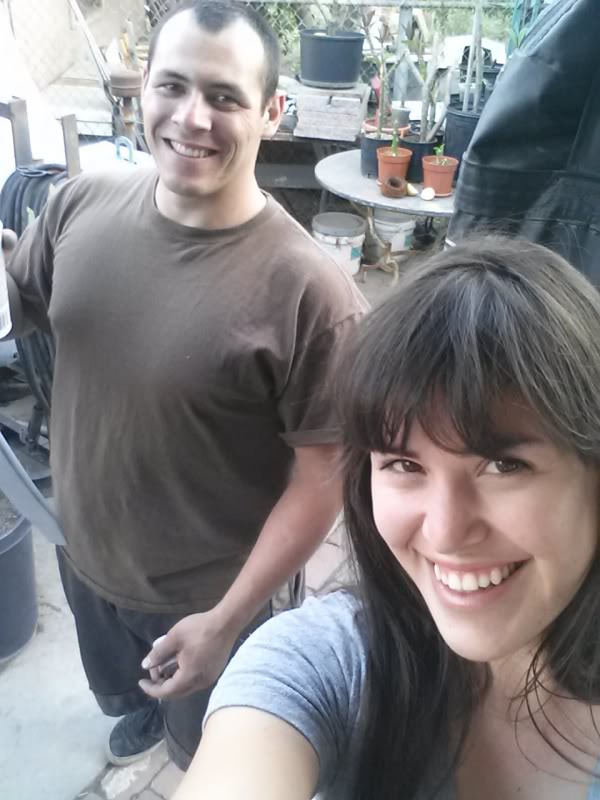
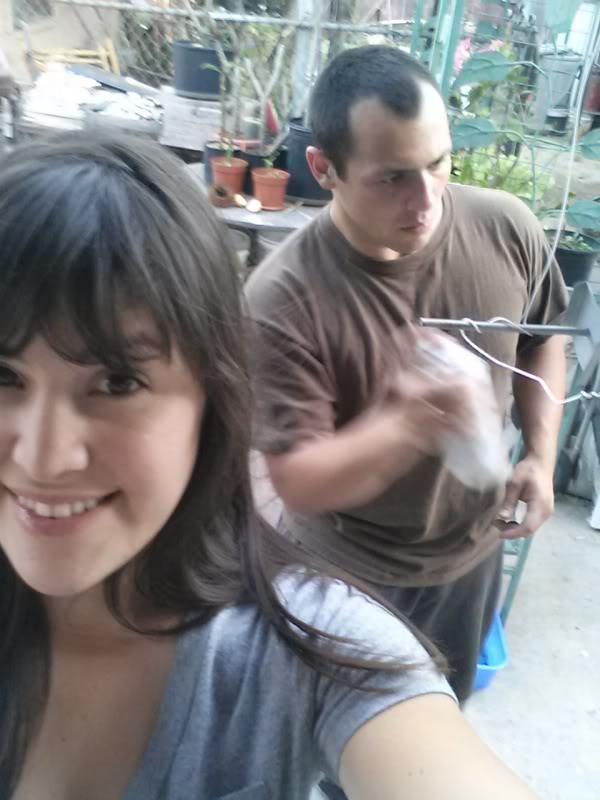
After that we got to work. And while painting the parts faby was entertaining herself with the camera lol I think the drink possibly could have had too much sugar for her cuz she was super goofy yesterday! lol
I'm just going yo go ahead and post all the pix from yesterday. I know It ain't necessary but I wanna be able to look back on my thread and see all the fun we had doing this project. And these pictures definitely show the fun times and goofing off we always do together. So for my memories here they are.


The small plates that go on the stock spring.


She did a good job


------------------------------------------
After that I went to go to a few auto electricians and too many of them turned me down in letting me know what's wrong due to me not wanting them to do the full install. All I need from them is to fix my master switch.... and to connect my wires to the main fuse box at the kick pannel. But since I would rather do that to save me money these A-holes woulf rather not do any of it. So f* them and finally I found one guy that told me the master switch would need to be replaced or the contacts would need to be replaced and the black wires should only be ground wires.
Thank you very much. Thats all I needed to know lol. That guy looked really shady. Amd I don't hink ill be taking my truck to him for the power windows but at least I got my questions answered.
------------------------------------------
After that I went to pick up my driveshaft whih was extended an extra 3&1/4" came home and got it installed.
Then I installed the valance and just driving the truck out of the drive way I realized I won't be able to use it because of some massive tire rubbage going on against it. So I just removed it.
After that I went to Smith Fastener. Its a local bolt store. They sell all types of bolts nuts screws lock nuts of different grades etc etc. Its a really handy store to have especially when looking for something specific.
So I bought myelf some Grade 8 bolts and lock nuts for when I swap in the overload leaf spring on to my All Pro leafs. Gonna need it a bit longer. I actually had to go back 2ce because the 1st time I wemt I got the wrong bolts. And the lady just let me keep all the bolts and nuts she gave me on the first time lol. So that was nice of her.
I will be using 2 of the ones on the right hand side for my leaf springs.
Took apart my stock leaf springs and removed the overload leafs. The one on the left has already been cleaned with the wire wheel. They both looked as bad as the right one to begin with.
After sanding everything down my girl surprised me at home so I made us some yummy strawberry smoothies. Home made obviously. Very tastey stuff.
After that we got to work. And while painting the parts faby was entertaining herself with the camera lol I think the drink possibly could have had too much sugar for her cuz she was super goofy yesterday! lol
I'm just going yo go ahead and post all the pix from yesterday. I know It ain't necessary but I wanna be able to look back on my thread and see all the fun we had doing this project. And these pictures definitely show the fun times and goofing off we always do together. So for my memories here they are.
The small plates that go on the stock spring.
She did a good job
May 21, 2013 | 11:45 AM
#1535
Thread Starter
Registered User
Joined: Apr 2012
Posts: 2,817
Likes: 2
From: Los Angeles CA
But that Smoothie in the picture above was made by Me. I make some really good smoothies, milkshakes, and home made fruit drinks. The good thing about when I cook is that she likes to help all the time. She always wants to help me when I fire up the grill.
May 21, 2013 | 01:29 PM
#1536
Awesome! Gotta love the loveable Fabylous! Lol.....
So ur slapping the overload under the rear/bottommost leaf and strapping it on the one side? AND, the strap fixed to the overload is long enough that it wony limit droop when the springs fully arch? Just scratching some physics itches. Lol....
So ur slapping the overload under the rear/bottommost leaf and strapping it on the one side? AND, the strap fixed to the overload is long enough that it wony limit droop when the springs fully arch? Just scratching some physics itches. Lol....
May 21, 2013 | 01:51 PM
#1537
Thread Starter
Registered User
Joined: Apr 2012
Posts: 2,817
Likes: 2
From: Los Angeles CA
Awesome! Gotta love the loveable Fabylous! Lol.....
So ur slapping the overload under the rear/bottommost leaf and strapping it on the one side? AND, the strap fixed to the overload is long enough that it wony limit droop when the springs fully arch? Just scratching some physics itches. Lol....
So ur slapping the overload under the rear/bottommost leaf and strapping it on the one side? AND, the strap fixed to the overload is long enough that it wony limit droop when the springs fully arch? Just scratching some physics itches. Lol....
May 21, 2013 | 02:05 PM
#1538
Chris did this as well? Ohhhhh, I thought that's why he didn't take a lot of weight is because he hadn't messed with the rear springs. Its okay, as long as I have 4 feet of flex on either side? Hahahahahahahahaha! just messing with you... But I actually was thinking about doing the coil because then I could easily compress it and remove it once I arrive but whatever event or weekend it might be... UC, what I want to do is add cups on both sides that will enable me to mount them securely but remain easily removable, and this way I can simply stick something through the cup, or as normally would be done with the spring compressor, and then in 5 minutes they would be out, labeling me to go pretty nuts with the Flex, and by fixing the spring, in a a removable way, I could decide whether I want to remove it all once I get where I'm going... Mainly because on some trips you have to carry all that gear up to the camp base and then drop it and then go up and up and up from there, only coming back down to camp at the end of the day. So when the final day comes, I would simply take the springs which are already compressed, drop them in place, release the spring compressor, and wallah, I'm back to a full load capacity for the trip going down. I know it sounds like a total pain in the butt, but its really not at all . It would be ideal I agree to find a middle ground and the best of both worlds... I guess we will see in the next couple days. Just anxious to see you what you figure out on the strap... Kill it homie!
May 21, 2013 | 02:44 PM
#1539
Dang your 4runner is looking sweet! I have rock slider envy again, lol...
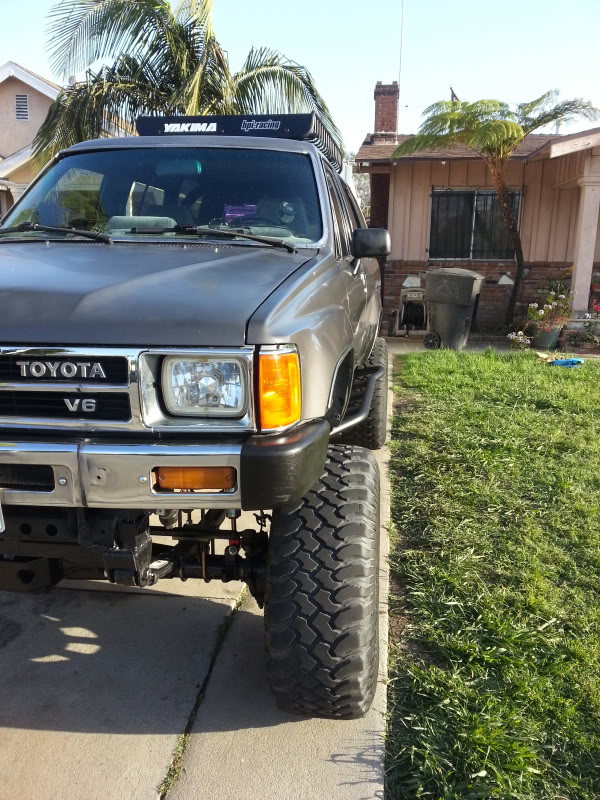
I'm glad you posted measurements between the tire and lip of the fender, because I always wondered how much lift I gained when I did my SAS (but since I was using rear springs up front and a homemade front spring hanger, I wasn't sure... (I thought I had about 5 or 6" lift up front) but mine has about the same stance as yours 12" between tire and fender up front, 8" in the back.
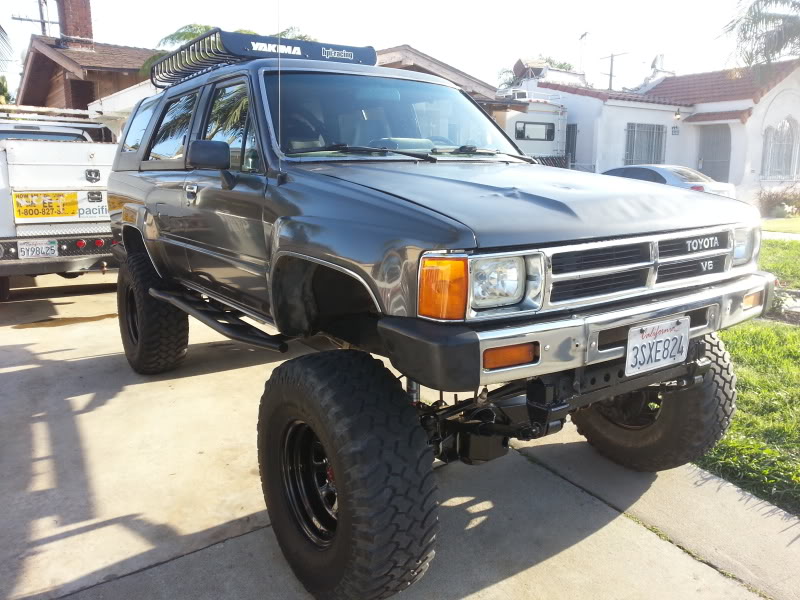
I think you'll get use to the looks of the front axel being forward, I personally like that look, plus the benefits are totally worth it! Your front shackle angle looks a lot better with the new springs too. Nice work man, oh I was going to ask, do you still have problems with bump steer after swapping in the new springs?
I'm glad you posted measurements between the tire and lip of the fender, because I always wondered how much lift I gained when I did my SAS (but since I was using rear springs up front and a homemade front spring hanger, I wasn't sure... (I thought I had about 5 or 6" lift up front) but mine has about the same stance as yours 12" between tire and fender up front, 8" in the back.
I think you'll get use to the looks of the front axel being forward, I personally like that look, plus the benefits are totally worth it! Your front shackle angle looks a lot better with the new springs too. Nice work man, oh I was going to ask, do you still have problems with bump steer after swapping in the new springs?
May 22, 2013 | 07:28 AM
#1540


Looking great man. Dad can really weld!! Rocking the BadA$$ welds in Sandals no doubt. HAHA
You are a lucky man. Wife that cooks,and helps out on the Runner.
You rig is looking better and better every time I see it. Wish mine looked half as good as yours.
You are a lucky man. Wife that cooks,and helps out on the Runner.
You rig is looking better and better every time I see it. Wish mine looked half as good as yours.


