
Redeth's 1989 4Runner Resurrection
 Feb 15, 2015 | 08:09 PM
#2522
Thread Starter
Registered User
Joined: Apr 2012
Posts: 2,817
Likes: 2
From: Los Angeles CA
Wooo, I updated everybody on all the other places minus you guys. Sorry guys. Here are the updates to my fender work.  Truck has been done since last week.
i'll post an update in a bit
Truck has been done since last week. i'll post an update in a bit
Feb 15, 2015 | 09:02 PM
#2523
Thread Starter
Registered User
Joined: Apr 2012
Posts: 2,817
Likes: 2
From: Los Angeles CA
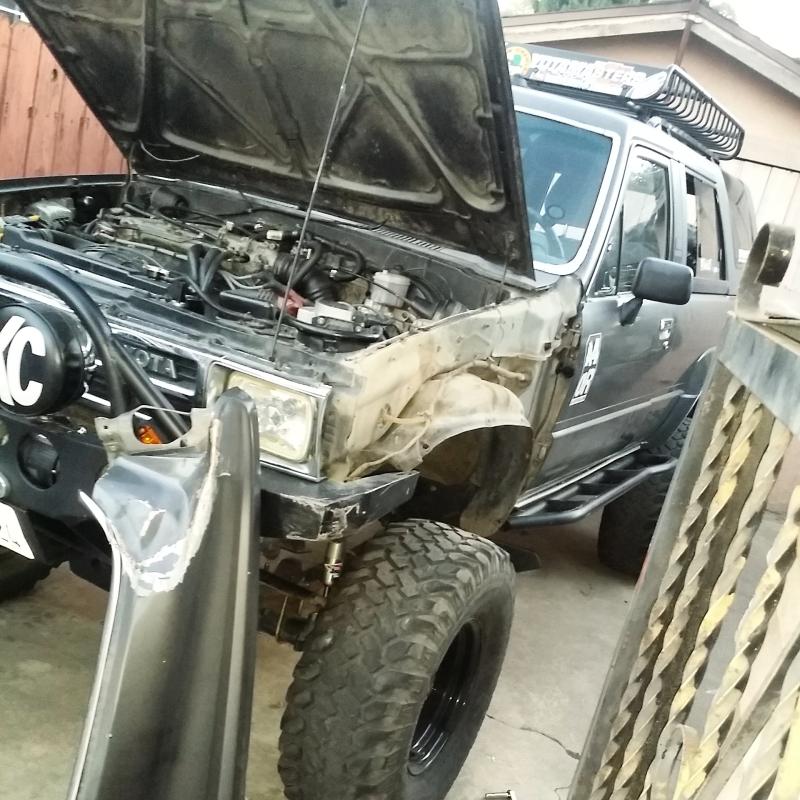
Here we are with the fender off. After the removal I soon noticed I had a small 2-3" crack on the top portion of the fender core support (where the fender mounts to). A few smacks with the hammer closed that small crack. I wish I would have welded it shut but I didn't think to do it then. I may do that in the future just to add support on there in case I get into another accident it wont totally deteriorate my panel. Aside from the crack I had a small bend up front near the front of the fender core support & a small bend on the front grill core support that I managed to somewhat push back. I had to give it a few smacks with the mallet to straighten it out a bit but after an accident like this one things are never left the same. So I did the best I could so I could align the holes on the new fender.
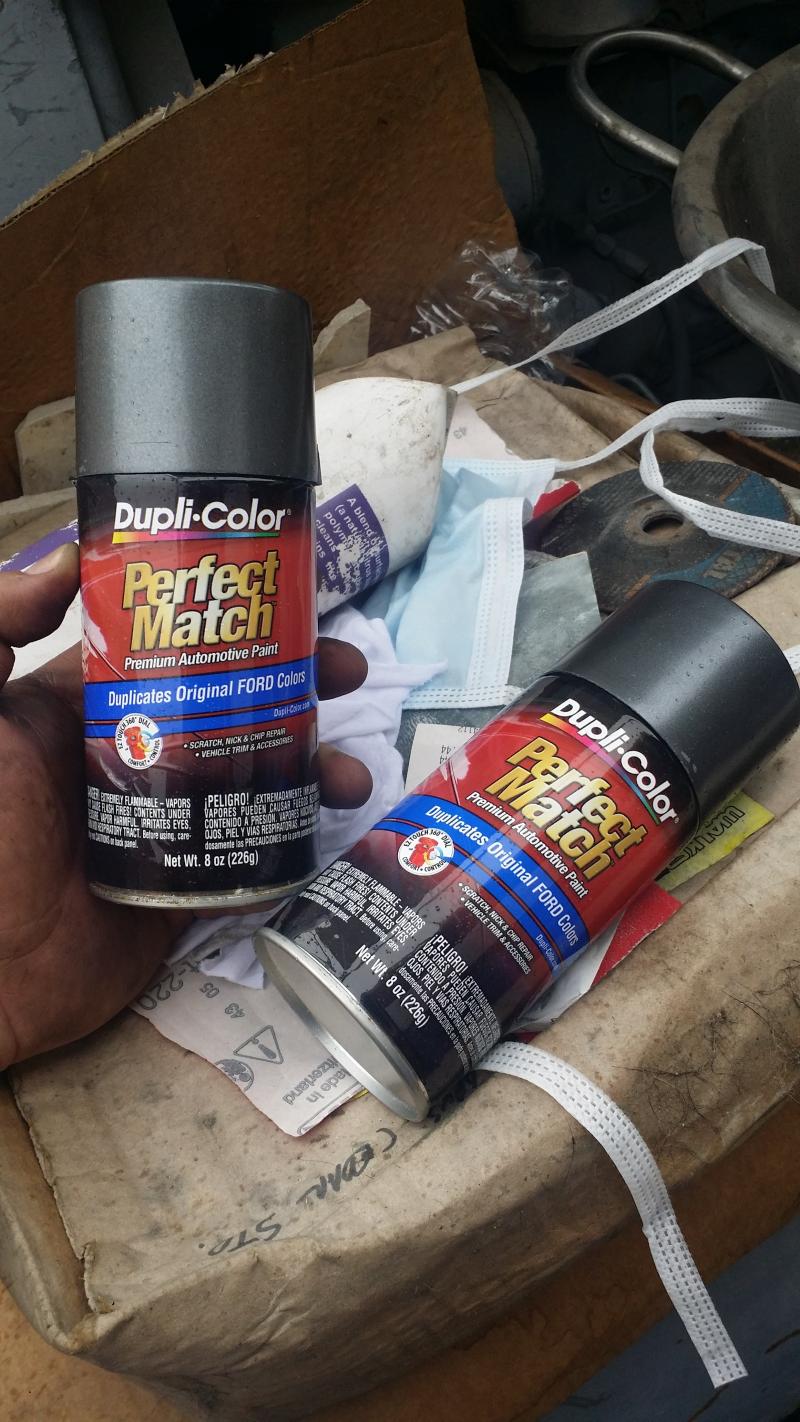
Also in case you're wondering... This is the paint that I used for m fender's paint job. I know what youre gonna say, why didn't I go to a pain shop and have an exact color match made? well im on an extreamly tight budget. I barely make enough to pay bills, and gas, and my bus/train pass. So I had to do this fix as cheap as possible. So that is why I went this route. I did a few coats of primer(3 cans) both cans of this charcoal grey paint (ford was the closest match to my faded Toyota paint) then 1 full large can of clear coat. I would say about 3 coats of clear coat to be exact.
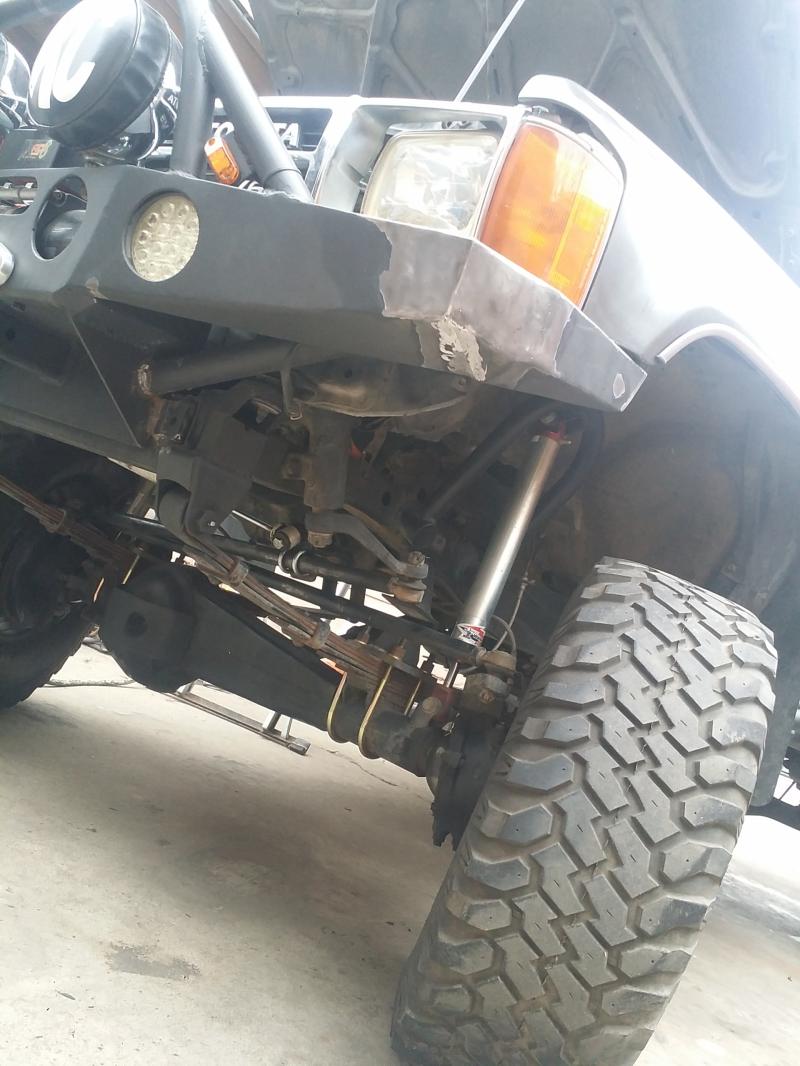
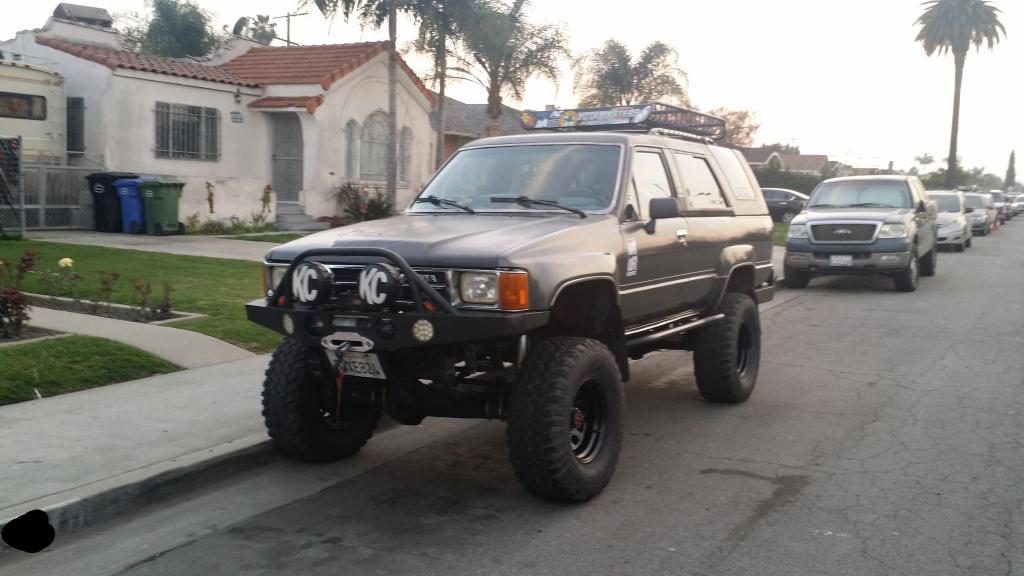
At this point I had gotten the fender on already. My truck was completely filthy though with this nicely freshly painted fender so the color looked like a big difference. But it really isn't that noticeable as it is in this picture.
In order to fix the damage to the driver side corner of the bumper. My neighbor Ruben and i attached a thick metal chain to the base of his huge avocado tree then to the corner portion of the bumper with a hook at the end of the chain. And with the trucks own engine power and pulling in reverse at different angles we managed to pull the bumper out to where it should be. Like any accident no car will be the same. But the damages have been pretty much fixed as good as its probably gonna get. For the most part it looks pretty straight. The only thing left to do here was to weld the gap shut where the original weld broke on the corner.
While I was at it I decided to fix the steering stabilizer. I know a few people who have seen my truck can tell you that I was getting some serious rubbing on the stabilizer u bolts that keep my stabilizer on the rods. So it was time to flip them the other way. Now they don't touch at all. I seriously don't know why it took me over a year to do something that only took about 25 minutes to get done. I blame my laziness for that lol It's always te little things that get neglected lol

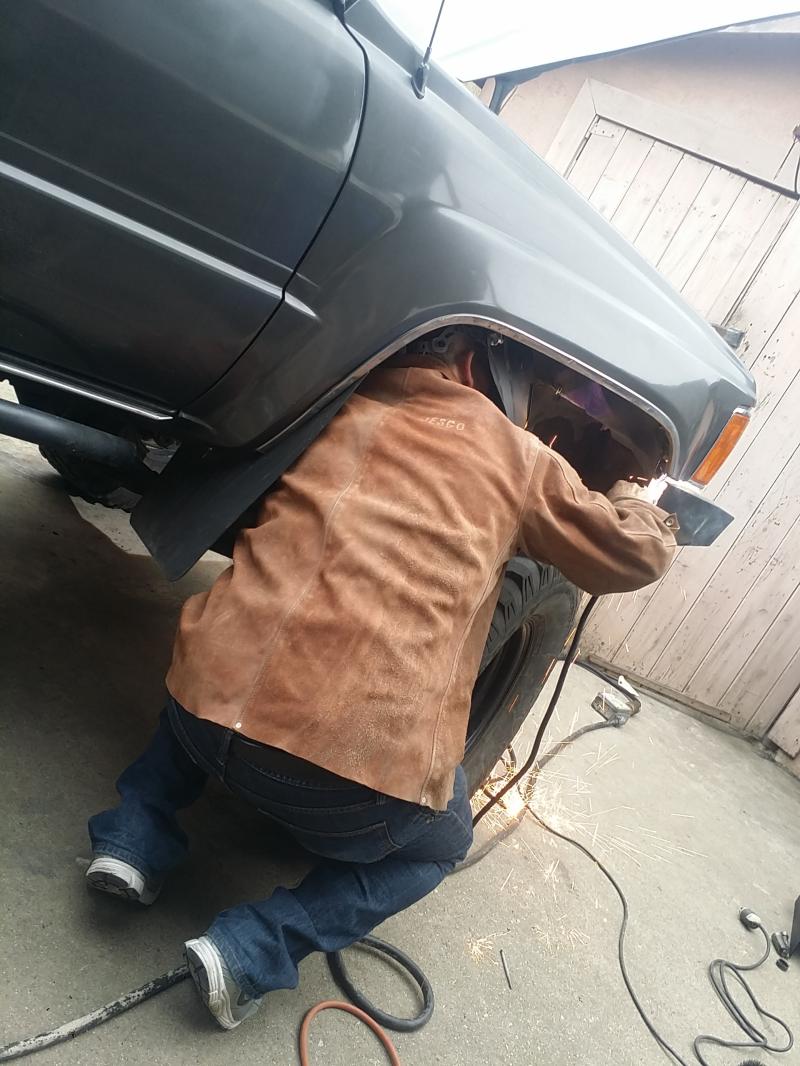
Got the corner welded on the inside this time as well as the outside. It's funny how such a simple mistake could cause your bumper so much damage when crashed. I honestly thought it had been welded on the underside on that corner. But I thought wrong. At least now it's all ground down on the outside and paint around the weld has been ground off. Now it's time to smooth out with a sander wheel then primer and paint.
Here is my dad reinforcing his previous weld on the side that did not get hit. And on the driver side he welded it shut again.
Quick video: It always rains at the most inconvenient times
  . I had to work quick to get the front covered up to prevent the freshly sanded surfaces on the bumper from rusting. All you guys with welding and painting experience know exactly what I'm talking about! Luckily for me I had a tarp and umbrella handy. Lol.

Although I fixed and straightened out this bumper as much as I possibly could it will never be left exactly as it was before. I have to use this heavy duty ratchet strap to pull the bumper corner down a bit to clear the space for a screw driver to reach the bottom 2 screws of the corner light just so I can uninstall and reinstall the light.
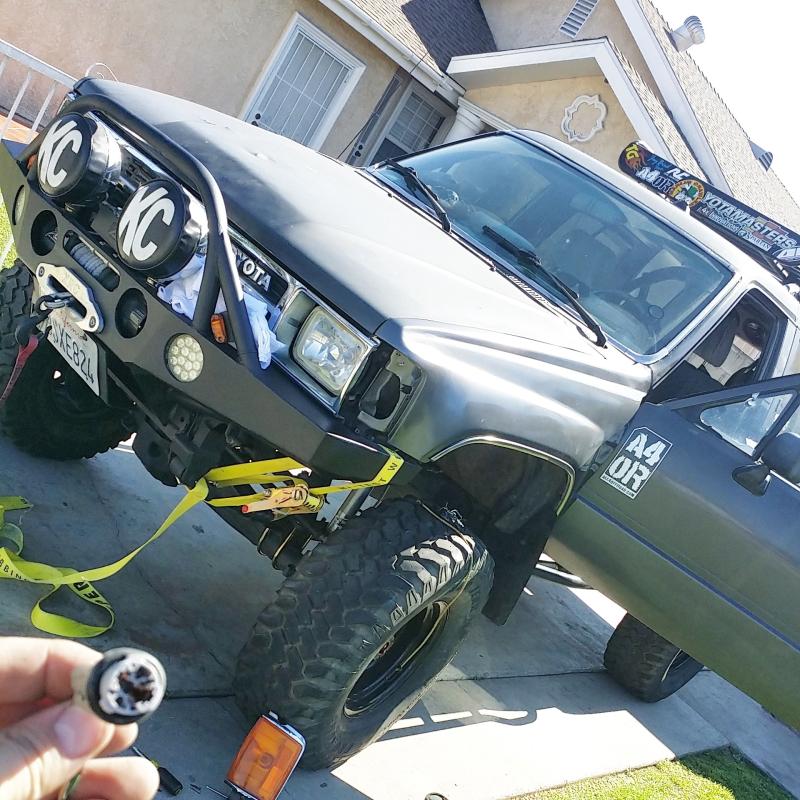
And here we are, Bumper fixed and painted and fender mounted. Almost like the crash never happened. Not bad for my 2nd time ever doing body work, but this was my first time ever painting any part of a vehicle. I think the hardest part was, not fixing the bumper, but trying to get the fender to align up properly where it is supposed to go. Because the core support and the support for the fender was slightly bent. Anyway, I think I did pretty good.

And I just got done washing the entire truck and giving the full 4runner a nice wax. Now the fender and truck match even more closely. You can still tell a slight color difference but it is damn close to the original. I don't Claim to be an expert painter or body shop tech. But I think I did damn good for my first time. I wish I would have taken some pix of it freshly waxed. I will have to give you guys a rain check on that one tomorrow when the sun is back out.
--------------------------------------------------------------------------------------
Hope you guys spent Valentines day with the awesome women in your lives. I know I had fun. Here is my beautiful girlfriend Faby all fixed up and ready for our night out together friday night. I'm happy she loved her roses. After this we went out on a double date with her brother and his girl where she treated me out to a dinner at Hooters for some beer, hot wings, and Nachos. Mmmm awesome night. We both decided long ago that we would never spend valentines day on the 14th. But better the day before or after. Restaurants are ridiculous the day of. Wait times aren't worth it.

Then the day of Valentines day Feb 14th Both faby and I went to spend the day with Mark(Chefyota4x4) and Johnny(Johnnyboy). We went out for breakfast then Hit up the local Pick your Part for his axles, Johnnys Door handles, and some lighting stuff for my rig. I wanted to get some pix of our rigs lined up before Johnny left back to Utah but Mark has his rig taken apart in the garage so I didn't get any pix. After leaving the house I figured I would make it home with the gas I still had in the tank. But apparently I was running on fumes lol. I had about 8 more miles to go before we made it home. This was the first time I had ever run out of gas on this 4runner. Luckily for me I included the 5 gallon Jerry can into my rear bumper tire carrier/bumper design when I built it. So I always have something for emergencies. But I did not have gasoline in it yet haha. So I had to walk to the nearest gas station which my GPS stated was 1.1Miles away from where we were at on the 710 N. freeway. I left Faby in the truck and I headed out to the gas station with my empty jerry can. and as I began to walk maybe 100yards out in front if the truck some guy in a BMW picked me up thanks to seeing the big ol' jerry can. So he said he'd take me to get gas. I was grateful to him just for taking me to the gas station but I did not expect him to drive me back to my truck. I thanked him for the generosity for I can tell he was on his way to visit his date for the night so I know he probably had dinner plans or something.
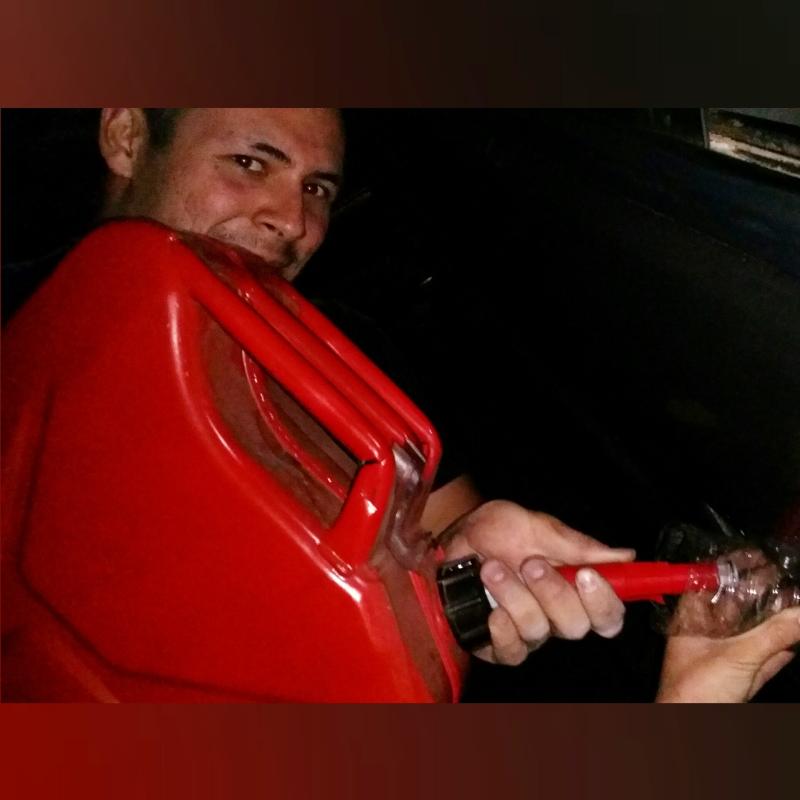
Here we are filling her up!
I guess there still are good people out in the world and I'm not the only one that does good gestures on the side of the road. I usually pass up hitch hikers because those are kinda weird but I usually volunteer to pull somebody's rig off the freeway or to the nearest gas station or help jump start somebody's car. I know most people don't carry cables on them and I always keep some extra long ones in my truck (I believe they're 24ft long). I guess good karma finally paid me back for all those times I helped people out on the side of the road. Thank you very much stranger!
I'm thinking that maybe I should think about always keeping at least 1 gallon of gas in my jerry can in case something like that happens again. 1 gallon can get me 10-12 miles and that is pretty much a good distance to travel for emergent situations such as this. It's more then enough to get me to the nearest gas station. I just don't know about carrying gas. Are jerry cans made to handle gasoline for super long periods of time?

Also in case you're wondering... This is the paint that I used for m fender's paint job. I know what youre gonna say, why didn't I go to a pain shop and have an exact color match made? well im on an extreamly tight budget. I barely make enough to pay bills, and gas, and my bus/train pass. So I had to do this fix as cheap as possible. So that is why I went this route. I did a few coats of primer(3 cans) both cans of this charcoal grey paint (ford was the closest match to my faded Toyota paint) then 1 full large can of clear coat. I would say about 3 coats of clear coat to be exact.

At this point I had gotten the fender on already. My truck was completely filthy though with this nicely freshly painted fender so the color looked like a big difference. But it really isn't that noticeable as it is in this picture.

In order to fix the damage to the driver side corner of the bumper. My neighbor Ruben and i attached a thick metal chain to the base of his huge avocado tree then to the corner portion of the bumper with a hook at the end of the chain. And with the trucks own engine power and pulling in reverse at different angles we managed to pull the bumper out to where it should be. Like any accident no car will be the same. But the damages have been pretty much fixed as good as its probably gonna get. For the most part it looks pretty straight. The only thing left to do here was to weld the gap shut where the original weld broke on the corner.
While I was at it I decided to fix the steering stabilizer. I know a few people who have seen my truck can tell you that I was getting some serious rubbing on the stabilizer u bolts that keep my stabilizer on the rods. So it was time to flip them the other way. Now they don't touch at all. I seriously don't know why it took me over a year to do something that only took about 25 minutes to get done. I blame my laziness for that lol It's always te little things that get neglected lol

Got the corner welded on the inside this time as well as the outside. It's funny how such a simple mistake could cause your bumper so much damage when crashed. I honestly thought it had been welded on the underside on that corner. But I thought wrong. At least now it's all ground down on the outside and paint around the weld has been ground off. Now it's time to smooth out with a sander wheel then primer and paint.

Here is my dad reinforcing his previous weld on the side that did not get hit. And on the driver side he welded it shut again.

Quick video:
It always rains at the most inconvenient times . I had to work quick to get the front covered up to prevent the freshly sanded surfaces on the bumper from rusting. All you guys with welding and painting experience know exactly what I'm talking about! Luckily for me I had a tarp and umbrella handy. Lol. Although I fixed and straightened out this bumper as much as I possibly could it will never be left exactly as it was before. I have to use this heavy duty ratchet strap to pull the bumper corner down a bit to clear the space for a screw driver to reach the bottom 2 screws of the corner light just so I can uninstall and reinstall the light.

And here we are, Bumper fixed and painted and fender mounted. Almost like the crash never happened. Not bad for my 2nd time ever doing body work, but this was my first time ever painting any part of a vehicle. I think the hardest part was, not fixing the bumper, but trying to get the fender to align up properly where it is supposed to go. Because the core support and the support for the fender was slightly bent. Anyway, I think I did pretty good.

And I just got done washing the entire truck and giving the full 4runner a nice wax. Now the fender and truck match even more closely. You can still tell a slight color difference but it is damn close to the original.
I don't Claim to be an expert painter or body shop tech. But I think I did damn good for my first time. I wish I would have taken some pix of it freshly waxed. I will have to give you guys a rain check on that one tomorrow when the sun is back out. --------------------------------------------------------------------------------------
Hope you guys spent Valentines day with the awesome women in your lives. I know I had fun. Here is my beautiful girlfriend Faby all fixed up and ready for our night out together friday night. I'm happy she loved her roses. After this we went out on a double date with her brother and his girl where she treated me out to a dinner at Hooters for some beer, hot wings, and Nachos. Mmmm awesome night. We both decided long ago that we would never spend valentines day on the 14th. But better the day before or after. Restaurants are ridiculous the day of. Wait times aren't worth it.

Then the day of Valentines day Feb 14th Both faby and I went to spend the day with Mark(Chefyota4x4) and Johnny(Johnnyboy). We went out for breakfast then Hit up the local Pick your Part for his axles, Johnnys Door handles, and some lighting stuff for my rig. I wanted to get some pix of our rigs lined up before Johnny left back to Utah but Mark has his rig taken apart in the garage so I didn't get any pix. After leaving the house I figured I would make it home with the gas I still had in the tank. But apparently I was running on fumes lol. I had about 8 more miles to go before we made it home. This was the first time I had ever run out of gas on this 4runner. Luckily for me I included the 5 gallon Jerry can into my rear bumper tire carrier/bumper design when I built it. So I always have something for emergencies. But I did not have gasoline in it yet haha
. So I had to walk to the nearest gas station which my GPS stated was 1.1Miles away from where we were at on the 710 N. freeway. I left Faby in the truck and I headed out to the gas station with my empty jerry can. and as I began to walk maybe 100yards out in front if the truck some guy in a BMW picked me up thanks to seeing the big ol' jerry can. So he said he'd take me to get gas. I was grateful to him just for taking me to the gas station but I did not expect him to drive me back to my truck. I thanked him for the generosity for I can tell he was on his way to visit his date for the night so I know he probably had dinner plans or something.Here we are filling her up!

I guess there still are good people out in the world and I'm not the only one that does good gestures on the side of the road. I usually pass up hitch hikers because those are kinda weird but I usually volunteer to pull somebody's rig off the freeway or to the nearest gas station or help jump start somebody's car. I know most people don't carry cables on them and I always keep some extra long ones in my truck (I believe they're 24ft long). I guess good karma finally paid me back for all those times I helped people out on the side of the road. Thank you very much stranger!
I'm thinking that maybe I should think about always keeping at least 1 gallon of gas in my jerry can in case something like that happens again. 1 gallon can get me 10-12 miles and that is pretty much a good distance to travel for emergent situations such as this. It's more then enough to get me to the nearest gas station. I just don't know about carrying gas. Are jerry cans made to handle gasoline for super long periods of time?
Last edited by Redeth005; Feb 15, 2015 at 09:59 PM.
Feb 17, 2015 | 06:53 AM
#2525
Sorry to hear about the accident and no one was hurt. Hope the others dont get crazy on wanting a big pay out but they are out there. Great job on getting your truck back together.
 Feb 18, 2015 | 12:38 PM
#2527
Thread Starter
Registered User
Joined: Apr 2012
Posts: 2,817
Likes: 2
From: Los Angeles CA
Thank you Ed. I'm happy with the way it came out. I was honestly scared the color would be a bigger difference but this is hardly noticeable.
well my insurance said that there were more then 1 person claiming to have gotten hurt. As far as I know it was just one. But even that she didn't seem like it. Either way that's what I got liability for I guess. She is covered up to 15k. And if more people are hurt my insurance covers up to 30k. So I'm sure that will cover their medical bills.
Lol i get that all the time. Thanks man. She enjoys coming to the yards. Even though sometimes she seems to be bored, she always finds entertainment. Somehow she always turns the trip to the junk yard into a selfie photo shoot haha !
Lol i get that all the time. Thanks man. She enjoys coming to the yards. Even though sometimes she seems to be bored, she always finds entertainment. Somehow she always turns the trip to the junk yard into a selfie photo shoot haha !
Last edited by Redeth005; Feb 18, 2015 at 12:39 PM.
Feb 18, 2015 | 07:03 PM
#2529
Registered User
Joined: Dec 2009
Posts: 2,762
Likes: 1
awesome to hear that you got a ride to get gas. surprised you dont keep your jerry can with at least 3 gallons. i plan on keep each one of my 3 gallon ones with atleast 2 gallons in each and rotate them round during fill ups. guess it easier for me since its not a DD
Feb 18, 2015 | 07:27 PM
#2530
Thread Starter
Registered User
Joined: Apr 2012
Posts: 2,817
Likes: 2
From: Los Angeles CA
 IT still looks nice though. But I wish I would have buffed it out first.
 awesome to hear that you got a ride to get gas. surprised you dont keep your jerry can with at least 3 gallons. i plan on keep each one of my 3 gallon ones with atleast 2 gallons in each and rotate them round during fill ups. guess it easier for me since its not a DD
I have read both legal and illegal on different forums. Illegal because the metal causes static electricity which can blow your tank and set your truck on fire. But then I hear plastic ones like rotopax are okay because they don't conduct electricity or static --- my Jerry can is the harbor freight one (same one that 4wheelparts sells) and it is a metal container but the nozzle is all plastic. And I'm sure that one should be legal. It also states on the harbor freight website that this one is CARB certified whatever that means. My guess if that i would be okay because the plastic nozzle won't conduct a static spark when putting the tip to the gas filler area. right?
Feb 18, 2015 | 10:34 PM
#2531
Registered User
Joined: Jul 2012
Posts: 2,365
Likes: 4
From: Idaho
on the static issue i would just keep the can full and sealed tight any air inside will be so out of the fuel air mix ratio it wont flash NOW thats not to say leaving it sun beating down on it wont make it "breathe" a bit
also they make an additive that strips the ethanol out of fuel which causes bare steel in fuel systems to rust like mad id add a bit to the cans contents
also they make an additive that strips the ethanol out of fuel which causes bare steel in fuel systems to rust like mad id add a bit to the cans contents
Feb 19, 2015 | 03:41 PM
#2533
Registered User
Joined: Dec 2009
Posts: 2,762
Likes: 1
I Waxed the whole truck an when I was done I realized that I didn't buff out any of the truck. IT still looks nice though. But I wish I would have buffed it out first.
I am seriously considering it. but not sure if it is illegal to have a jerry can with gas on the rear bumper.
I have read both legal and illegal on different forums. Illegal because the metal causes static electricity which can blow your tank and set your truck on fire. But then I hear plastic ones like rotopax are okay because they don't conduct electricity or static --- my Jerry can is the harbor freight one (same one that 4wheelparts sells) and it is a metal container but the nozzle is all plastic. And I'm sure that one should be legal. It also states on the harbor freight website that this one is CARB certified whatever that means. My guess if that i would be okay because the plastic nozzle won't conduct a static spark when putting the tip to the gas filler area. right?
IT still looks nice though. But I wish I would have buffed it out first. I am seriously considering it. but not sure if it is illegal to have a jerry can with gas on the rear bumper.
I have read both legal and illegal on different forums. Illegal because the metal causes static electricity which can blow your tank and set your truck on fire. But then I hear plastic ones like rotopax are okay because they don't conduct electricity or static --- my Jerry can is the harbor freight one (same one that 4wheelparts sells) and it is a metal container but the nozzle is all plastic. And I'm sure that one should be legal. It also states on the harbor freight website that this one is CARB certified whatever that means. My guess if that i would be okay because the plastic nozzle won't conduct a static spark when putting the tip to the gas filler area. right?
gas up and carry on. if your worry about spark, clip a metal cable to can to truck before filling up and this should eliminate any spark.
Feb 19, 2015 | 06:53 PM
#2534
Thread Starter
Registered User
Joined: Apr 2012
Posts: 2,817
Likes: 2
From: Los Angeles CA
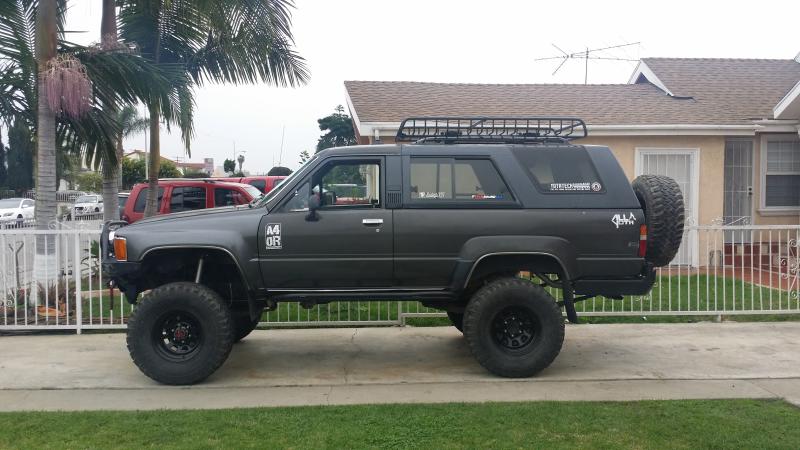
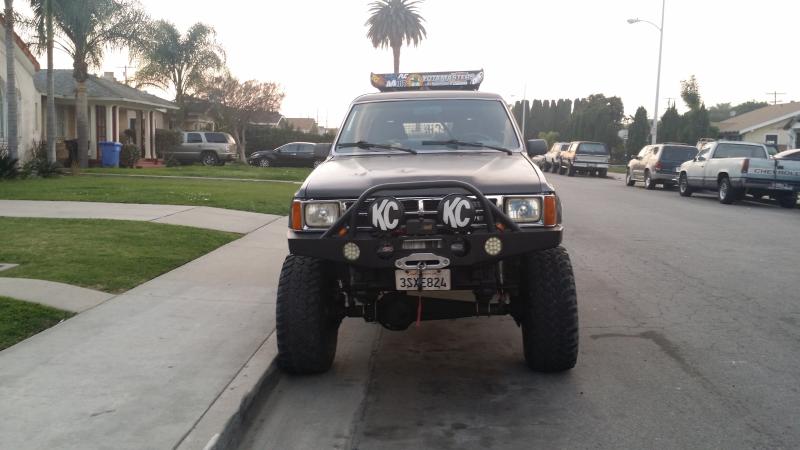
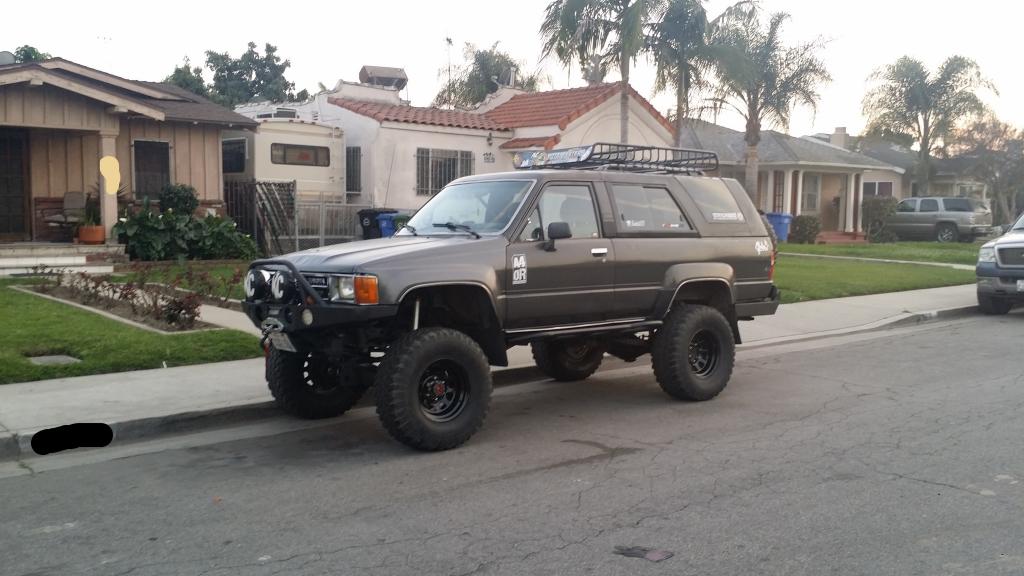
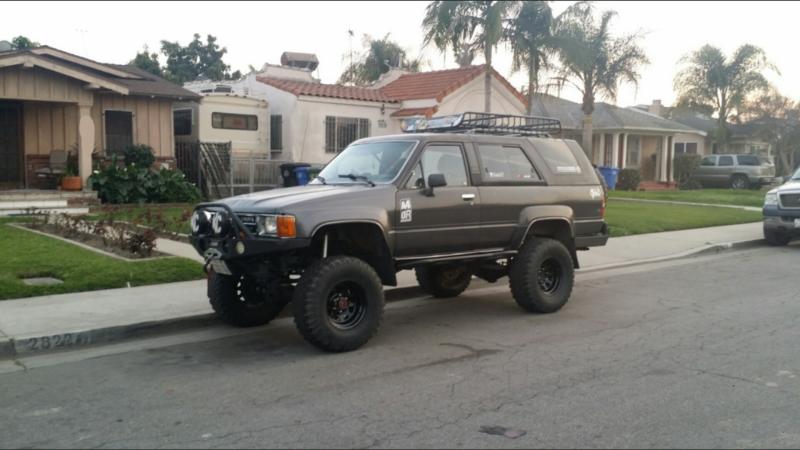
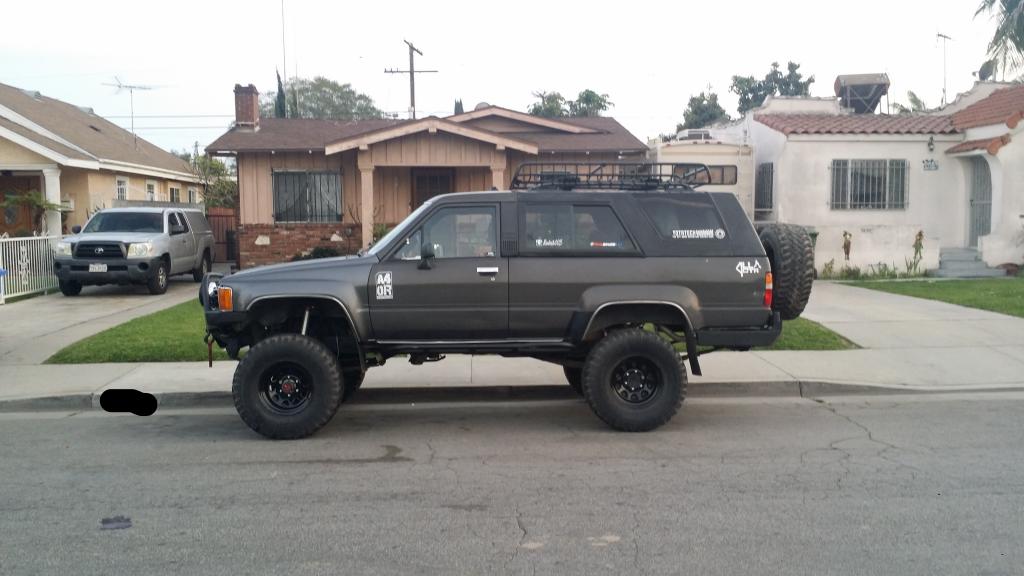
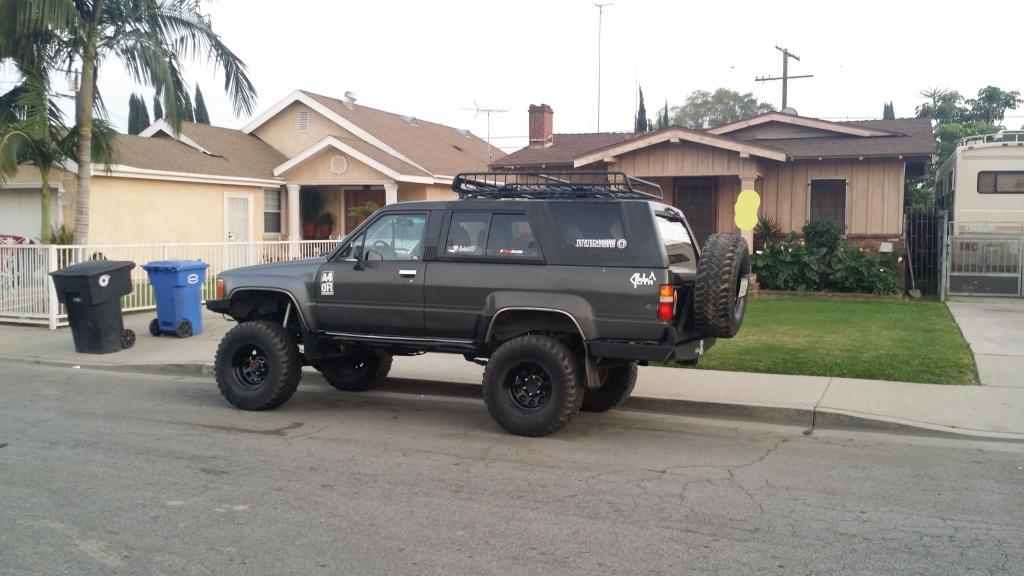
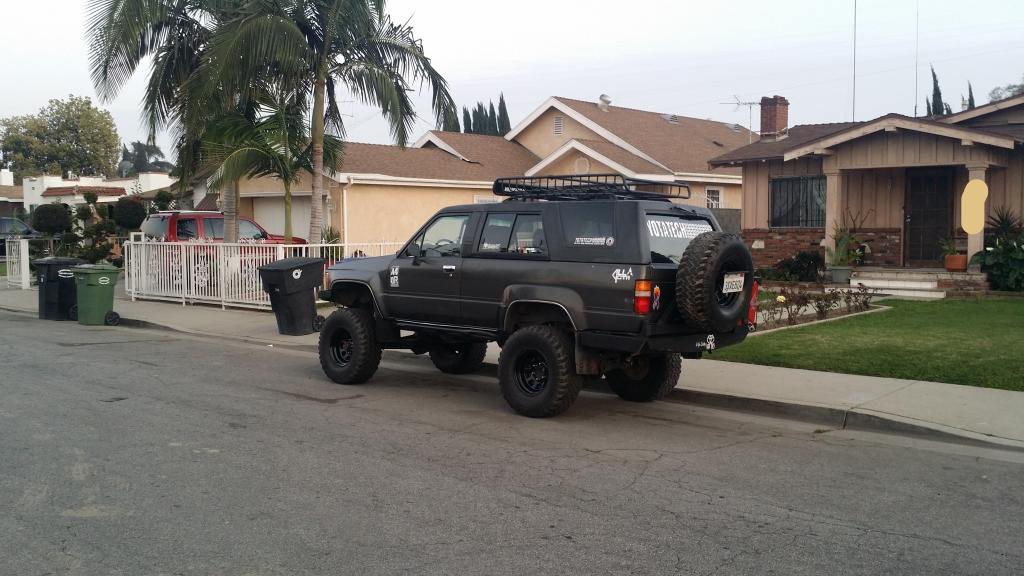
Well I finally got around to taking pix of the truck after it was waxed. And I have got to say there is a huge difference in color when the sun is going down. The rig looks perfectly fine during the day time. but as the sun moves down I guess the darker time of day makes a huge difference lol I guess I could have gone with a darker color but I was doing this on a budget so that's quite fine with me. I'm still happy with the paint job.
Here you go from multiple angles.

Here you go from multiple angles.


 Mar 3, 2015 | 04:08 PM
#2536
Thread Starter
Registered User
Joined: Apr 2012
Posts: 2,817
Likes: 2
From: Los Angeles CA
Mar 3, 2015 | 04:28 PM
#2538
https://www.yotatech.com/forums/f114...torial-264405/
Hey Richard, the runner is looking great after all your work! I saw that Mark just got done replacing and painting one of his fenders too, you guys are going to be pro auto body techs before too long!
Last edited by rustED; Mar 3, 2015 at 04:32 PM.
Mar 3, 2015 | 09:53 PM
#2539
It looks fine, & mines way more different any time of the day! Lol. I kind of like it though... Cuz my door is screwed up anyway. Lol... Actually, I have plans where it's not going to matter very much anyway... But that's for another time.
Mar 4, 2015 | 06:06 AM
#2540
Thread Starter
Registered User
Joined: Apr 2012
Posts: 2,817
Likes: 2
From: Los Angeles CA
MARK, did you use the Toyota color match can? I can't recall. I remember the auto zone had the silver color match for your truck. I didn't go with Toyota charcoal Grey because the Ford one matched my faded paint the best. I still haven't seen a full post paint job side picture of your truck yet.


