
Redeth's 1989 4Runner Resurrection
 Apr 9, 2013 | 12:54 PM
#1261
6? Yeah,......thanks to Ruben, fo sho! Lol. .......It's great u have him, man... What a class dude, really enjoyed meeting him..... And, ur doing a great and thorough job on all the details stuff/semantics..... Most of us dont have access to plasma cutters.....so thats also AWESOME! HEY,.......almost there.....SWEET!
Apr 9, 2013 | 01:36 PM
#1262
Registered User
Joined: Dec 2008
Posts: 2,391
Likes: 1
From: tecumseh nebraska
Im assuming Ruben and his son are the ones with you and chef at salton sea??I did some research on that place.simply amazing how everyone thought it was such a paradise and turned into something so desolate and creepy. Looks like a drug dealer or homicidal maniacs paradise now!!(but a great place for wheeling)
Keep up the good work, everytime i see my 85 axle lying in the corner i think of what my 4runner would look like with it.
Keep up the good work, everytime i see my 85 axle lying in the corner i think of what my 4runner would look like with it.
Apr 9, 2013 | 01:51 PM
#1263
Thread Starter
Registered User
Joined: Apr 2012
Posts: 2,817
Likes: 2
From: Los Angeles CA
Red, this rig is no longer a daily driver right?
At least with manual hubs we can unlock the front end. I dont think I could put an auto locker up front in Canada. Too many times I need to drive with my hubs locked so I can switch to 4 wheel drive. A Spartan up front would put me in a ditch.
PS,
--------------
At least with manual hubs we can unlock the front end. I dont think I could put an auto locker up front in Canada. Too many times I need to drive with my hubs locked so I can switch to 4 wheel drive. A Spartan up front would put me in a ditch.
PS,
--------------
As for the locker bit you talk about. I have heard a few people mention that its dangerous having a locker up in front. Why is that exactly? what happenes if it locks up when you are driving? or is the concern having it lock up while you make a turn? i dont get it.
6? Yeah,......thanks to Ruben, fo sho! Lol. .......It's great u have him, man... What a class dude, really enjoyed meeting him..... And, ur doing a great and thorough job on all the details stuff/semantics..... Most of us dont have access to plasma cutters.....so thats also AWESOME! HEY,.......almost there.....SWEET!
Apr 9, 2013 | 02:17 PM
#1264
Of course I wannaaaa come! Hope I cannn! Lol ....
Cutting it off is not the problem.... its having a pro welder and measuring/placement guru that is the Godsend ... those eyes and shock hoop tubes and hangers and all that is definitely something u want done professionally.... like the gears if ur able to pay.... VERY good choice, as I'm sure u COULD do it after research...but why not be 100% sure and then be done with it? U are very blessed to have them, stoked for ya bud! U did a great job on the cleanup and axle work! All of it looks great!
Working til 10, but gonna get ahold of ya l8r, k? Gotta ask ya a couple things.
Cutting it off is not the problem.... its having a pro welder and measuring/placement guru that is the Godsend
... those eyes and shock hoop tubes and hangers and all that is definitely something u want done professionally.... like the gears if ur able to pay.... VERY good choice, as I'm sure u COULD do it after research...but why not be 100% sure and then be done with it? U are very blessed to have them, stoked for ya bud! U did a great job on the cleanup and axle work! All of it looks great! Working til 10, but gonna get ahold of ya l8r, k? Gotta ask ya a couple things.
Apr 9, 2013 | 05:59 PM
#1266
Registered User
Joined: Dec 2009
Posts: 2,762
Likes: 1
your non traditional jack stands are scary. cylinder blocks are a huge no no. they can come apart at any time. a rubber tire to hold the front up?? yikes
heres why being locked can be a bad thing on dry pavement
heres why being locked can be a bad thing on dry pavement
Apr 9, 2013 | 07:40 PM
#1267
Thread Starter
Registered User
Joined: Apr 2012
Posts: 2,817
Likes: 2
From: Los Angeles CA
Im assuming Ruben and his son are the ones with you and chef at salton sea??I did some research on that place.simply amazing how everyone thought it was such a paradise and turned into something so desolate and creepy. Looks like a drug dealer or homicidal maniacs paradise now!!(but a great place for wheeling)
Keep up the good work, everytime i see my 85 axle lying in the corner i think of what my 4runner would look like with it.
Keep up the good work, everytime i see my 85 axle lying in the corner i think of what my 4runner would look like with it.
As for your axle. Dude just buy a restore kit. And clean it all up completely prime and paint it. Once that's done just go at your own pace buying what you need. Gather parts slowly like I did. It took me 1 &1/2 years before I finally had most of what I needed. If u plan to huy everything in one shot and have work done properly on your diffs I suggest you save up $3000-3500 so u cam do it in one shot. If not just gather parts as u go knocking out one kit at a time. Good luck with that one man.
As for the trip. Ill let ya know when we go. I wanna at least have1 to 2 weeks of driving it in 4x4 high then change the diff fluid before we go on the trip.
your non traditional jack stands are scary. cylinder blocks are a huge no no. they can come apart at any time. a rubber tire to hold the front up?? yikes
heres why being locked can be a bad thing on dry pavement
Video Link: http://www.youtube.com/watch?v=KxtAvRuyri8
heres why being locked can be a bad thing on dry pavement
Video Link: http://www.youtube.com/watch?v=KxtAvRuyri8
As for the stands these aren't cylinder blocks. They are wood blocks.
 but I agree witg you on the front end. We have those wood blocks sitting on the rim. But I didn't like the idea of that either
Last edited by Redeth005; Apr 9, 2013 at 08:21 PM.
Apr 9, 2013 | 07:57 PM
#1268
Thread Starter
Registered User
Joined: Apr 2012
Posts: 2,817
Likes: 2
From: Los Angeles CA
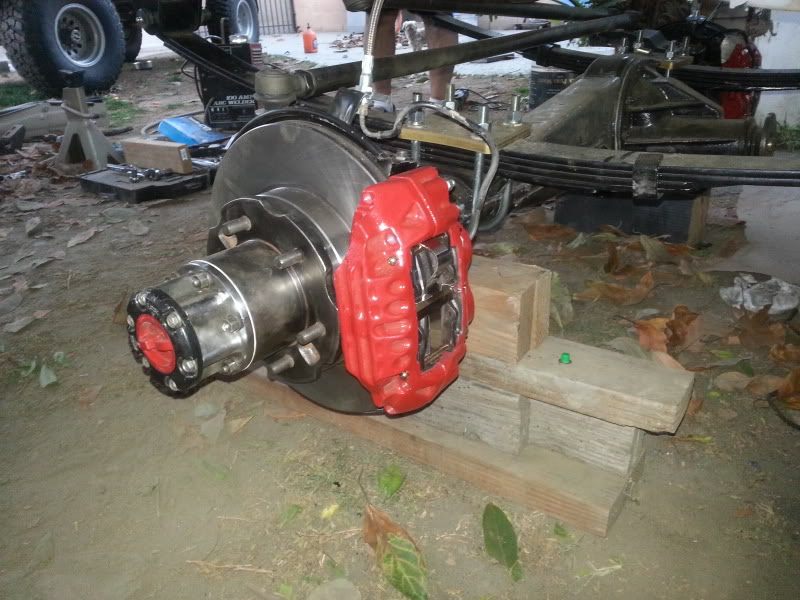
Hey guys here are my calipers in better lighting. Brake pads already installed.

Everybody has their preferred brake brand. Mine are Bendix brake pads. I've had very bad experiences with Autozones duralast brakes and othera from pepboys and I dunno about O'Reilly but since I've started useing Bendix I've never had jacked up discs ever again.
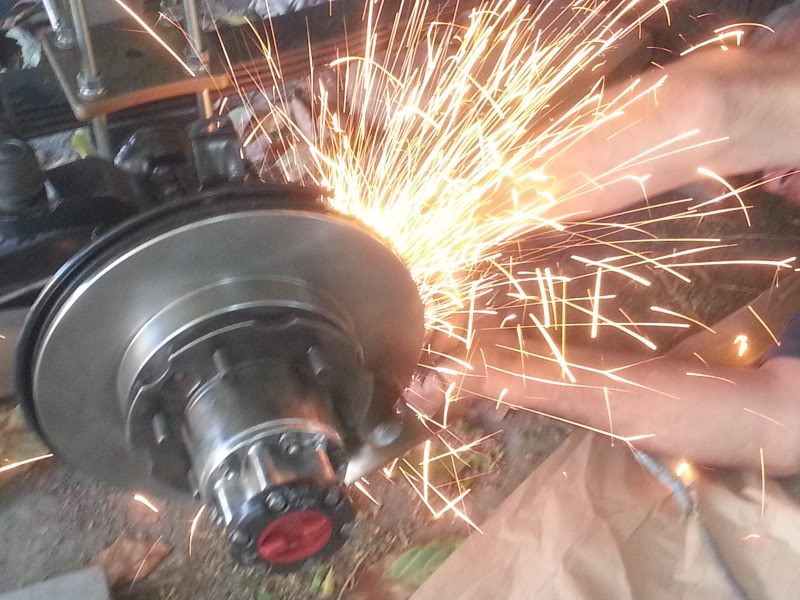
Guys if you plan to SAS and decide to use the vented v6 rotors with v6 calipers please do yourselves the favor of cutting about 1/4" - 3/8" off both sides of your dust shield. I totally forgot to do this while the dust shield was off and so of course my calipers didn't fit. Ruben amd I are so freekin tired of taking apart thw hubs that we just put some thin metal plate between the rotors and dust shield and cut the dust shield down enough to make my calipers fit. Do yoyrself the favor and do this before you put it together. Lol
Here is Ruben cutting the Dust shield with a small blade Makita.
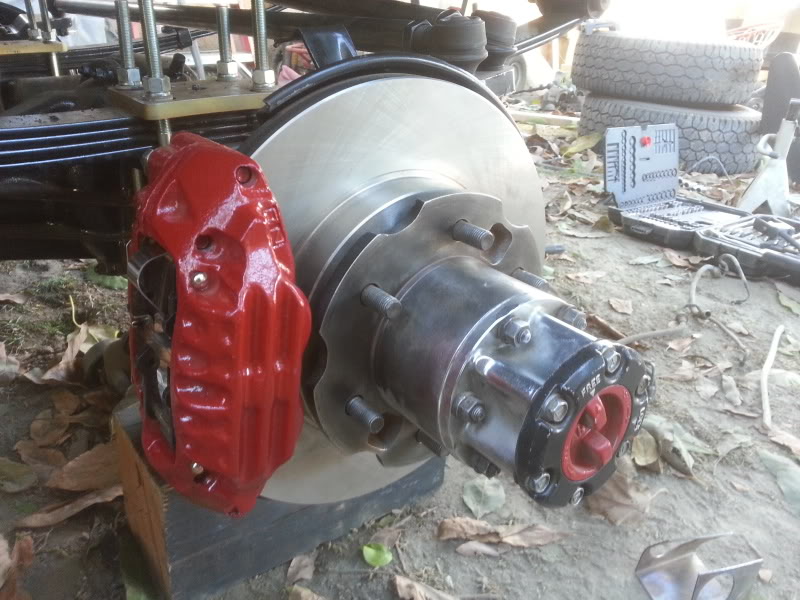
Here are my finished calipers on the new shiney rotors.
We also managed to tack weld the shock hoops on so whenever I'm done with cleaning up my rear axle and we're ready to mount the rear spring perches then he will bring the better welding machine from work and do all the left over welds all in one shot.
Everybody has their preferred brake brand. Mine are Bendix brake pads. I've had very bad experiences with Autozones duralast brakes and othera from pepboys and I dunno about O'Reilly but since I've started useing Bendix I've never had jacked up discs ever again.
Guys if you plan to SAS and decide to use the vented v6 rotors with v6 calipers please do yourselves the favor of cutting about 1/4" - 3/8" off both sides of your dust shield. I totally forgot to do this while the dust shield was off and so of course my calipers didn't fit. Ruben amd I are so freekin tired of taking apart thw hubs that we just put some thin metal plate between the rotors and dust shield and cut the dust shield down enough to make my calipers fit. Do yoyrself the favor and do this before you put it together. Lol
Here is Ruben cutting the Dust shield with a small blade Makita.
Here are my finished calipers on the new shiney rotors.
We also managed to tack weld the shock hoops on so whenever I'm done with cleaning up my rear axle and we're ready to mount the rear spring perches then he will bring the better welding machine from work and do all the left over welds all in one shot.
Apr 9, 2013 | 08:22 PM
#1269

"cinder block" You had me going back looking for an engine under there I didn't notice. They're just holding the axle in place, and they're the solid ones it looks like, even if they're not they're atleast oriented the better way. When it's all done you're going to need some of those fancy custom high stands 
The pick a part in denver uses two rims on each corner of the frame,one flat one upright, this used to scare the crap outta me till I watched one of the lot goons run into one with the BA tractor. I'm good now, er mostly now I just worry about the crappy rusted colorado vehicles falling apart on the stands instead of falling off them.
Ruben don't recall seeing his face recently but you can just "tell" he's enjoying doing this with you.
When it's all done you're going to need some of those fancy custom high stands The pick a part in denver uses two rims on each corner of the frame,one flat one upright, this used to scare the crap outta me till I watched one of the lot goons run into one with the BA tractor. I'm good now, er mostly now I just worry about the crappy rusted colorado vehicles falling apart on the stands instead of falling off them.
Ruben
don't recall seeing his face recently but you can just "tell" he's enjoying doing this with you.
Apr 10, 2013 | 12:27 AM
#1270
Congratulations on getting your Runner SASed. I know you been wanting it done for quite some time. Congrats again, it is looking good. I dont think brakes are supposed to spark like that. Just kidding.
Bet you are ready to try a trail out soon. Looking forward to some pics, just keep the shiney side up.
Bet you are ready to try a trail out soon. Looking forward to some pics, just keep the shiney side up.
Apr 10, 2013 | 12:07 PM
#1272
Registered User
Joined: Dec 2009
Posts: 2,762
Likes: 1
Congratulations on getting your Runner SASed. I know you been wanting it done for quite some time. Congrats again, it is looking good. I dont think brakes are supposed to spark like that. Just kidding.
Bet you are ready to try a trail out soon. Looking forward to some pics, just keep the shiney side up.
Bet you are ready to try a trail out soon. Looking forward to some pics, just keep the shiney side up.
Apr 10, 2013 | 01:46 PM
#1273
Thread Starter
Registered User
Joined: Apr 2012
Posts: 2,817
Likes: 2
From: Los Angeles CA
Only on the axle and attatchments lol. my rear will be nicely painted too. wish the whole truck had a fresh paint job thats be pretty sweet! maybe in the future ill take my truck to get a cheap, stage 1, $400-500 paint job something before i install the nice CBI bumpers. ya know. Charcoal Grey with black camper, bumpers, and sliders will look sick!!!!
Last edited by Redeth005; Apr 10, 2013 at 01:51 PM.
Apr 10, 2013 | 02:51 PM
#1277
Thread Starter
Registered User
Joined: Apr 2012
Posts: 2,817
Likes: 2
From: Los Angeles CA

Thanks William. I'm very happy with how they came out too. Its the shiniest part on the truck lol
Apr 10, 2013 | 03:37 PM
#1278
Hey Richard, I wonder if you had read that thread that I showed you about the CBI bumpers having issues? I'll see if I can find the thread again, and not for the purpose of trying to talk you out of a CBI bumper, I think they are sick! Rather, just as a heads up so that you can I think that out ahead of time. The guy that was having issues seems to be a very experienced welder and fabricator... So maybe if you could see what he ran into you can head that off before the stuff gets there? I seem to remember him saying that he wasn't the only one as well. either way, nothing is going to look sick with those bumpers!
Apr 10, 2013 | 04:31 PM
#1279
Hey Richard your SAS is really coming along! Nice work! I bet it was nice having access to the plasma cutter, I cut all my ifs off with a 4" grinder and about 20 skinny cutoff wheels, I didn't think I'd ever get it done, lol! Can't wait to see yours finished and sitting on those 33's!!!
Last edited by rustED; Apr 10, 2013 at 04:32 PM.
Apr 10, 2013 | 07:14 PM
#1280
Thread Starter
Registered User
Joined: Apr 2012
Posts: 2,817
Likes: 2
From: Los Angeles CA
Get'er done!
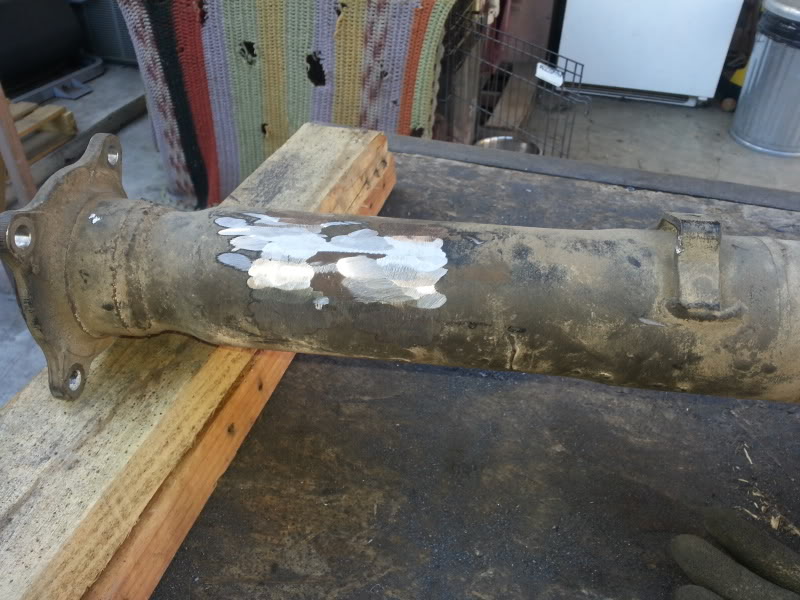
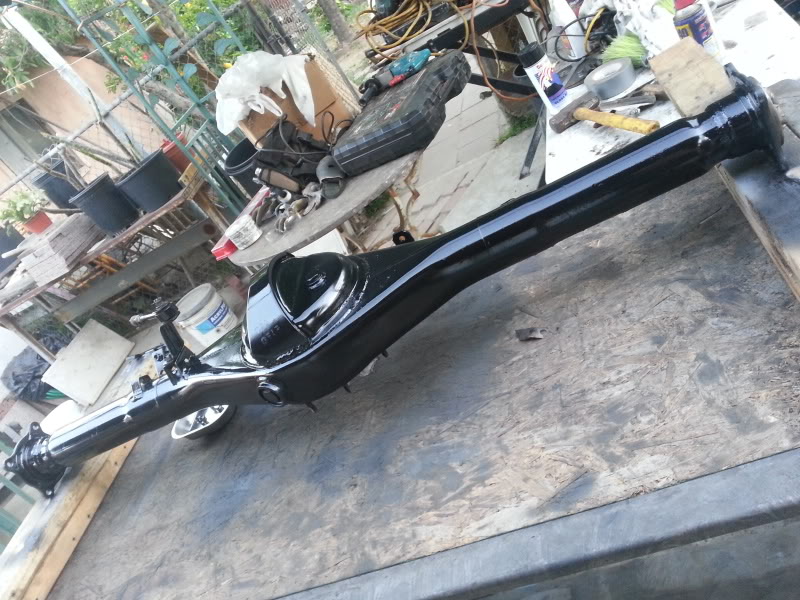
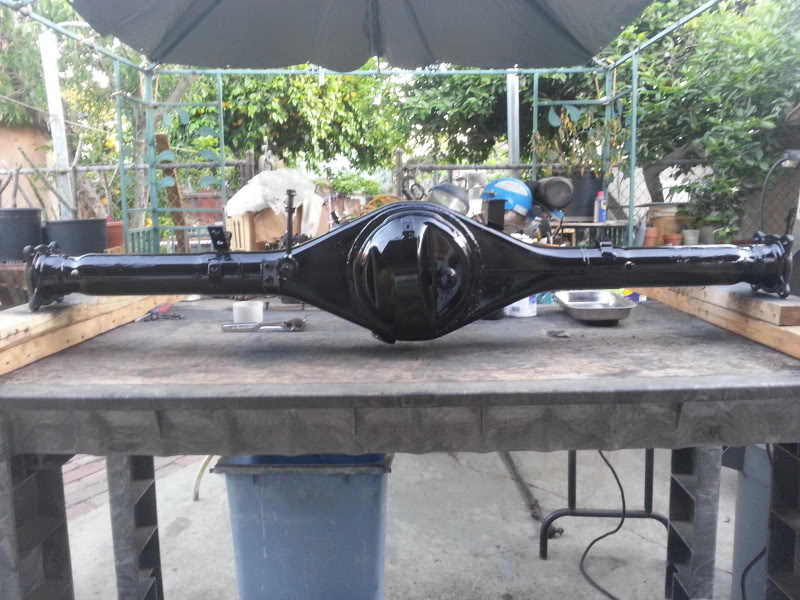
Today I did the rear axle. I was amazed at how much easier this axle was to clean up vs the jacked up front axle. Lol all this one needed was a quick soak with Purple Power and then a light pass with the lighter wire wheel; just to knock off all the loose dirt.
Here I had already cut off the spring perches then passed the grinder to make it all even.
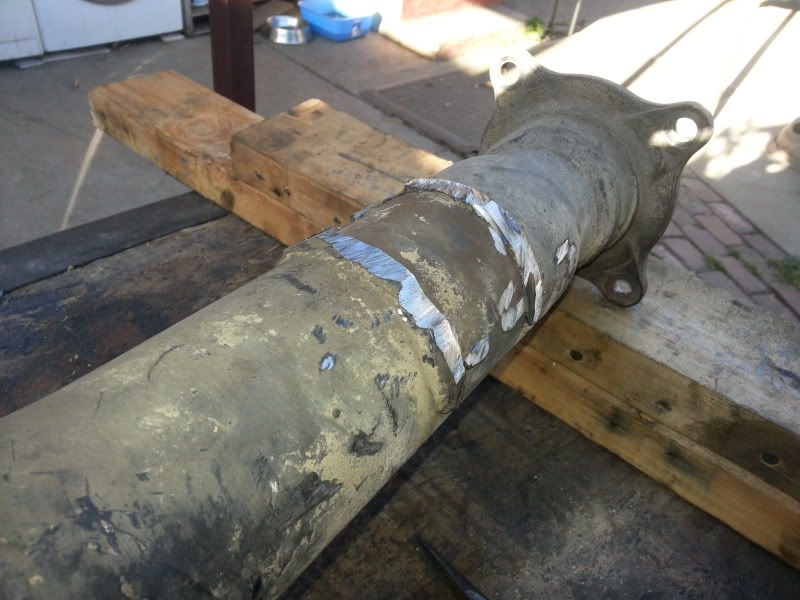
Soak in Purple Power.
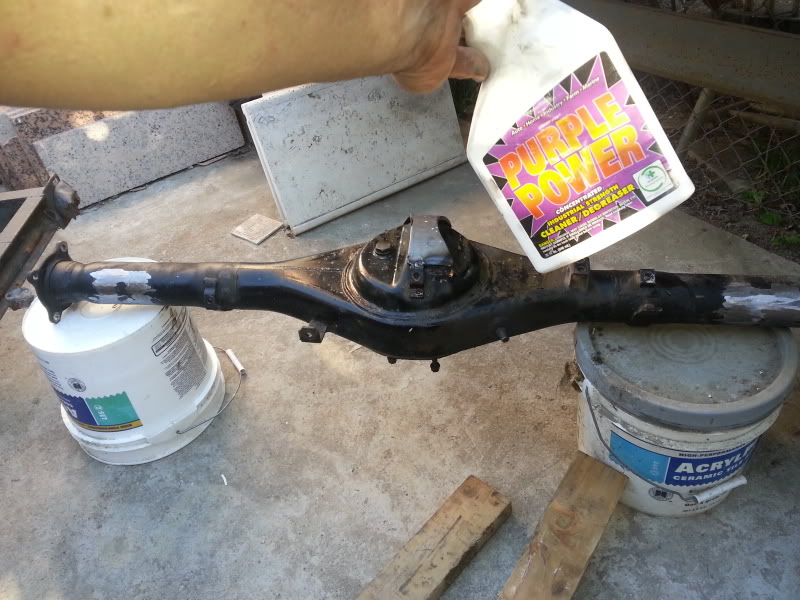
After soak is when I used the light wire wheel. My axle was fine just like that. But the black powder coat paint looked all old and faded. So i wanted to give it a new black coat so after the soak I wiped it all down with some clean cloths. Then I passed 2 coats of primer on top of the paint it already had.
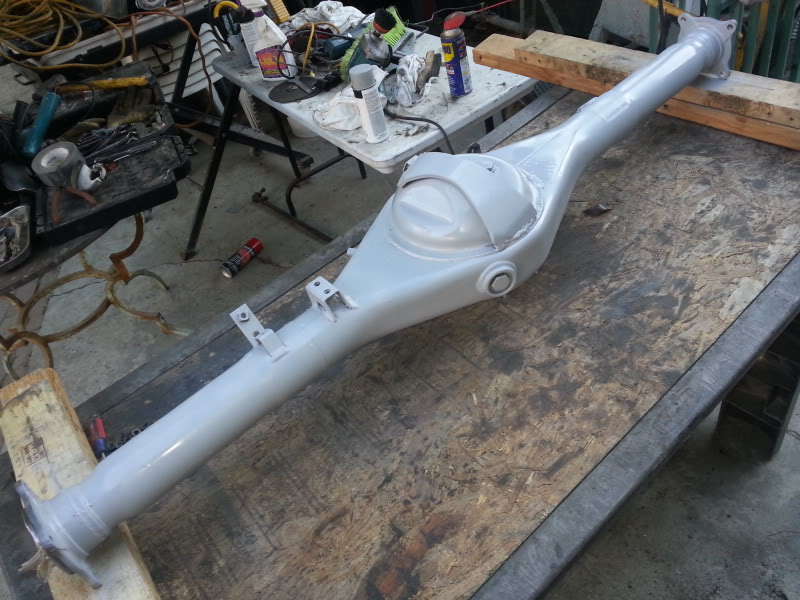
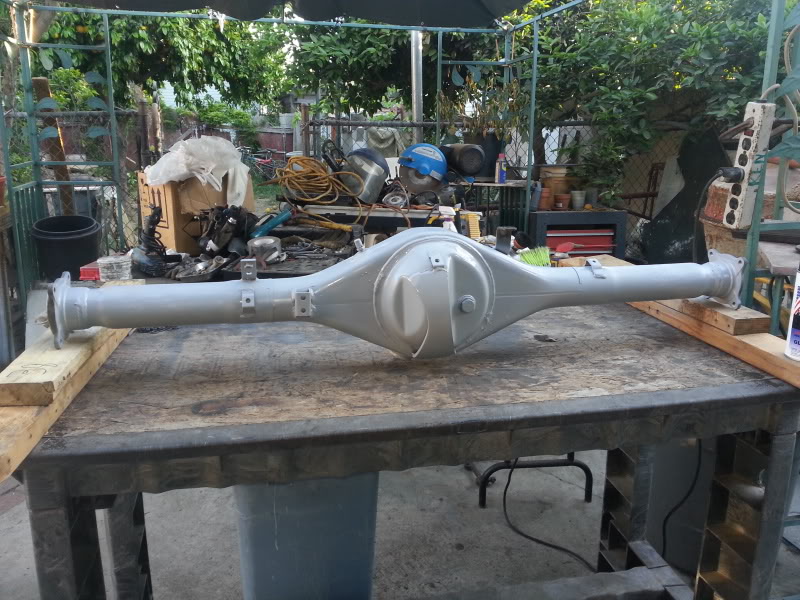
Then I painted the axle black with 2 coats.
Today I did the rear axle. I was amazed at how much easier this axle was to clean up vs the jacked up front axle. Lol all this one needed was a quick soak with Purple Power and then a light pass with the lighter wire wheel; just to knock off all the loose dirt.
Here I had already cut off the spring perches then passed the grinder to make it all even.
Soak in Purple Power.
After soak is when I used the light wire wheel. My axle was fine just like that. But the black powder coat paint looked all old and faded. So i wanted to give it a new black coat so after the soak I wiped it all down with some clean cloths. Then I passed 2 coats of primer on top of the paint it already had.
Then I painted the axle black with 2 coats.
Last edited by Redeth005; Apr 10, 2013 at 07:15 PM.


