
Redeth's 1989 4Runner Resurrection
 Jan 16, 2013 | 02:19 PM
#901
Registered User
Joined: Jun 2010
Posts: 1,448
Likes: 100
From: Virginia
Wow your 4Runner has come a long way. It looks great. If you're going to get a paint job I just wanted to remind you to get all that wax off. They won't bother to even wash the truck before they paint. So maybe wash it down several times with Dawn or Purple Power and use a Scotch Brite when you do it. Rinse very well. I swear people who complain about paint pelling off had wax on their vehicle when they took it in.
Jan 16, 2013 | 03:37 PM
#902
Thread Starter
Registered User
Joined: Apr 2012
Posts: 2,817
Likes: 2
From: Los Angeles CA
Wow your 4Runner has come a long way. It looks great. If you're going to get a paint job I just wanted to remind you to get all that wax off. They won't bother to even wash the truck before they paint. So maybe wash it down several times with Dawn or Purple Power and use a Scotch Brite when you do it. Rinse very well. I swear people who complain about paint pelling off had wax on their vehicle when they took it in.
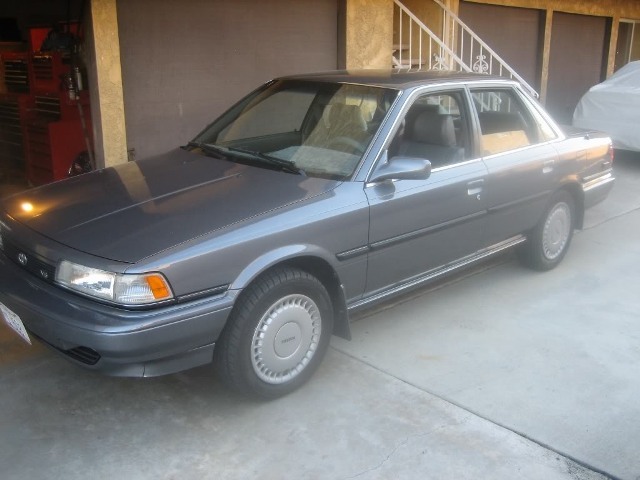
As for the paint job. Sorry I should have been more specific. I'm getting my Toyota Corolla painted. I havent waxed it for a few months so I should be ok. I just dropped off my car. Its gonna be $691 for the stage 2 paint job. Including painting under my white hood.
Jan 16, 2013 | 05:24 PM
#903
Registered User
Joined: Aug 2011
Posts: 1,507
Likes: 2
From: Fraser Valley, British Columbia
For a deal like the one you showed me in the link I would happily pay that. A professional job without the headache of doing it at home.
When I complete my build I'll do it then. For now I'll try painting in the garage to save $$.
When I complete my build I'll do it then. For now I'll try painting in the garage to save $$.
Jan 16, 2013 | 05:31 PM
#904
Hey Nervo. Thanks. Sometimes I like to go back through my thread and just see my progress. Its a really satisfying feeling of accomplishment when you see a huge difference like that. :grin:
As for the paint job. Sorry I should have been more specific. I'm getting my Toyota Corolla painted. I havent waxed it for a few months so I should be ok. I just dropped off my car. Its gonna be $691 for the stage 2 paint job. Including painting under my white hood.
As for the paint job. Sorry I should have been more specific. I'm getting my Toyota Corolla painted. I havent waxed it for a few months so I should be ok. I just dropped off my car. Its gonna be $691 for the stage 2 paint job. Including painting under my white hood.
Jan 16, 2013 | 08:07 PM
#905
Thread Starter
Registered User
Joined: Apr 2012
Posts: 2,817
Likes: 2
From: Los Angeles CA
Only body work I told them to do was on the driver side rear. Earl sheib made a hole where they decided to screw into to hold ny bumper on then took it back and decided to mount my body kit on differently. So i was left with a grinded down mistake with a hole in it. And I never knew it was there. I revealed that when we took my body kit off. I'm lucky it never corroded. As for all the small knicks. If they were to fix all the tiny dents the bill woulf have been about $600 more. So I told them I didnt care too much on those. Its just that grindage amd hole that i really needed to have fixed. This isnt gonna be a show car anyway. This is just the daily driver. So it wasnt very big of a deal to me to get those done. Plus $600 is money I can use toward my truck. And my truck is my baby, show off vehicle, and fun time car. Thats where I want my investments at.
Jan 16, 2013 | 08:55 PM
#906
Registered User
iTrader: (4)
Joined: May 2010
Posts: 720
Likes: 16
From: People's Republic of California
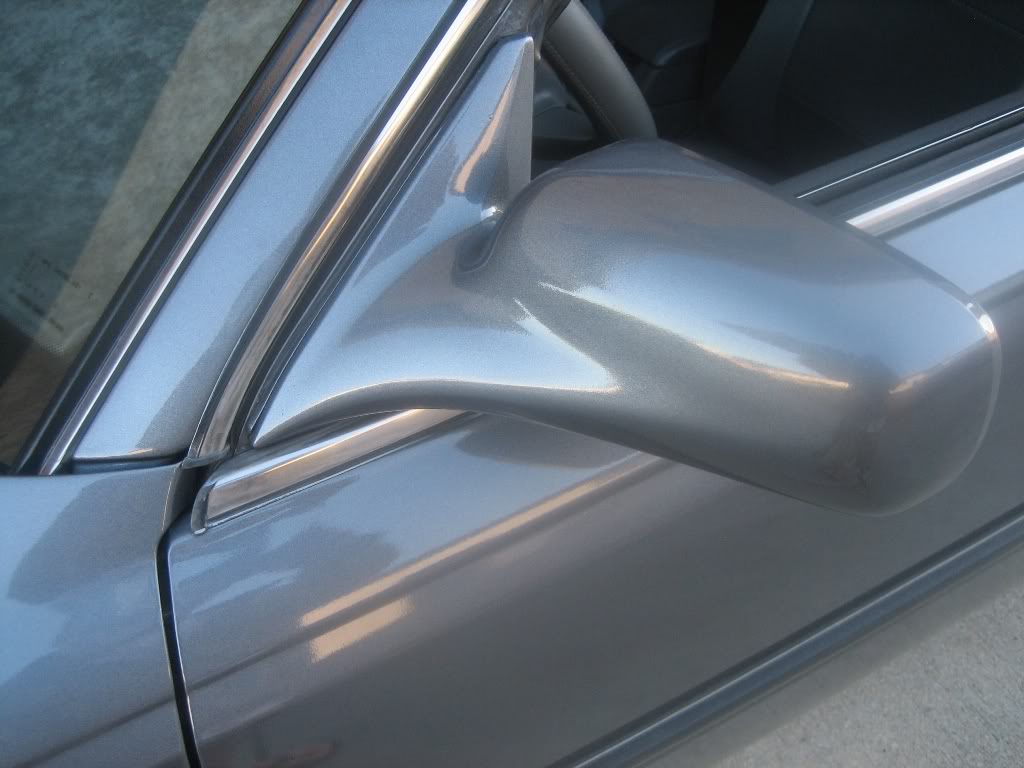
Hey Richard....sure you don't want to wait for a bigger discount? I got the stage 3 on my camry for $491 out the door in september 2011. I see it's only a $50 discount for stage 2.......it's not uncommon for it to go $100 and $150 off. I had no body work done and no under the hood paint....just did the color match to the metallic grey.
But I understand the annoyance of having a multi colored daily driver They use to call my car the "leopard" because it had 5 blotchy tones of grey all over.
  If you decide to move forward, I would suggest masking over the vacuum and emission stickers on the bottom of the hood if still there. Otherwise they may just paint right over them.
Nonetheless, 1 day is way better than that scheib place....I can vouch for that. Pics of mine after I got it back (pre rear spoiler)

But I understand the annoyance of having a multi colored daily driver
They use to call my car the "leopard" because it had 5 blotchy tones of grey all over. If you decide to move forward, I would suggest masking over the vacuum and emission stickers on the bottom of the hood if still there. Otherwise they may just paint right over them. Nonetheless, 1 day is way better than that scheib place....I can vouch for that. Pics of mine after I got it back (pre rear spoiler)
Jan 16, 2013 | 09:00 PM
#907
Thread Starter
Registered User
Joined: Apr 2012
Posts: 2,817
Likes: 2
From: Los Angeles CA
Damn they did a good job.  I already left my car over there. Lol
Well its all good. Still way cheaper then earl scheib amd maaco would charge. Ad based of your pix they did a hell of a job too. They said the car should be ready for pick up on friday.
I already left my car over there. Lol Well its all good. Still way cheaper then earl scheib amd maaco would charge. Ad based of your pix they did a hell of a job too. They said the car should be ready for pick up on friday.
Jan 16, 2013 | 09:05 PM
#908
Registered User
iTrader: (4)
Joined: May 2010
Posts: 720
Likes: 16
From: People's Republic of California
Oh well, you'll be happy with it I'm sure. I was gonna say, i also have a dent puller thing that I used also on a couple of dents that really worked pretty good! It was $20 at harbor freight and I was a little skeptical....but the darn thing worked pretty good.
Jan 17, 2013 | 05:46 AM
#911
Thread Starter
Registered User
Joined: Apr 2012
Posts: 2,817
Likes: 2
From: Los Angeles CA
Gotcha. Thanks for the advise Grego. I know there are some limitations for when u get your car painted such as not washing it for a few weeks. I think last time they told me one month. I'm sure theyll give me a paper with everything I need to know. All I know is I'm not gonna slack off with the wax jobs anymore. Gotta keep those up.
Jan 17, 2013 | 08:00 AM
#912
If it is base coat/ clear coat, you dont need to wait that long. I usually will wait a week in the summer, but when I help in the bodyshop, he says after about 3 days it is safe to wash. I start out easy when washing a new paint job.
If it is the Acrylic Enamel, it can take a long period of time for it to dry. A repaint is never as tough as what comes from the factory. They have the perfect enviroment for painting. Basic maintaince wheter mechanical or paint wise will go a long way on preventing major damage.
If it is the Acrylic Enamel, it can take a long period of time for it to dry. A repaint is never as tough as what comes from the factory. They have the perfect enviroment for painting. Basic maintaince wheter mechanical or paint wise will go a long way on preventing major damage.
Jan 17, 2013 | 07:07 PM
#913
Thread Starter
Registered User
Joined: Apr 2012
Posts: 2,817
Likes: 2
From: Los Angeles CA
Here is what the stage 2 paibt job says.
The Paint:˟We use Sherwin Williams˟Urethane Paints for durability and gloss.˟ This system combines a strong binder with pure urethane toners to give you an incredible finish.˟Choice of Colors:You can choose from over 10,000 beautiful, colors including metallics, pearls and micas. We can also color match your paint at no additional charge.˟Warranty:˟A Full 3 Year warranty against Peeling, Wrinkling and Fading. Our warranty is NOT prorated.
$549.00
Jan 17, 2013 | 07:21 PM
#914
Thread Starter
Registered User
Joined: Apr 2012
Posts: 2,817
Likes: 2
From: Los Angeles CA
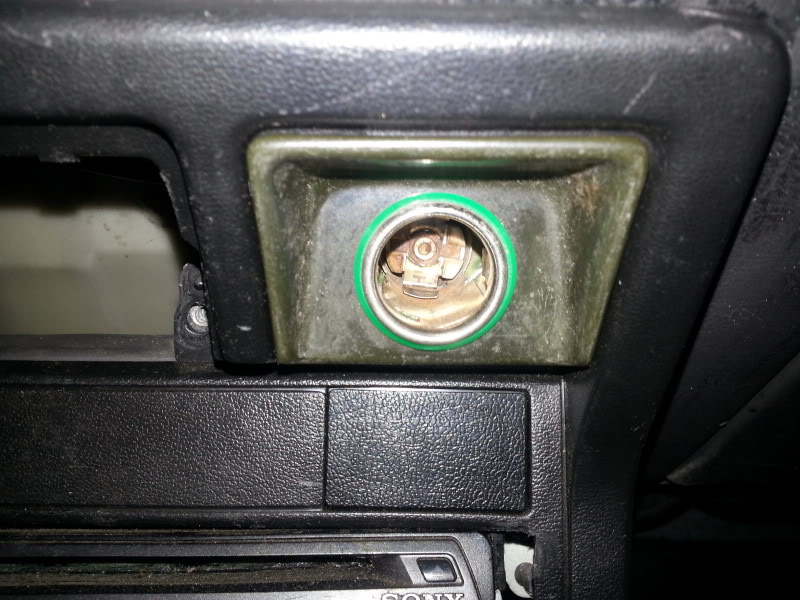
Finally got around to installing the green glow ring for the cigarette lighter. I've had this for a few months and I never got around to it. It works, its just really dim. Barely noticeable. I'm thinking it probably needs a cleaning to let more light shine through.
Also. I took apart my dash again. And I looked and I really looked for that plug ToyoTech says should be there for the inclinometer. I really could not find it. I didnt see it tucked in behind the ac/heater control. And so i took some other things out to get a better view in the under dash area. Still didnt find anything. So I just tapped into the cigarette lighter wires. So now my inclinometer turns on whenever i turn the key for the ignition. Not with the head lights. It doesnt bother me much so I guess its ok. It works thats what matters amd I still have the ability to turn it off when I want while the truck is turned on.
As far as bulb wattage goes I figured since im going to get the super bright LEDs for the inclinometer to match ny odometer lights I dont think itll pull too much power off it right??? Ray? I'm sure u could answer that one for me for sure. Please lol
lol
So here is the inclinometer now.
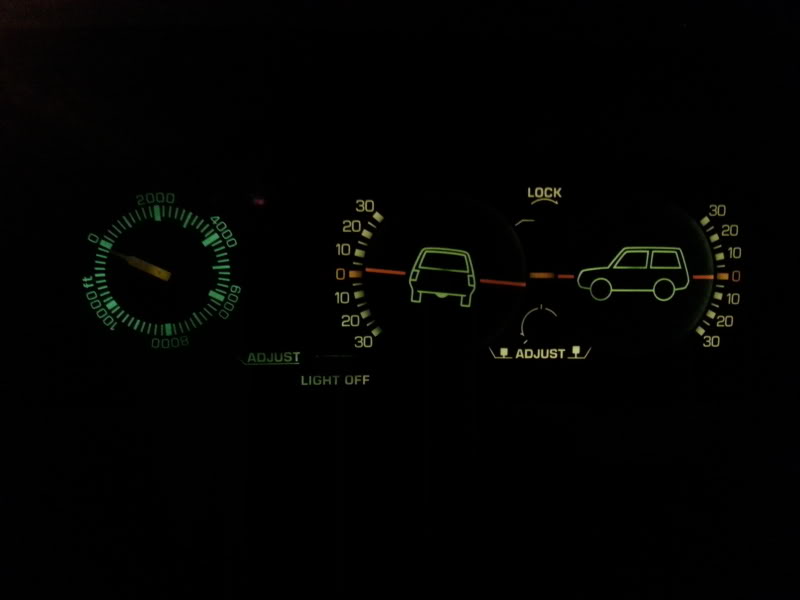
Also. I took apart my dash again. And I looked and I really looked for that plug ToyoTech says should be there for the inclinometer. I really could not find it. I didnt see it tucked in behind the ac/heater control. And so i took some other things out to get a better view in the under dash area. Still didnt find anything. So I just tapped into the cigarette lighter wires. So now my inclinometer turns on whenever i turn the key for the ignition. Not with the head lights. It doesnt bother me much so I guess its ok. It works thats what matters amd I still have the ability to turn it off when I want while the truck is turned on.
As far as bulb wattage goes I figured since im going to get the super bright LEDs for the inclinometer to match ny odometer lights I dont think itll pull too much power off it right??? Ray? I'm sure u could answer that one for me for sure. Please
lol So here is the inclinometer now.
Last edited by Redeth005; Jan 17, 2013 at 07:23 PM.
Jan 18, 2013 | 01:44 AM
#916
Registered User


Joined: Mar 2012
Posts: 7,139
Likes: 687
You've been busy, Dude!
Check the socket for the bulb first to make sure there's no oxidation- like we did with your window switches. When contacts sit un-moved they tend to get corrosion.
You should be fine if the LED is made for same fixture in the inclinometer. Generally, LED's draw less current than comparable stock incandescent bulbs.
...As far as bulb wattage goes I figured since im going to get the super bright LEDs for the inclinometer to match ny odometer lights I dont think itll pull too much power off it right??? Ray? I'm sure u could answer that one for me for sure. Please lol
lol
Jan 18, 2013 | 01:51 PM
#917
Thread Starter
Registered User
Joined: Apr 2012
Posts: 2,817
Likes: 2
From: Los Angeles CA
You've been busy, Dude!
Check the socket for the bulb first to make sure there's no oxidation- like we did with your window switches. When contacts sit un-moved they tend to get corrosion.
You should be fine if the LED is made for same fixture in the inclinometer. Generally, LED's draw less current than comparable stock incandescent bulbs.
Jan 18, 2013 | 03:40 PM
#918
Hey Richard, the wiring to the dimmer switch should be fairly easy to splice into, just look under your dash unscrew the round bolt using needle nose pliers , and then pull it out the bottom to give you a good look at the connector. You could probably pull the pin right out of the back of the connector and splice in your wire for the altimeter / inclinometer. The nice thing about this is that you should be able to tie off and solder heat shrink a longer wire from what use to be on the cigarette lighter wiring, and then drag it down to the dimmer switch and hack In to it there . Another reason this is important is because you can then dim the altimeter along with the rest of the dash lights. Best wishes on this, I'm sure rad Will chime in.
Sent from my SPH-L900 using YotaTech
Sent from my SPH-L900 using YotaTech
Jan 18, 2013 | 04:34 PM
#920
Registered User
Joined: Mar 2012
Posts: 7,139
Likes: 687
Hey Richard, the wiring to the dimmer switch should be fairly easy to splice into, just look under your dash unscrew the round bolt using needle nose pliers , and then pull it out the bottom to give you a good look at the connector. You could probably pull the pin right out of the back of the connector and splice in your wire for the altimeter / inclinometer. The nice thing about this is that you should be able to tie off and solder heat shrink a longer wire from what use to be on the cigarette lighter wiring, and then drag it down to the dimmer switch and hack In to it there . Another reason this is important is because you can then dim the altimeter along with the rest of the dash lights. Best wishes on this, I'm sure rad Will chime in.
Sent from my SPH-L900 using YotaTech
Sent from my SPH-L900 using YotaTech
 Concur with Chef Hope to finish my headlight harness upgrade on Sunday, but need to buy some diodes, etc. Hopefully local Radioshack has them.


