When you click on links to various merchants on this site and make a purchase, this can result in this site earning a commission. Affiliate programs and affiliations include, but are not limited to, the eBay Partner Network.
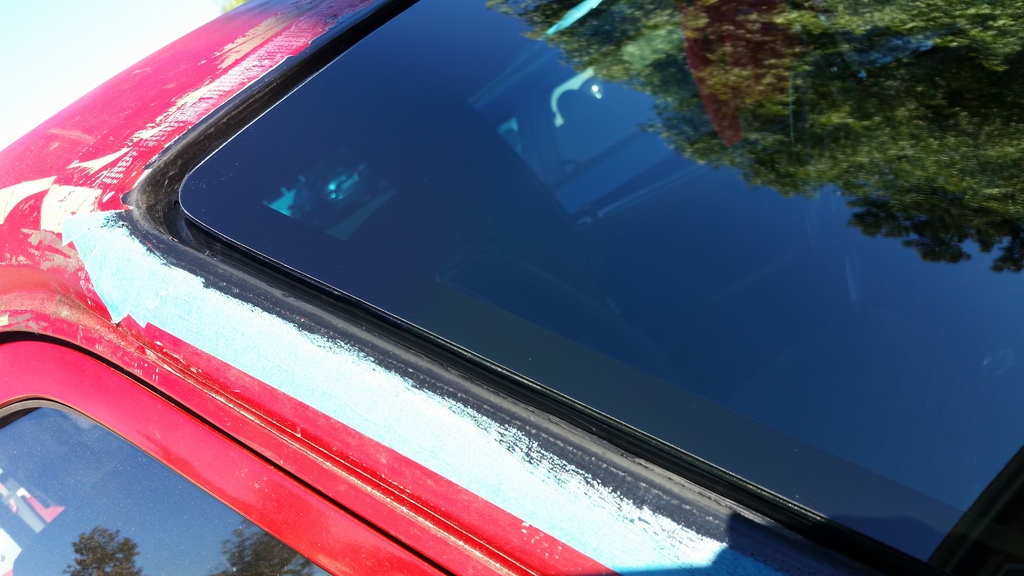
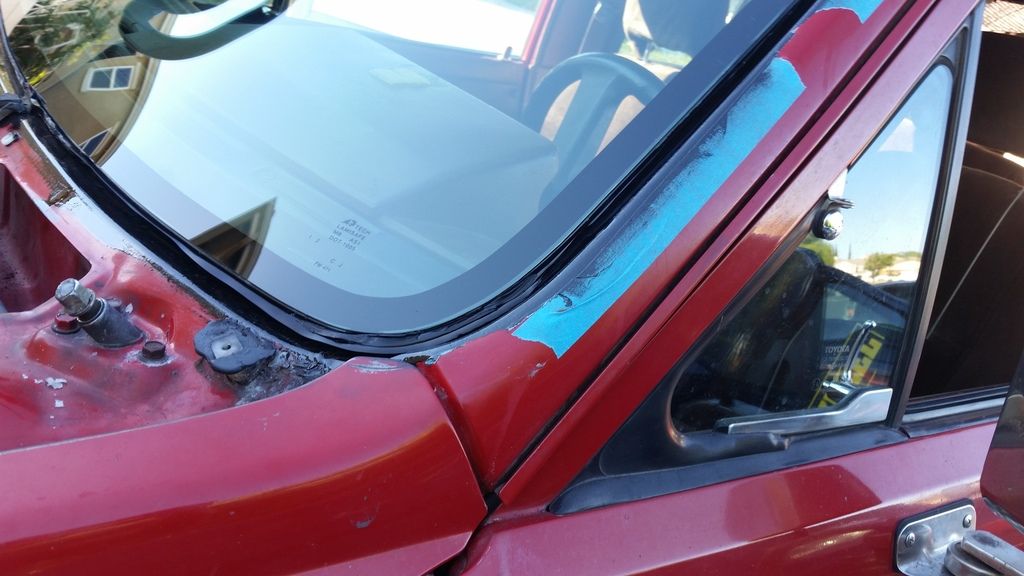
... I pulled my windshield last night after months of a leak that had seemed to have gotten worse and found that the surface where the glass is glued down was in workable condition but there was rust everywhere under the trim...
Howdy!
MAN, do I hate that trim!
I think it would be best to take your time repairing that rusted area. Magnet18 mentioned Allmetal on his thread here where he actually welded new metal to fix the rusted areas.
(BTW, my windshield surround and install were actually good on last replacement. Leak turned out to be from cracked seam seal on gutter above the window, and water merely wicked toward the windshield pinch-weld.)
I would grind/sand down to bare metal, rust-proof and patch (or vise-versa, whichever would stick the best) or weld the holes if they're really big.
IF only patched and not welded over, I would ask glass tech to lay an extra thick bead of urethane windshield adhesive so when it squeezes out it will cover the patched area.
On mine, I deleted the trim just like Jeep has done (below).
If you prefer to have a trim for aesthetics, I suggest you use a rubber one. It will also trap some moisture but it would not be as bad as chrome (steel really) that could cause galvanic corrosion ((dissimilar metals in corrosive liquid)
Last edited by RAD4Runner; Apr 20, 2017 at 10:33 PM.
Howdy!
MAN, do I hate that trim!
I think it would be best to take your time repairing that rusted area. Magnet18 mentioned Allmetal on his thread here where he actually welded new metal to fix the rusted areas.
(BTW, my windshield surround and install were actually good on last replacement. Leak turned out to be from cracked seam seal on gutter above the window, and water merely wicked toward the windshield pinch-weld.)
I would grind/sand down to bare metal, rust-proof and patch (or vise-versa, whichever would stick the best) or weld the holes if they're really big.
IF only patched and not welded over, I would ask glass tech to lay an extra thick bead of urethane windshield adhesive so when it squeezes out it will cover the patched area.
On mine, I deleted the trim just like Jeep has done (below).
If you prefer to have a trim for aesthetics, I suggest you use a rubber one. It will also trap some moisture but it would not be as bad as chrome (steel really) that could cause galvanic corrosion ((dissimilar metals in corrosive liquid)
Lol, you're lucky, i was missing 2 feet of pinchweld
If I recall correctly, if you unhook the front of the headliner you can get to the backside of that area
If that's the case, if it was me having just done this, i would brush and grind to bare metal both sides of possible, use allmetal ( or short strand fiberglass filler like duraglas), then paint (both sides). That's not on the pinchweld where anything seals, I can't imagine that area takes much load
I used POR, but it requires a lot of prep to be confident it will adhere properly
had i used regular auto paint methods i feel like i would have been just fine, but you can't leave a spec if rust or it'll bubbles through. POR was expensive and time consuming, but it was a bit of peace of mind
Re the trim, everything they had likes to curl in our upper corners. Leave it curled out instead of in, then have them glue it down flat
Like he said, check your gutters. Mine looked fine at first glance, but I had pinhole in the side of the roof and that pinchweld was starting to rust out as well
Edit
If you already have the welding capability, weld in a little patch, you'll probably feel better inside
Last edited by magnet18; Apr 21, 2017 at 03:29 AM.
... It may be a month before I get another chance to even mess with it and it rains every third day down here this time a year...
The repair plus rust-proofing may take a weekend. I also have to paint the gap between windshield and body. I have bare POR-15 there now and it is not resistant to UV rays...
To protect from UV rays OR remedy for leak while you gather materials and research process, Harbor Freight is your friend
Last edited by RAD4Runner; Apr 21, 2017 at 08:19 AM.
Thanks guys for the quick reply. I didn't panic at the site of the surface rust under the trim. I was prepared for that. I worked my way around from the driver's side, grinding down the rust on the worst of the spots and had found no ultra thin or rusted through spots. Then I got to the last corner at about 11:30 and broke through. There are no places to get any materials for a job like this on a weekend so I had to reach out for advice in a hurry so I could get my things together. Luckily the surface where the glass is glued down is in pretty good shape and can just be cleaned up and primed.
I didn't think about getting to the back side of those spots from inside. It was late and dark so I couldn't really probe around behind there to find access. I will sure look into that. I will be patching it if I can get in there behind it. If not, I'm going to grind it out a little bigger so I can clean out behind the damage and weld in metal. I'm not scared to weld on it but the fact that there are going to be three angles involved in my patch piece is going to complicate things. Either way, I'll make it work.
Last question. Like to hear all opinions on the channel around the glass. Rubber generic seal? If so, how wide? Nothing but new paint in the channel and no seal or fill the entire channel with epoxy or some other type of sealant?
Let me know what you think and thank you again for the help.
..Like to hear all opinions on the channel around the glass. Rubber generic seal? If so, how wide? Nothing but new paint in the channel and no seal or fill the entire channel with epoxy or some other type of sealant?
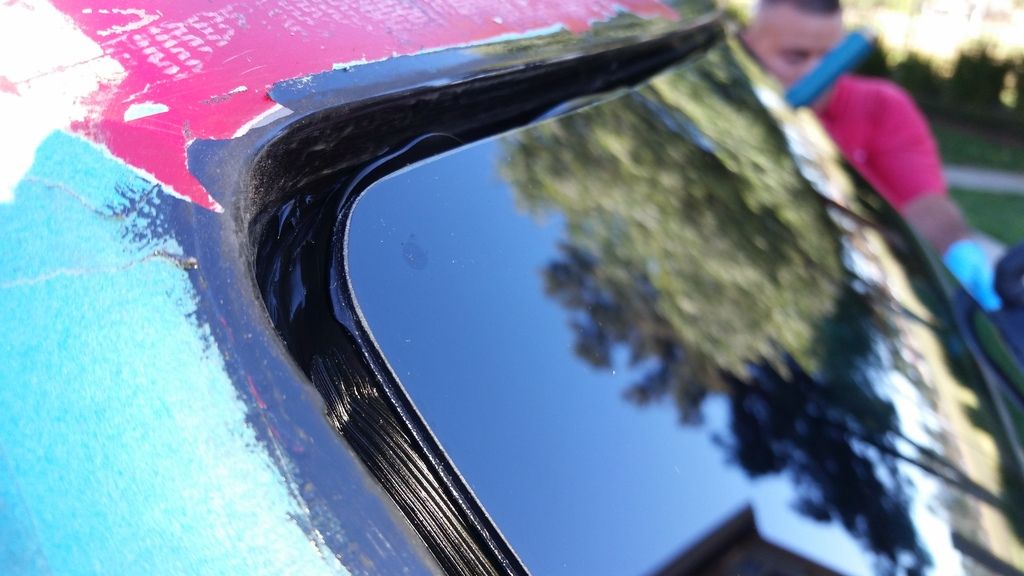
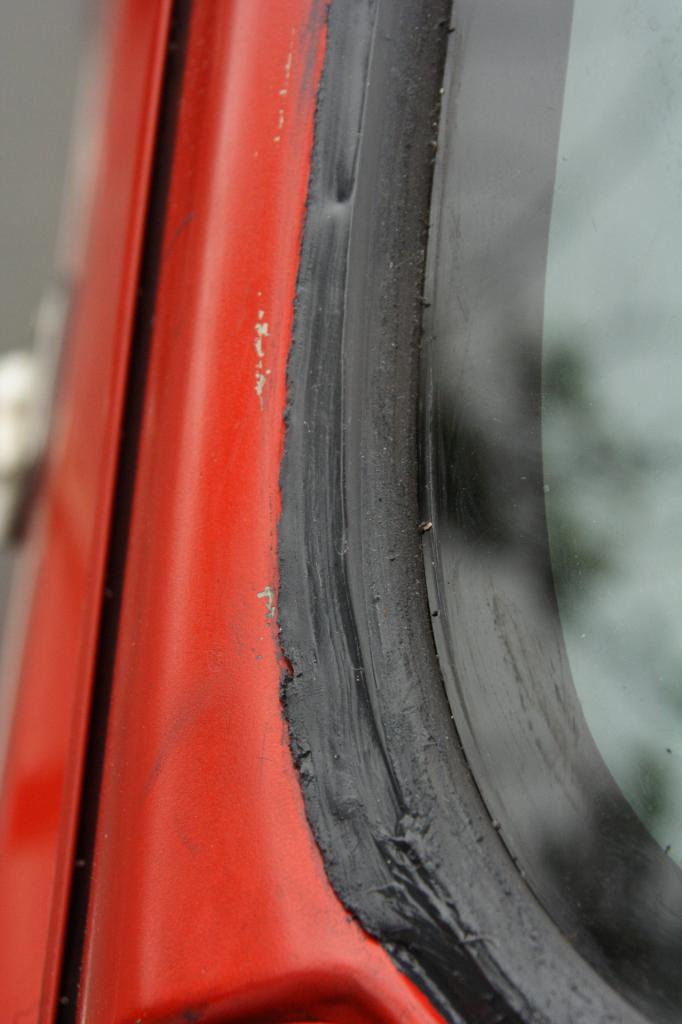
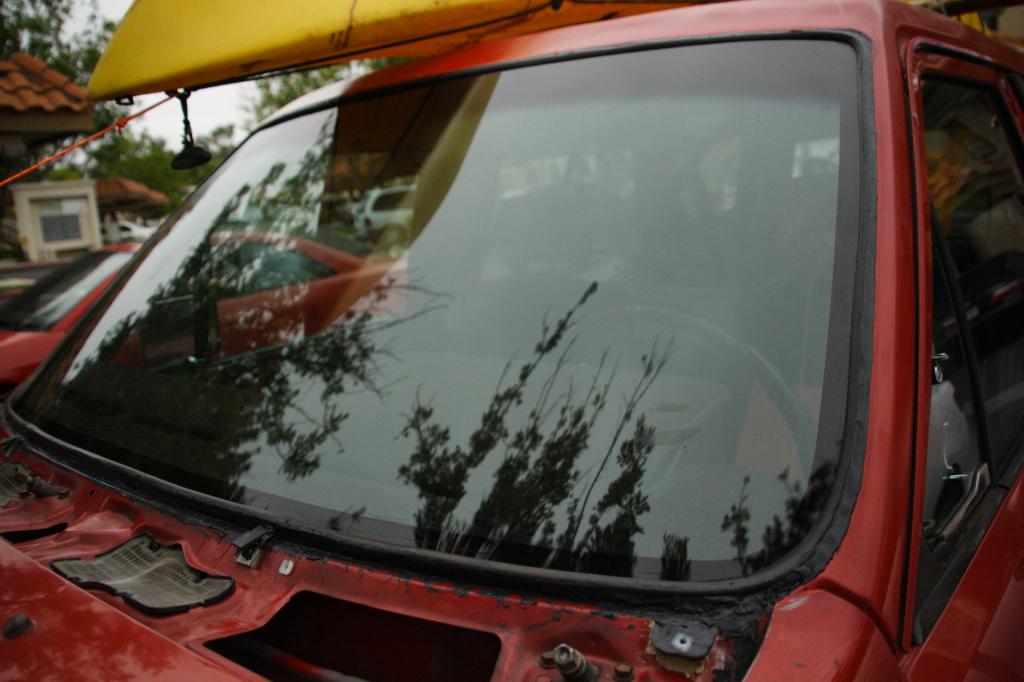
No trim and no sealant to fill the gap (This is how I roll):
This is how it would look like. Just need to mask and paint a clean black border around the glass for aesthetics and to protect POR-15 from UV rays.
Just like the rear window on a Corolla...
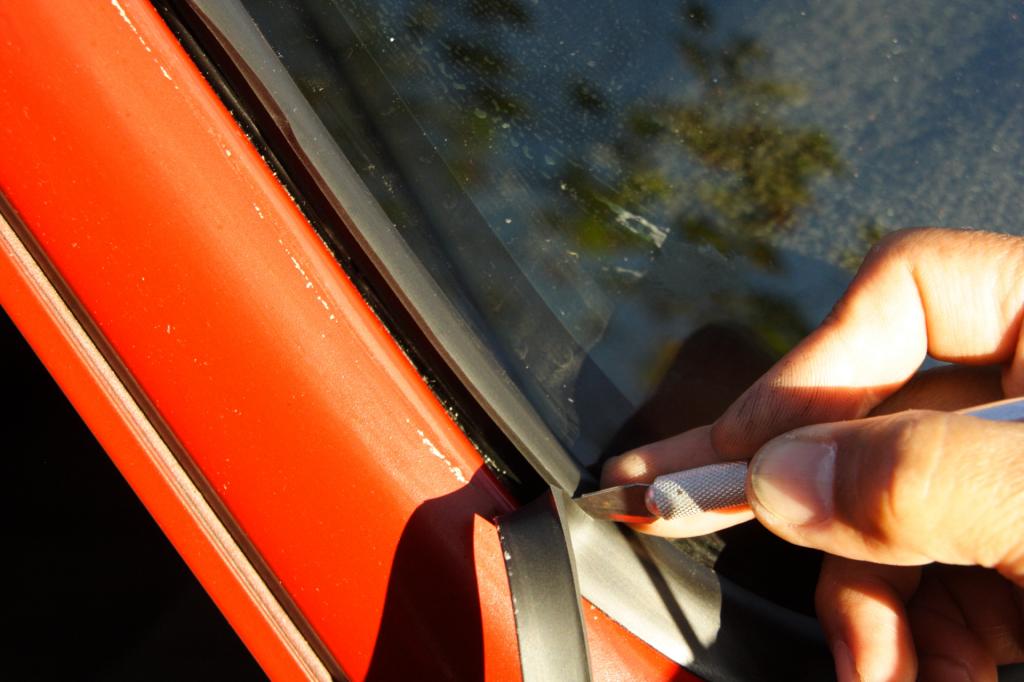
With Rubber Trim but I sliced the "flap" off to expose gap for easier rinsing and drying:
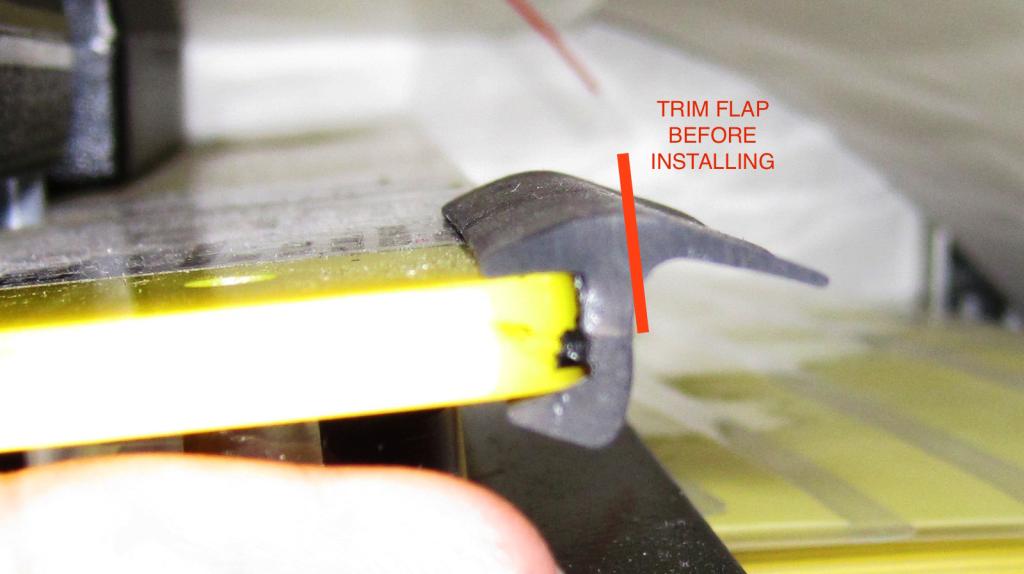
Started with this low-profile trim (wrapped around 1/4-inch plexiglas for illustration)
Trimmed the flap...
Here's what I mean by rinsing the gap after exposure to corrosive electrolyte:
I used Dow Corning 995 Silicone. It uses stearic acid for solvent. Stearic acid is supposedly used for rust-proofing. This was before I learned that Urethane windshield adhesive is much more robust than silicone.
Last edited by RAD4Runner; Apr 21, 2017 at 01:31 PM.
10-4! I got a plan now. I was a little confused at first but now that I'm not looking at it on a phone I see what you did. You kind of left yourself some options. So I'll let them install the piece of universal trim that I can later cut if I don't like it, and I bet I won't. Then you went back and filled the gap. My surface is starting to look good now since I've got air power. Wouldn't use the die grinders last night, being a school night and all. My neighbors dread Friday nights but they don't say anything because this is where they come when their stuff breaks.
One more question and I'll abandon this hijack of your thread. What method should I use to seal the seams as mentioned above? Body filler? Liquid metal? Just primer?
10-4! ...One more question and I'll abandon this hijack of your thread. What method should I use to seal the seams as mentioned above? Body filler? Liquid metal? Just primer?...
No problem at all. Great to discuss.
POR15 covered the seams (like I encircled above) so I let the thick urethane bead fill it up. I think the layers to fail the better.
For the pinhole, I just squeezed Daynatron through it, POR'd then for extra measure, smeared some urethane that squeezed out after install.
If you use POR15, it forms a shiny hard surface so sand it yourself because the glass tech's scouring pad may not be enough.
Also samd and prime the surrounding POR area aside from the mounting area. This way it would be ready to prime when u want.
Im working on an insert for first and second gen trucks for the windshield. New glass will be flush mounted and only 3/64 gap all the way around. Hope someone is still gonna need them by the time im done with the prototype. Have a good weekend.
Im working on an insert for first and second gen trucks for the windshield. New glass will be flush mounted and only 3/64 gap all the way around. Hope someone is still gonna need them by the time im done with the prototype. Have a good weekend.
Would be nice to see that, Tony! Pls keep us posted.
Rubber generic seal? If so, how wide? Nothing but new paint in the channel and no seal or fill the entire channel with epoxy or some other type of sealant?
I went rubber generic, I'm happy. I think 3/4. if I wanted to cut it I could
Originally Posted by RAD4Runner
For the pinhole, I just squeezed Daynatron through it, POR'd then for extra measure, smeared some urethane that squeezed out after install.
If you use POR15, it forms a shiny hard surface so sand it yourself because the glass tech's scouring pad may not be enough.
The scotch brite I used did fine on the POR, safelite techs use scotch brite as well.
Note, POR ONLY goes on CORRODED metal. (the metal prep they sell puts a corrosion layer on metal)
Put in on anything else and it will peel off like latex paint.
for making your patch, I got a harbor freight shrinker/stretcher. worked great with a little patience, not sure how I would have done it without it.
Amazing view of the galaxy Ray, did you camp out there?
Yes, we did, Cory. BLM land so no permits no reservations necessary. Main loop is sedan-friendly. Harbor Freight sprayer is for washing things down, rinsing my kayak, taking a quick shower
Ray - you go to some beautiful places. Do you always keep your kayak on top of your 4Runner?
Yes, Cory. Most of time I leave it up there/ I live in a condo, have minimal storage, and despite my Thule Hullavator loader, it's still a pain to load and unload. It only weighs 50 pounds so it's no big deal and aerodynamic so drag is minimal. I monitor my MPG and am getting between 18 and 21 MPG' still something the latest 4Runner is barely getting.

 Apr 20, 2017 | 10:31 PM