
KawaZX636's 1983 Toyota Pickup Restoration
 Aug 8, 2013 | 06:43 AM
#183
Thread Starter
Super Moderator
iTrader: (3)
Joined: Jan 2012
Posts: 3,218
Likes: 26
From: Salisbury, MD
Thanks gmack! I've been following your build too. If I were to build a trail truck, I would want it to look like your's. I'm not sure what it is about it, but it does something for me.
Aug 8, 2013 | 08:18 AM
#184
Registered User
Joined: May 2012
Posts: 396
Likes: 2
From: Jackson, TN
I read this thread and feel so...
unworthy. LOL.
But, I'm looking forward to the rollback coming to get my truck Saturday!
hahaha.
I'm so outta my league.
Good work buddy.
You've got my, as Aretha says..R-E-S-P-E-C-T.
unworthy. LOL.
But, I'm looking forward to the rollback coming to get my truck Saturday!
hahaha.
I'm so outta my league.
Good work buddy.
You've got my, as Aretha says..R-E-S-P-E-C-T.
Aug 8, 2013 | 06:03 PM
#185

Registered User
Joined: May 2013
Posts: 51
Likes: 0
From: Illinois
I would if I were you. It's one of the best $150 purchases I have ever made and it pays for itself. I know I used 2 cans of primer and 2 cans of gloss black to paint all the pulleys and accessory brackets on my motor. That's about $40 in spray paint. When I powder coat them I will probably only use about $8-12 worth of powder and it will last damn near forever while the spray paint would have looked like crap in a year or two. My motto in refurbishing parts is "if it can fit in an oven then it's getting powdercoated." So far I've done my knuckles, hubs, hub locks, j-arms, drag link, brake shields, exhaust brackets, transmission plate, brake brackets, rear disc bracket, double cardan shield, clutch fork, lower coolant line, motor mounts, shifters, hanger pins, bump stops and probably a few other parts that I can't recall and I have yet to use more than $40 worth of powder. It's a no brainer to me, just buy one!
(Sent from my iPhone using the YotaTech app)
(Sent from my iPhone using the YotaTech app)
Aug 8, 2013 | 08:05 PM
#186
Thread Starter
Super Moderator
iTrader: (3)
Joined: Jan 2012
Posts: 3,218
Likes: 26
From: Salisbury, MD
A pizza oven would be awesome, I've definitely thought about it. There are no powdercoaters within 150 miles of me so I've been seriously thinking about getting some commercial equipment and opening up shop. I would own the market in my area - I've already made a few hundred bucks powdercoating small parts for friends and local folks. The only thing that sucks about it is the prep work. If somebody drops off a greasy grimey part then I have to clean it up or the coating won't bond well and cause bubbles.
Aug 8, 2013 | 08:30 PM
#187
Thread Starter
Super Moderator
iTrader: (3)
Joined: Jan 2012
Posts: 3,218
Likes: 26
From: Salisbury, MD
Well I got the used drive shaft today that I was planning snagging the yoke off of but upon further investigation I discovered that it has 10mm holes and I need 8mm holes. Apparently the guy listed it wrong since the bolt pattern is from a 1986-1995 pickup. I was going to buy a new 3 pattern pinion flange from trail gear, but upon further searching I found a company that has them! So if you need a 86-95 front drive shaft, let me know!
The company that I found the yoke from is driveshaftparts.com. Ended up costing me $15 plus $12 shipping for a brand new yoke. Can't beat that deal! Hopefully they are legit. Also got all new u-joints (2 for the double cardan and 3 for the end yokes) and a new double cardan joint centering bearing kit. Unfortunately, I have no idea how to go about removing the old one. I looks like it presses in like an oil seal, but I'm going to wait until the kit comes so I can get a better idea of how to approach it.
I also got my steering stabilizer today. I went with the Skyjacker 9000 (silver). I orginally had an old Skyjacker 7000 on the truck and was really pleased with the performance. The 9000 is supposedly a little firmer so it should be ideal for my driving environment. Normally, I wouldn't use Skyjacker for anything, but this is the exception from my prior experiences. To be quite frank, I would have gone with OME but I really didn't want a bright yellow damper hanging underneath my truck and the Bilsteins that I looked had a stroke/cylinder that was just barely to long for me to use the stock mount on the axle housing.
Last edited by kawazx636; Aug 8, 2013 at 08:32 PM.

 Aug 8, 2013 | 10:02 PM
#190
Registered User
Joined: Sep 2008
Posts: 522
Likes: 0
Thank you....It started out as a "just get it running" build.... It sorta took on a mind of its own, if that makes sense...
Aug 9, 2013 | 08:37 PM
#192
Thread Starter
Super Moderator
iTrader: (3)
Joined: Jan 2012
Posts: 3,218
Likes: 26
From: Salisbury, MD
Still waiting for for some drive shaft parts. The new yoke and double cardan centering bearing kit should be here by Monday (maybe tomorrow). I got 4 of the 5 u-joints that I need today - the Advance Auto in town here didn't have one of the three end yoke u-joints so I'm going to pick up the 3rd one from the Advance Auto on my way to the beach at some point this weekend.
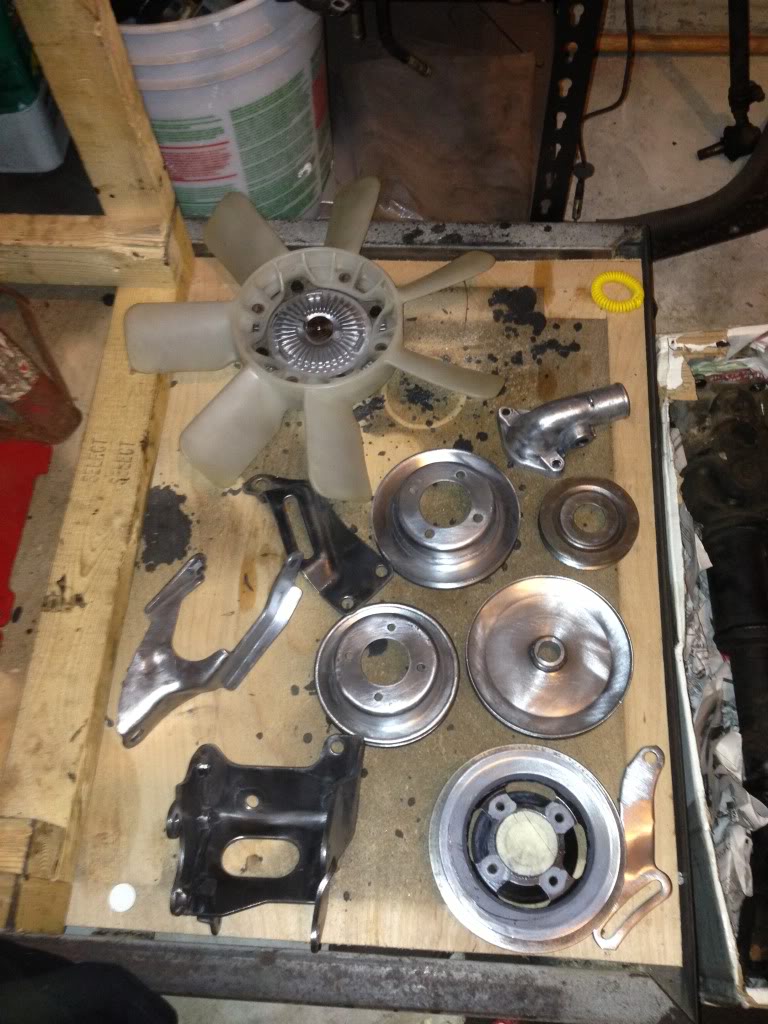
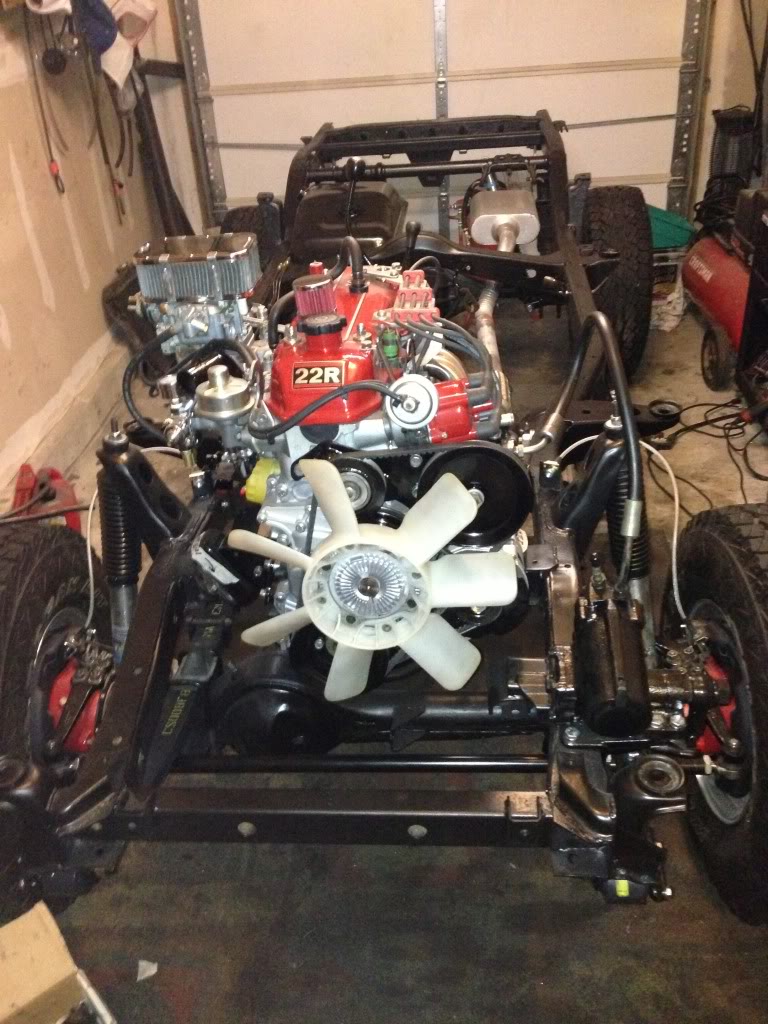
Meanwhile, I wire brushed the paint off of all the engine pulleys and brackets. The high temp paint that I used was crap so it went fairly easy. It's kind of depressing knowing that I spent so much time and money prepping and painting the parts, but the powdercoating will be well worth it - they'll last longer than the motor and we all know that will be a long time given the longevity of 22R motors! I should be able to get the powdercoating done tomorrow
If the weather cooperates with me tomorrow, I will hopefully get the driveshafts media blasted. I'm hoping that I can powdercoat all the driveshaft parts with the exception of the long portion of the rear driveshaft - that should be the only piece that won't fit in the oven so I'll have to just POR-15 it.
Meanwhile, I wire brushed the paint off of all the engine pulleys and brackets. The high temp paint that I used was crap so it went fairly easy. It's kind of depressing knowing that I spent so much time and money prepping and painting the parts, but the powdercoating will be well worth it - they'll last longer than the motor and we all know that will be a long time given the longevity of 22R motors! I should be able to get the powdercoating done tomorrow

If the weather cooperates with me tomorrow, I will hopefully get the driveshafts media blasted. I'm hoping that I can powdercoat all the driveshaft parts with the exception of the long portion of the rear driveshaft - that should be the only piece that won't fit in the oven so I'll have to just POR-15 it.
 Aug 11, 2013 | 07:45 PM
#194
Thread Starter
Super Moderator
iTrader: (3)
Joined: Jan 2012
Posts: 3,218
Likes: 26
From: Salisbury, MD
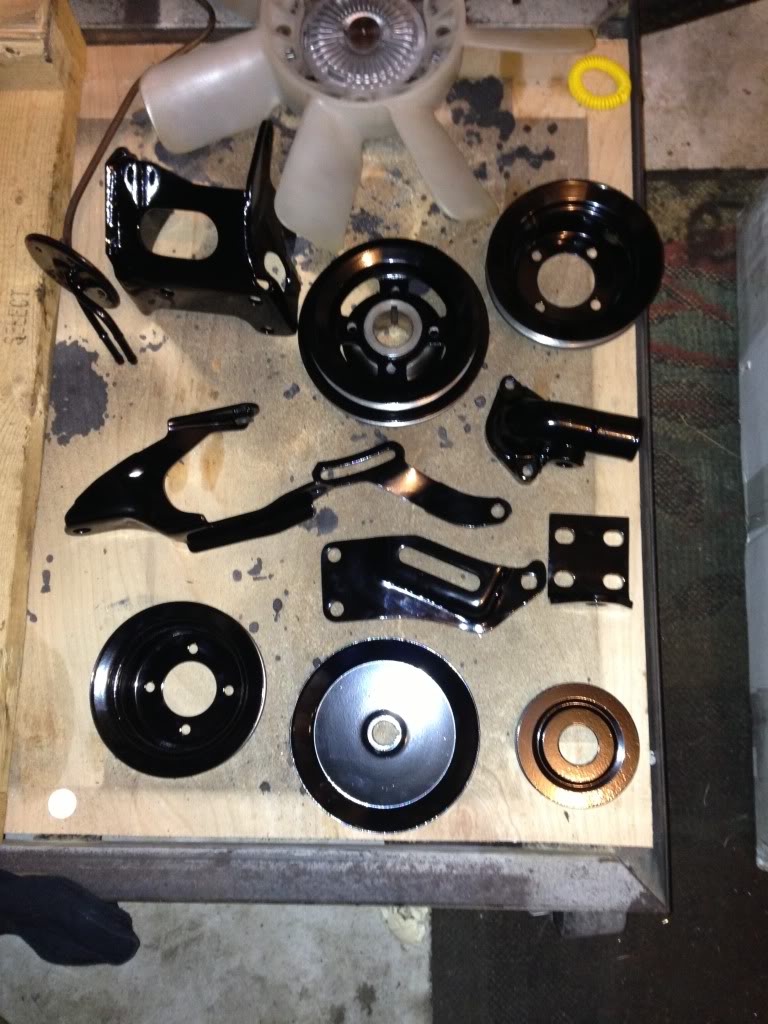
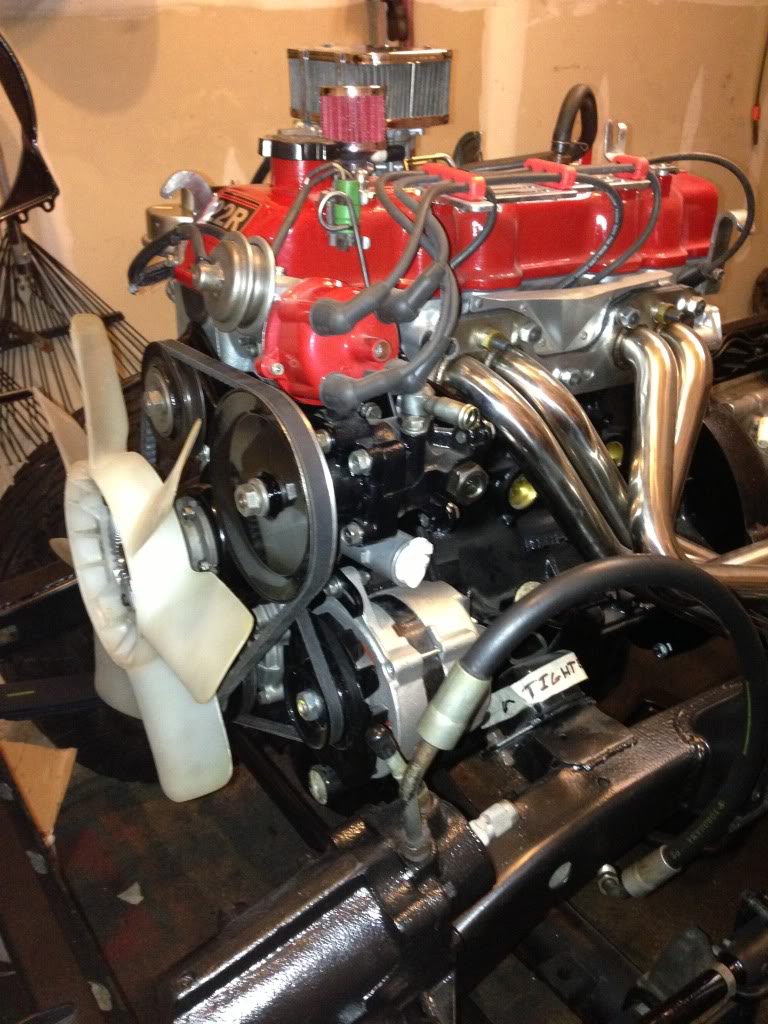
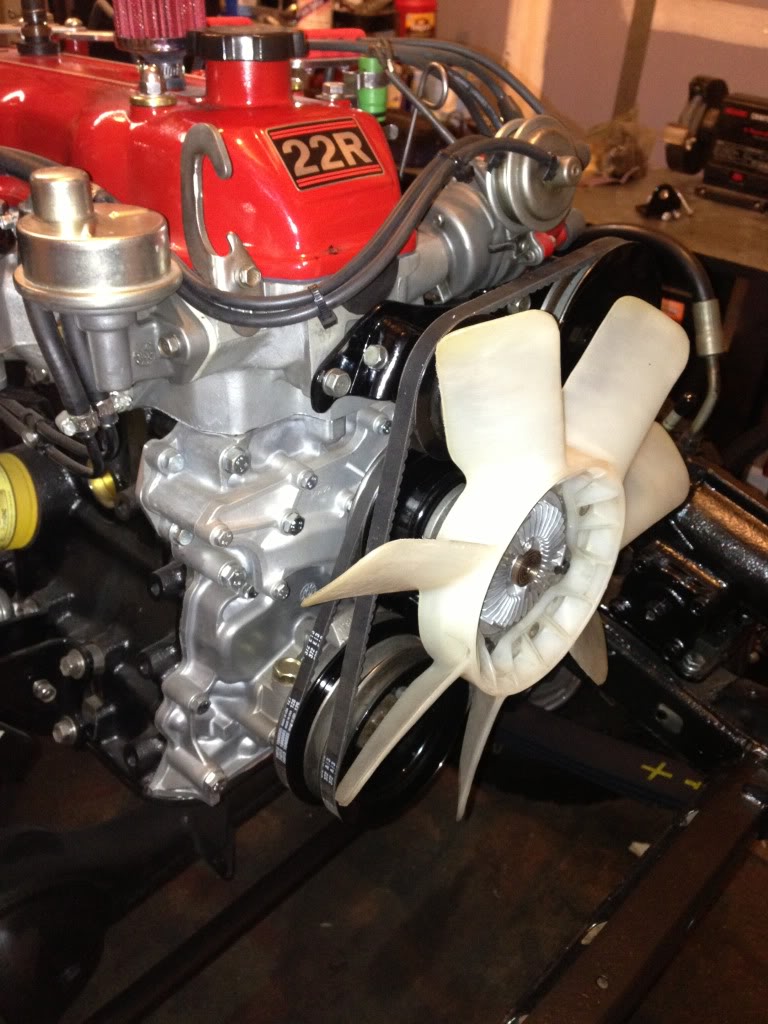
I got my freshly powdercoated engine pulleys and brackets re-installed tonight. Turned out really well. Pretty much looks the same as the originally painted parts, but much more durable.
My replacement driveshaft yoke should be here tomorrow so I'm hoping to get the driveshafts cleaned up and painted/powdercoated at some point this week.


My replacement driveshaft yoke should be here tomorrow so I'm hoping to get the driveshafts cleaned up and painted/powdercoated at some point this week.


 Aug 12, 2013 | 08:14 PM
#196
Thread Starter
Super Moderator
iTrader: (3)
Joined: Jan 2012
Posts: 3,218
Likes: 26
From: Salisbury, MD
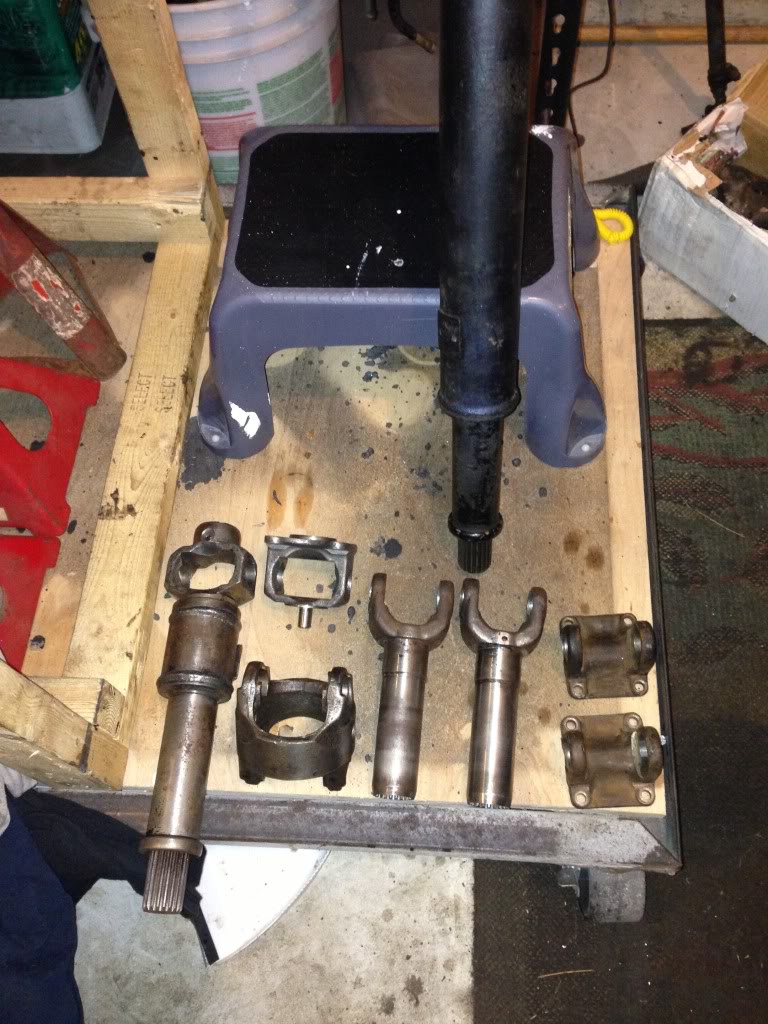
I got the replacement driveshaft end yoke today from driveshaftparts.com. This thing is a perfect match, cheap and came quick! I would definitely recommend this company to those who need replacement drive shaft parts.
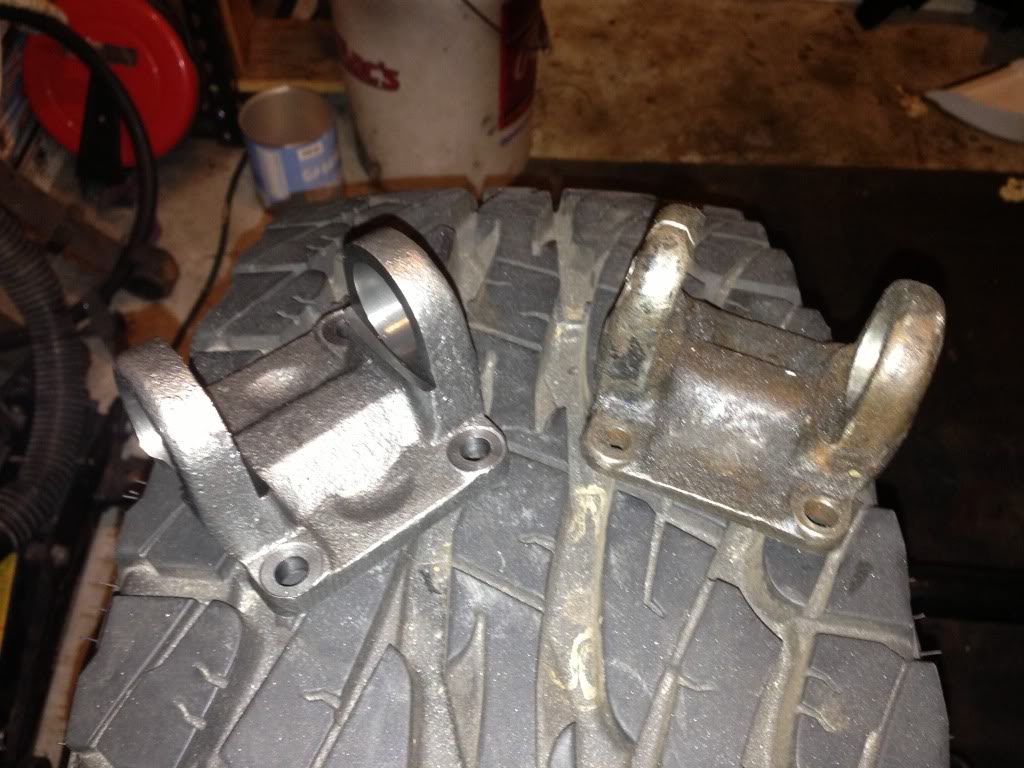
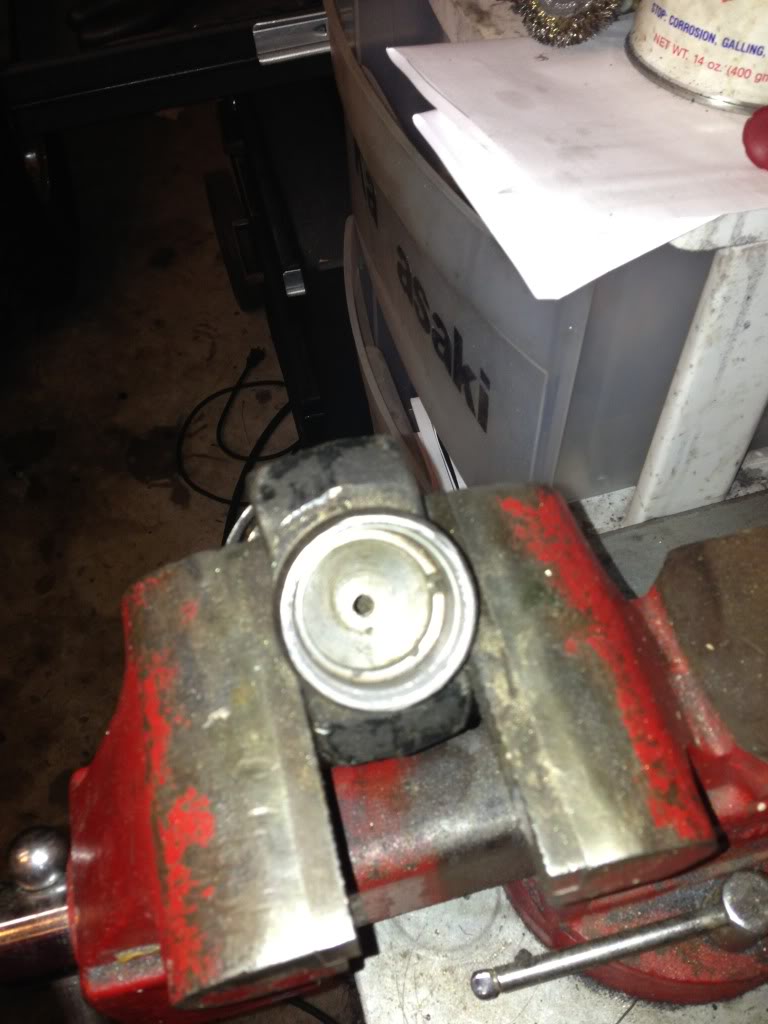
I also got the replacement self centering bearing in the front double cardan today. I was waiting to remove the old one until I got the new part just incase the part was the wrong size (there are two different bearing post sizes for our trucks). Fortunately, the part was right. Unfortunately, the old one was a major PITA to remove!
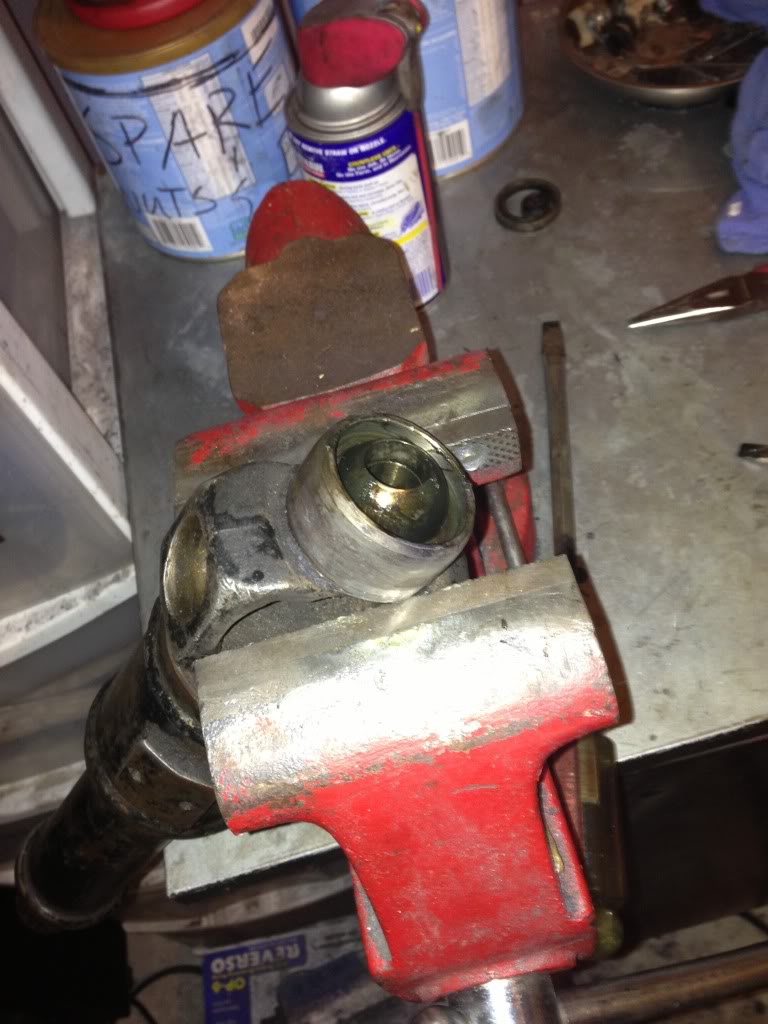
After a slew of cursing, some heat, a beer, some dremeling, some more heat, a little prying, a BFH, more dremeling, a lot more heat, two more beers and some banging of the BFH on a pry bar...I FINALLY got it out!! I also did it with hardly any marring of the cup. For those of you that decide to rebuild your front driveshaft, I would HIGHLY recommend avoiding replacing this bearing! There simply does not appear to be any easy way to remove it since there is no access to the back side of the bearing to bang it out. What I did was pry out the ball and then cut a slit in the race that it sits in with my dremel. The race was siezed in pretty good so I broke out the torch and heated it up really well. From there I was able to pry the crap out of it to wiggle it out.
Now I just have to media blast everything, powdercoat/paint, reassemble and the drive shafts will be complete thus finishing the chassis.

I also got the replacement self centering bearing in the front double cardan today. I was waiting to remove the old one until I got the new part just incase the part was the wrong size (there are two different bearing post sizes for our trucks). Fortunately, the part was right. Unfortunately, the old one was a major PITA to remove!

After a slew of cursing, some heat, a beer, some dremeling, some more heat, a little prying, a BFH, more dremeling, a lot more heat, two more beers and some banging of the BFH on a pry bar...I FINALLY got it out!! I also did it with hardly any marring of the cup. For those of you that decide to rebuild your front driveshaft, I would HIGHLY recommend avoiding replacing this bearing! There simply does not appear to be any easy way to remove it since there is no access to the back side of the bearing to bang it out. What I did was pry out the ball and then cut a slit in the race that it sits in with my dremel. The race was siezed in pretty good so I broke out the torch and heated it up really well. From there I was able to pry the crap out of it to wiggle it out.

Now I just have to media blast everything, powdercoat/paint, reassemble and the drive shafts will be complete thus finishing the chassis.
Aug 13, 2013 | 07:21 PM
#197
Thread Starter
Super Moderator
iTrader: (3)
Joined: Jan 2012
Posts: 3,218
Likes: 26
From: Salisbury, MD
I degreased all the driveshaft parts tonight. I wanted to get all the caked up grime from within the slip joints and grease fitting holes so that when I go to sand blast them I won't end up with sandy grease in the tight parts that are harder to get to (that would be problematic).
 Aug 13, 2013 | 08:40 PM
#200

Registered User
Joined: Aug 2013
Posts: 7
Likes: 0
beautiful build bro. just something I noticed when looking at your rear disc conversion pics is to make sure your bleeder screws are at the top and not pointing down its kinda hard to tell from the pics, if there pointing down you will never get the air out it will be stuck at the top of the caliper. +1 for the powercoating, I did the same thing with a old oven I make about $2500 extra a year coating things for people.


