
jmswltn 91 4runner build up thread 3vz 4wd auto to 22r 2wd manual
 Sep 5, 2012 | 05:05 PM
#1

Thread Starter
Registered User
Joined: Nov 2011
Posts: 72
Likes: 0
From: toledo, oh
jmswltn 91 4runner build thread 3vz to 22r to 1uzfe 341e to 341f 4wd to 2wd and back
hello all this is my first post to yotatech but have been lurking for over a year.
this is the thread documenting my swap from a 3slow auto 4wd 4runner to a 22r manual 2wd. you might ask why bother, to this day i still say i dont know!,
but it has been a fun adventure that has also included alot of frustration.
mind you this whole project is merely an experiment to keep my junk yota on the road as i had just purchased a complete set of tires before finding out my 3vz was at the end of its life cycle.
THIS IS NOT A BEAUTY BUILD.. I AM ONLY DOING THIS TO KEEP MY WINTER BEATER ALIVE AND LEARN A LITTLE BIT
i was looking for a "cheap fix" to keep me on the road and from scrapping/parting out the truck.
i found an 86 22r with 107000 miles on it that had even compression across all cylinders and ran decent when gas was pored thru the carb (my pick a part drains all gas from the tanks and separates them)
new radiator to the driveshaft and everything in between $322 at the pick a part (4/27/12)


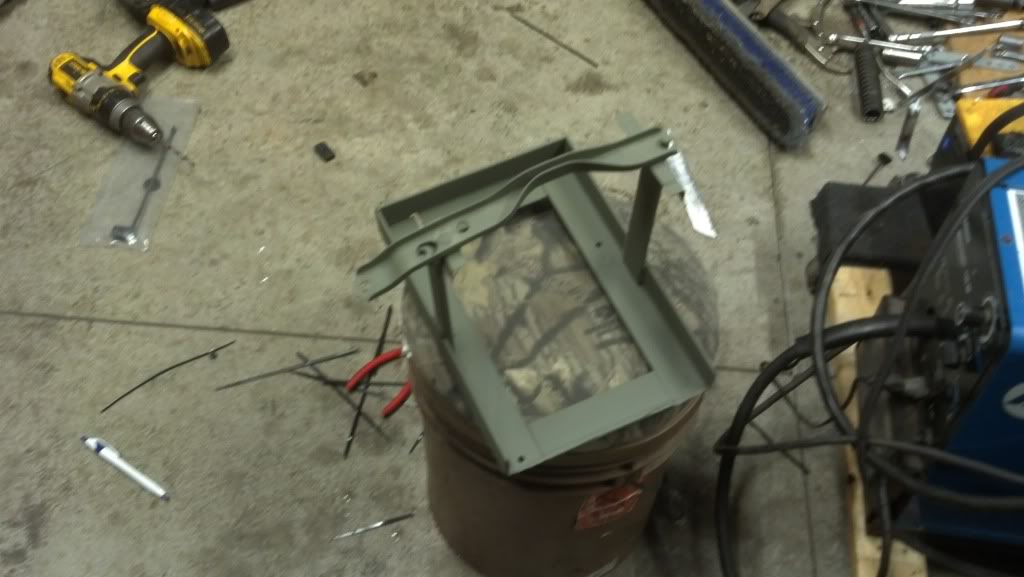
engine run in stand i made from 4x4s bolts and the mounts i got with the motor package. i had to check for leaks before installing... still very green as far as 22r knowledge at this point. (5/7/12)

g52 i picked up for $50 because it wouldnt go into gear when i got there. he originally wanted $125
figured i could fix it or scrap it. i already drove 75 miles to get it.. (5/15/12)

this is the problem.. when you sit them down on the bell housing to hard the reverse gear will pop forward and lock out the shifter from doing anything.. easier fix is to drop it (sort of) on the tail end, but i didnt know this and disassembled the whole case before figuring it out.
i still have this trans and diff but havent located the necessary oil pan, pickup tube, driveshafts, crossmember and mount to use it... (6/5/12)

finally got what i thought was everything i needed to swap this out so here we go,
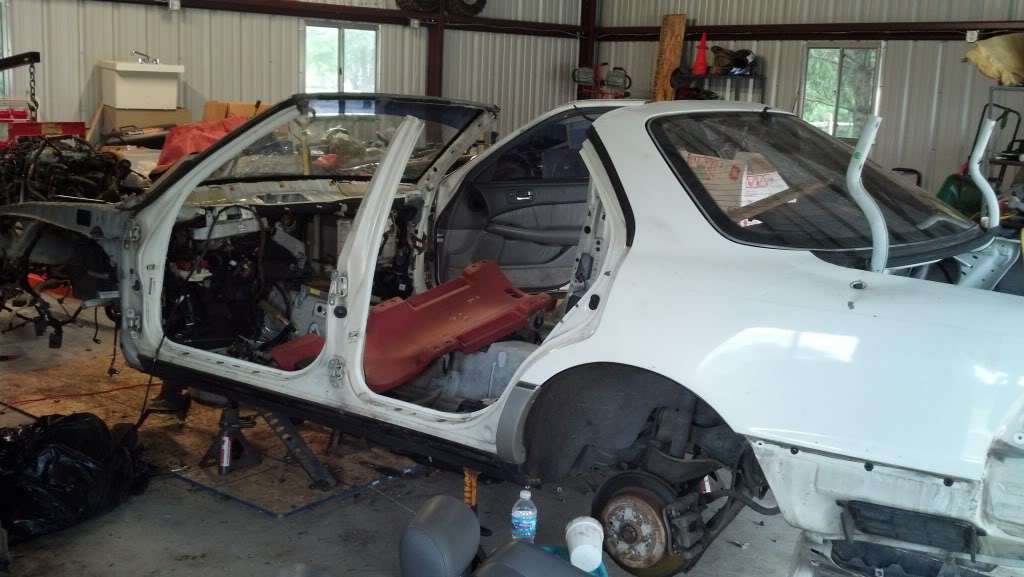
cutting the core support is the best way hands down to get the 3vz and 340h out together

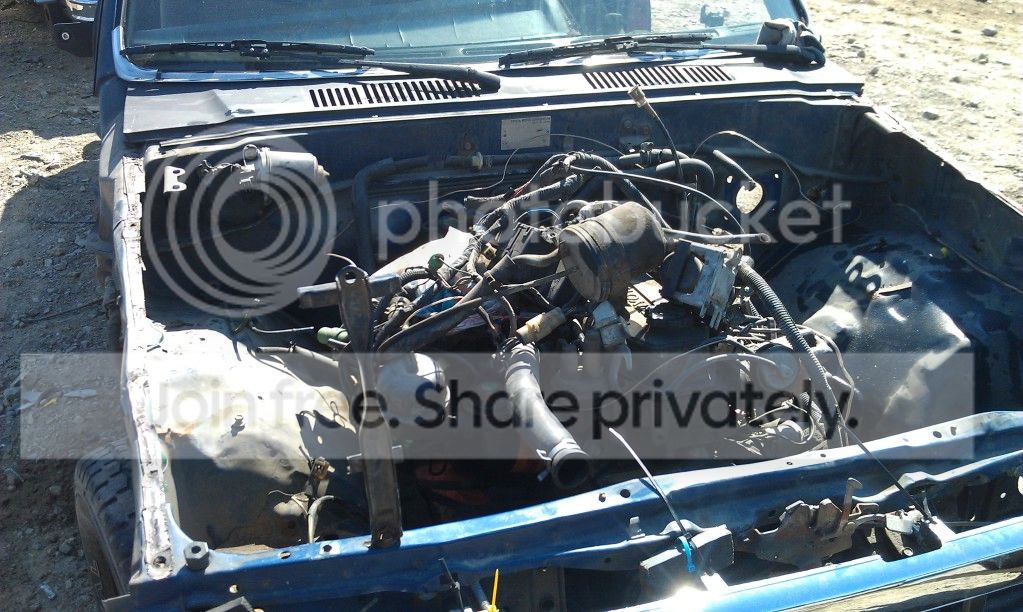
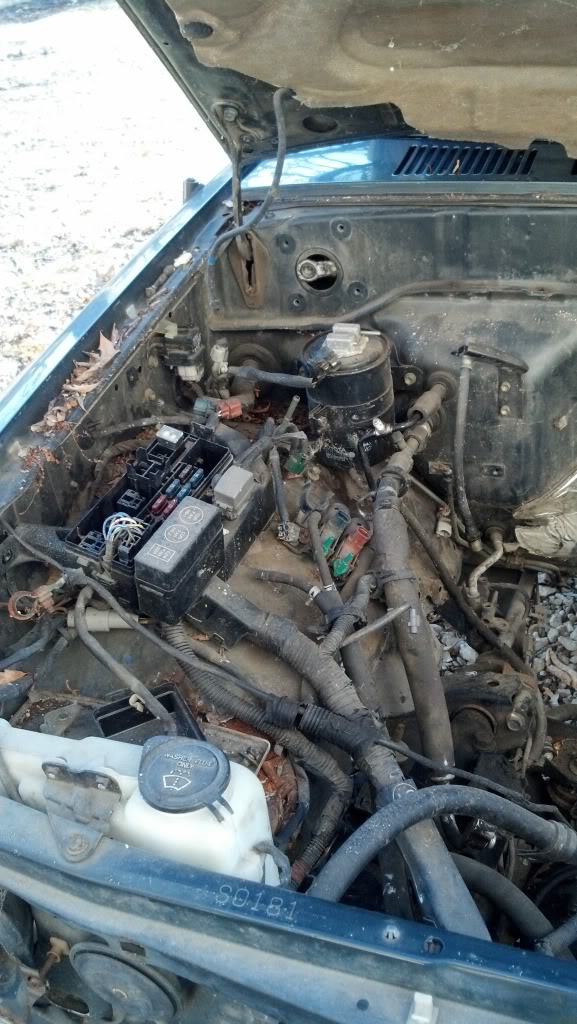
she was tired.. 210k on the odometer running 60 psi in 2 cylinders (7/12/12)

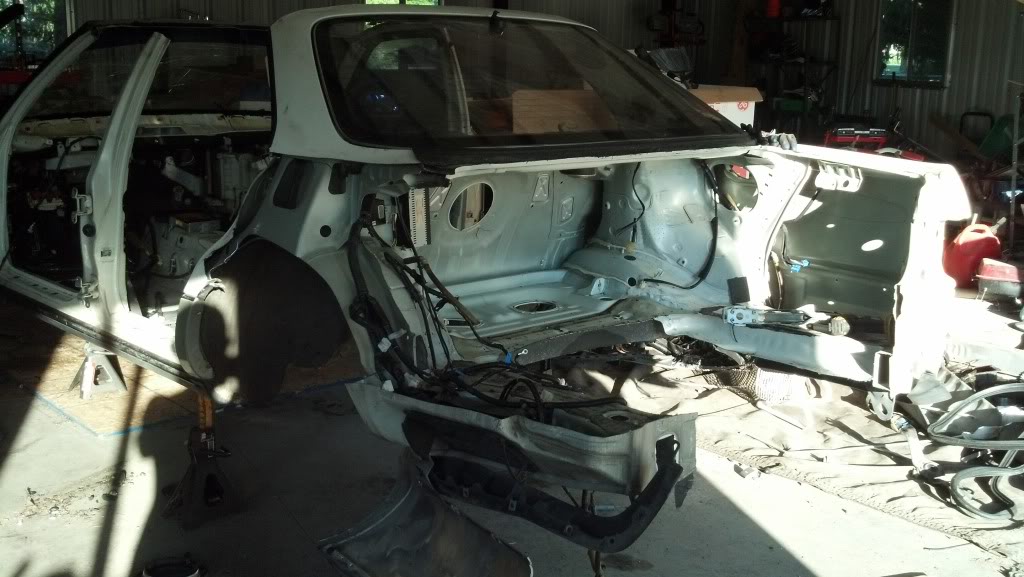
of course the empty bay shot no build is complete without one.. dont forget to take out the auto shifter horse shoe looking thing it will hang you up and cause some unneeded cursing

first fitting of the 22r and w46.. i read many times that the mounts didnt line up but couldnt get a clear answer as to why or how so here it is FWIW i had to move mine about 2 inches forward and 1 inch down this allowed my transmission shifter to line up, the engine to clear the firewall (albeit about a half inch back from stock from the looks of it) and the factory shortbed driveshaft to fit and bolt up to my rear end.


here is how i made my engine mount adapter plates. its 3/16 plate tacked on, drivetrain sat in and positioned then traced around the mounts with a sharpie simple and effective .. now before you say it i realize this might not work with 4wd but i dont have that to work with yet. this is just what worked for me.


they are painted now but you get the point.. not pretty but they work great.
as far as the transmission mount goes i couldnt just unbolt a factory 2wd crossmember and didnt want to cut and weld an old rusty one
so i decided to reuse the one from my 4wd 340h.


not exactly going to bolt in.. also shows how the 2wd manifold down pipes run right into the torsion bar adjusters and pretty close to the frame notice the old exhaust right next to it.

first step is to secure the top and bottom plates on the 340 mount while making a base for the backer plate... using a piece of 1/4 plate with a 90 degree bend about 2 inches short side 8 or so long side 8 inches wide i believe. and some other scrap steel i had.


i ended up with this also pretty ugly but works great

exhaust tube block off plate made from cutoffs.. lol
just a couple update pics
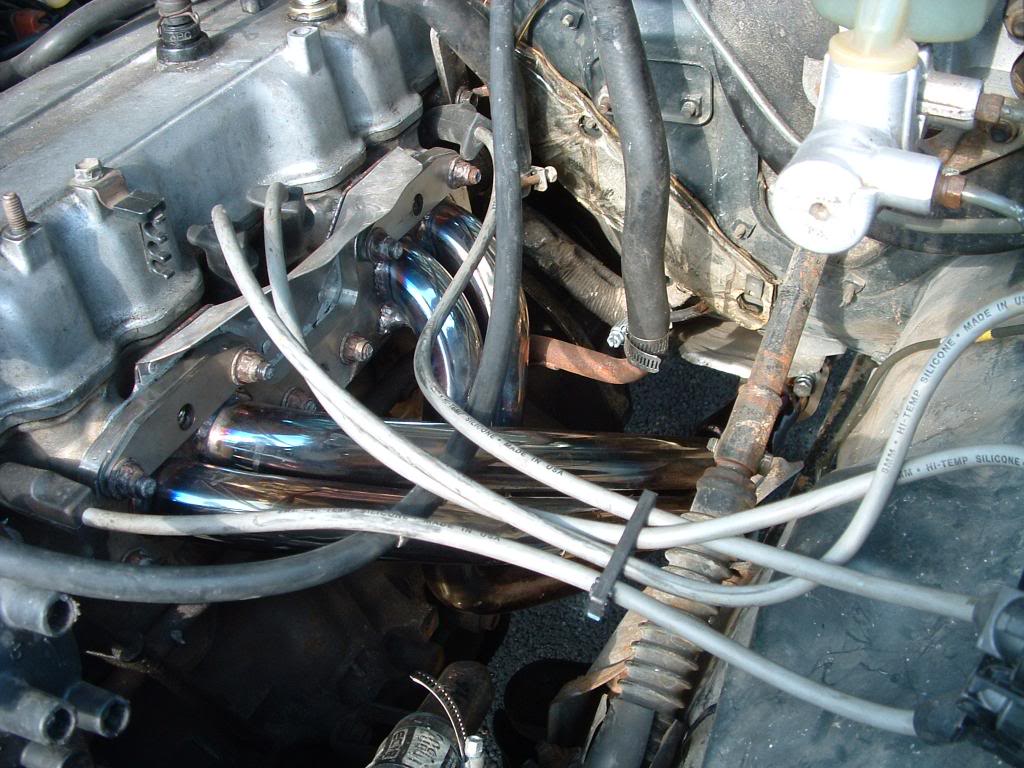
this is my super cheap header that i had to send back once because the flange was warped and the whole thing was scratched up

engine bay sporting the tech4 air cleaner and edis coil packs

1st try trigger wheel setup

GM coolant temp sensor threads right in to 22r intake

close up of the tbi adapter

here is whats next

this is the thread documenting my swap from a 3slow auto 4wd 4runner to a 22r manual 2wd. you might ask why bother, to this day i still say i dont know!,
but it has been a fun adventure that has also included alot of frustration.
mind you this whole project is merely an experiment to keep my junk yota on the road as i had just purchased a complete set of tires before finding out my 3vz was at the end of its life cycle.
THIS IS NOT A BEAUTY BUILD.. I AM ONLY DOING THIS TO KEEP MY WINTER BEATER ALIVE AND LEARN A LITTLE BIT
i was looking for a "cheap fix" to keep me on the road and from scrapping/parting out the truck.
i found an 86 22r with 107000 miles on it that had even compression across all cylinders and ran decent when gas was pored thru the carb (my pick a part drains all gas from the tanks and separates them)
new radiator to the driveshaft and everything in between $322 at the pick a part (4/27/12)
engine run in stand i made from 4x4s bolts and the mounts i got with the motor package. i had to check for leaks before installing... still very green as far as 22r knowledge at this point. (5/7/12)
g52 i picked up for $50 because it wouldnt go into gear when i got there. he originally wanted $125
figured i could fix it or scrap it. i already drove 75 miles to get it.. (5/15/12)
this is the problem.. when you sit them down on the bell housing to hard the reverse gear will pop forward and lock out the shifter from doing anything.. easier fix is to drop it (sort of) on the tail end, but i didnt know this and disassembled the whole case before figuring it out.
i still have this trans and diff but havent located the necessary oil pan, pickup tube, driveshafts, crossmember and mount to use it... (6/5/12)
finally got what i thought was everything i needed to swap this out so here we go,
cutting the core support is the best way hands down to get the 3vz and 340h out together
she was tired.. 210k on the odometer running 60 psi in 2 cylinders (7/12/12)
of course the empty bay shot no build is complete without one.. dont forget to take out the auto shifter horse shoe looking thing it will hang you up and cause some unneeded cursing
first fitting of the 22r and w46.. i read many times that the mounts didnt line up but couldnt get a clear answer as to why or how so here it is FWIW i had to move mine about 2 inches forward and 1 inch down this allowed my transmission shifter to line up, the engine to clear the firewall (albeit about a half inch back from stock from the looks of it) and the factory shortbed driveshaft to fit and bolt up to my rear end.
here is how i made my engine mount adapter plates. its 3/16 plate tacked on, drivetrain sat in and positioned then traced around the mounts with a sharpie simple and effective .. now before you say it i realize this might not work with 4wd but i dont have that to work with yet. this is just what worked for me.
they are painted now but you get the point.. not pretty but they work great.
as far as the transmission mount goes i couldnt just unbolt a factory 2wd crossmember and didnt want to cut and weld an old rusty one
so i decided to reuse the one from my 4wd 340h.
not exactly going to bolt in.. also shows how the 2wd manifold down pipes run right into the torsion bar adjusters and pretty close to the frame notice the old exhaust right next to it.
first step is to secure the top and bottom plates on the 340 mount while making a base for the backer plate... using a piece of 1/4 plate with a 90 degree bend about 2 inches short side 8 or so long side 8 inches wide i believe. and some other scrap steel i had.
i ended up with this also pretty ugly but works great
exhaust tube block off plate made from cutoffs.. lol
just a couple update pics
this is my super cheap header that i had to send back once because the flange was warped and the whole thing was scratched up

engine bay sporting the tech4 air cleaner and edis coil packs

1st try trigger wheel setup

GM coolant temp sensor threads right in to 22r intake

close up of the tbi adapter

here is whats next

Last edited by jmswltn; Sep 29, 2013 at 07:44 PM.
Aug 20, 2013 | 08:29 PM
#2
Thread Starter
Registered User
Joined: Nov 2011
Posts: 72
Likes: 0
From: toledo, oh
stage 2
its been a while and a lot of changes since my last build thread additions but here we go.
after many thoughts and research on how to repair the rust holes in my frame (and body of course).. i came across this on good old craigslist (the bane of my financial well being)
it was pretty much gutted but was from california and had never seen an ohio winter road.
i love my truck and after swapping, rebuilding, and r&r my motor and trans a few 5 times it was a welcome project. the deal included the rebuilt r150 that was originally in it, a w56 with case, a 22re 2 sets of rims and tires and various other parts for $700 plus tow.
now to all you people from out west this seams ridiculous but here it is a cherry find.
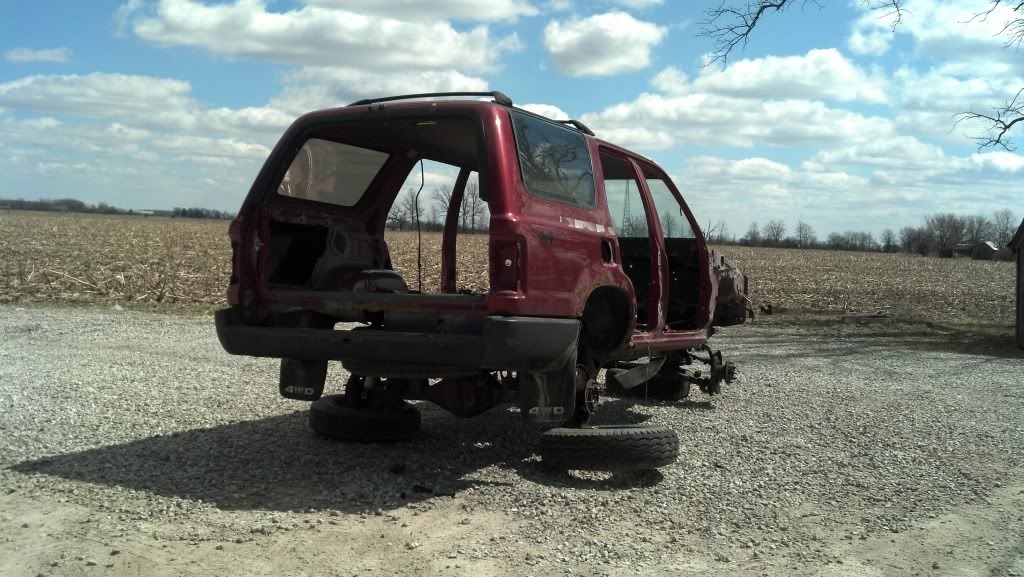
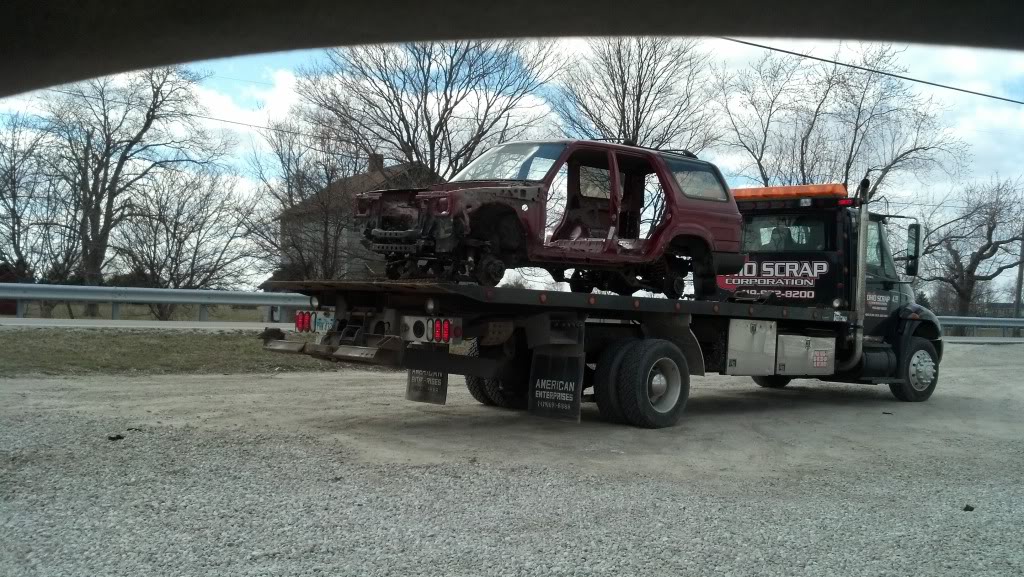
so in 7 days i completely gutted all usable items from my 4runner and scrapped it..

still wish i had my windshield tools but what can you do
after this i was to busy to take pics of the whole ordeal but i swapped in:
almost all old break line..and new where needed
new fuel lines
gas tank
brakes new and used
cross member
various interior that was missing
motor
w56
all megasquirt harness
3rd gen wiper transmission
all my front end
obx stainless header for 22r 4wd
my rusty tail gate, the previous owner parted out a lot of the truck
custom trans to crossmember adjustment plate found on ebay
1 bolt for the upper a arm not sure why it was removed but it was kinda pricey.
my used torsion bar
new torsion adjuster bolts and nuts
rebuilt dash harness because some people dont know how to unplug modules...
im sure there was more done but start to finish in 20 days:
obx header with lc engineering egr delete plates
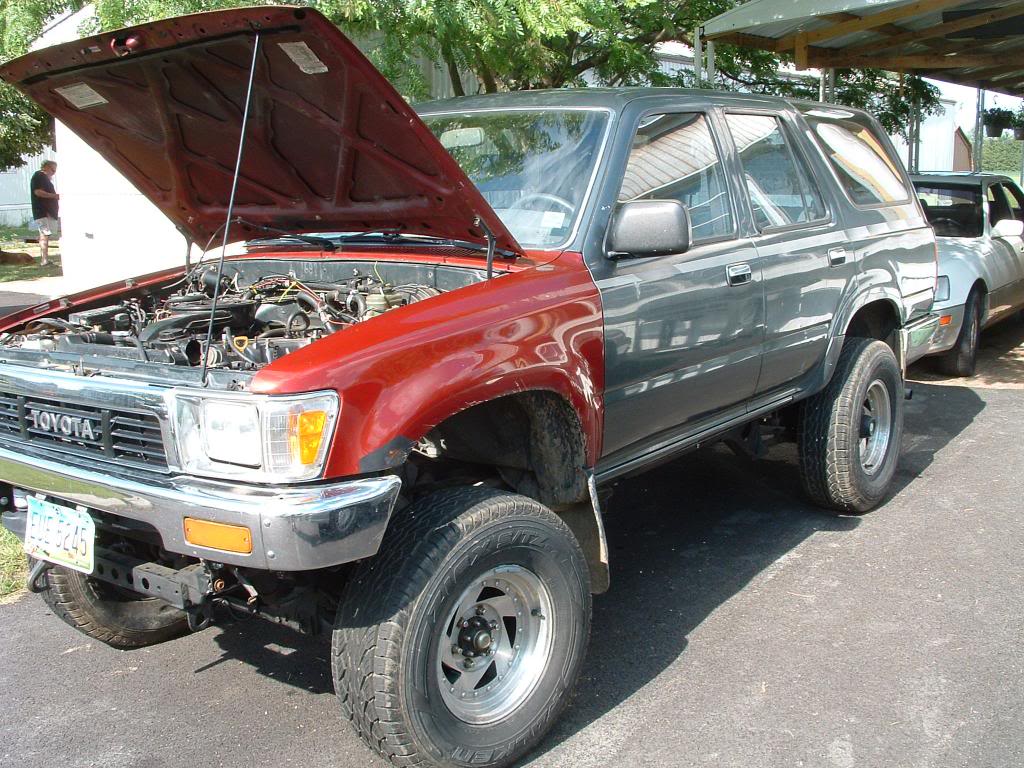
here she is before the body lift
less than a year dealing with the anemic power of the 22r even with a 270 cam, header, and megasquirt... it was time to move on.
after reading every swap and build on several forums here and abroad i came across this (again on craigslist)
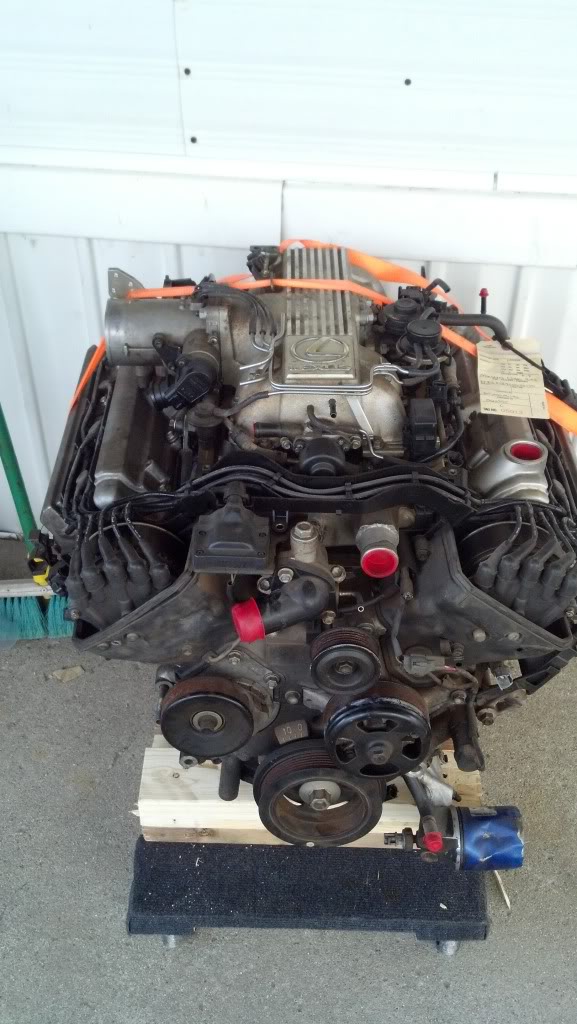
now in retrospect i know this is an engine from a 93 sc400 not the ls400 that i needed although i was told it was a 96 ls400 (do your research before buying!! )
)
after much research on needed accessories, harness,ecu, and transmission options i found this motor to me a bit of a money pit.
this than led me to this:
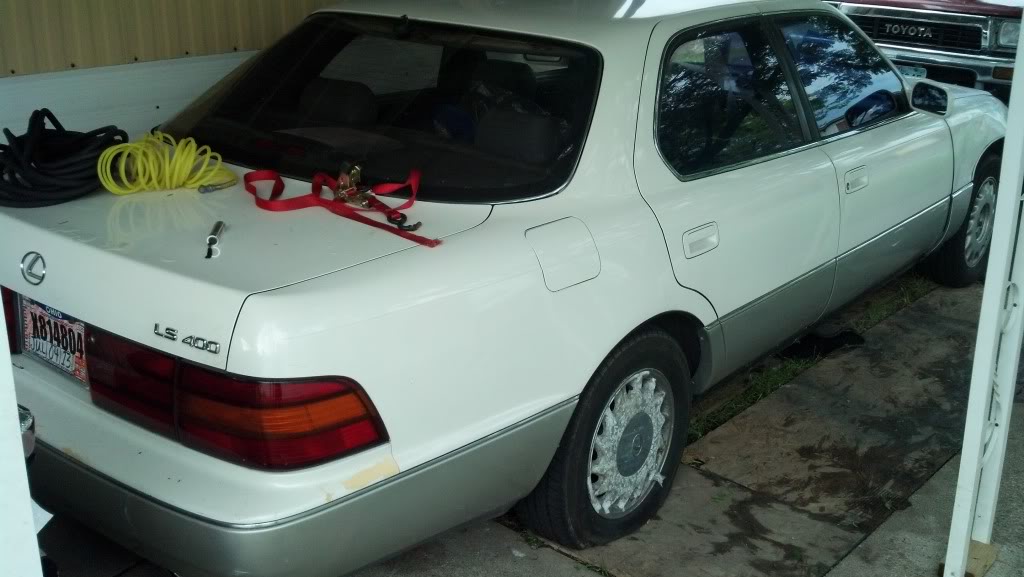
Yes craigslist again lol!!
$500 for a whole running driving lexus ls400... as usual some people made a point to show their concern for tearing apart 2 perfectly fine running vehicles
not much to say about tearing down the lex but here is some pics
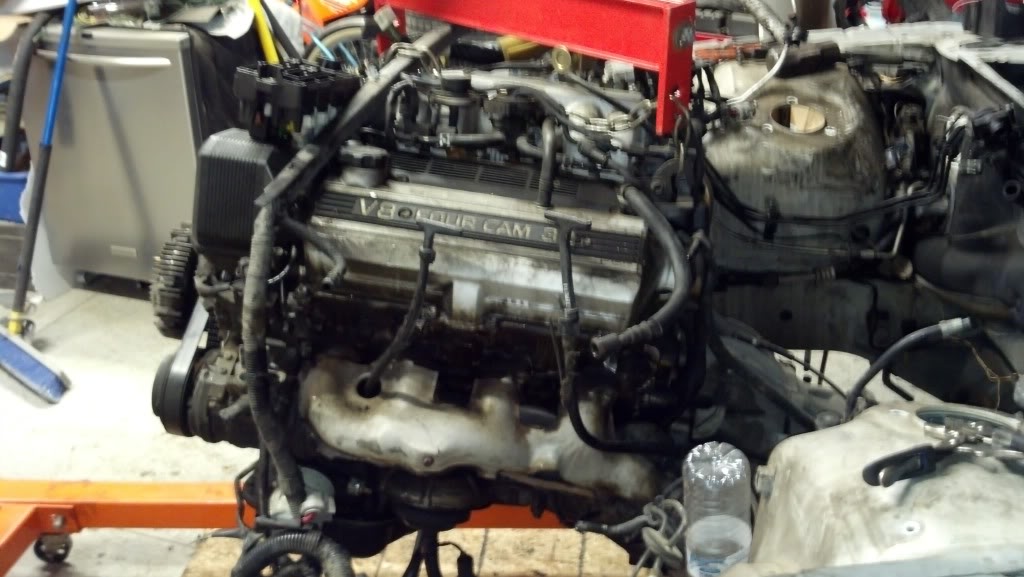
hear is the oily pig coming out
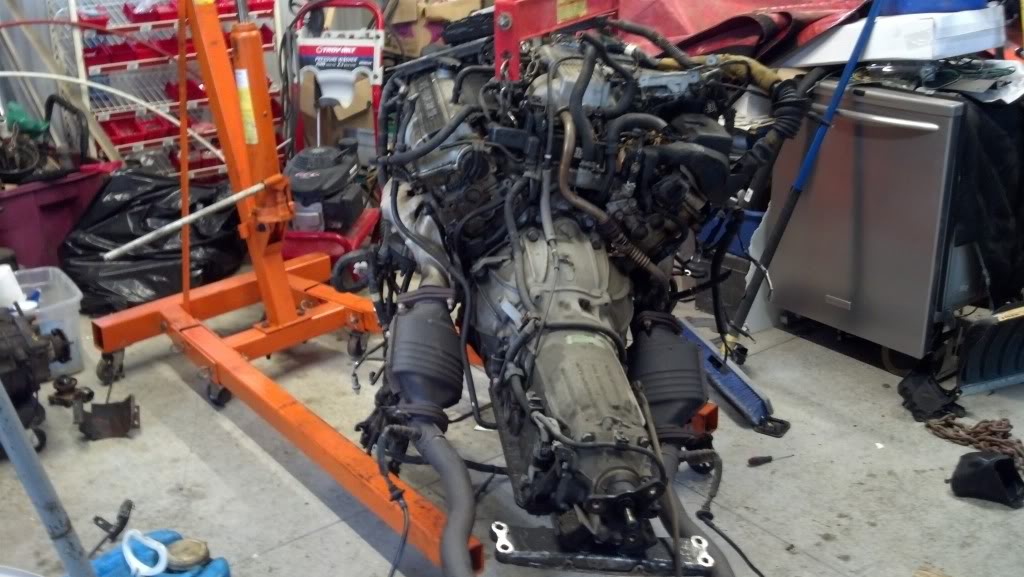
cats and all
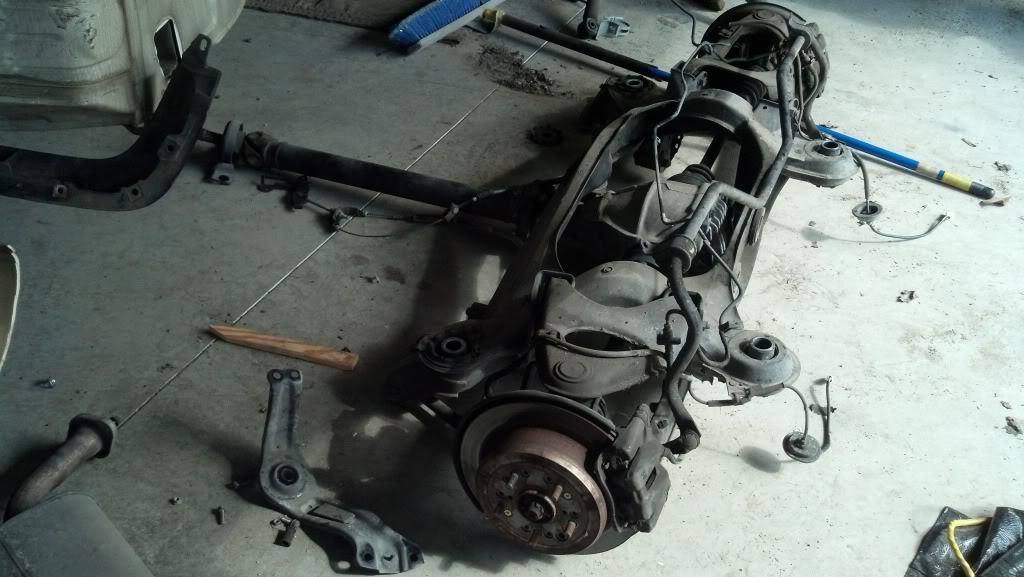
the rear end ..
i wanted to make sure i had everything worth anything and all needed accessories/wiring/modules/relays off this thing before scrapping it this time i took it in. this is your best bet if you have the time
selling various items and scrapping the rest i have pretty much got everything needed from this car for free...
here is a few pics of the transmission comparison i was putting in my uz trans options post

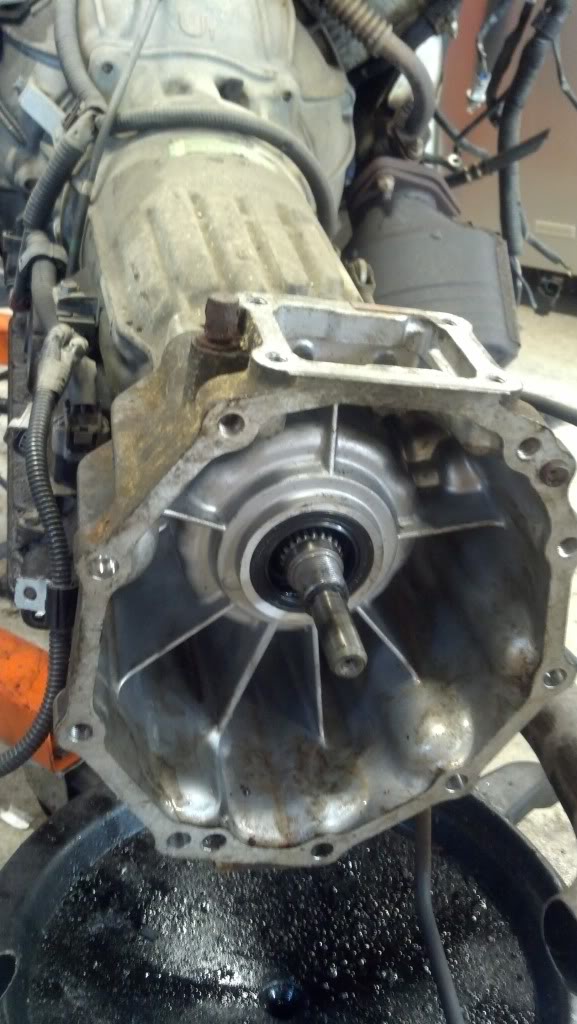
a341 sporting the 340h 4bolt flange allowing use of 4wd dshafts on the 341 trans
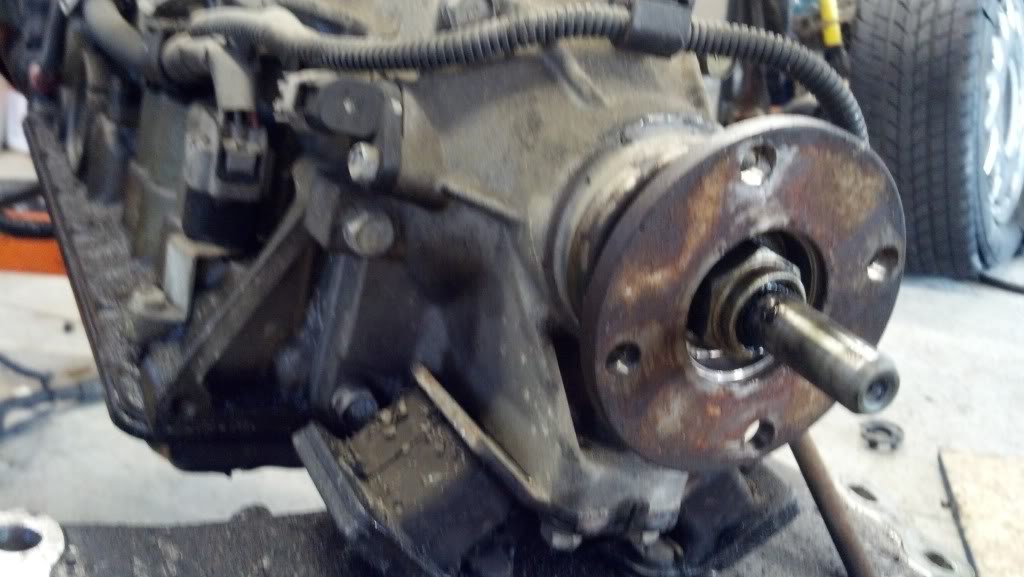
here is the 340f transfer case adapter bolted to the 341 before cutting the tailshaft to fit
lots of cleaning with a toothbrush and amazing Purple Power its the best engine degreaser ive ever seen. and pretty cheap too

found the connectors are pretty brittle this one was broke from the last rebuild in 2006.
more to come..
after many thoughts and research on how to repair the rust holes in my frame (and body of course).. i came across this on good old craigslist (the bane of my financial well being)


it was pretty much gutted but was from california and had never seen an ohio winter road.


i love my truck and after swapping, rebuilding, and r&r my motor and trans a few 5 times it was a welcome project. the deal included the rebuilt r150 that was originally in it, a w56 with case, a 22re 2 sets of rims and tires and various other parts for $700 plus tow.
now to all you people from out west this seams ridiculous but here it is a cherry find.
so in 7 days i completely gutted all usable items from my 4runner and scrapped it..


still wish i had my windshield tools but what can you do
after this i was to busy to take pics of the whole ordeal but i swapped in:
almost all old break line..and new where needed
new fuel lines
gas tank
brakes new and used
cross member
various interior that was missing
motor
w56
all megasquirt harness
3rd gen wiper transmission
all my front end
obx stainless header for 22r 4wd
my rusty tail gate, the previous owner parted out a lot of the truck
custom trans to crossmember adjustment plate found on ebay
1 bolt for the upper a arm not sure why it was removed but it was kinda pricey.
my used torsion bar
new torsion adjuster bolts and nuts
rebuilt dash harness because some people dont know how to unplug modules...
im sure there was more done but start to finish in 20 days:
obx header with lc engineering egr delete plates

here she is before the body lift
less than a year dealing with the anemic power of the 22r even with a 270 cam, header, and megasquirt... it was time to move on.
after reading every swap and build on several forums here and abroad i came across this (again on craigslist)

now in retrospect i know this is an engine from a 93 sc400 not the ls400 that i needed although i was told it was a 96 ls400 (do your research before buying!!
) after much research on needed accessories, harness,ecu, and transmission options i found this motor to me a bit of a money pit.
this than led me to this:

Yes craigslist again lol!!
$500 for a whole running driving lexus ls400... as usual some people made a point to show their concern for tearing apart 2 perfectly fine running vehicles
not much to say about tearing down the lex but here is some pics


hear is the oily pig coming out

cats and all

the rear end ..
i wanted to make sure i had everything worth anything and all needed accessories/wiring/modules/relays off this thing before scrapping it this time i took it in. this is your best bet if you have the time
selling various items and scrapping the rest i have pretty much got everything needed from this car for free...
here is a few pics of the transmission comparison i was putting in my uz trans options post

a341 sporting the 340h 4bolt flange allowing use of 4wd dshafts on the 341 trans

here is the 340f transfer case adapter bolted to the 341 before cutting the tailshaft to fit


lots of cleaning with a toothbrush and amazing Purple Power its the best engine degreaser ive ever seen. and pretty cheap too

found the connectors are pretty brittle this one was broke from the last rebuild in 2006.
more to come..
Last edited by jmswltn; Sep 28, 2013 at 12:15 PM.
 Sep 28, 2013 | 11:58 AM
#4
Thread Starter
Registered User
Joined: Nov 2011
Posts: 72
Likes: 0
From: toledo, oh
its been a while since i had an update so here we go..
as this is a budget build all work is being done by me using quite a bit of materials that are recycled from other projects and collected parts.
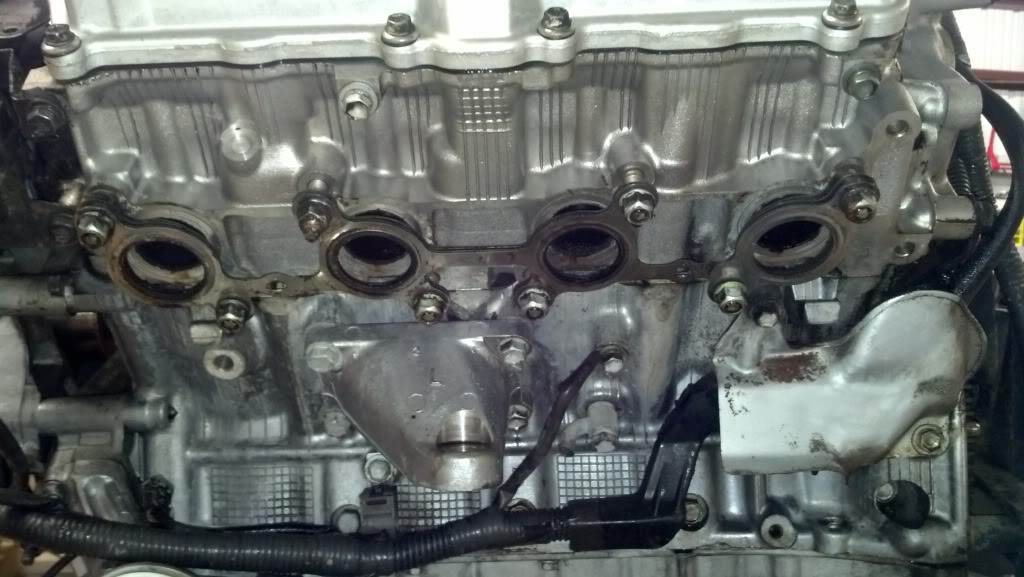
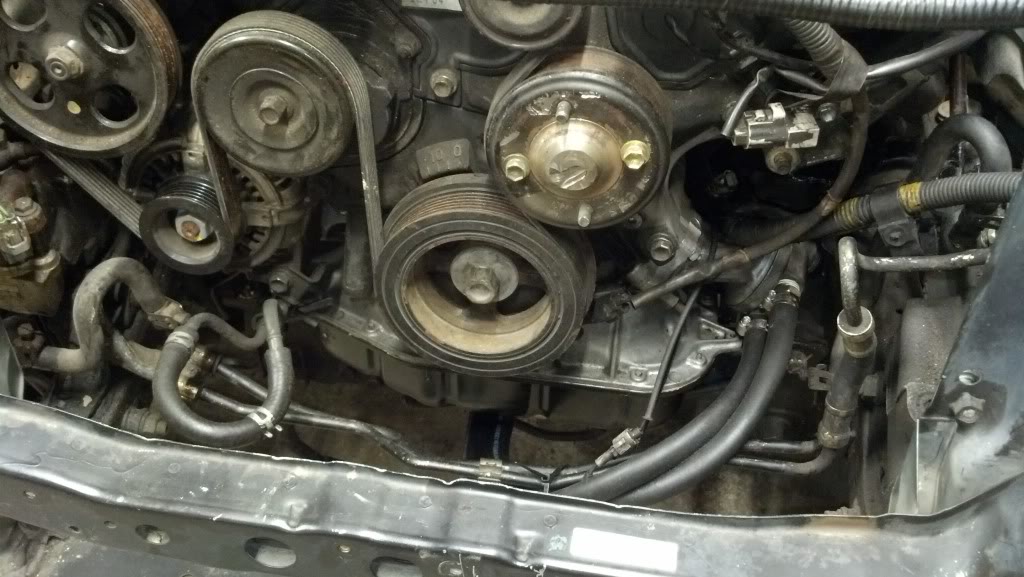
here is the front cover minus the a/c with the new smaller belt
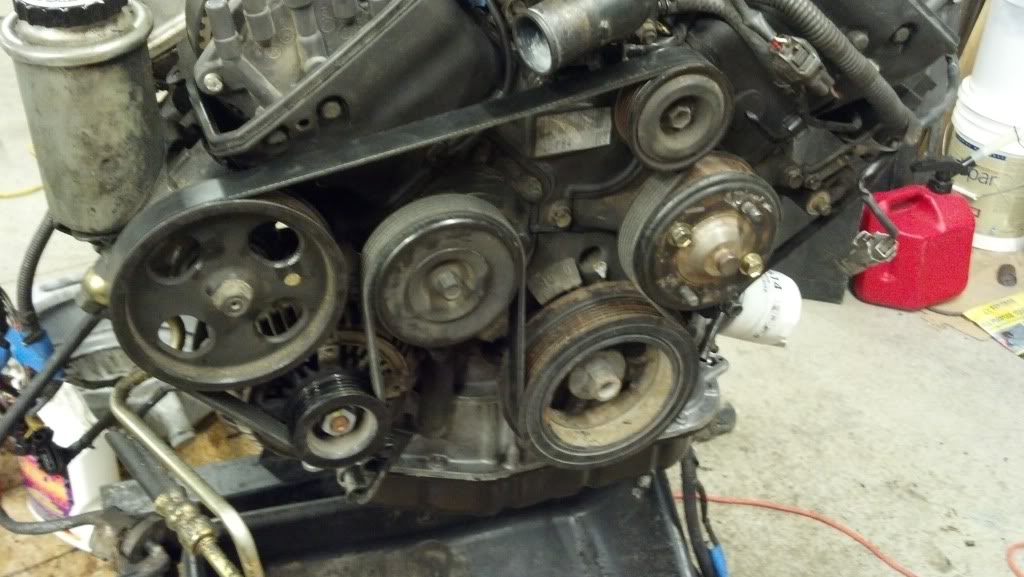
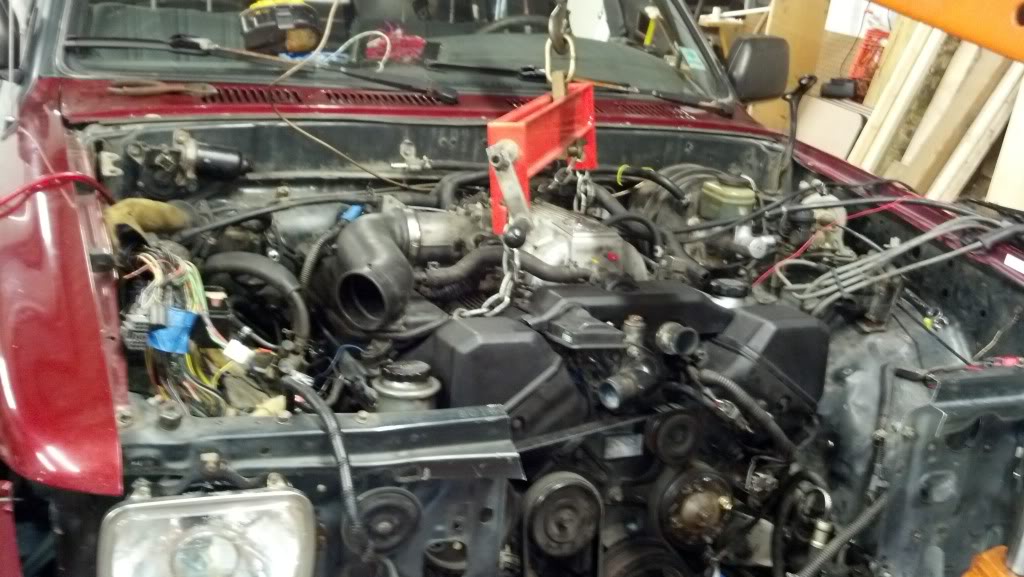
first test fit
transmission mount made from the w56 mount that was cut up, widened, rubber removed, welded to a piece of square tubing, mounted to the 22r mount, than mounted to a mount adapter purchased from
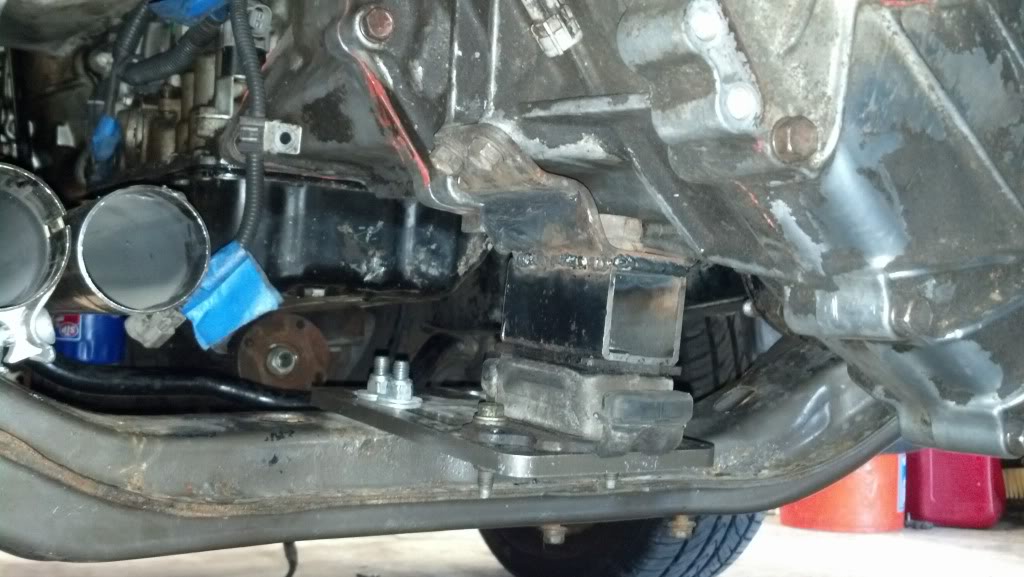
dual 2 and 1/2s
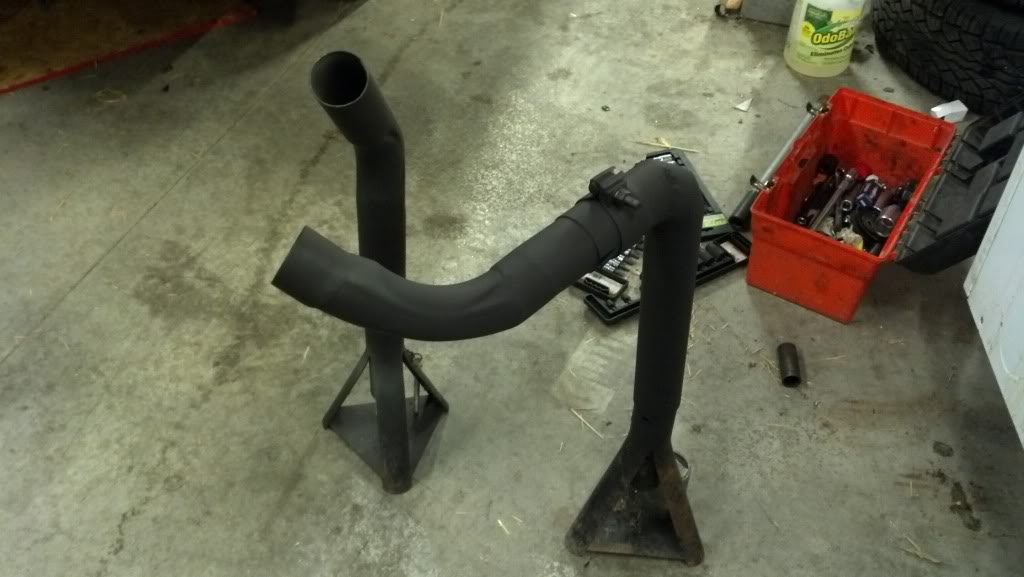
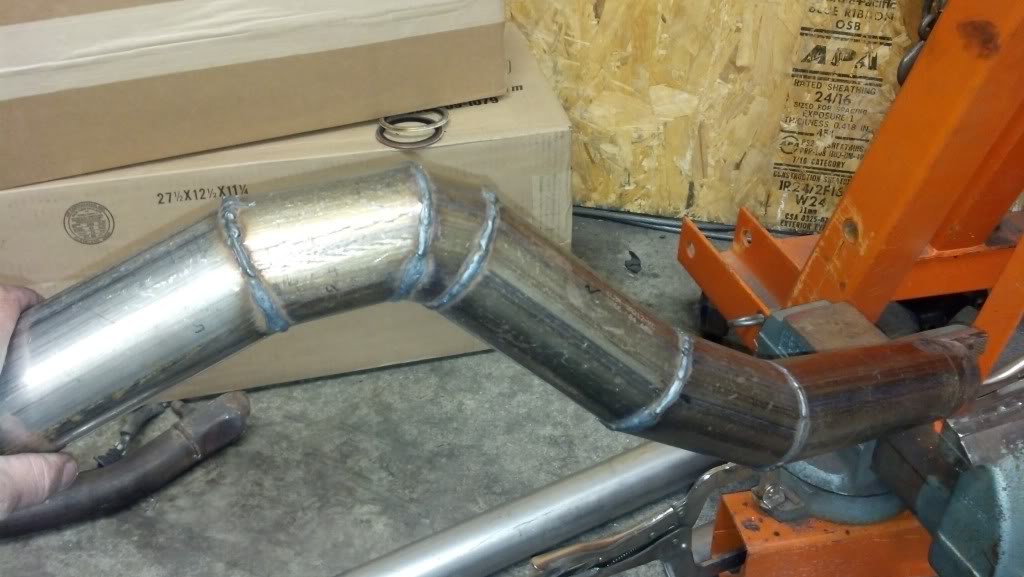
my bend around the front of the transmission pan made by sectioning a piece of straight pipe. this was very time consuming but i am very satisfied with it despite the fact it may rust out pretty bad

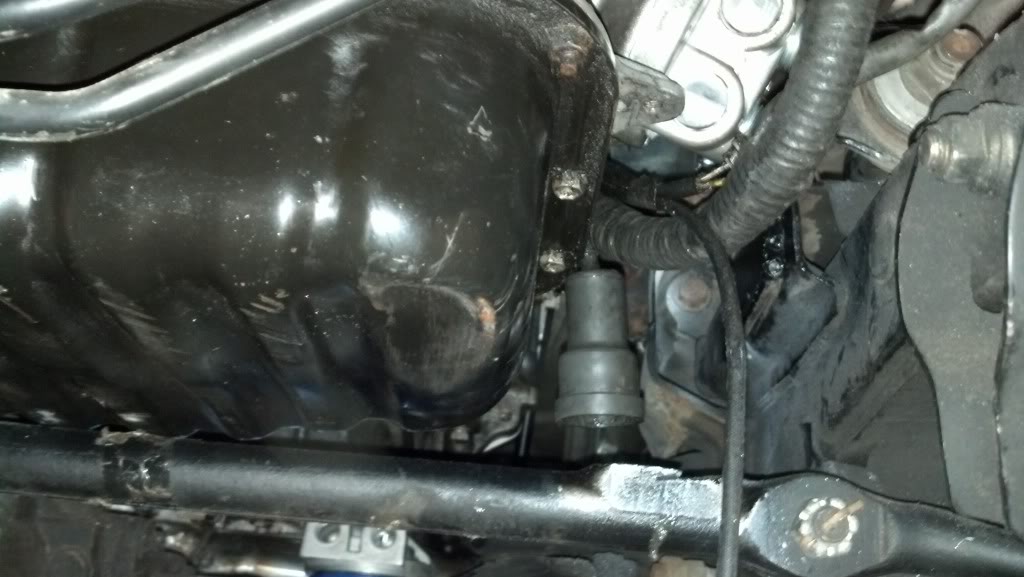
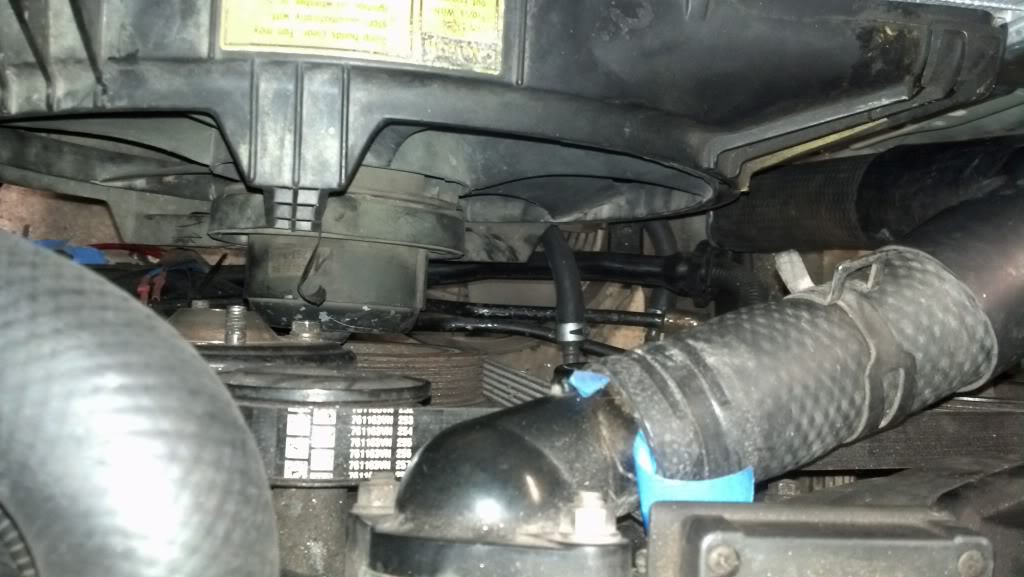
here is my remote oil filter adapter (top and bottom of picture).I dont have the hose hooked up yet i am putting a cooler up front if i can make it fit..
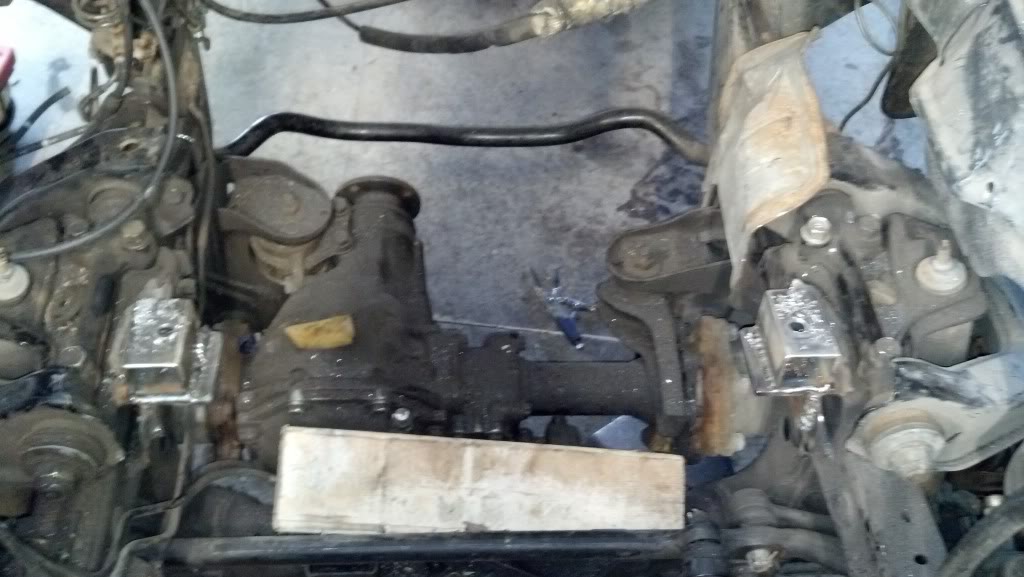
here is how i made my engine mount base i am using international transmission bushings for my mounts
as this is a budget build all work is being done by me using quite a bit of materials that are recycled from other projects and collected parts.
here is the front cover minus the a/c with the new smaller belt

first test fit

transmission mount made from the w56 mount that was cut up, widened, rubber removed, welded to a piece of square tubing, mounted to the 22r mount, than mounted to a mount adapter purchased from

dual 2 and 1/2s

my bend around the front of the transmission pan made by sectioning a piece of straight pipe. this was very time consuming but i am very satisfied with it despite the fact it may rust out pretty bad

here is my remote oil filter adapter (top and bottom of picture).I dont have the hose hooked up yet i am putting a cooler up front if i can make it fit..

here is how i made my engine mount base i am using international transmission bushings for my mounts

 Sep 29, 2013 | 07:17 PM
#5
Thread Starter
Registered User
Joined: Nov 2011
Posts: 72
Likes: 0
From: toledo, oh
so.. i know my mounts seem a little anemic but i figure i will run with them for now, if its a problem ill fix it. worst thing that can happen is they'll bend a little one way or the other, no big deal motor will probably be r&r before spring again any way lol...
here is todays doings:
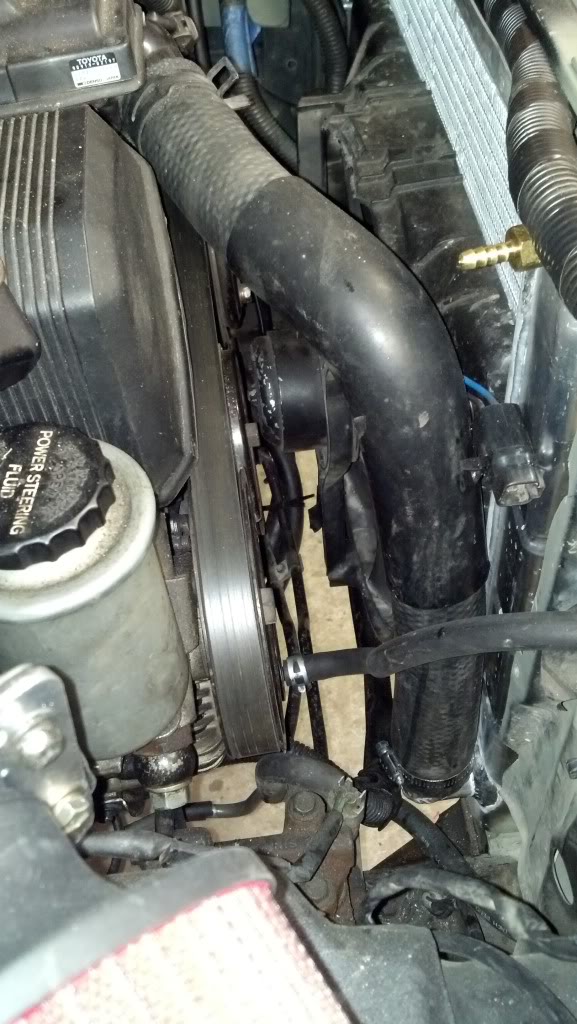
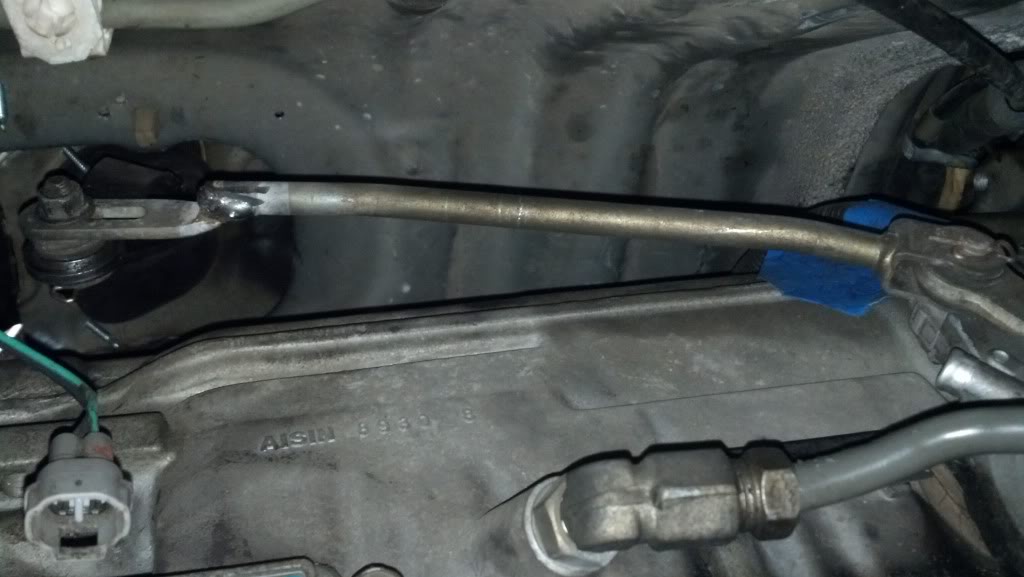
22r power steering line installed from lexus pump to 4runner distribution system/abs thing looks factory almost to good..
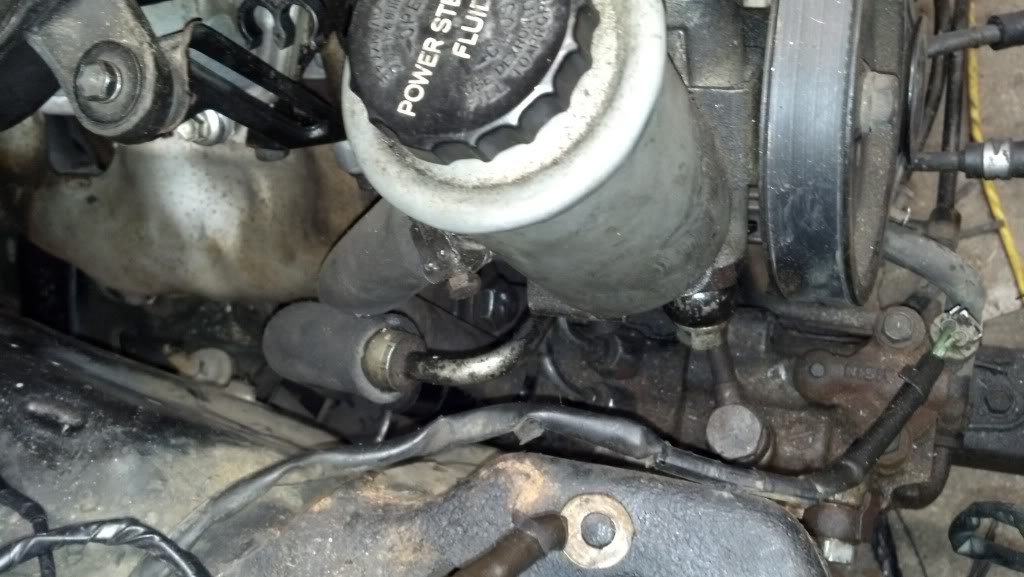
remote mount oil lines installed with new ph8a bosch filter(proper number i cant remember right now)
and oil filled
painted collector/downpipe with autozones vht header paint (not properly of course)
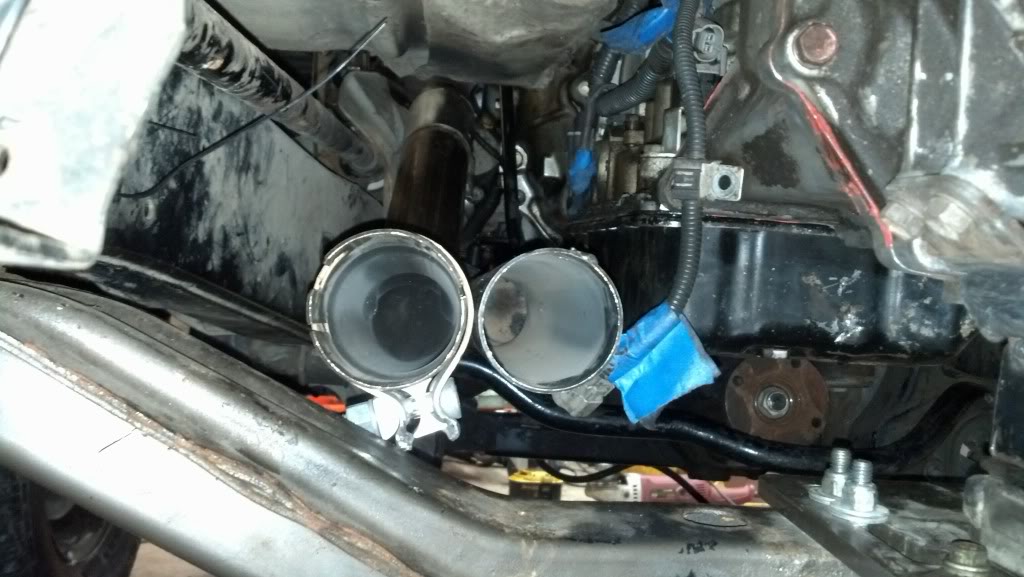
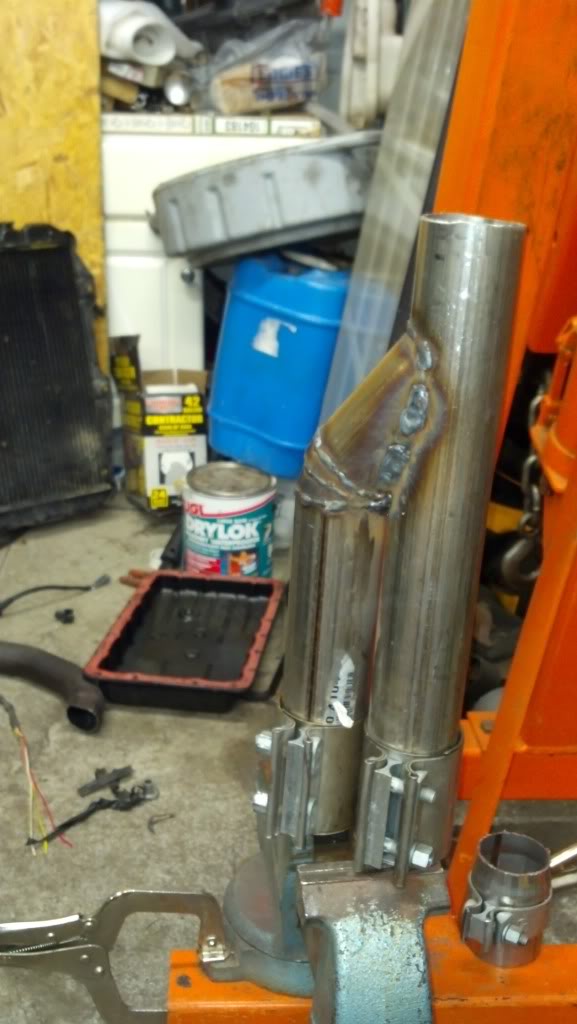
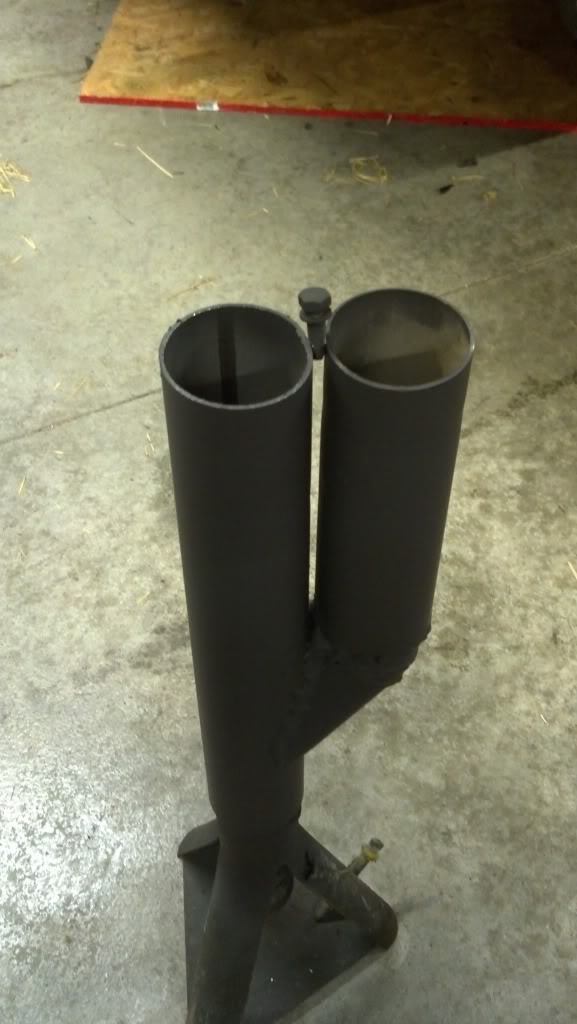
made my fancy off set y pipe hopefully i get some scavenging going on here..
still not beautiful but much better (above picture shows those fantastic clamps i got in the deal,i wish i had more than i do)
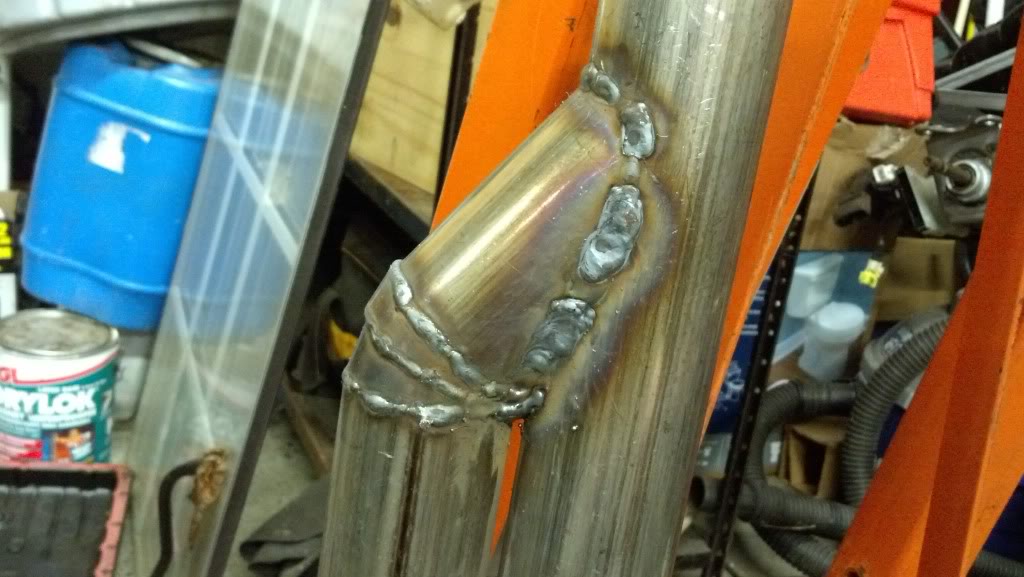
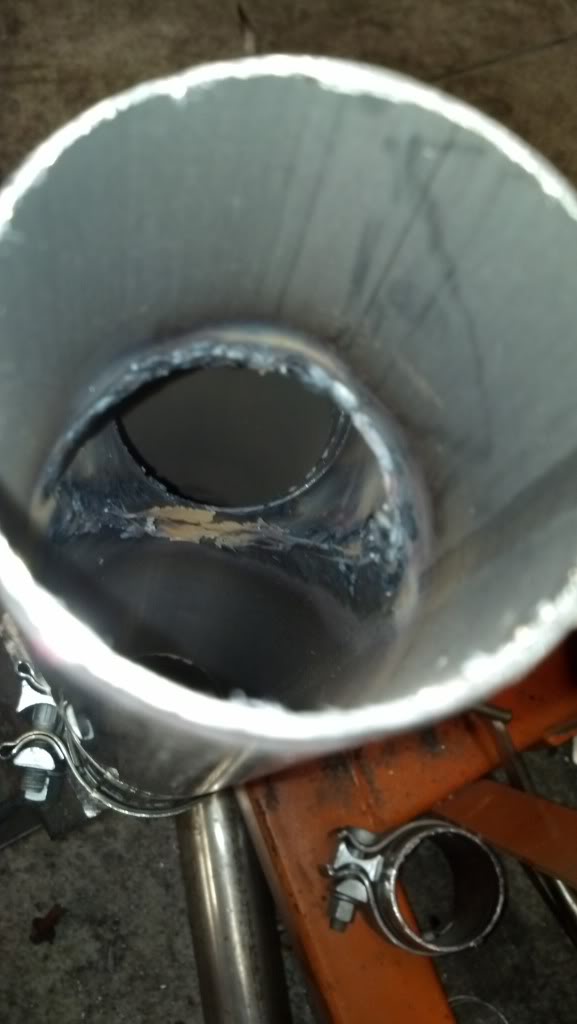
all painted up..some might ask why go dual 2 1/2 to single, the way i look at it %99 of the time i will not be "balls out" so will not need the extra flow that duals could give me. all in all velocity and scavenging will do me and most others fine.. remember its still only a 4 litre
why not throw a catalytic converter in there too.. its not welded up yet but im down for some polution control
i also installed the trans lines and bought the biggest trans cooler i could get from oreilys . its not installed yet as i am still working on the radiator situation.
i am thinking of using the 4 cylinder radiator i have as its brand new, along side of 1 or 2 extra heater cores to compensate for the extra volume needed. ill probably build a custom radiator when we get the tig welder at the shop i work at.
i believe it will be a good idea to modify the hood for vents above the backside of the radiator. most of the swap i have seen/read about have cooling problems do to limited under hood space for ventilation.. so thats on the to do list.
I hooked up the fuel supply line. i had to install a new line when i got the truck so i just bent it over to the drivers side at the h part of the frame, than brought it up to the front with a section of the ls400 fuel line and and original filter.. easy peasy
also connected the alternator wiring from the ls400 into the 4runner harness, with this i ran the wiring for my inverter and am using the in line fuse as my main battery fuse to the under hood box....
here is todays doings:
22r power steering line installed from lexus pump to 4runner distribution system/abs thing looks factory almost to good..

remote mount oil lines installed with new ph8a bosch filter(proper number i cant remember right now)
and oil filled

painted collector/downpipe with autozones vht header paint (not properly of course)

made my fancy off set y pipe hopefully i get some scavenging going on here..


still not beautiful but much better (above picture shows those fantastic clamps i got in the deal,i wish i had more than i do
)

all painted up..some might ask why go dual 2 1/2 to single, the way i look at it %99 of the time i will not be "balls out" so will not need the extra flow that duals could give me. all in all velocity and scavenging will do me and most others fine.. remember its still only a 4 litre

why not throw a catalytic converter in there too.. its not welded up yet but im down for some polution control

i also installed the trans lines and bought the biggest trans cooler i could get from oreilys . its not installed yet as i am still working on the radiator situation.
i am thinking of using the 4 cylinder radiator i have as its brand new, along side of 1 or 2 extra heater cores to compensate for the extra volume needed. ill probably build a custom radiator when we get the tig welder at the shop i work at.
i believe it will be a good idea to modify the hood for vents above the backside of the radiator. most of the swap i have seen/read about have cooling problems do to limited under hood space for ventilation.. so thats on the to do list.
I hooked up the fuel supply line. i had to install a new line when i got the truck so i just bent it over to the drivers side at the h part of the frame, than brought it up to the front with a section of the ls400 fuel line and and original filter.. easy peasy
also connected the alternator wiring from the ls400 into the 4runner harness, with this i ran the wiring for my inverter and am using the in line fuse as my main battery fuse to the under hood box....
Last edited by jmswltn; Sep 29, 2013 at 07:26 PM.
Oct 13, 2013 | 07:09 PM
#6
Thread Starter
Registered User
Joined: Nov 2011
Posts: 72
Likes: 0
From: toledo, oh
its been a busy couple of weeks..
i decided why bother trying to make a 4 cyl radiator work when i can order new 3 core from summit...
http://www.summitracing.com/parts/sum-380324/overview/
this is about the best you can find to fit in that area but there was still alot of cutting to get it in there.
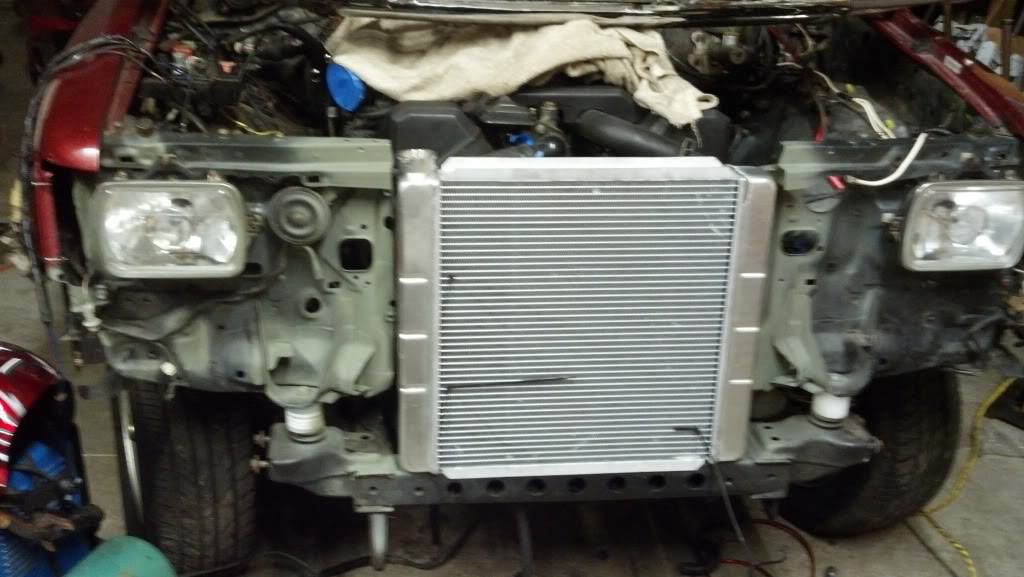
i had 1 stop speed shop https://www.facebook.com/1stopSpeedShop cut off the lower inlet and replace it with a 90 degree 1.5 inch bend (the radiator comes with 1.75 inlet)
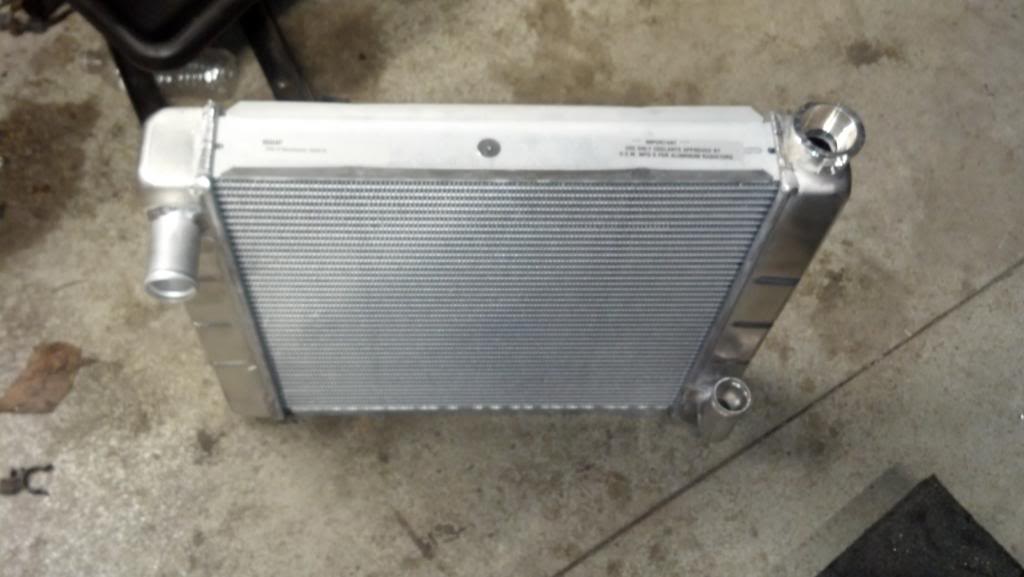
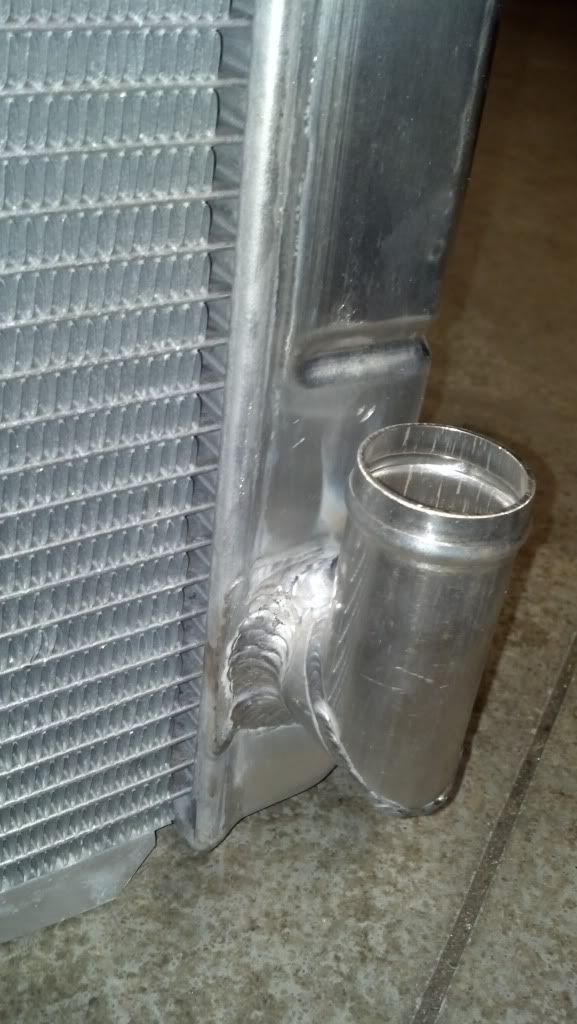
a great job for a great price $50 out the door..
with the in/outlets located where they are i was able to use the newer ls400 radiator hoses with minor trimming
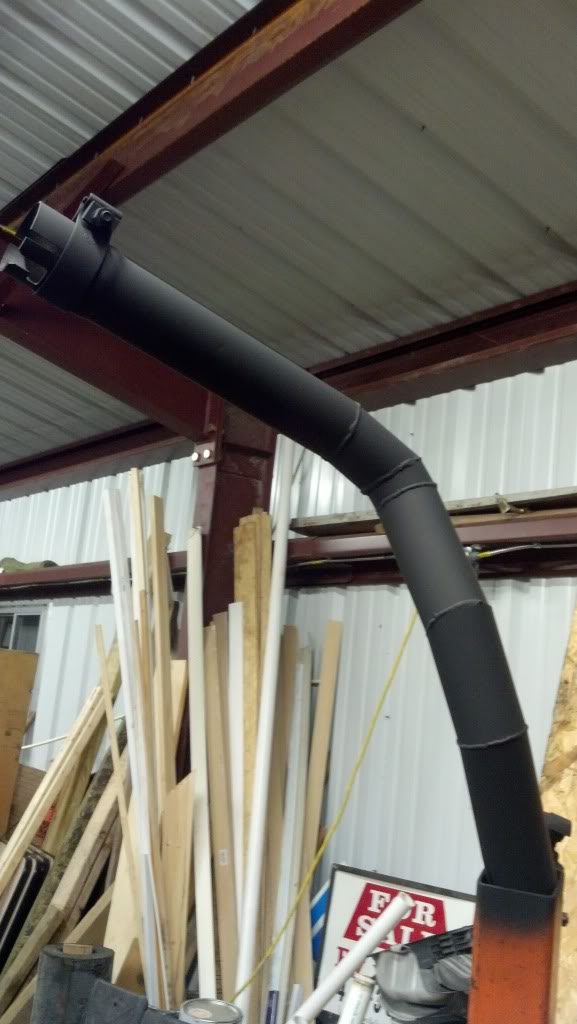
i also finished up my exhaust minus 1 hanger in the back.
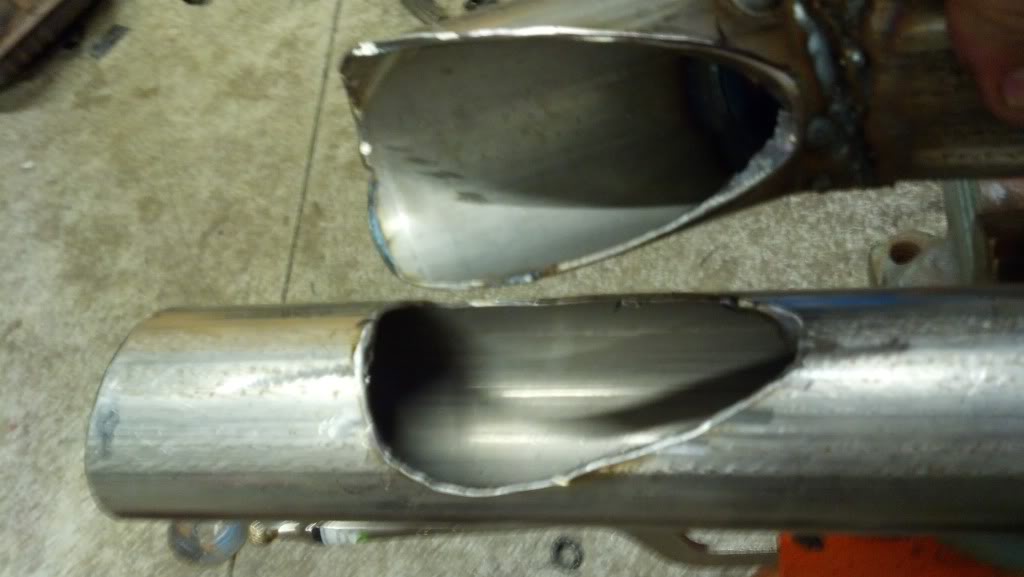
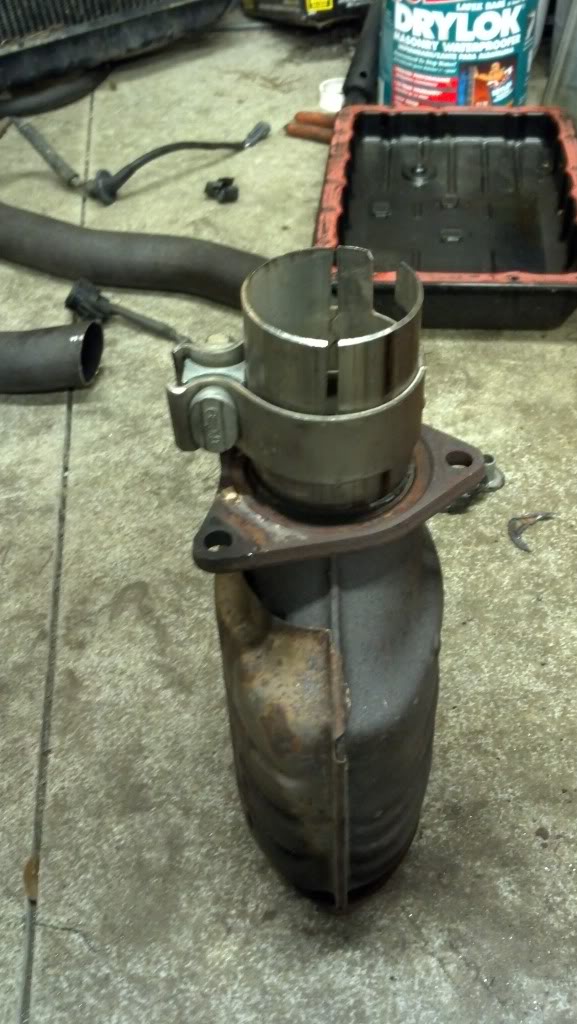
factory lexus catalytic converter in/out size ~2.7 inches. why use flanges when you have slip fittings:
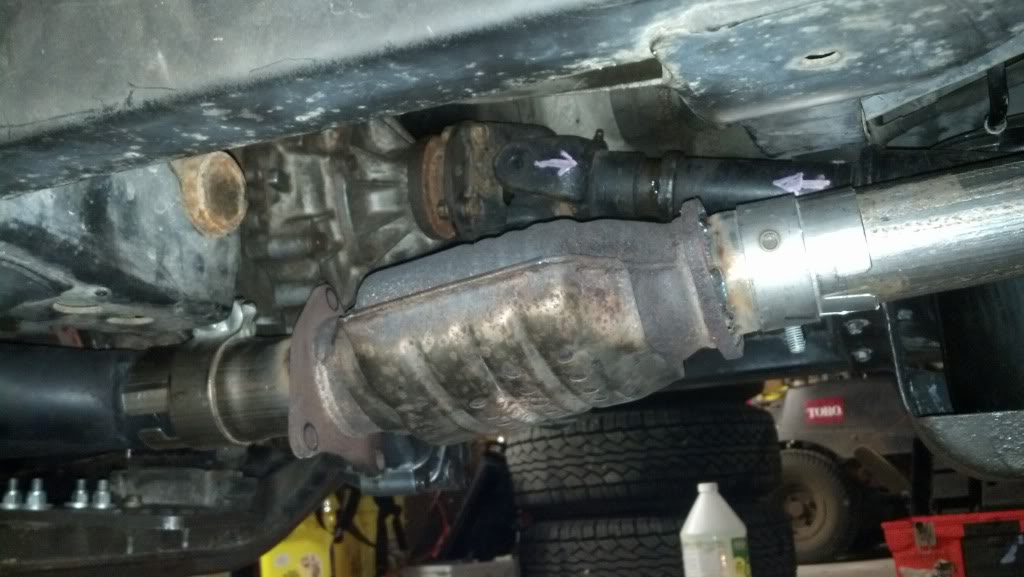
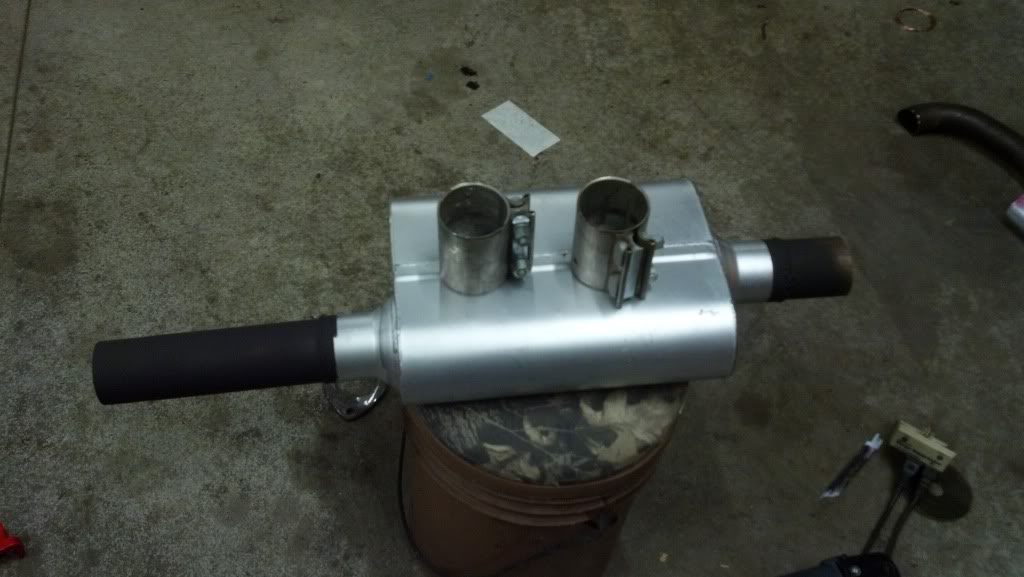
muffler:
together:

pie slicing:

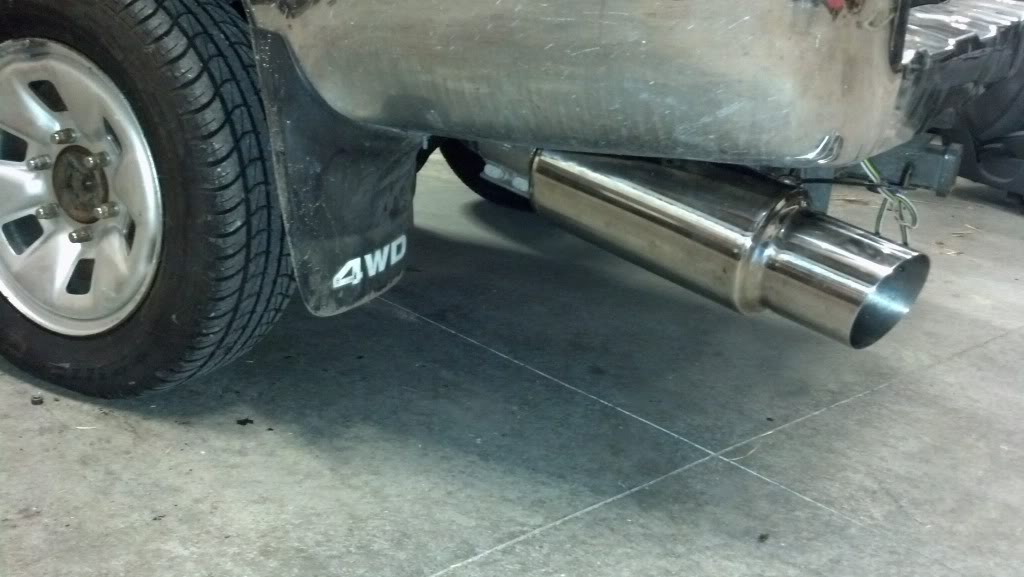
and last but not least the fart can
also notice the factory rubber from the lexus. the tires were in really good shape it would have been a shame to part with them for the $50 i was offered rims and all. i scrapped the rims alone for $60
here also is my shifter linkage around 8 inches
so after all of this i put fluids in it hooked up my battery in my quickly fabbed battery retainer
after a quick dead run for oil pressure i got this

just the y pipe and cat but still not to loud.
now you can look at my fab/install work and say why not go that extra mile.. it comes down to this: in this area we are known as the rust belt eg; everything auto wise goes to ˟˟˟˟ in 5-10 years. im not going for show quality because the truck will be rusted out in 5-10 it is my "winter beater".
i figure i probably have close to 2 grand into this maybe less but it is all worth it as i maintain not having a car payment.
tomorrow i will button everything up i still have to add a pickup to my drive shaft bolts as it does not want to shift to second due to no speed pickup i guess....
i decided why bother trying to make a 4 cyl radiator work when i can order new 3 core from summit...
http://www.summitracing.com/parts/sum-380324/overview/
this is about the best you can find to fit in that area but there was still alot of cutting to get it in there.

i had 1 stop speed shop https://www.facebook.com/1stopSpeedShop cut off the lower inlet and replace it with a 90 degree 1.5 inch bend (the radiator comes with 1.75 inlet)


a great job for a great price $50 out the door..
with the in/outlets located where they are i was able to use the newer ls400 radiator hoses with minor trimming


i also finished up my exhaust minus 1 hanger in the back.
factory lexus catalytic converter in/out size ~2.7 inches. why use flanges when you have slip fittings:

muffler:

together:

pie slicing:


and last but not least the fart can

also notice the factory rubber from the lexus. the tires were in really good shape it would have been a shame to part with them for the $50 i was offered rims and all. i scrapped the rims alone for $60
here also is my shifter linkage around 8 inches

so after all of this i put fluids in it hooked up my battery in my quickly fabbed battery retainer

after a quick dead run for oil pressure i got this
just the y pipe and cat but still not to loud.
now you can look at my fab/install work and say why not go that extra mile.. it comes down to this: in this area we are known as the rust belt eg; everything auto wise goes to ˟˟˟˟ in 5-10 years. im not going for show quality because the truck will be rusted out in 5-10 it is my "winter beater".
i figure i probably have close to 2 grand into this maybe less but it is all worth it as i maintain not having a car payment.
tomorrow i will button everything up i still have to add a pickup to my drive shaft bolts as it does not want to shift to second due to no speed pickup i guess....
Last edited by jmswltn; Oct 13, 2013 at 07:20 PM.
Oct 15, 2013 | 08:08 PM
#7
Thread Starter
Registered User
Joined: Nov 2011
Posts: 72
Likes: 0
From: toledo, oh
as usual with most if not every build things do not always go as planned..
while fitting my speed sensor pickup to read the bolts of the driveshaft,
i found that the transfer case i drove 100 miles to get 4 months ago has a bent output shaft
not saying i didnt possibly do it myself test driving the truck with a pretty snug driveshaft but i figured the half inch i had left in the slip would be fine... not sure but,
thats $300 dollars down the drain
so after calling the local yards and checking a few places on car-part i thought it would be a good idea to look at the other t-cases i have..
low and behold the case behind and r150 is almost the same besides having a beefier input coupler, and top shift instead of forward like the 340f, and quite possibly a bit longer overall.
it bolts up and appears to be fully functional but now i for sure need to shorten my rear drive shaft.
so here is the wrap up for drive shaft mods: minus 5 in the rear plus 5 in the front.
despite all that fun stuff i still could not get the truck to shift to second gear. even after fitting the different t-case.
i did however finally get my check engine light to come on. it appears you have to hook up both black/orange pins to switched ignition (IL1 pin 2 and 12)
i can only assume that other functions of the ecu are also activated when this pin 12 wire is connected but i have not tried to get the trans to shift after that though so maybe that will do it
Last edited by jmswltn; Oct 15, 2013 at 08:31 PM.
Trending Topics
Dec 10, 2013 | 09:55 PM
#8
Thread Starter
Registered User
Joined: Nov 2011
Posts: 72
Likes: 0
From: toledo, oh
simple mistakes will screw you up..
i got the trans to shift finally after hooking a few more wires from harness to harness mainly the spd wire from the cluster going into the computer. in addition to this i also had the 1st gear wire hooked to the cor trigger same color same harness
basically it will leave you in first gear..
now the trans did shift but it would behave erratically at times.
. reverse would go in and out when moving
.1st gear would go back and forth to overdrive
currently i am only running the speed input from the 4 tooth reluctor wheel mounted were the front driveshaft would go on the t-case because my speedometer gave out going down the highway.
this caused my trans to not shift again but lucky for me i had the wheel mounted already for testing purposes so a quick switch to 4wd and i was going again.
after the speedometer incident i had noticed my shifting issues were gone so i decided i should go with an electric speedo conversion
i will be doing a write up soon but all in all its pretty dang easy. just get the cluster add a few wires run to speed sensor.
but the speed sensor is tricky if you have a chain driven case because it takes the fatter speed sensor. after a bit of research i found they put the sensor itself in many different vehicles for nearly 30 years. so i found a pretty clean 93 corolla and plucked its sensor. now being a bit of a cautious experimenter i went over to the 4runner in the same yard that had the same case i am using to check it for fitment. fits pretty good but the geared end is smaller/less teeth. the good thing was the 4runner gear and shaft was same diameter as the corolla and had the same snap ring groove. the bad it was to long and had a different inner bore, nothing a cut off wheel couldnt fix.
now i ran everything soldered and heat shrinked together from the fsm of both the lexus and the 4runner. they share the same sensor pig tail no problem...WRONG!!!
BIG PROBLEM!!
the lexus pinout at the pig tail is all backwards.
this caused a lot of smoke from my newly acquired cluster.
i will admit i was a bit upset from this but i trucked on removing the cluster to see what had caused the nasty cloud of electric death.
ahh it was the cluster ground to speed sensor ground, it got super hot.. enough to separate it a little bit from the plastiboard but not real bad. after disconnecting the sensor i fired it back up and all is working
well after looking at the lexus colors on the pigtail i found my answer. after i repinned it i hooked it back to the sensor and nothing. so i tried another sensor i had from the w55 a couple spins of the gear and it was moving the speedo. awesome just fried the sensor so off to the bone yard tomorrow to get another.
oh ya and estimated mileage is 12.2.. yuck, i have to figure that out
i got the trans to shift finally after hooking a few more wires from harness to harness mainly the spd wire from the cluster going into the computer. in addition to this i also had the 1st gear wire hooked to the cor trigger same color same harness
basically it will leave you in first gear..
now the trans did shift but it would behave erratically at times.
. reverse would go in and out when moving
.1st gear would go back and forth to overdrive
currently i am only running the speed input from the 4 tooth reluctor wheel mounted were the front driveshaft would go on the t-case because my speedometer gave out going down the highway.
this caused my trans to not shift again but lucky for me i had the wheel mounted already for testing purposes so a quick switch to 4wd and i was going again.
after the speedometer incident i had noticed my shifting issues were gone so i decided i should go with an electric speedo conversion
i will be doing a write up soon but all in all its pretty dang easy. just get the cluster add a few wires run to speed sensor.
but the speed sensor is tricky if you have a chain driven case because it takes the fatter speed sensor. after a bit of research i found they put the sensor itself in many different vehicles for nearly 30 years. so i found a pretty clean 93 corolla and plucked its sensor. now being a bit of a cautious experimenter i went over to the 4runner in the same yard that had the same case i am using to check it for fitment. fits pretty good but the geared end is smaller/less teeth. the good thing was the 4runner gear and shaft was same diameter as the corolla and had the same snap ring groove. the bad it was to long and had a different inner bore, nothing a cut off wheel couldnt fix.
now i ran everything soldered and heat shrinked together from the fsm of both the lexus and the 4runner. they share the same sensor pig tail no problem...WRONG!!!
BIG PROBLEM!!
the lexus pinout at the pig tail is all backwards.
this caused a lot of smoke from my newly acquired cluster.
i will admit i was a bit upset from this but i trucked on removing the cluster to see what had caused the nasty cloud of electric death.
ahh it was the cluster ground to speed sensor ground, it got super hot.. enough to separate it a little bit from the plastiboard but not real bad. after disconnecting the sensor i fired it back up and all is working
well after looking at the lexus colors on the pigtail i found my answer. after i repinned it i hooked it back to the sensor and nothing.
so i tried another sensor i had from the w55 a couple spins of the gear and it was moving the speedo. awesome just fried the sensor so off to the bone yard tomorrow to get another.oh ya and estimated mileage is 12.2.. yuck, i have to figure that out
Dec 10, 2013 | 11:24 PM
#9
Well so far, ....dayummmm this is entertaining! Nice work and great attitude, man!
Entertaining this swap, so I need all the "drama episodes" stories I can get! Just to keep things in perspective, ya know? Lol.....
Buddy is suggesting I do the 1GR OR WHATEVER thw newer 4.0 V6 is called (it's on my thread, just escaping me atm. Haha. )... Problem, .....I am in C.A.R.B.-CALIFORNIA! Lol.... Not sure we can go more than 7 years apart from original motor to swap motor. Ima have ti get allll that 1st.
One thing is for certain... The longer I wait, nasty the regulations are going to get. So gutsy, innovative guys like you are getting me motivated! Hahaha.
Edit: 12.2 mpg? Eeek.
Dec 11, 2013 | 05:32 AM
#10
Thread Starter
Registered User
Joined: Nov 2011
Posts: 72
Likes: 0
From: toledo, oh
Ya 12.2... factory computer, old oxygen sensors one of which is locked in the lean position. As well as running the factory auto trans.
I think a lot of the fuel goes into the factory fuel and ignition map
It goes really rich at 3000 rpm when at 1/3 throttle or more, around 10.5:1 most times.
To make matters worse lexus retards the timing between shifts and has a shift shock reducing solenoid. So it shifts really smooth but at a cost.
To add to the drama the rectifier in my alternator spontaniously caught fire driving down the road. It probably would have been a normal fail had I fused the output line instead of connecting it directly to the battery
Apr 18, 2014 | 08:36 PM
#11
Thread Starter
Registered User
Joined: Nov 2011
Posts: 72
Likes: 0
From: toledo, oh
I added new oxygen sensors, still get 14.7 all hwy around 12.3 still city. only thing left is knock sensors. finally got cruise hooked up have around 5000 miles on it now. it starts well, runs pretty well despite still have weird extra/rich fuel fluctuations during automatic shifting and above 3k rpm. i should never see 10:1 afr like i do sometimes.
Nov 13, 2014 | 07:38 AM
#12
Thread Starter
Registered User
Joined: Nov 2011
Posts: 72
Likes: 0
From: toledo, oh
nothing really new to post here still runs,drives,sounds amazing, and of course drinks fuel like its leaking lol. I have started and ran it on megasquirt through the stock harness. with manual shifting through a 4 position rotary switch. as with every project life has gotten in the way so it has stayed running on the stock computer till i find time to sort the shifting thing. suprastick is sounding pretty good.
either way any questions can be sent over to my email jmswltn@ymail.com
either way any questions can be sent over to my email jmswltn@ymail.com

Thread
Thread Starter
Forum
Replies
Last Post
voiddweller
86-95 Trucks & 4Runners (Build-Up Section)
19
May 2, 2016 09:10 PM
TheManOutside
95.5-2004 Tacomas & 96-2002 4Runners
0
Jun 18, 2015 03:32 PM


