
Offroad/camping/utility-all in one trailer build


 Aug 25, 2013 | 12:25 PM
#63
Thread Starter
Registered User
iTrader: (2)
Joined: Sep 2010
Posts: 2,716
Likes: 7
From: Tri-Cities, Wa
As a side note I'm going to take your advice and add the other link to the axel like you were talking about to prevent the axel from twisting, I was looking at some pics and that make a lot more sense, don't know why I didn't go that way to begin with, lol.
For your trailer, it might be more cost efficient to reinforce the existing frame work than building one from scratch, that is if you can make it work and still meet your needs.
Not exactly sure what you were asking about the cheat rails?
Last edited by rustED; Aug 25, 2013 at 12:29 PM.
Aug 25, 2013 | 03:31 PM
#64
Registered User
Joined: Aug 2010
Posts: 277
Likes: 1
From: Victorville, CA
Aug 25, 2013 | 07:38 PM
#65
Thread Starter
Registered User
iTrader: (2)
Joined: Sep 2010
Posts: 2,716
Likes: 7
From: Tri-Cities, Wa
http://www.sierra4x4trailers.com/wp-..._n-300x225.jpg
I really like Dirtco's trailer build, that was partly what inspired me to build mine.... I might have to give his build thread on here a bump, I haven't seen him give any updates in awhile, lol.
Last edited by rustED; Aug 26, 2013 at 07:32 PM.
Sep 2, 2013 | 09:14 PM
#66
Thread Starter
Registered User
iTrader: (2)
Joined: Sep 2010
Posts: 2,716
Likes: 7
From: Tri-Cities, Wa
Yesterday, I reworked and trimmed the bottom edge of my tailgate where it was binding up, now it opens like it should. Today I started mounting the tailgate stops, but ran into a snag.
^^^ after mounting the stop, I could only close the tailgate to this point (sorry about the crappy cellphone pic) and the stop would hit the tailgate. So I ended up shortening the top part of the stop by 1" then I added the 1" piece to the other side of the stop, lengthening it
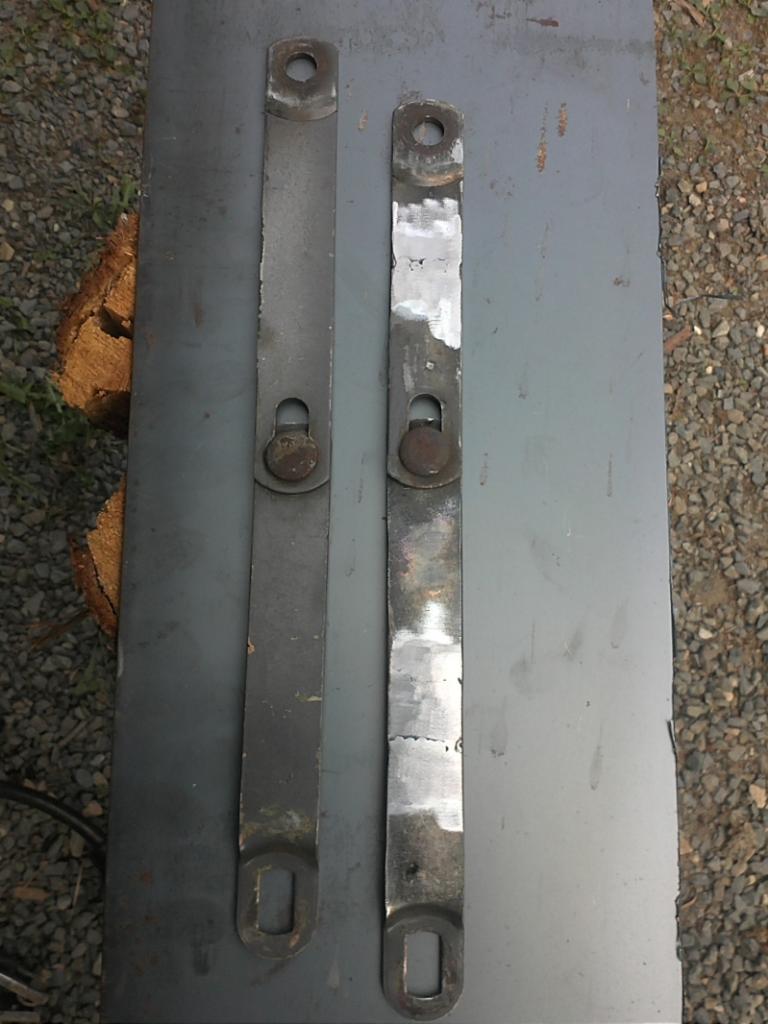
^^^ here is a comparision pic of the stop after modifying it
^^^here is one side finished, it opens and closes nice now.

^^^ after mounting the stop, I could only close the tailgate to this point (sorry about the crappy cellphone pic) and the stop would hit the tailgate. So I ended up shortening the top part of the stop by 1" then I added the 1" piece to the other side of the stop, lengthening it

^^^ here is a comparision pic of the stop after modifying it

^^^here is one side finished, it opens and closes nice now.
Last edited by rustED; Sep 2, 2013 at 09:24 PM.
Sep 3, 2013 | 07:01 PM
#68
Thread Starter
Registered User
iTrader: (2)
Joined: Sep 2010
Posts: 2,716
Likes: 7
From: Tri-Cities, Wa
Thanks bud, yeah it seems like it's always the unforeseen little stuff that ends up taking up the most time, I had the entire tailgate assembly (latching mechanism, tailgate stops, hinges etc) planned out in my head as to how I was going to build them, and expected to have the tailgate completed in one afternoon....well you see how that went, lol.
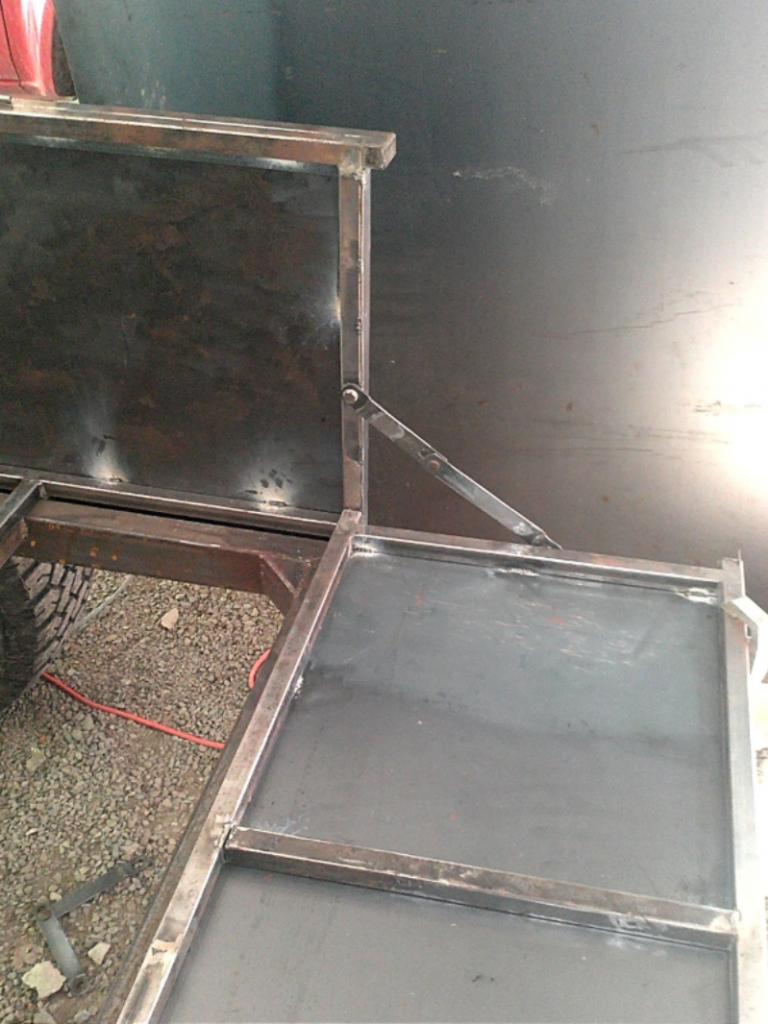
I got a little done on the latching mechanism today, basically I'm going to have a handle that turns and pulls on the cables (one for each side) in turn that pulls the spring loaded pin and unlatches.
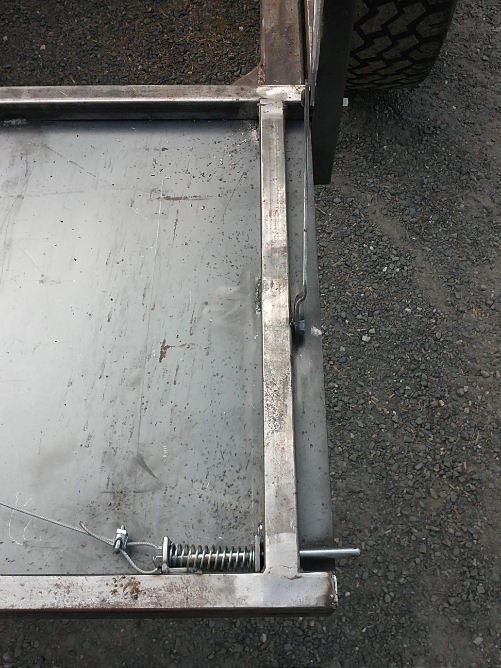
^^^got one side finished...
^^^ I need to find some different bolts for the tailgate stops, these were just for mock up, I need ones with a lower profile head, maybe an (allen head)...
I originally was going to have a locking "T" handle (like off a canopy) for the tailgate handle, but decided to just simplify and just have a handle on the inside of the tailgate. Once I have the hard tonneau cover built and it's locked you wouldn't be able to open the tailgate anyway.
I have enough sheetmetal to cover the inside of the tailgate and hide all the inner workings when I'm finished, I'm just going to use self tapping screws that way it will be easy to run the wiring for my taillights, license plate light, etc.
I got a little done on the latching mechanism today, basically I'm going to have a handle that turns and pulls on the cables (one for each side) in turn that pulls the spring loaded pin and unlatches.

^^^got one side finished...

^^^ I need to find some different bolts for the tailgate stops, these were just for mock up, I need ones with a lower profile head, maybe an (allen head)...
I originally was going to have a locking "T" handle (like off a canopy) for the tailgate handle, but decided to just simplify and just have a handle on the inside of the tailgate. Once I have the hard tonneau cover built and it's locked you wouldn't be able to open the tailgate anyway.
I have enough sheetmetal to cover the inside of the tailgate and hide all the inner workings when I'm finished, I'm just going to use self tapping screws that way it will be easy to run the wiring for my taillights, license plate light, etc.
Last edited by rustED; Sep 3, 2013 at 07:19 PM.
Sep 3, 2013 | 07:39 PM
#69
Thread Starter
Registered User
iTrader: (2)
Joined: Sep 2010
Posts: 2,716
Likes: 7
From: Tri-Cities, Wa
*list update*
1.) build mounts on the 1" frame work and also on the trailer frame (i don't wont to drill into the trailer frame if i don't have to so i'll probably build some tabs to mount the bed/box to.
2.) cut out the 14 gage sheetmetal into the size panels i need and tack them in place. *done*
3.) build the tail gate frame work out of 1" square tube, i have just enough left over to do this *done*
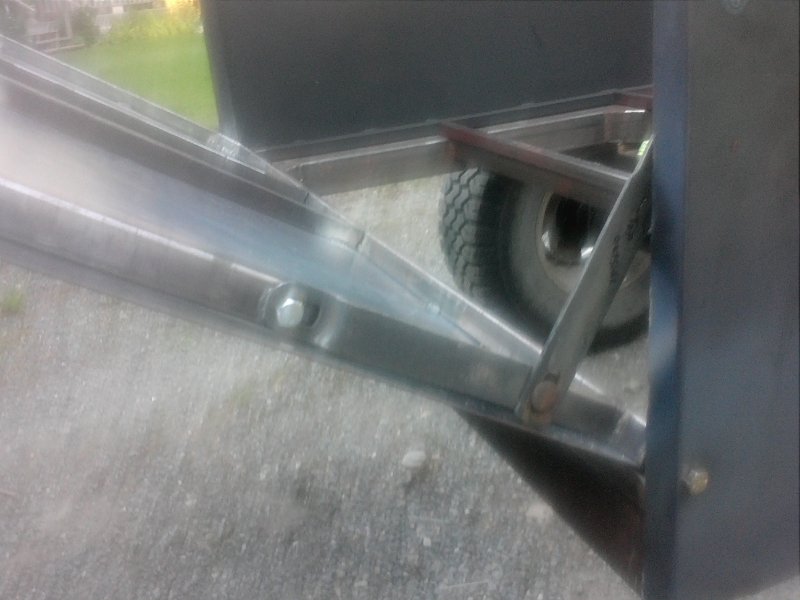
4.) get some more welding wire and attach the trailer tongue, add gussets and reinforce the area where it attaches to the main trailer frame. *tailer tongue attached, need to finish gussets*
5.) finish up all the final welding on the trailer frame, then prime and paint... I would like to use por15, but not sure if it's in the budget at this time.
6.) mount the firestone air bags
7.) decide on whether to build trailer fenders or just buy some
8.) build a lockable hard top cover for it
9.) paint the body red to match my 4runner (fenders and hard top black)
10.) *need to buy trailer wiring harness, taillights, side marker lights, lisence plate light, more stuff...*
will update as things are completed
1.) build mounts on the 1" frame work and also on the trailer frame (i don't wont to drill into the trailer frame if i don't have to so i'll probably build some tabs to mount the bed/box to.
2.) cut out the 14 gage sheetmetal into the size panels i need and tack them in place. *done*
3.) build the tail gate frame work out of 1" square tube, i have just enough left over to do this *done*
4.) get some more welding wire and attach the trailer tongue, add gussets and reinforce the area where it attaches to the main trailer frame. *tailer tongue attached, need to finish gussets*
5.) finish up all the final welding on the trailer frame, then prime and paint... I would like to use por15, but not sure if it's in the budget at this time.
6.) mount the firestone air bags
7.) decide on whether to build trailer fenders or just buy some
8.) build a lockable hard top cover for it
9.) paint the body red to match my 4runner (fenders and hard top black)
10.) *need to buy trailer wiring harness, taillights, side marker lights, lisence plate light, more stuff...*
Last edited by rustED; Sep 3, 2013 at 07:47 PM.
Sep 3, 2013 | 10:05 PM
#71
Thread Starter
Registered User
iTrader: (2)
Joined: Sep 2010
Posts: 2,716
Likes: 7
From: Tri-Cities, Wa
LOL, I'm horrible with remembering the correct names of parts and components... everything is either a dew-hicky or thing-ama-jig, lol.
Sep 4, 2013 | 05:21 AM
#72
Registered User
Joined: Sep 2012
Posts: 618
Likes: 0
From: iowa
Haha I hear ya, the only reason I know is because I'm a toolmaker and that's what we use on dies. It got burned into my head when I went to school. Another thing we learned at school is that all "bolts" are technically screws, until u put a nut on them. Then they are bolts lol. Uh, another thing i just thought of that may be useful to u would be a socket head stripper screw. They have an "allen" head and a solid shaft with threads at the very end. That way your springs would have a shaft to ride on rather than threads. It may make the whole mechanism function smoother.
Sep 16, 2013 | 02:15 PM
#73
Thread Starter
Registered User
iTrader: (2)
Joined: Sep 2010
Posts: 2,716
Likes: 7
From: Tri-Cities, Wa
Haha I hear ya, the only reason I know is because I'm a toolmaker and that's what we use on dies. It got burned into my head when I went to school. Another thing we learned at school is that all "bolts" are technically screws, until u put a nut on them. Then they are bolts lol. Uh, another thing i just thought of that may be useful to u would be a socket head stripper screw. They have an "allen" head and a solid shaft with threads at the very end. That way your springs would have a shaft to ride on rather than threads. It may make the whole mechanism function smoother.
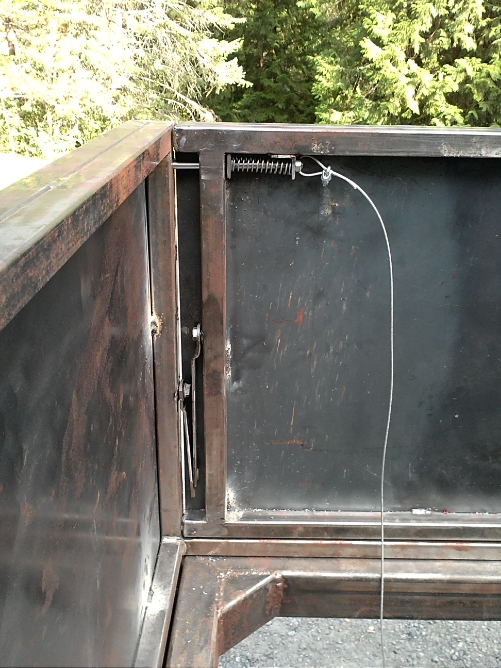
I finished up the latching mechanism the other day, I ended up stealing a "T" handle off my old canopy for now. For the cables to actuate the latches I used some coated cable I had, it worked good because it was a straight shot into the other side of the T handle, but for the other side the cable would have rubbed, and eventually frayed the cable, so I ended up using a bicycle hand brake cable, worked out really good. I didn't get any pics of the setup, but can take some if anyone is interested.


I also made the recessed area where the license plate will go, I plan on adding a LED light into it later. Now I just need to finish up welding some seams, and also need to modify the other tailgate stop and the tailgate will be finished. It's pretty heavy, probably as heavy as a full size pickup tailgate, but over all I'm pretty happy with how it turned out.


Last edited by rustED; Sep 16, 2013 at 05:18 PM.
Sep 16, 2013 | 04:24 PM
#75
Thread Starter
Registered User
iTrader: (2)
Joined: Sep 2010
Posts: 2,716
Likes: 7
From: Tri-Cities, Wa
thanks... ha, ha, ...well I built the main part of the trailer frame in the spring of 2012, then it was put on hold when I started building my 4runner. Then I started working on it again in March of this year, so yeah it's this last bit has taken me the better part of 6mths, a lot longer than I expected, lol, I had hoped to get some use out of it this summer, but now I just hope to get a cheap paint job on it before winter hits to keep it from rusting!
Oct 8, 2013 | 04:49 PM
#78
Thread Starter
Registered User
iTrader: (2)
Joined: Sep 2010
Posts: 2,716
Likes: 7
From: Tri-Cities, Wa
Thanks guys, sorry but I haven't worked on the trailer very much lately, the weather has gotten cold and rainy, (I think fall is definitely here!) I got a little primer sprayed down today just before it rained. I also got the sheetmetal cut out for the floor, and got it laid down and fitted into place, still need to weld up a bunch of seams... honestly, I don't see me getting much done on it this winter, might just put the project on hold till spring 


