
Dirtco's 1999 4Runner Build-Up Thread

 Sep 11, 2011 | 06:27 PM
#282
Thread Starter
Registered User
Joined: May 2007
Posts: 1,441
Likes: 0
From: Summit County, Colorado
 Sep 11, 2011 | 06:48 PM
#283
Thread Starter
Registered User
Joined: May 2007
Posts: 1,441
Likes: 0
From: Summit County, Colorado
if you look back at the pics, you can see that he ordered them from superbrightleds.com... 
man, awesome work... i wish that i could just come watch you while you fab this stuff... i know that you'd prolly say its pretty boring, but geez, its gorgeous and intriguing to me...
man, awesome work... i wish that i could just come watch you while you fab this stuff... i know that you'd prolly say its pretty boring, but geez, its gorgeous and intriguing to me...
Sep 12, 2011 | 10:49 AM
#284
Registered User
Joined: Feb 2010
Posts: 301
Likes: 0
From: Southern California
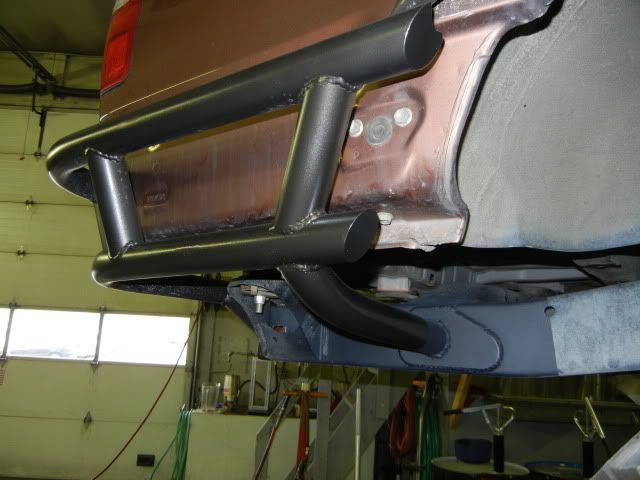
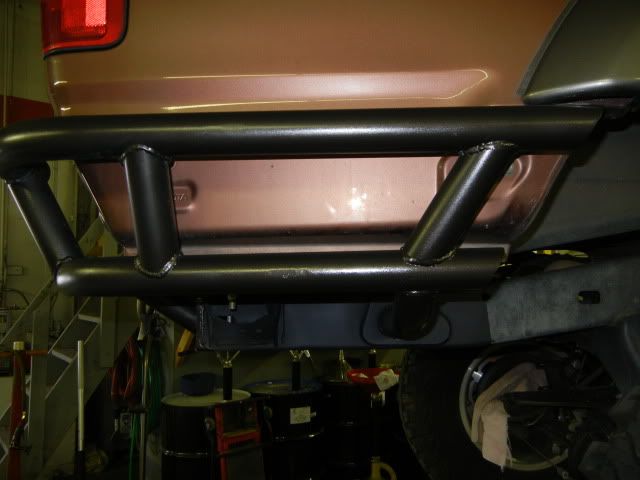
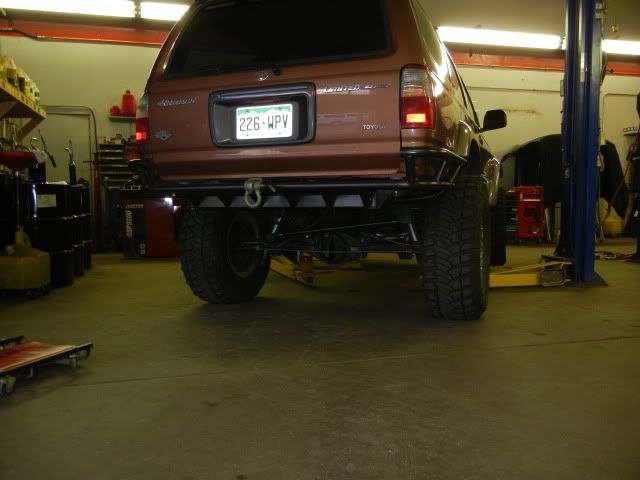
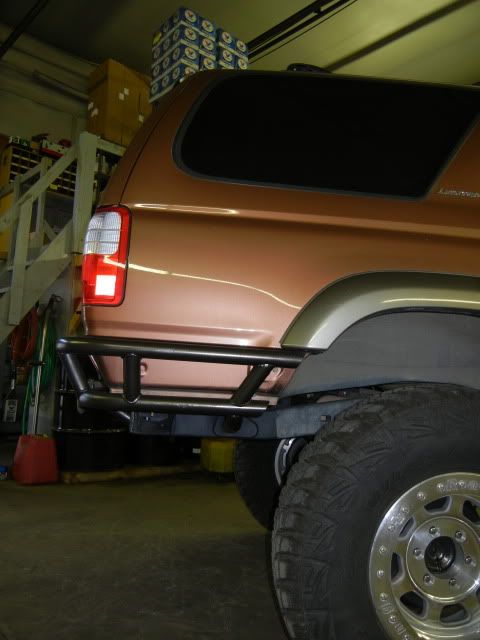
That rear bumper is amazing. Its pretty much exactly what I was imagining for my 2nd gen 4runner with the factory tire swing out. Due to the hinges from it I cant buy a pre-fabbed bumper. But your design is like perfect!
Well Done!
Well Done!
Sep 12, 2011 | 01:19 PM
#285
Registered User

Joined: Jan 2010
Posts: 953
Likes: 21
From: Imperial County CA
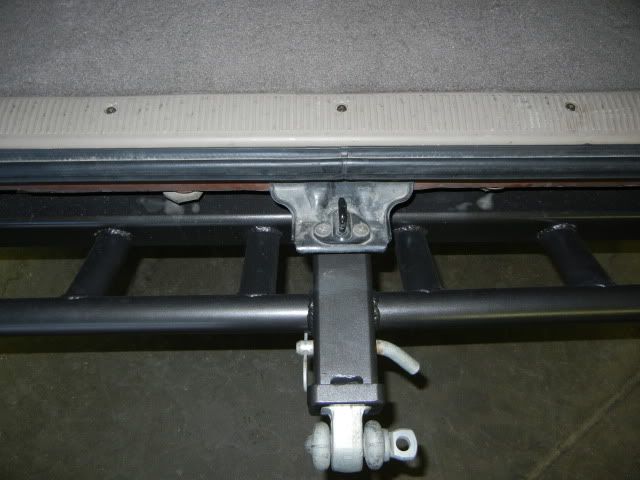
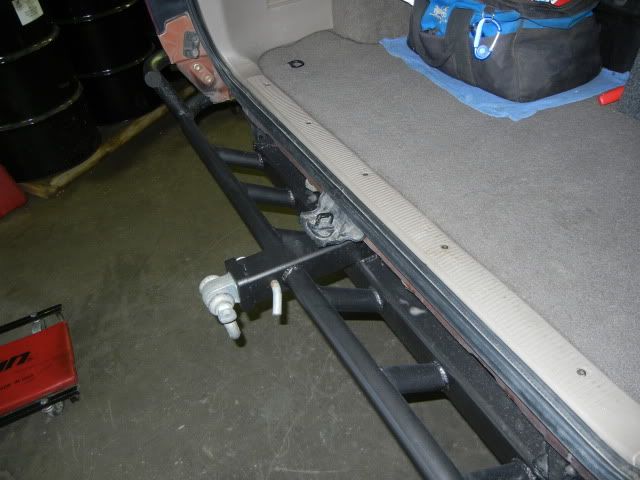
Could you take a picture of your tailgate latch area looks with the tailgate open? I'm curious how that looks.
Also did your rear end drop with the added weight of the bumper? How heavy did it wind up being?
Once again it looks really great. Plus now if someone rear ends you they have a totalled car and you have a couple scratches to touch up.
Also did your rear end drop with the added weight of the bumper? How heavy did it wind up being?
Once again it looks really great. Plus now if someone rear ends you they have a totalled car and you have a couple scratches to touch up.
Sep 16, 2011 | 06:38 PM
#286
Thread Starter
Registered User
Joined: May 2007
Posts: 1,441
Likes: 0
From: Summit County, Colorado
Could you take a picture of your tailgate latch area looks with the tailgate open? I'm curious how that looks.
Also did your rear end drop with the added weight of the bumper? How heavy did it wind up being?
Once again it looks really great. Plus now if someone rear ends you they have a totalled car and you have a couple scratches to touch up.
Also did your rear end drop with the added weight of the bumper? How heavy did it wind up being?
Once again it looks really great. Plus now if someone rear ends you they have a totalled car and you have a couple scratches to touch up.
Here are a couple pictures with the tailgate open

 Sep 16, 2011 | 07:04 PM
#287
Thread Starter
Registered User
Joined: May 2007
Posts: 1,441
Likes: 0
From: Summit County, Colorado
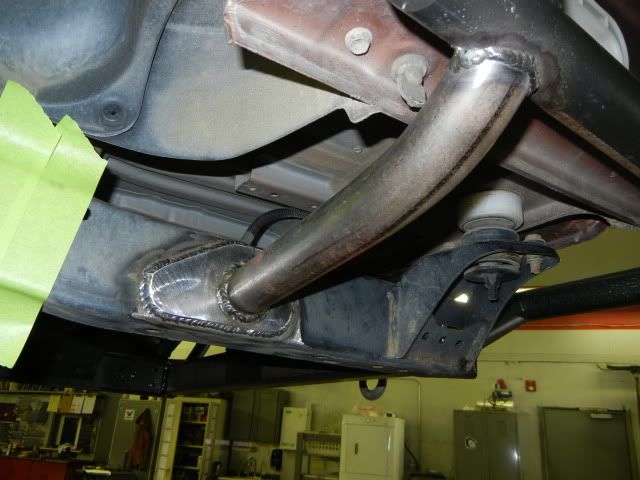
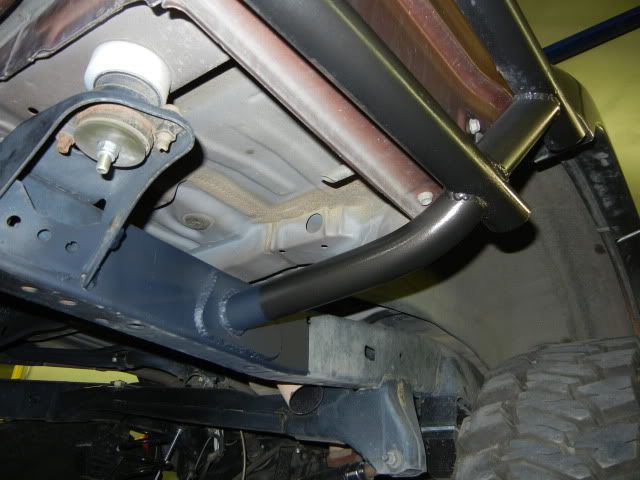
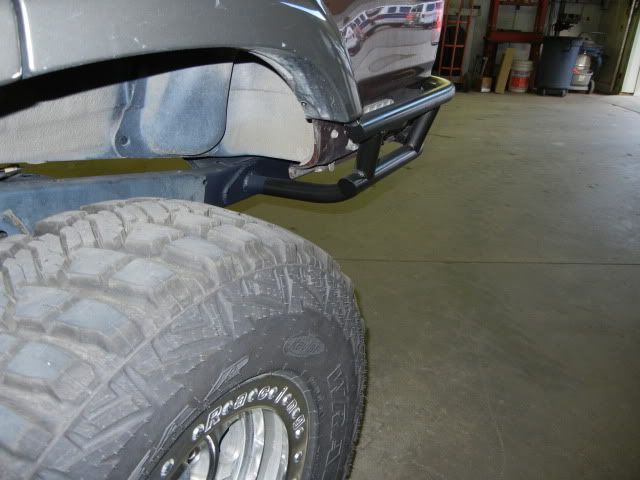
Before I started on the side braces I needed to do something about the exhaust. I plan on routing it above the frame and having it exit by the bumper. While I�m not ready to take on that project, it was still in the way and looked horrible. Not to mention the first time I go wheeling it will get caught on something. So I broke out the sawzall
Before


After

Before
After

 Sep 16, 2011 | 07:36 PM
#289
Thread Starter
Registered User
Joined: May 2007
Posts: 1,441
Likes: 0
From: Summit County, Colorado
Then I cut/fit the side braces and installed them
I�m really happy how they turned out, all the tubing flows nice and it should be more than strong enough. I still need to brace the inside of the frame rails, but I need to make some other decisions about the build before I do that.

I�m really happy how they turned out, all the tubing flows nice and it should be more than strong enough. I still need to brace the inside of the frame rails, but I need to make some other decisions about the build before I do that.
Sep 17, 2011 | 02:30 PM
#292
Registered User
Joined: Jun 2009
Posts: 572
Likes: 0
From: Virginia Beach, VA
fold down tire carrier coming soon? front bumper plans? oh and another reason I went with a tubular upper control arm was because i don't have the rubbing of the spindle on the coil anymore, and of course it doesn't rub anymore now that i have my bumper and winch up front... you should also do a diff drop to help out the angle of the CV joints. also i don't use my sway bars (i do plan on putting the front one to use once i can build quick disconnects) but the rear sway bar broke off the first time i went wheeling and got tangled in the coils... i've driven the truck up to whistler and back multiple times and to yakima and back (olympia is home base) and i don't feel like the rear sway bar is needed, or atleast its more of a hassle having it on specially when i want to wheel
Sep 17, 2011 | 05:50 PM
#294
Thread Starter
Registered User
Joined: May 2007
Posts: 1,441
Likes: 0
From: Summit County, Colorado
Thanks!
It's Rustolem Hammered spray paint, the label says it's black but it's more of a dark metallic grey with a little texture. It holds up better than any other spray paint I've used and it's easy to touch up.
It's Rustolem Hammered spray paint, the label says it's black but it's more of a dark metallic grey with a little texture. It holds up better than any other spray paint I've used and it's easy to touch up.
Sep 17, 2011 | 06:56 PM
#295
Thread Starter
Registered User
Joined: May 2007
Posts: 1,441
Likes: 0
From: Summit County, Colorado
fold down tire carrier coming soon? front bumper plans? oh and another reason I went with a tubular upper control arm was because i don't have the rubbing of the spindle on the coil anymore, and of course it doesn't rub anymore now that i have my bumper and winch up front... you should also do a diff drop to help out the angle of the CV joints. also i don't use my sway bars (i do plan on putting the front one to use once i can build quick disconnects) but the rear sway bar broke off the first time i went wheeling and got tangled in the coils... i've driven the truck up to whistler and back multiple times and to yakima and back (olympia is home base) and i don't feel like the rear sway bar is needed, or atleast its more of a hassle having it on specially when i want to wheel
I ordered limit straps for the front; if Steve at SS is right about the upper control arm bushings and the lower shock bushing controlling the amount of down travel, the weight of my tires and wheels are going to wear those bushings out in no time. Each wheel is around 35 pounds and with a tire it’s close to 100 pounds, that’s a big difference from stock. I really think they are a good idea with my set-up.
I have a 1” diff drop, it comes with the SS1.2 kit. Thanks for the heads up!
I drove for a couple weeks without the front sway bar and it was scary! I really think it depends on what coils you are running, it seems like the guys w/o sway bars are running the stiffer OME coils. The coils that come in the SS kit are really soft. The kit also comes with rear sway bar drop brackets which I hope that will keep the links from breaking but we will see. I plan on making some sway bar disconnects, but that is down the road because I have more important things to take care of.
I’m not going to have a spare tire carrier on this 4Runner, it adds a lot of weight and makes getting into the cargo area a real PITA. With my beadlock wheels I don’t have to worry about loosing a bead, I also have air and a plug kit so if I get a nail/etc I can fix it. I could tear a sidewall, but that’s very unlikely with the kind of wheeling I will be doing in this rig and the fact I have Kevlar MTR’s (knock on wood
 ). When I’m on longer and/or camping trips I will have the trailer, which has two 35’s on six lug wheels. The trailer will have a smaller spare, or two donuts, depending on space (there’s no room for a full size spare). I can always rob both tires from the trailer, park it on jack stands, and drive to the nearest town to get replacement tires if everything goes to hell.
Last edited by DIRTCO; Sep 17, 2011 at 07:04 PM.


 Sep 17, 2011 | 08:30 PM
#298
Thread Starter
Registered User
Joined: May 2007
Posts: 1,441
Likes: 0
From: Summit County, Colorado
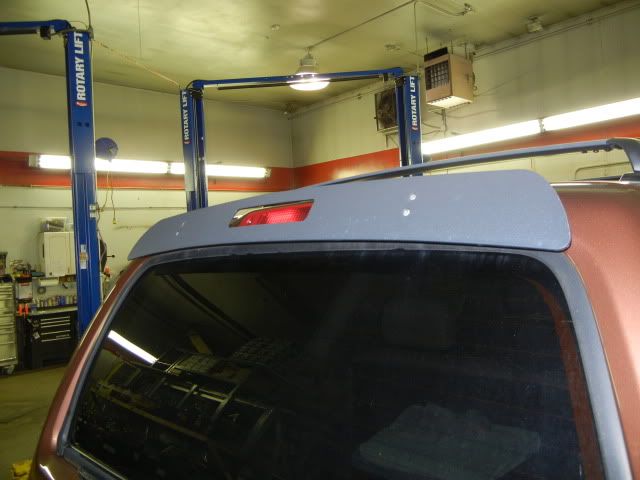
I switched the running light LED�s and turn signals back around to the stock configuration, the lower LED�s are brighter and better suited for a turn signal.
Before

After
Before
After
Sep 17, 2011 | 08:54 PM
#299
Thread Starter
Registered User
Joined: May 2007
Posts: 1,441
Likes: 0
From: Summit County, Colorado
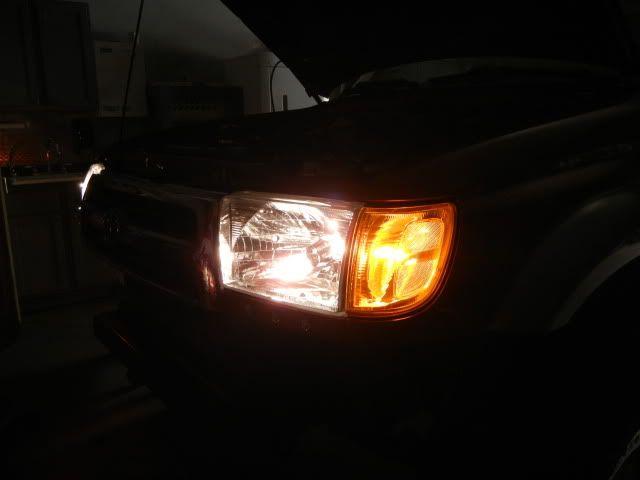
You always need more light when you�re out on the trail or camping, so I added an extra LED light into the rear tailgate.
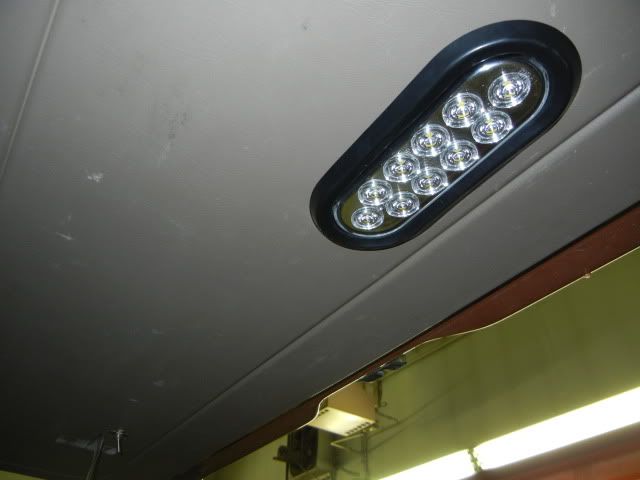
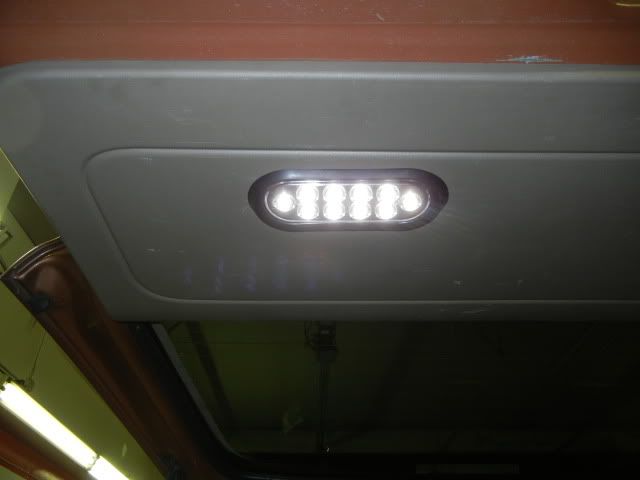

My camera exaggerated the light output, but here is the LED cargo light in the stock housing along with the extra LED light.


My camera exaggerated the light output, but here is the LED cargo light in the stock housing along with the extra LED light.
Sep 17, 2011 | 09:45 PM
#300
That is a great idea for interior lighting. Is that one from superbright led's too?
When I redid my taillights to LED I wanted to do my back up lights with that style but was amazed that the clear/white LEDs were so much more expensive. Your's lOok great, might just suck it up and go that route..
Looking forward to the front bumper
When I redid my taillights to LED I wanted to do my back up lights with that style but was amazed that the clear/white LEDs were so much more expensive. Your's lOok great, might just suck it up and go that route..
Looking forward to the front bumper


