
Dirtco's 1999 4Runner Build-Up Thread
 Sep 6, 2011 | 06:16 PM
#261
Thread Starter
Registered User
Joined: May 2007
Posts: 1,441
Likes: 0
From: Summit County, Colorado
im sure others are having the same issue at full droop but dont say or care bout the noise. heres a picture of a FJ cruiser that came in with some cheap pro comp lift im guess. truck only has 7000 miles and this is what happens when i lifted it on the lift. you can see it hits has well and this is with the correct coils (thickness wise). so even if you slim your coil down, i still think its gonna hit just a little bit later. only thing i can think of would be long travel

Like I said before; I'm not upset at the product (yet), I'm just bummed that I can't take my truck out and I'm frustrated.
 Sep 6, 2011 | 06:31 PM
#262
Thread Starter
Registered User
Joined: May 2007
Posts: 1,441
Likes: 0
From: Summit County, Colorado
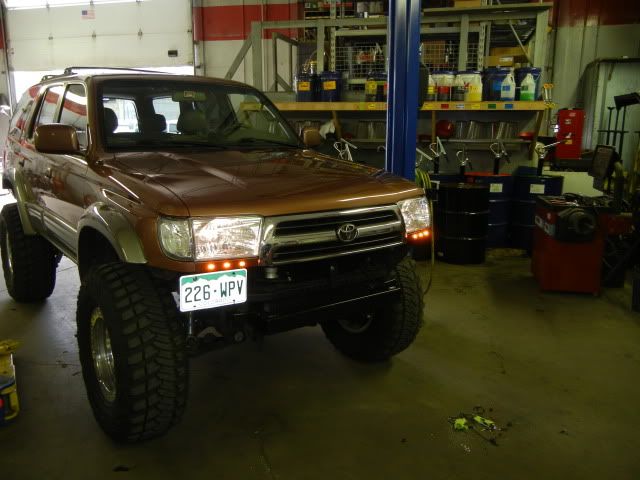
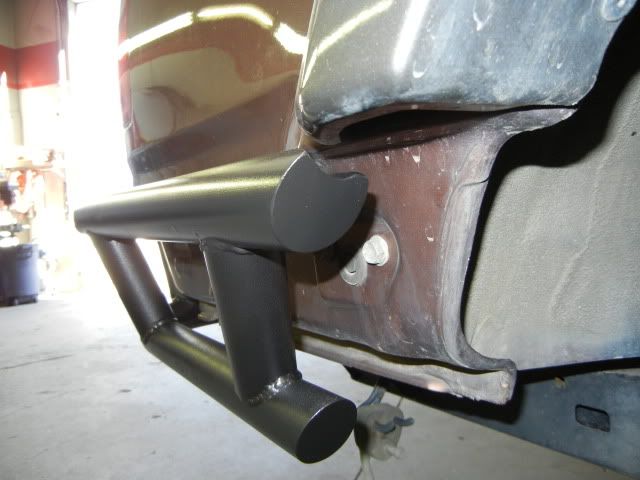
When I took off the front bumper I lost my turn signals. On my last 4Runner I converted the corner marker lights to turn signals using bright LED bulbs and a modified flasher. I decided to do the same thing on this one, so I bought some bulbs and load resistors.
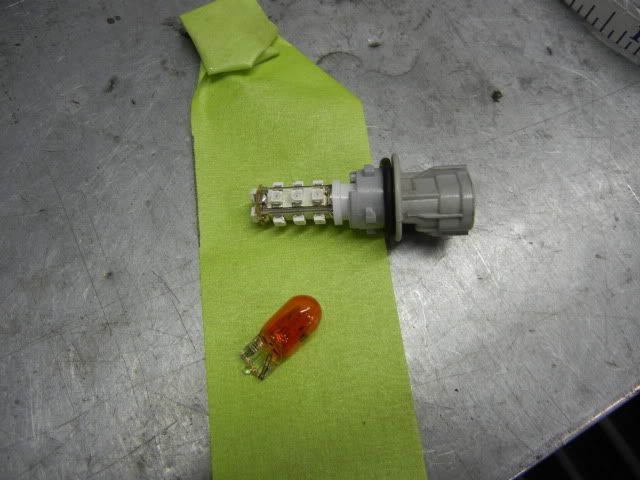

The Turbo 4Runner did not have front marker lights but I figured on this one I should (to keep the police happy). I thought about it for several days, then I saw an Audi that had the LED day time running lights. It gave me an idea.
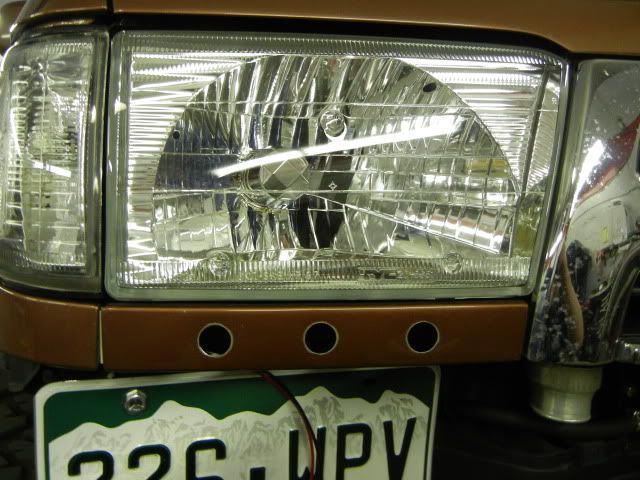
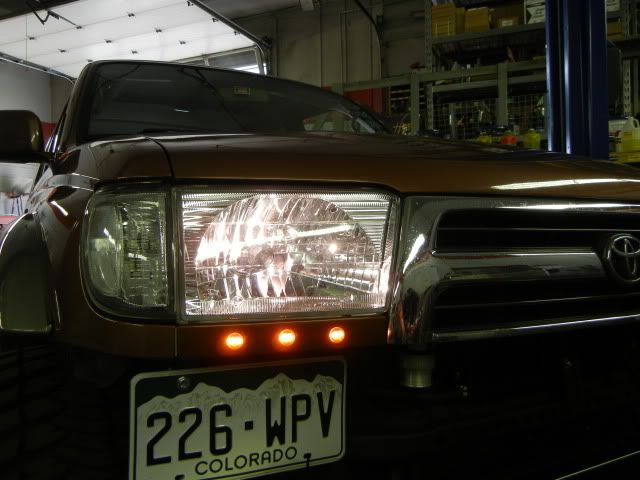
I bought six 1� LED lights that are clear (to match the headlights and clear corners) but have an amber light. I mounted them in the panel below the headlights. I like the way they turned out, but I�m debating switching them back to my turn signals. It seems like the corner markers are not bright enough and people don�t see them all the time. I�m going to give it a week or two, then decide.

The Turbo 4Runner did not have front marker lights but I figured on this one I should (to keep the police happy). I thought about it for several days, then I saw an Audi that had the LED day time running lights. It gave me an idea.
I bought six 1� LED lights that are clear (to match the headlights and clear corners) but have an amber light. I mounted them in the panel below the headlights. I like the way they turned out, but I�m debating switching them back to my turn signals. It seems like the corner markers are not bright enough and people don�t see them all the time. I�m going to give it a week or two, then decide.
 Sep 7, 2011 | 08:03 PM
#265
Thread Starter
Registered User
Joined: May 2007
Posts: 1,441
Likes: 0
From: Summit County, Colorado
I never posted this to bad mouth Steve�s product or SS, or to loose him any business. I was just hoping someone out there had the same issue and could confirm the issue/solution. It would just be nice to know that the weight and setting of the struts is the issue and that there is not something else wrong with the 4Runner, the SS kit, or something else. Like I said before, Steve has been very helpful through this whole situation and this is a new issue to him too. I apologize that a couple of my posts came off with a bad attitude, but this whole IFS stuff is new to me and I really just want to go wheeling and I can�t.
Sep 8, 2011 | 04:54 PM
#266

Registered User
Joined: May 2009
Posts: 11
Likes: 0
From: Queen Creek, AZ
I appreciate your concern and I really didn’t think you were hard on Steve at all. It’s just that there is A LOT to consider when purchasing a lift kit and in my opinion customer service is a huge factor. It’s been hard for me to judge costumer service from SS mostly because this is the 1st issue I have come across.
Sep 8, 2011 | 06:18 PM
#267
Thread Starter
Registered User
Joined: May 2007
Posts: 1,441
Likes: 0
From: Summit County, Colorado
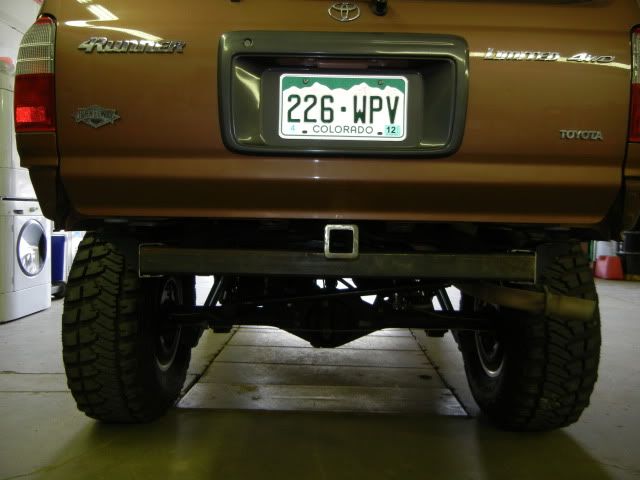
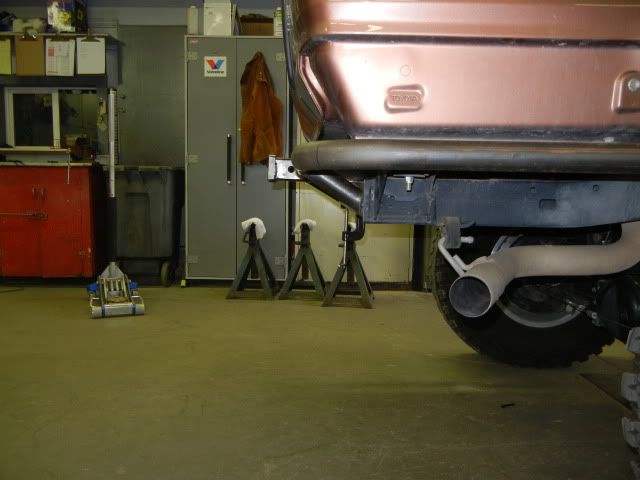
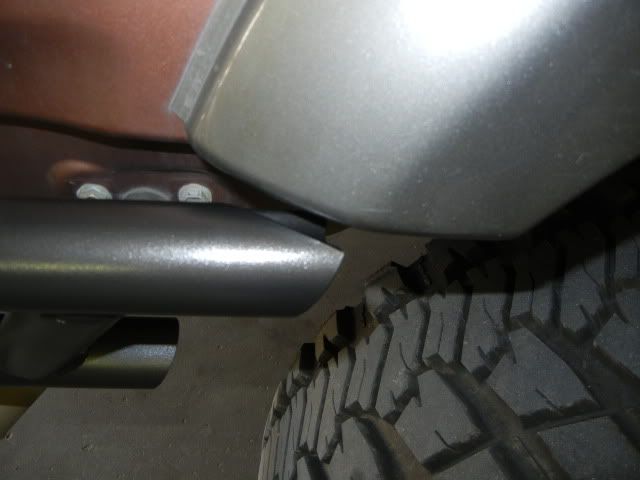
Well, I started working on the rear bumper! I�ve been really worried about someone rear ending me and totaling the 4Runner (especially with winter coming). If I got hit without the factory bumper and hitch it would not be pretty. It�s also a PITA moving the trailer around by hand.
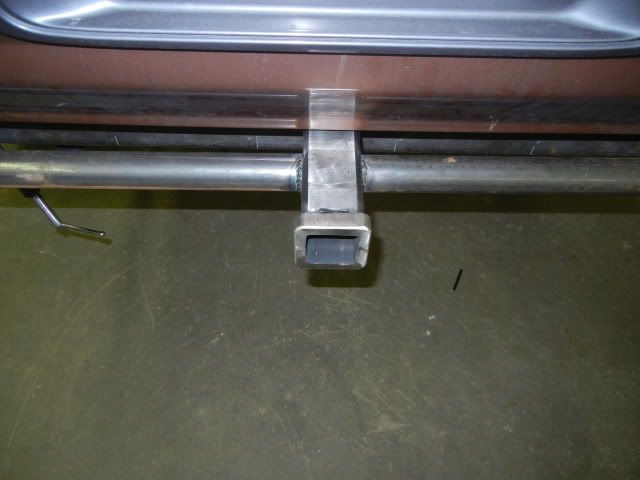
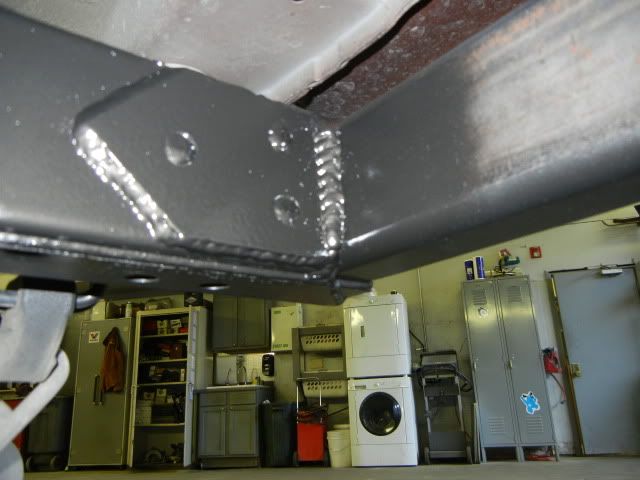
I started with a section of �� wall 2x3� steel, it�s overkill but I got it for free. I would have preferred to use 3/16�.
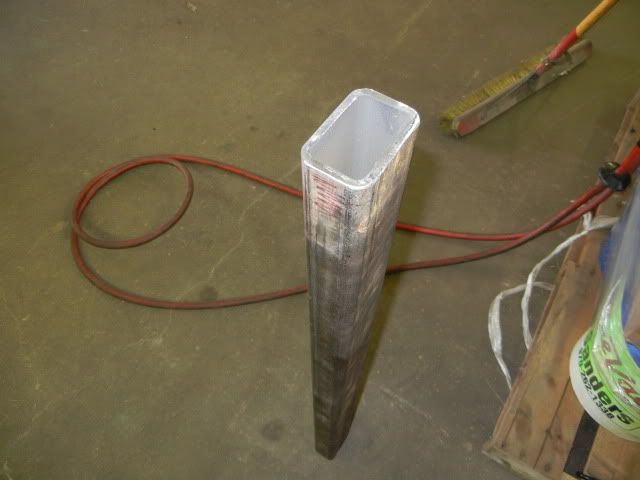
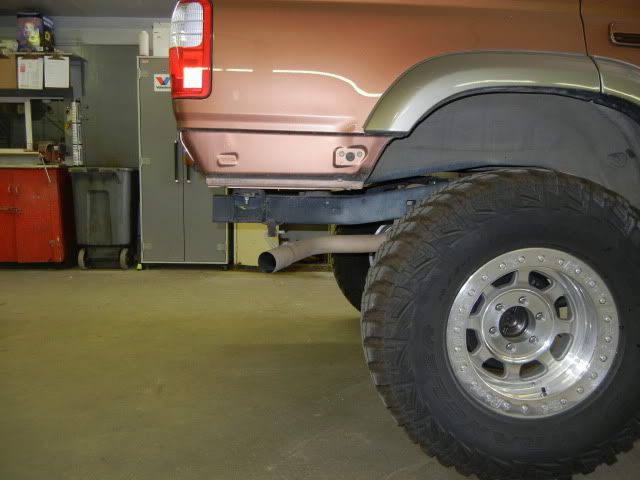
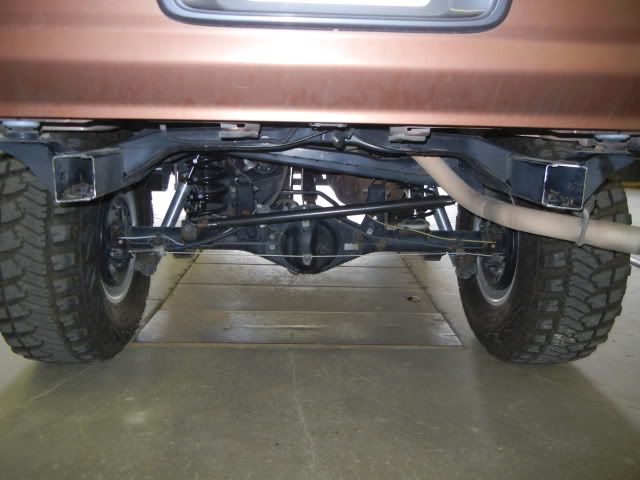
Then it was time to chop down the frame as much as I could. I really hate how low the rear frame section sets on the 3rd Gen 4Runners, it looks stupid and only gets worse with a body lift. I could only go back so far because of the body mounts and the internal bracing.
Before
After
I started with a section of �� wall 2x3� steel, it�s overkill but I got it for free. I would have preferred to use 3/16�.
Then it was time to chop down the frame as much as I could. I really hate how low the rear frame section sets on the 3rd Gen 4Runners, it looks stupid and only gets worse with a body lift. I could only go back so far because of the body mounts and the internal bracing.
Before
After
Sep 8, 2011 | 06:20 PM
#268
Thread Starter
Registered User
Joined: May 2007
Posts: 1,441
Likes: 0
From: Summit County, Colorado
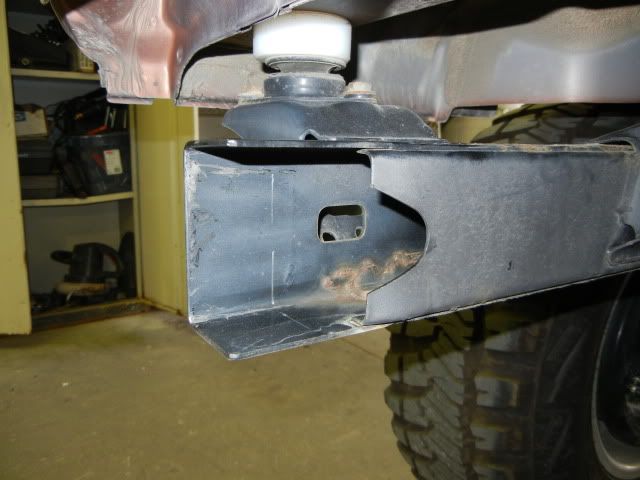
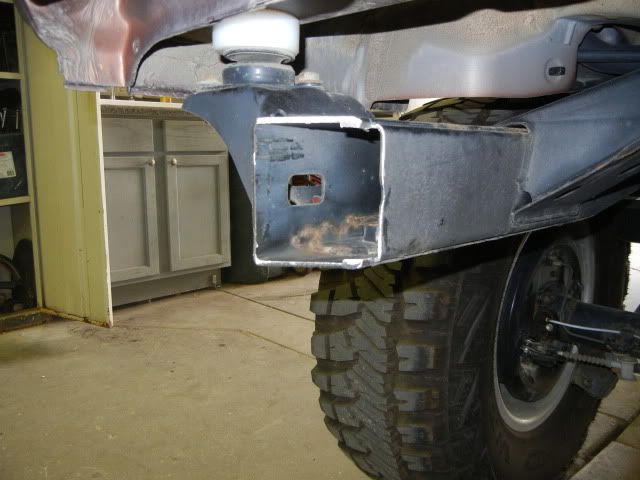
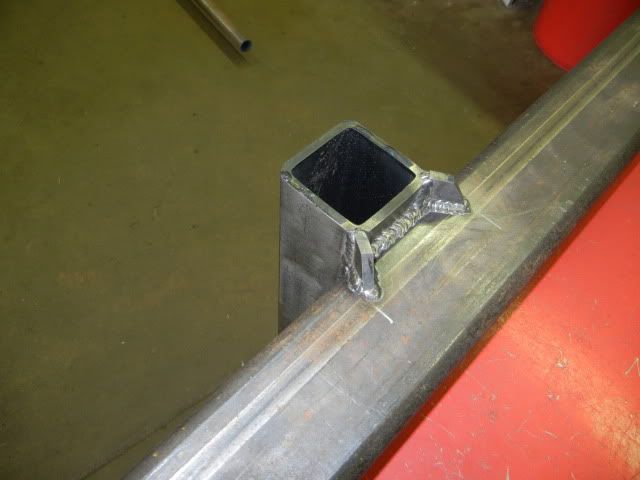
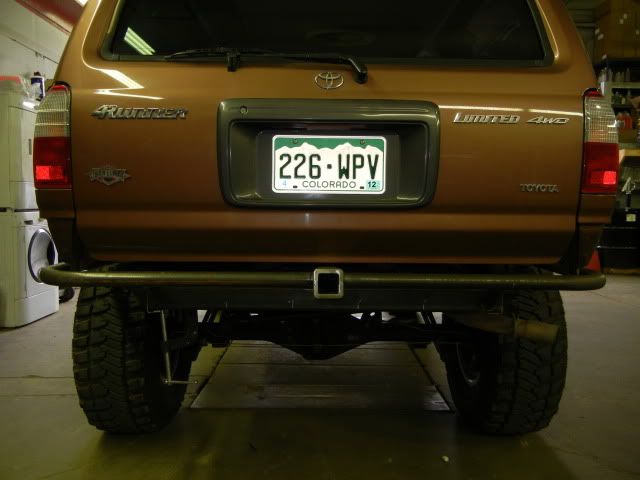
The crossmember will be shimmed for a tight fit, and welded solid.

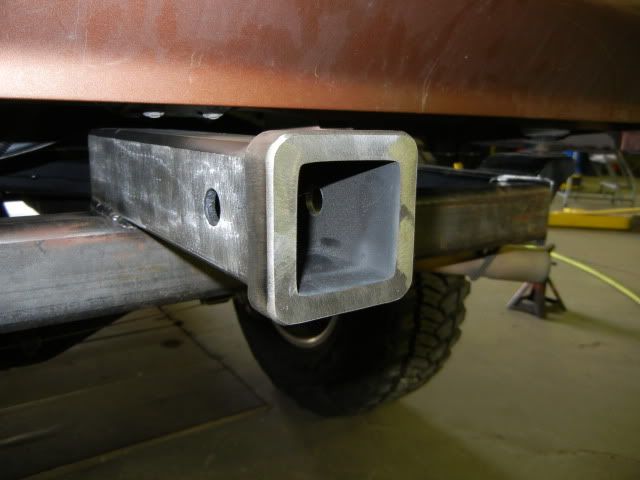
I needed a 2� receiver for towing and recovery duties. It worked perfect to have it set on top of the crossmember. The receiver has a collar on the end for added strength, but it was only welded on the inside and looked like crap, so I finished welding it and smoothed out the harsh edges.
I also added some small gussets to the back of the crossmember for added strength.
Sep 8, 2011 | 06:56 PM
#269
Thread Starter
Registered User
Joined: May 2007
Posts: 1,441
Likes: 0
From: Summit County, Colorado
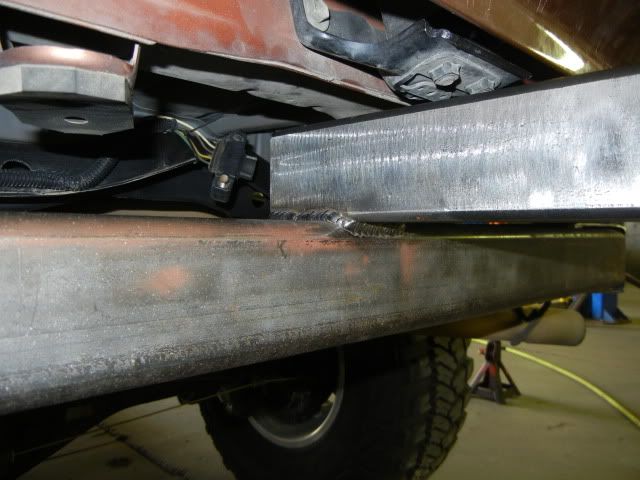
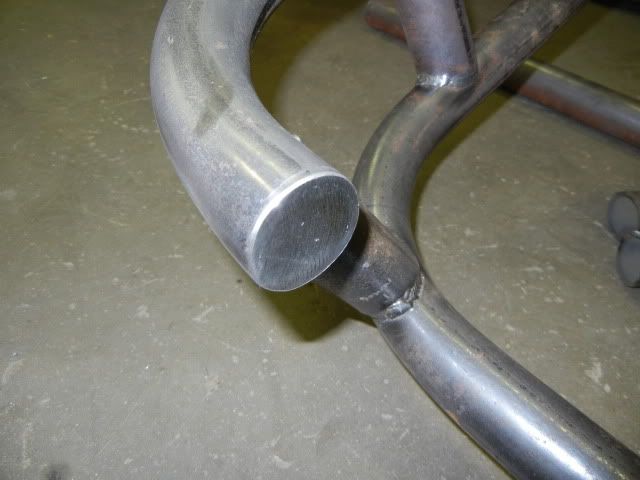
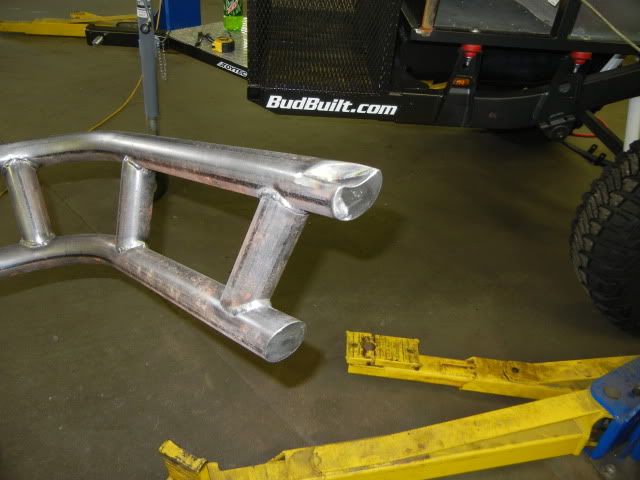
With the rear cross member done I could start playing with some tubing. I wanted the bumper to follow the body lines as much as possible and still have a good amount of protection.
Sep 8, 2011 | 07:29 PM
#270
Thread Starter
Registered User
Joined: May 2007
Posts: 1,441
Likes: 0
From: Summit County, Colorado
And some more work�
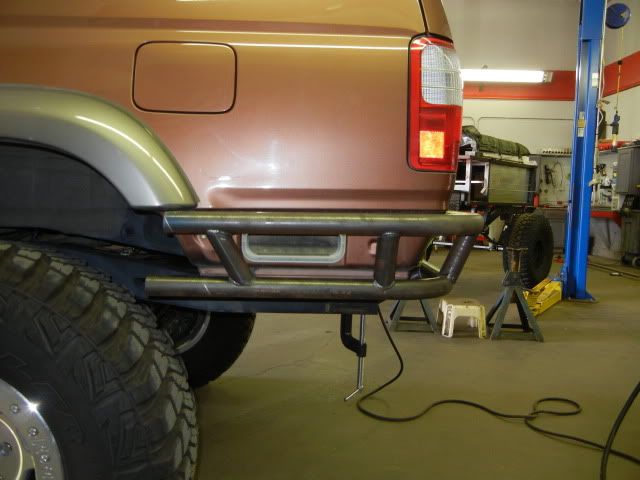

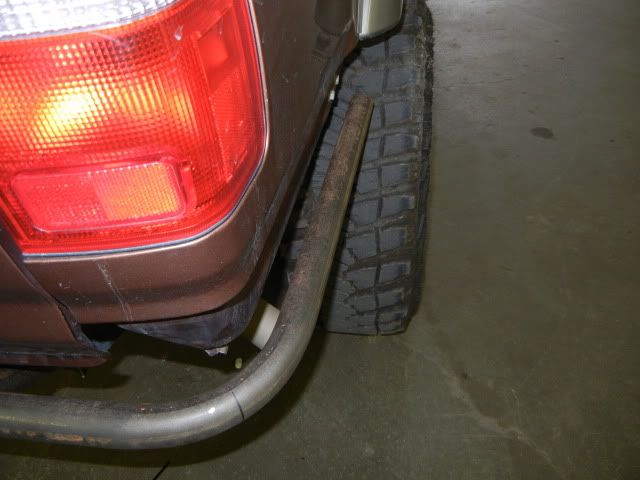
I was going to clearance the fender flare for the bumper, but I decided to clearance the bumper instead. It should make for a much cleaner look.
Here it is off the truck with the ends trimmed and starting the capping process. I still need to complete the passenger side and all the frame plates, gussets and supports.
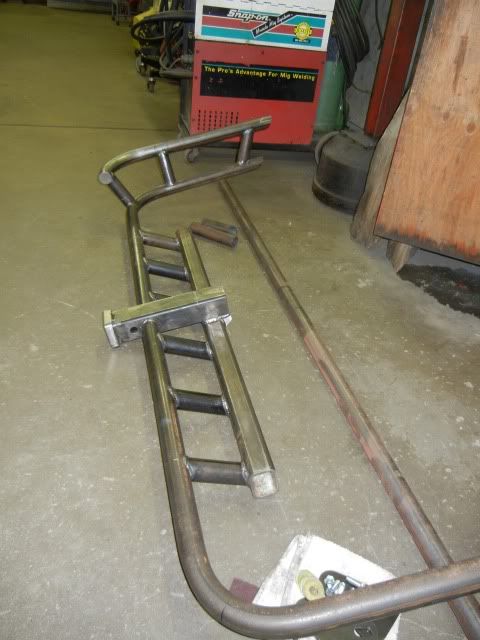
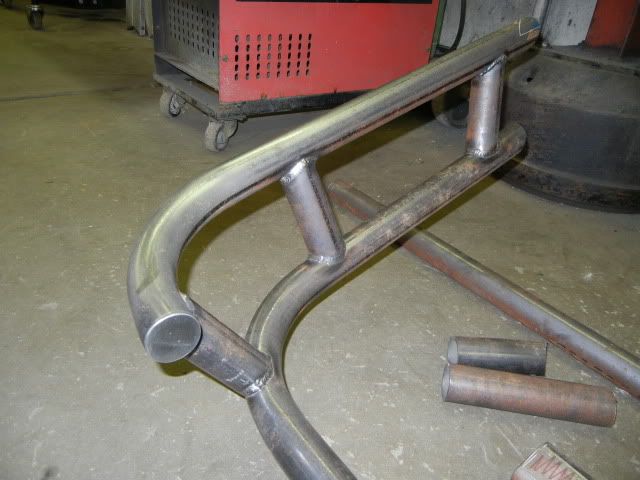
Sep 10, 2011 | 05:43 PM
#273
Thread Starter
Registered User
Joined: May 2007
Posts: 1,441
Likes: 0
From: Summit County, Colorado
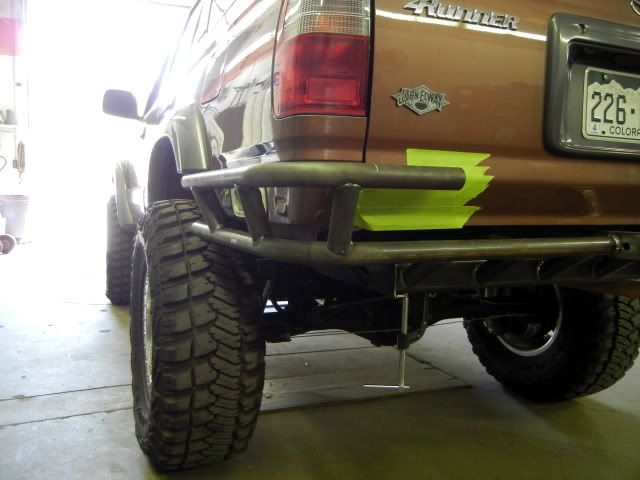
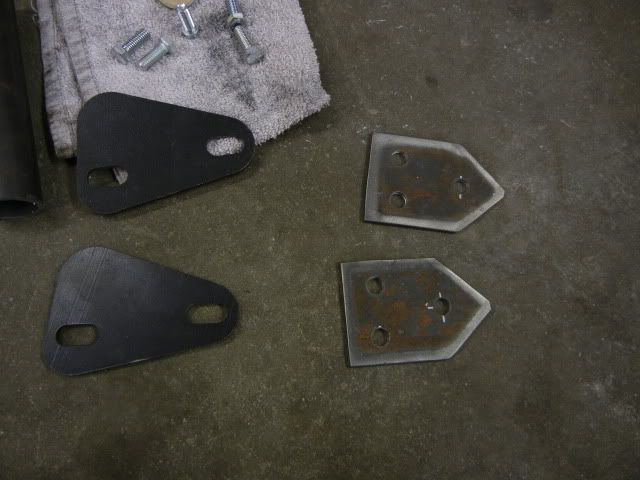
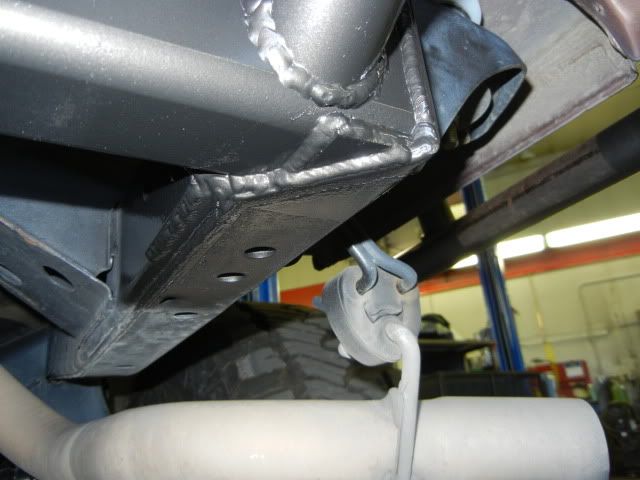
I got some more work done on the bumper. The frames on these 3rd gens are really pretty thin, so I made some frame plates for the inside of the rail and I found some random plates I will use on the outside.
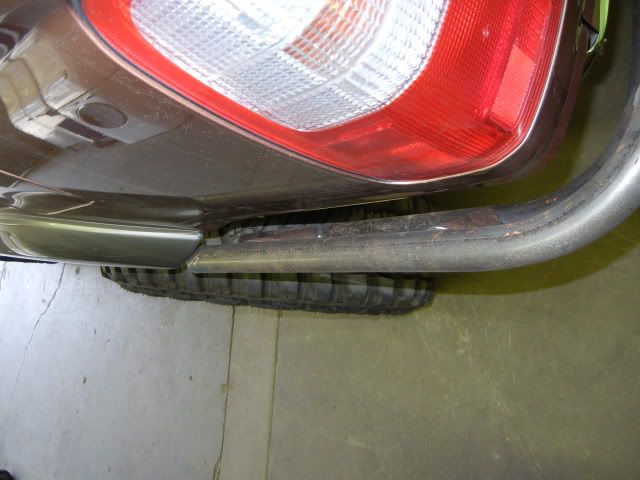
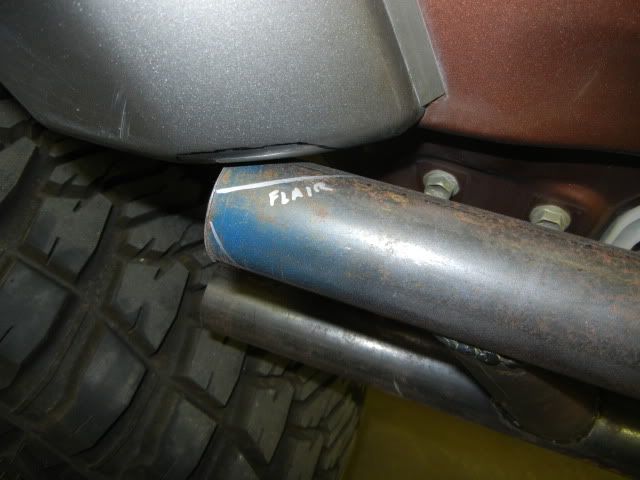
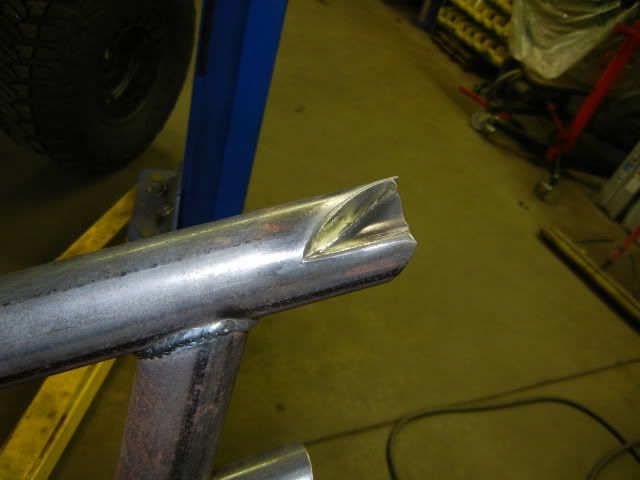
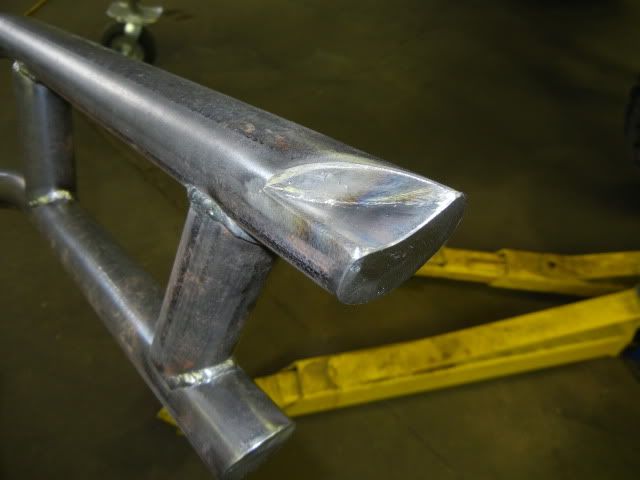
Then I trimmed all the tubing down to size and started the capping process. I notched out the upper tube for extra fender flair clearance, that way when the frame flexes it does not tear the flair off.
Then I trimmed all the tubing down to size and started the capping process. I notched out the upper tube for extra fender flair clearance, that way when the frame flexes it does not tear the flair off.
 Sep 10, 2011 | 07:42 PM
#275
Thread Starter
Registered User
Joined: May 2007
Posts: 1,441
Likes: 0
From: Summit County, Colorado
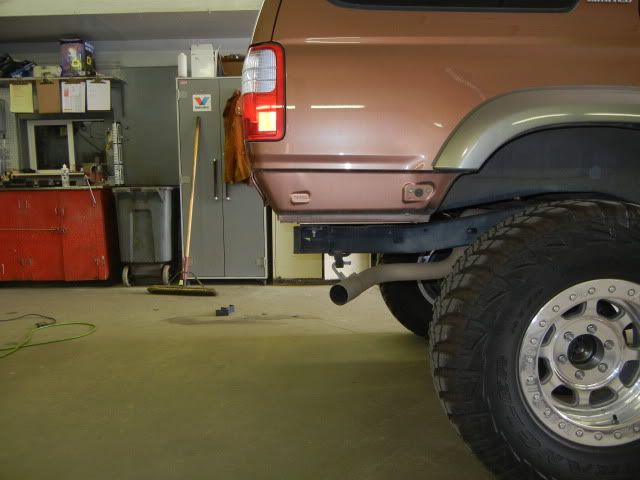
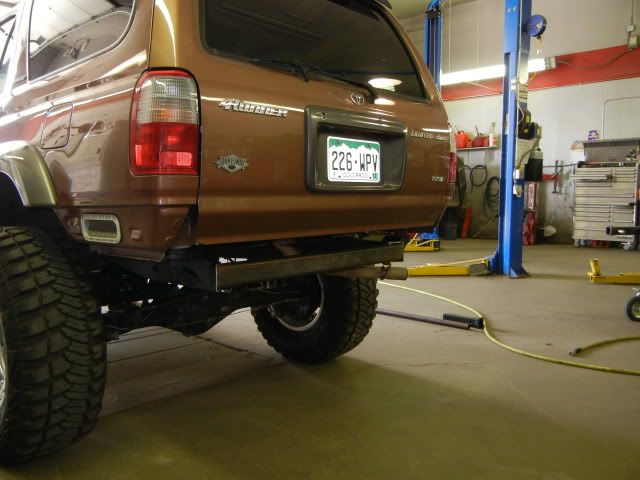
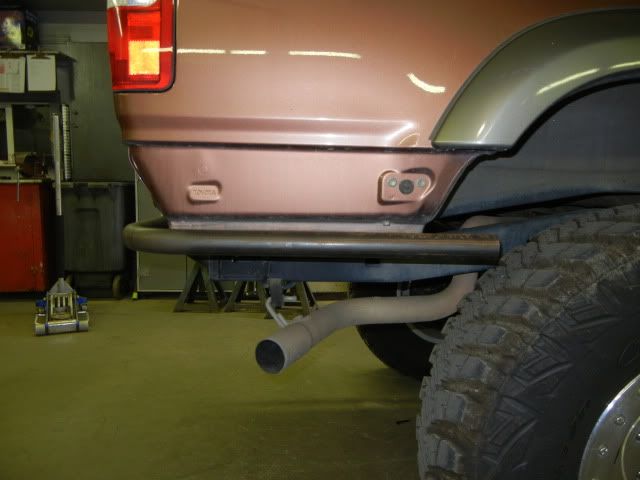
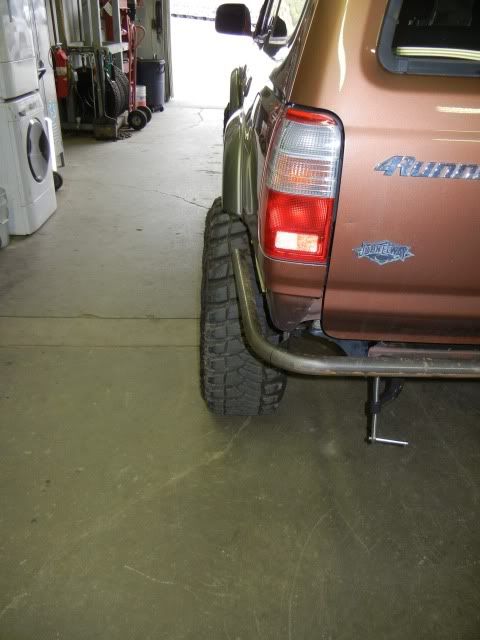
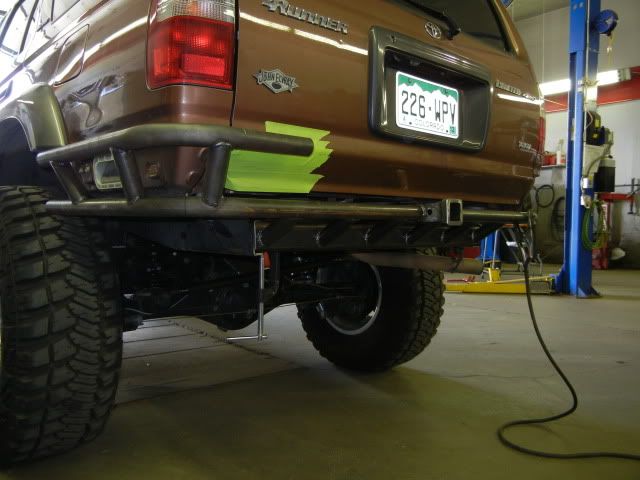
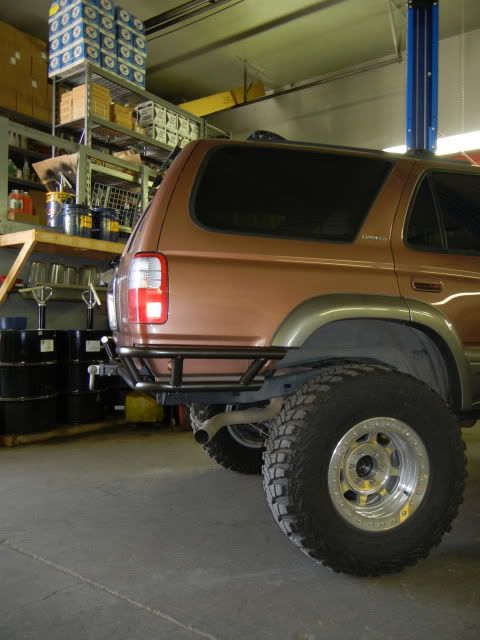
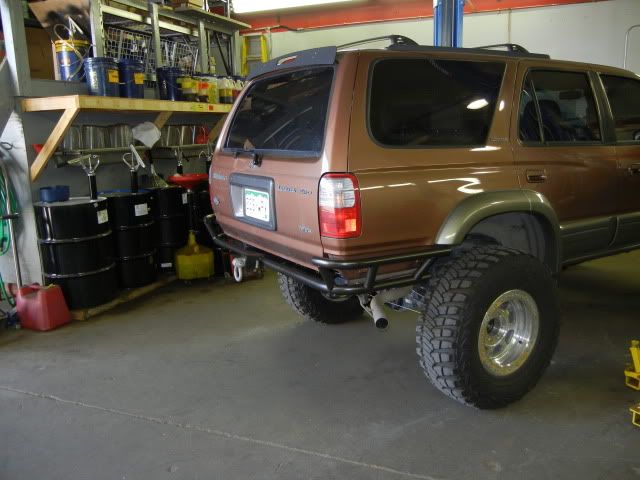
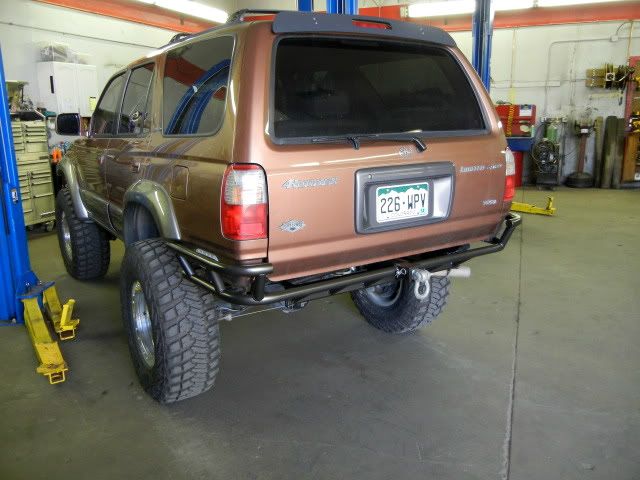
And I got the bumper installed!  I still need to install the outer supports, along with some inner bracing/supports.
I went back and forth on paint for a long time. I wanted to color match the trim but I needed a paint that was easy to touch up (I have to repaint my bumpers and sliders several times a year) and did not require masking half the vehicle off, mixing paint, etc. I thought about powder coating them, but once I hit a rock it would have to be touched up too. I really needed an over the counter spray paint, and I bought several different cans of silver. But all of the silvers were too light and made the color of the 4Runner, and trim look dull/darker.
I decided to use “Hammered” black spray paint, but it’s really a dark grey metallic. It holds up to abuse a lot better than most spray paint and is easy to touch up. In the sunlight it compliments the factory paint, and adds some contrast making the factory paint look brighter. I can always repaint it if I find a better color and/or paint.
I still need to install the outer supports, along with some inner bracing/supports.I went back and forth on paint for a long time. I wanted to color match the trim but I needed a paint that was easy to touch up (I have to repaint my bumpers and sliders several times a year) and did not require masking half the vehicle off, mixing paint, etc. I thought about powder coating them, but once I hit a rock it would have to be touched up too. I really needed an over the counter spray paint, and I bought several different cans of silver. But all of the silvers were too light and made the color of the 4Runner, and trim look dull/darker.
I decided to use “Hammered” black spray paint, but it’s really a dark grey metallic. It holds up to abuse a lot better than most spray paint and is easy to touch up. In the sunlight it compliments the factory paint, and adds some contrast making the factory paint look brighter. I can always repaint it if I find a better color and/or paint.
Last edited by DIRTCO; Sep 10, 2011 at 07:43 PM.

 Sep 11, 2011 | 06:42 AM
#280
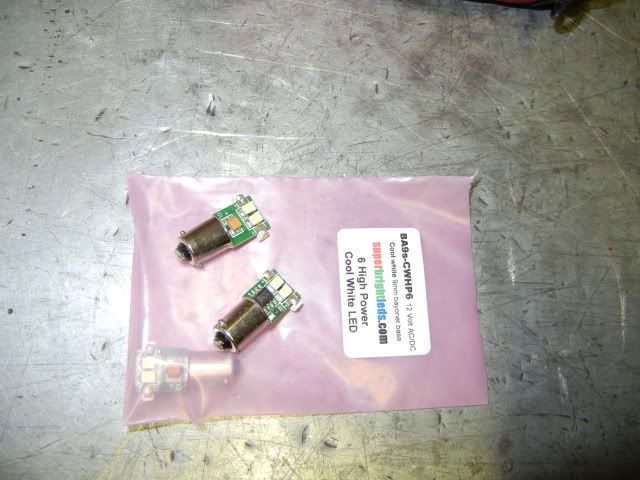
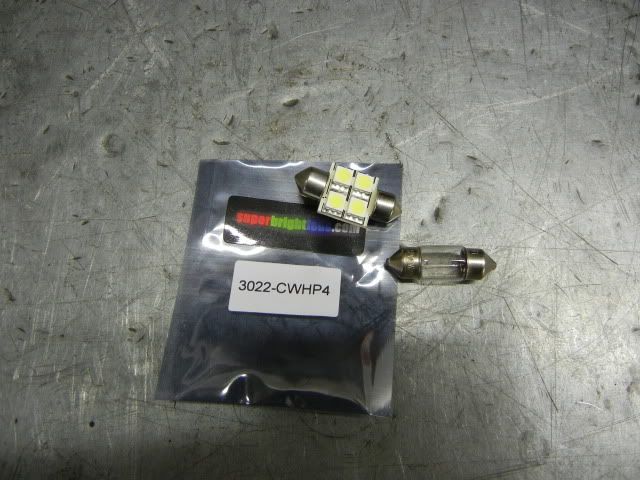
if you look back at the pics, you can see that he ordered them from superbrightleds.com... 
man, awesome work... i wish that i could just come watch you while you fab this stuff... i know that you'd prolly say its pretty boring, but geez, its gorgeous and intriguing to me...
man, awesome work... i wish that i could just come watch you while you fab this stuff... i know that you'd prolly say its pretty boring, but geez, its gorgeous and intriguing to me...


