Dirtco's 1999 4Runner Build-Up Thread
 Sep 18, 2011 | 06:50 AM
#301
Registered User
Joined: Oct 2008
Posts: 98
Likes: 0
From: Alabama
Excellent job on the bumper. I would like to copy it but I don't have the tools for the round tubing, mine would be all square tubing. I wonder how it would look if the quarter panel was painted black where the factory bumper used to be?
Sep 20, 2011 | 06:47 PM
#302
Thread Starter
Registered User
Joined: May 2007
Posts: 1,441
Likes: 0
From: Summit County, Colorado
That is a great idea for interior lighting. Is that one from superbright led's too?
When I redid my taillights to LED I wanted to do my back up lights with that style but was amazed that the clear/white LEDs were so much more expensive. Your's lOok great, might just suck it up and go that route..
Looking forward to the front bumper
When I redid my taillights to LED I wanted to do my back up lights with that style but was amazed that the clear/white LEDs were so much more expensive. Your's lOok great, might just suck it up and go that route..
Looking forward to the front bumper
Sep 20, 2011 | 06:57 PM
#303
Thread Starter
Registered User
Joined: May 2007
Posts: 1,441
Likes: 0
From: Summit County, Colorado
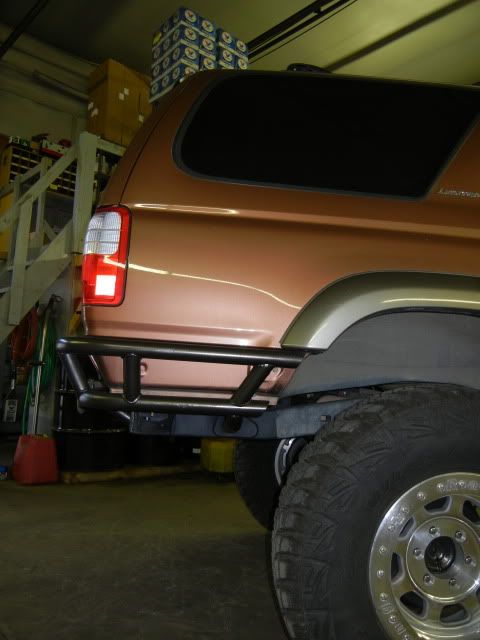
I thought about painting it black, but I like the contrast. It makes the bumper stand out, directing your attention to the bumper not the background.
Sep 21, 2011 | 12:27 AM
#304
Yes, I bought them from Superbrightleds.com. If I was going to do it again I would use these for the hatch LED Marine & Boat Products : Waterproof Marine LED Flood Light . I just ordered a few for rock lights and they are awesome; small, super bright (for the size), and only one watt!
a hair cheaper than the oznium lights.
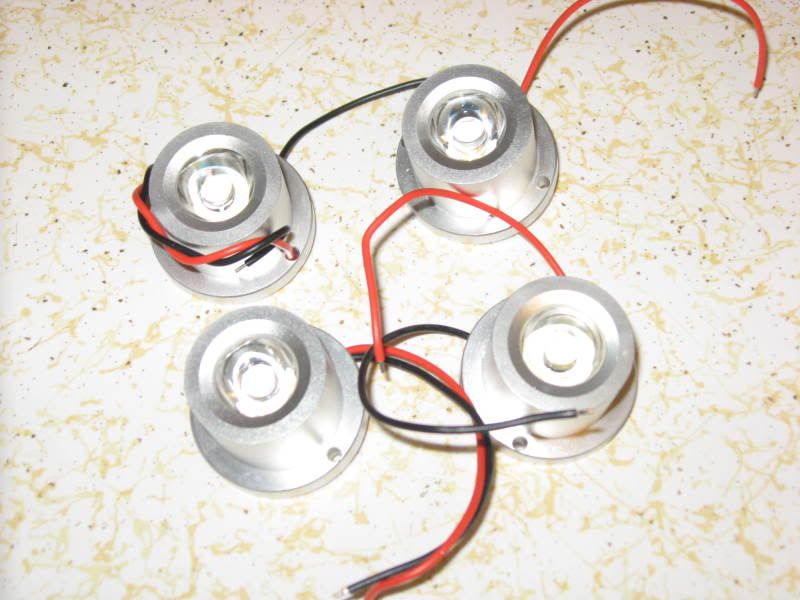
They do put out a ton of light,
Nice thing is since they hardly pull any power they won't need a relay.
Seeing how fast you are moving on your truck is great motivation for the rest of us

Starting on the front bumper this weekend?
Sep 22, 2011 | 05:06 PM
#305
Thread Starter
Registered User
Joined: May 2007
Posts: 1,441
Likes: 0
From: Summit County, Colorado


 Sep 23, 2011 | 02:08 PM
#308
Registered User
Joined: Apr 2004
Posts: 98
Likes: 0
From: Broomfield, Colorado
Awesome build thread! I love 3rd gens, although, I just got rid of my 3rd gen 4runner and went with an FJ Cruiser! I will keep watching this but check back in 2 years to see if you build an FJ next 
Sep 24, 2011 | 09:18 PM
#309
Thread Starter
Registered User
Joined: May 2007
Posts: 1,441
Likes: 0
From: Summit County, Colorado
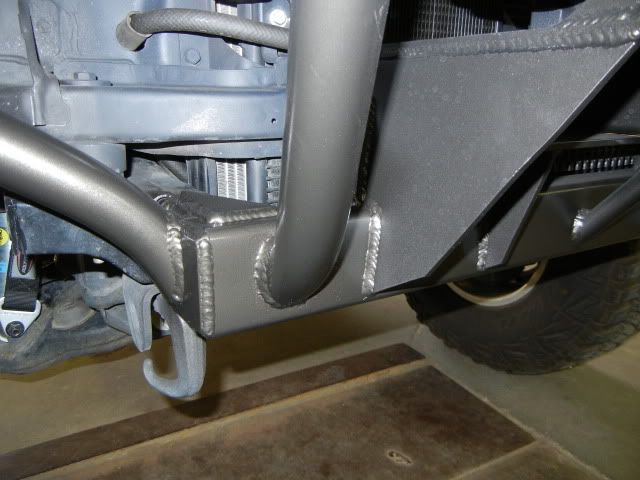
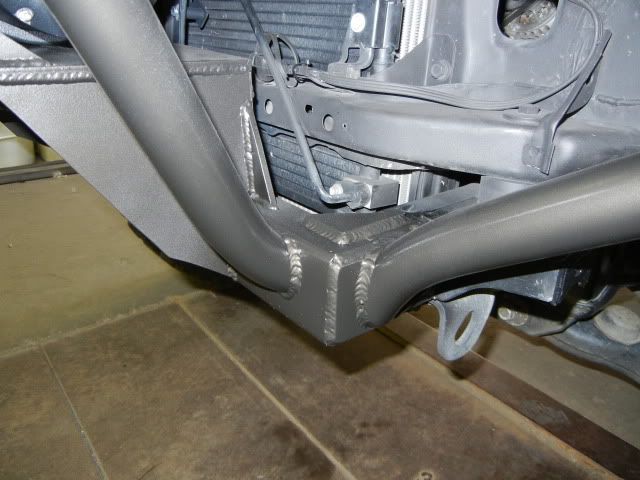
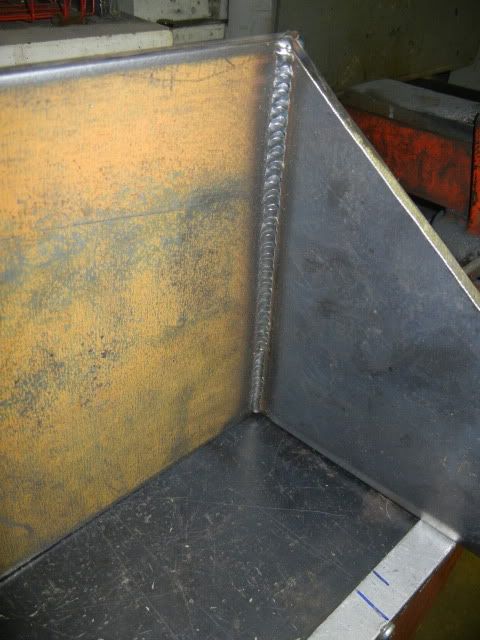
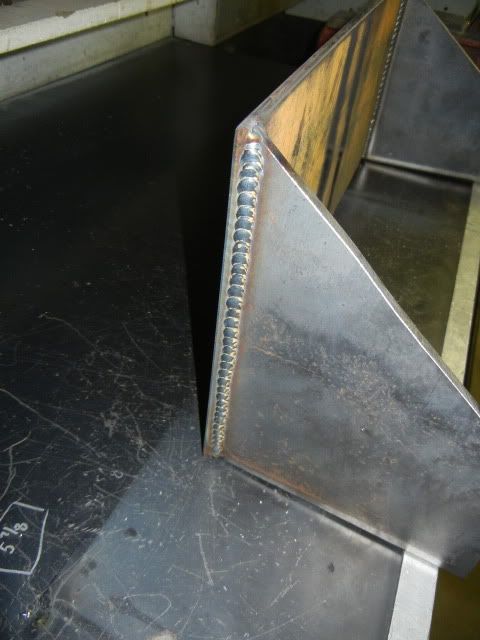
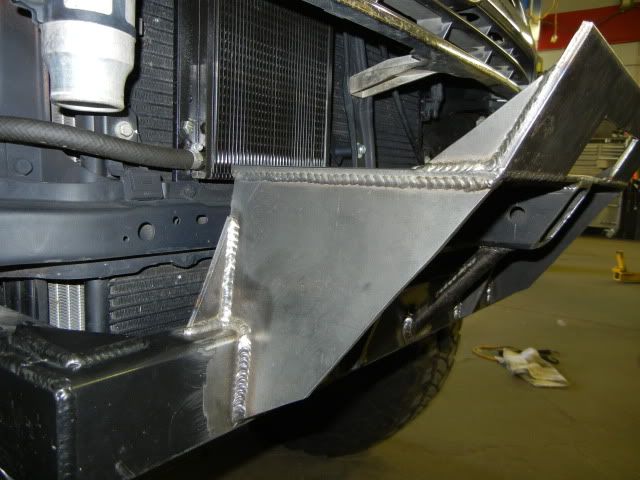
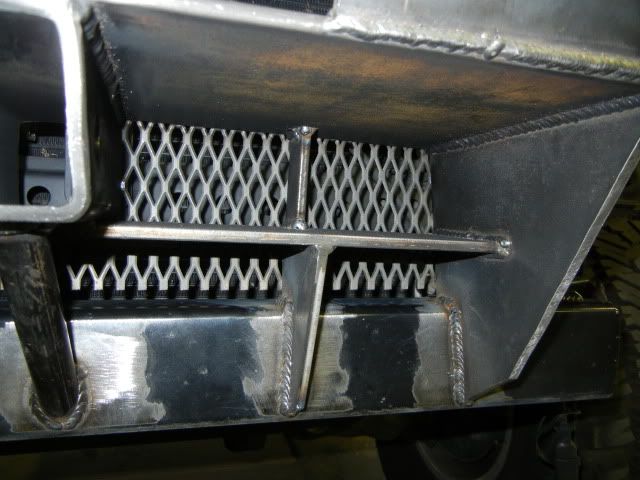
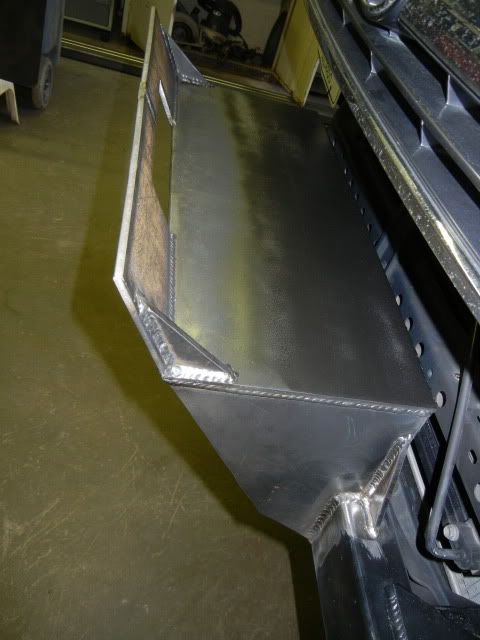
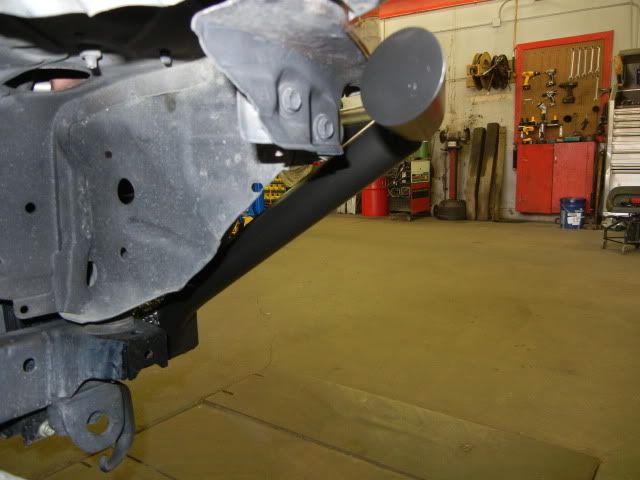
I got a good start on the front bumper; the winch mount had to be built first so I got to work. My front bumper is going to be a lot like the one I built for the Turbo 4Runner, but I wanted the back side of the winch mount to be open for extra air flow to the radiator and transmission cooler. That required a lot of extra bracing and reinforcement. Like the Turbo 4Runner, I tried to angle everything to give it a more aggressive look.
Pictures for reference
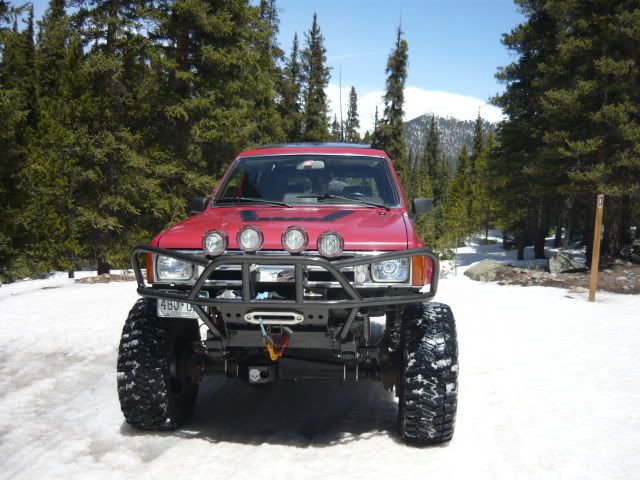
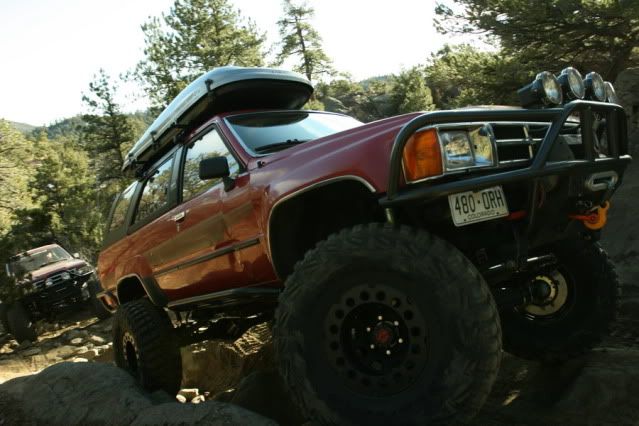
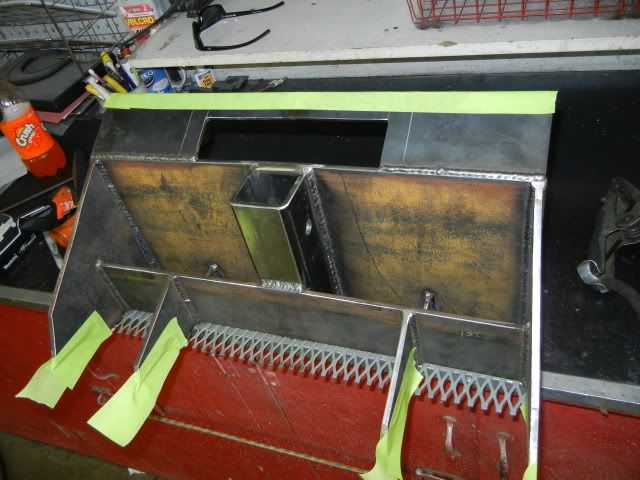
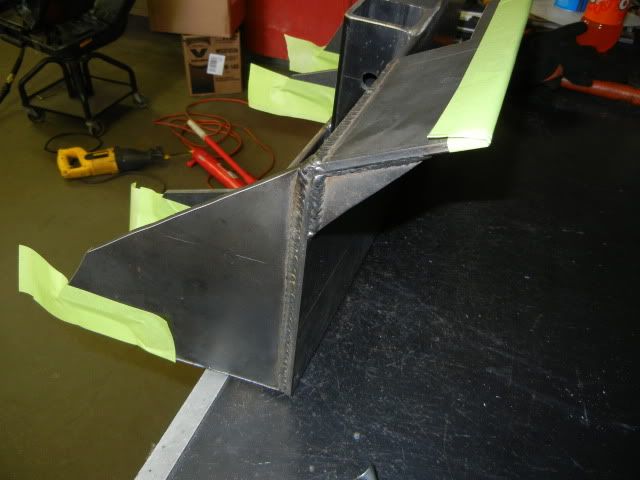
I didn�t take many pictures during the building process, but here are a couple I snapped along the way
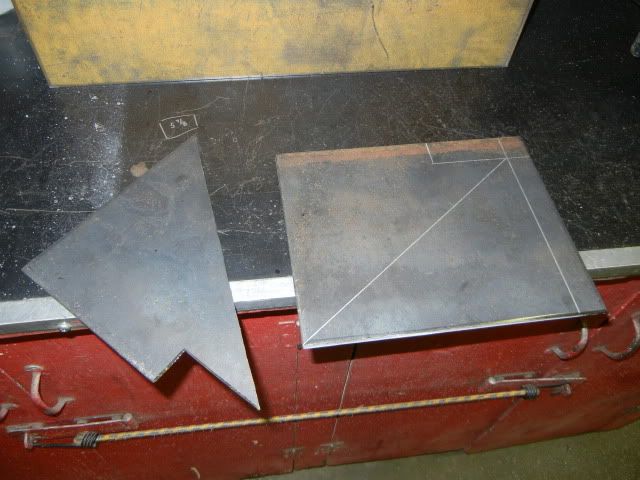
And here it is mostly completed, I made a few modifications after these pictures
Pictures for reference
I didn�t take many pictures during the building process, but here are a couple I snapped along the way
And here it is mostly completed, I made a few modifications after these pictures
 Sep 27, 2011 | 05:54 PM
#313
Thread Starter
Registered User
Joined: May 2007
Posts: 1,441
Likes: 0
From: Summit County, Colorado
Sep 29, 2011 | 06:31 PM
#315
Registered User
Joined: Jun 2011
Posts: 58
Likes: 0
From: Littleton, Colorado
Dirtco,
quick qestion, i got a 99 sr5 w a 2 inch body lift, and 2.5 inch daystar coil spacers, looking at going to sonoran steele 1.2 lift same as yours, do you think 315/75/16 would clear with the 2 inch body or would i be cutting alot, My rear bumper is similiar to yours is savage offroad front bumper is stock without bottom skirt on as of now. I have 0 rubbing issues as the stock rear suspension my panhard bar pulls and it allows little flex. any advice.
thanks man great build been following the whole thing. sickest 3rd gen ive seen
Oct 2, 2011 | 03:48 PM
#316
Thread Starter
Registered User
Joined: May 2007
Posts: 1,441
Likes: 0
From: Summit County, Colorado
Dirtco,
quick qestion, i got a 99 sr5 w a 2 inch body lift, and 2.5 inch daystar coil spacers, looking at going to sonoran steele 1.2 lift same as yours, do you think 315/75/16 would clear with the 2 inch body or would i be cutting alot, My rear bumper is similiar to yours is savage offroad front bumper is stock without bottom skirt on as of now. I have 0 rubbing issues as the stock rear suspension my panhard bar pulls and it allows little flex. any advice.
thanks man great build been following the whole thing. sickest 3rd gen ive seen
quick qestion, i got a 99 sr5 w a 2 inch body lift, and 2.5 inch daystar coil spacers, looking at going to sonoran steele 1.2 lift same as yours, do you think 315/75/16 would clear with the 2 inch body or would i be cutting alot, My rear bumper is similiar to yours is savage offroad front bumper is stock without bottom skirt on as of now. I have 0 rubbing issues as the stock rear suspension my panhard bar pulls and it allows little flex. any advice.
thanks man great build been following the whole thing. sickest 3rd gen ive seen
Oct 2, 2011 | 05:25 PM
#317
Thread Starter
Registered User
Joined: May 2007
Posts: 1,441
Likes: 0
From: Summit County, Colorado
Suspension Update�
As you guys know, I was having issues with the front spindle contacting the coil at full droop. I contacted Steve at Sonoran Steel, he said I needed more weight on the truck and that it was setting too high, allowing for more droop (all the details and pictures can be found a page or two back, it�s a long story).
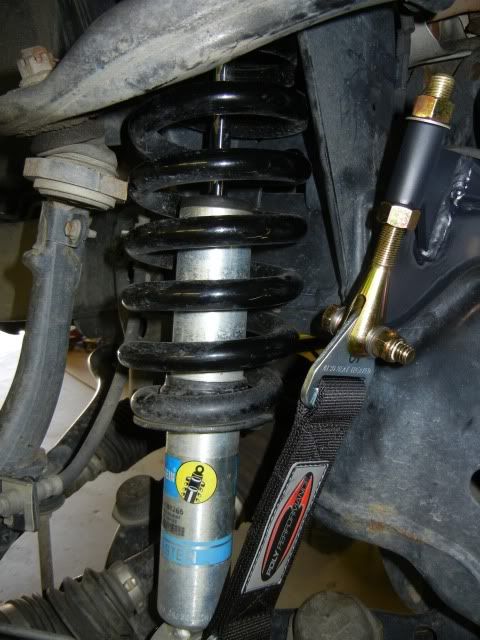
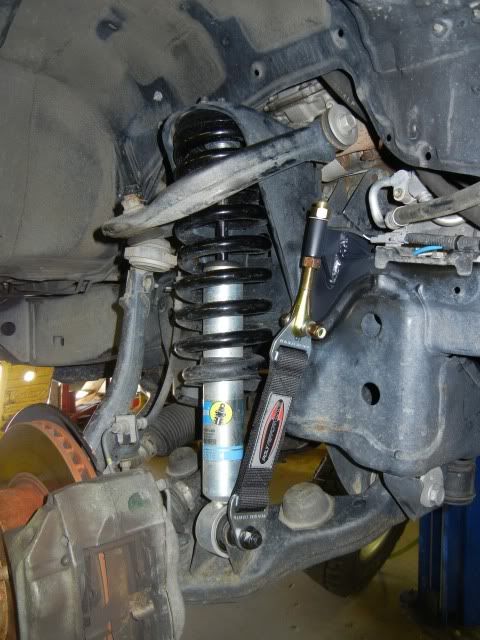
Last weekend BigFishAllDay contacted me; he noticed a banging noise in his front suspension and after reading my thread he checked his front coils for any sign of contact. Well his 4Runner is doing the same thing as mine, but he has an ARB front bumper, winch and sliders. So it seems that the weight of the 4Runner really has nothing to do with it, the fact that my 4Runner sat taller just made the problem more pronounced and constant. Both of us think that this is a more common issue than Steve says, and I really feel that if you have the SS1.2 kit (at the 2.5� front setting) you need limit straps, period!
More info can be found in this thread: http://www.toyota-4runner.org/3rd-ge...ts-please.html
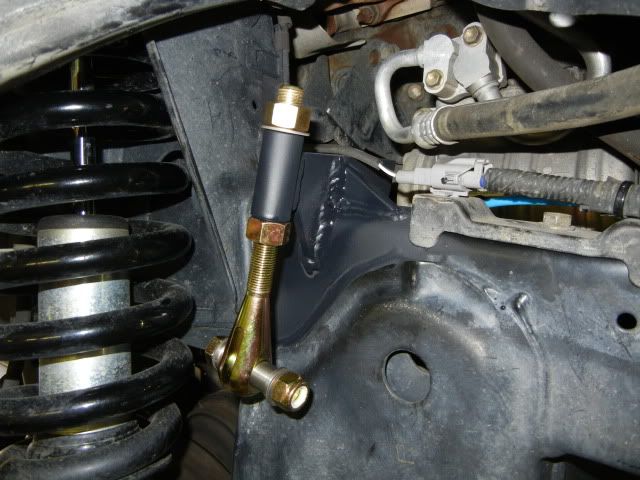
We discussed several different options to solve the problem, but only one seemed to be a 100% fix and not create more issues in the process. That was limit straps.
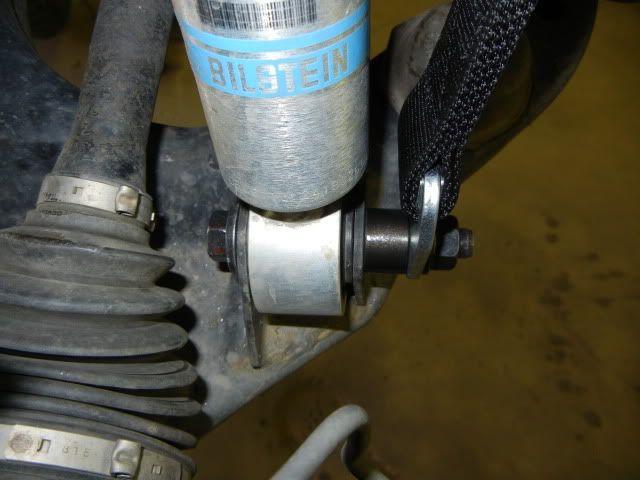
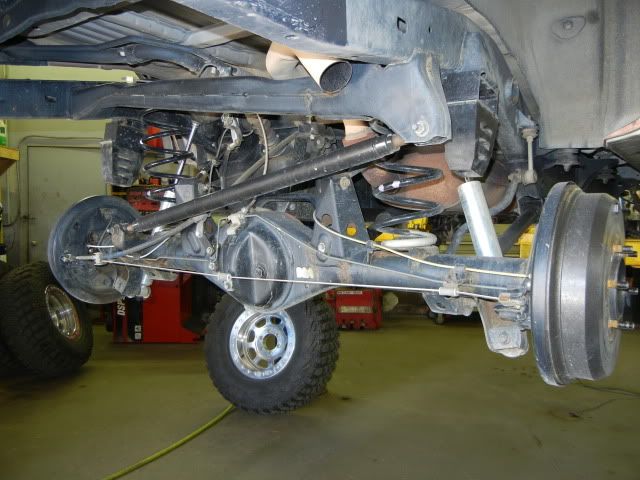
I had already bought limit straps before BigFish contacted me, for the following reasons: to 100% solve the spindle/coil problem, to reduce stress on the bushings with the weight of the 35�s w/ heavy beadlocks, and reduce some stress on the CV�s from drooping too far. I got them installed, but I still need to go wheeling and see if everything works the way it should.
As you guys know, I was having issues with the front spindle contacting the coil at full droop. I contacted Steve at Sonoran Steel, he said I needed more weight on the truck and that it was setting too high, allowing for more droop (all the details and pictures can be found a page or two back, it�s a long story).
Last weekend BigFishAllDay contacted me; he noticed a banging noise in his front suspension and after reading my thread he checked his front coils for any sign of contact. Well his 4Runner is doing the same thing as mine, but he has an ARB front bumper, winch and sliders. So it seems that the weight of the 4Runner really has nothing to do with it, the fact that my 4Runner sat taller just made the problem more pronounced and constant. Both of us think that this is a more common issue than Steve says, and I really feel that if you have the SS1.2 kit (at the 2.5� front setting) you need limit straps, period!
More info can be found in this thread: http://www.toyota-4runner.org/3rd-ge...ts-please.html
We discussed several different options to solve the problem, but only one seemed to be a 100% fix and not create more issues in the process. That was limit straps.
I had already bought limit straps before BigFish contacted me, for the following reasons: to 100% solve the spindle/coil problem, to reduce stress on the bushings with the weight of the 35�s w/ heavy beadlocks, and reduce some stress on the CV�s from drooping too far. I got them installed, but I still need to go wheeling and see if everything works the way it should.
Oct 2, 2011 | 06:17 PM
#318
Thread Starter
Registered User
Joined: May 2007
Posts: 1,441
Likes: 0
From: Summit County, Colorado
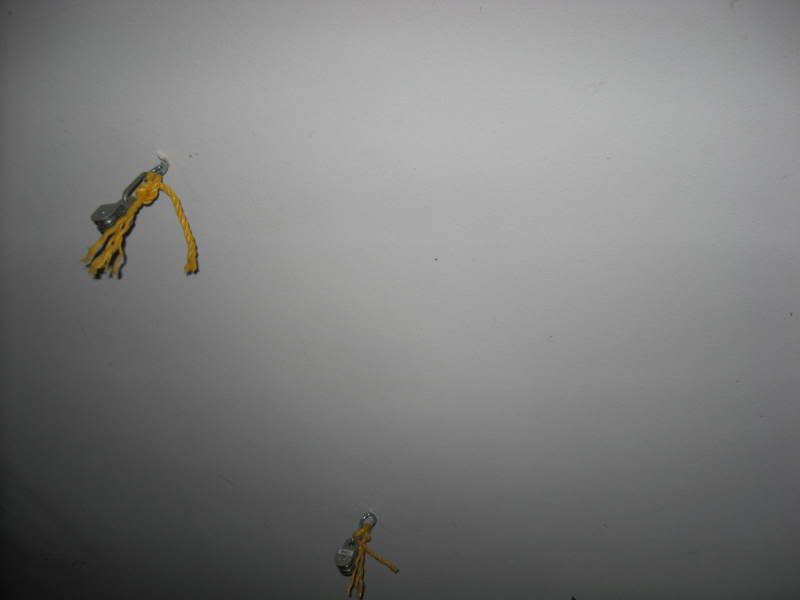
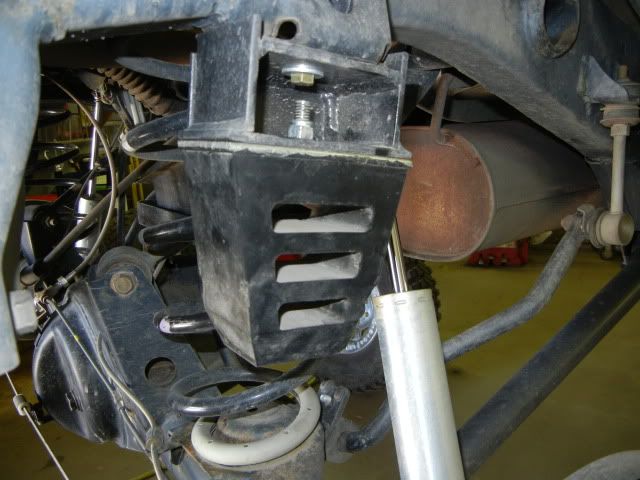
I also replaced the rear bump stops, I had a set off the old green 4Runner that were 1 �� taller. They are still a progressive rate bump stop (really comfortable) and they should stop the travel right before the tire rubs the inner fender.
Here�s the old set that are included with the SS 1.2 kit, they are starting to compress as the tire rubs.
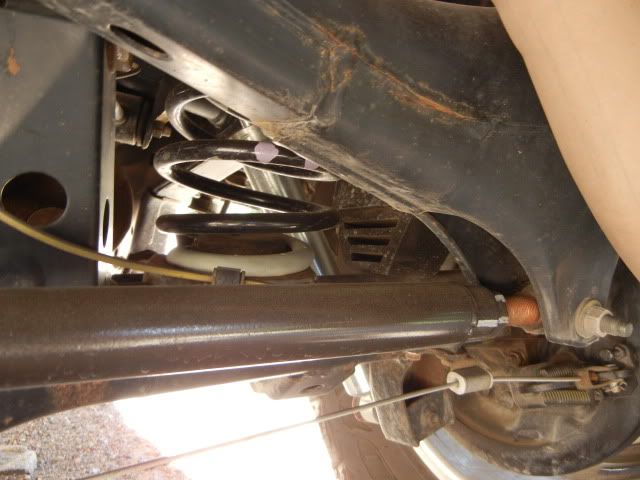
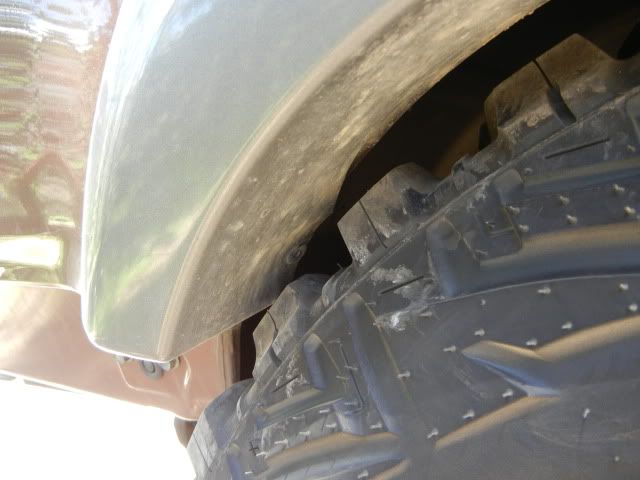
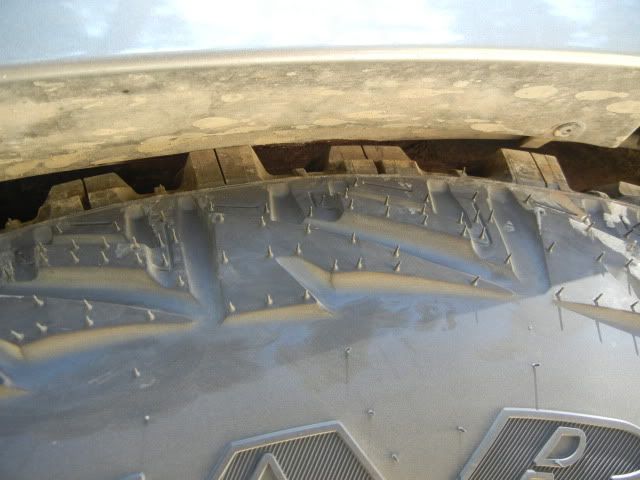
And here�s the new set, at full compression they should be the same as the above pictures. I might get a slight amount of rubbing when I�m really flexed out but I think it will minimal (I don�t mind a little trimming). I am loosing a small amount of up travel in the rear suspension, but I feel the 35�s make up for that. Also, I�m not building this for rock crawling; it�s a trail/expedition/snow wheeling 4Runner that will see some rocky trails. I don�t mind taking the easy line or bypass, I�ve run all the hard lines in my last two rigs.
Here�s the old set that are included with the SS 1.2 kit, they are starting to compress as the tire rubs.
And here�s the new set, at full compression they should be the same as the above pictures. I might get a slight amount of rubbing when I�m really flexed out but I think it will minimal (I don�t mind a little trimming). I am loosing a small amount of up travel in the rear suspension, but I feel the 35�s make up for that. Also, I�m not building this for rock crawling; it�s a trail/expedition/snow wheeling 4Runner that will see some rocky trails. I don�t mind taking the easy line or bypass, I�ve run all the hard lines in my last two rigs.
Oct 2, 2011 | 07:38 PM
#319
Thread Starter
Registered User
Joined: May 2007
Posts: 1,441
Likes: 0
From: Summit County, Colorado
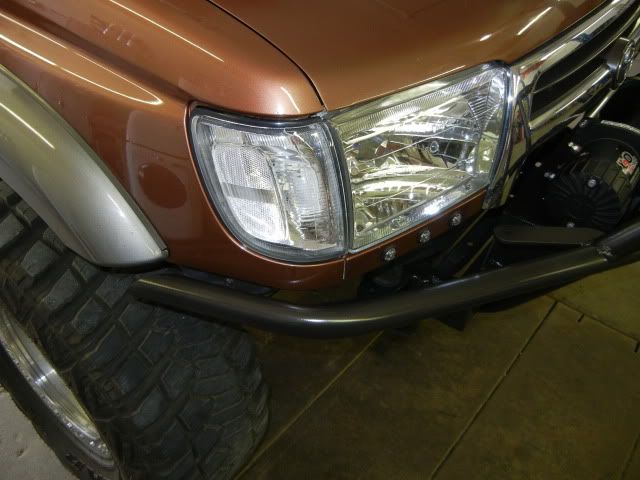
I also finished the front bumper! It took a couple long days, (there were a few times I thought about pulling the trailer in the shop and going to bed ) but it�s done! I still need to wire the winch and install my Master-Pull winch rope but I�ll take care of that later this week.
I didn�t take any pictures during the process but here is how it turned out�

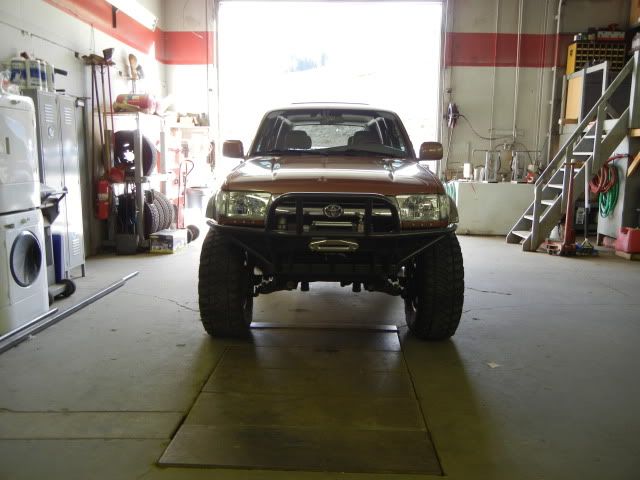
Fender clearance
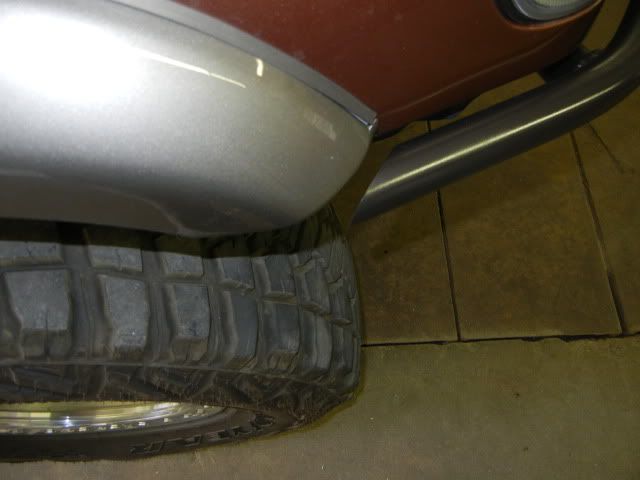
) but it�s done! I still need to wire the winch and install my Master-Pull winch rope but I�ll take care of that later this week.I didn�t take any pictures during the process but here is how it turned out�
Fender clearance
Last edited by DIRTCO; Oct 2, 2011 at 07:41 PM.