
vwfastg60's 1987 Pickup Build-Up Thread
 Aug 19, 2009 | 11:37 PM
#121
Thread Starter
Registered User
Joined: Apr 2005
Posts: 876
Likes: 0
From: Longmont Colorado
The only things im going to rewire are the washer pump if i cant fit the tacoma one in the 87 bottle and im adding stereo, alarm, power in the bed with a battery box or 2, some aftermarket lighting and the power seats and mirror. It made the swap much easier and less of a headache then i planned in the beginning. Once painted i can have the truck wired and dash installed in a day. I will take longer tho because im going to be cleaning everything in and out to be spotless intstalling new carpet,seals, and wrapping tons of pieces for the interior and stereo.
After seeing my swap a few friends are interested in having them done but cant do them on there own so that will be next winters projects for them while i finish up new running gear in the spring.
So here are some new pics.....
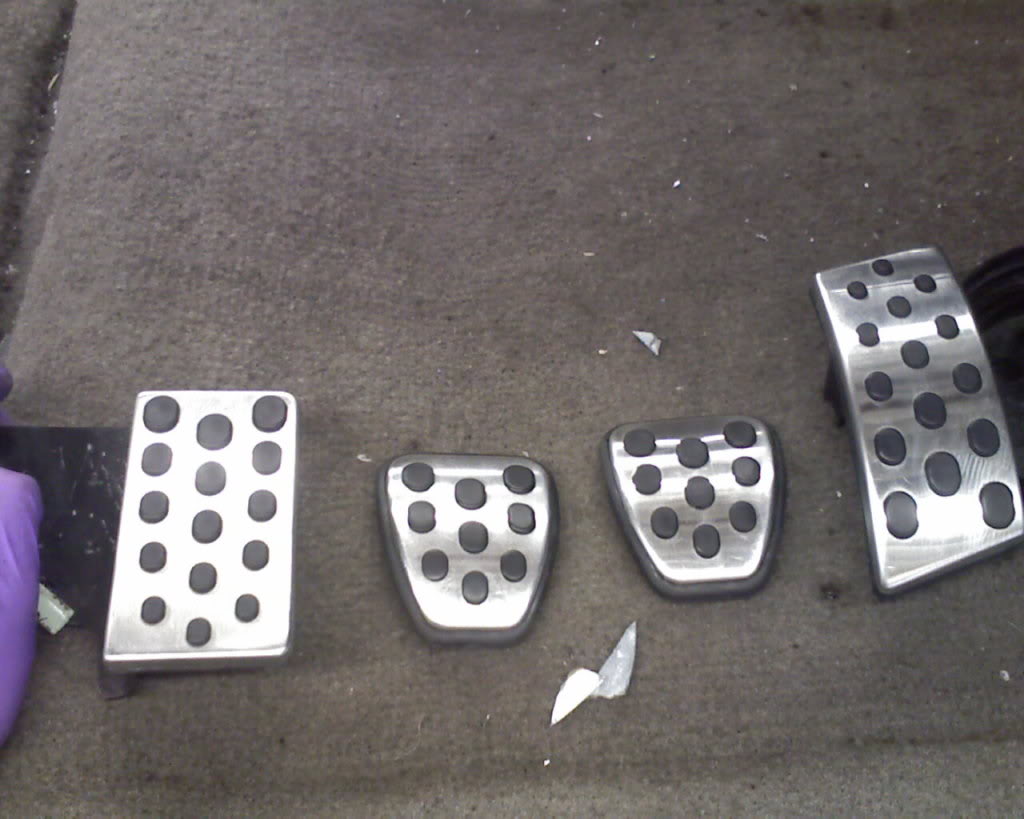
My pedal set with footrest. This will be glassed in to the kick pannel or mounted through the carpet. I guess the people i set the pic to said it was too much bling so i took one next to the shift knob to compare.

Nate had me grab some new seam sealer for some new metal i added and the new piece we cut from the tacoma and put under the windshield in my truck. I always hear about people using silicone and household crap so here...now you guys know what to get. its under 20 and you can use a regular household calking gun.

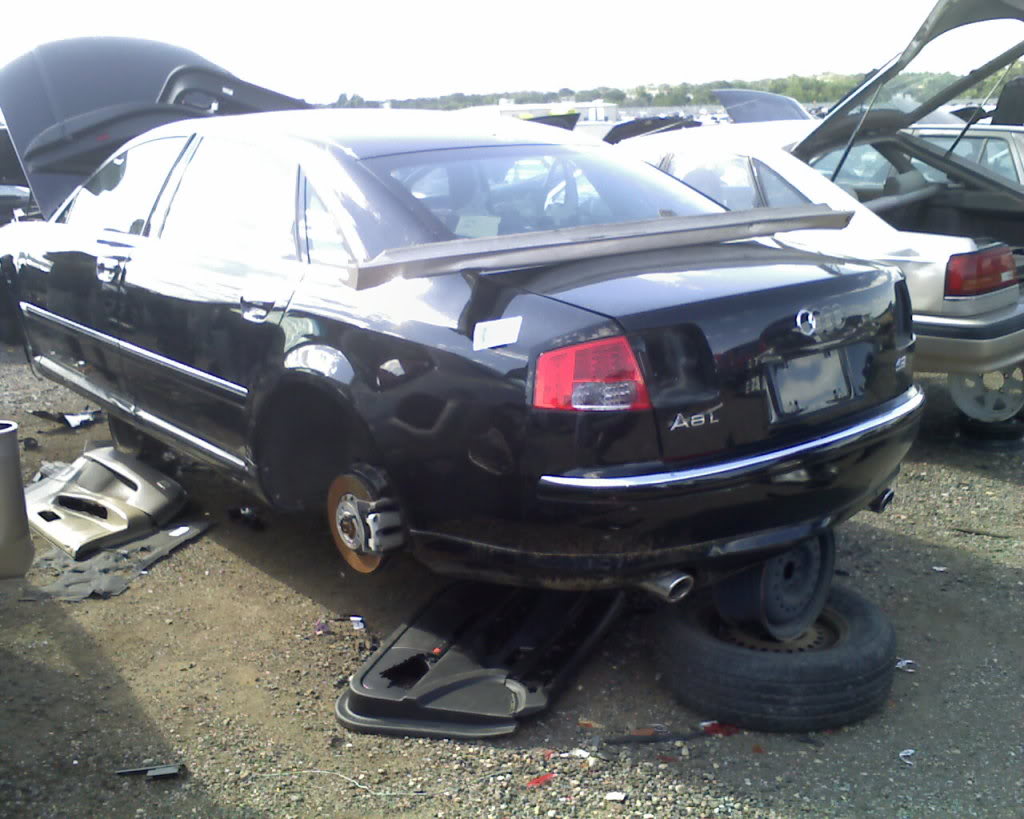
05/06 audi A8 i stripped at the yard today for some interior lighting and cigarette lighters. I broke the homelink from the console and then managed to brake one in an infinity visor...i know how to take them out now

Stopped over at my buddys shop and he picked up a ktx400 for 1500 but needed a seat and some little stuff so i thought id sharpen my interior skills and made him a seat.

While i was tinkering with the quad we got to talking hes donating the use of his booth to me so i dont have to set one up in the shop....I hoped to wait for my move next year so i didnt have to pull it all down anyways.
Back to work on the truck tomorrow for a bit and My GF is taking me to cirque du soleil...I thought i sounded kinda weird but she thinks i will like it cause of how ripped everyone is(my other hobby is weightlifting)
Sep 7, 2009 | 07:54 PM
#123
Thread Starter
Registered User
Joined: Apr 2005
Posts: 876
Likes: 0
From: Longmont Colorado
The truck is in final mock up stages. The interior is done ready to be wrapped and the bay needs the battery tray and fuseblock brackets spotwelded in. The A/C mock up started today and its a PITA! i wish i didnt have to hack up the radsuppot to fit some of it.
Im having issues with the evap box delete for the 3rz. I hear it cant be done with out throwing a CEL but i really dont want it in the bay...any ideas?
other then that i should make my deadline for driving it on my bday...nov.28th... Even if its not 100% finished i just wanna drive it out of the shop under its own power.
more pics to come after my Photobucket is undercontrol.
Sep 7, 2009 | 11:10 PM
#125
Thread Starter
Registered User
Joined: Apr 2005
Posts: 876
Likes: 0
From: Longmont Colorado
Thanks, The pics really make the thread tho. I was wondering how much the pics i have hosted are viewed and the week before my limit was reached i had 43,893 views in the week!
That is insane to me...Im going to see if i can see what gets the most views. Looks like the most viewed are old cars and the turboed zx10 i took video of after the airshifter and 2 step install...
That is insane to me...Im going to see if i can see what gets the most views. Looks like the most viewed are old cars and the turboed zx10 i took video of after the airshifter and 2 step install...
Last edited by vwfastg60; Sep 7, 2009 at 11:13 PM.
 Sep 15, 2009 | 11:43 PM
#129
Thread Starter
Registered User
Joined: Apr 2005
Posts: 876
Likes: 0
From: Longmont Colorado
Sorry didnt get much done over the weekend i was working on the FJ all weekend. The truck WILL see paint sometime next week. I have to clean up the mount on the core support fill the heater hole thats not used with the tacoma dash and finish the battery tray and fuseblock welding. I have been working too much to spend time on it tho cause i wanna put some more money aside for the interior.
My gf's mom is teaching me to twin stitch so the interior is going to go one step father then i thought.
My gf's mom is teaching me to twin stitch so the interior is going to go one step father then i thought.
Sep 22, 2009 | 11:45 PM
#130
Thread Starter
Registered User
Joined: Apr 2005
Posts: 876
Likes: 0
From: Longmont Colorado
OK so its time for an update....
Sooooo, I haven't been moving as fast as planned. Not only have i been working as much as possible im also taking on any and all side work i can so i can put the money away for interior and a new toy(not a car or drivable). My OCD went in to overdrive on the bay and rather then deal with the hole i cut in the firewall i thought sectioning the tacoma firewall would be the answer. After talking to my buddy bart and getting his feedback i went for it. Bart came up and cut it all up and welded the new plate in and took care of some of the spotwelds i drilled out for the old battery tray. His fab work always amazes me.
So when we left early a.m. the truck still needed to have a few welds ground down and then mud work. So today i went over to the shop about 4 and went nuts. I metal shaped where the shock towers go to make a bit of extra room so they dont rub if the body moves, Mudded them and sanded em down, Mudded the firewall where bart welded up the tacoma section and plugged off the old heatercore line on the drivers side. I think the way it turns out looks factory and weird at the same time...Dont get me wrong i think its bad ass i just have to adjust. I also ground out the old battery tray area where the welds were done and smoothed it out. Got the floor cut and cleaned up for the duals and because im using a 2wd cab the shifters didnt fit right.
Enough talk on to the pics.
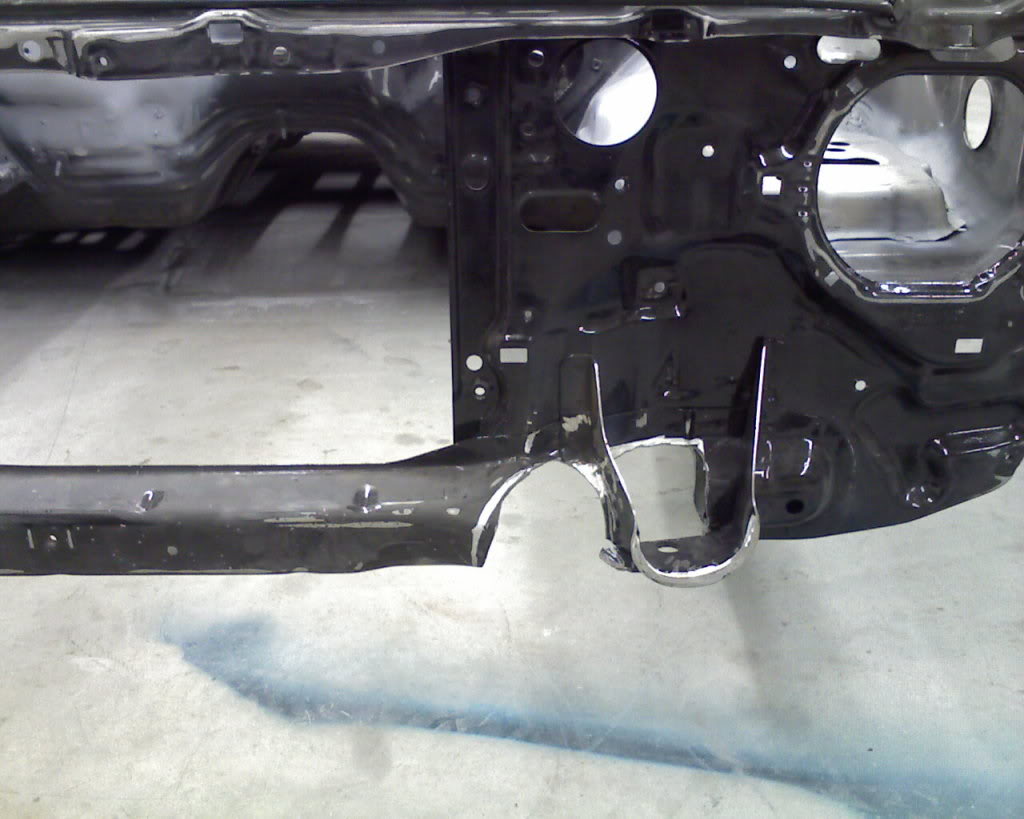
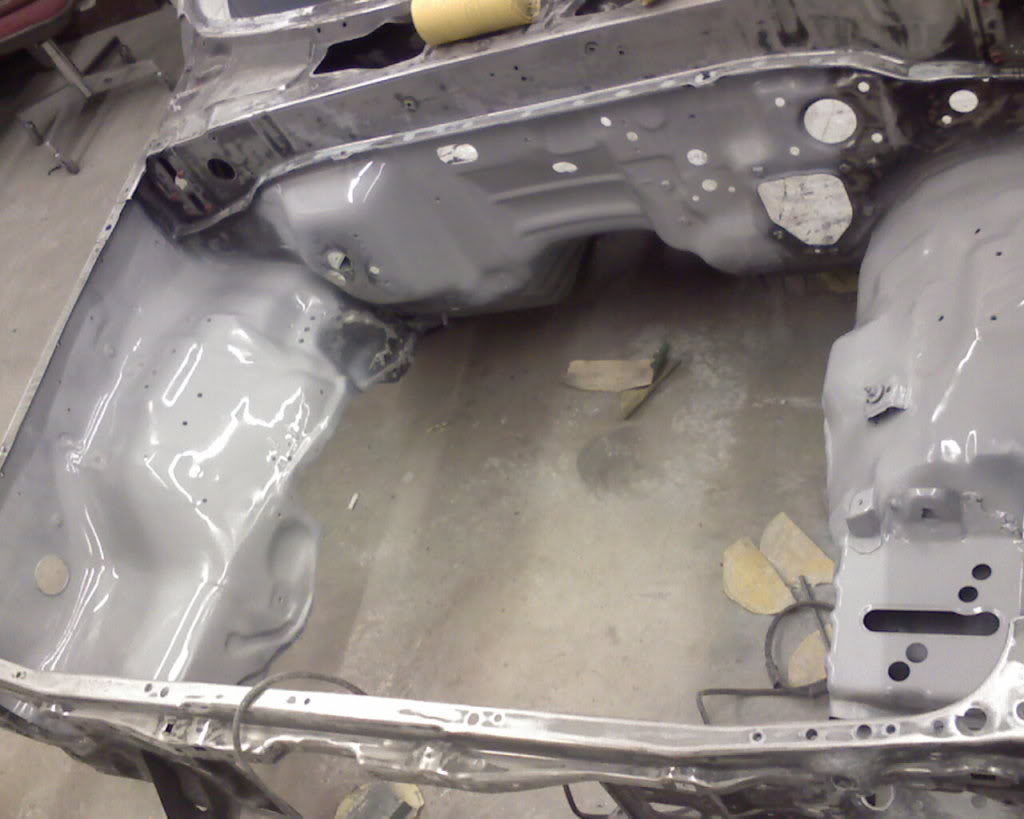
Shock tower area and old battery tray area primed
Drivers tower and bracket for the tacoma fuseblock primed.
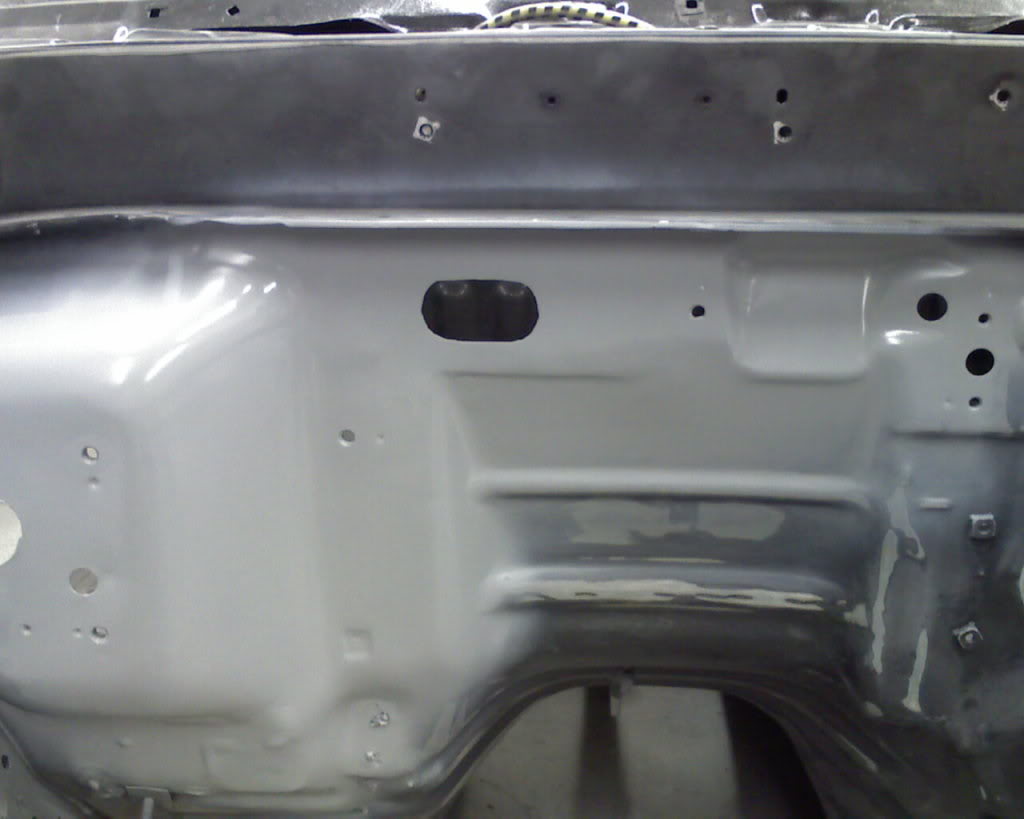
Tacoma area and shaved hole for the old heatercore.
The whole thing together...I wanna block it out and sand the bay in the other areas again because the rust stuff i used on the cab is garbage

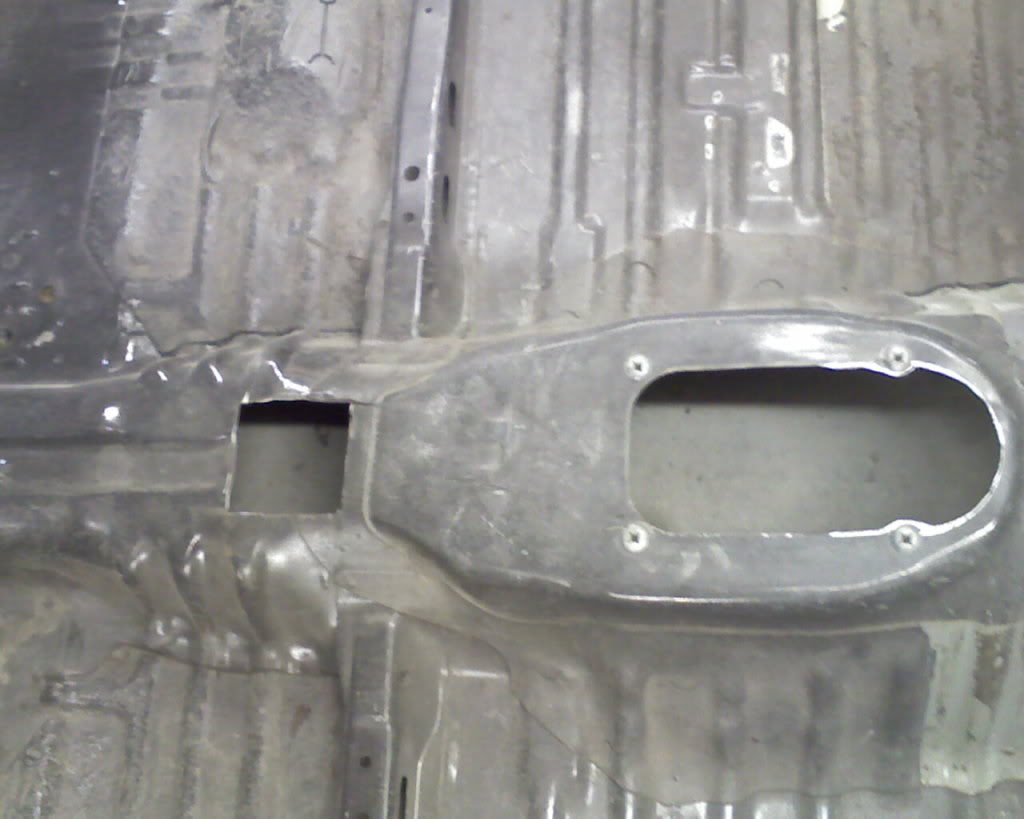
The floor. I didnt get fancy with the cuts on the rear case but i have a nice boot that covers it all up and a console.
I also had to weld the body mount together from where i cut it for the powersterring box. I ground it all out and had to move the inner fender area over another 3/4 inch so it didnt rub and make noise over bumps..Plus the cab wouldnt line up as it was.
I seam sealed everything on the cab i could find so that i wouldnt be dealing with rust. Some gaps were open really far so i cleaned them and pinched them back together with some seam sealer inside.
So that has tonight and tomorrow to dry so i can prep the underside of the truck and inside for the next step.
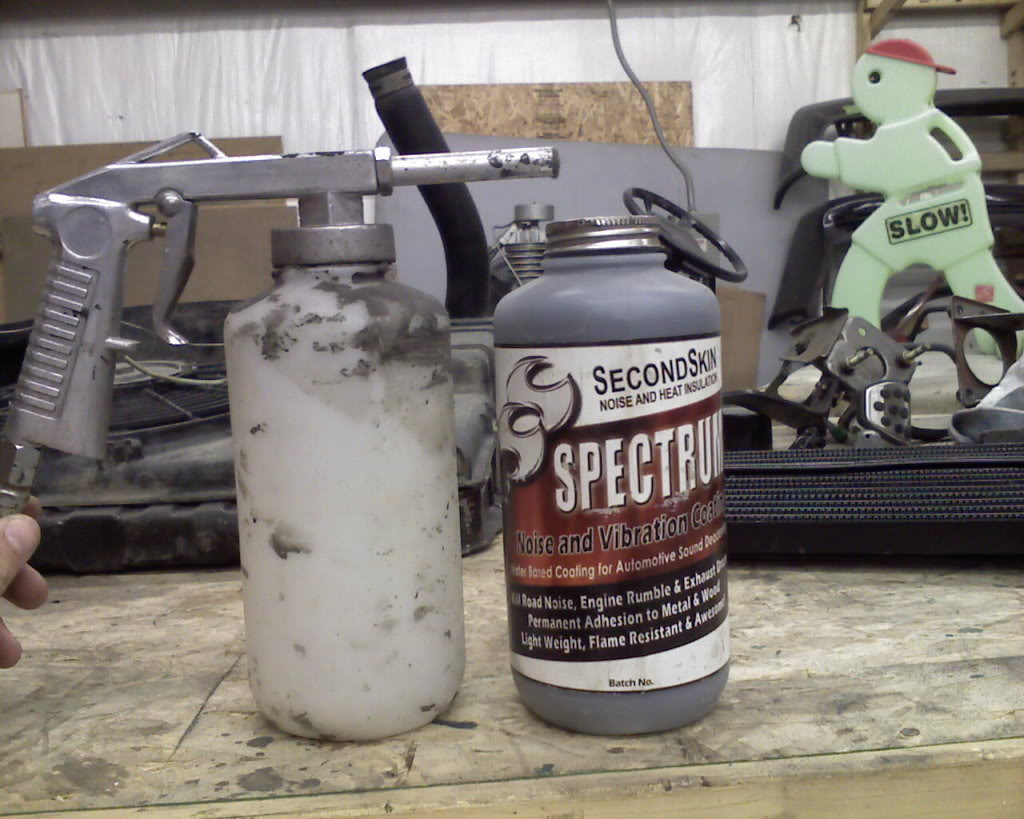
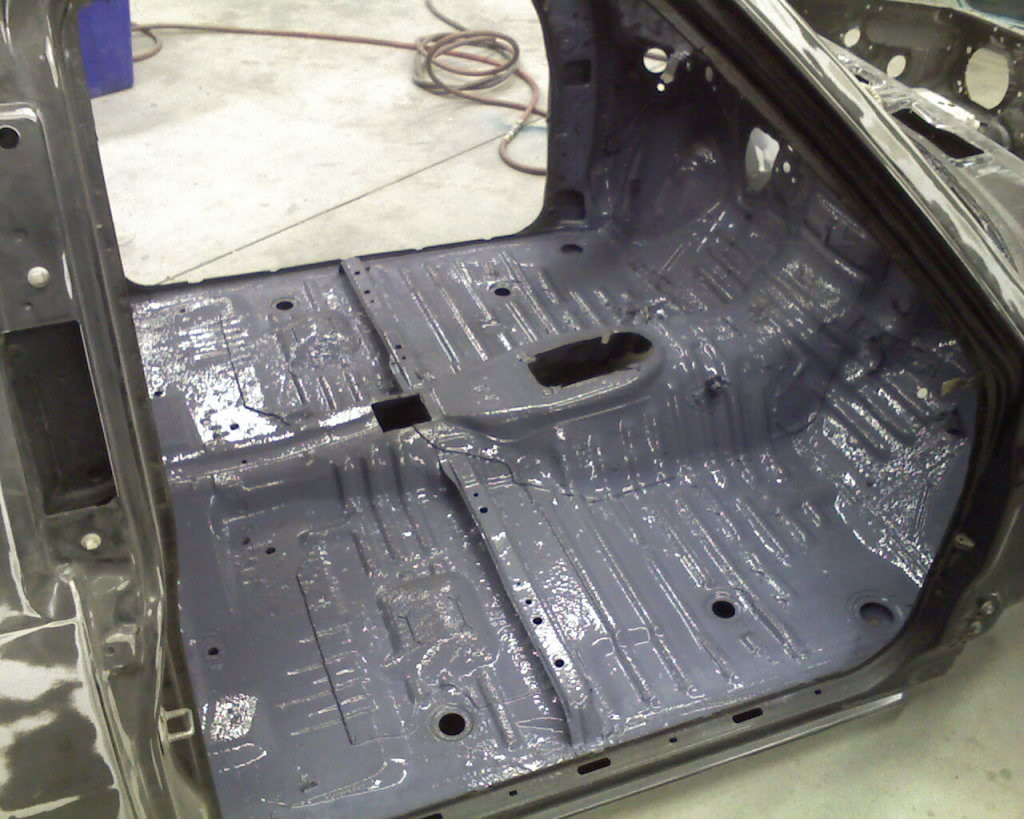
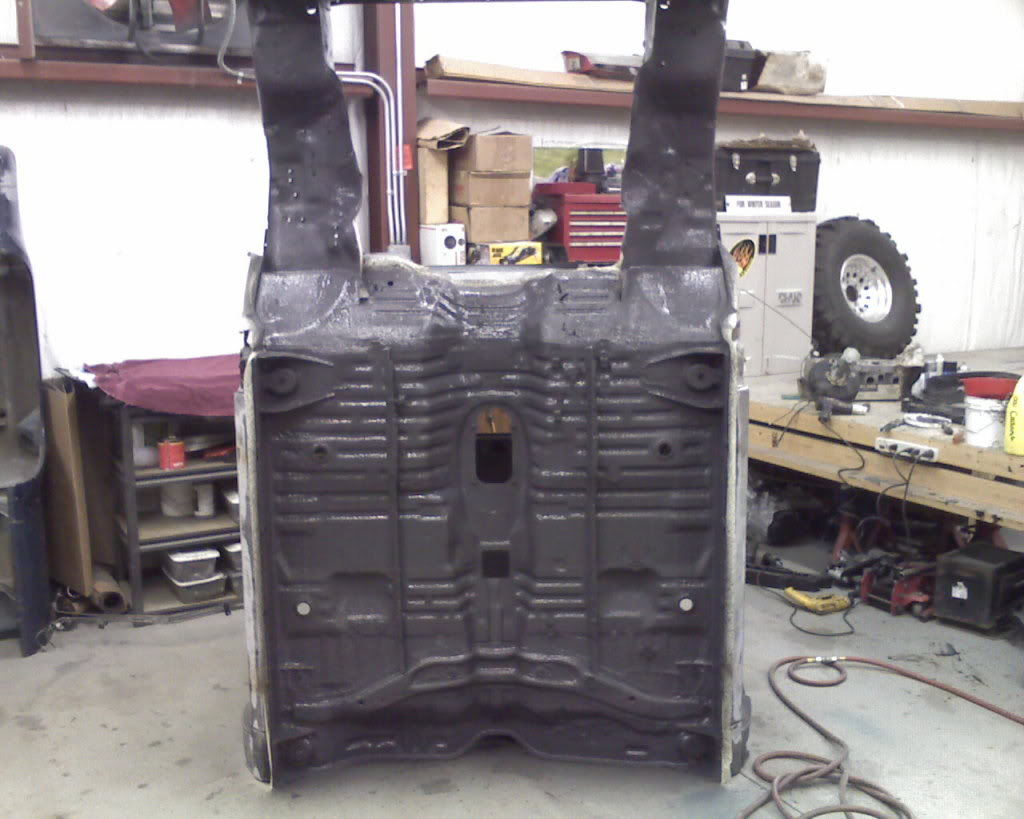
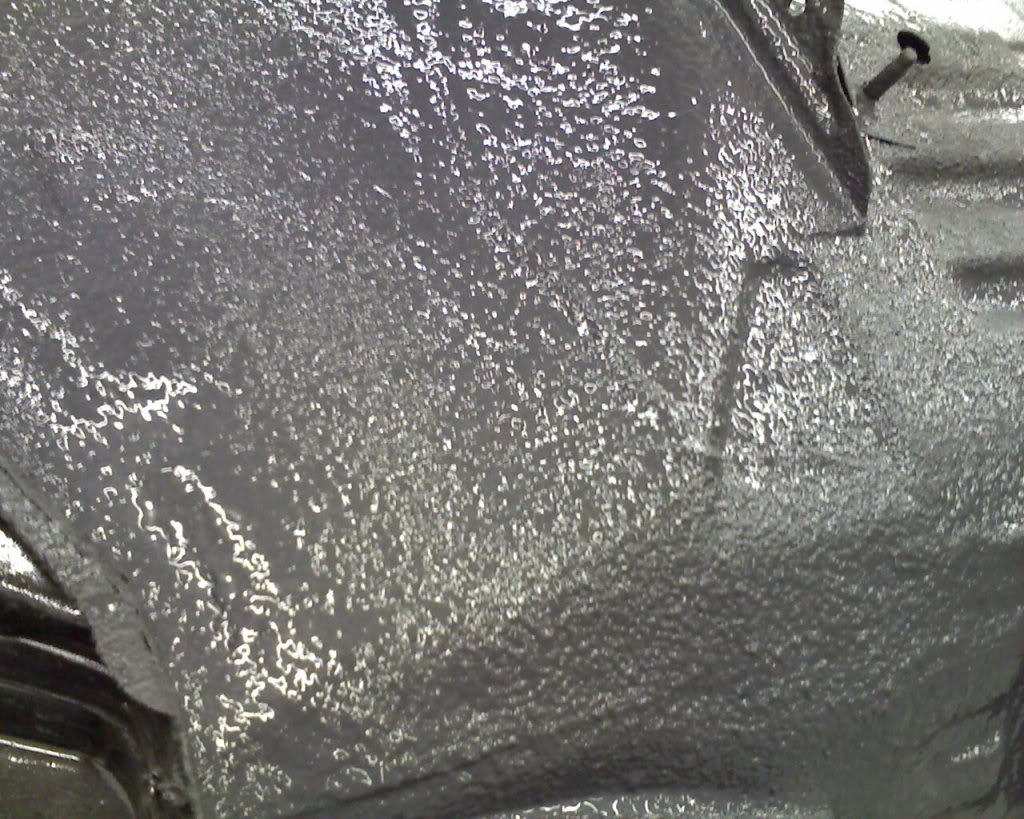
Gotta kill the noise. My buddy ben hooked me up with 3+ gallons of this stuff cause it would go bad by the time he got back from playing army. The idea is cover the bottom and inside of the cab then paint over it so it has a nice texture(spray gun to the left) and will be clean and quiet. After i finish that on the inside of the cab i will paint the bottom, inside and bay of the truck and start the mat of the full inside of the truck. Remember im going for lexus quiet on this truck cause it will be a daily in the winter and i drive 80+ miles a day. I can then throw in the wiring, finish the dash and throw new carpet in and block the cab, jam the doors and hood. Nate has some filler work to do from the bed bob(great bodyguy) and the smashed up bedside on the used bed i picked up but then i can paint it finish putting it together and drive it!!!!
Sooooo, I haven't been moving as fast as planned. Not only have i been working as much as possible im also taking on any and all side work i can so i can put the money away for interior and a new toy(not a car or drivable). My OCD went in to overdrive on the bay and rather then deal with the hole i cut in the firewall i thought sectioning the tacoma firewall would be the answer. After talking to my buddy bart and getting his feedback i went for it. Bart came up and cut it all up and welded the new plate in and took care of some of the spotwelds i drilled out for the old battery tray. His fab work always amazes me.
So when we left early a.m. the truck still needed to have a few welds ground down and then mud work. So today i went over to the shop about 4 and went nuts. I metal shaped where the shock towers go to make a bit of extra room so they dont rub if the body moves, Mudded them and sanded em down, Mudded the firewall where bart welded up the tacoma section and plugged off the old heatercore line on the drivers side. I think the way it turns out looks factory and weird at the same time...Dont get me wrong i think its bad ass i just have to adjust. I also ground out the old battery tray area where the welds were done and smoothed it out. Got the floor cut and cleaned up for the duals and because im using a 2wd cab the shifters didnt fit right.
Enough talk on to the pics.
Shock tower area and old battery tray area primed
Drivers tower and bracket for the tacoma fuseblock primed.
Tacoma area and shaved hole for the old heatercore.
The whole thing together...I wanna block it out and sand the bay in the other areas again because the rust stuff i used on the cab is garbage
The floor. I didnt get fancy with the cuts on the rear case but i have a nice boot that covers it all up and a console.
I also had to weld the body mount together from where i cut it for the powersterring box. I ground it all out and had to move the inner fender area over another 3/4 inch so it didnt rub and make noise over bumps..Plus the cab wouldnt line up as it was.
I seam sealed everything on the cab i could find so that i wouldnt be dealing with rust. Some gaps were open really far so i cleaned them and pinched them back together with some seam sealer inside.
So that has tonight and tomorrow to dry so i can prep the underside of the truck and inside for the next step.
Gotta kill the noise. My buddy ben hooked me up with 3+ gallons of this stuff cause it would go bad by the time he got back from playing army. The idea is cover the bottom and inside of the cab then paint over it so it has a nice texture(spray gun to the left) and will be clean and quiet. After i finish that on the inside of the cab i will paint the bottom, inside and bay of the truck and start the mat of the full inside of the truck. Remember im going for lexus quiet on this truck cause it will be a daily in the winter and i drive 80+ miles a day. I can then throw in the wiring, finish the dash and throw new carpet in and block the cab, jam the doors and hood. Nate has some filler work to do from the bed bob(great bodyguy) and the smashed up bedside on the used bed i picked up but then i can paint it finish putting it together and drive it!!!!
Sep 26, 2009 | 12:01 PM
#131
Thread Starter
Registered User
Joined: Apr 2005
Posts: 876
Likes: 0
From: Longmont Colorado
never again!
pics are up.

I just need to resand the bay and jams for overspray of this crap. After that i can paint the bay and underside of the cab and inside. After that body work on the bed and doors goes down and i can paint it and buy it. Now work on it tel sunday if im lucky. Im wheeling and watching the olympia this weekend.
pics are up.
I just need to resand the bay and jams for overspray of this crap. After that i can paint the bay and underside of the cab and inside. After that body work on the bed and doors goes down and i can paint it and buy it. Now work on it tel sunday if im lucky. Im wheeling and watching the olympia this weekend.
Oct 2, 2009 | 09:33 PM
#132
Registered User
Joined: Jan 2006
Posts: 878
Likes: 0
From: Elbert, CO
I didn't know you had a thread up here, it's way more updated than your Cottora one, IIRC. Looks like I need to get my ass up there and take a look at everything, maybe give you a hand one of these weekends.
We oughta go out for our birthdays (mine's the 18th).
We oughta go out for our birthdays (mine's the 18th).
Oct 4, 2009 | 11:12 PM
#133
Thread Starter
Registered User
Joined: Apr 2005
Posts: 876
Likes: 0
From: Longmont Colorado
I stopped updating the cottora one for a while but will update it as soon as i see some color.
Yeah you do! Building another rig (see saving one thread on cottora) so i have been slacking on mine some. But come up whenever and im sure we can figure out something to do on the truck. It will see paint on the stuff im shooting at the shop anyday...the rest is waiting on nate to do some mud and some money from me for supplys.
LMK about the B-day thing. I dont drink but im down for whatever!
Oct 19, 2009 | 07:19 PM
#134
Thread Starter
Registered User
Joined: Apr 2005
Posts: 876
Likes: 0
From: Longmont Colorado
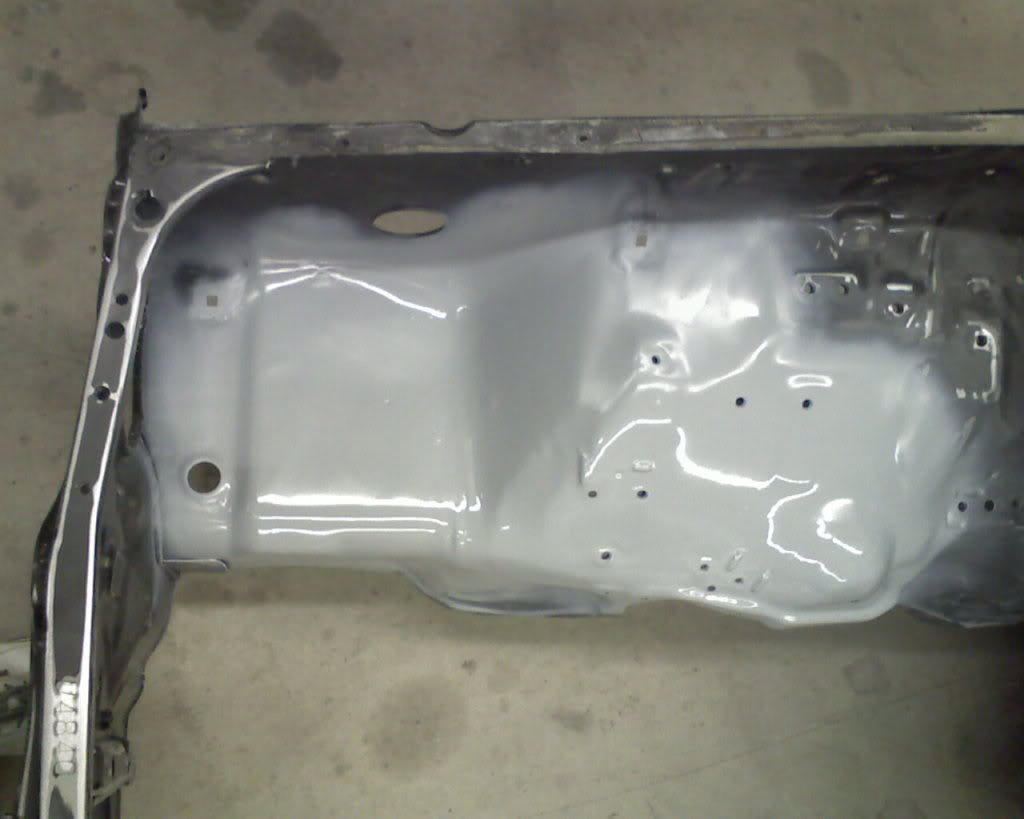
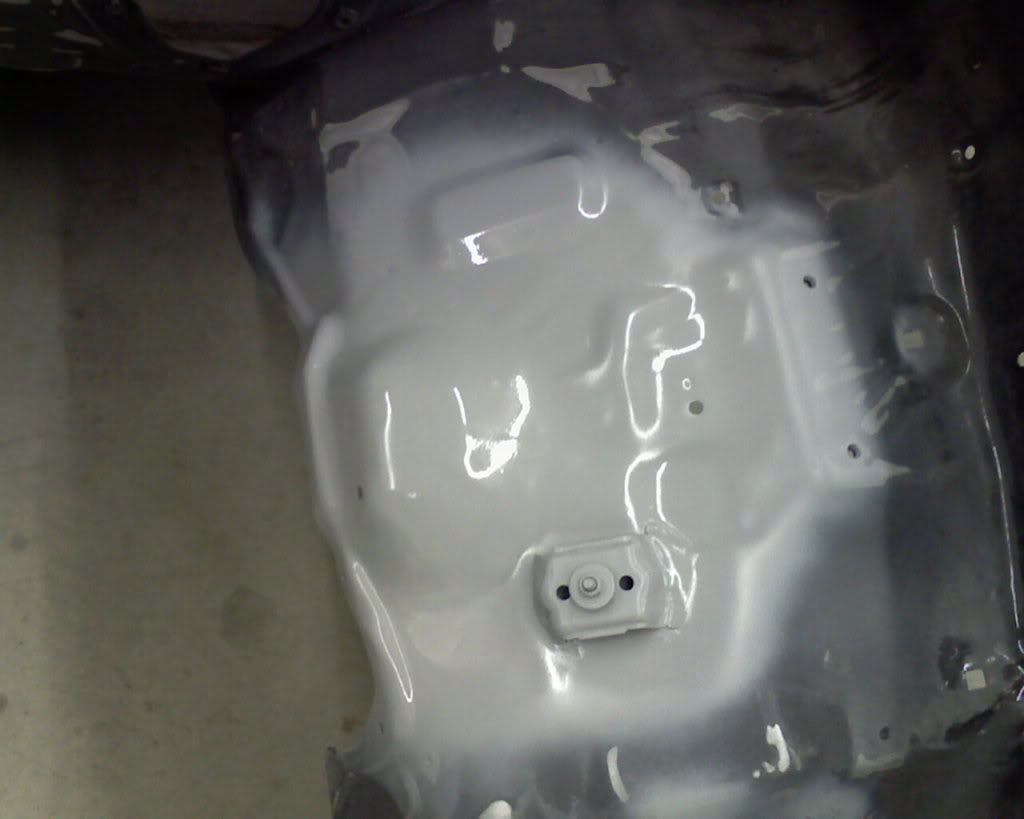
updated...Couldnt paint the bay and underside cause the chassis saver i used on the bay is garbage and peeled when i hit it with air to dust it off. I have to get it all out before i paint it.
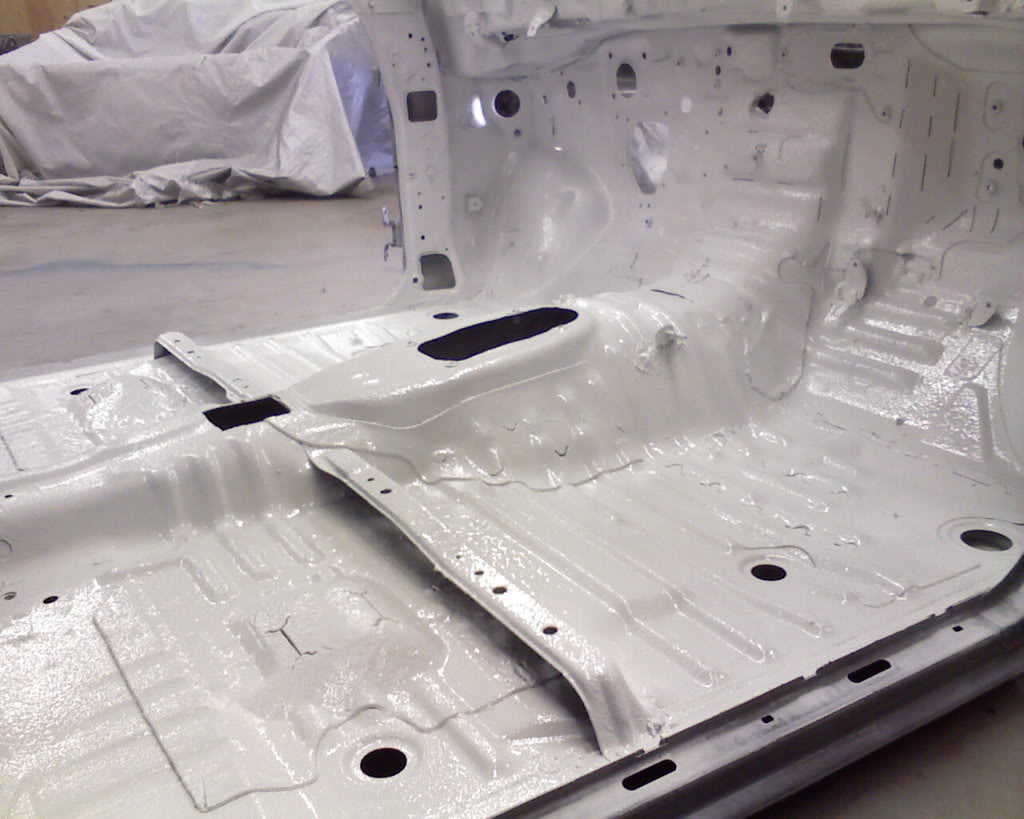
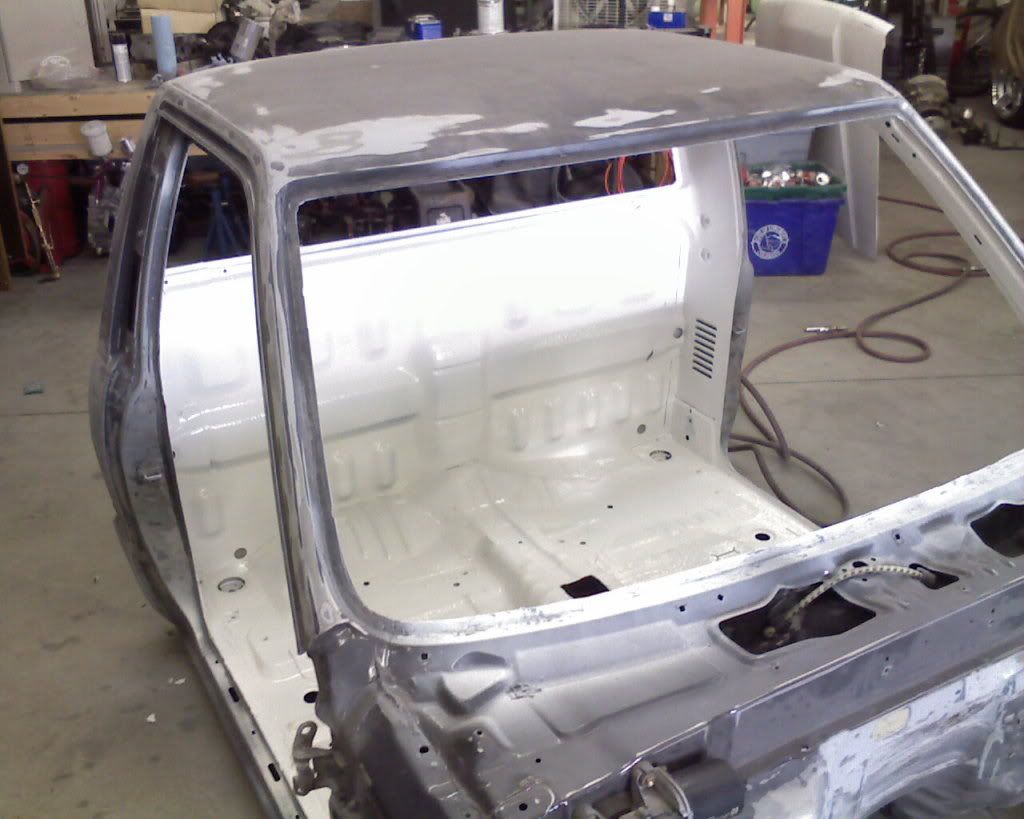
Super white is a bright color.
Super white is a bright color.
Oct 19, 2009 | 09:24 PM
#136
Thread Starter
Registered User
Joined: Apr 2005
Posts: 876
Likes: 0
From: Longmont Colorado
Thanks for following! I will be posting pics as i get through the final steps. I have set a goal to drive it on november 28th so for now im going to dye the dash and get another one to wrap. The interior will be in with multi color goodness tel i get some time to finish it all off.....We all know projects are never finished by the first of the year i should be finished with all i have started and then can drive the truck if i want or need. I still plan on rocking the maxima but if it snows id like to be in the truck.
Oct 28, 2009 | 12:37 AM
#137
Thread Starter
Registered User
Joined: Apr 2005
Posts: 876
Likes: 0
From: Longmont Colorado
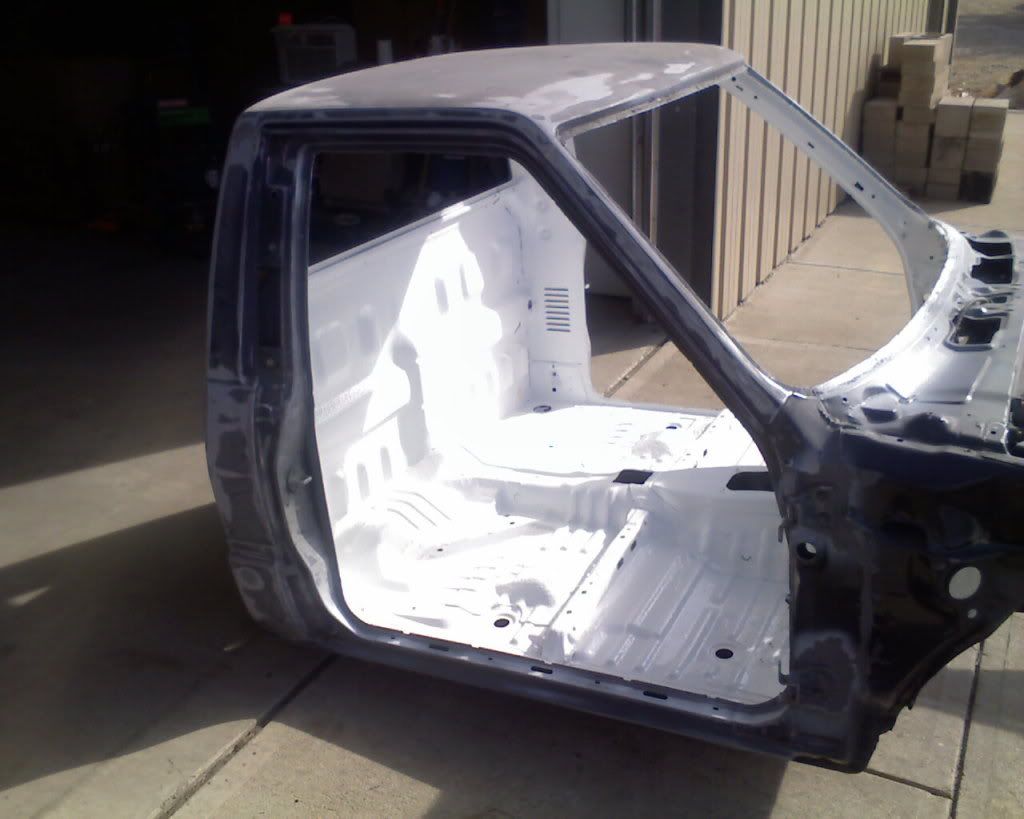
well the chassis saver was junk. Im not sure if i posted it here but its crap and came up in sheets. I had to sand a bunch out too. I ground out all the filler and just started over.
This is what i did today. I have a few spots to finish and i can paint it.
This is what i did today. I have a few spots to finish and i can paint it.
Oct 28, 2009 | 03:57 AM
#138
I love how you spend so much time on each minute detail...but damn is it frustrating haha! I'm so ready for this truck to be done so I can see the finished product. Its like a good long book, you wanna know how it ends but you love the journey to get there haha.
Its lookin good though! Keep it up
Its lookin good though! Keep it up
Oct 28, 2009 | 10:32 AM
#139
Contributing Member
Joined: Jul 2003
Posts: 9,076
Likes: 0
From: Orlando, FL
This is seriously one of the best builds I've seen.
One day, I want to do all of this to the '85 but I just don't have nearly enough time, money, experience...well, you get the idea...
Fink
One day, I want to do all of this to the '85 but I just don't have nearly enough time, money, experience...well, you get the idea...
Fink


