
Redeth's 1989 4Runner Resurrection
 Jun 17, 2015 | 12:07 AM
#2601
Thread Starter
Registered User
Joined: Apr 2012
Posts: 2,817
Likes: 2
From: Los Angeles CA
Update continued:
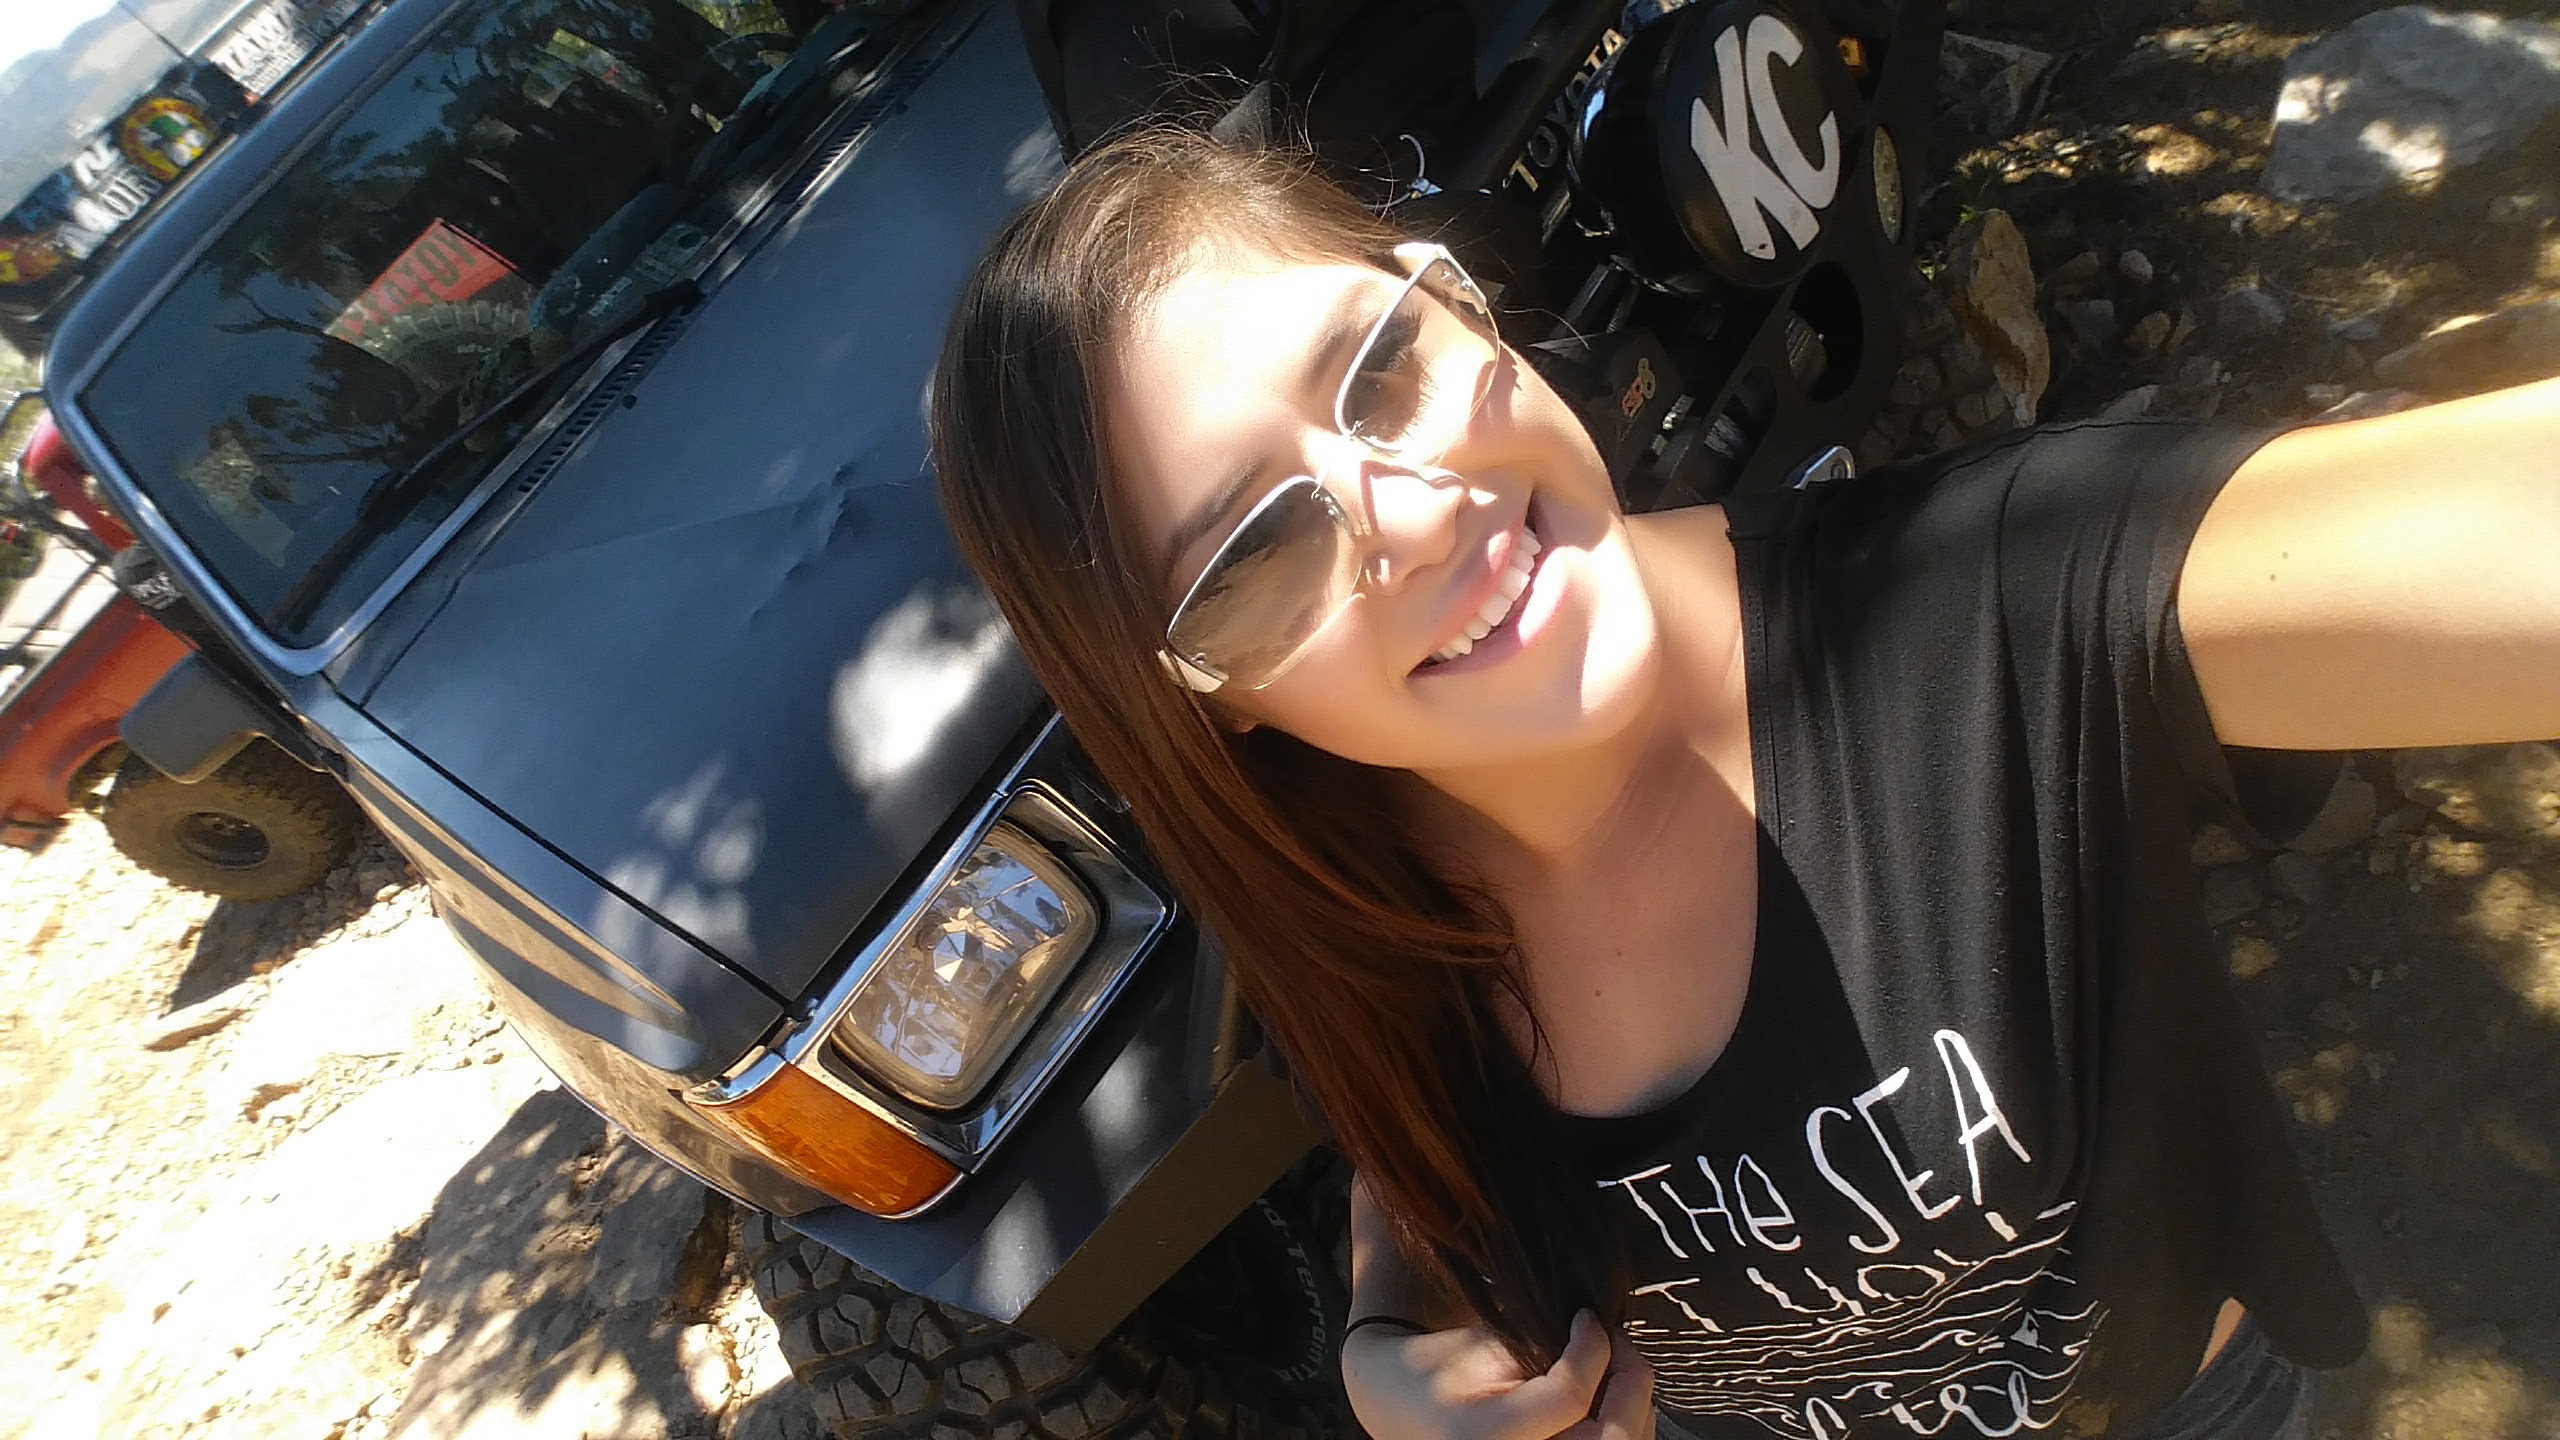
The following weekend (this past weekend) Mark, Me, my girlfriend Faby and about 8 other rigs went to Lucerne Valley Ca to Cougar Buttes. And I have to say I experienced the hardest trails my truck and I ever had to endure! The funny thing is my girlfriend faby has only been off roading with me on desert trips. She has never made it to a rock crawling trip before. So she was scared the whole time! I wish we could have gotten more pix but the wheeling all happened during the night time from 9pm to 3am so most of the pix that were taken were too dark to distinguish what is what. but here are a few good pix. I know you'll enjoy these!
I just had to get away from the City. Being stuck in the hospital all week, doing an online class, and dealing with heavy Los Angeles traffic can get really tiring quick. and I needed to get away for a while. So this trip was pretty nice. We left Saturday morning around 12pm. arrived around 3pm and set up a really nice campsite early on in the day before everybody else showed up.
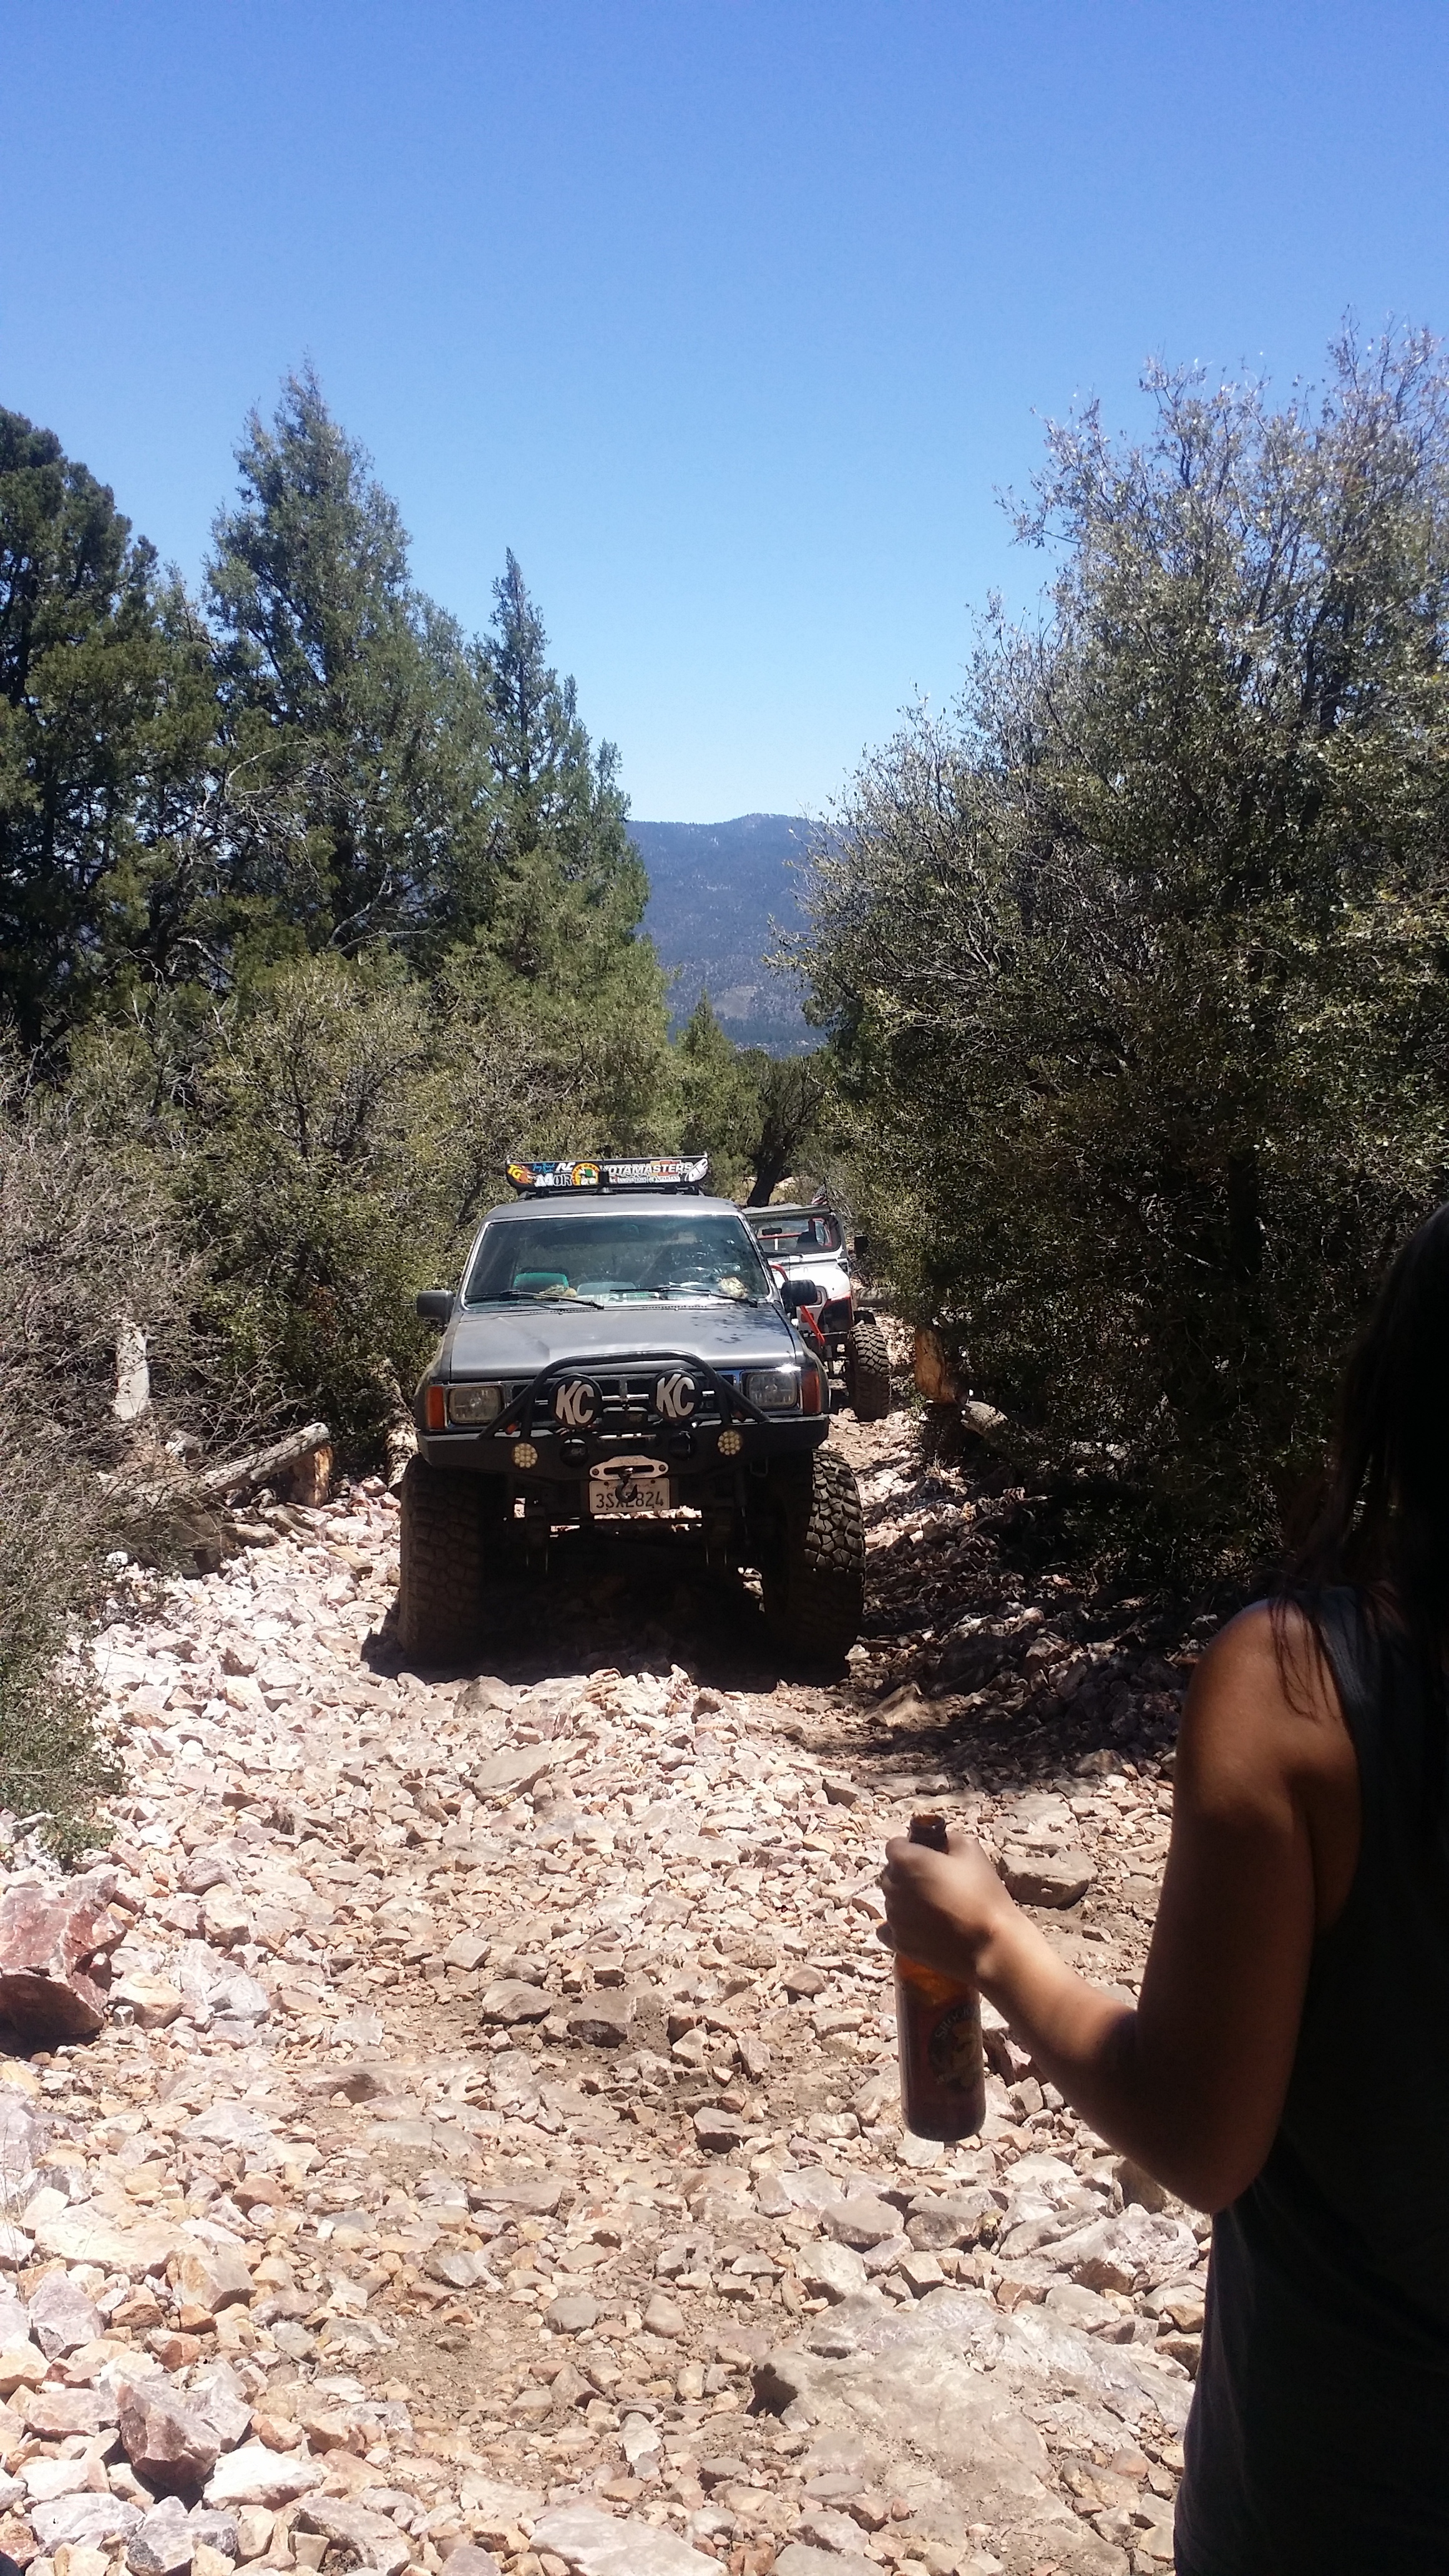
Here we are barely leaving
Arriving on the trail and airing down with my new ARB tire deflator Made things so much easier!

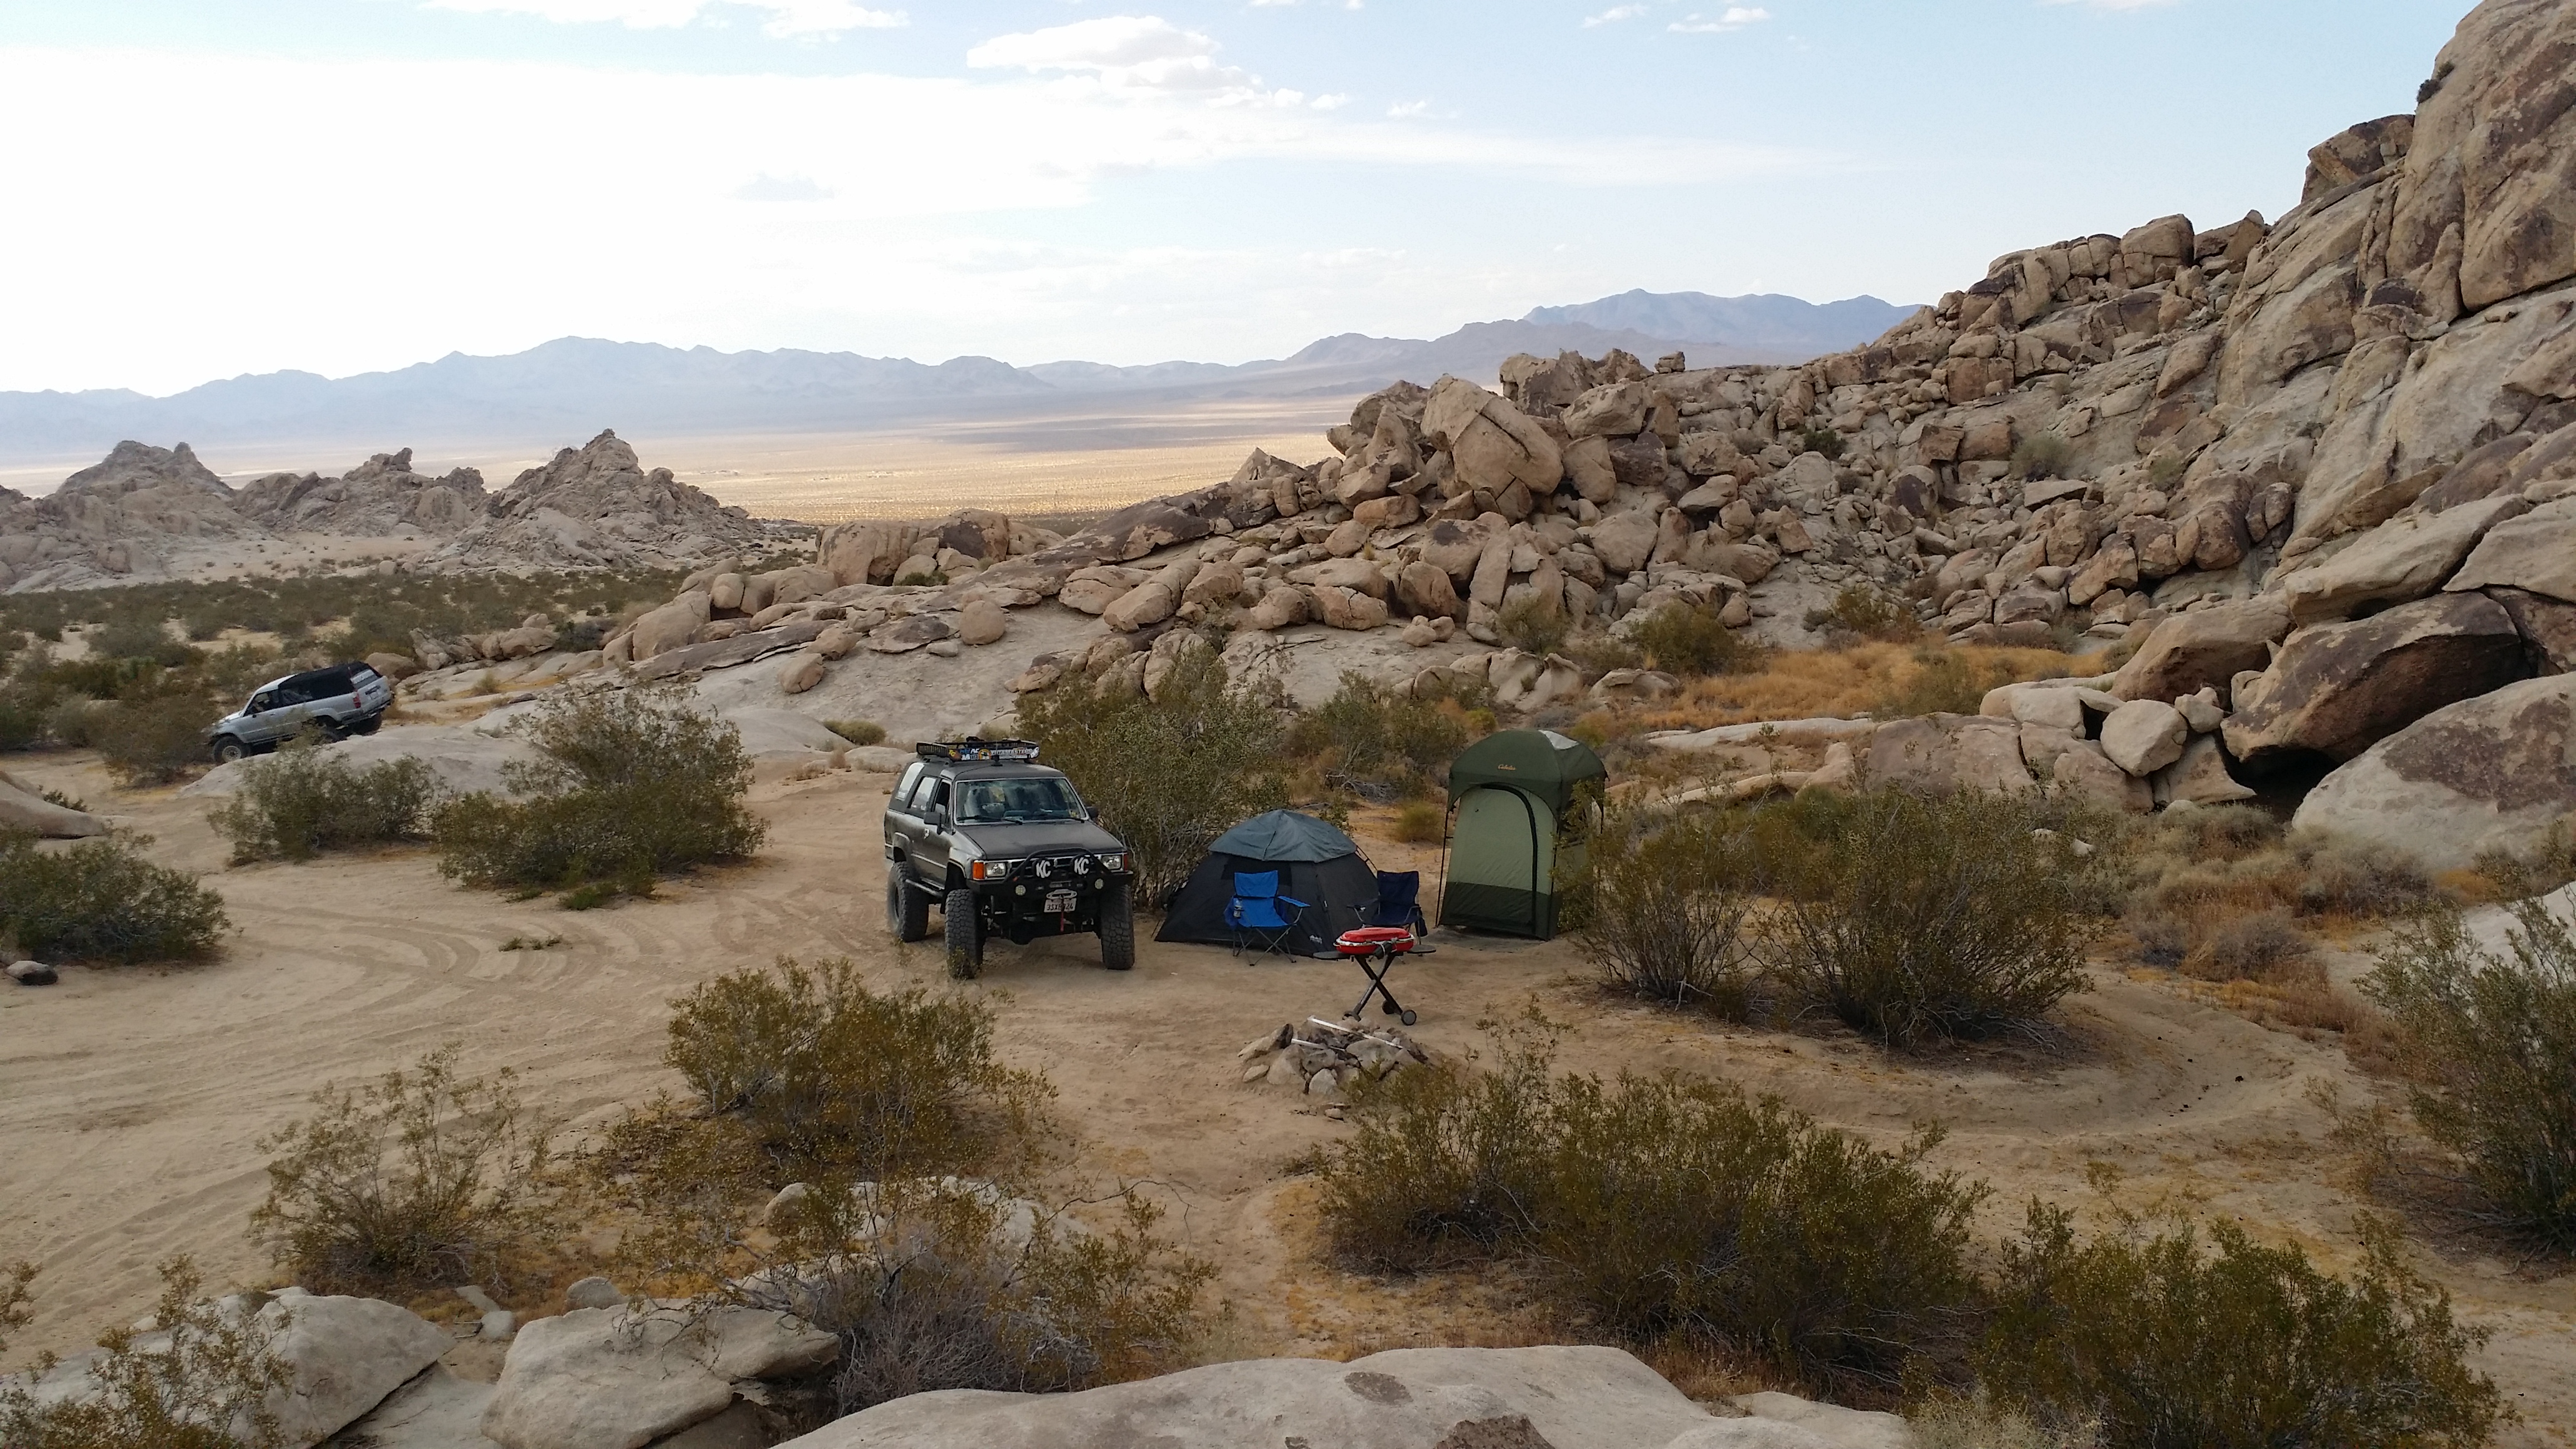
Here is my awesome camp site nook. I think this would be a great shot to blow up on a canvas. or enter for another Calendar contest.
Heres a few more. All i know is that this shower tent (in green) has proven to be a great addition to my camping gear over and over every trip! i love it!
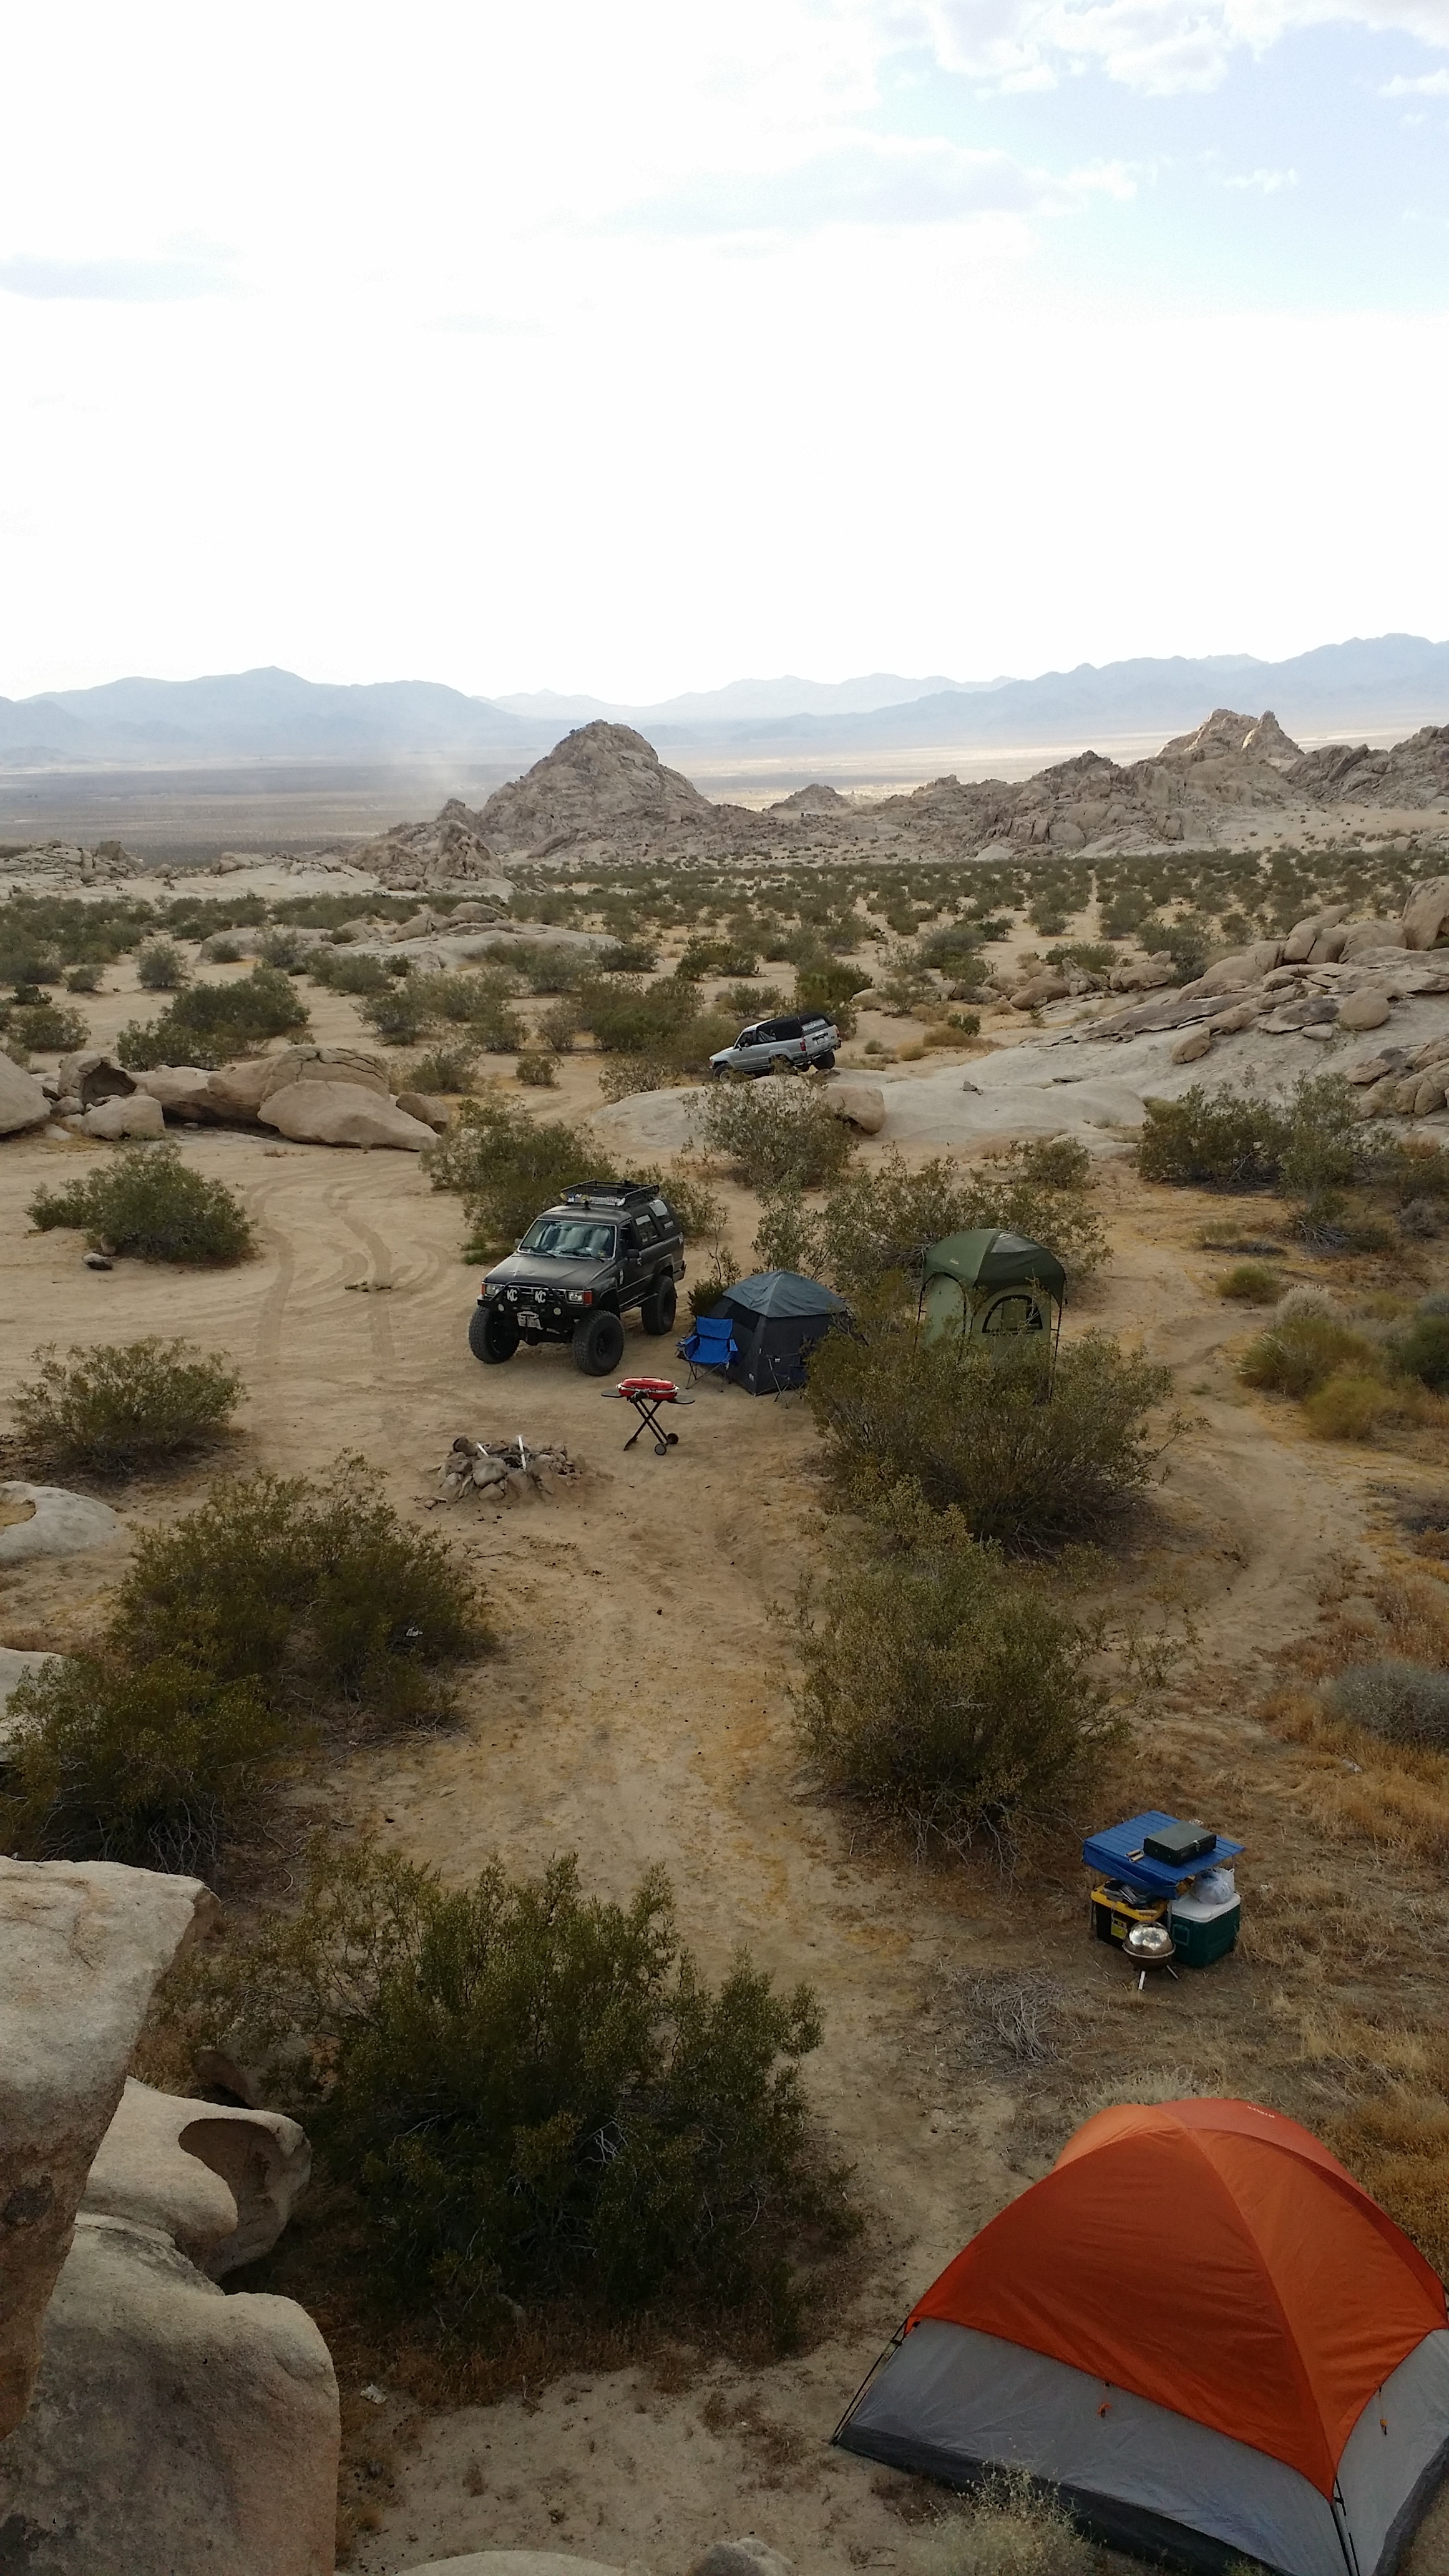
I had to climb on top of a short cliff to get these shots
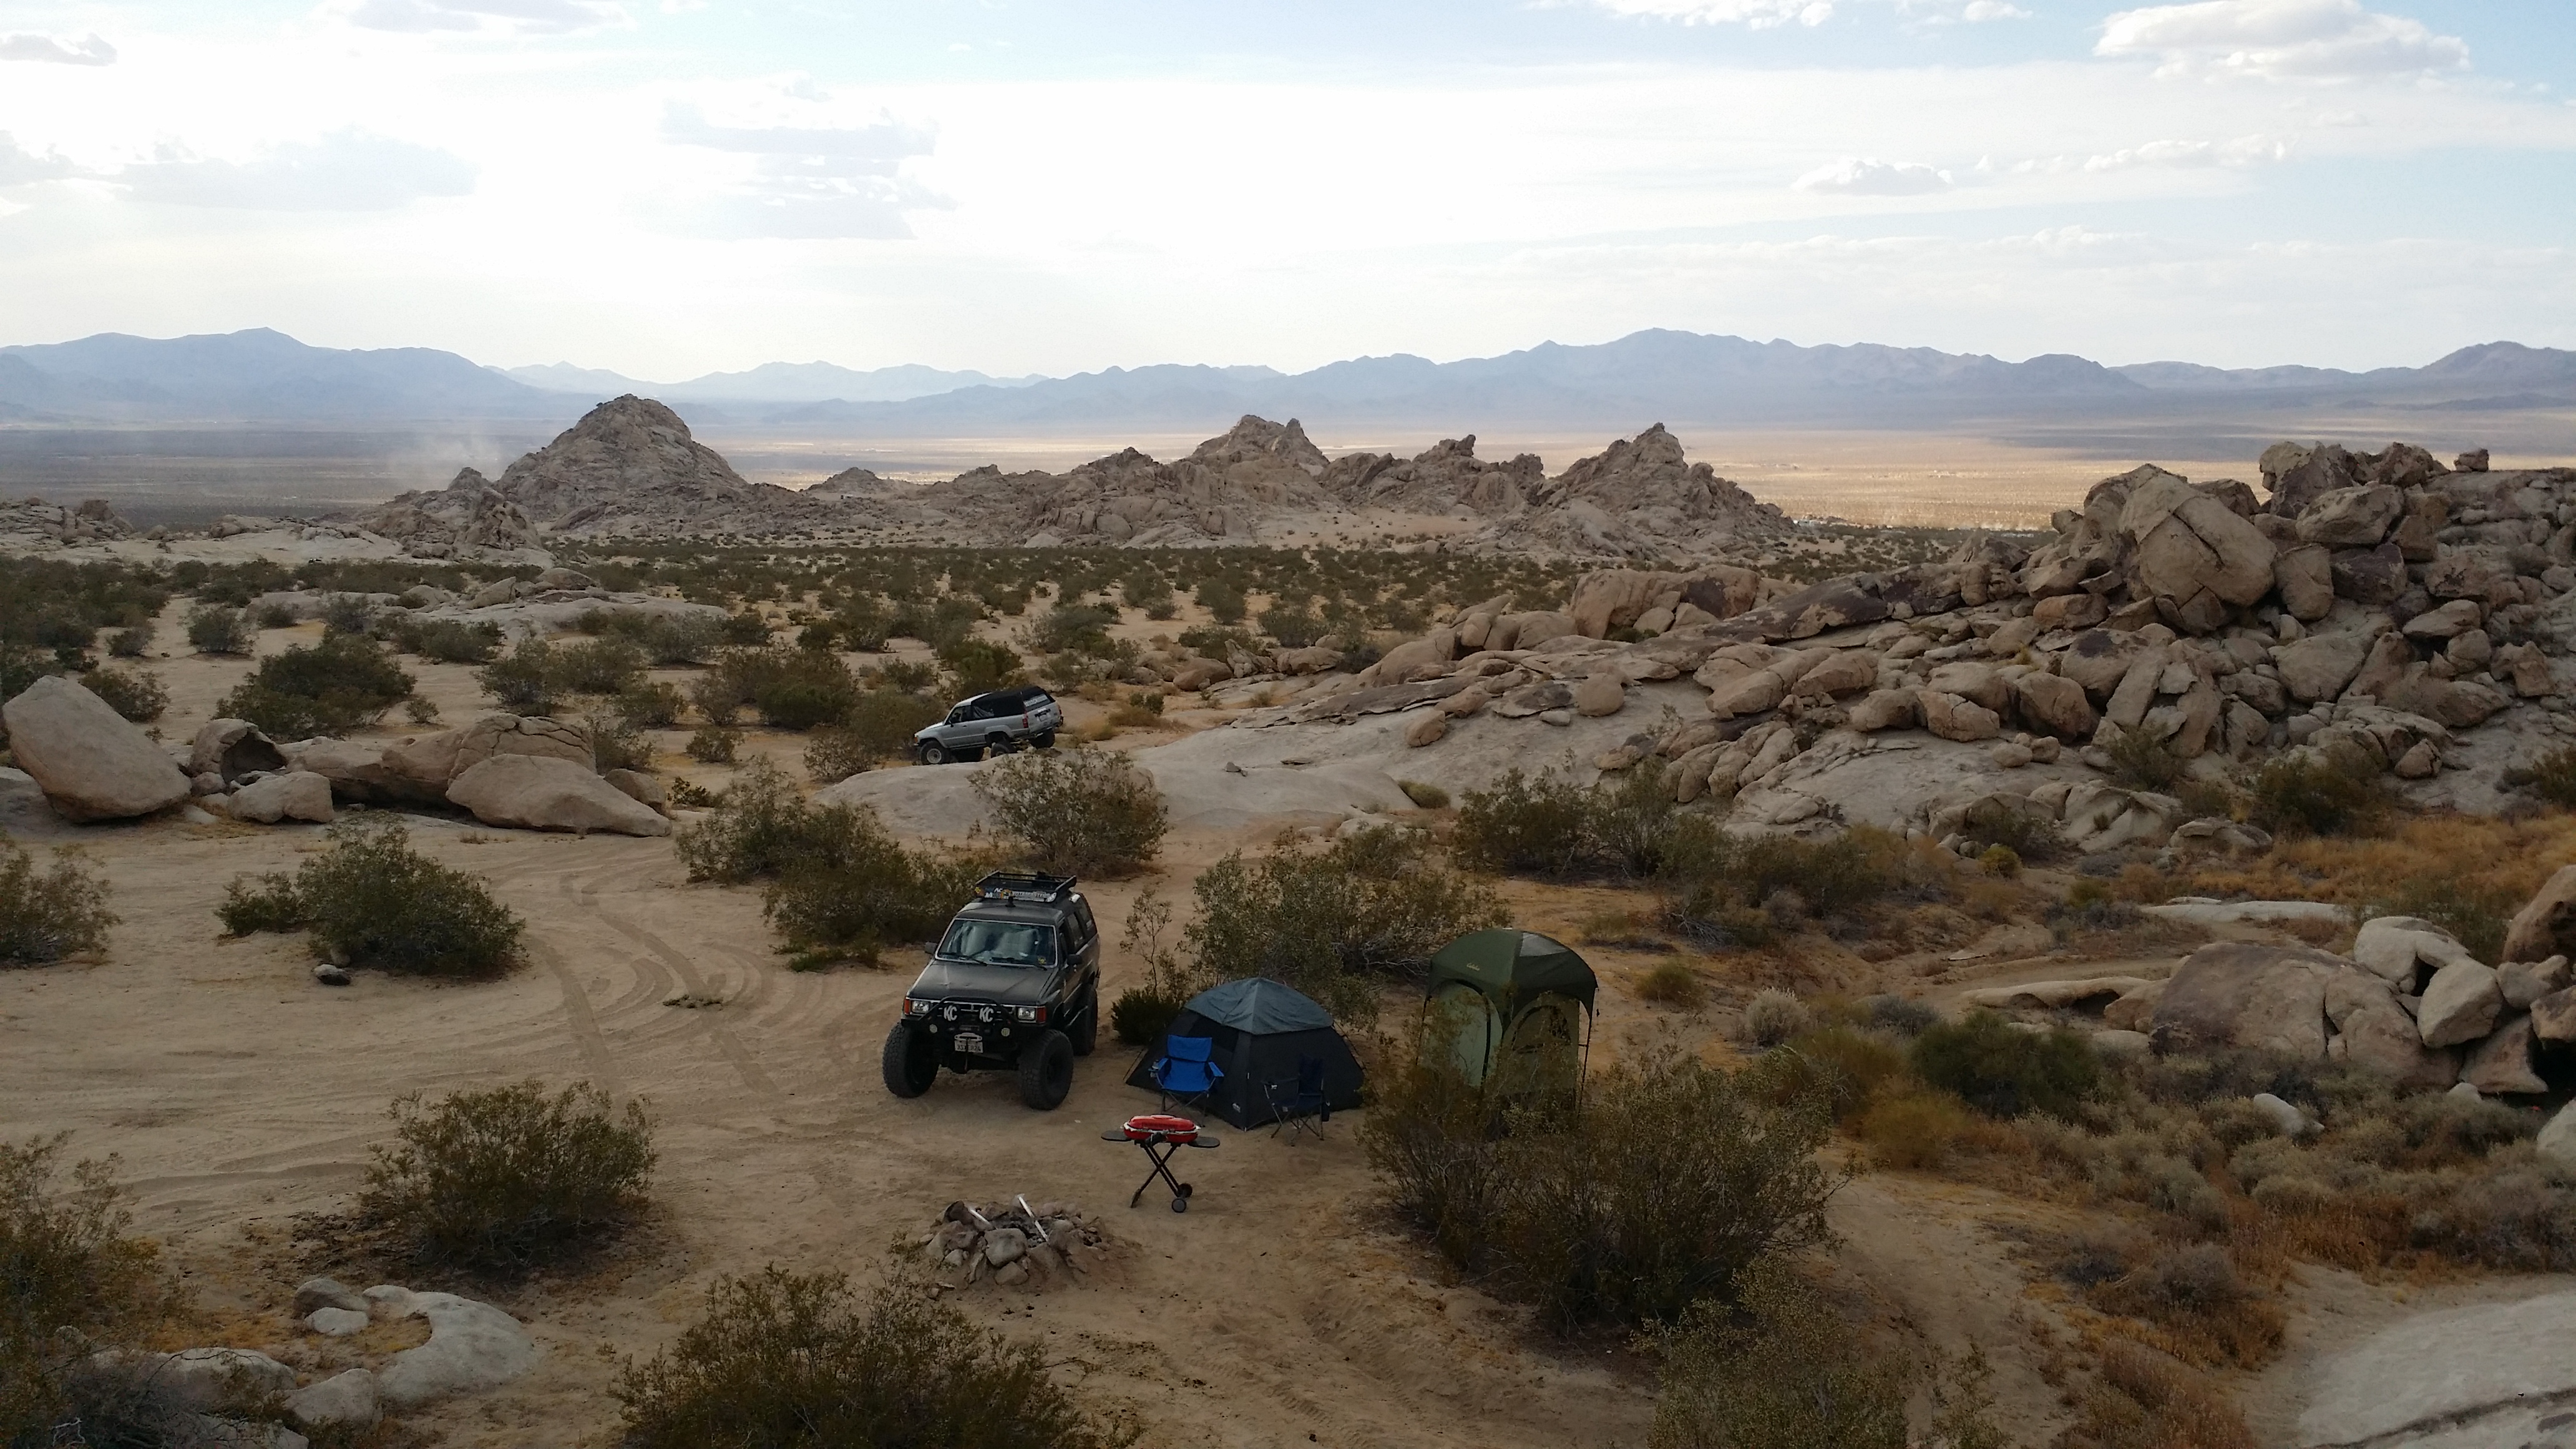
Here's where mark's campsite was. He was out and about looking for gps and cellphone service to direct the rest of the group to us. but at the end of the day he just backed his truck in that space and he was good to go
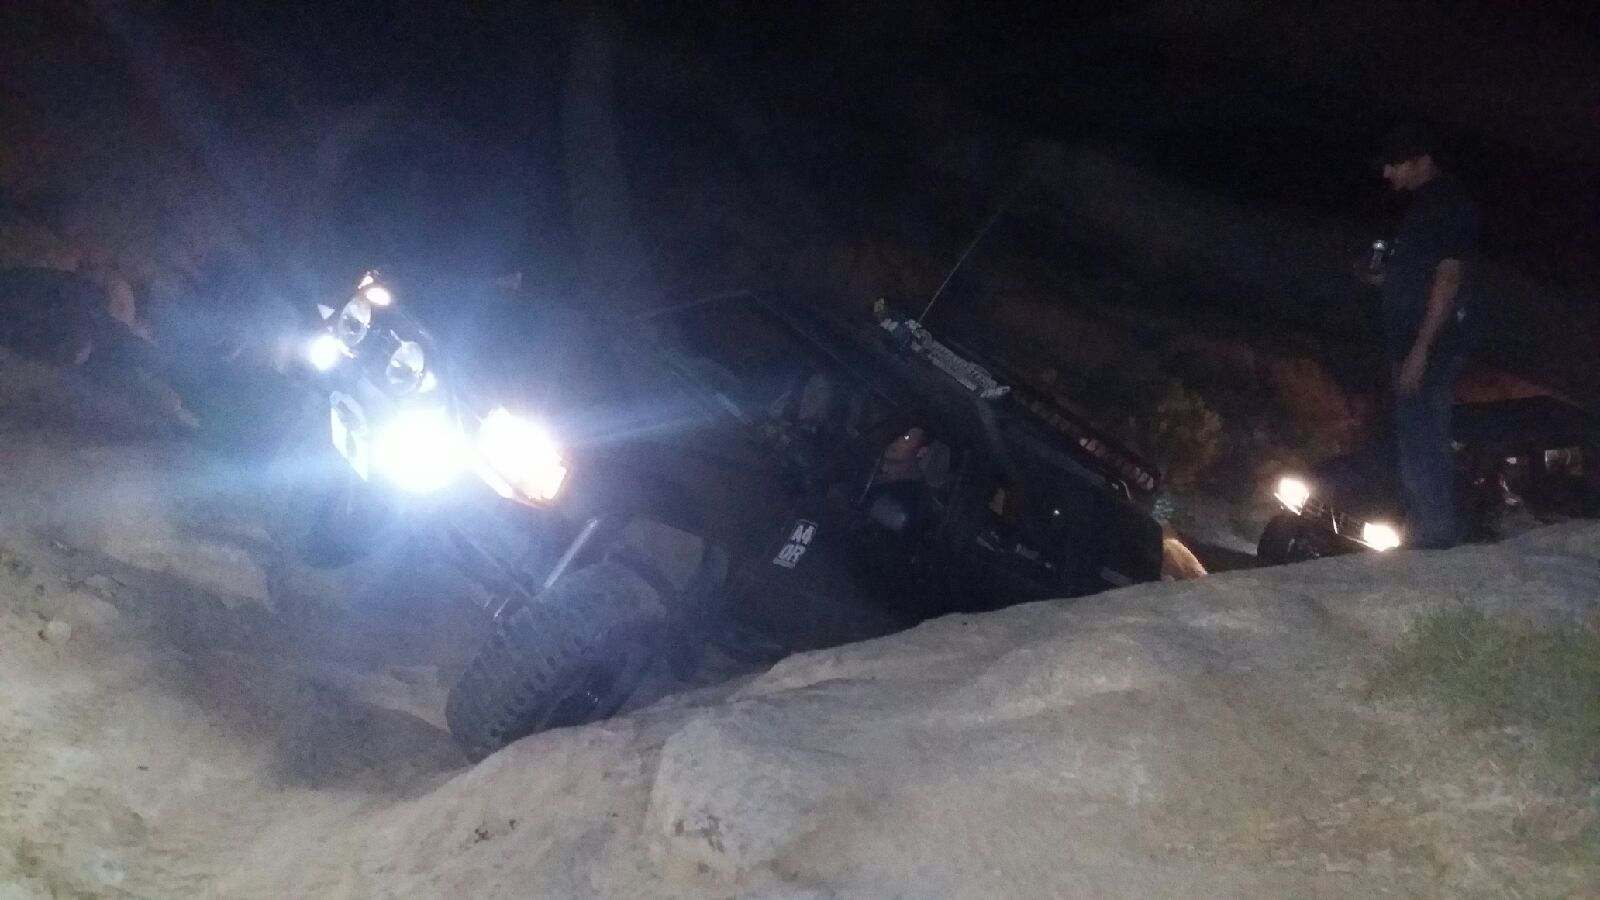
I'm so glad i went on this trip. I experienced Night wheeling for the first time. And i have to admit this was definitely the scariest and hardest trails i have ever done with my truck. I'm happy i had my LED and Dick Cepek Halogen Baja Lights on the front bumper to light my way. IT also helps that everybody there that joined us for the trip also had a ton of lighting including rock lights and LEDS everywhere. So the trail was pretty well lit. And i was always in the middle of the group. I almost flopped on my side twice! and coulde have had some bad scratches on the body, hard top, and maybe a broken rear glass if it wasn't for the awesome spotters we had. i was pretty scared. but once you were in that deep there really isn't much you can do to turn around. So i had to go through it. Thank God i came out of that trail completely with no body damage or broken parts.

This particular shot is where i would have flopped hard on the driver side if i hadn't leveled out
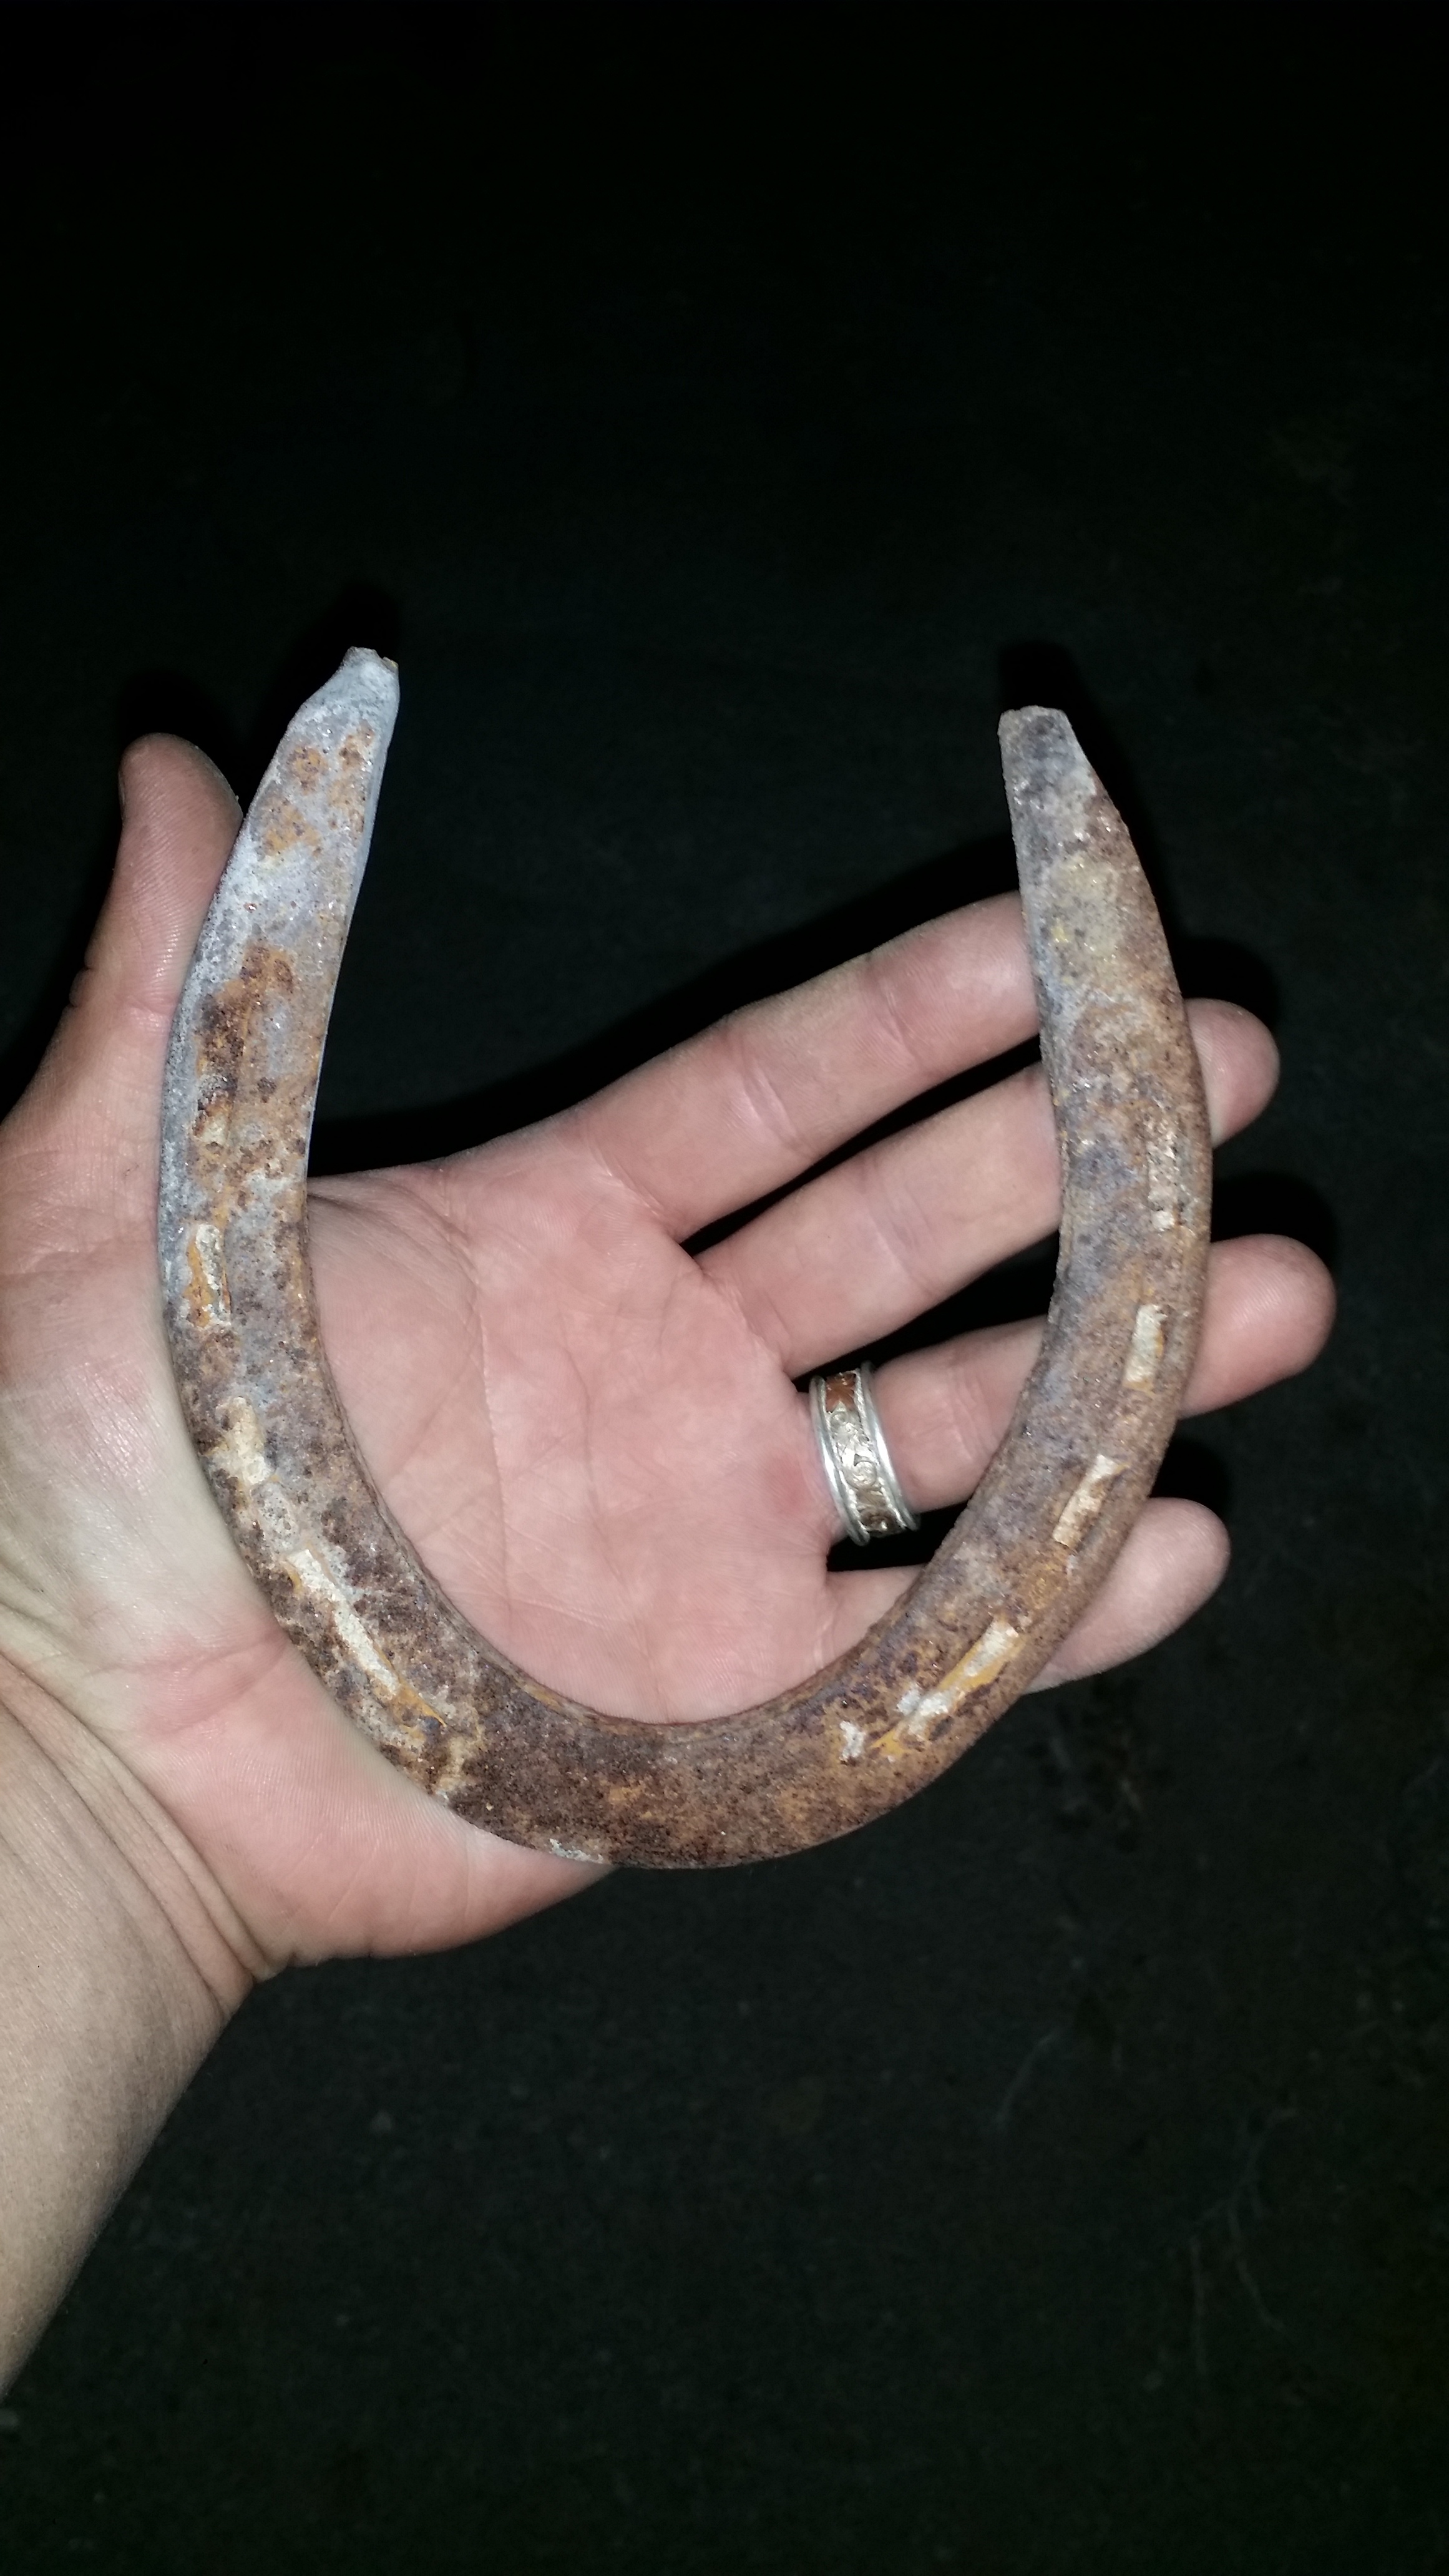
Maybe my luck had to do with this cool old Horse shoe that i found earlier that night. But i'd like to think god was watching over my dumba$s trying to conquer those trails lol
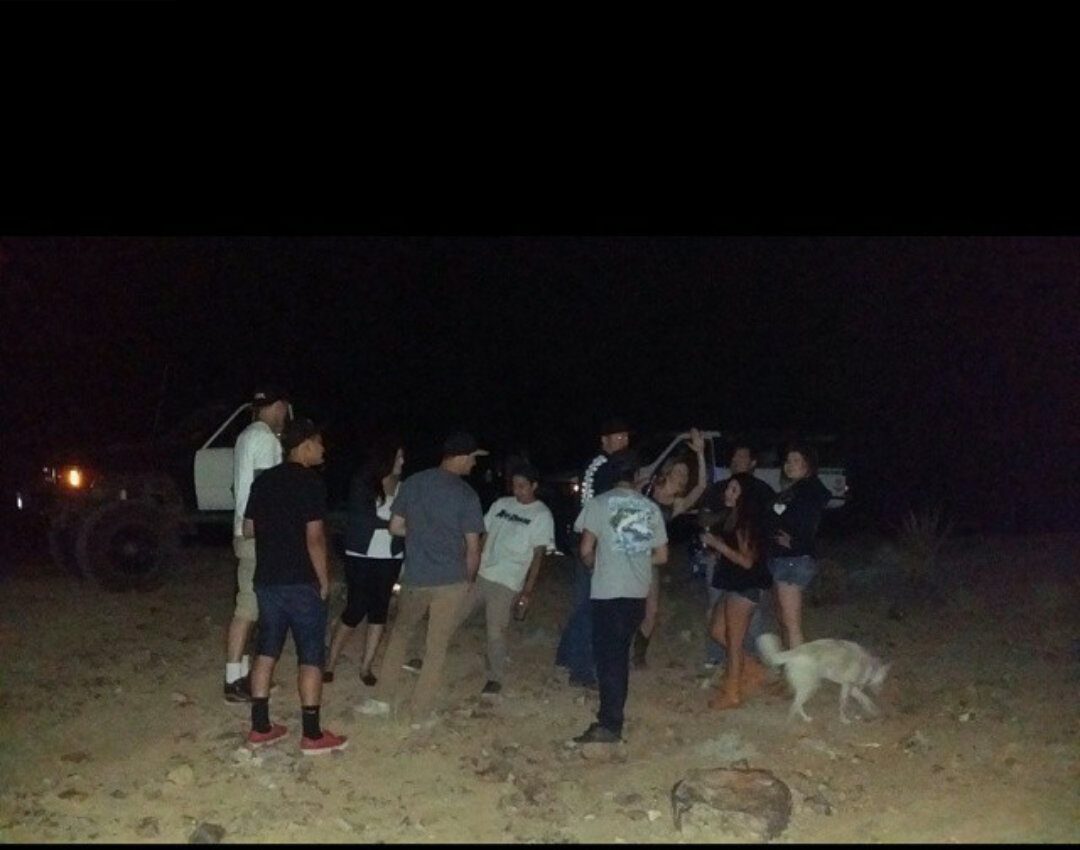
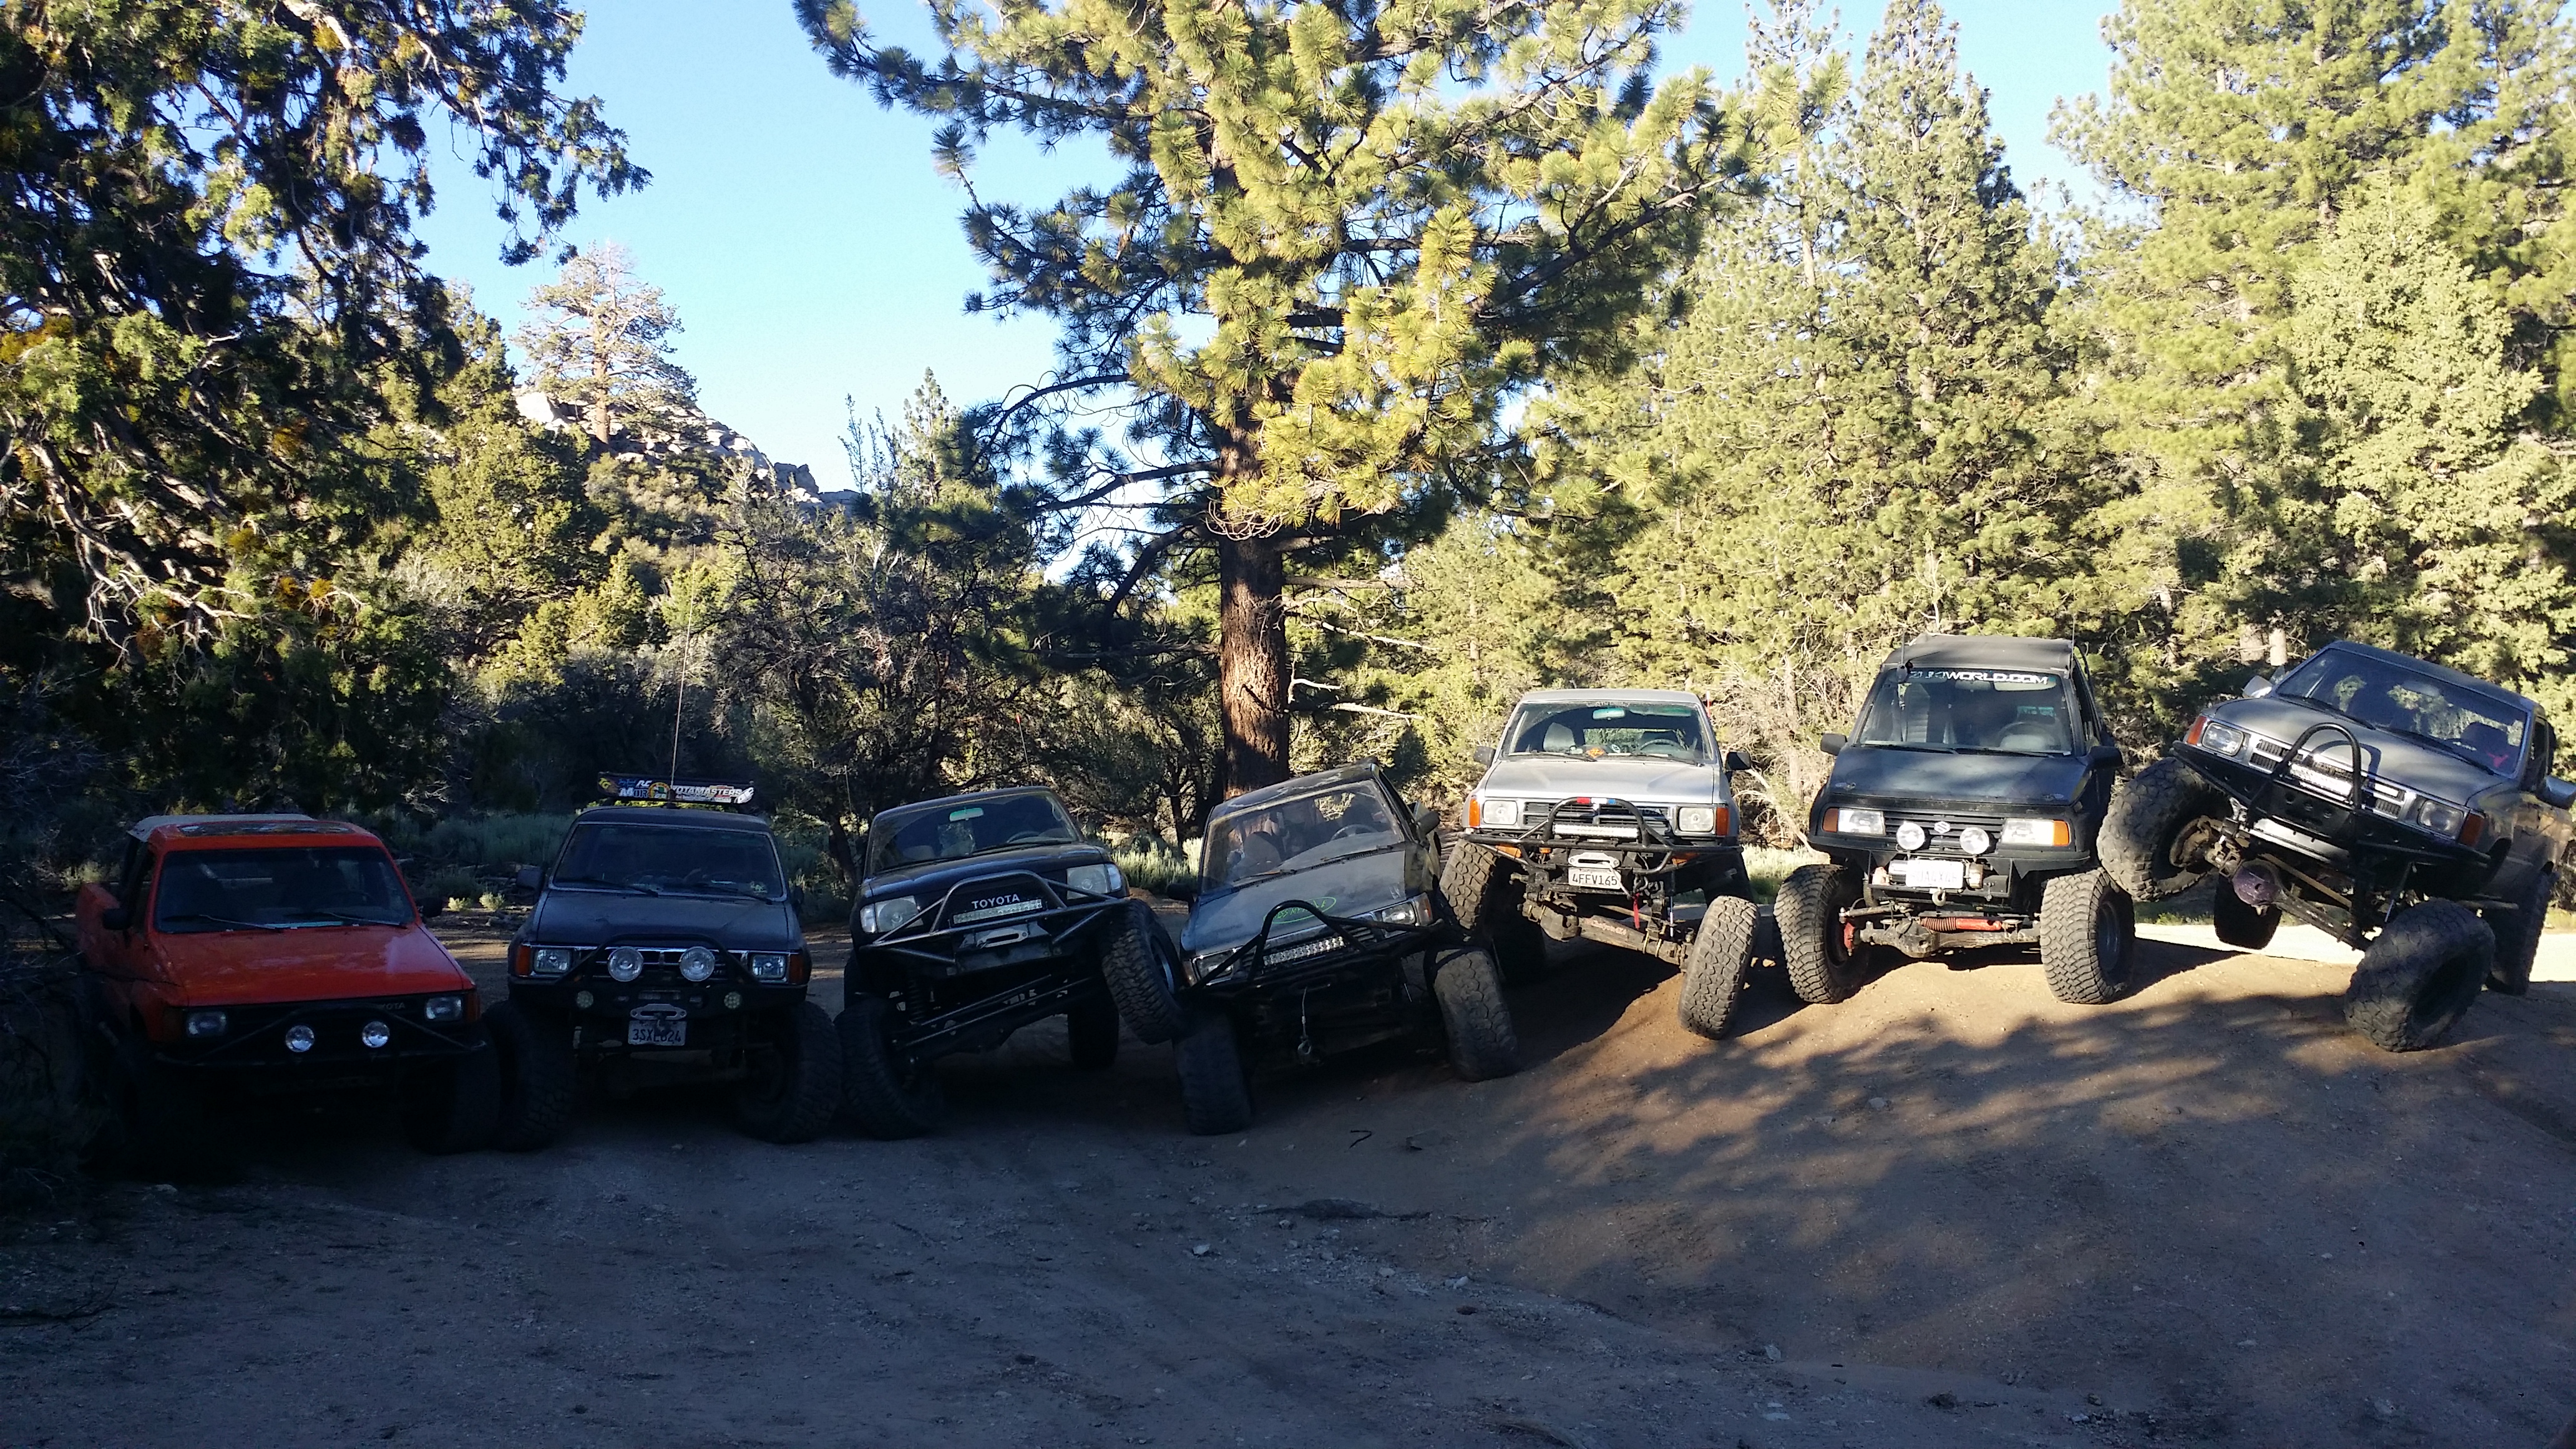
Some of the people who came in our group

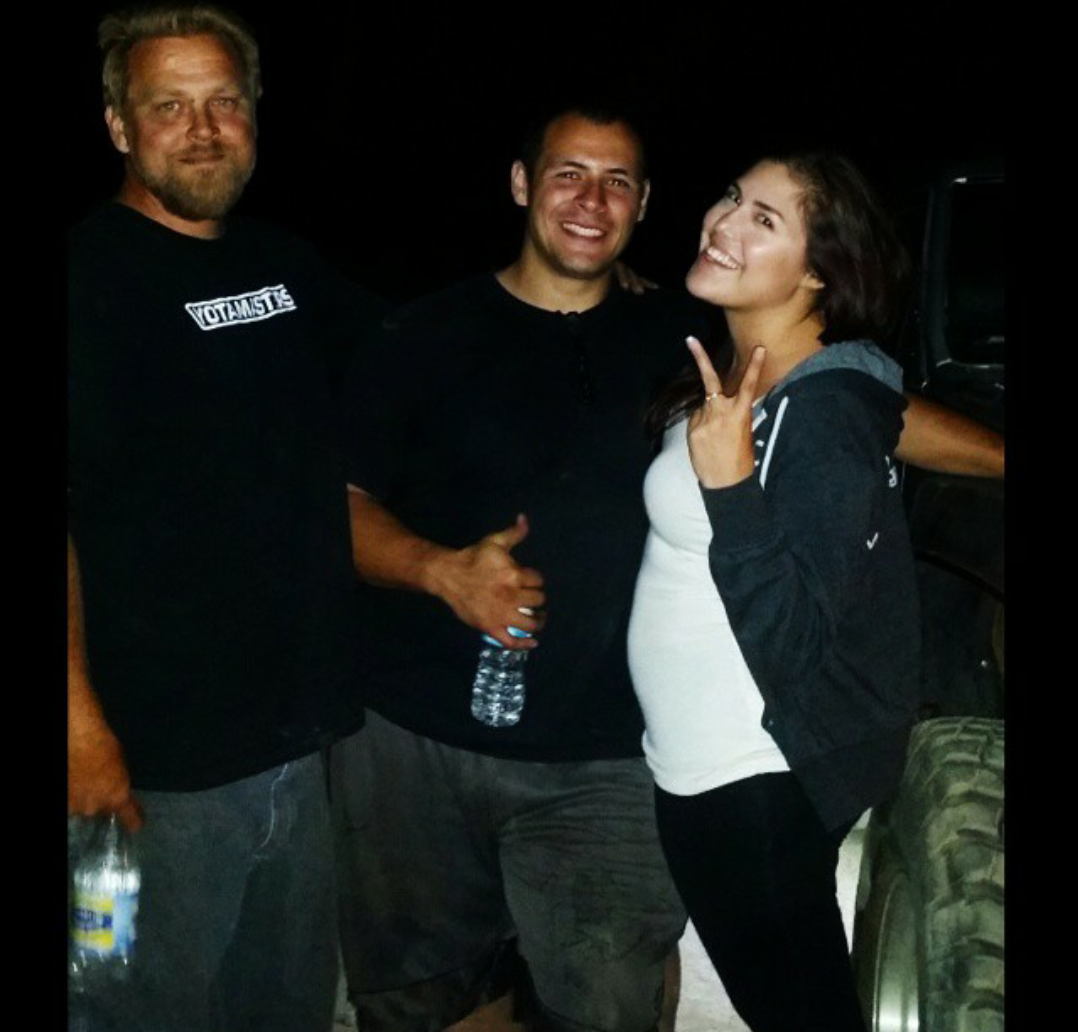
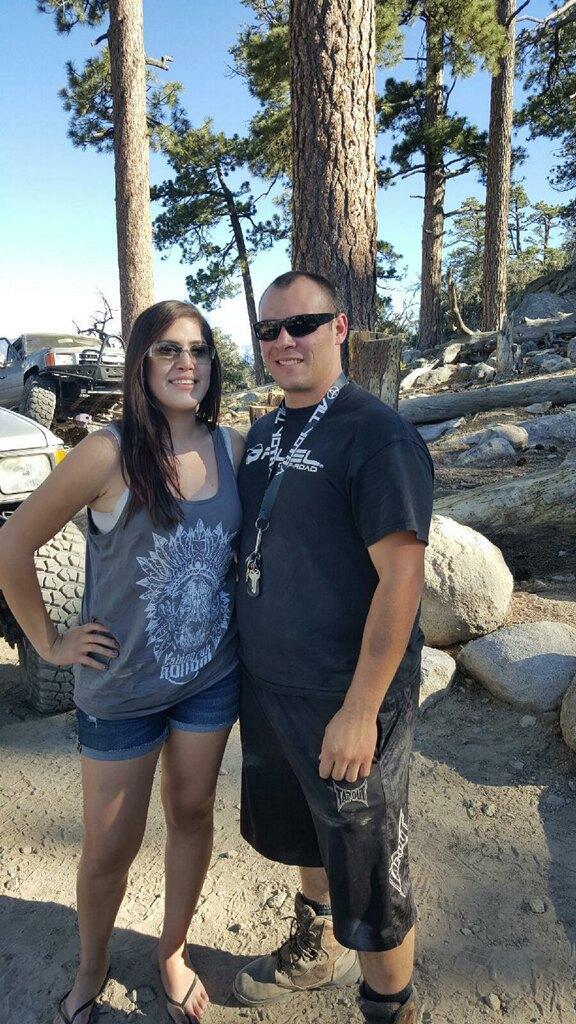
Mark, Me, and Faby
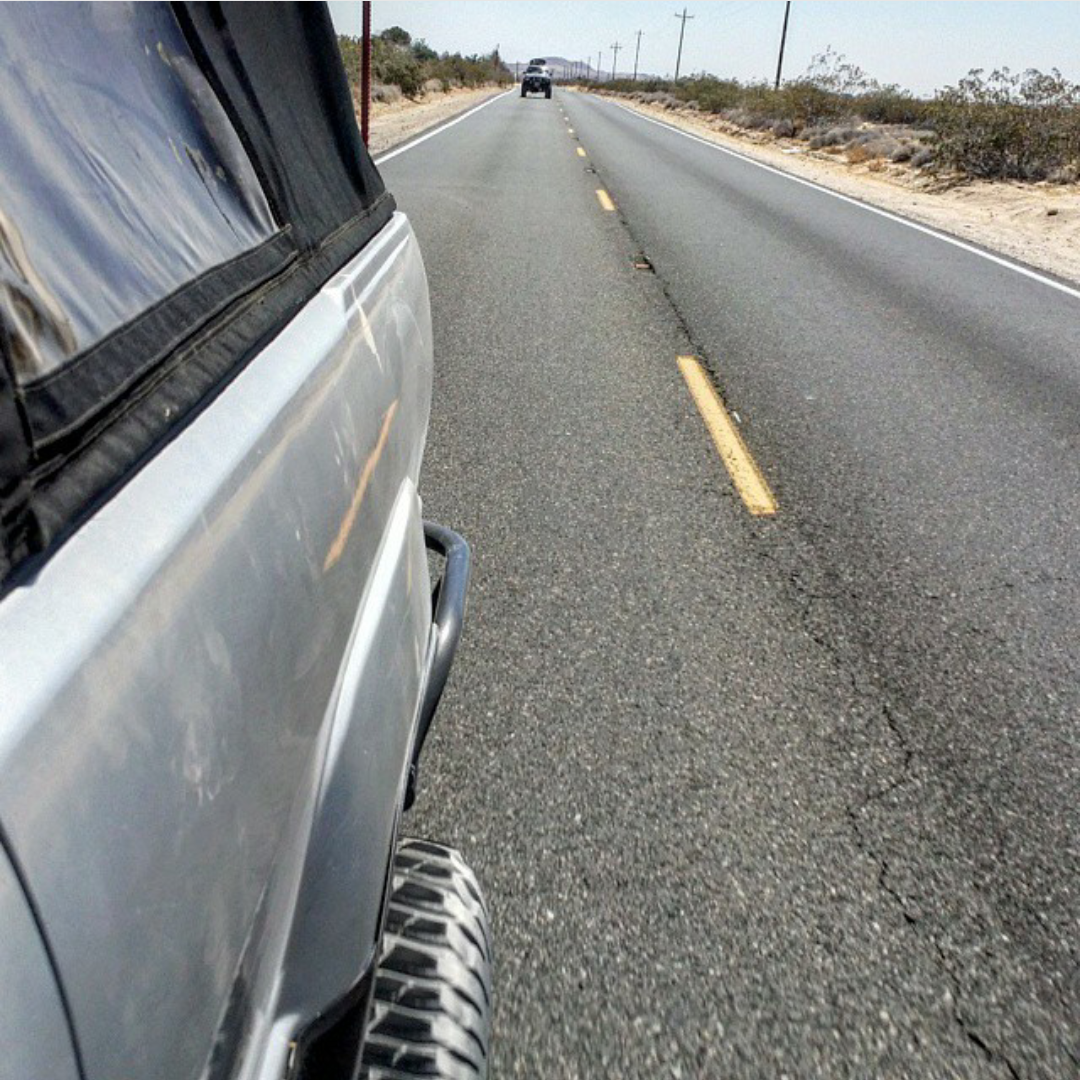
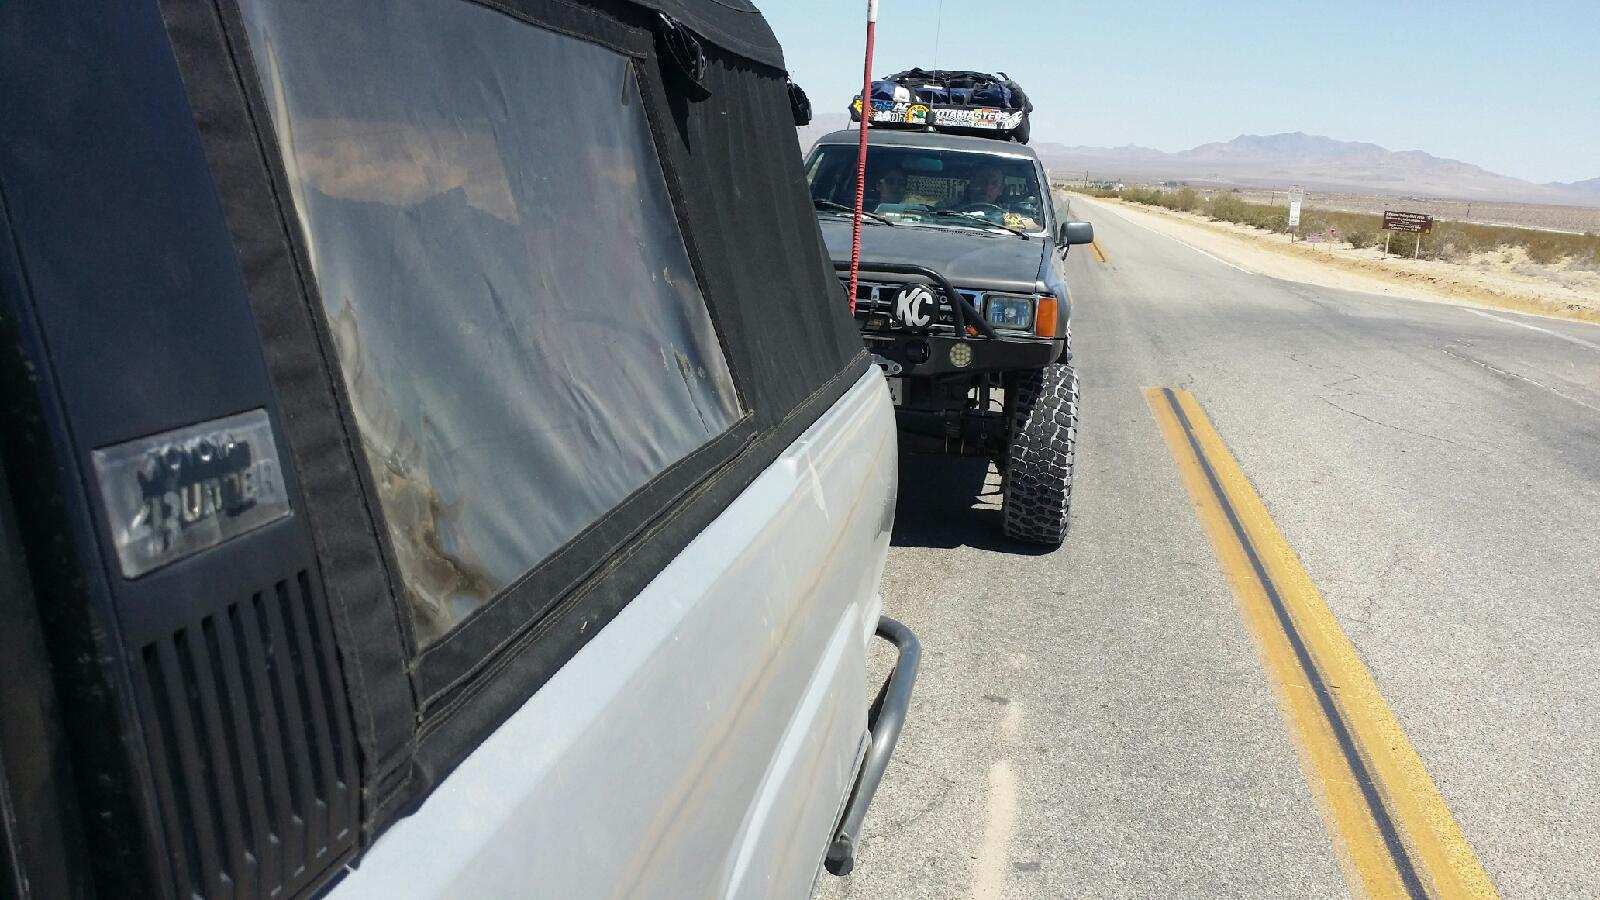
Heading home the next day
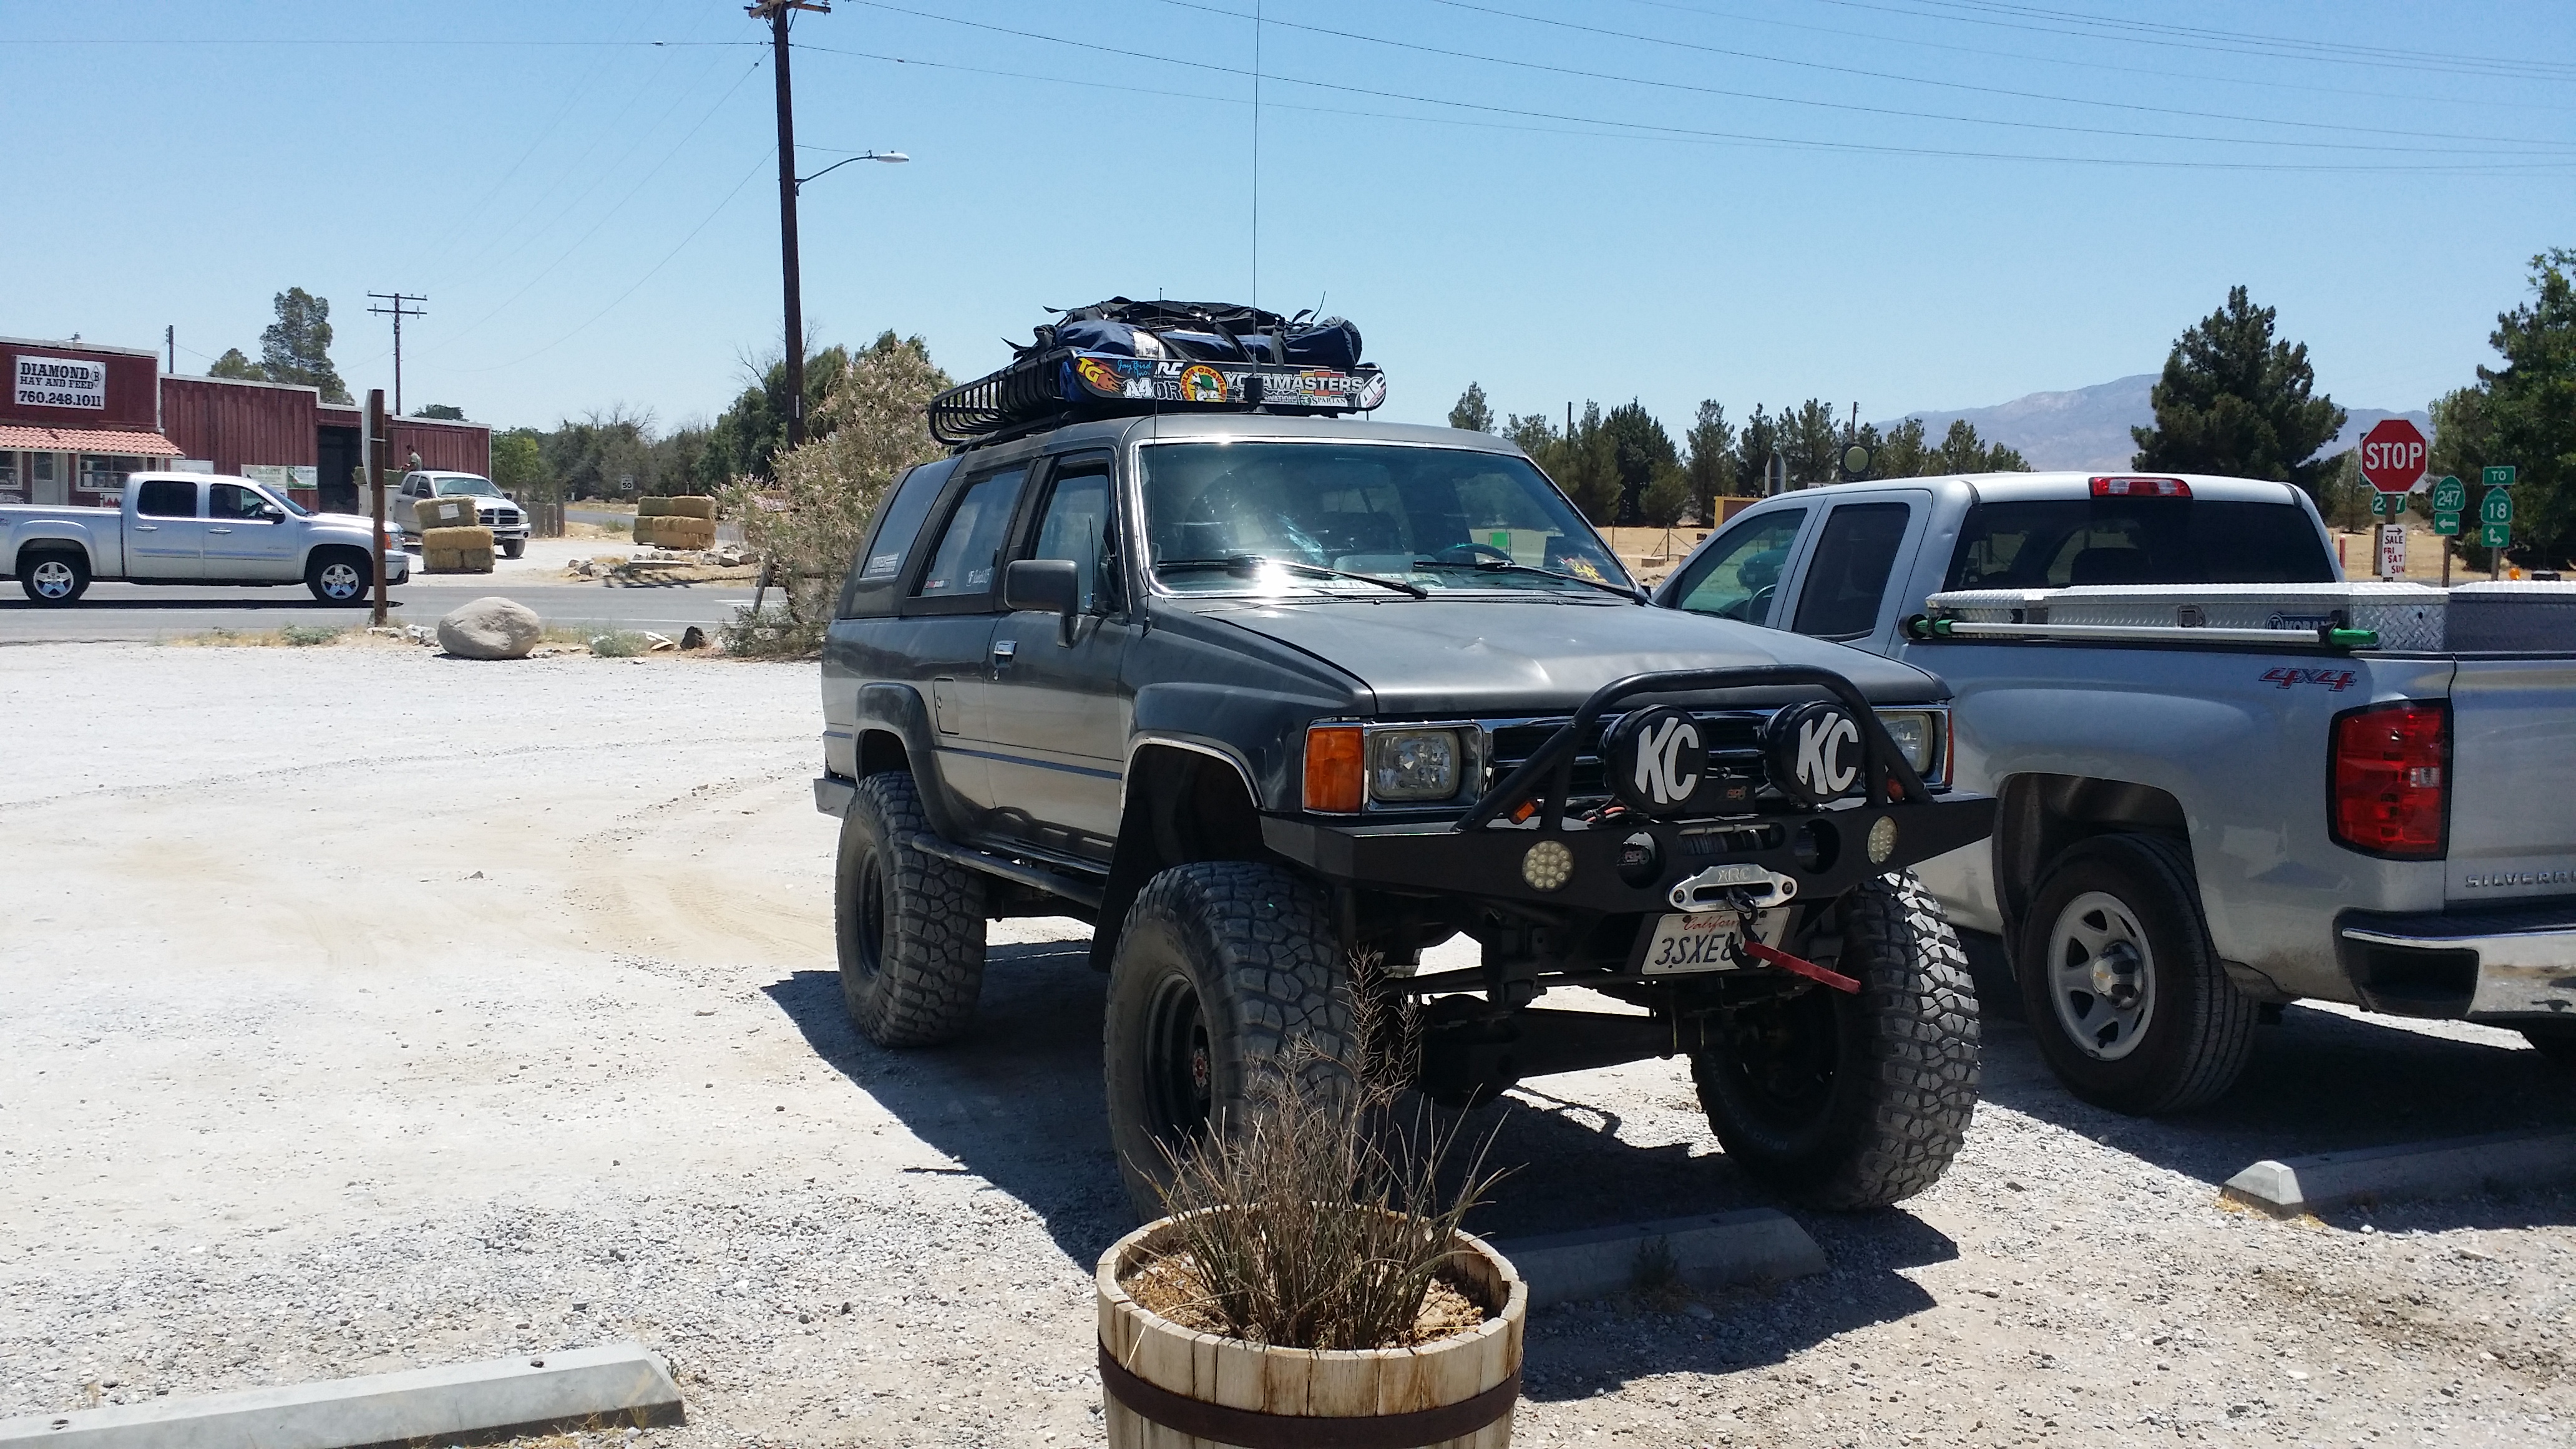
Stopped at an awesome restraint in the middle of nowhere and had some of the best burgers ever!
Over All this trip was a great experience. came out with no damage at all. and experienced my first night wheeling trip. I did realize a couple of things this trip though
1) although the Dick Cepek Halogen lights are super bright and have great range. They definitely suck the life out of your battery. My truck can use them but it drops the battery level a lot. I didn't like that so I may be =getting some LED bar replacements so i don't have to worry about large power drainage anymore.
2) The Clutch/transmission performed wonderfully. I have so much more power now. I'm assuming this is because the clutch was old before and it wouldn't catch. also guessing it would make my engine work harder revving at higher RPM on the freeway. Because before i would overheat driving on the hwy/fwy going up hill with 33's and no gear at all. And this time i was rolling on 35's and fully loaded with gear and i managed to hit 87MPH and no signs of overheating at all. I'm not complaining but it was a great improvement in performance, speed, and power. I was definitely satisfied
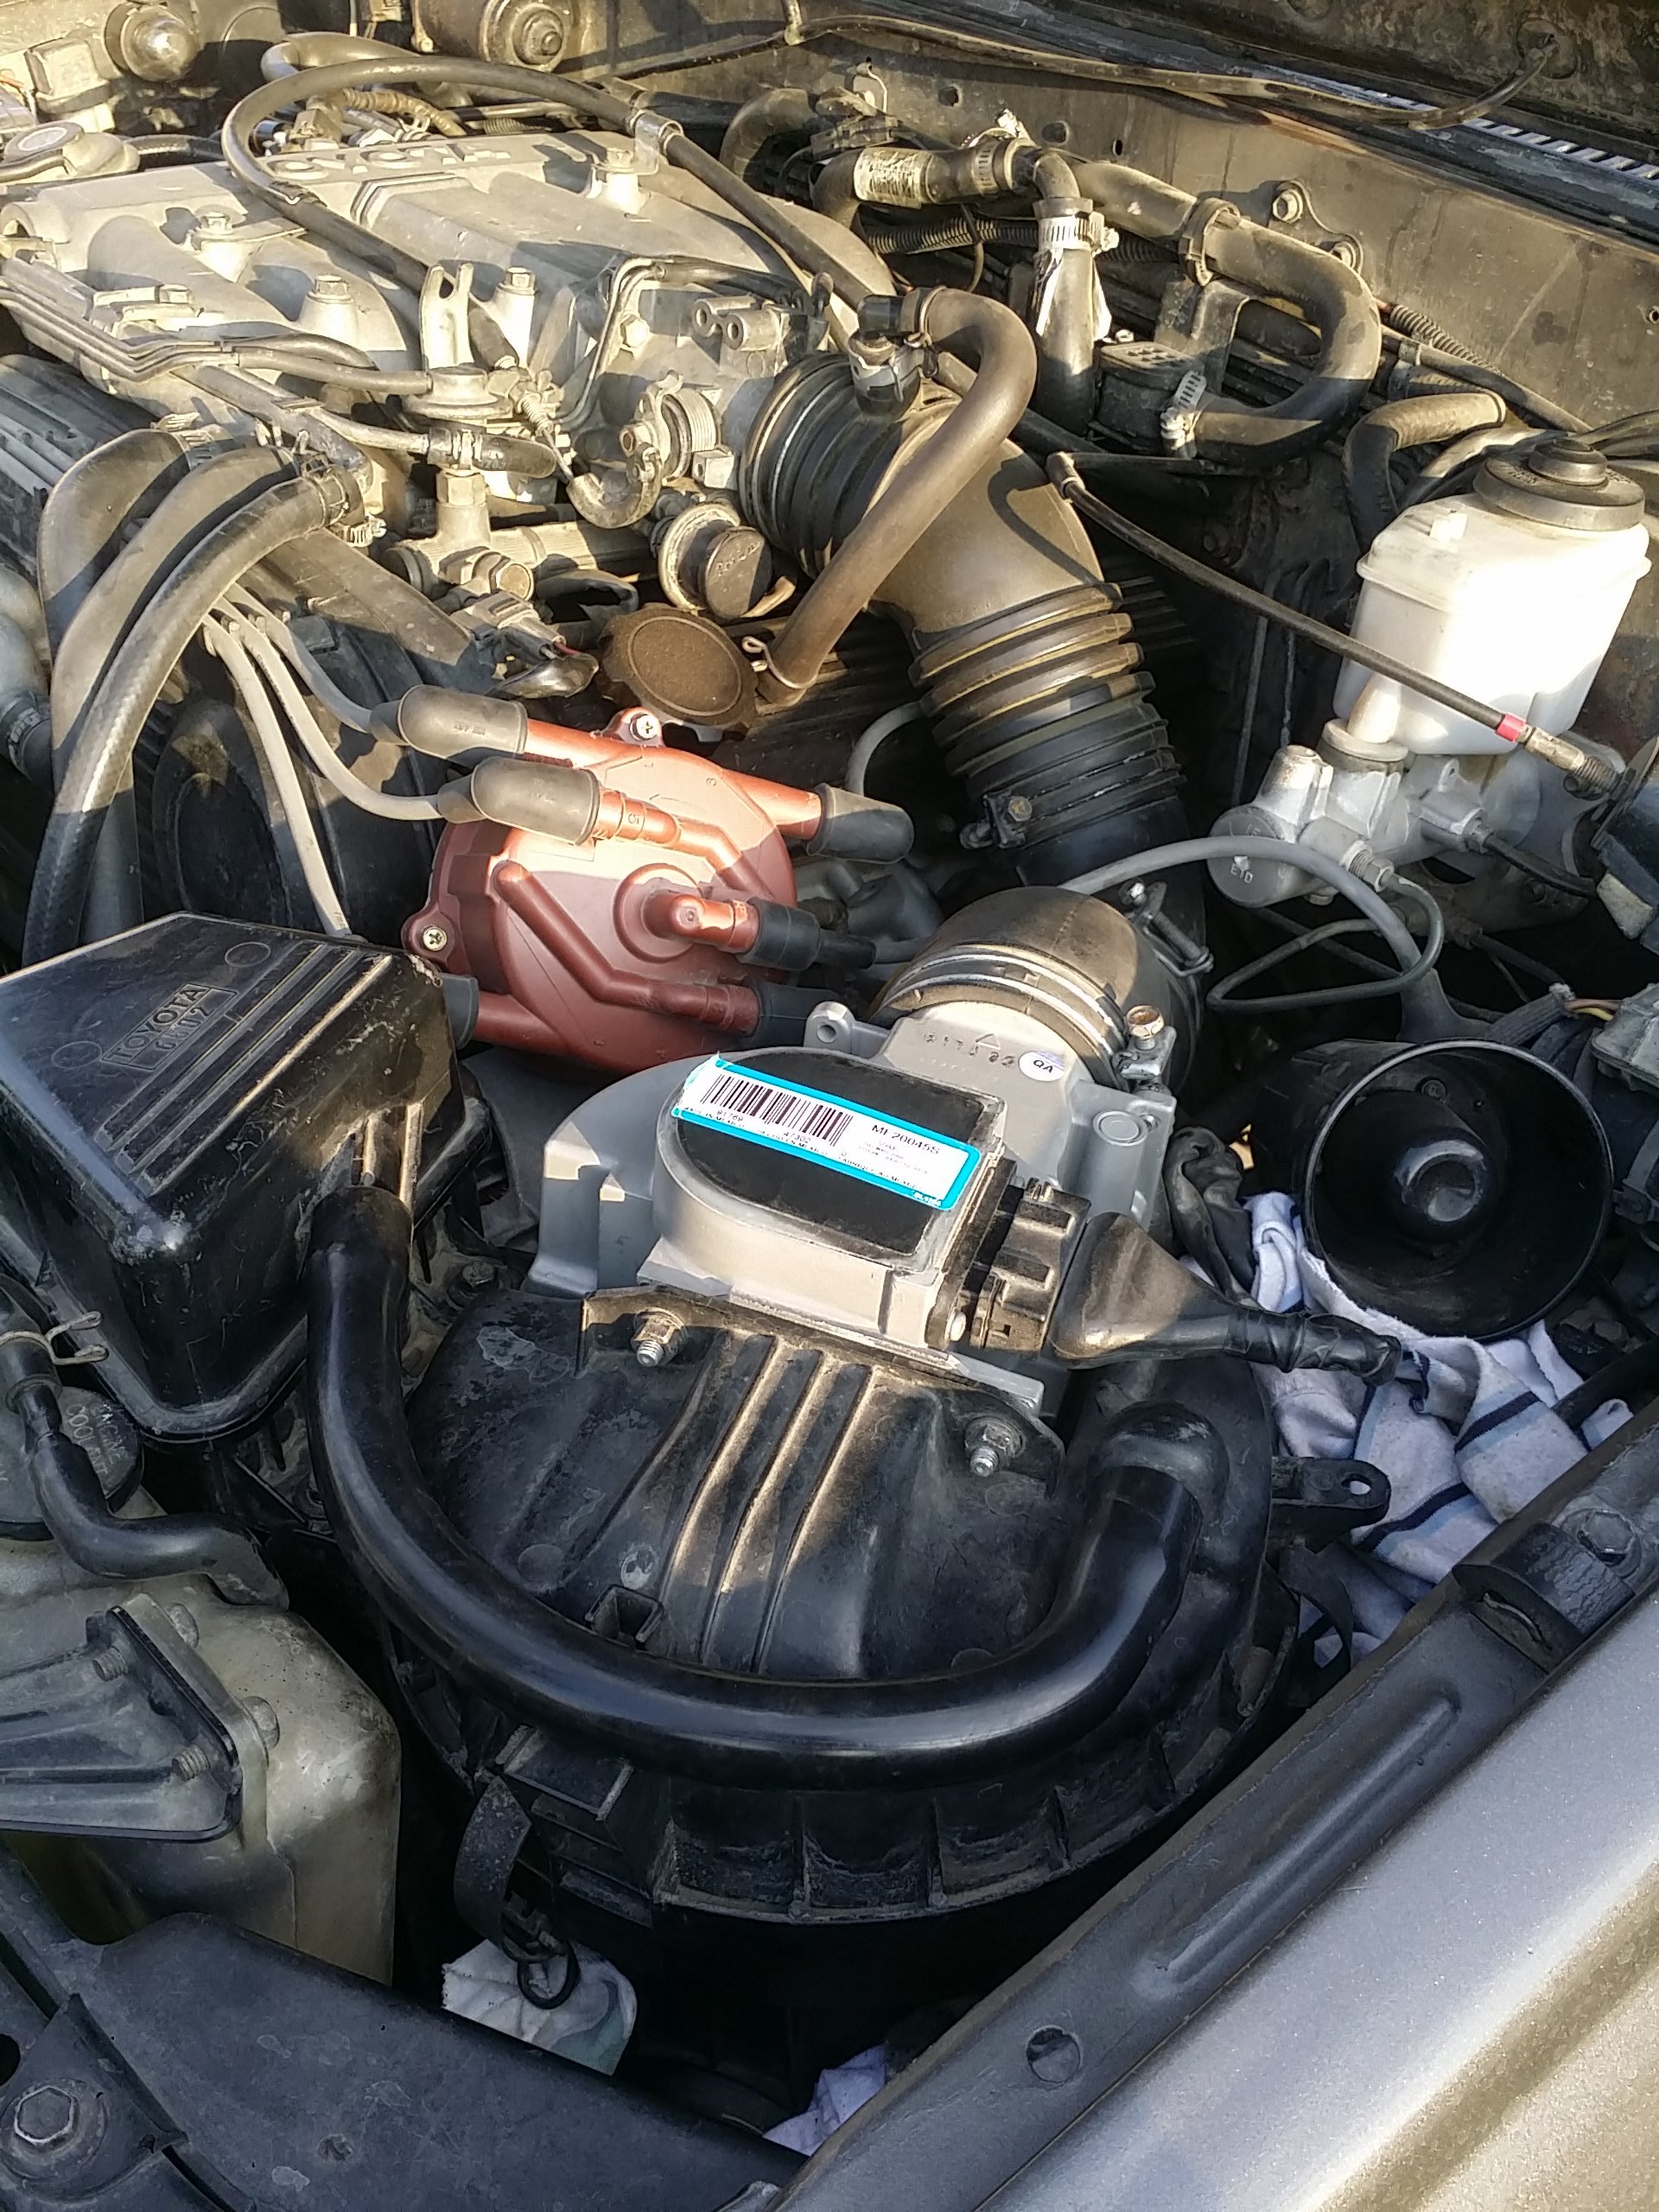
3) i didn't realize how much gas i was burning till this trip. i was going through 17 gallon tanks like crazy these past 2 weeks. I would only go 143miles per tank! So Something had to be done! So this same week i actually started to look into what i had done over the past 2 years because i have always had a gas guzzling issue, cold start for the past year, and rough idle for about 2.5 years! I looked into everything i replaced and narrowed my problems down to the o2 sensor and a MAF. The o2 was changed when i rebuilt the engine 3 years ago. So it could have been bad. But the MAF was replaced early last year. but it could have been defective. I didn't wanna spend the money to replac them but i was going through money like crazy so i didn't mind buying a MAF to confirm it was defective.
Here is the rebuilt MAF bought off my uncles shop:
I normally get crappy mileage on this truck. But lately I went from getting 14mpg down to 9.5mpg.
After the past 2 years of struggling with idle issues, rough cold start issues, and rough take offs and incorrect idle in different altitudes I began to replace things left and right and upon that I always ruled out the MAF because I replaced it a little over a year ago at yotamasters and I tested it with another MAF that I tried from @chefyota4x4's donor 4runner and it still had the same issue so I just assumed it was not defective. But after so much spending I nearly replaced everything else except for the O2 sensor and the MAF so after running horribly at this past weekend's off road trip and chugging through 17gallon gas tanks every 140miles I finally replaced the MAF and wow... just wow. I can't believe that was the answer to all the issues over the past 3 years! especially this past year! I wish I wouldn't have waited so long to accept that the MAF I got from yotamasers may have either gone bad or was defective. Whichever it was I don't care. It now runs great. All the problems went away with simply changing this out. i also went ahead anc changed out the O2 sensor because I'm sure it is toast after 3 years and lots of carbon build up from the unbunt gasoline and 2 sea foam treatments.
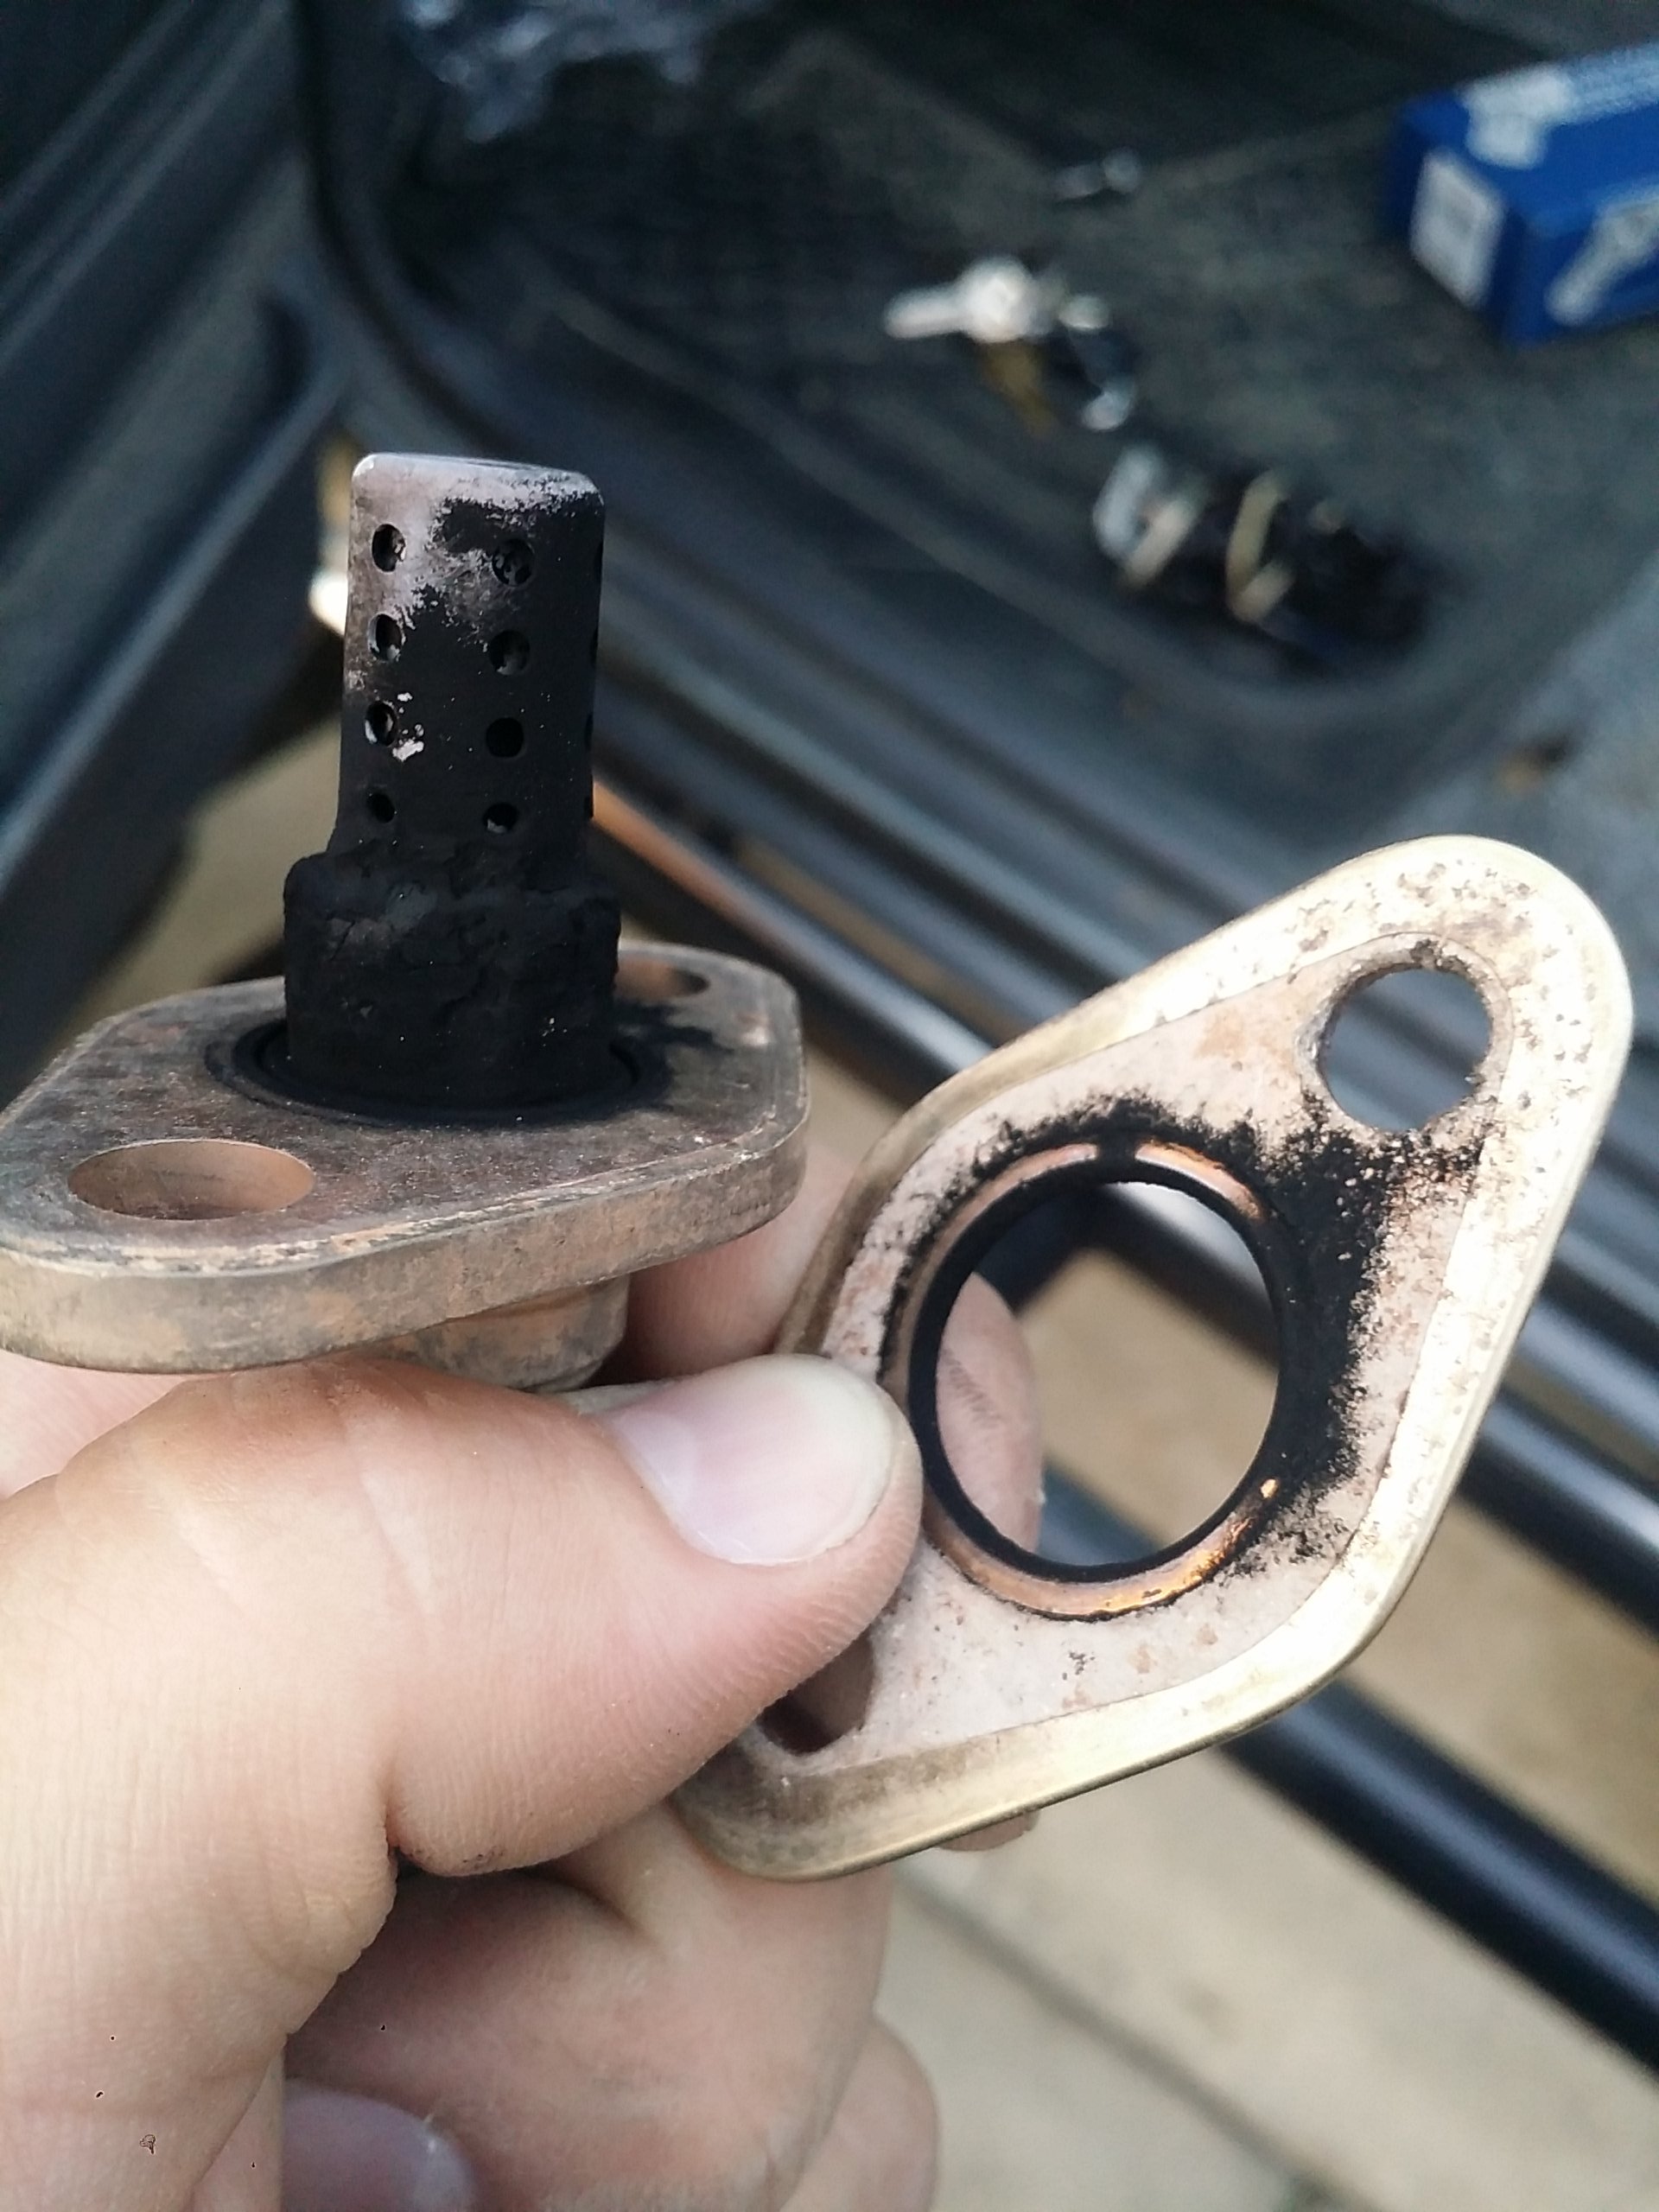
I removed the old O2 sensor and this is what i found! Look at that carbon build up. There is literally chunks! I wonder what the inside of my catalytic converter and muffler look like.
Also you can see I must had had an air leak on that gasket. You can see where the carbon leads away from the center hole toward the bolt hole.
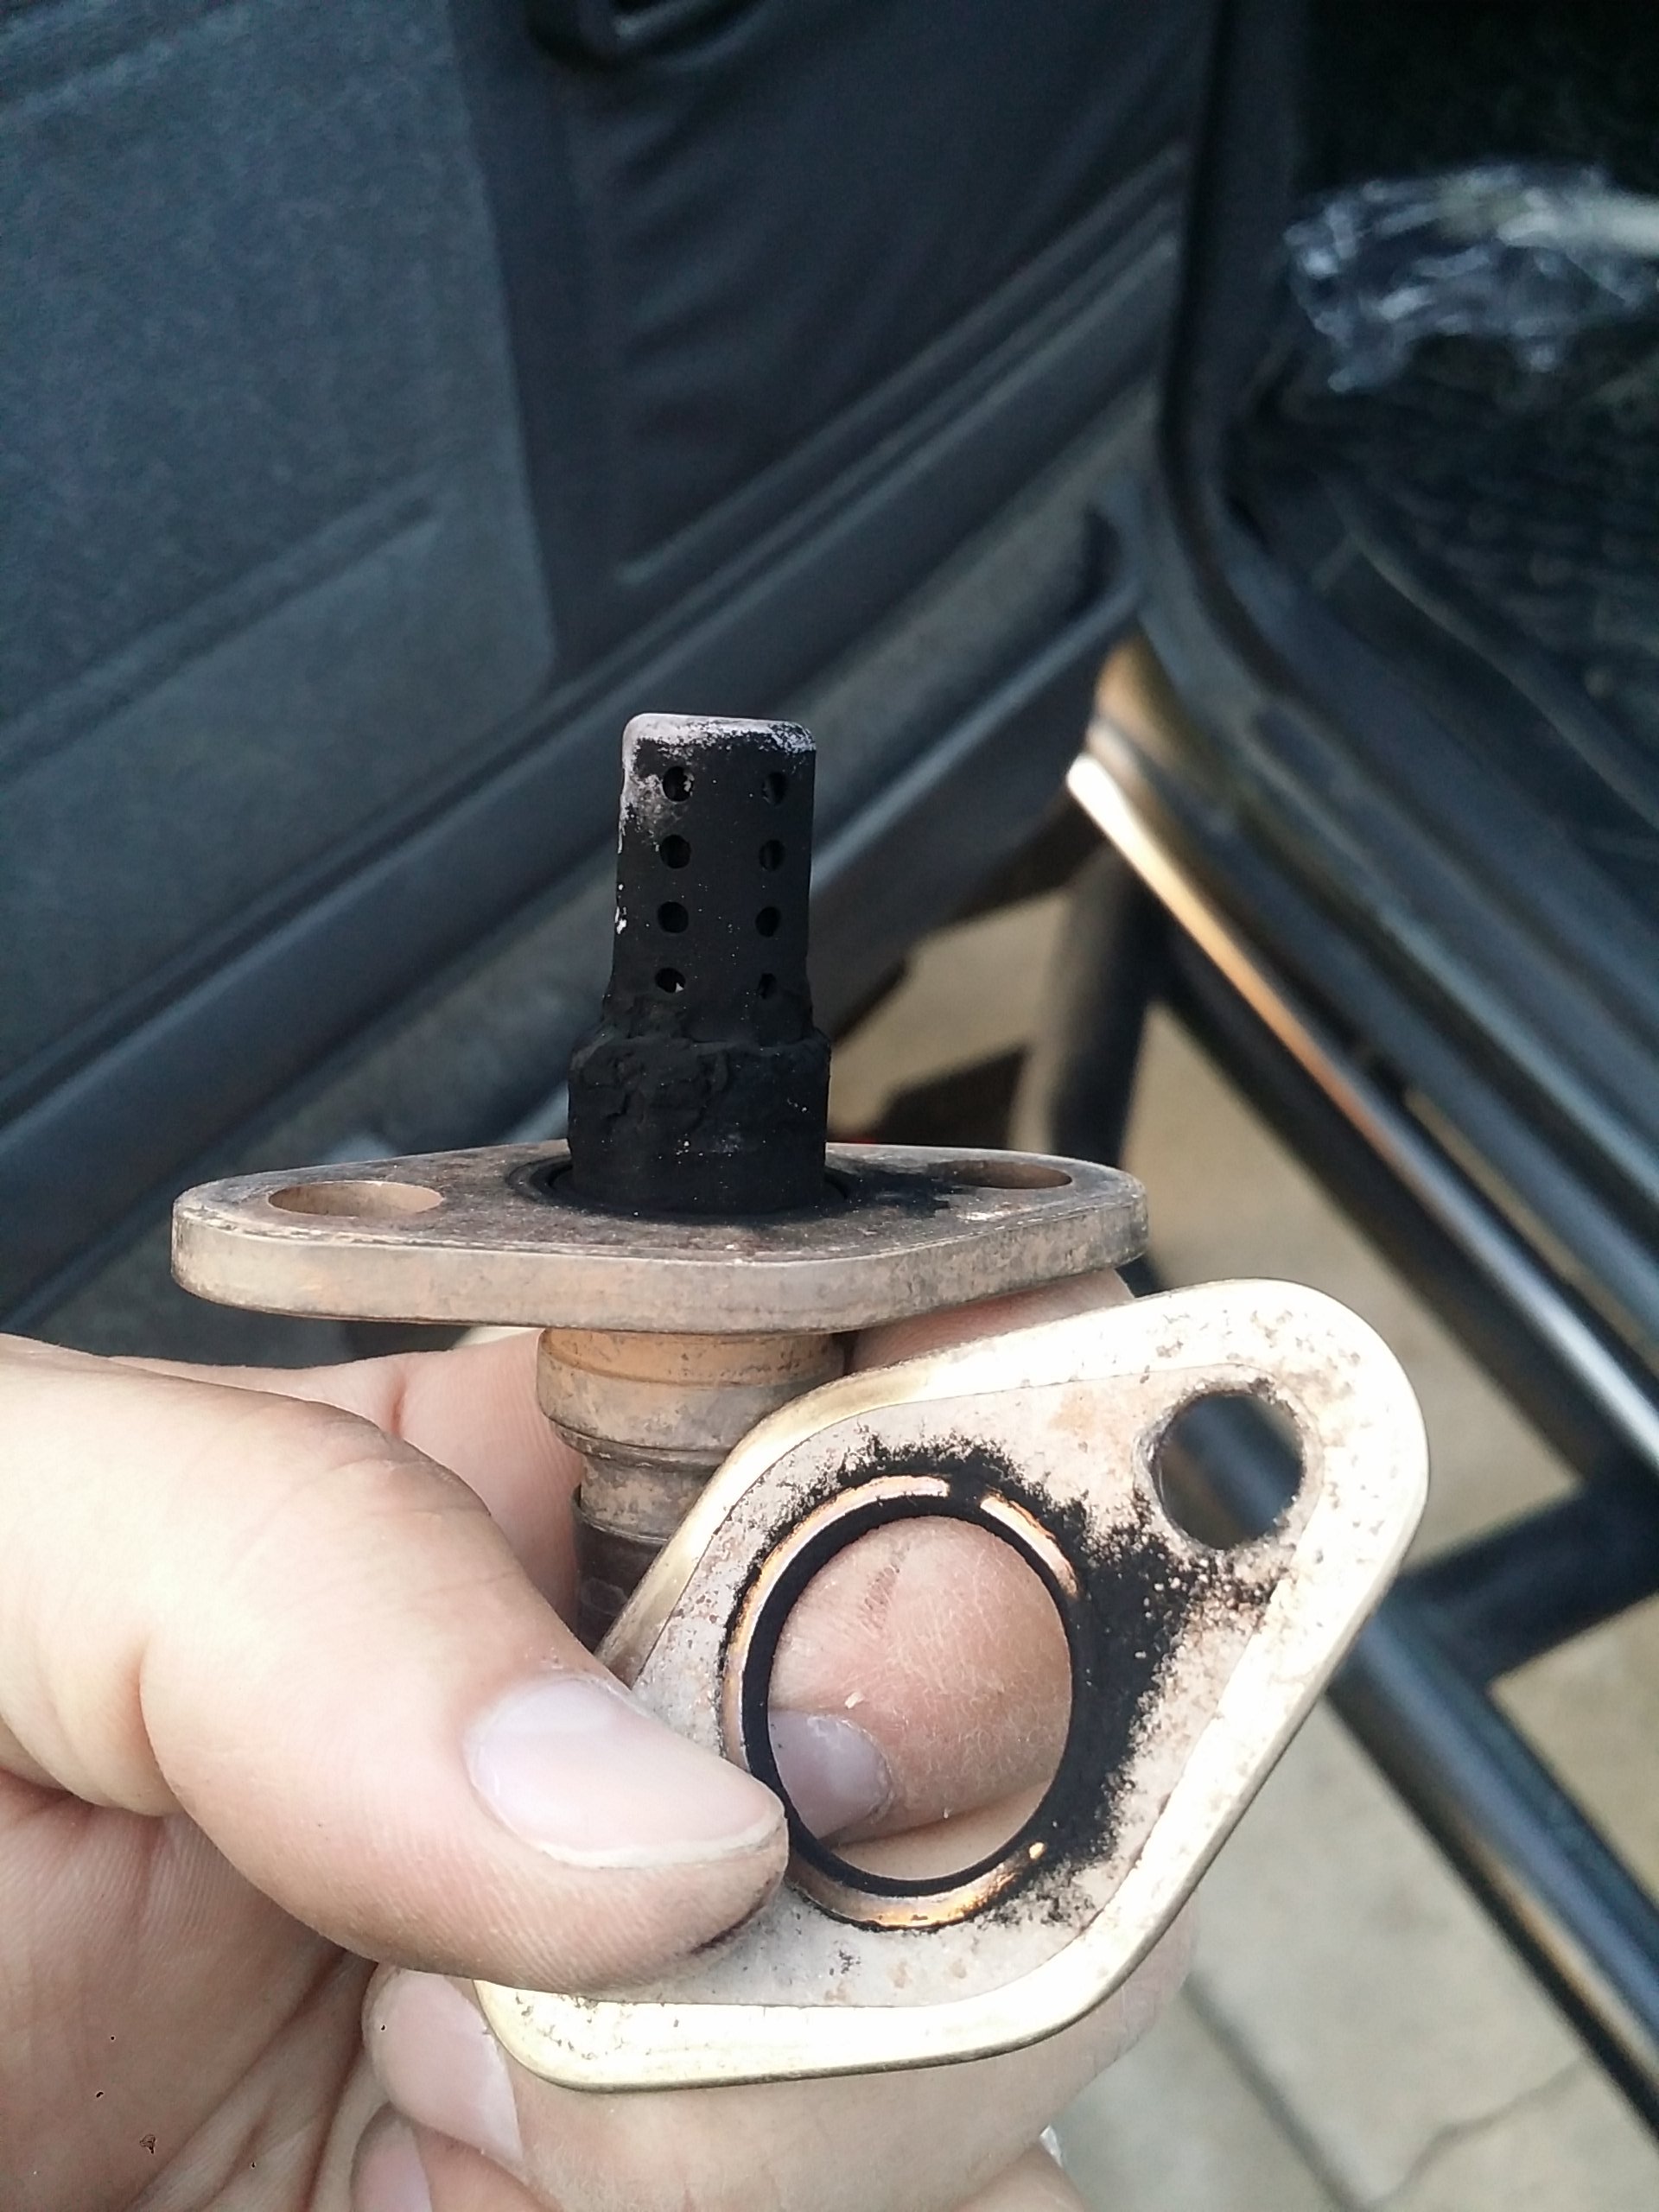
New vs OLD

Also found an extremely old gasket stuck to the exhaust pipe that i didn't know was there. I found it by chance too! i'm glad id id find it o else i probably would have had an air leak around the O2 sensor area. I took a razor to it and cleaned it up real good.
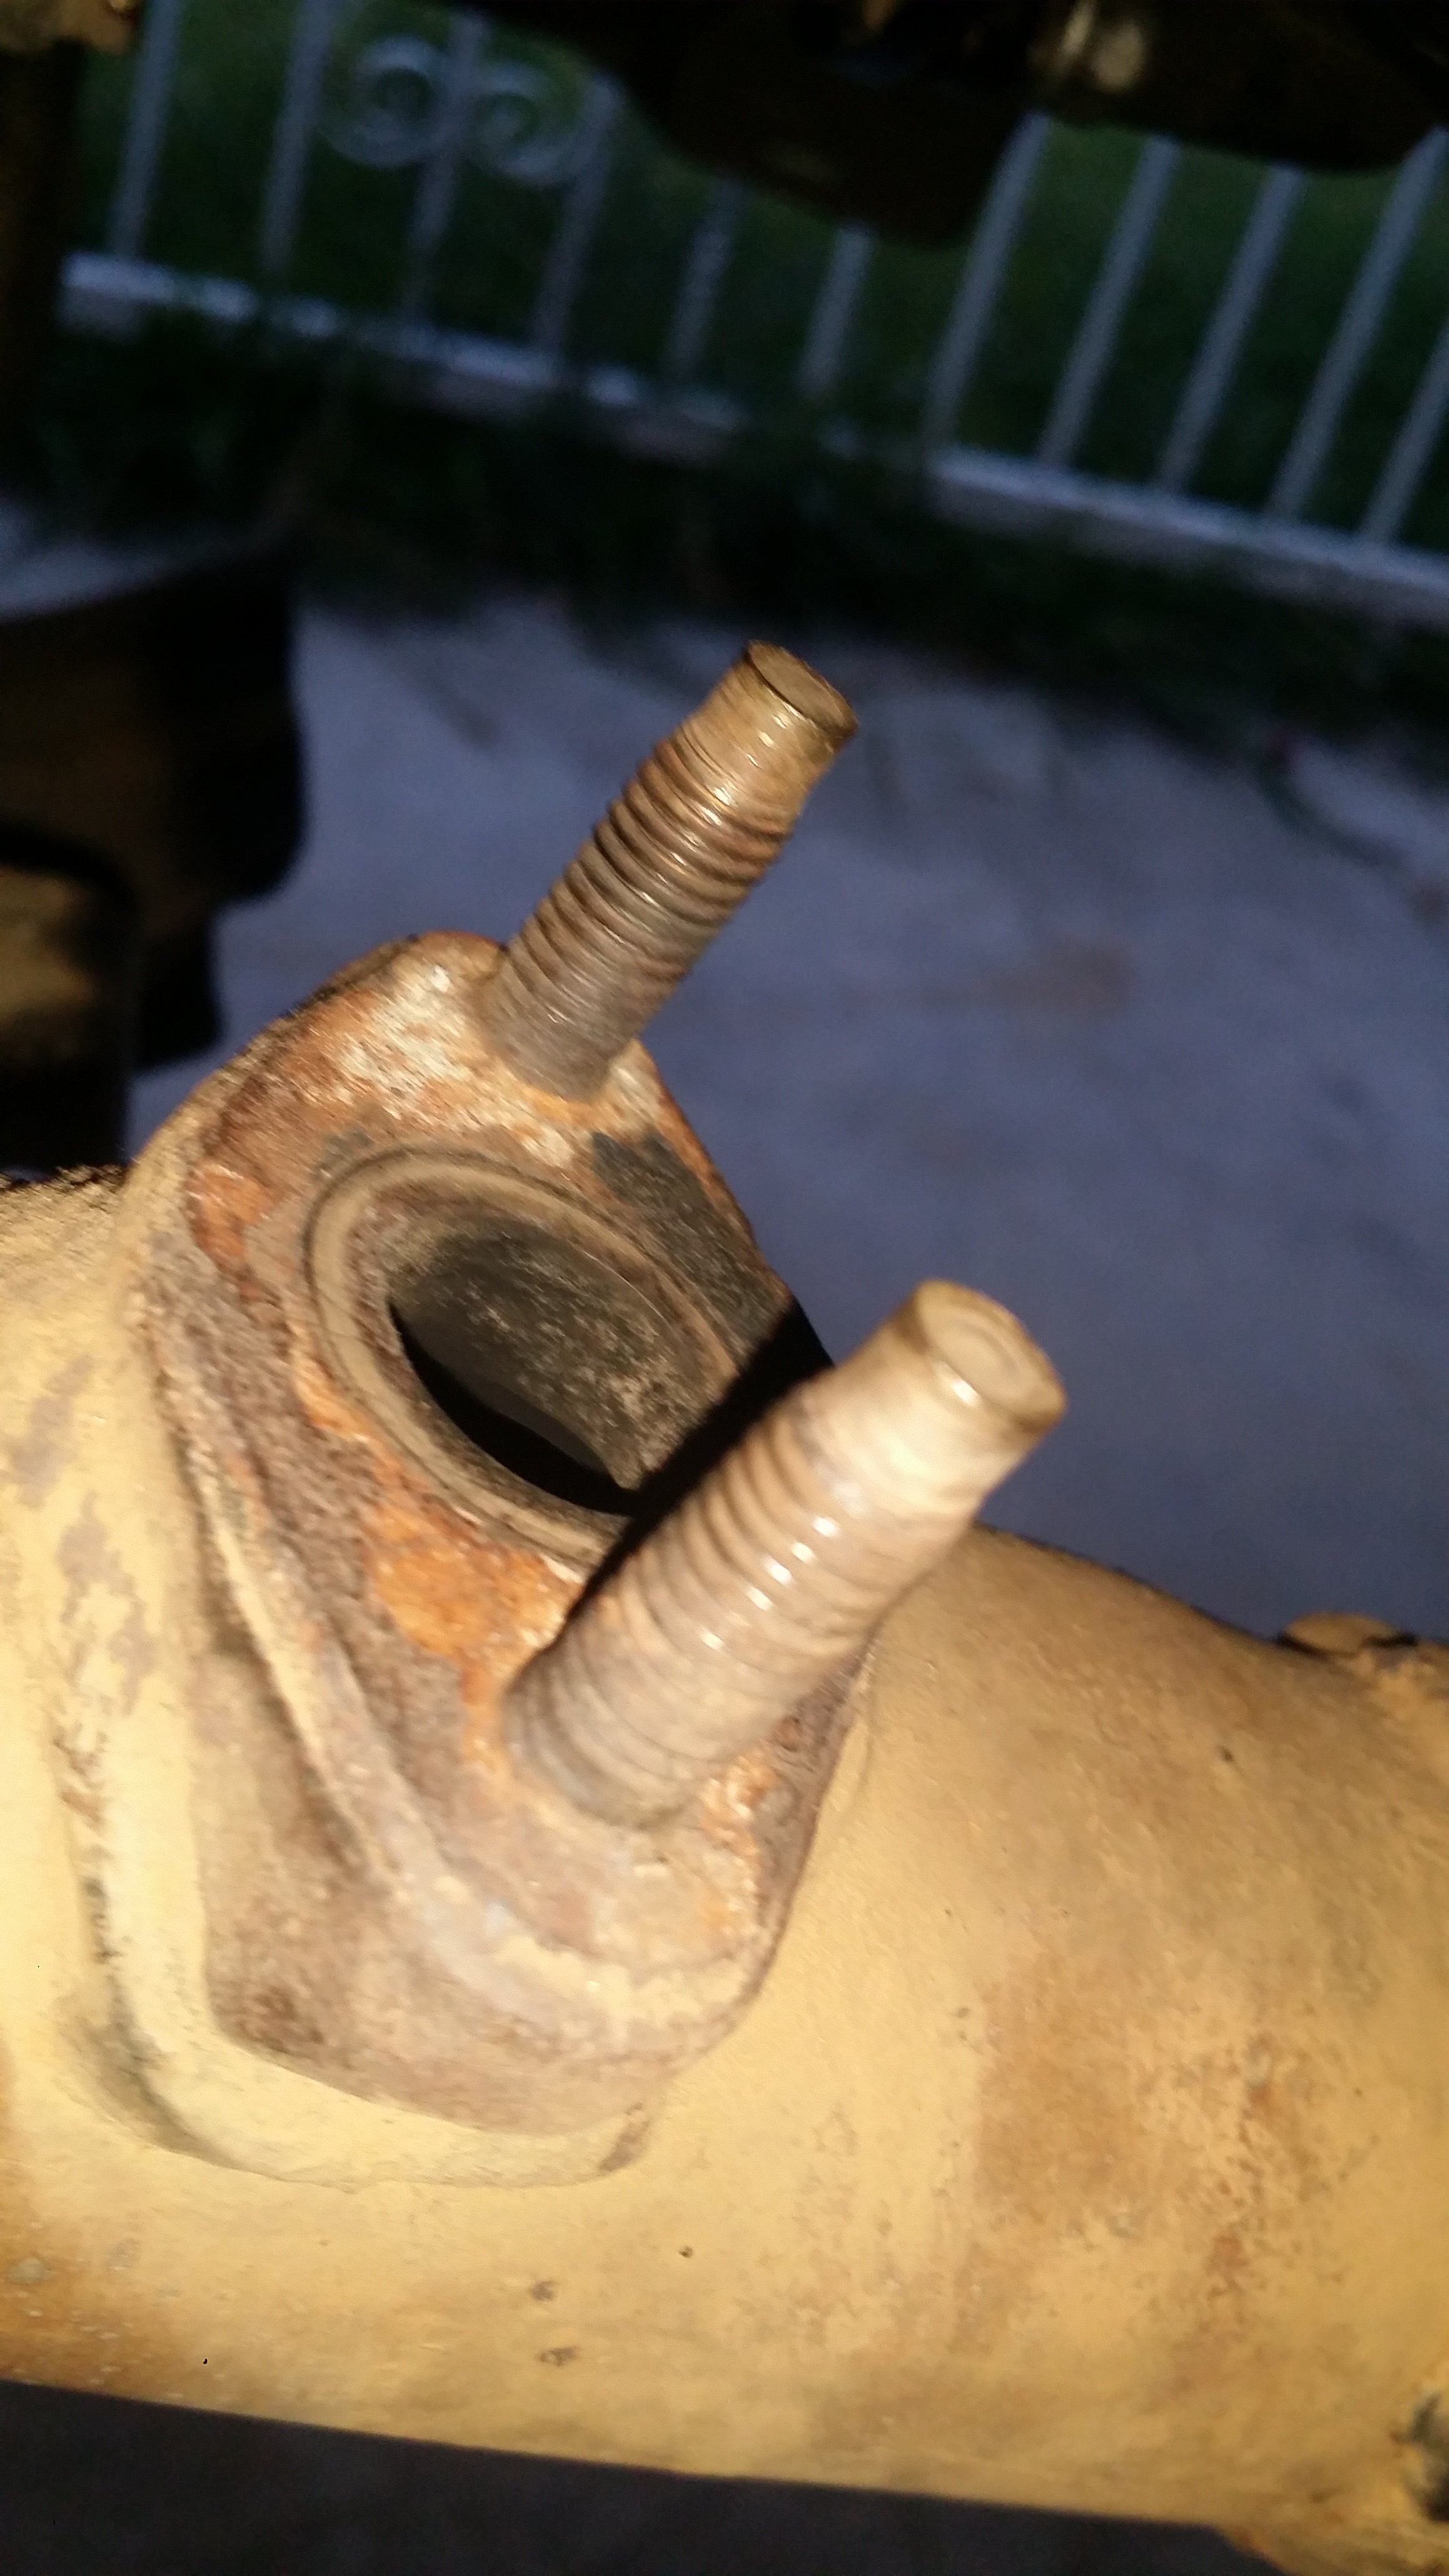
Here is the chunks of seized on gasket that was on there: btw this is separate from the O2 sensor/gasket that i put in 3 years ago. Who knows how long that thing had been burnt on to the metal lol

--------------------------------------------------------------------------
After changing out the MAF and o2 Sensor this past Friday i filled up my gas tank and kept track of my mileage. Here are the results.
So coming from the original 9.5mpg when it was chugging my gas like crazy. I went up from that to 13.90mpg. I know it's still crappy mileage but that's one heck of a difference considering it went up 4.4mpg over all. And another thing is I step of the pedal a lot. So I'm sure the numbers would increase if I watched how I drove too.
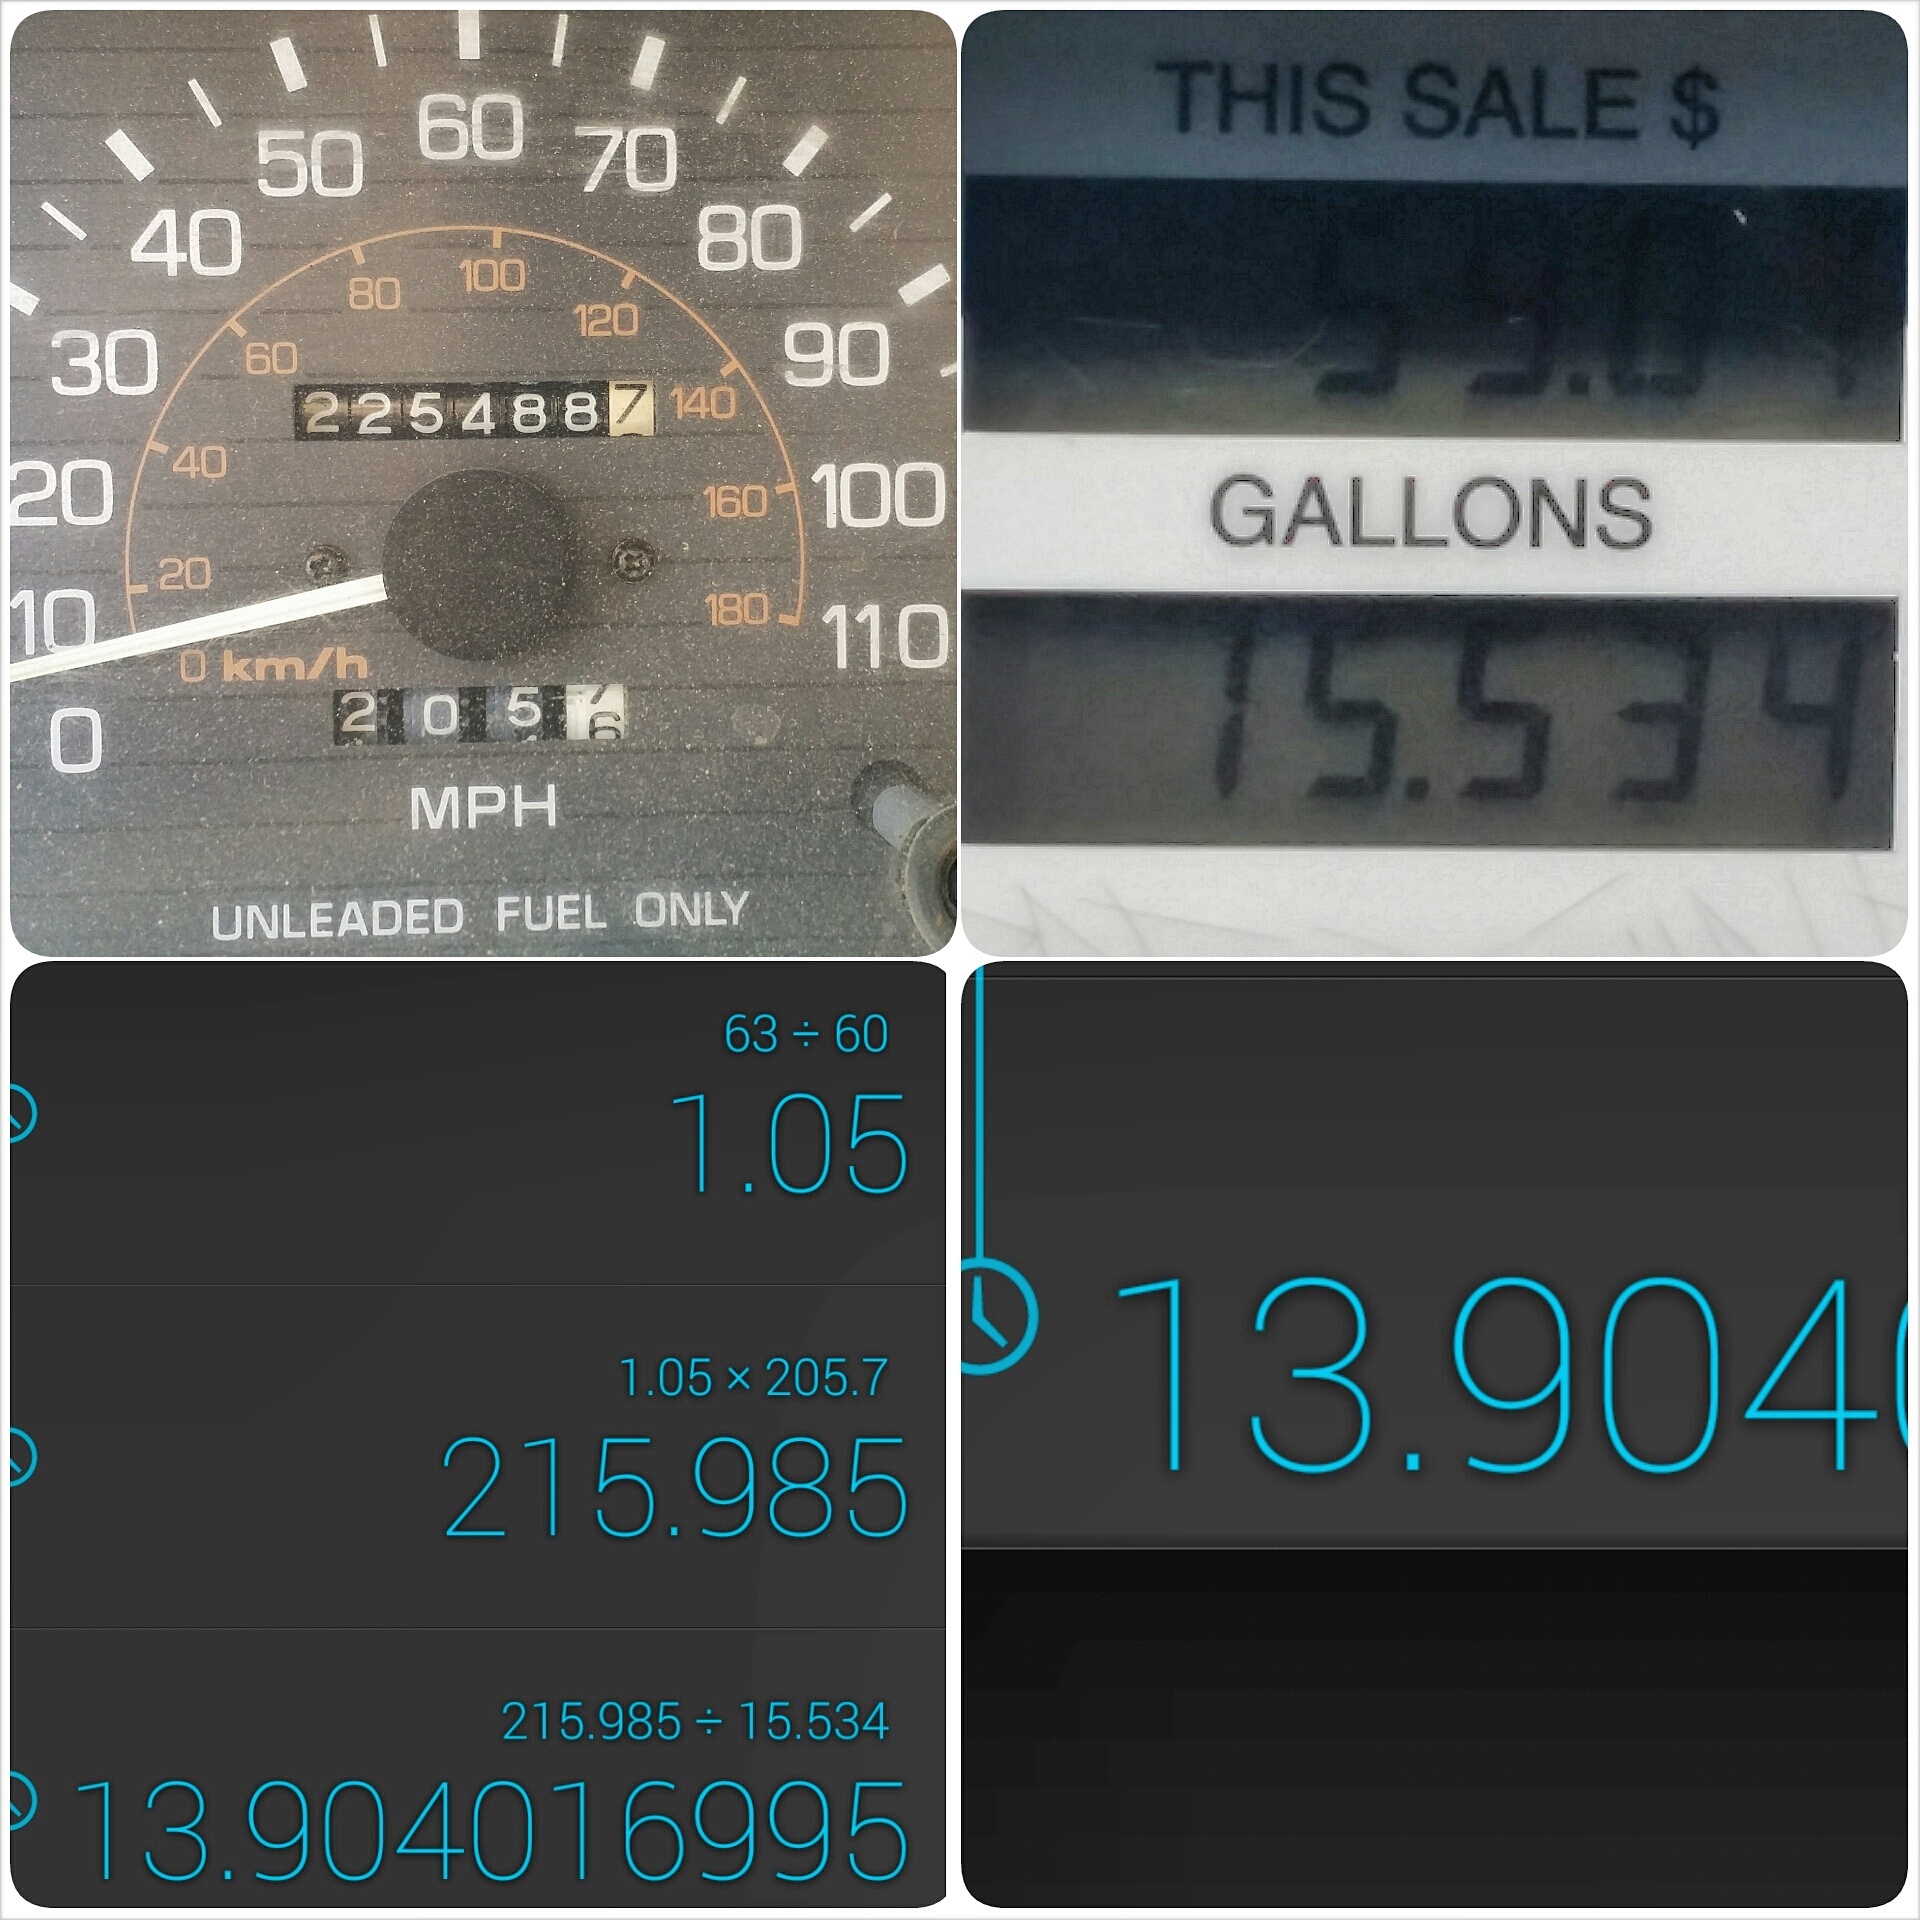
In case you're wondering what all that mumbo jumbo number stuff is... it is a formula I have to do to calculate correct mpg. So considering my MPG is off by 3miles less per hour. I had to do a formula to calculate the accurate mpg.
- when going 63mph my gps states I am actually traveling at 60mph. So when you divide those numbers the total comes out to 1.05 so I multiply that number with what the odometer says which was 205.7 and the accurate number of traveled miles of. This tank of gas is 215.985. After that I divide the amount of gallons I filled my tank with which was 15.534gal and then comes put the correct mpg "13.904mpg
The following weekend (this past weekend) Mark, Me, my girlfriend Faby and about 8 other rigs went to Lucerne Valley Ca to Cougar Buttes. And I have to say I experienced the hardest trails my truck and I ever had to endure! The funny thing is my girlfriend faby has only been off roading with me on desert trips. She has never made it to a rock crawling trip before. So she was scared the whole time!
I wish we could have gotten more pix but the wheeling all happened during the night time from 9pm to 3am so most of the pix that were taken were too dark to distinguish what is what. but here are a few good pix. I know you'll enjoy these! I just had to get away from the City. Being stuck in the hospital all week, doing an online class, and dealing with heavy Los Angeles traffic can get really tiring quick. and I needed to get away for a while. So this trip was pretty nice. We left Saturday morning around 12pm. arrived around 3pm and set up a really nice campsite early on in the day before everybody else showed up.
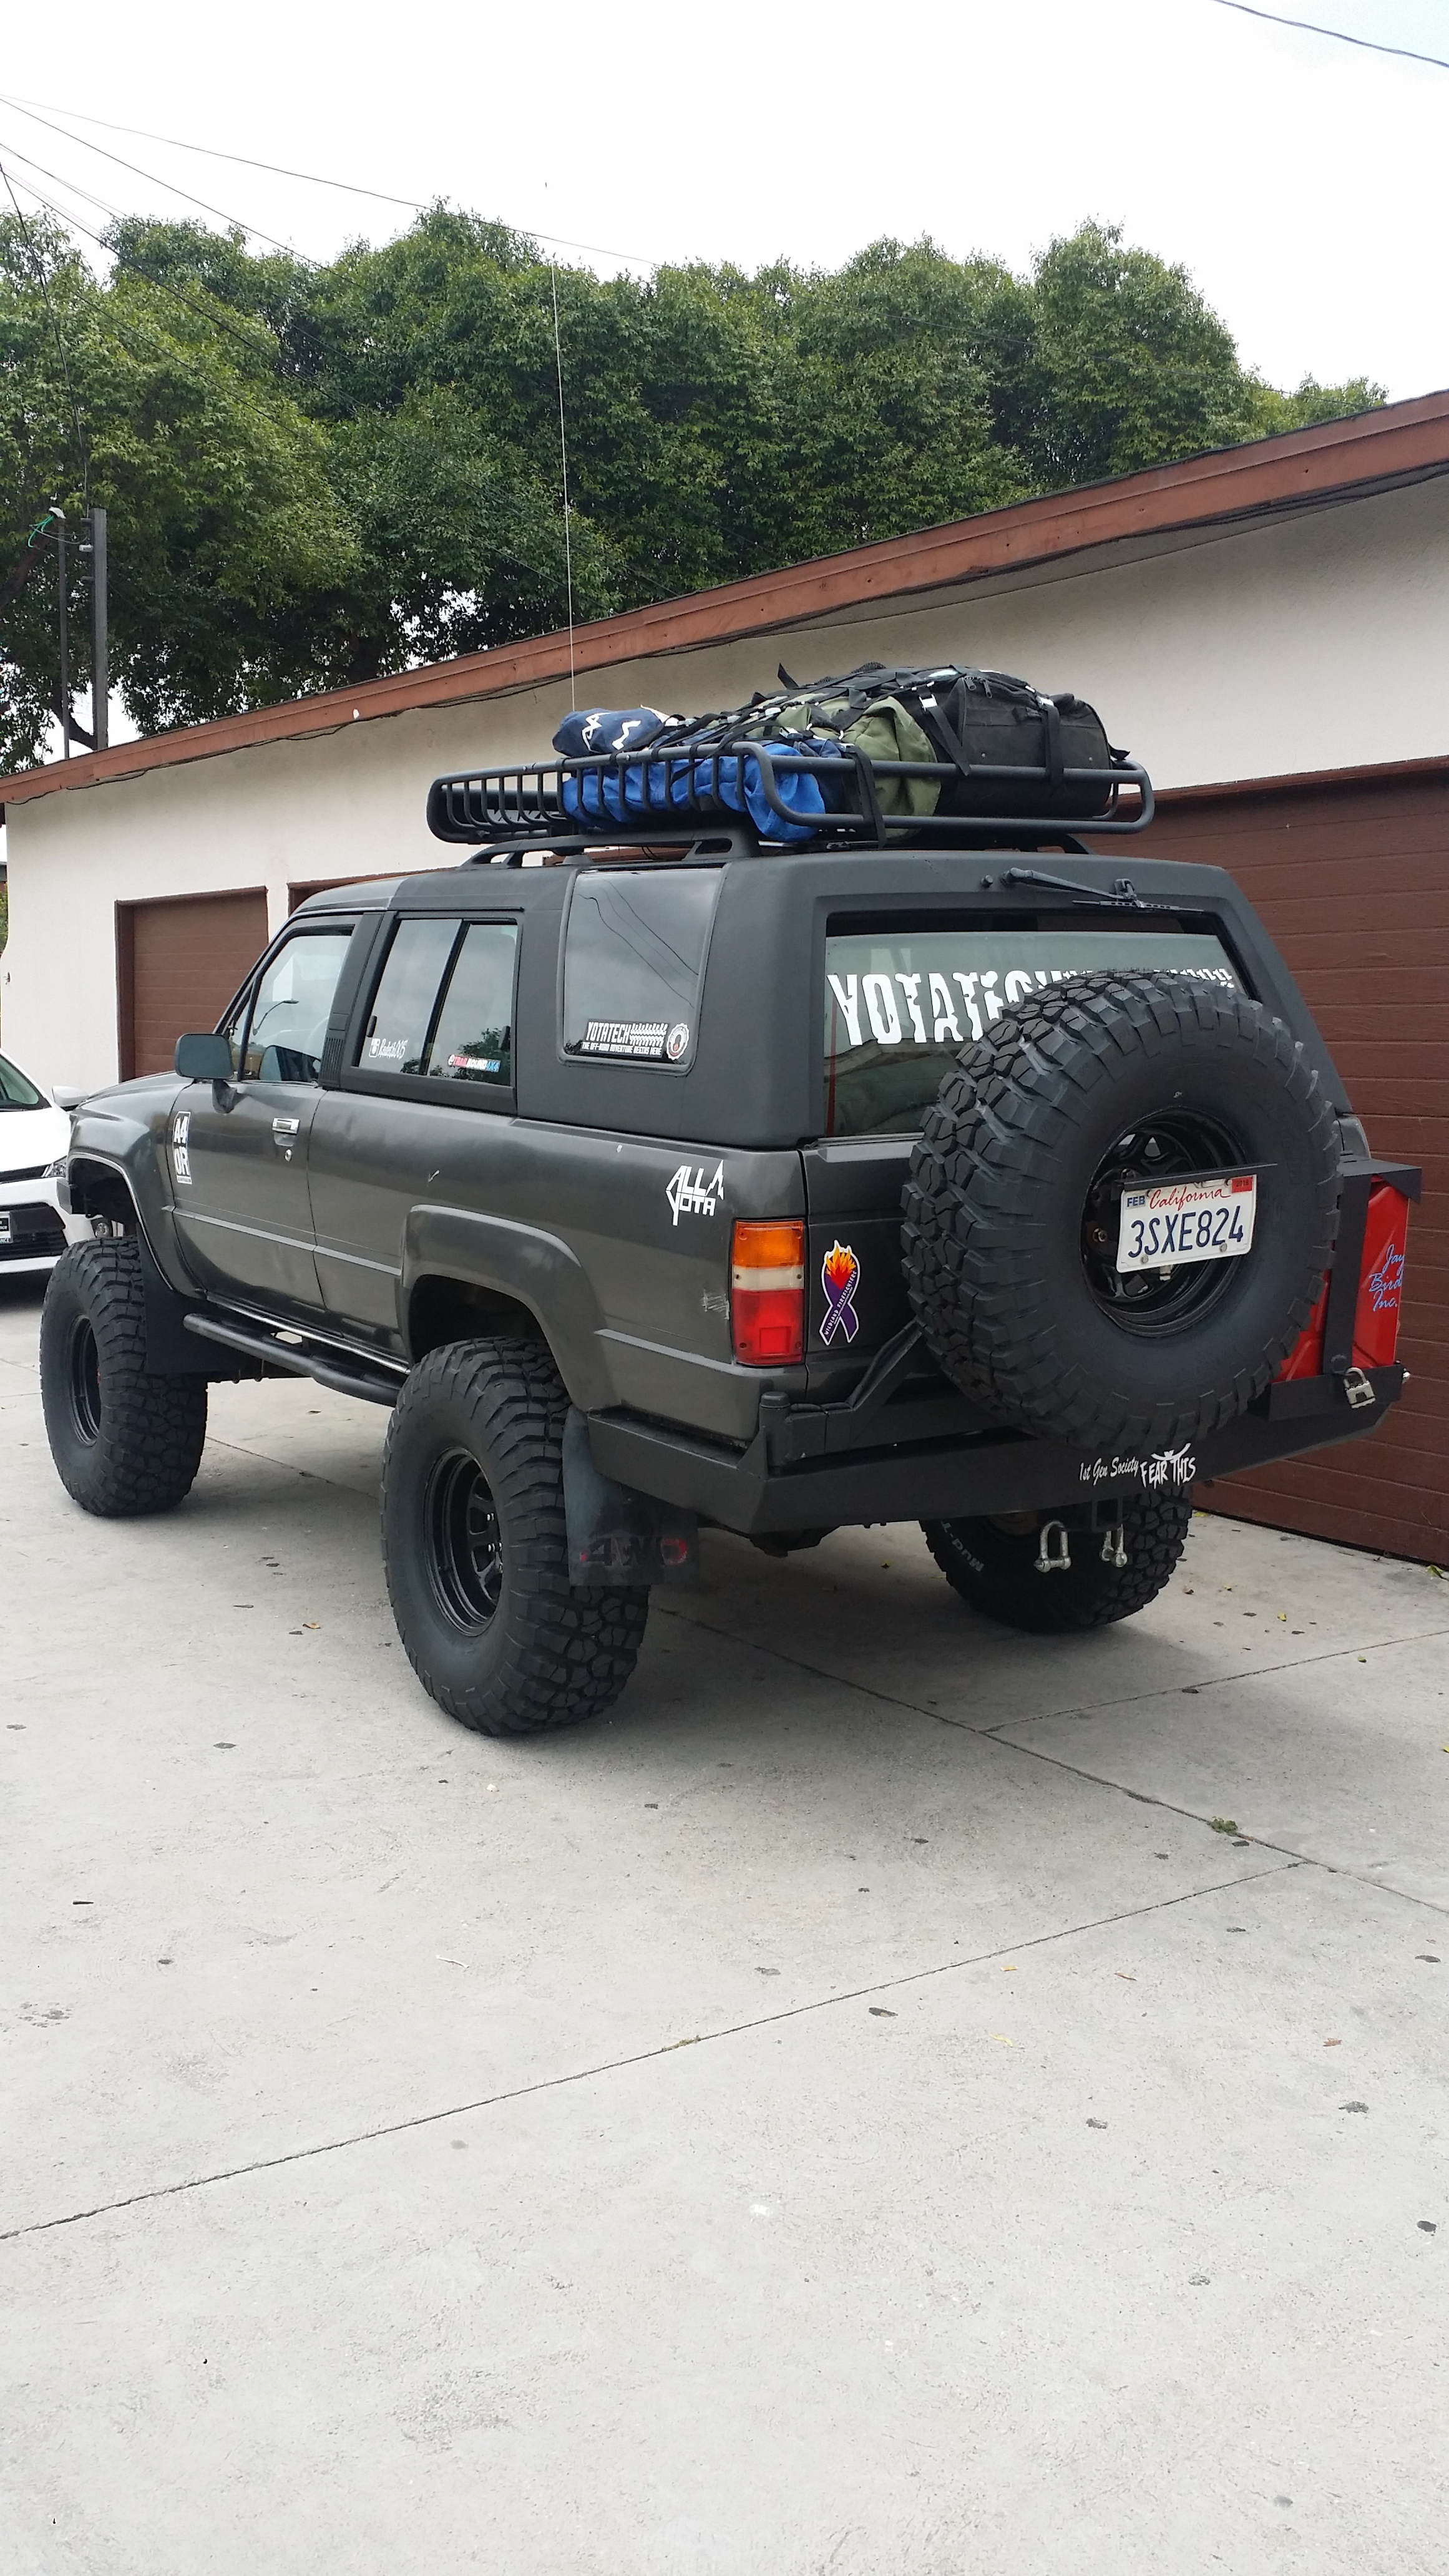
Here we are barely leaving

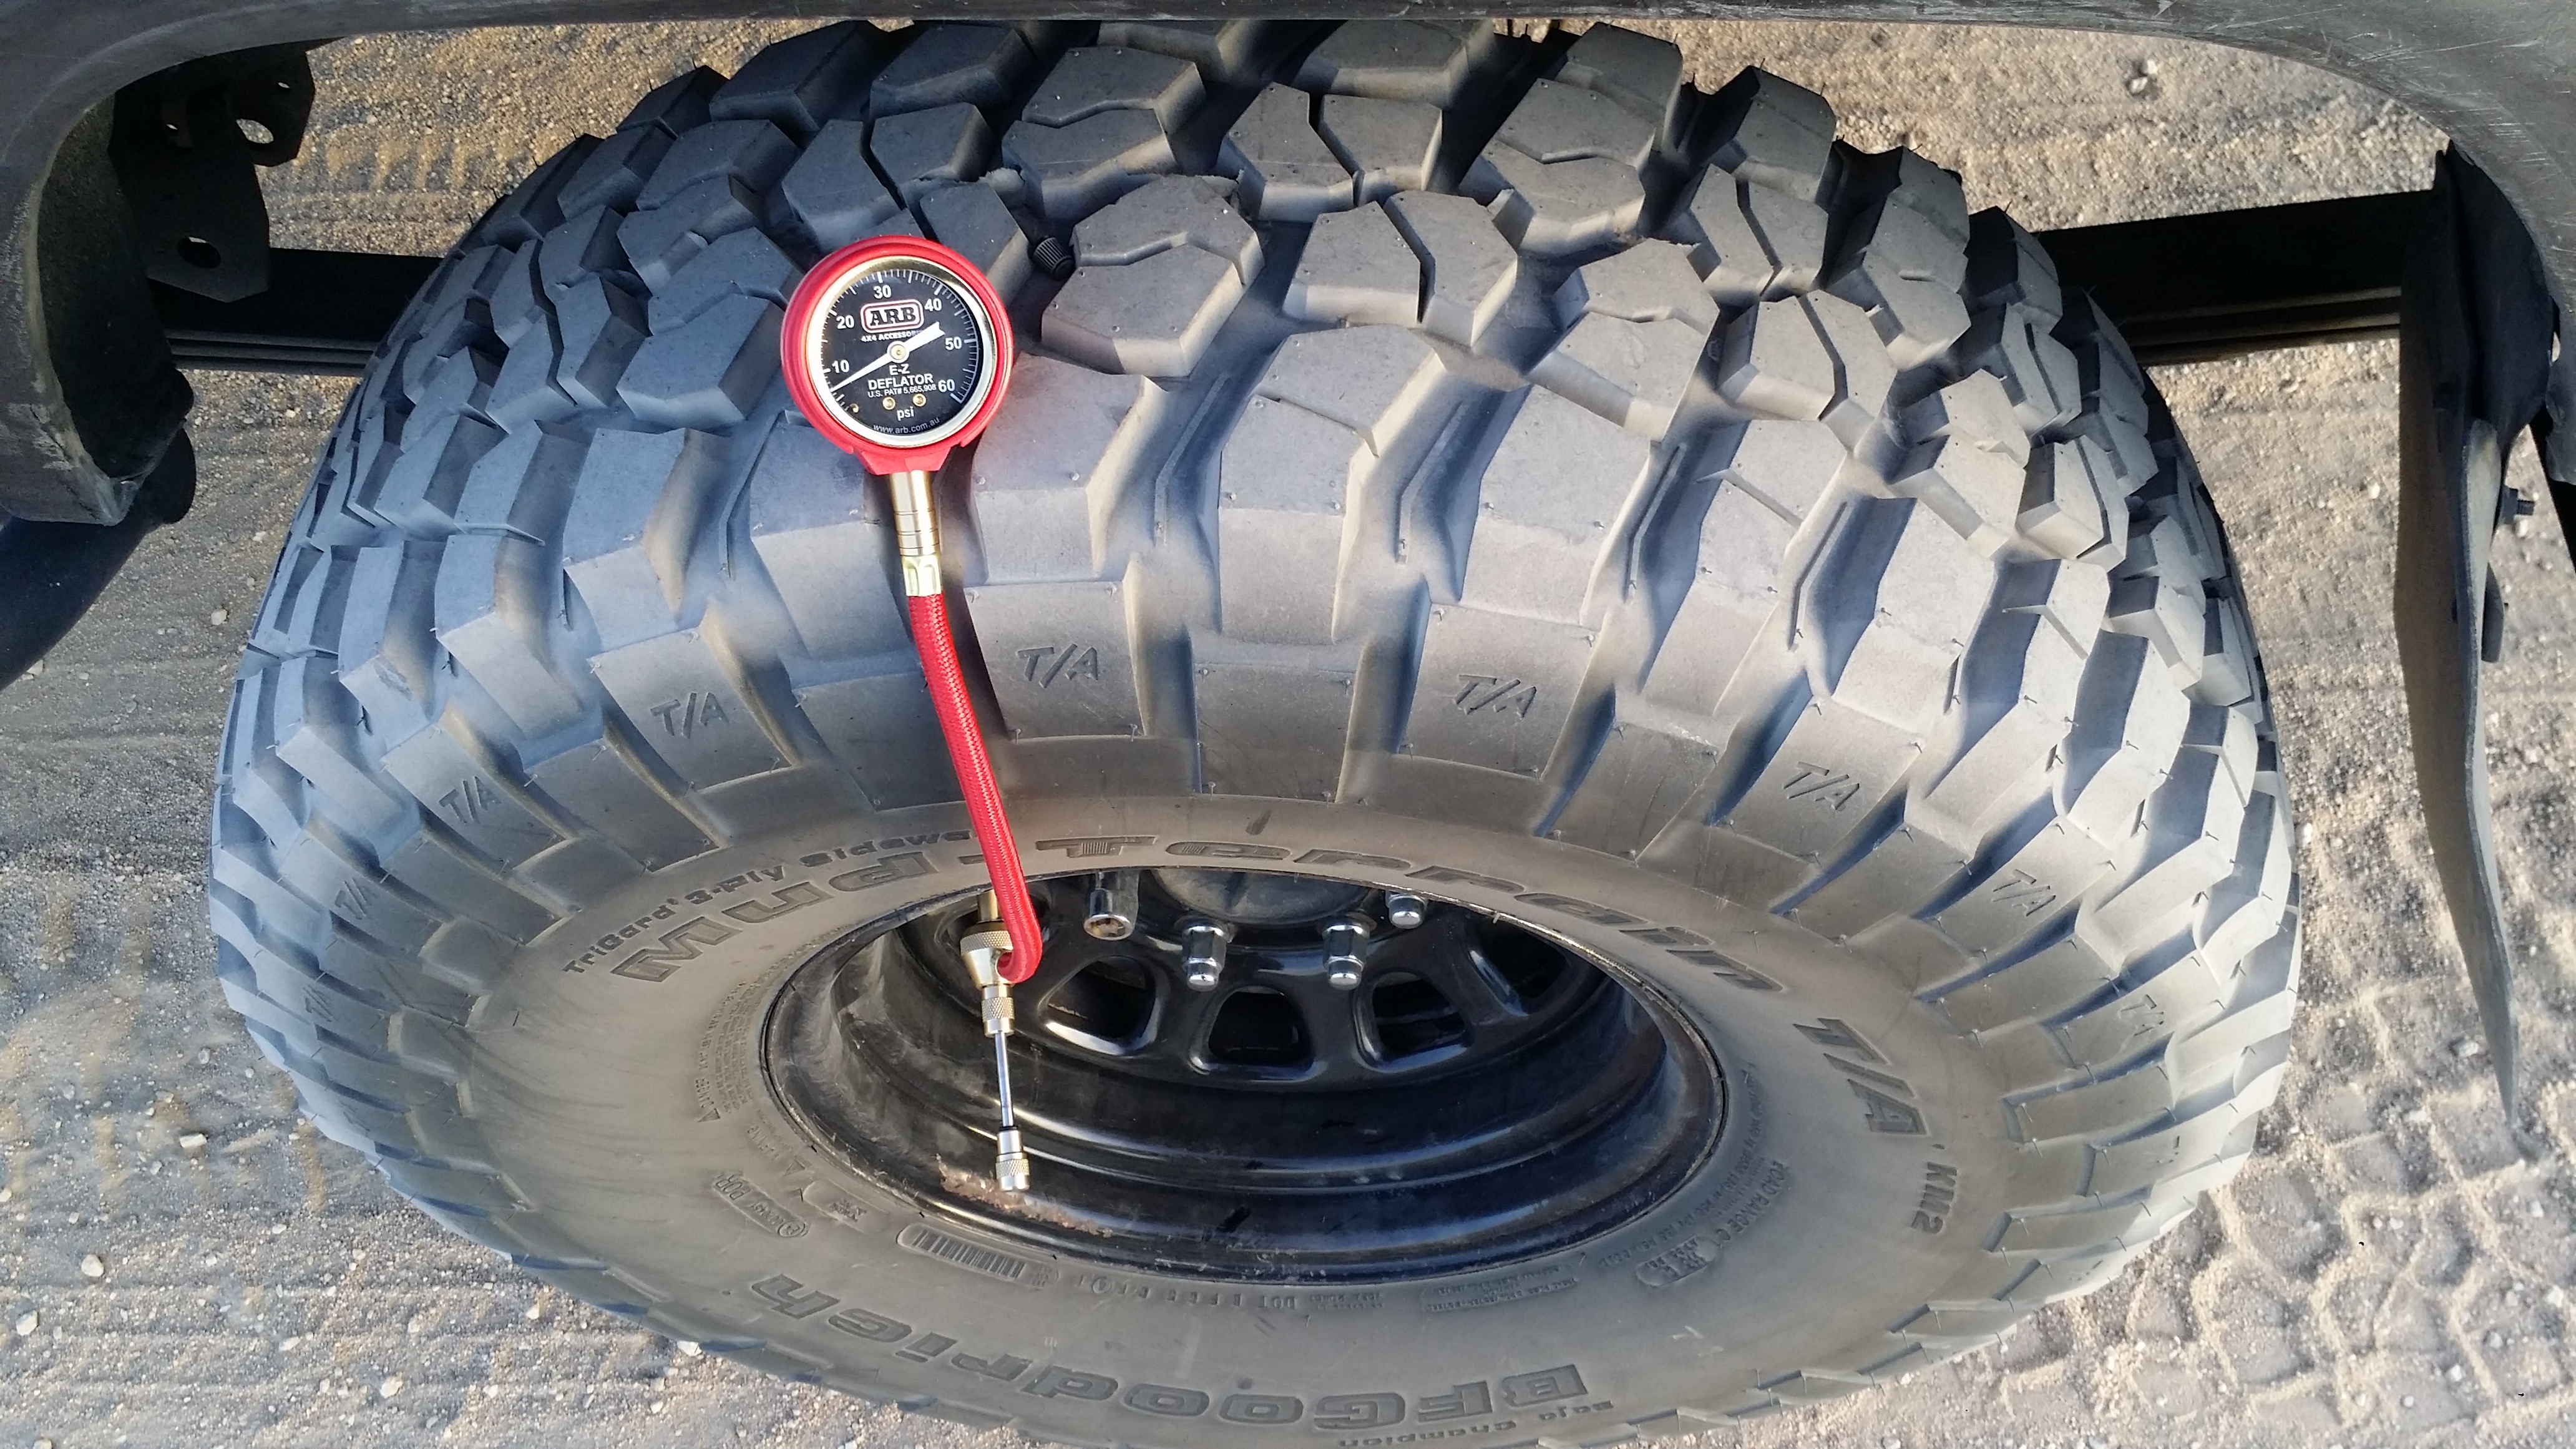
Arriving on the trail and airing down with my new ARB tire deflator Made things so much easier!


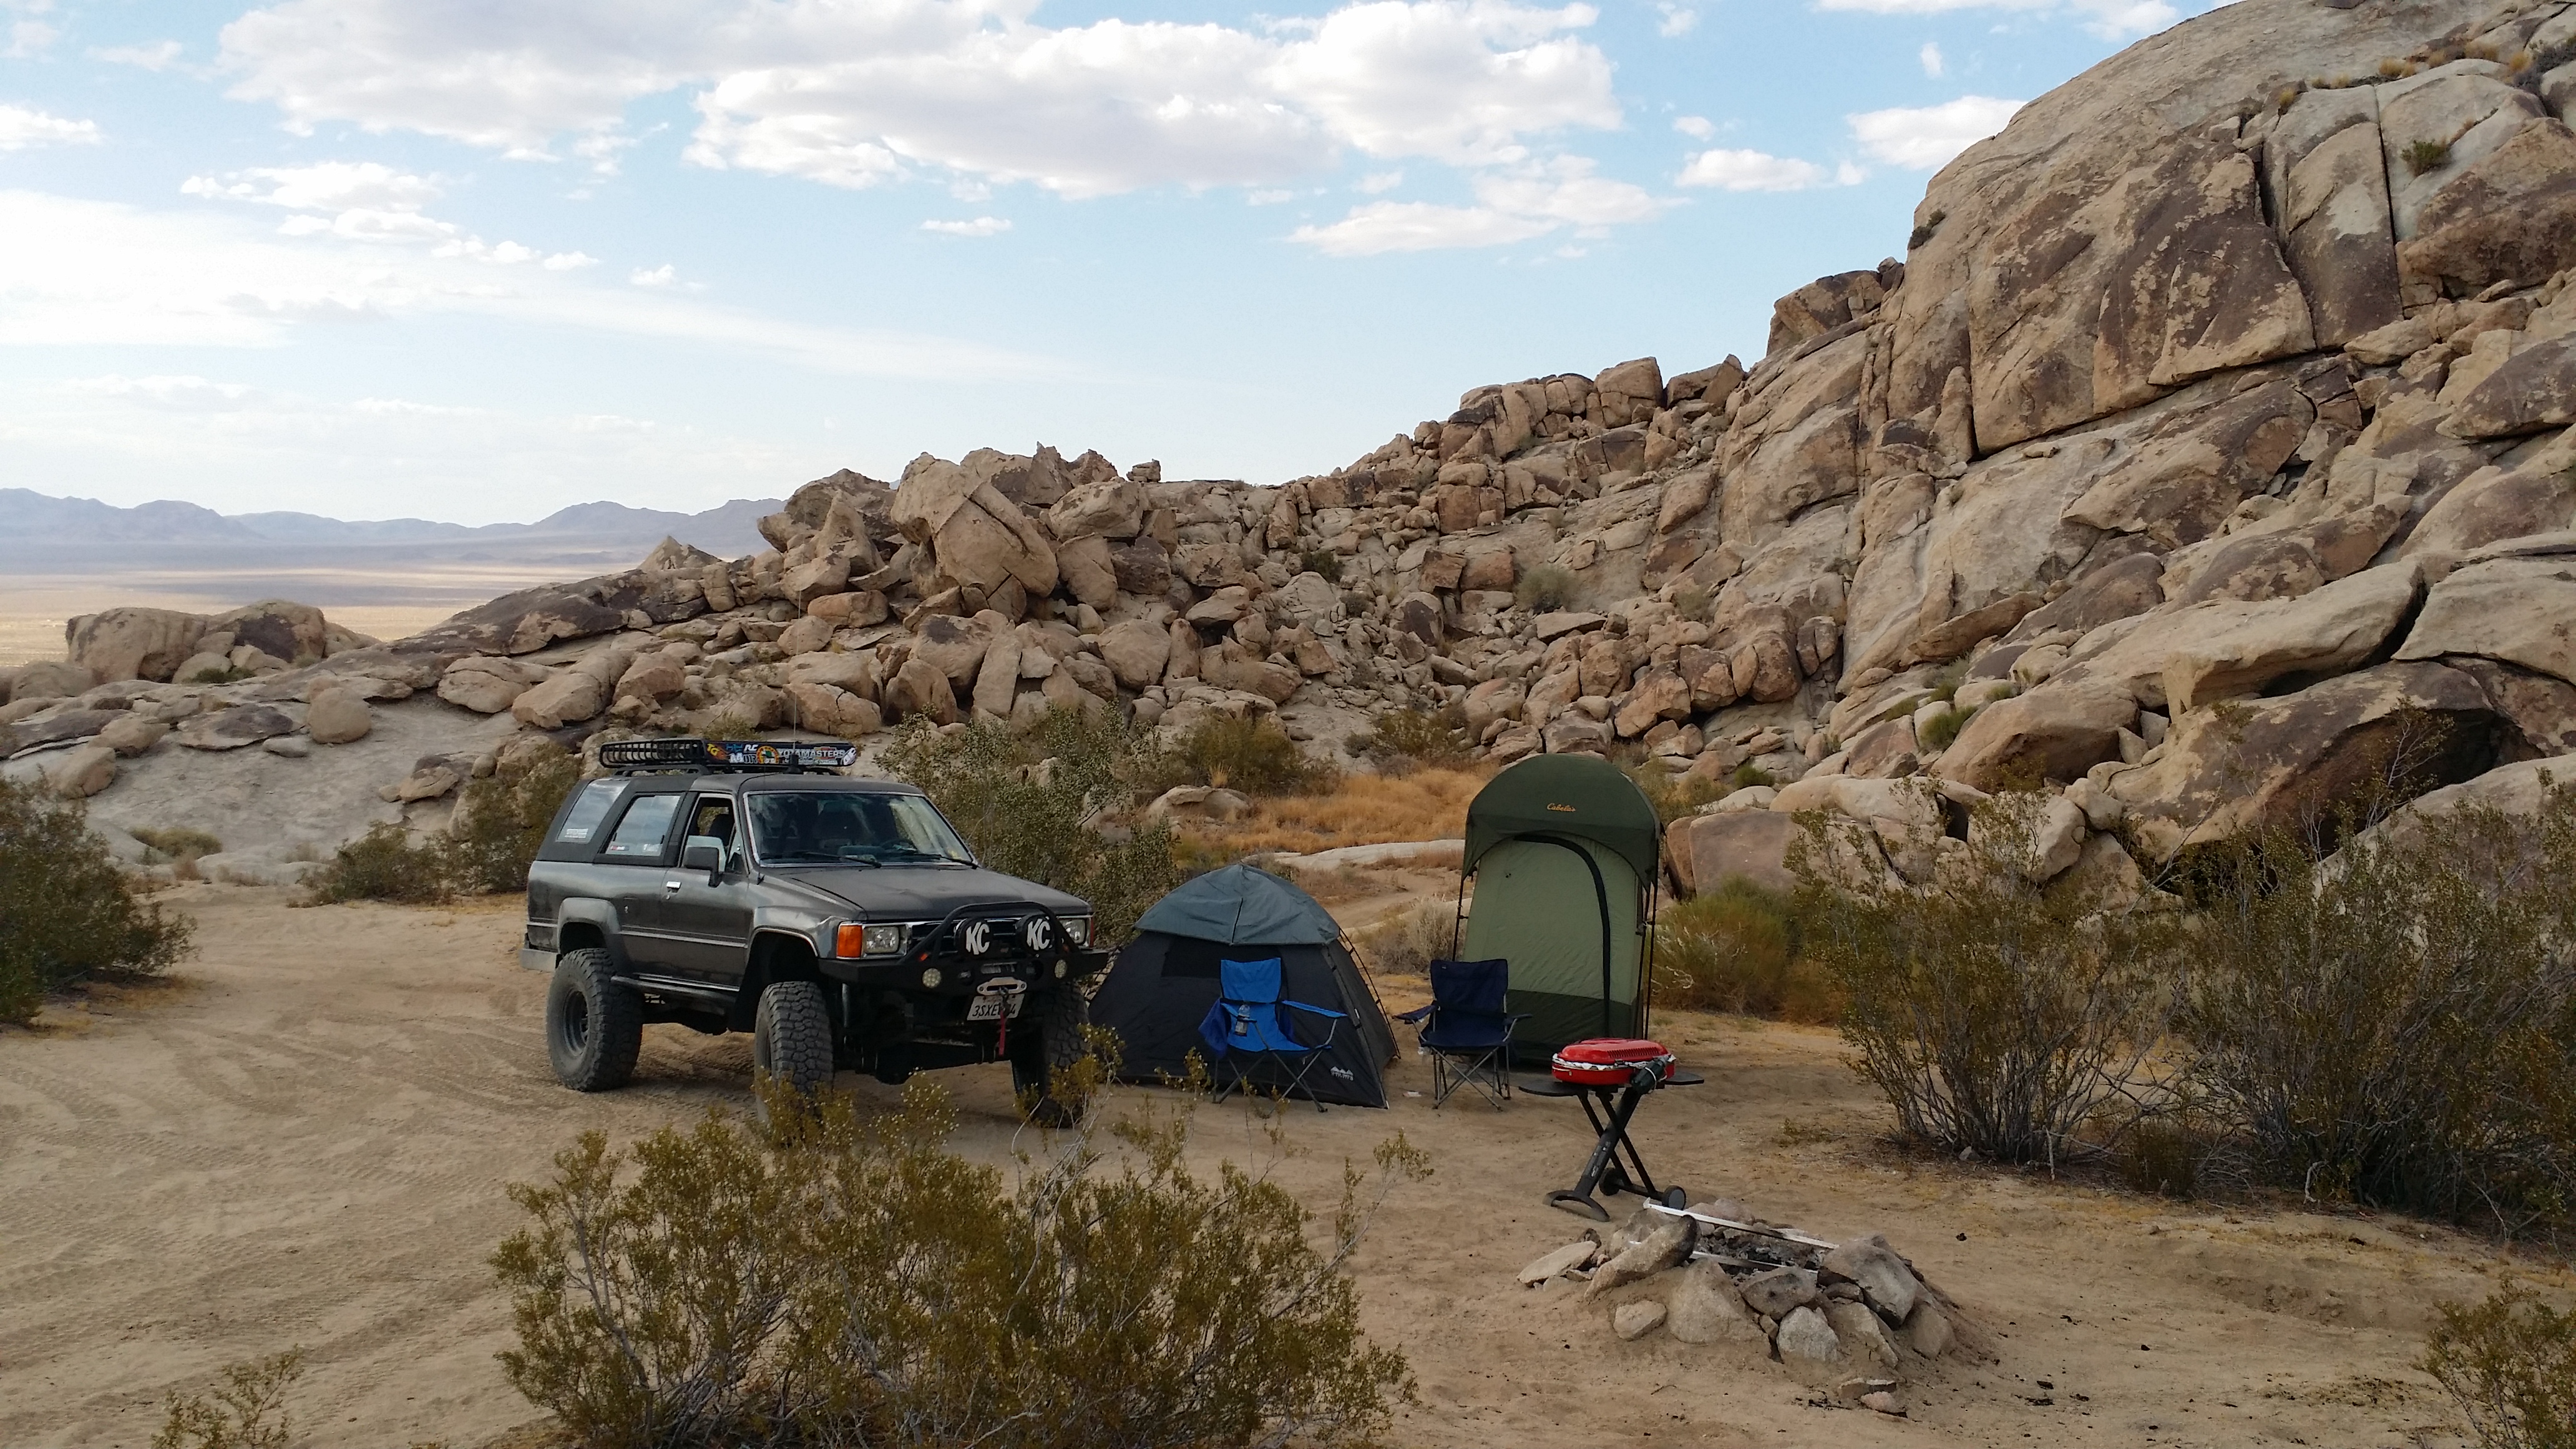
Here is my awesome camp site nook. I think this would be a great shot to blow up on a canvas. or enter for another Calendar contest.

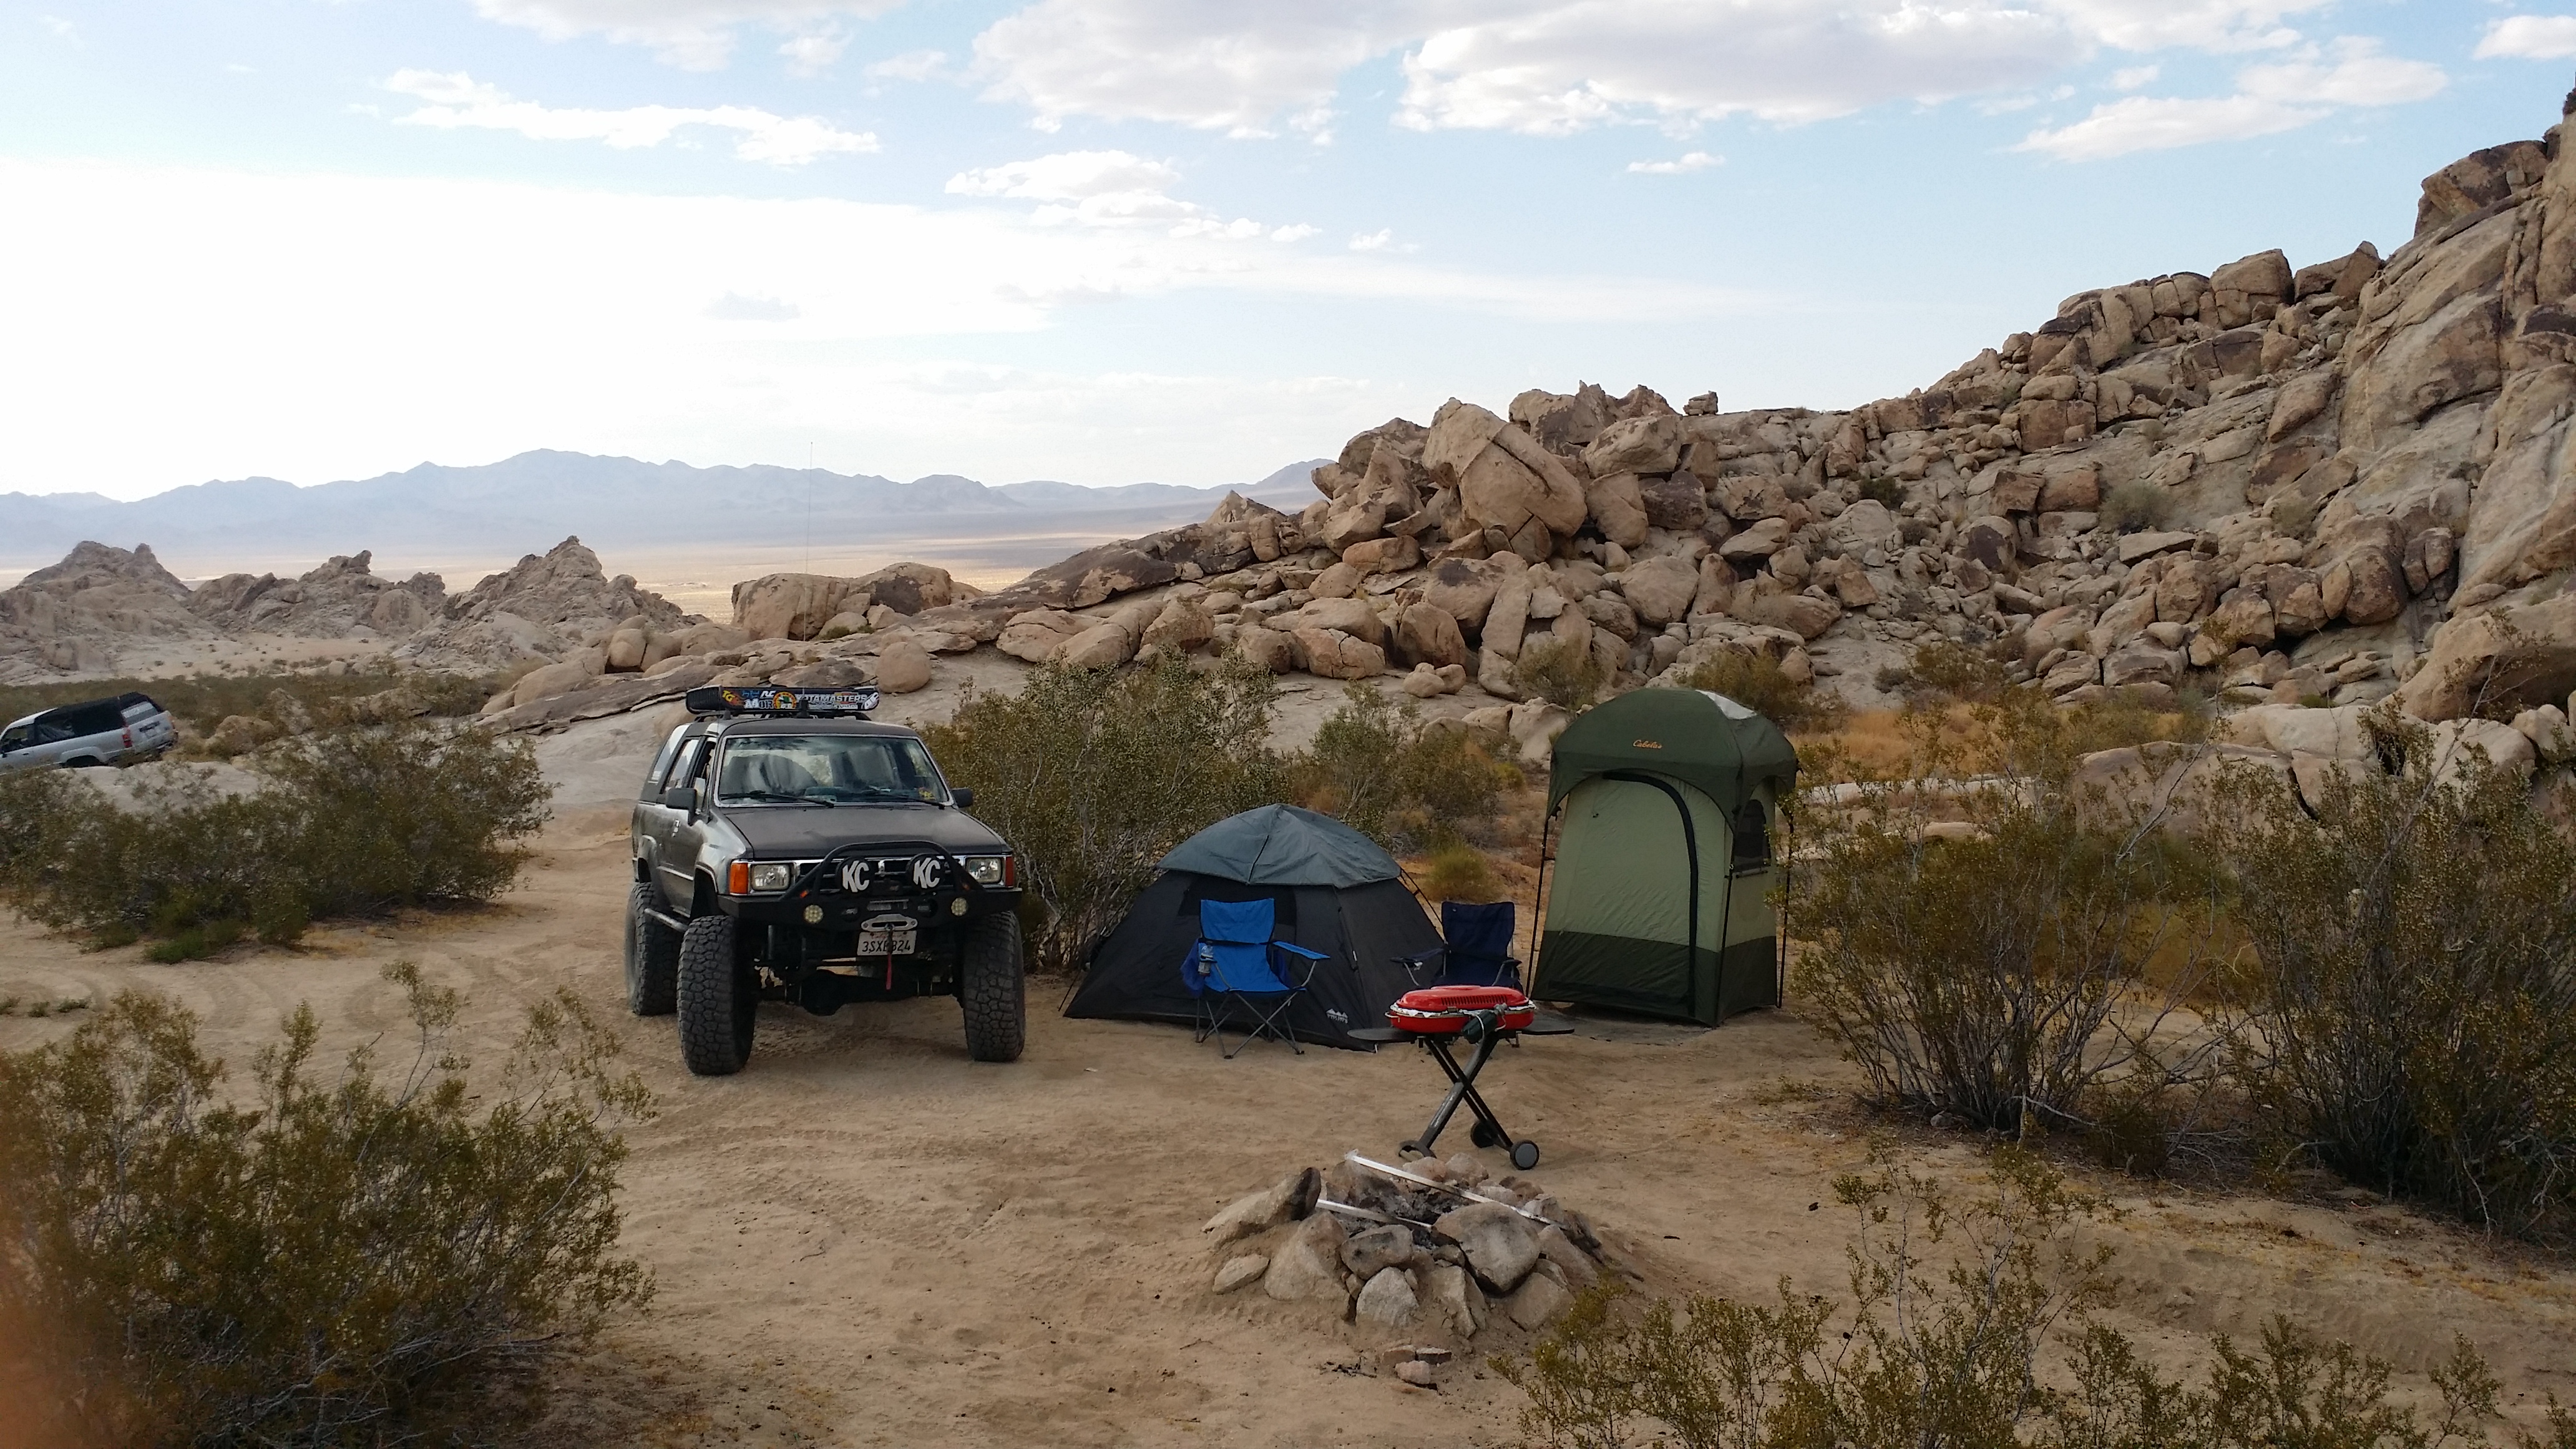
Heres a few more. All i know is that this shower tent (in green) has proven to be a great addition to my camping gear over and over every trip! i love it!

I had to climb on top of a short cliff to get these shots


Here's where mark's campsite was. He was out and about looking for gps and cellphone service to direct the rest of the group to us. but at the end of the day he just backed his truck in that space and he was good to go

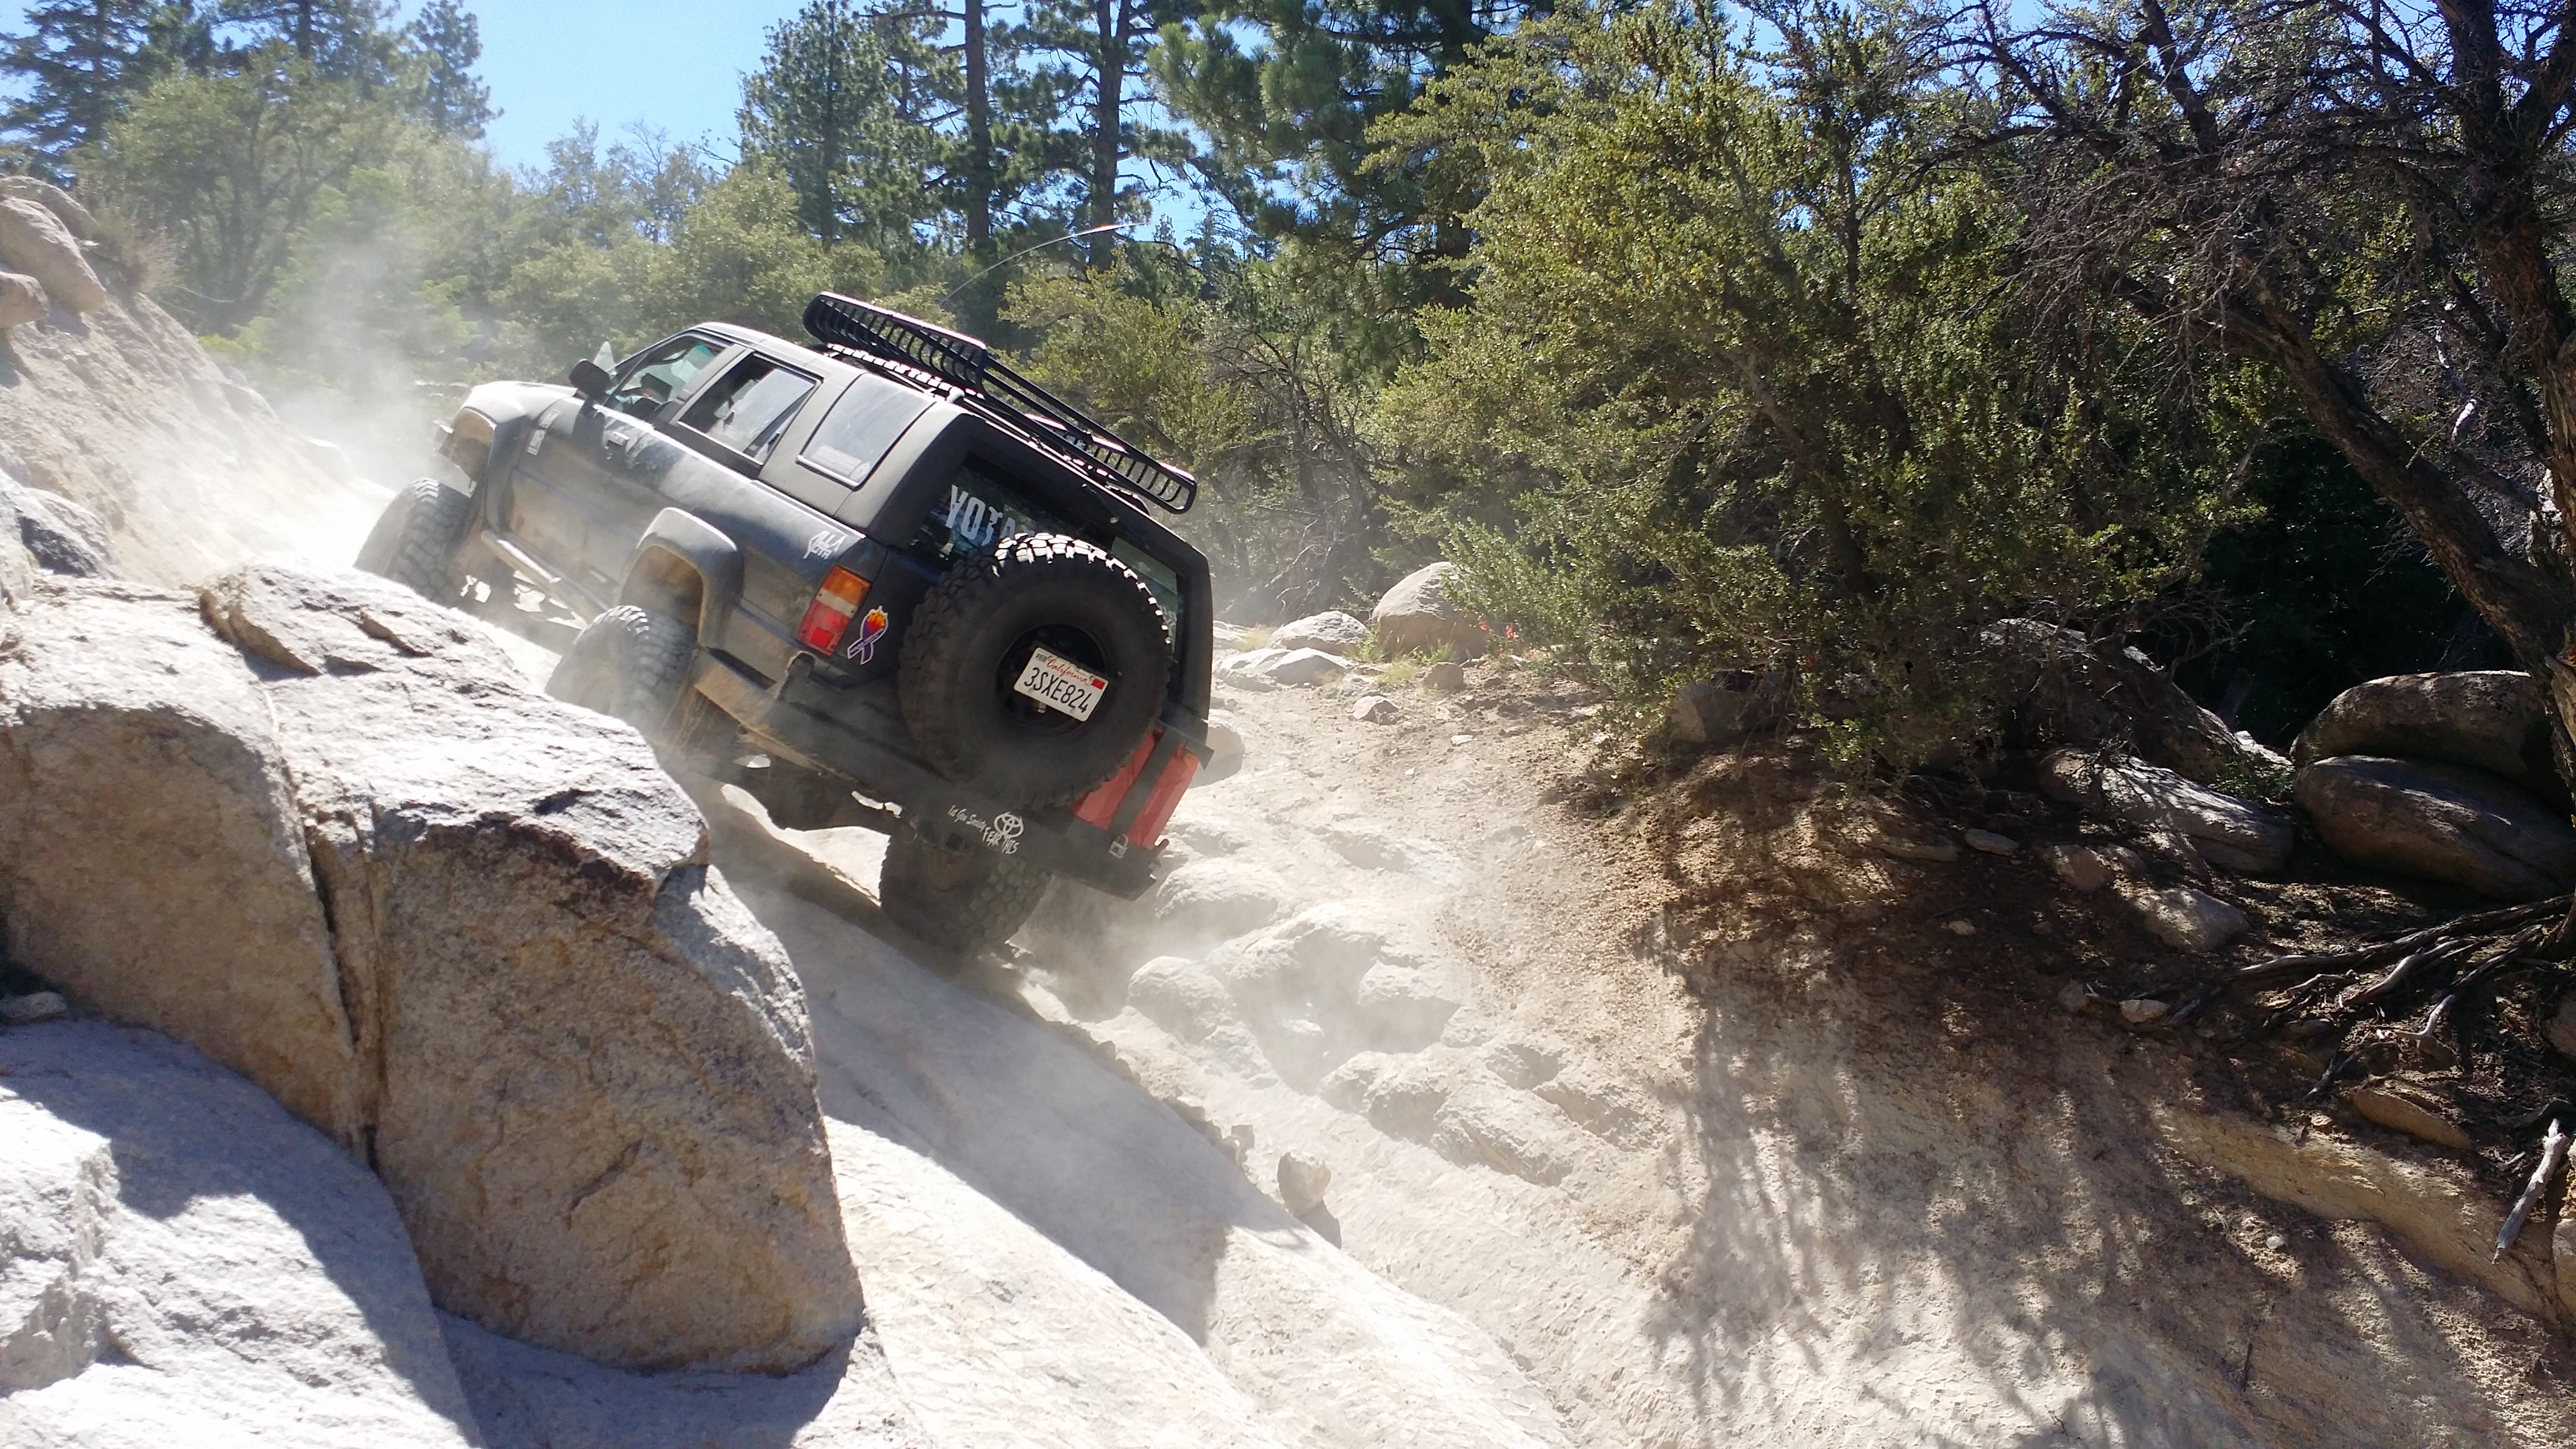
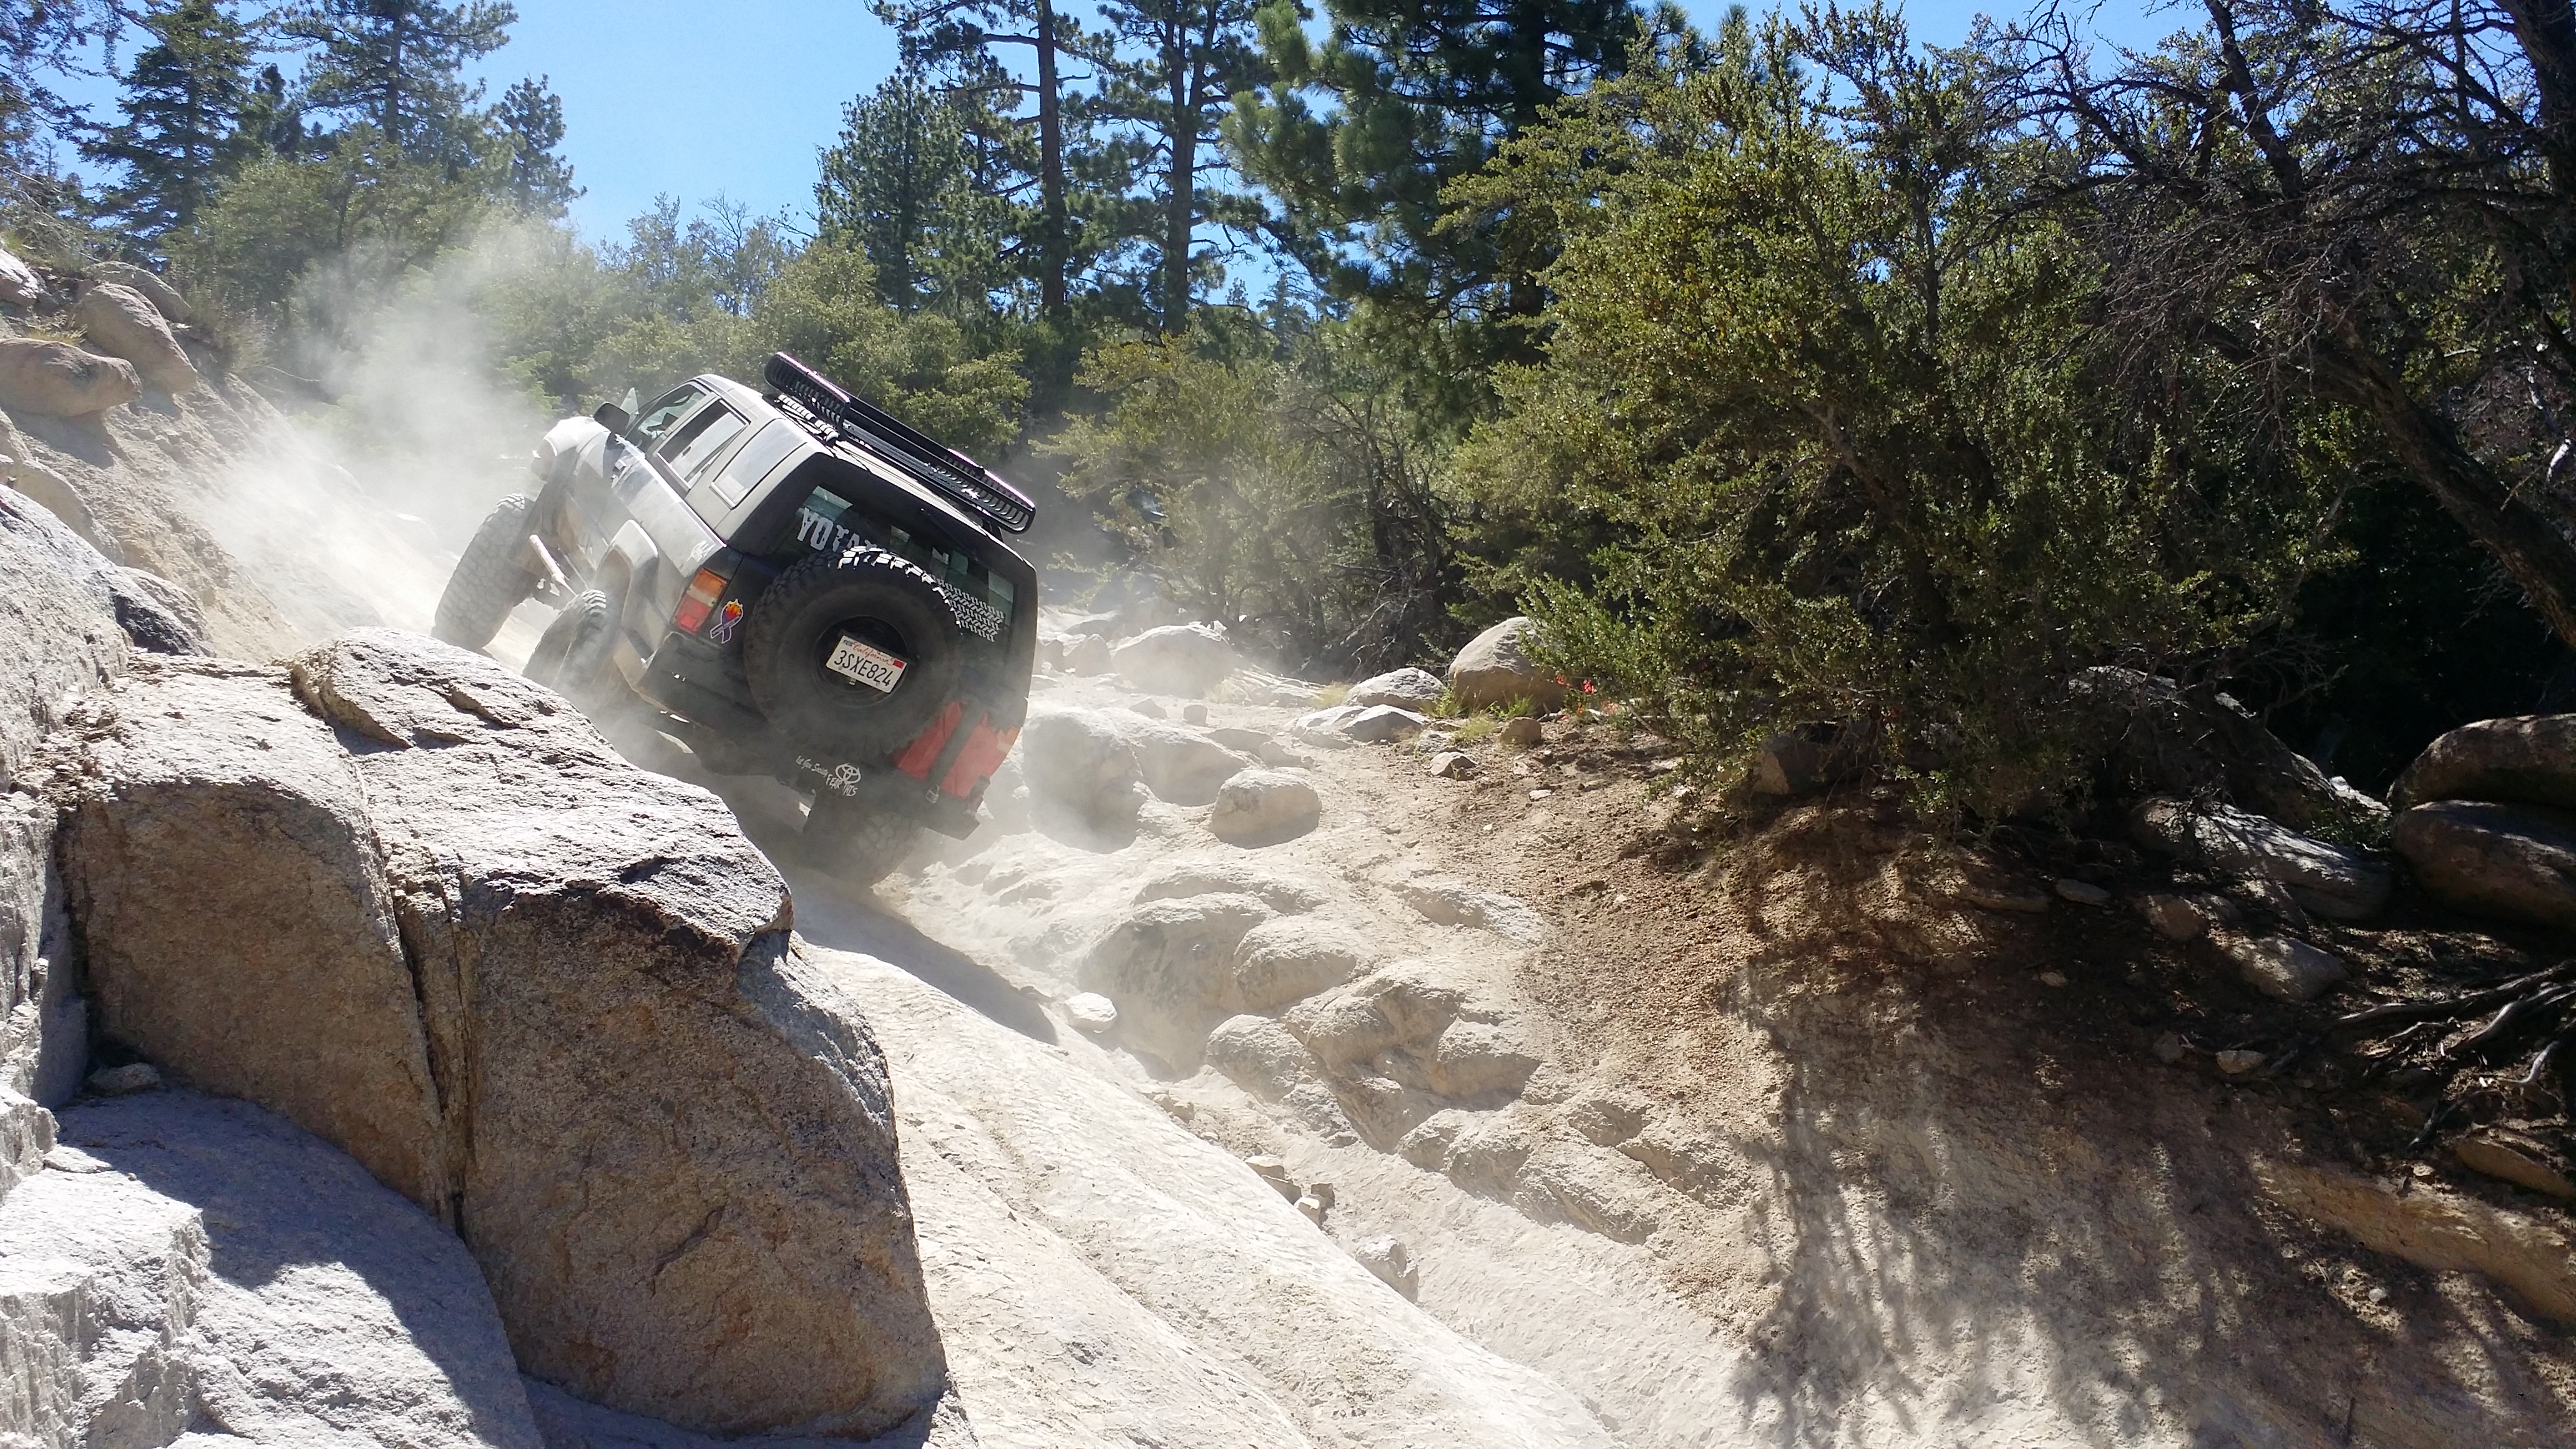
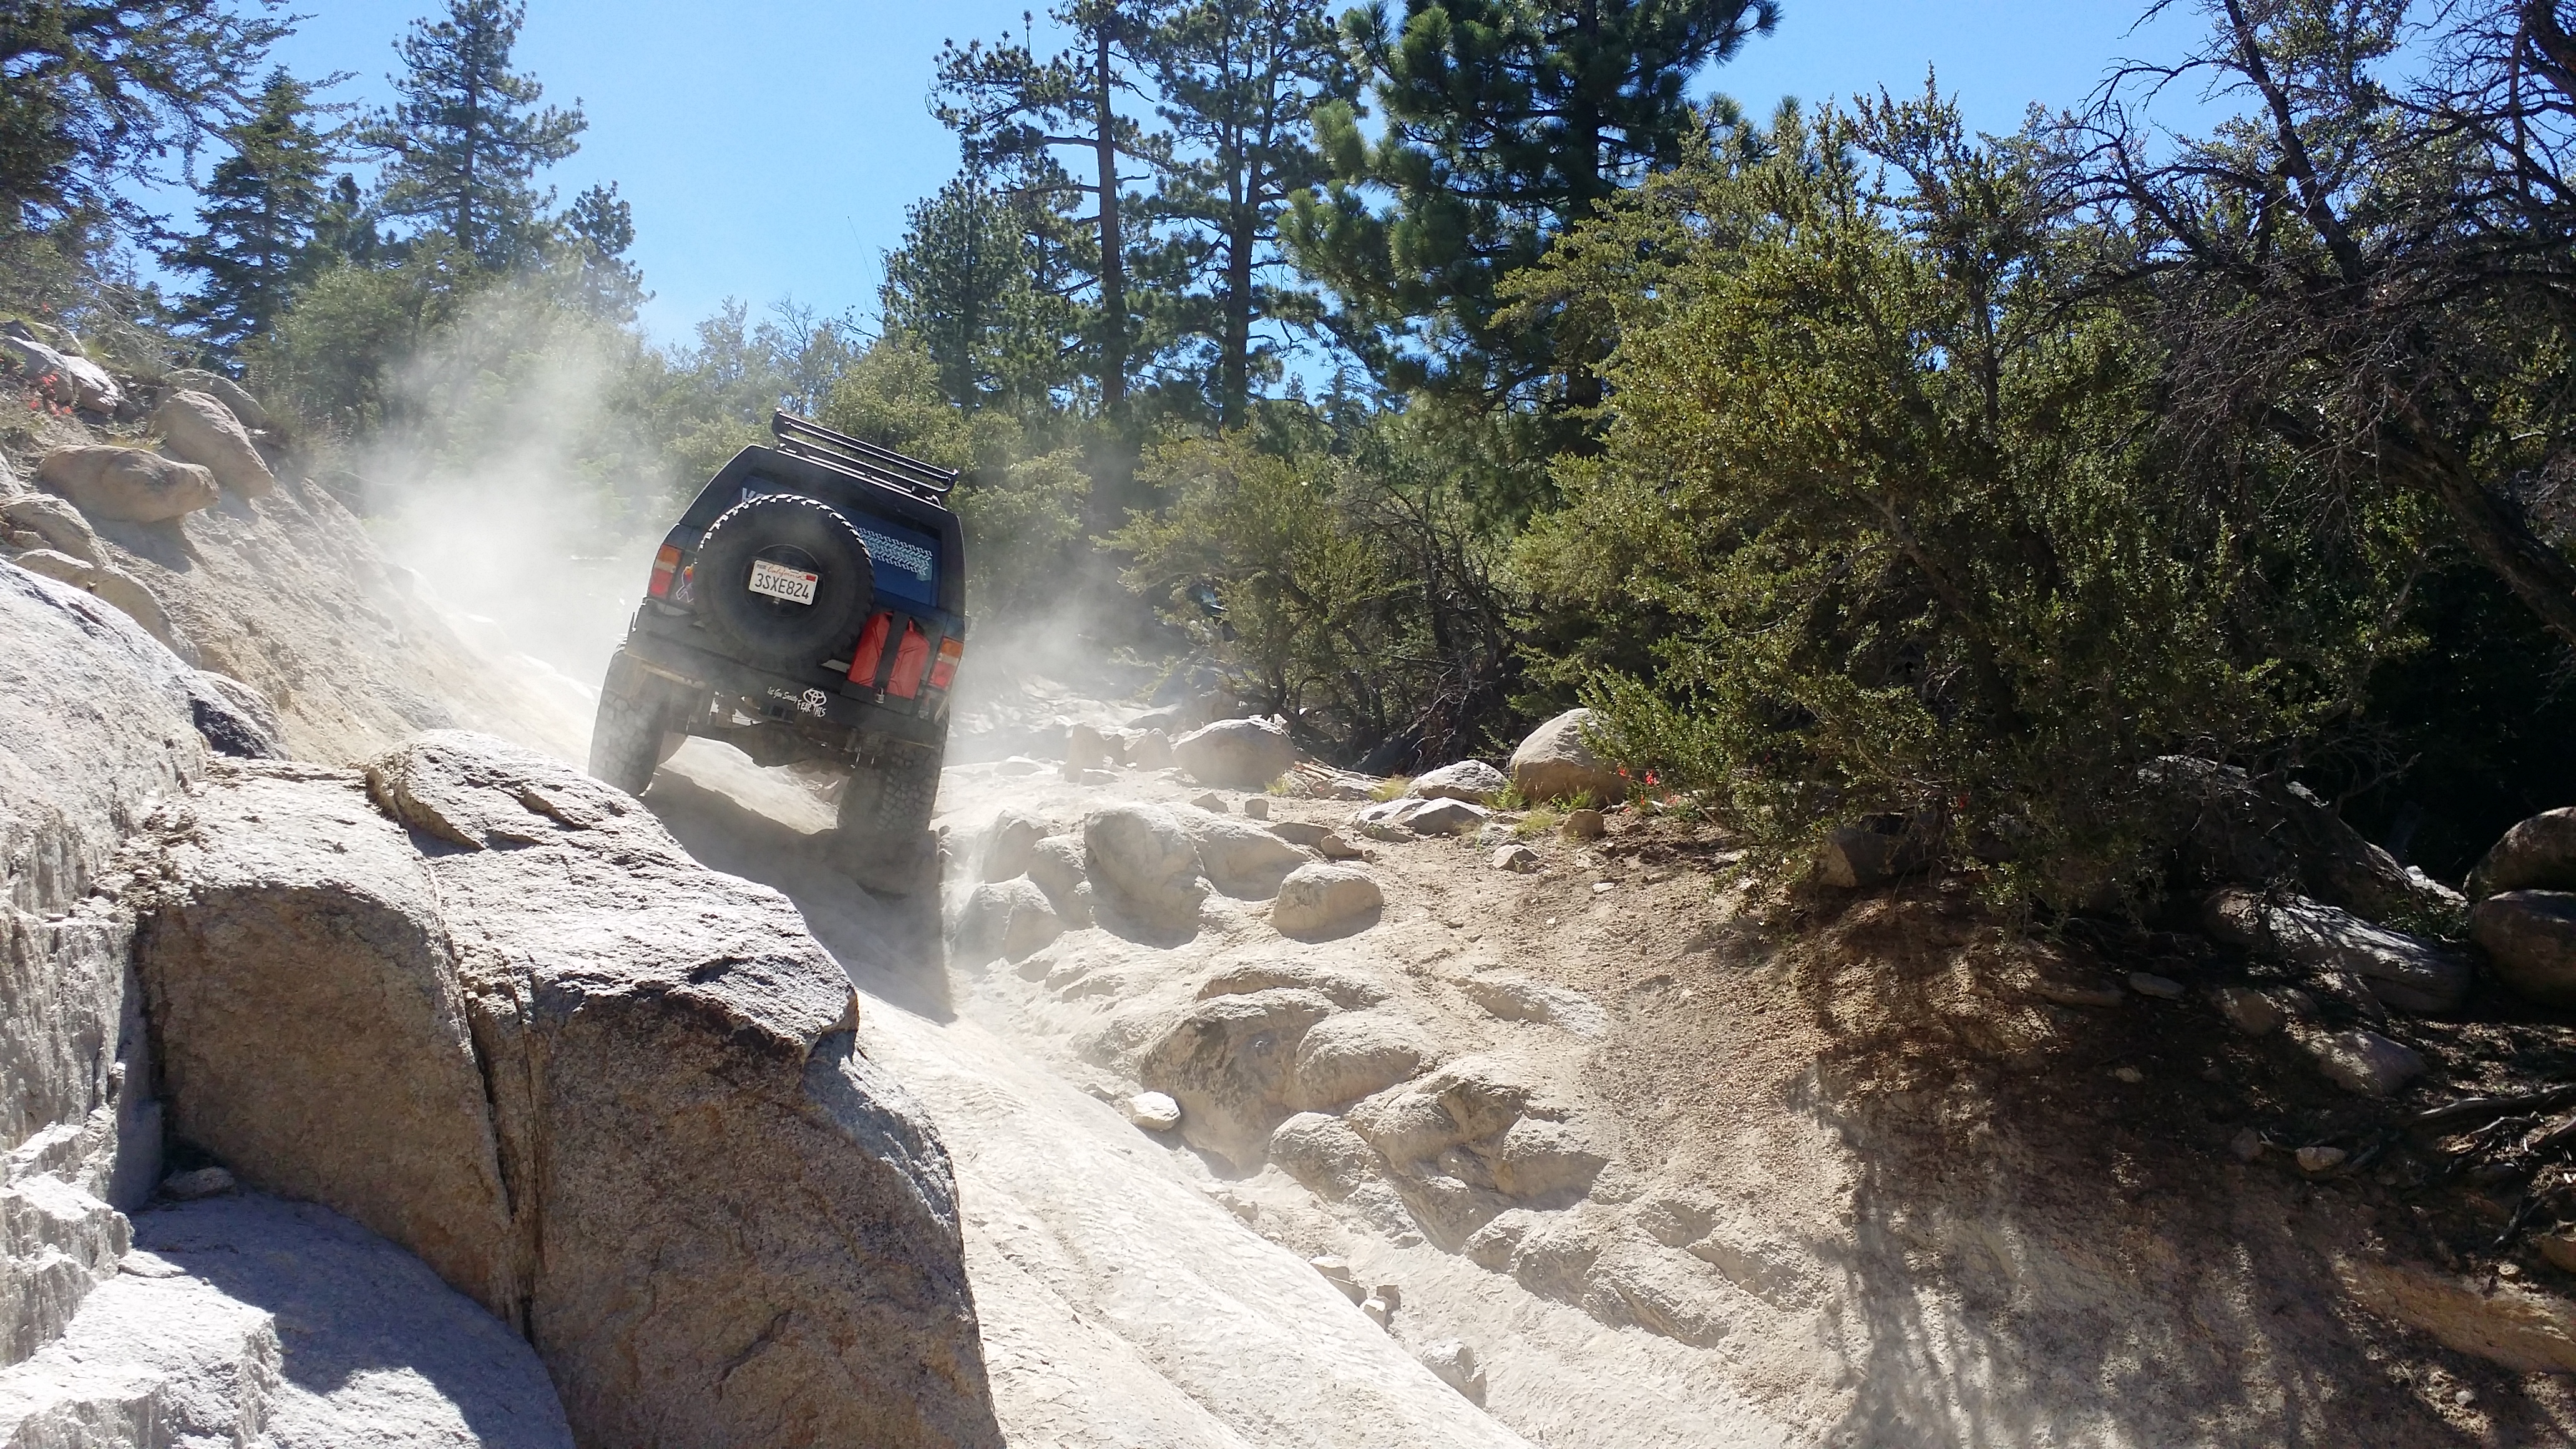
I'm so glad i went on this trip. I experienced Night wheeling for the first time. And i have to admit this was definitely the scariest and hardest trails i have ever done with my truck. I'm happy i had my LED and Dick Cepek Halogen Baja Lights on the front bumper to light my way. IT also helps that everybody there that joined us for the trip also had a ton of lighting including rock lights and LEDS everywhere. So the trail was pretty well lit. And i was always in the middle of the group. I almost flopped on my side twice! and coulde have had some bad scratches on the body, hard top, and maybe a broken rear glass if it wasn't for the awesome spotters we had. i was pretty scared. but once you were in that deep there really isn't much you can do to turn around. So i had to go through it. Thank God i came out of that trail completely with no body damage or broken parts.

This particular shot is where i would have flopped hard on the driver side if i hadn't leveled out

Maybe my luck had to do with this cool old Horse shoe that i found earlier that night. But i'd like to think god was watching over my dumba$s trying to conquer those trails lol

Some of the people who came in our group


Mark, Me, and Faby

Heading home the next day


Stopped at an awesome restraint in the middle of nowhere and had some of the best burgers ever!

Over All this trip was a great experience. came out with no damage at all. and experienced my first night wheeling trip. I did realize a couple of things this trip though
1) although the Dick Cepek Halogen lights are super bright and have great range. They definitely suck the life out of your battery. My truck can use them but it drops the battery level a lot. I didn't like that so I may be =getting some LED bar replacements so i don't have to worry about large power drainage anymore.
2) The Clutch/transmission performed wonderfully. I have so much more power now. I'm assuming this is because the clutch was old before and it wouldn't catch. also guessing it would make my engine work harder revving at higher RPM on the freeway. Because before i would overheat driving on the hwy/fwy going up hill with 33's and no gear at all. And this time i was rolling on 35's and fully loaded with gear and i managed to hit 87MPH and no signs of overheating at all.
I'm not complaining but it was a great improvement in performance, speed, and power. I was definitely satisfied3) i didn't realize how much gas i was burning till this trip. i was going through 17 gallon tanks like crazy these past 2 weeks. I would only go 143miles per tank!
So Something had to be done! So this same week i actually started to look into what i had done over the past 2 years because i have always had a gas guzzling issue, cold start for the past year, and rough idle for about 2.5 years! I looked into everything i replaced and narrowed my problems down to the o2 sensor and a MAF. The o2 was changed when i rebuilt the engine 3 years ago. So it could have been bad. But the MAF was replaced early last year. but it could have been defective. I didn't wanna spend the money to replac them but i was going through money like crazy so i didn't mind buying a MAF to confirm it was defective. Here is the rebuilt MAF bought off my uncles shop:

I normally get crappy mileage on this truck. But lately I went from getting 14mpg down to 9.5mpg.
After the past 2 years of struggling with idle issues, rough cold start issues, and rough take offs and incorrect idle in different altitudes I began to replace things left and right and upon that I always ruled out the MAF because I replaced it a little over a year ago at yotamasters and I tested it with another MAF that I tried from @chefyota4x4's donor 4runner and it still had the same issue so I just assumed it was not defective. But after so much spending I nearly replaced everything else except for the O2 sensor and the MAF so after running horribly at this past weekend's off road trip and chugging through 17gallon gas tanks every 140miles I finally replaced the MAF and wow... just wow. I can't believe that was the answer to all the issues over the past 3 years! especially this past year! I wish I wouldn't have waited so long to accept that the MAF I got from yotamasers may have either gone bad or was defective. Whichever it was I don't care. It now runs great. All the problems went away with simply changing this out. i also went ahead anc changed out the O2 sensor because I'm sure it is toast after 3 years and lots of carbon build up from the unbunt gasoline and 2 sea foam treatments.
I removed the old O2 sensor and this is what i found! Look at that carbon build up. There is literally chunks! I wonder what the inside of my catalytic converter and muffler look like.
Also you can see I must had had an air leak on that gasket. You can see where the carbon leads away from the center hole toward the bolt hole.


New vs OLD

Also found an extremely old gasket stuck to the exhaust pipe that i didn't know was there. I found it by chance too! i'm glad id id find it o else i probably would have had an air leak around the O2 sensor area. I took a razor to it and cleaned it up real good.

Here is the chunks of seized on gasket that was on there: btw this is separate from the O2 sensor/gasket that i put in 3 years ago. Who knows how long that thing had been burnt on to the metal lol

--------------------------------------------------------------------------
After changing out the MAF and o2 Sensor this past Friday i filled up my gas tank and kept track of my mileage. Here are the results.
So coming from the original 9.5mpg when it was chugging my gas like crazy. I went up from that to 13.90mpg. I know it's still crappy mileage but that's one heck of a difference considering it went up 4.4mpg over all. And another thing is I step of the pedal a lot. So I'm sure the numbers would increase if I watched how I drove too.

In case you're wondering what all that mumbo jumbo number stuff is... it is a formula I have to do to calculate correct mpg. So considering my MPG is off by 3miles less per hour. I had to do a formula to calculate the accurate mpg.
- when going 63mph my gps states I am actually traveling at 60mph. So when you divide those numbers the total comes out to 1.05 so I multiply that number with what the odometer says which was 205.7 and the accurate number of traveled miles of. This tank of gas is 215.985. After that I divide the amount of gallons I filled my tank with which was 15.534gal and then comes put the correct mpg "13.904mpg
Jun 17, 2015 | 12:17 AM
#2602
Thread Starter
Registered User
Joined: Apr 2012
Posts: 2,817
Likes: 2
From: Los Angeles CA
LASTLY. Faby and I have our 7 year anniversary coming up this Monday. She told me she wants to buy me some better LED lighting to replace those Hologen Dick Cepek Baja Lights. So MArk and i have a buddy with All4Offroad.com / on instagram who sells off road lighting and he said he would cut me a good deal. I've been telling him on gonna buy some lights ff him for over a year now and looks like now is the chance.
Here is the measurments to my Bullbar/ bumper. I do have some restrictions that i need to work around. One is the winch box from my SMittybilt XRC8 winch. i cant mount a long bar at the bottom because the box is in the way and it doesn't matter where i relocate it to it will continue to be in the way. and the 2nd restriction is the bull bar itself is too small or too large for the standard LED bar sizes. So I gotta work with what is available to me.
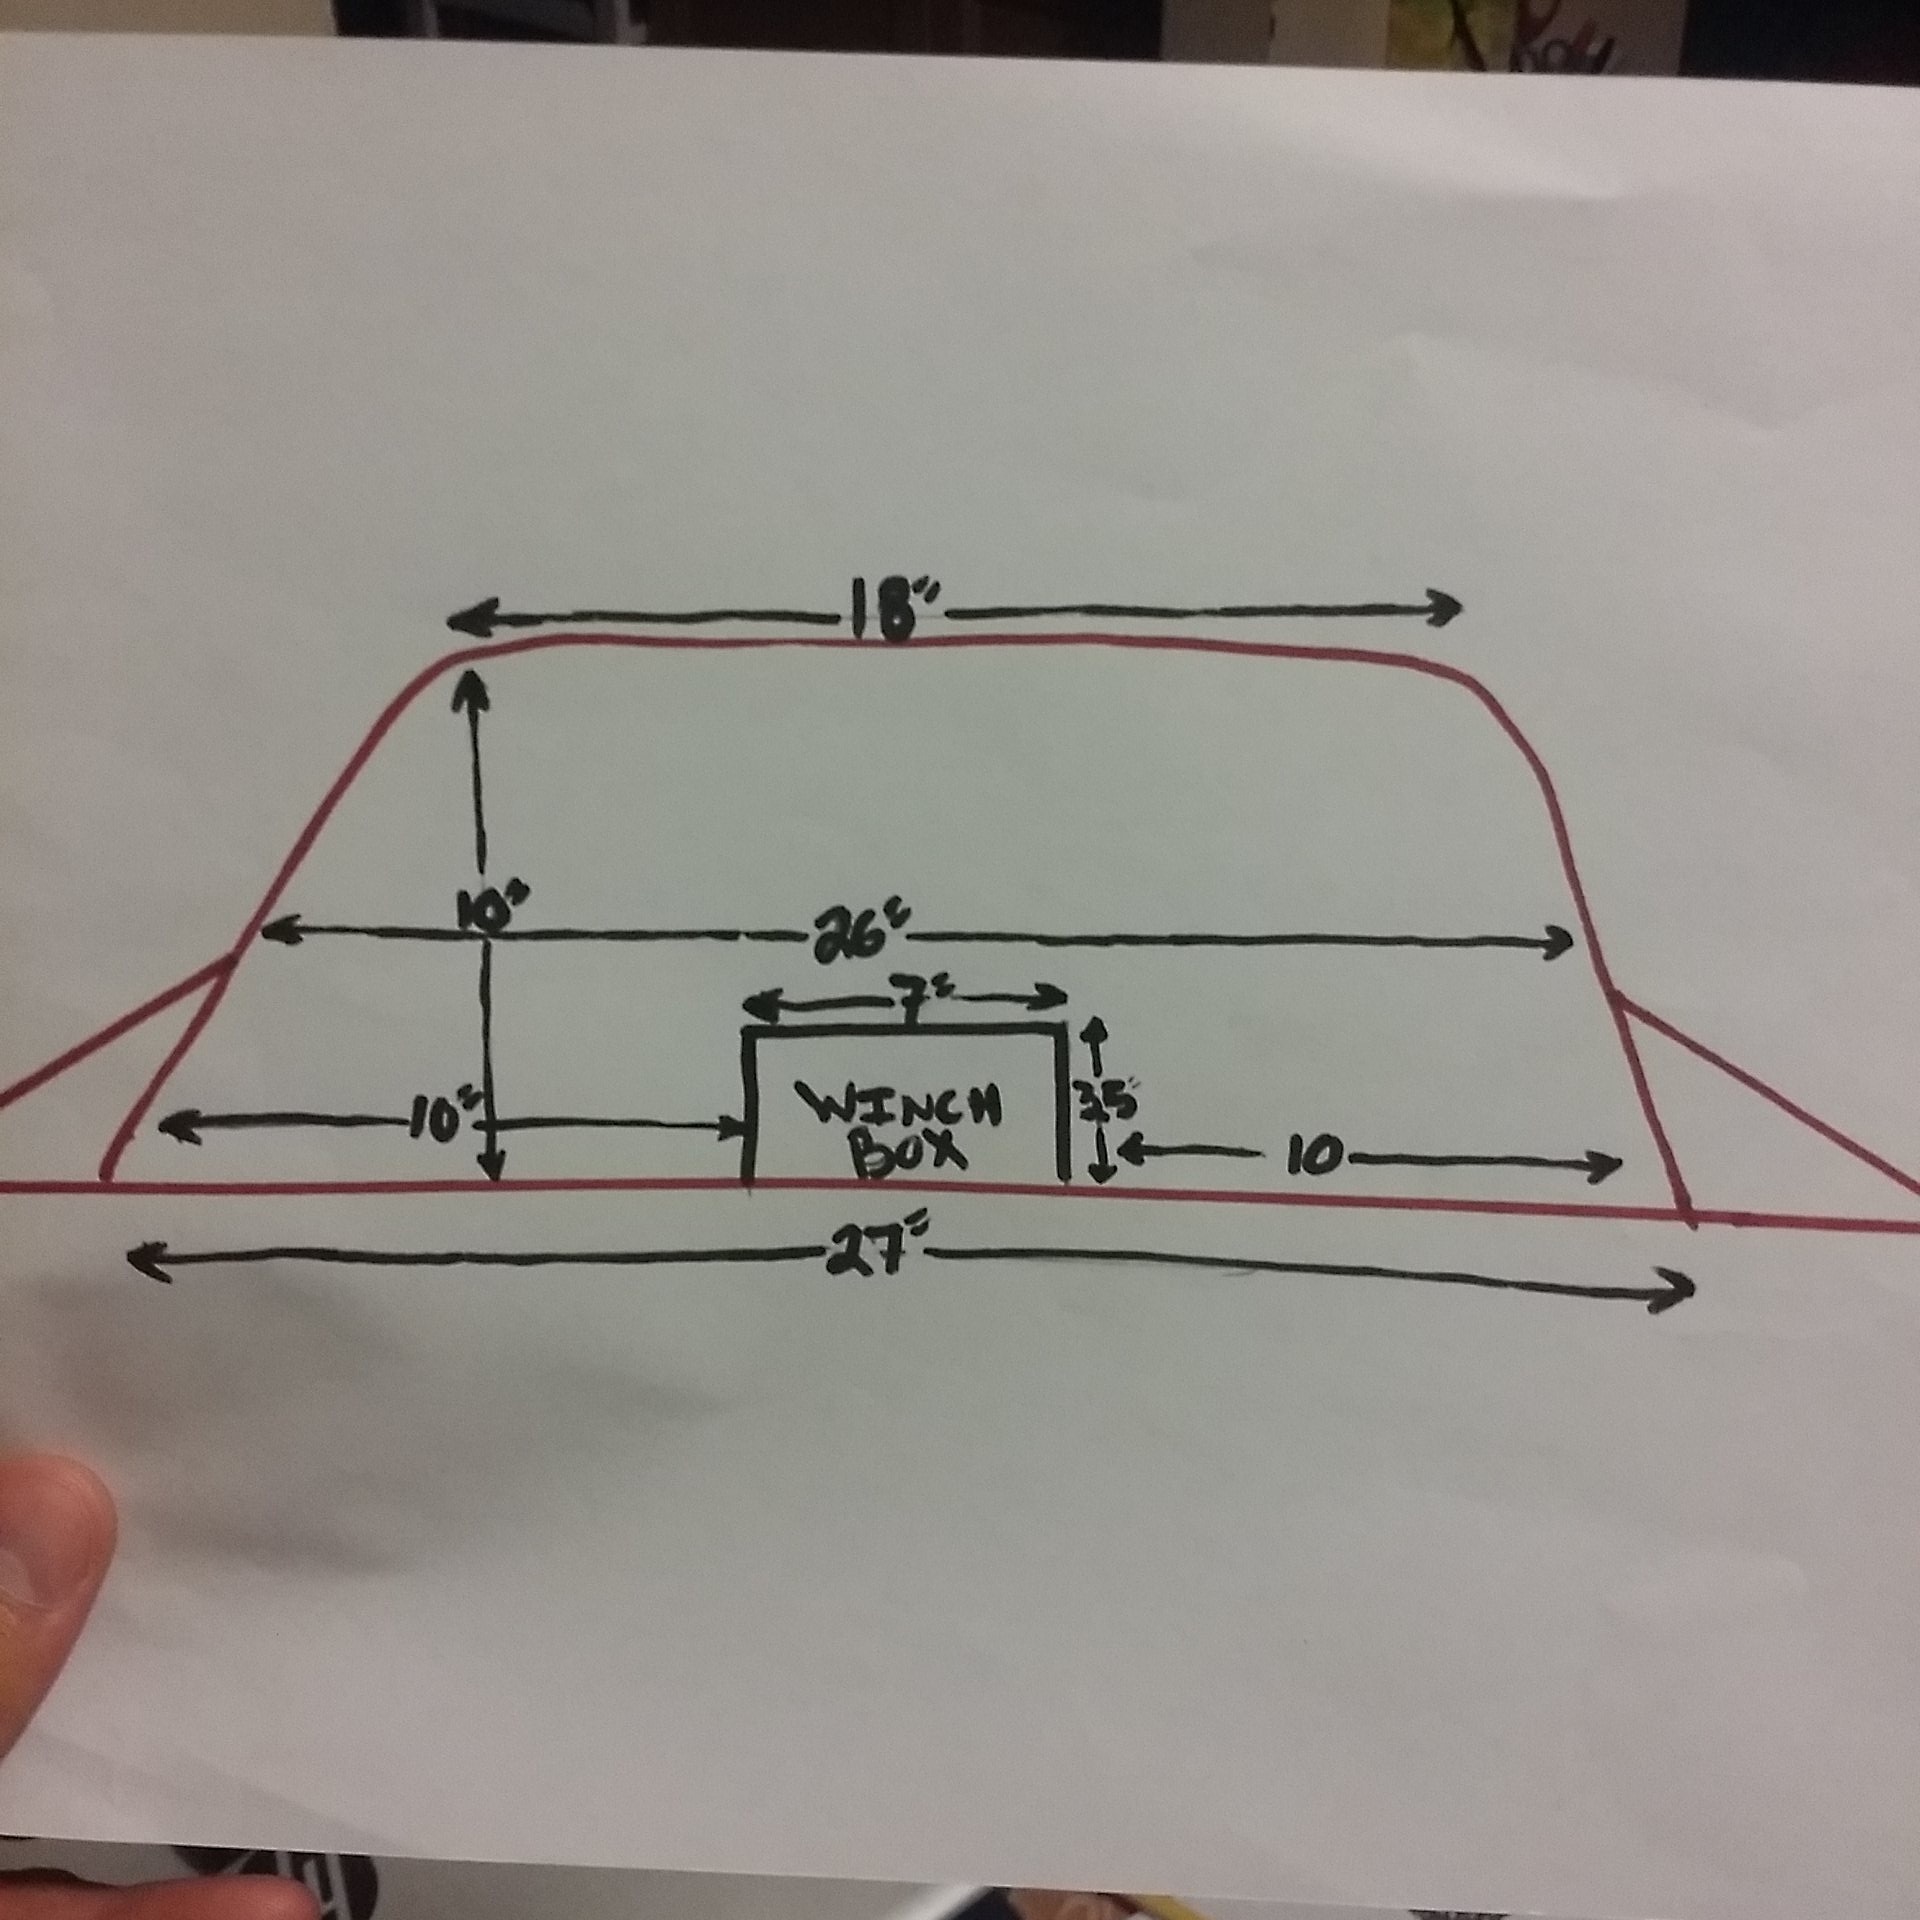
I am torn between two 21.5" lights or getting two 7.5" for the bottom and one 21.5" up on top like what I have on the picture down below. I have to work around the Winch box that is located in the middle at the bottom plus take into consideration the winch controller cable that mounts on to the top of the winch box. So I don't think going with two 21.5" bars would be possible which is why I did this mock up picture here to give me an idea of what the smaller ones would look like with the larger one on top. (BTW i think i drew in the lights a bit larger too)
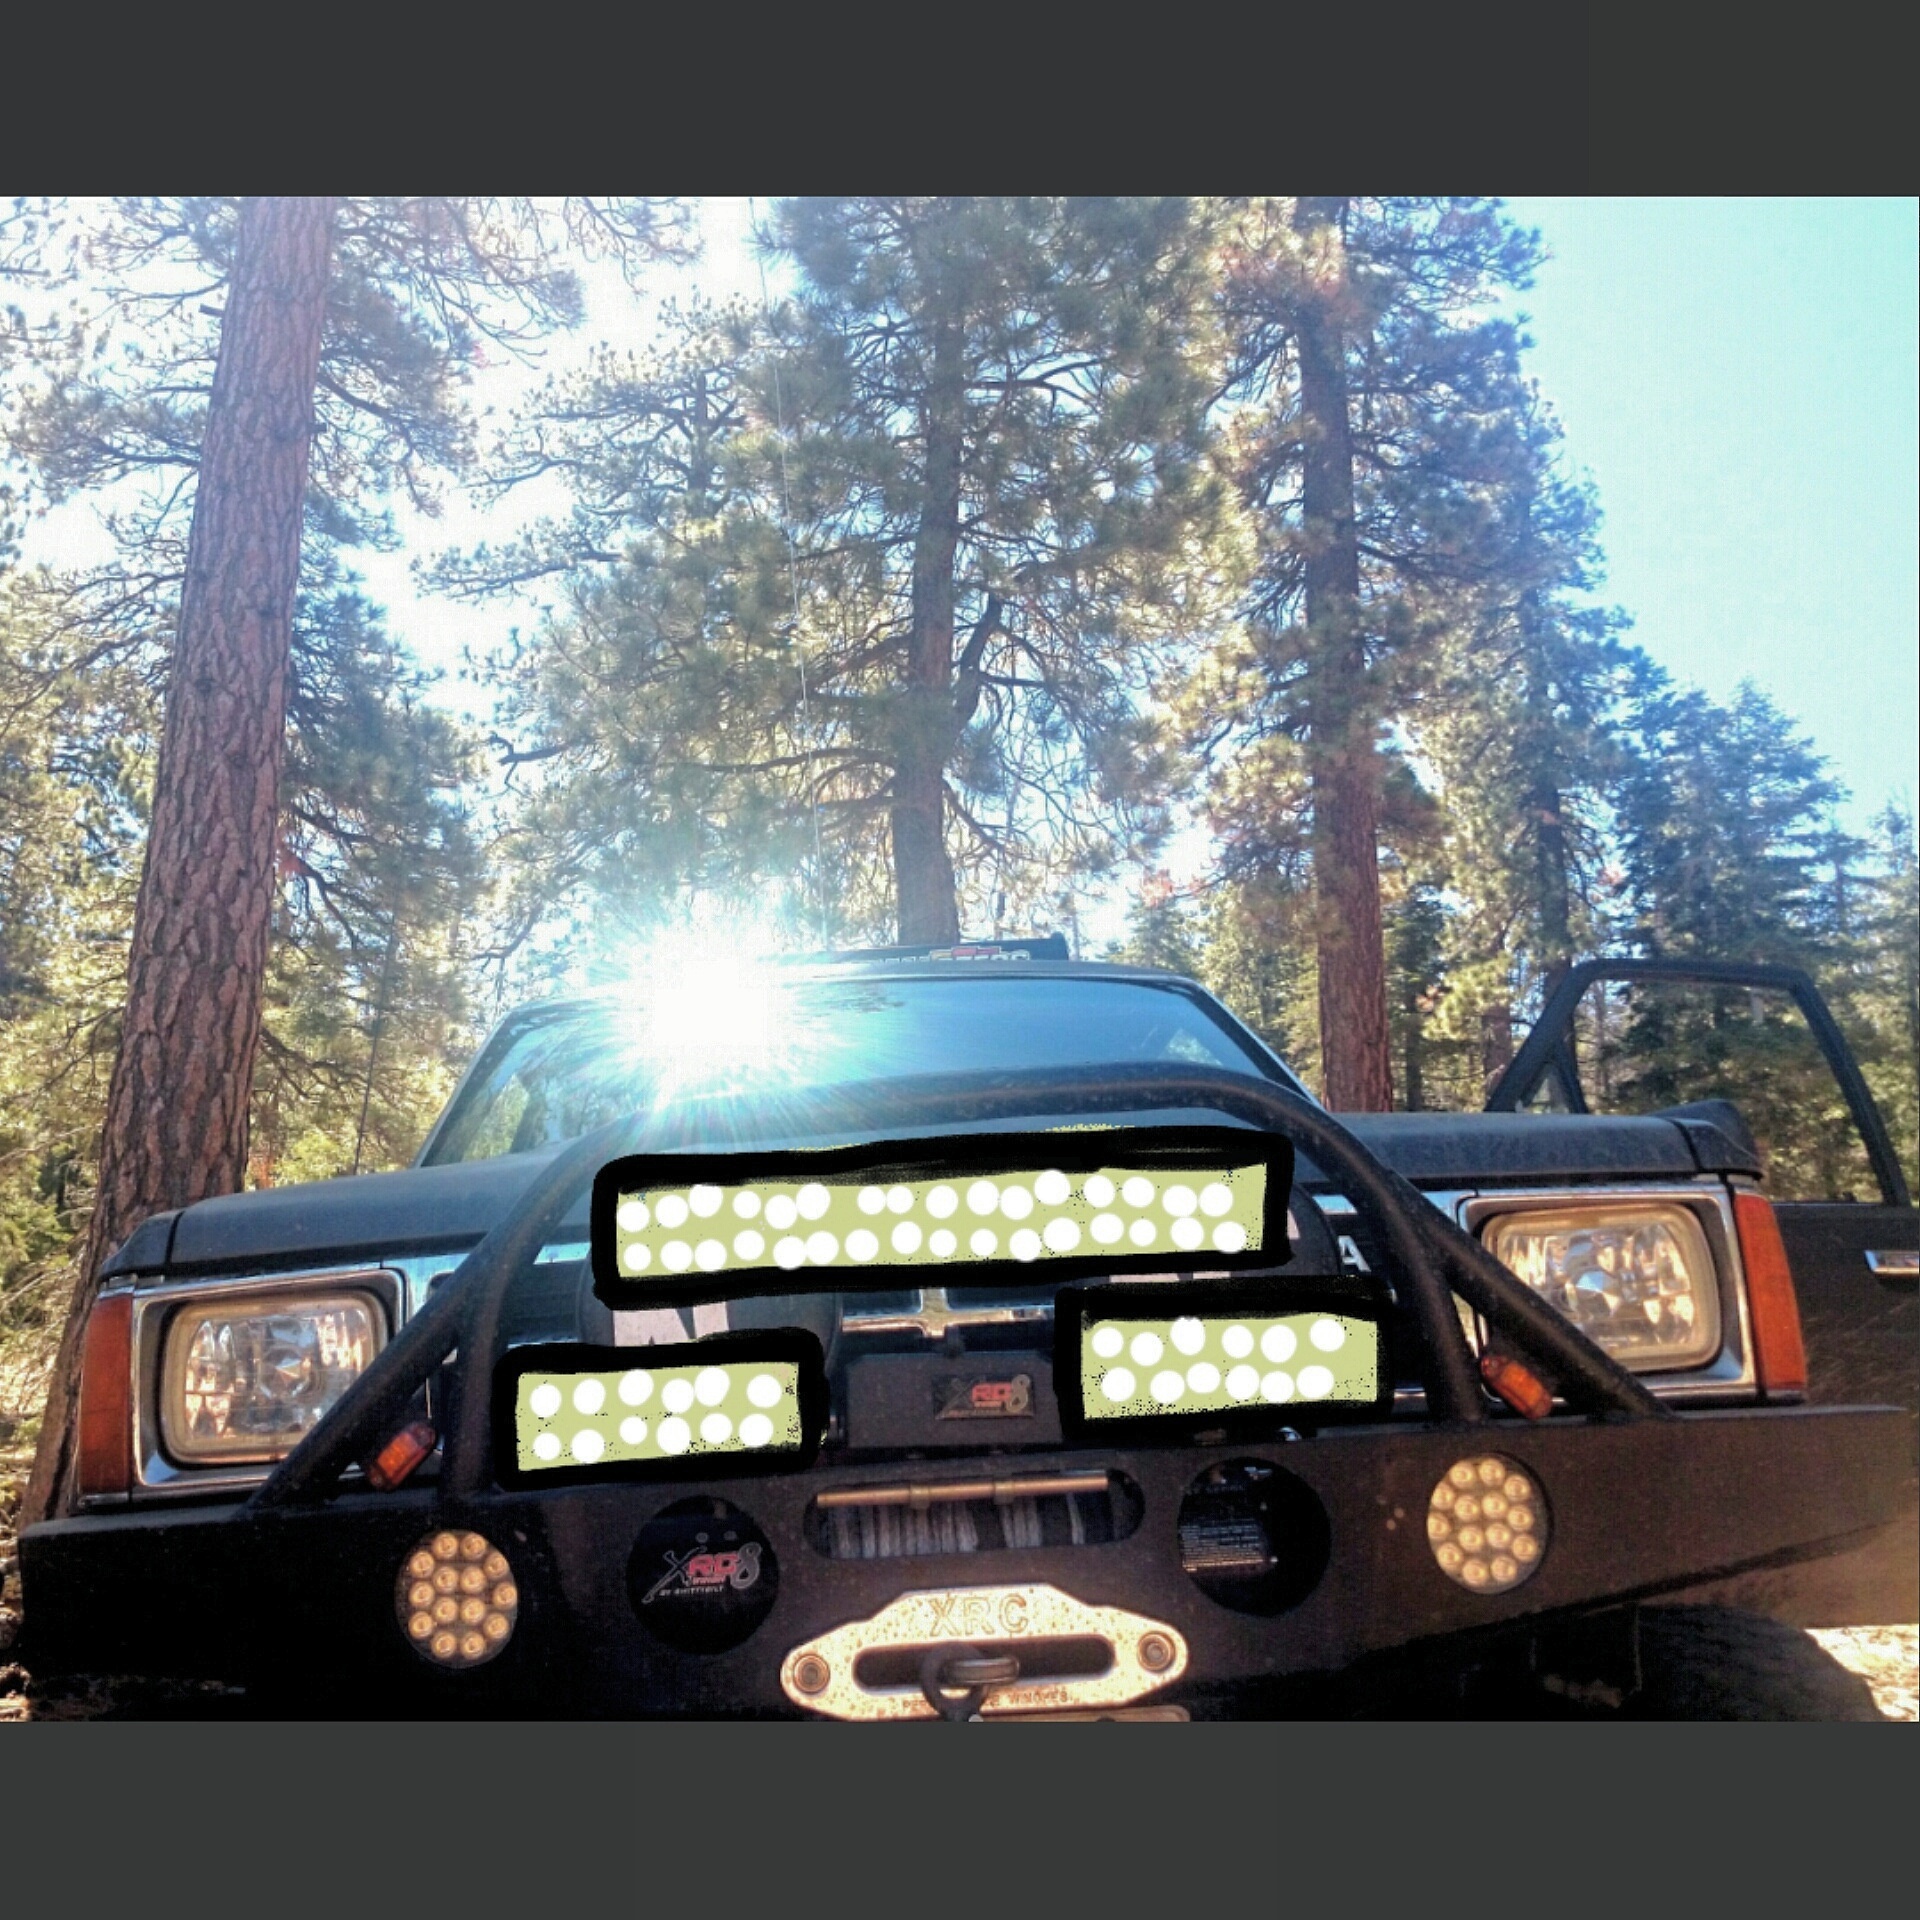
So that is the last update of the night! time to knock out! I'm sure i'll have some nice LEDS soon. i just need to check out the prices because Faby is limited to how much she can spend. MOst likely she is only gonna be able to afford the 2 smaller 7.5 lights so i may need to buy the 21.5" light bar. Still thinking it over. Mark did bring up the possibility of having adequate cooling issues from the light bars blocking the grill too much. If that ends up being the case i may go wit a 41.5 or 50" light bar up above the windshield. We will see. I'm sure whatever we go with will be well thought out and carefully planned.
Jun 17, 2015 | 12:20 AM
#2603
Thread Starter
Registered User
Joined: Apr 2012
Posts: 2,817
Likes: 2
From: Los Angeles CA
Also after fixing the clutch, trans, MAF, and o2 sensor. the truck has been running like a champ! I think everything is officially fixed onthis rig now. Which is a great relief because i'm starting to run out of financial aid money and i still gotta stretch out what i have to last me till September! lol Just wanted to share that. Hope you guys liked these past few updates. I had a ton of work done! and i didn't wanna fall behind my updates again.
Jun 17, 2015 | 04:30 AM
#2604
Registered User
Joined: Apr 2013
Posts: 478
Likes: 4
From: Louisiana
That thing looks good with the 35s on it. Glad you got it running better finally too. I could definitely use some of your 3.0 knowledge on my buddies 4runner lol.
Something about your calculation on your fuel mileage doesn't seem right to me. If your truck thinks your going 63 but your gps says your going 60, that means that your ODO reading will be higher than your actual miles traveled. You really should be dividing your gps speed/speedo to get the number that you multiply to the odo reading.
Something about your calculation on your fuel mileage doesn't seem right to me. If your truck thinks your going 63 but your gps says your going 60, that means that your ODO reading will be higher than your actual miles traveled. You really should be dividing your gps speed/speedo to get the number that you multiply to the odo reading.
Jun 17, 2015 | 04:43 AM
#2605
Thread Starter
Registered User
Joined: Apr 2012
Posts: 2,817
Likes: 2
From: Los Angeles CA
Something about your calculation on your fuel mileage doesn't seem right to me. If your truck thinks your going 63 but your gps says your going 60, that means that your ODO reading will be higher than your actual miles traveled. You really should be dividing your gps speed/speedo to get the number that you multiply to the odo reading.
 Jun 17, 2015 | 05:59 AM
#2607
Registered User
Joined: Apr 2013
Posts: 478
Likes: 4
From: Louisiana
And again, that's a good looking 4runner. Im jealous of the areas yall have to wheel over there. All we have is swaps and mud lol
Jun 21, 2015 | 12:43 PM
#2608
Hey Richard, your 4runner looks sweet with the new 35's! Looks like you guys had another awesome wheelin trip, look like a fun time, no body damage or broken parts is always a bonus! Glad the new trans and clutch are working out good for you too.
Hey, I was wondering where you guys got the large Yotatech sticker that you have on your back window? I asked you awhile back, but you must have missed my post, lol, no biggie, ha, ha... I tried looking on here where they sell stickers, but didn't see them, did you have them made?
Hey, I was wondering where you guys got the large Yotatech sticker that you have on your back window? I asked you awhile back, but you must have missed my post, lol, no biggie, ha, ha... I tried looking on here where they sell stickers, but didn't see them, did you have them made?
Sep 21, 2015 | 08:40 PM
#2609
Thread Starter
Registered User
Joined: Apr 2012
Posts: 2,817
Likes: 2
From: Los Angeles CA
And thanks. I think the tires make the 4runner looks more complete. it gives it a whole different attitude. lol
Sep 21, 2015 | 10:45 PM
#2610
Thread Starter
Registered User
Joined: Apr 2012
Posts: 2,817
Likes: 2
From: Los Angeles CA
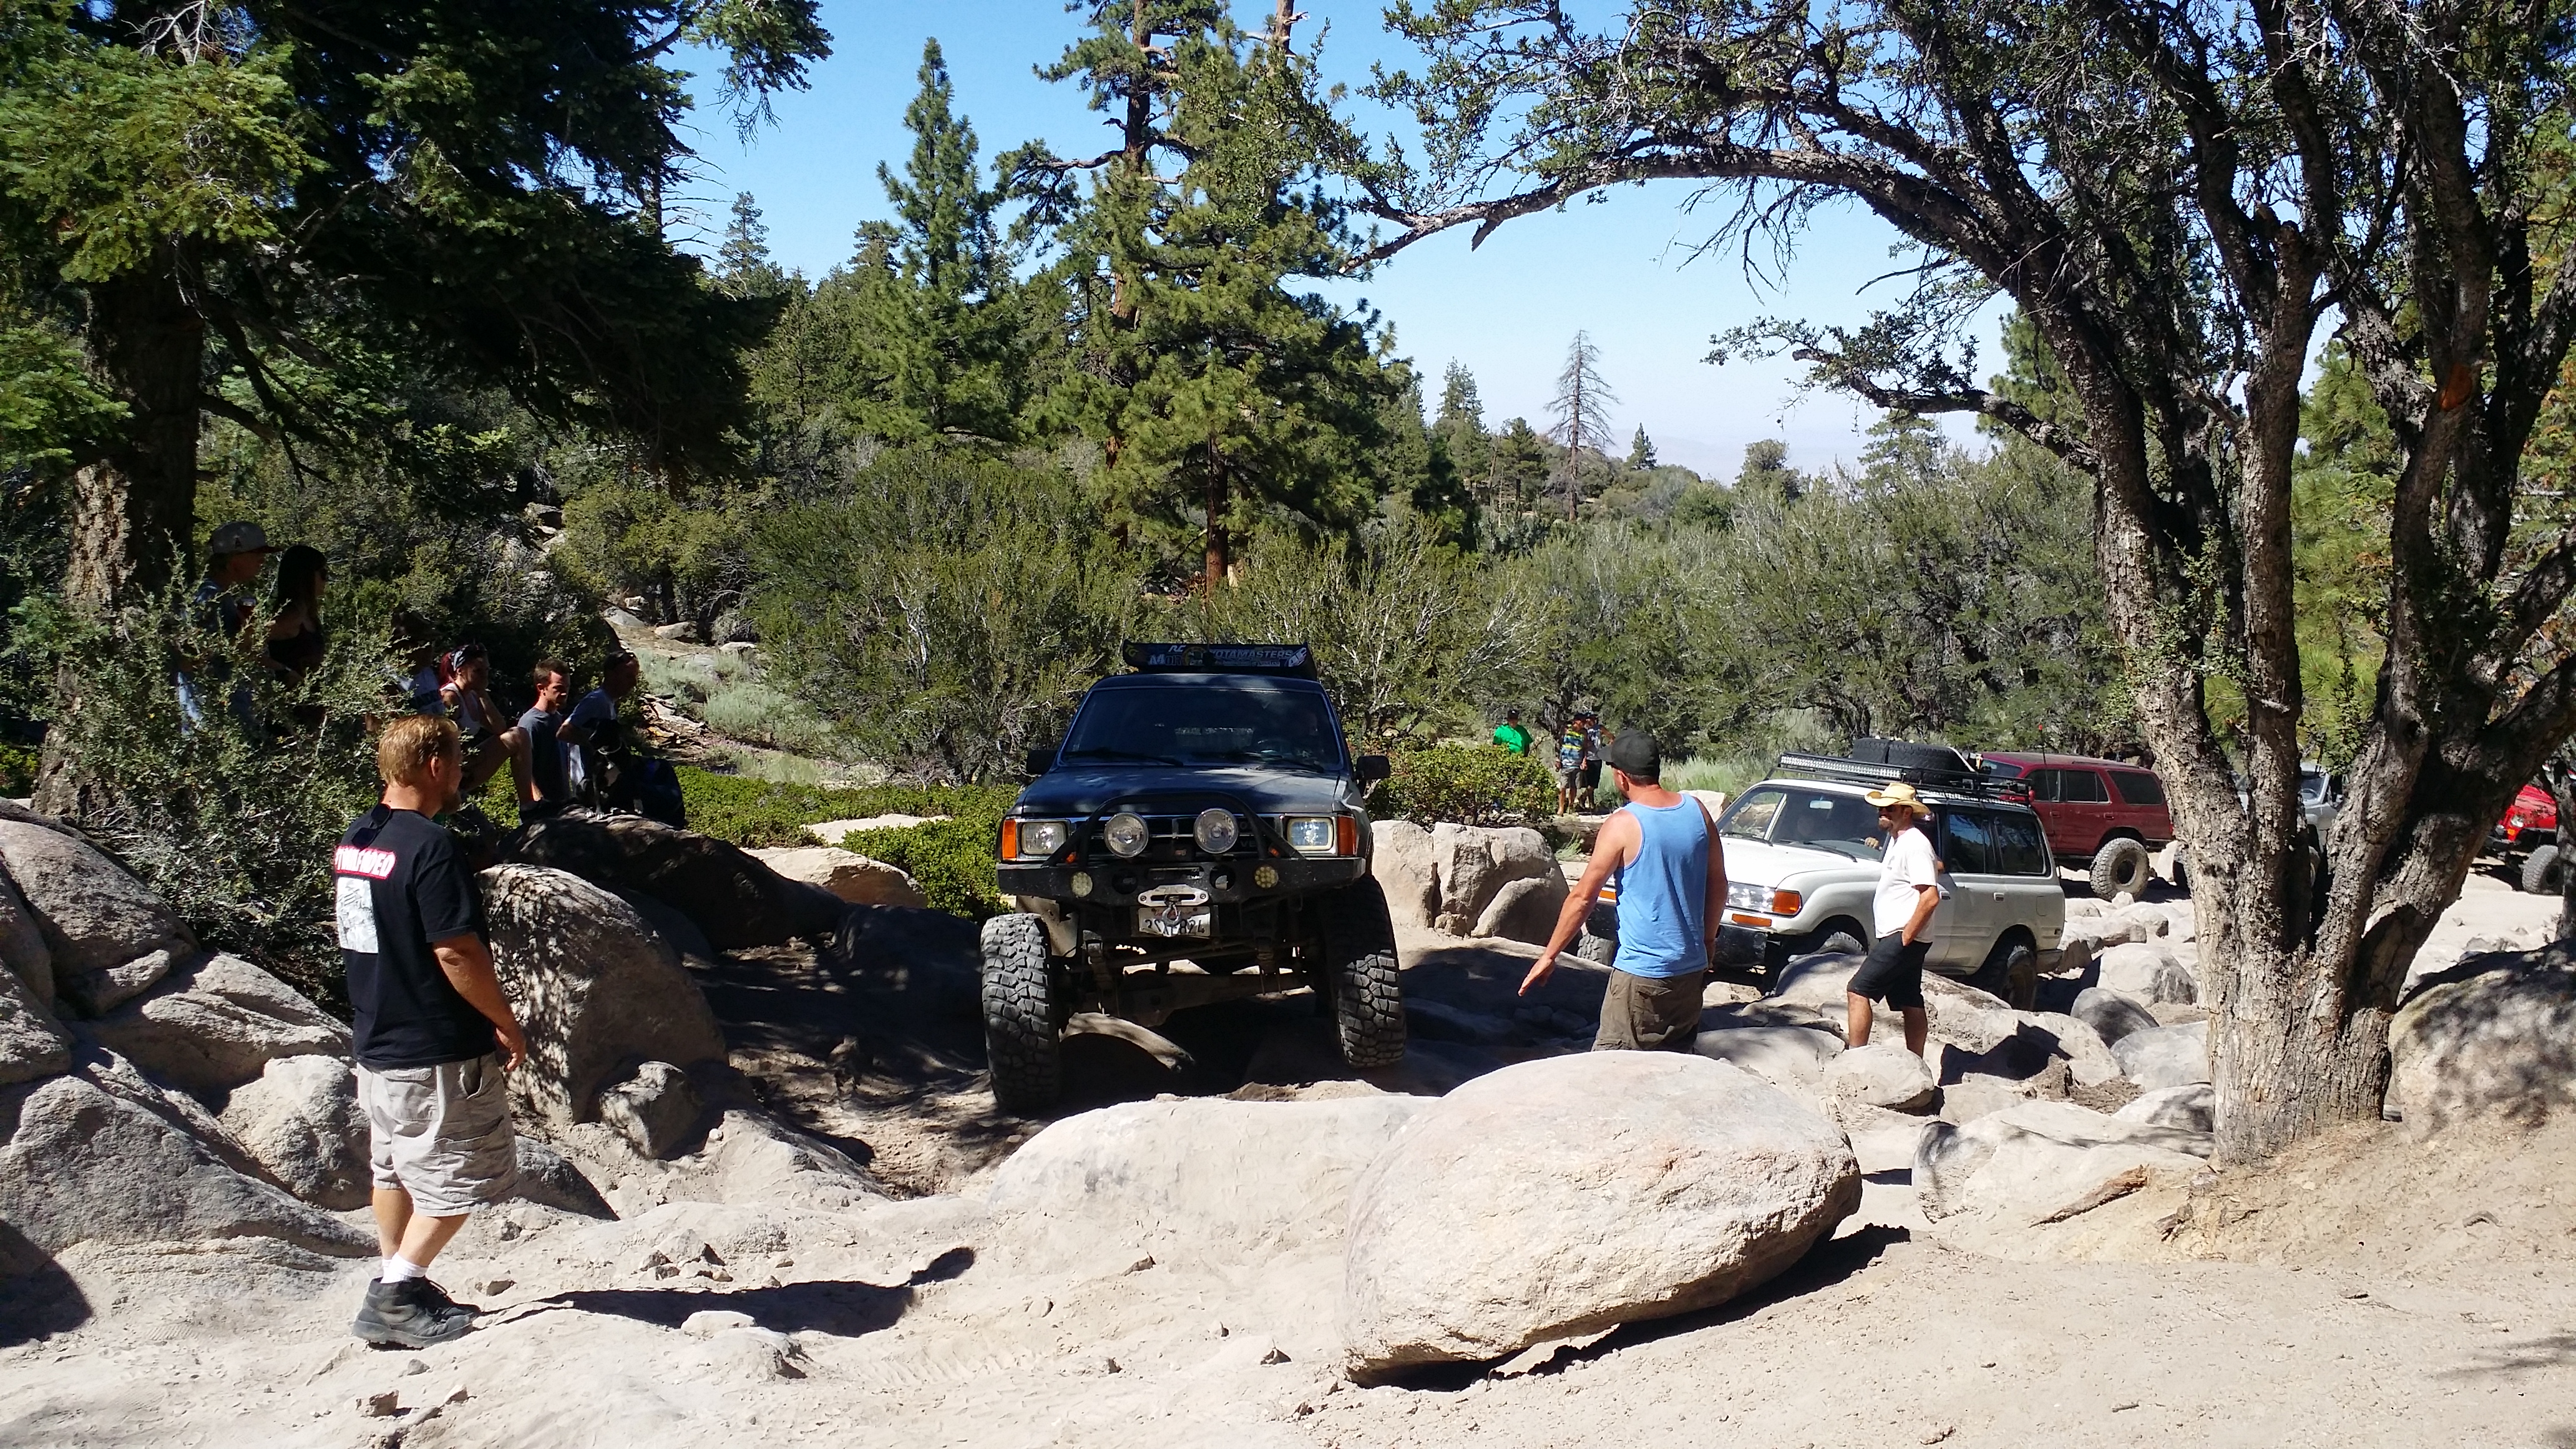
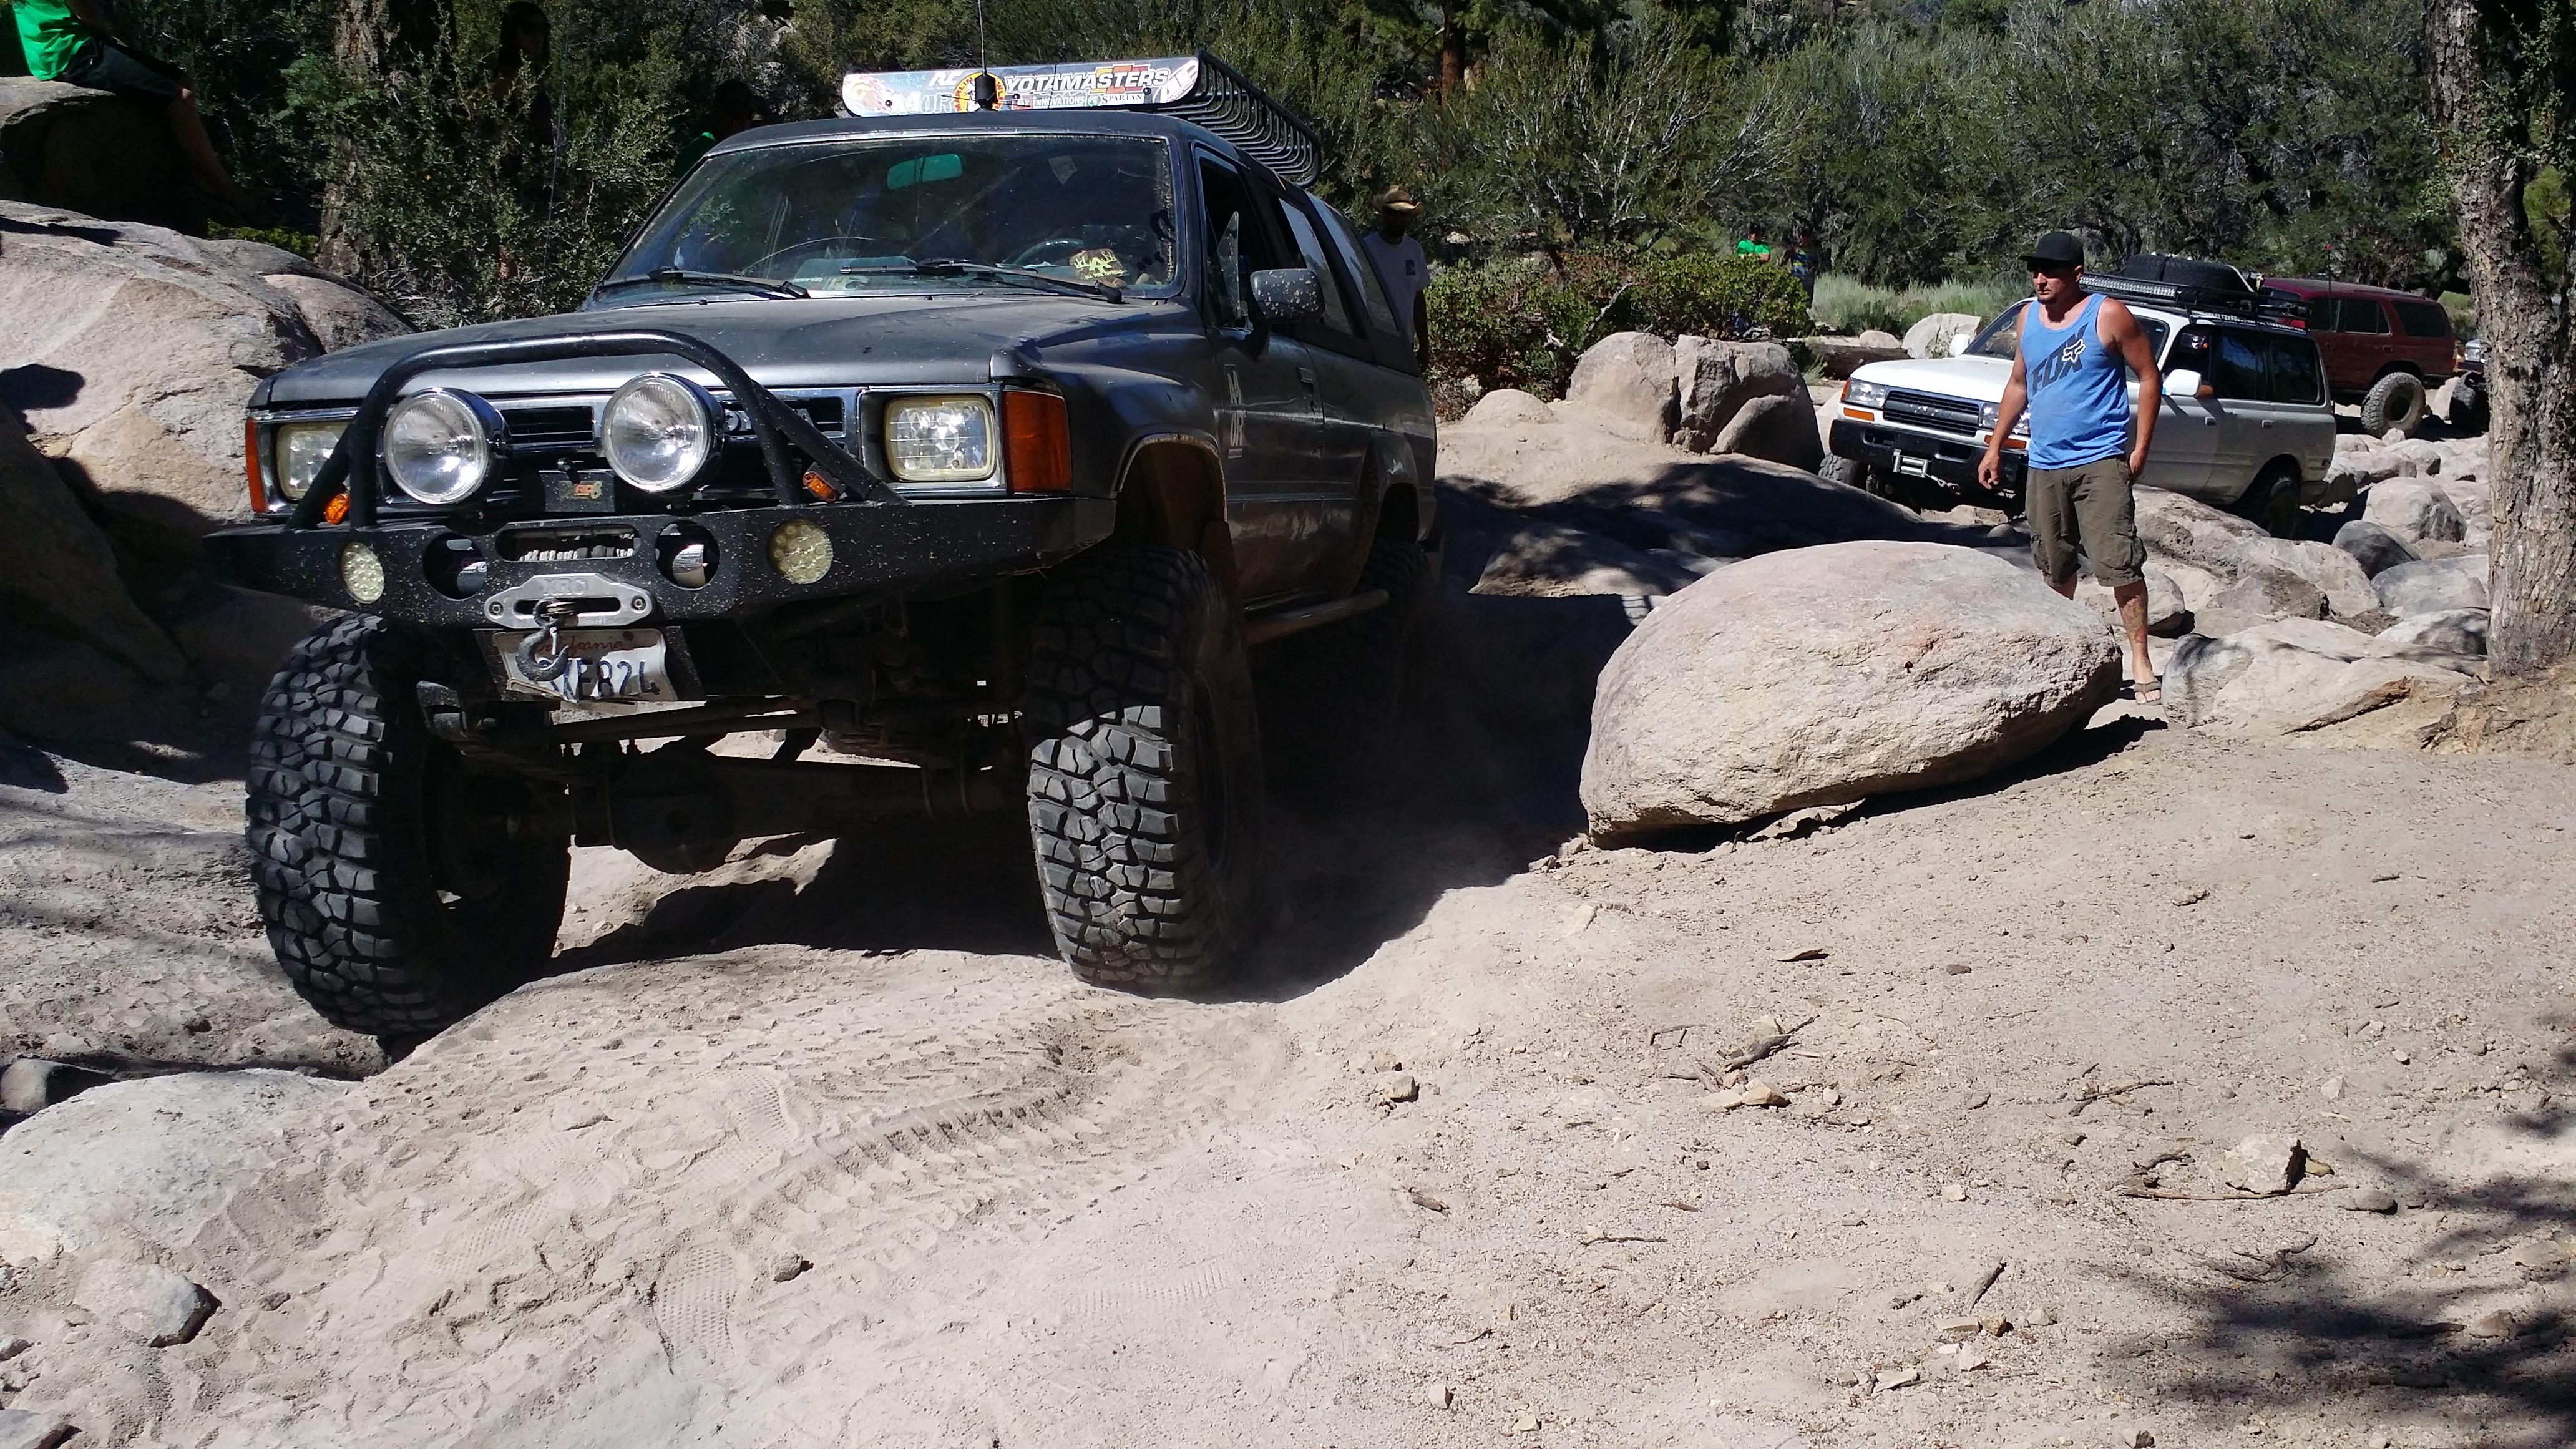
So We went to an offroad meet at Big Bear for the All_Yota page on instagram celebrating his 40k followers (now almost 50). This is kinda an old trip that happened 2 months ago on 7-25-2015
One of the many other people who went put this video together for the meet. I think he did a pretty good job.
Here are the pix that me and Faby took. We didnt really manage to get too many shots because me and my buddy Collin stayed at the tail of the group to make sure that all the "less capable" or "nearly stock" rigs were able to make it through the trails. So we were always left spotting everybody and making sure everybody kept up while we had Chefyota4x4 leading the pack of our group of about 25 or so vehicles.
Mark and I met up with Zach and his dad (zach is the owner of the All_Yota page) at a cabin that Mark(chefyota4x4) reserved for us. it was pretty cozy. My girl and i didnt arrive till way way way late at night about 1am. only to show up to start grilling up some hot link sausage dogs over the burning fireplace wood. I just had to do it to kill my craving. anyway this was the morning about 2 hours before the Allyota meet up.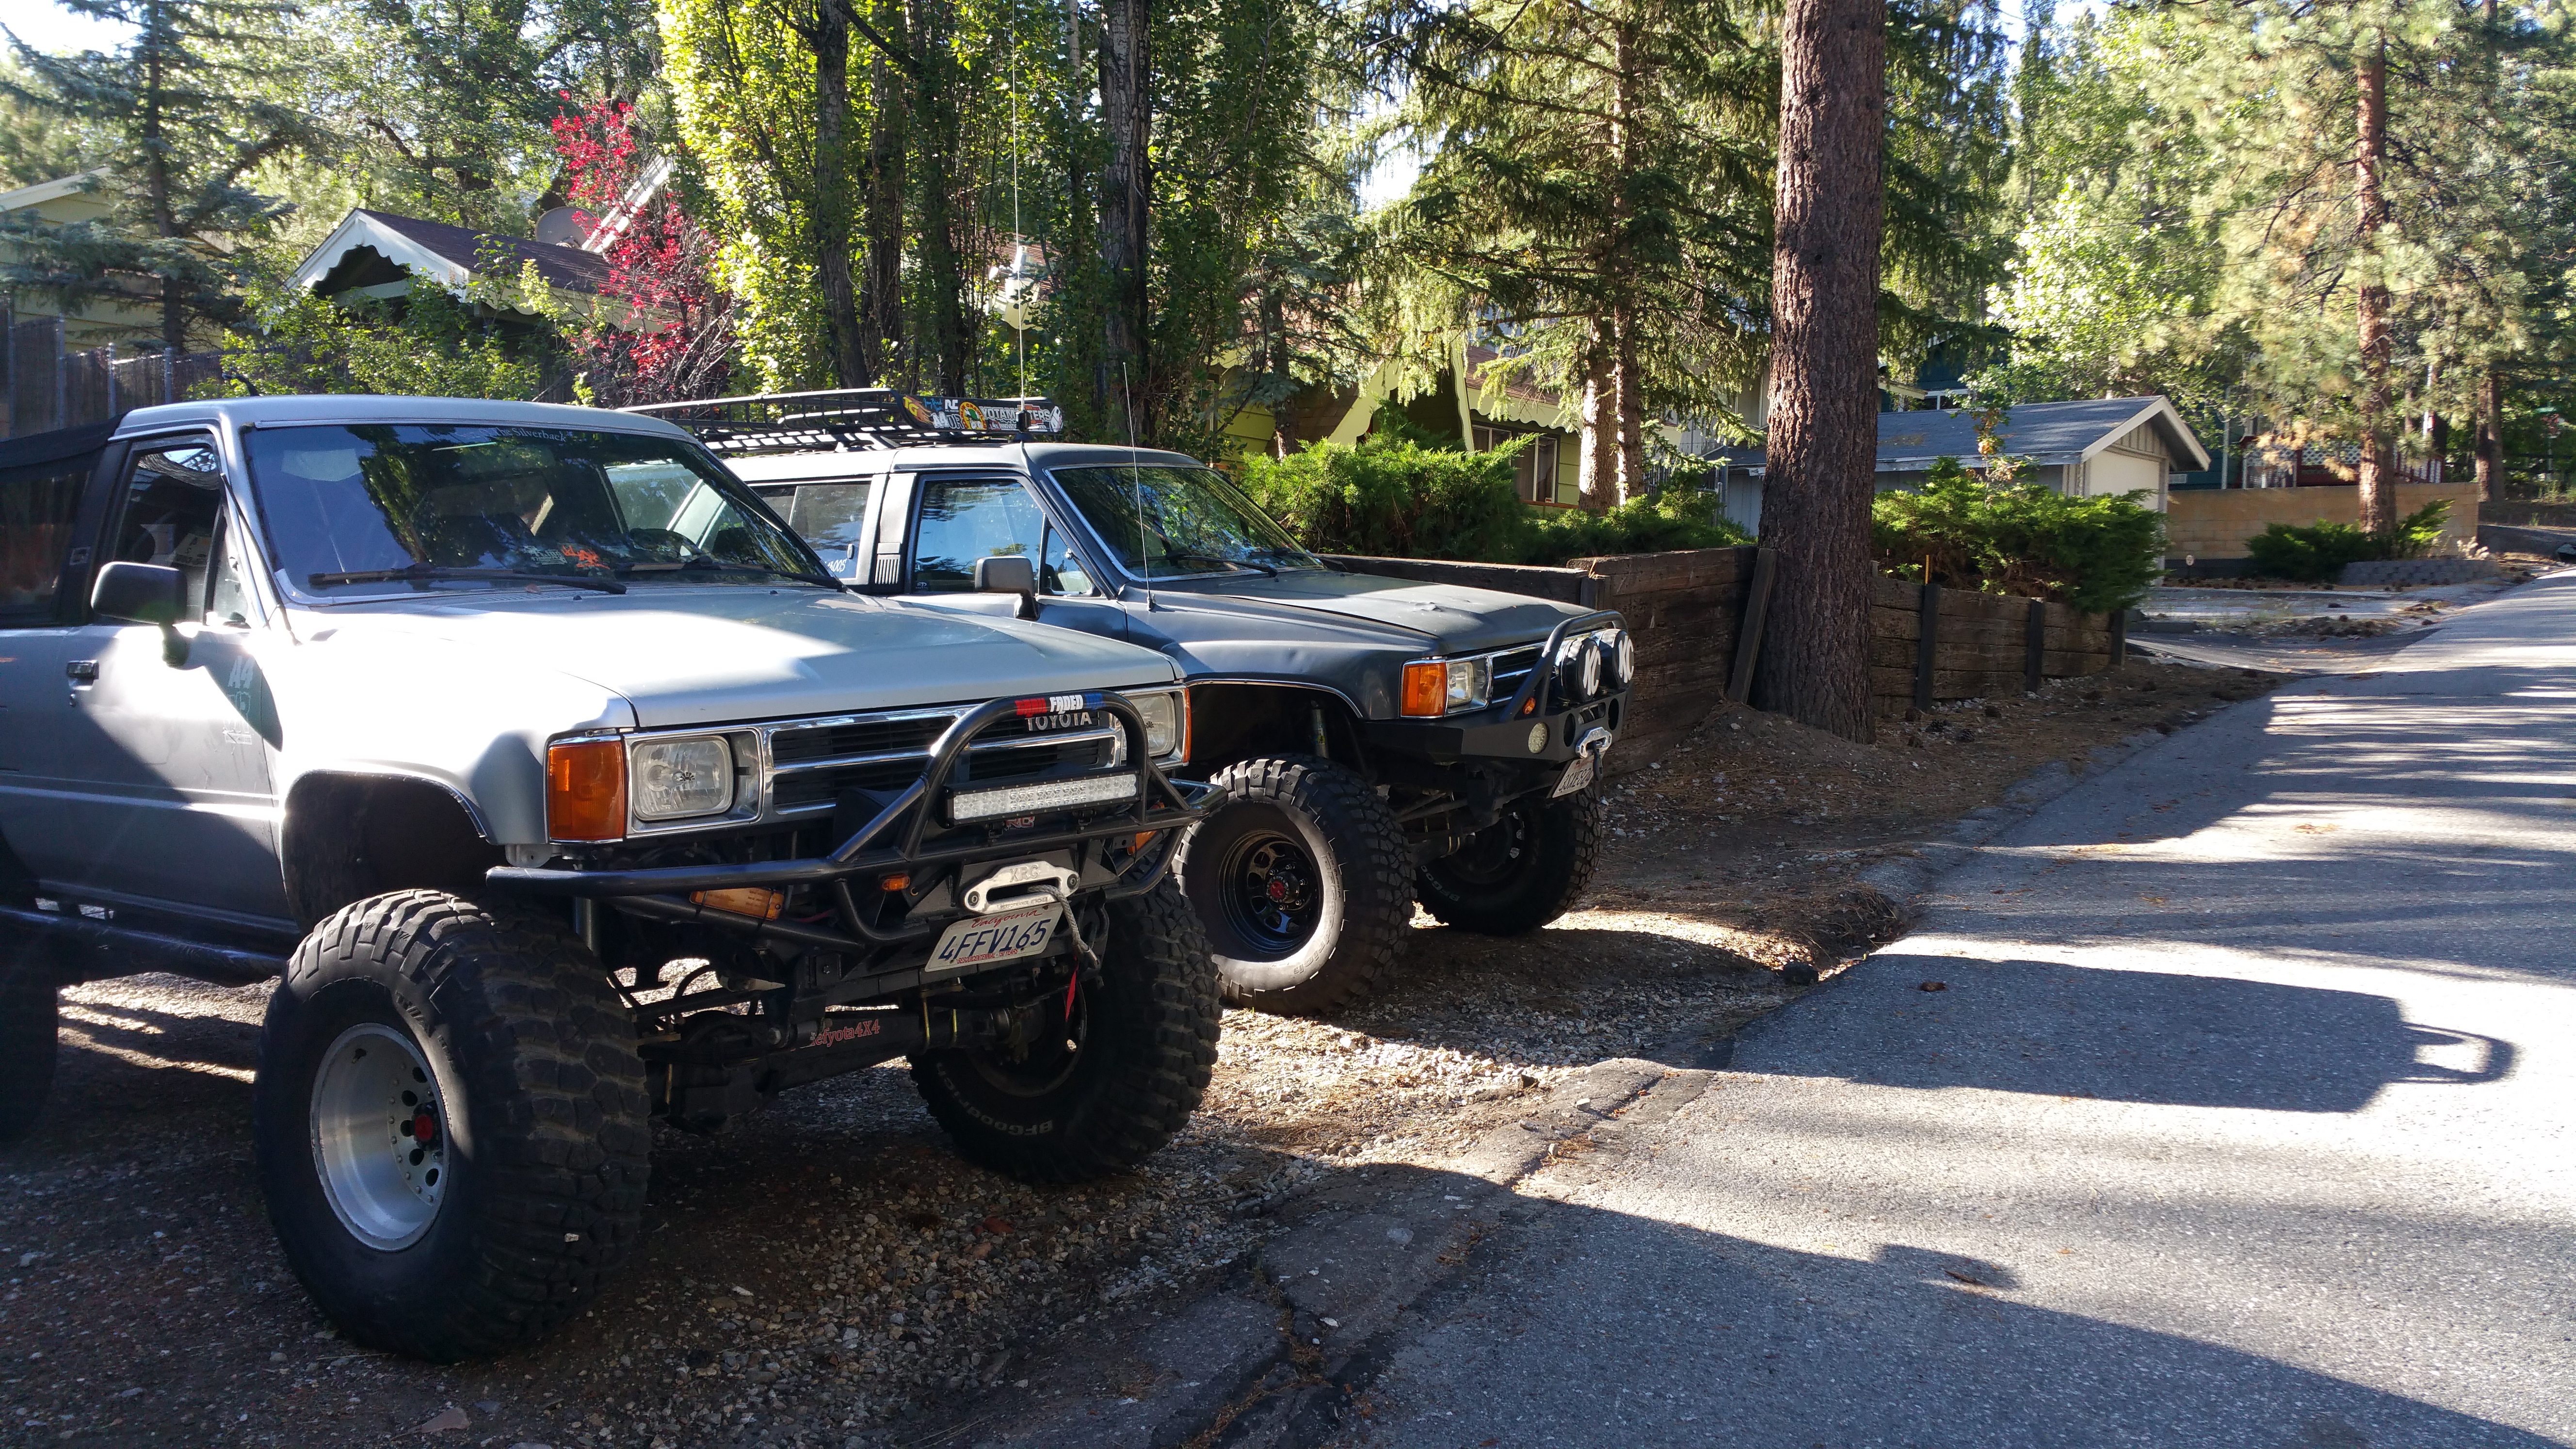
we got everybody rounded up and here we are getting ready to leave the meet up area for gold mountain.

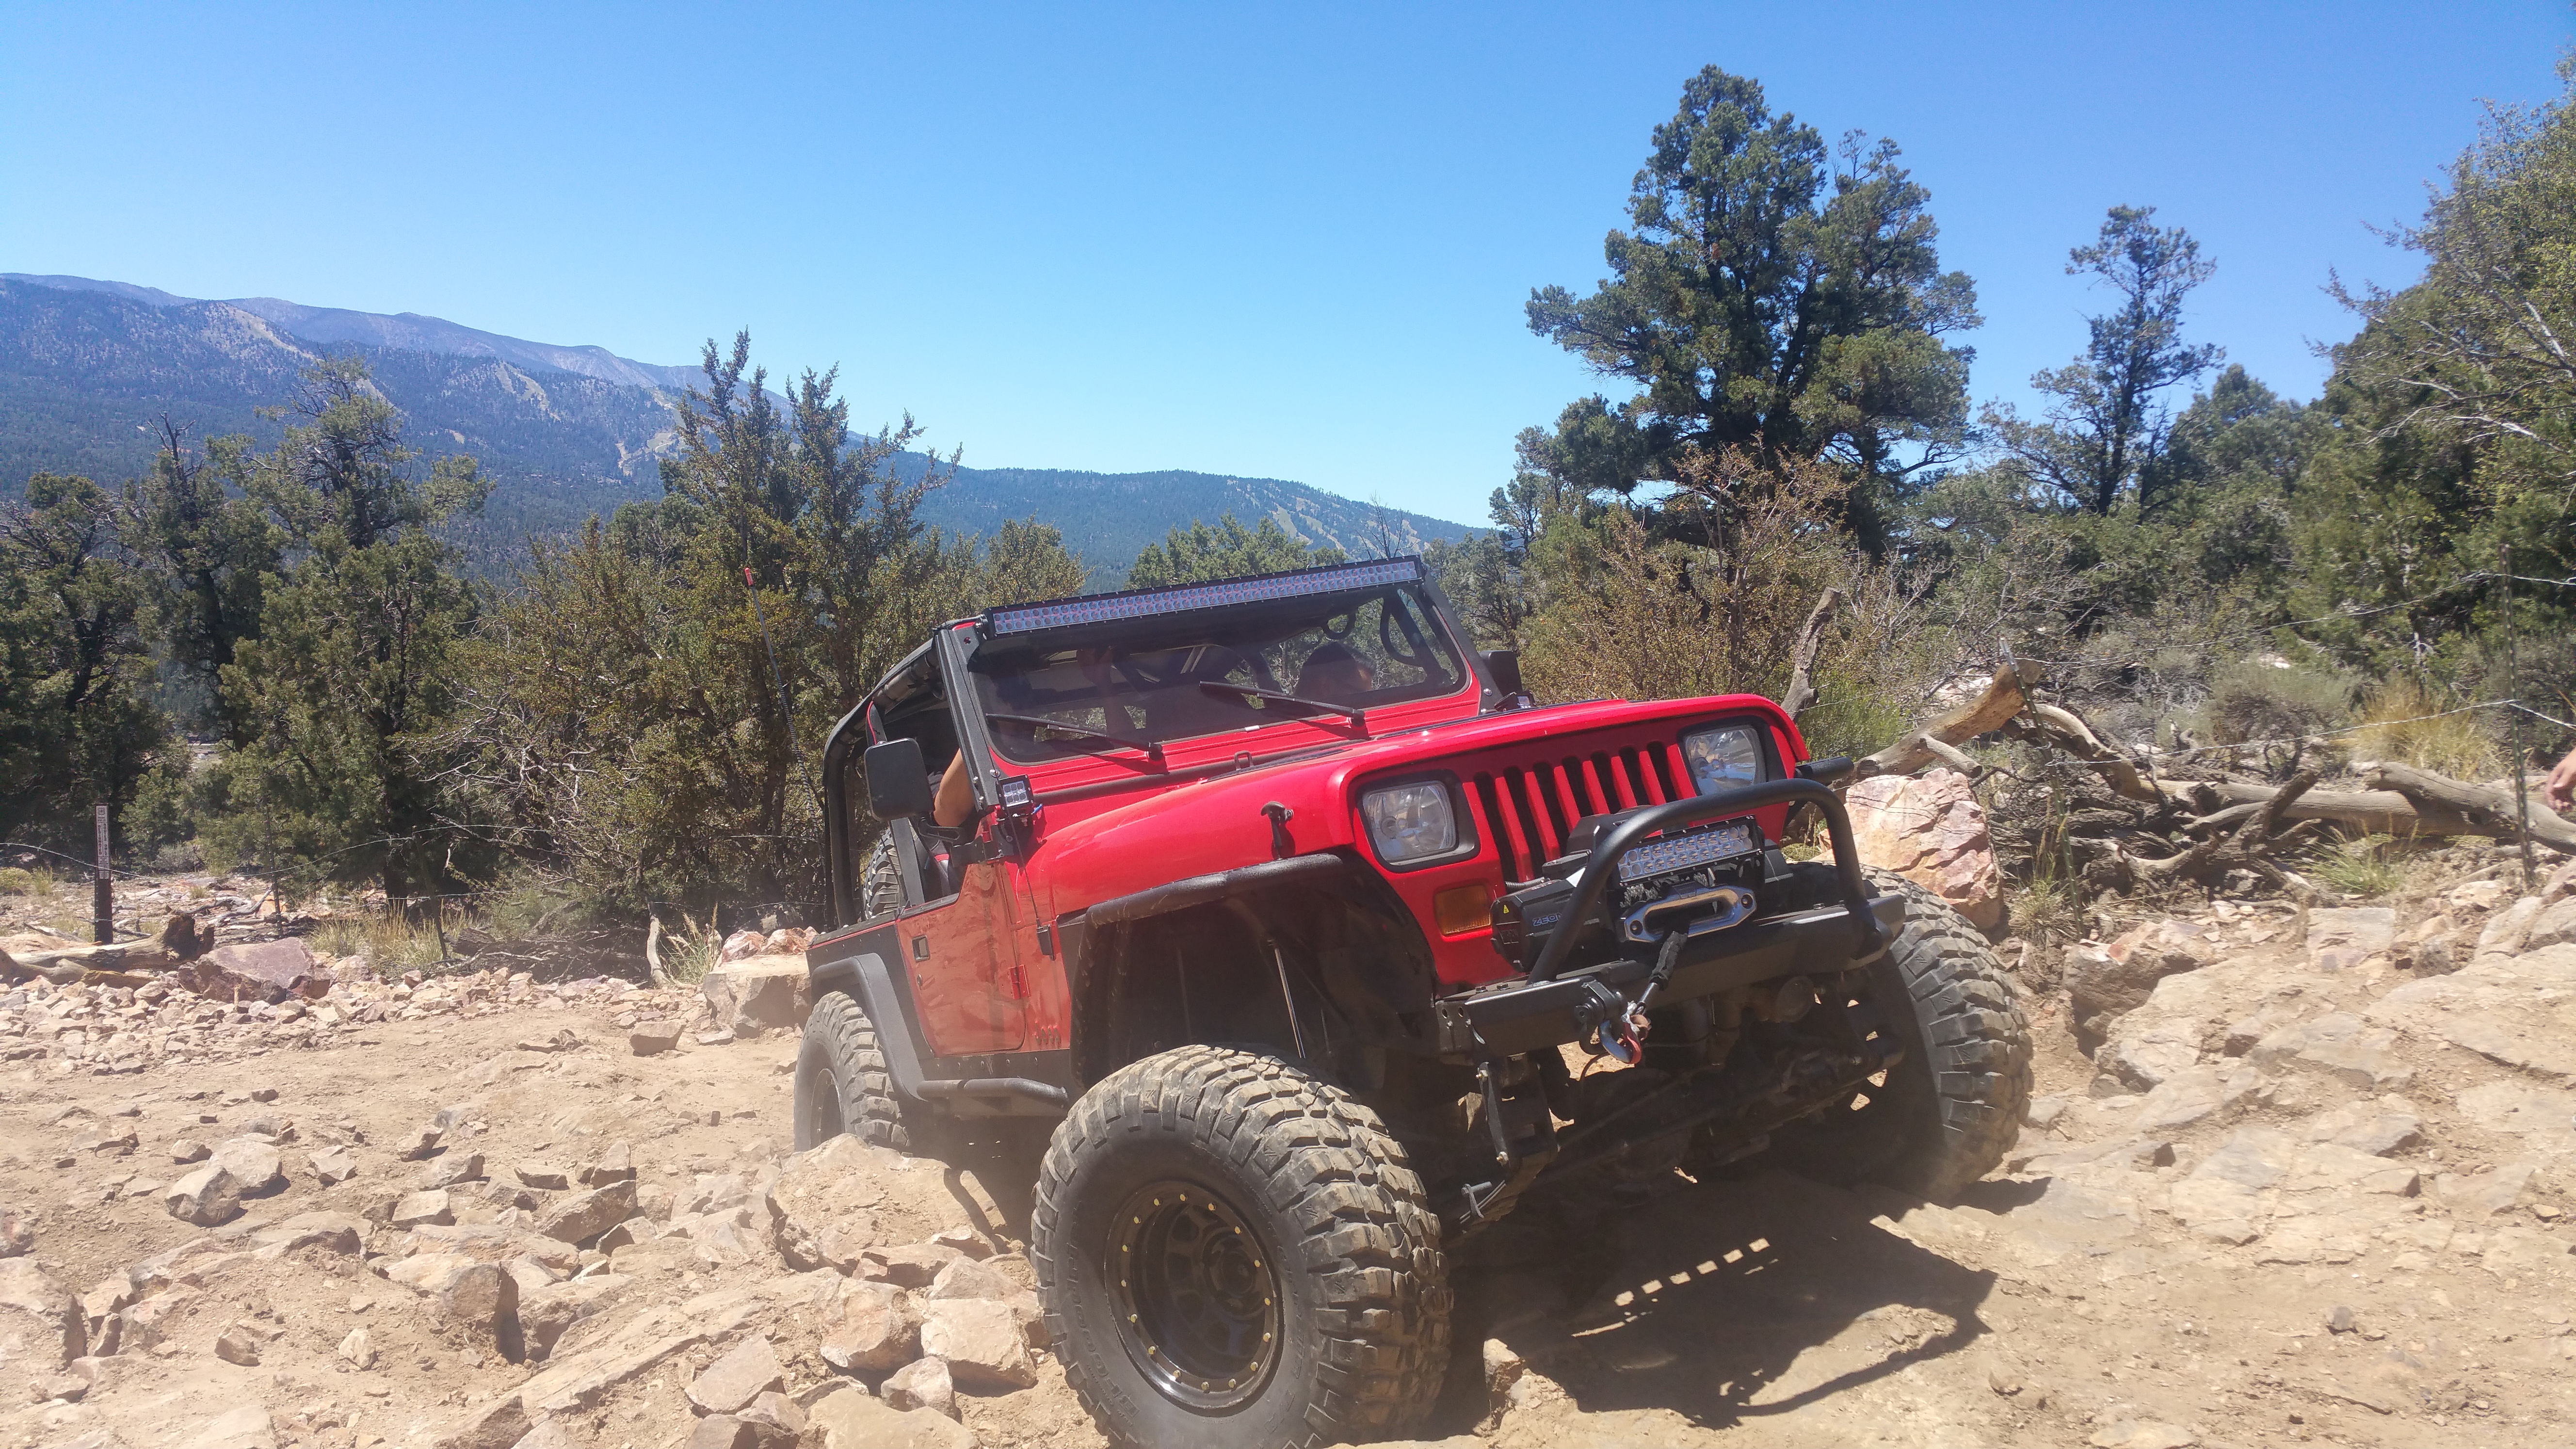
I honestly dont remember this guy in our group. but apparently we had some jeeps in the crew if it was in my pictures lol
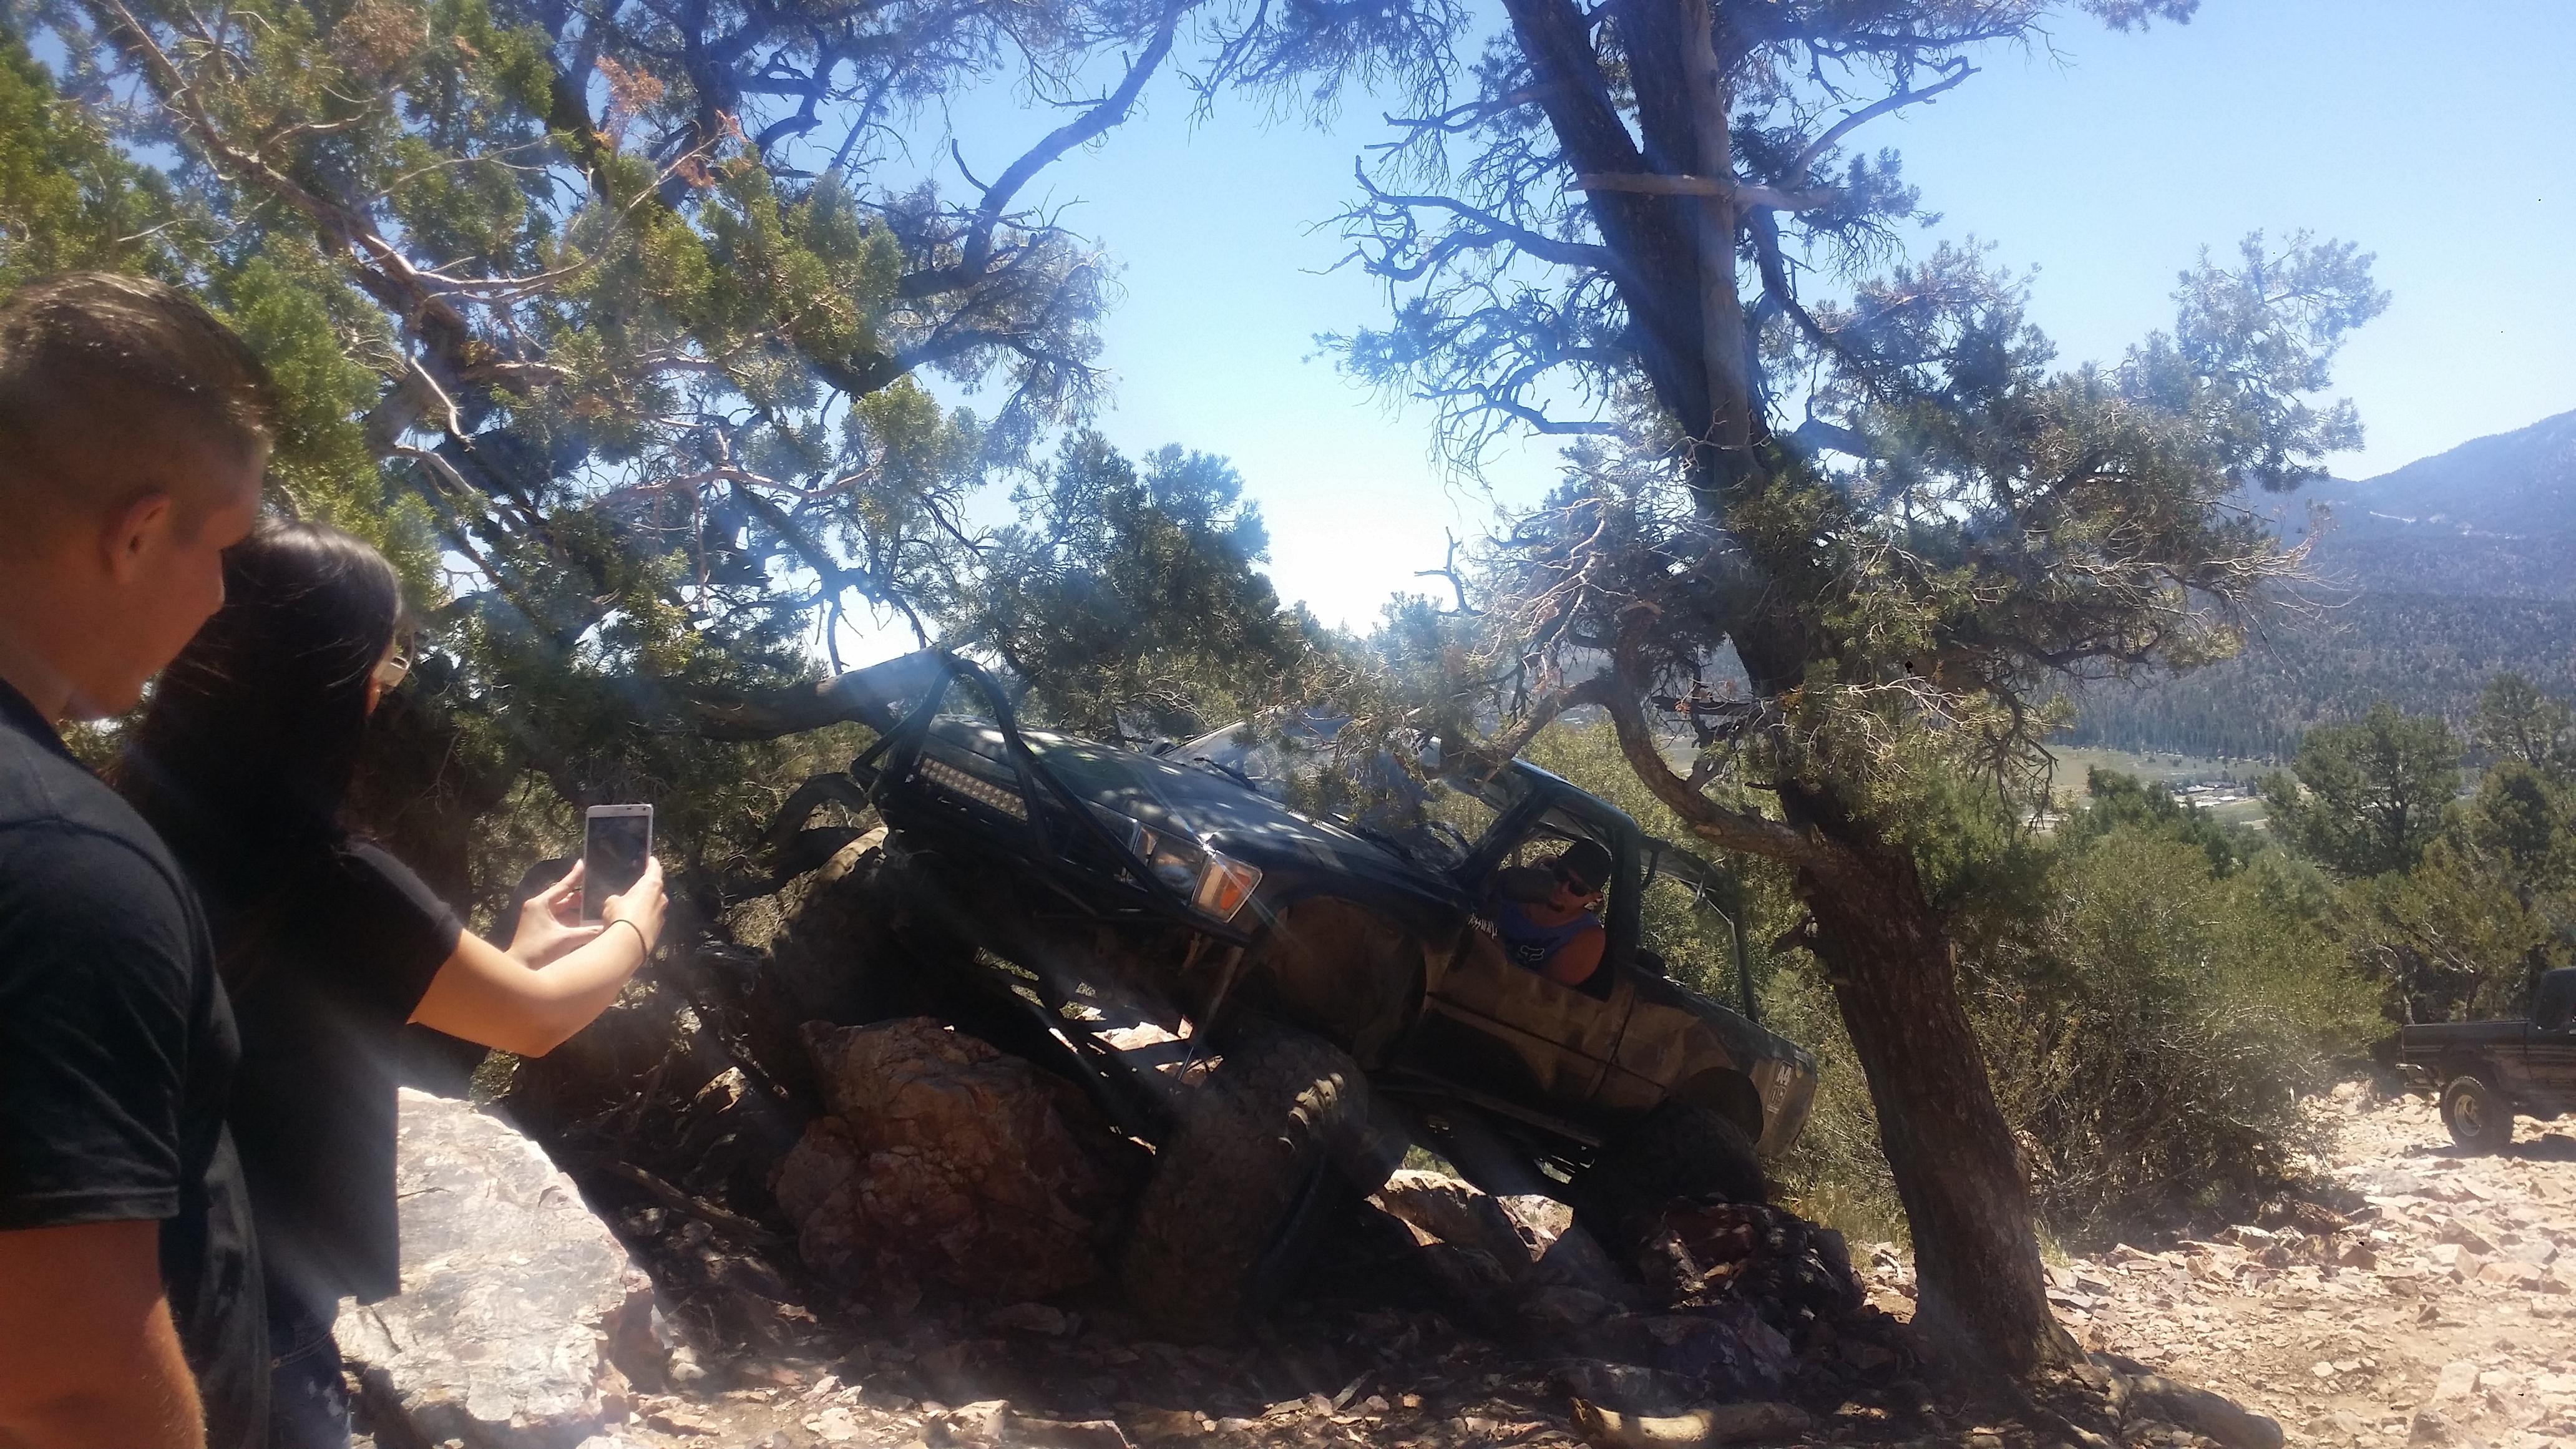
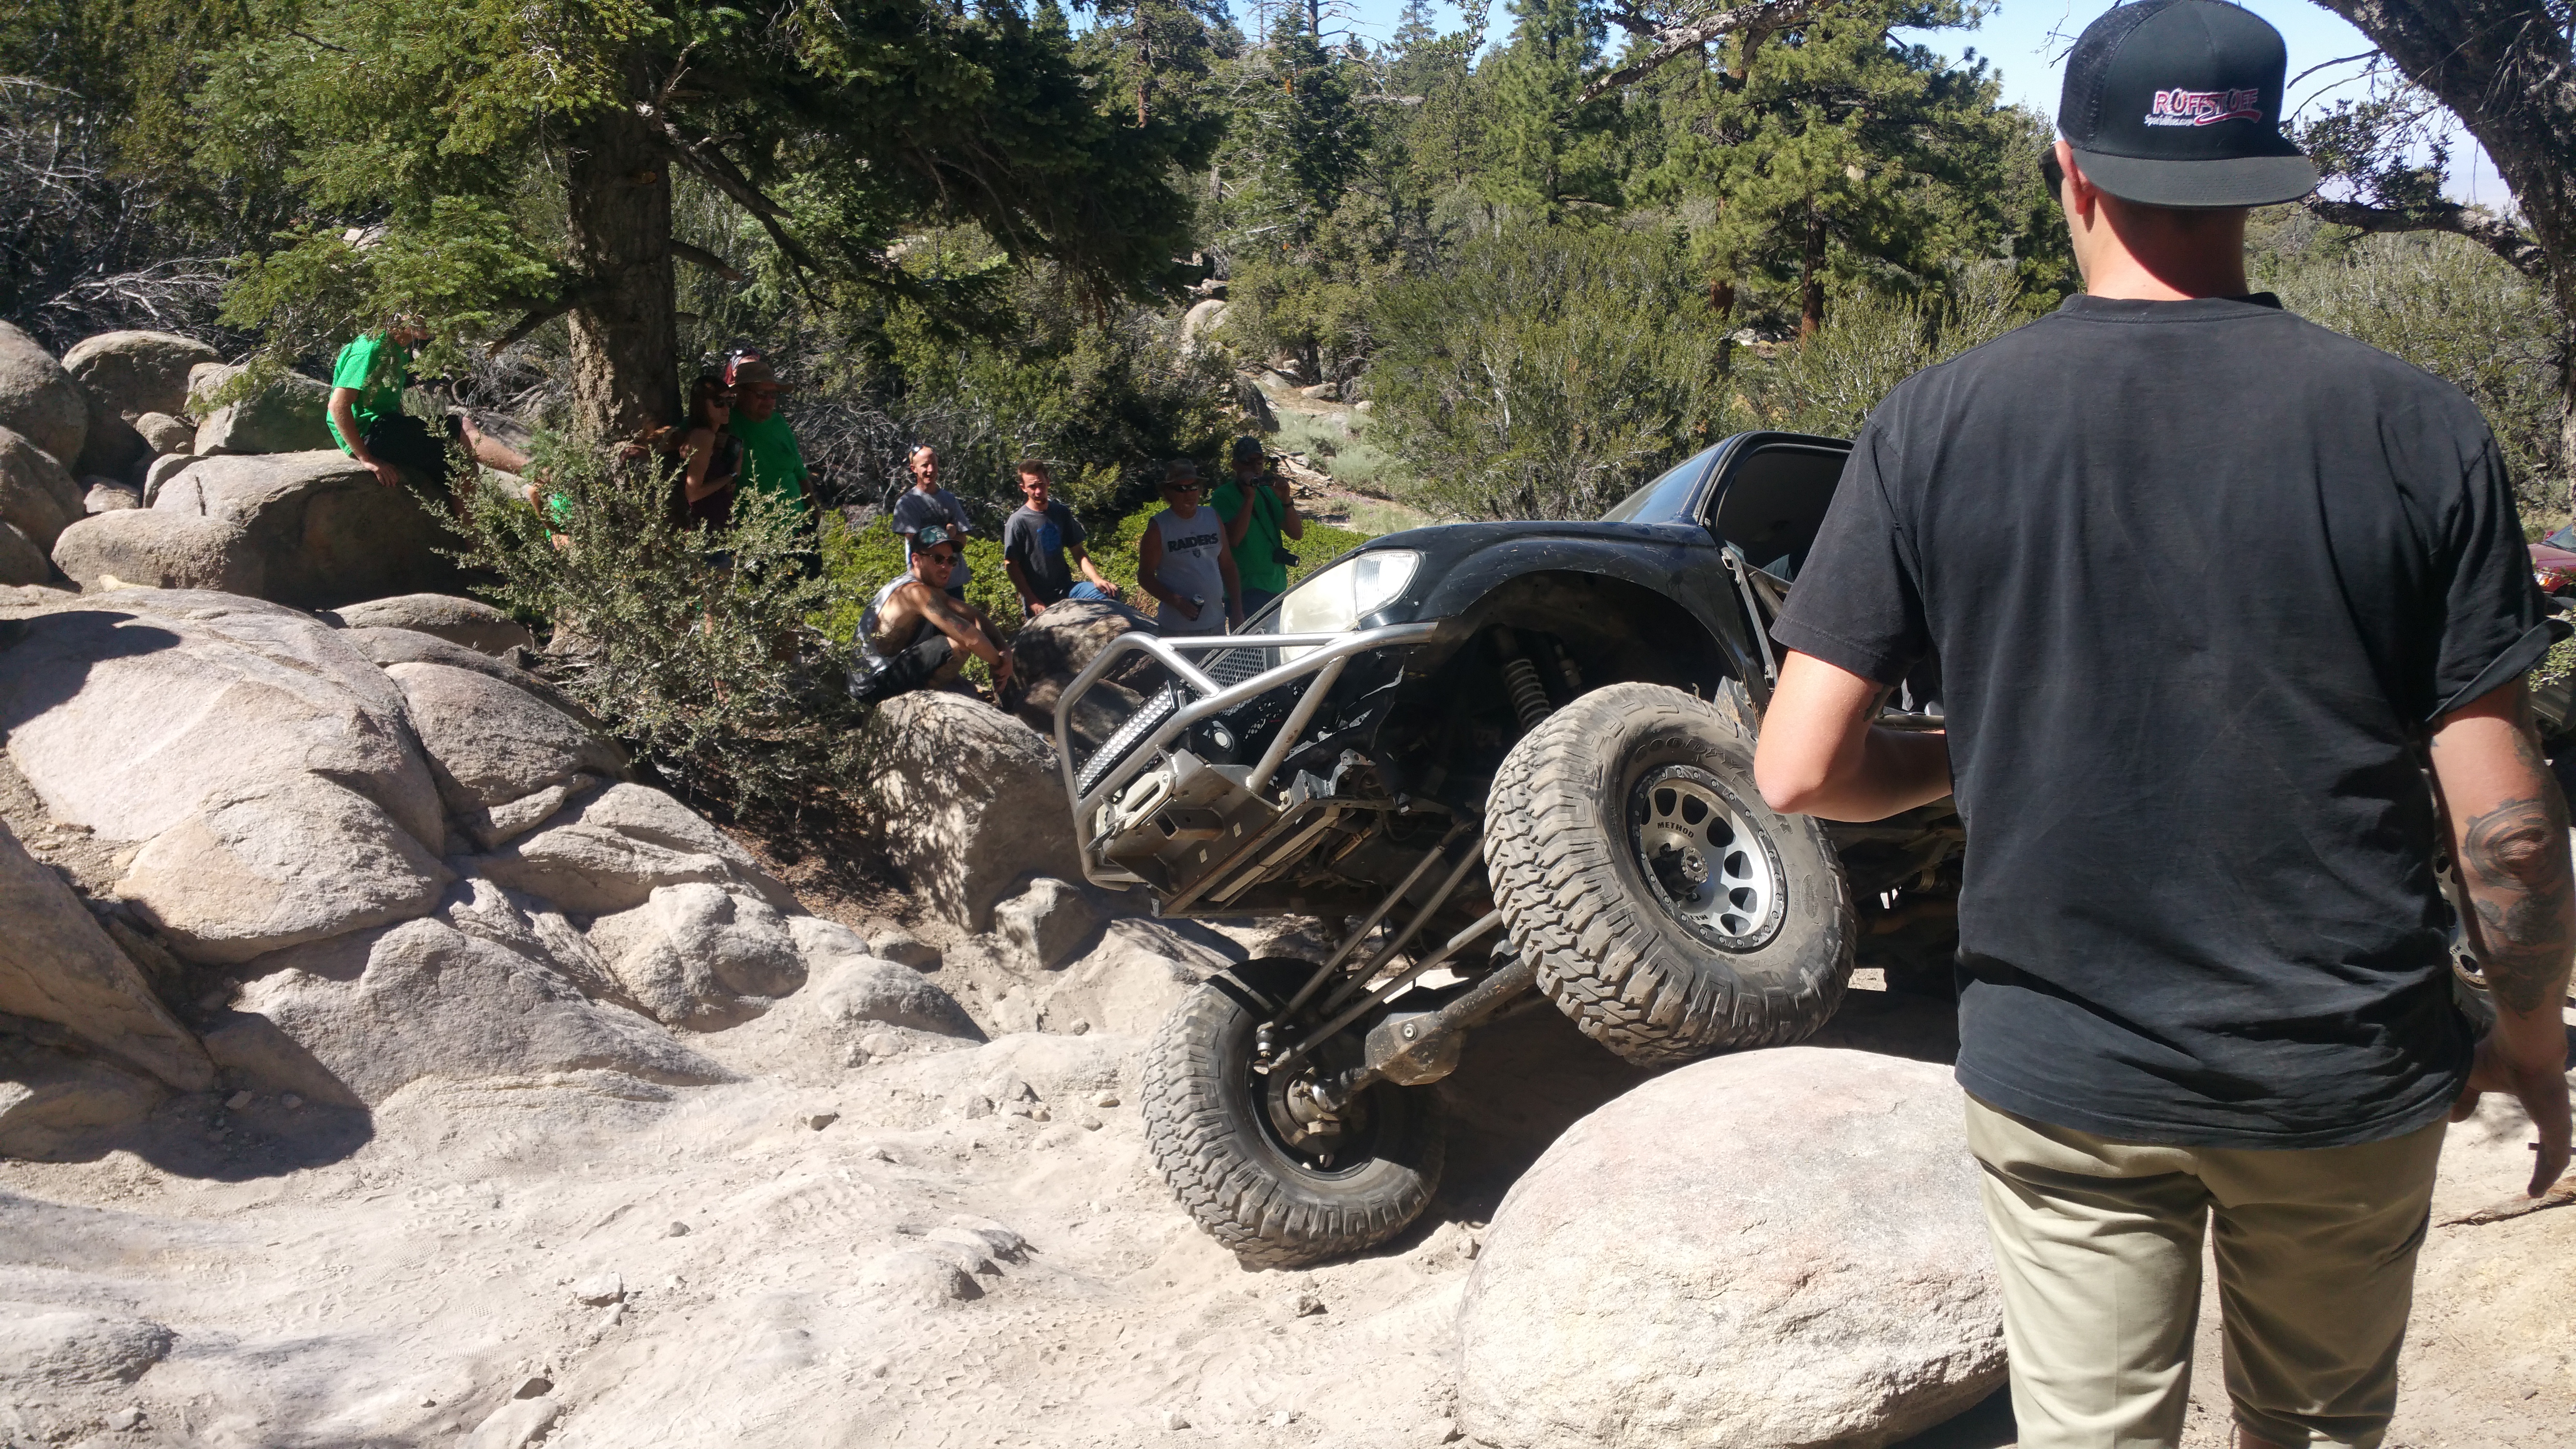
My buddy James taking that beast on 39's over, what i thought was an impossible line lol, he sure proved me wrong.
My beautiful girlfriend Faby Turning any moment into a photoshoot as often as she can lol

Me and My buddy Collin riding in his friends white jeep behind me. His crazy toyota rock crawler got messed up a while before this trip luckily his friend lent him his jeep for the day and he managed to make the trip. Here we are at the tail of the group.
Bad arse tacoma.
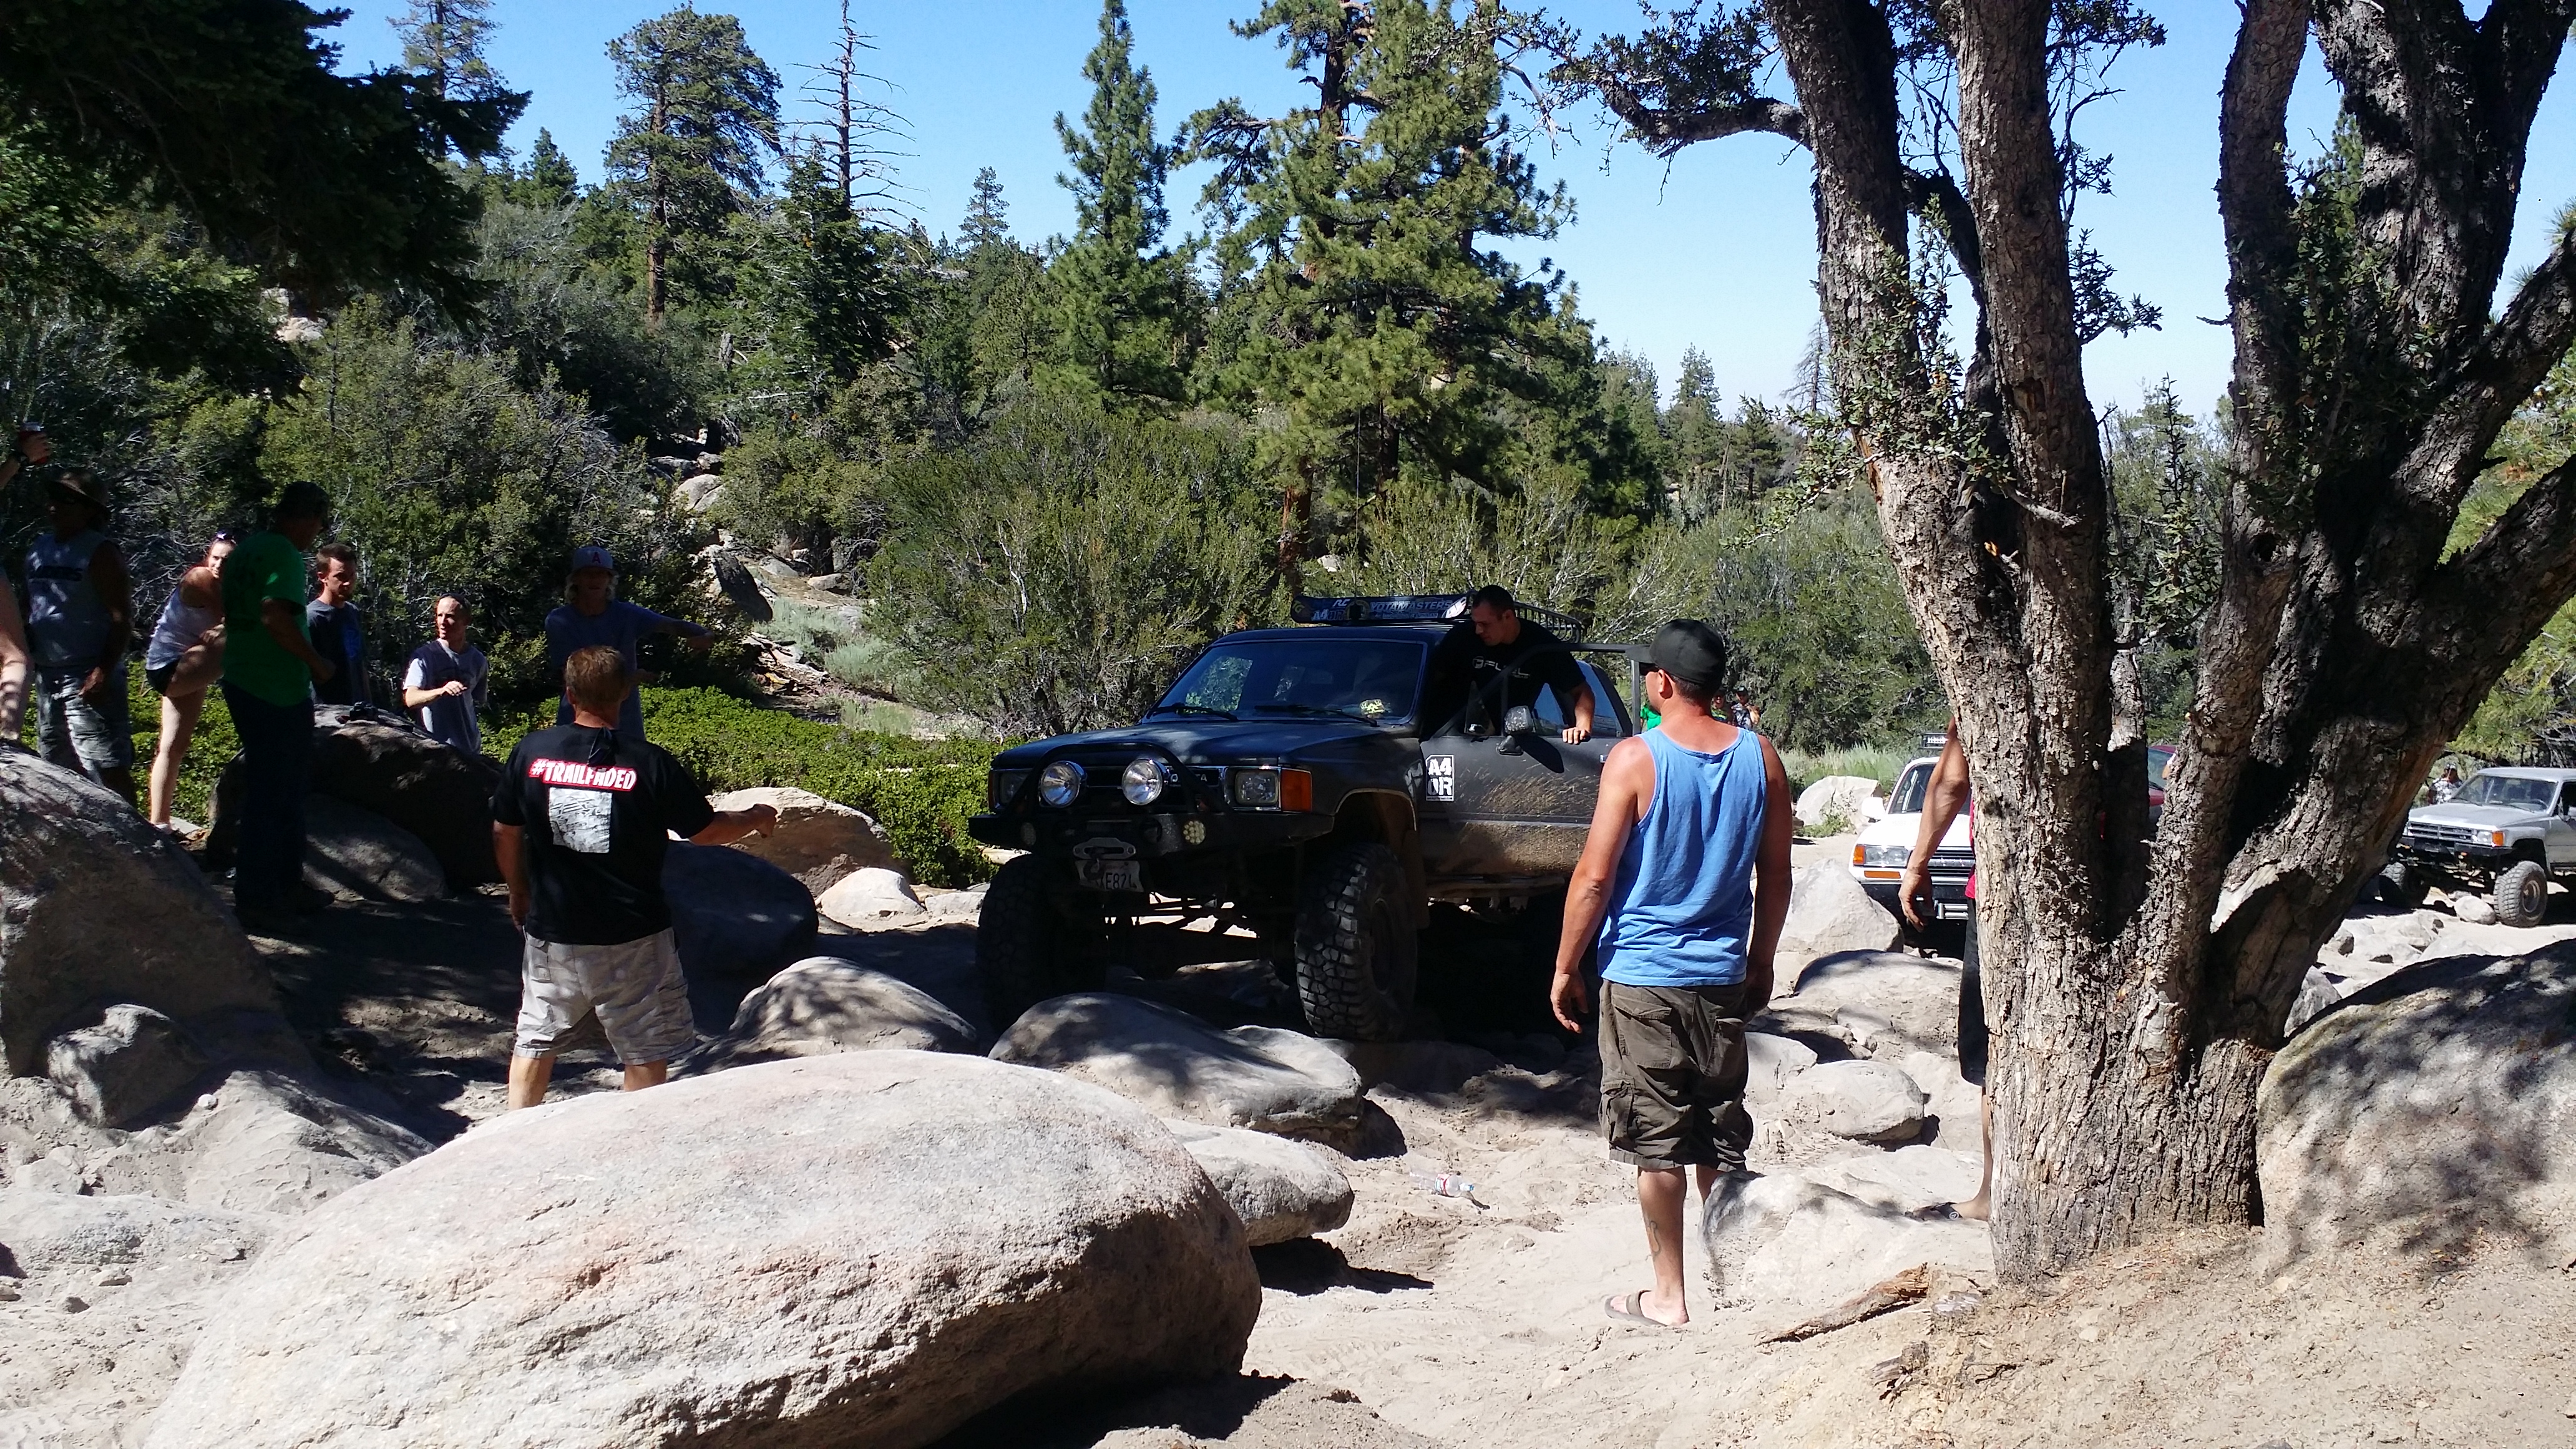
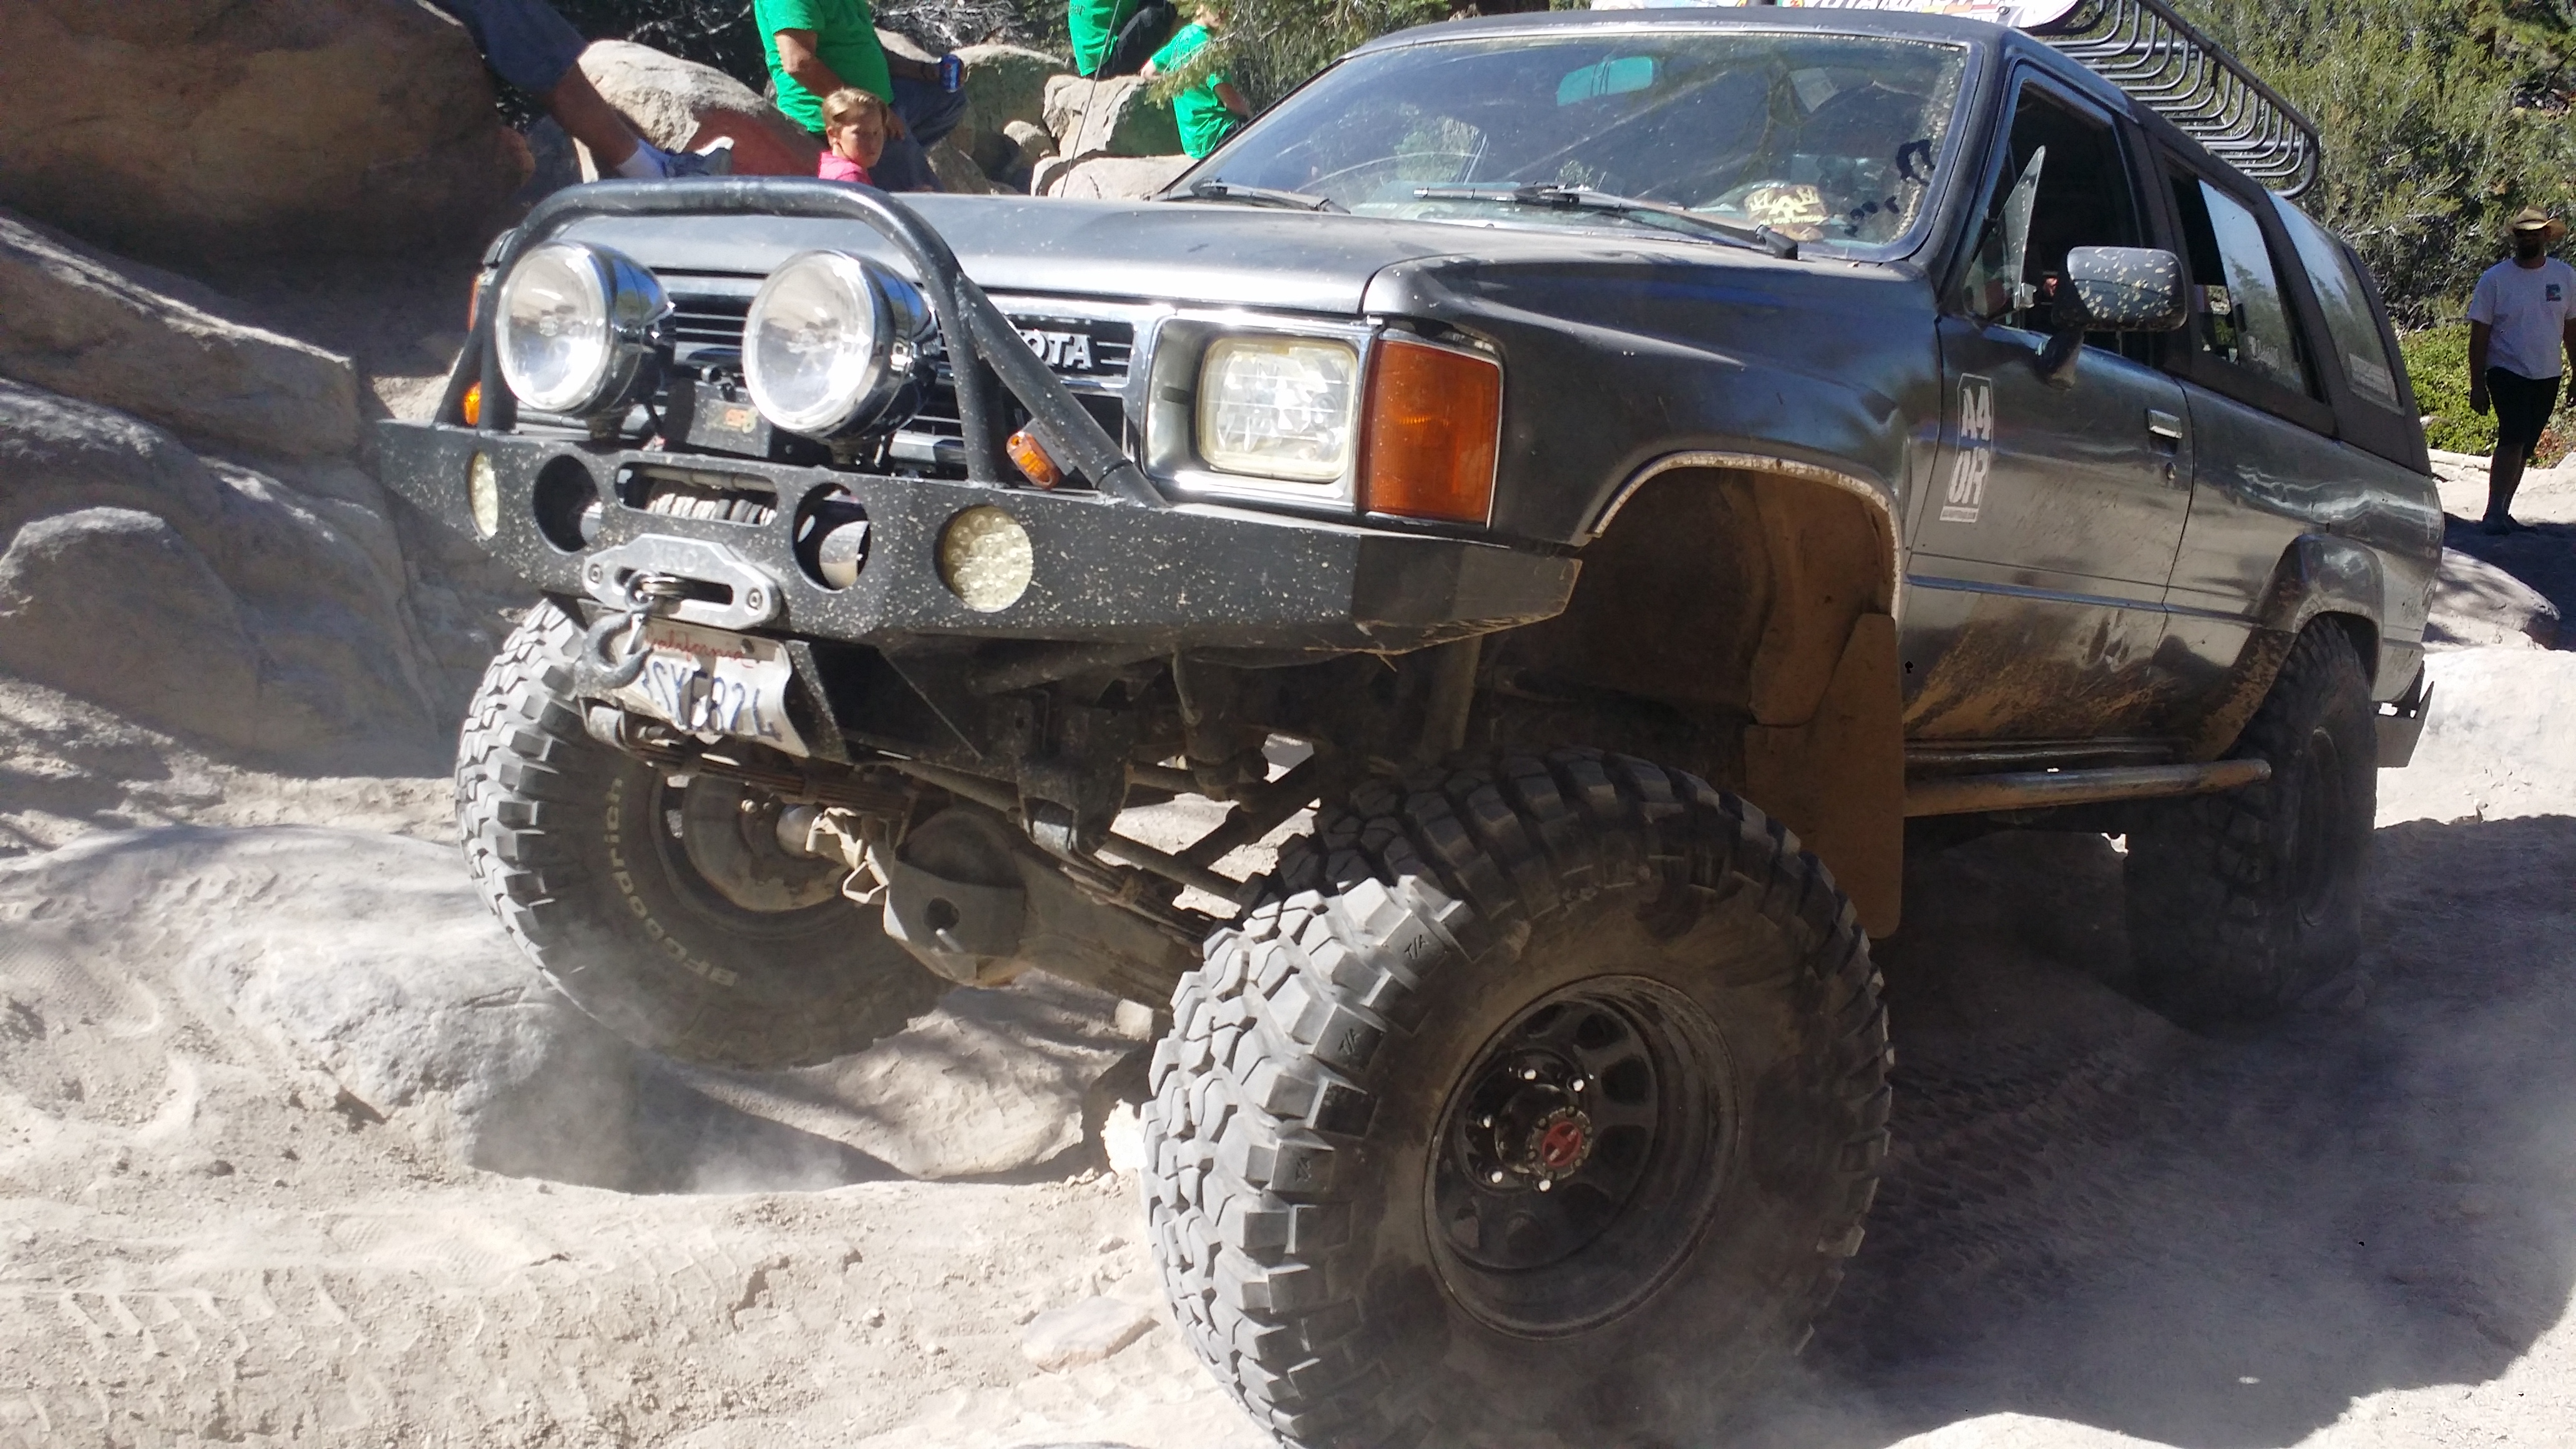
John bull has gotten so much harder. I thoguht now that i went from 33s to 35's that i would have had a much easier time on this trail but apparently rain, and people getting stuck over the years has caused the trail to have deep dug out areas and more of boulders exposed. So this time around i had one hell of a time trying to get out of these ruts for John Bull.
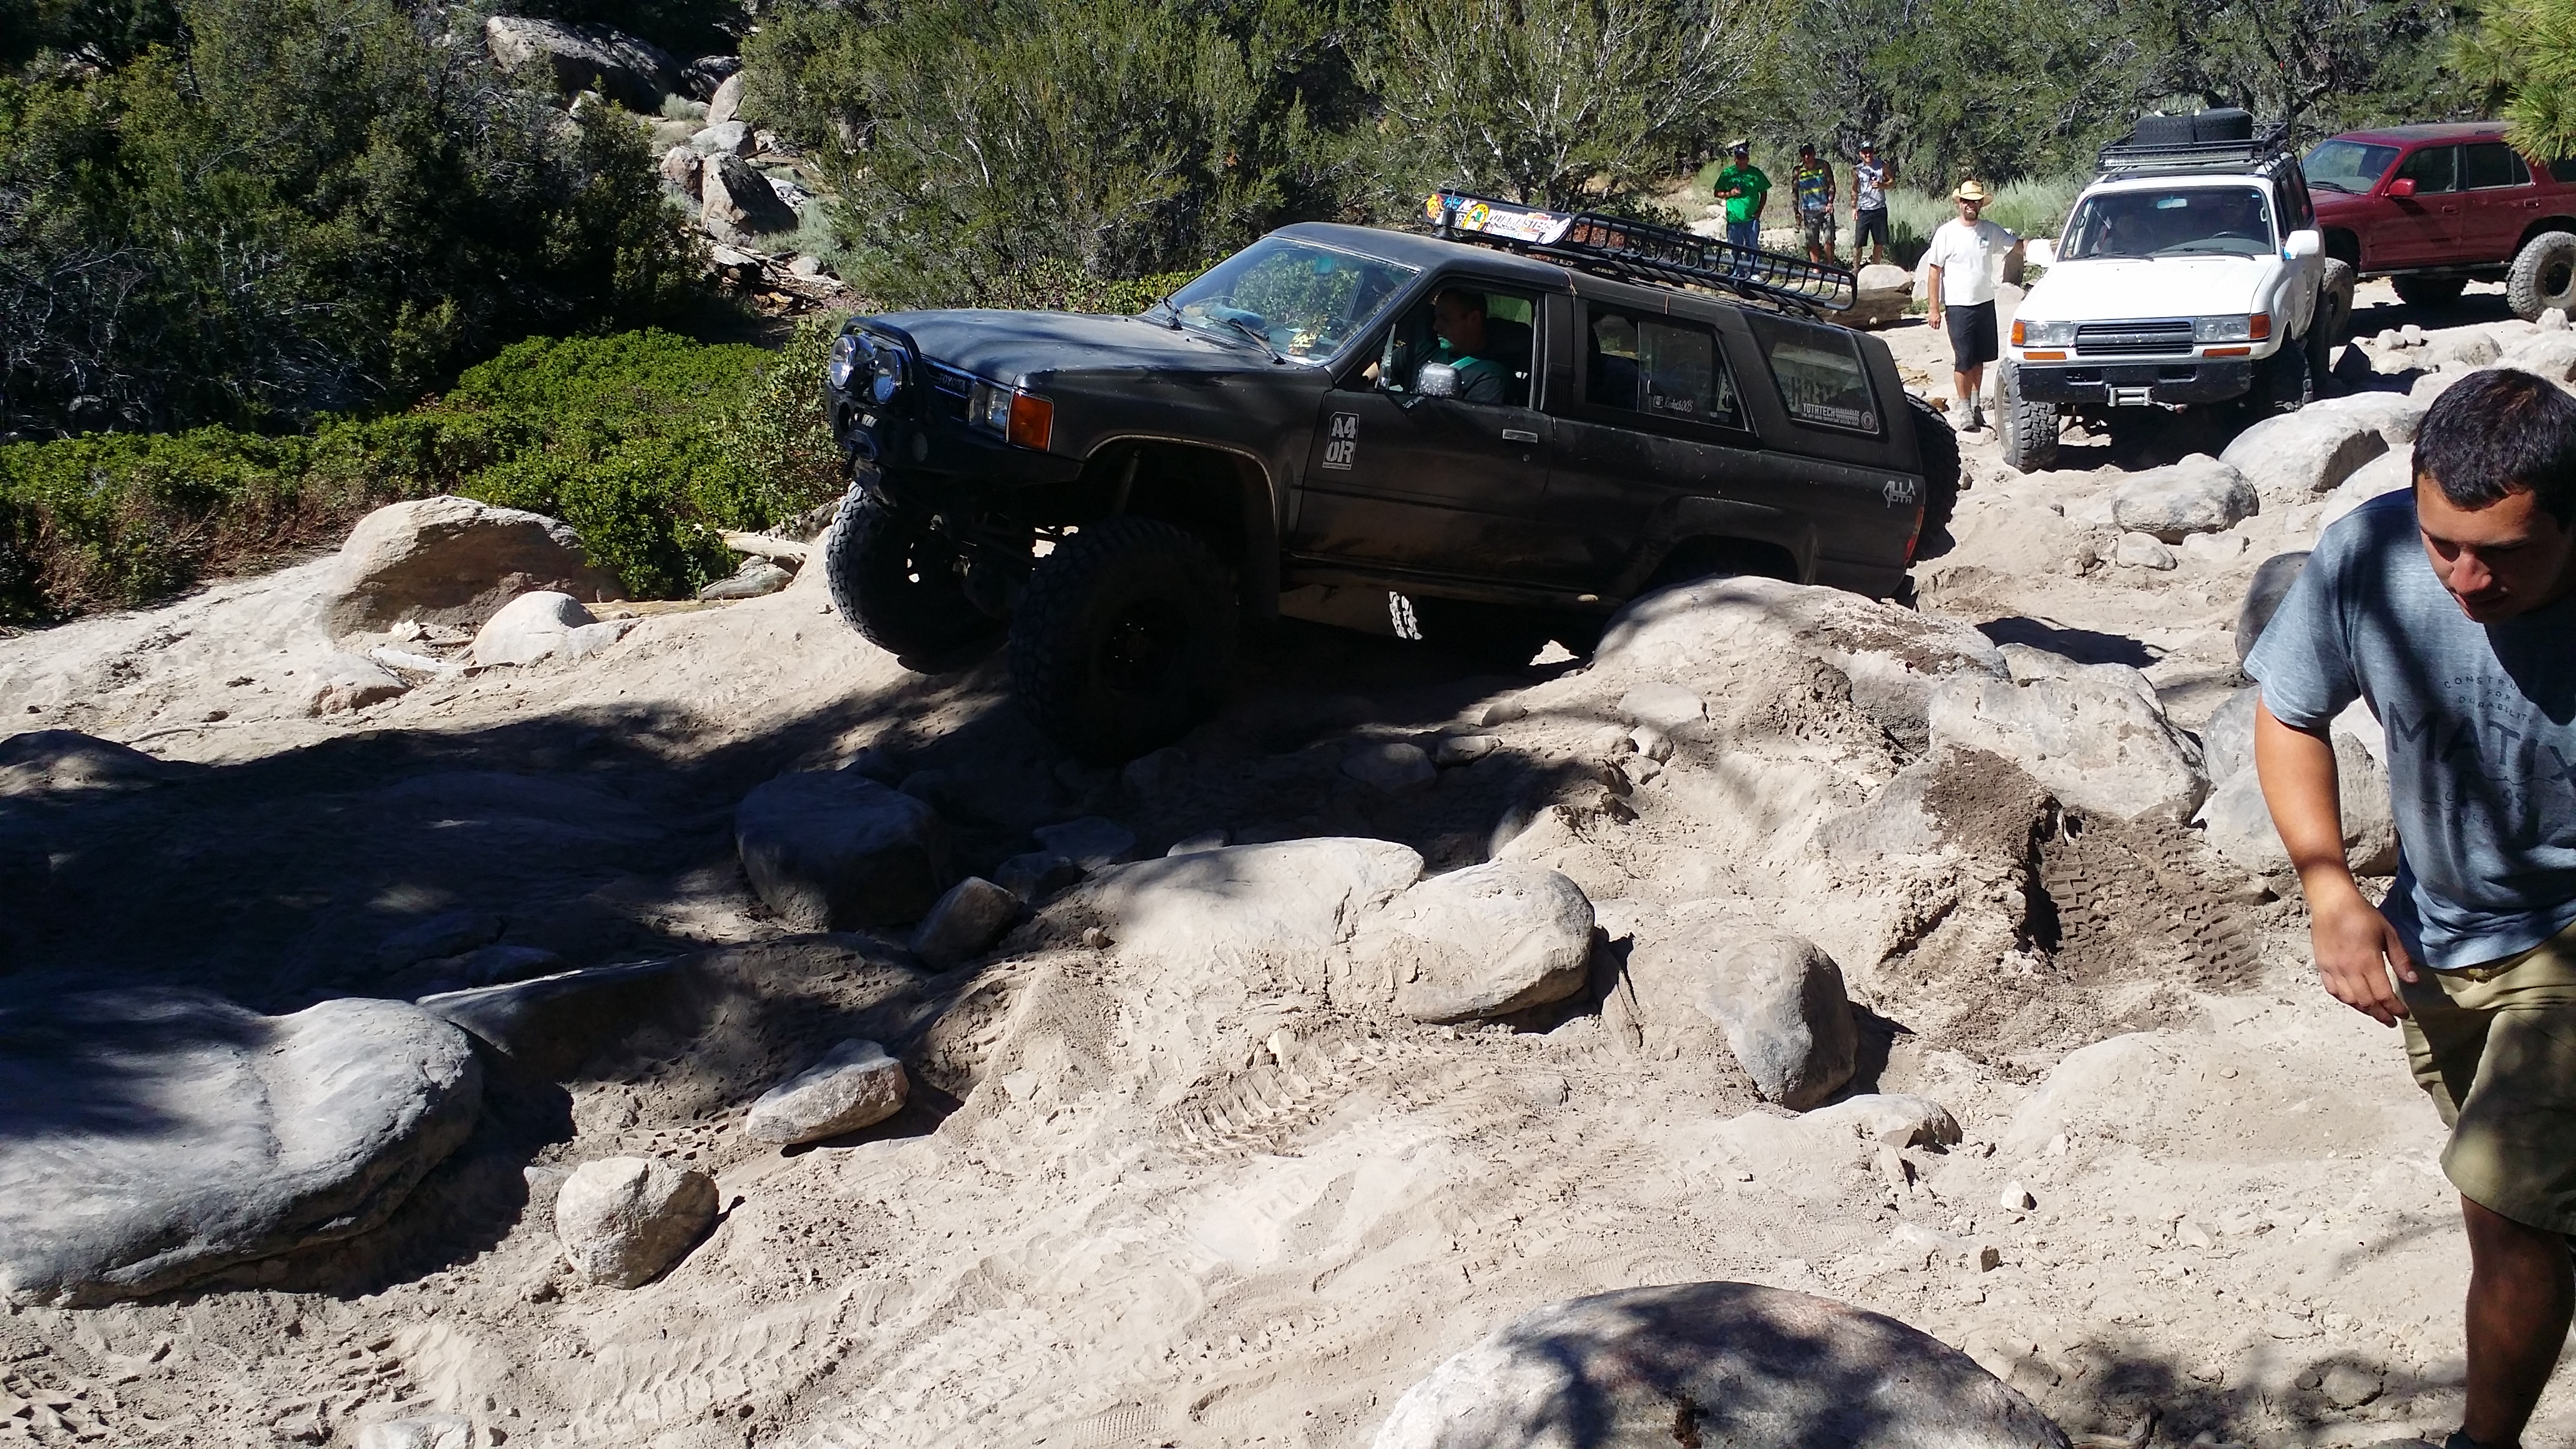
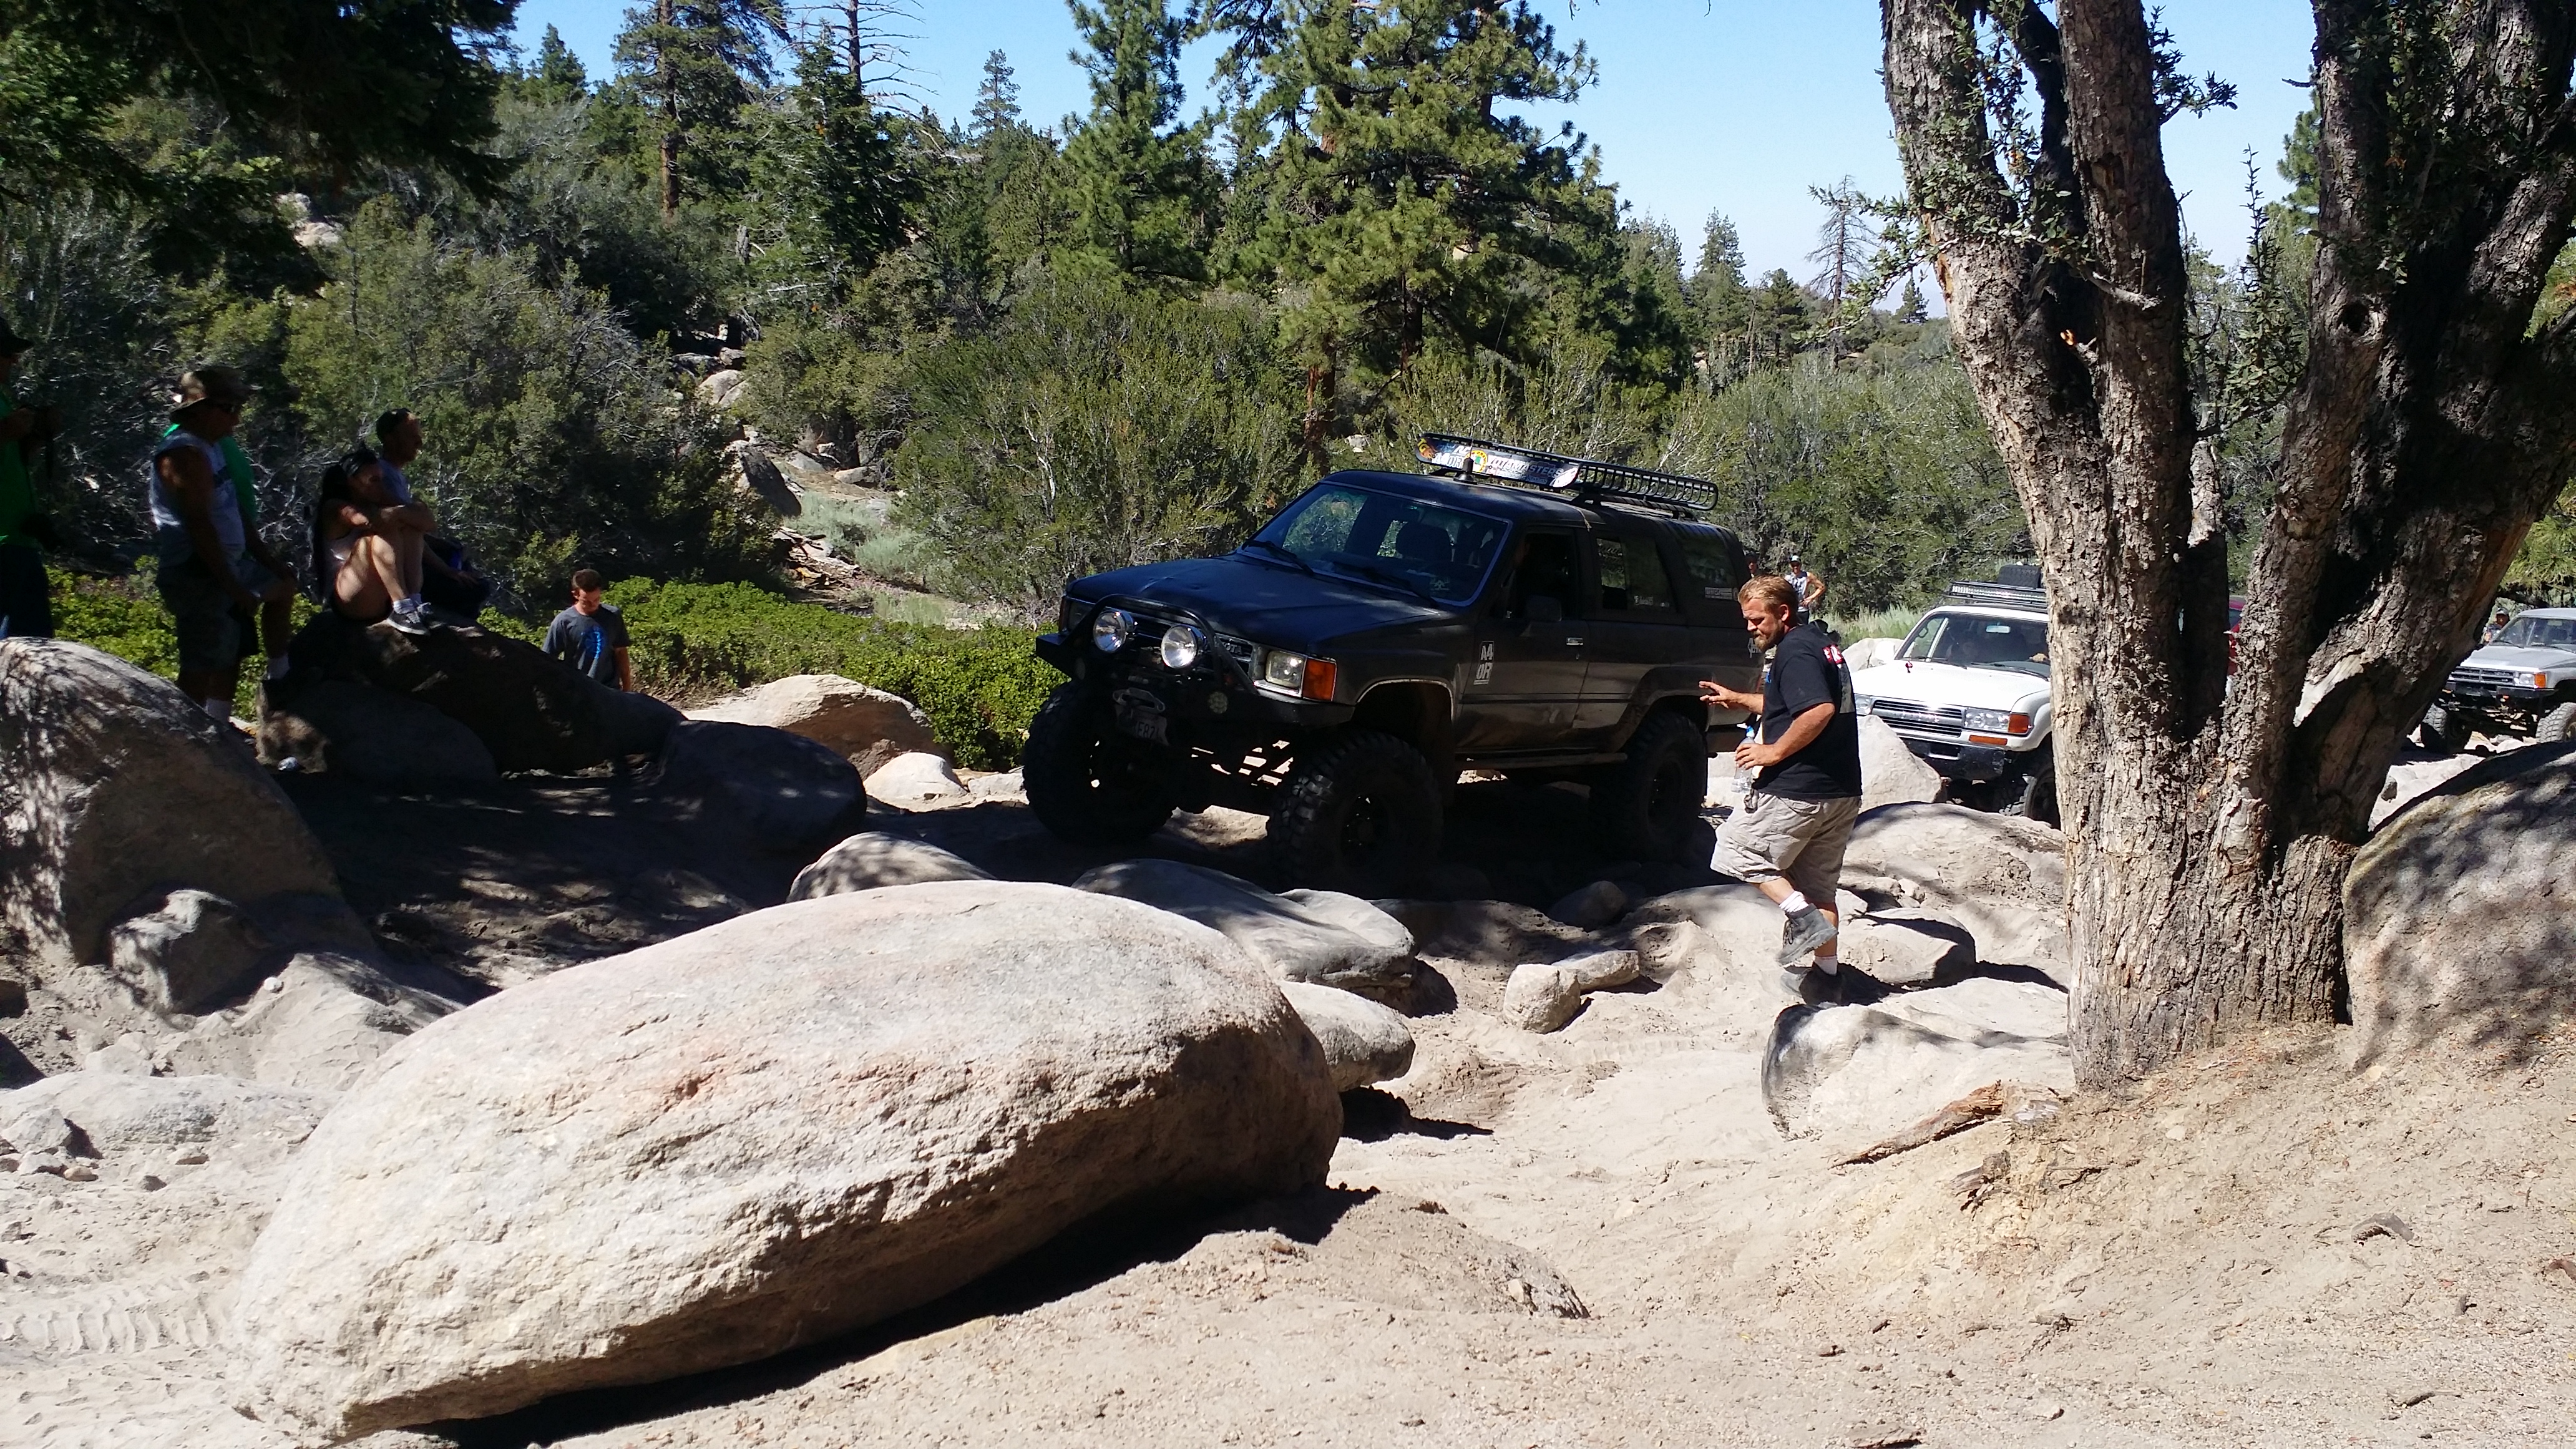
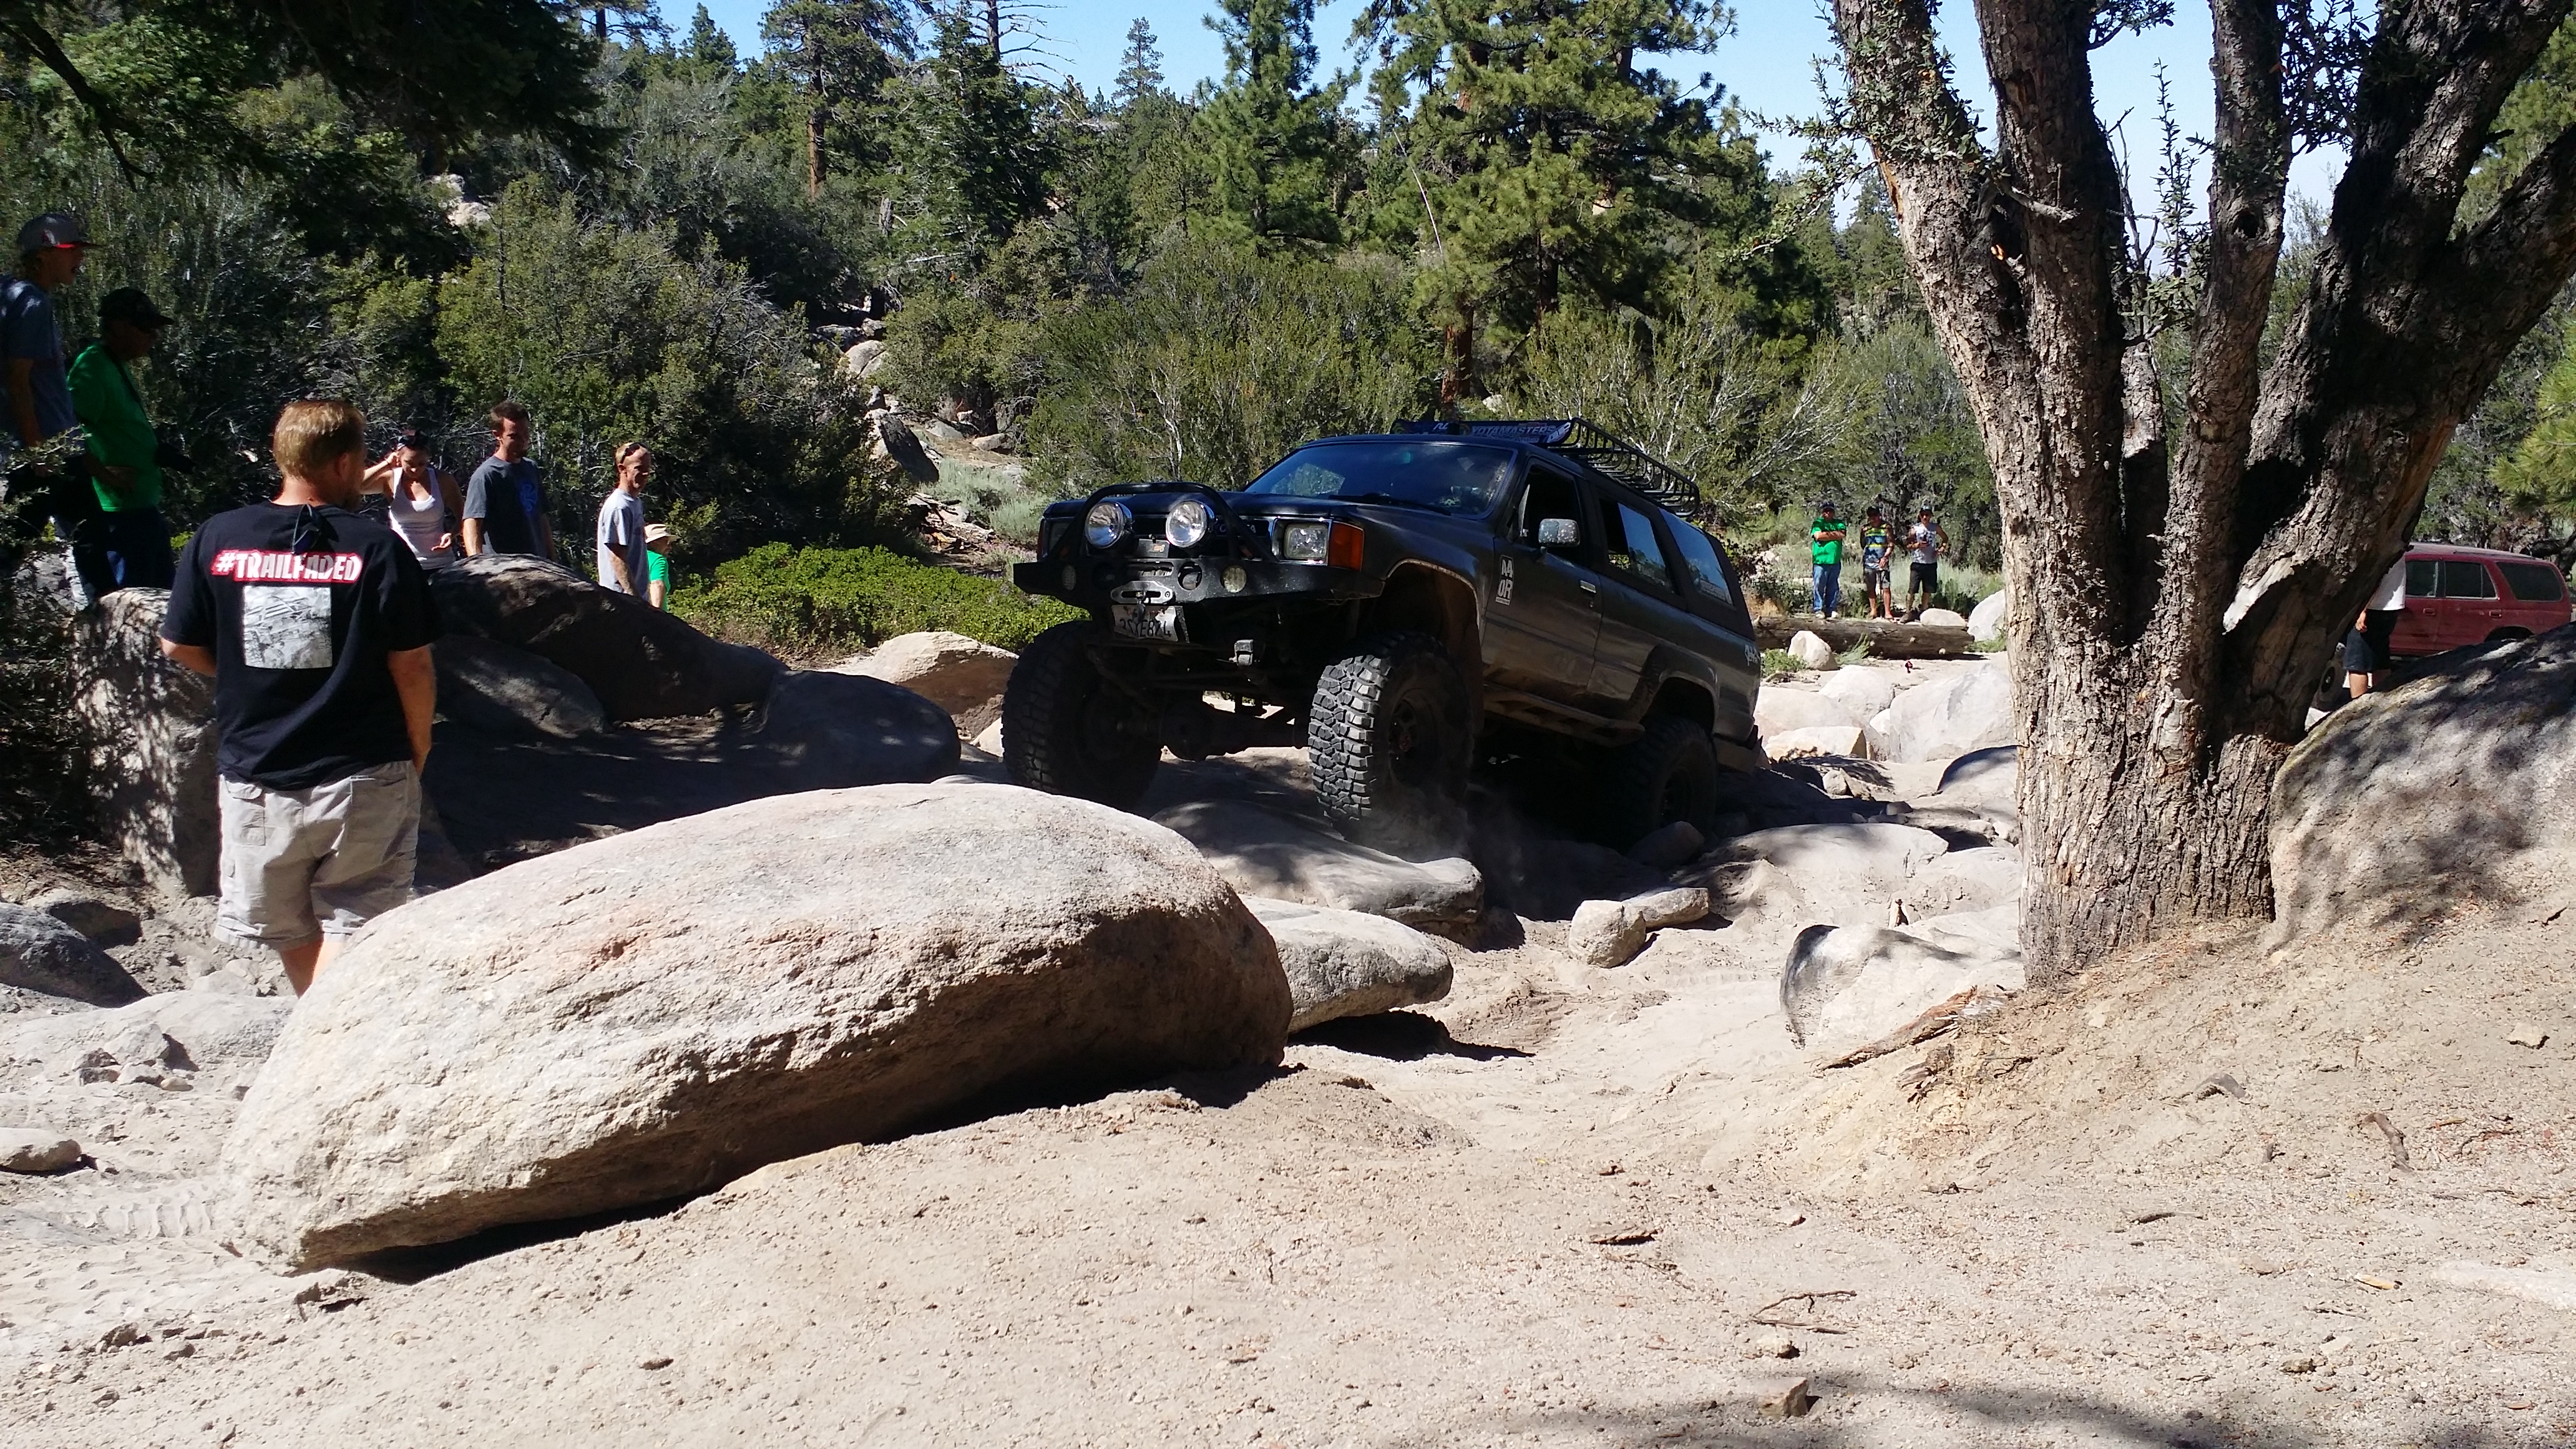
After a while when you have 20 people telling you to stop and go, turn left, right, give it gas stop. blah blah blah. i find it is sometimes just best to take a look for yourself and make up your mind what is best for you and the outcome of your rig. and that is exactly what i had to do out of sheer frustration.
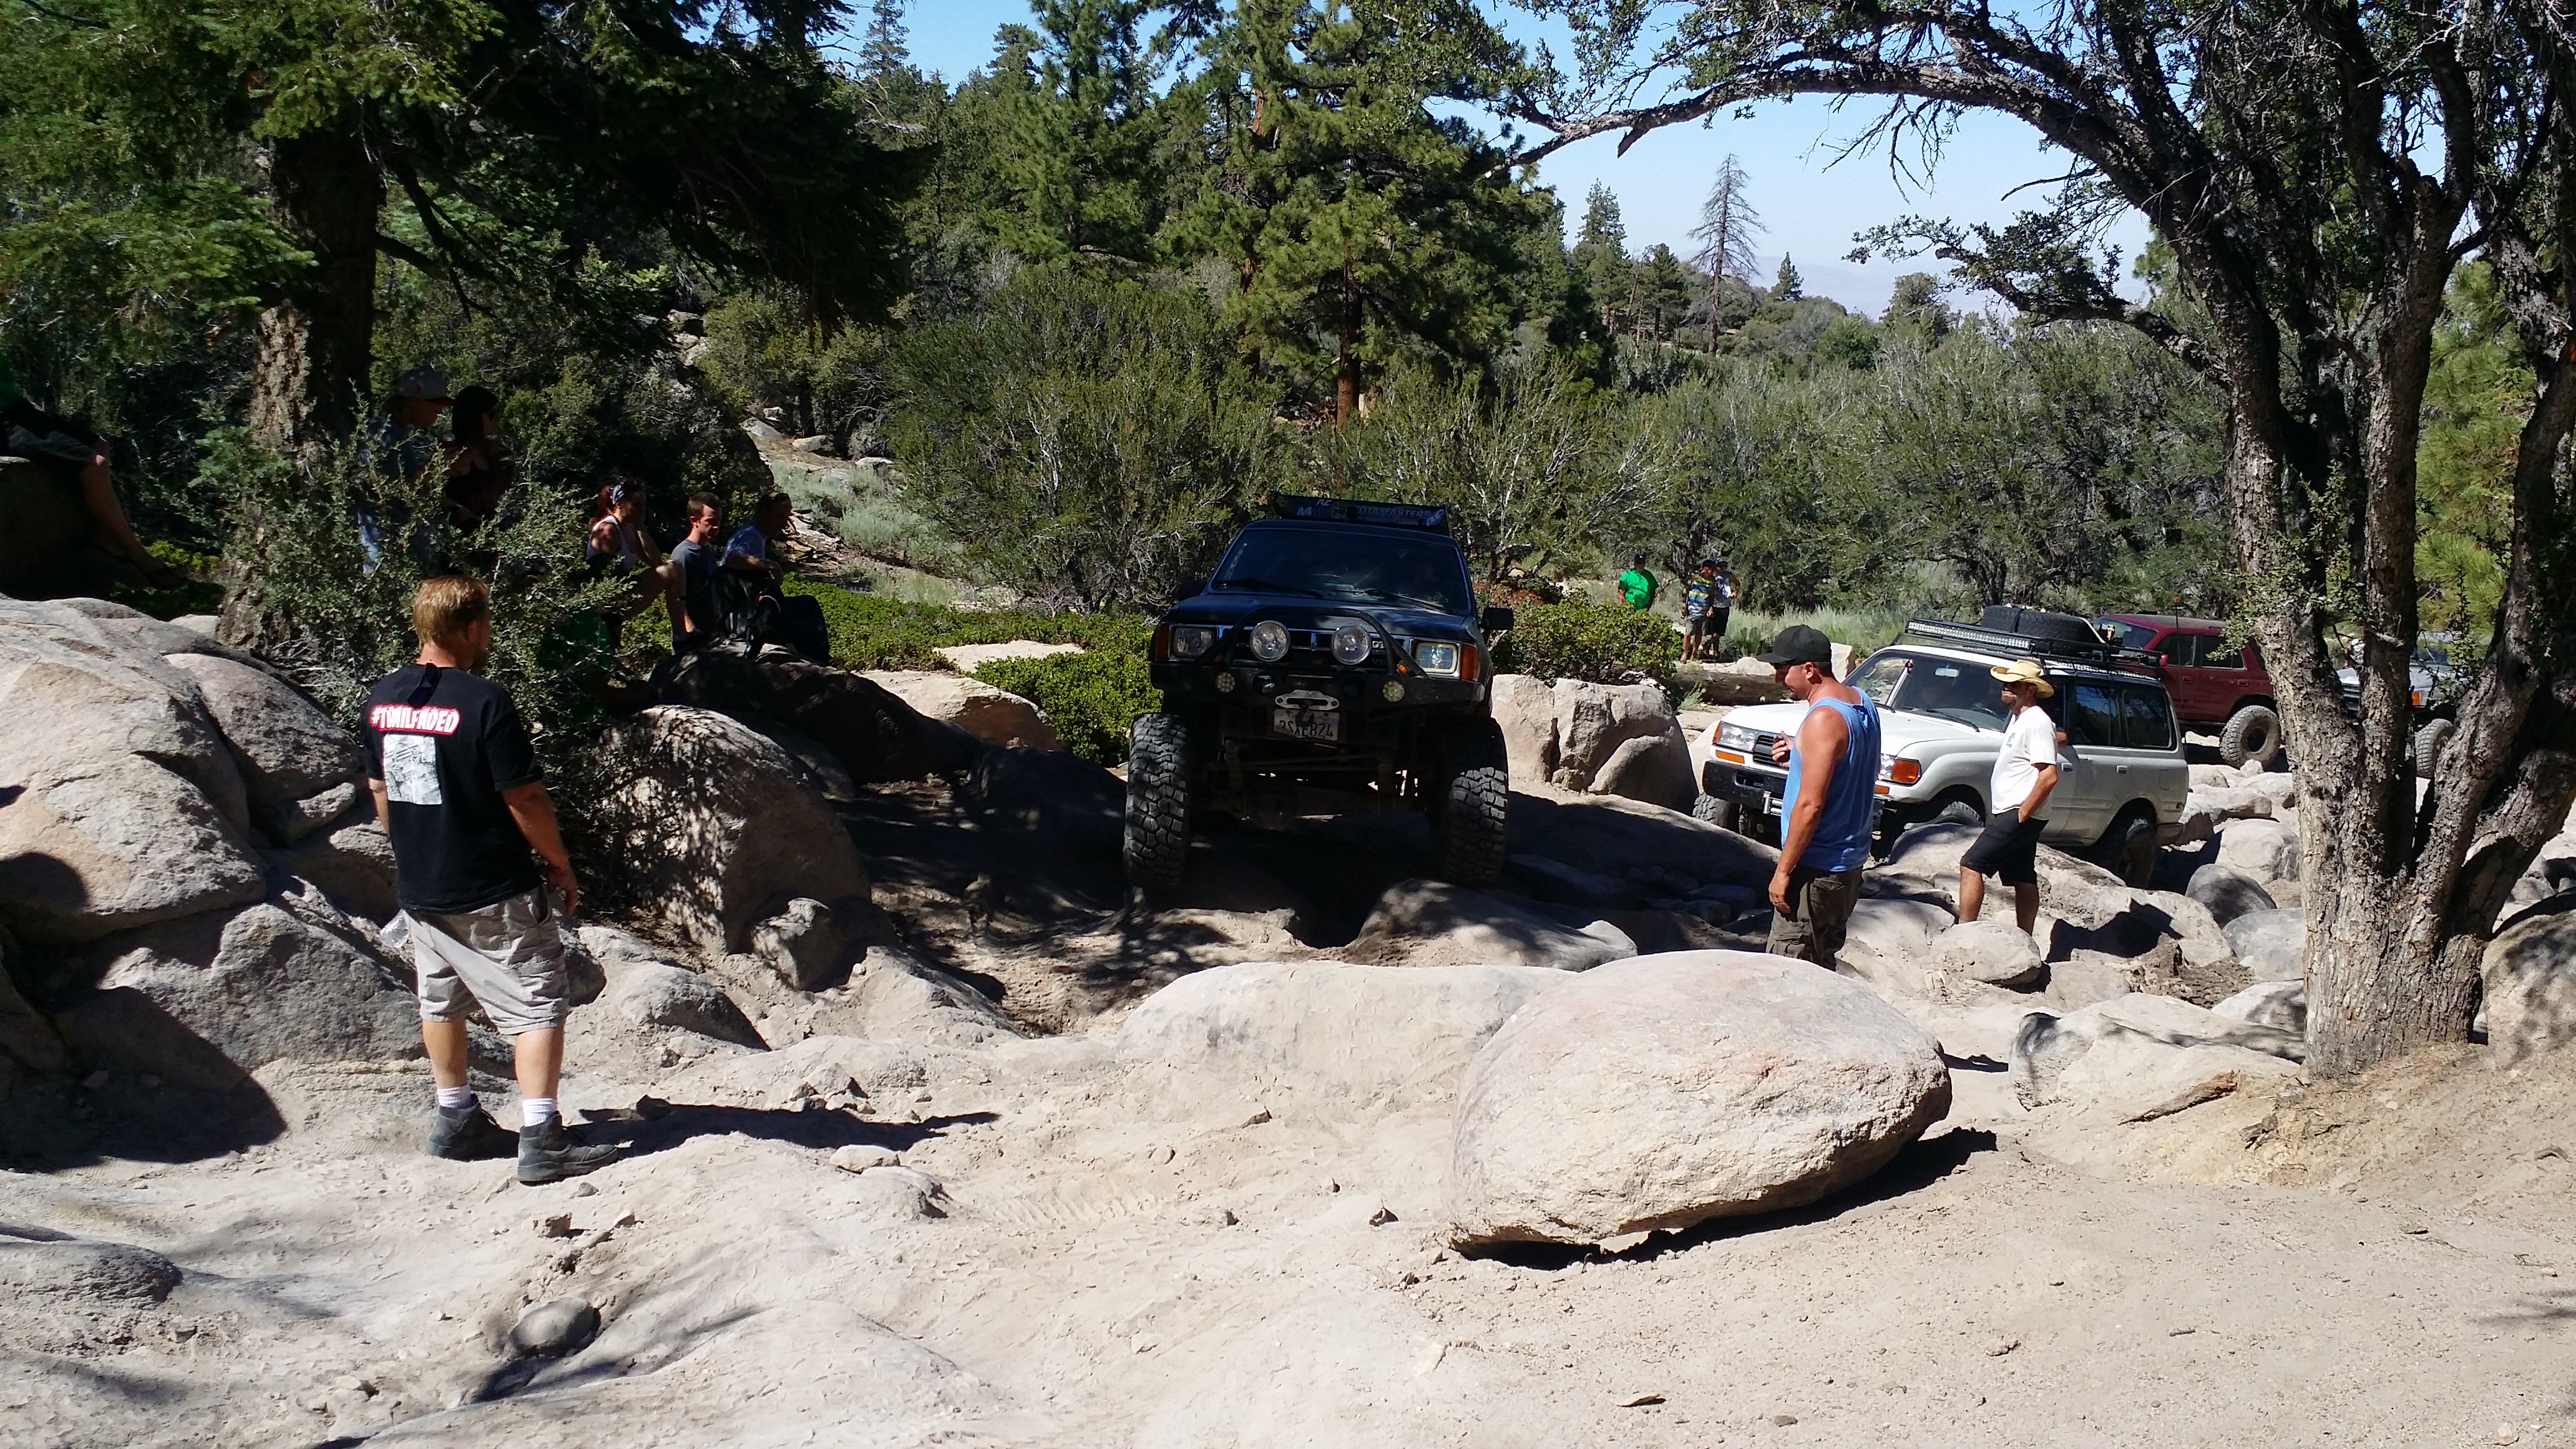


After we made it to the end of the trip we had more then half of the group gone. Most of the people parted ways after we went up john bull only because there is no way they would have ever made it up the mountain. so they only did Gold mountain. and the left home in their own group.
out of about 25 rigs this is all that remained. The few, the elite. All_Yotas and 1 suzuki.
We both look worn out. IT was a super hot day and we were very tired.
One of my favorite shots of the whole weekend. ME with my Ride-or-Die Girl.
Here is a quick video i put together of all the clips i had.
The first 2 vids are of our buddy James showing us that where there is a will there is a way. No need for a hammer and chisel all you need is your yota axle lol
The 3rd video is of his wife Shawna crawling up that nasty spot making it look simple.
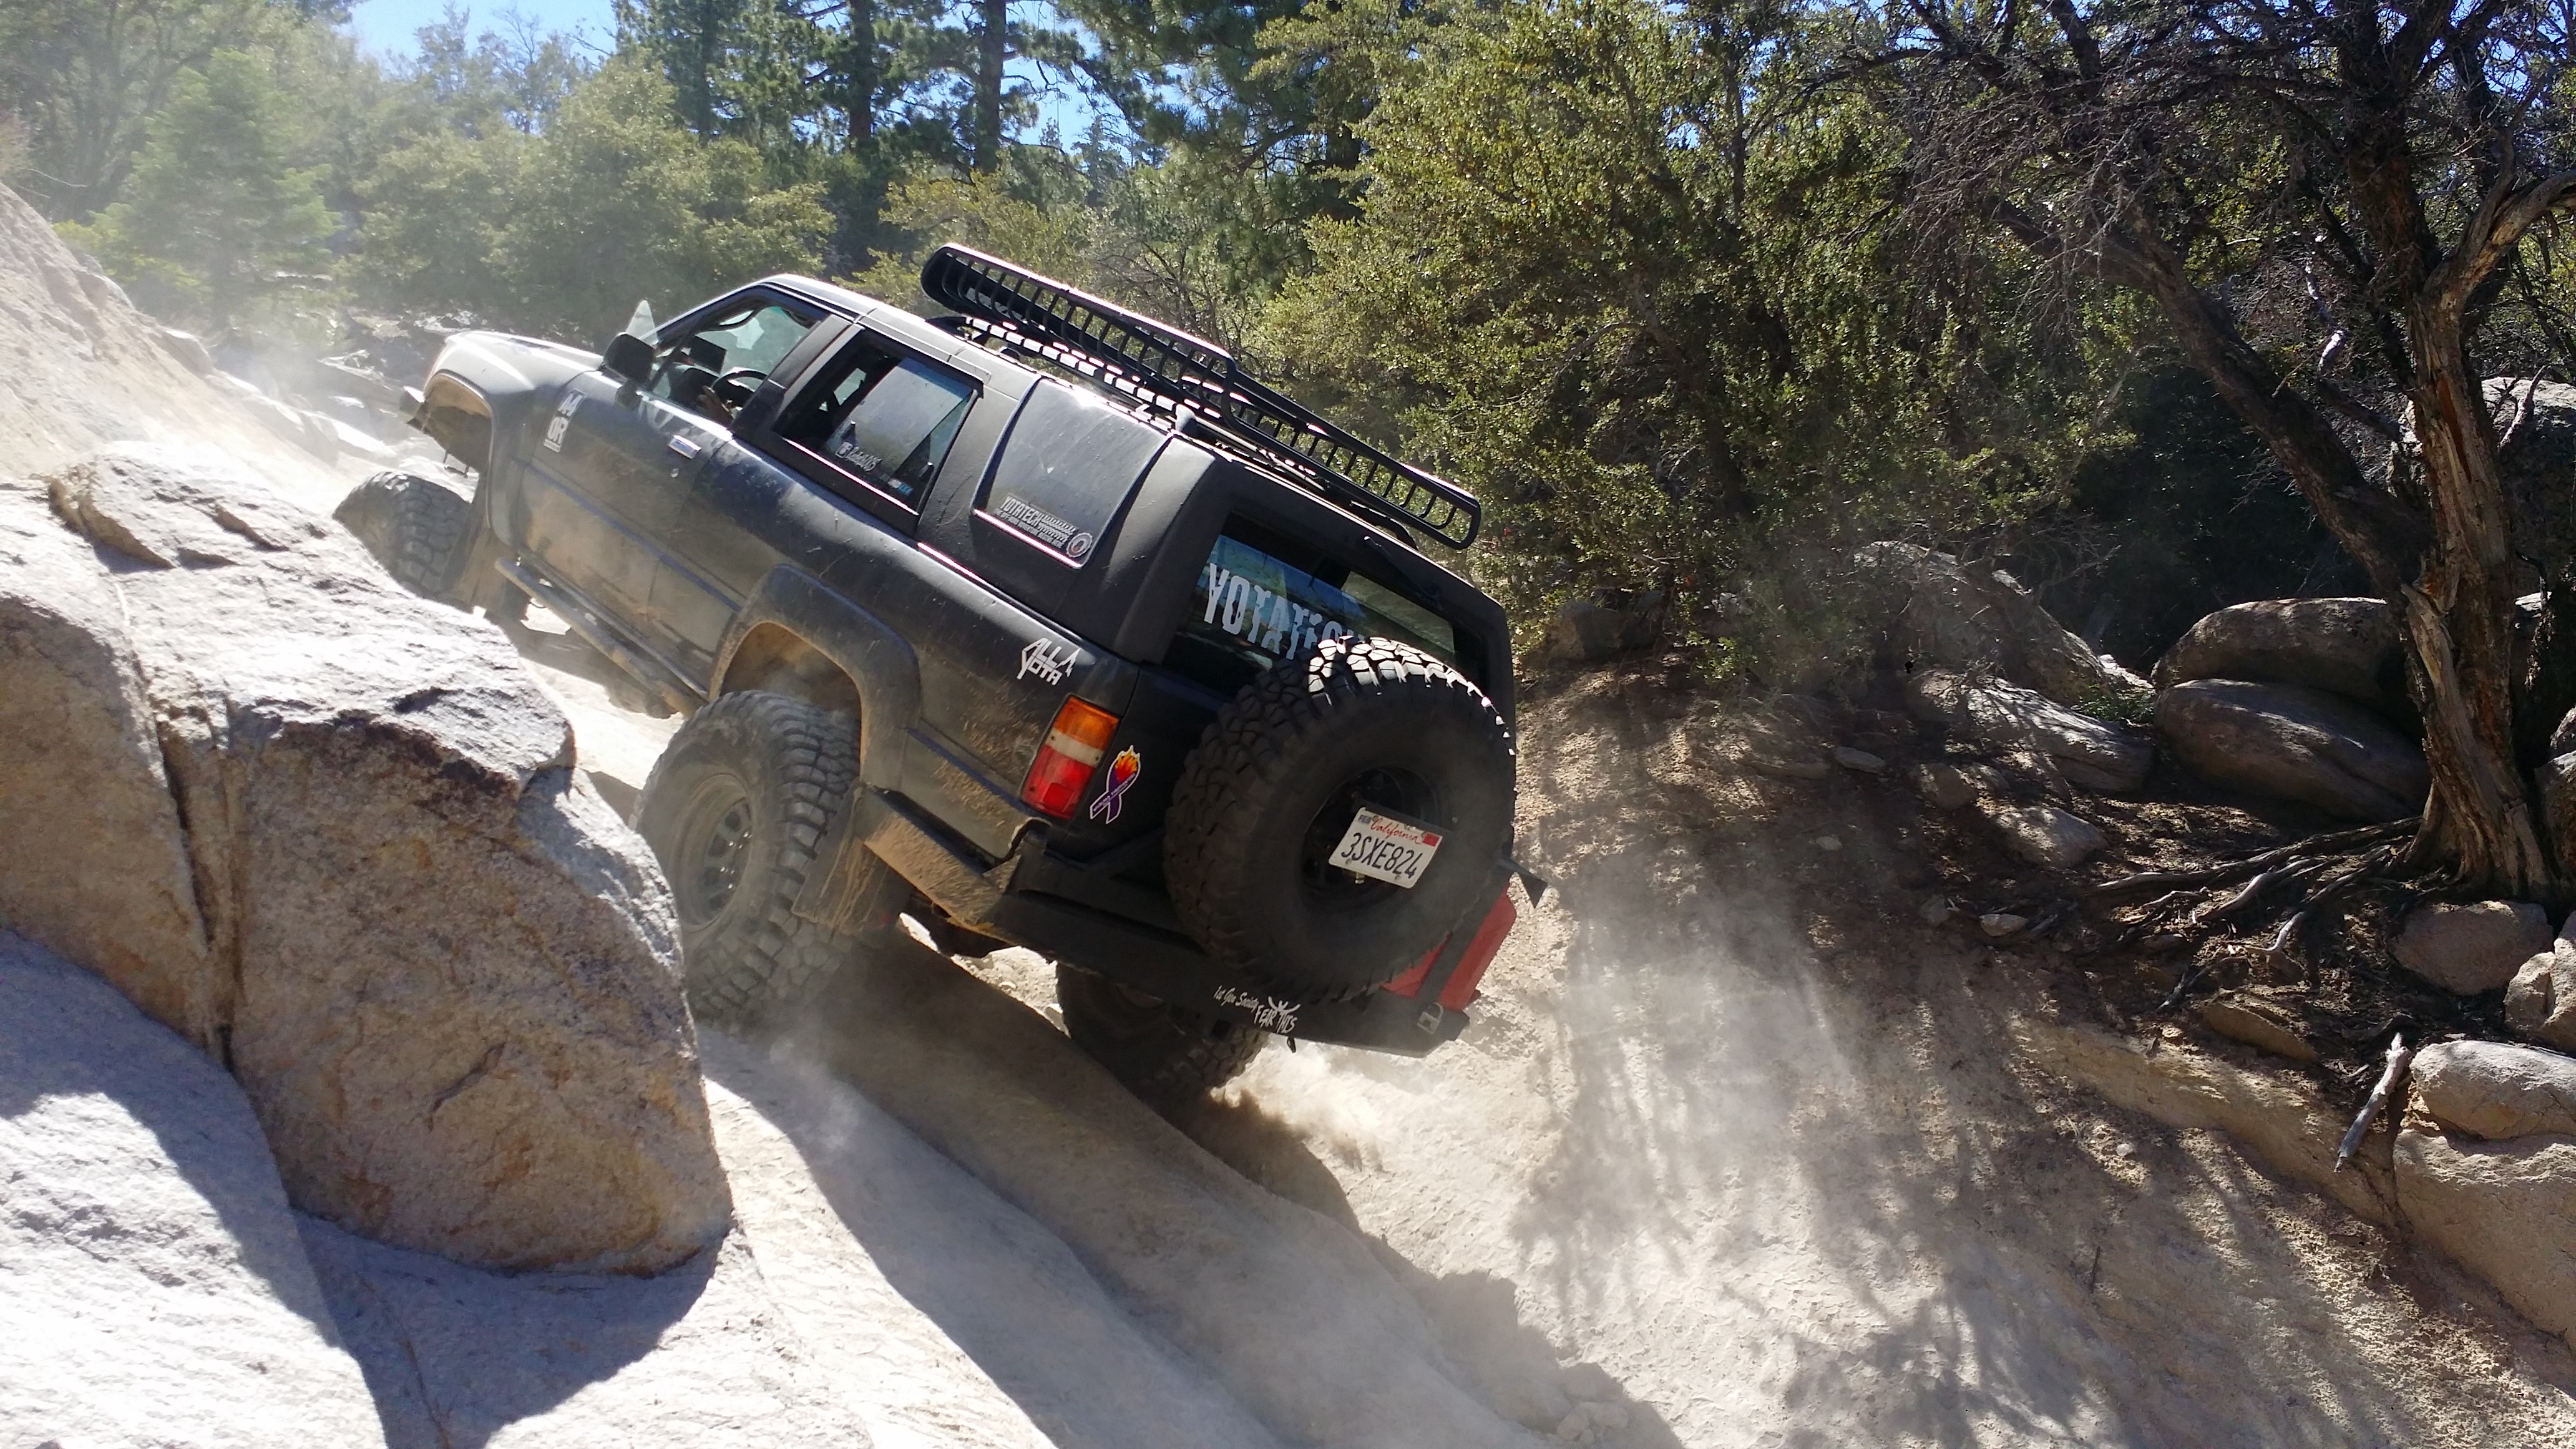
the 4th video and the remainder of the vid is me trying to make it up gatekeeper at the base of john bull. I had a much harder time without having dual cases. i was really surprised it was so hard but toward the end of the video you'll see that i made it up.
One of the many other people who went put this video together for the meet. I think he did a pretty good job.
Here are the pix that me and Faby took. We didnt really manage to get too many shots because me and my buddy Collin stayed at the tail of the group to make sure that all the "less capable" or "nearly stock" rigs were able to make it through the trails. So we were always left spotting everybody and making sure everybody kept up while we had Chefyota4x4 leading the pack of our group of about 25 or so vehicles.
Mark and I met up with Zach and his dad (zach is the owner of the All_Yota page) at a cabin that Mark(chefyota4x4) reserved for us. it was pretty cozy. My girl and i didnt arrive till way way way late at night about 1am. only to show up to start grilling up some hot link sausage dogs over the burning fireplace wood. I just had to do it to kill my craving. anyway this was the morning about 2 hours before the Allyota meet up.

we got everybody rounded up and here we are getting ready to leave the meet up area for gold mountain.

I honestly dont remember this guy in our group. but apparently we had some jeeps in the crew if it was in my pictures lol

My buddy James taking that beast on 39's over, what i thought was an impossible line lol, he sure proved me wrong.

My beautiful girlfriend Faby Turning any moment into a photoshoot as often as she can lol


Me and My buddy Collin riding in his friends white jeep behind me. His crazy toyota rock crawler got messed up a while before this trip luckily his friend lent him his jeep for the day and he managed to make the trip. Here we are at the tail of the group.

Bad arse tacoma.

John bull has gotten so much harder. I thoguht now that i went from 33s to 35's that i would have had a much easier time on this trail but apparently rain, and people getting stuck over the years has caused the trail to have deep dug out areas and more of boulders exposed. So this time around i had one hell of a time trying to get out of these ruts for John Bull.


After a while when you have 20 people telling you to stop and go, turn left, right, give it gas stop. blah blah blah. i find it is sometimes just best to take a look for yourself and make up your mind what is best for you and the outcome of your rig. and that is exactly what i had to do out of sheer frustration.


After we made it to the end of the trip we had more then half of the group gone. Most of the people parted ways after we went up john bull only because there is no way they would have ever made it up the mountain. so they only did Gold mountain. and the left home in their own group.
out of about 25 rigs this is all that remained. The few, the elite. All_Yotas and 1 suzuki.

We both look worn out. IT was a super hot day and we were very tired.

One of my favorite shots of the whole weekend. ME with my Ride-or-Die Girl.

Here is a quick video i put together of all the clips i had.
The first 2 vids are of our buddy James showing us that where there is a will there is a way. No need for a hammer and chisel all you need is your yota axle lol
The 3rd video is of his wife Shawna crawling up that nasty spot making it look simple.
the 4th video and the remainder of the vid is me trying to make it up gatekeeper at the base of john bull. I had a much harder time without having dual cases. i was really surprised it was so hard but toward the end of the video you'll see that i made it up.
Sep 21, 2015 | 11:24 PM
#2611
Thread Starter
Registered User
Joined: Apr 2012
Posts: 2,817
Likes: 2
From: Los Angeles CA
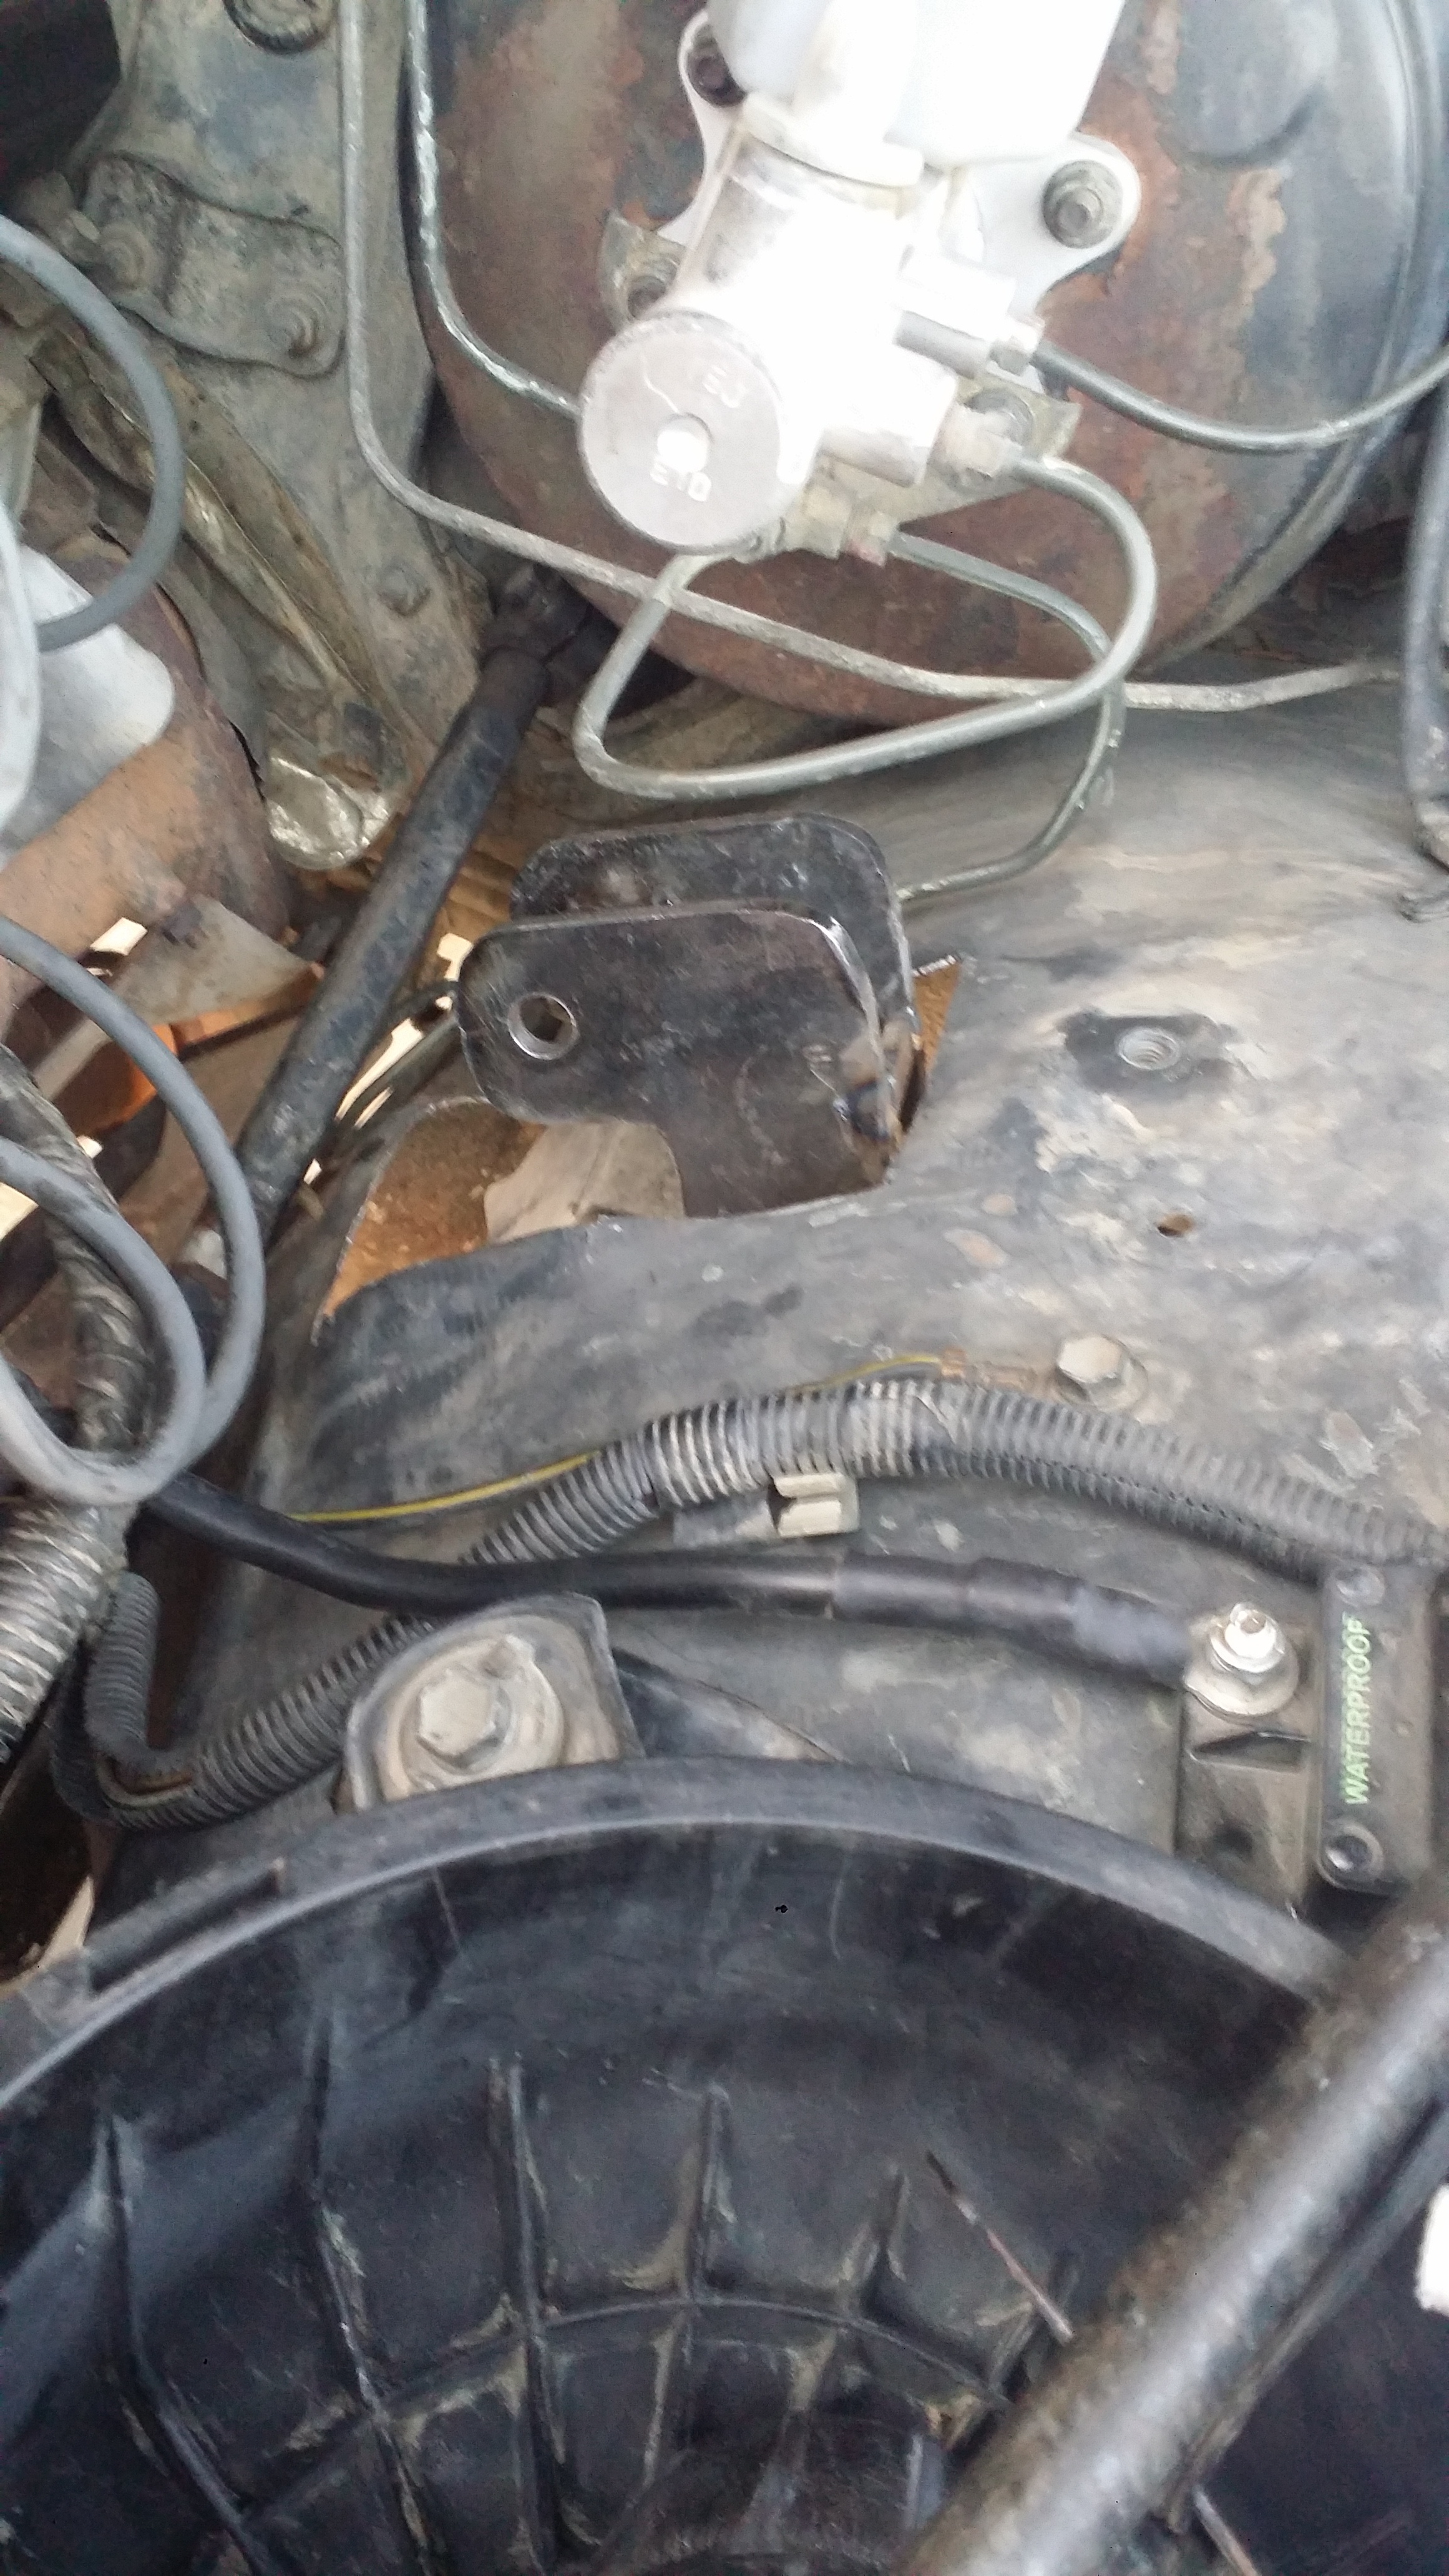
After the Big bear trip i eventually found that my steering box had literally sheered off and broken the welds one 2 or the only 3 bolts that hold the steering box in place. This obviously had to be fixed immediately as it could be torn off and lose control of the vehicle was very likely to occur. So Here was the job. NOthing special. it was an easy job but it was a pain in the butt to install and it took a few hours.
So in order to fix the issue i went with a Trailgear Steering box reinforcement kit. By using this not only do i heavily reinforce the frame where it mounts but i was also able to relocate the steering box further toward my radiator and slightly upward. By doing this i now avoid hitting my 2 rods together on bumps (they would scratch every now and then) and the steering stabilizer bolts that mount it to the top rod will not come close to my 3vze oil pan anymore. So this kit fixed alot of issues that i had. and i find it was definitely worth them money. Not only did i relocate the box. but i also installed the flat pitman arm which brought up that top rod about 1 inch. its not alot but it makes a heck of a difference!
heres the pix.
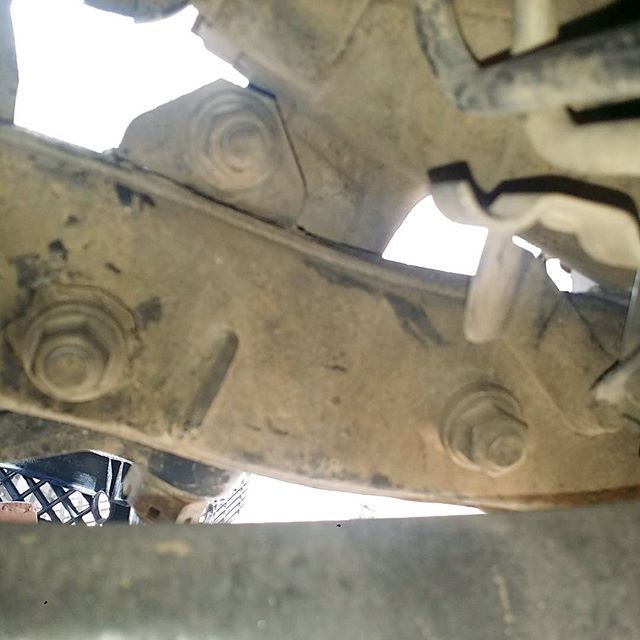
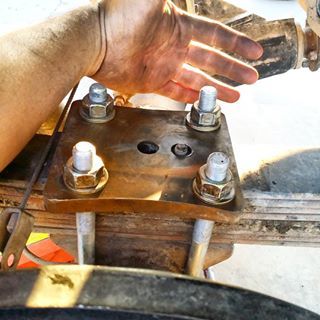
Here you can see that the top gusset welds literally broke. there was nothing holding it in place. the bottom left one you can see a small circle around the bolt head that was pushing and pulling into the frame every time i turned left and right. The only bold that was holding everything together was the very front bolt pictured on the right.
Dad welded on the plates after i had everything ready for him
Putting the girl to work. Had her hold the steering box a few times and i let her do what she likes to do; paint!

Like always making the day into a photoshoot lol shes so goofy.

All Installed and nicely painted
That Pitman arm clears that frame by about 3/8ths of an inch. pretty close. but perfect!

----------------------------------------------------------------------------------------------------------------------------------------------------
EDIT:
ALSO after that big bear trip i realized that i had to get my rear axle relocated 1" back more because the larger tires rubbed way too much toward the front side. so moving it back one inch would correct this issue. (which i still get some rubbing but nowhere near as much anymore.
At first i thought it was going to be as easy as just moving the leaf springs over 1 inch on the AllPro offroad triple drilled spring perches that are welded on the axle. BUT NO! leaving it like that left it looking like this

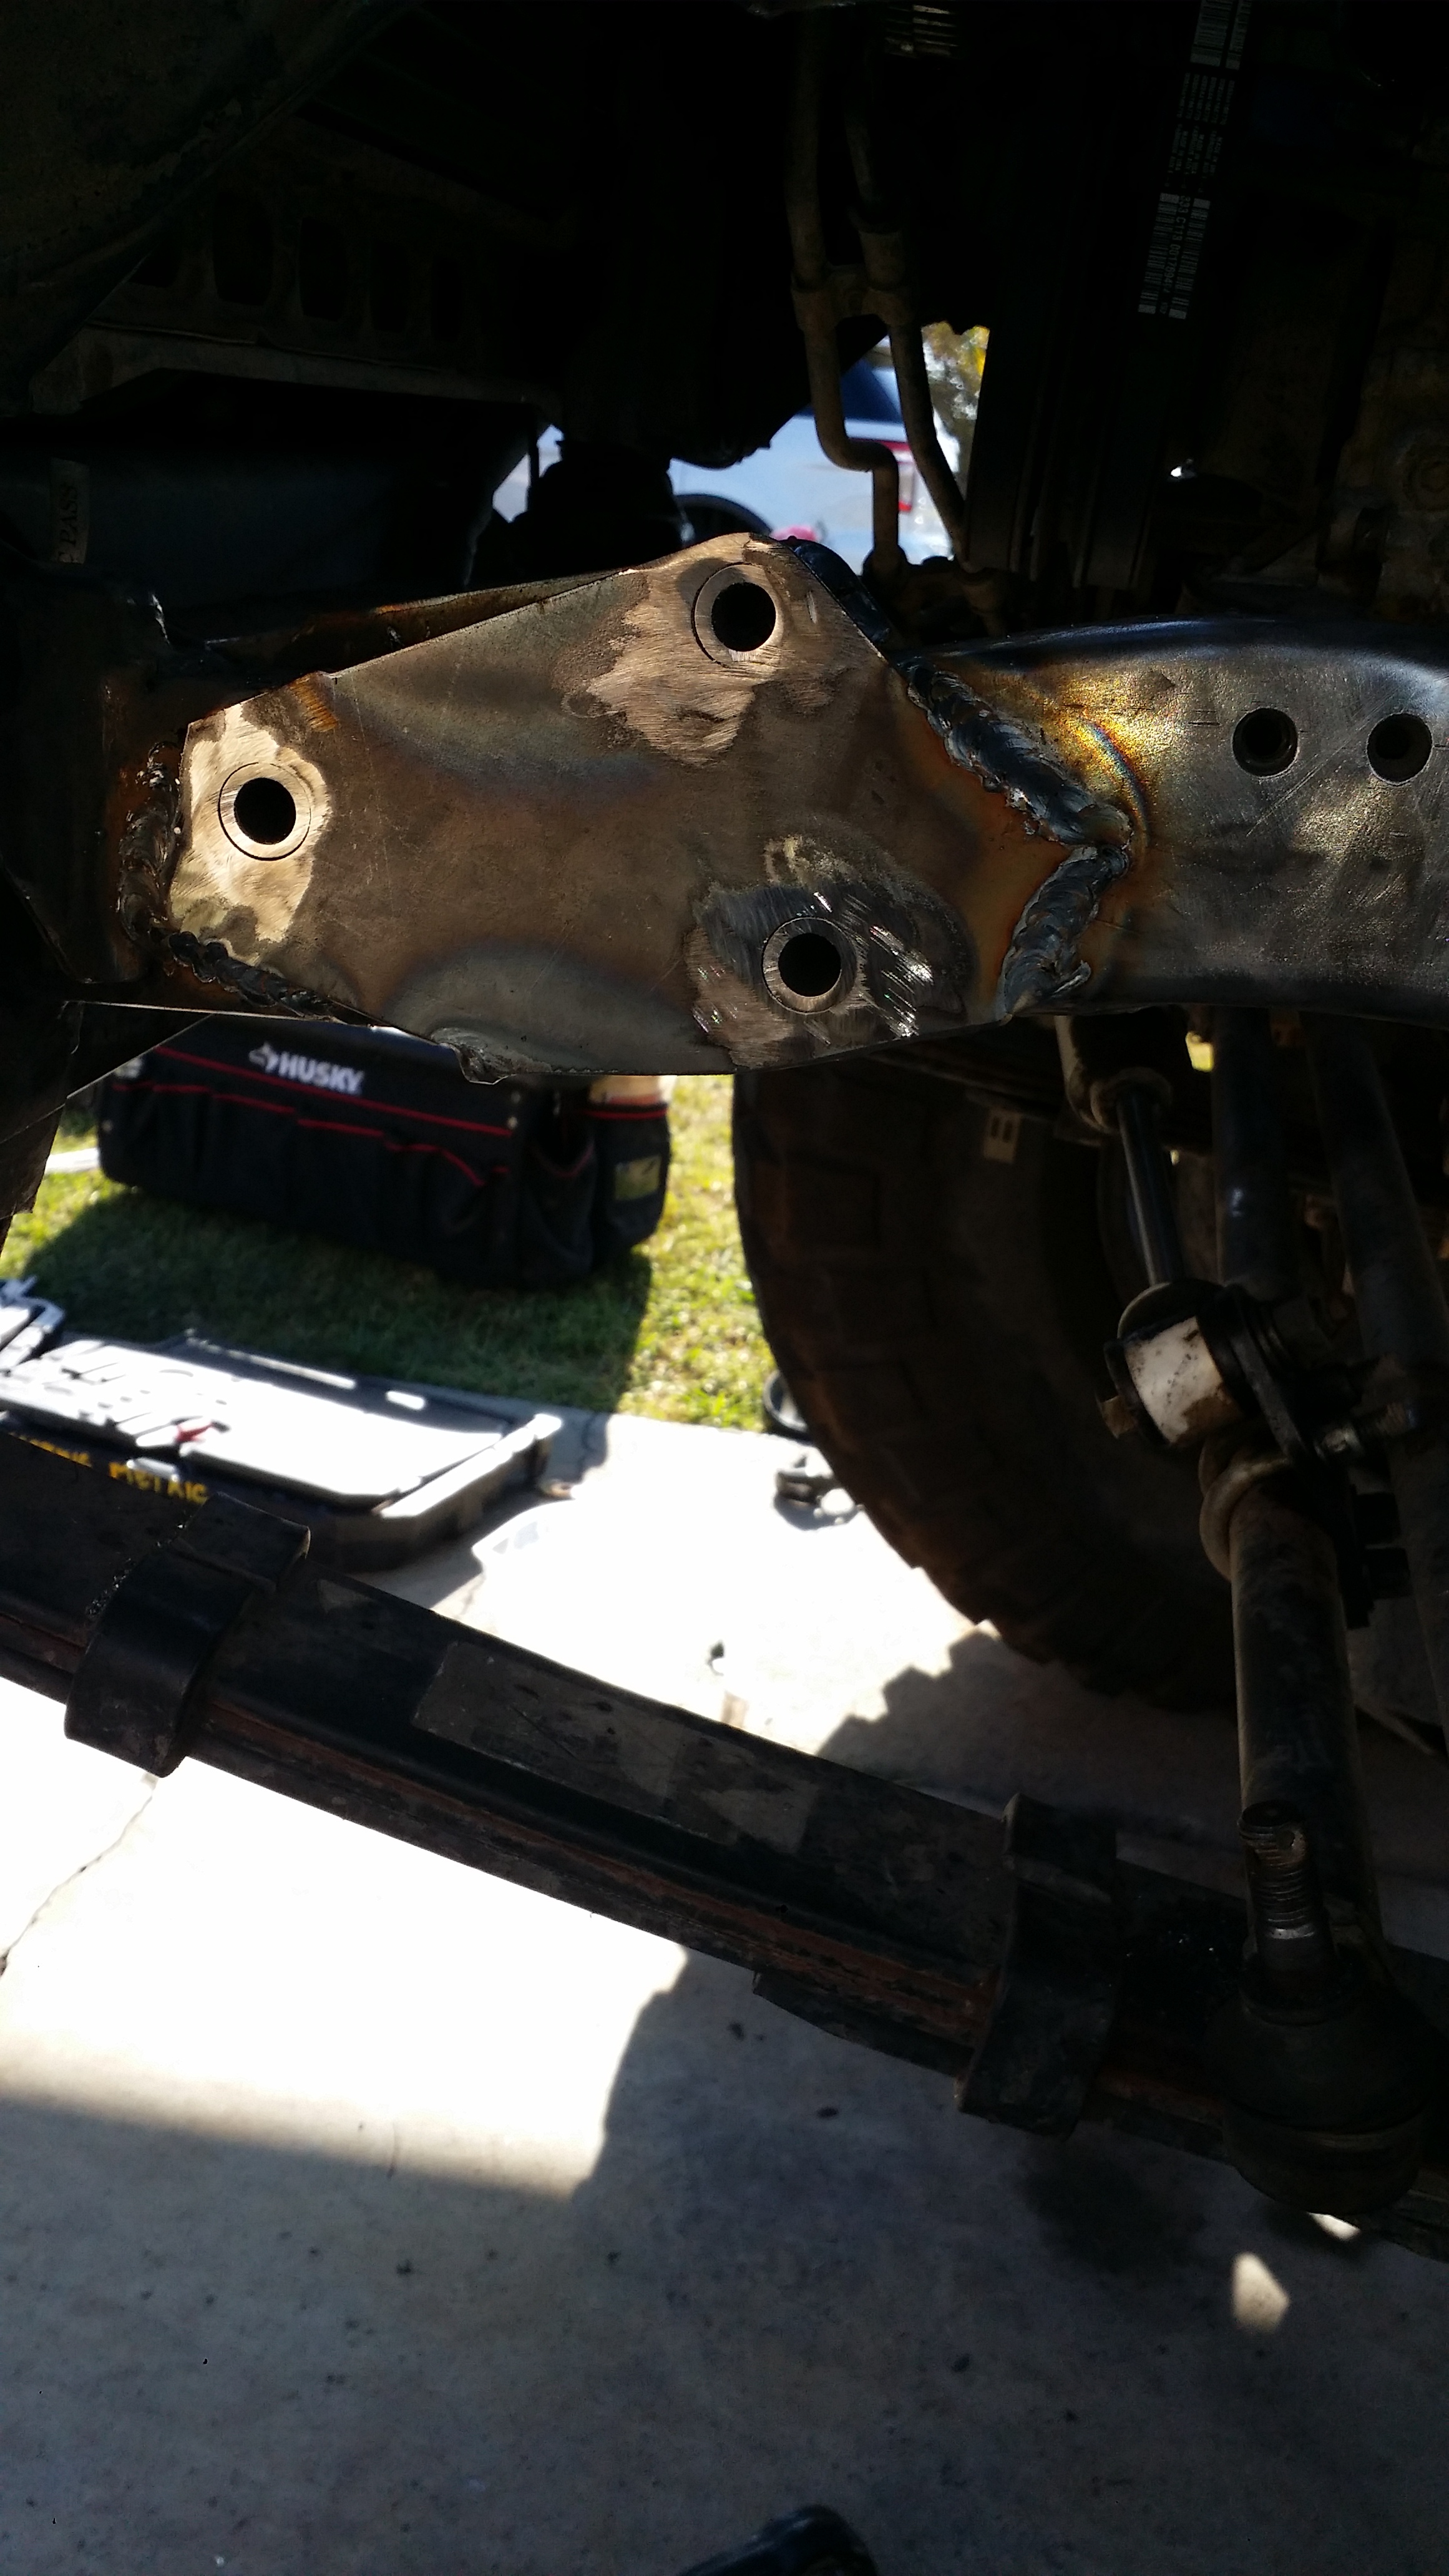
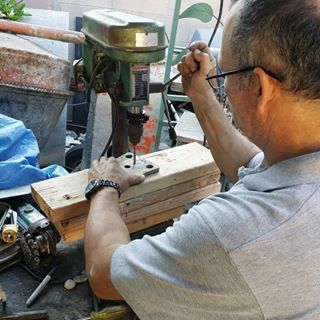
And as you can tell this is not safe or correct. It turns out we had to drill 1 more hole 1 inch over to accomodate that axle shift toward the rear more too. So my dad and i pulled out the drill press and made a new hole
here is the fixed job
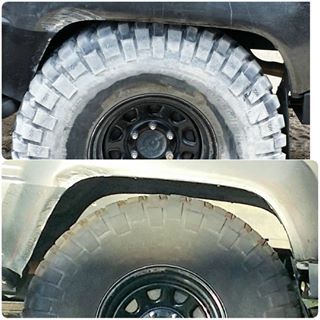
Just a before and after comparison. The top is a picture from my recent Big Bear trip when flexed out. You can clearly see where it was rubbing. The passenger side was way worse to the point it tore off chunks of tire tred off my new 35" BFG KM2's. The bottom is after moving the axle back 1". It seems to have centered out pretty well.
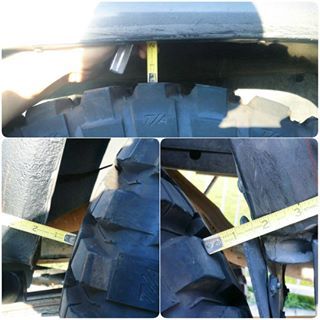
On the front portion where I would rub all the time I was measuring 1.5" away from the quart panel, 1.5" away from the rear quarter panel and 2 inches away on the top side. This ended up working out pretty well
So in order to fix the issue i went with a Trailgear Steering box reinforcement kit. By using this not only do i heavily reinforce the frame where it mounts but i was also able to relocate the steering box further toward my radiator and slightly upward. By doing this i now avoid hitting my 2 rods together on bumps (they would scratch every now and then) and the steering stabilizer bolts that mount it to the top rod will not come close to my 3vze oil pan anymore. So this kit fixed alot of issues that i had. and i find it was definitely worth them money. Not only did i relocate the box. but i also installed the flat pitman arm which brought up that top rod about 1 inch. its not alot but it makes a heck of a difference!
heres the pix.
Here you can see that the top gusset welds literally broke. there was nothing holding it in place. the bottom left one you can see a small circle around the bolt head that was pushing and pulling into the frame every time i turned left and right. The only bold that was holding everything together was the very front bolt pictured on the right.

Dad welded on the plates after i had everything ready for him

Putting the girl to work. Had her hold the steering box a few times and i let her do what she likes to do; paint!

Like always making the day into a photoshoot lol shes so goofy.

All Installed and nicely painted
That Pitman arm clears that frame by about 3/8ths of an inch. pretty close. but perfect!

----------------------------------------------------------------------------------------------------------------------------------------------------
EDIT:
ALSO after that big bear trip i realized that i had to get my rear axle relocated 1" back more because the larger tires rubbed way too much toward the front side. so moving it back one inch would correct this issue. (which i still get some rubbing but nowhere near as much anymore.
At first i thought it was going to be as easy as just moving the leaf springs over 1 inch on the AllPro offroad triple drilled spring perches that are welded on the axle. BUT NO! leaving it like that left it looking like this

And as you can tell this is not safe or correct. It turns out we had to drill 1 more hole 1 inch over to accomodate that axle shift toward the rear more too. So my dad and i pulled out the drill press and made a new hole

here is the fixed job

Just a before and after comparison. The top is a picture from my recent Big Bear trip when flexed out. You can clearly see where it was rubbing. The passenger side was way worse to the point it tore off chunks of tire tred off my new 35" BFG KM2's. The bottom is after moving the axle back 1". It seems to have centered out pretty well.

On the front portion where I would rub all the time I was measuring 1.5" away from the quart panel, 1.5" away from the rear quarter panel and 2 inches away on the top side. This ended up working out pretty well

Last edited by Redeth005; Sep 22, 2015 at 12:04 AM.
Sep 21, 2015 | 11:56 PM
#2612
Thread Starter
Registered User
Joined: Apr 2012
Posts: 2,817
Likes: 2
From: Los Angeles CA
After fixing the steering box issue. It allowed for more front end travel. So i cut off the bump stop towers and left the rubber bump stops in place. After i did this i quickly realized that i was going to have an issue with the shocks hitting. and at this point i had already been using Marks 12" bilstein shocks in the front because my 12" Walker evans racing shocks are almost 2 more inches longer; the cylinder housing is longer i should say not the shaft.
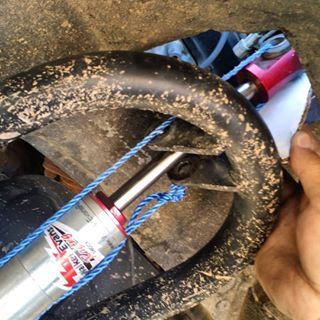
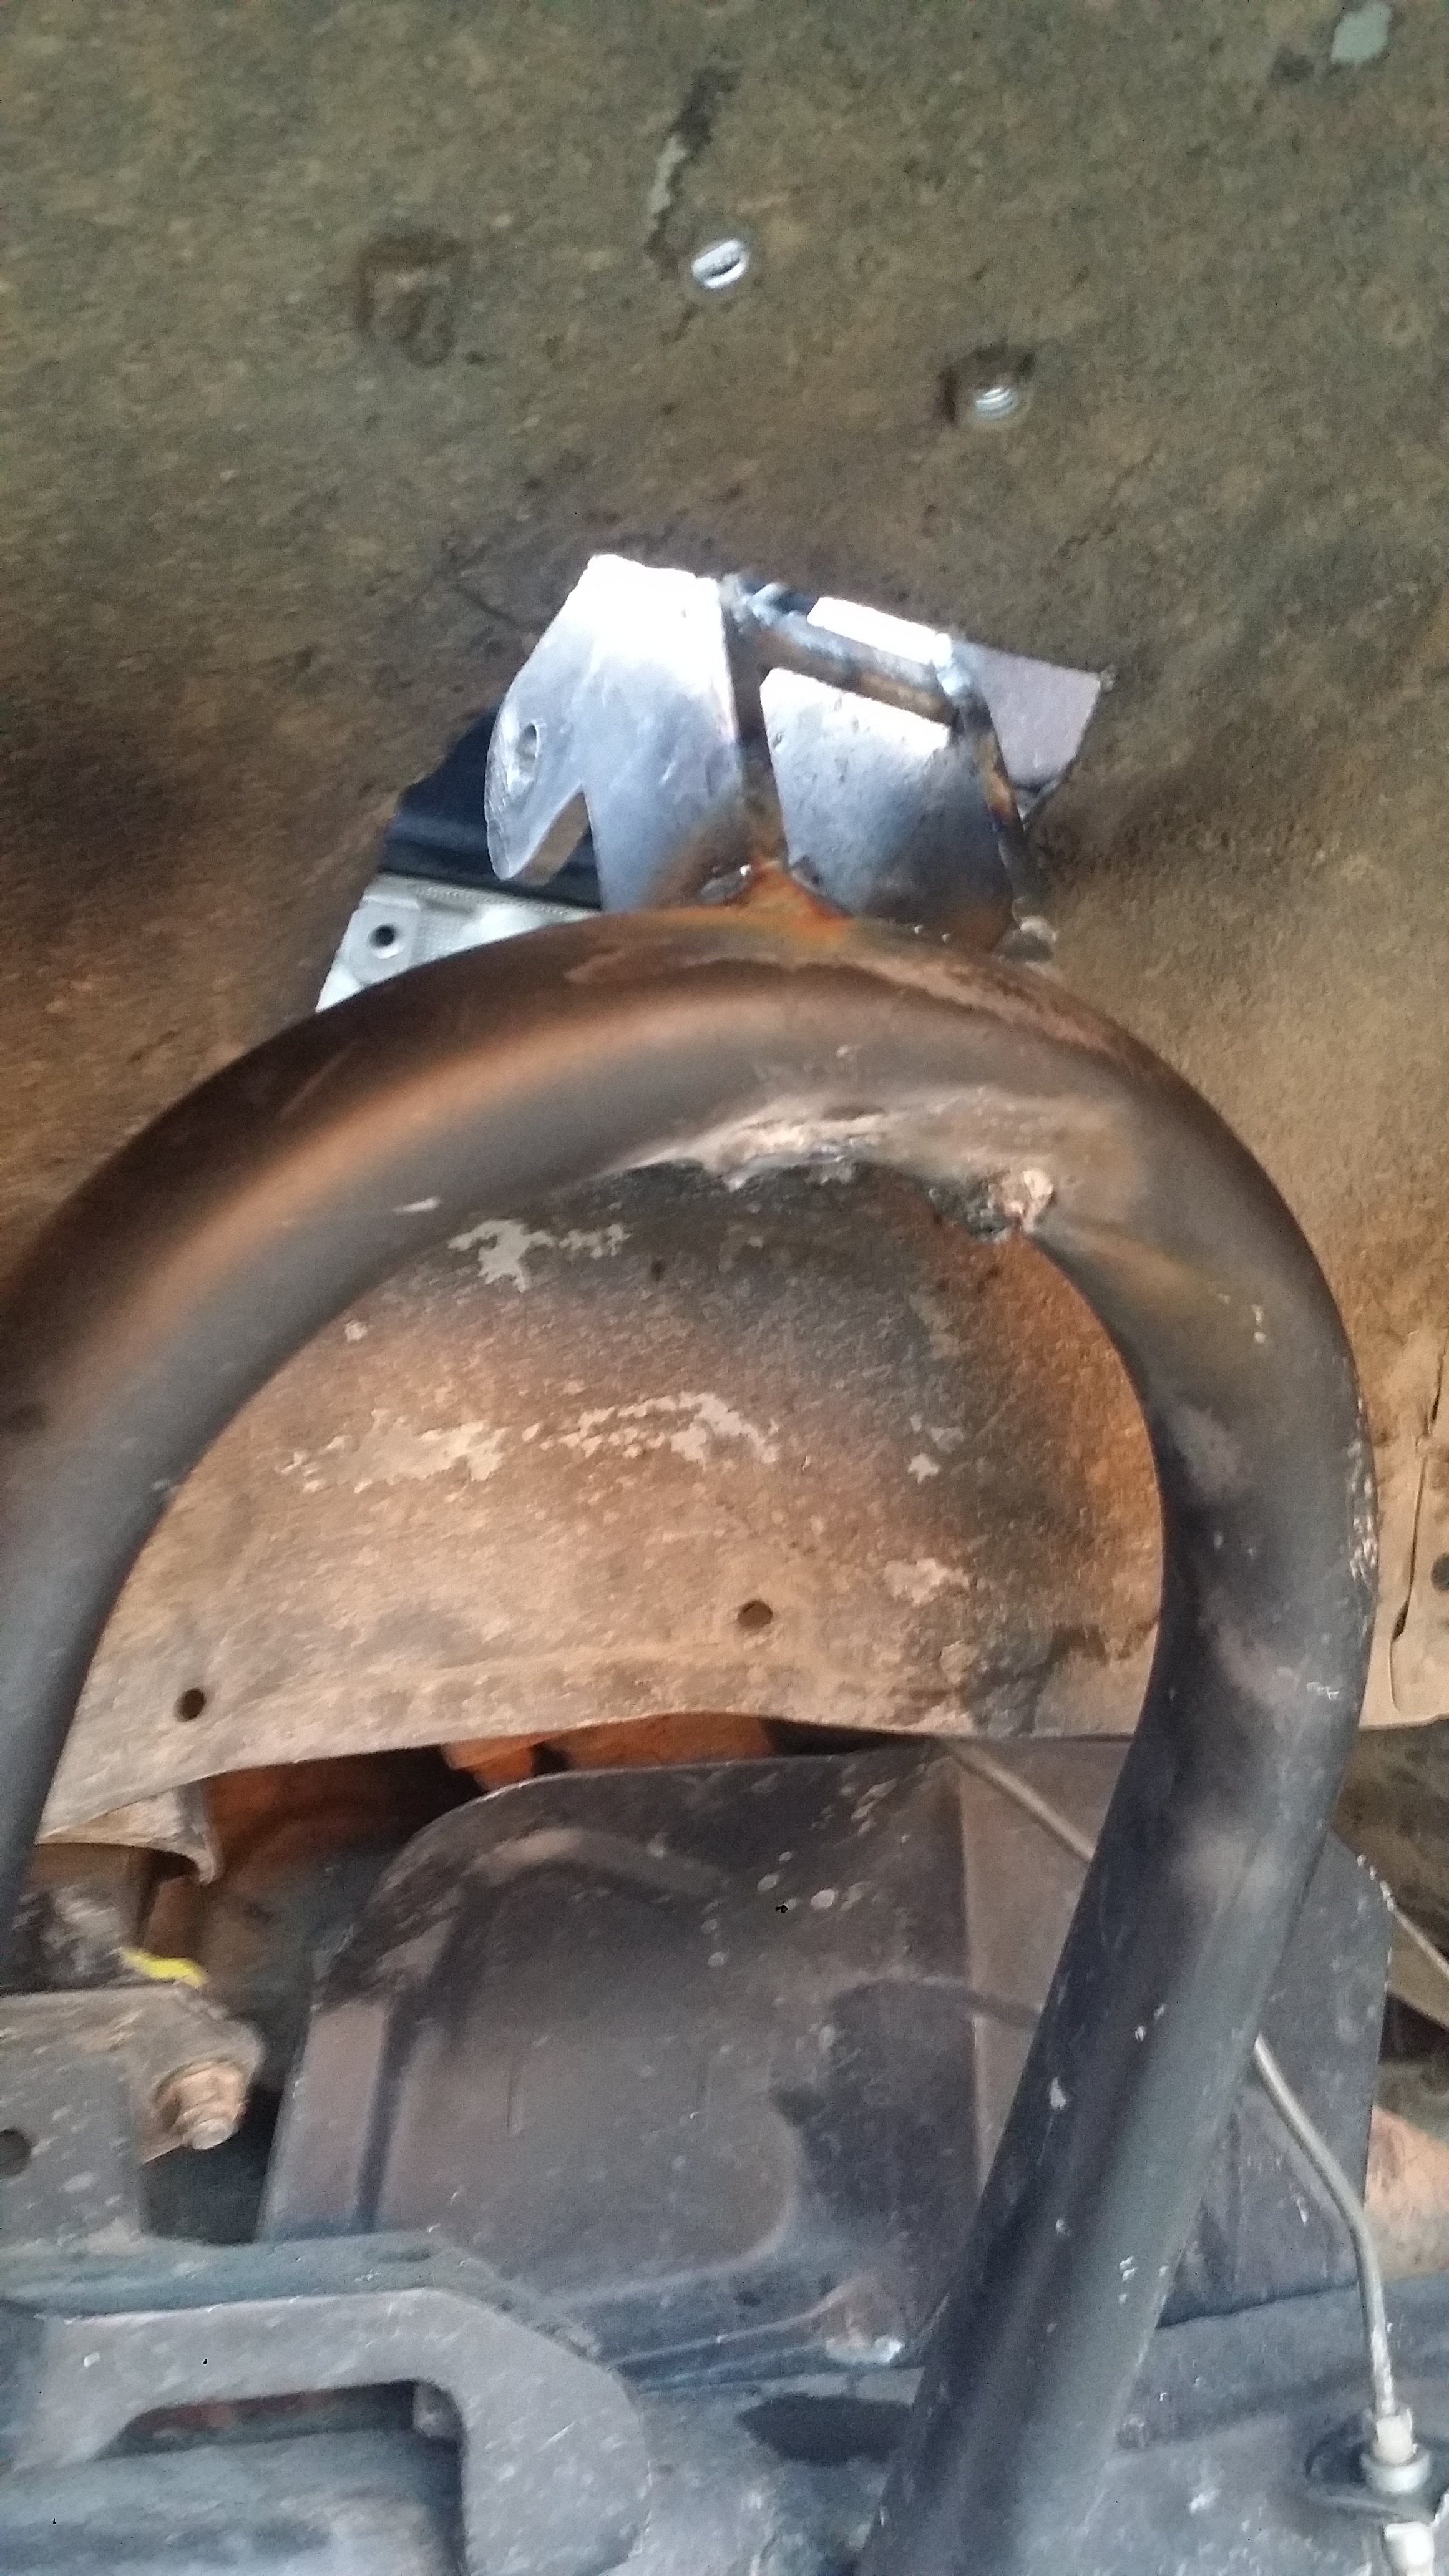
Anyway so i wanted to give mark his shocks back and i had the free time so why not make my shocks work out. The only problem was that if i was to install them they would bottom out because they only had 2" exposed. HOw to solve the problem? i had to cut the inner wheelwells cut off the existing shock mounts and and make new extended shock mounts to weld on the Allpro shock hoops.
Here i had begun to cut
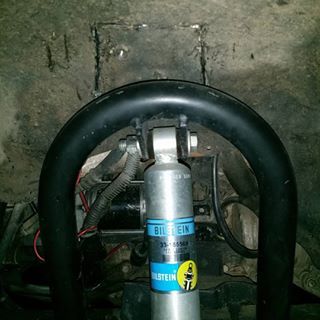
afterward i tied the shock to keep it at 5.5 inches which is where i wanted it to be.
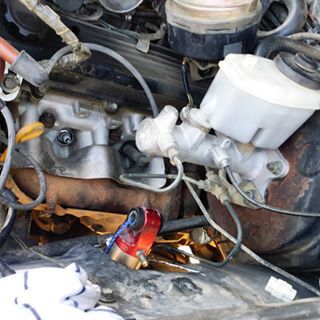
Engine bay shot of the same shock from the above picture.
At this point i just measured and made a carboard cut of what i wanted my shock mounts to look like and how they would mount onto the shock hoops.
Here is my dad cutting the pieces i outlined for the shock mount extensions
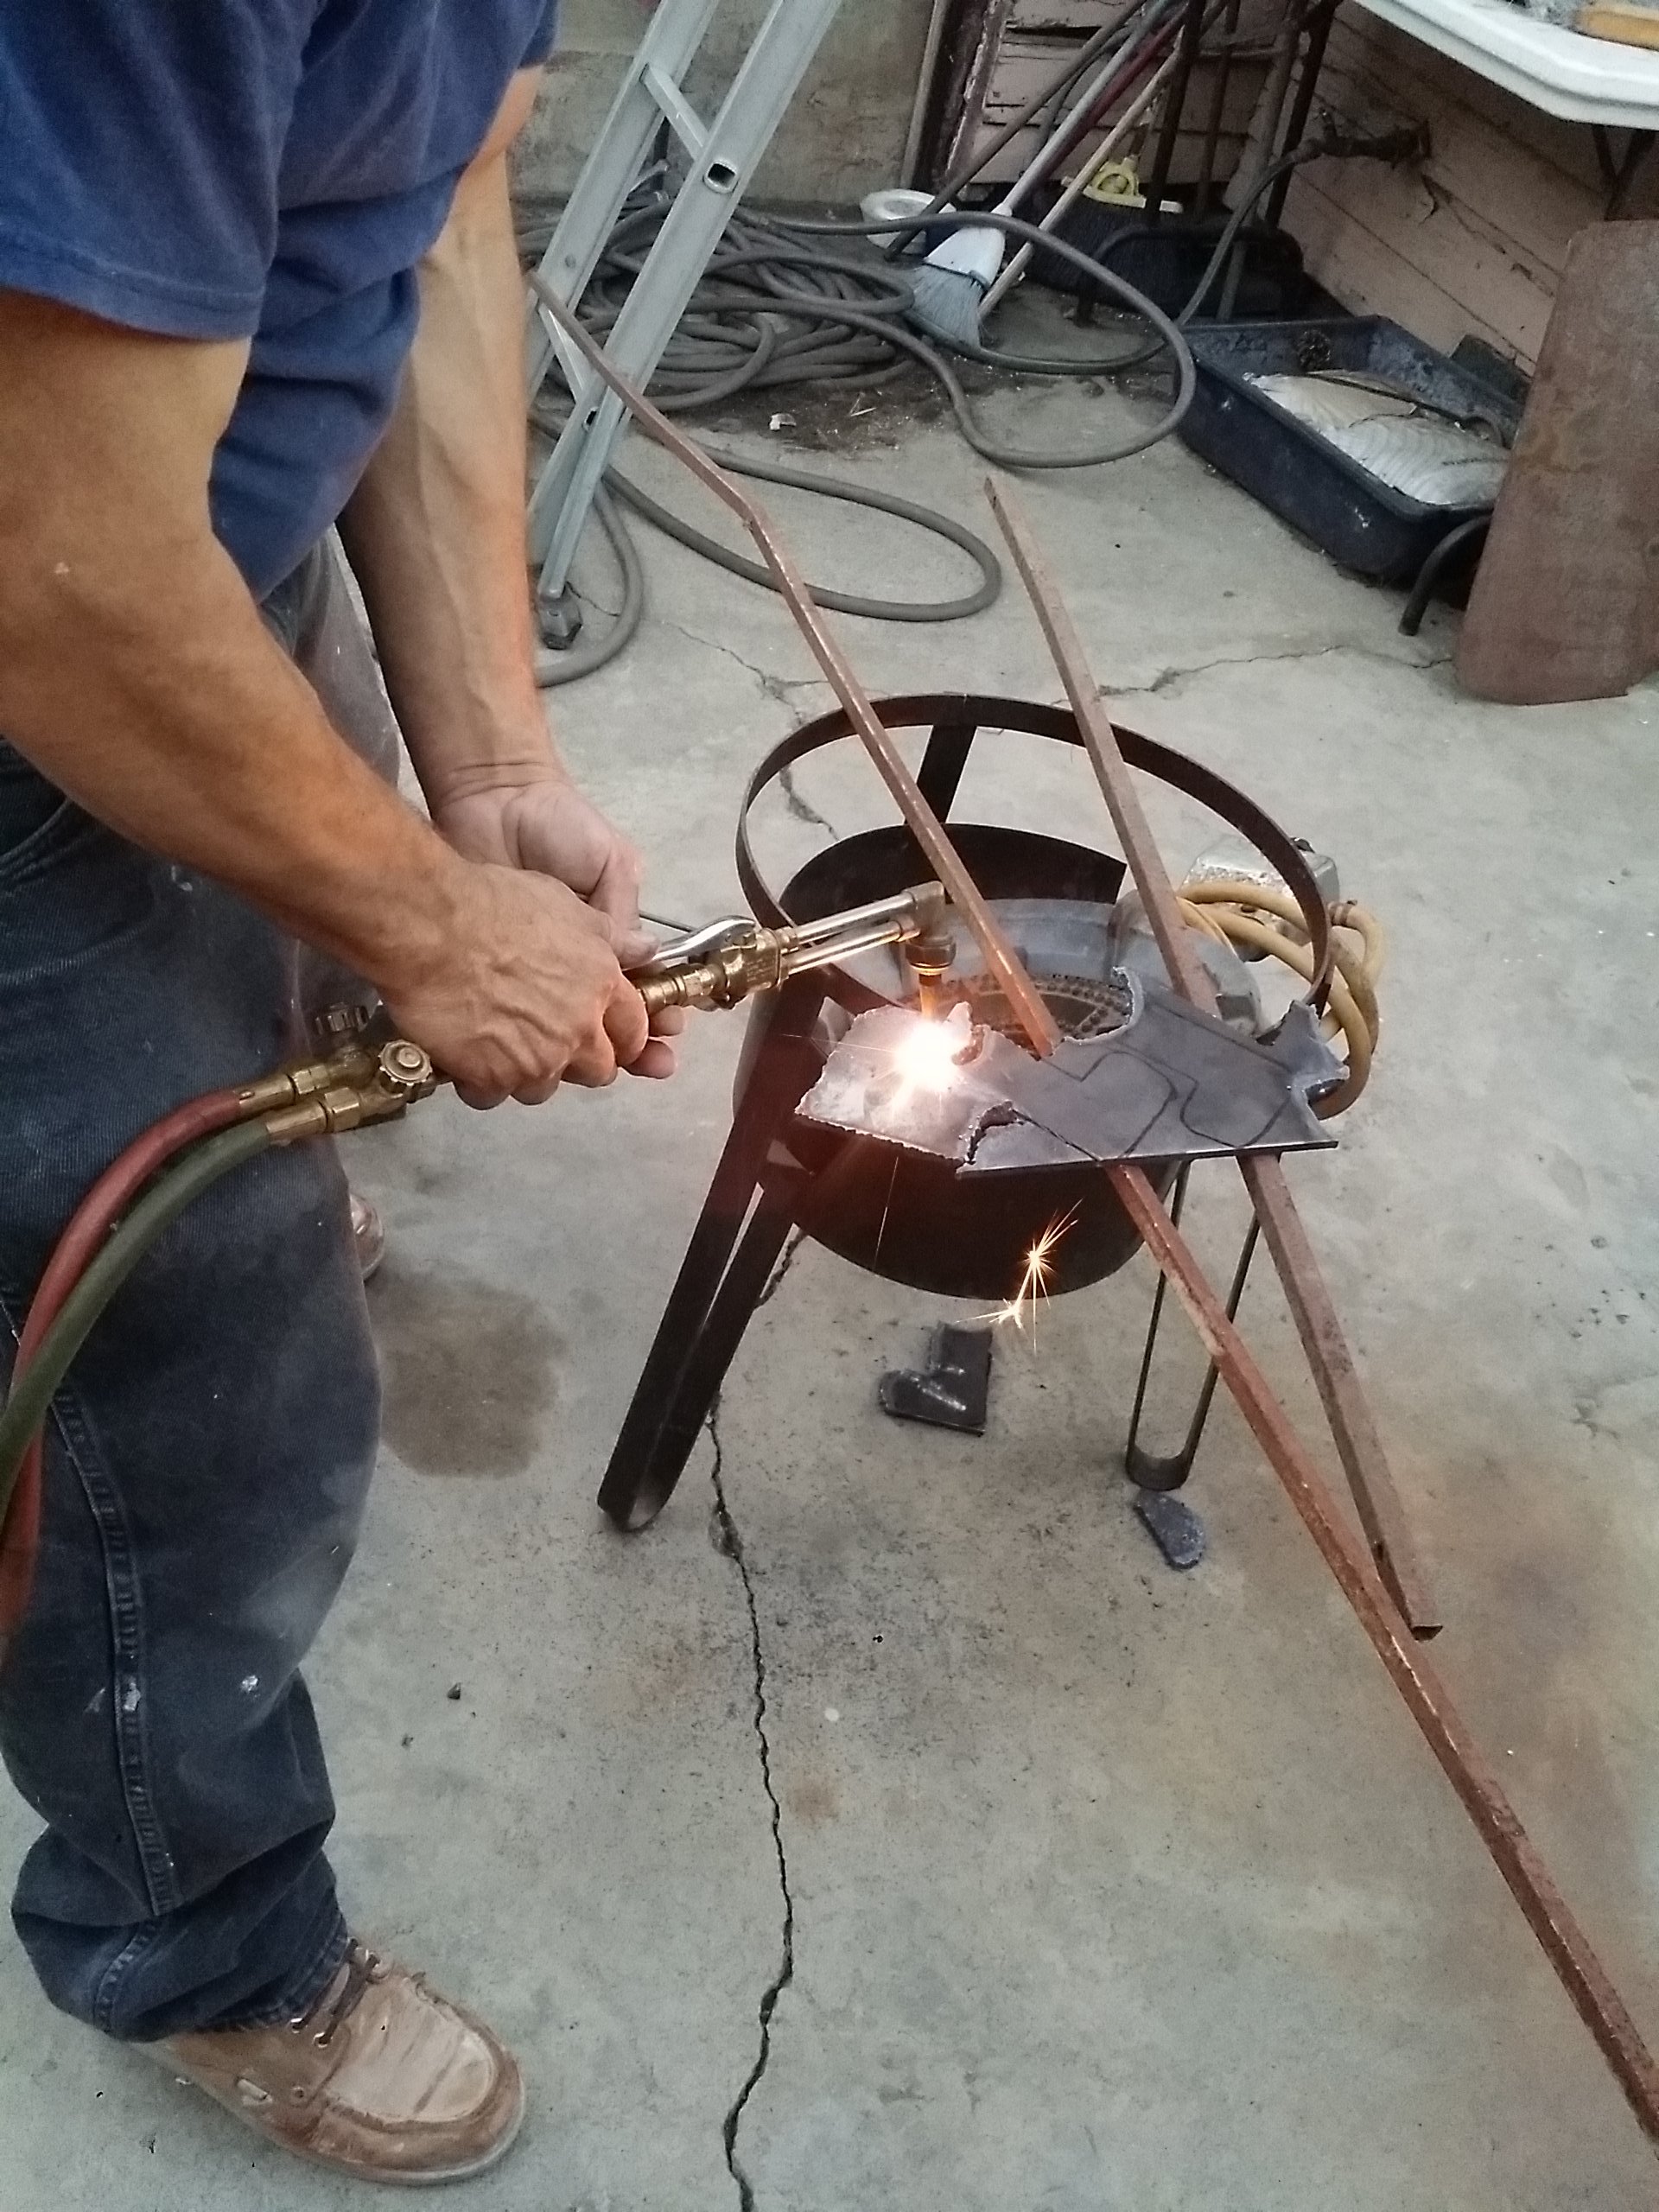
I then placed a small piece of metal to give the correct 1.5" spaceing to be able to fit the shock in place nicely without it getting misaligned on the bolt holes.
Dad cut off the existing allpro shock mounts that sat WAY TOO LOW. and welded on the new ones that i made.
Bottom View of the passenger side

top view of the passenger side
Top view driver
Bottom wheelwell driver side
primed and painted.
BAM! pure beefiness!

I know it looks liek there is too much of the shock exposed but rest assured that the way i left it is actually perfect! IT will not bottom out and it will not max out at full droop either because the leaf springs wont bend down that far down. In the end i left the shocks at 6" out of the 12" exposed. YEA YEA YEA! i know it is supposed to be 1/3rd of the shock exposed but this is just what works for my build. I'm telling ya. I'll show you pix of the flexing in the next post....
Anyway so i wanted to give mark his shocks back and i had the free time so why not make my shocks work out. The only problem was that if i was to install them they would bottom out because they only had 2" exposed. HOw to solve the problem? i had to cut the inner wheelwells cut off the existing shock mounts and and make new extended shock mounts to weld on the Allpro shock hoops.
Here i had begun to cut

afterward i tied the shock to keep it at 5.5 inches which is where i wanted it to be.

Engine bay shot of the same shock from the above picture.
At this point i just measured and made a carboard cut of what i wanted my shock mounts to look like and how they would mount onto the shock hoops.

Here is my dad cutting the pieces i outlined for the shock mount extensions

I then placed a small piece of metal to give the correct 1.5" spaceing to be able to fit the shock in place nicely without it getting misaligned on the bolt holes.

Dad cut off the existing allpro shock mounts that sat WAY TOO LOW. and welded on the new ones that i made.
Bottom View of the passenger side

top view of the passenger side

Top view driver

Bottom wheelwell driver side

primed and painted.

BAM! pure beefiness!

I know it looks liek there is too much of the shock exposed but rest assured that the way i left it is actually perfect! IT will not bottom out and it will not max out at full droop either because the leaf springs wont bend down that far down. In the end i left the shocks at 6" out of the 12" exposed. YEA YEA YEA! i know it is supposed to be 1/3rd of the shock exposed but this is just what works for my build. I'm telling ya. I'll show you pix of the flexing in the next post....
Sep 22, 2015 | 12:18 AM
#2613
Thread Starter
Registered User
Joined: Apr 2012
Posts: 2,817
Likes: 2
From: Los Angeles CA
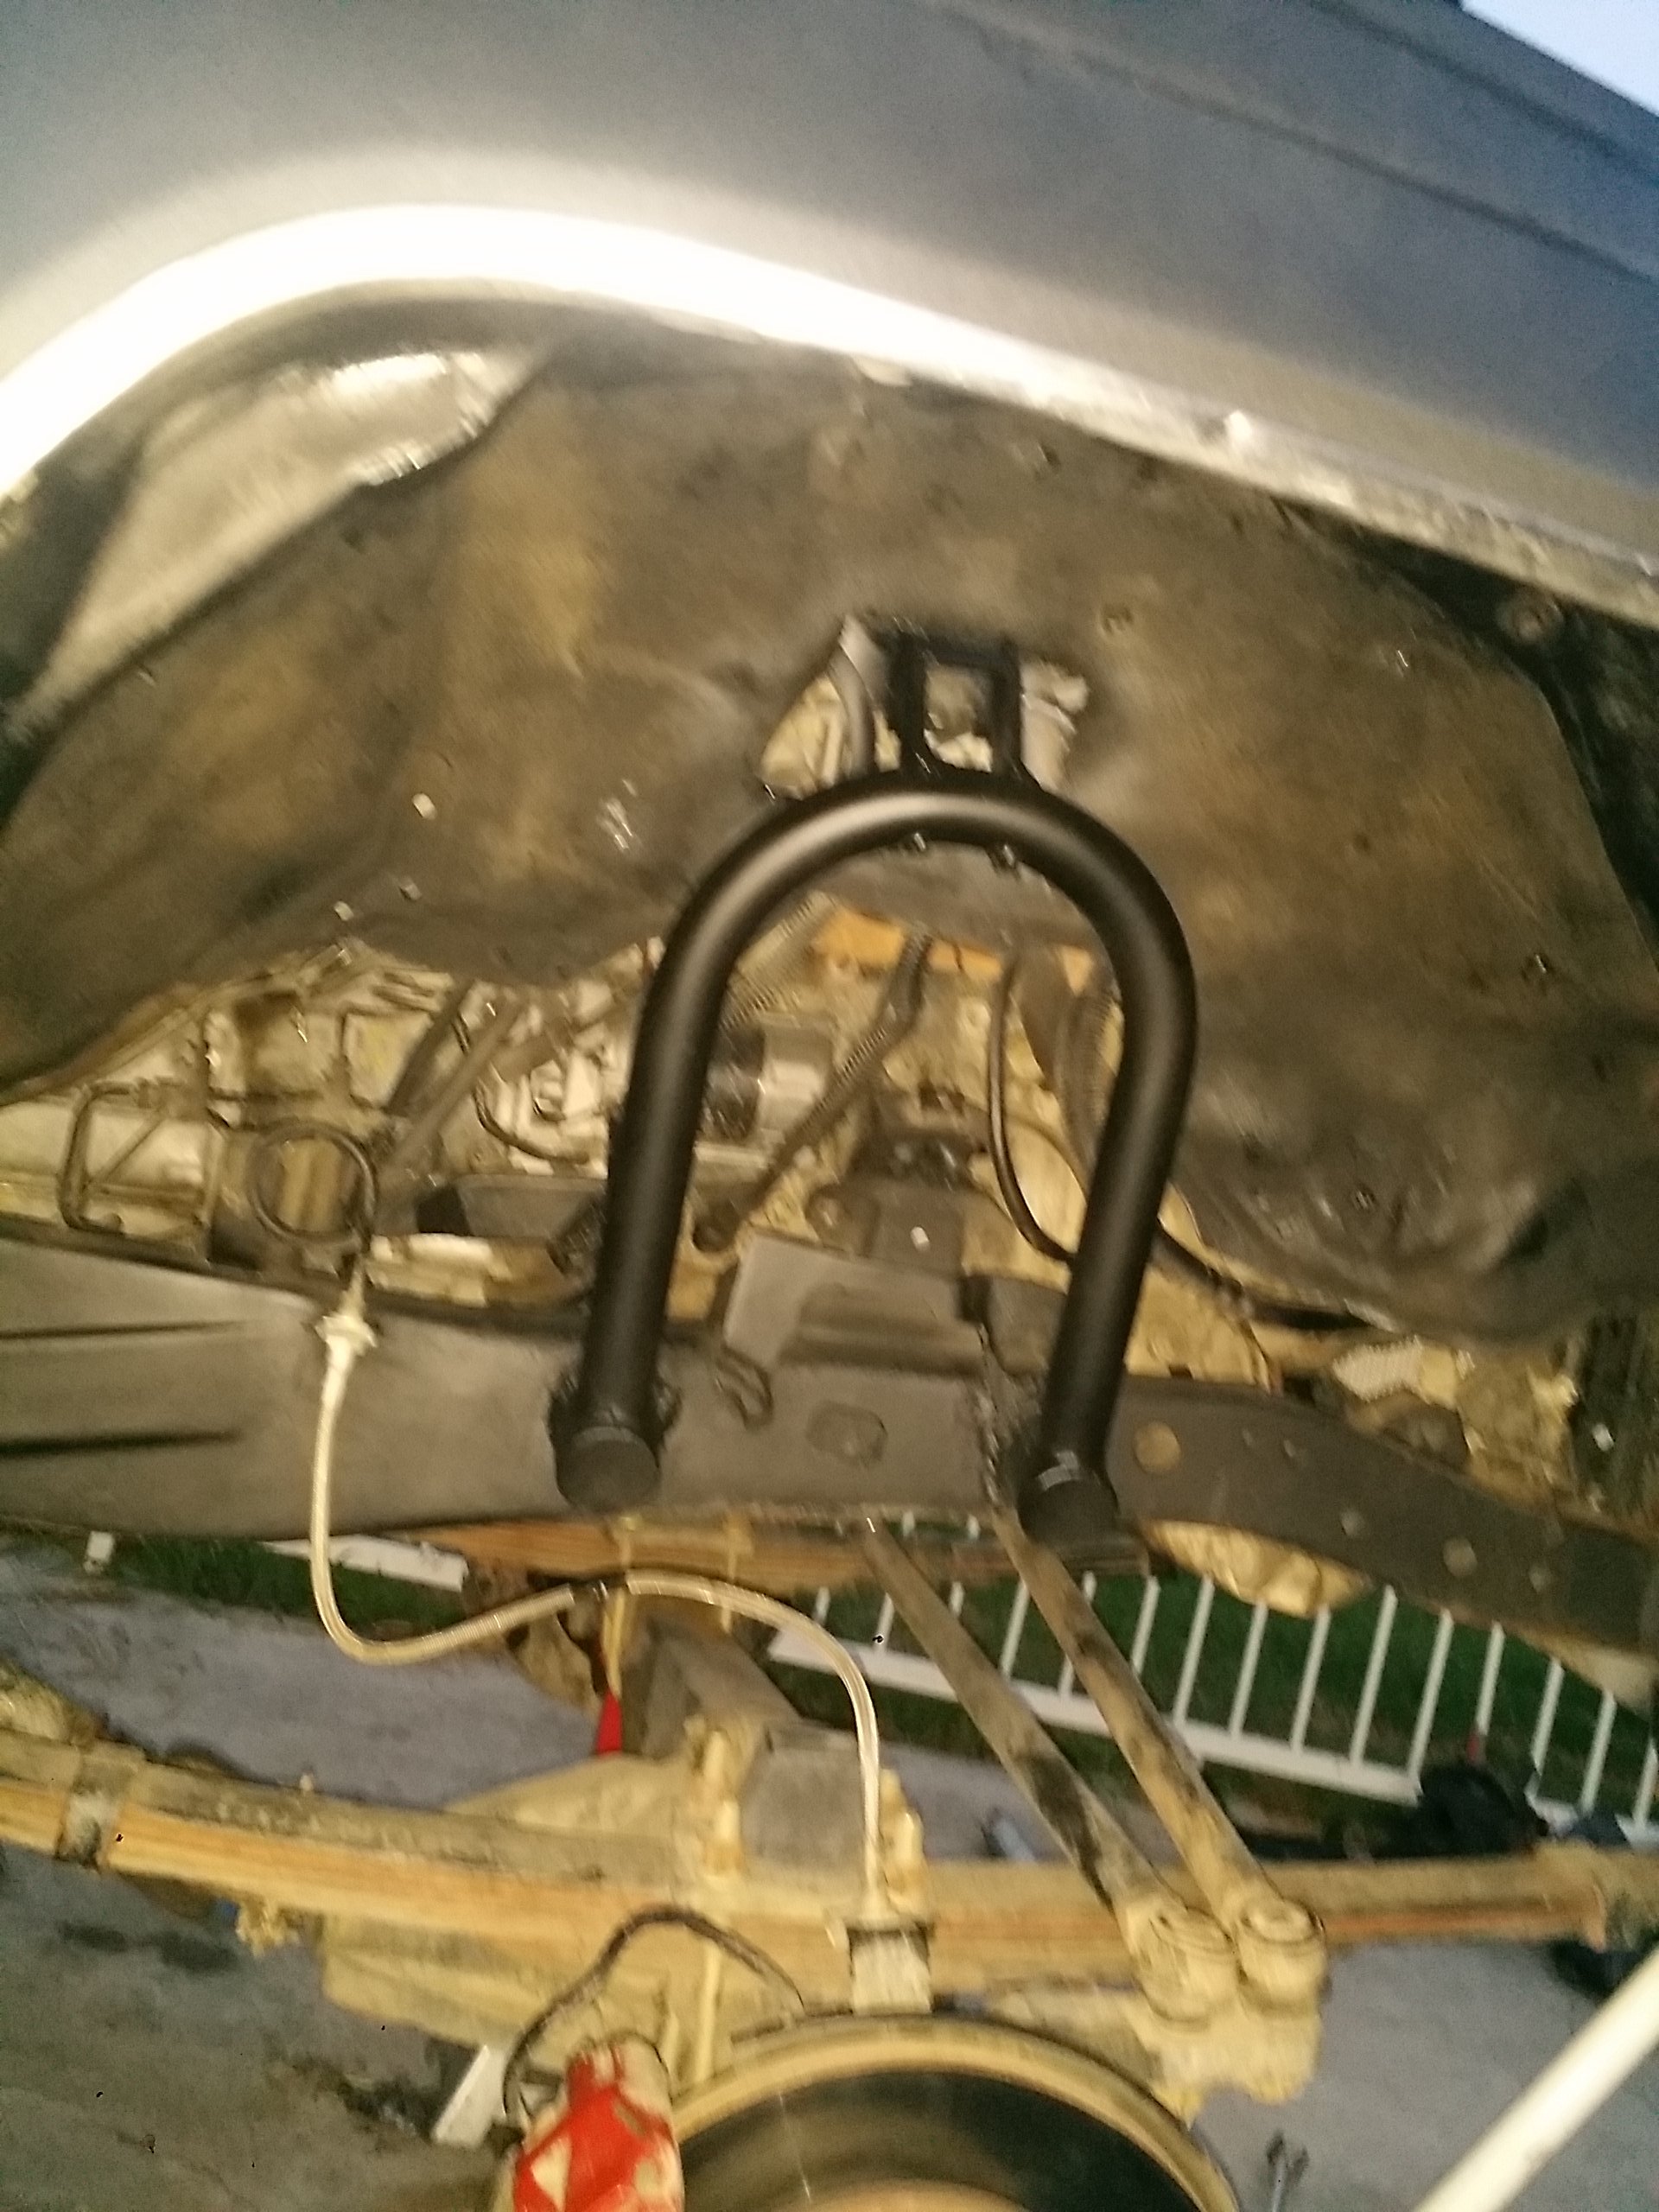
After doing all these miscellaneous mods i had to test it out. So my dog and i went for a hike at Azusa about 2 weeks ago. And on the way back down from the canyon i saw a big rock on one of the turnouts that i just could not resist. So i tested it out. And man these pix pretty much speak for themselves. The 4runner flexes great!
I gotta say they are perfect! The passenger side still had 1.5" before touching the bump stop at full flex. And about 10.5" extended on the driver side. It was really flexed out and it could have gone a little bit more.
The rear passenger side shock only had 6" out of the 10" of shock exposed and the driver shock. Unfortunately the I realized that the driver side bottomed out at this much flex. So now I gotta re adjust the height of where to mount my rear shocks to avoid bottoming out and damaging my rear shocks. Looks like I have to fix that soon i dont want to damage my rear shocks.
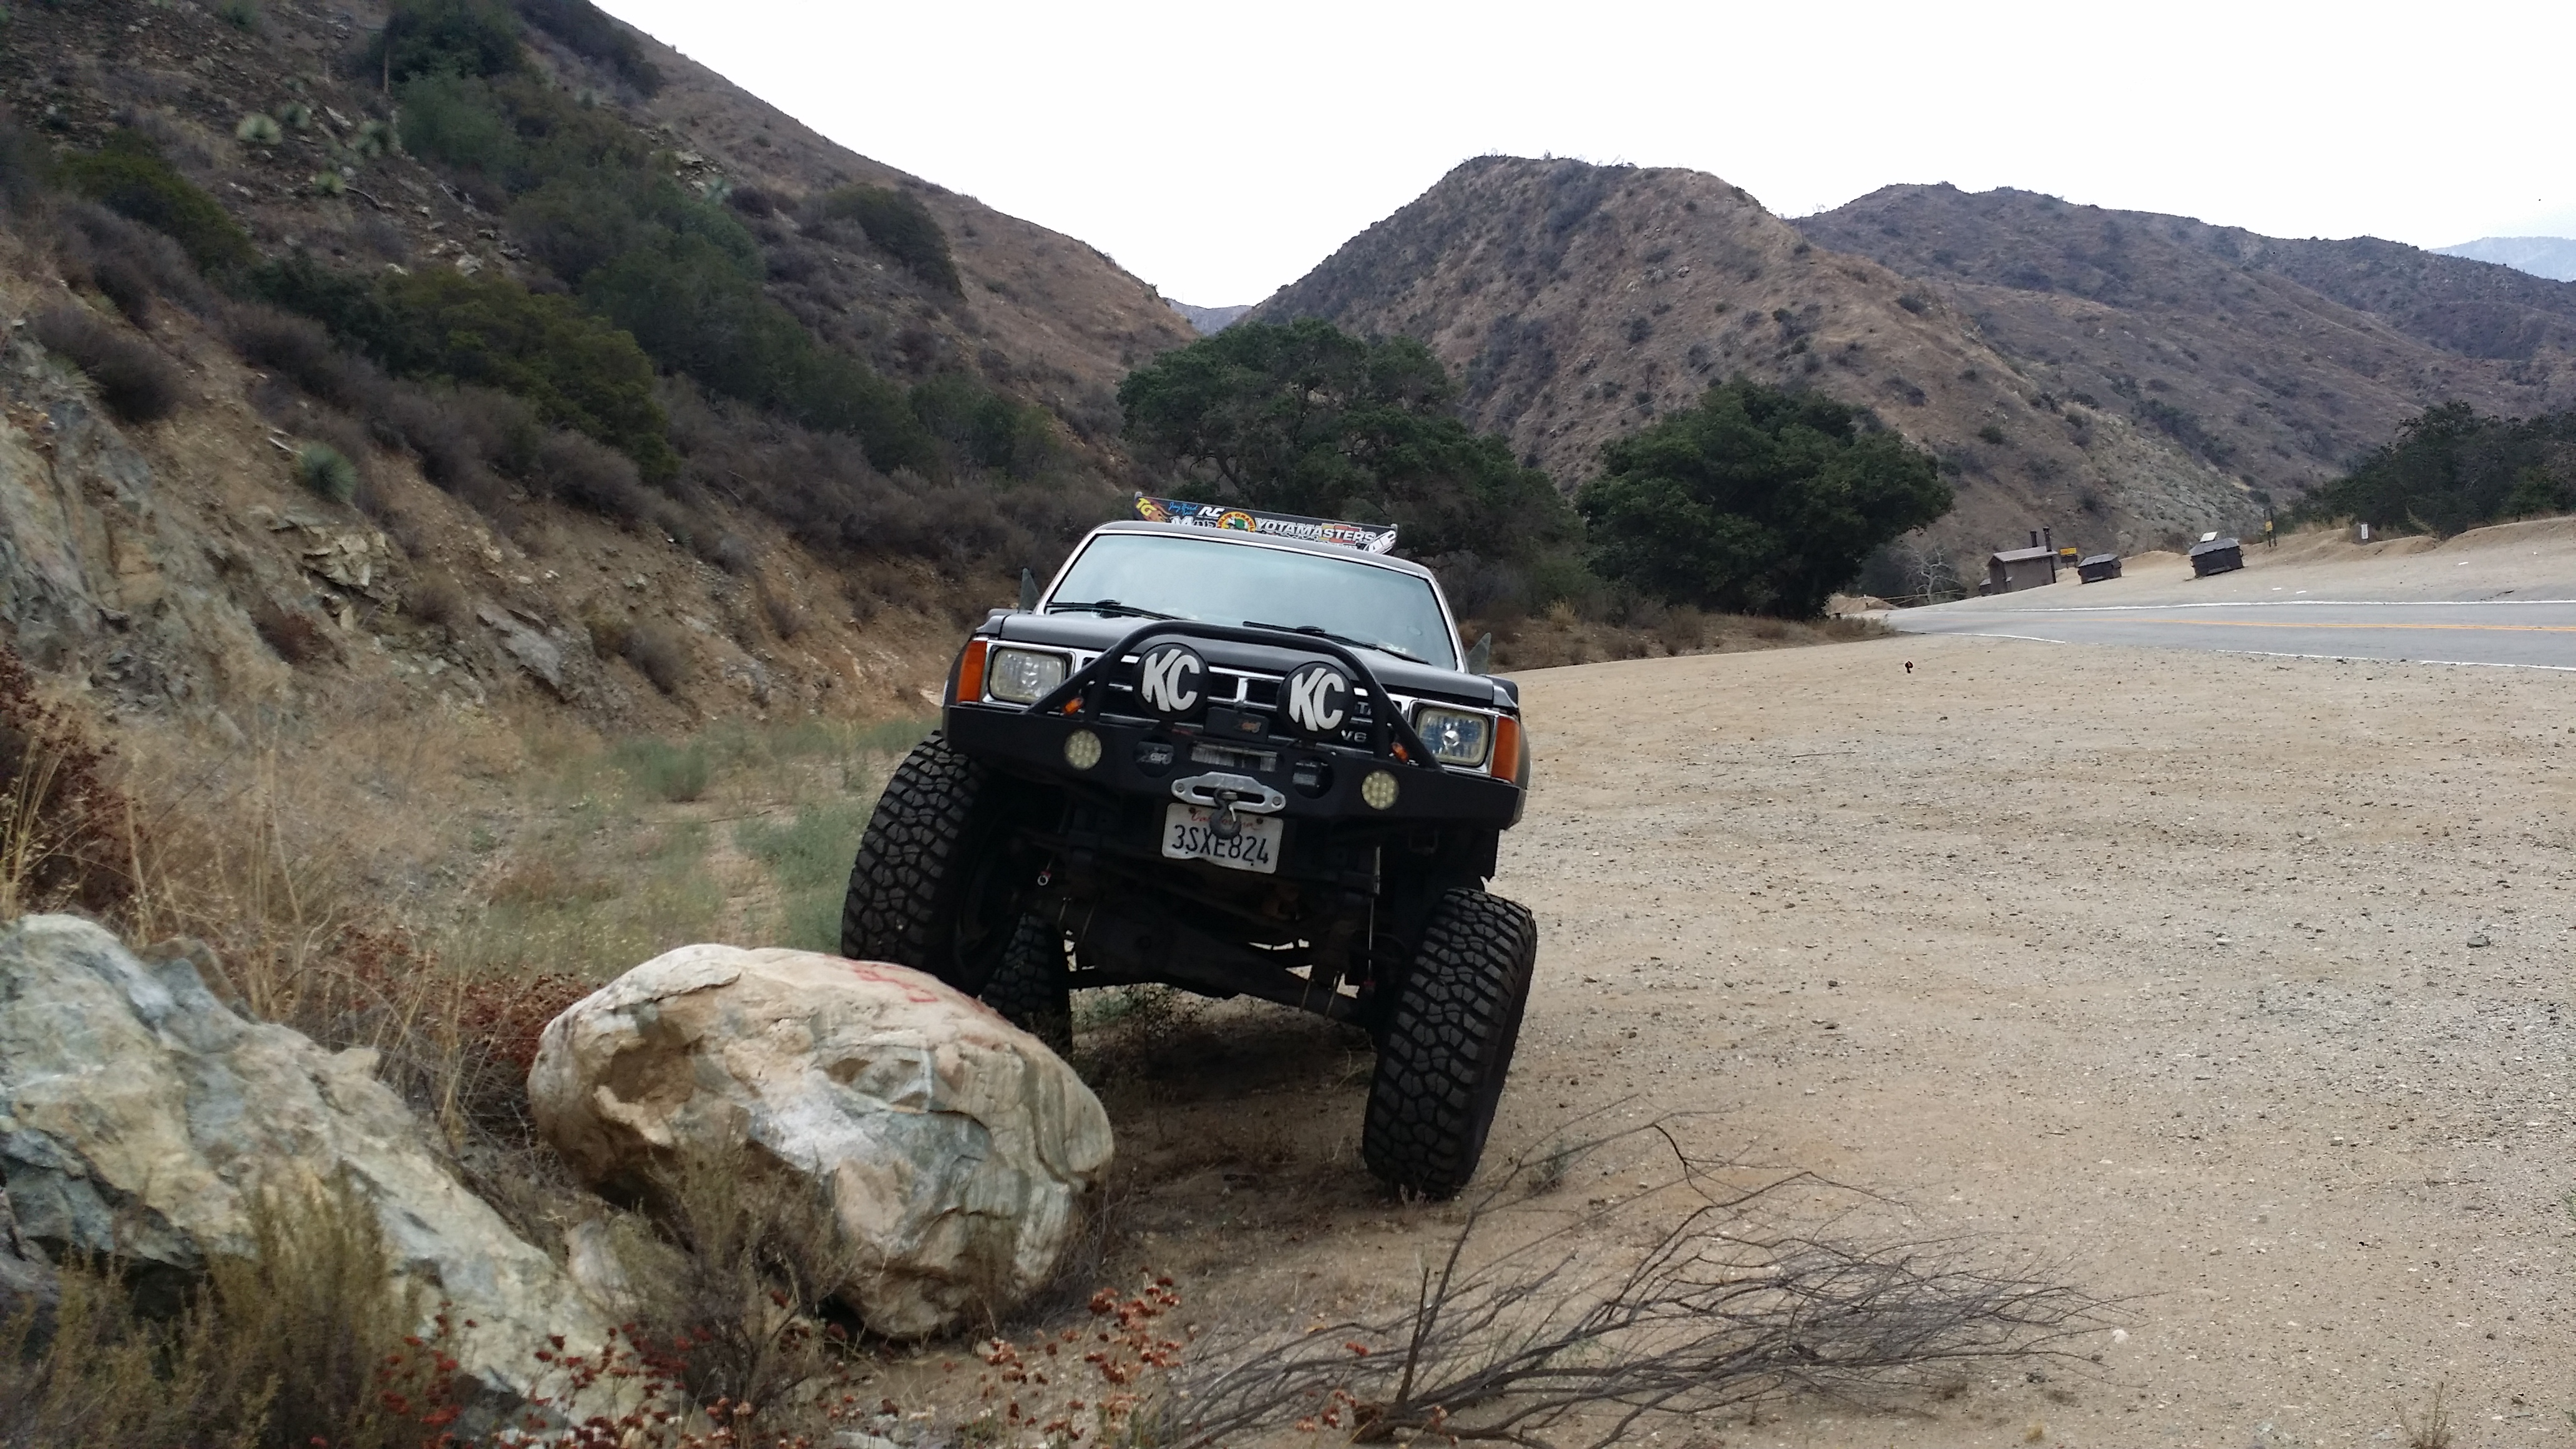
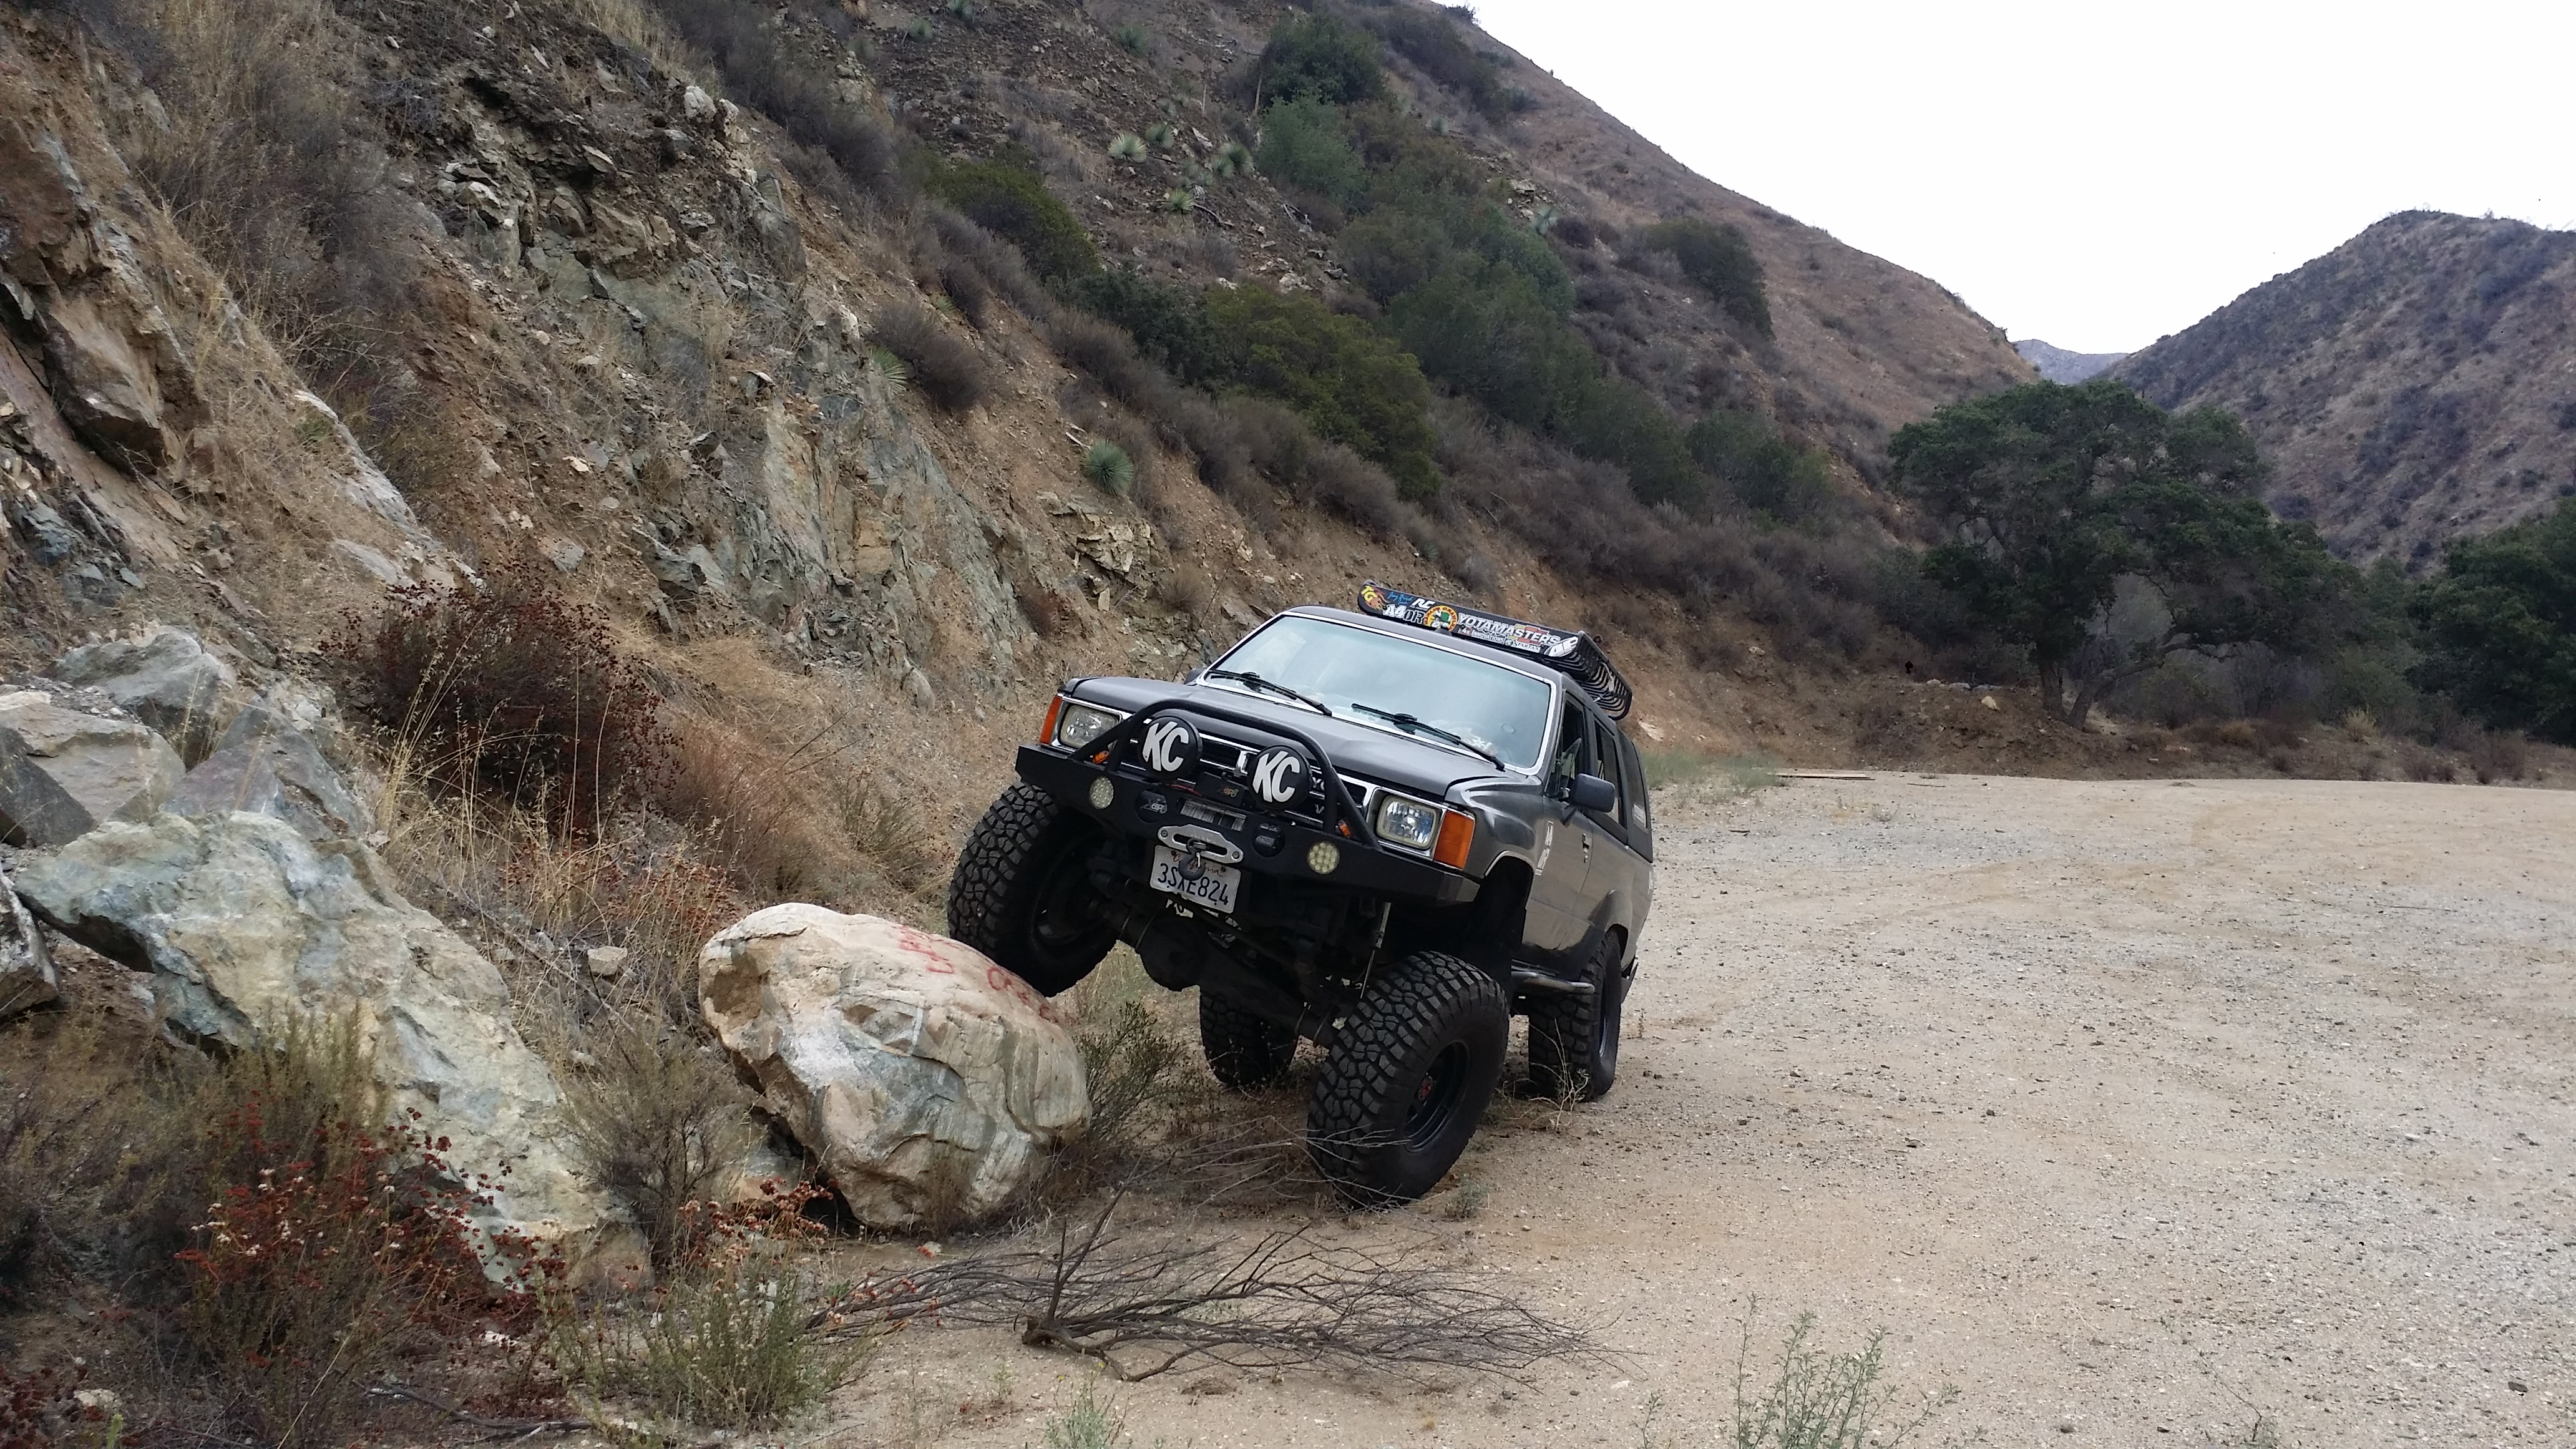
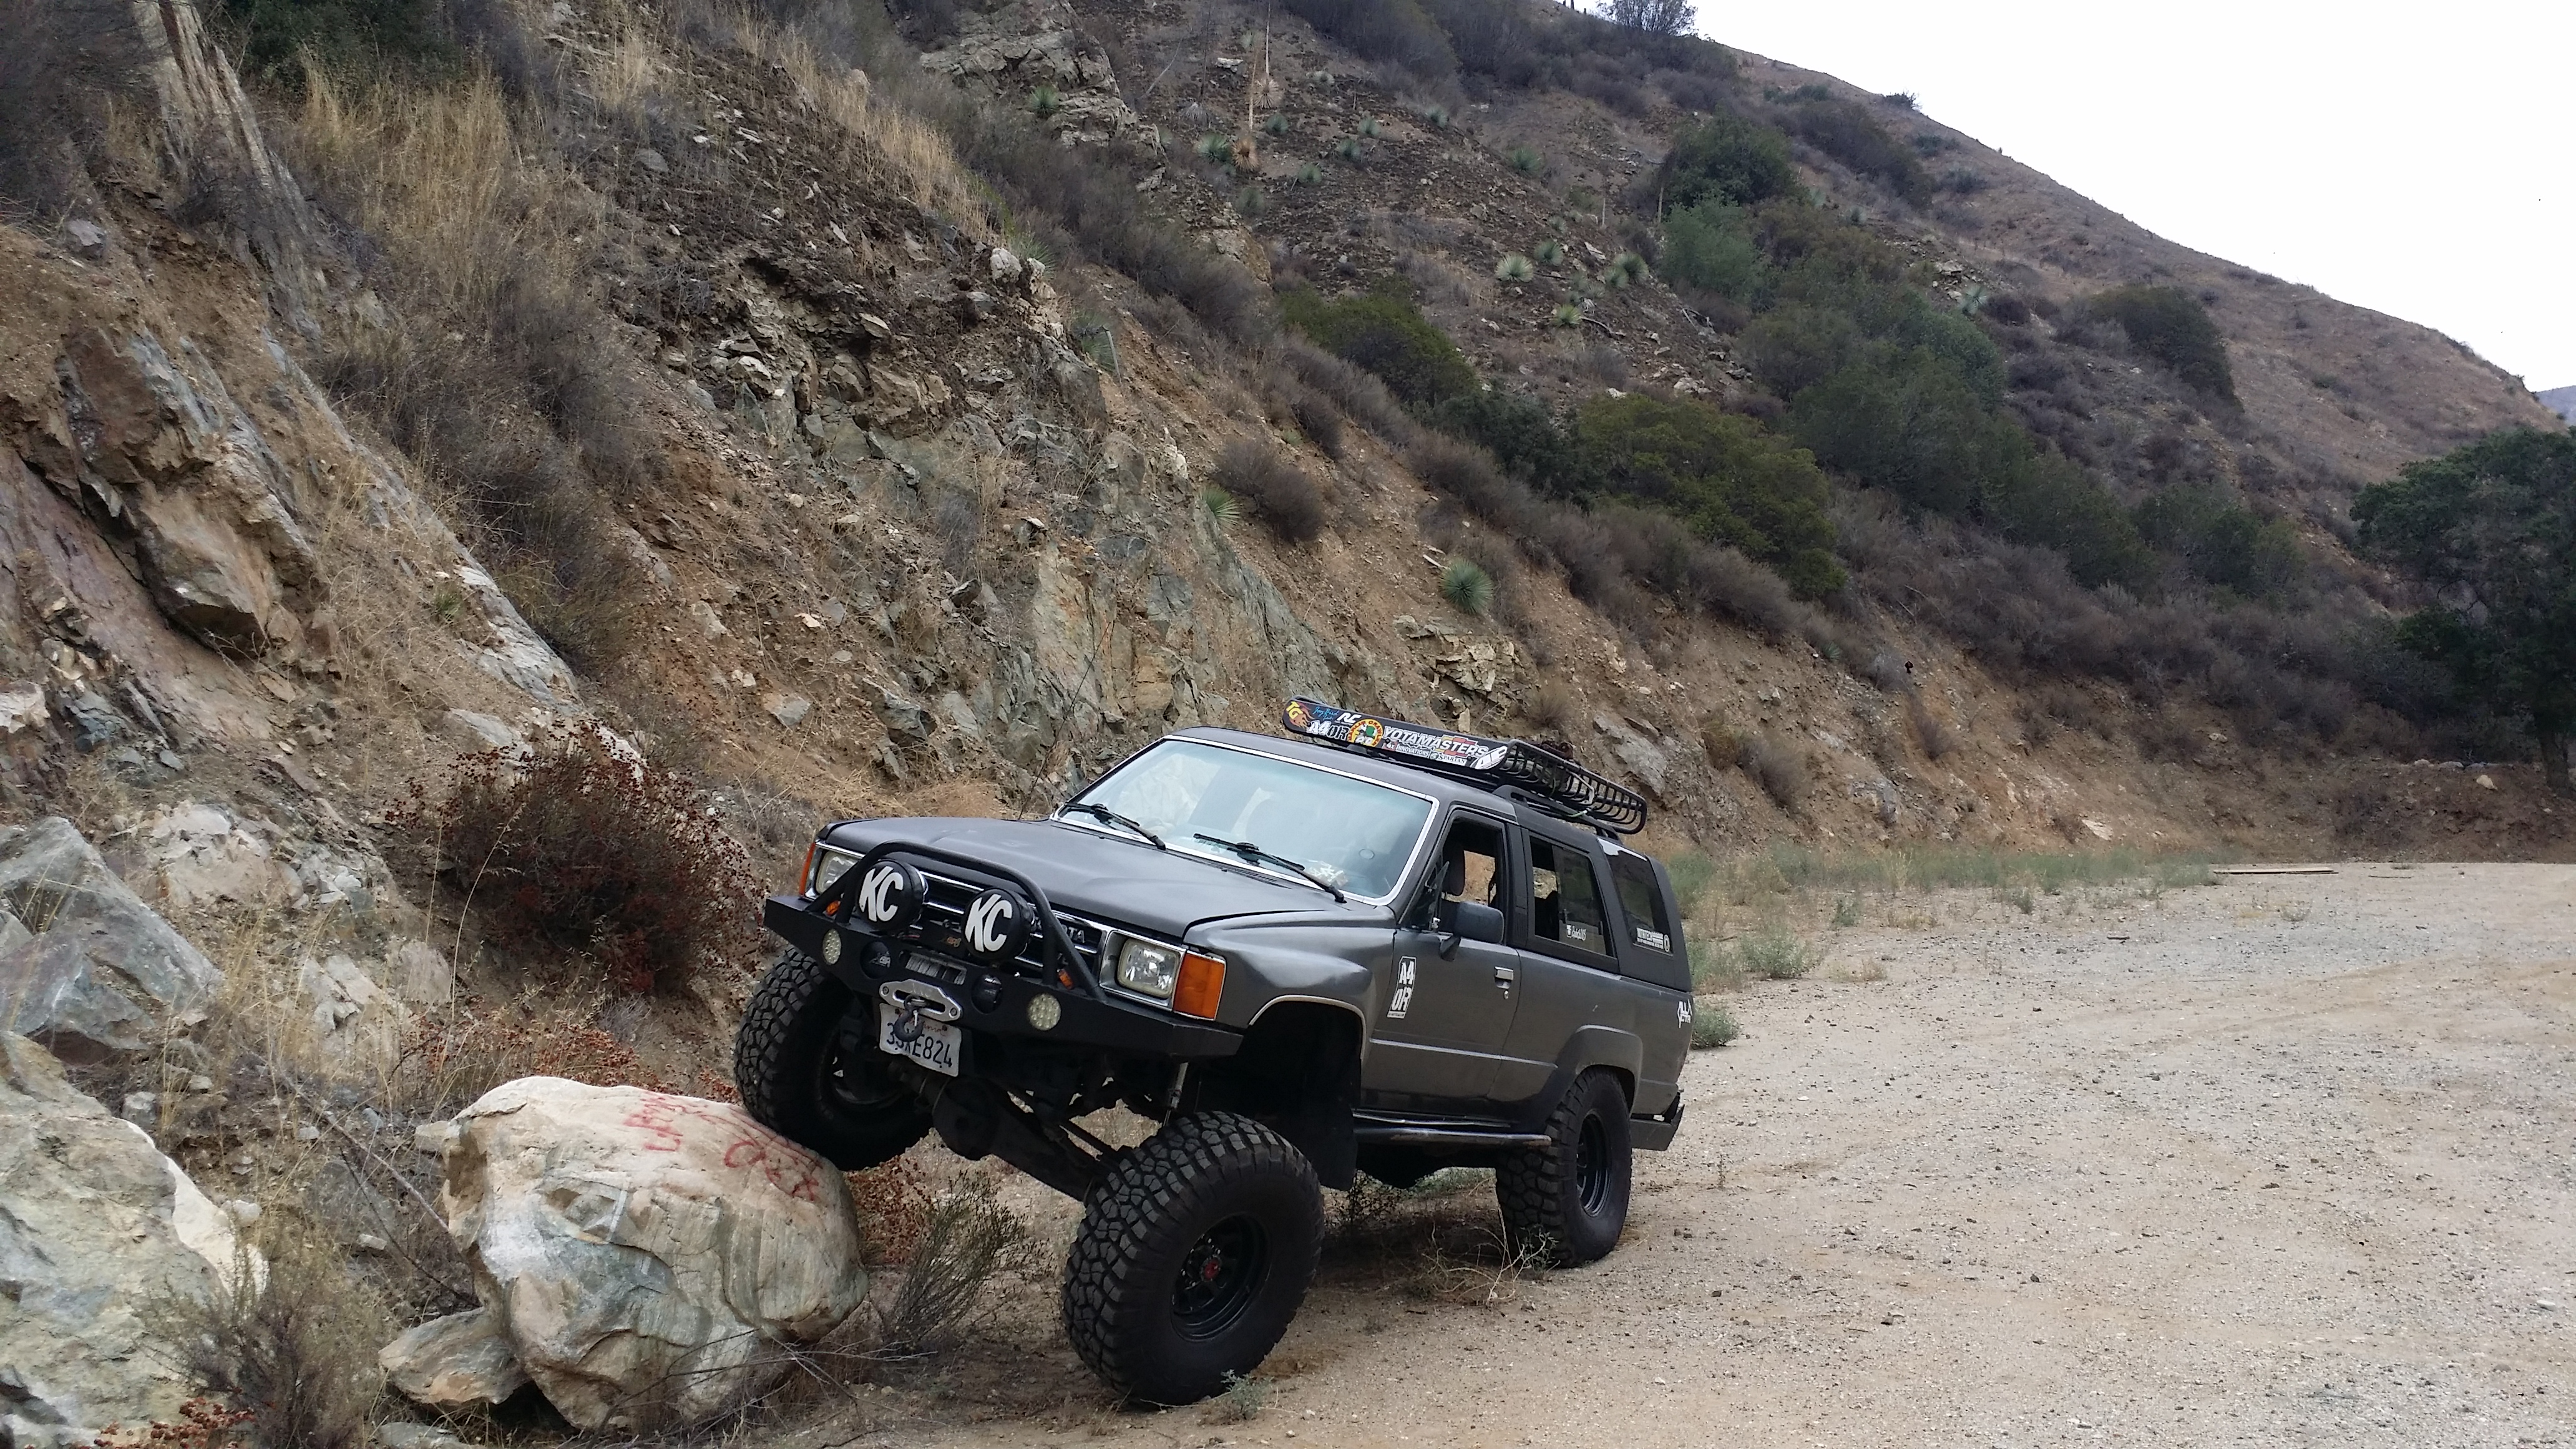
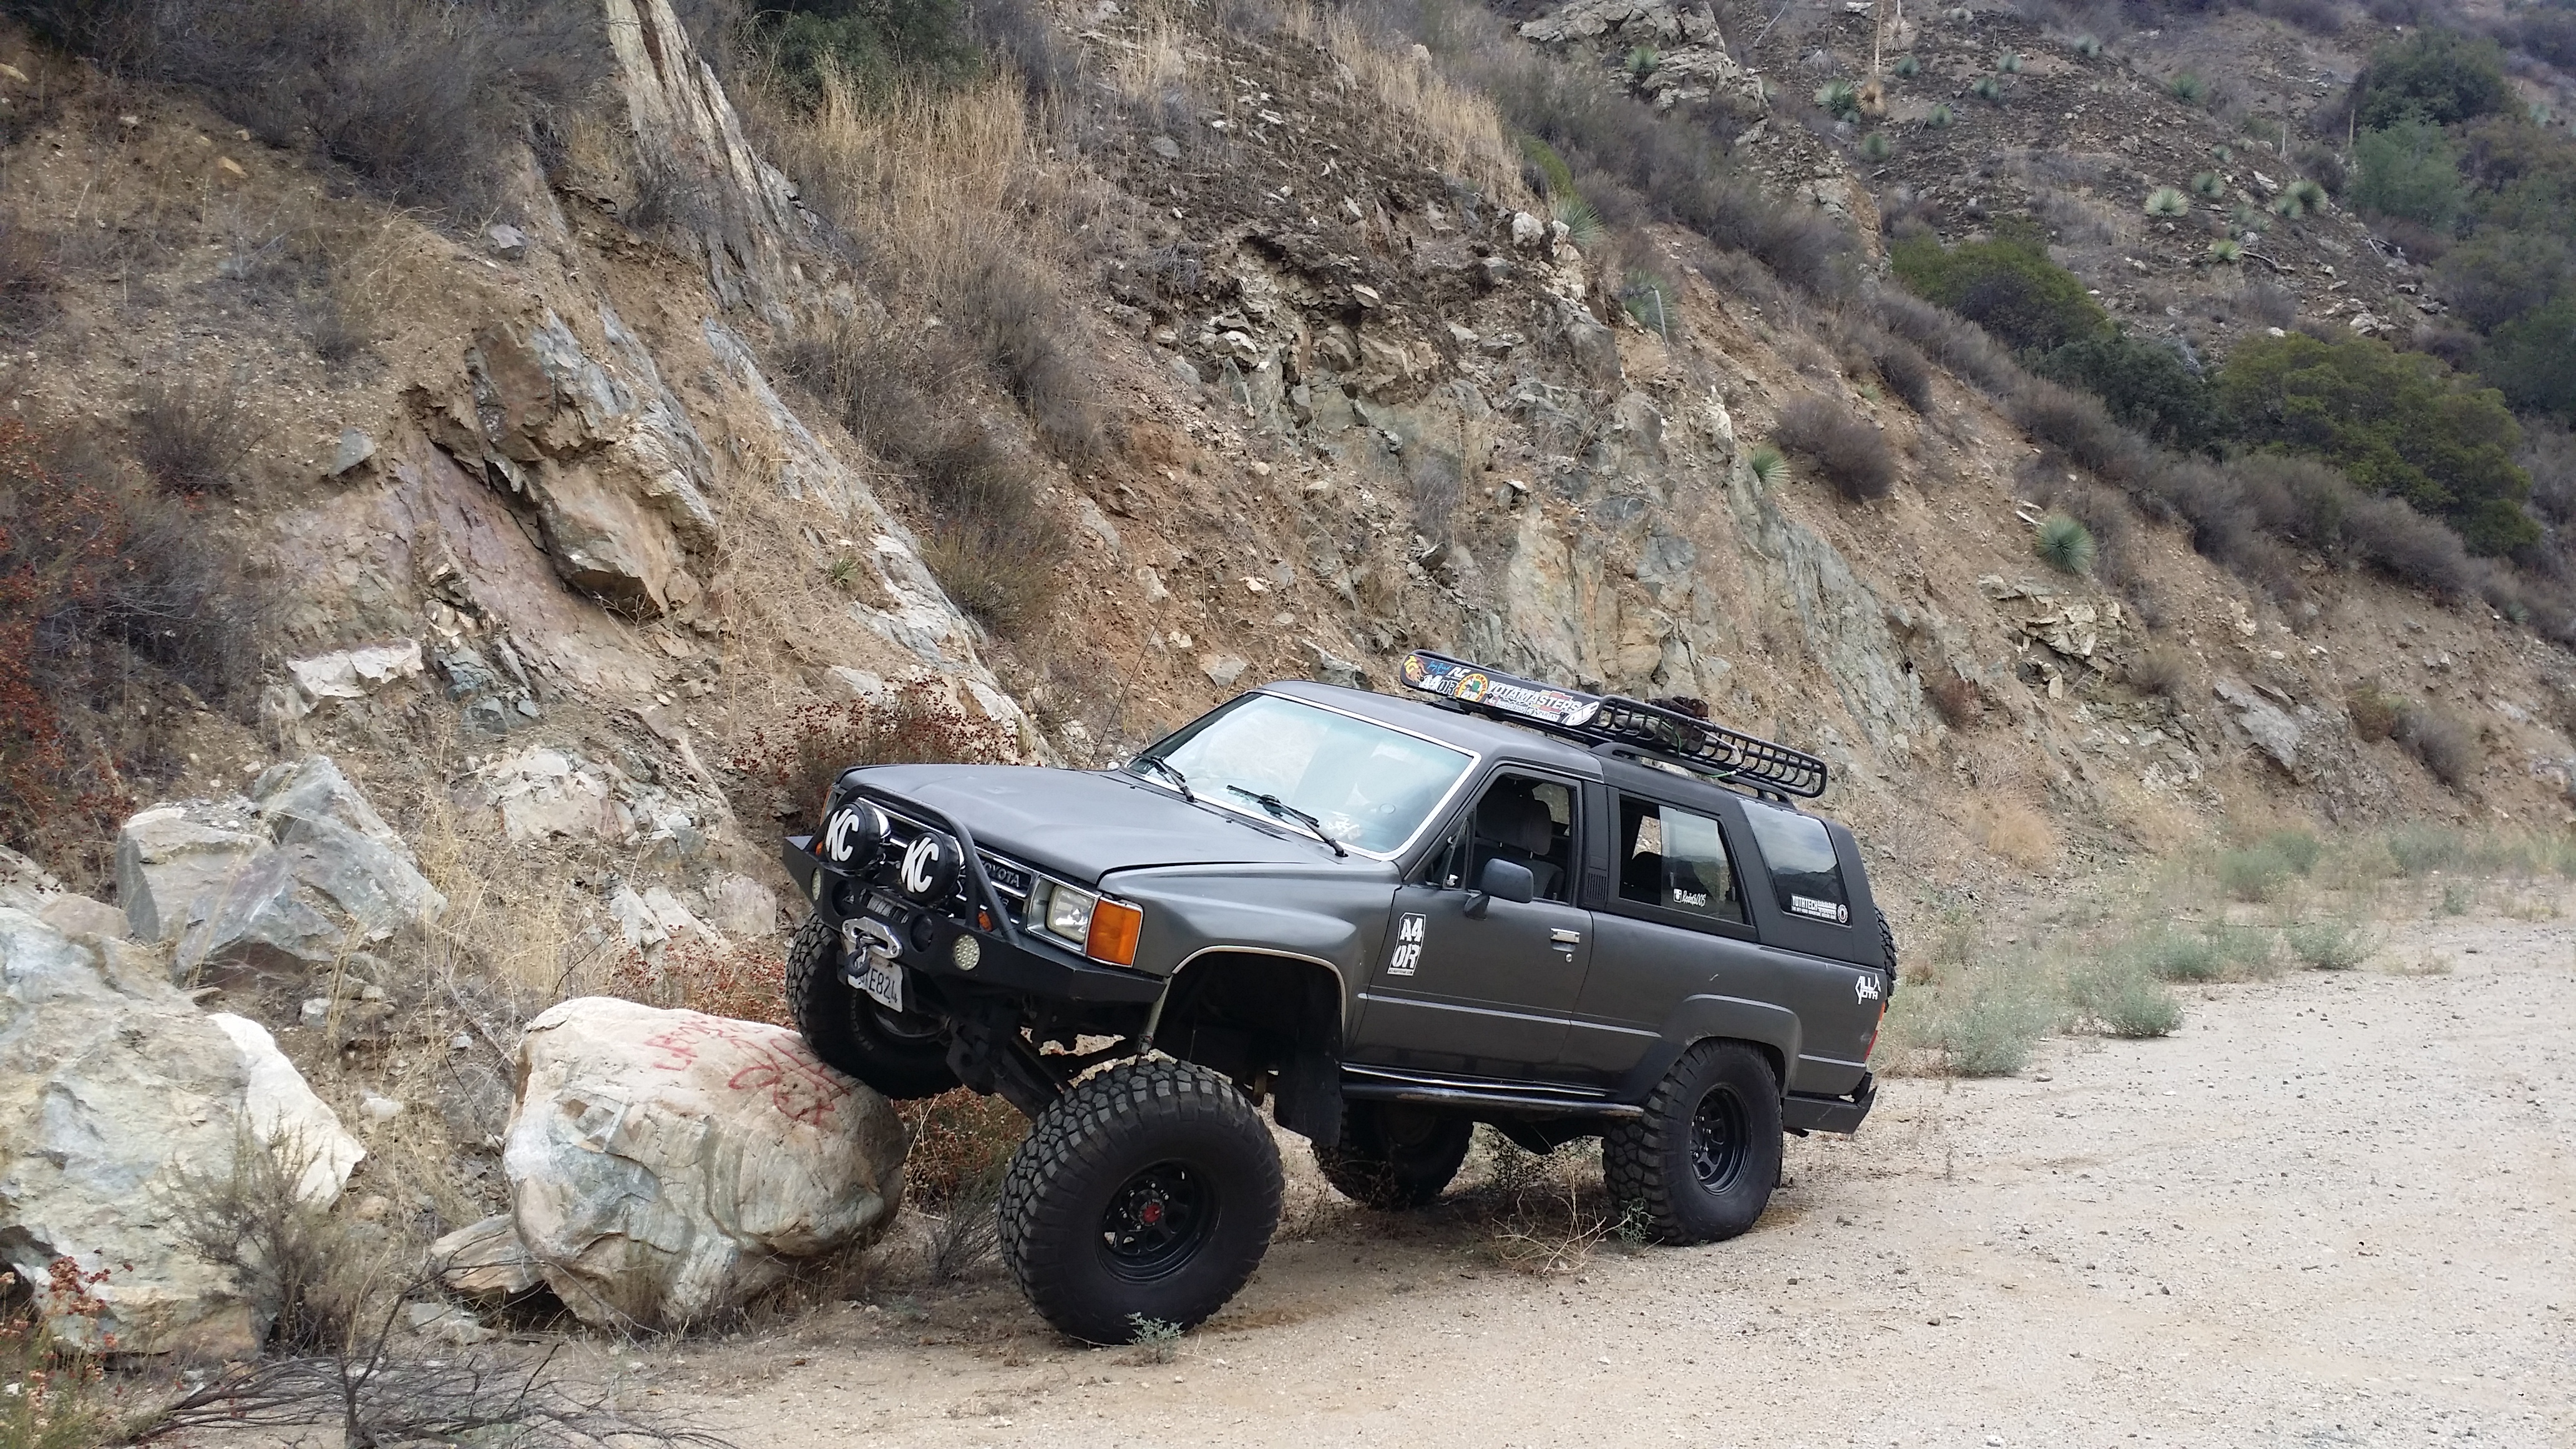
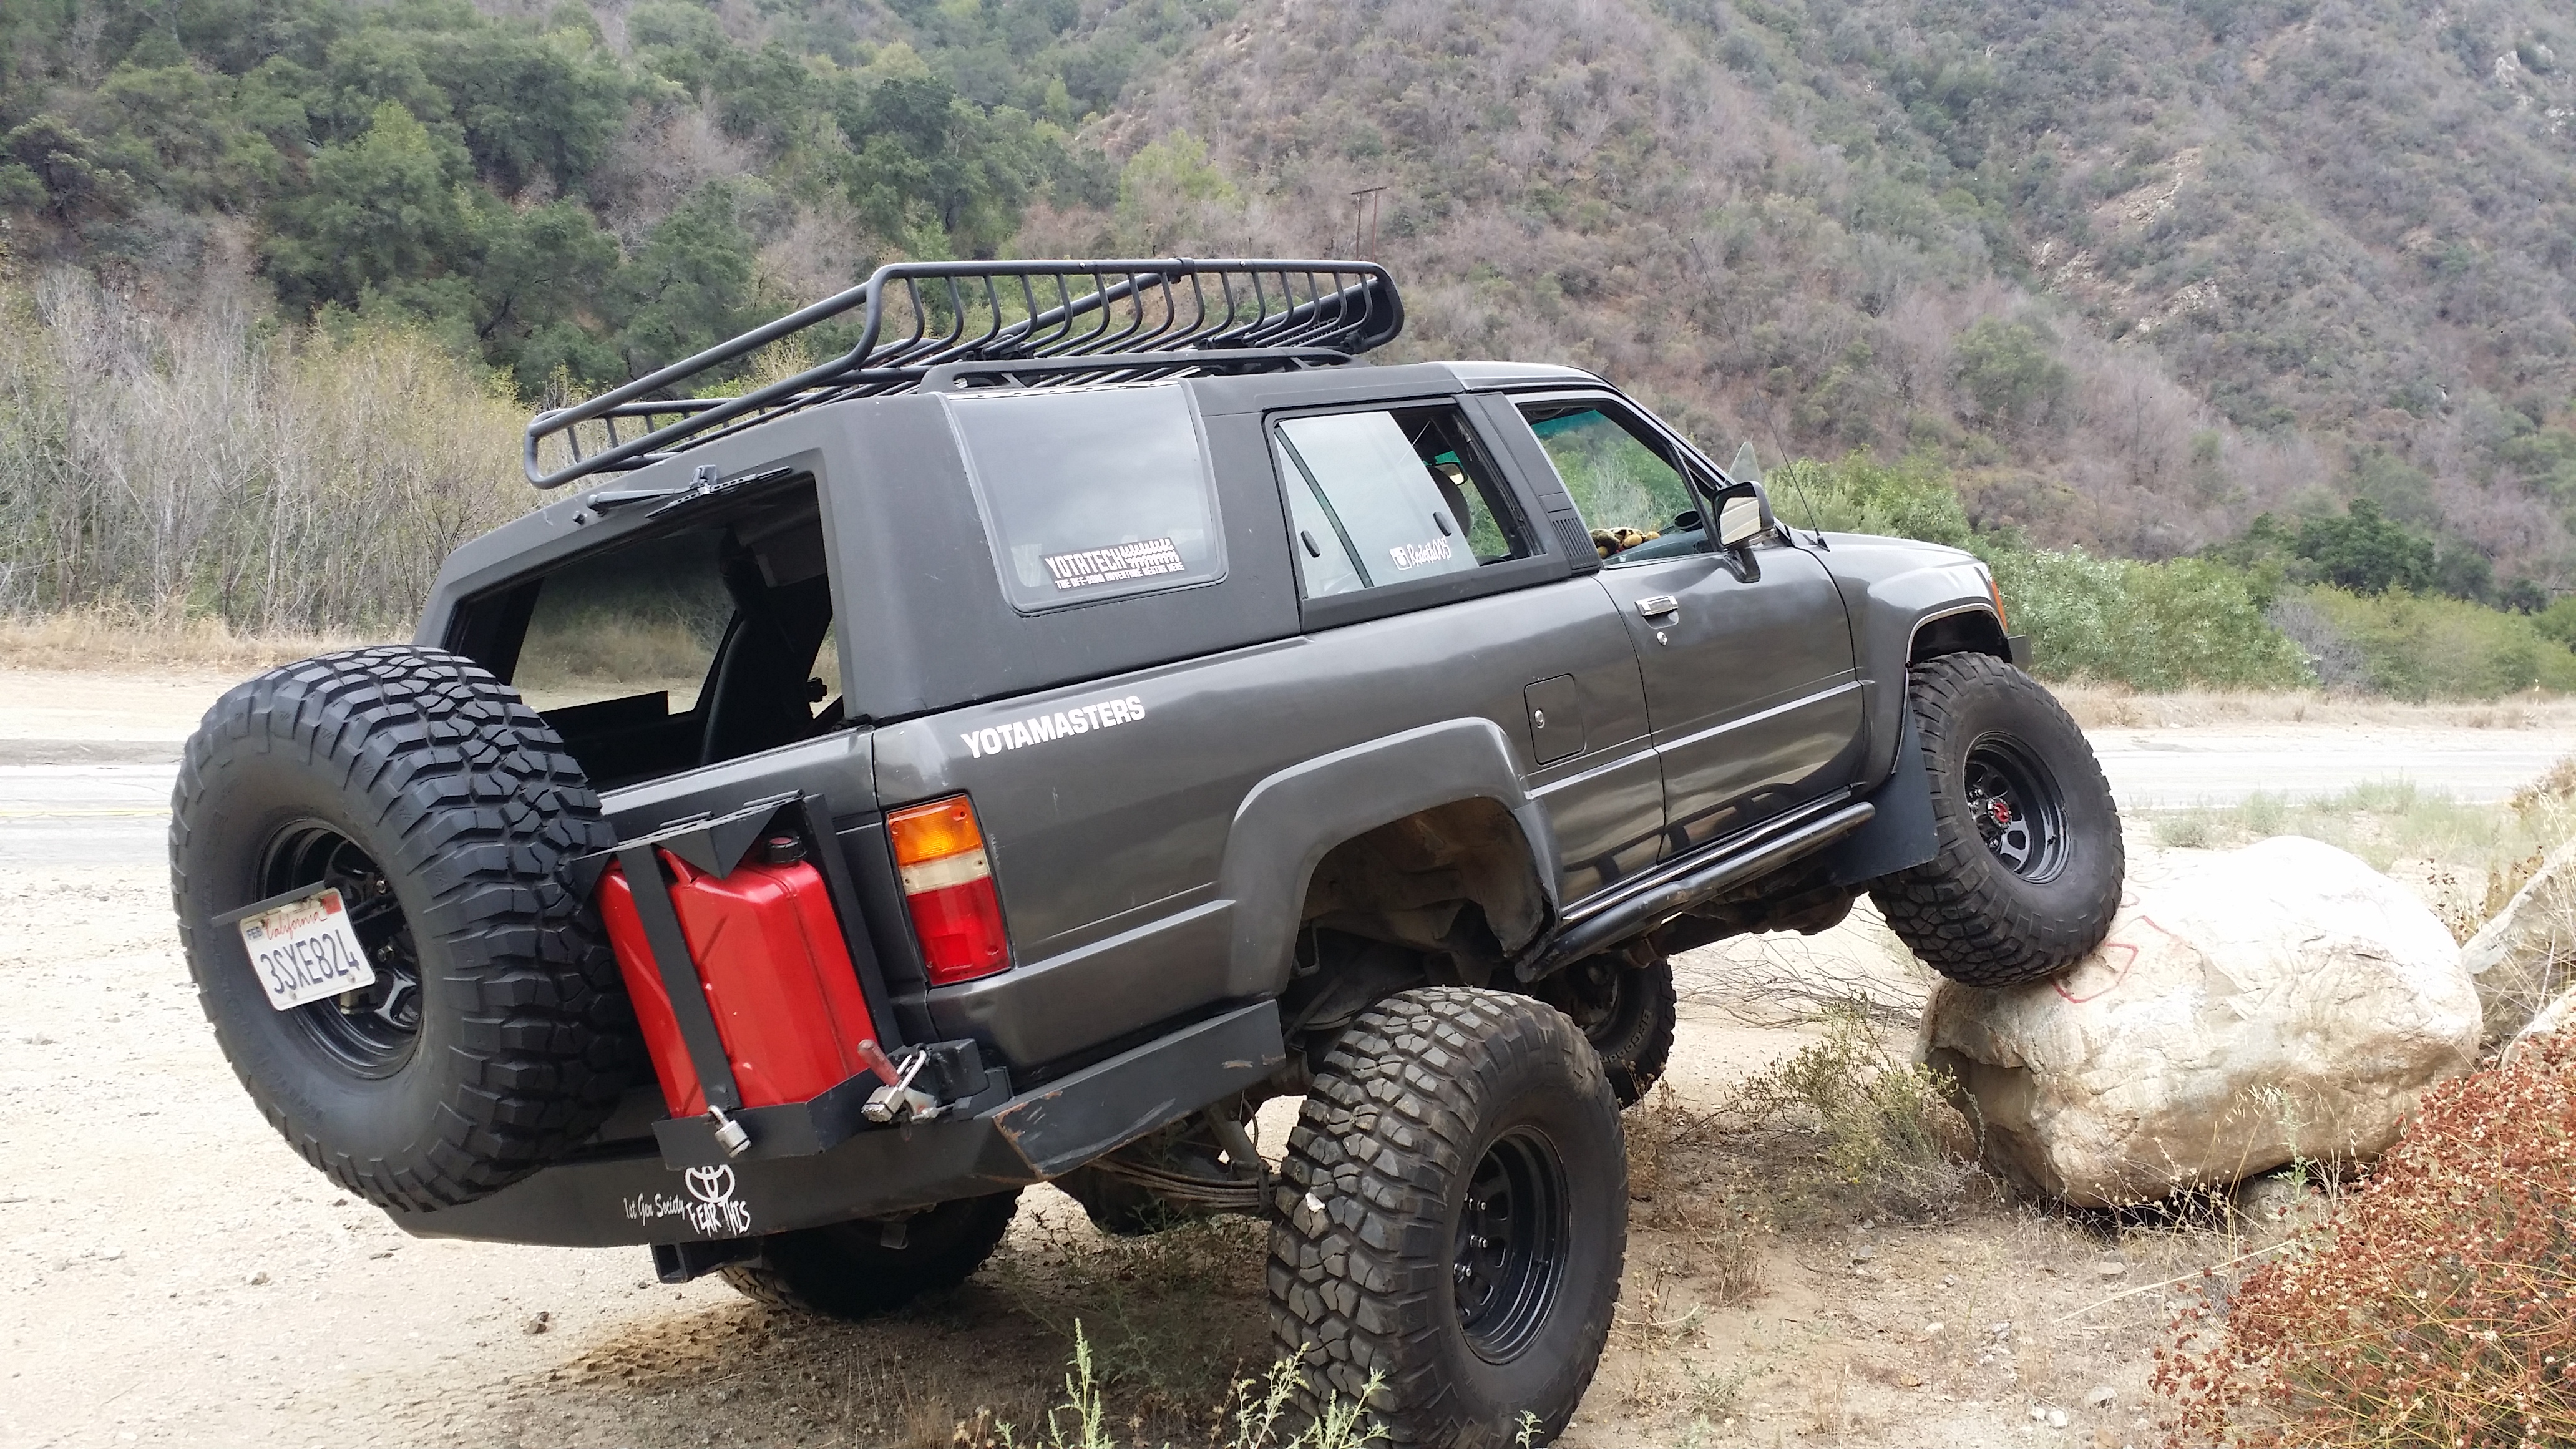
This one is really sweet

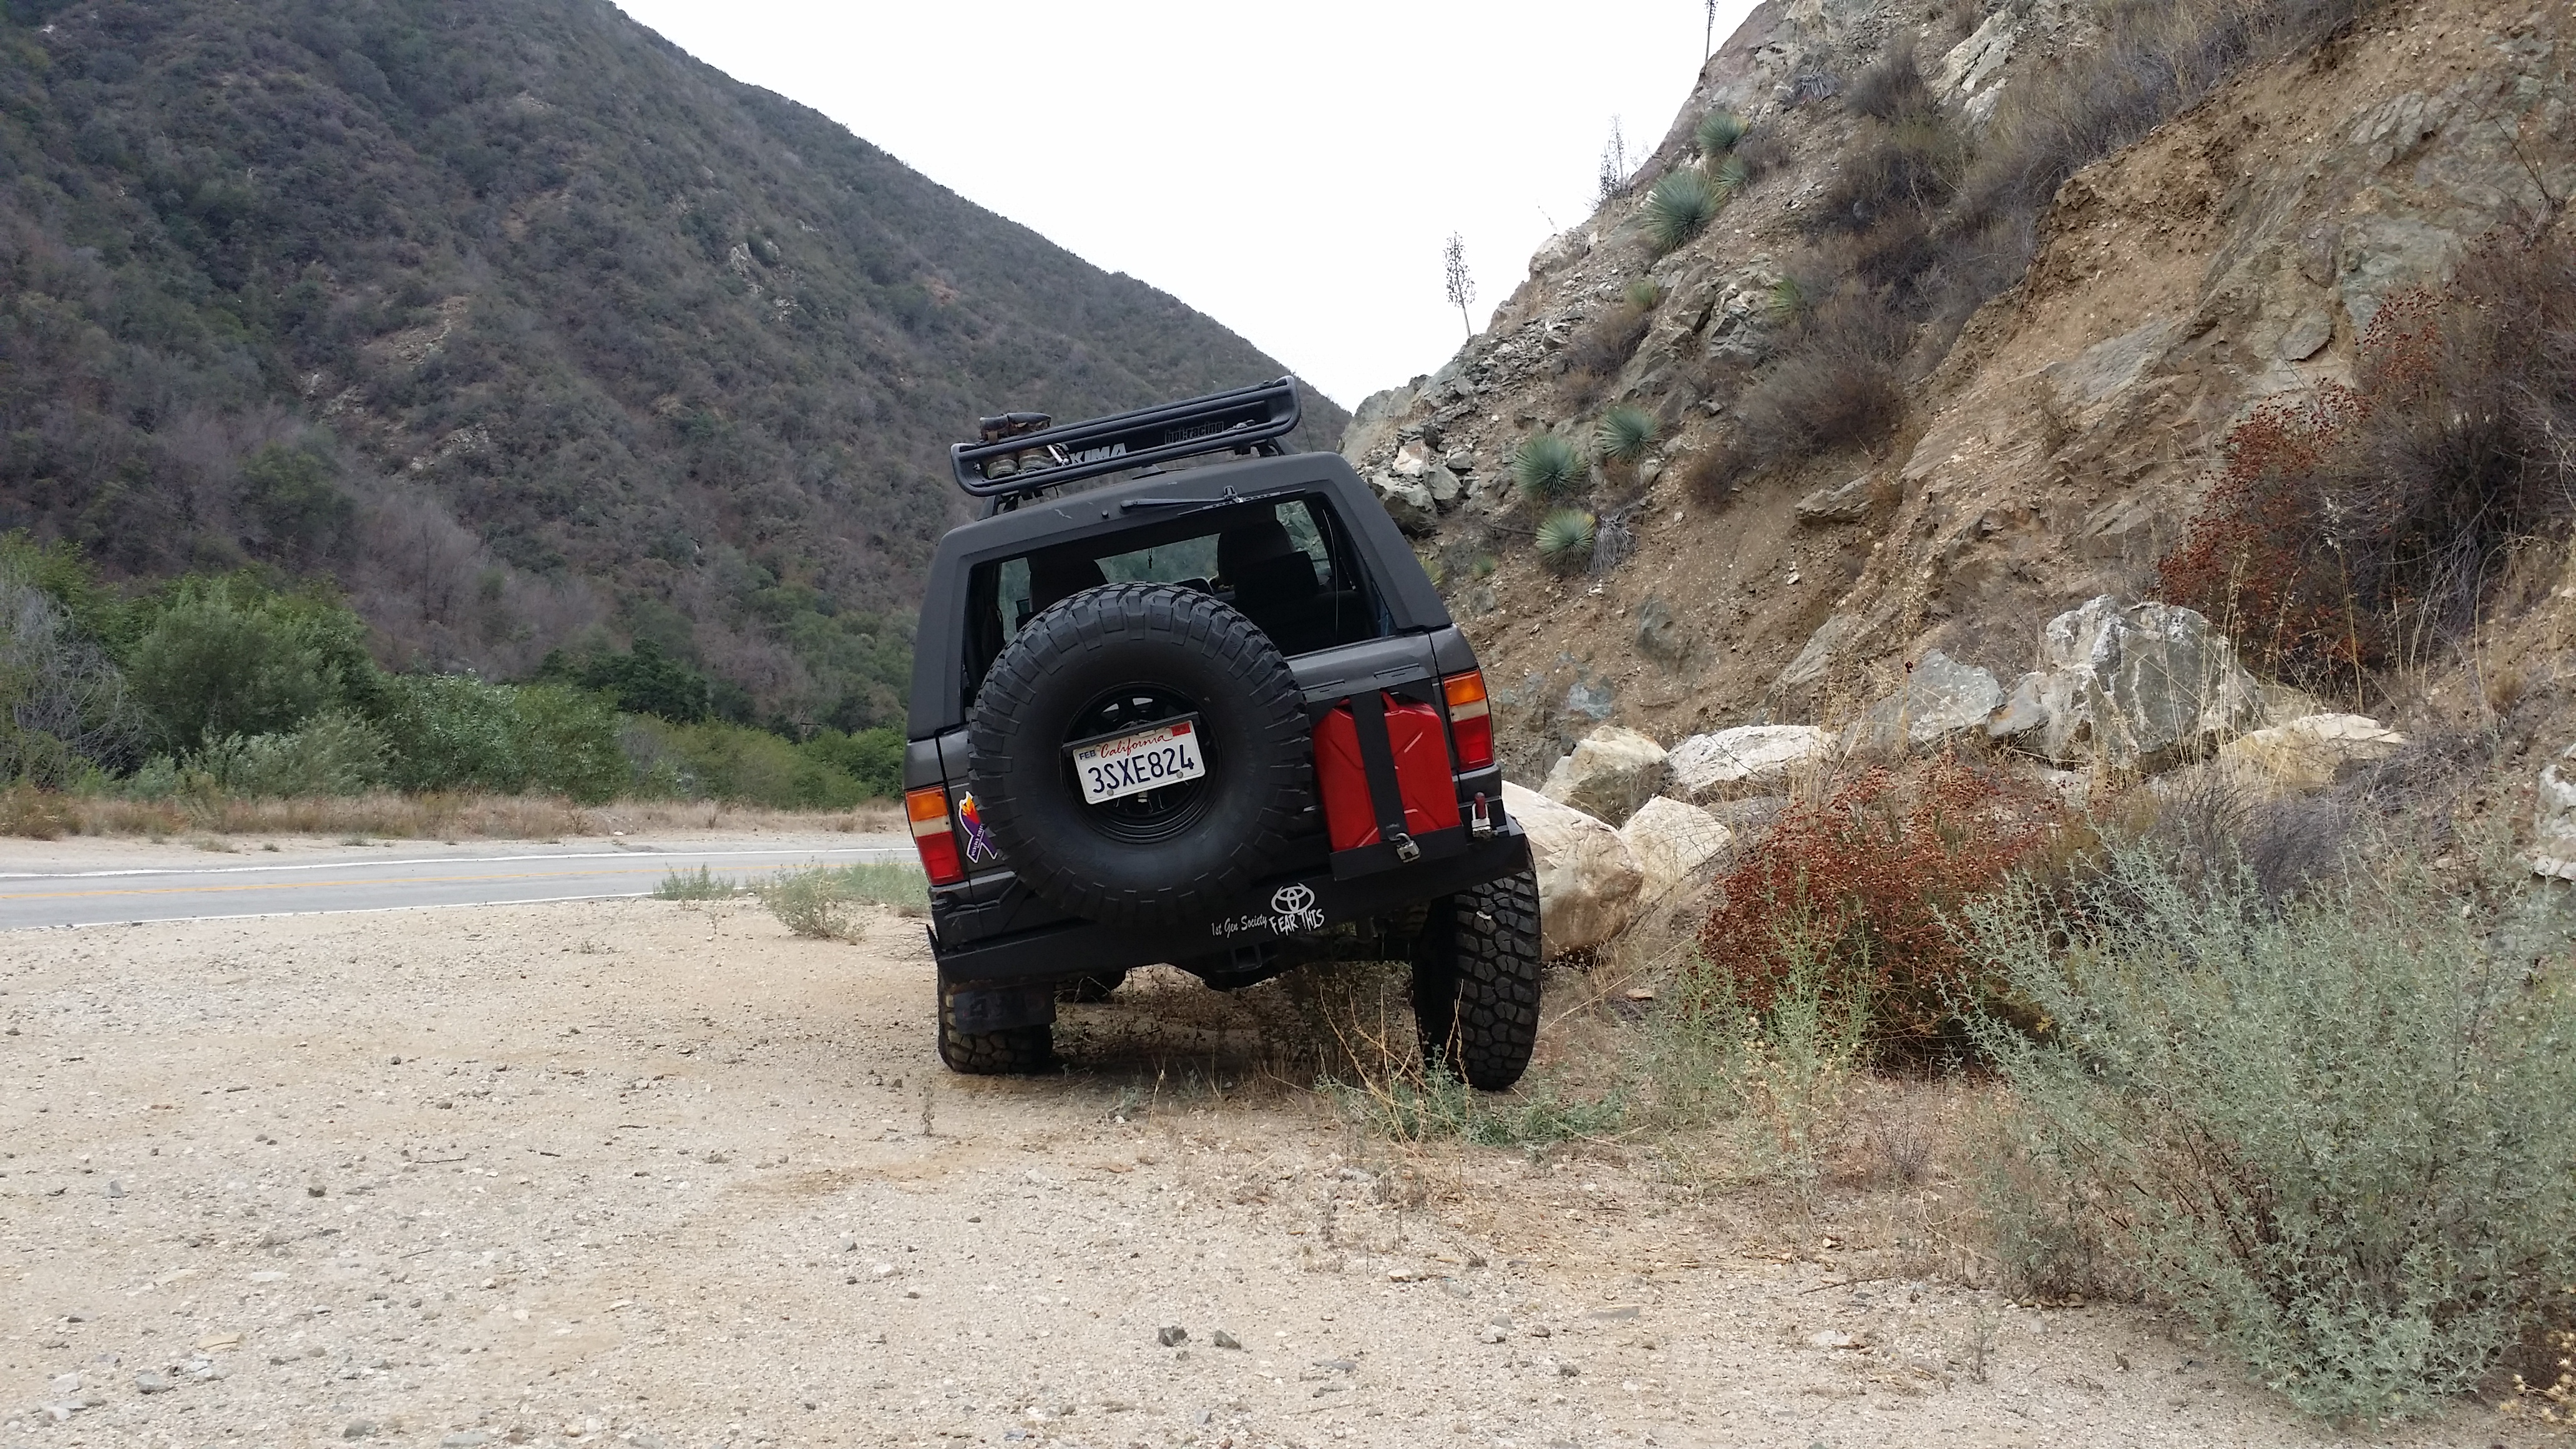
That booty though!

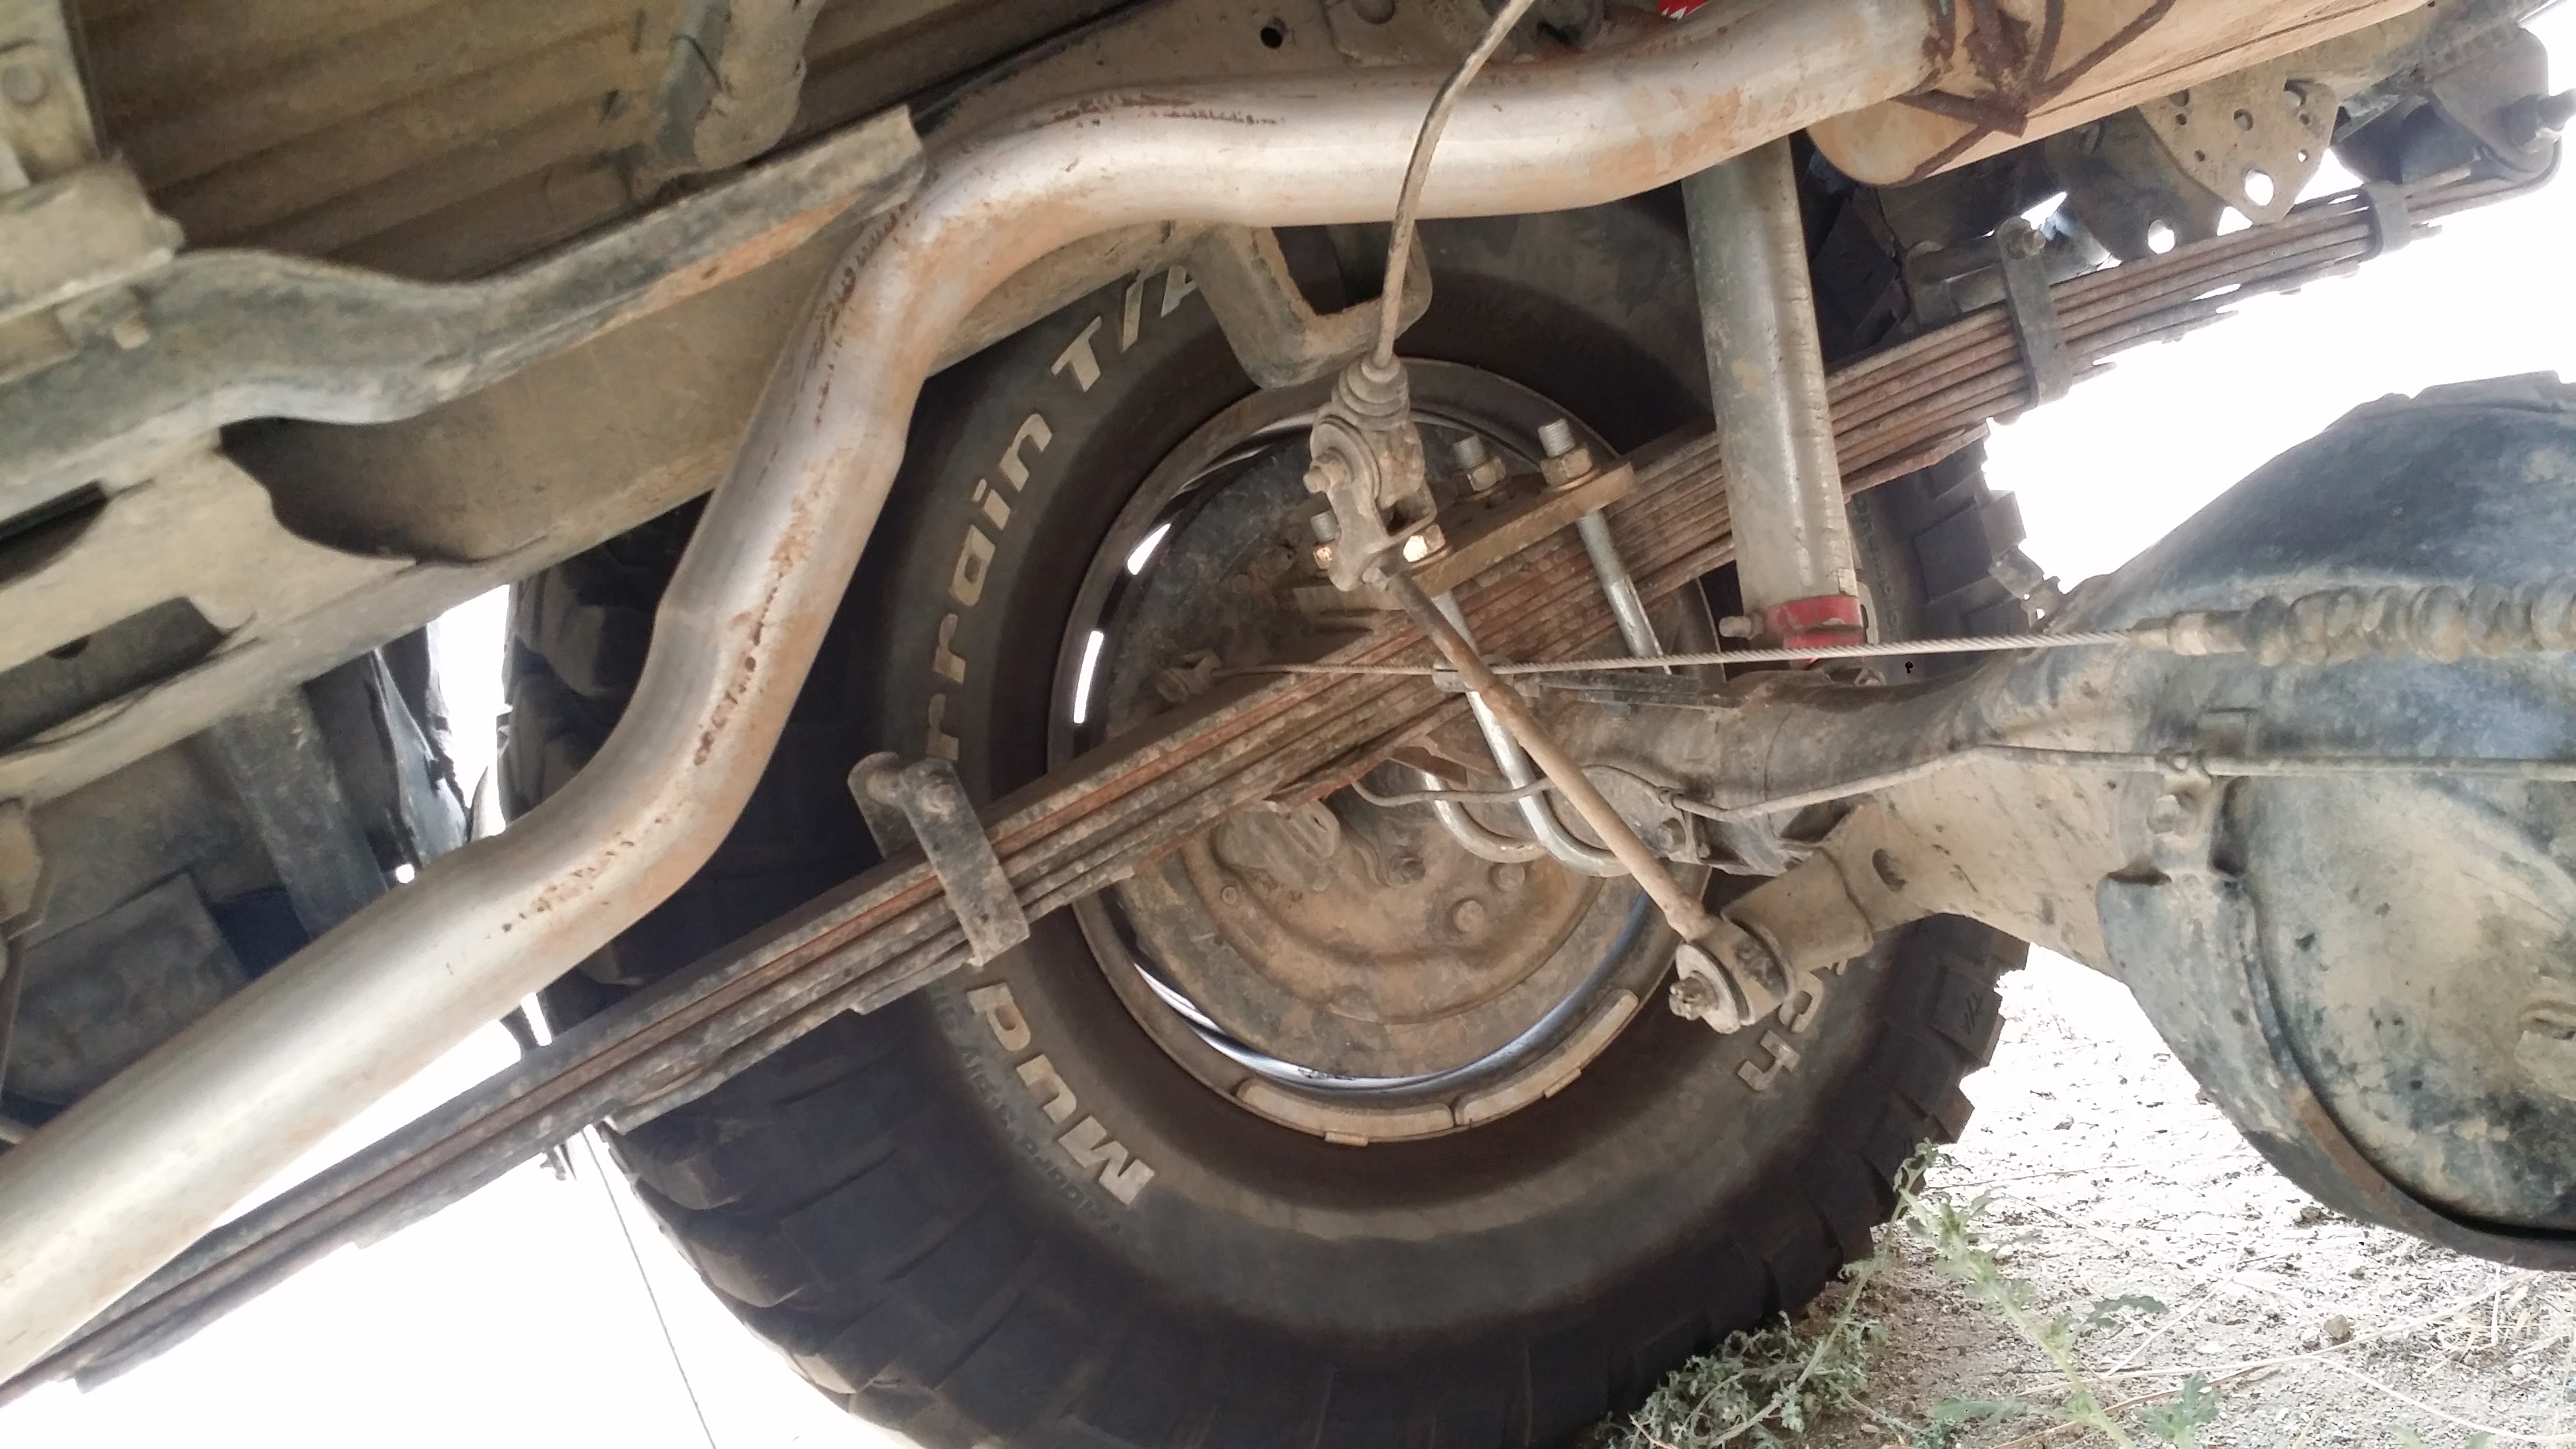
Here you can see that due to the shock bottoming out the leaf spring was forced to bend where it isnt supposed to bend; going past the flat zone. I need to fix this issue soon. By the way this picture below is fully flexed out right now.
So after this flex test i now know that my front end is perfect. But the rear needs to get the shocks relocated so they can extend further and allow my rear leaf springs to flex properly. Now after doing this it means that my tire will be allowed to flex further into the wheel well. And the problem with that is that my tires rarely rub the wheelwell now. So if i allow for more travel (which i want for better rock crawling) it means i will ahve more rubbing again on both sides of the quarter panel/rear fenders. So I may need to chop a bit of the quart panels. just at the bottom. I dont want to chop the full fender all around. Just the bottom ends on the front and rear sides of the quarter panel
I gotta say they are perfect! The passenger side still had 1.5" before touching the bump stop at full flex. And about 10.5" extended on the driver side. It was really flexed out and it could have gone a little bit more.
The rear passenger side shock only had 6" out of the 10" of shock exposed and the driver shock. Unfortunately the I realized that the driver side bottomed out at this much flex. So now I gotta re adjust the height of where to mount my rear shocks to avoid bottoming out and damaging my rear shocks. Looks like I have to fix that soon i dont want to damage my rear shocks.


This one is really sweet

That booty though!


Here you can see that due to the shock bottoming out the leaf spring was forced to bend where it isnt supposed to bend; going past the flat zone. I need to fix this issue soon. By the way this picture below is fully flexed out right now.

So after this flex test i now know that my front end is perfect. But the rear needs to get the shocks relocated so they can extend further and allow my rear leaf springs to flex properly. Now after doing this it means that my tire will be allowed to flex further into the wheel well. And the problem with that is that my tires rarely rub the wheelwell now. So if i allow for more travel (which i want for better rock crawling) it means i will ahve more rubbing again on both sides of the quarter panel/rear fenders. So I may need to chop a bit of the quart panels. just at the bottom. I dont want to chop the full fender all around. Just the bottom ends on the front and rear sides of the quarter panel
Last edited by Redeth005; Sep 22, 2015 at 12:20 AM.
 Sep 22, 2015 | 12:50 AM
#2615
Thread Starter
Registered User
Joined: Apr 2012
Posts: 2,817
Likes: 2
From: Los Angeles CA
And here is the best update of them all. I really wanted to share with you all that I am officially done with school! after 2 long years i finally finished. graduation ceromony isnt till february. But I finished at one of the top students in my class with honors, as Student Ambassador with a 5 month internship at UCLA under my belt.
Not only this but i also went on and applied for the Surgical technologist position at UCLA in the main operating room. I was called in for an interview 1 week before i even finished my school!
The hospital staff already knew me, since I worked there for the past 5 months during my clinical internship. So the whole interview was very causal. I tried my best to keep it professional but they insisted it was cool lol The way they all spoke to me was unlike any other interview I had ever had. Normally I'm trying to sell myself like it is the last position in the world but they pretty much did that for me haha.
---
The whole time i was there they all talked to me as if already got the position and they were pretty much just telling me what to expect for "when" I get hired (but they kept having to correct themselves to say "if" I get hired). The charge nurse did tell me that yes they did have a few other people interested in the position but since I did my internship there at the hospital, got trained by their staff and the fact that I was a very reputable intern, and that not a single employee had one bad thing to say about me during my training there said a lot about me and my work ethic.
---
She said, "I don't think you have to worry too much. The choice is pretty much going to be a no brainer." While laughing it off and looking at me with assurance. She never officially said I got the job. But everybody who interviewed me came off as if I was the one they were going to choose. I left that interview feeling amazing & drove home in style!
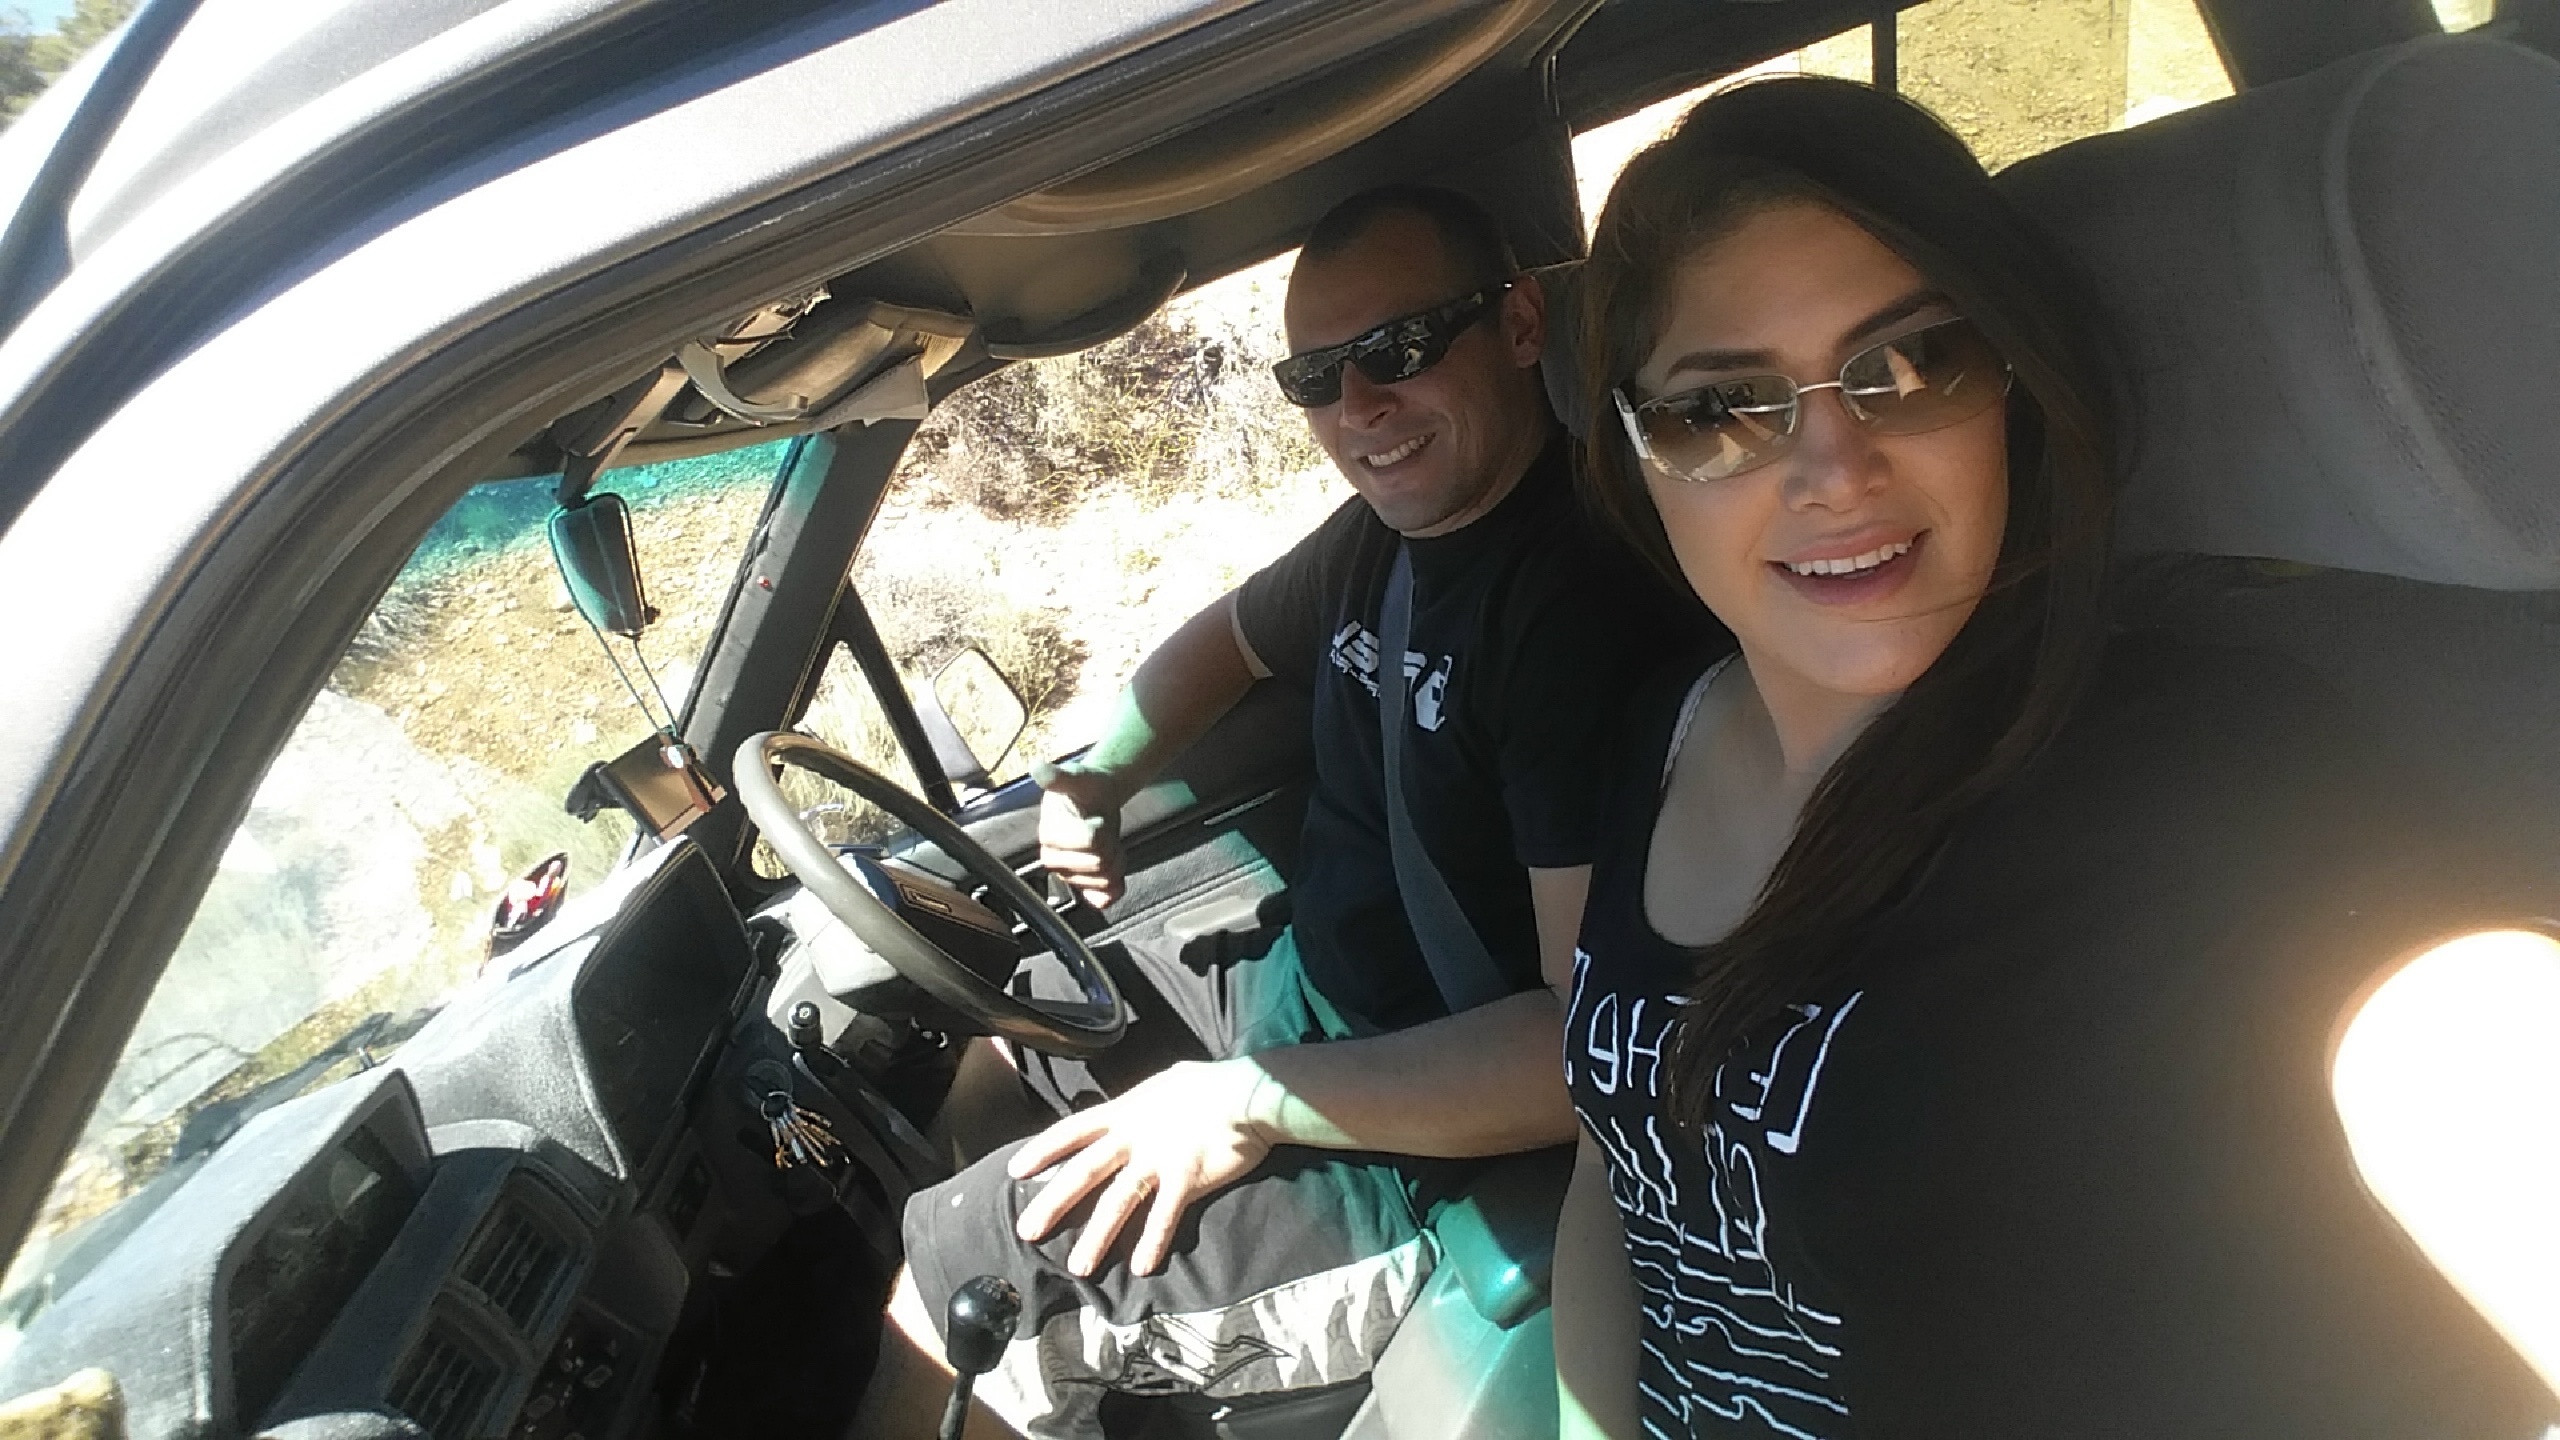
Here i am coming home from the interview!

1 week later i took my Certification exam i gotta say it was the hardest test ive ever had to take in my entire life! LUCKILY FOR ME I STUDIED MY BUTT OFF! I was the first person my program director called to let me know I scored 139; passing grade is 118. All those long nights studying and busting my butt till 1-2am in the morning and arriving early every day to practice my techniques at school finally paid off. I'm so grateful. All my stubbornness and determination finally paid off. And I'm so happy to say that I am officially "Richard Garcia, CST"
And now! Just last week i finally got the call from UCLA to get the great news! I GOT THE JOB!!!! Just when I thought the good news couldn't get any better. I finally got the phone call that they chose me to work at UCLA Santa Monica Hospital as a Certified Surgical Technologist(CST) in the main O.R.! I was so happy I literally teared up out of so much joy. This is a dream come true. Not only did I finally finish school, graduate with an "Associates of Occupational Science in Surgical Technology", graduate with honors, & as student ambassador, pass my certification exam, but now I'm going to be working in the direct field that I studied for in my #1 choice of hospital which has all the specialties I love! Oh man. I still feel super happy about the news. Everything that has happened this past month is going to change my life forever. I can't wait to start my new career and new life working in a field I love. This just shows that hard work and at lot of patience pays off. I start Orientation Oct 5th. And start working in the operating room on Oct 6th
As much as i am proud of my accomplishments with my truck and everything i have ever done with myself i am no where near as proud as i am of this accomplishment.
Not only this but i also went on and applied for the Surgical technologist position at UCLA in the main operating room. I was called in for an interview 1 week before i even finished my school!
The hospital staff already knew me, since I worked there for the past 5 months during my clinical internship. So the whole interview was very causal. I tried my best to keep it professional but they insisted it was cool lol The way they all spoke to me was unlike any other interview I had ever had. Normally I'm trying to sell myself like it is the last position in the world but they pretty much did that for me haha.
---
The whole time i was there they all talked to me as if already got the position and they were pretty much just telling me what to expect for "when" I get hired (but they kept having to correct themselves to say "if" I get hired). The charge nurse did tell me that yes they did have a few other people interested in the position but since I did my internship there at the hospital, got trained by their staff and the fact that I was a very reputable intern, and that not a single employee had one bad thing to say about me during my training there said a lot about me and my work ethic.
---
She said, "I don't think you have to worry too much. The choice is pretty much going to be a no brainer." While laughing it off and looking at me with assurance. She never officially said I got the job. But everybody who interviewed me came off as if I was the one they were going to choose. I left that interview feeling amazing & drove home in style!
Here i am coming home from the interview!

1 week later i took my Certification exam i gotta say it was the hardest test ive ever had to take in my entire life! LUCKILY FOR ME I STUDIED MY BUTT OFF! I was the first person my program director called to let me know I scored 139; passing grade is 118. All those long nights studying and busting my butt till 1-2am in the morning and arriving early every day to practice my techniques at school finally paid off. I'm so grateful. All my stubbornness and determination finally paid off. And I'm so happy to say that I am officially "Richard Garcia, CST"
And now! Just last week i finally got the call from UCLA to get the great news! I GOT THE JOB!!!! Just when I thought the good news couldn't get any better. I finally got the phone call that they chose me to work at UCLA Santa Monica Hospital as a Certified Surgical Technologist(CST) in the main O.R.! I was so happy I literally teared up out of so much joy. This is a dream come true. Not only did I finally finish school, graduate with an "Associates of Occupational Science in Surgical Technology", graduate with honors, & as student ambassador, pass my certification exam, but now I'm going to be working in the direct field that I studied for in my #1 choice of hospital which has all the specialties I love! Oh man. I still feel super happy about the news. Everything that has happened this past month is going to change my life forever. I can't wait to start my new career and new life working in a field I love. This just shows that hard work and at lot of patience pays off. I start Orientation Oct 5th. And start working in the operating room on Oct 6th
As much as i am proud of my accomplishments with my truck and everything i have ever done with myself i am no where near as proud as i am of this accomplishment.

Last edited by Redeth005; Sep 22, 2015 at 08:24 AM.
Sep 22, 2015 | 01:00 AM
#2616
Thread Starter
Registered User
Joined: Apr 2012
Posts: 2,817
Likes: 2
From: Los Angeles CA
Oh boy, do i sure have some awesome news for you guys. About my upcoming build. I will let you guys know what it is tomorrow. ive been typing all these updates here on yotatech for the past 4 hours. I am officially done with updates for tonight.
All i will let you know is that I am planning to build a Camping/expedition/offroad trailer to use for my offroad trips(Id like to think of it as an overland adventure). And also for my future road trip throughout California, nevada, and possibly utah. I am possibly thinking about eventually doing a trip through a portion of route 66 some day. and this trailer would be perfect for that. Now that i'm really going to start making some good money i am planning to make this thing the ultimate camping trailer capable of going almost anywhere (not rock crawling though). I will explain in detail what i am planning to include in it. But most of all i will begin a totally new thread for this trailer build. This will make it easier for me to document everything and keep track of every portion of my build. Plus i want to have a tabe of contents for this build so i can look back through it all alot easier.
Most of the build is inspired by yotatech user "Dirtco's" trailer build here:
https://www.yotatech.com/forums/f88/...roject-219053/
Last edited by Redeth005; Sep 22, 2015 at 01:05 AM.
Sep 22, 2015 | 01:05 AM
#2617

Registered User
Joined: Sep 2013
Posts: 56
Likes: 1
congratulations!
i wish i was where you are now (pass my exams) i will be doing mine in february (for practitioner)
if i was ia bit more near i wouldn't mind to be at that time an that trip, (im a bit too far, in europe) looks like you had a good time, and commendable your efforts to keep improving all.
i wish i was where you are now (pass my exams) i will be doing mine in february (for practitioner)
if i was ia bit more near i wouldn't mind to be at that time an that trip, (im a bit too far, in europe) looks like you had a good time, and commendable your efforts to keep improving all.
Sep 22, 2015 | 03:15 PM
#2620
Congrats on all that you've accomplished, it's got to be a great feeling to be reaping the rewards of all your hard work and effort you've put in over the last 2yrs!
Nice updates on your 4runner too! I did the same thing on my rear suspension, I had to drill the holes an inch forward in the spring perch (u bolt) plate to move my axel back, I was getting some tire rub as well. I like how you did your front shock mount as well turned out really good, I might have to follow your lead and borrow that idea!
Nice updates on your 4runner too! I did the same thing on my rear suspension, I had to drill the holes an inch forward in the spring perch (u bolt) plate to move my axel back, I was getting some tire rub as well. I like how you did your front shock mount as well turned out really good, I might have to follow your lead and borrow that idea!
Last edited by rustED; Sep 22, 2015 at 03:30 PM.


