
Redeth's 1989 4Runner Resurrection
 Sep 1, 2013 | 11:26 AM
#2082
Thread Starter
Registered User
Joined: Apr 2012
Posts: 2,817
Likes: 2
From: Los Angeles CA
Hi guys, We almost had another canceled trip. Drama before even driving up to Big Bear. While driving approx 30 miles to meet up with Mark my truck finally died. literally. It had no power. Symptoms were gradually losing power and MPH were dropping slowly. Battery charge was dropping. I didnt think anything of it i figured the battery would charge but i thought wrong.
While Mark waited patiently for almost 2 hours at the Dennys still about 8-10 miles away from us My neighbor Ruben towed me off the freeway with my rope. After looking for parking in a city where most parking is "permit parking only(on the steet) we couldnt just leave my truck anywhere. Finally found a gas station after about 2-3 miles of towing. and the clerk was nice enough to allow me to park next to the air compressor parking area. My Multimeter read a charge of 8.36v on my battery. thing was dead! by this time it was about 7:20am. NO AUTO STORES ARE OPEN AT THIS TIME! Most open at 9pm. But luckily we found an O'reily's and thank god they Open at 7am. Bought the alternator and some brand new heavy duty 12ft jumper cables so we could jumpstart my truck then we drove back. Removed mine and began to install the new one when i realized.... WTF?!?! this is a 22re alternator! stupid cashier. We had to uninstall it all over again(8:10am). took both alternators back and recieved a core discount and got it swapped out for the correct one. We were done about 8:40am and met up with Mark at Denny's for breakfast.
Sorry we made you wait 2&1/2 hours but i really didnt want to turn back and cancel another trip. So i was determined to fix the problem. Sorry no pix of us at work on the alternator. i was too focused on hurrying up. i didnt want to keep you waiting any longer then you already had. You patience is greatly appreciated.
-------------------------------------------------------------------------------------------------------------
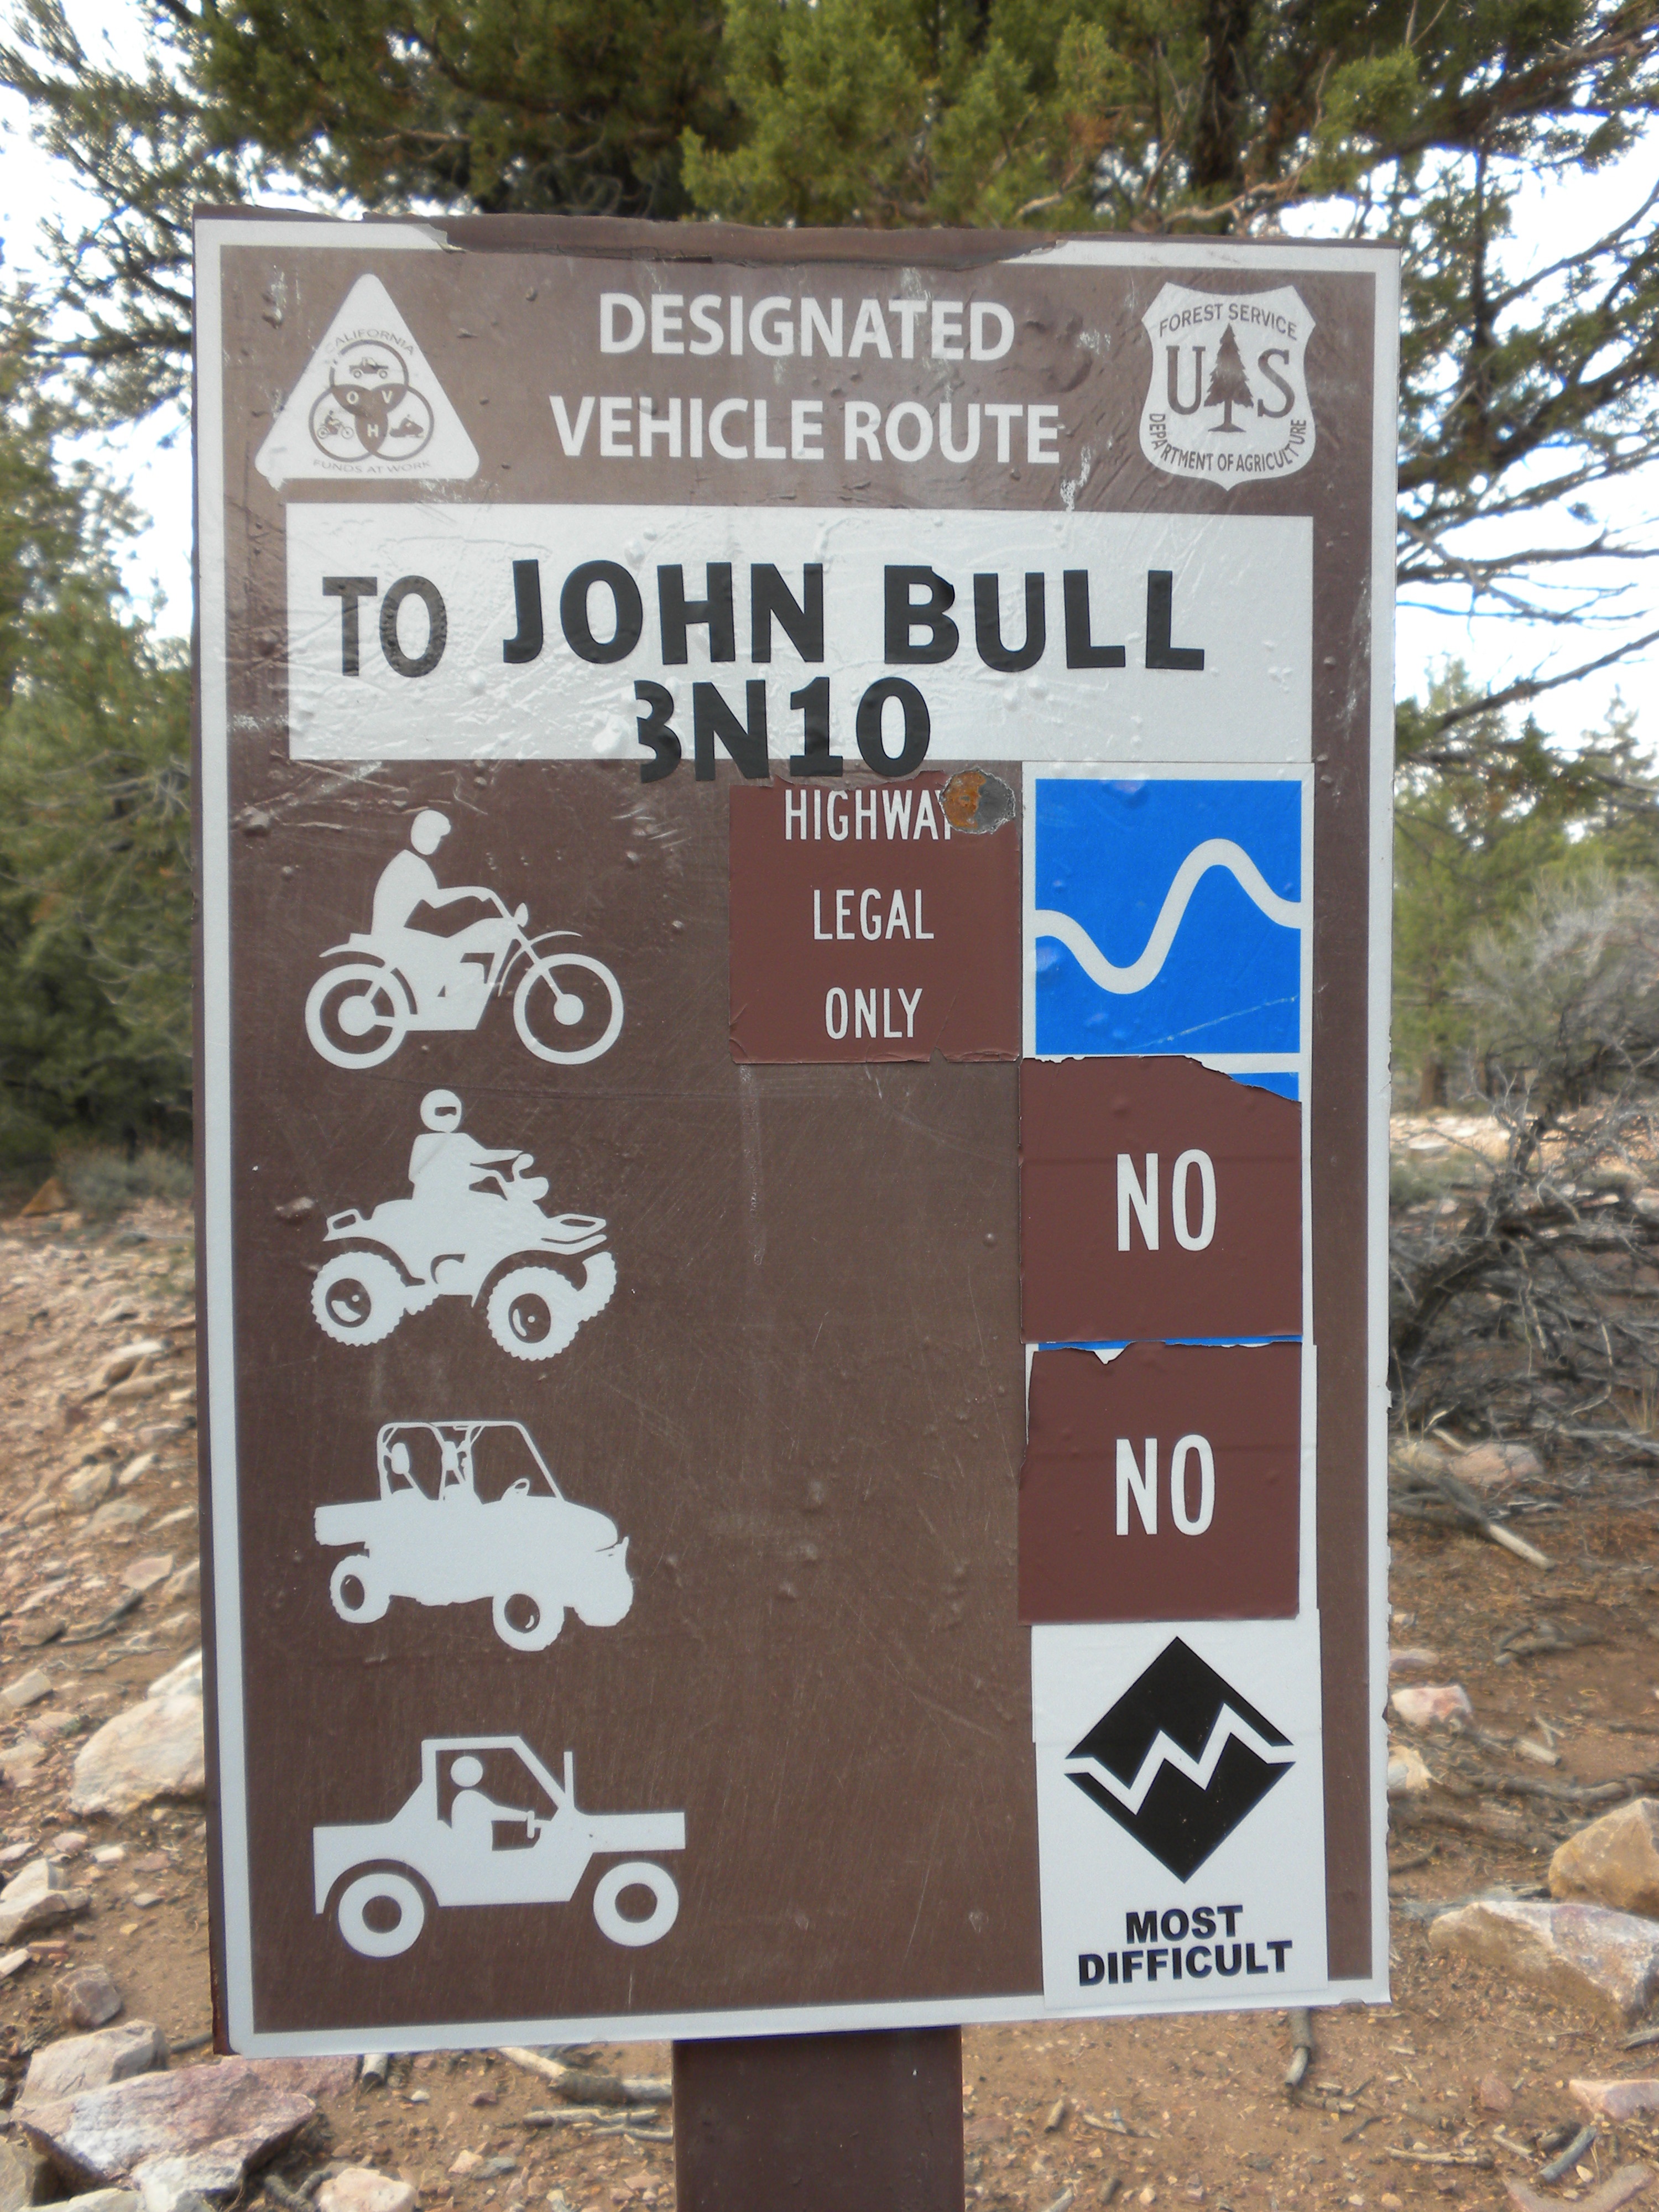
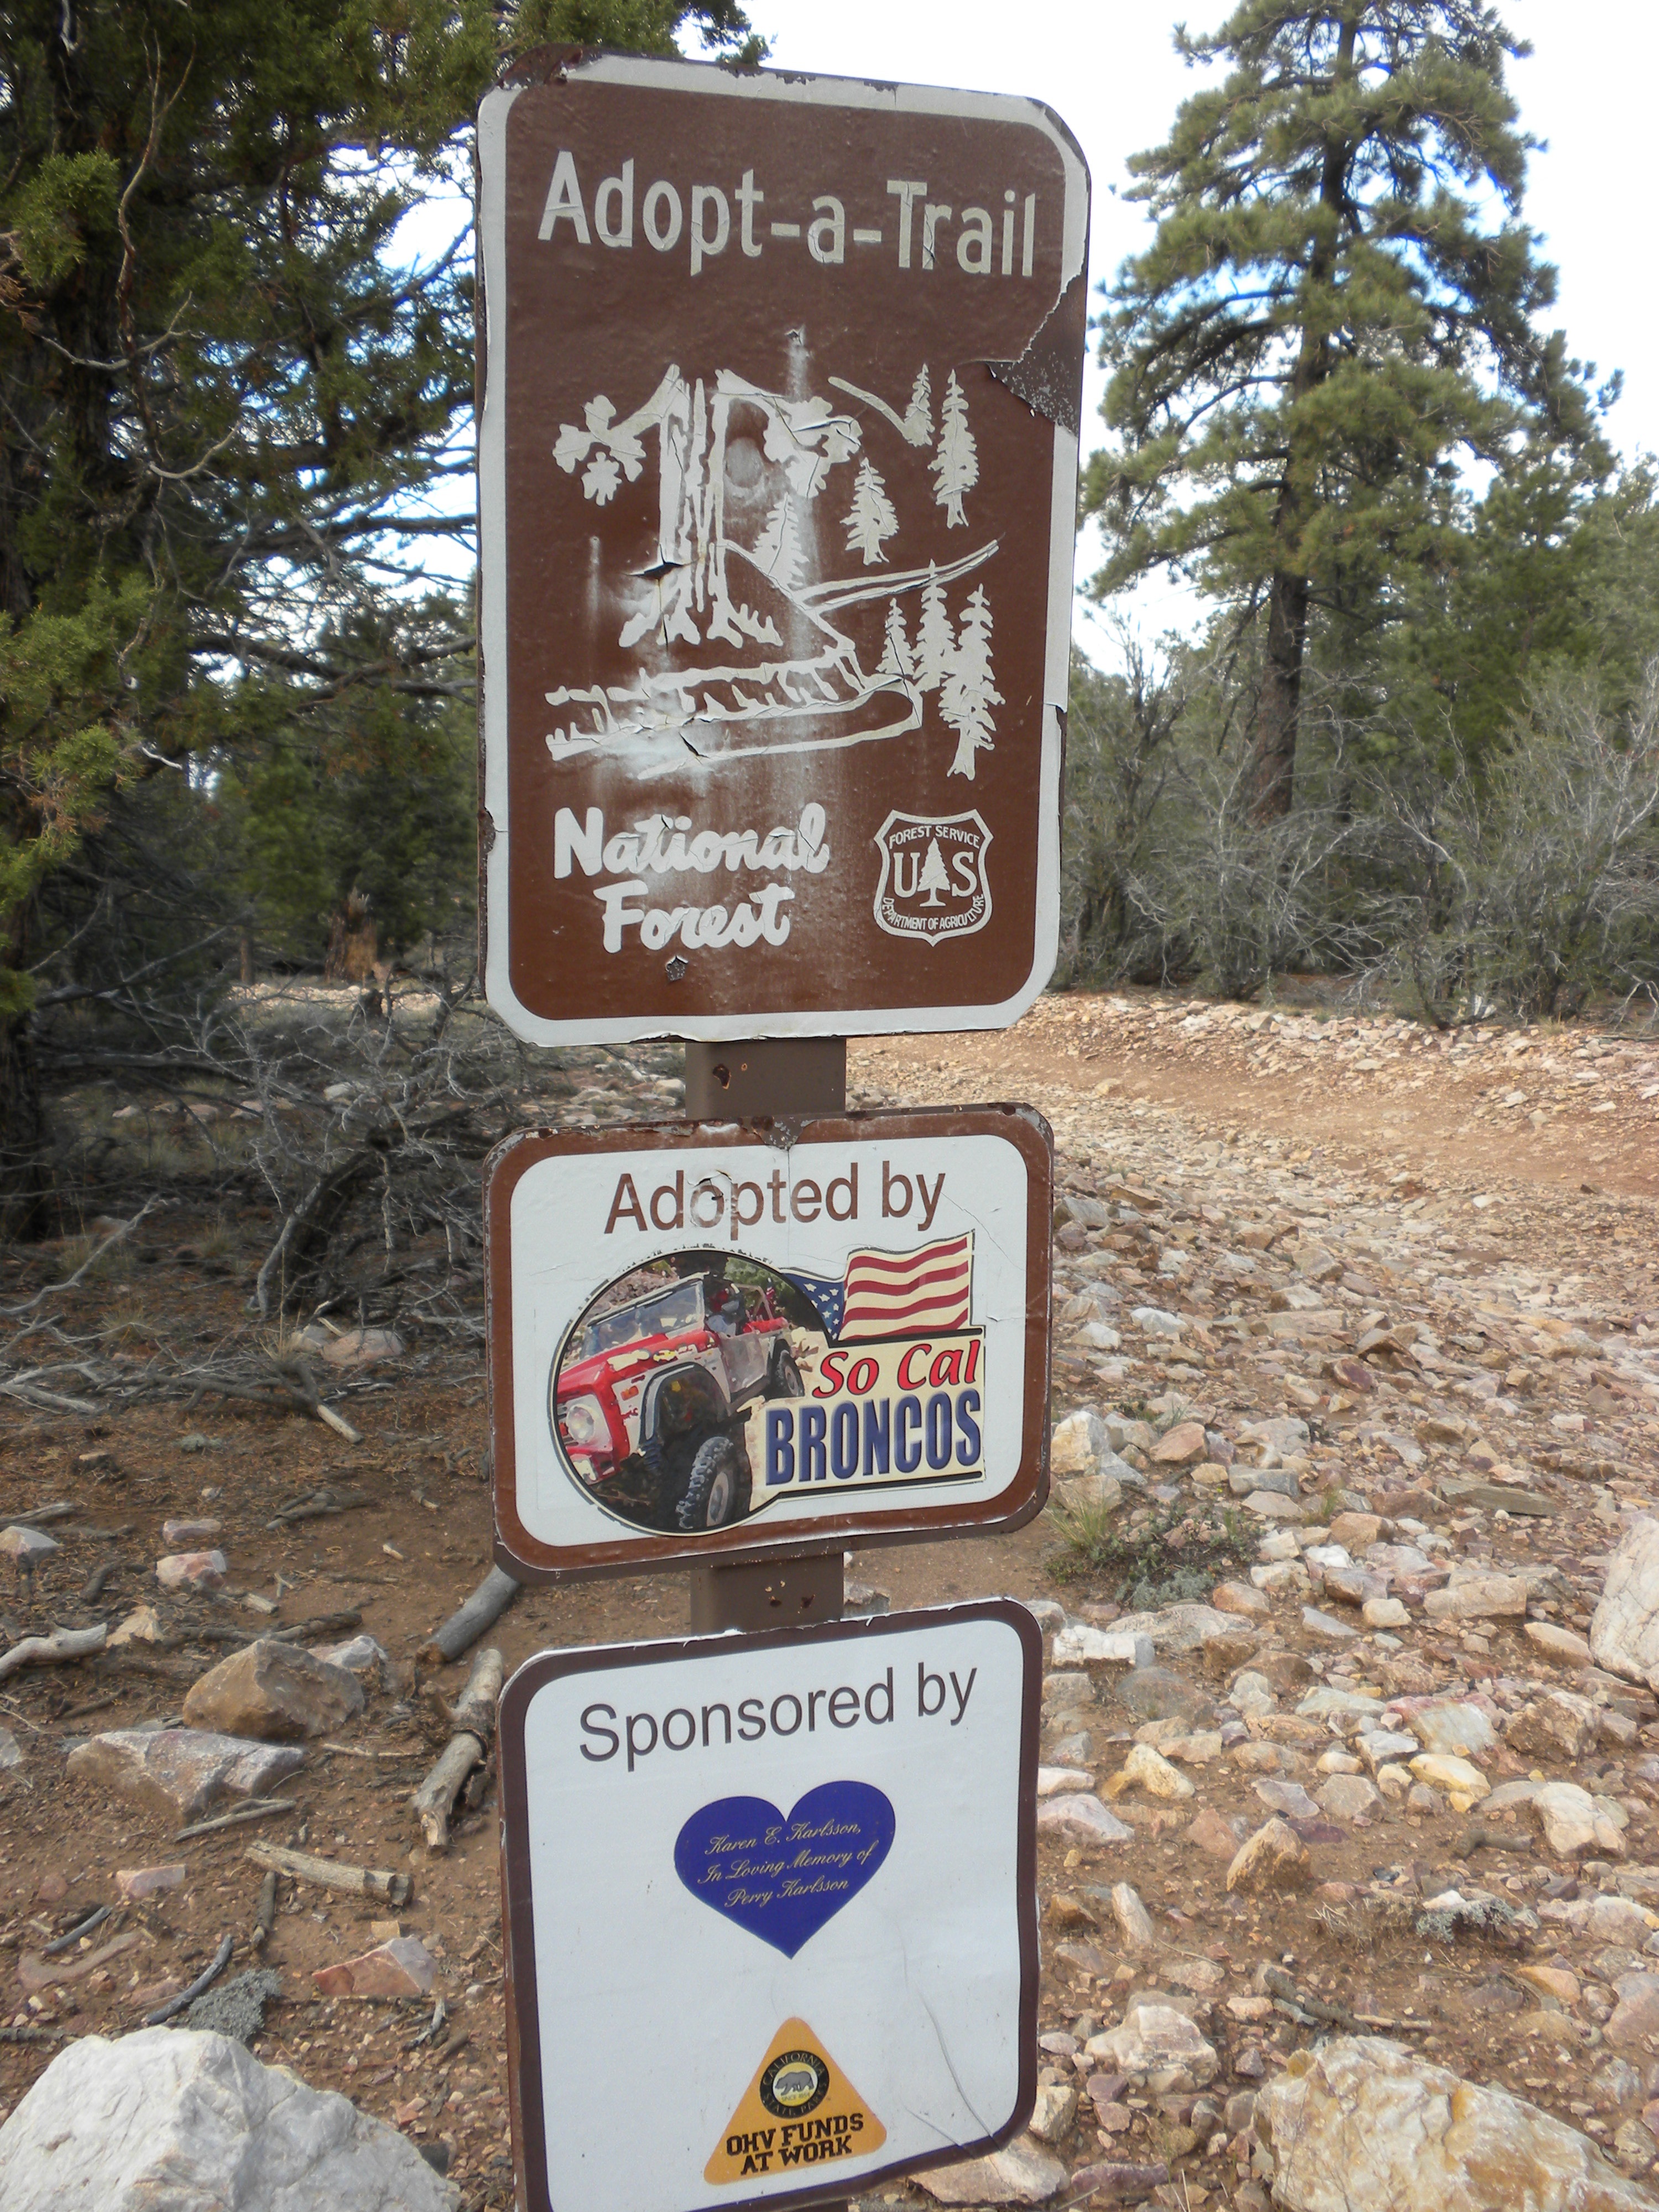
We took one trail that eventually met up with the John Bull Trail(the hardest Big bear trail out there)
Finally picture time!
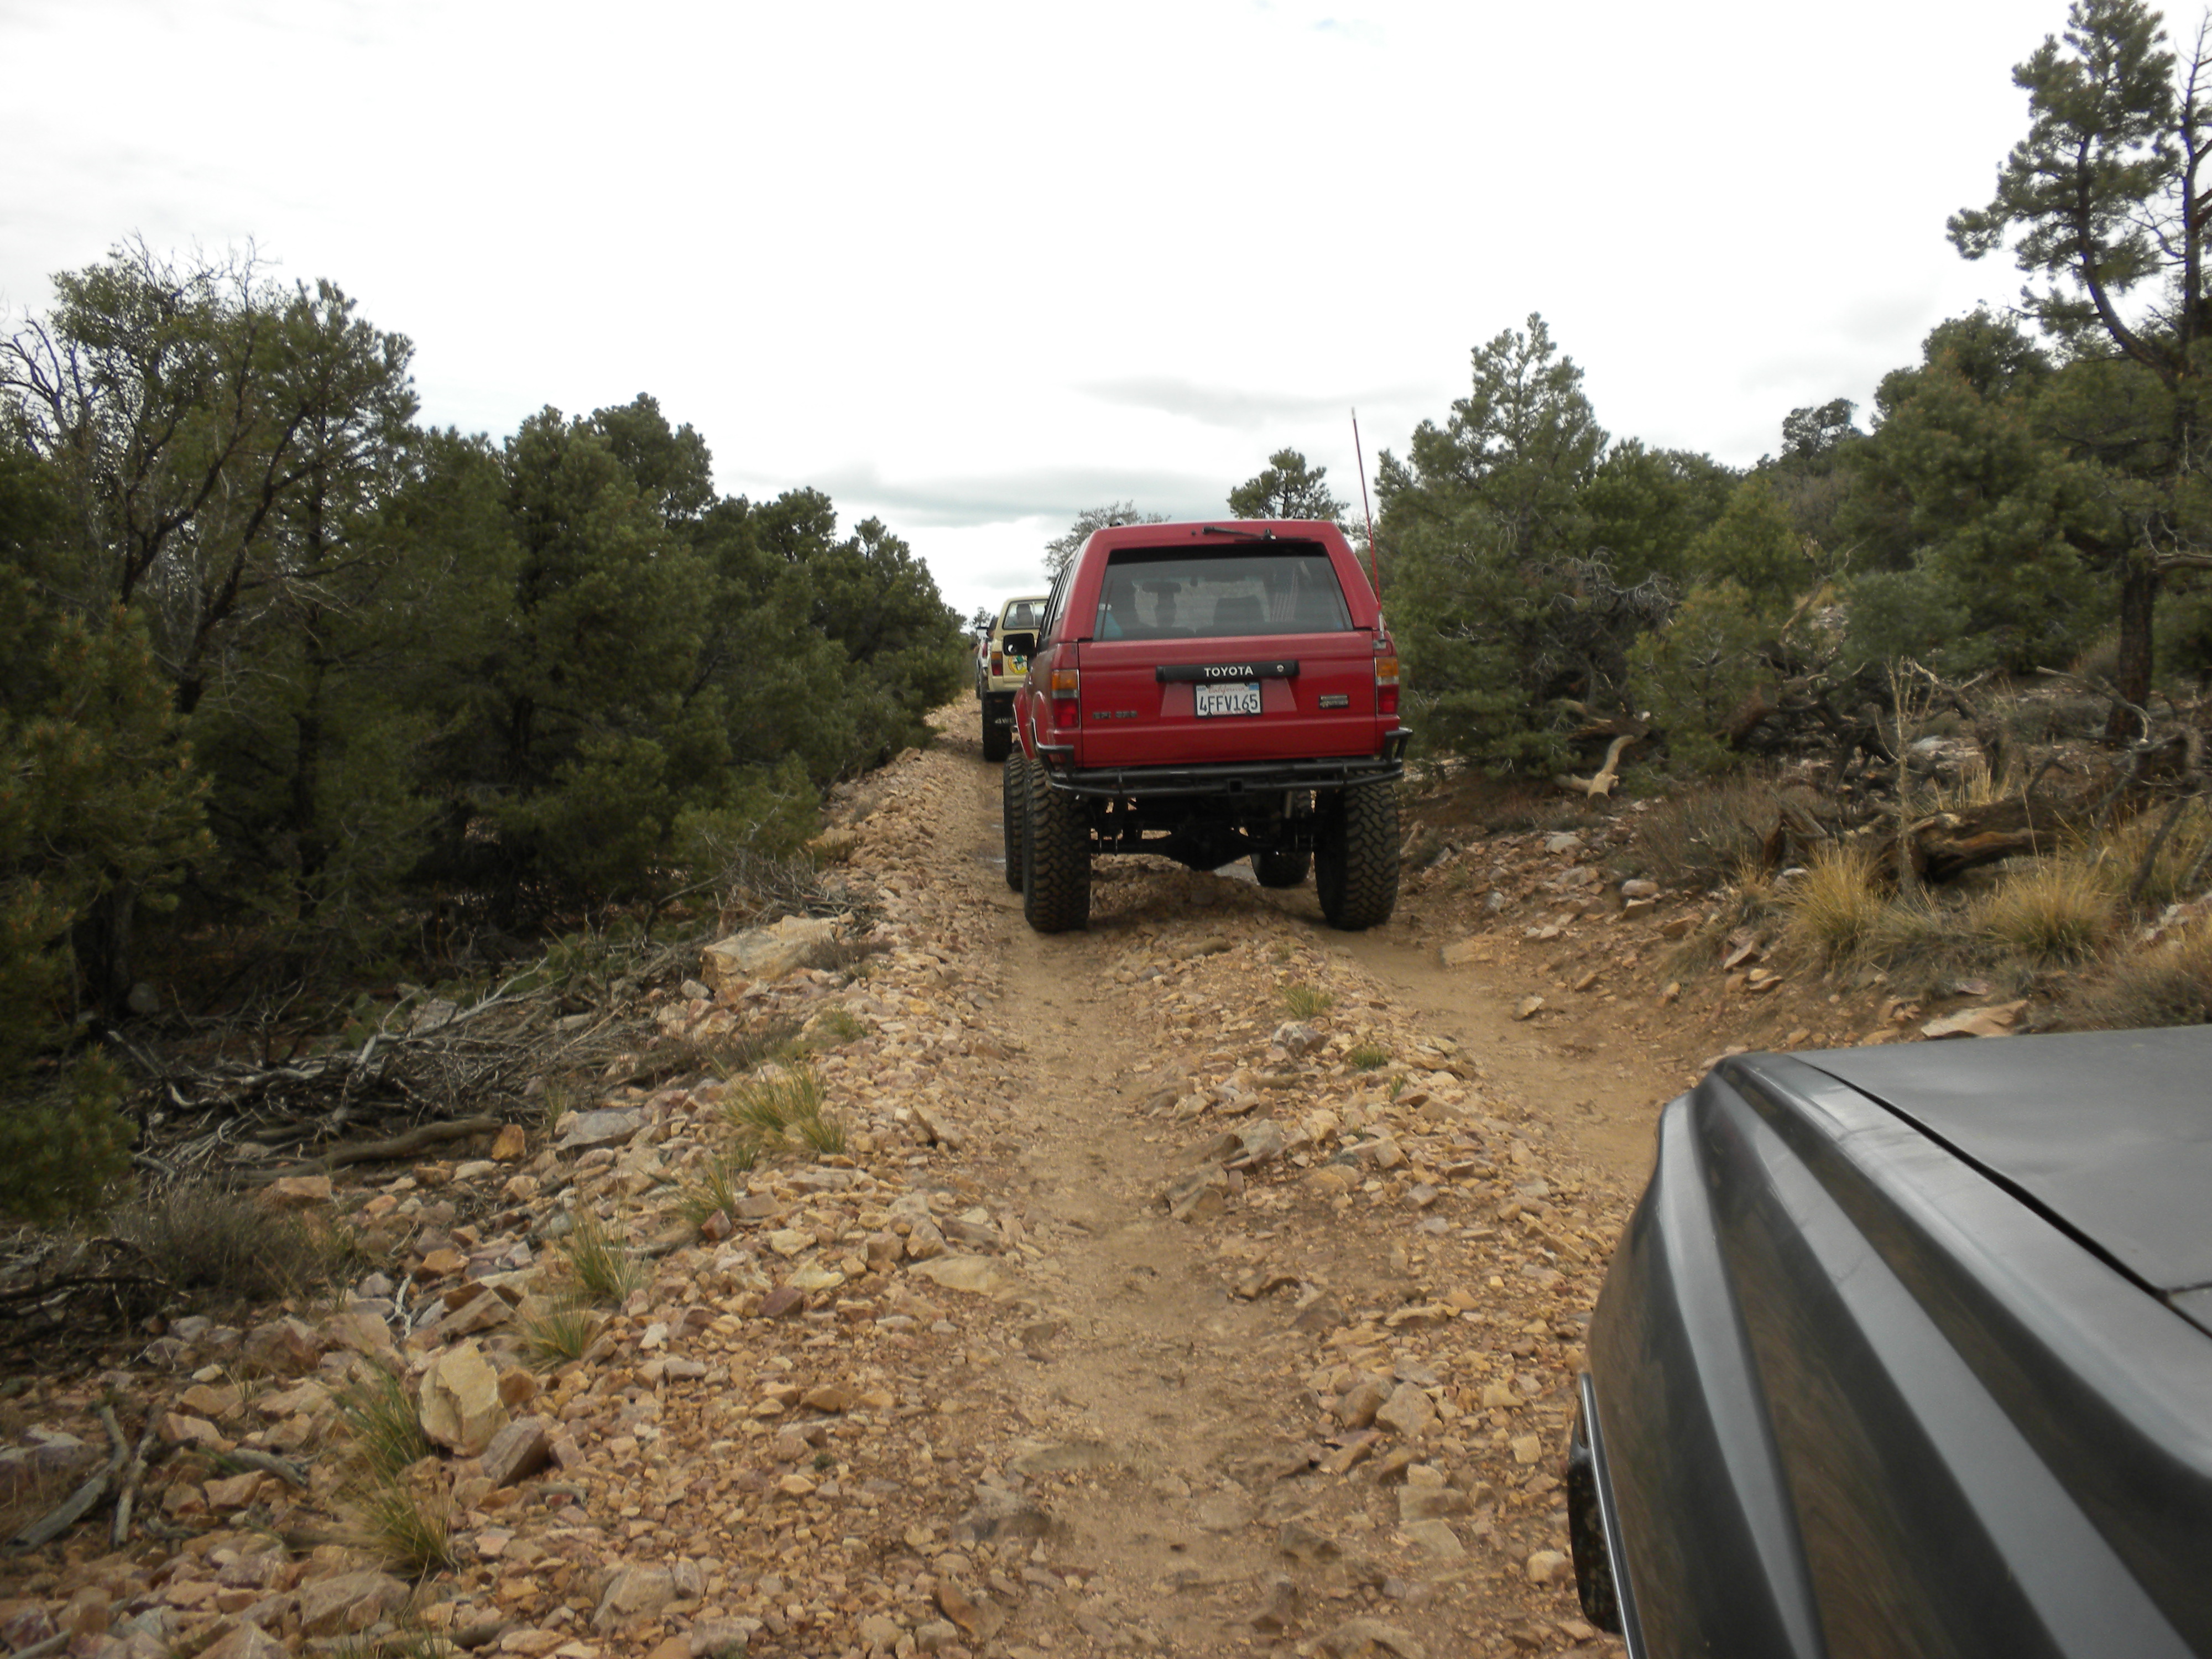
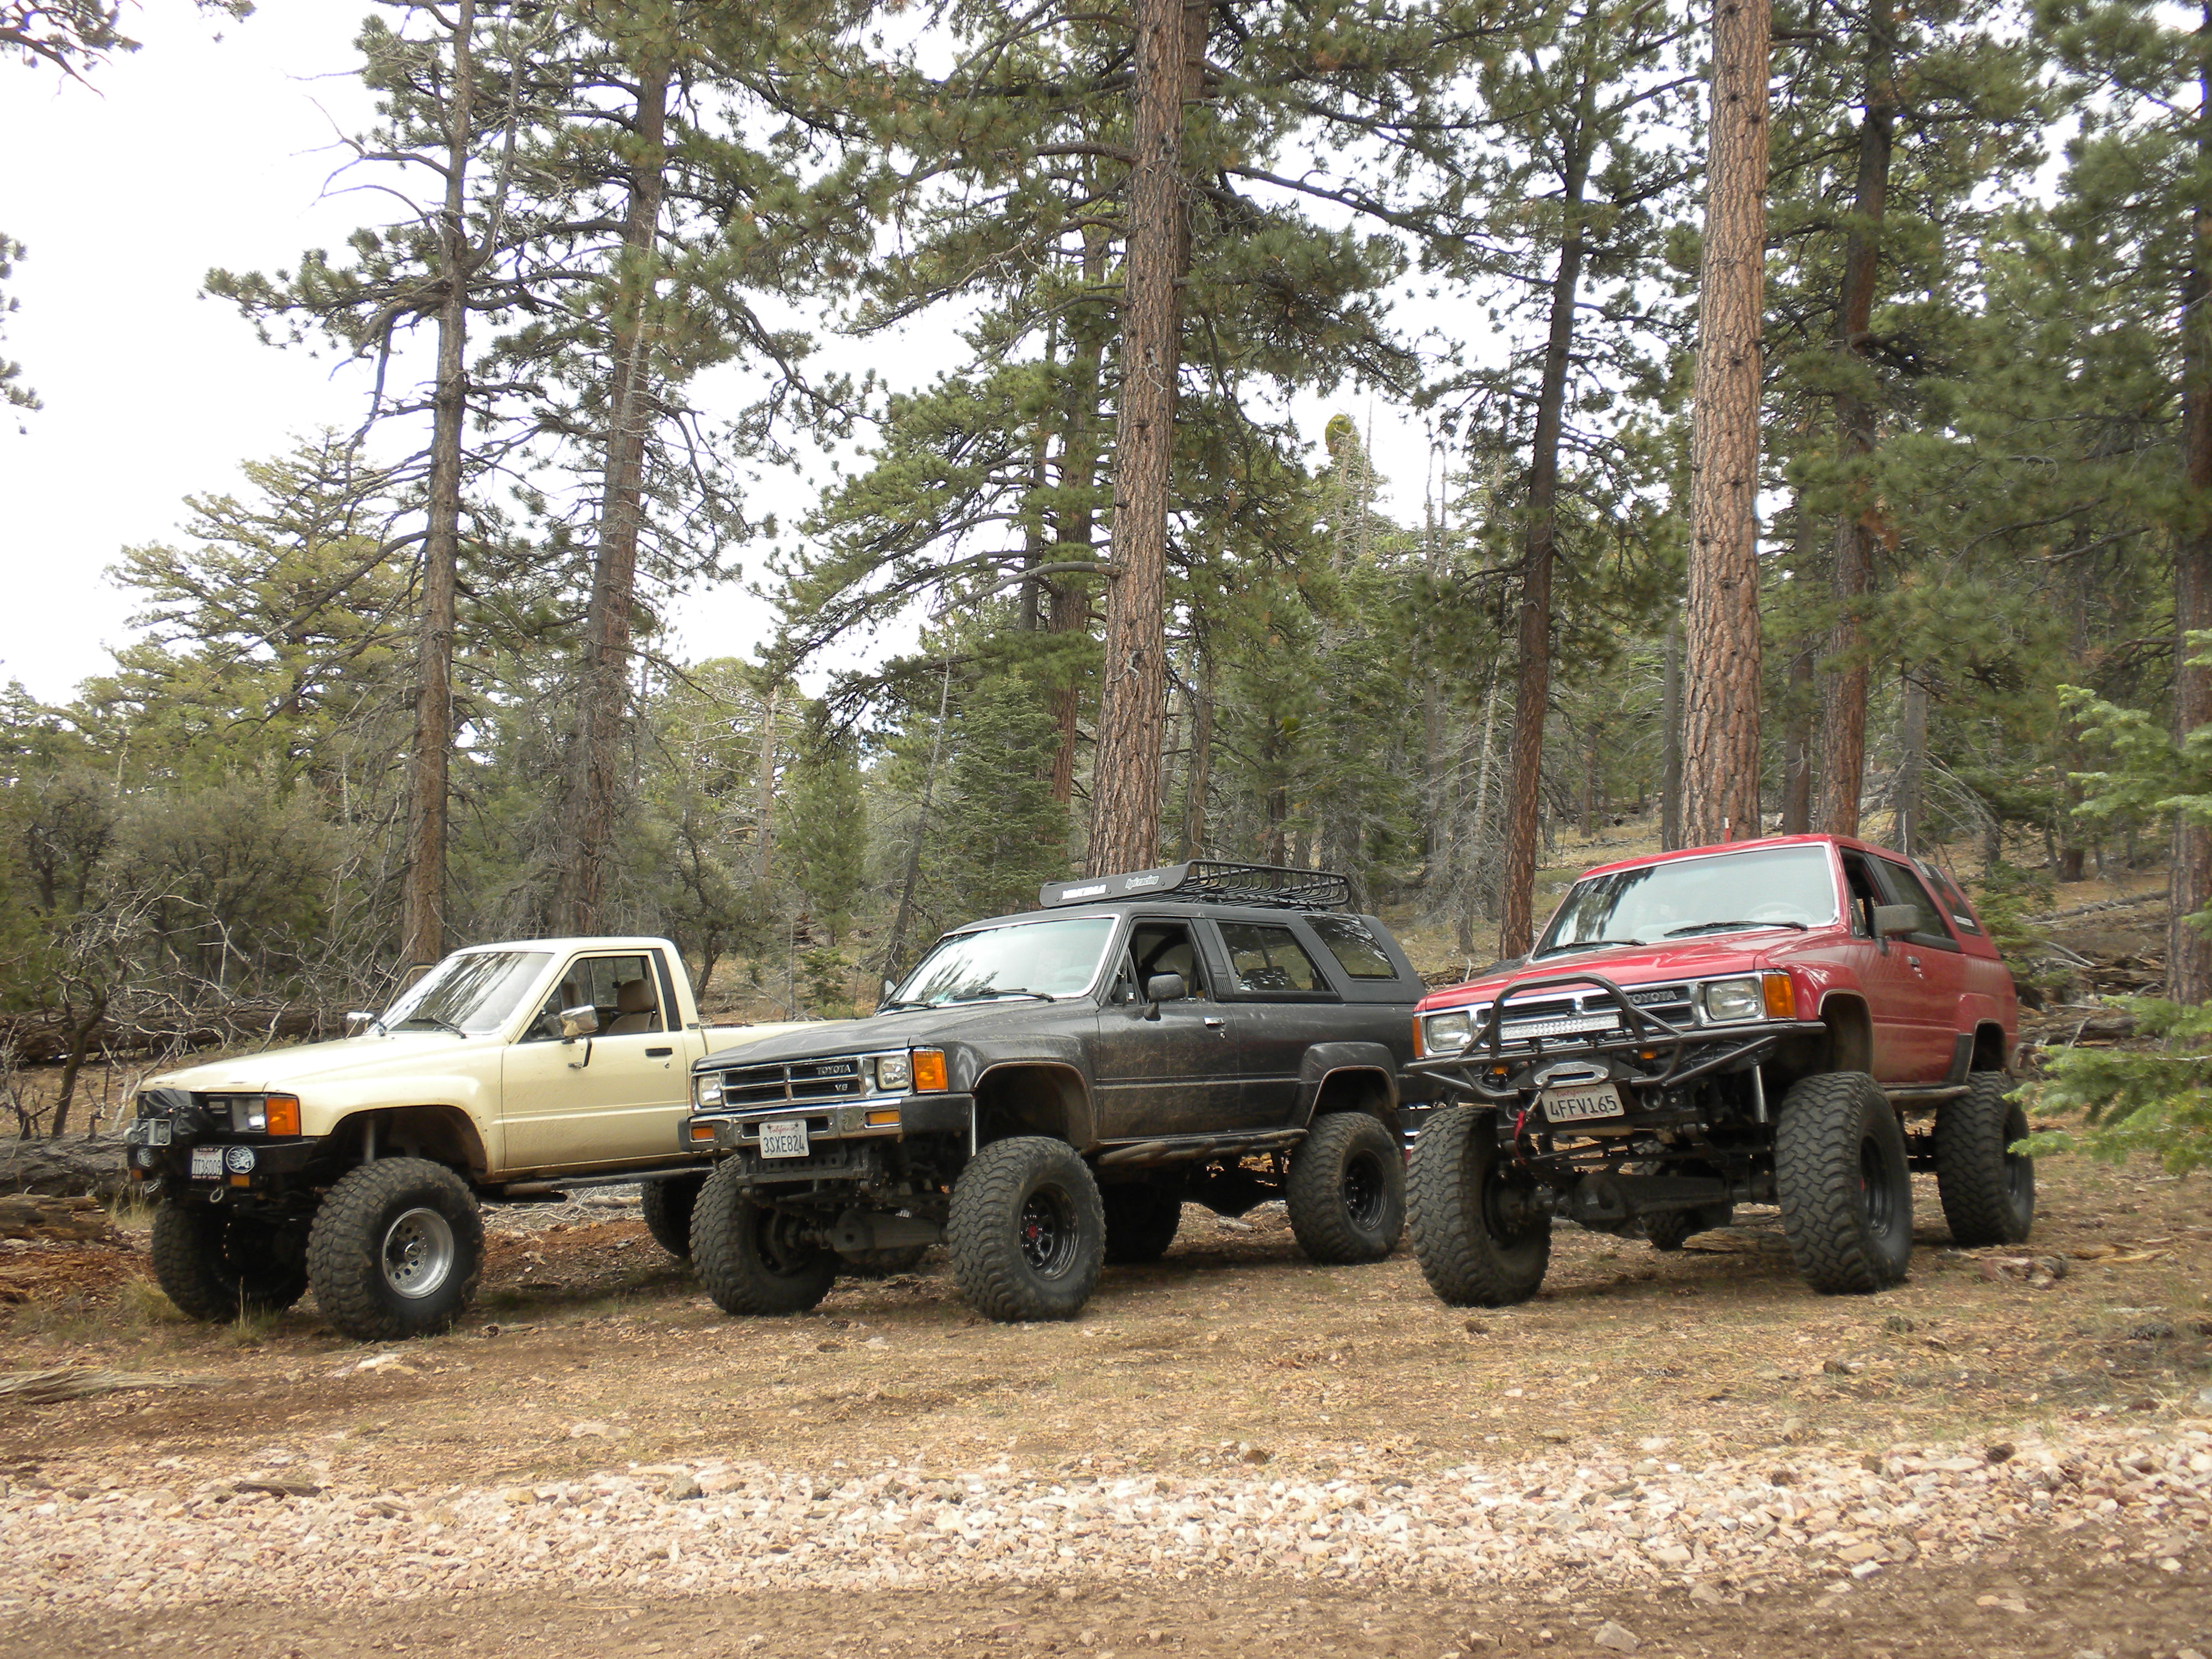
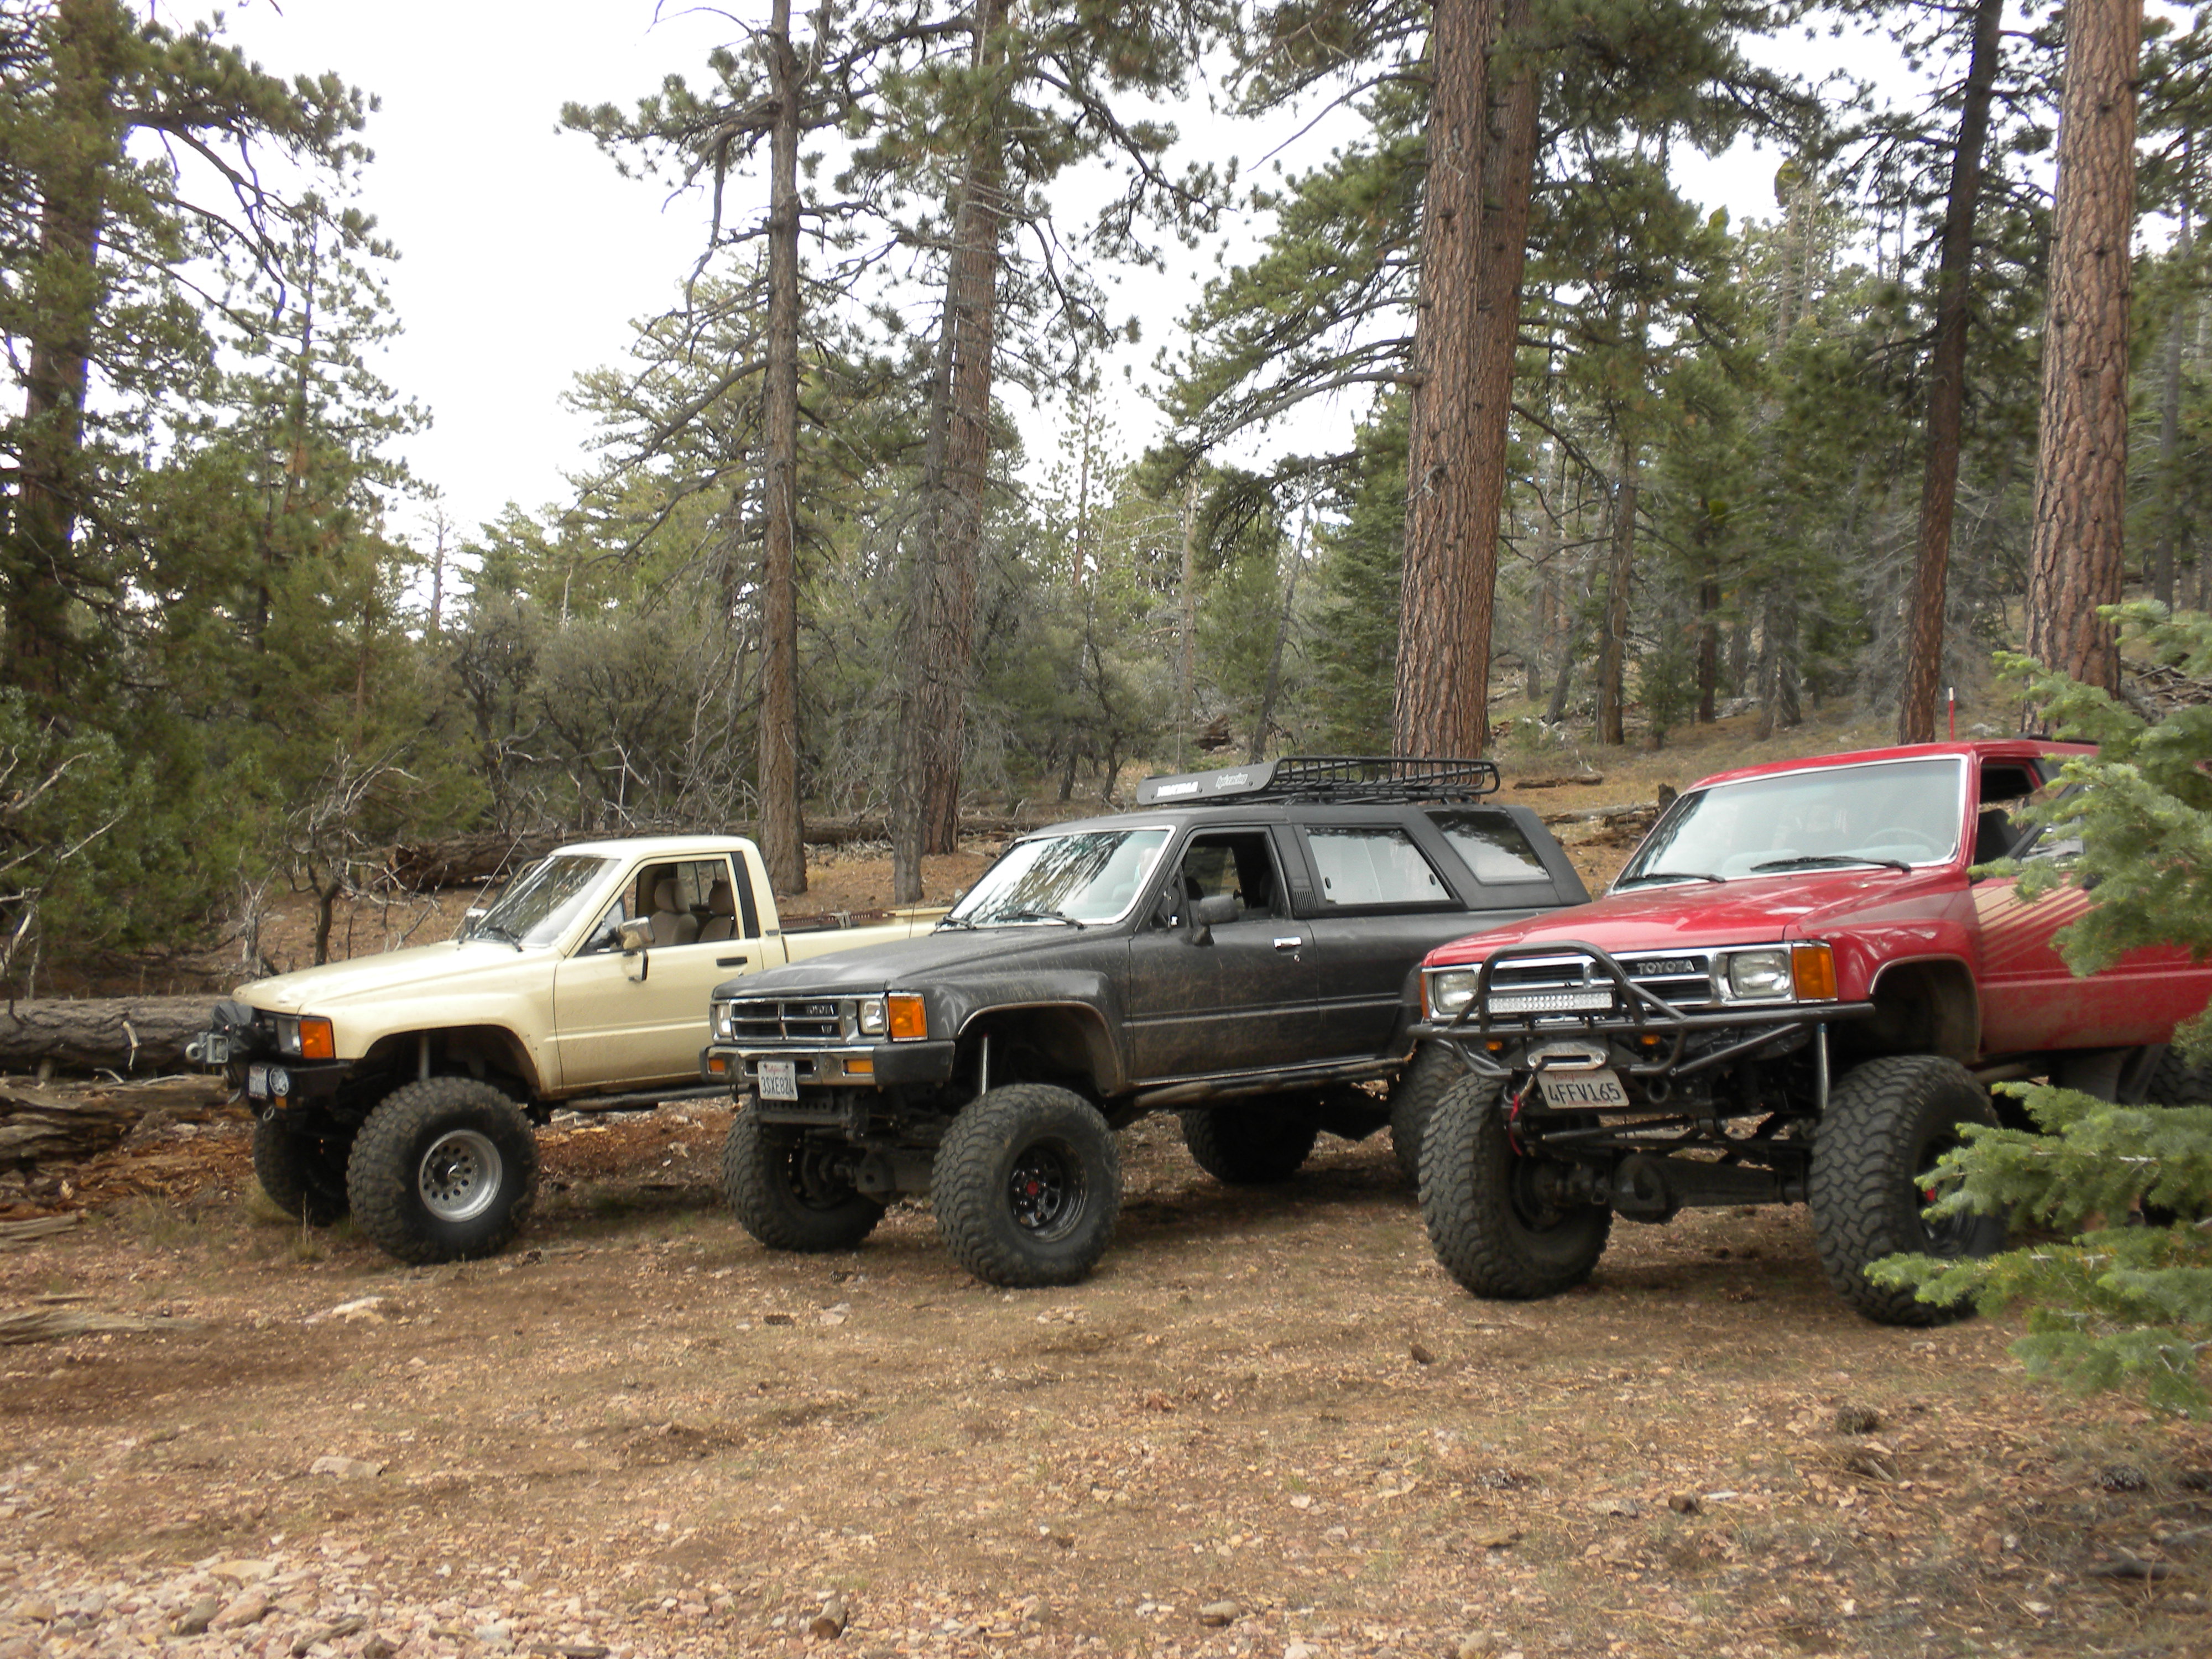
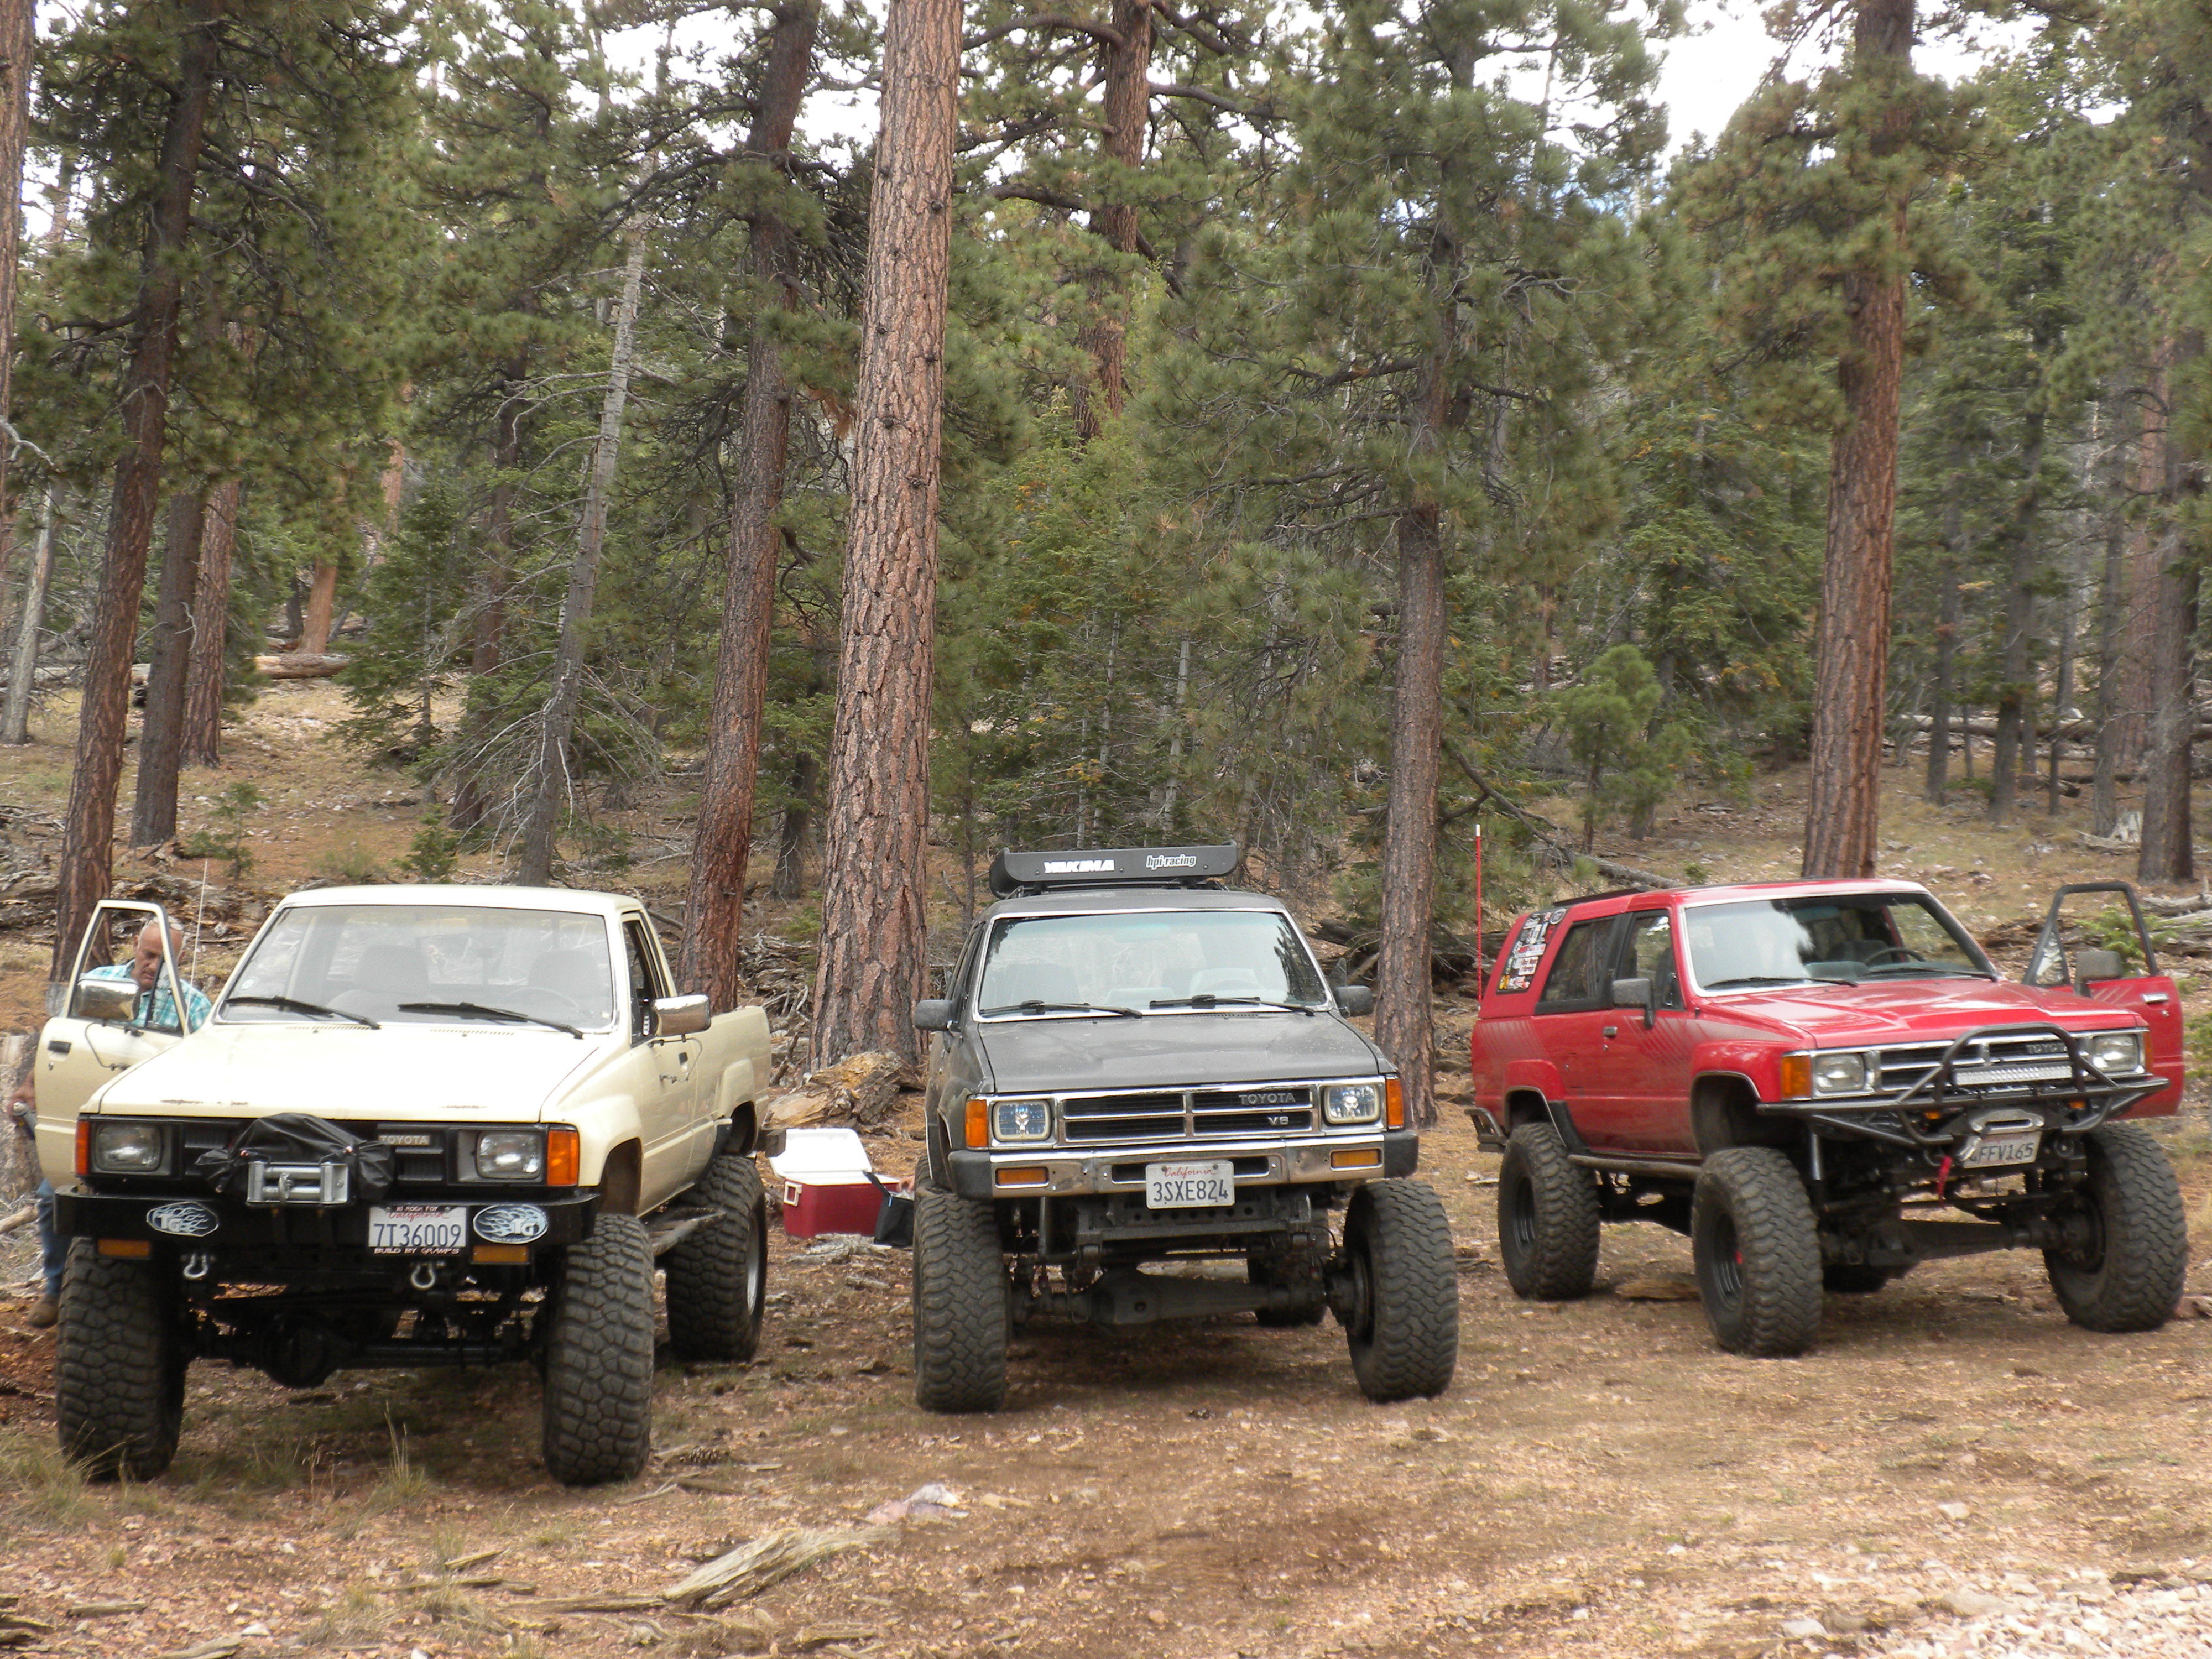
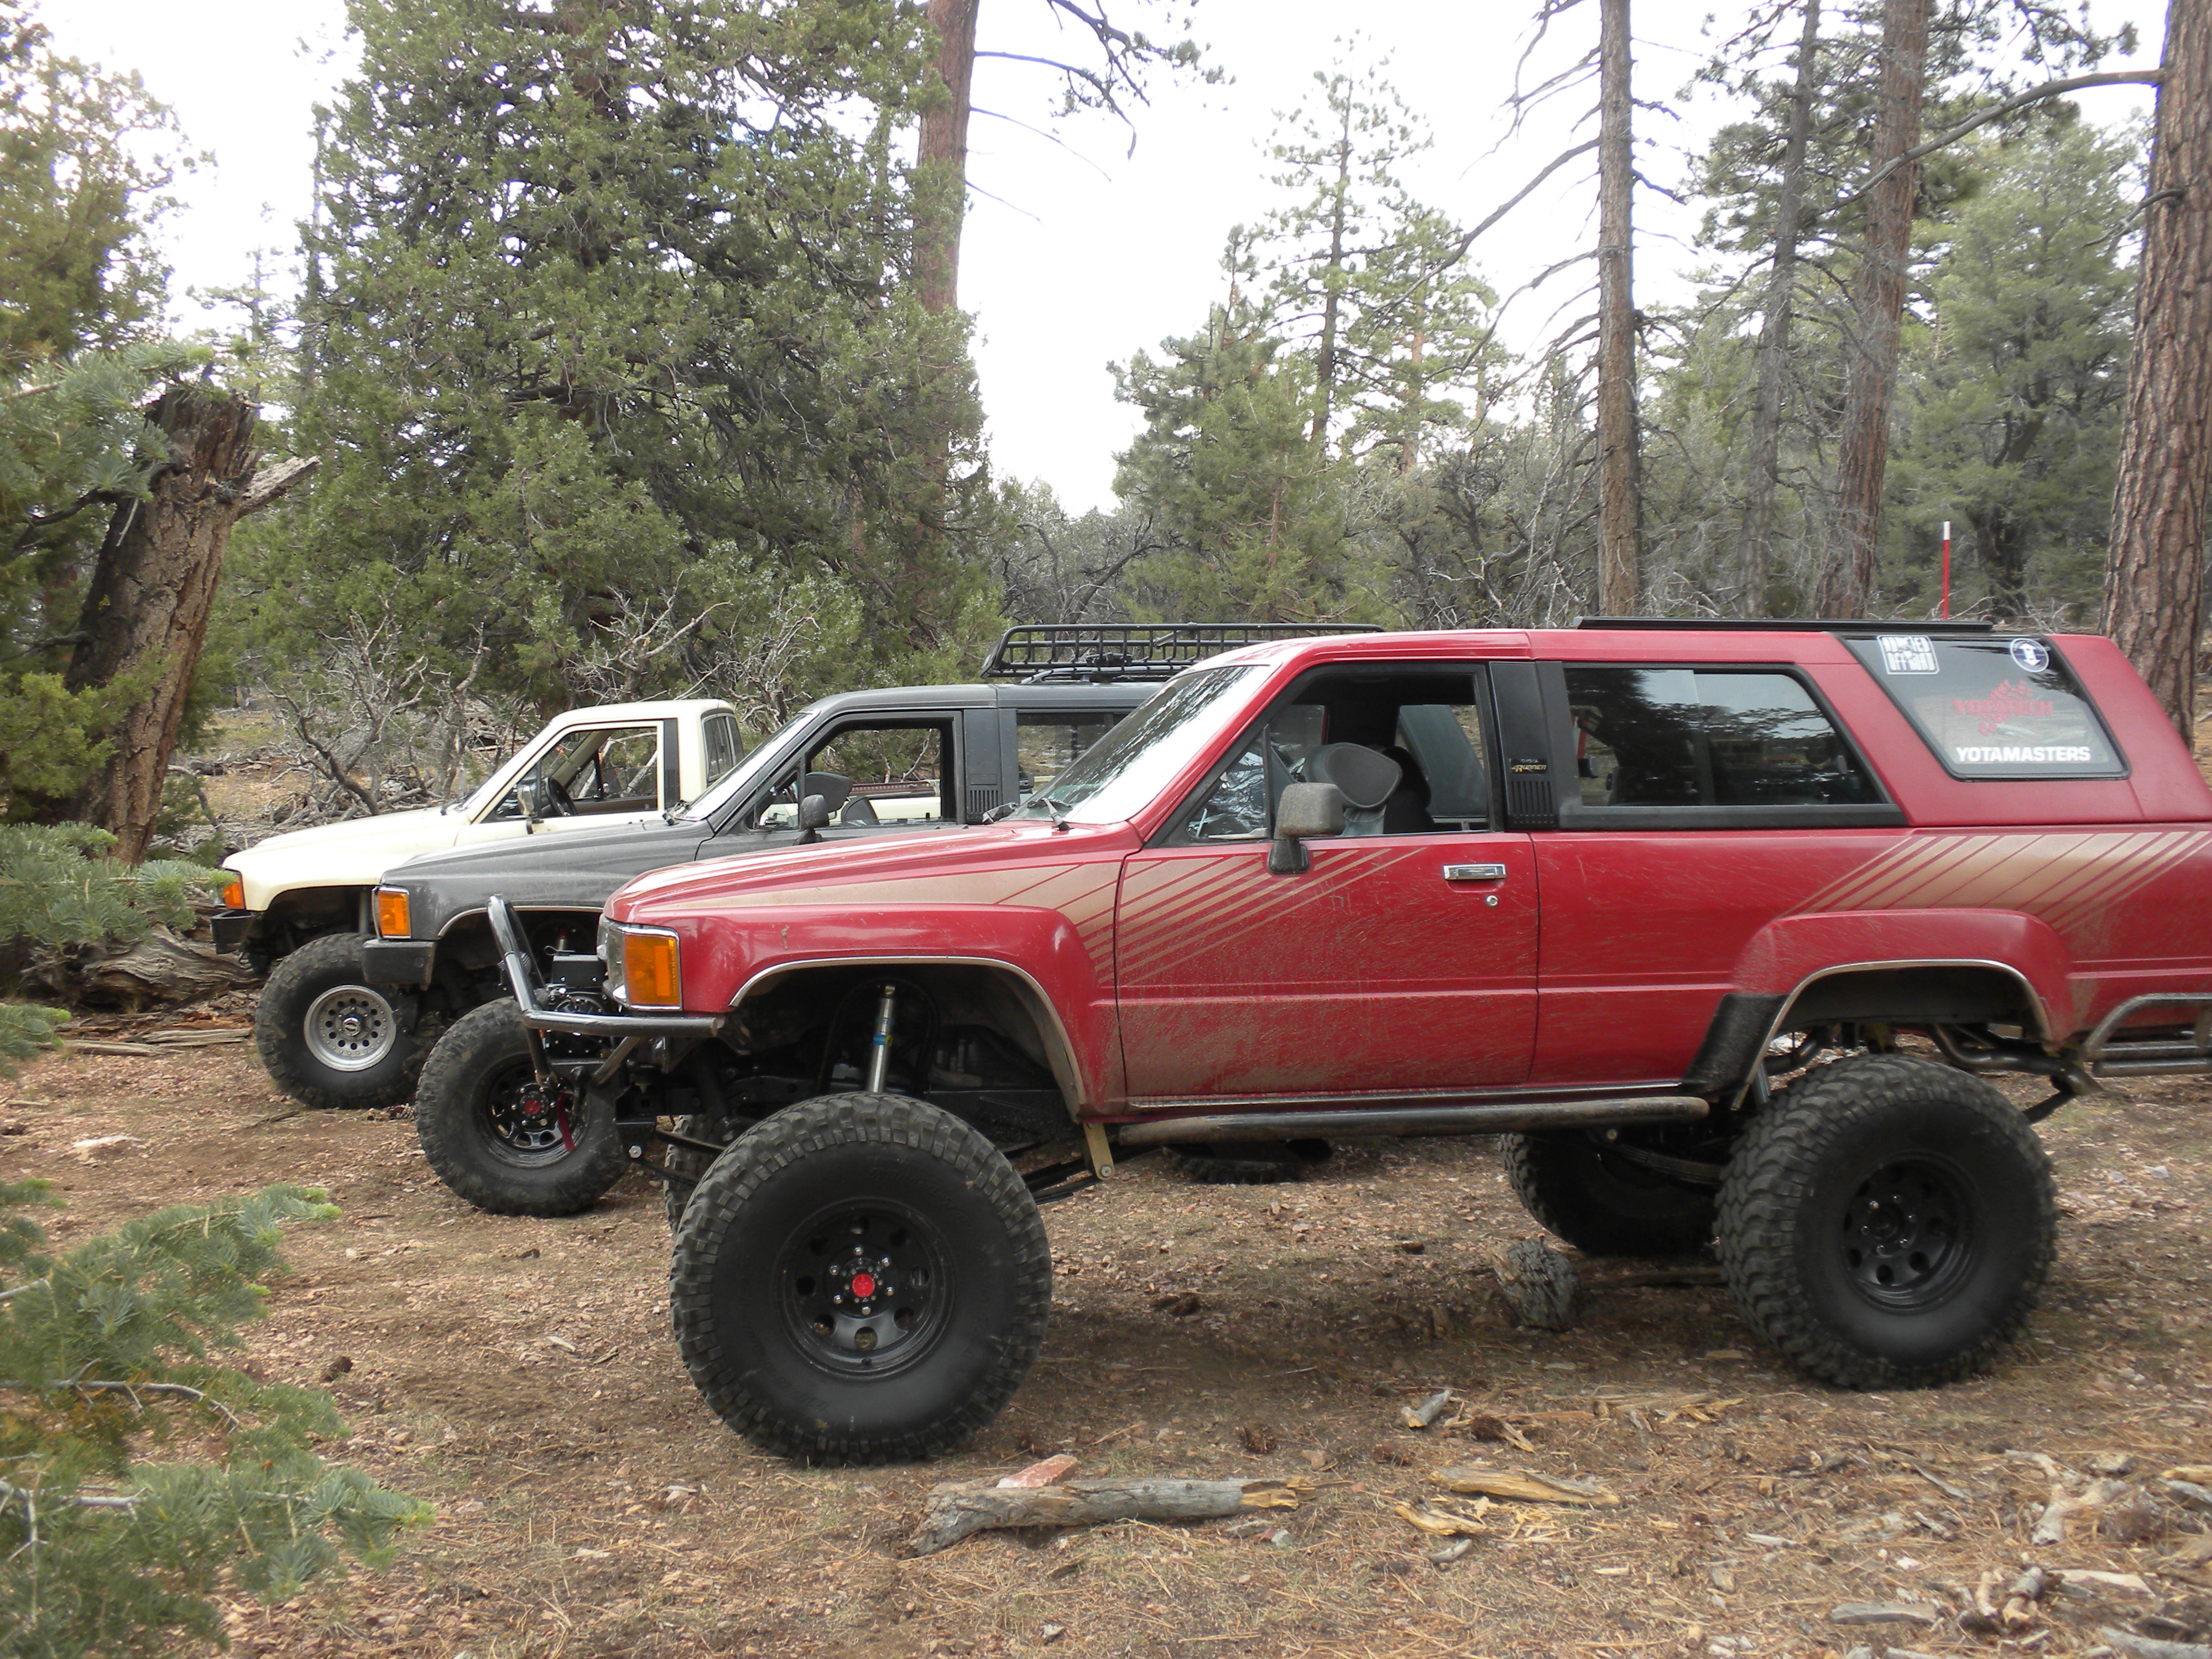
Driving up there entrance to the trail
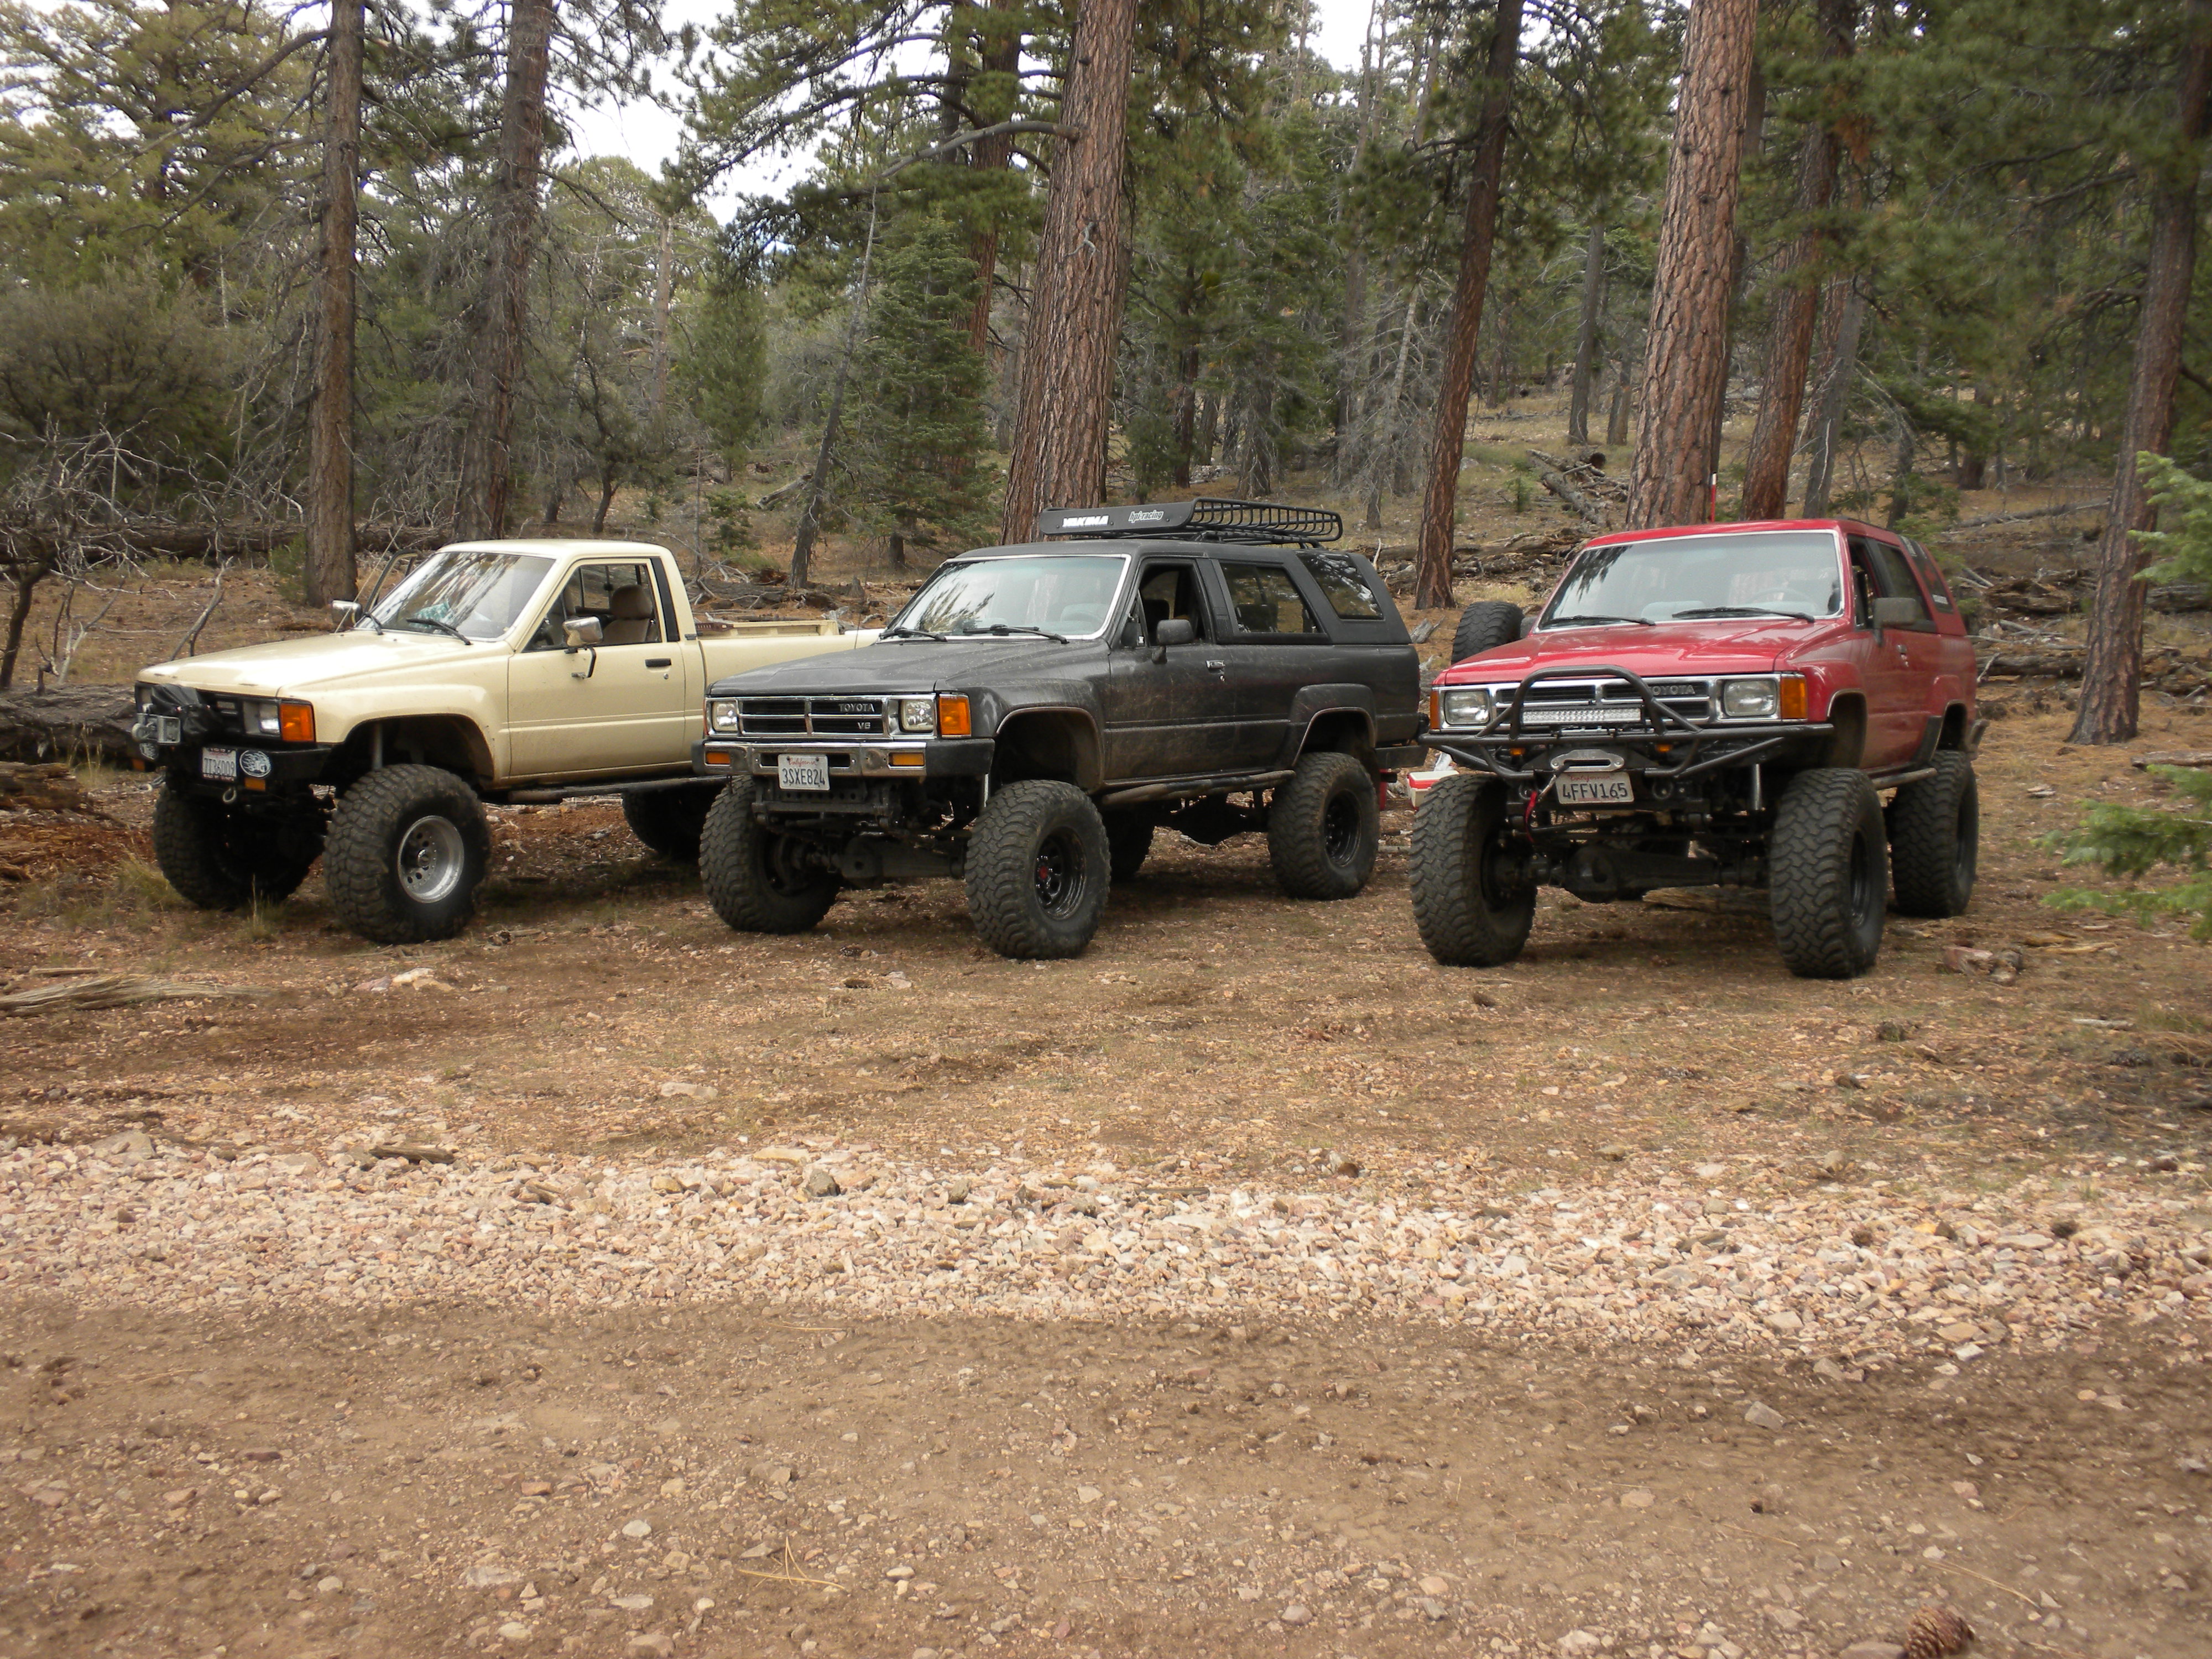
I didnt get many pictures of my neighbors truck. He was always in a hurry lol He wouldnt hold still for any pictures so most of what i got of him were him in action and me having to time it right to get something good.

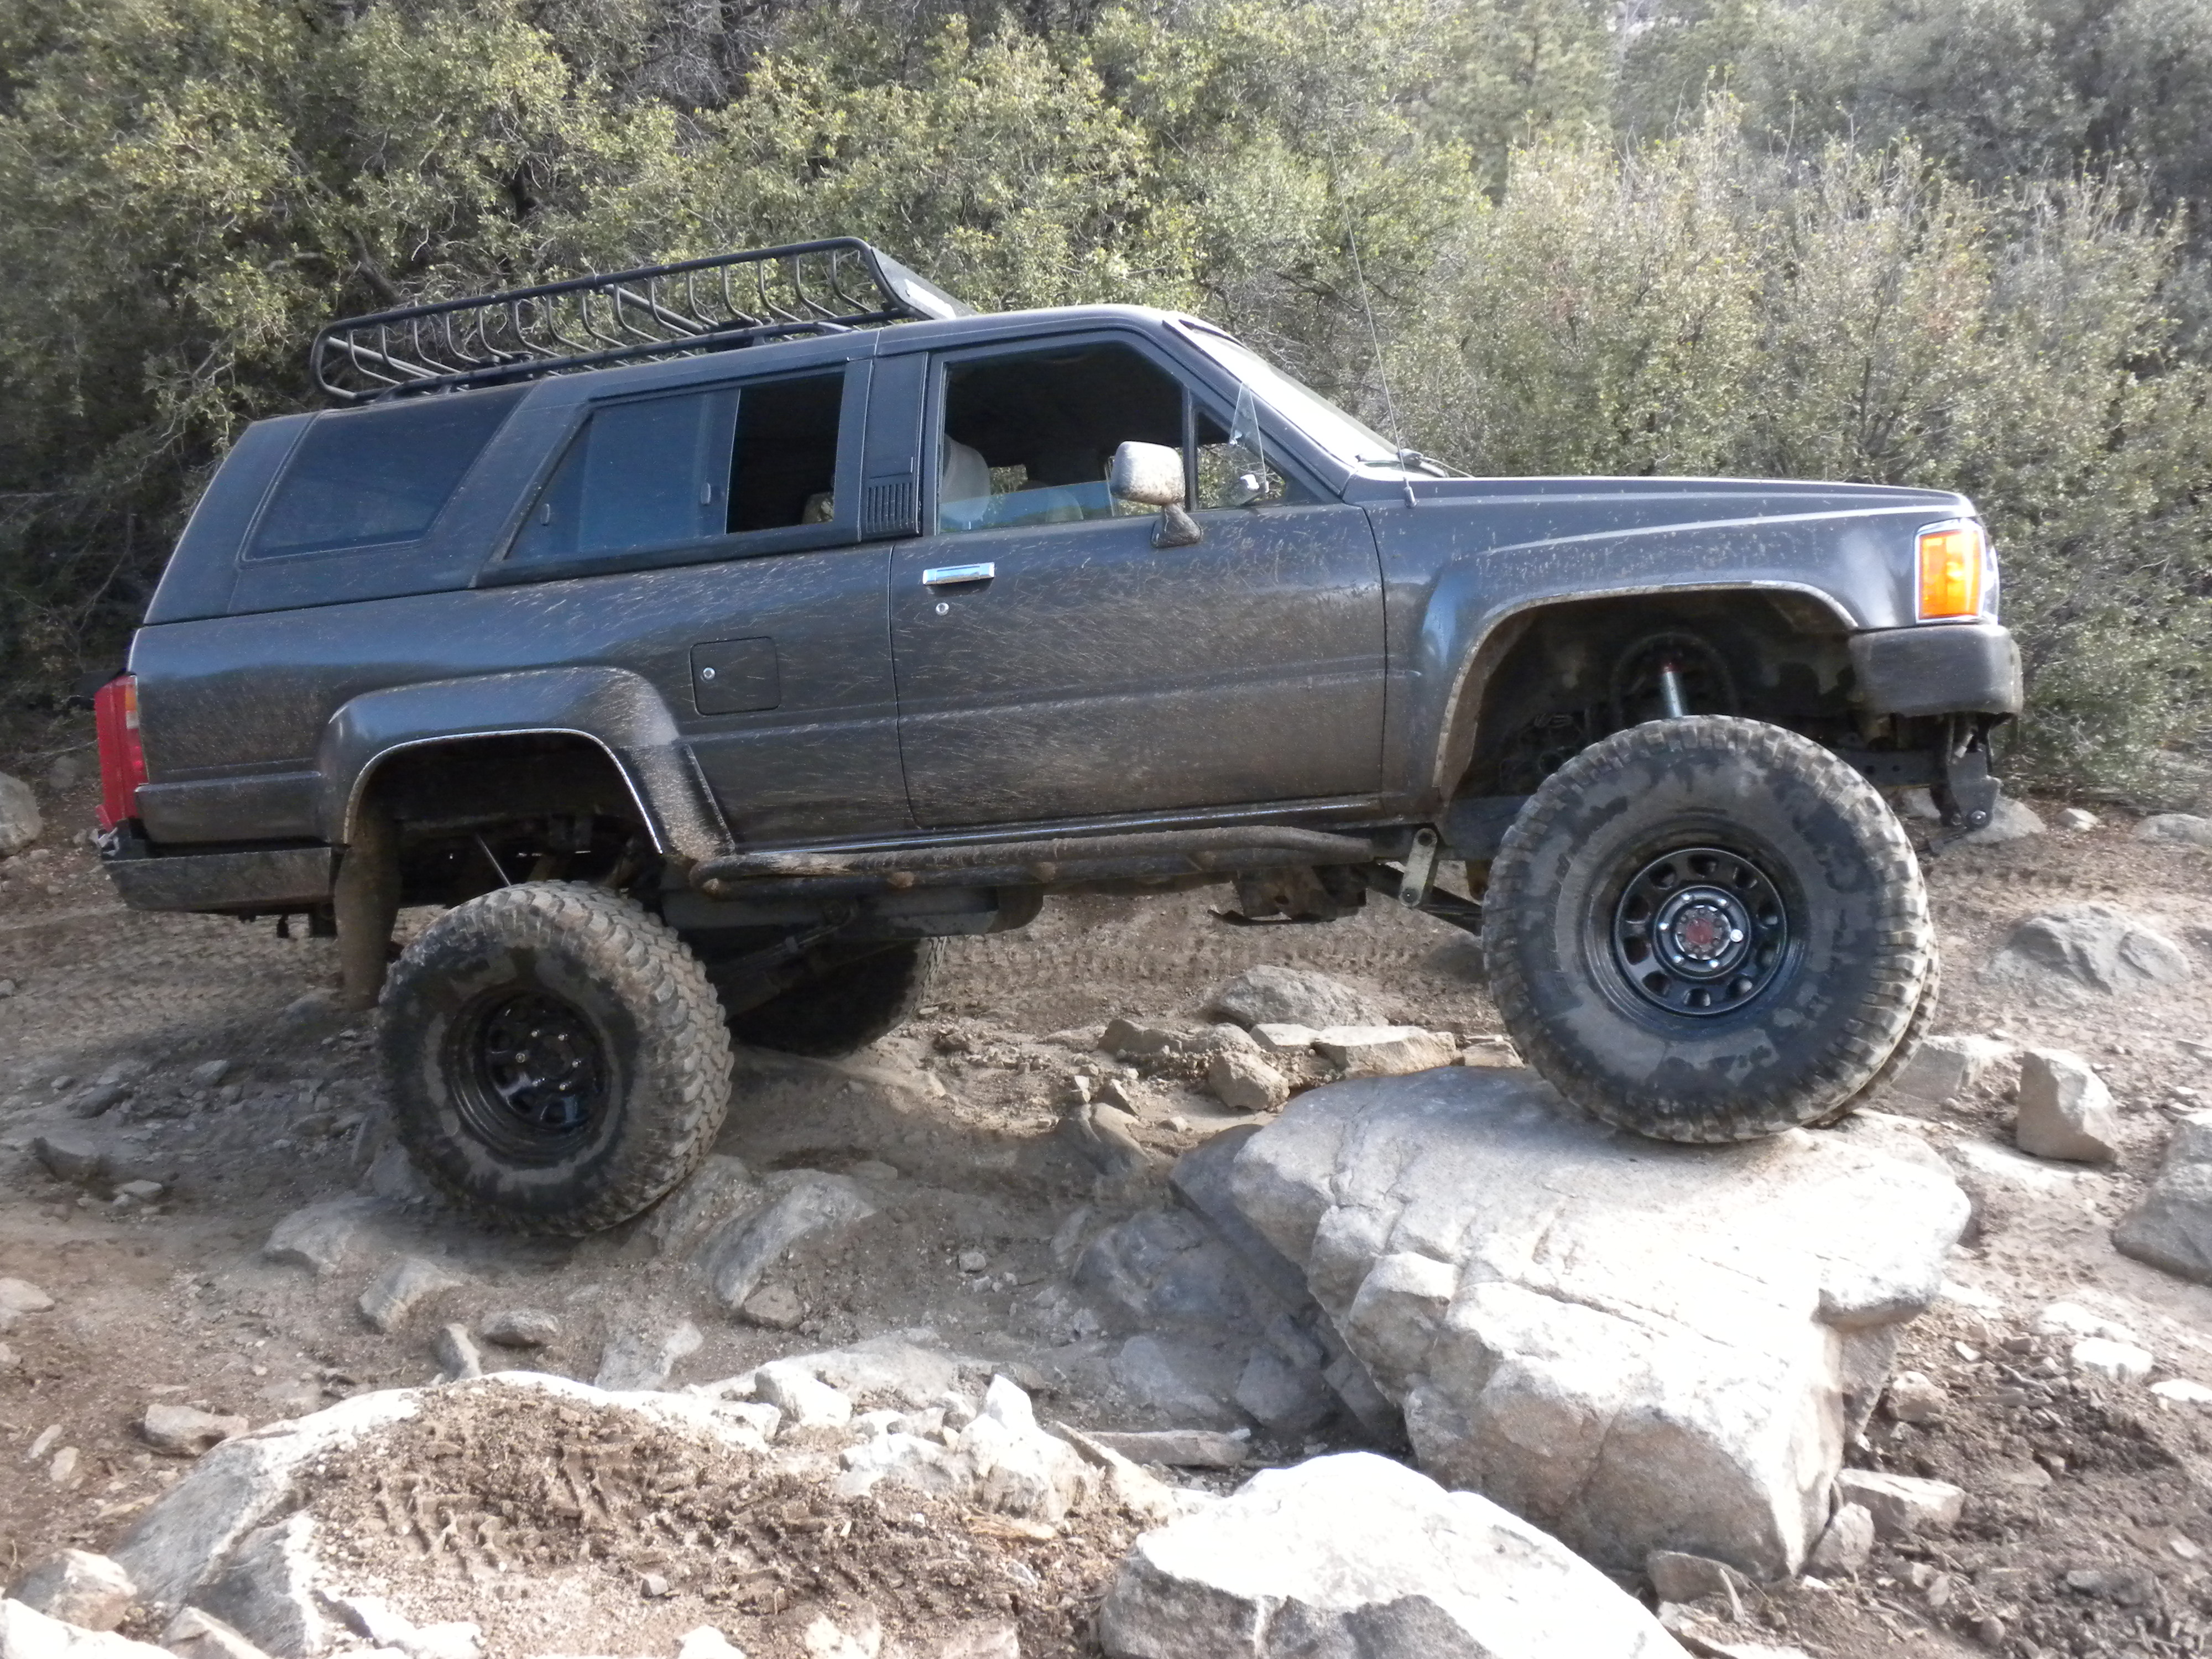
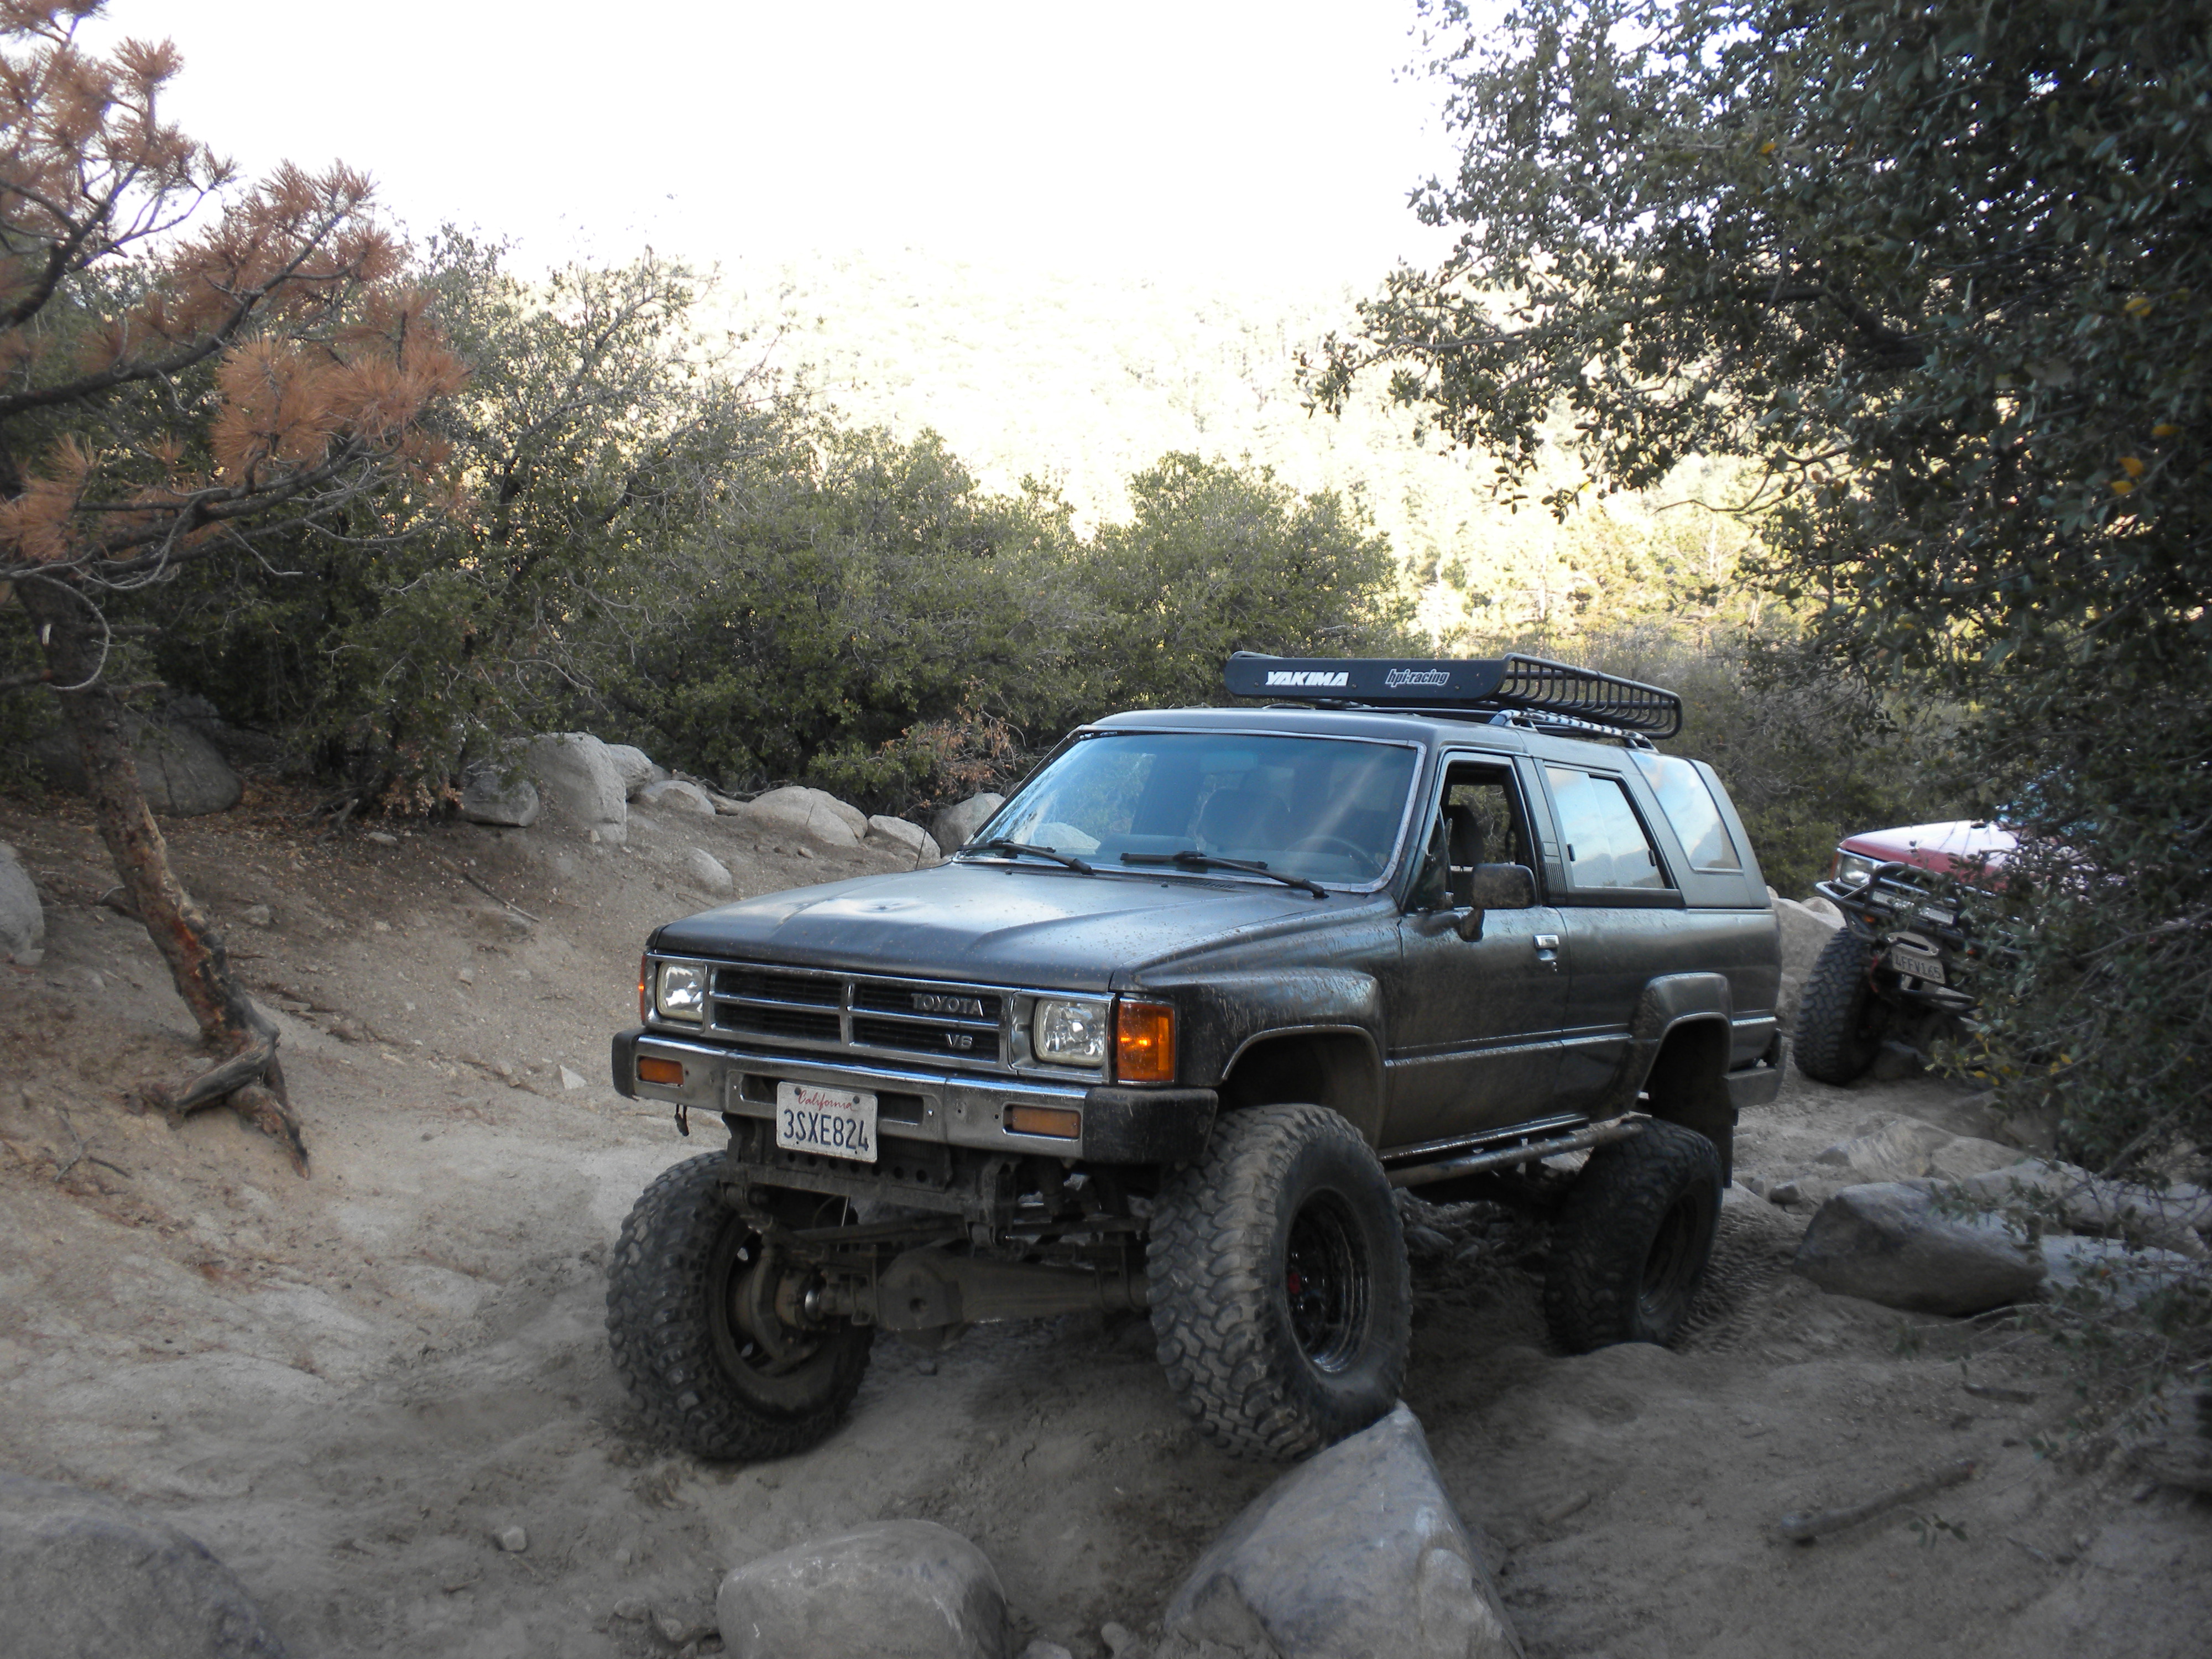
I wanted to take a bunch of pictures and video footage of Mark's truck because i wanted him to have a bunch of action shots for his first time testing out his new SAS set up. I know i sure as hell wanted somebody taking a bunch of pix and videos of me when i first went on mine. So I took a bunch of shots of his rig and Mark returned the favor. Thanks again Mark.

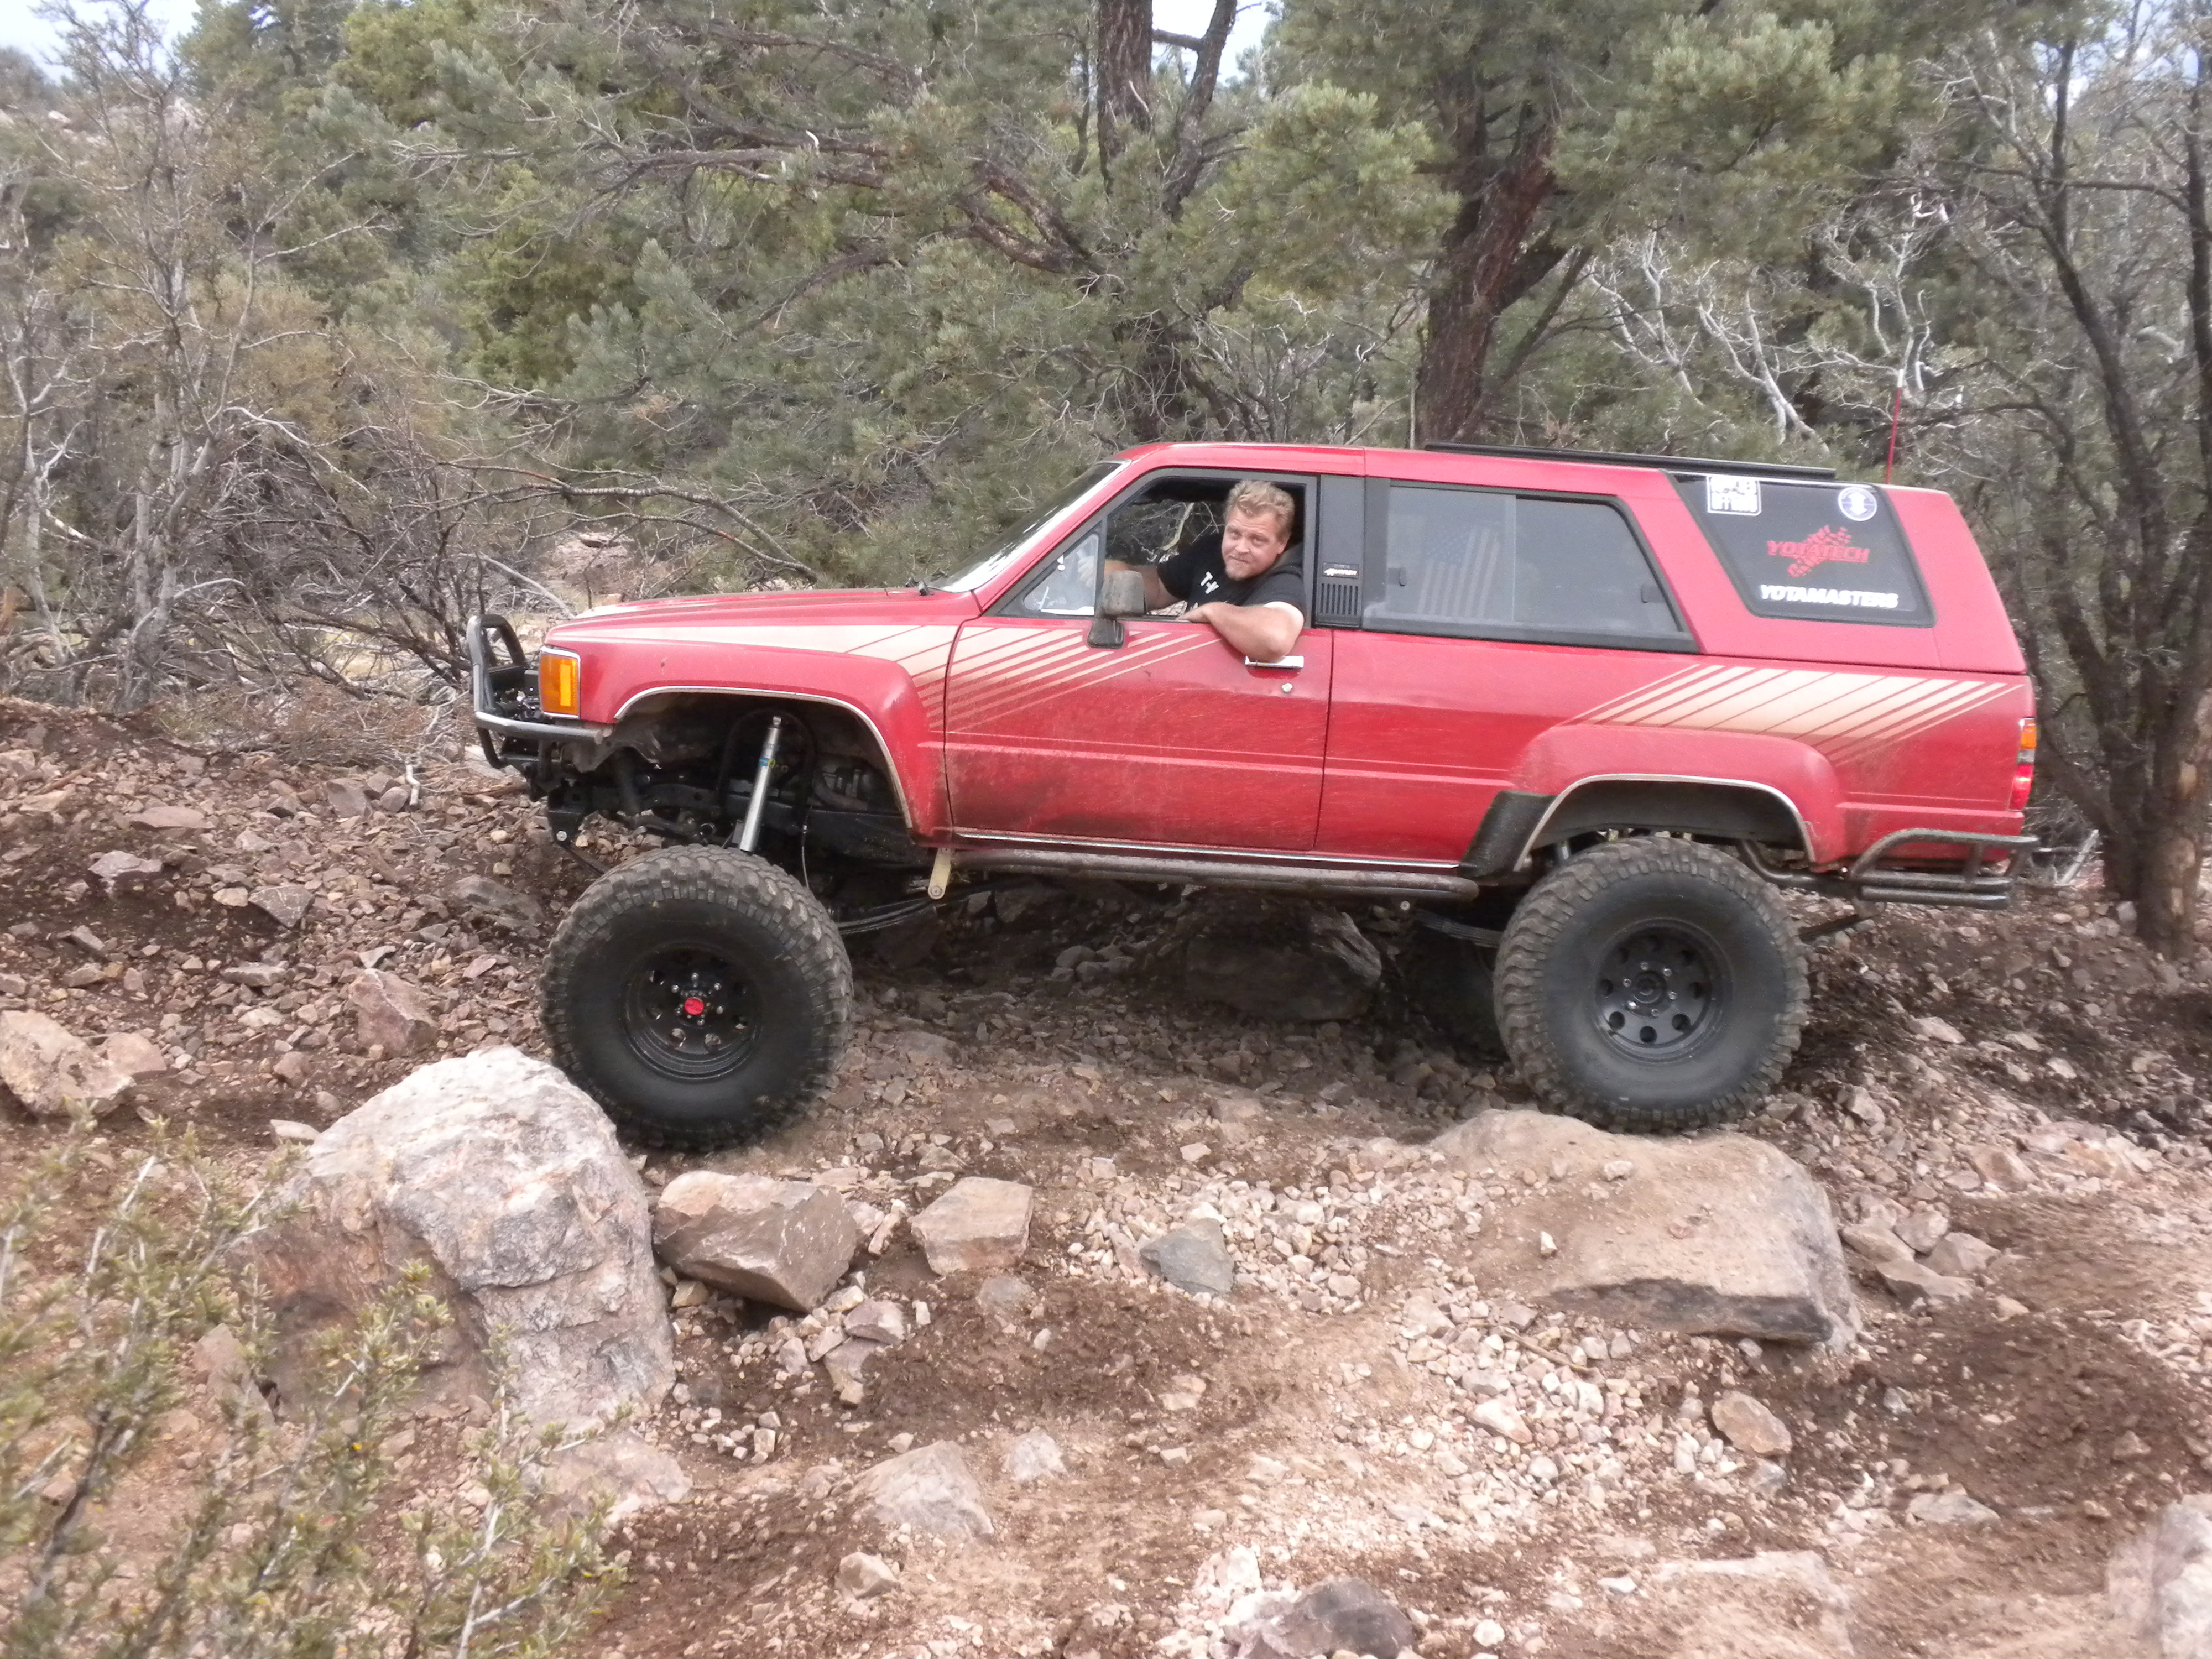
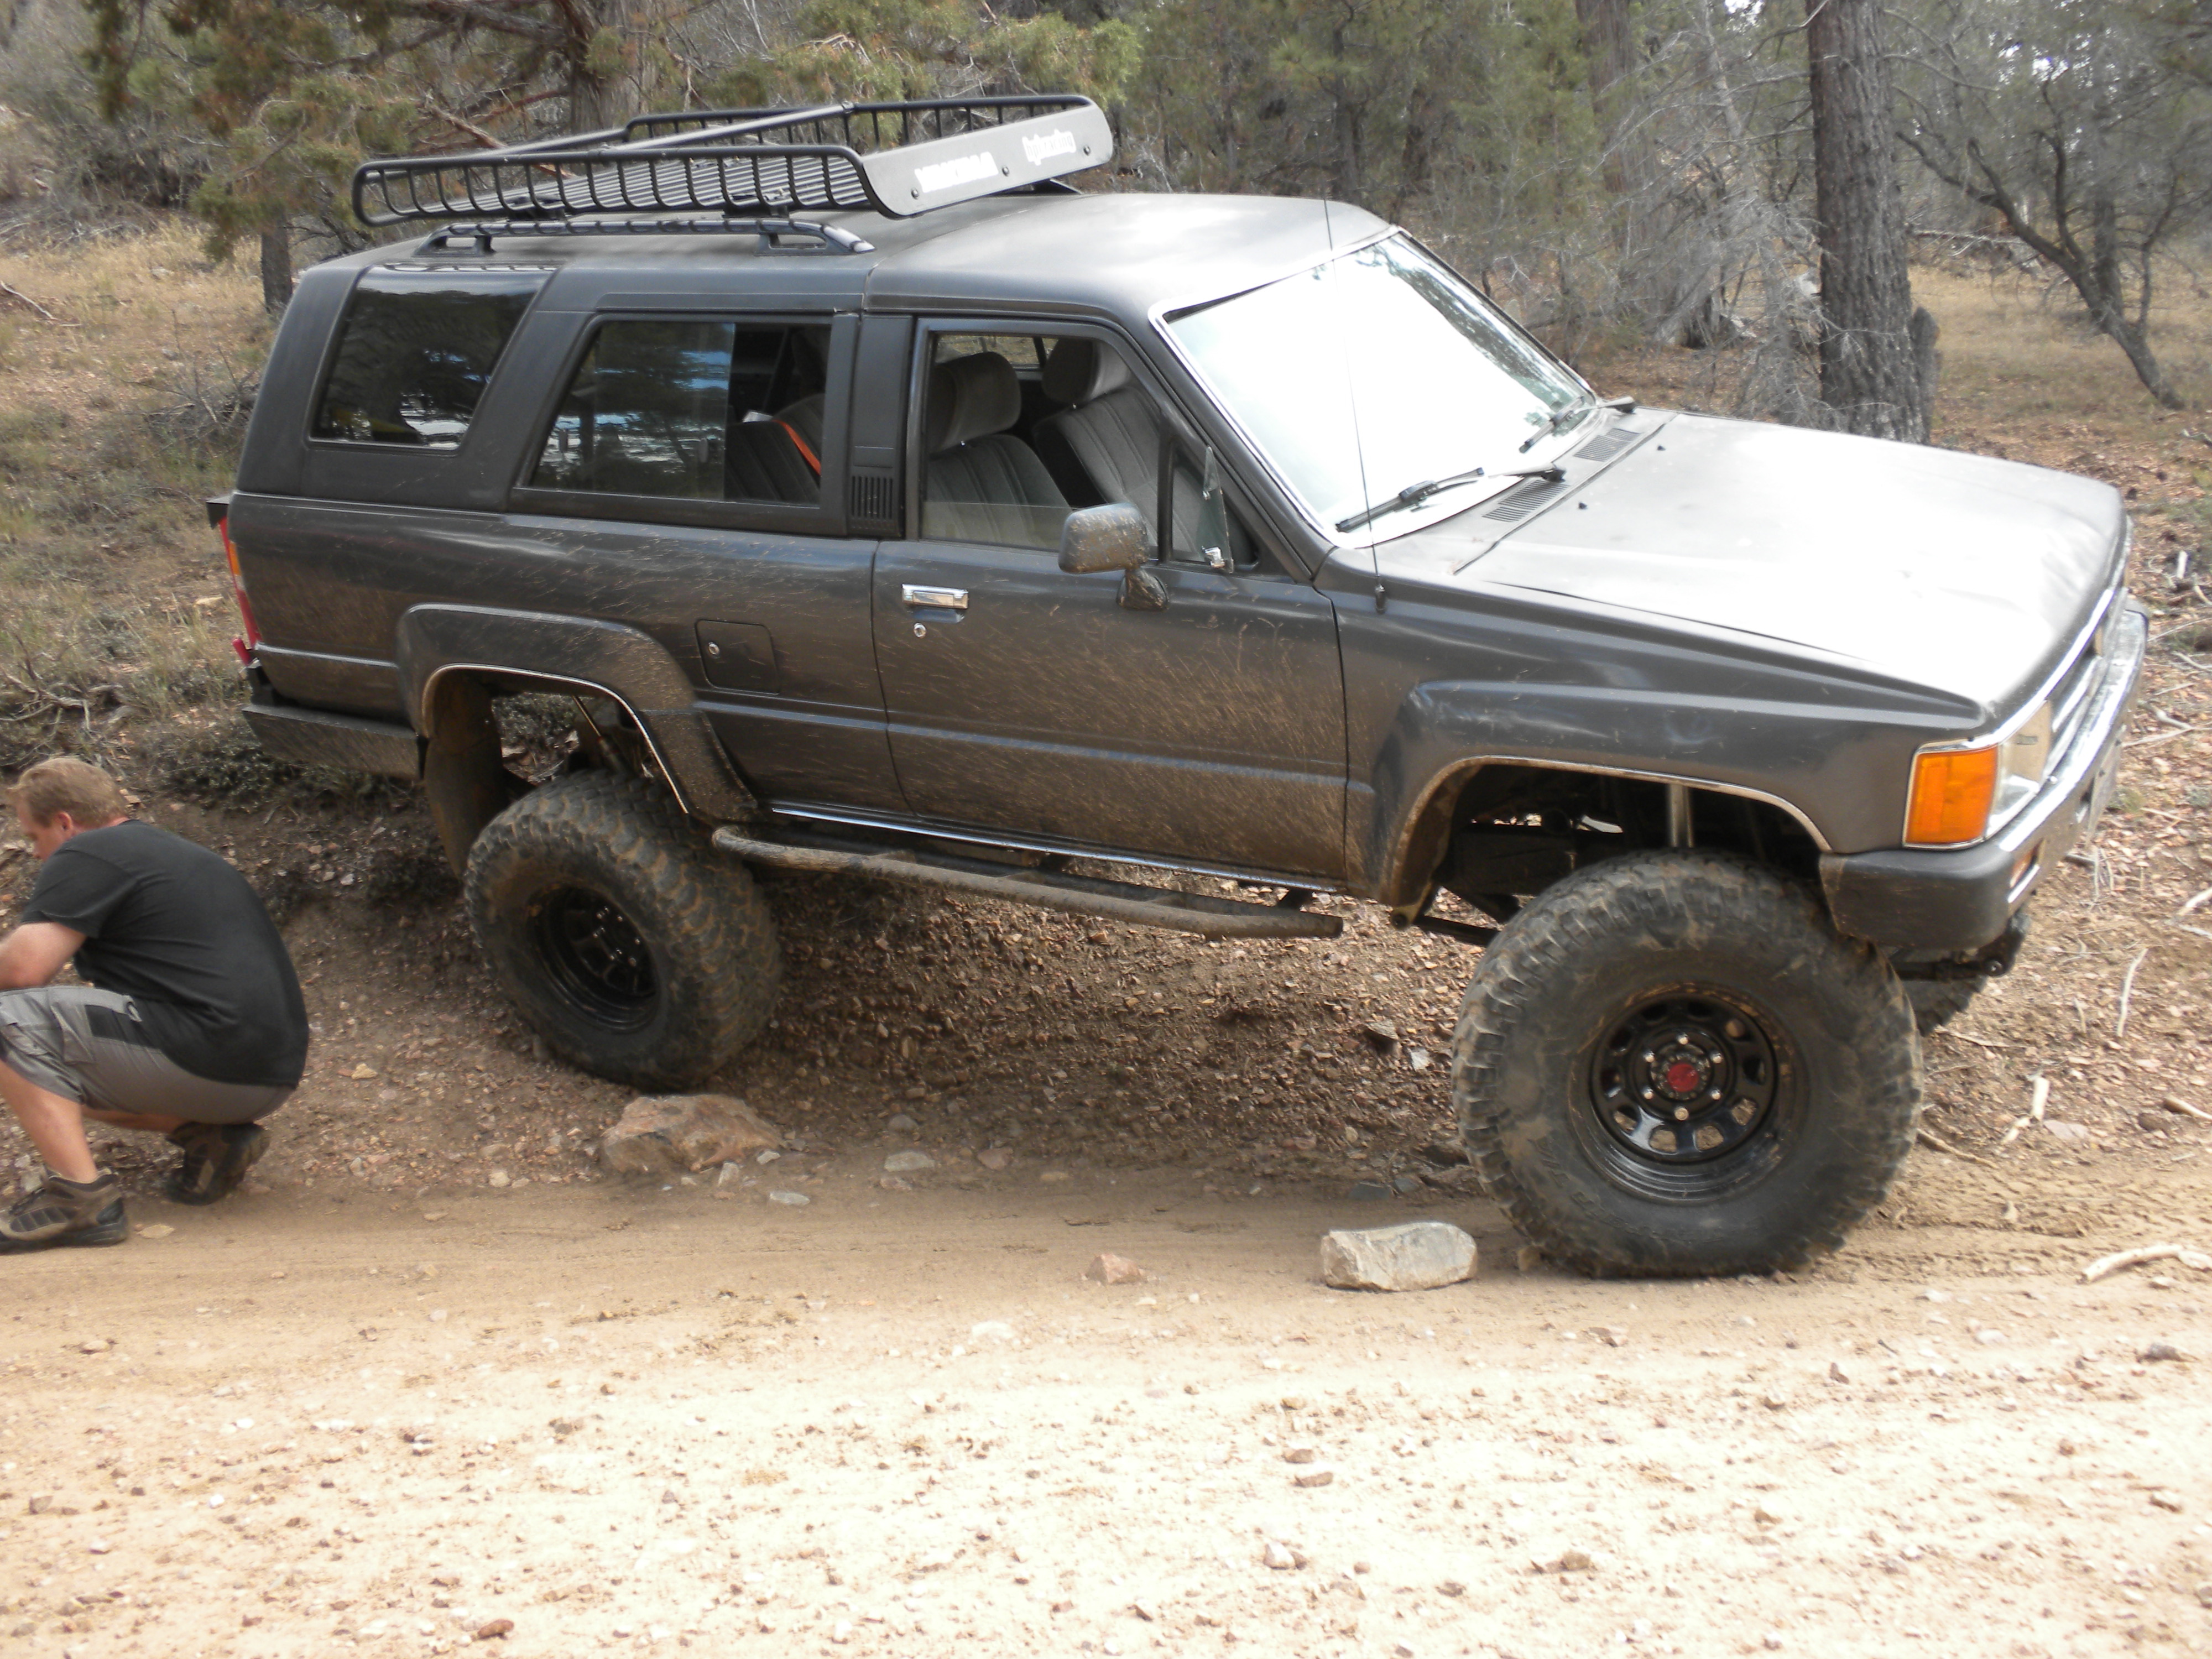
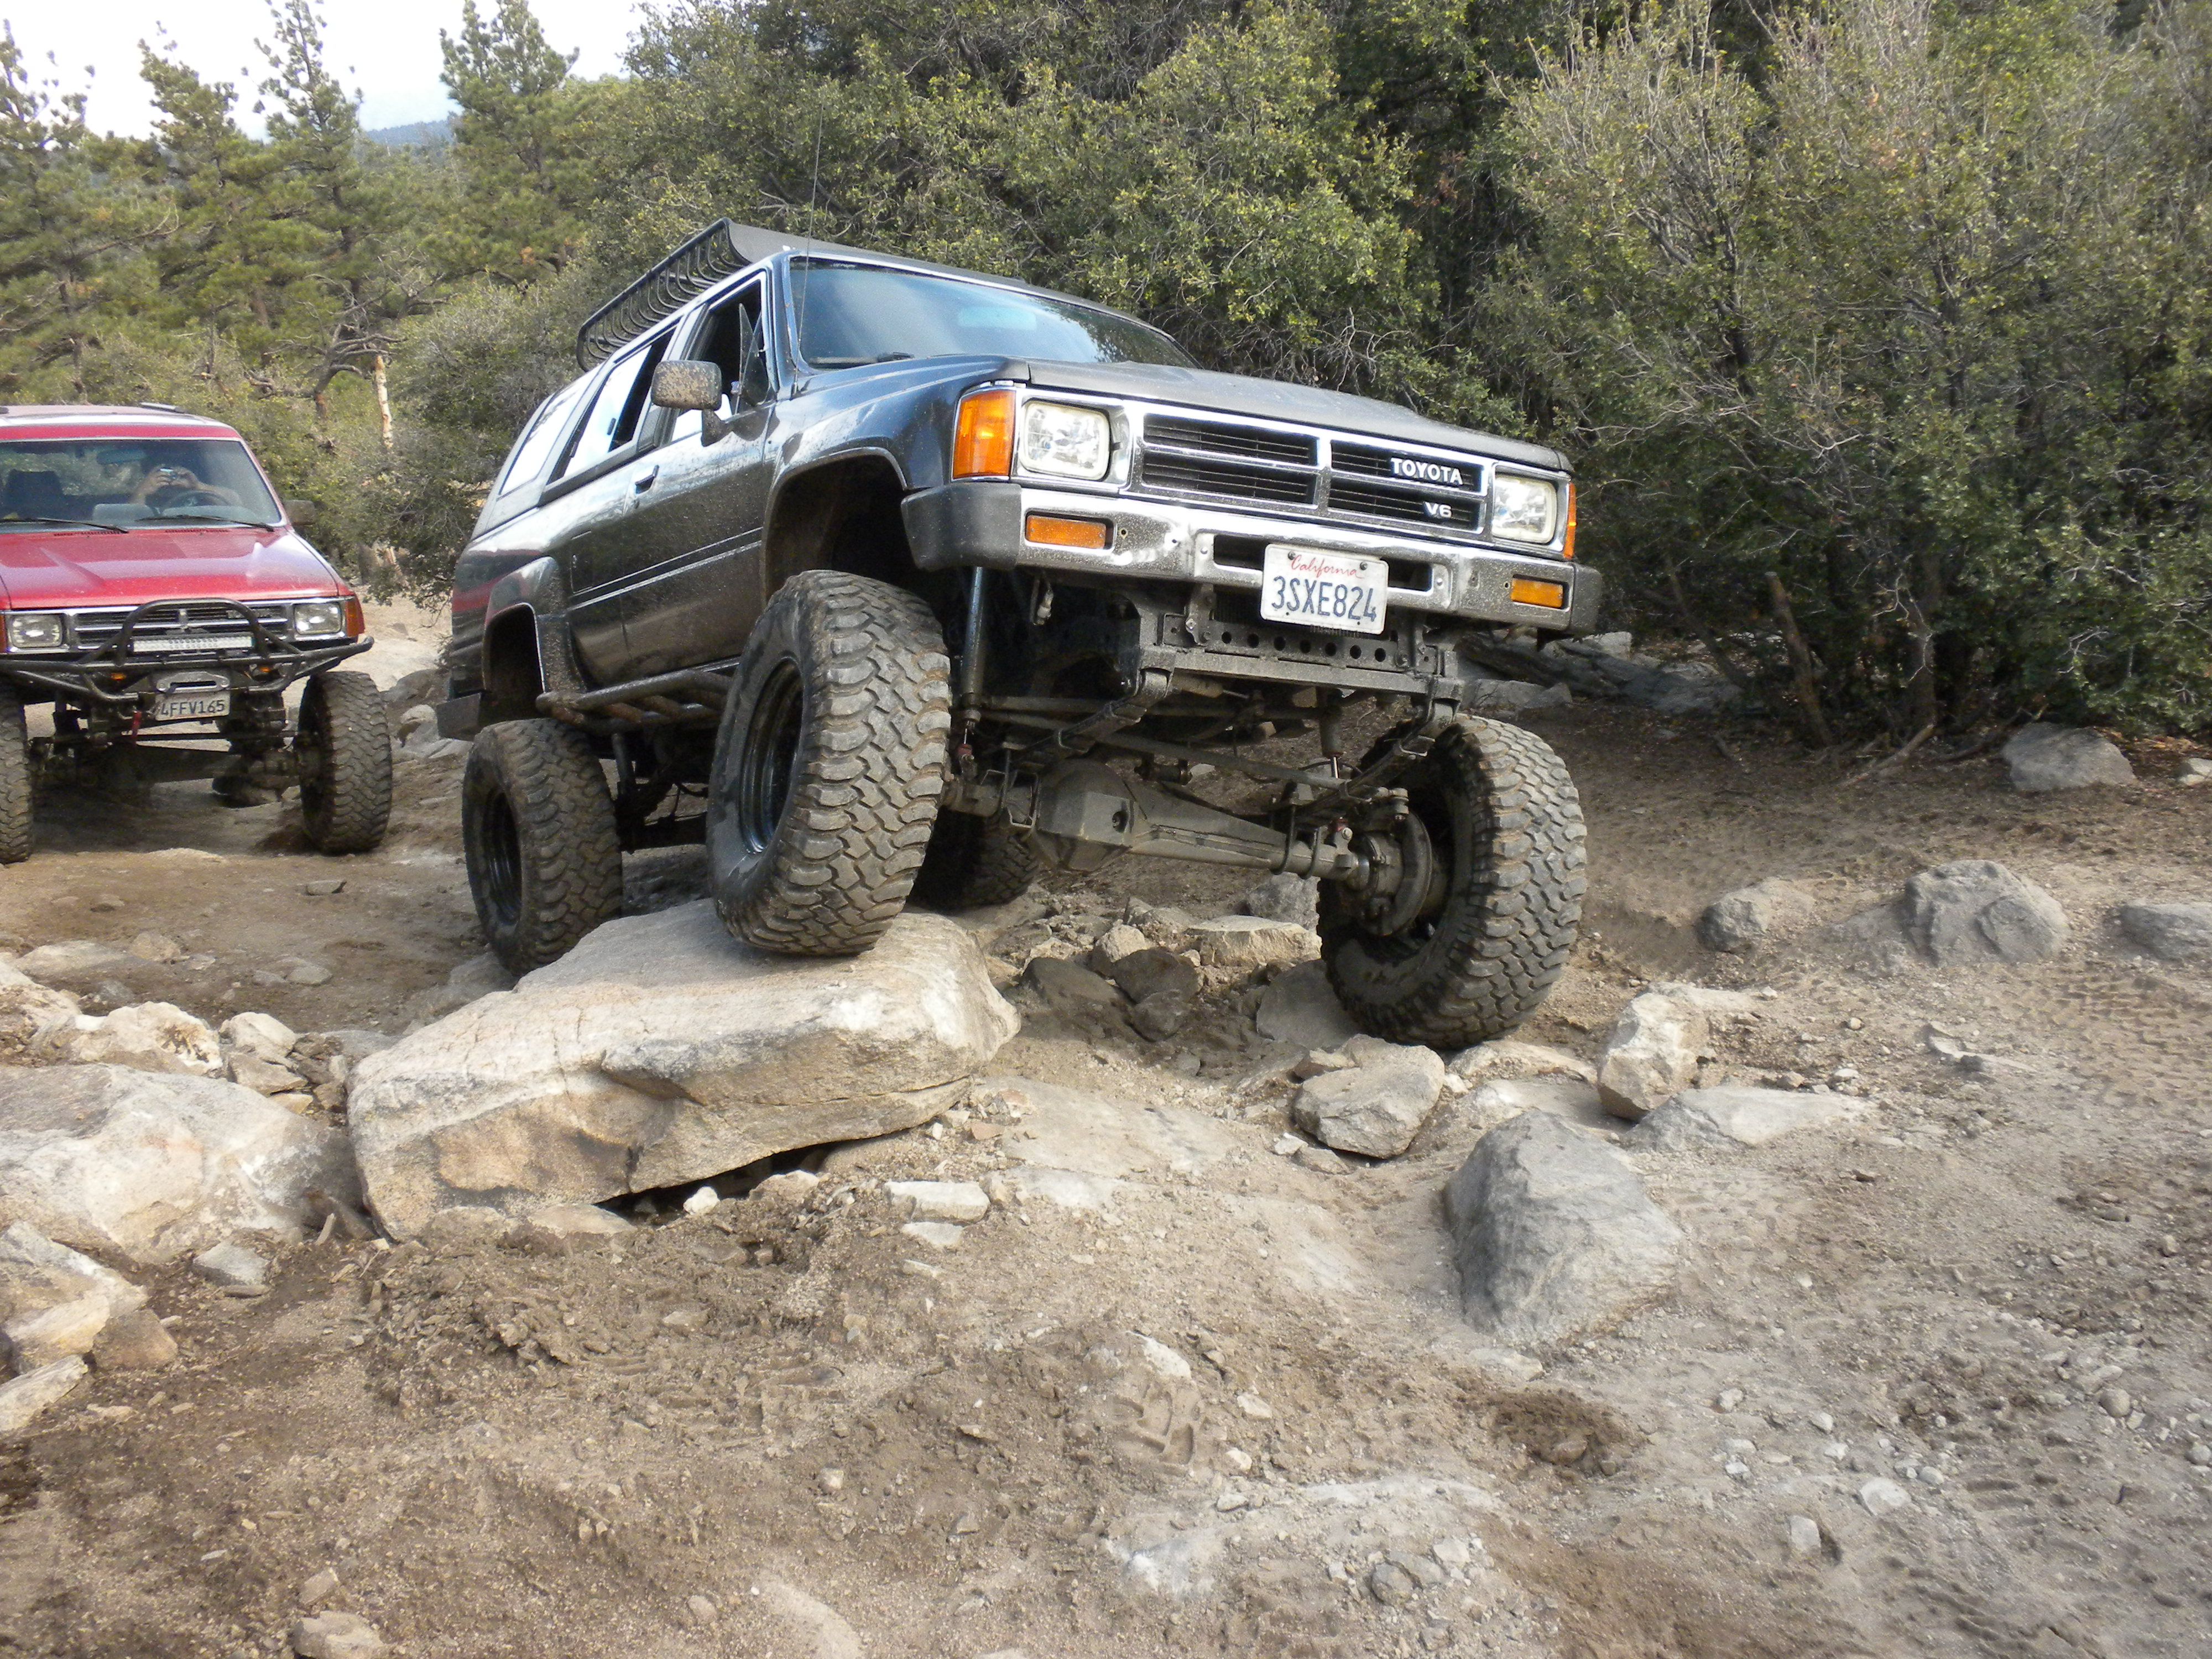
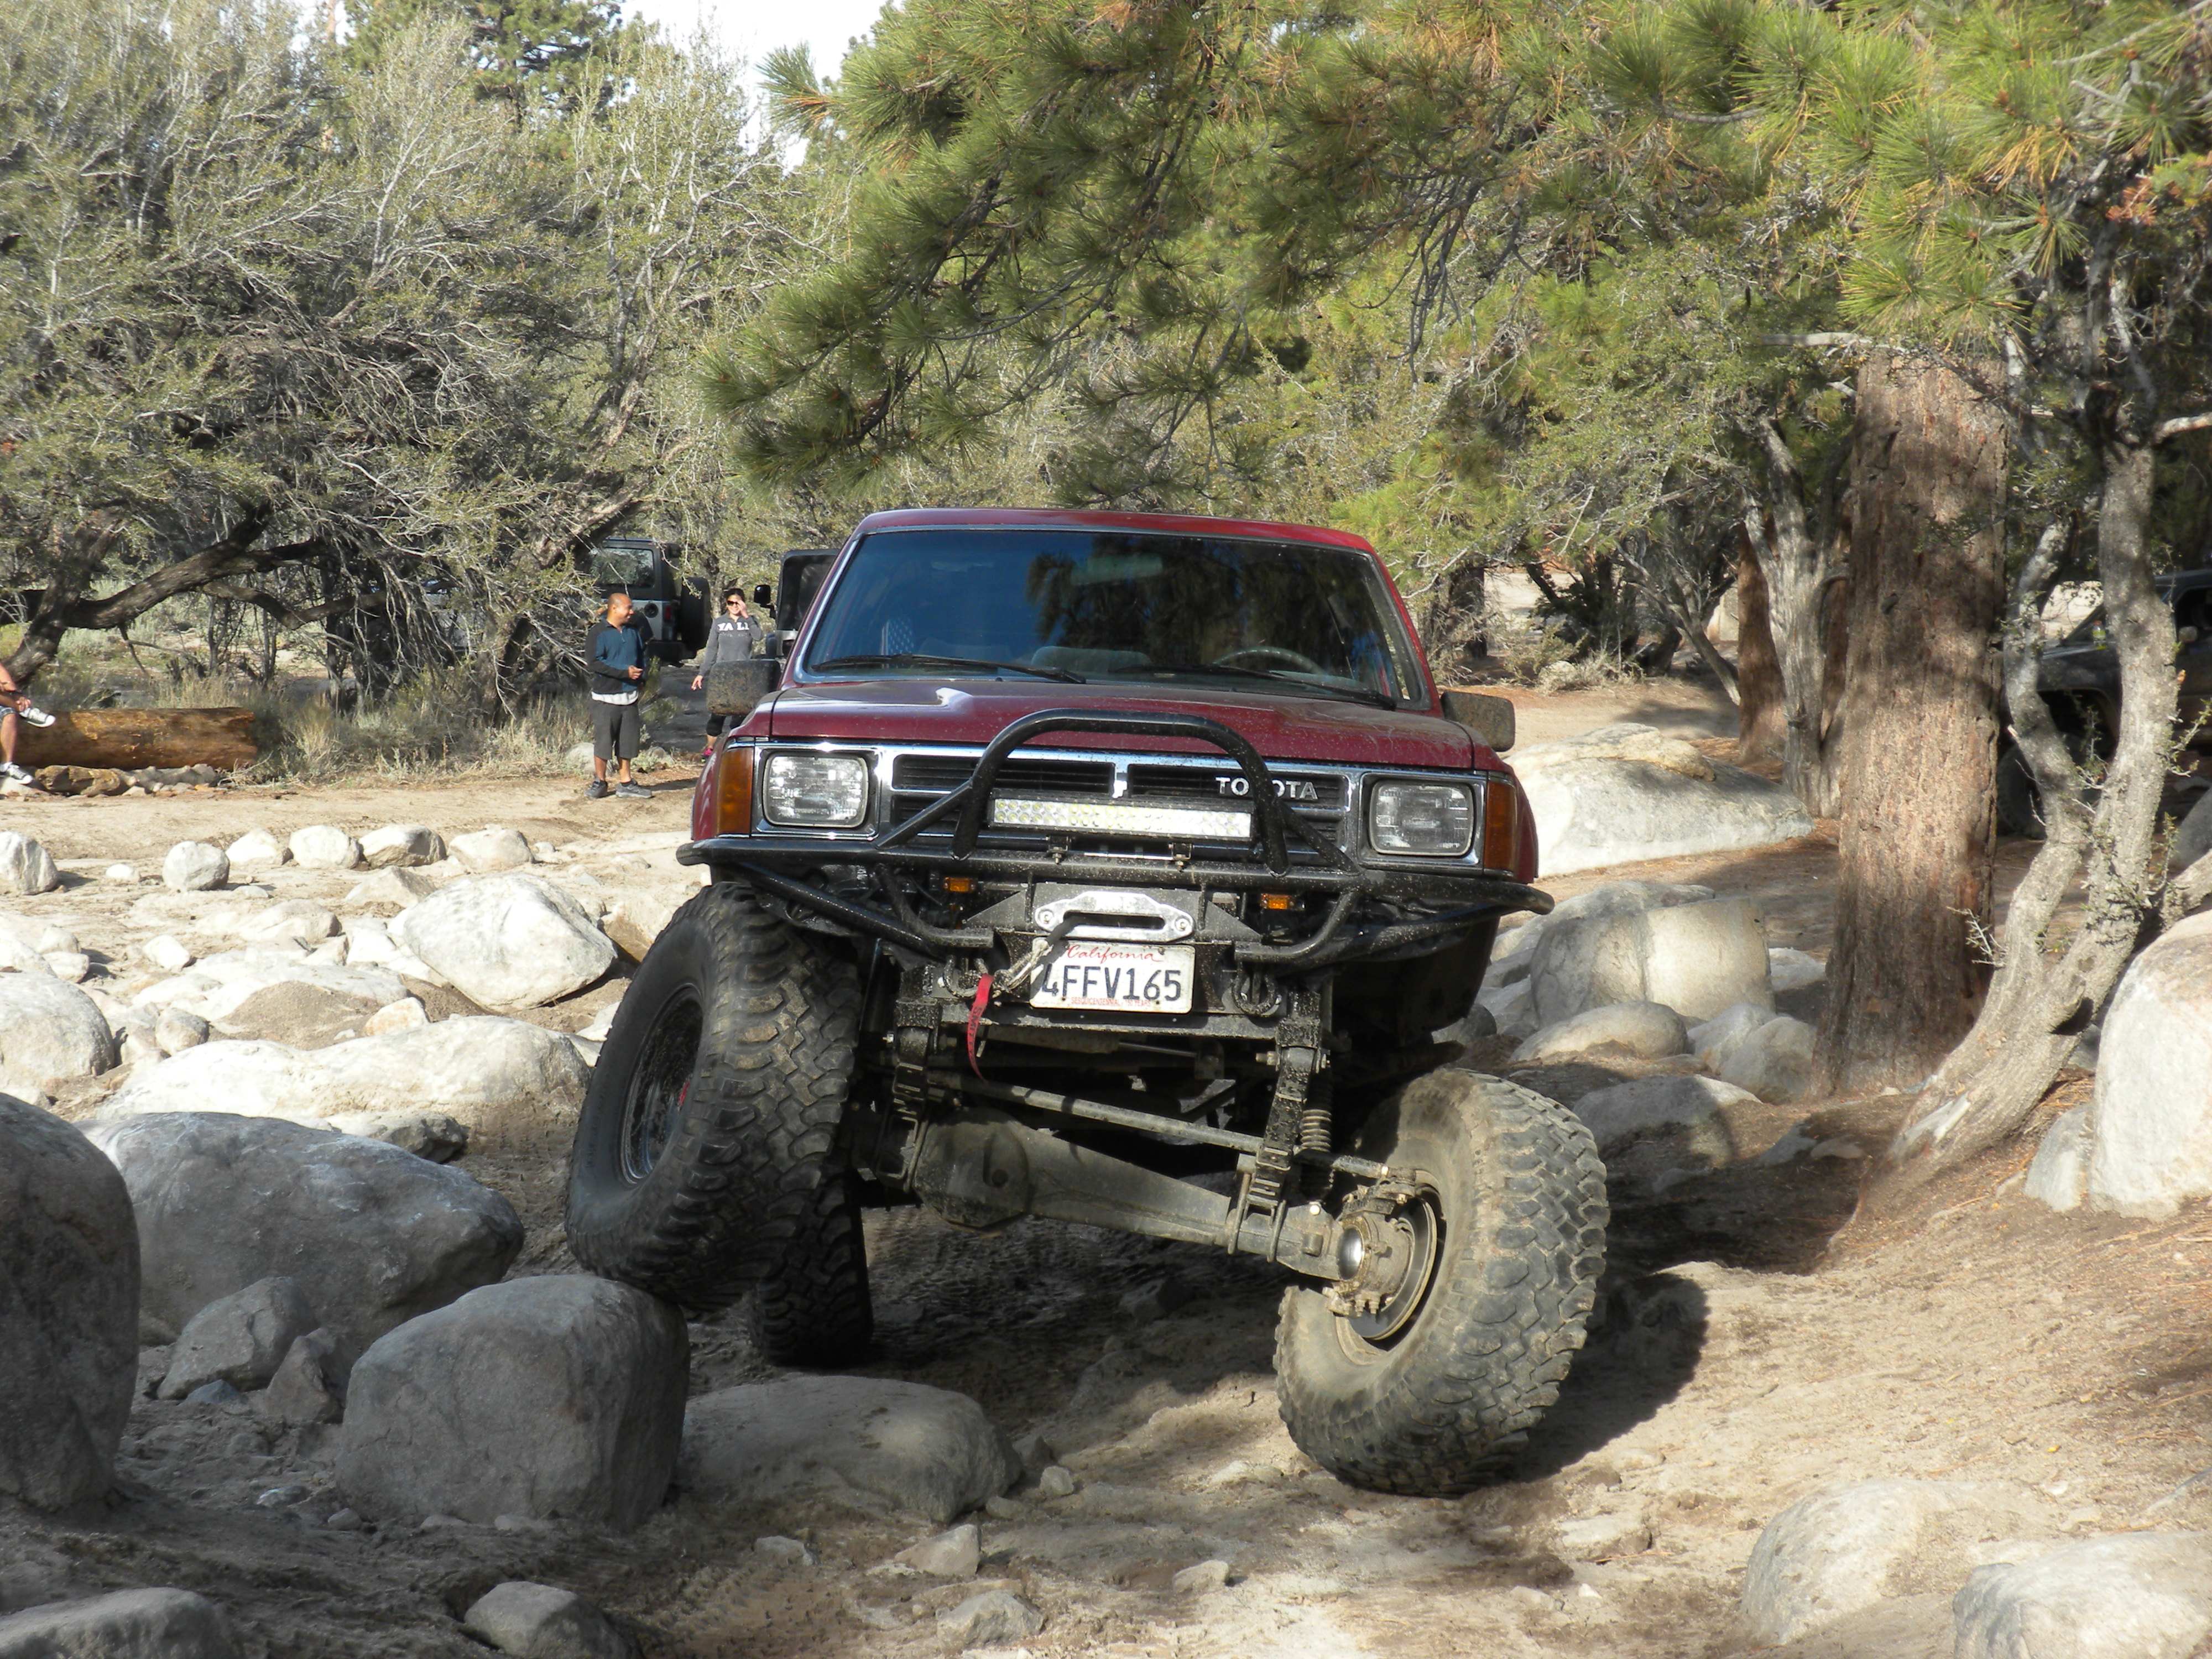
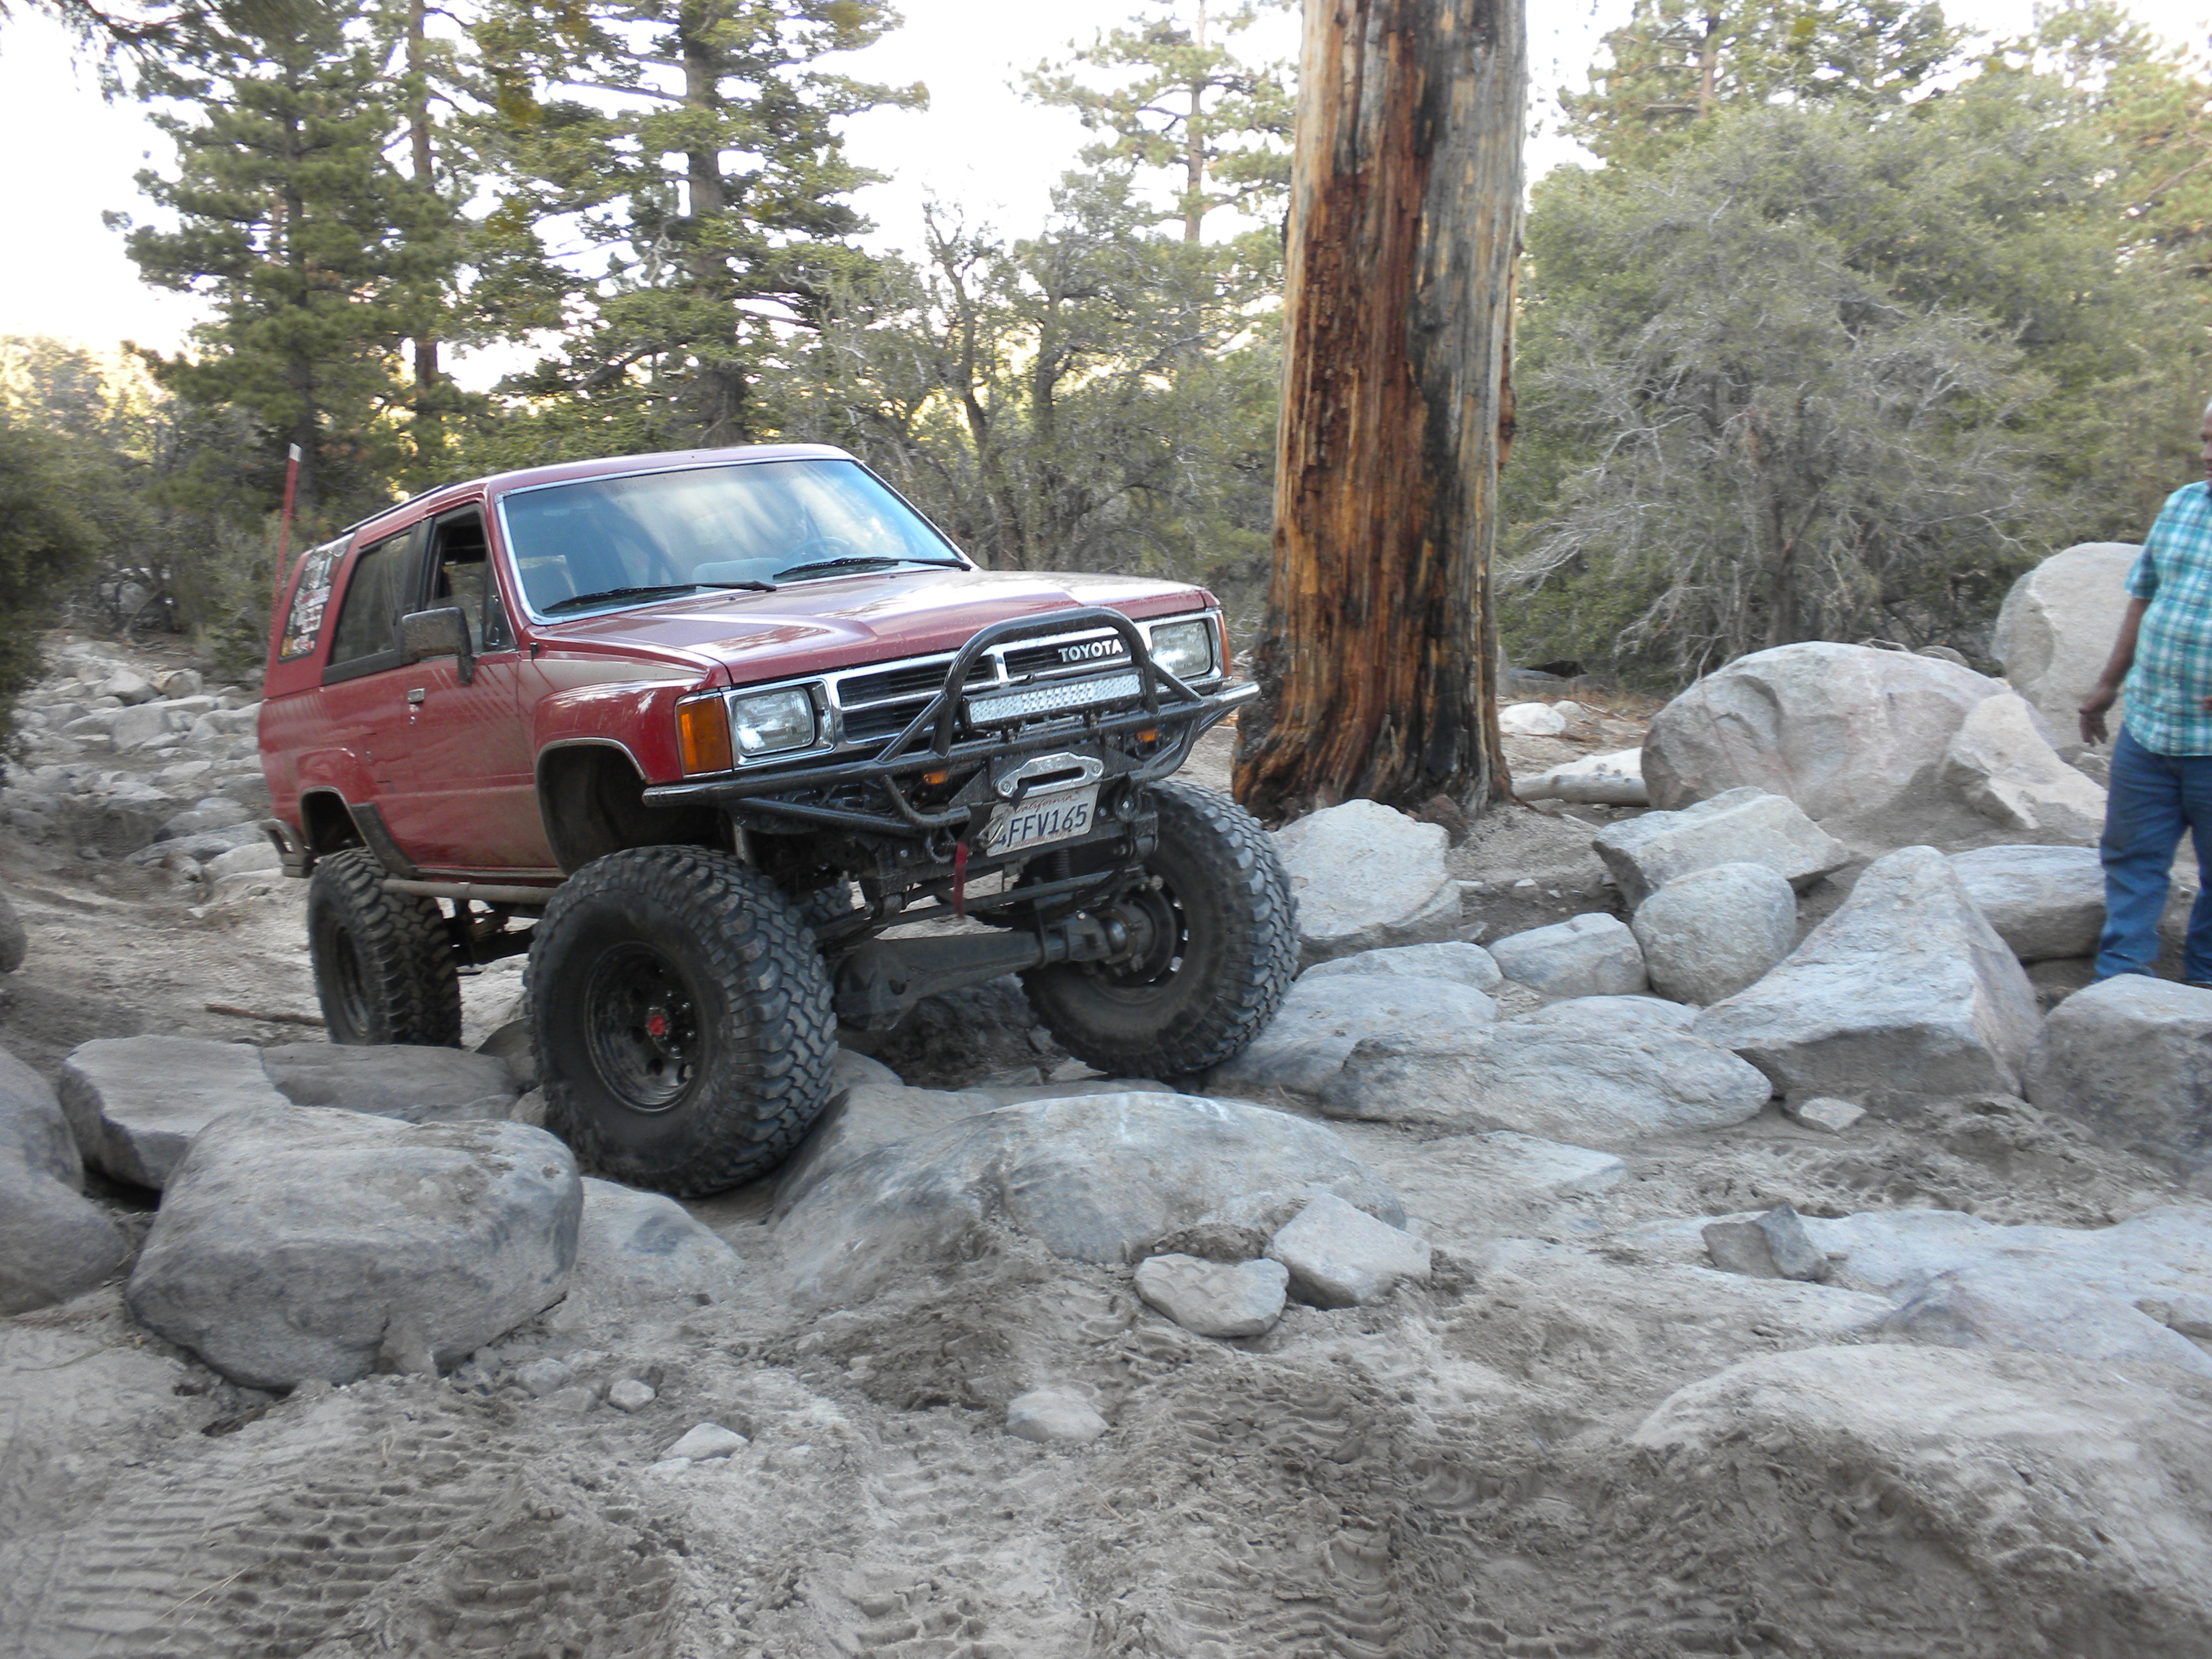
Poser shot. I sware i thought it'd flex out a bit more but i over estimated the size of that tiny rock lol
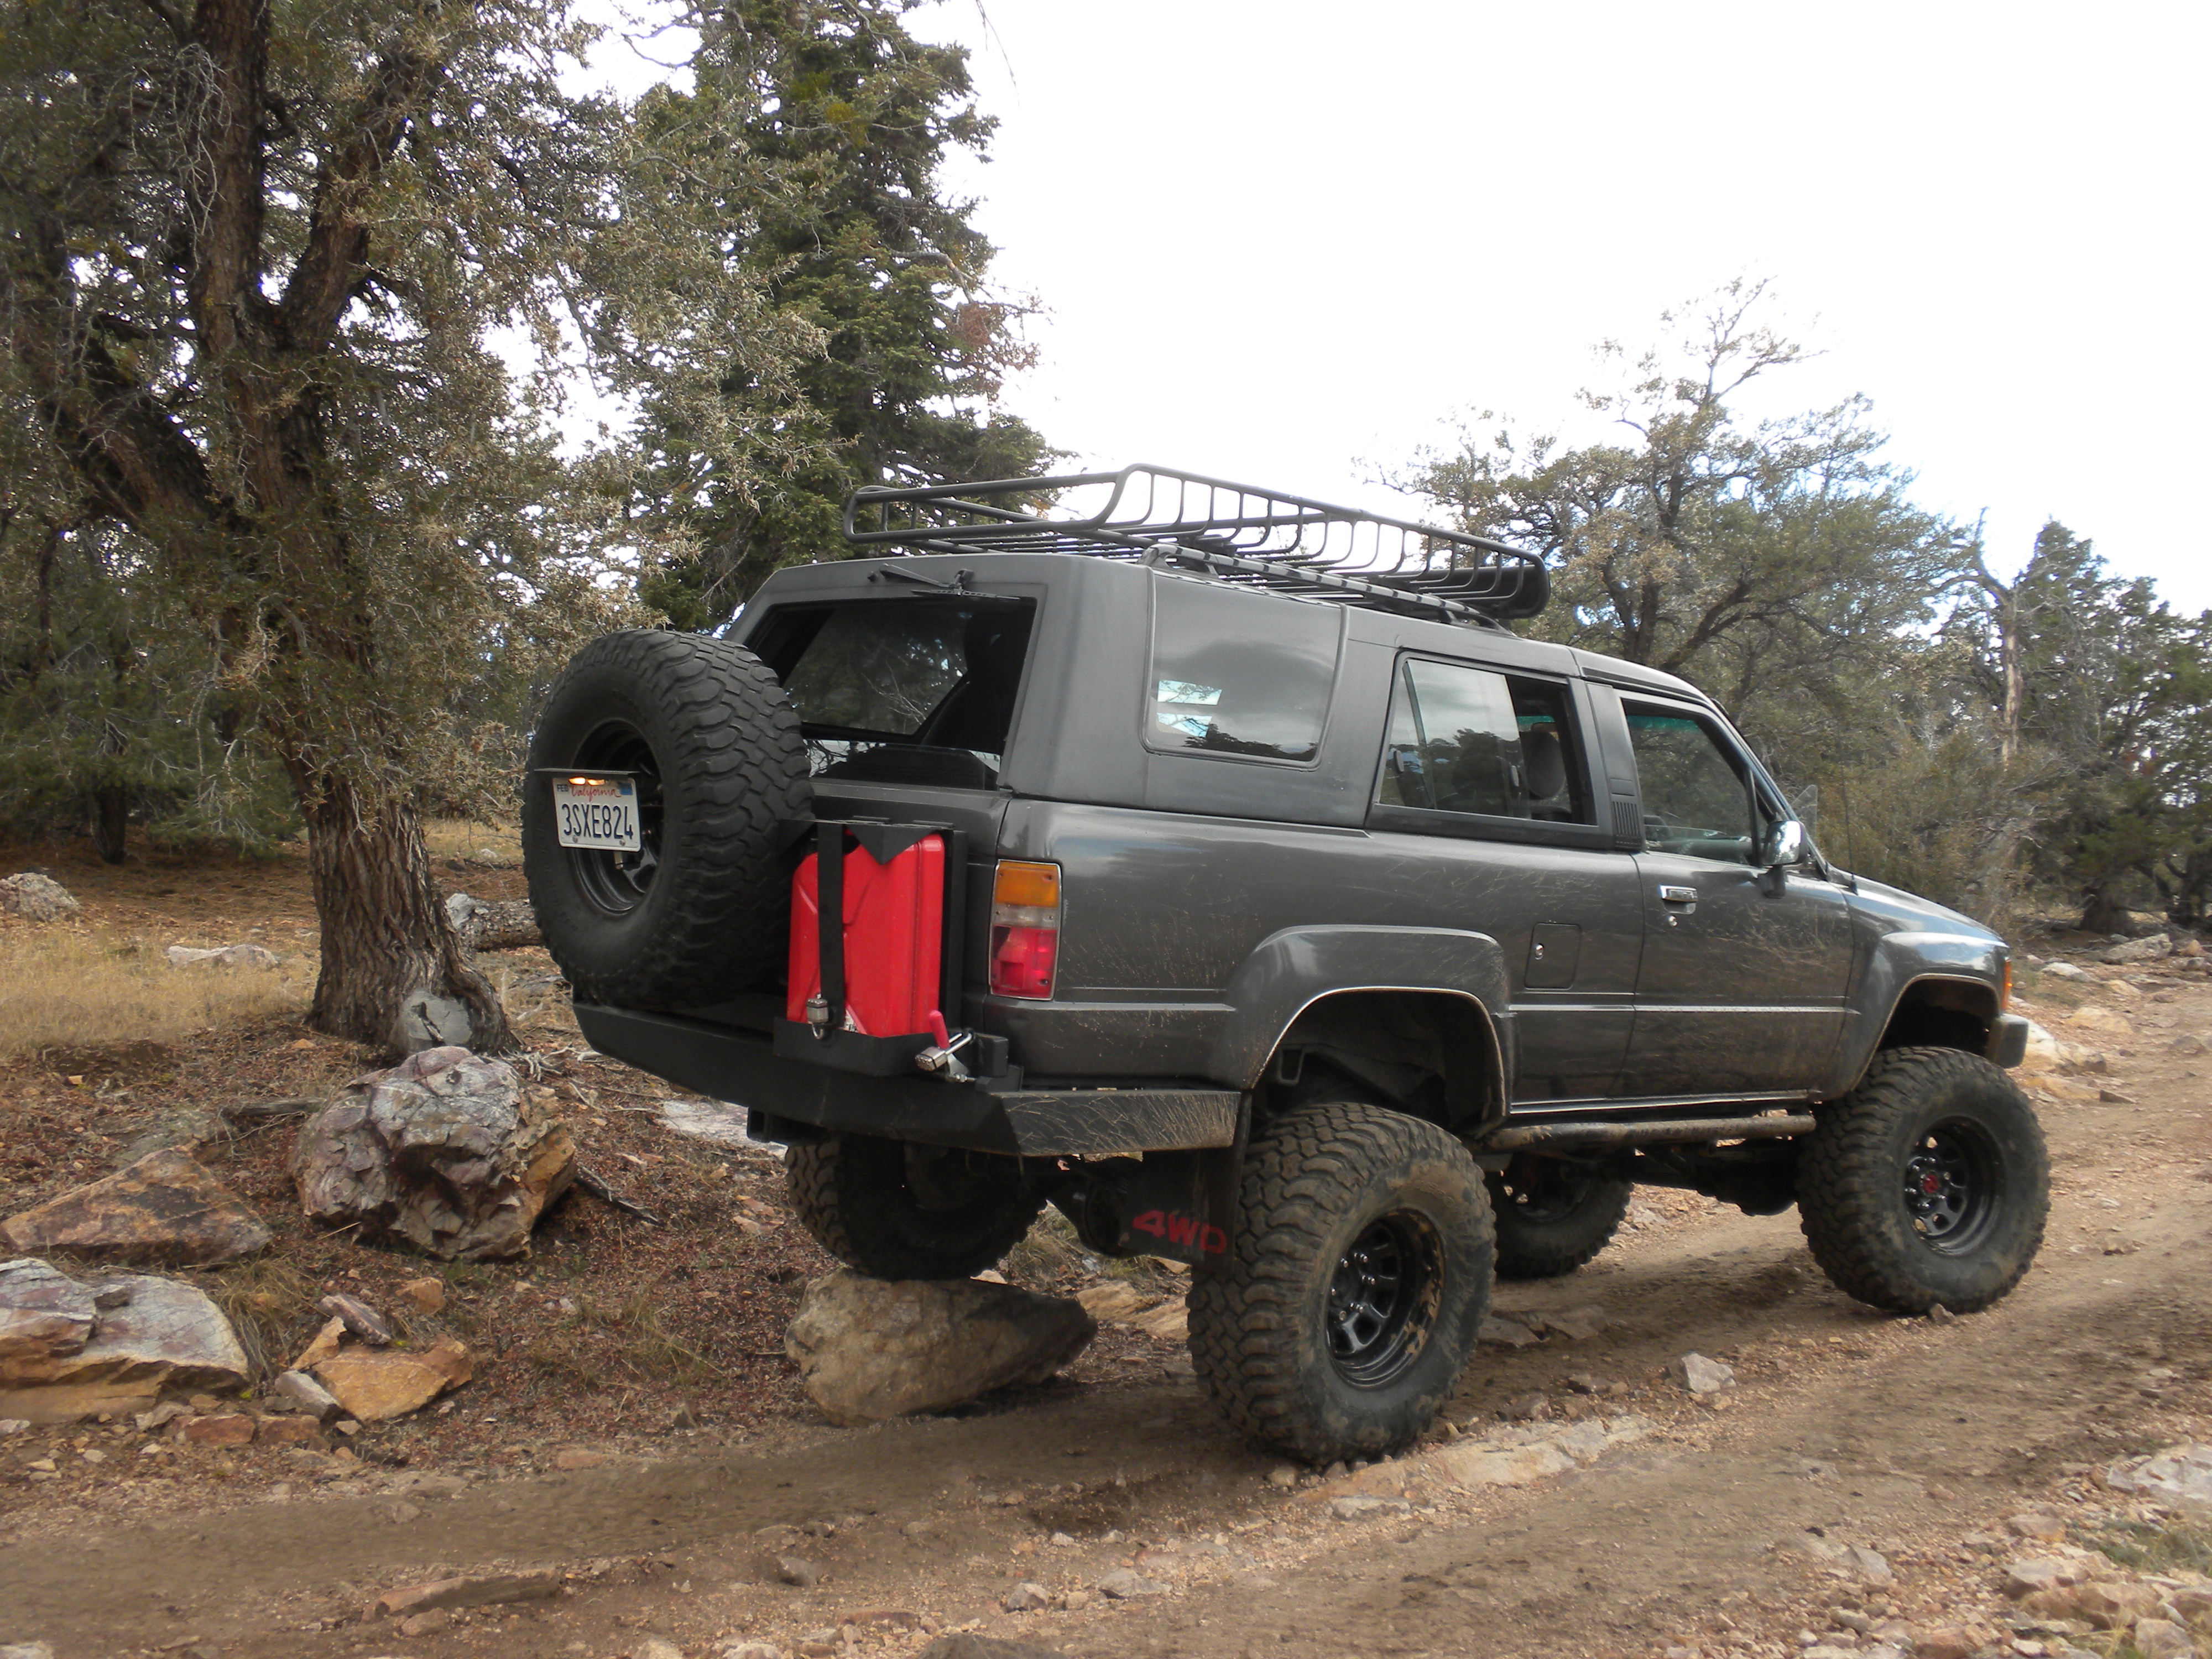
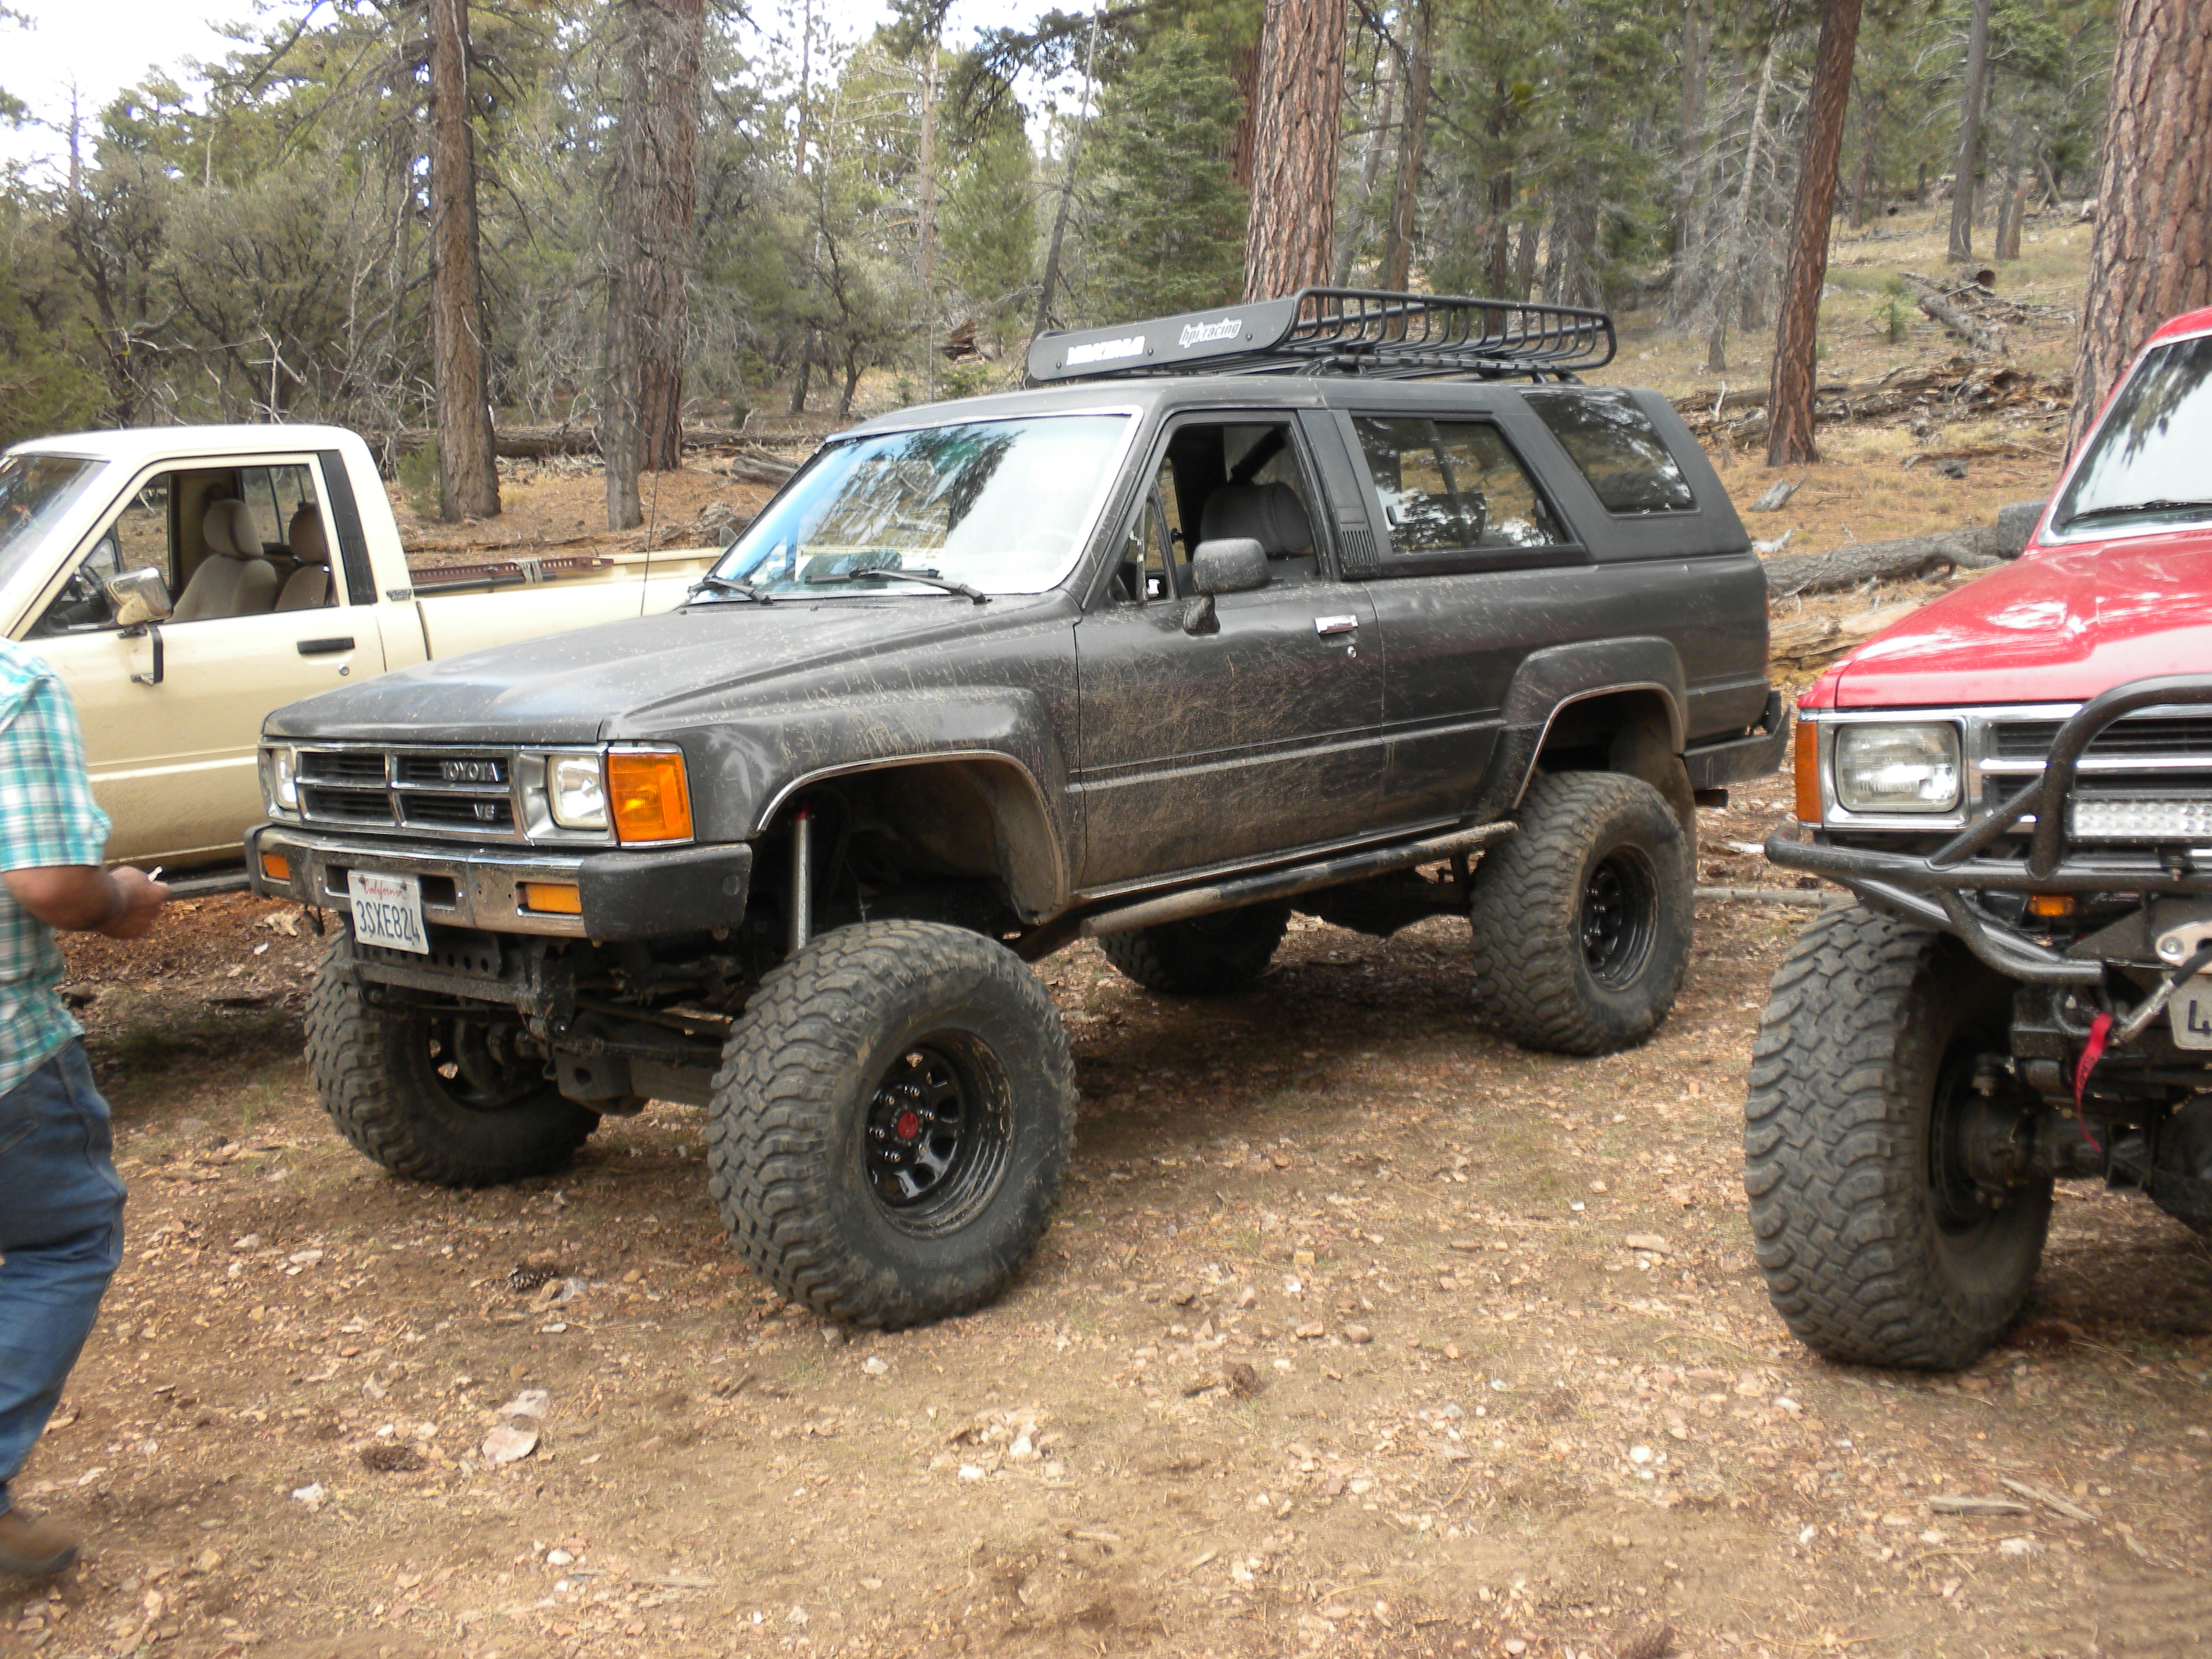
Finally reached the 1st point where we could get some good flex shots of Marks truck
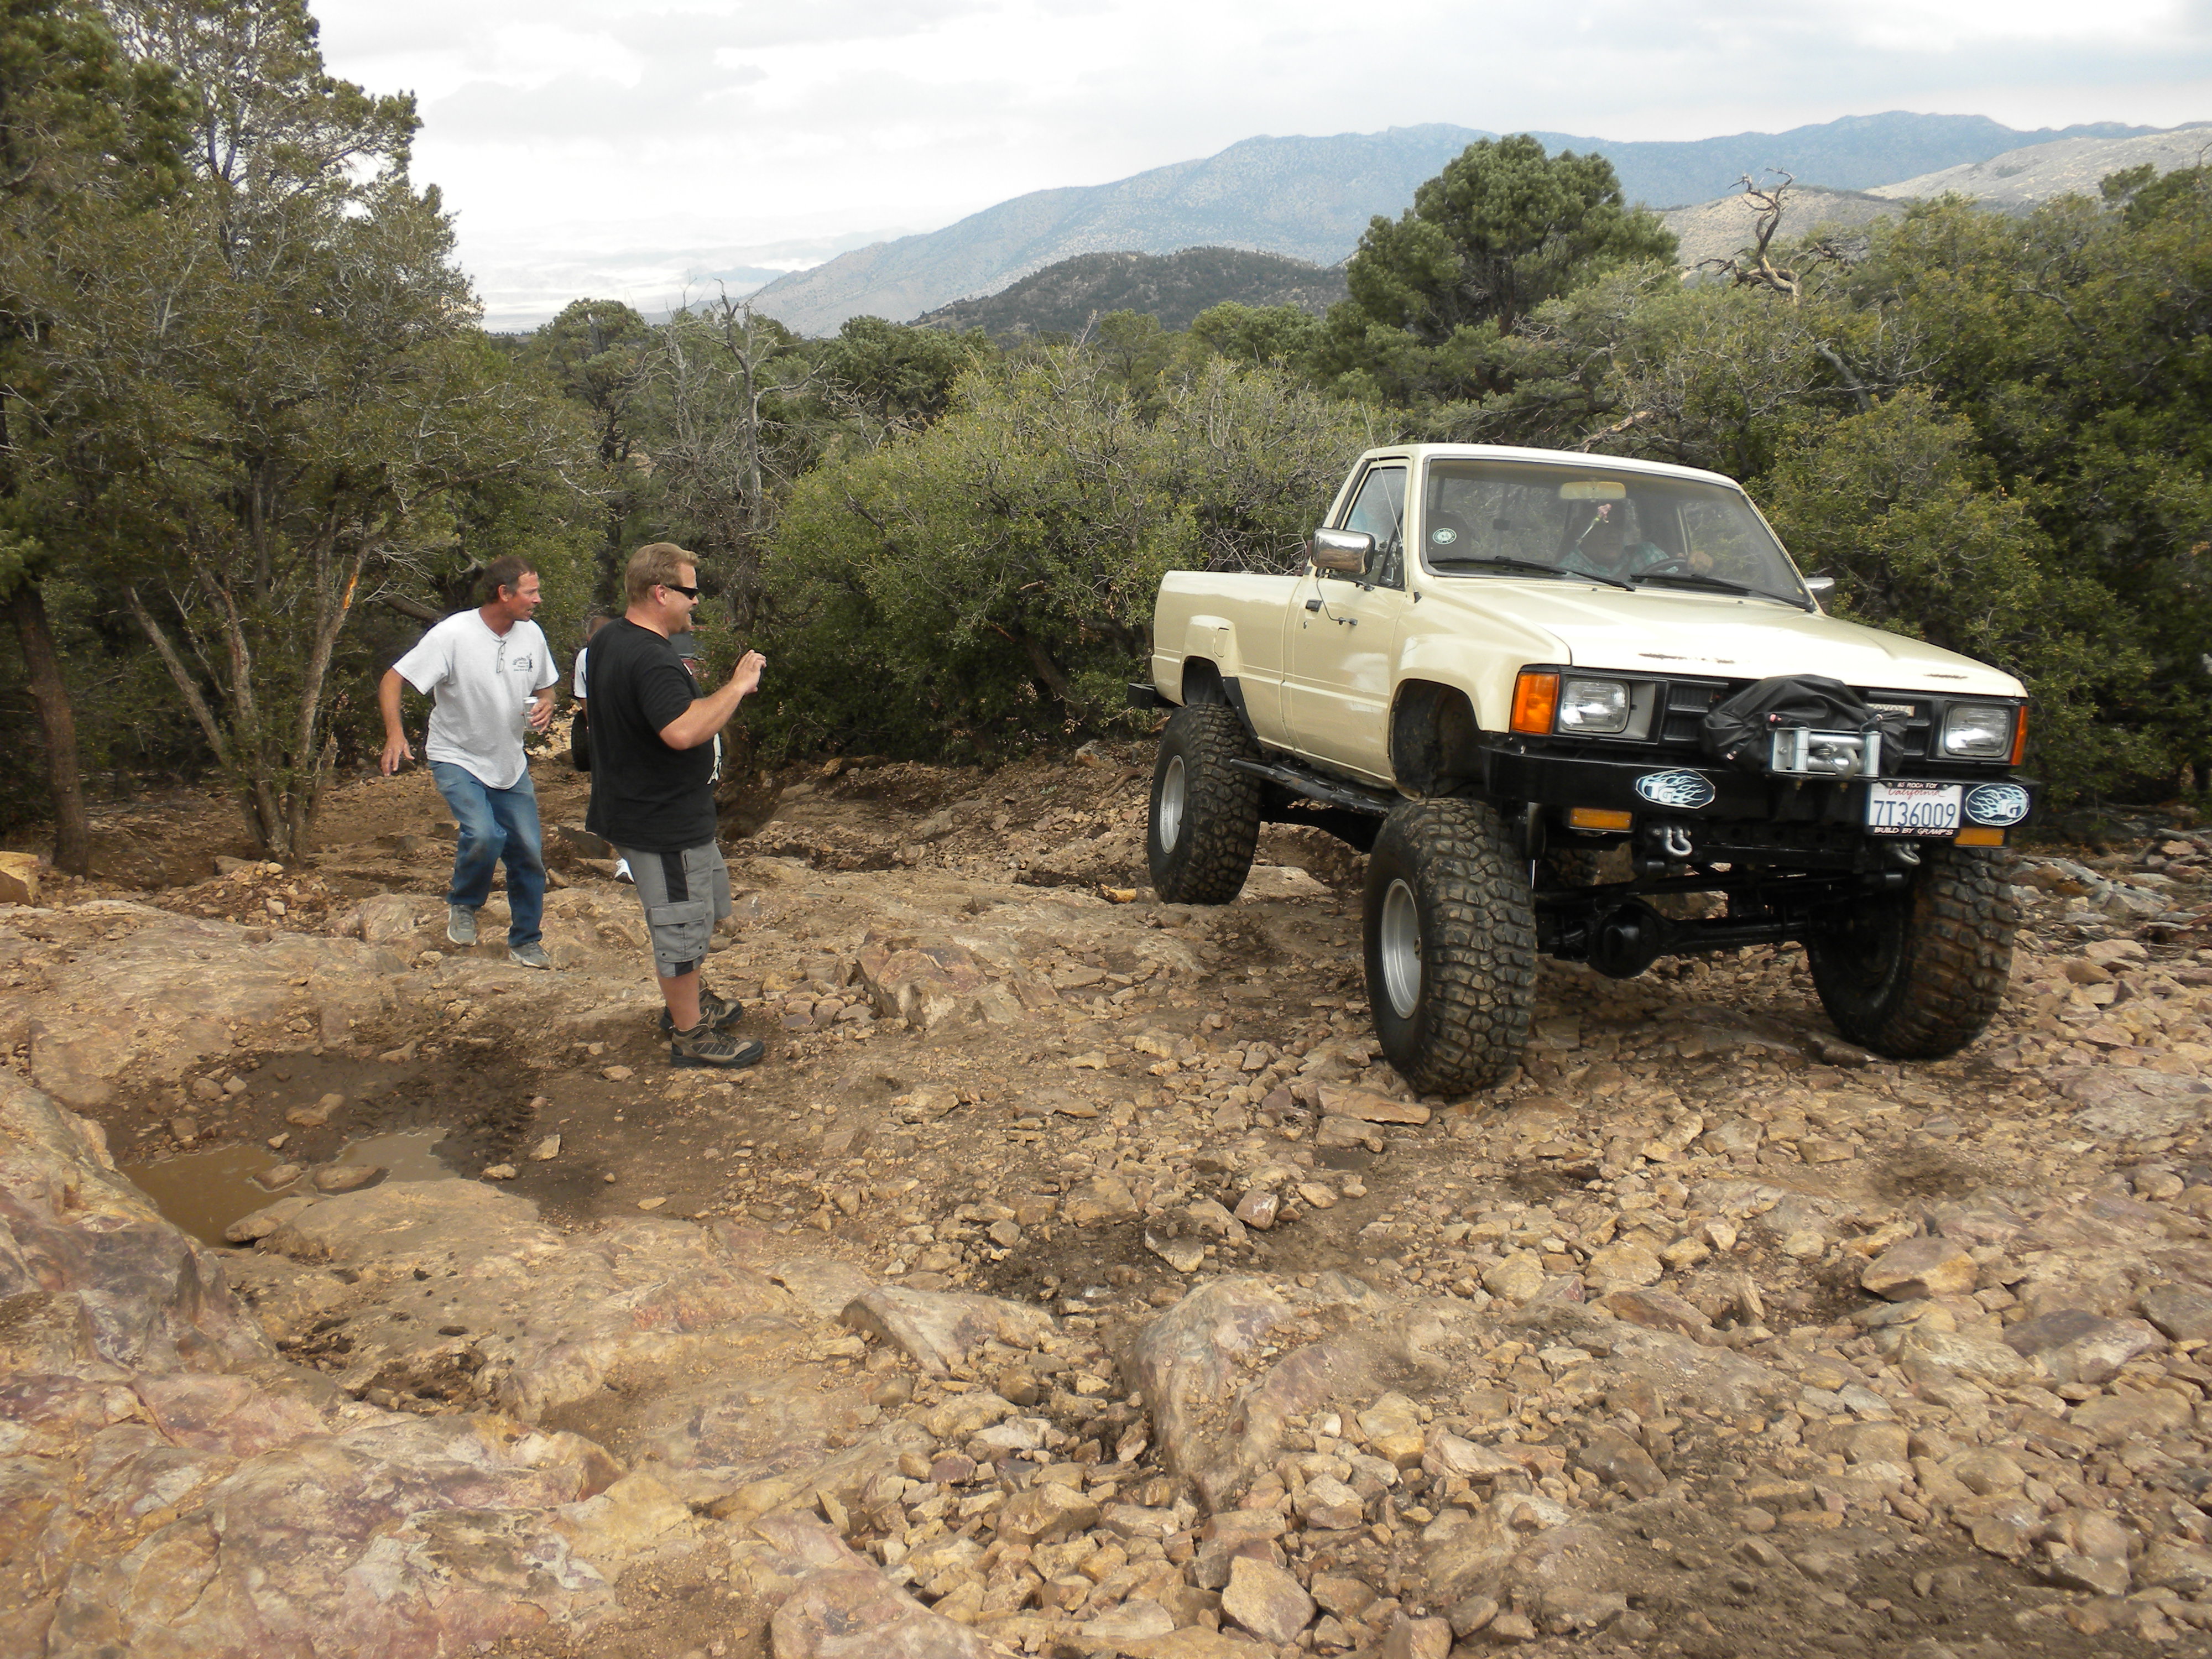
This was around the area that Ruben's Pickup broke down. And although it may not seem like it on this video this is all on an incline and in the way of many people passing by trying to get up that same route. Rubens truck didnt come up on the video but he is off to the right side. The motor wasnt getting any fuel. after a few different tests we found that Rubens Fuel pump wasnt working. Wasnt giving any gasoline.
BTW this was about 1/6th into the long trail. We had to remove the Fuel pump(which wasnt hard at all. It was just a pain trying to work as other groups made their way up next to us and as the truck was on an incline.) So once we removed the Fuel pump Mark was left alone yet again(So Sorry man. Thanks again for your patience.) We had no choice we had to go back down the 1 way trail in my truck as Mark stayed with his truck to watch over Rubens truck. Let me tell ya driving back down isnt fun when you have a few groups still making their way up the 1way road you're trying to go down lol. We drove back into town and after a bunch of driving we finally found a NAPA auto parts which had the part(WOOT!) Drove back up to the trail and Made it up all the obstacles again where we met up with Mark installed the part and continued out trail!
Anyway here is Mark making his way up that part where Ruben broke down.
------------------------------------------------------------------
After getting Rubens truck fixed and finding an open space we finally parked and had lunch. Sharing foods and kicking it just taking time to rest up a bit. I got a bunch of shots here. dont mind the picture whoring of non flex shots. lol
I thought this picture looked kind of cool.
Lunch time over! We made it on to a different trail that eventually led to the John Bull trail and here we are just messing around with the hill side.
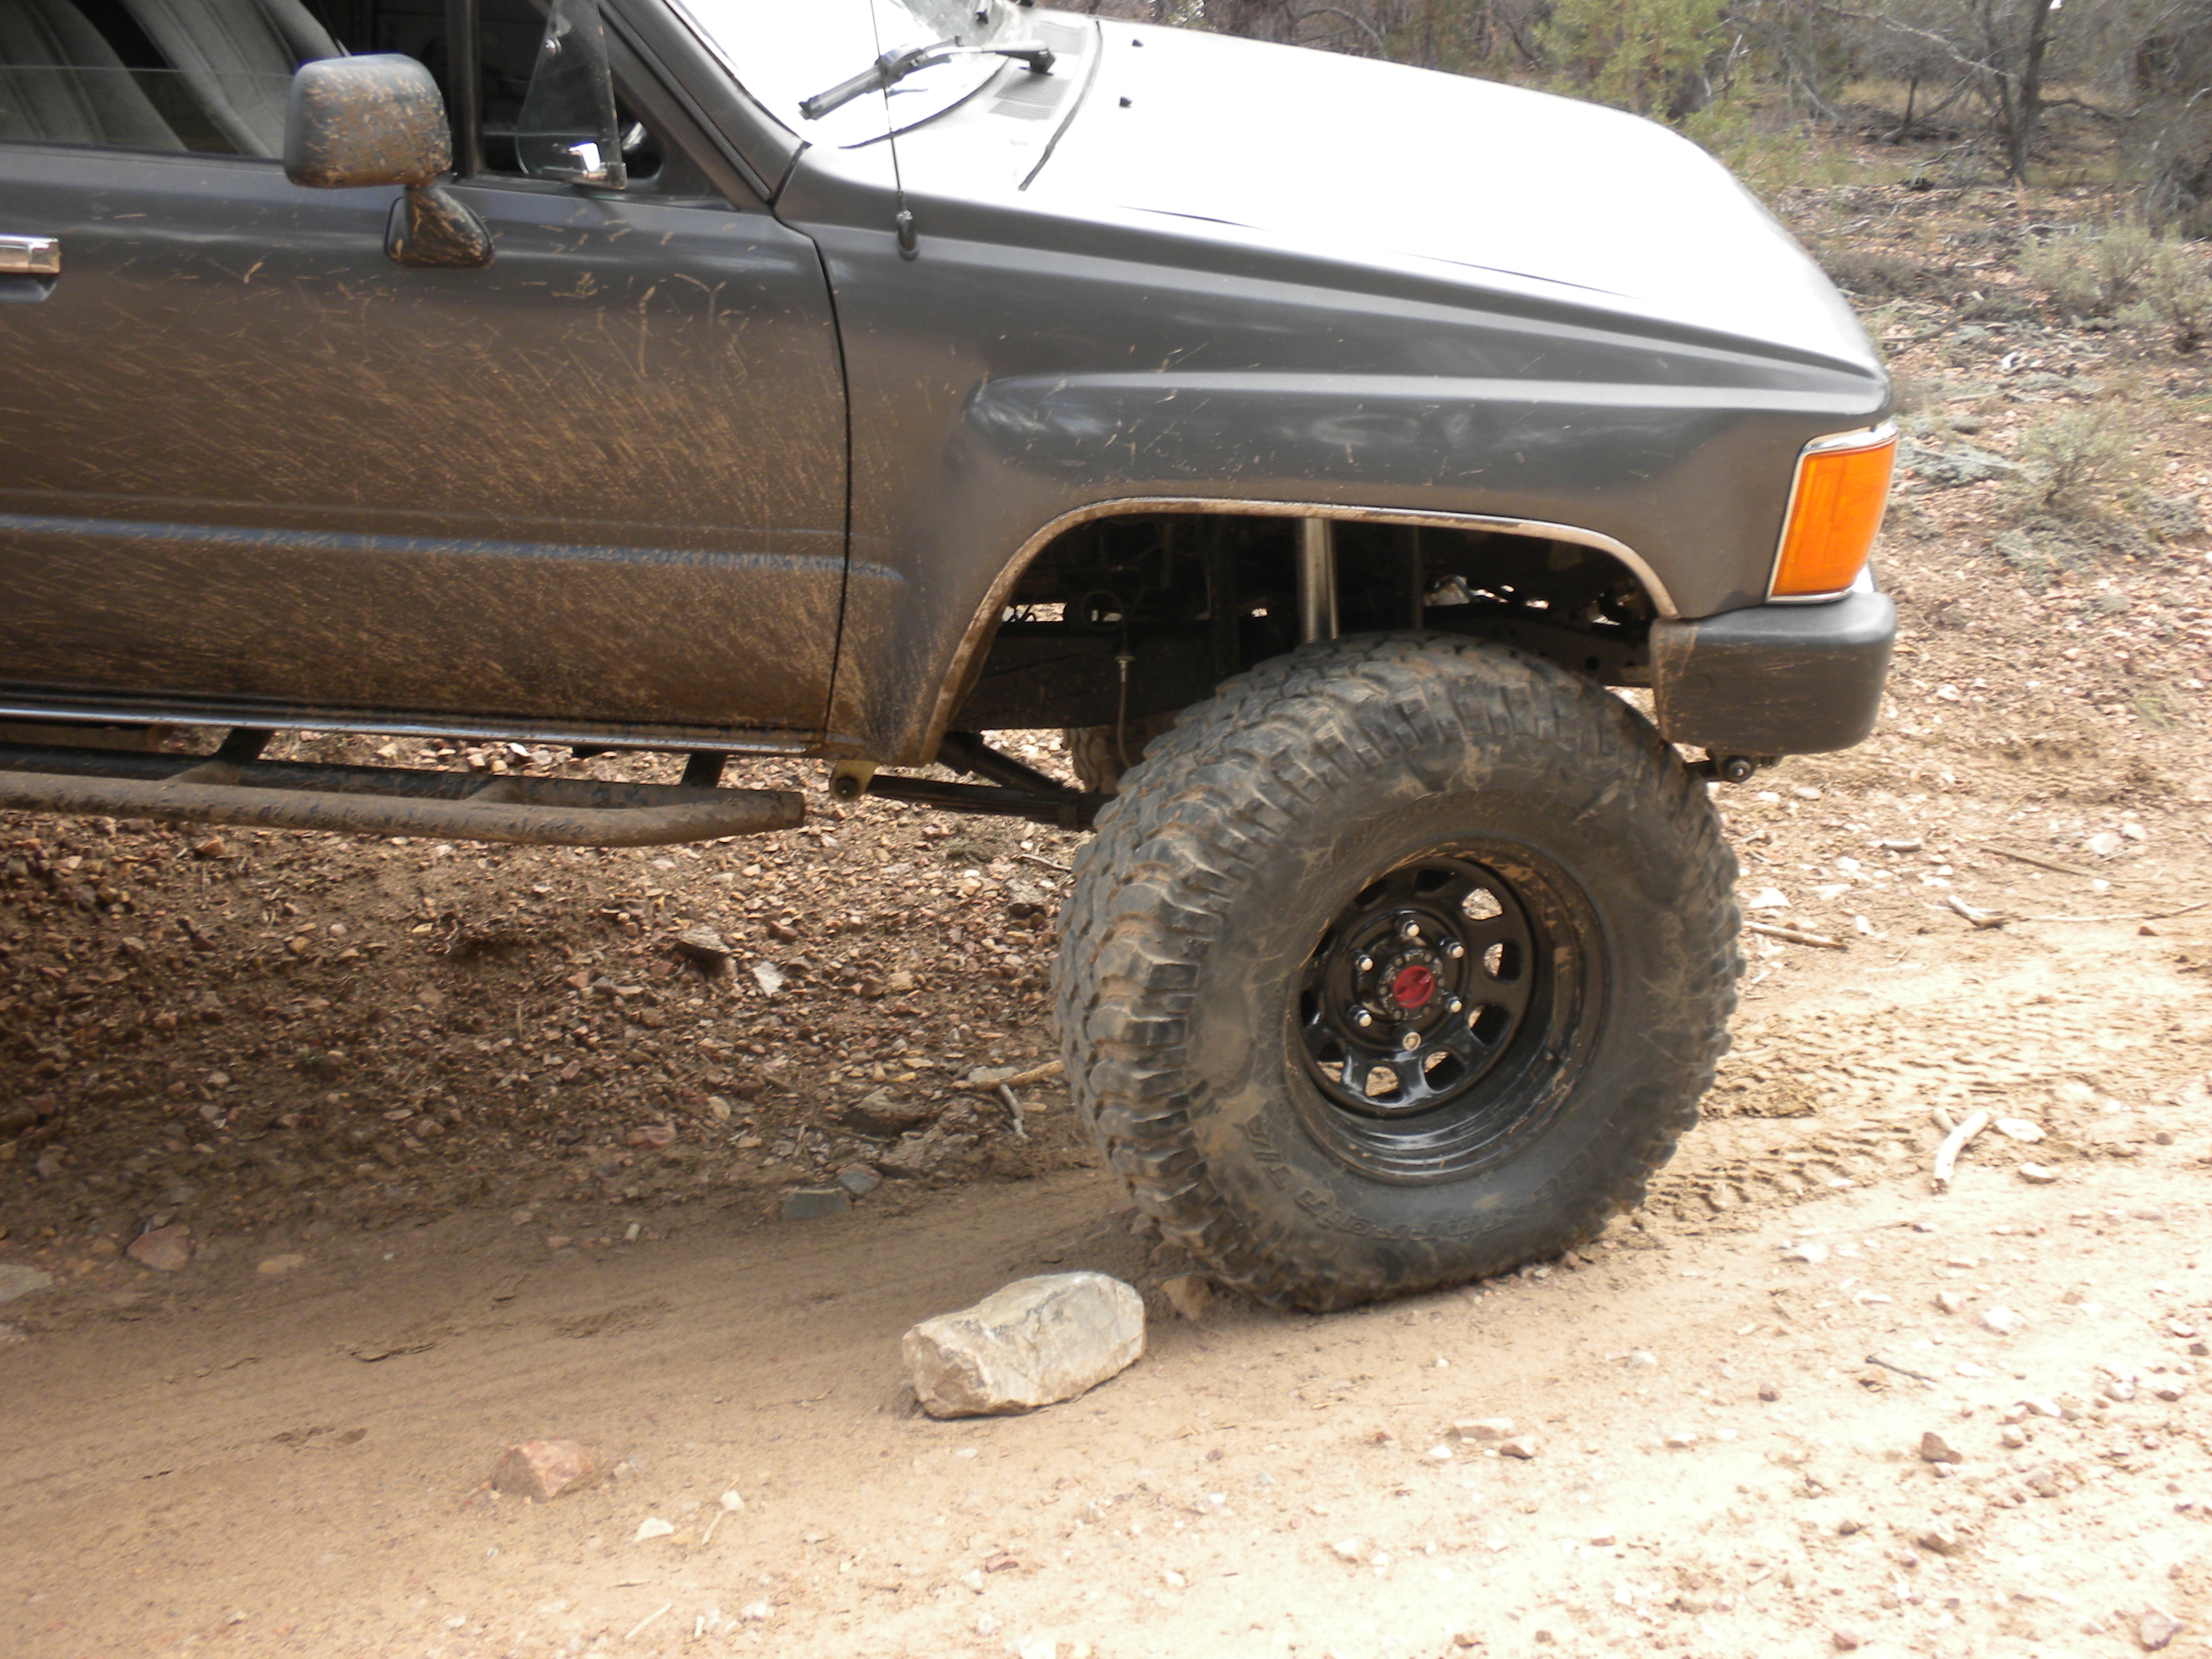
I ran into some minor front tire rubbage. but nothing that bothered me the rest of the day. i never flexed it to that point the rest of the day so i'm good. I wont have that problem once i build my front bumper.


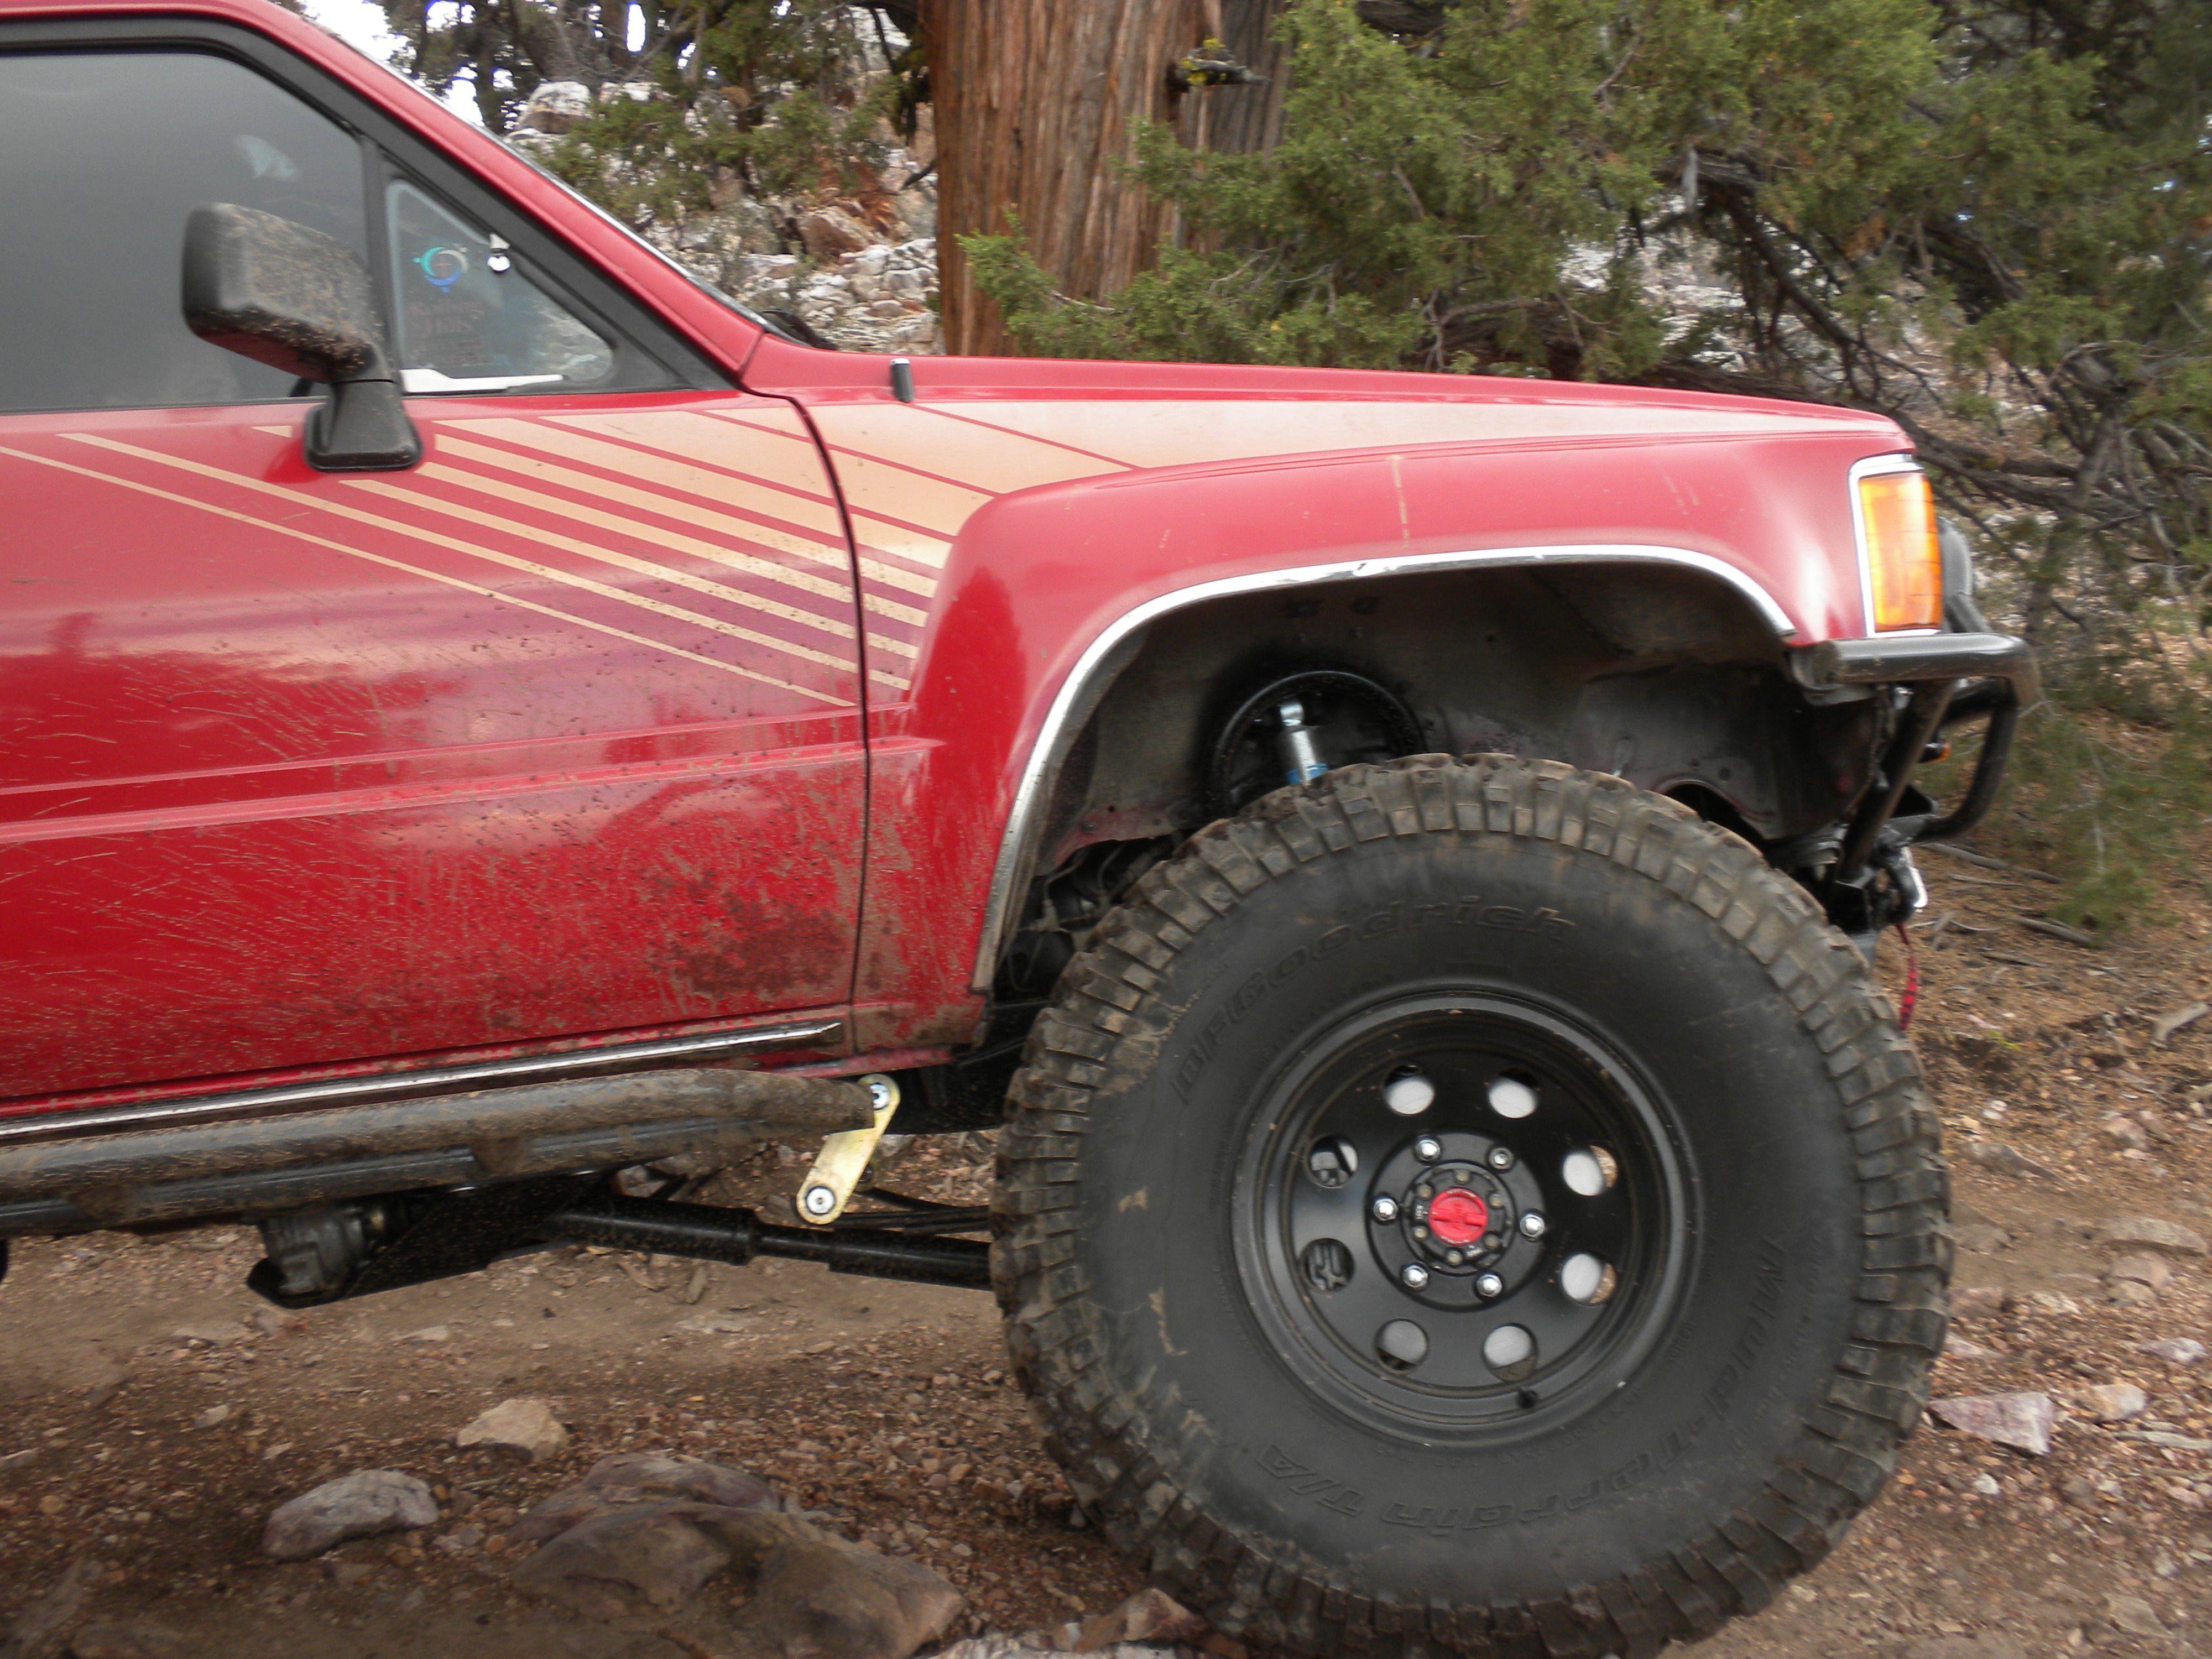
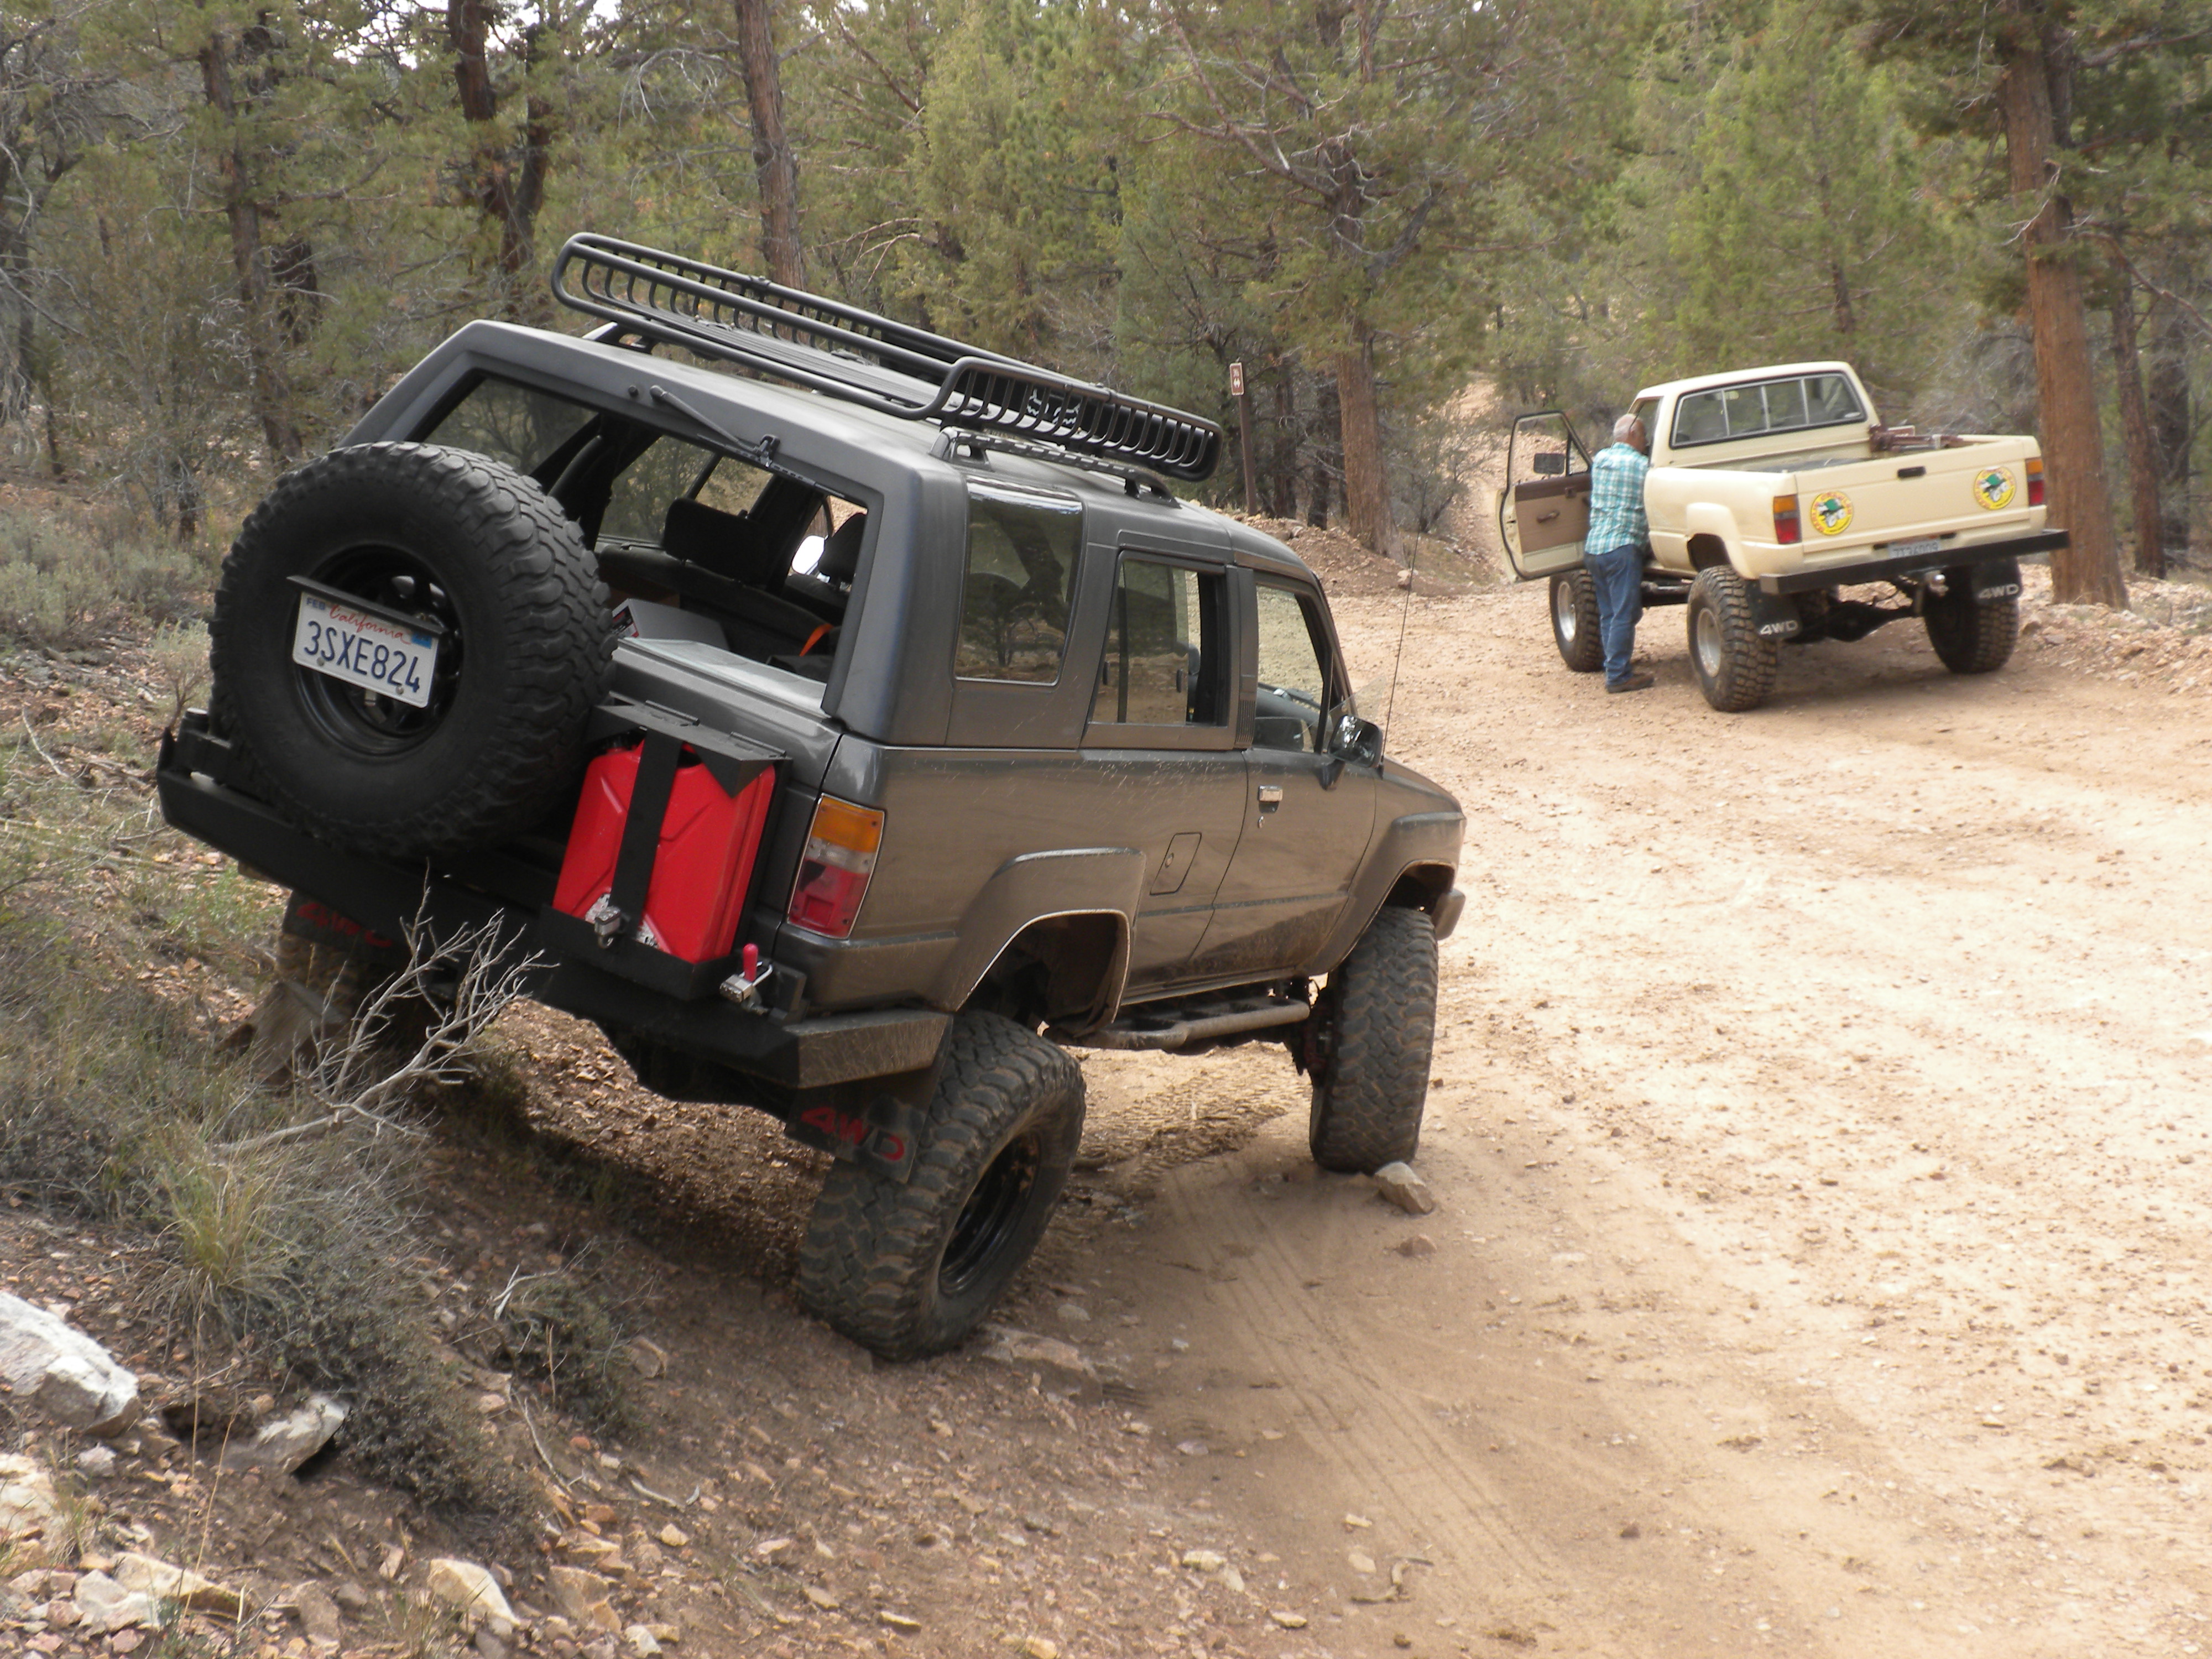
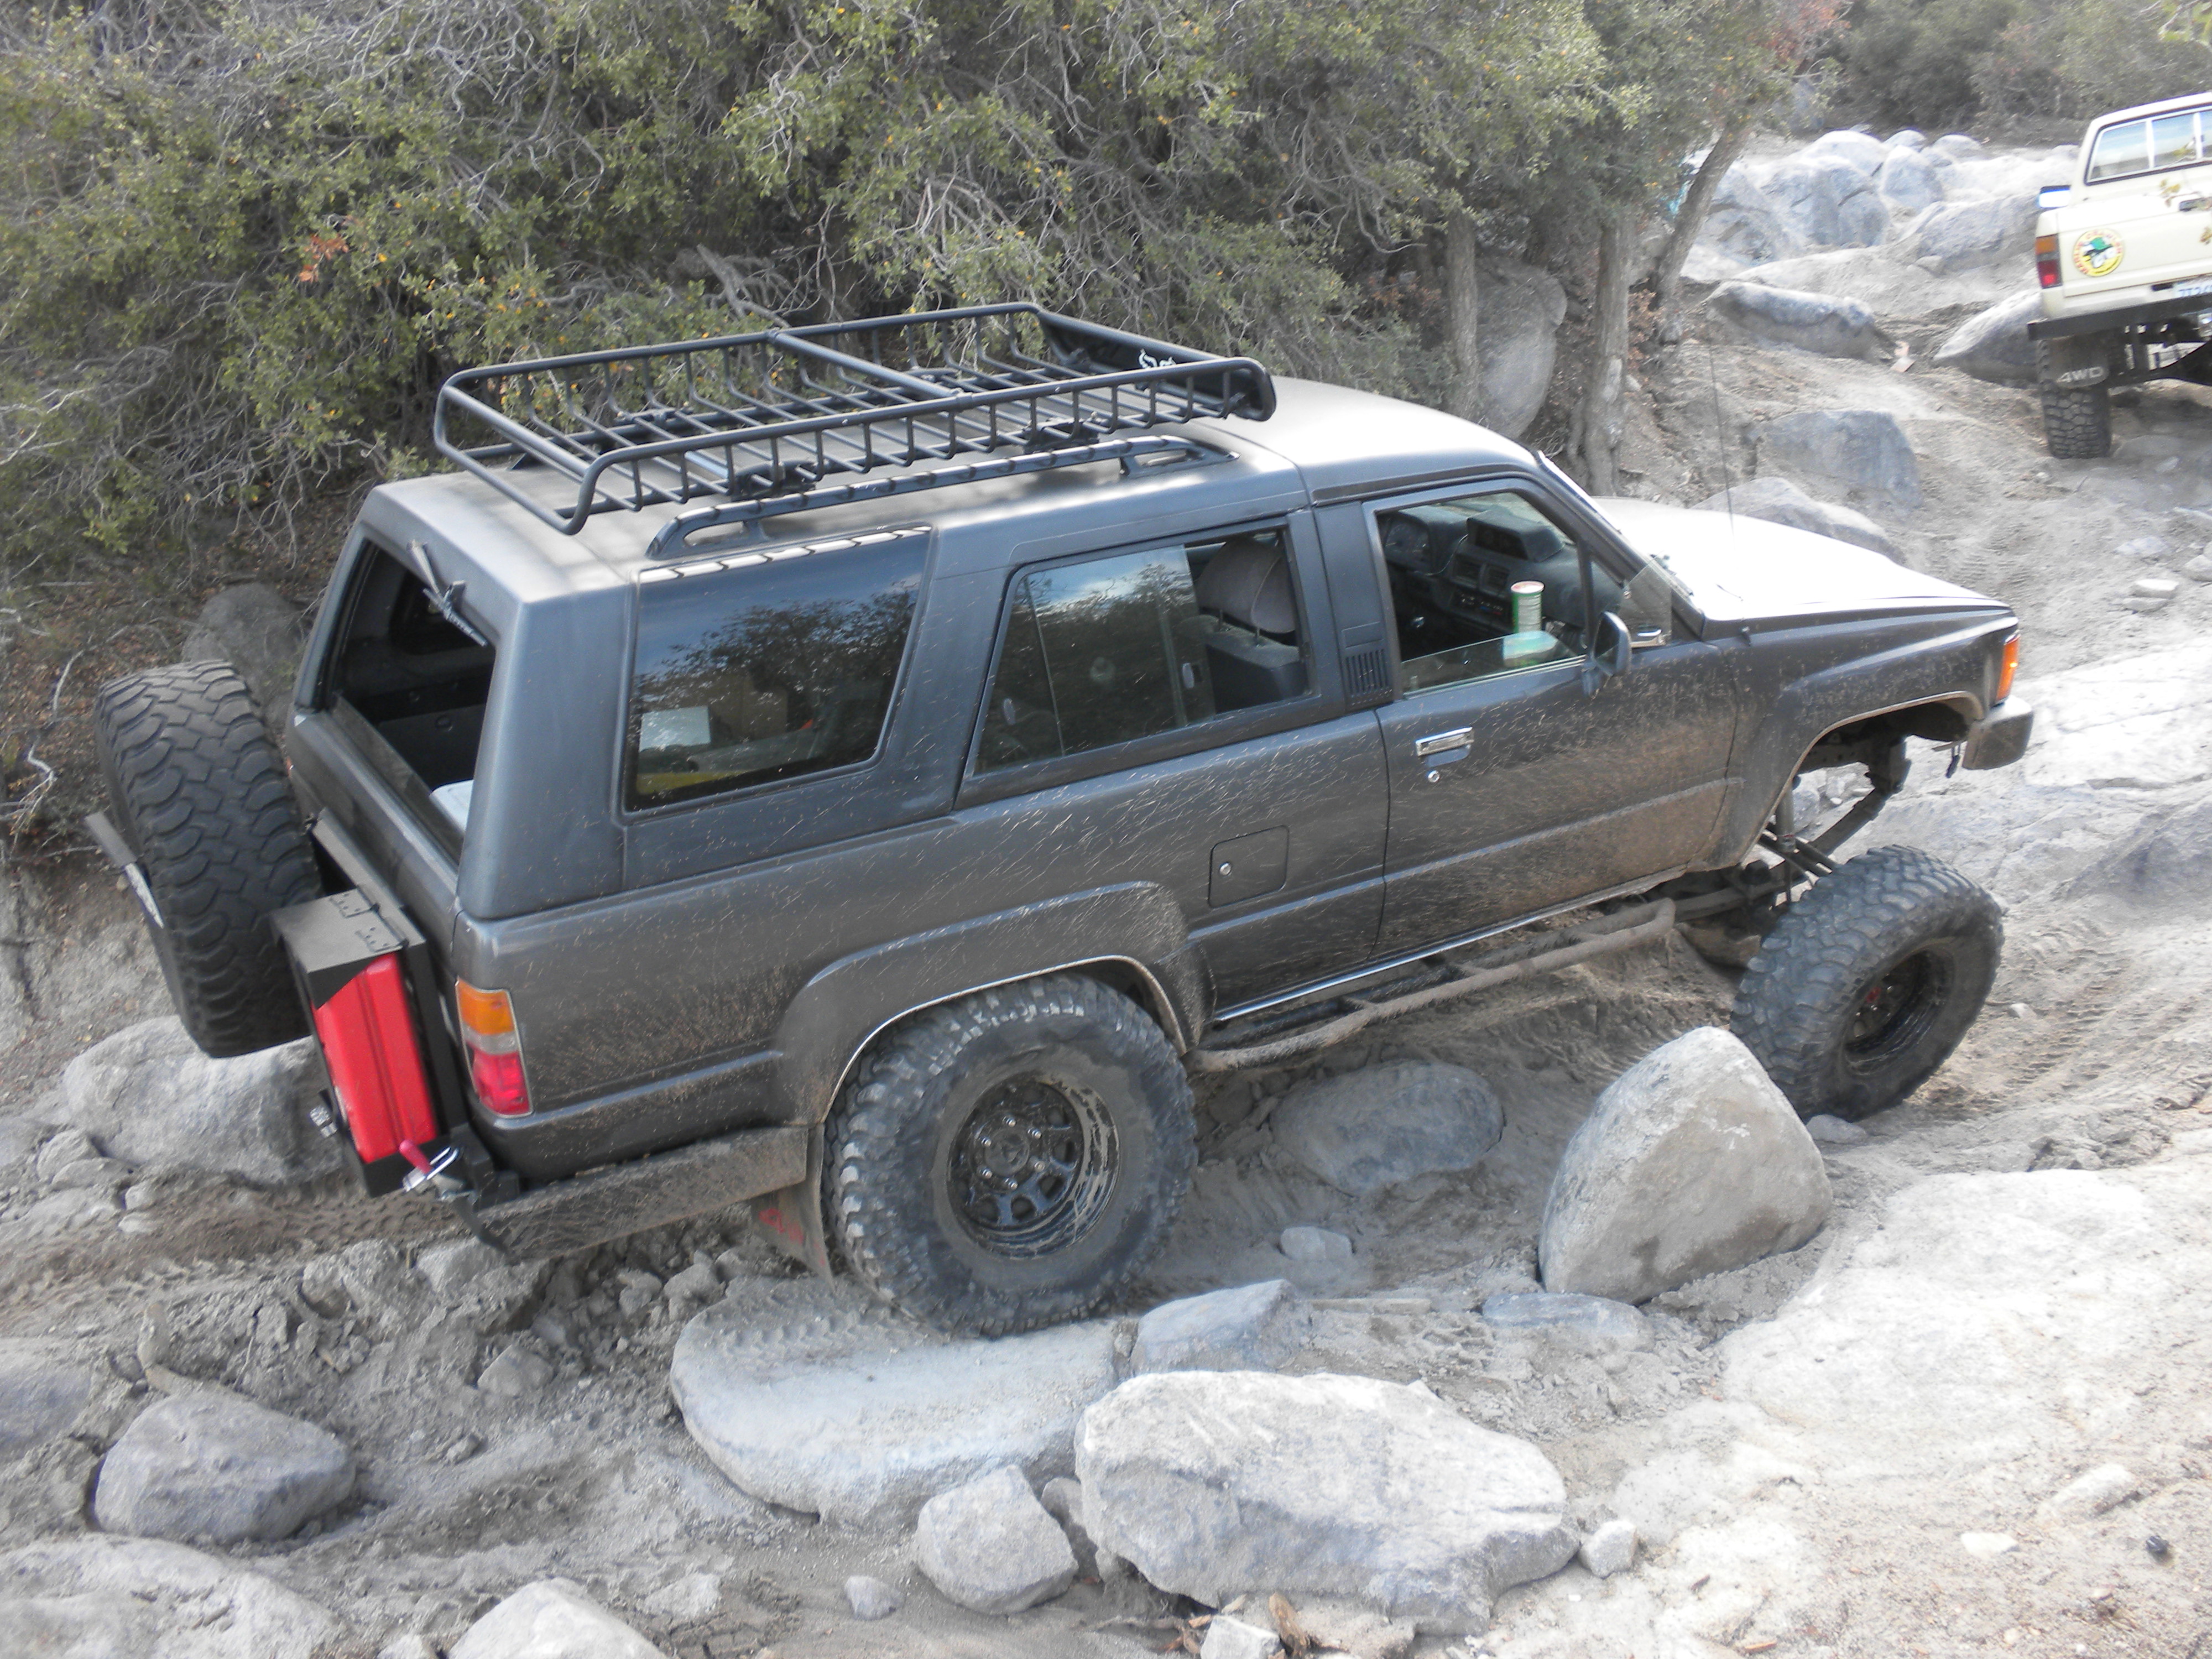
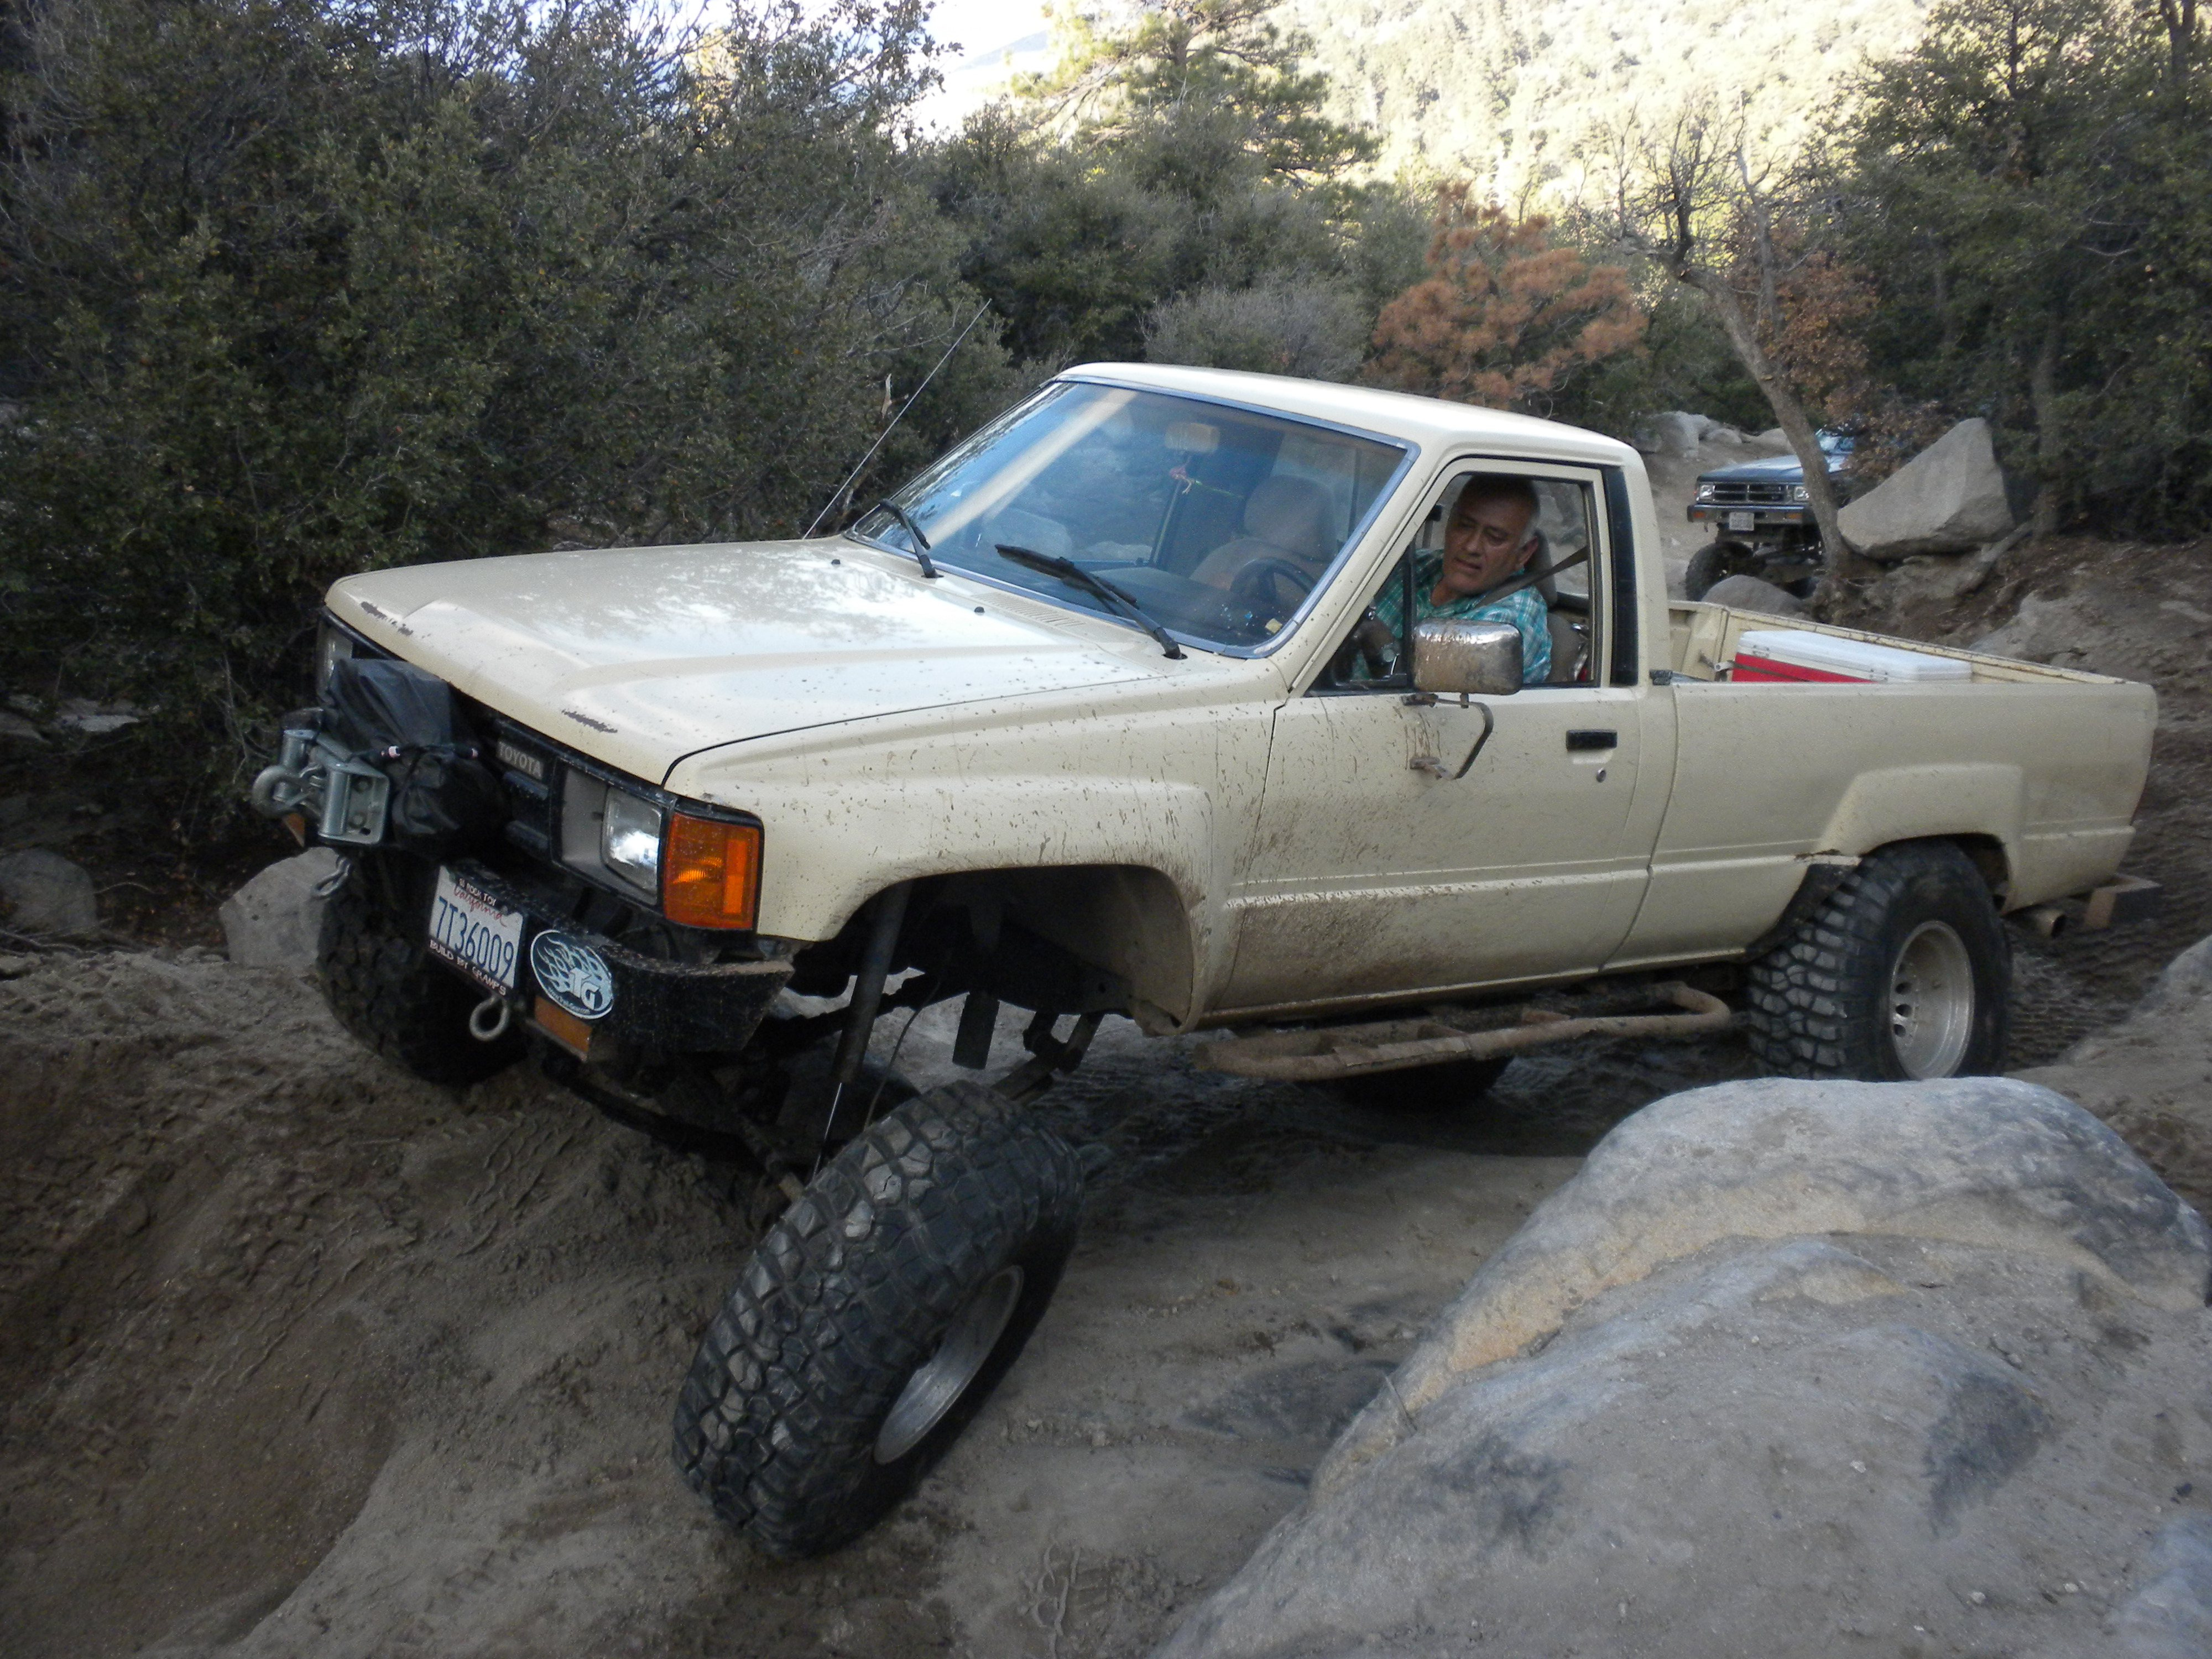
One of the best upgrades i think i ever built was this Rear Bumper that my Dad and I built. I mentioned before that i wanted a sick heavy duty bumper. Which is why i chose 1/4" plate steel for the rear end. and let me tell ya. I AM SO HAPPY I WENT WITH THAT THICKNESS! I must had hit that rear bumper about 25 times in the whole trip. A lot was to the hitch but i did get my rear bumper a lot too. It definitely did its job at protecting my body and rear end. All those hits it took and the only thing i was left with was a couple of scratches and paint blemishes. Nothing that cant be slightly sanded and re painted. to look normal again. I'm so happy with the results. Only part that did get damaged was the jerry can holder. It did hit and did break one of my welds. but i mean the jerry can tray is only made of 1/16 - 2/16 steel so cant expect that to hold up too well with a hit. its all good. It still held together. nothing that cant be better reinforced and welded to be stronger.
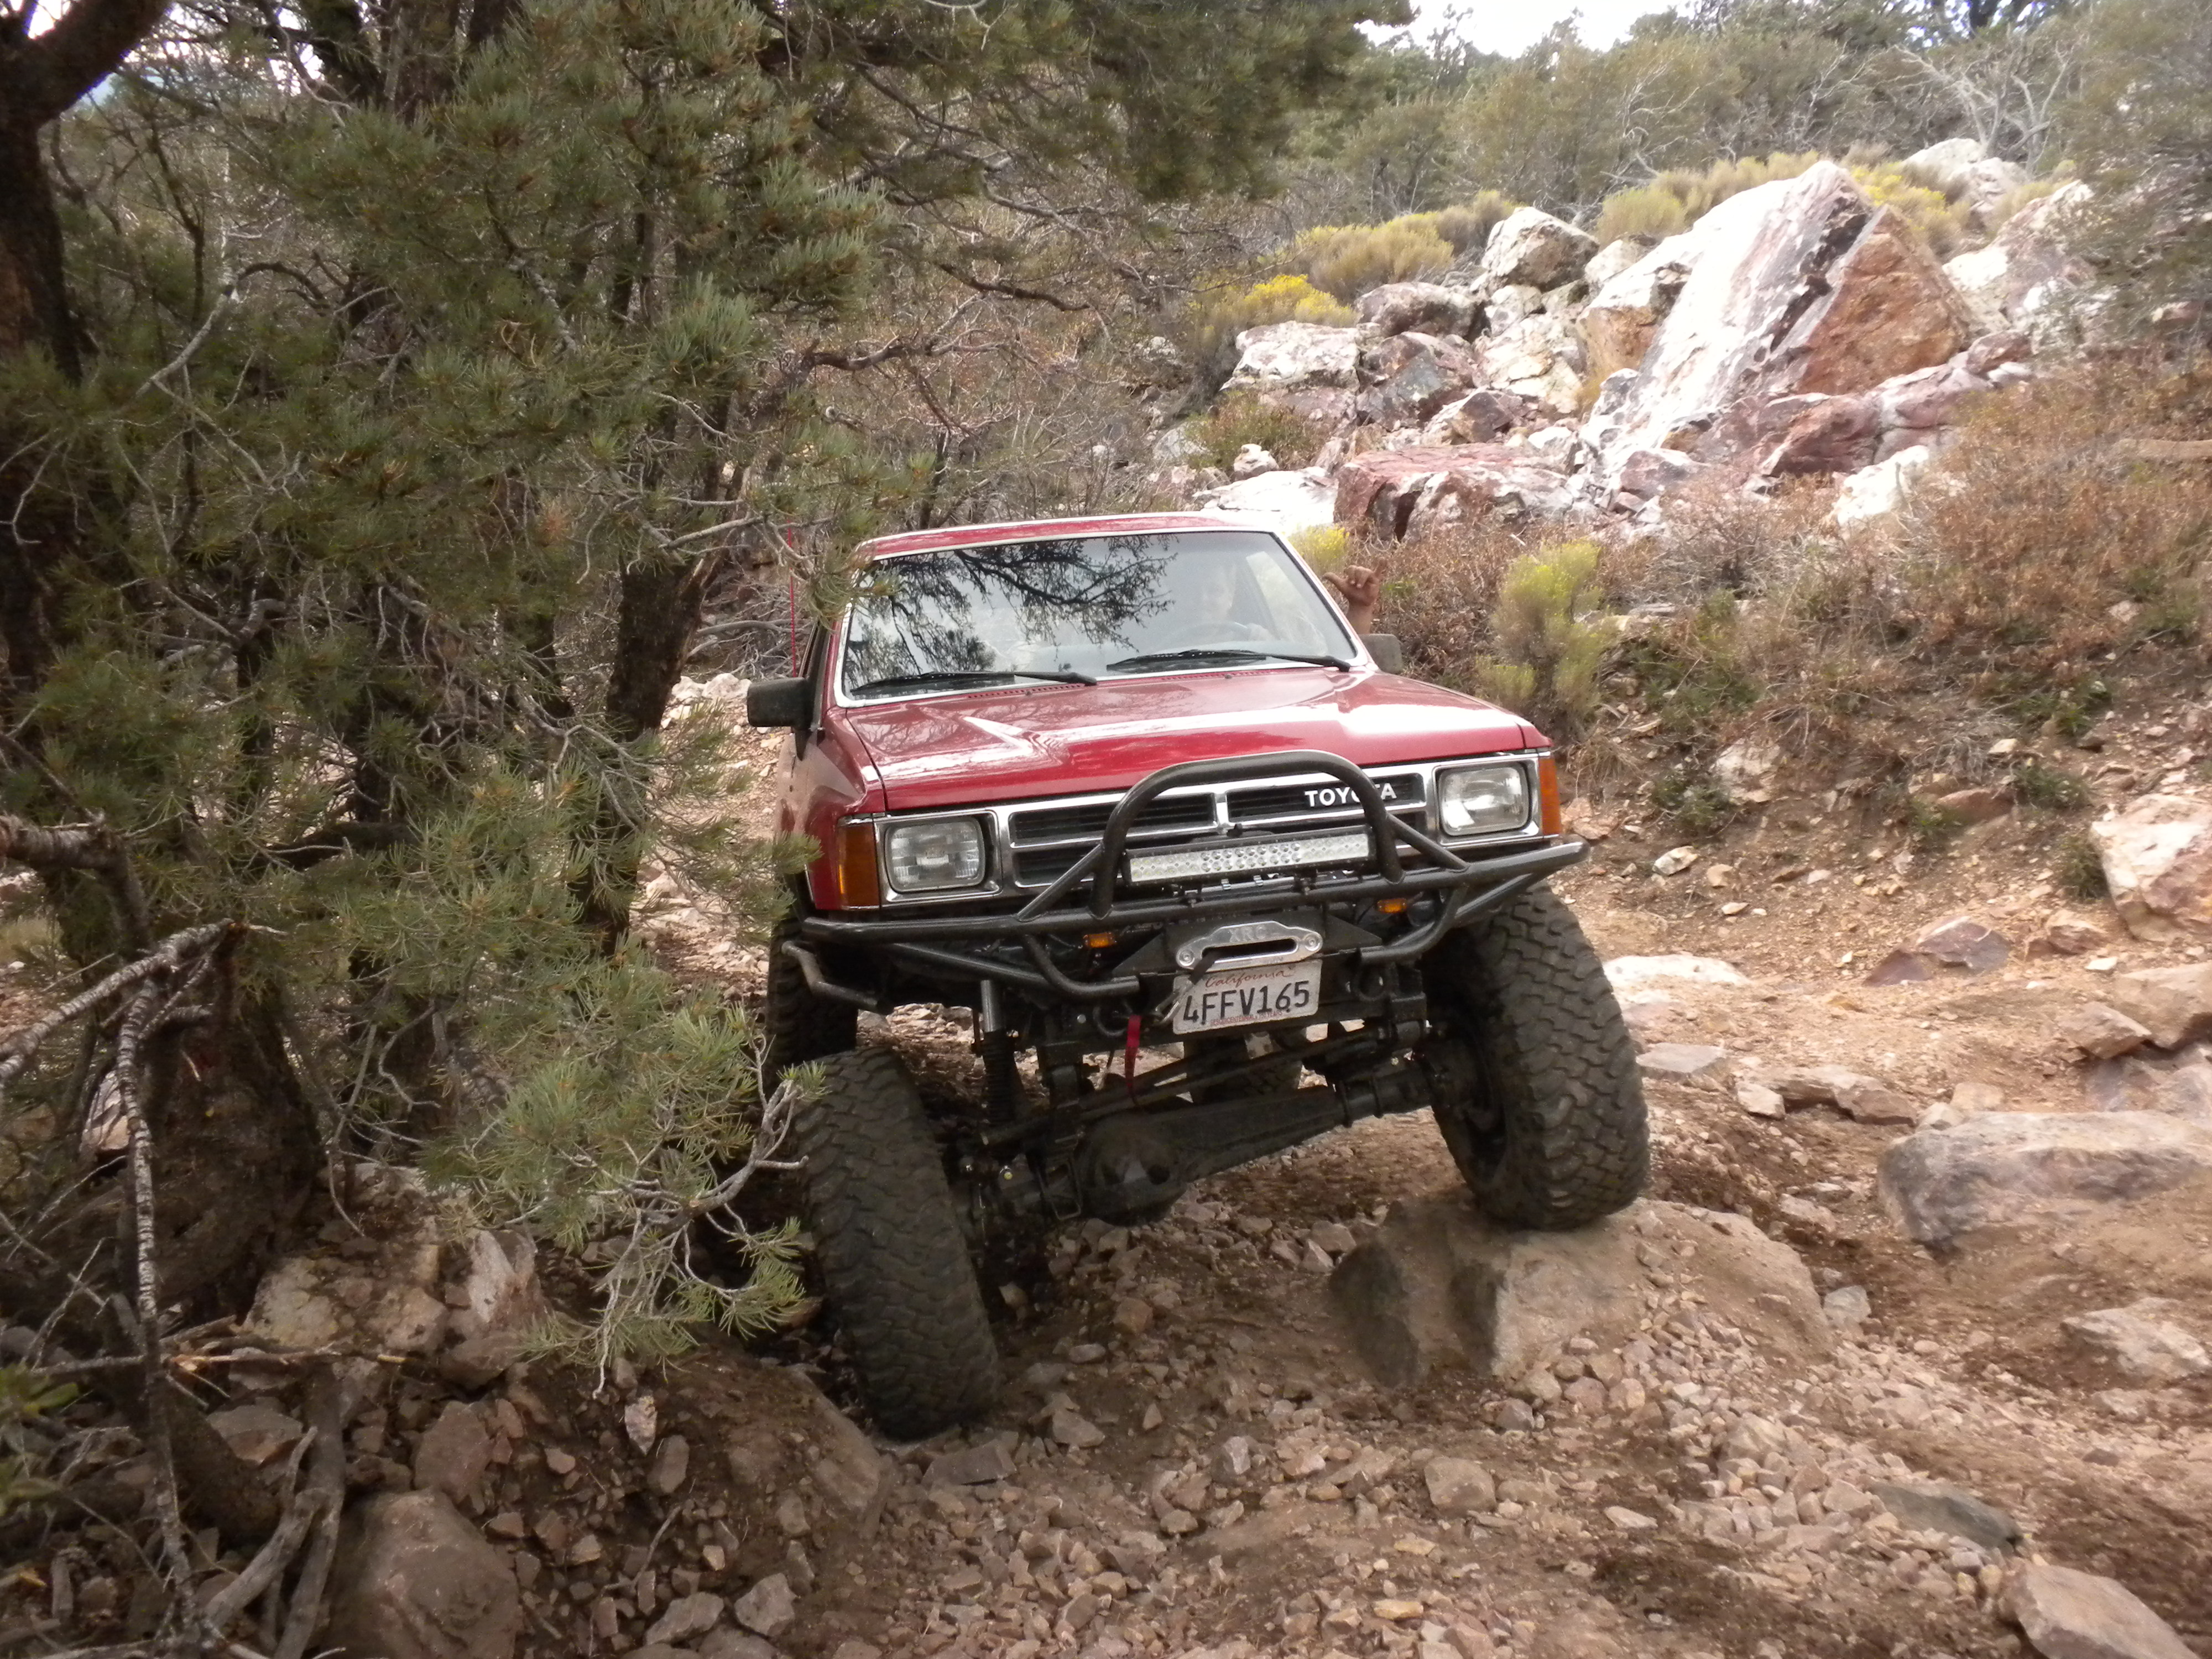
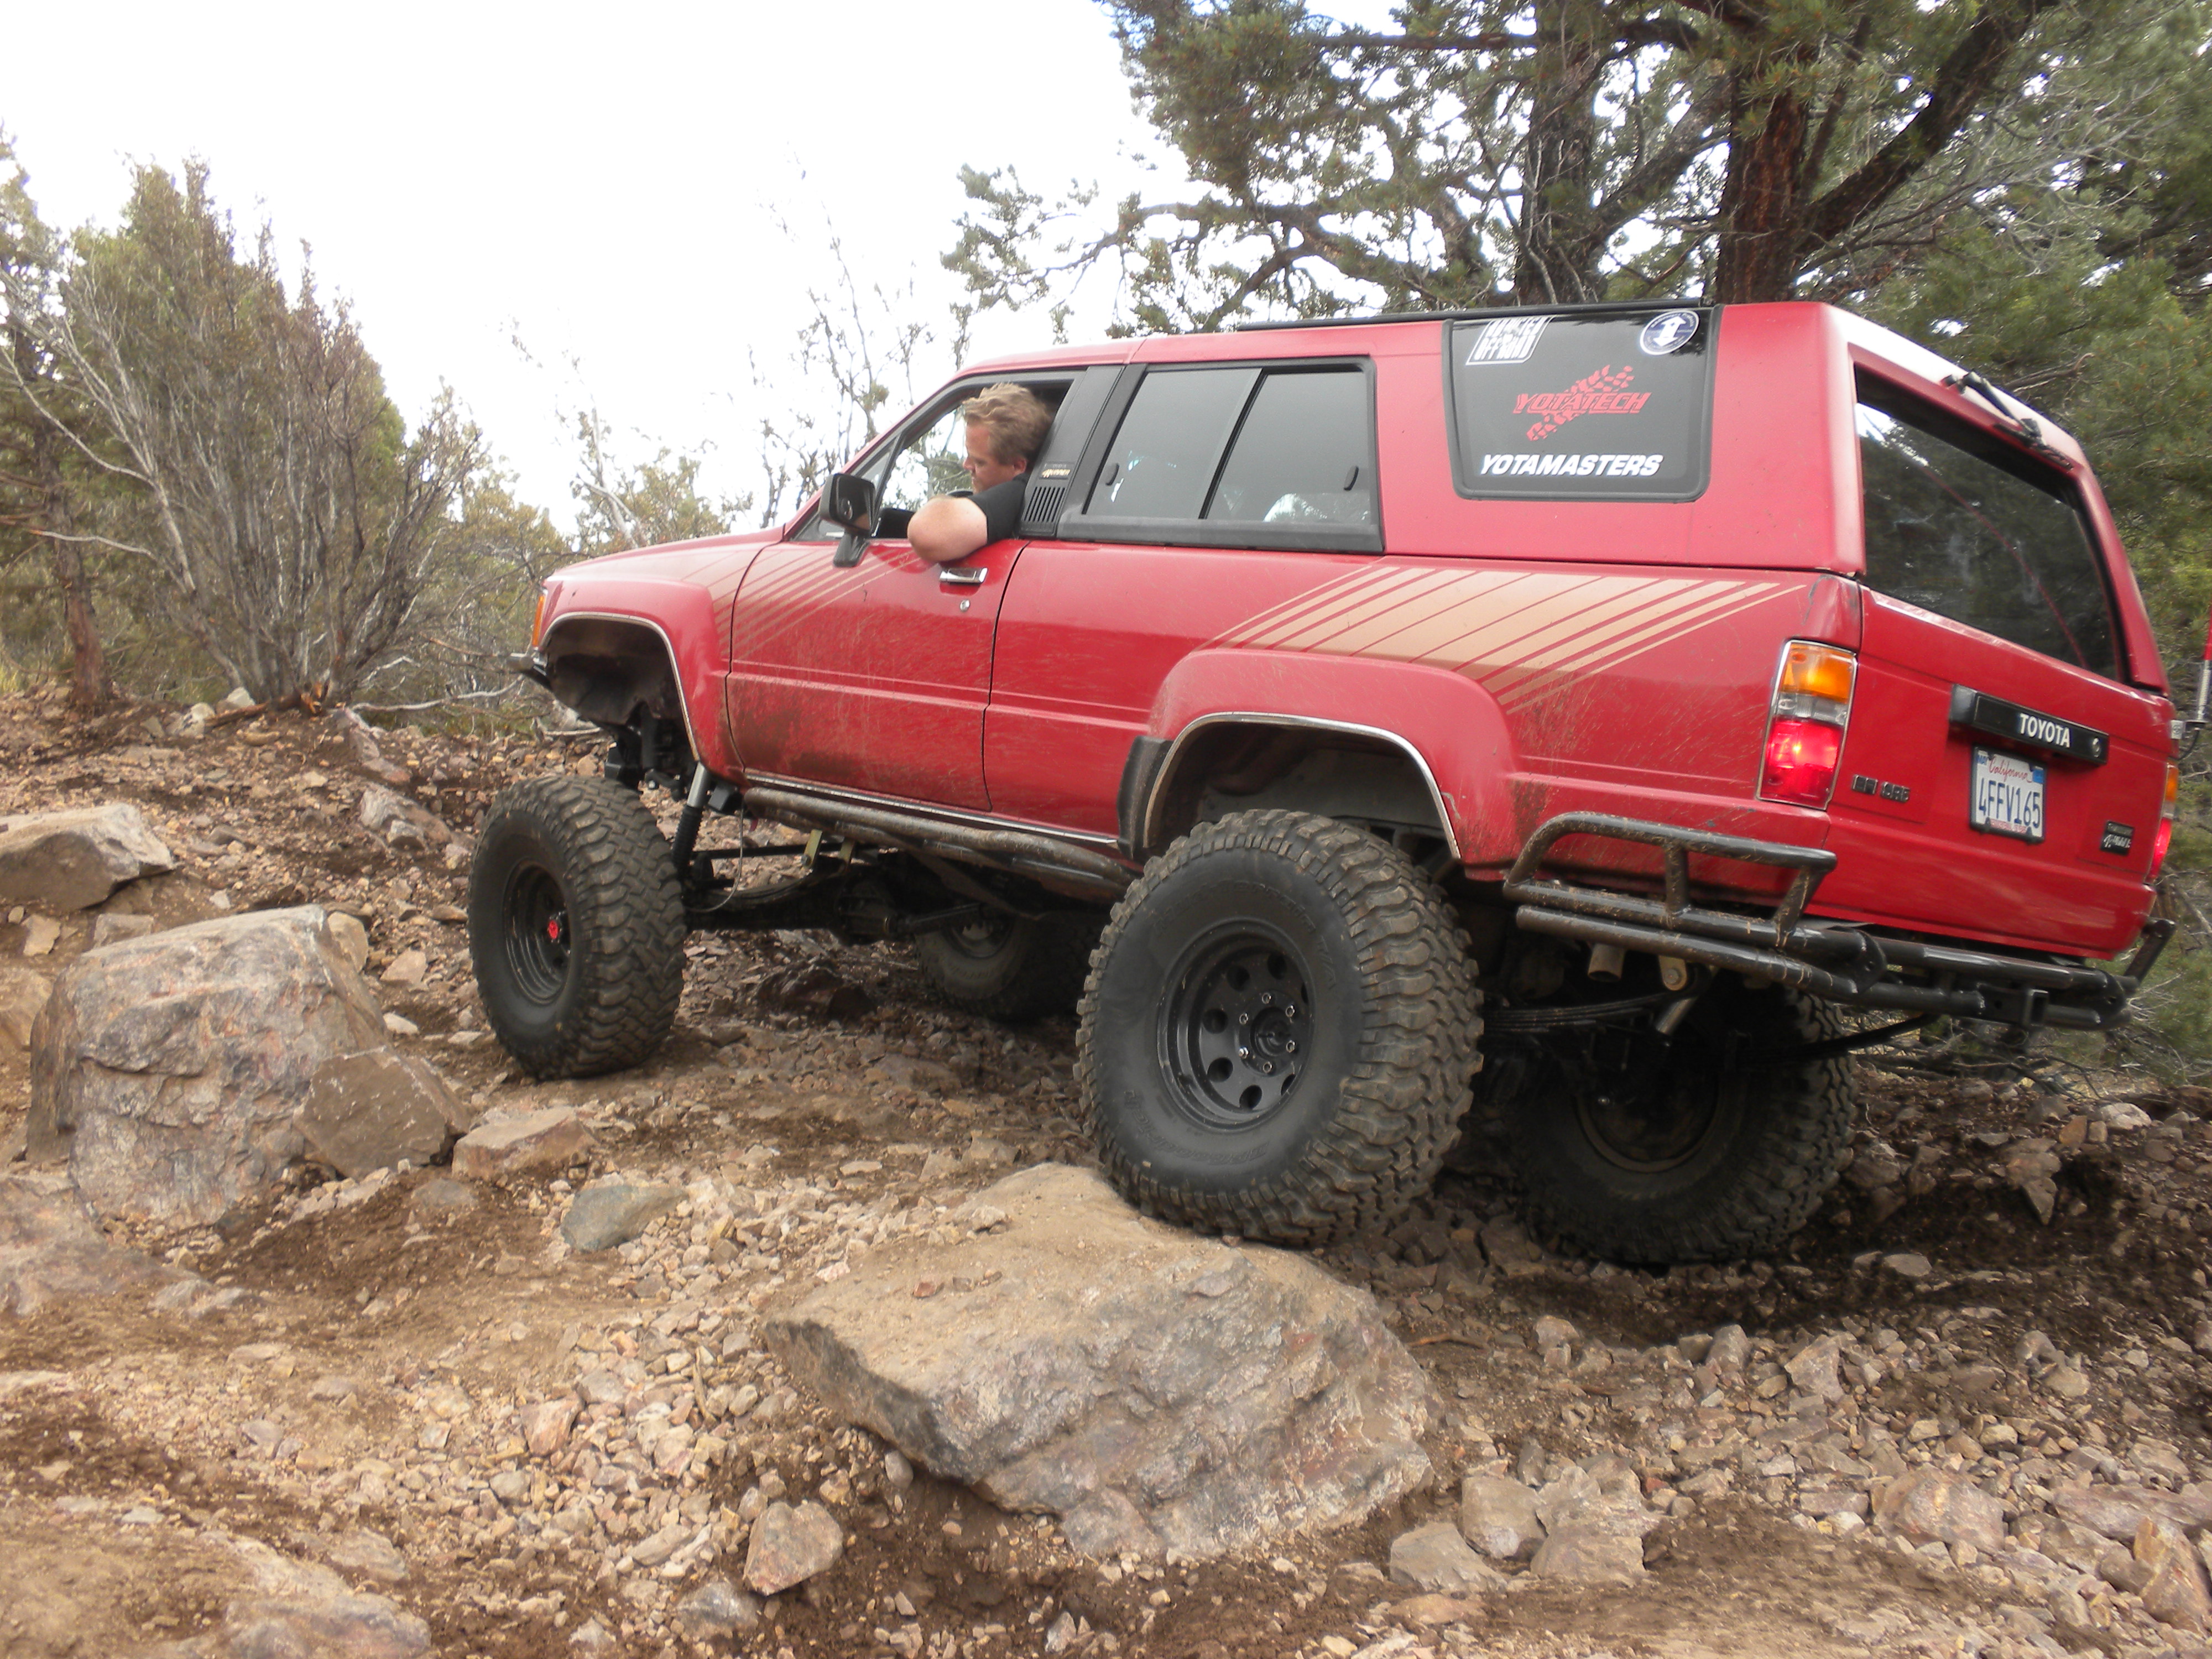
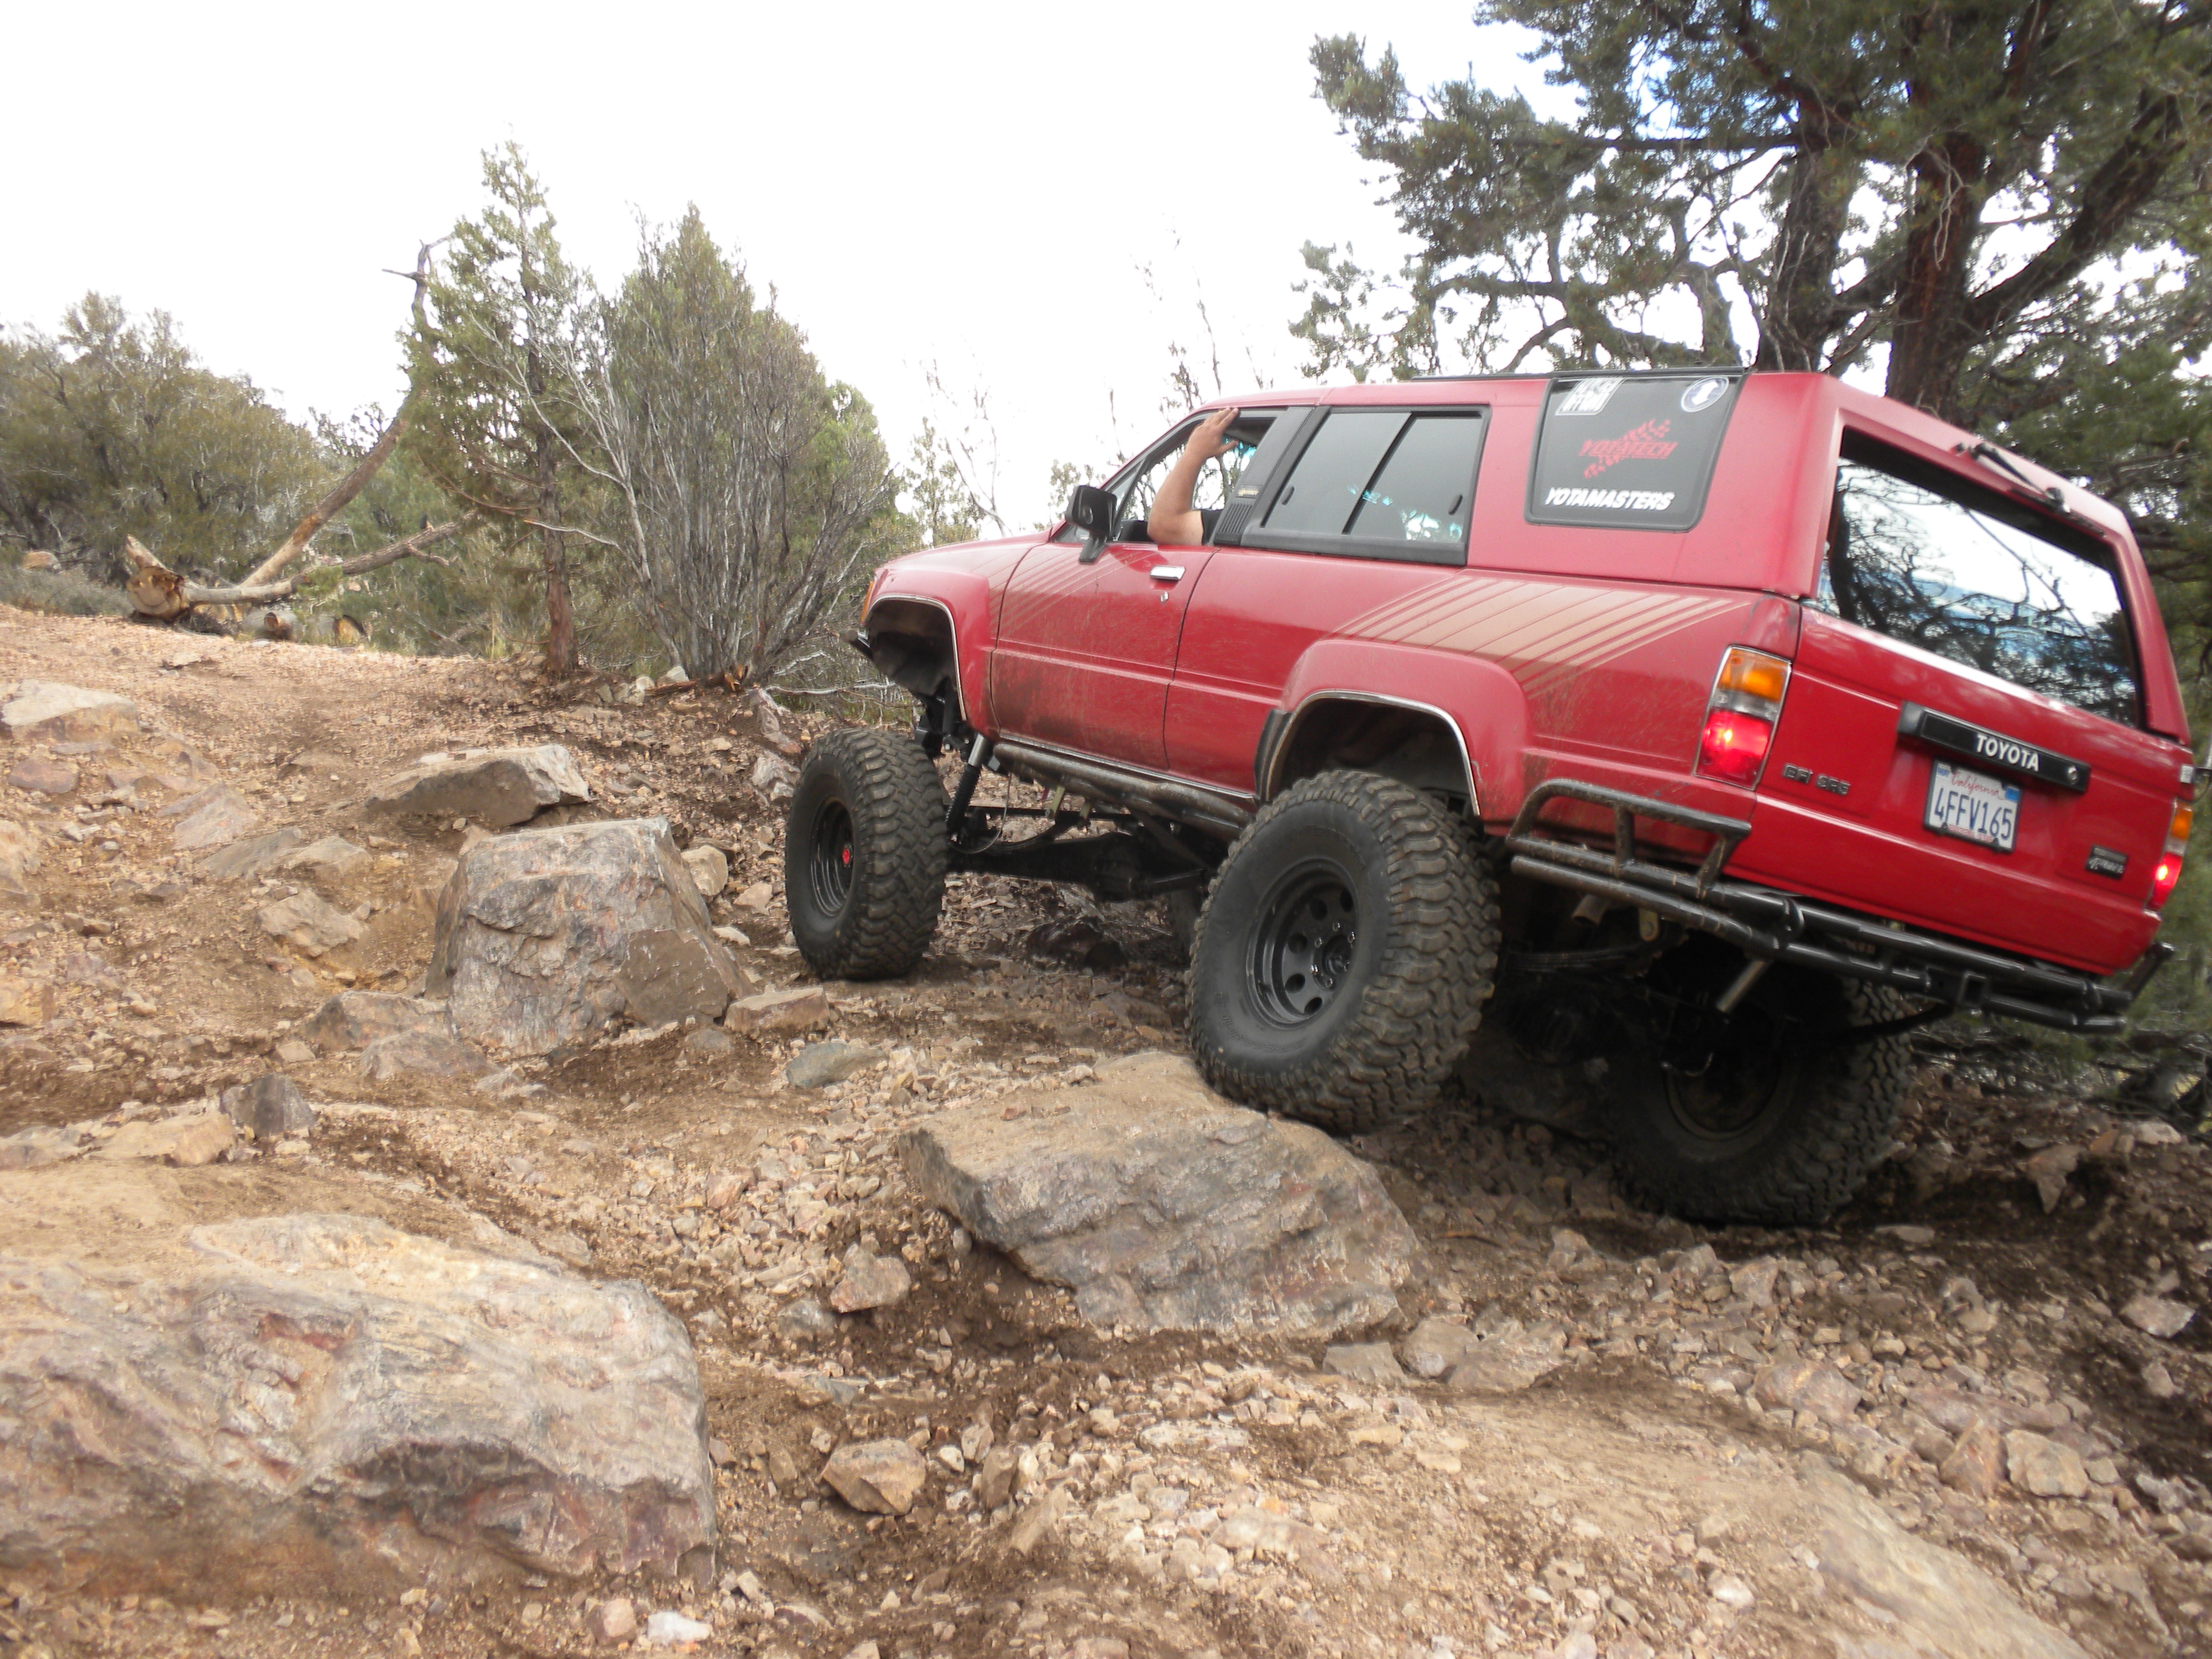
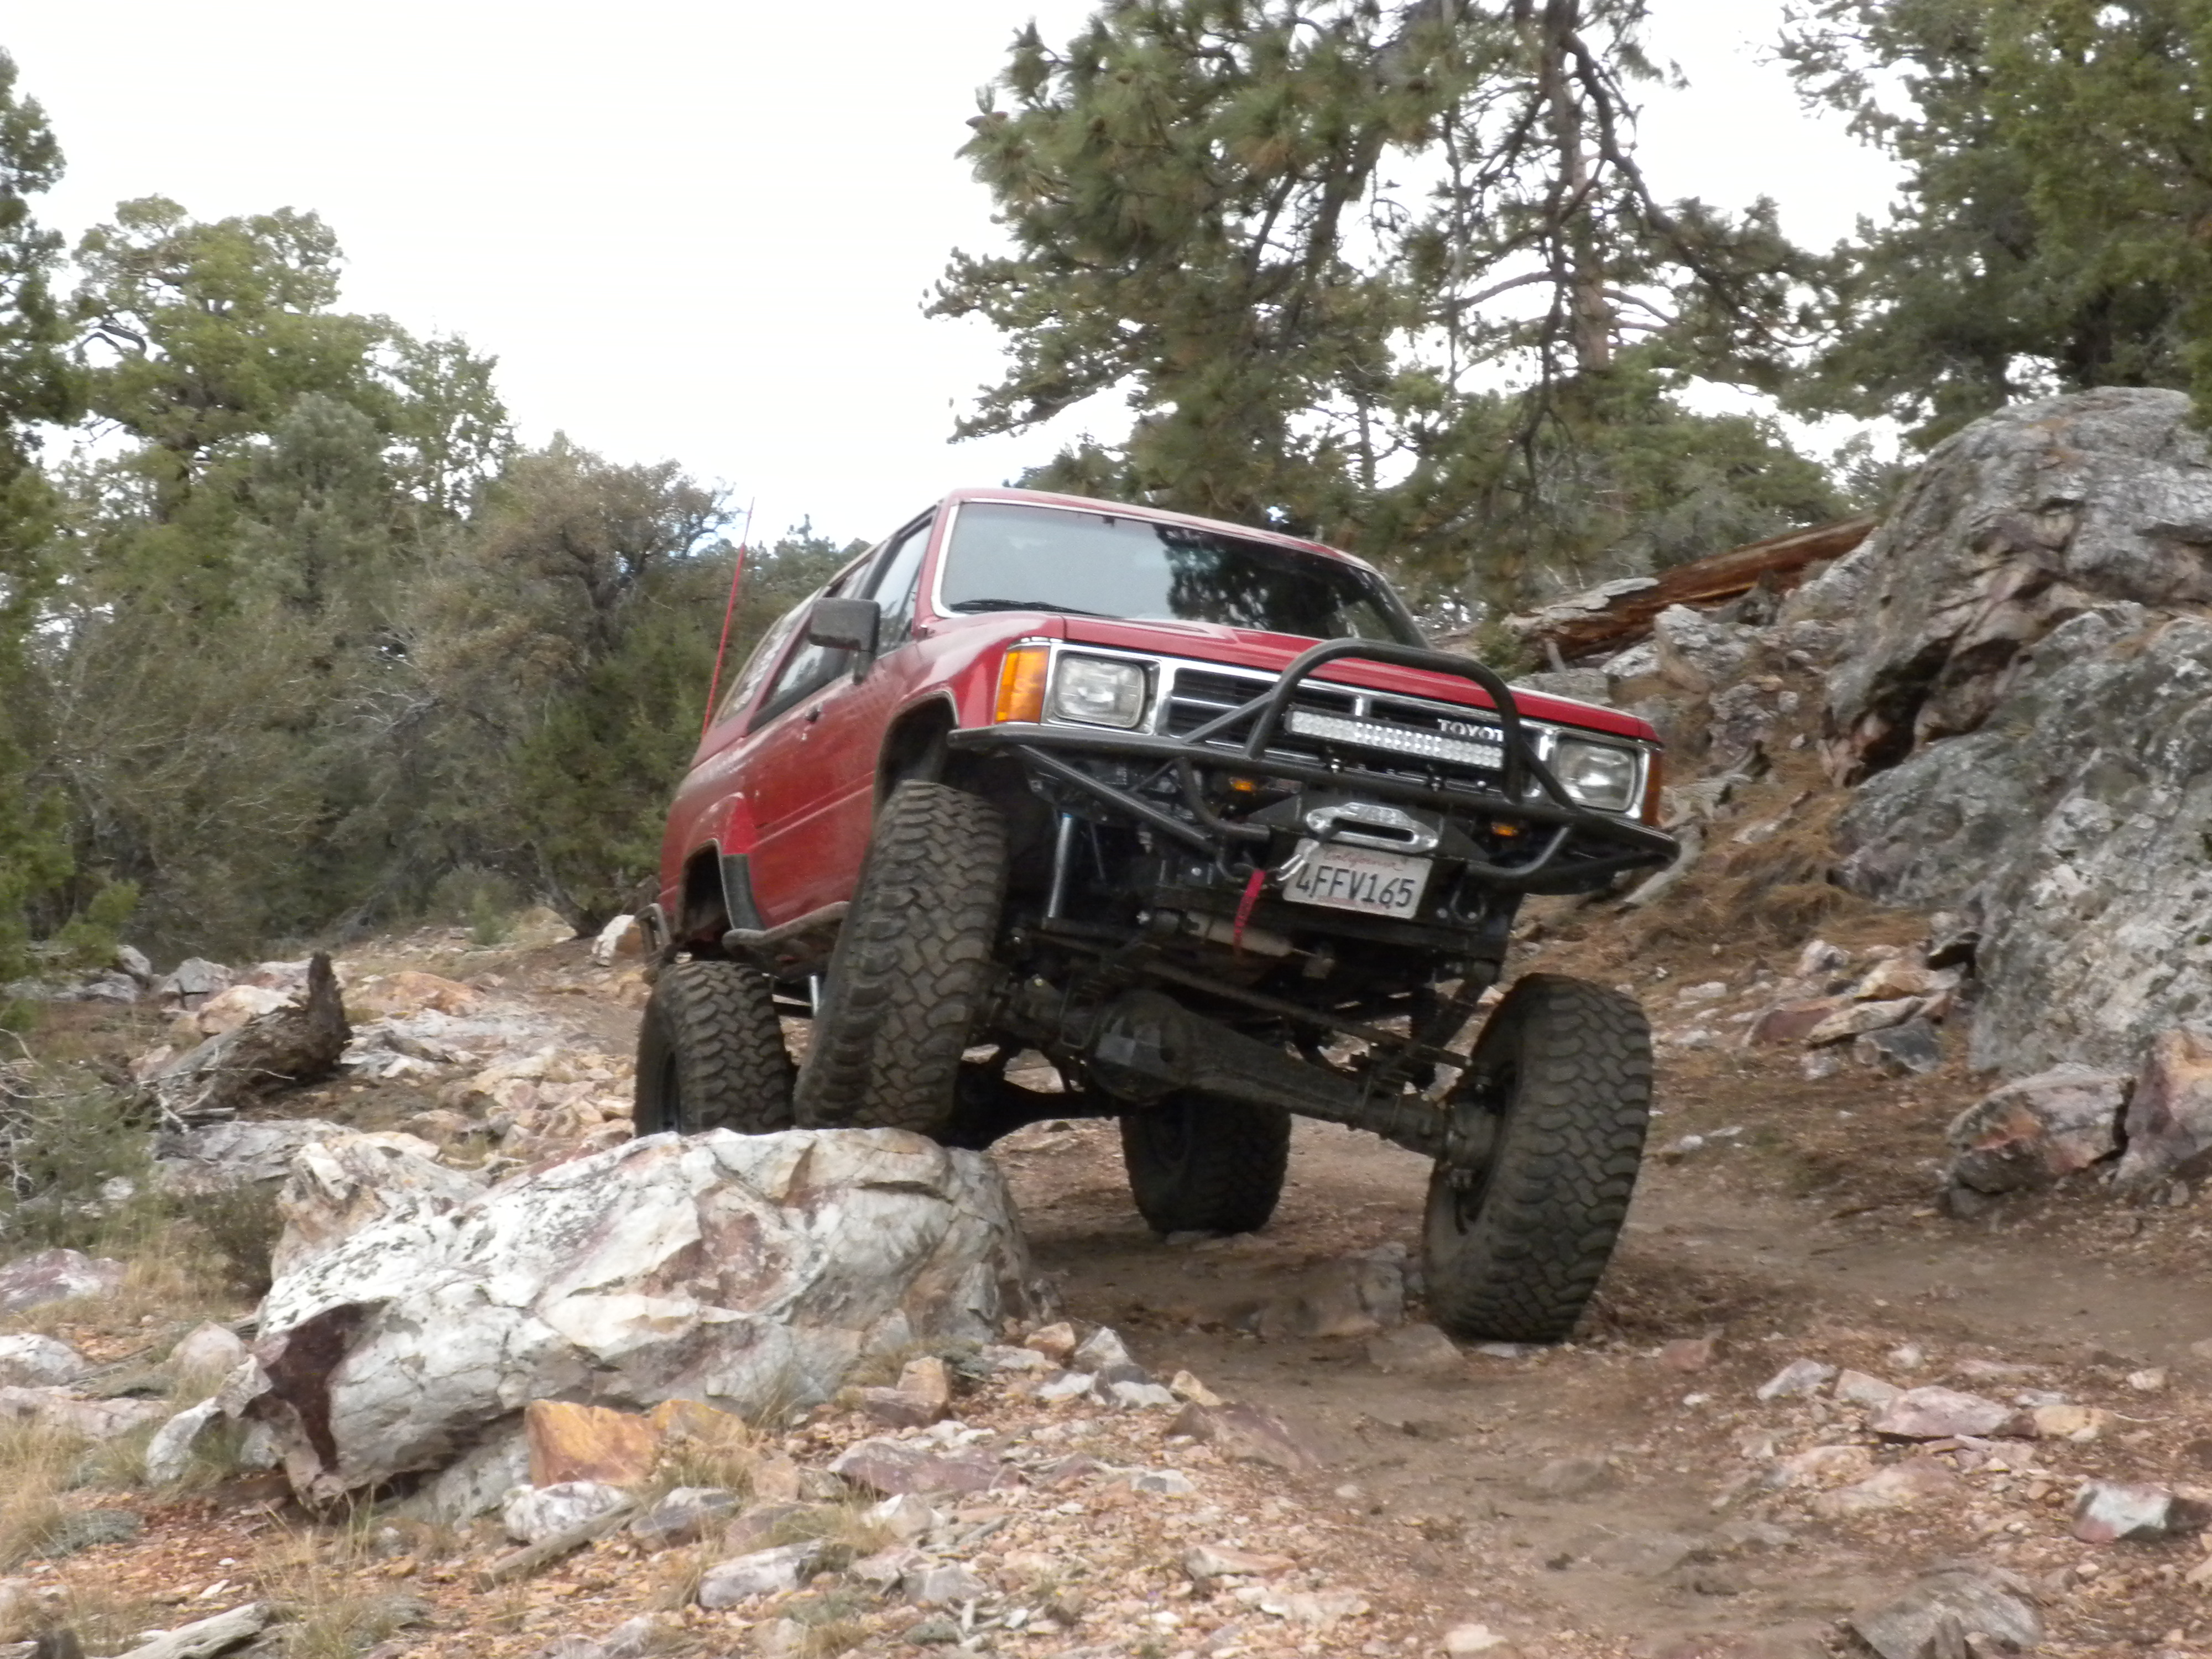
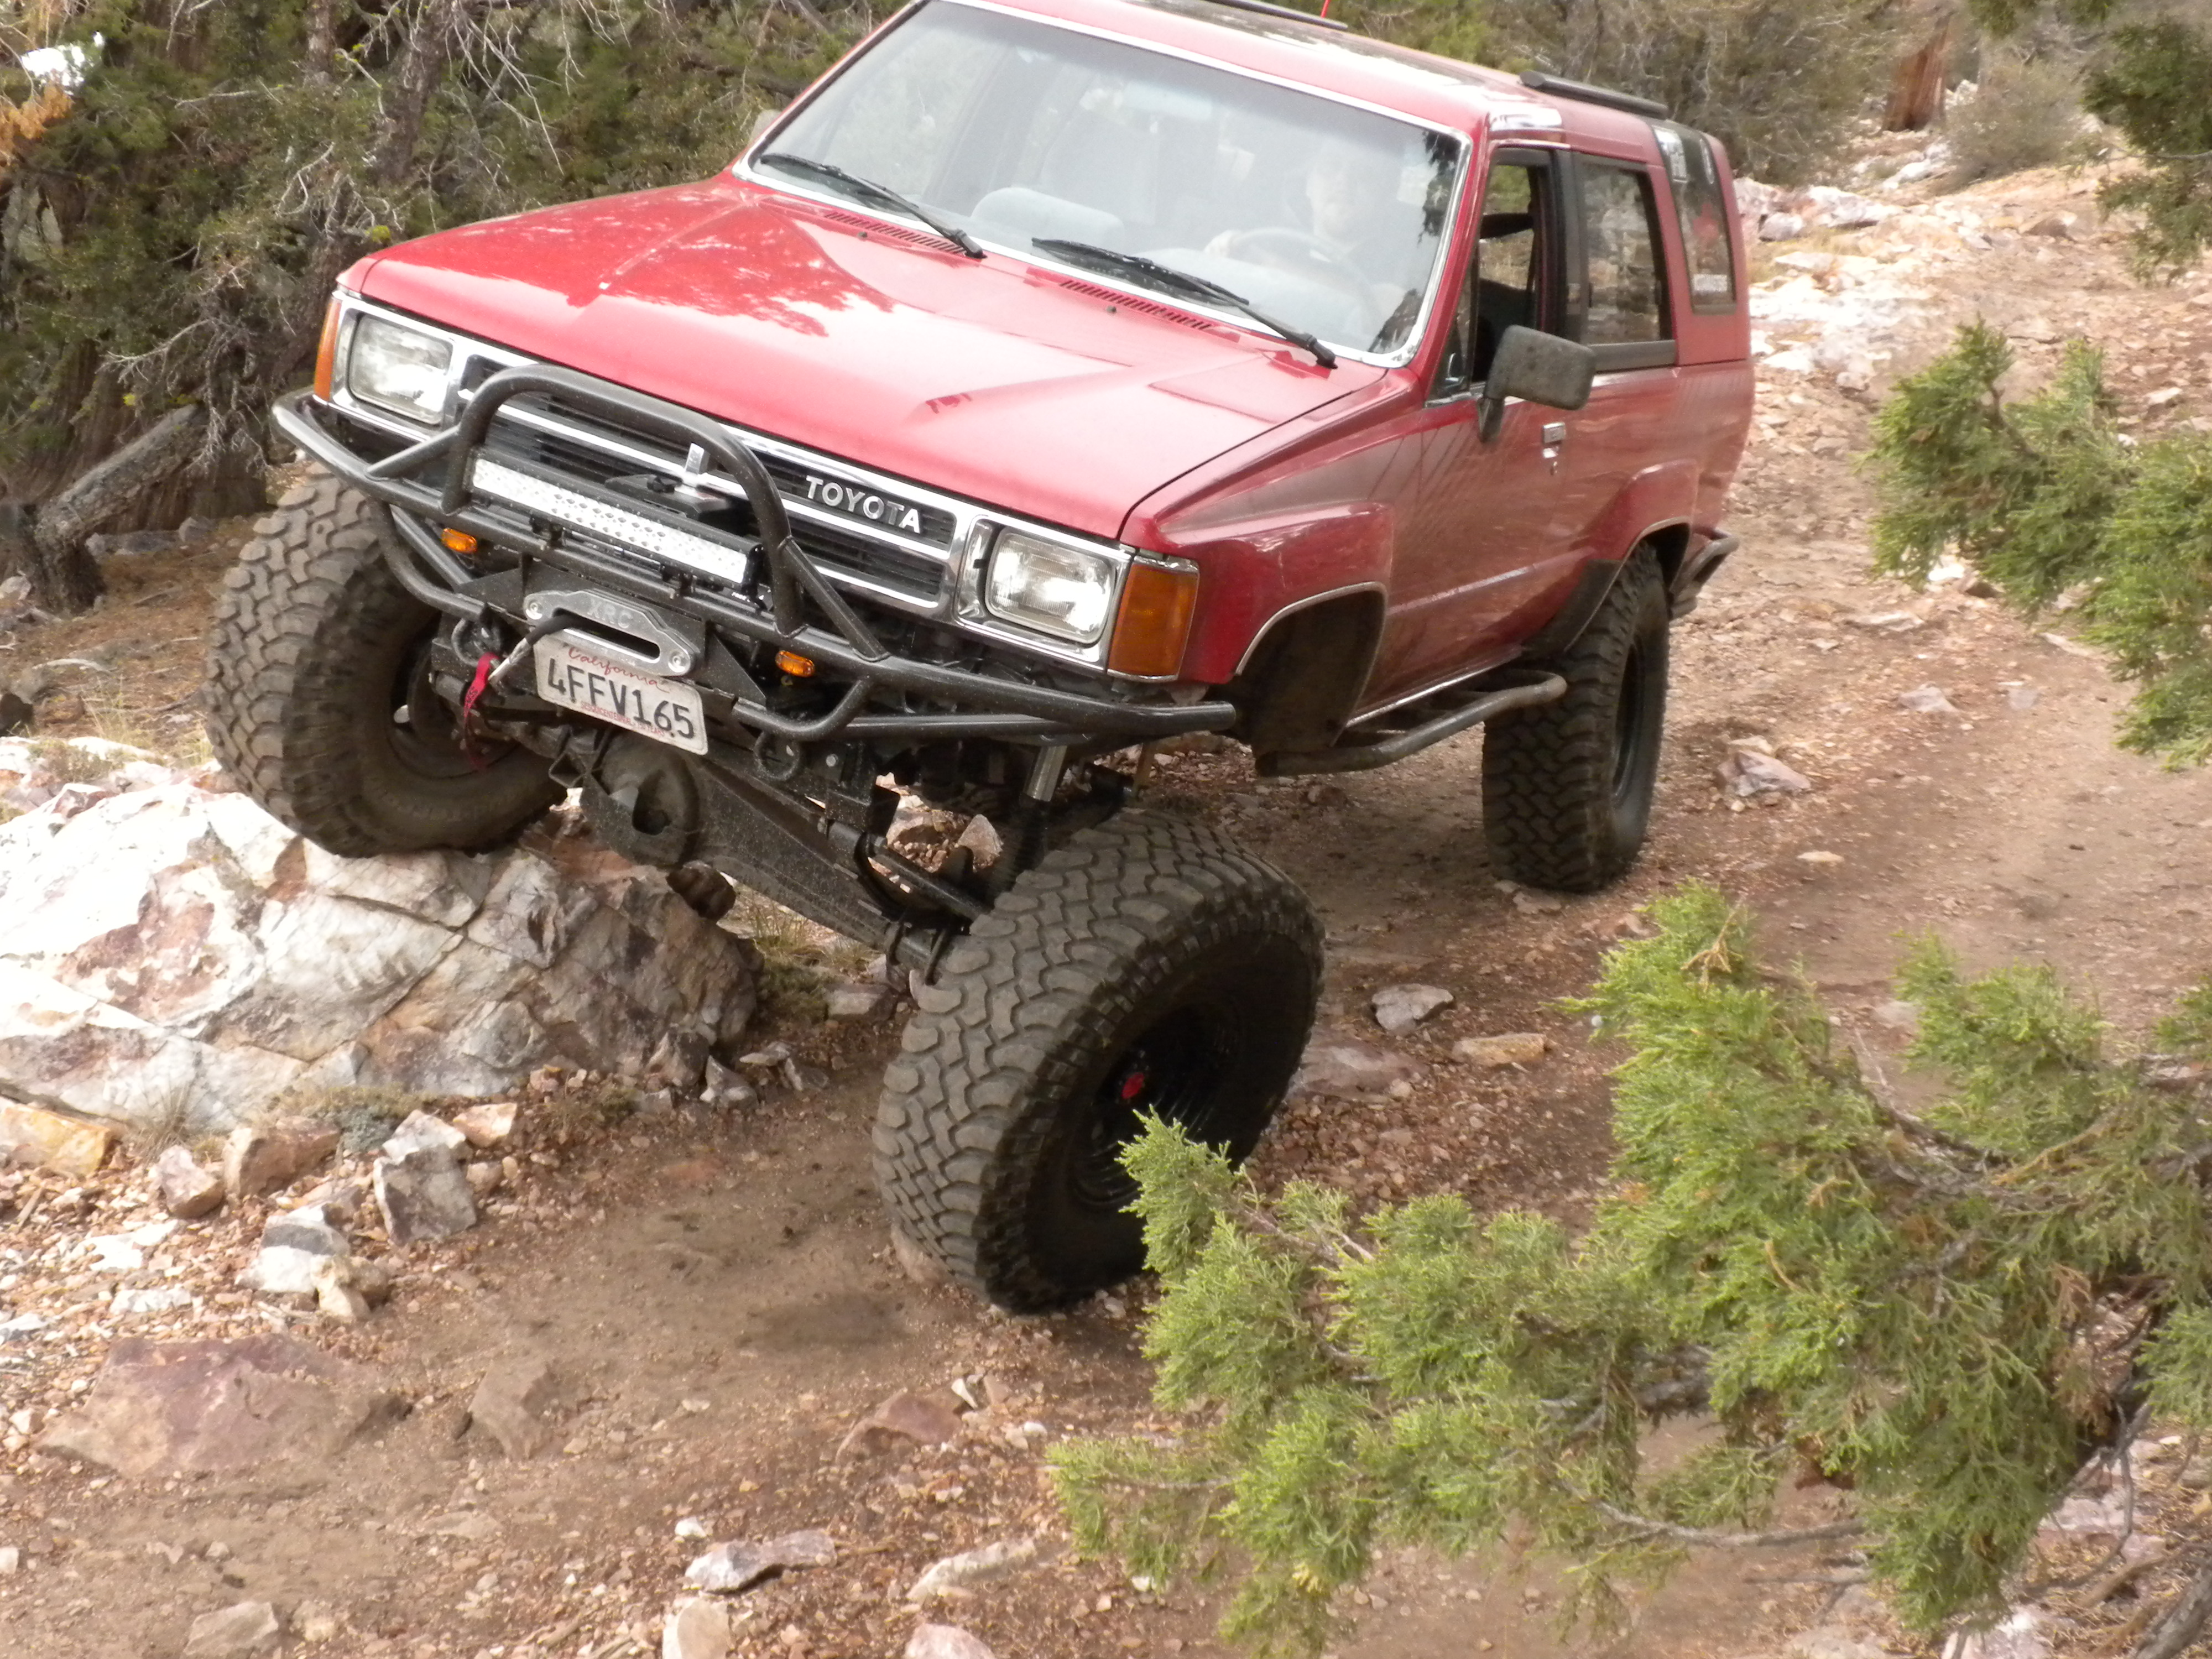
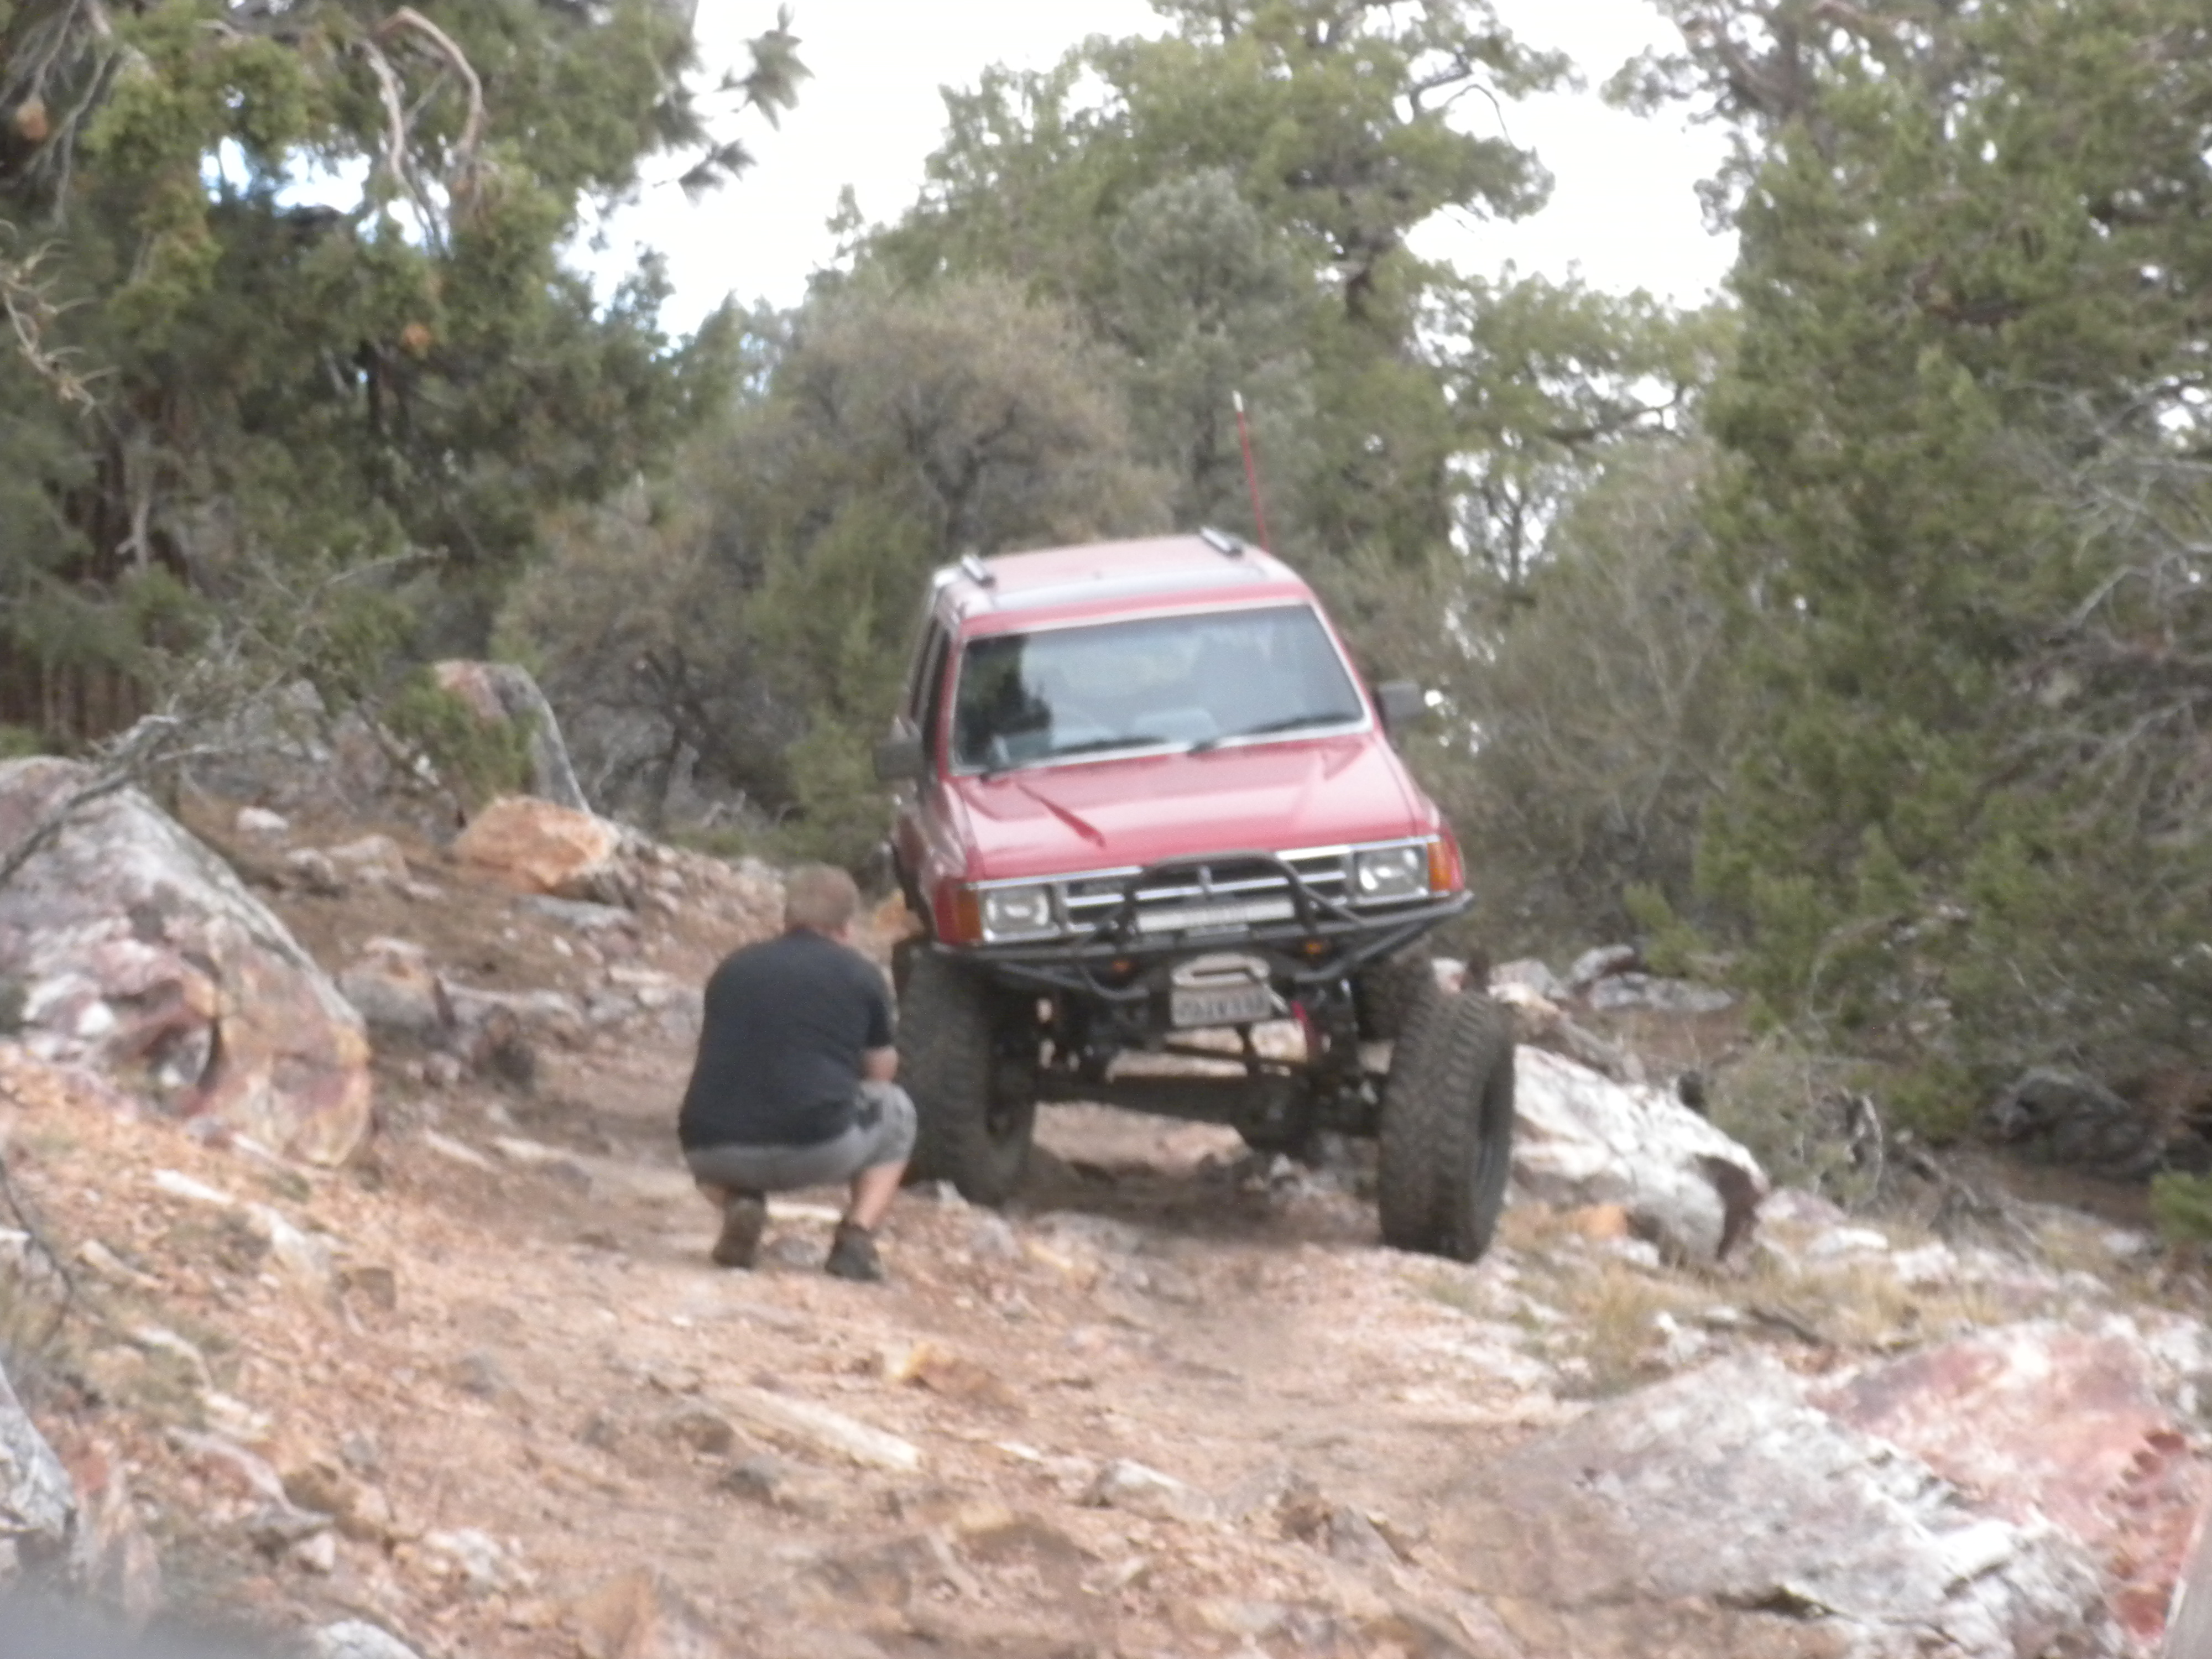
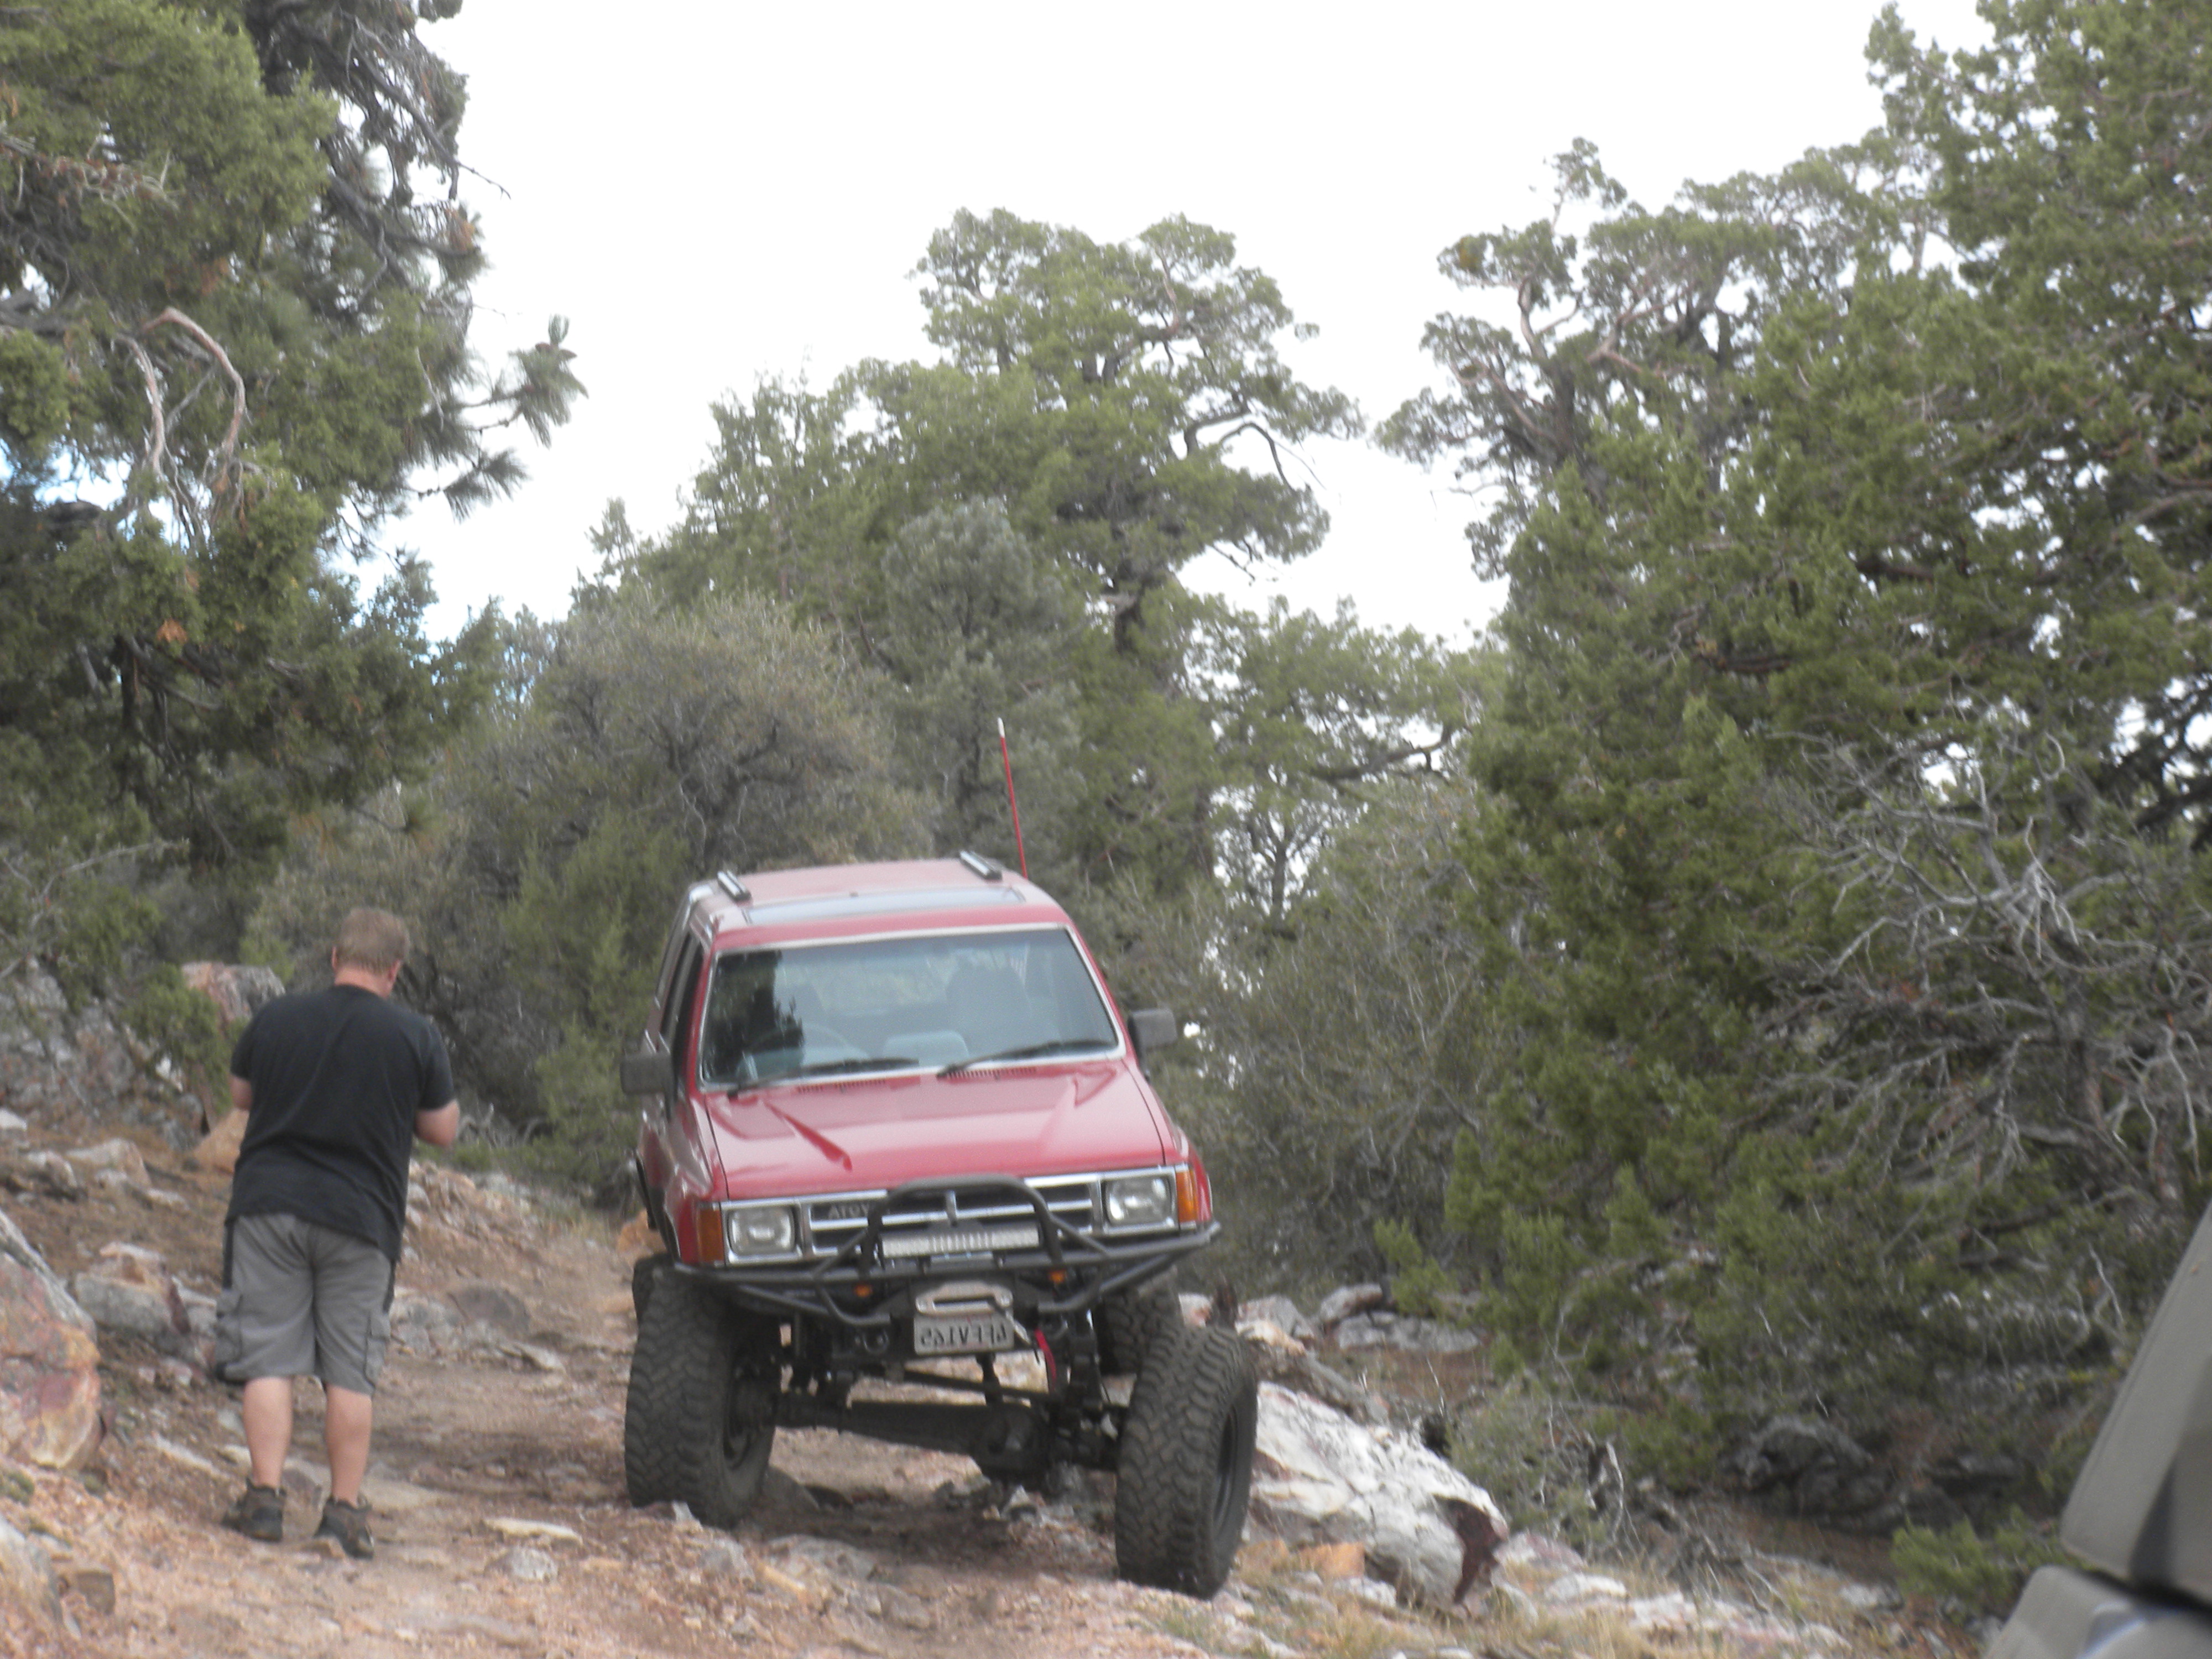
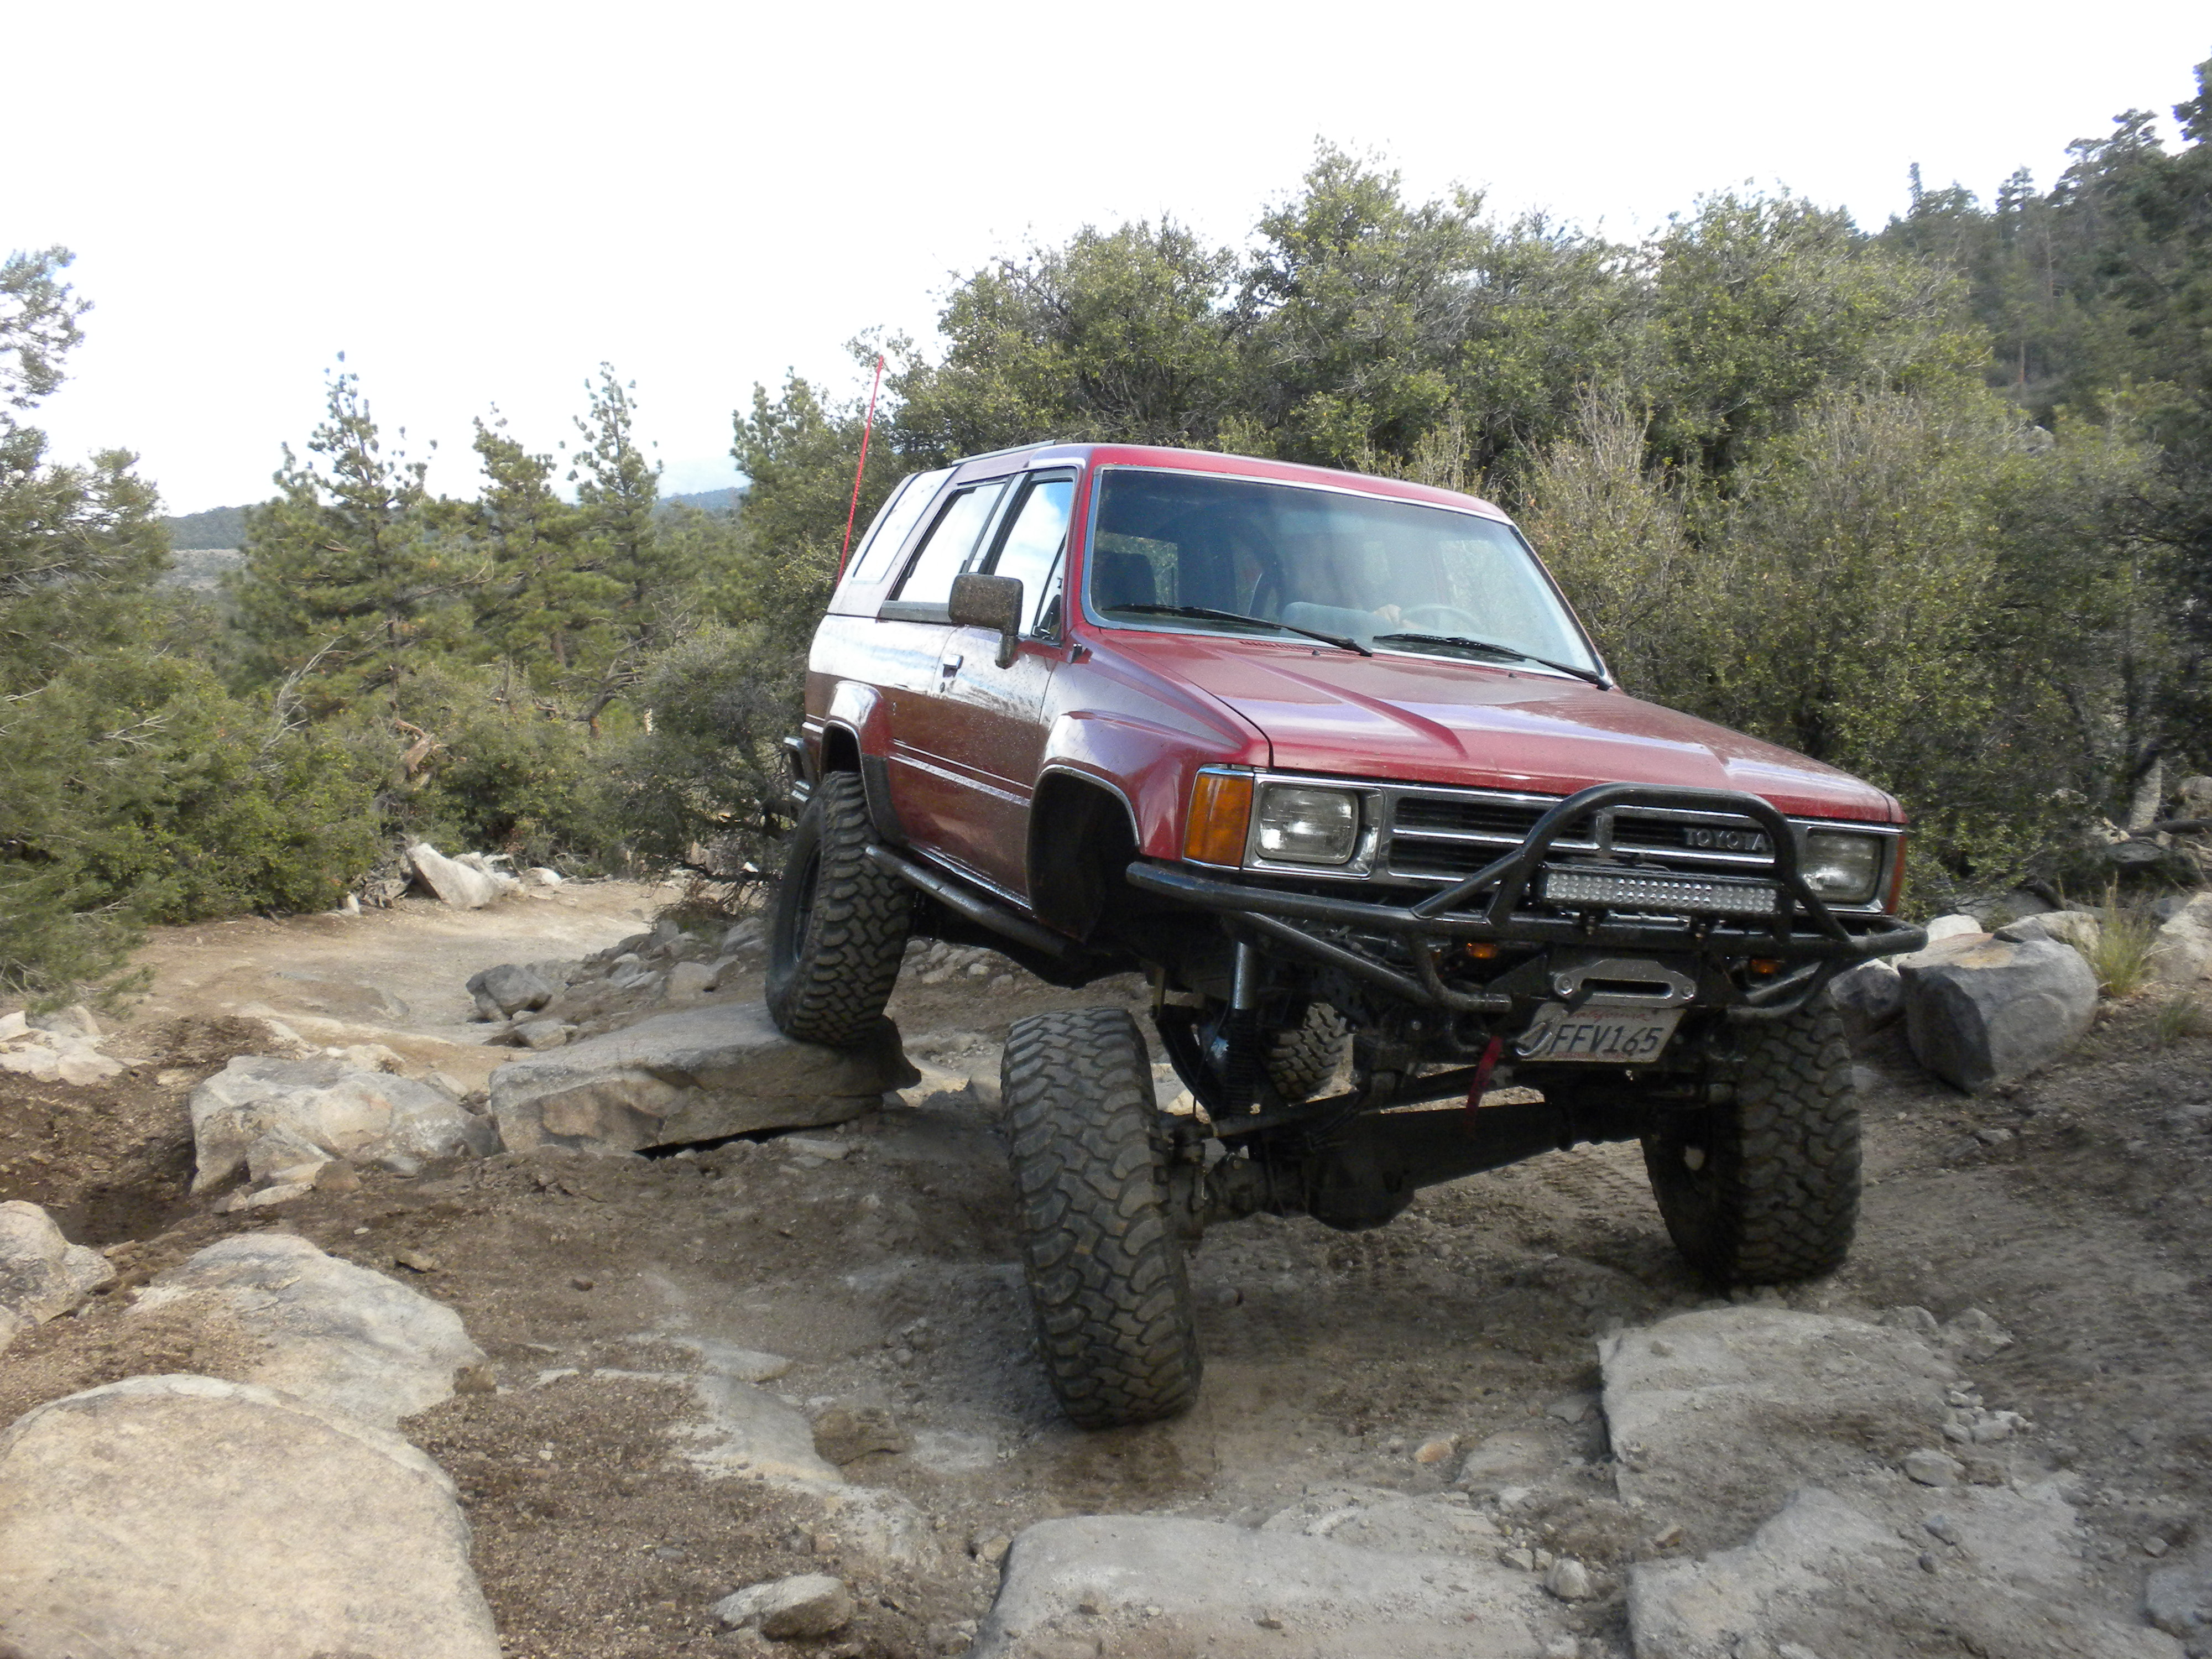
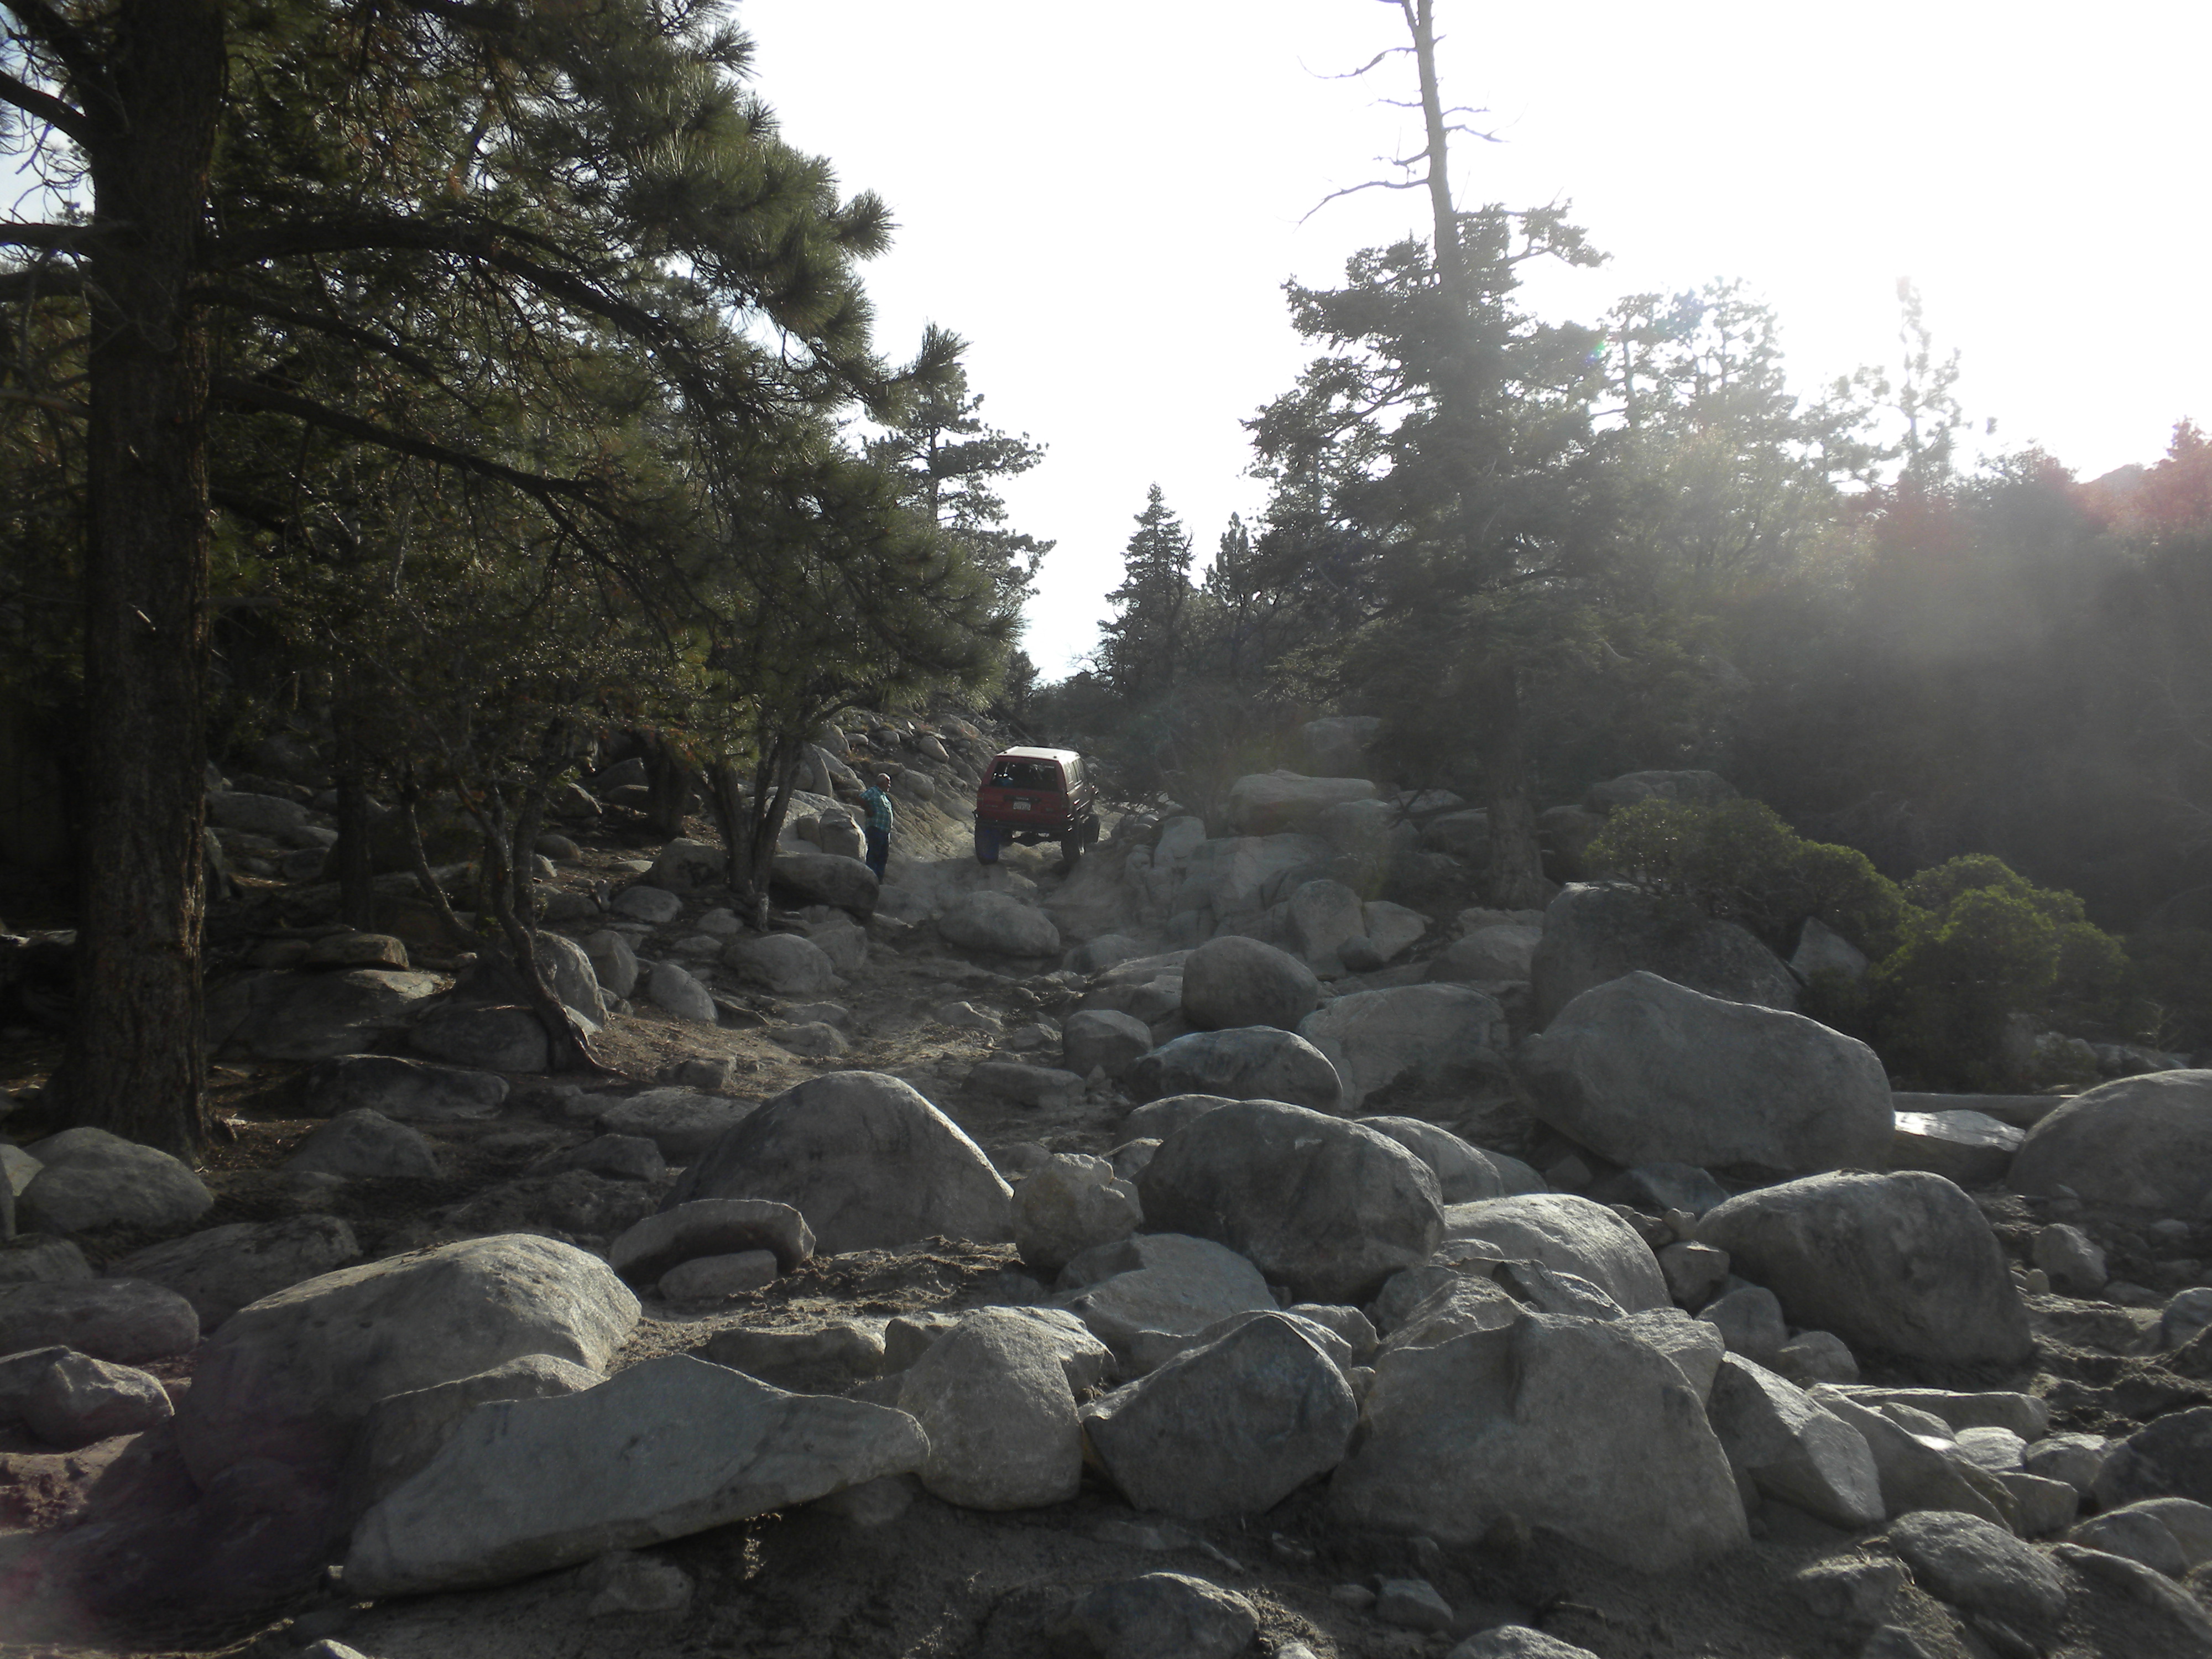
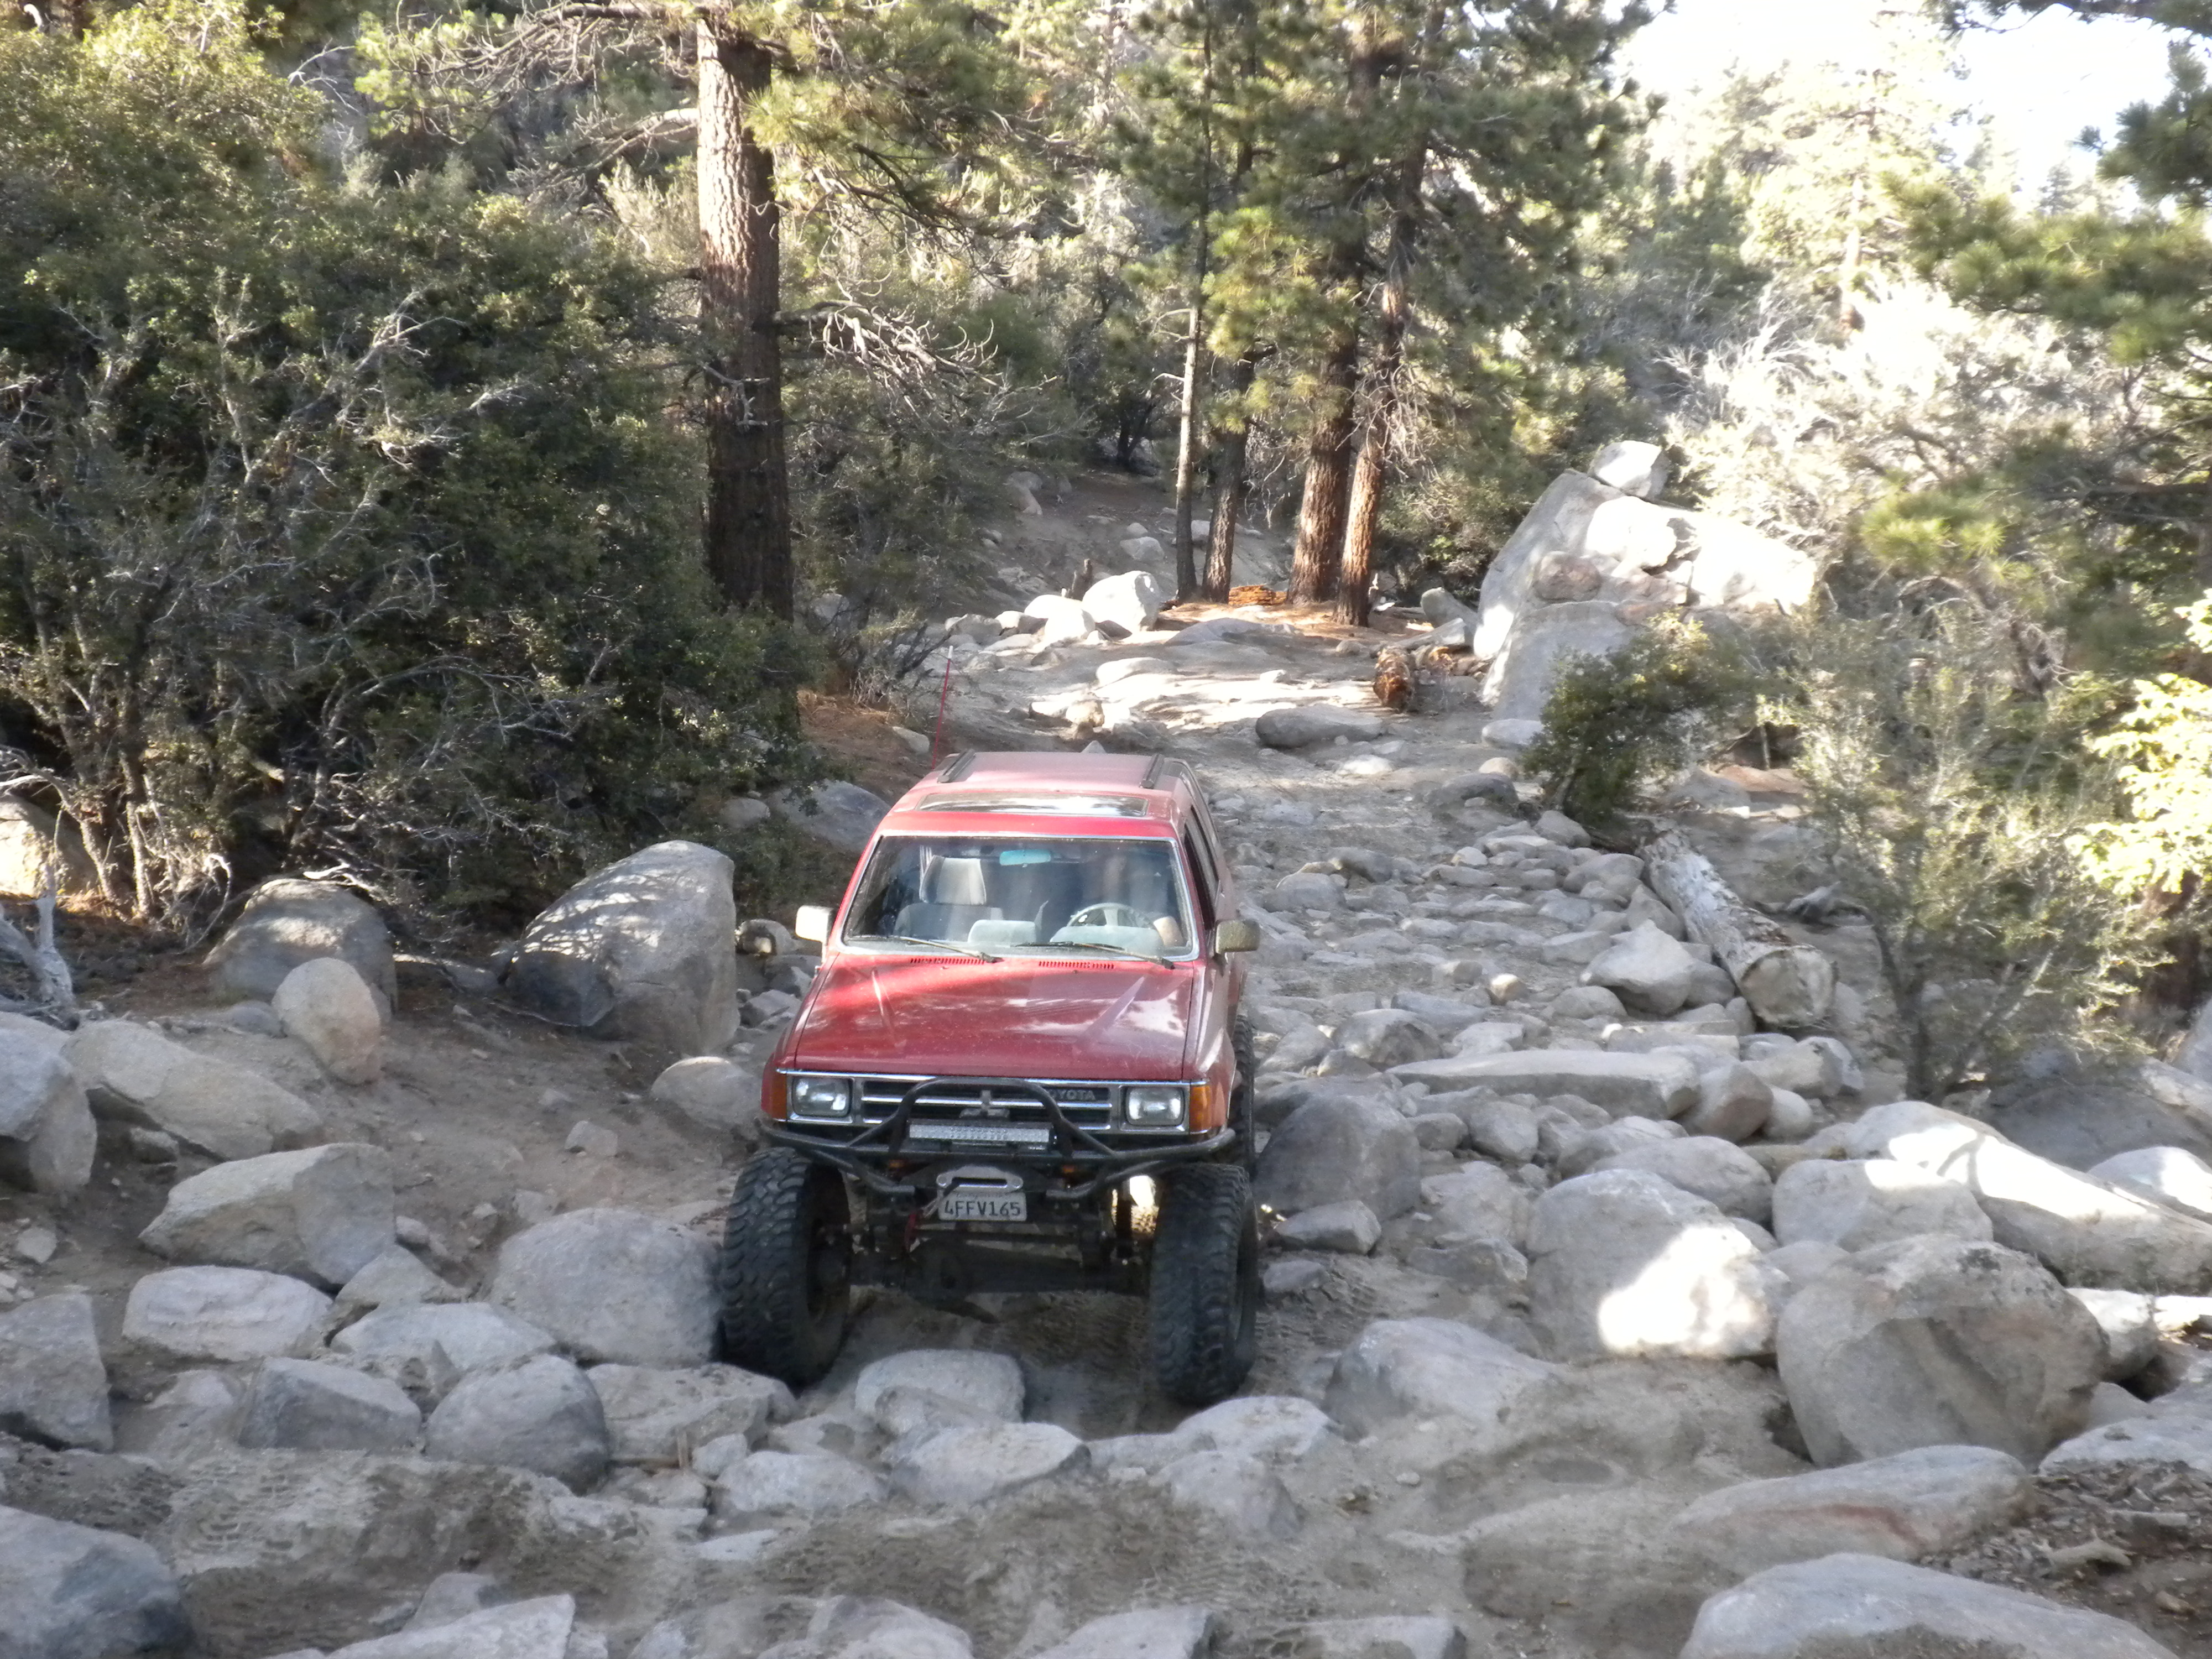
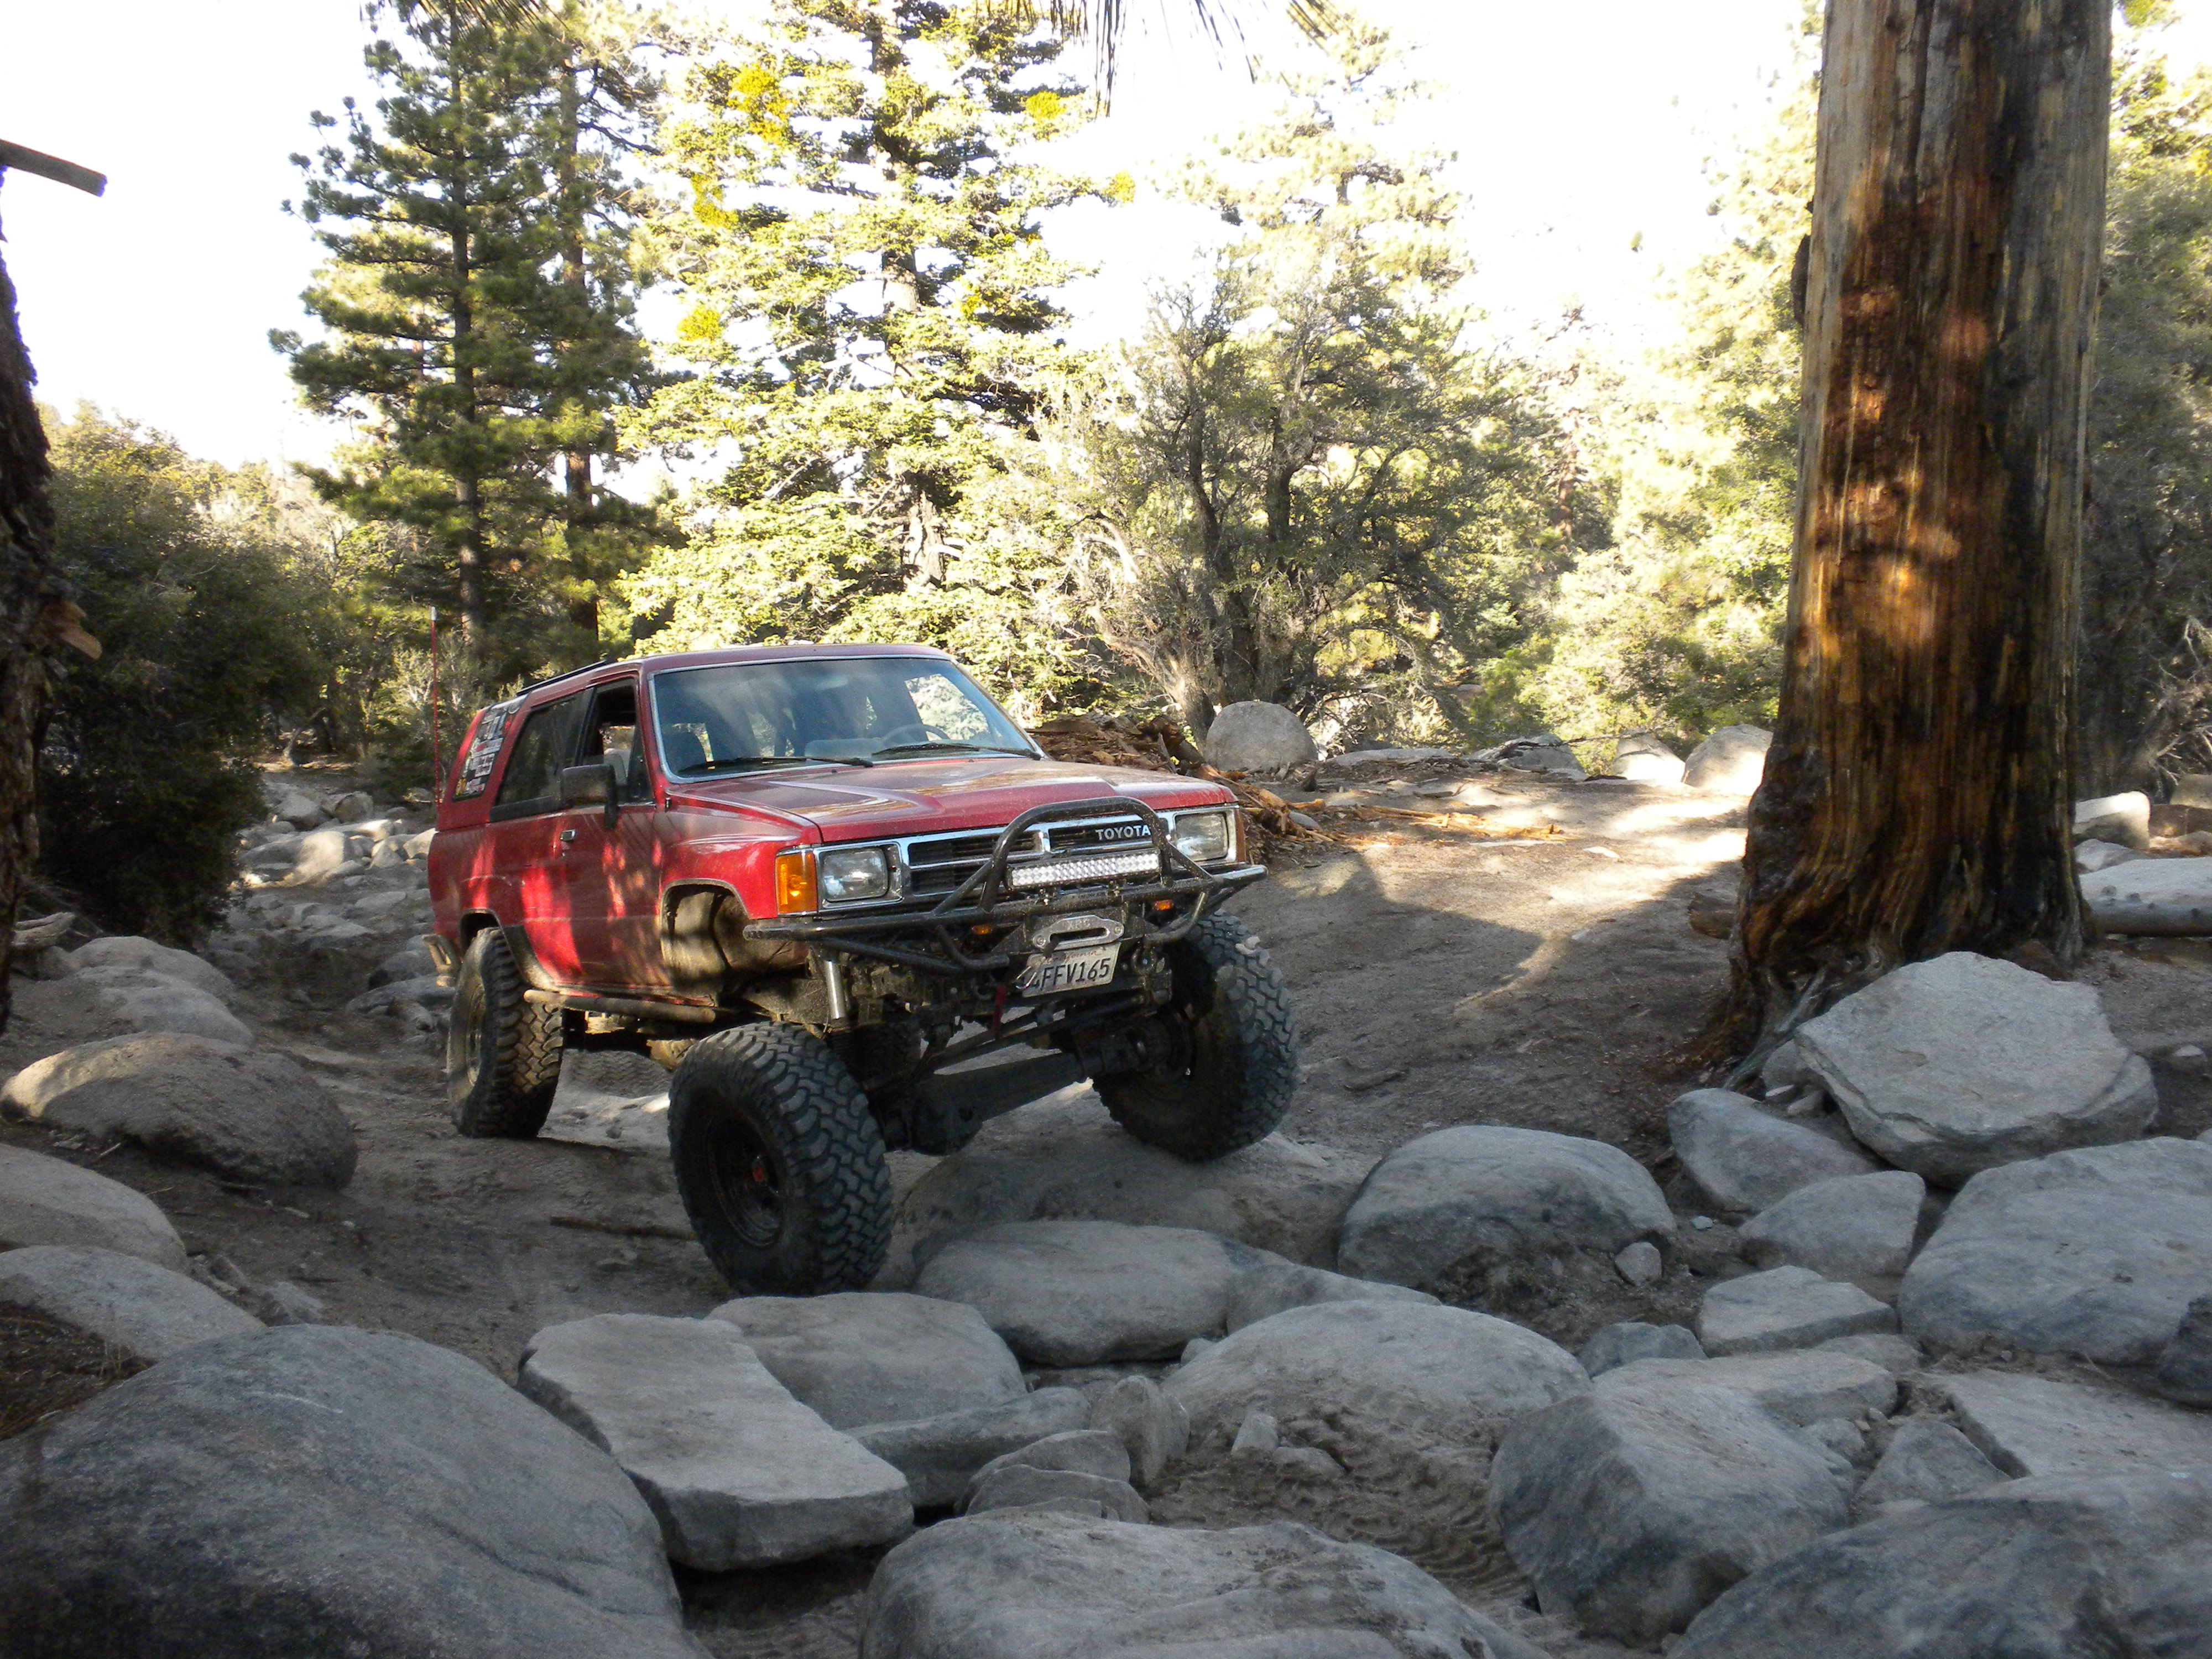
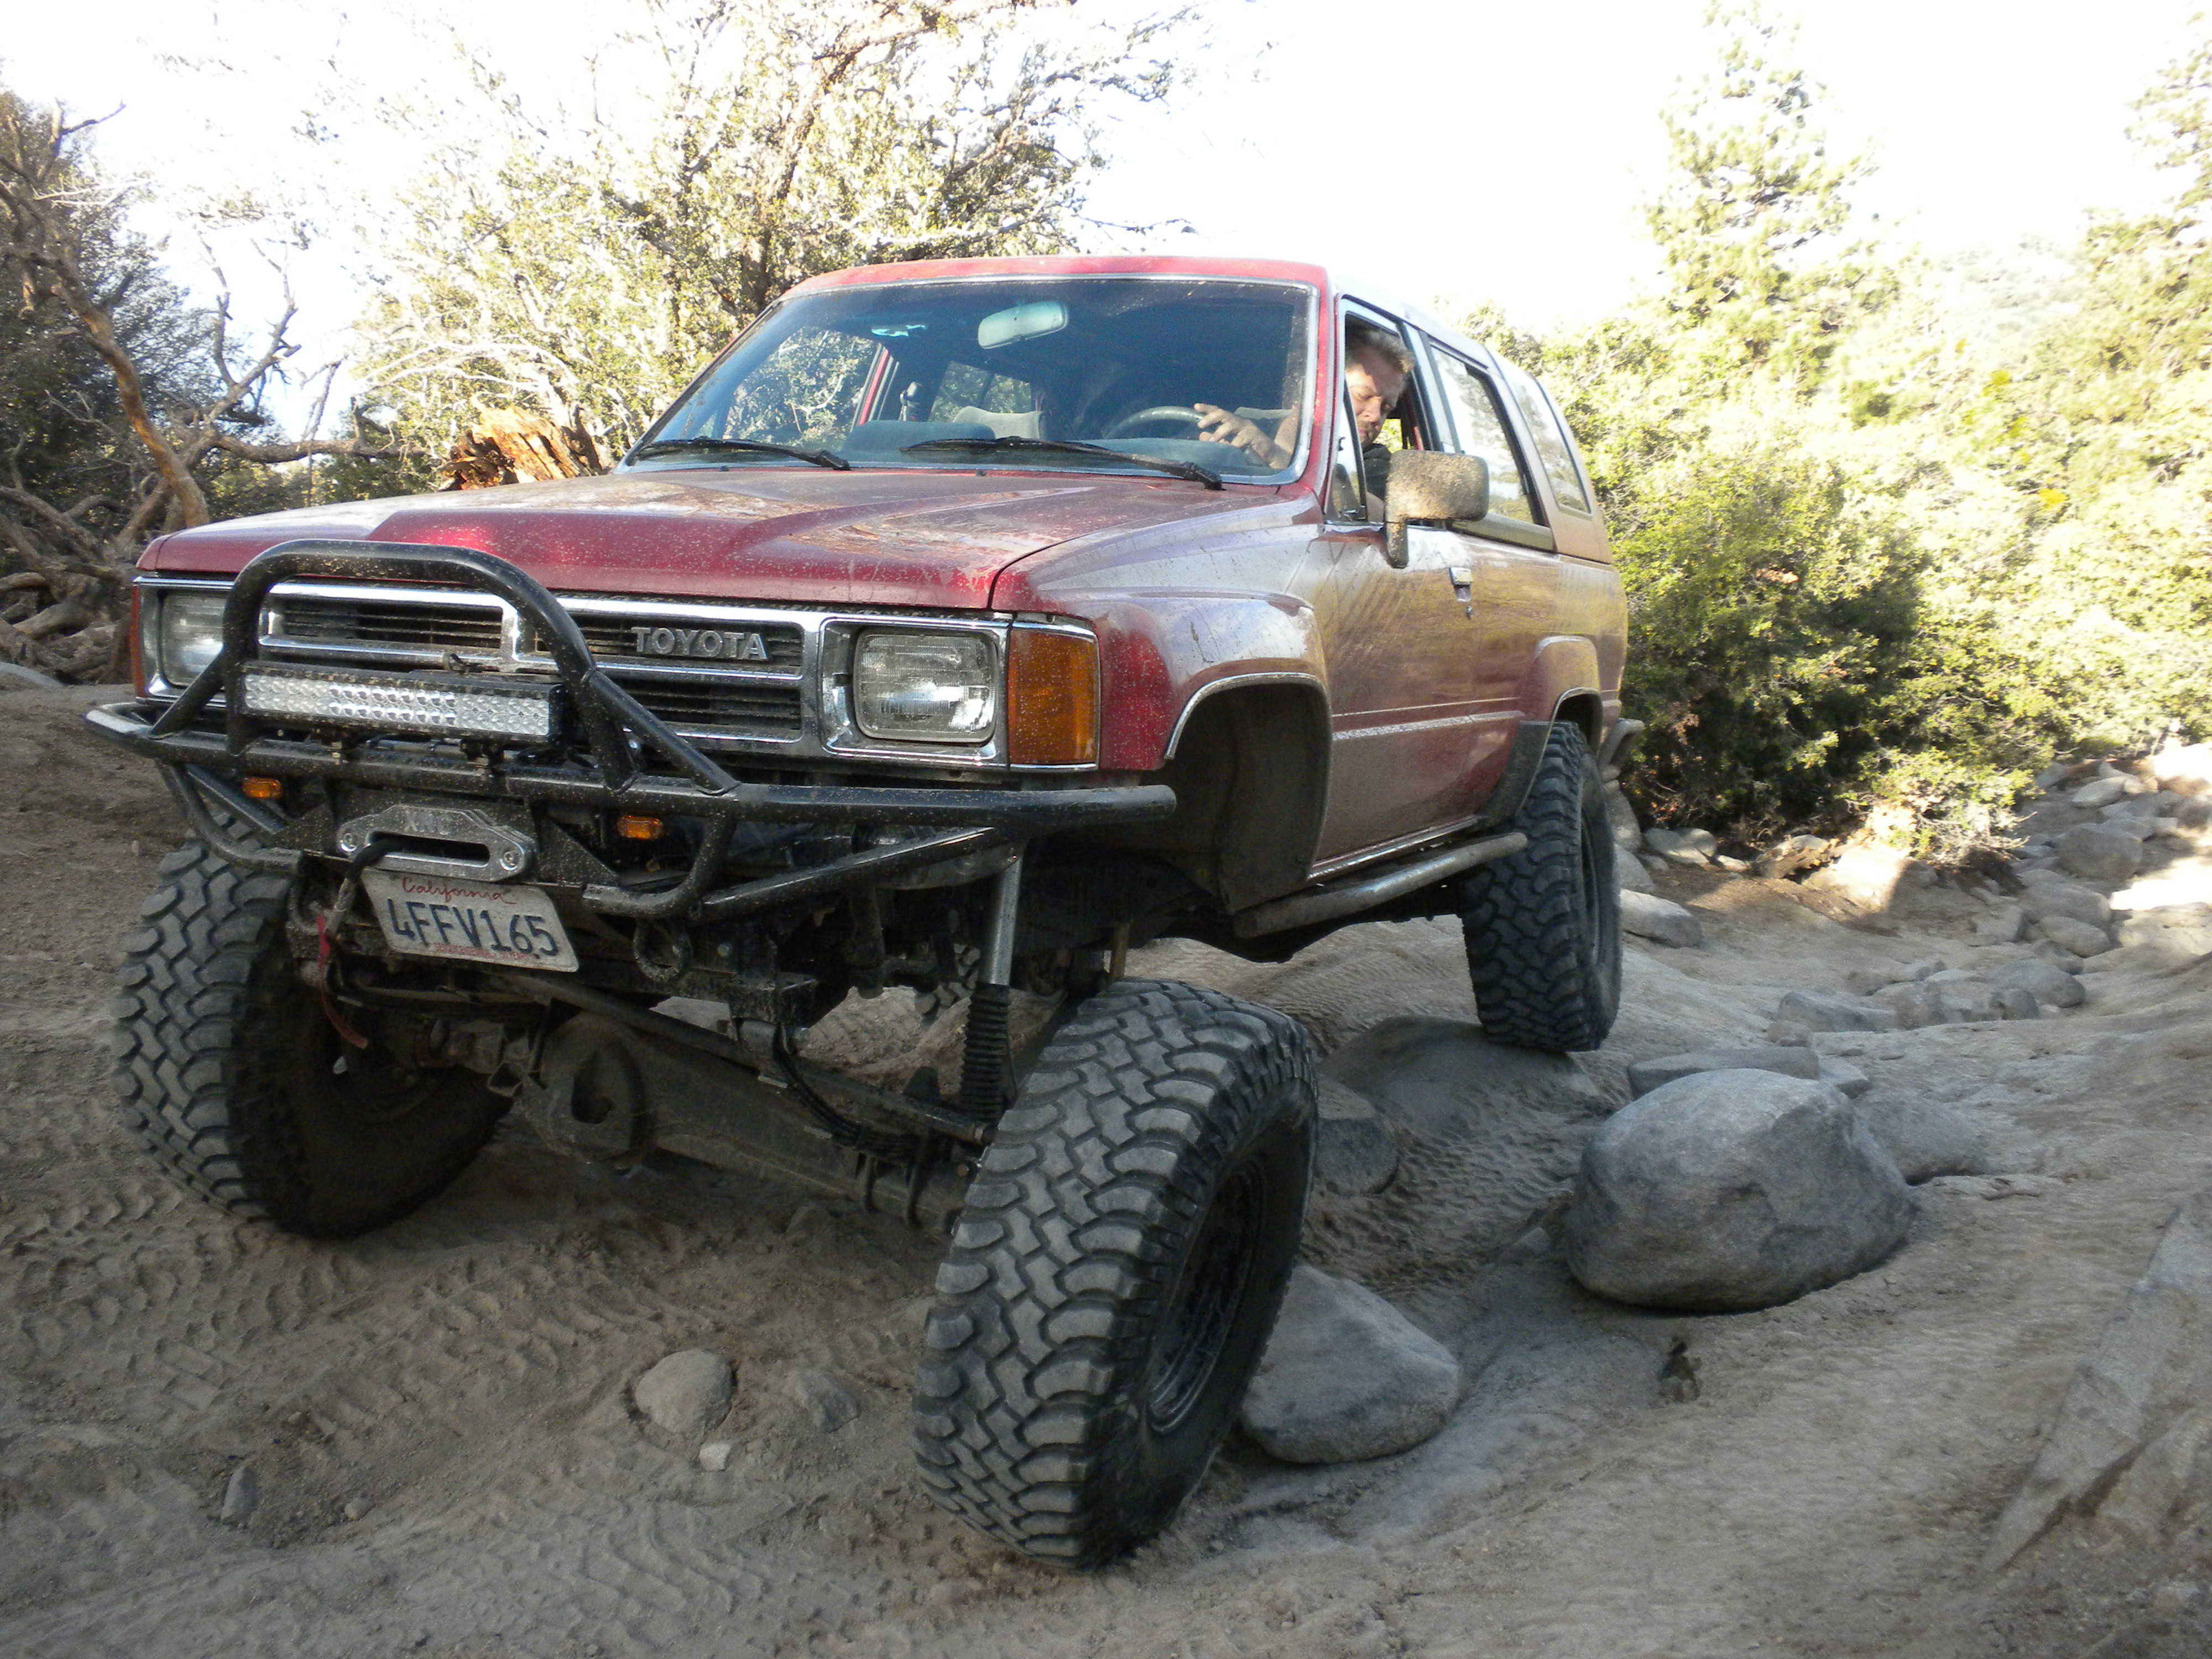
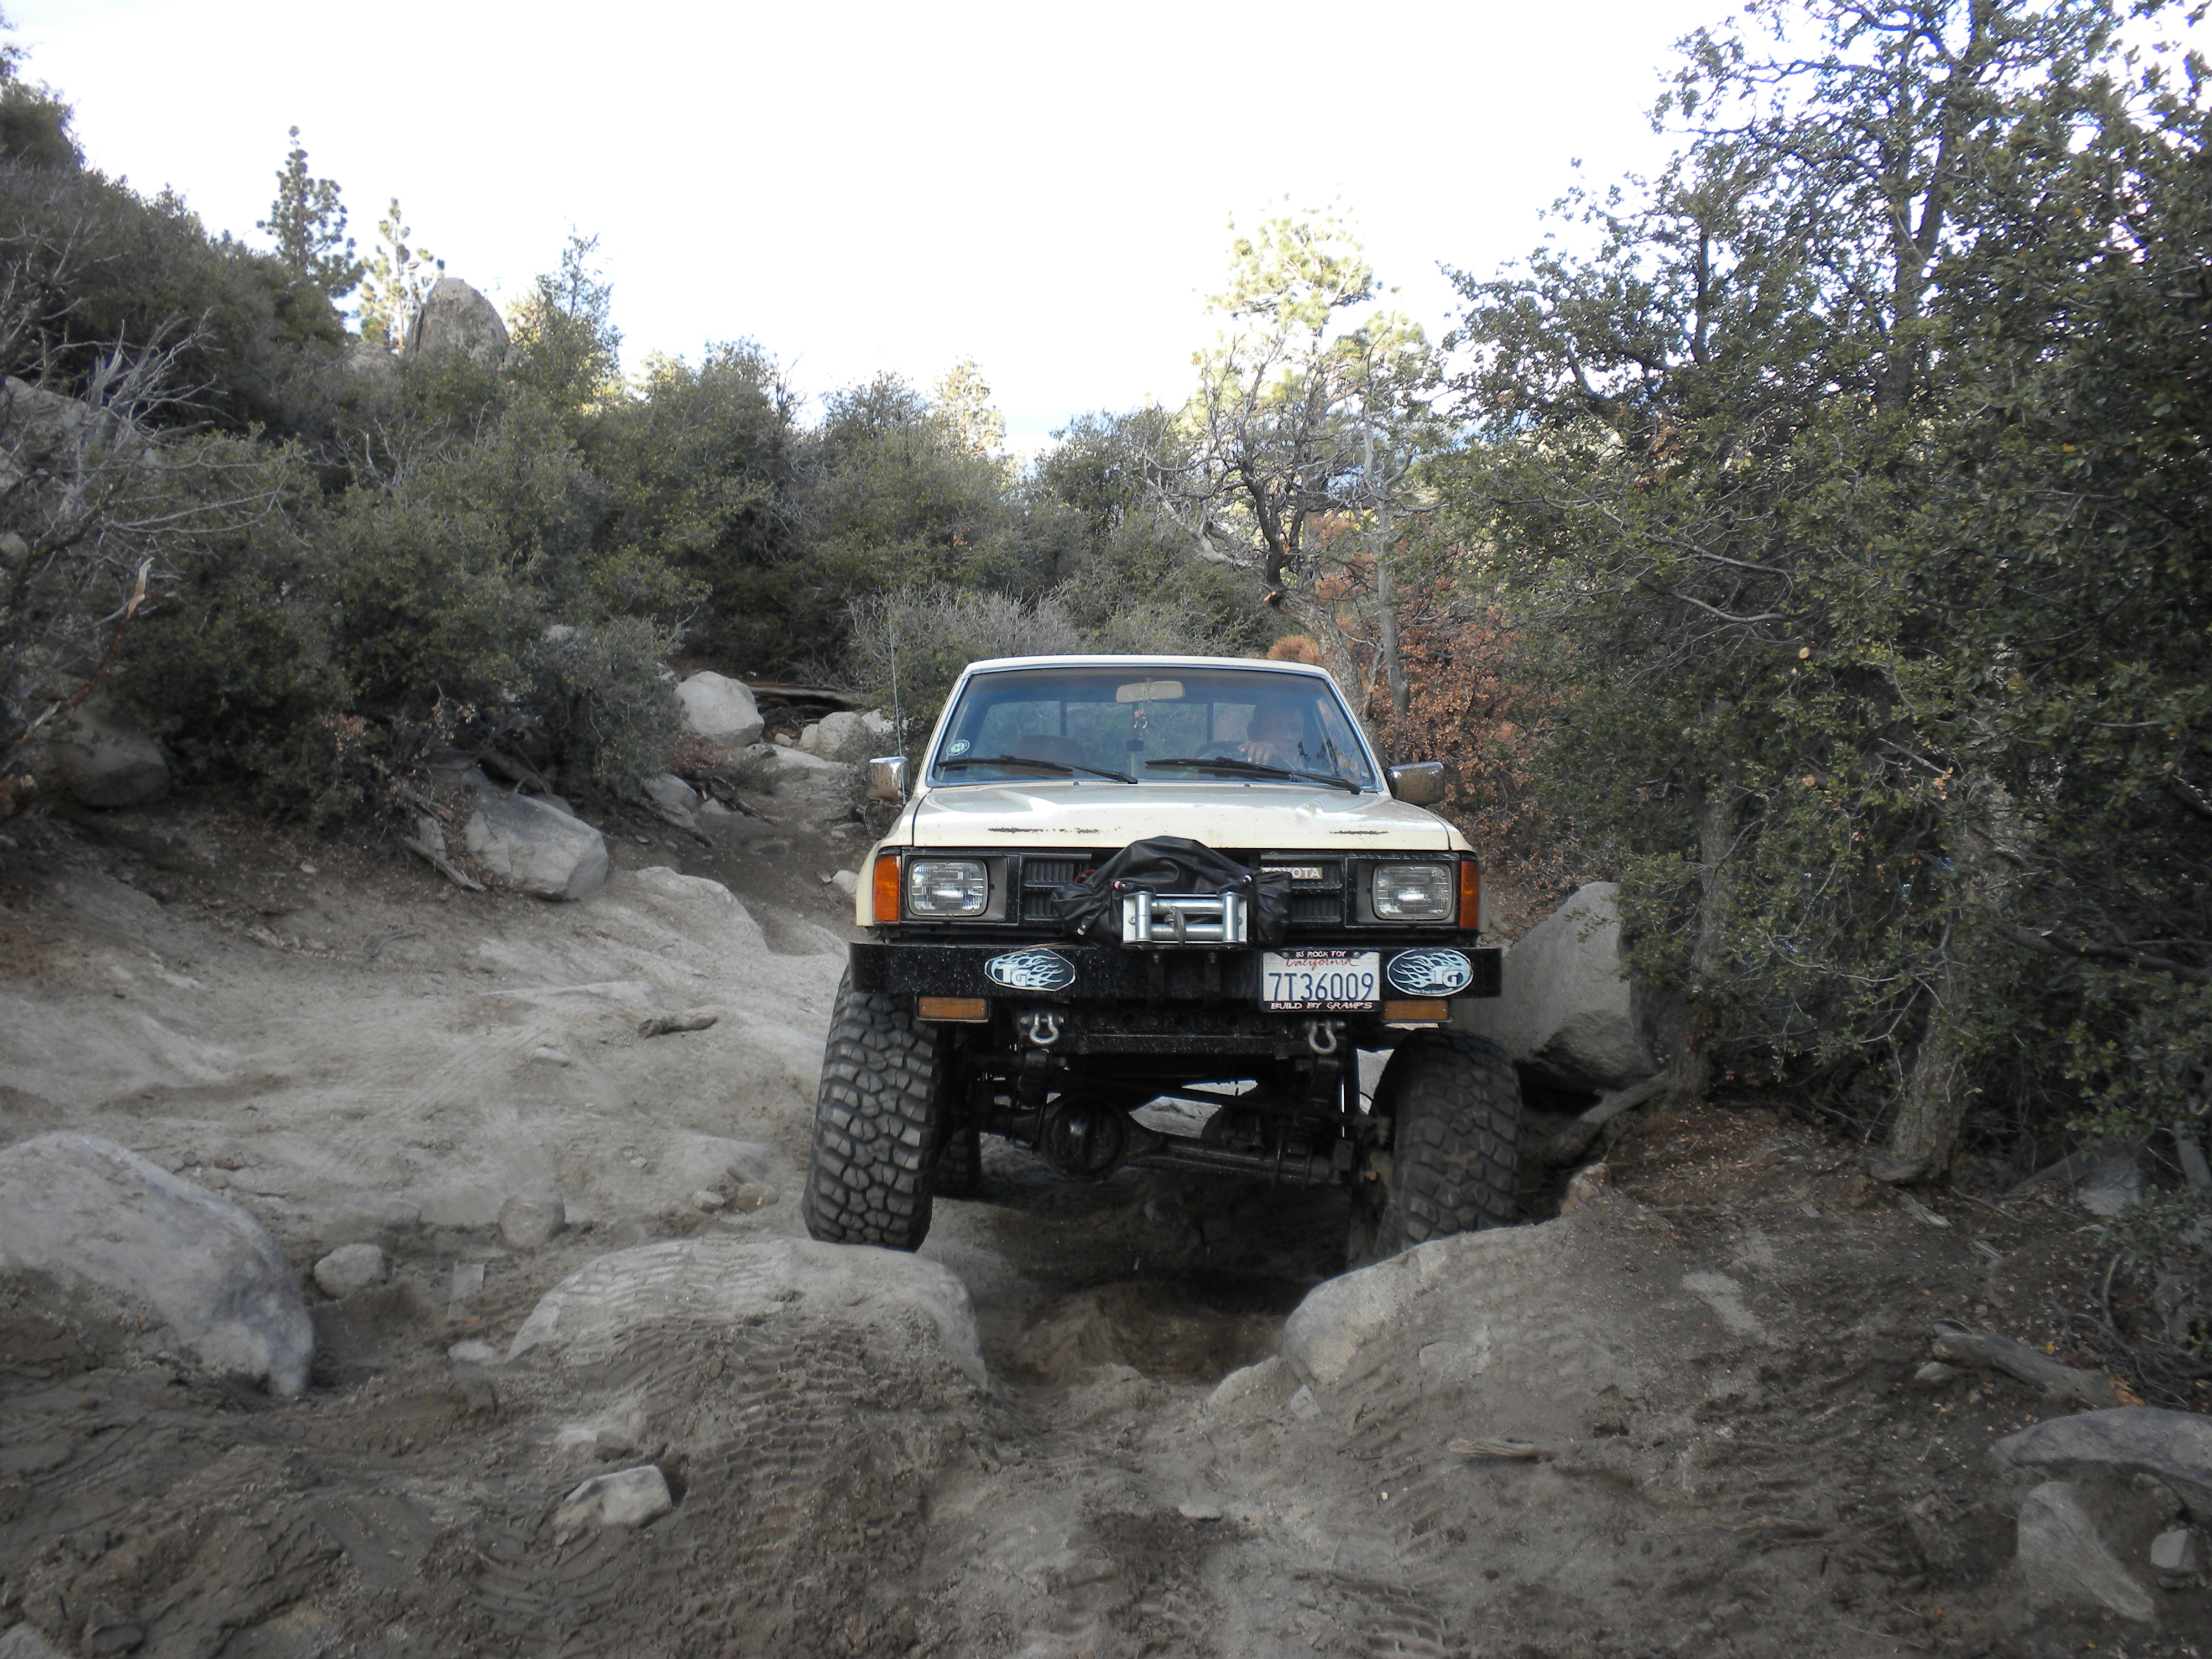
Shortly after the trail we reached John Bull. From here on out it was nothing but big boulders and steep inclines. We had many spots where we came 3-4 inches from scratching the body or hitting one of our rear camper windows. There were many close calls and LOTS of getting stuck. Plus the fact that there had been rain and thunder storms for the past 3 days this week made everything damp and difficult to get grip on lots of rocks. especially the steep ones that we had to crawl up.
a fun Mud puddle before we reached the hard stuff.


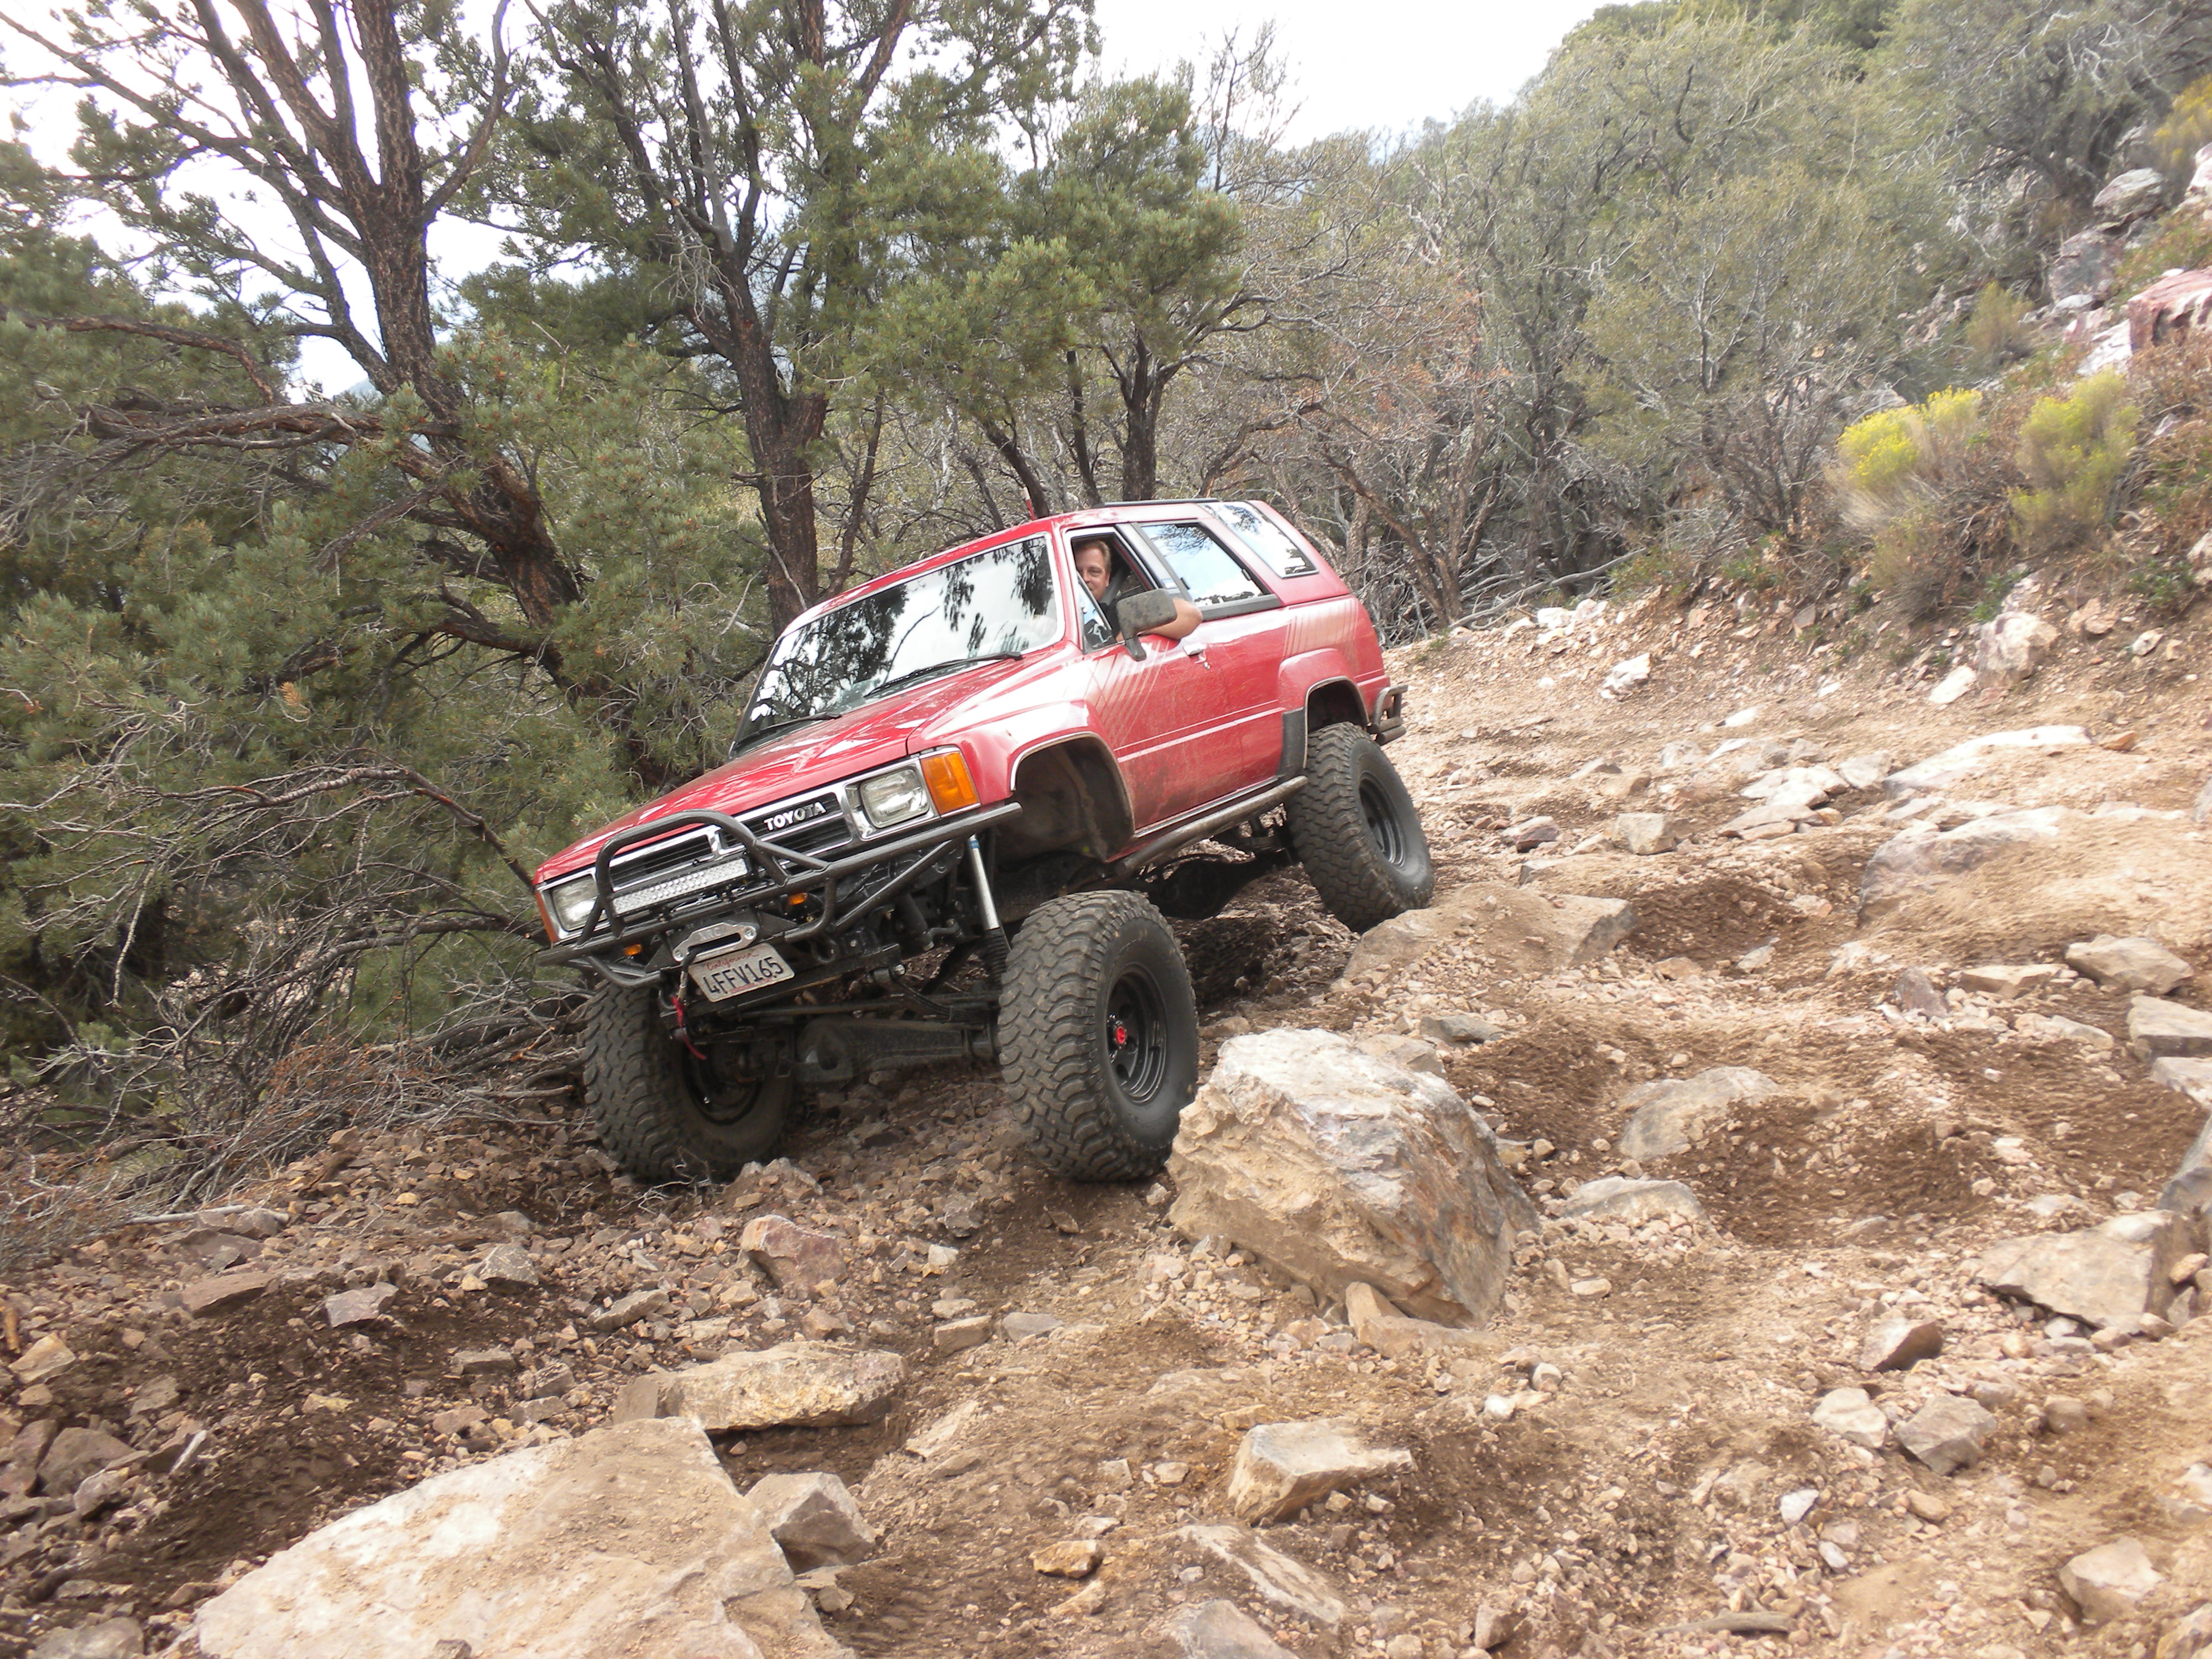
THIS SHALL BE OUR PLAYGROUND! Belive it or not this is the easy part. It got so much worse at the top of that hill!
This is at the bottom of that hill

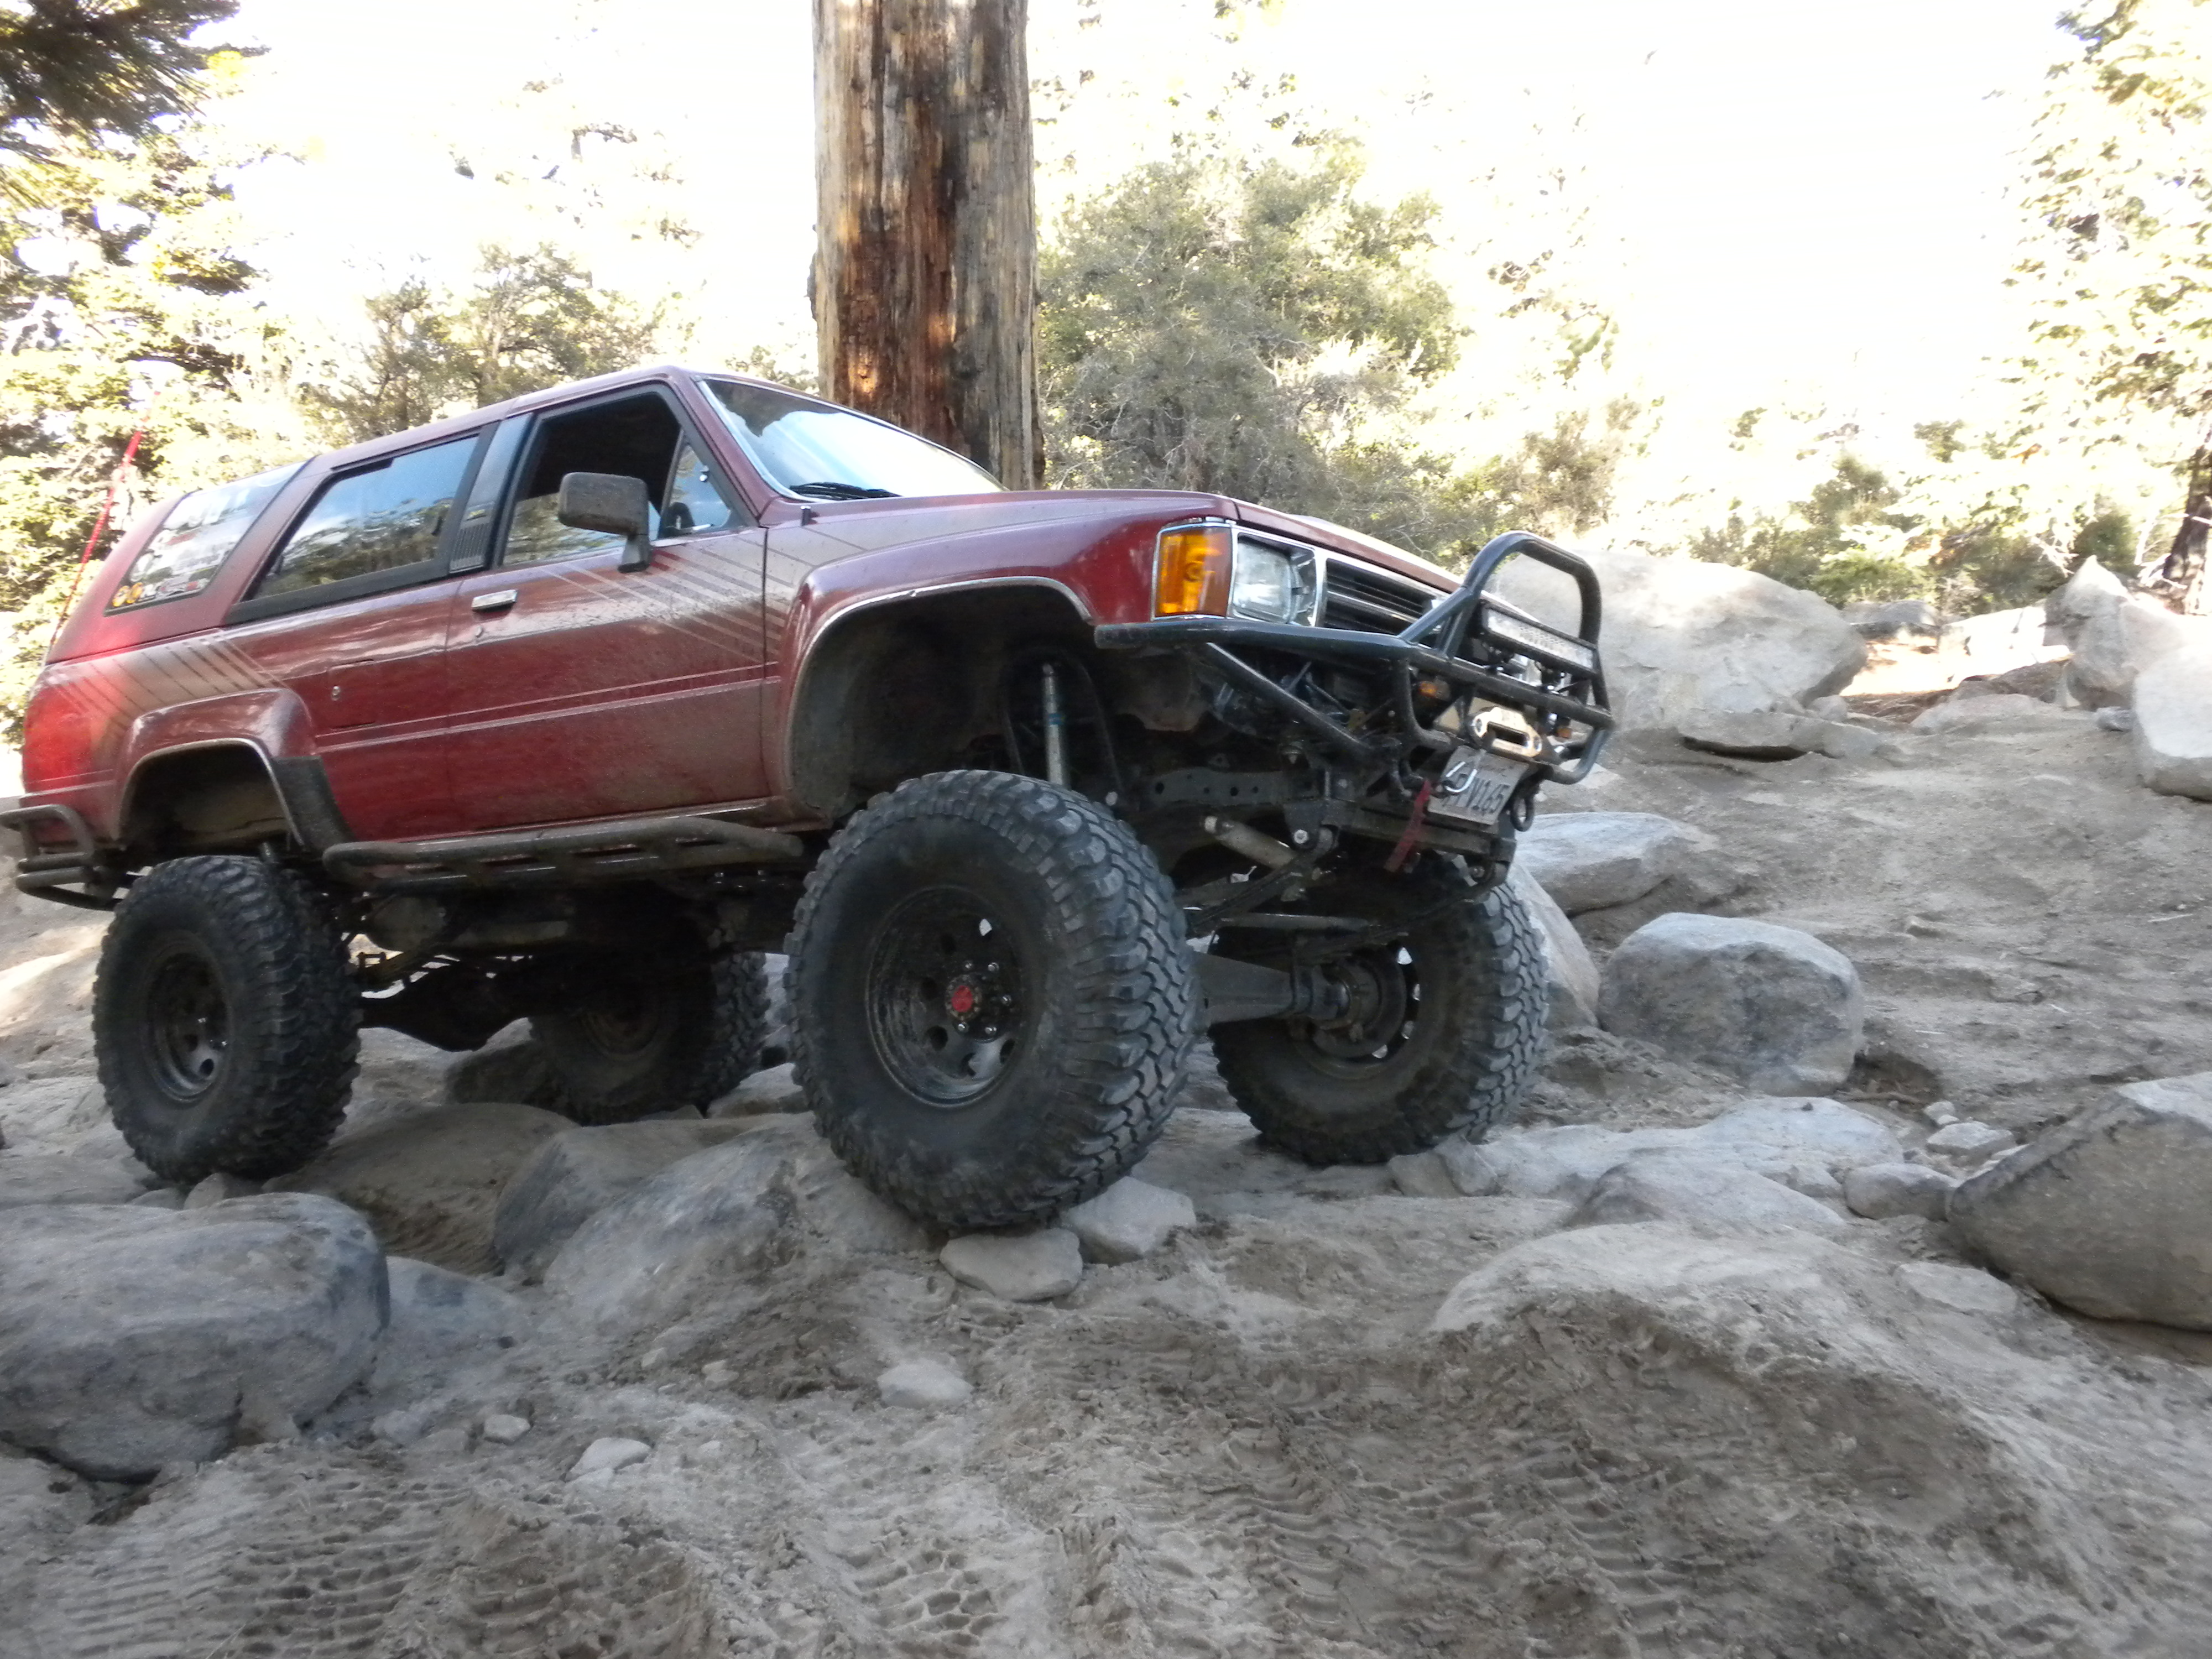

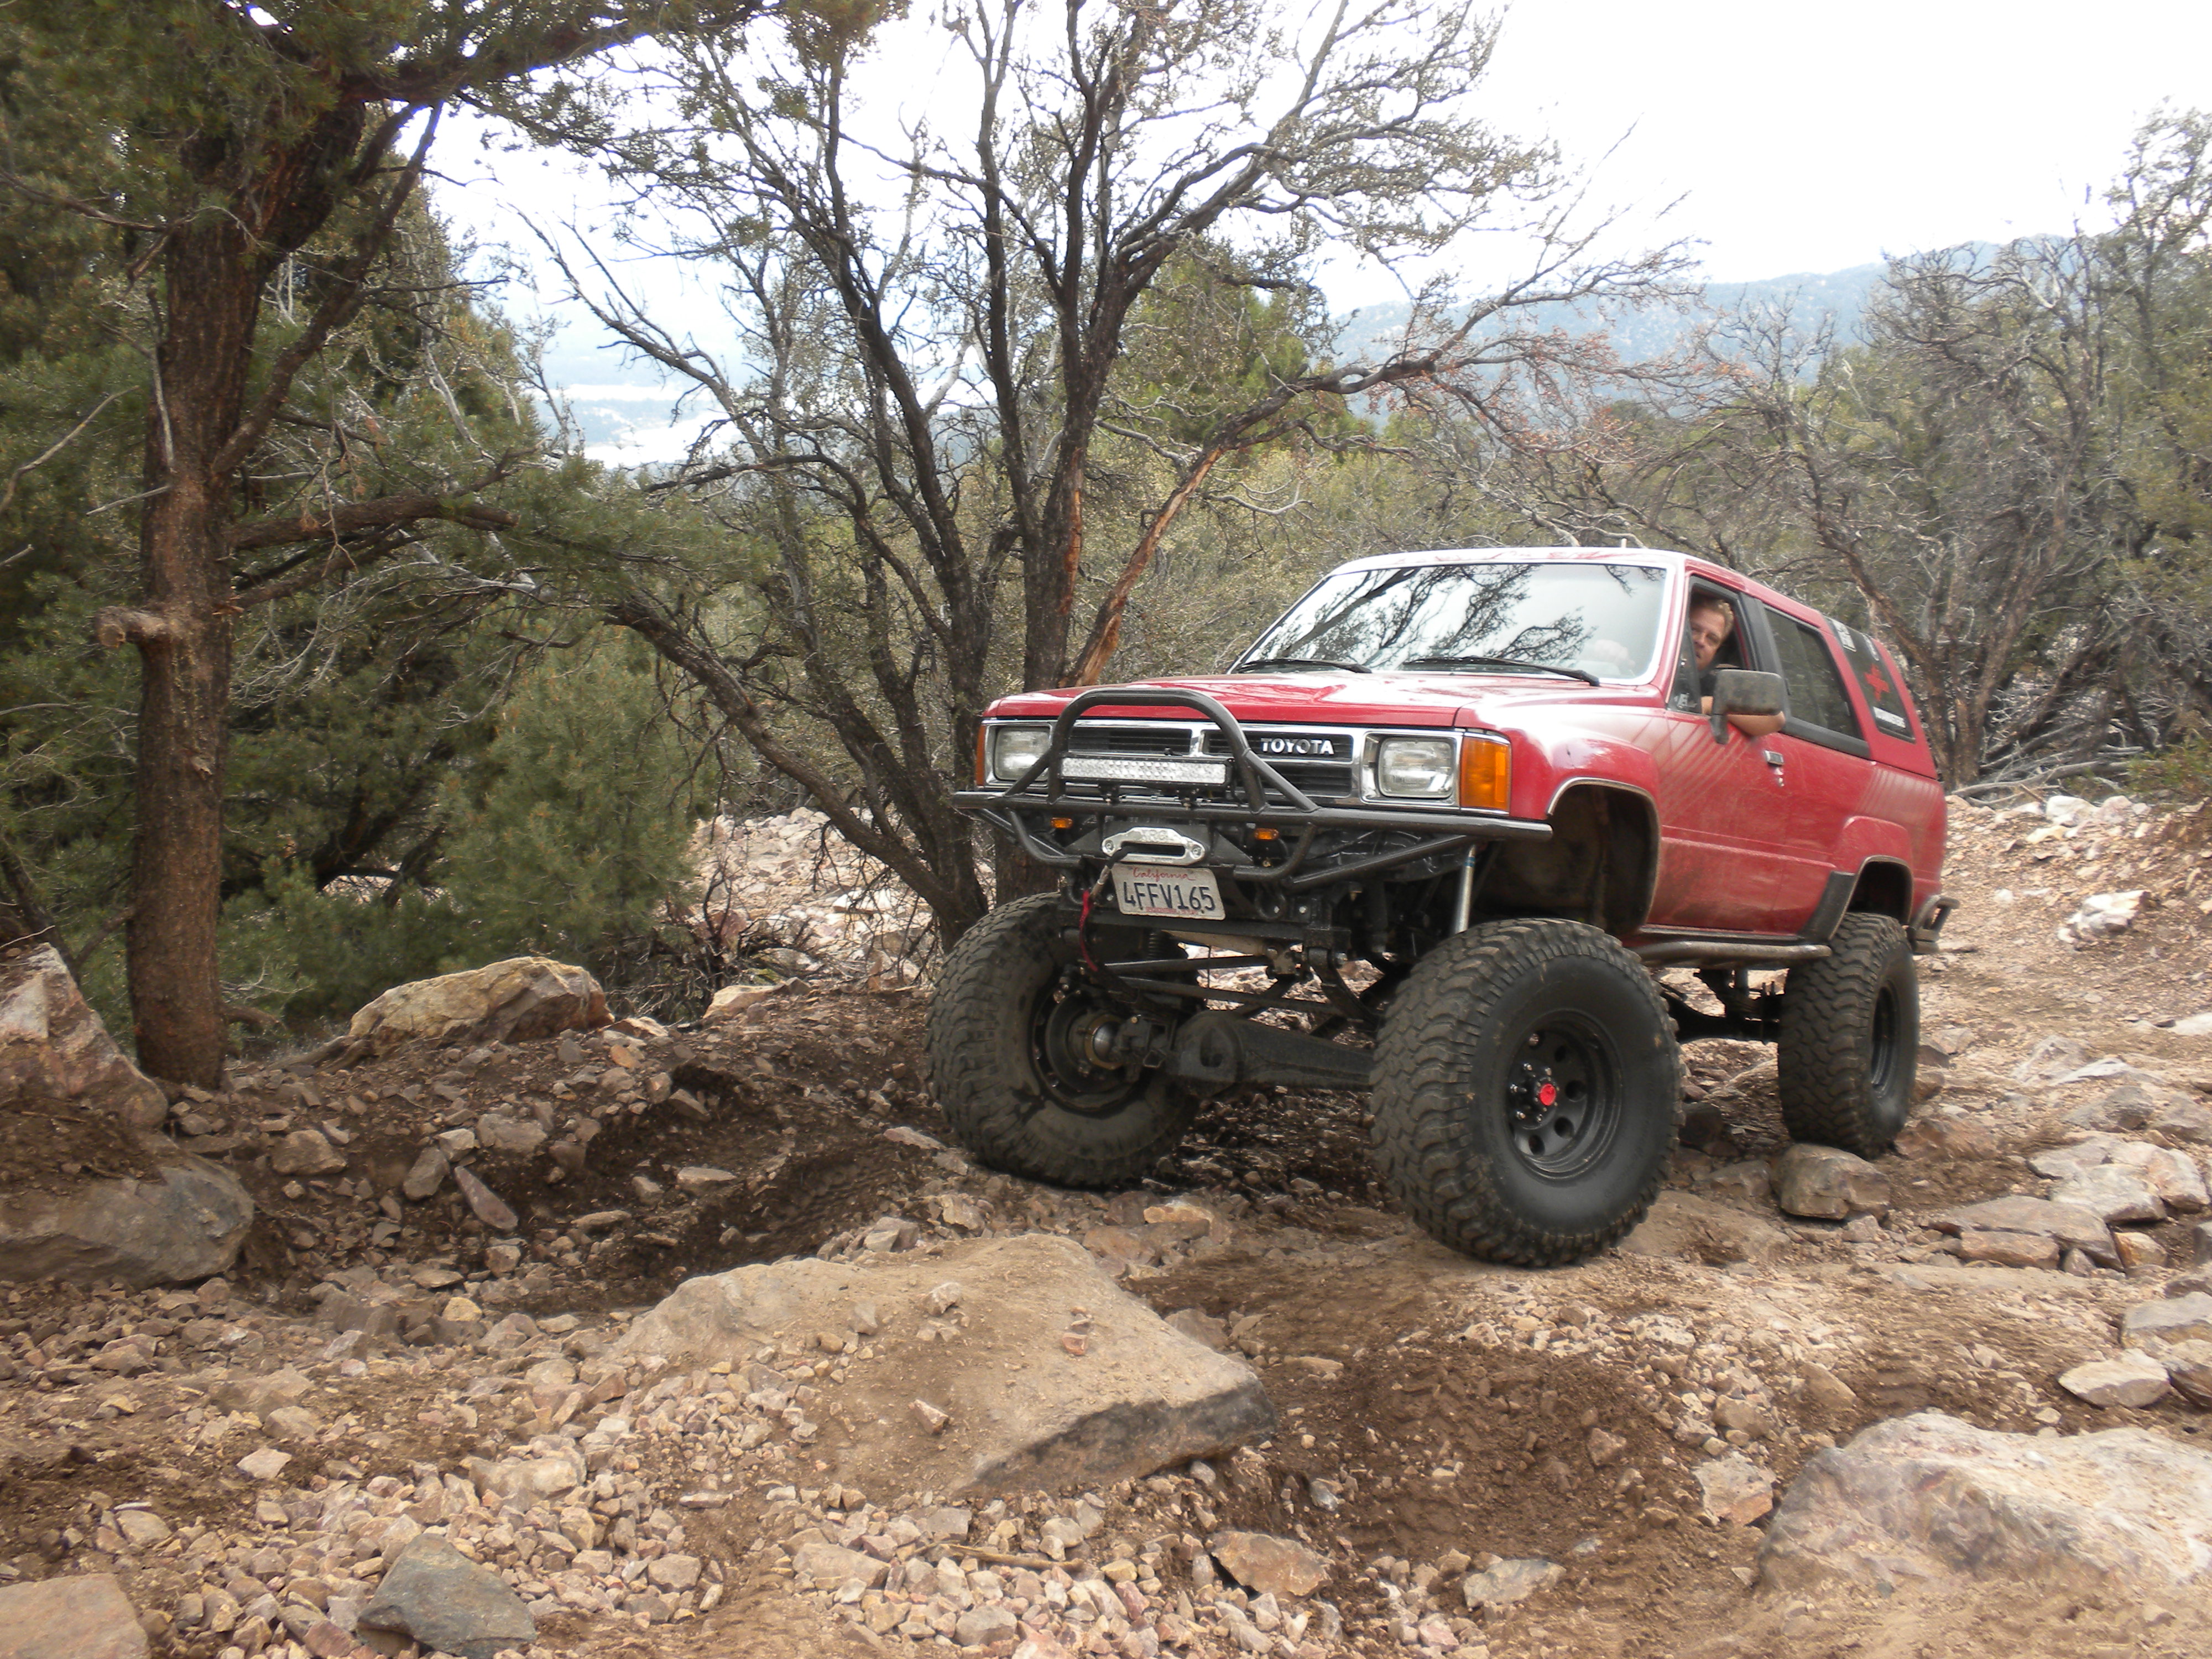
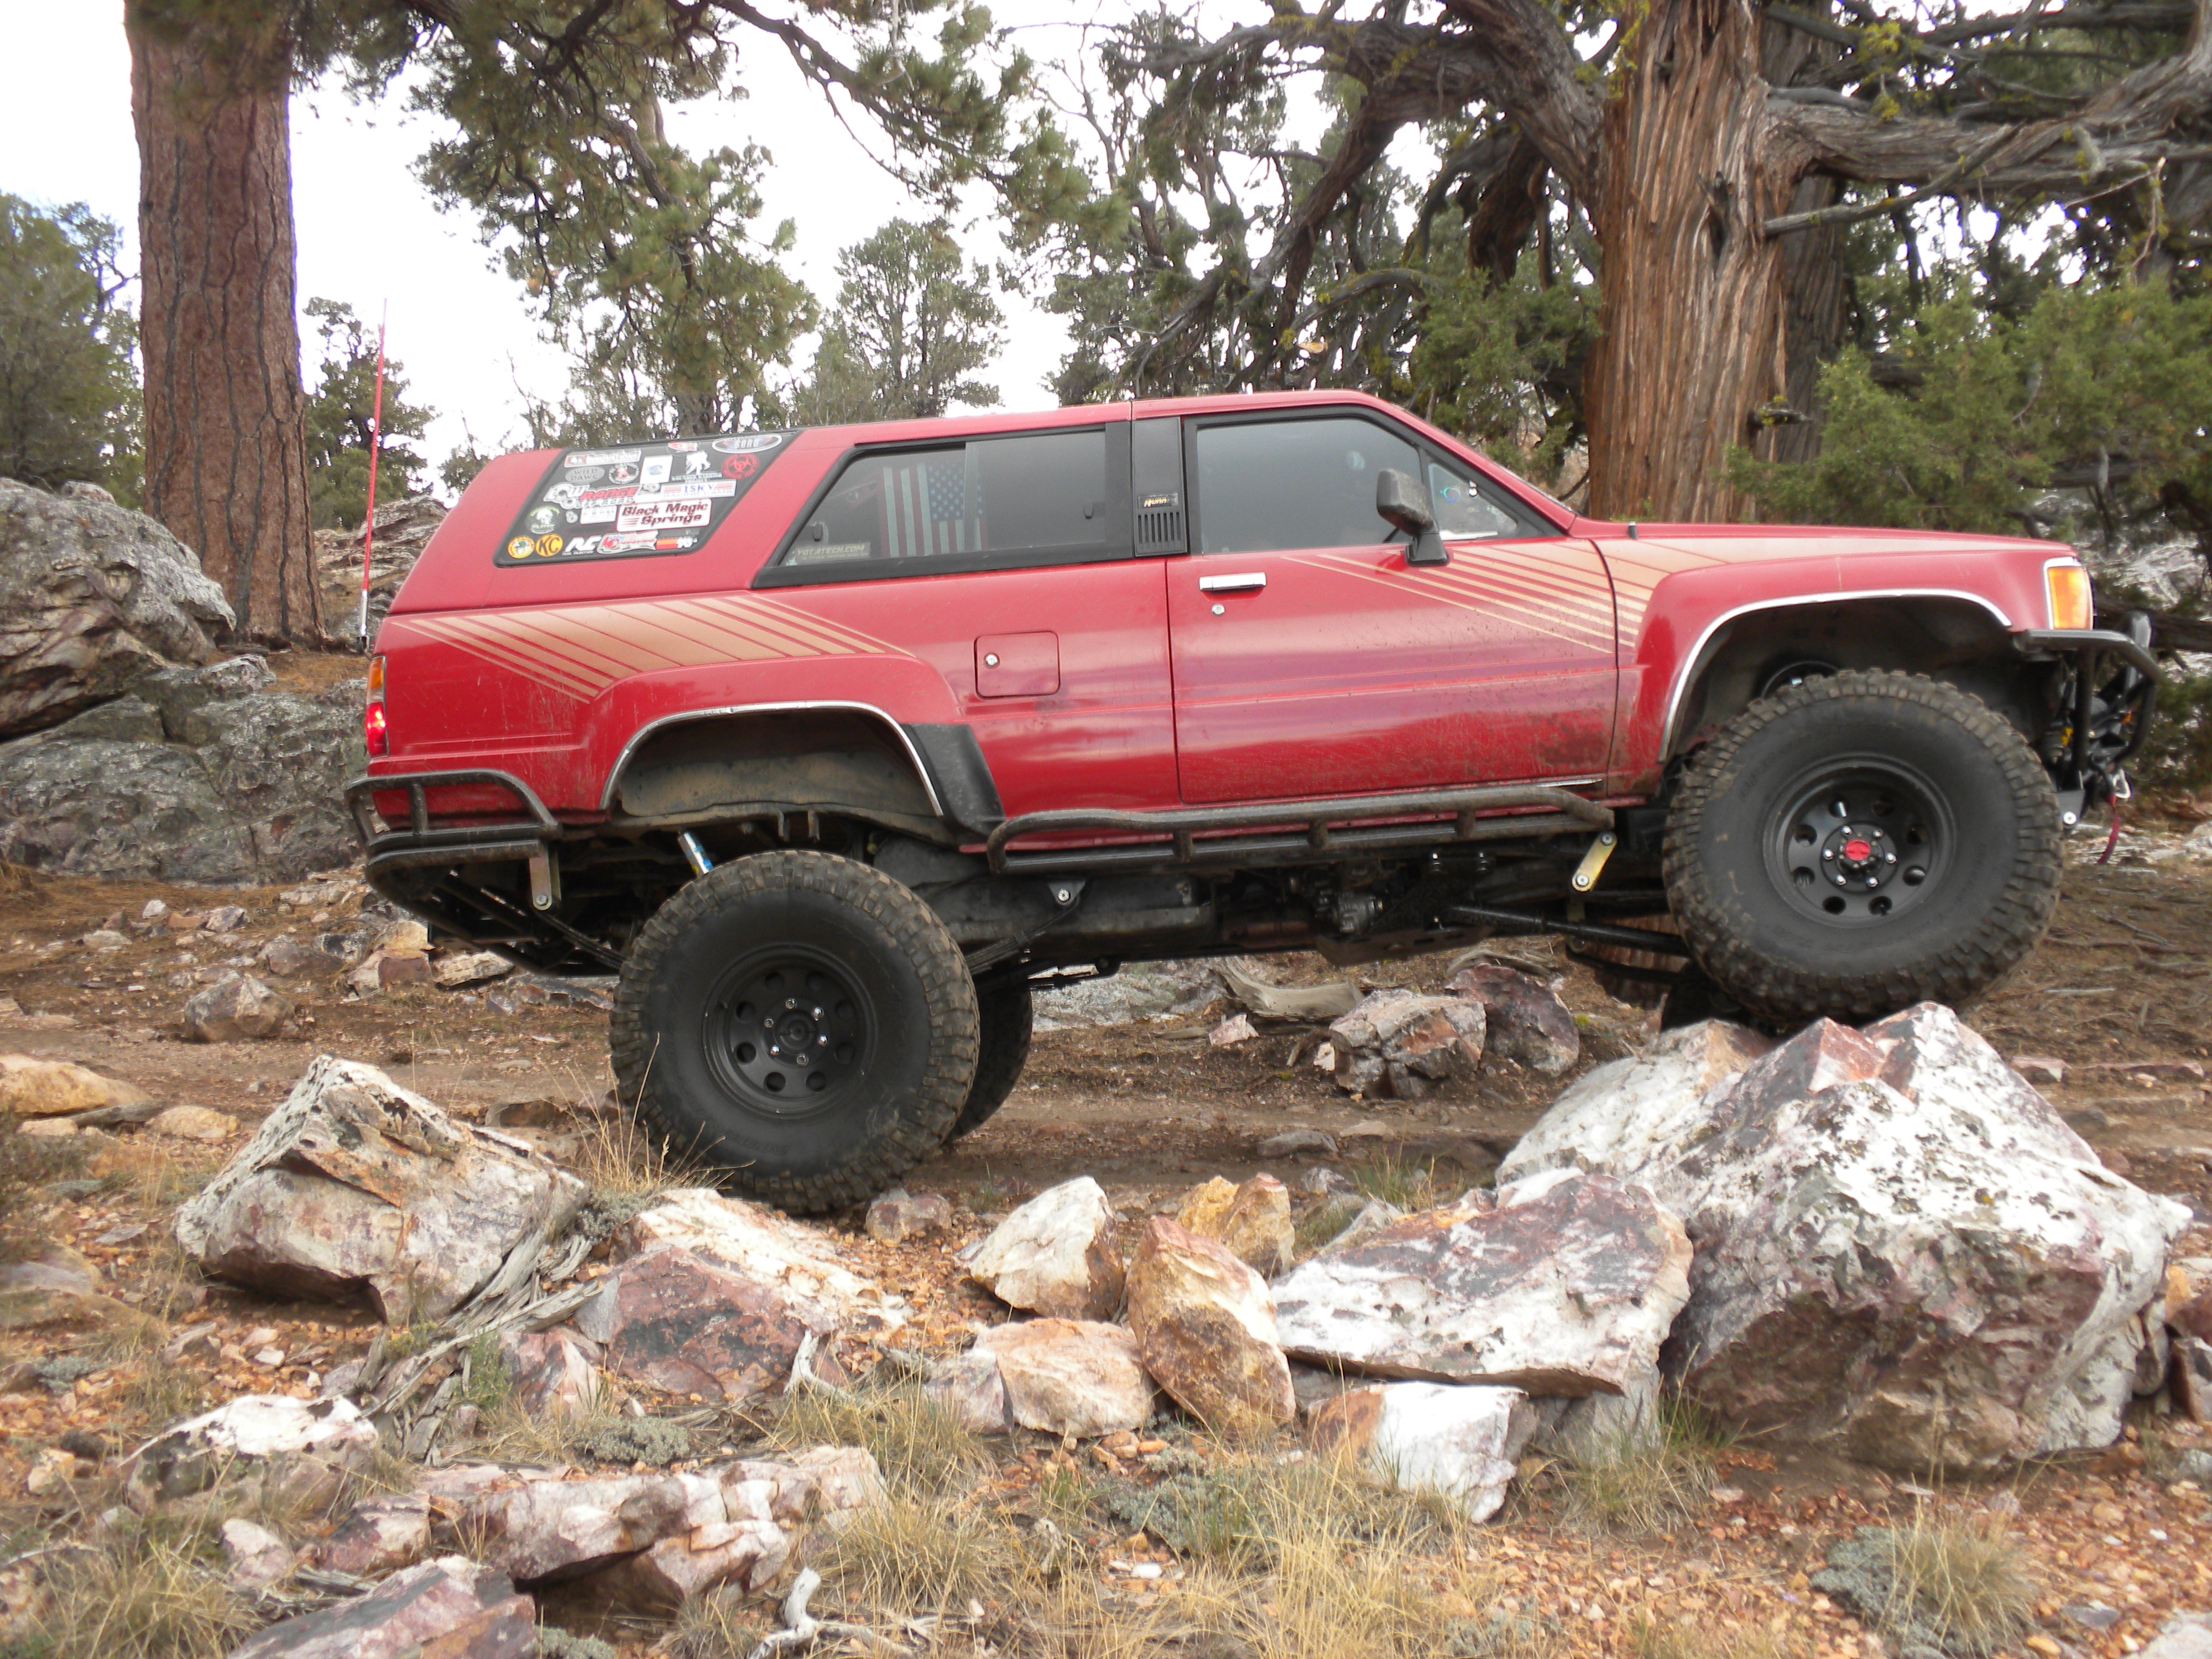
This was probably one of my more favorite shots of the trip. Look at the way his truck is twisting.

Now unfortunately for me the hardest part of the trail wasn't caught on video or any pictures of me going up. But i did get a full video from beginning to end of Mark making his way up that hard part. So at least you'll get the Idea of how hard it is.
Ruben was telling me that on that last part there when i was stuck my front wheels were up about 1.5ft and when the truck was about to come back down on the floor my rear tires got traction and literally launched my truck out. My only proof of this is Ruben and Mark as my witnesses but Ruben said that i got some serious air on that last part. He said my rear tires were about 1.5 ft off the floor and my front tires got about 3ft off the floor when finally landing on the floor in front of me. I tell ya to me being the driver i literally felt like i was gonna flip backward. definitely dont want to have that feeling again lol
This is by far the Hardest trail ive ever been on. Lots of rear end hits and SLIDERS ARE A MUST. To anybody thinking of going up that way I would definitely recommend sliders and a better rear defense because there is no way around that; you will hit. Also Axle armor. Many spots leave you a staring at the floor from your side windows to where if you stick your hand out you can actually touch the boulders that are super close to you. It's like i previously said there were parts so bad i honestly thought that i was gonna have body damage because the sides of the mountain or boulders were literally just 3-5 in case away from the body or windows. Its nerve racking knowing that you might leave with body damage.
In the end this was a super fun trip and only downfall was all the break downs that we had. Those combined breakdowns delayed us 4.5 hours Easy. But thats exactly why i always come prepared with all my tools and extra oils etc.. i dont care if people laugh at me. It's the smartest thing to do. One never knows what you'll need and yesterday proved it.
We have lots more pix to come. but Mark has the rest of the pictures. So I'll let him post them to my page.
While Mark waited patiently for almost 2 hours at the Dennys still about 8-10 miles away from us My neighbor Ruben towed me off the freeway with my rope. After looking for parking in a city where most parking is "permit parking only(on the steet) we couldnt just leave my truck anywhere. Finally found a gas station after about 2-3 miles of towing. and the clerk was nice enough to allow me to park next to the air compressor parking area. My Multimeter read a charge of 8.36v on my battery. thing was dead! by this time it was about 7:20am. NO AUTO STORES ARE OPEN AT THIS TIME! Most open at 9pm. But luckily we found an O'reily's and thank god they Open at 7am. Bought the alternator and some brand new heavy duty 12ft jumper cables so we could jumpstart my truck then we drove back. Removed mine and began to install the new one when i realized.... WTF?!?! this is a 22re alternator! stupid cashier. We had to uninstall it all over again(8:10am). took both alternators back and recieved a core discount and got it swapped out for the correct one. We were done about 8:40am and met up with Mark at Denny's for breakfast.
Sorry we made you wait 2&1/2 hours but i really didnt want to turn back and cancel another trip. So i was determined to fix the problem. Sorry no pix of us at work on the alternator. i was too focused on hurrying up. i didnt want to keep you waiting any longer then you already had. You patience is greatly appreciated.
-------------------------------------------------------------------------------------------------------------
We took one trail that eventually met up with the John Bull Trail(the hardest Big bear trail out there)
Finally picture time!
Driving up there entrance to the trail

I didnt get many pictures of my neighbors truck. He was always in a hurry lol He wouldnt hold still for any pictures so most of what i got of him were him in action and me having to time it right to get something good.


I wanted to take a bunch of pictures and video footage of Mark's truck because i wanted him to have a bunch of action shots for his first time testing out his new SAS set up. I know i sure as hell wanted somebody taking a bunch of pix and videos of me when i first went on mine. So I took a bunch of shots of his rig and Mark returned the favor. Thanks again Mark.


Poser shot. I sware i thought it'd flex out a bit more but i over estimated the size of that tiny rock lol

Finally reached the 1st point where we could get some good flex shots of Marks truck


This was around the area that Ruben's Pickup broke down. And although it may not seem like it on this video this is all on an incline and in the way of many people passing by trying to get up that same route. Rubens truck didnt come up on the video but he is off to the right side. The motor wasnt getting any fuel. after a few different tests we found that Rubens Fuel pump wasnt working. Wasnt giving any gasoline.
BTW this was about 1/6th into the long trail. We had to remove the Fuel pump(which wasnt hard at all. It was just a pain trying to work as other groups made their way up next to us and as the truck was on an incline.) So once we removed the Fuel pump Mark was left alone yet again(So Sorry man. Thanks again for your patience.) We had no choice we had to go back down the 1 way trail in my truck as Mark stayed with his truck to watch over Rubens truck. Let me tell ya driving back down isnt fun when you have a few groups still making their way up the 1way road you're trying to go down lol. We drove back into town and after a bunch of driving we finally found a NAPA auto parts which had the part(WOOT!) Drove back up to the trail and Made it up all the obstacles again where we met up with Mark installed the part and continued out trail!
Anyway here is Mark making his way up that part where Ruben broke down.
------------------------------------------------------------------
After getting Rubens truck fixed and finding an open space we finally parked and had lunch. Sharing foods and kicking it just taking time to rest up a bit. I got a bunch of shots here. dont mind the picture whoring of non flex shots. lol


I thought this picture looked kind of cool.


Lunch time over! We made it on to a different trail that eventually led to the John Bull trail and here we are just messing around with the hill side.


I ran into some minor front tire rubbage. but nothing that bothered me the rest of the day. i never flexed it to that point the rest of the day so i'm good. I wont have that problem once i build my front bumper.


One of the best upgrades i think i ever built was this Rear Bumper that my Dad and I built. I mentioned before that i wanted a sick heavy duty bumper. Which is why i chose 1/4" plate steel for the rear end. and let me tell ya. I AM SO HAPPY I WENT WITH THAT THICKNESS! I must had hit that rear bumper about 25 times in the whole trip. A lot was to the hitch but i did get my rear bumper a lot too. It definitely did its job at protecting my body and rear end. All those hits it took and the only thing i was left with was a couple of scratches and paint blemishes. Nothing that cant be slightly sanded and re painted. to look normal again. I'm so happy with the results. Only part that did get damaged was the jerry can holder. It did hit and did break one of my welds. but i mean the jerry can tray is only made of 1/16 - 2/16 steel so cant expect that to hold up too well with a hit. its all good. It still held together. nothing that cant be better reinforced and welded to be stronger.

Shortly after the trail we reached John Bull. From here on out it was nothing but big boulders and steep inclines. We had many spots where we came 3-4 inches from scratching the body or hitting one of our rear camper windows. There were many close calls and LOTS of getting stuck. Plus the fact that there had been rain and thunder storms for the past 3 days this week made everything damp and difficult to get grip on lots of rocks. especially the steep ones that we had to crawl up.


a fun Mud puddle before we reached the hard stuff.


THIS SHALL BE OUR PLAYGROUND! Belive it or not this is the easy part. It got so much worse at the top of that hill!

This is at the bottom of that hill


This was probably one of my more favorite shots of the trip. Look at the way his truck is twisting.


Now unfortunately for me the hardest part of the trail wasn't caught on video or any pictures of me going up. But i did get a full video from beginning to end of Mark making his way up that hard part. So at least you'll get the Idea of how hard it is.
Ruben was telling me that on that last part there when i was stuck my front wheels were up about 1.5ft and when the truck was about to come back down on the floor my rear tires got traction and literally launched my truck out. My only proof of this is Ruben and Mark as my witnesses but Ruben said that i got some serious air on that last part. He said my rear tires were about 1.5 ft off the floor and my front tires got about 3ft off the floor when finally landing on the floor in front of me. I tell ya to me being the driver i literally felt like i was gonna flip backward. definitely dont want to have that feeling again lol
This is by far the Hardest trail ive ever been on. Lots of rear end hits and SLIDERS ARE A MUST. To anybody thinking of going up that way I would definitely recommend sliders and a better rear defense because there is no way around that; you will hit. Also Axle armor. Many spots leave you a staring at the floor from your side windows to where if you stick your hand out you can actually touch the boulders that are super close to you. It's like i previously said there were parts so bad i honestly thought that i was gonna have body damage because the sides of the mountain or boulders were literally just 3-5 in case away from the body or windows. Its nerve racking knowing that you might leave with body damage.
In the end this was a super fun trip and only downfall was all the break downs that we had. Those combined breakdowns delayed us 4.5 hours Easy. But thats exactly why i always come prepared with all my tools and extra oils etc.. i dont care if people laugh at me. It's the smartest thing to do. One never knows what you'll need and yesterday proved it.
We have lots more pix to come. but Mark has the rest of the pictures. So I'll let him post them to my page.
Sep 1, 2013 | 11:49 AM
#2083
Registered User
Joined: Jul 2012
Posts: 2,365
Likes: 4
From: Idaho
looks like much awesome epicness will watch the vids later
hey good thing is the breaks were FIXED these things happen when you put um under load testing the limits of the machines id almost expect something like it on a trip otherwise ya might call it jinxed
hey good thing is the breaks were FIXED these things happen when you put um under load testing the limits of the machines id almost expect something like it on a trip otherwise ya might call it jinxed
Sep 1, 2013 | 01:50 PM
#2084
Totally no problem on the waiting! There was nothing you could do about it... And it could have been much worse... I'm just glad nobody got hurt and no major body damage.
As far as you getting 1.5ft air, I have it on video and it's uploading right now. Like I said, there were only spots of that portion because you would ask me to spot for you and then Ruben ask me to please go down and get ready, as we were losing daylight pretty fast.
One thing you forgot to mention, regarding John Bull.... I would add to your recommendations that anyone who wants to do that needs to get up there early... Because especially on that trail the odds of you having carnage or needing some serious time to get out of something are dramatically increased. Another reason to get there a little early is because, well, I can only speak for myself, but I could absolutely not see a damn thing for a large portion of that incline... The Sun was absolutely blinding right in my face!!!!!!! I literally had to put my whole head out the window in order to see anything, and even then, on top of having my glasses on, it was literally coming right over the top of the rocks.
Thank you so much for taking great pictures and video, buddy! While some of the ones I took are not great there are a couple good shots of you getting some flexin going on! Lol. If you could only talk Ruben into taking some video from the top. However, I think he'd rather just spot, and that's fine.
I'm running around right now but I will update my thread with a similar post. I might even just start a thread.
Anybody who's interested in finding these trails on your own by just going up there and winging it, just download all the PDFs for maps of the trails up there and you can see all the ways most things lead you back to the same spot. Coming up John Bull? I think I would also add one more thing... I'm sure there are videos, rare anomalies that display people doing so... But I would highly recommend against people at stock height tryingto get up that, I don't give a crap how awesome the truck is. In fact, I would recommend at least 33's and a lift of 3 or more inches... And one last thing regarding that trail... It is nearly impossible to turn around and pretty much the last thing in the world that you want to do once you get past the trailhead which is pretty much the worst but not by much.
Last edited by ChefYota4x4; Sep 1, 2013 at 02:41 PM.
Sep 2, 2013 | 10:43 AM
#2088
Looks like you guys had a awesome trip.... hey, at least your alternator went out on the trip up there and not while you were on the trail, that would have been a little to much drama, lol,... as always you and Mark took some sweet pics, really enjoyed them, glad you guys made it up and back with out any major trail damage!
Sep 2, 2013 | 09:07 PM
#2089
Thread Starter
Registered User
Joined: Apr 2012
Posts: 2,817
Likes: 2
From: Los Angeles CA
looks like much awesome epicness will watch the vids later
hey good thing is the breaks were FIXED these things happen when you put um under load testing the limits of the machines id almost expect something like it on a trip otherwise ya might call it jinxed
hey good thing is the breaks were FIXED these things happen when you put um under load testing the limits of the machines id almost expect something like it on a trip otherwise ya might call it jinxed
Totally no problem on the waiting! There was nothing you could do about it... And it could have been much worse... I'm just glad nobody got hurt and no major body damage.
As far as you getting 1.5ft air, I have it on video and it's uploading right now. Like I said, there were only spots of that portion because you would ask me to spot for you and then Ruben ask me to please go down and get ready, as we were losing daylight pretty fast.
As far as you getting 1.5ft air, I have it on video and it's uploading right now. Like I said, there were only spots of that portion because you would ask me to spot for you and then Ruben ask me to please go down and get ready, as we were losing daylight pretty fast.
And as far as getting Air i seen the video you were talking about on your youtube. but the one i was talking about was when all 4 tires were off the floor. On that hardest John Bull part. but like you said i asked you to spot me. It's cool i was just bummed out we didnt get that on tape. that would have been epic!
I honestly think this was one of the funnest offroad trips ive ever been on. Even with all the car drama we got. I just wish we would have had a 3 day off-road trip out there with maybe a couple more people. That would have been great.
Thanks Grego. I didnt want to go through another canceled trip. And well the 2nd breakdown was a must fix because we were already on the trail and we couldnt have just left the truck up there. it was in a bad spot where passerby's could easily slide and hit his truck. Once the problem was fixed we just decided to continue the trip. seemed like everything major had been fixed anyway.

Looks like you guys had a awesome trip.... hey, at least your alternator went out on the trip up there and not while you were on the trail, that would have been a little to much drama, lol,... as always you and Mark took some sweet pics, really enjoyed them, glad you guys made it up and back with out any major trail damage!
I cant imagine having my alternator go out on the trail that really would have sucked. Can you imagine? Hey Ruben hooray we finally got back and fixed your alternator all within 2 hours. Oh whats that? Ah crap my alternator died now?!? WTF???
 Okay there goes another 2&1/2 hour round trip and fix time. wow Noooo way. haha
Sep 4, 2013 | 07:34 PM
Okay there goes another 2&1/2 hour round trip and fix time. wow Noooo way. haha
Sep 4, 2013 | 07:34 PM
#2090
Thread Starter
Registered User
Joined: Apr 2012
Posts: 2,817
Likes: 2
From: Los Angeles CA
Can Anyone guess what i was up to today?

If you answered getting started on the power window/mirror project then you guessed right!
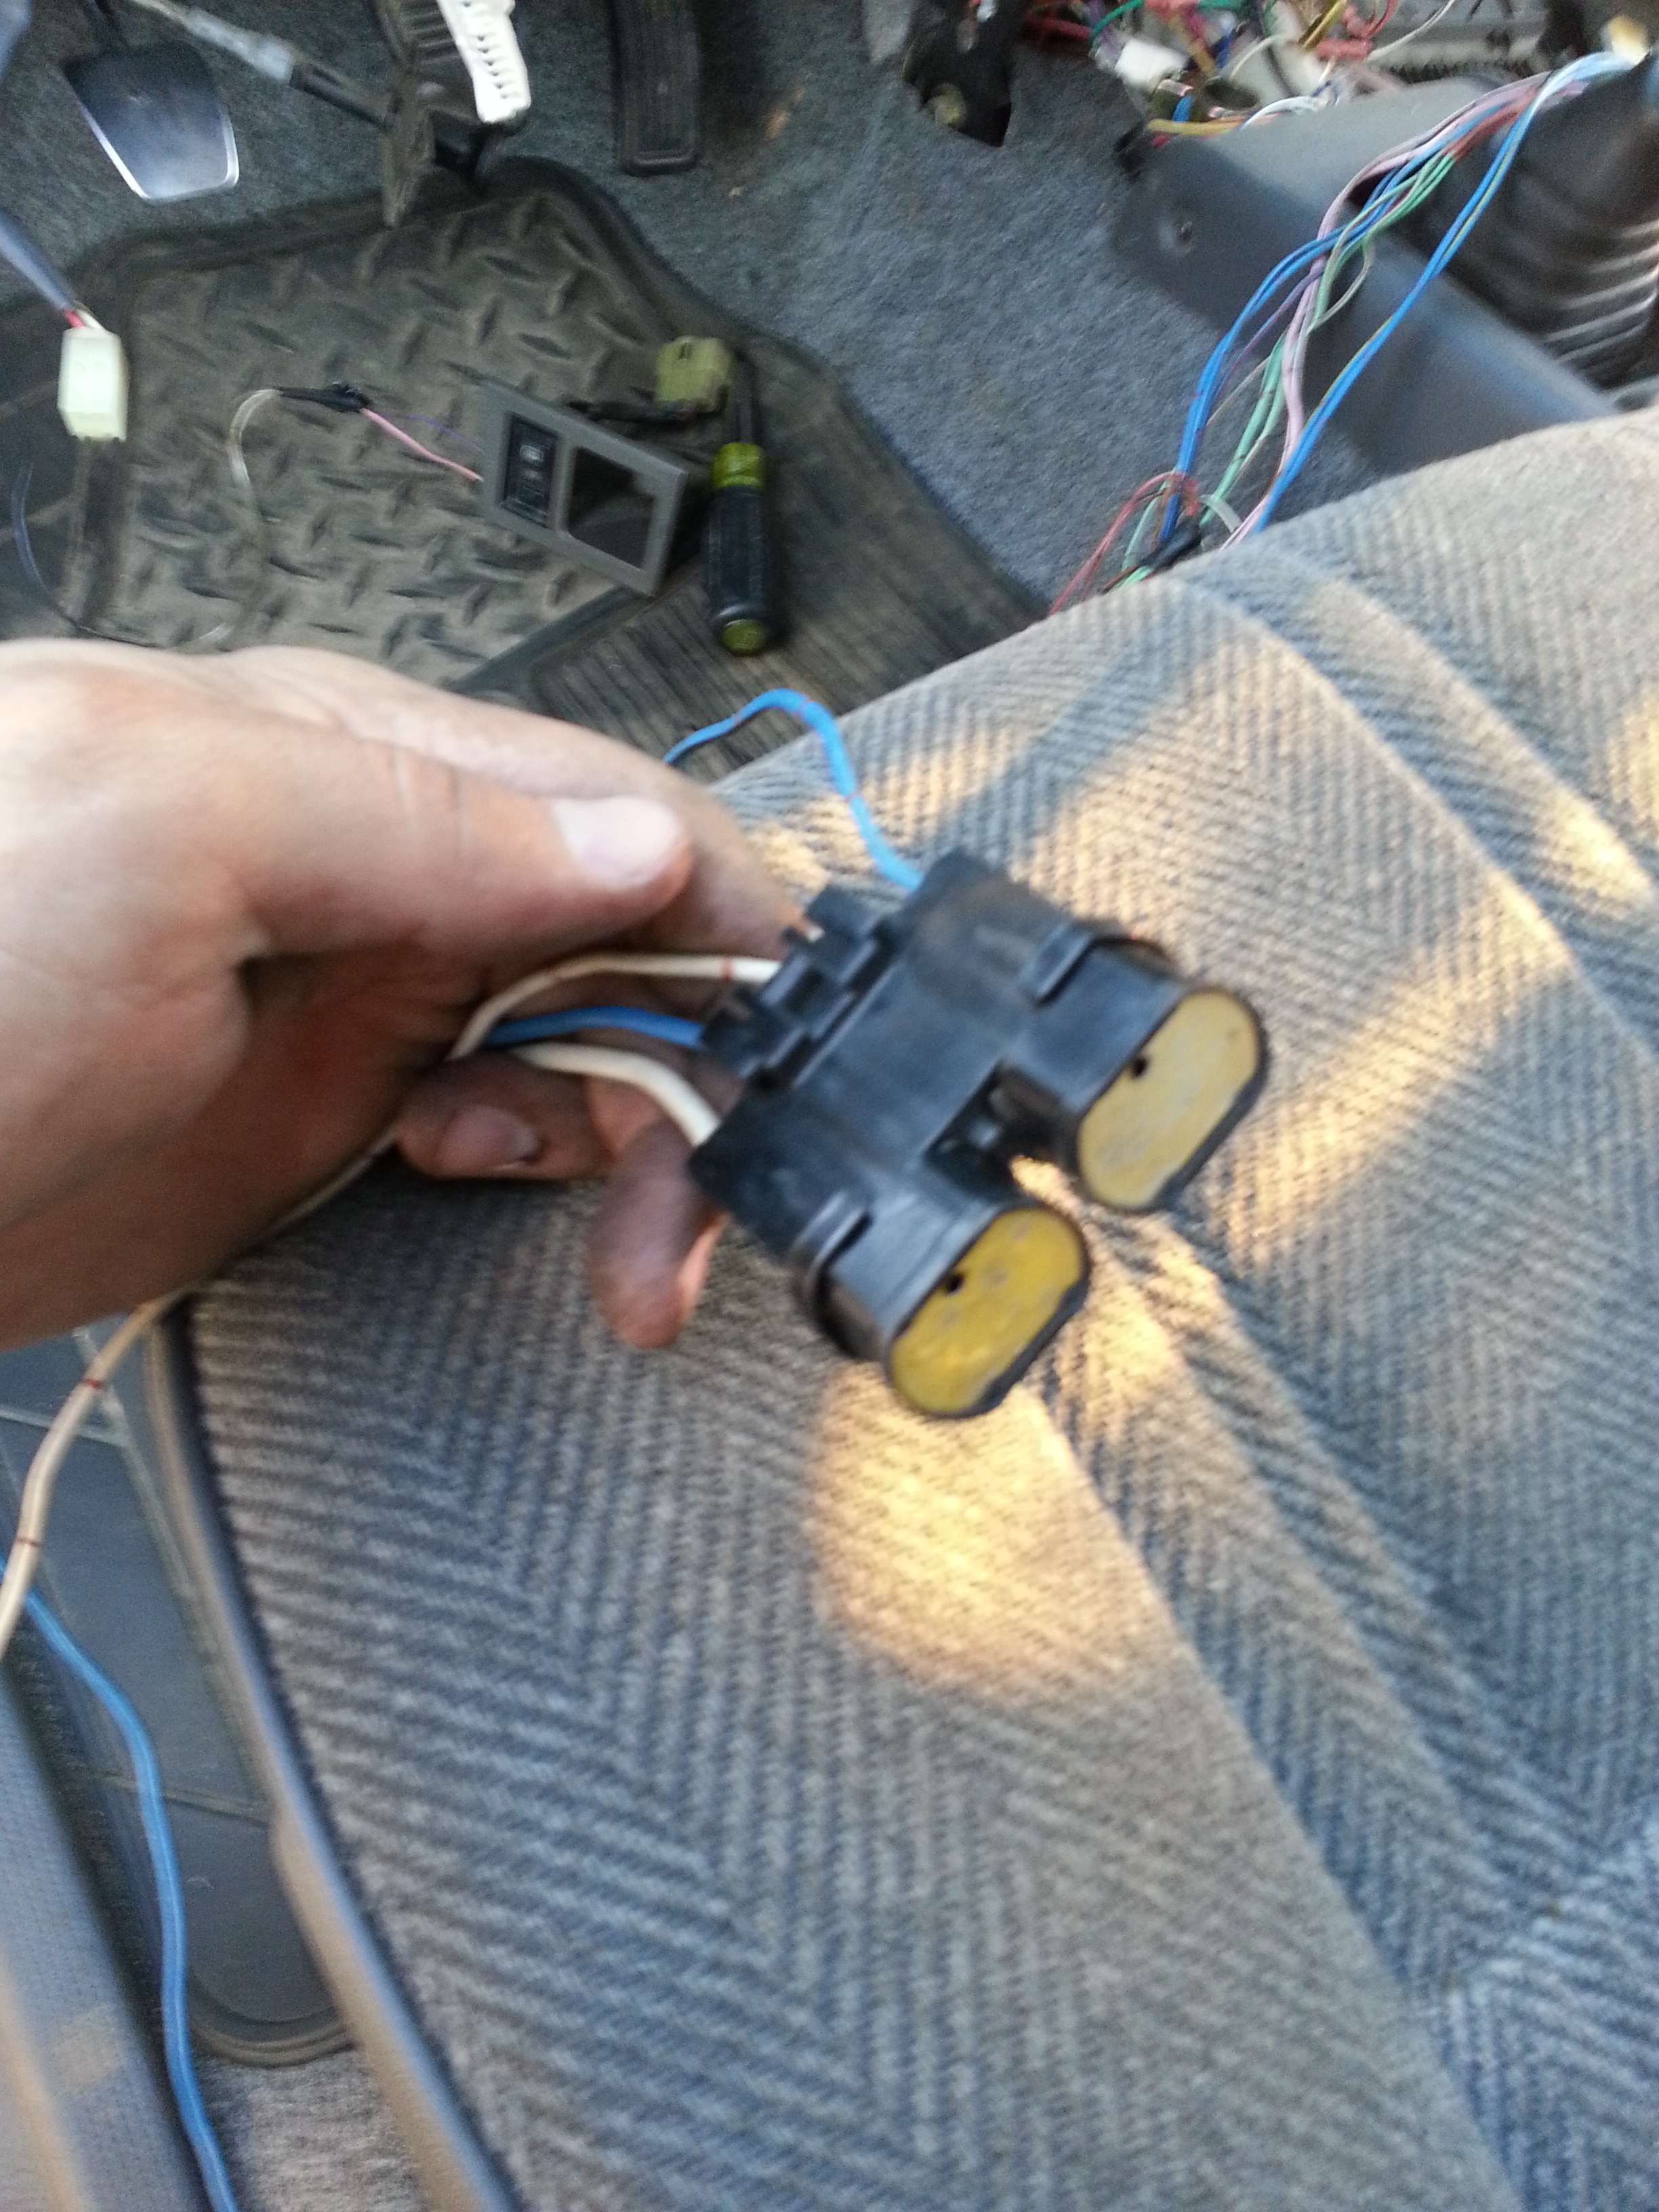
I was gonna get home and take a nap but im so tired of having that box of wires and motors sitting on my room's top shelf. I finally had it. I pulled out the box and figured out what those 3 wires were that i had originally asked in my power window video earlier. IT was actually 2 wires not 3. The 3rd wire was looped and was routed to the relay box. the other 2 wires met up on the passenger side where there were 2 wires matching the same color code/pattern.
Now that i figured that out i was ready to get started!
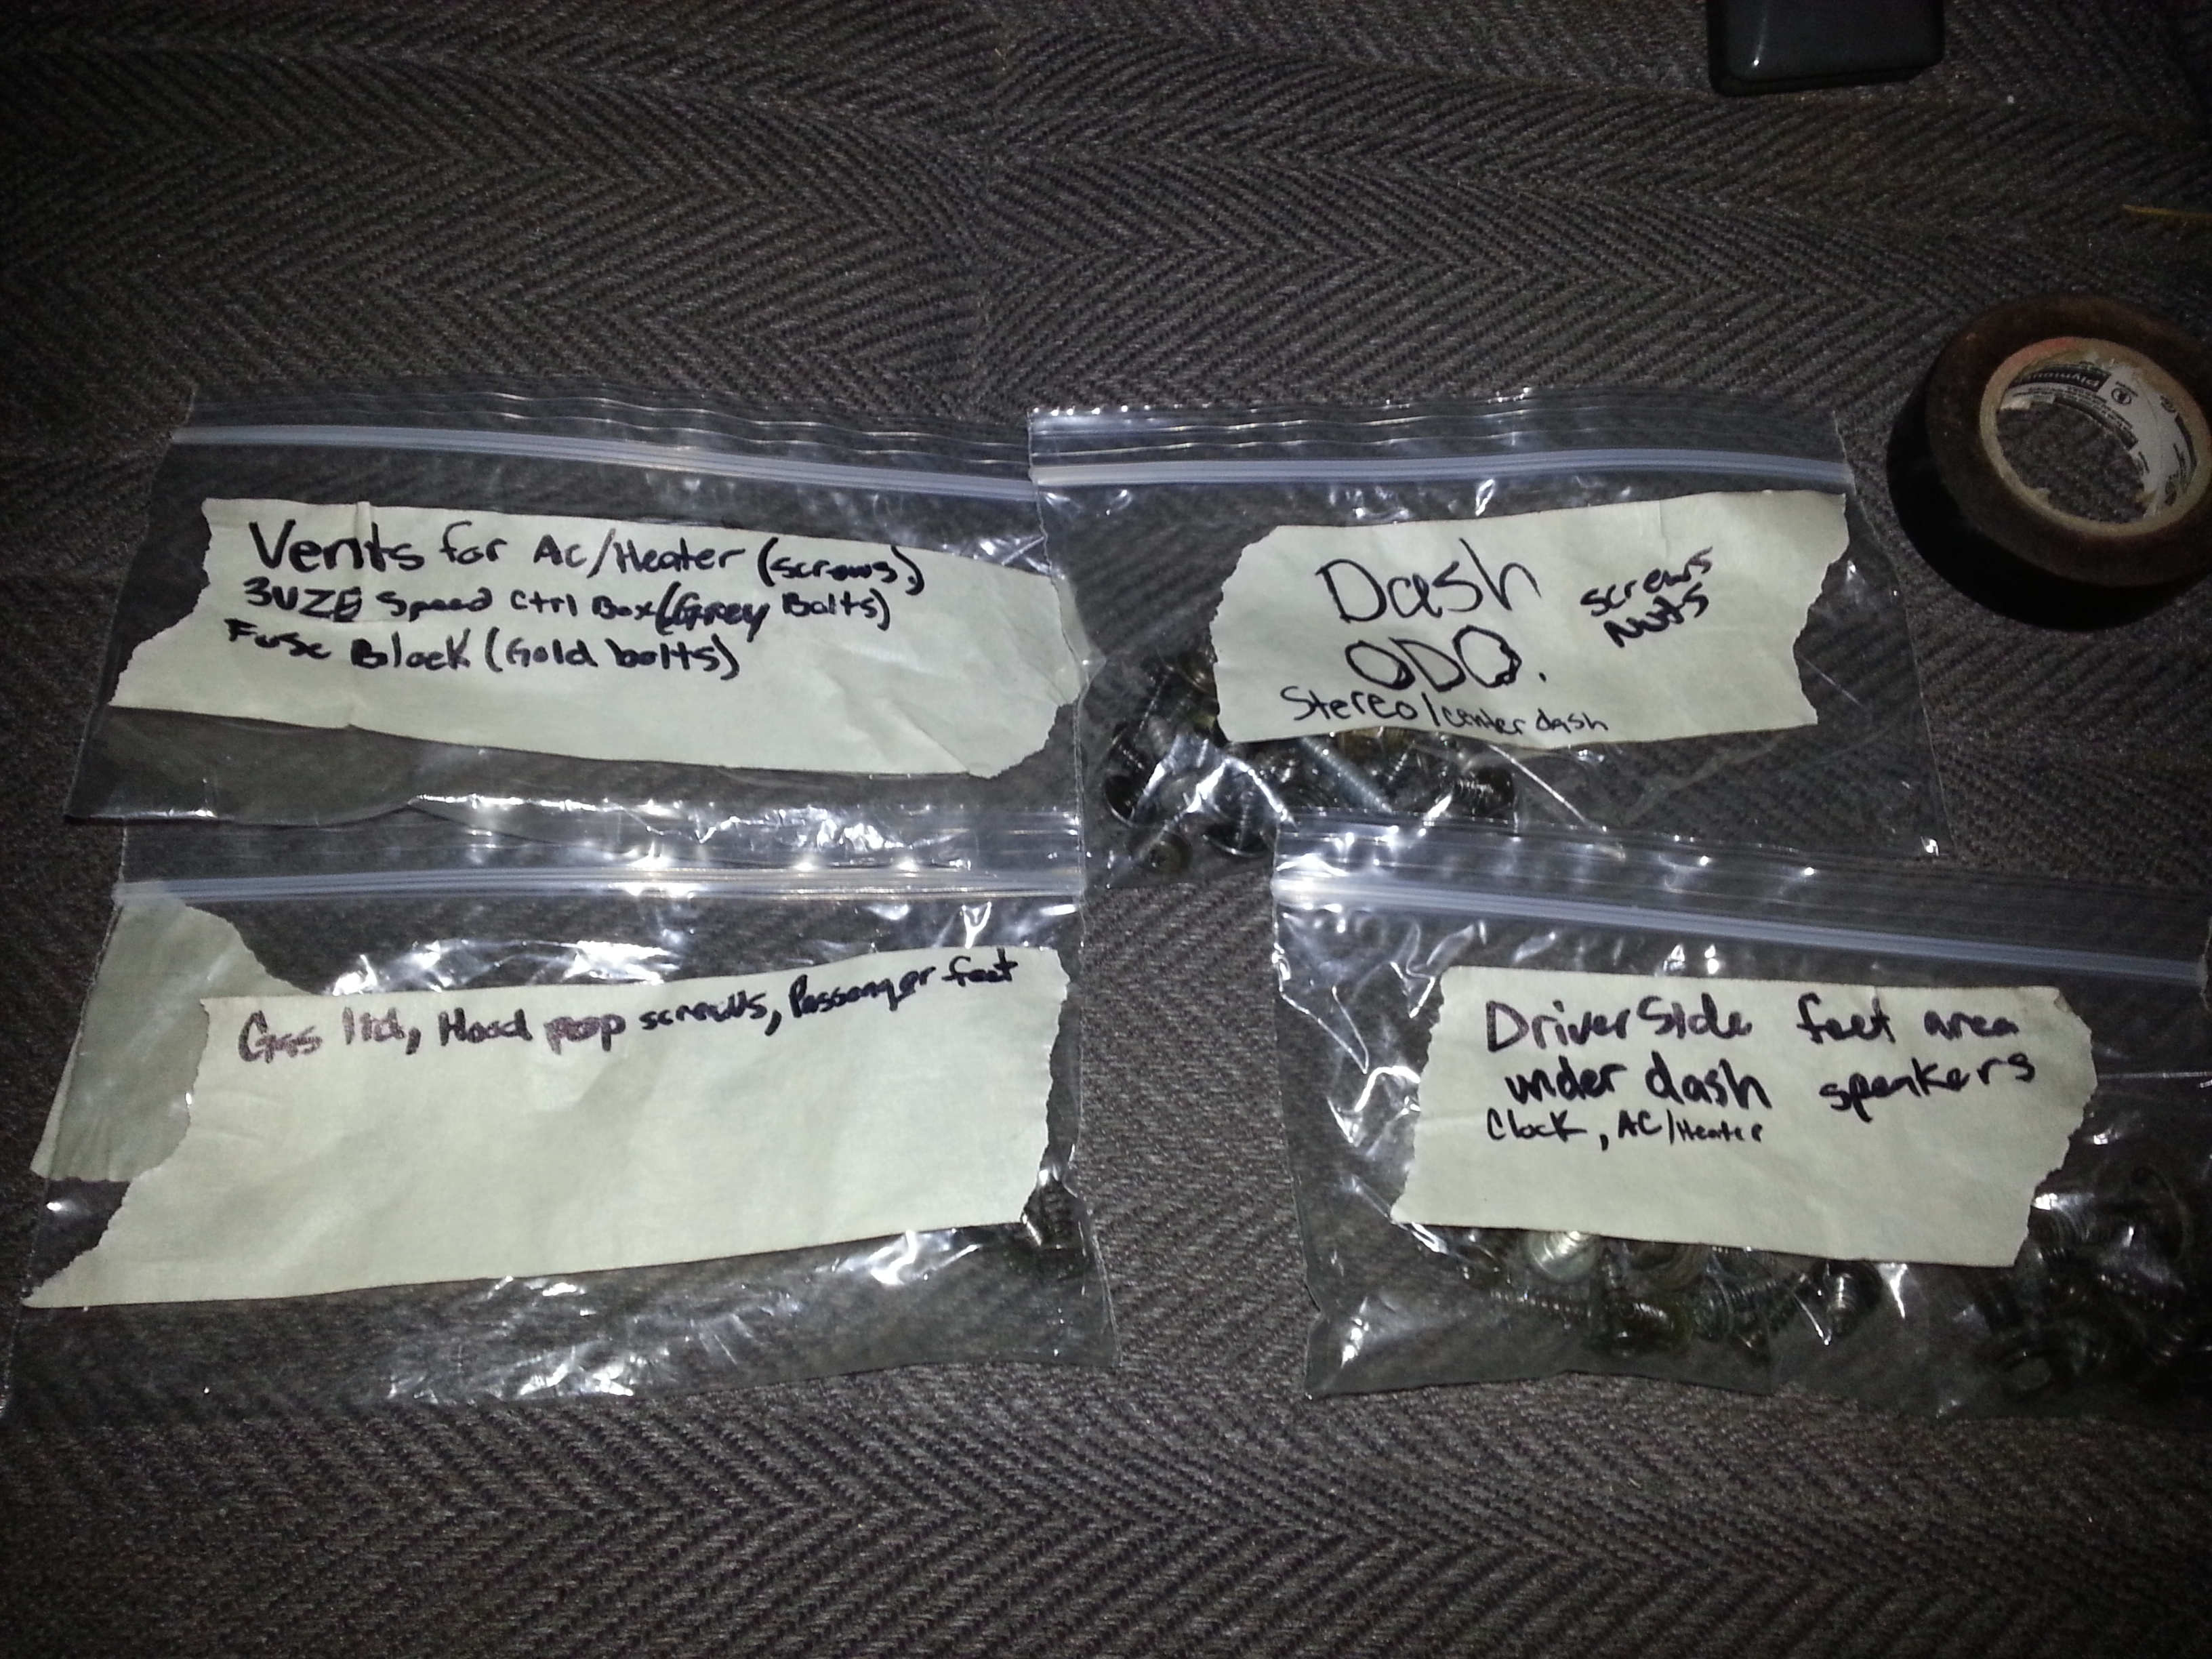
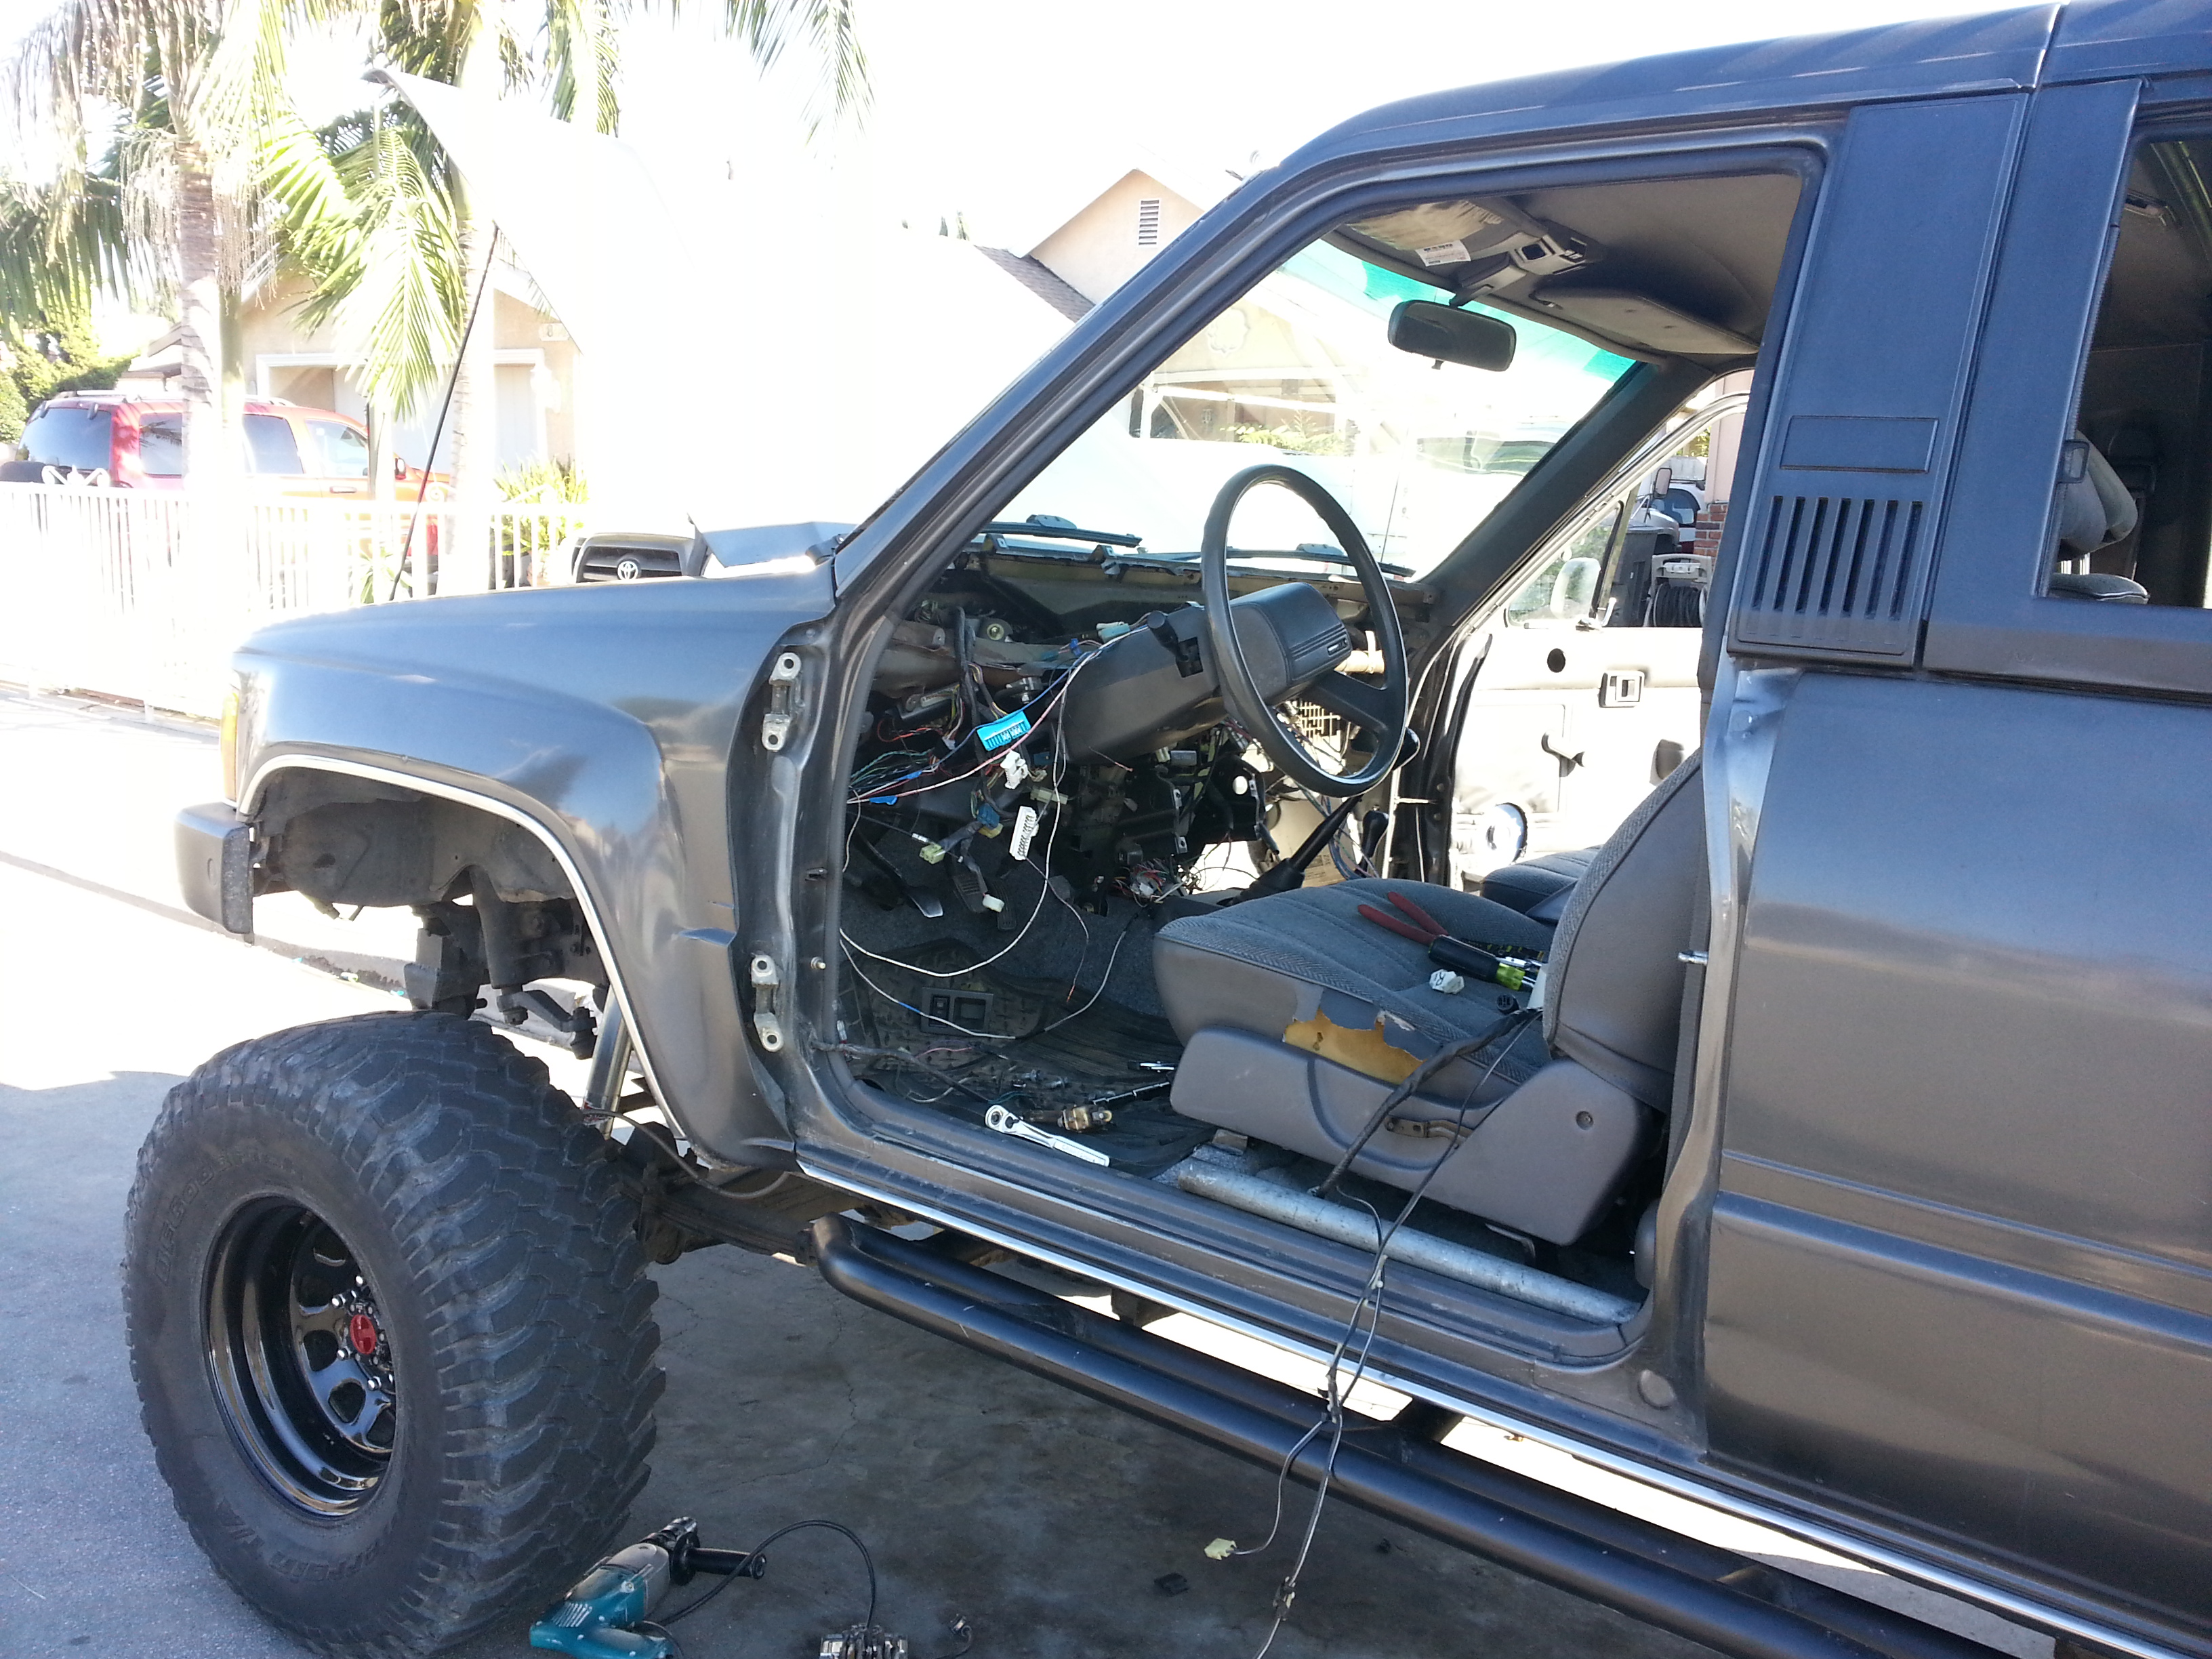
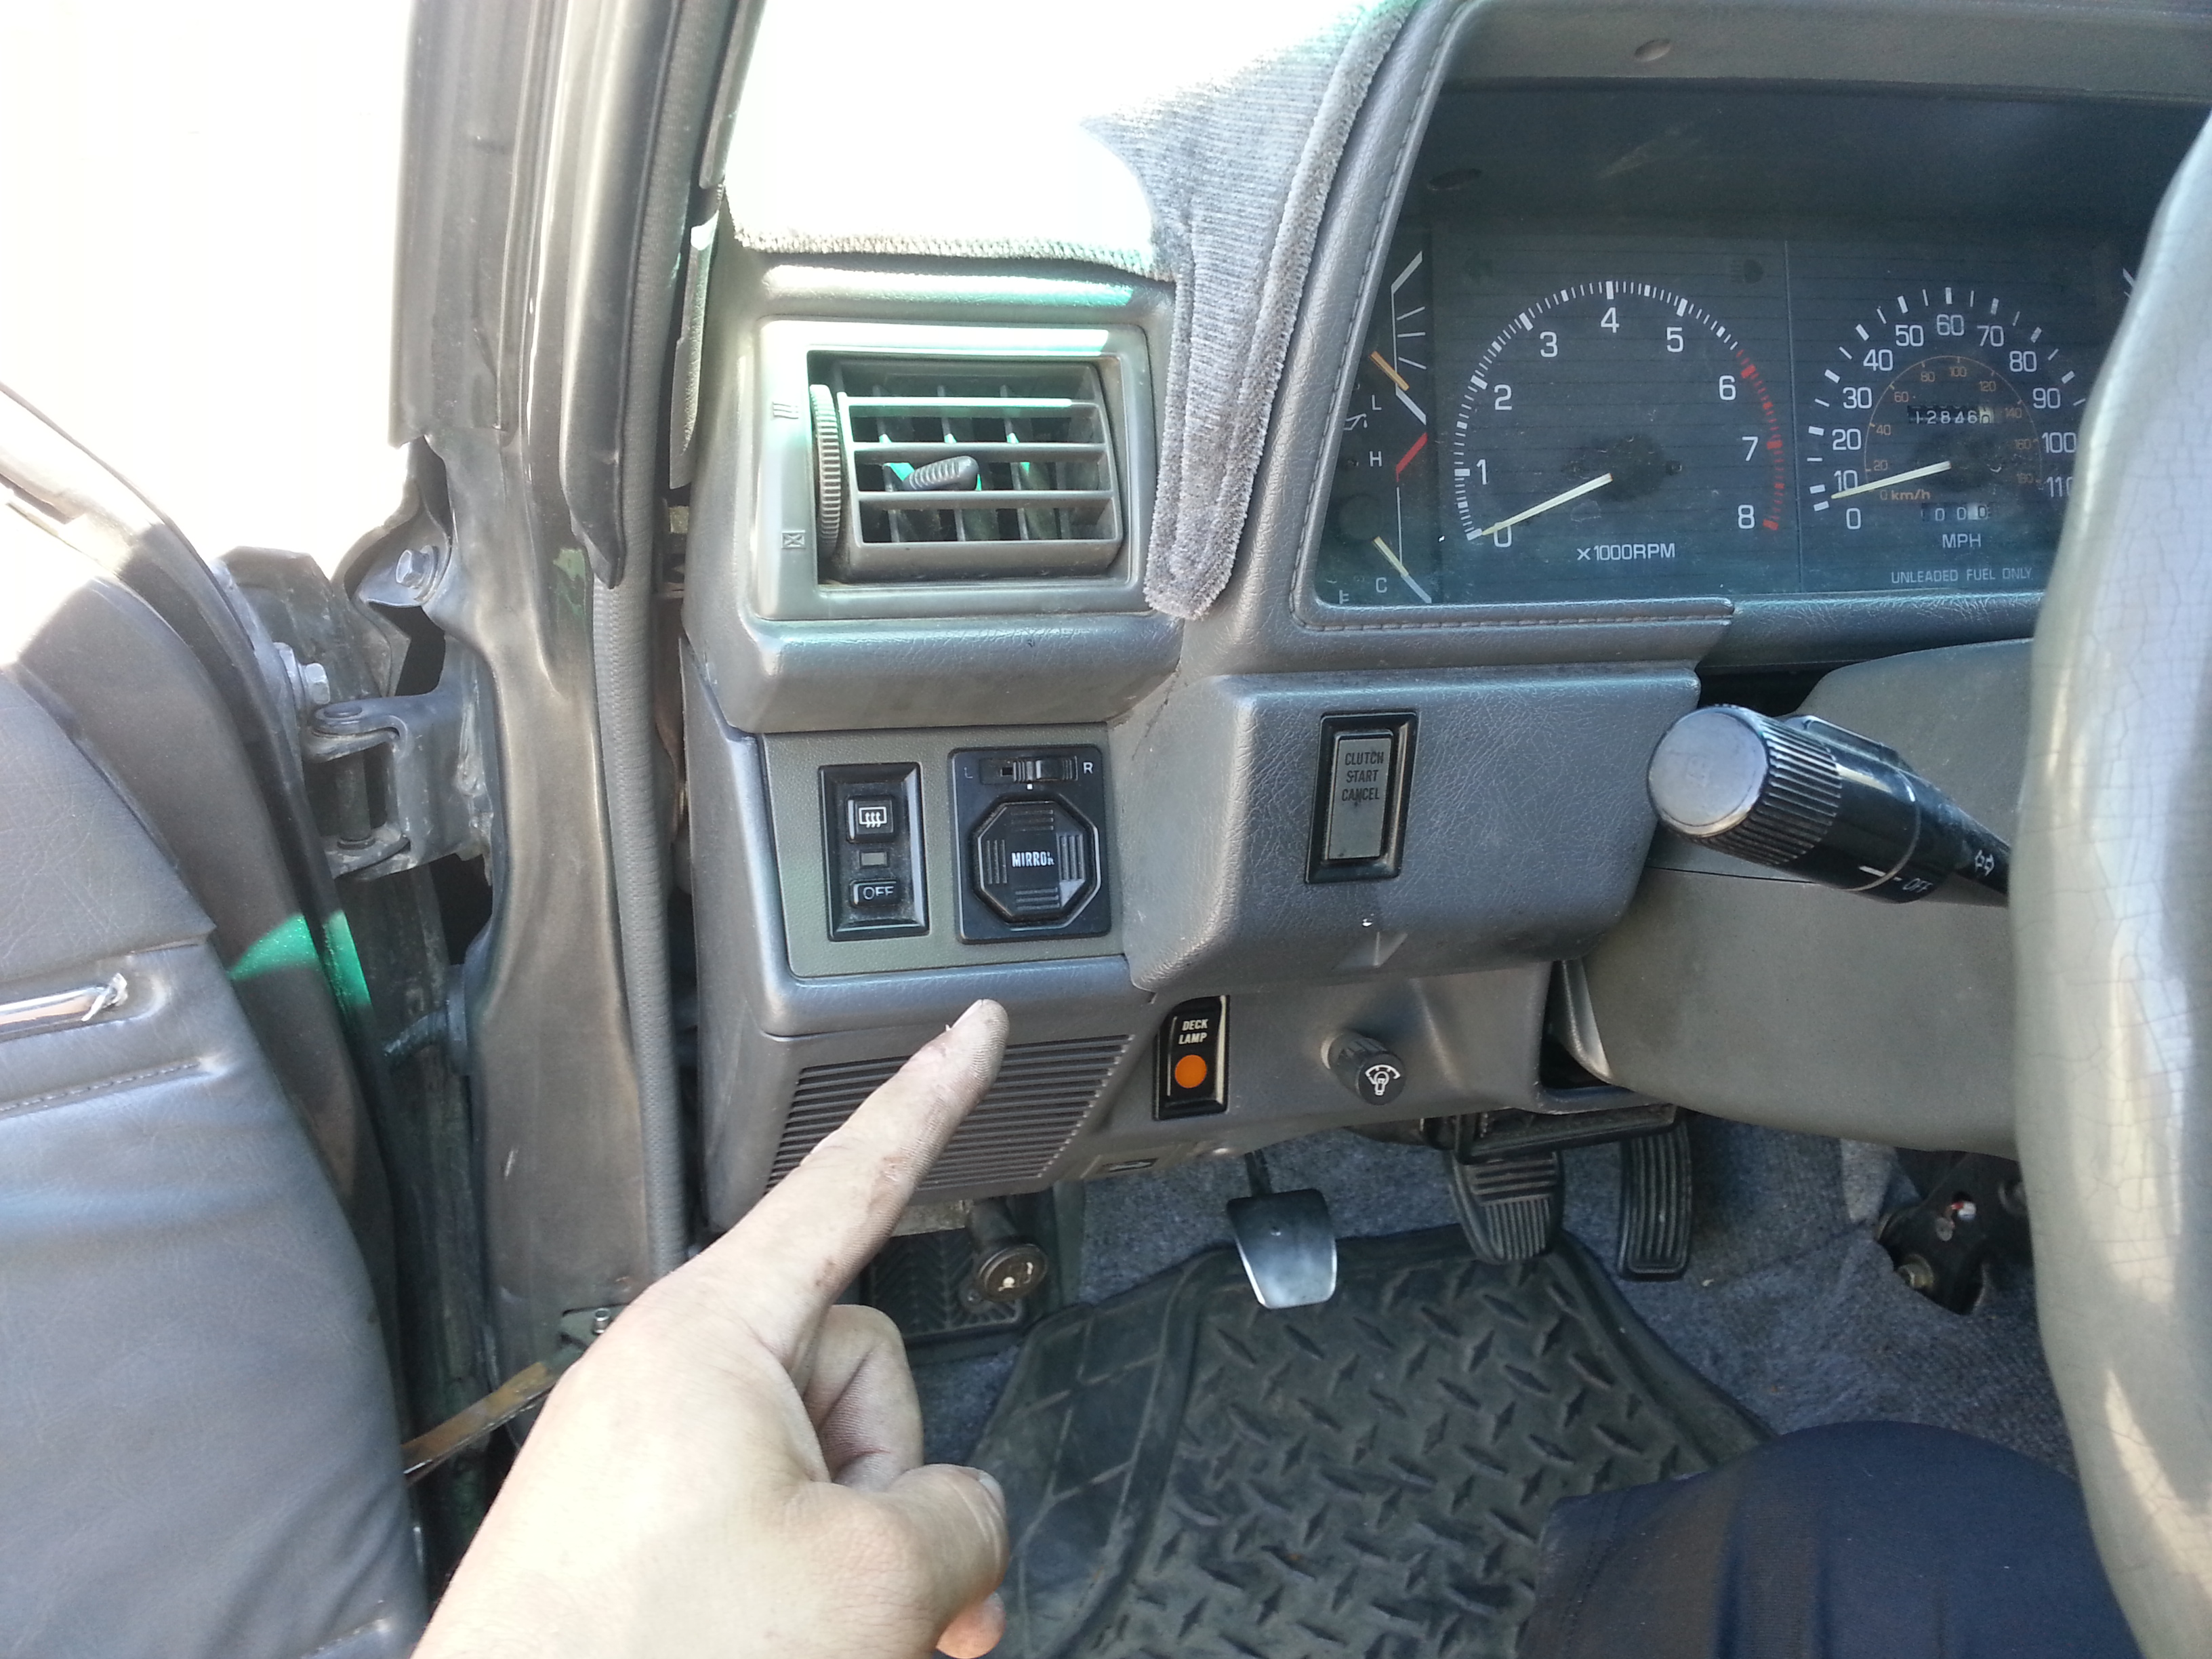
I started out by removing the entire dash/undershash, center radio bezel dash, speakers, buttons, odometer, AC/heater vents, pretty much everything that would be in the way of me running the wires. It came in handy knowing how to remove the whole dash having done so before when i installed the inclinometer.
To anybody wanting to do this. Do yourself a favor and label every group of screws, bolts, nuts, you take off and where they go. I only had 4 bags but i honestly wish i would have had made 8 ziplocks instead. There are just so many. and i can already tell its gonna be intimidating trying to put everything that i took off back together.
The next thing on the list would be to route the wires and tap into the fuse box. This is the one attached to my power window harness. I need to remove these wires from this plastic housing and push them into my trucks wiring harness.
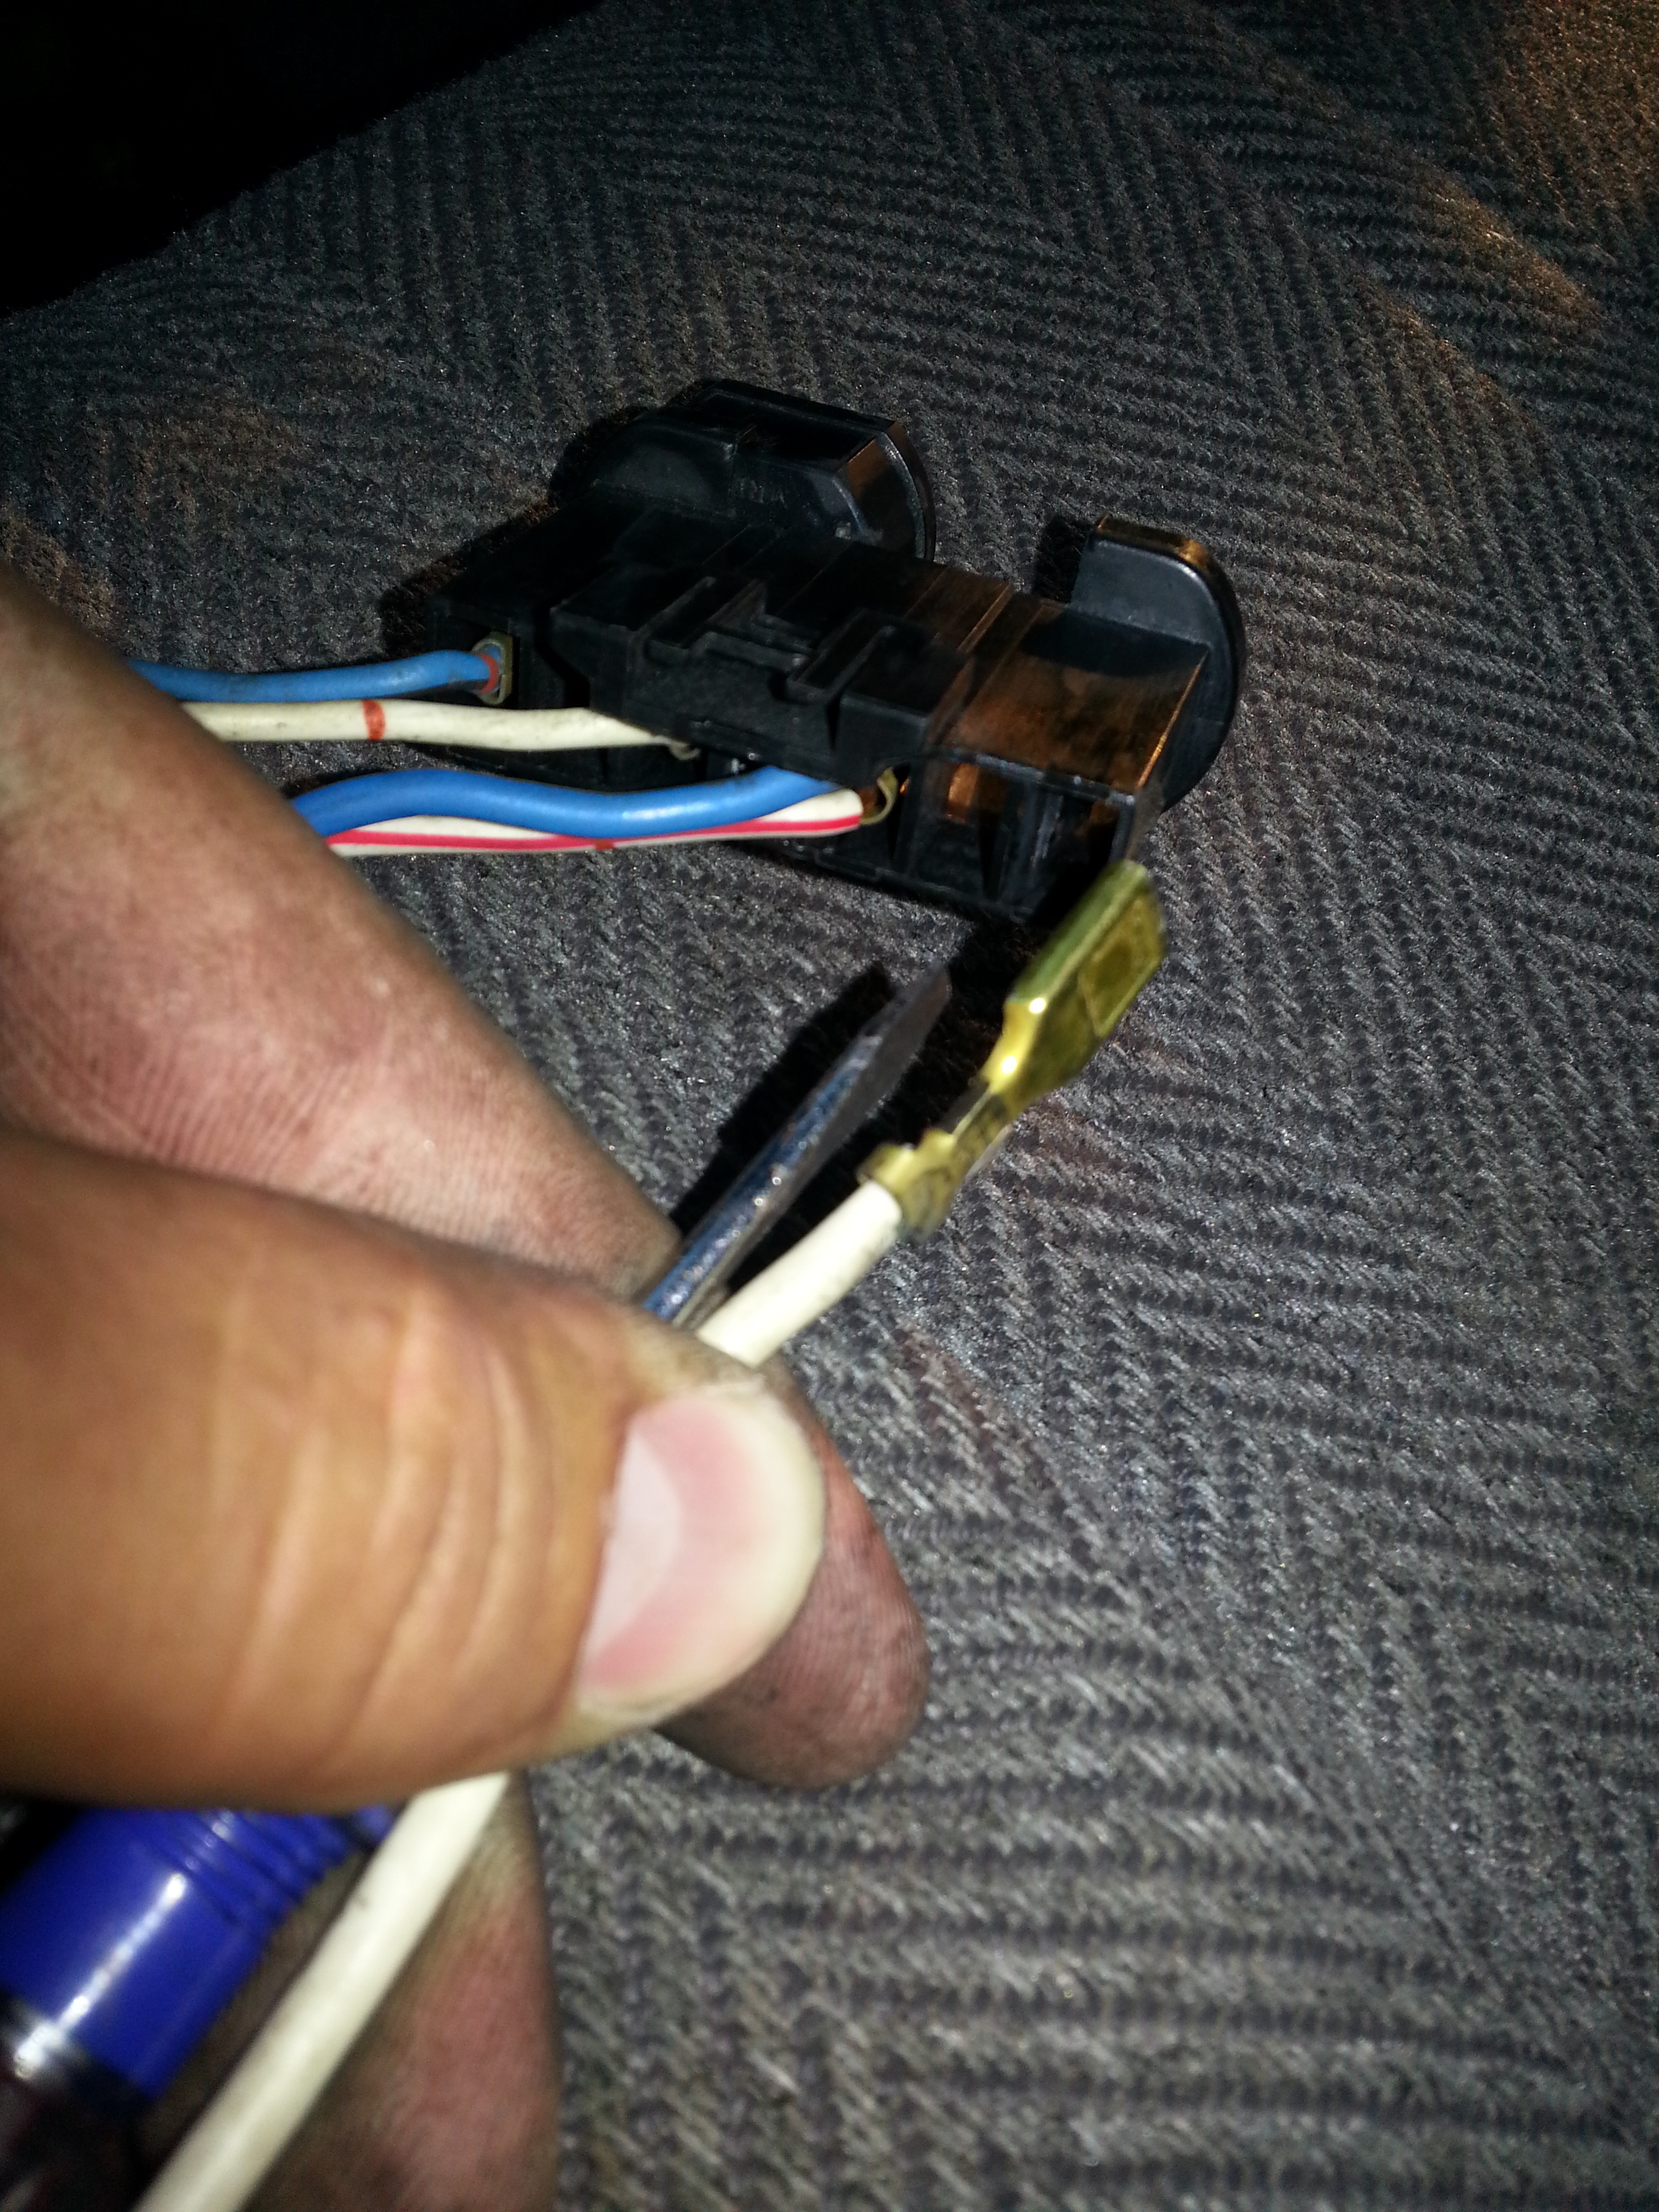
First remove the breaker

Stick a tiny flathead screw driver into the rounded side of the wire tip. the part that gets crimped. not sure how to explain it. But you stick the scre driver dead center then twist to push down the plastic clip on the plastic housing. Twist about 90degrees then pull. It took me about 2-3 times before i was successful at it.

This is how it will come out. I was lucky enough to have all my trucks wires matching these wires. I would definitely recommend you guys remove one at a time and tap in to the breaker piece on your truck so you dont get confused or stick them in the wrong holes. first one done. (the one with the blue/white wires going in the same one)
Alright! I got all the wires installed. They pretty much have 12v running already. the only one you need to connect (or i need to connect i should say) is the White wire. the one being held by my thumb. There wasnt any wire for me to tap into for this one. So I'm going to need to either tap into one of these existing 12v wires. or run one single 12v wire from my additional fuse block with slots that i installed in my engine bay. Still wondering. I wouldnt want to trip one of these breakers or both because i only have one spare.
The ground wires are pretty straight forward. They are the white wires with a solid black line running through it. It should be 2 of them. Those you can just add onto the same ground bolt that bolts into the left side of the driver kick panel. i just over lapped both of mine on top of each other.
EDIT:
I forgot to mention. I didnt finish. I worked from 4-8:30pm but didnt get enough time.
Tomorrow hook up that lone 12v wire and run all the wires neatly on the back side of that dashboard area. i also want to drill out of the body into that door hinge area and remove the doors to drill the 2 holes for the door wiring portion that plugs into the window motor and power mirrors. Id really like to get that dash board on by tomorrow but i think will only have time to do the wiring stuff. i want to put everything back together while the sun is still out so i might have to wait till friday to get the dash back on.

If you answered getting started on the power window/mirror project then you guessed right!
I was gonna get home and take a nap but im so tired of having that box of wires and motors sitting on my room's top shelf. I finally had it. I pulled out the box and figured out what those 3 wires were that i had originally asked in my power window video earlier. IT was actually 2 wires not 3. The 3rd wire was looped and was routed to the relay box. the other 2 wires met up on the passenger side where there were 2 wires matching the same color code/pattern.
Now that i figured that out i was ready to get started!
I started out by removing the entire dash/undershash, center radio bezel dash, speakers, buttons, odometer, AC/heater vents, pretty much everything that would be in the way of me running the wires. It came in handy knowing how to remove the whole dash having done so before when i installed the inclinometer.
To anybody wanting to do this. Do yourself a favor and label every group of screws, bolts, nuts, you take off and where they go. I only had 4 bags but i honestly wish i would have had made 8 ziplocks instead. There are just so many. and i can already tell its gonna be intimidating trying to put everything that i took off back together.

The next thing on the list would be to route the wires and tap into the fuse box. This is the one attached to my power window harness. I need to remove these wires from this plastic housing and push them into my trucks wiring harness.

First remove the breaker

Stick a tiny flathead screw driver into the rounded side of the wire tip. the part that gets crimped. not sure how to explain it. But you stick the scre driver dead center then twist to push down the plastic clip on the plastic housing. Twist about 90degrees then pull. It took me about 2-3 times before i was successful at it.

This is how it will come out. I was lucky enough to have all my trucks wires matching these wires. I would definitely recommend you guys remove one at a time and tap in to the breaker piece on your truck so you dont get confused or stick them in the wrong holes. first one done. (the one with the blue/white wires going in the same one)

Alright! I got all the wires installed. They pretty much have 12v running already. the only one you need to connect (or i need to connect i should say) is the White wire. the one being held by my thumb. There wasnt any wire for me to tap into for this one. So I'm going to need to either tap into one of these existing 12v wires. or run one single 12v wire from my additional fuse block with slots that i installed in my engine bay. Still wondering. I wouldnt want to trip one of these breakers or both because i only have one spare.
The ground wires are pretty straight forward. They are the white wires with a solid black line running through it. It should be 2 of them. Those you can just add onto the same ground bolt that bolts into the left side of the driver kick panel. i just over lapped both of mine on top of each other.

EDIT:
I forgot to mention. I didnt finish. I worked from 4-8:30pm but didnt get enough time.
Tomorrow hook up that lone 12v wire and run all the wires neatly on the back side of that dashboard area. i also want to drill out of the body into that door hinge area and remove the doors to drill the 2 holes for the door wiring portion that plugs into the window motor and power mirrors. Id really like to get that dash board on by tomorrow but i think will only have time to do the wiring stuff. i want to put everything back together while the sun is still out so i might have to wait till friday to get the dash back on.
Last edited by Redeth005; Sep 4, 2013 at 07:52 PM.
Sep 5, 2013 | 05:02 AM
#2093
Thread Starter
Registered User
Joined: Apr 2012
Posts: 2,817
Likes: 2
From: Los Angeles CA
Hello Mark, Thank, and its about time haha. I'm sure Grego is happy that ive finally begun this project after about 1.5years of waiting lol. Can you do me a huge favor. Since i dont have a truck to reference to can you take a picture of your door hinge area with a measuring tape going from top to bottom. I want to see where i need to drill out the holes onto the inner door and on the body side too. There should be 2 sets of wires that go in from the cab into the door.
Lol Now that its a new day and ive gotten some sleep i feel like i might have forgotten some of the parts im gonna need to put back together. Ive never taken the dash apart this far. IT looks like a truck at the junk yard completely stripped. Scary stuff.
Lol Now that its a new day and ive gotten some sleep i feel like i might have forgotten some of the parts im gonna need to put back together. Ive never taken the dash apart this far. IT looks like a truck at the junk yard completely stripped. Scary stuff.
Sep 5, 2013 | 08:55 PM
#2094
Thread Starter
Registered User
Joined: Apr 2012
Posts: 2,817
Likes: 2
From: Los Angeles CA
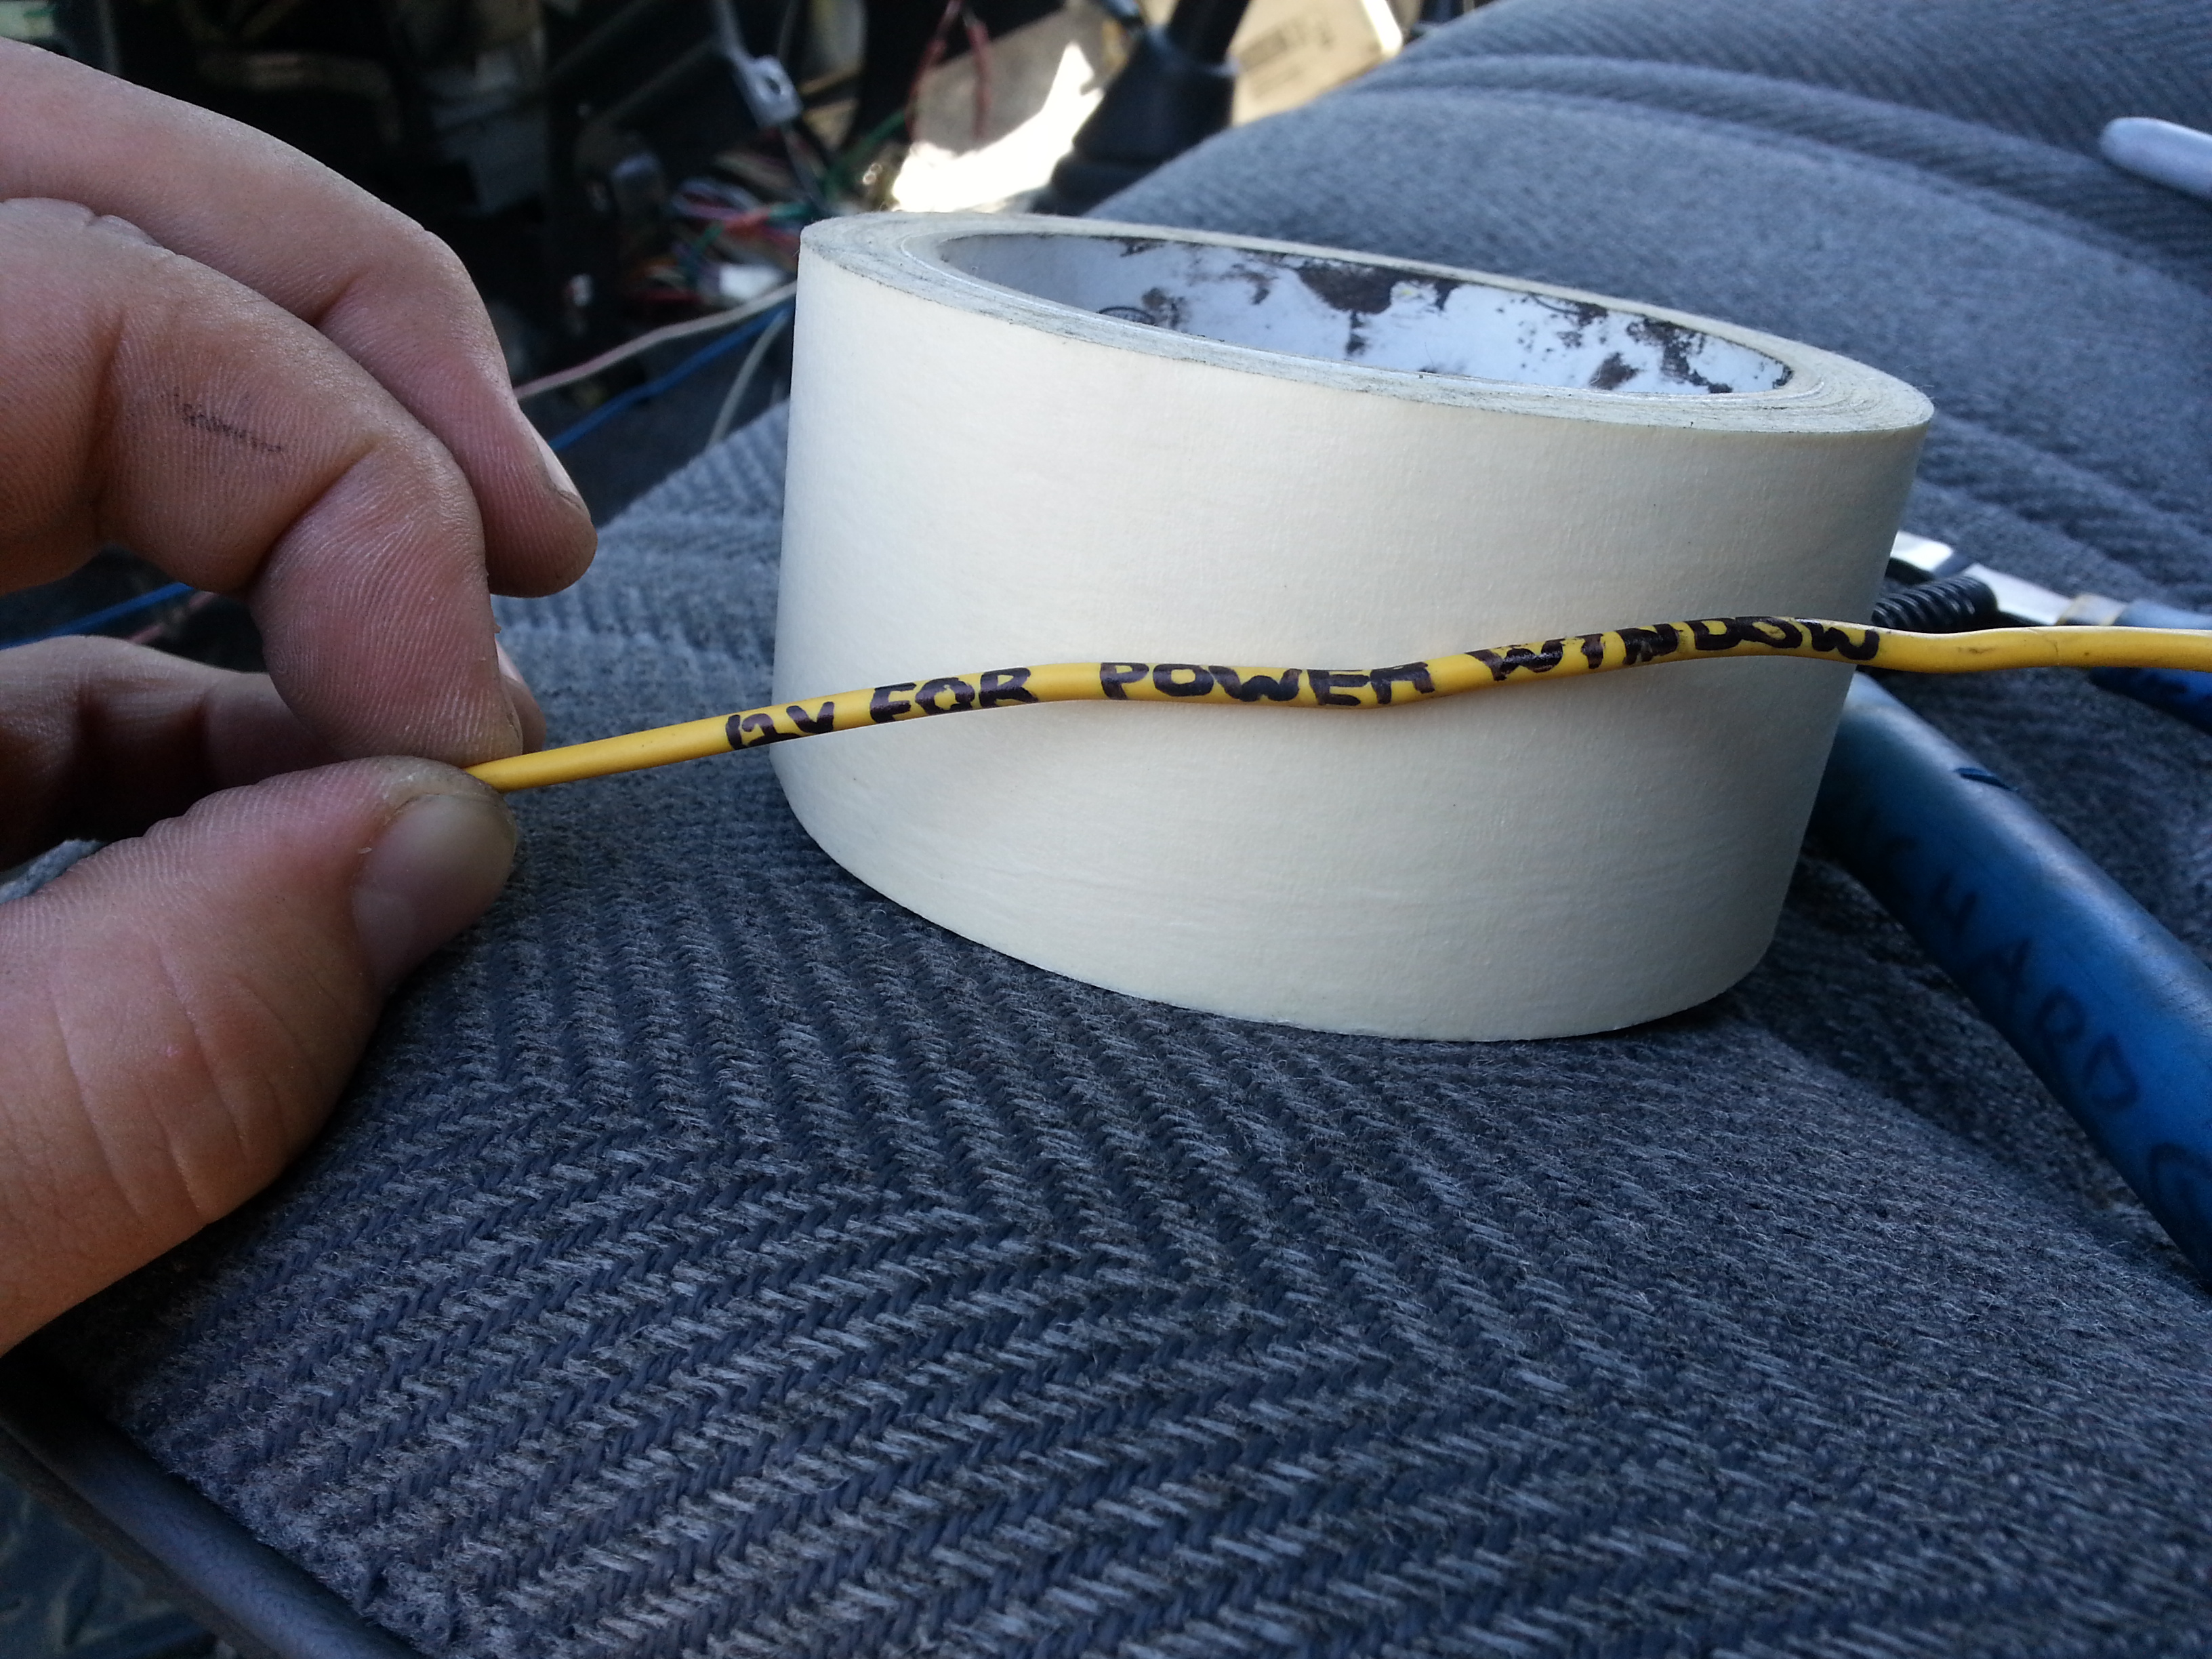
Alright, so i decided to just run a 2nd 12v wire for the 2nd power source. I made sure to label my wire for future reference. I will also be labeling it on the other end where it will hook up to my extra battery fuse block in the engine bay.
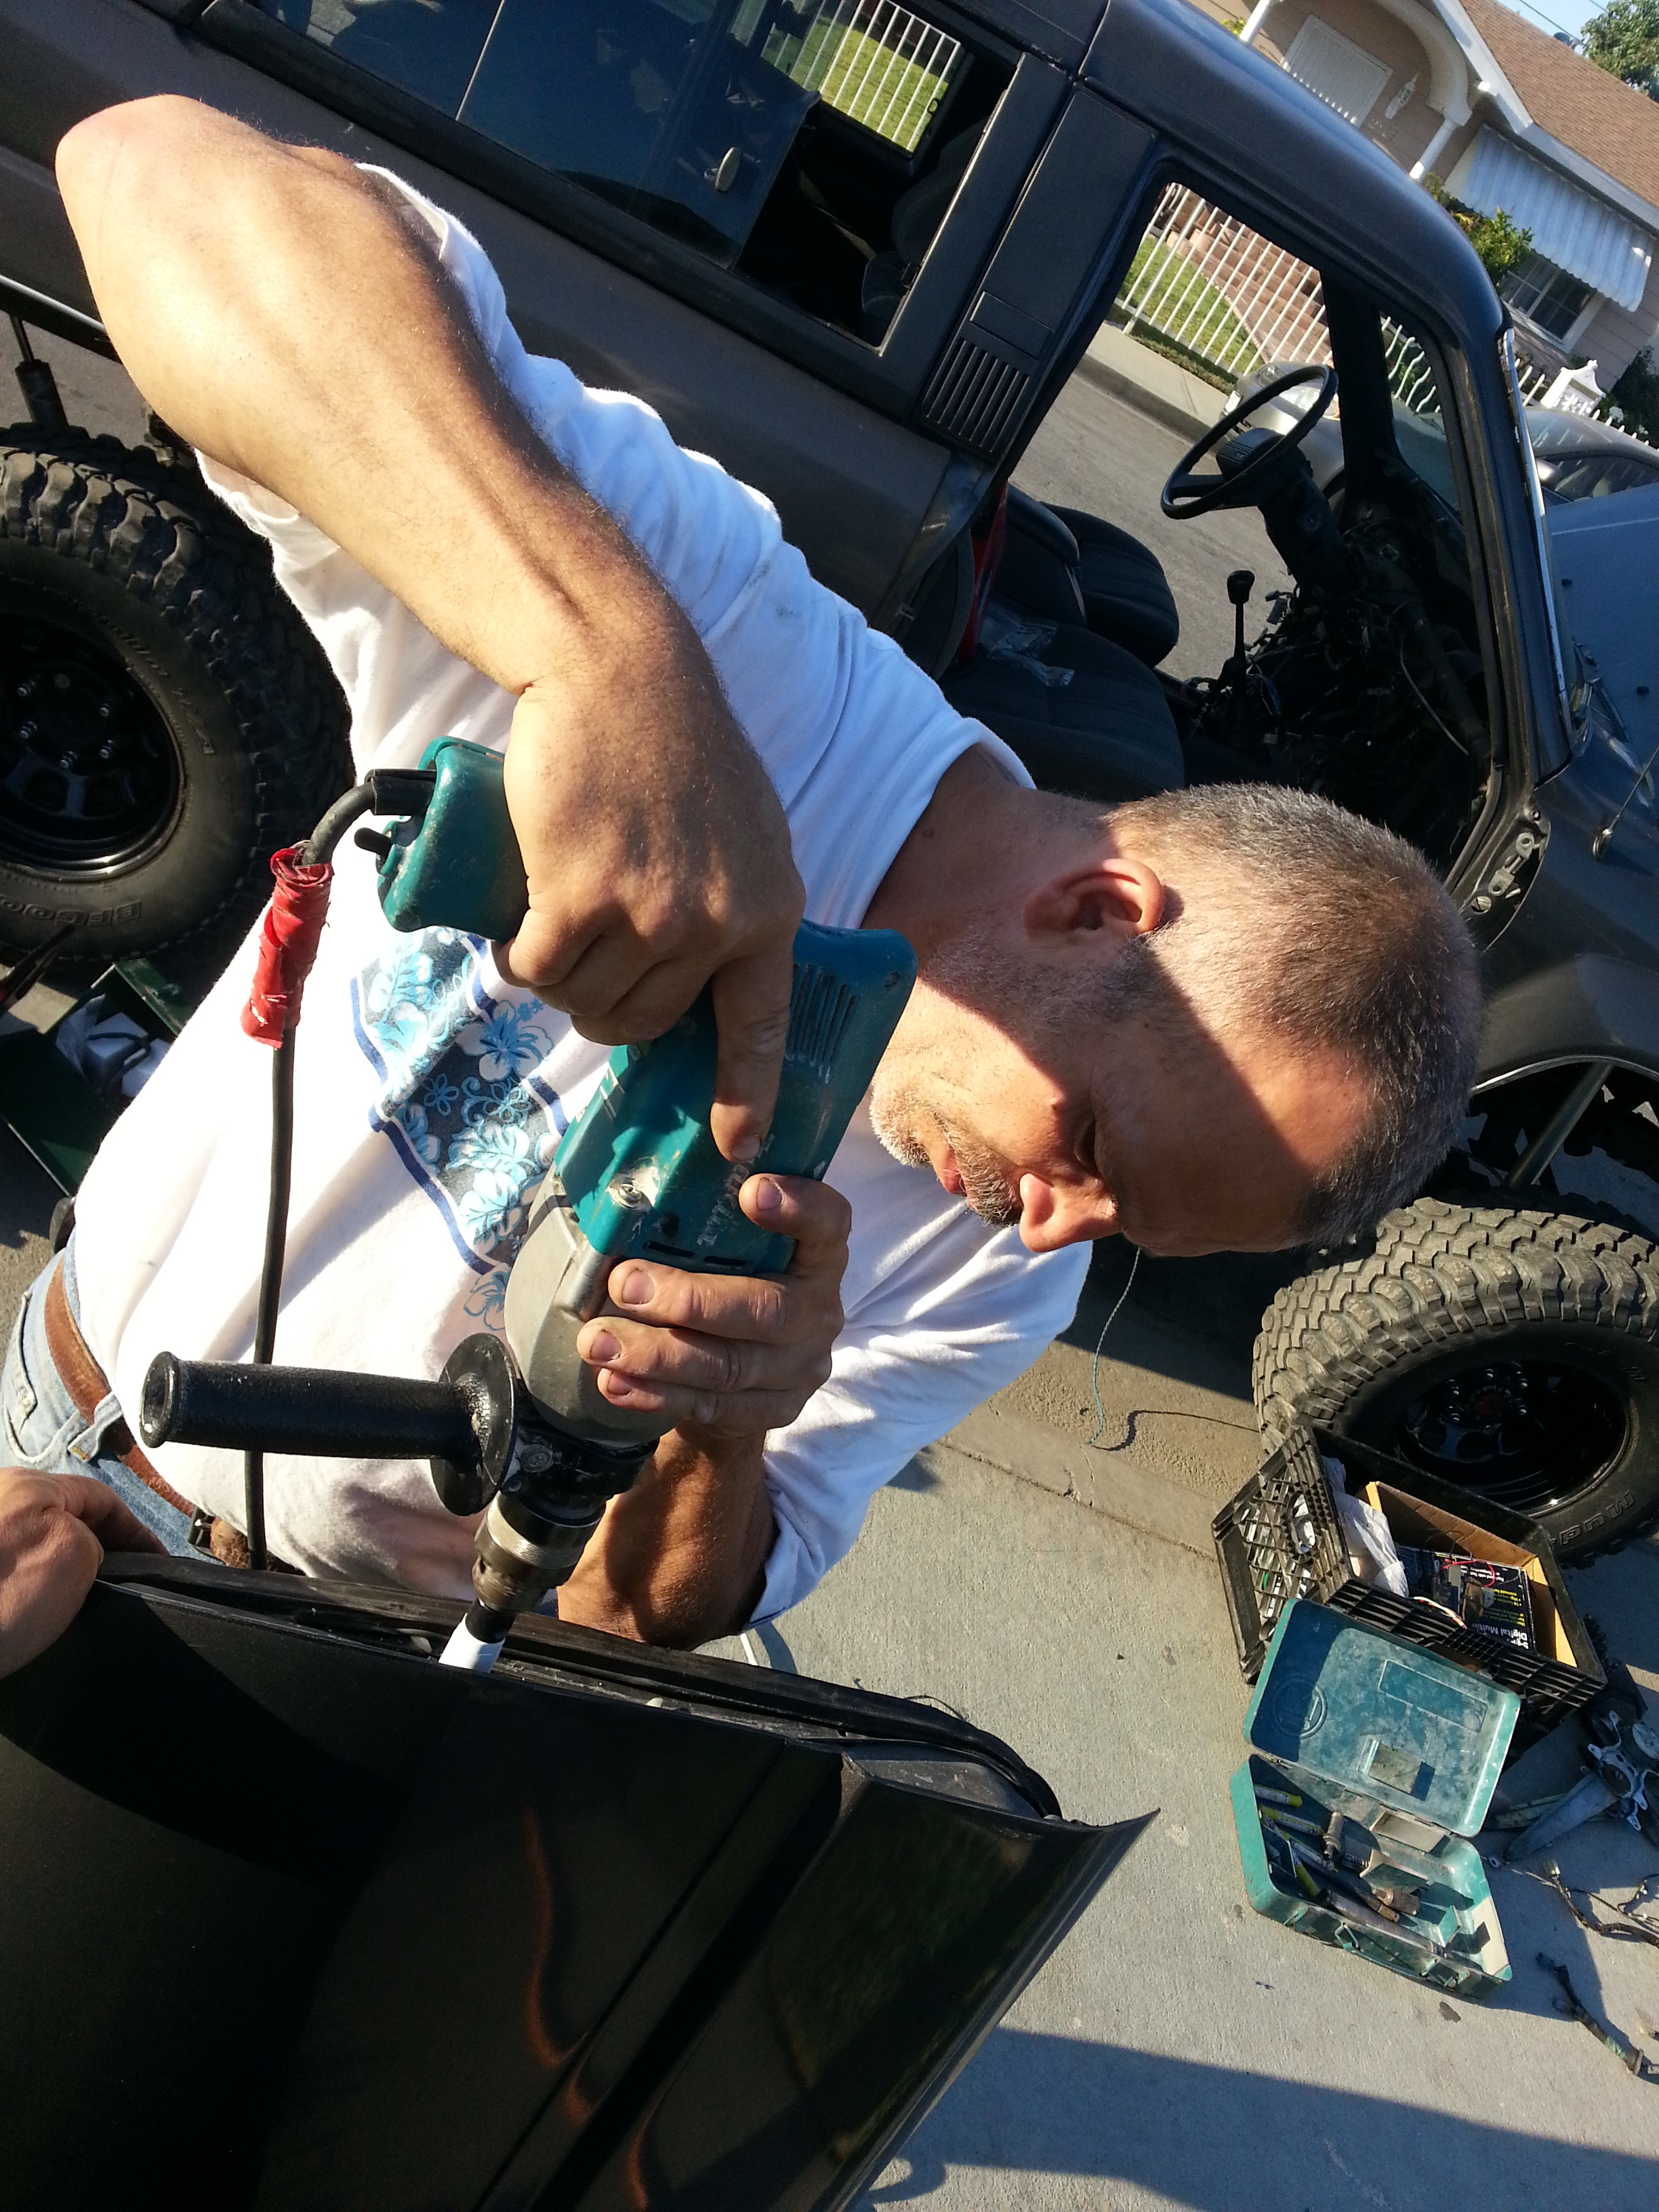
Off come the doors!
Made the holes in the premade punch area made from the factory on the doors.
(note in this picture the bottom is the top side of the door.)
Used some metal hole cutter drill tips The size is 1" but i notice that one was a bit too loose. So i used a 7/8" cutter and that had the best result. Had my dad help me out on this project!
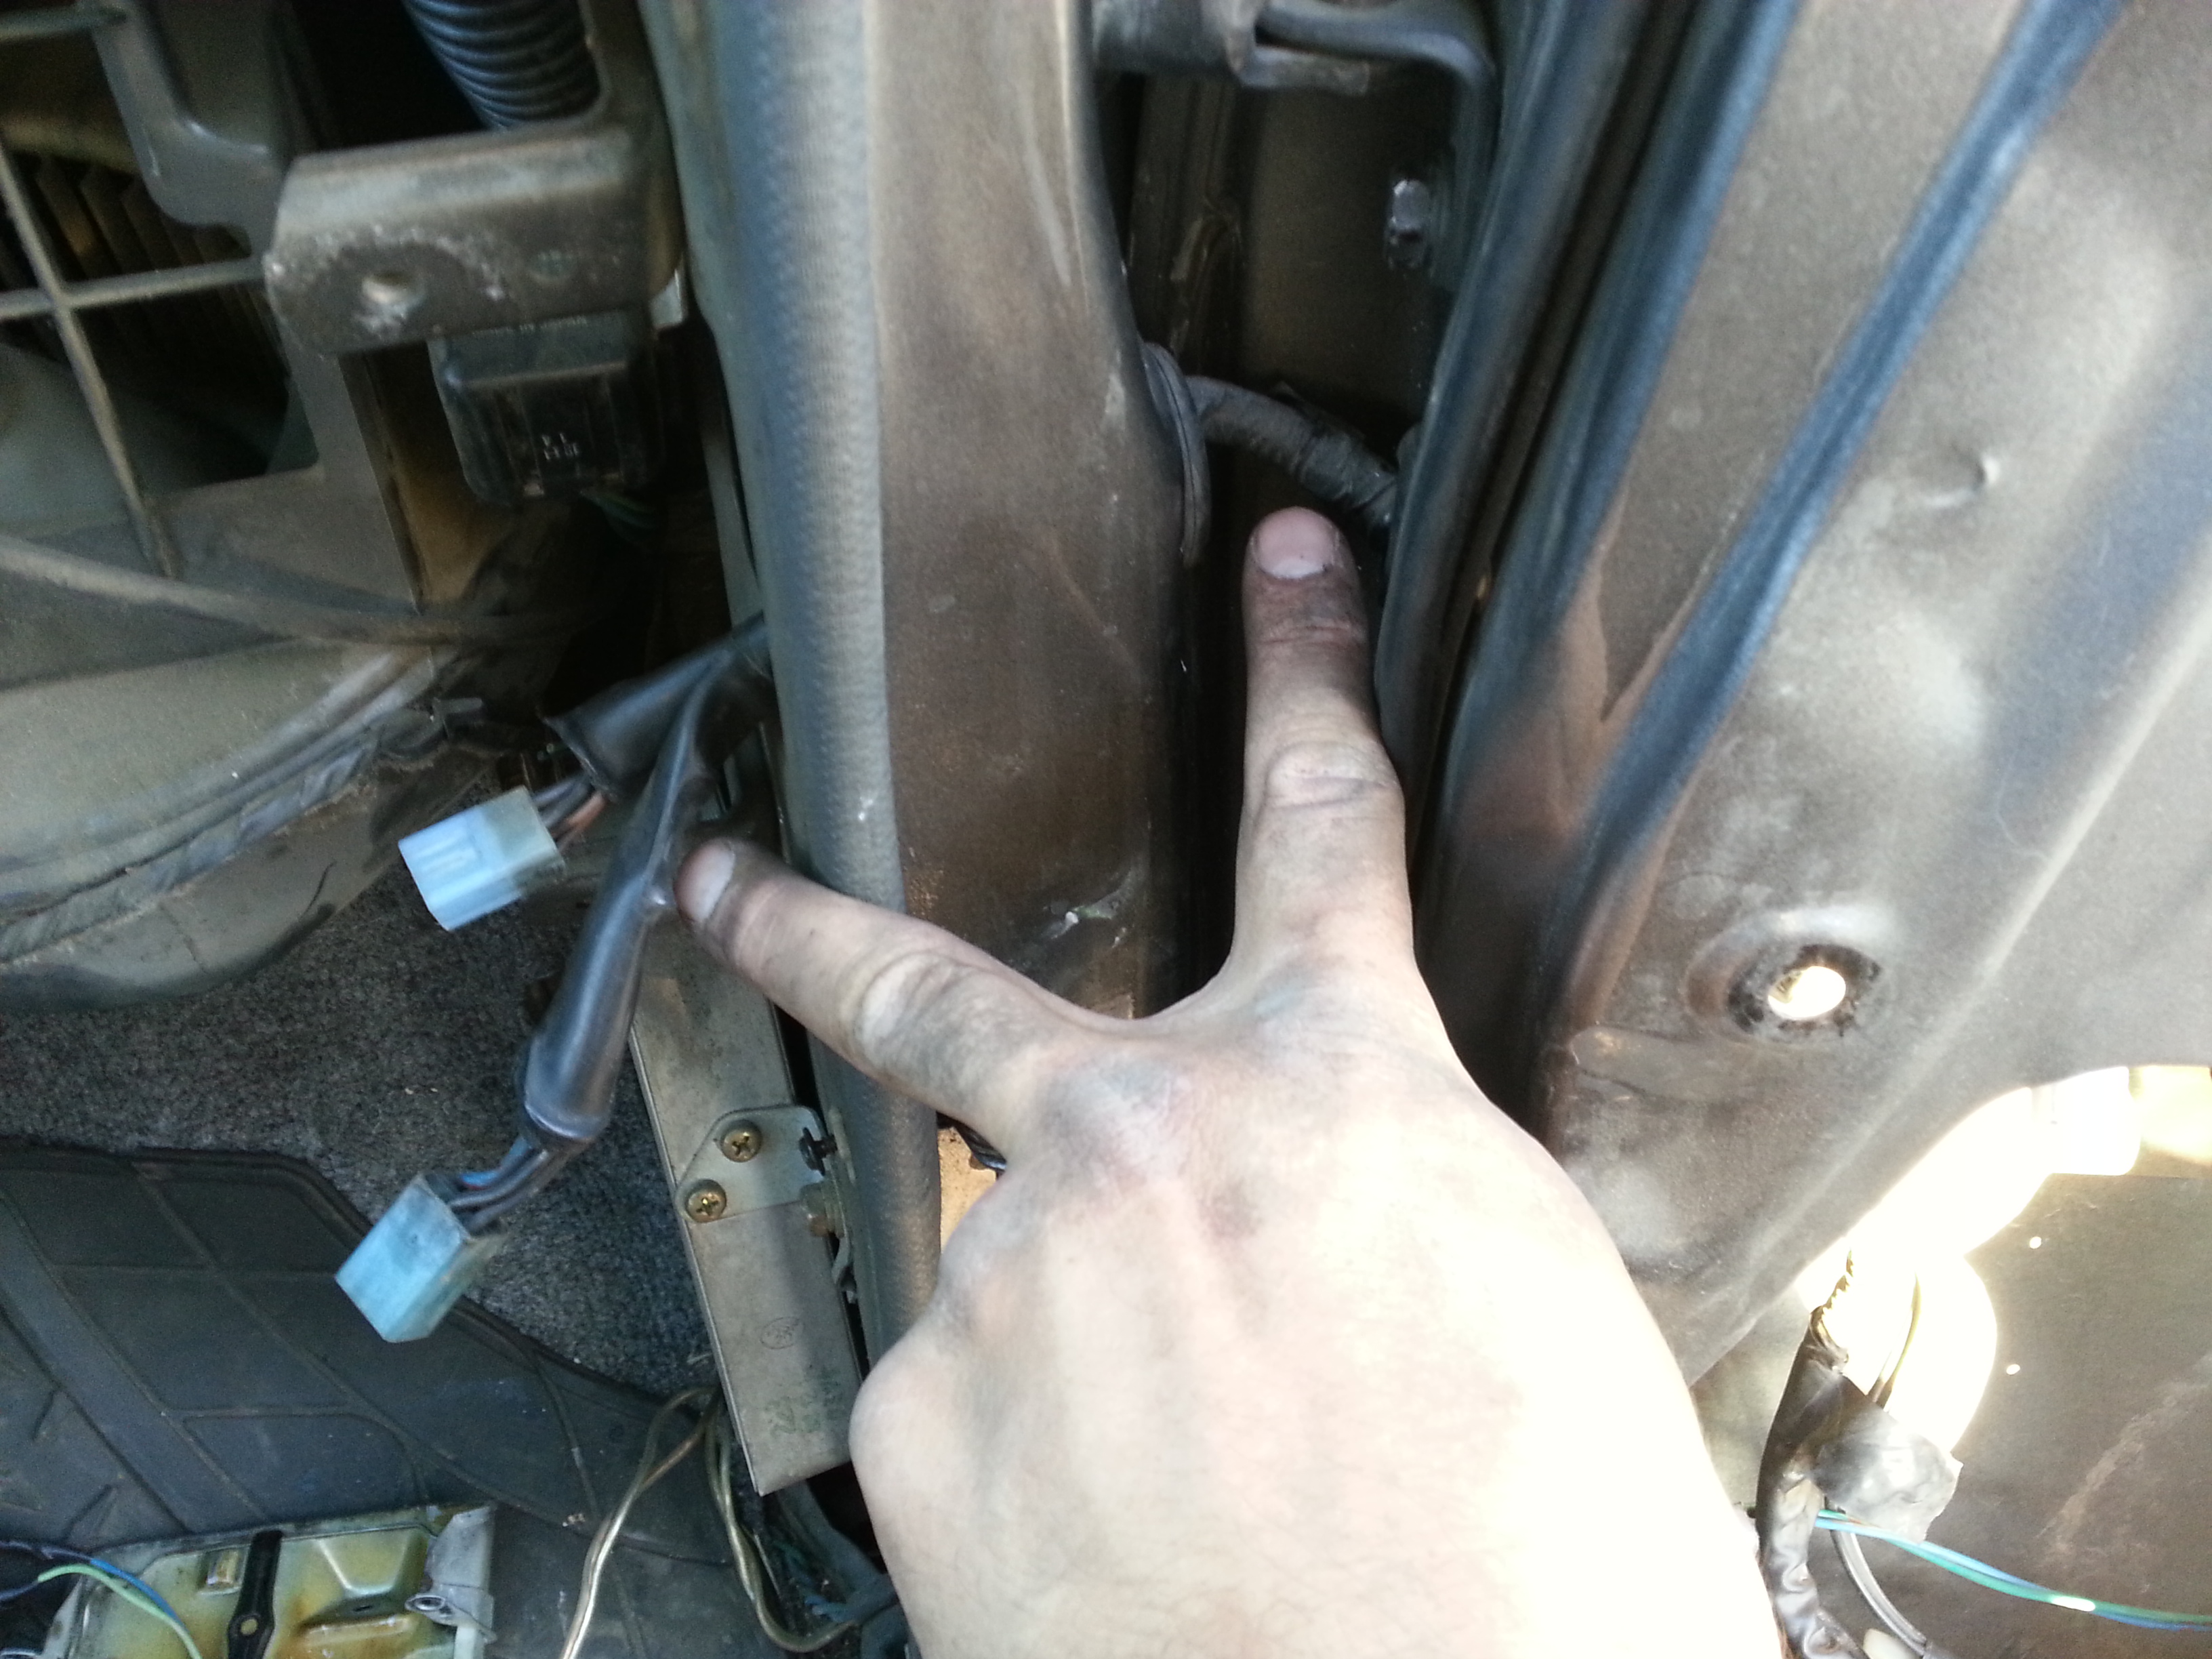
Made another hole on the truck wall.

Ran my door wires through the hole.
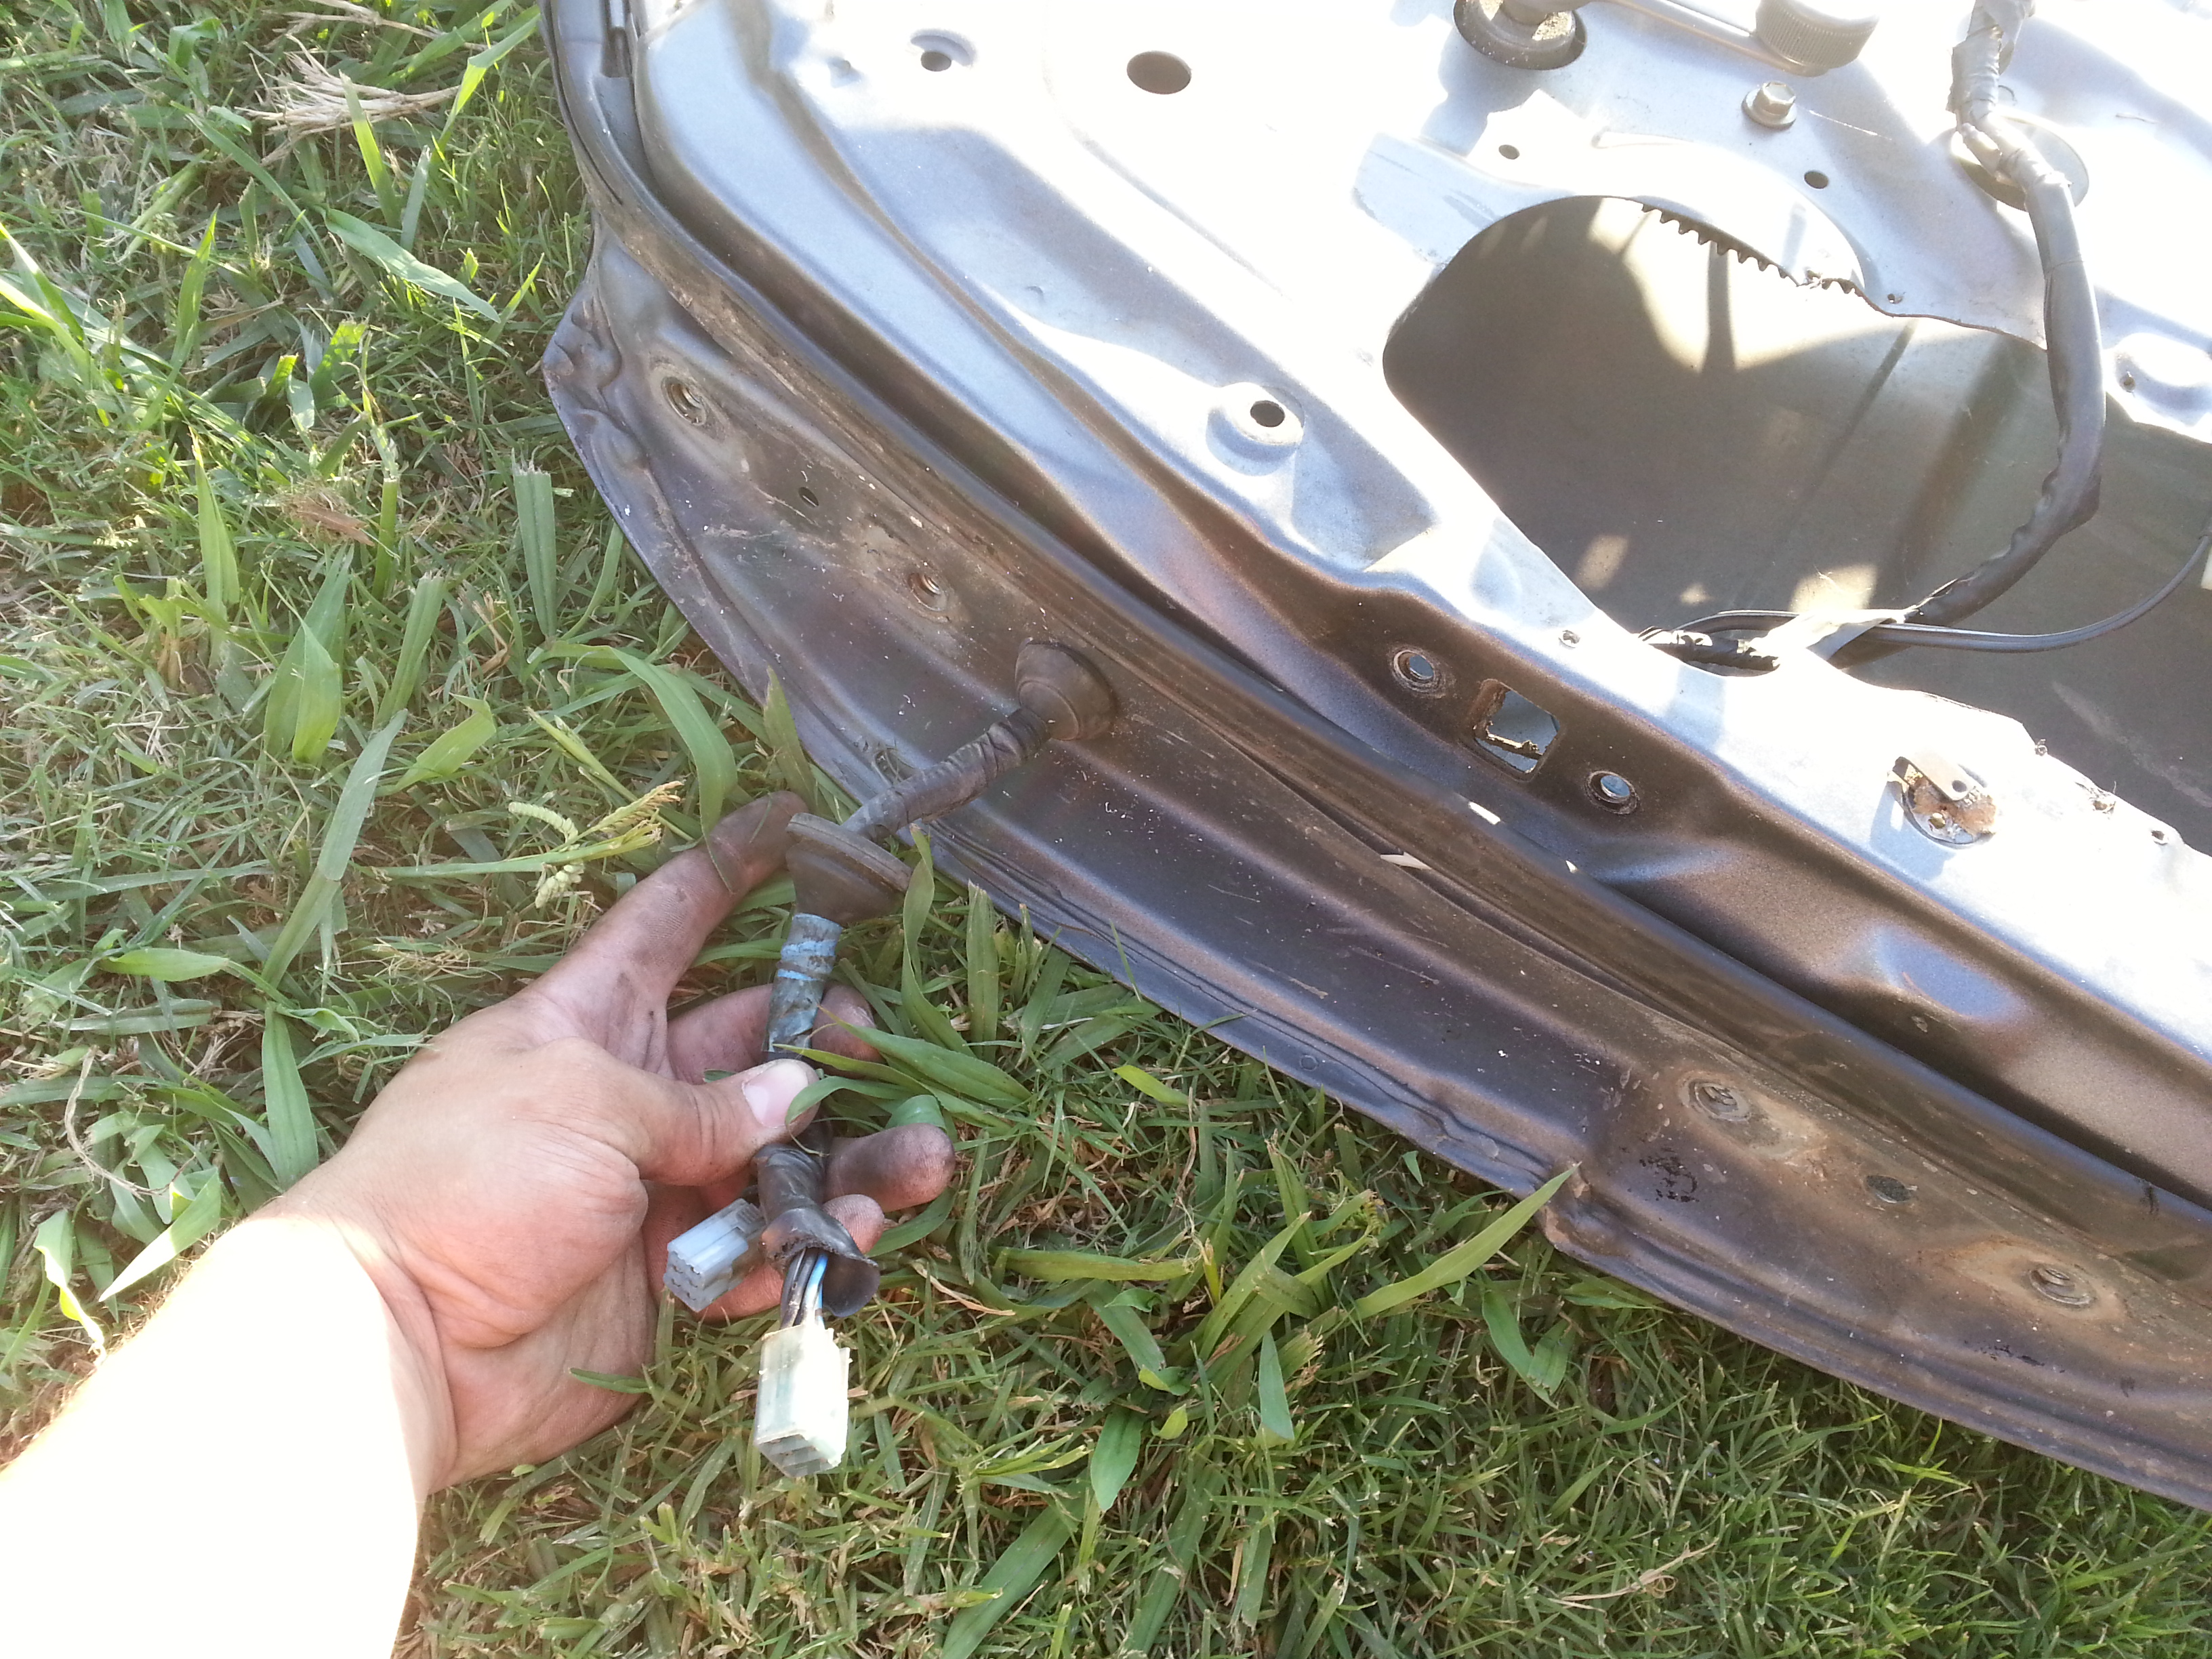
There We go. Wires are all ran from the door into the cab.
All the wires kept getting tangled so i walked the wires out of the cab and pulled on a few loose wires to even out the slack and then used electrical tape as protection to the window/mirror wire harness. All set and ready to be ran over to the passenger side.
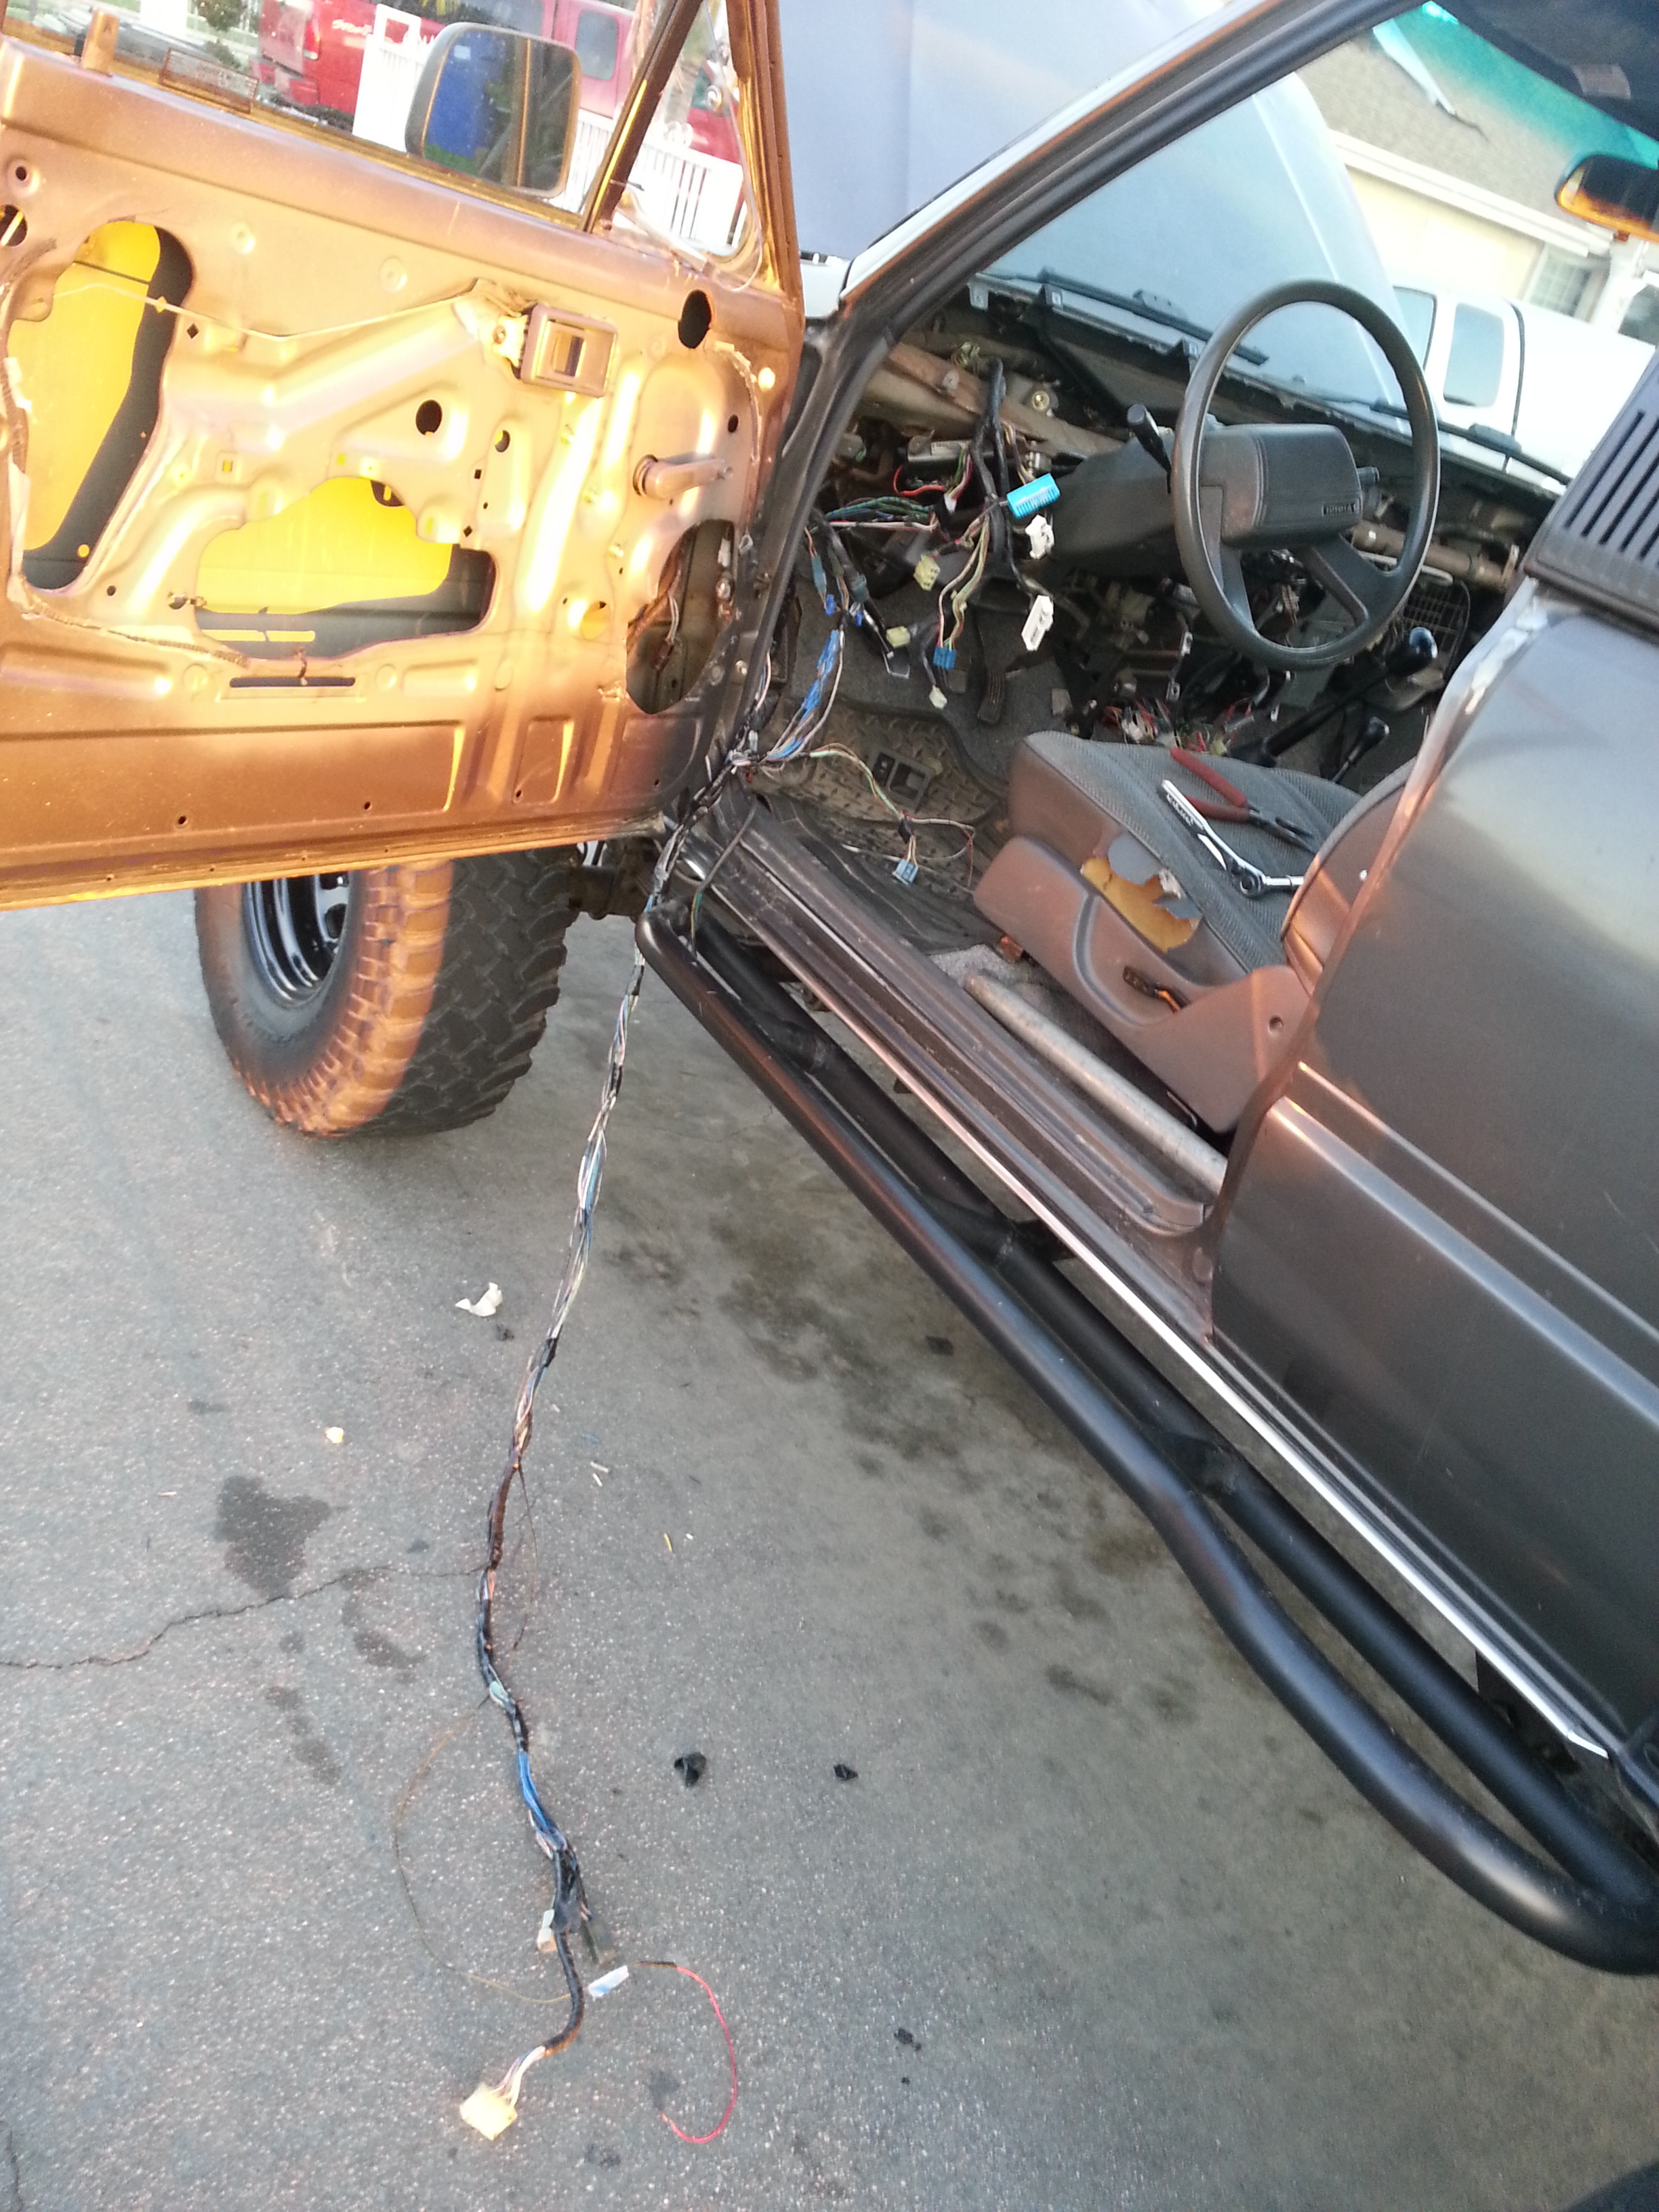
I ran the wires along the factory wire harness in my truck. (behind the Defroster plastic.)
Also I tapped my ignition wire(black with yellow line) onto the same power source for the power mirrors. I used the multimeter first to make sure that the power only turns on when my key turns the ignition and sure enough i get 12.37v when on and 0 when off. So now i have the switched power working.
I didnt get pix after the sun went down. But i also managed to install the window motors.
I did a test of my install after the installation and everything worked flawlessly. Windows are a bit slow on the way up but im sure that is normal right? I began to put my refurbished door panels on but ran into some clip problems; plus i couldnt see anything. So i just cleaned up, and took everything inside.
Tomorrow i will install that extra 12v wire onto my extra fuse block slot. Wondering what size fuse i should use for that. I had in mind the blue 15a? what do you think?
If i get enough time i would really like to put everything back together. I know its going to be a challenge but i would really like to pick up Faby for our friday night date in this truck and surprise her with the power windows. and maybe annoy her a bit by locking her window control with the windows down for a minute lol.
Hope you guys liked this great update. I'm really proud of myself for pulling this one off. And btw i dont know if you guys remember me saying a while back ago but when i first started out this project and my dad would see me sorting out the wires he would just look at me like ...wth??? You think you are going to be able to do this? I think you should take it to an auto electician instead. And although he was only looking out for me because he wanted to ensure the truck was wired correctly it actually felt bad a little because he didnt have the confidence in me. Well now i'm happy because i was able to do it and make it work! I dont know. I just always like proving people wrong. and this is one of those cases when i think i'll sure show my dad that i can do it.

Off come the doors!

Made the holes in the premade punch area made from the factory on the doors.
(note in this picture the bottom is the top side of the door.)

Used some metal hole cutter drill tips The size is 1" but i notice that one was a bit too loose. So i used a 7/8" cutter and that had the best result. Had my dad help me out on this project!

Made another hole on the truck wall.

Ran my door wires through the hole.

There We go. Wires are all ran from the door into the cab.

All the wires kept getting tangled so i walked the wires out of the cab and pulled on a few loose wires to even out the slack and then used electrical tape as protection to the window/mirror wire harness. All set and ready to be ran over to the passenger side.

I ran the wires along the factory wire harness in my truck. (behind the Defroster plastic.)
Also I tapped my ignition wire(black with yellow line) onto the same power source for the power mirrors. I used the multimeter first to make sure that the power only turns on when my key turns the ignition and sure enough i get 12.37v when on and 0 when off. So now i have the switched power working.
I didnt get pix after the sun went down. But i also managed to install the window motors.
I did a test of my install after the installation and everything worked flawlessly. Windows are a bit slow on the way up but im sure that is normal right? I began to put my refurbished door panels on but ran into some clip problems; plus i couldnt see anything. So i just cleaned up, and took everything inside.
Tomorrow i will install that extra 12v wire onto my extra fuse block slot. Wondering what size fuse i should use for that. I had in mind the blue 15a? what do you think?
If i get enough time i would really like to put everything back together. I know its going to be a challenge but i would really like to pick up Faby for our friday night date in this truck and surprise her with the power windows. and maybe annoy her a bit by locking her window control with the windows down for a minute lol.
Hope you guys liked this great update. I'm really proud of myself for pulling this one off. And btw i dont know if you guys remember me saying a while back ago but when i first started out this project and my dad would see me sorting out the wires he would just look at me like ...wth???
You think you are going to be able to do this? I think you should take it to an auto electician instead. And although he was only looking out for me because he wanted to ensure the truck was wired correctly it actually felt bad a little because he didnt have the confidence in me. Well now i'm happy because i was able to do it and make it work! I dont know. I just always like proving people wrong. and this is one of those cases when i think i'll sure show my dad that i can do it.
Sep 5, 2013 | 11:36 PM
#2095
Hey buddy, looking awesome! I apologize for not being able to get you those pictures as soon as I'd like to have... I got back pretty late and then I have to head over and prep for some stuff tomorrow. Now I'm back and I'm going to crash out after answering some stuff on my thread.
I posted up a picture of the tail light, and I'm just shocked how good the quality they are for like 20 bucks!
I think I posted the link but in case I didn't if you like it let me know, I will gladly posted up here for you. I know it's not critical but it sure would be nice to drive behind you and see a nice set of clean tail lights. I know that has to annoy you. Like I said until you can order some you're welcome to use that one on the passenger side.
That's sweet man, and now you just need some AC and the whole creature comfort package will be set! Hahaha
Sep 6, 2013 | 12:02 PM
#2096
Registered User
Joined: Jul 2012
Posts: 2,365
Likes: 4
From: Idaho
tooo cool man very awesome be nice to fabby waves finger at ya
now got a question is the windows your puttin in are they like the 90's where you kill the truck but for a few after you can still roll up the windows or till someone opens a door?
now got a question is the windows your puttin in are they like the 90's where you kill the truck but for a few after you can still roll up the windows or till someone opens a door?
Sep 6, 2013 | 12:41 PM
#2097
Registered User

Joined: Jan 2010
Posts: 3,795
Likes: 33
From: Bloodymore
He'll need a module to control that. It'd be real slick. Or just make them 'hot' without the key. But if you don't start the truck every few days it would kill the battery. I required mine this way, 4crawler has a how to. I'm going to wire my window lock to disconnect windows from battery so I don't drain my battery. Course I have two batteries.
Sep 7, 2013 | 02:49 PM
#2098
Thread Starter
Registered User
Joined: Apr 2012
Posts: 2,817
Likes: 2
From: Los Angeles CA
Hey buddy, looking awesome! I apologize for not being able to get you those pictures as soon as I'd like to have... I got back pretty late and...
I posted up a picture of the tail light, and I'm just shocked how good the quality they are for like 20 bucks!
I think I posted the link but in case I didn't if you like it let me know, I will gladly posted up here for you. I know it's not critical but it sure would be nice to drive behind you and see a nice set of clean tail lights. I know that has to annoy you. Like I said until you can order some you're welcome to use that one on the passenger side.
That's sweet man, and now you just need some AC and the whole creature comfort package will be set! Hahaha
Ha I know my rear tail lights have annoyed you since i first me you haha! Dont get me wrong man. I want to change them out. Its just that i keep finding cool things that i can do with my money instead so that swap is always delayed lol I'll definitely buy a pair soon though. Because they do annoy me too. Especially because im slowly making my truck look clean as heck and yet i still have 2 faded, patched up, and cracked tail light covers hahaha
Mark I know this past summer wasnt nearly as hot as last year's summer but i definitely need that Air conditioning to work on my truck. My last truck never had AC and since then ive driven my corolla for the past 5 years and lets just say that i have been a bit spoiled and came to love that AC feature haha.
I need to make an appointment with your guy out in San Pedro and get this baby working once and for all. It'll definitely come in handy for next summer. and the next Tierra Del Sol desert trip.
Will To answer your question on the windows YES they do have enough juice for about 30-40 seconds or so after i turn off my truck. I honestly didnt even know that was gonna happen. But after reading this post i went back out to the truck to test it out and yea it works. WOOT

He'll need a module to control that. It'd be real slick. Or just make them 'hot' without the key. But if you don't start the truck every few days it would kill the battery. I required mine this way, 4crawler has a how to. I'm going to wire my window lock to disconnect windows from battery so I don't drain my battery. Course I have two batteries.
Either way. I am not sure i would want my windows to have a constant power to them. I my city isnt too bad but my city is a bit close to other areas not so nice. and that feature would give crooks an easy way into my truck.
I also thought about doing something like what you last mentioned and running a switched power to the ignition wire. This wait i can just flip the switch while the truck is off and it will still work even without the keys. I can still do this if i wanted to it would simply be to reroute that wire. I like that idea for the rear window. Since we like to sleep in the rear of the truck. This way we can climb in through the back of the truck and turn that switch on then roll it up. Definitely beats climbing into the cab and rolling it up with your keys in the ignition then climbing over from the front seat into the back.
I see the convenience more in the night time when i gotta use my outhouse instead. Jumping over to the front seat is the last thing i wanna do. haha
Thanks for that idea. I might have to try something out like that.
---------------------------------------------------------------------------------------------
Alright guys i have an update coming for you guys. gonna begin typing it out.
Sep 7, 2013 | 03:50 PM
#2100
Thread Starter
Registered User
Joined: Apr 2012
Posts: 2,817
Likes: 2
From: Los Angeles CA
Power windows finished!
Alright guys. Yesterday after work i jumped back to work on the project.
I connected the motors and installed my refurbished door panels. I refurbished these panels a few months ago.
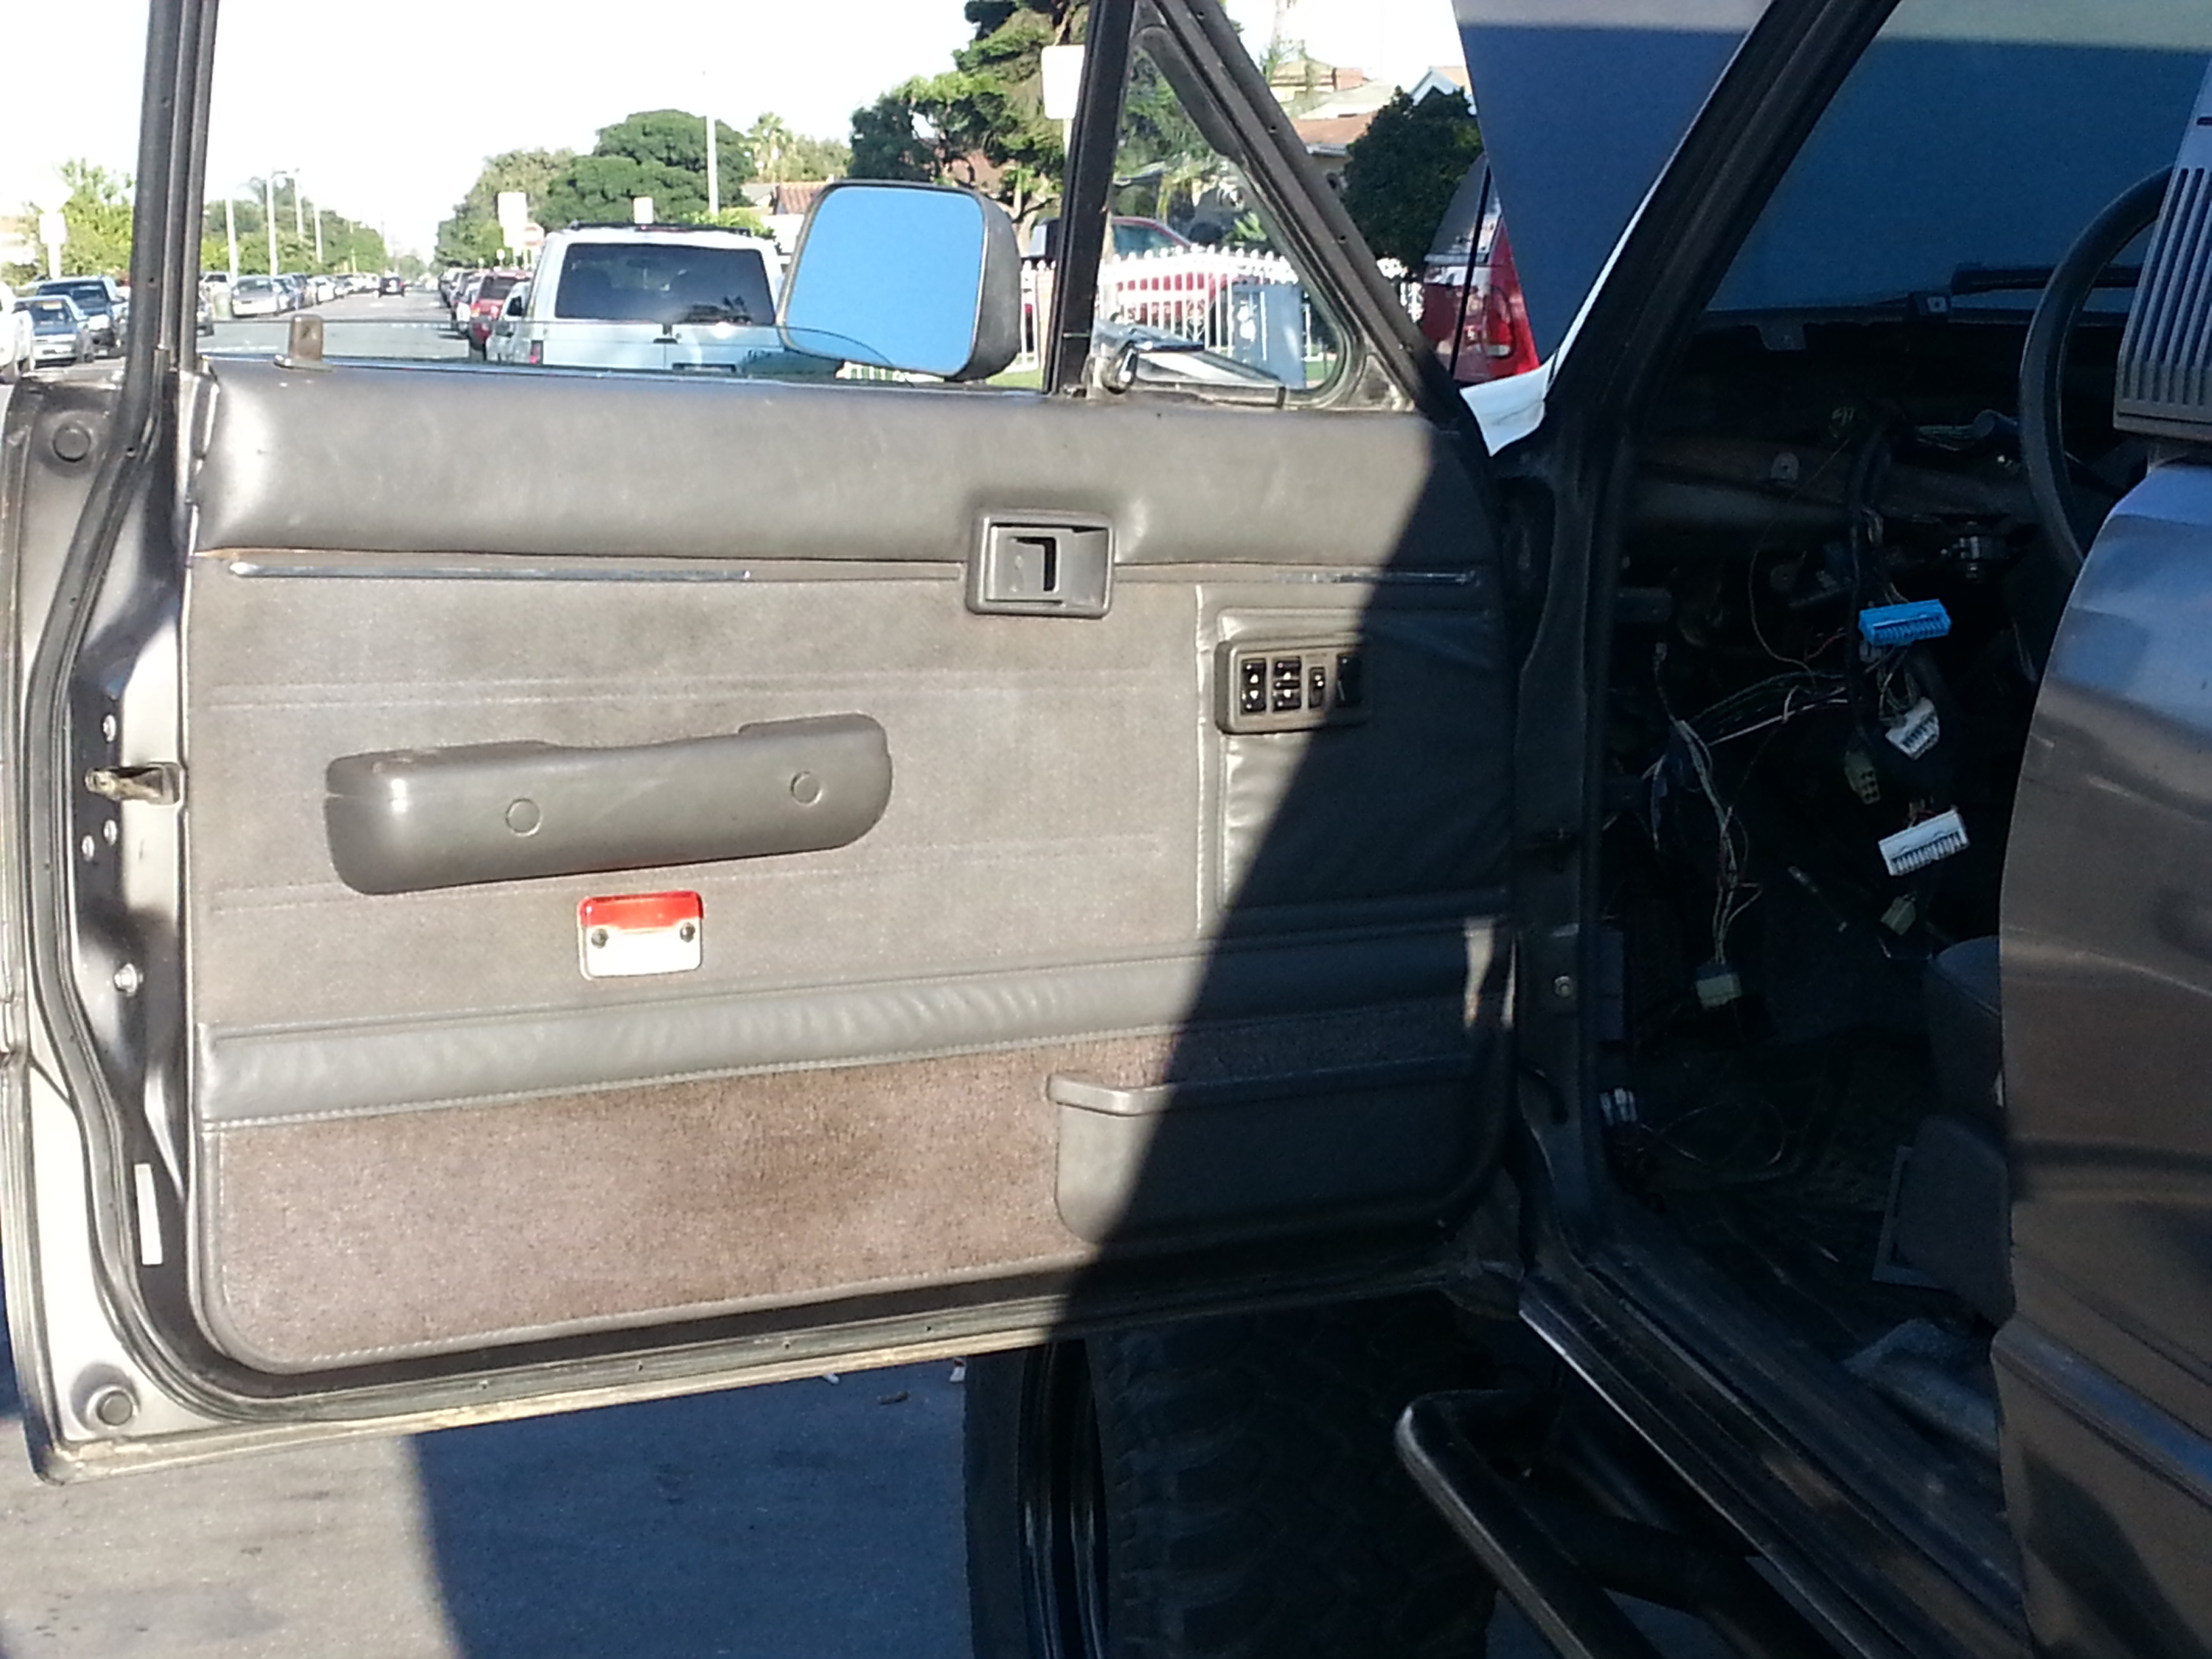
I double checked the power windows and passenger mirror to make sure everything was connected correctly and in working order. After seeing everything worked properly i began putting the whole dash back together
Faby arrived sometime during this time to wash her truck and help me out because the sun was starting to go down. So she held the flashlights and powered lights up for me as the sun was going down.
I finished puttting everything back together at about 09:00pm. Then i go to roll up my Windows so we can put all my tools away and as i press the buttons i had no response! I double checked my wires and engine bay fuse box where i ran my 12v wire to. everything was connected properly. I had no clue what it was. Well I was so darn frustrated that i just took the door panels off and un clipped the motors. used a wire and connected 12v and ground to the battery and rolled them up manually by touching the contacts like this.
I was too frustrated to deal with it. I had already spent 4.5 hours on it. i just left it the way it was till this morning.
--------------------------------------------------------------------------------------
This morning i began taking off the dashboard and i got half way when i wanted to test it out one last time. so i turned the key to the on postion and i noticed that my cigarette lighter light is off. i thought it was odd. so i changed out the fuse and what do you know i blew again... I grabbed my multimeter and pulled off the relay box to my power windows/mirror, andchecked the contacts for the ground and the one of the two power wires and seen that yes there is power. Then when i checked the ignition wire that turns on the power window relay box i seen that i didnt have power going to it.
So i took apart my cigarette lighter and realized that the 2 small washers in there(the white non-conductive washer and the smal metal washer were placed on the inside of the cigarette lighter. So of course my fuse was gonna keep blowing... my 12v and ground were touching. So i put the cigarette lighter back together the correct way. Then i swapped that fuse again. and bam! the light works! So i took the multimeter and checked the wires again and all was fine. I plugged in that relay box again and tested out all the functions and everything worked properly i even fired up the engine to make sure all was good and it works good now. So i just reassembled the whole dash for the 2nd time.
Anyway here are pix of my door panels and dash all put back together. I'll record a video for you guys later.
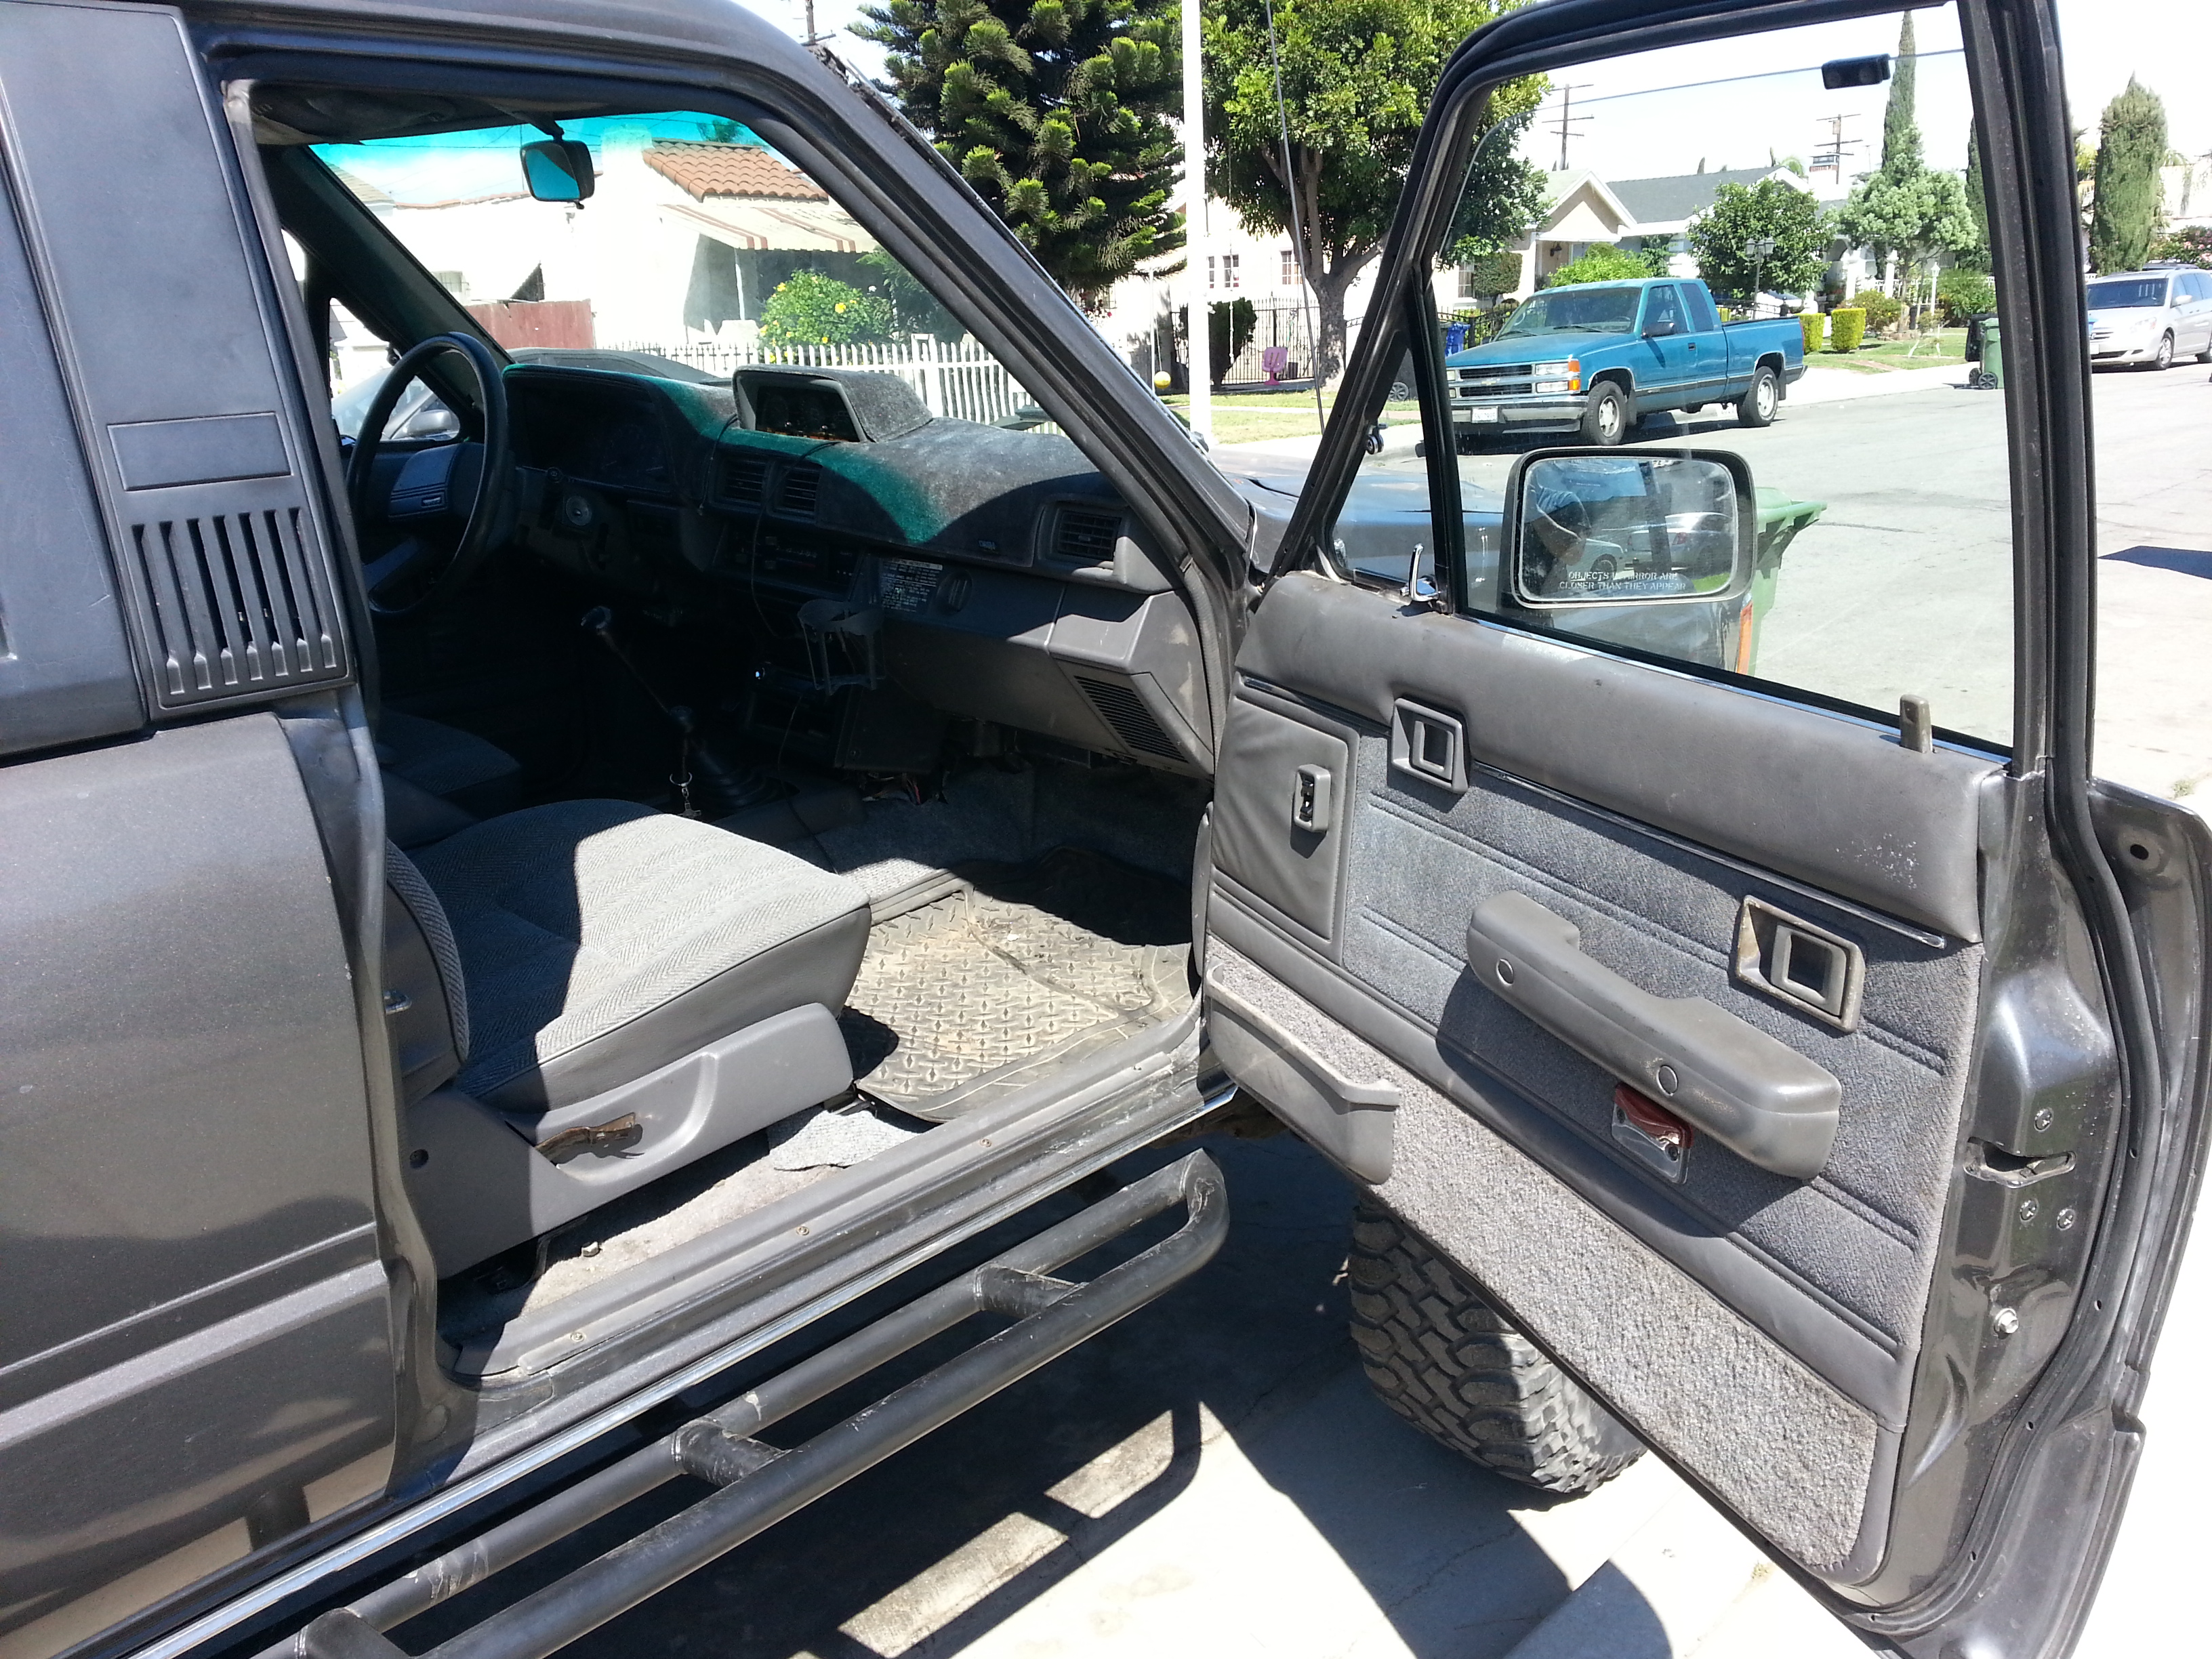
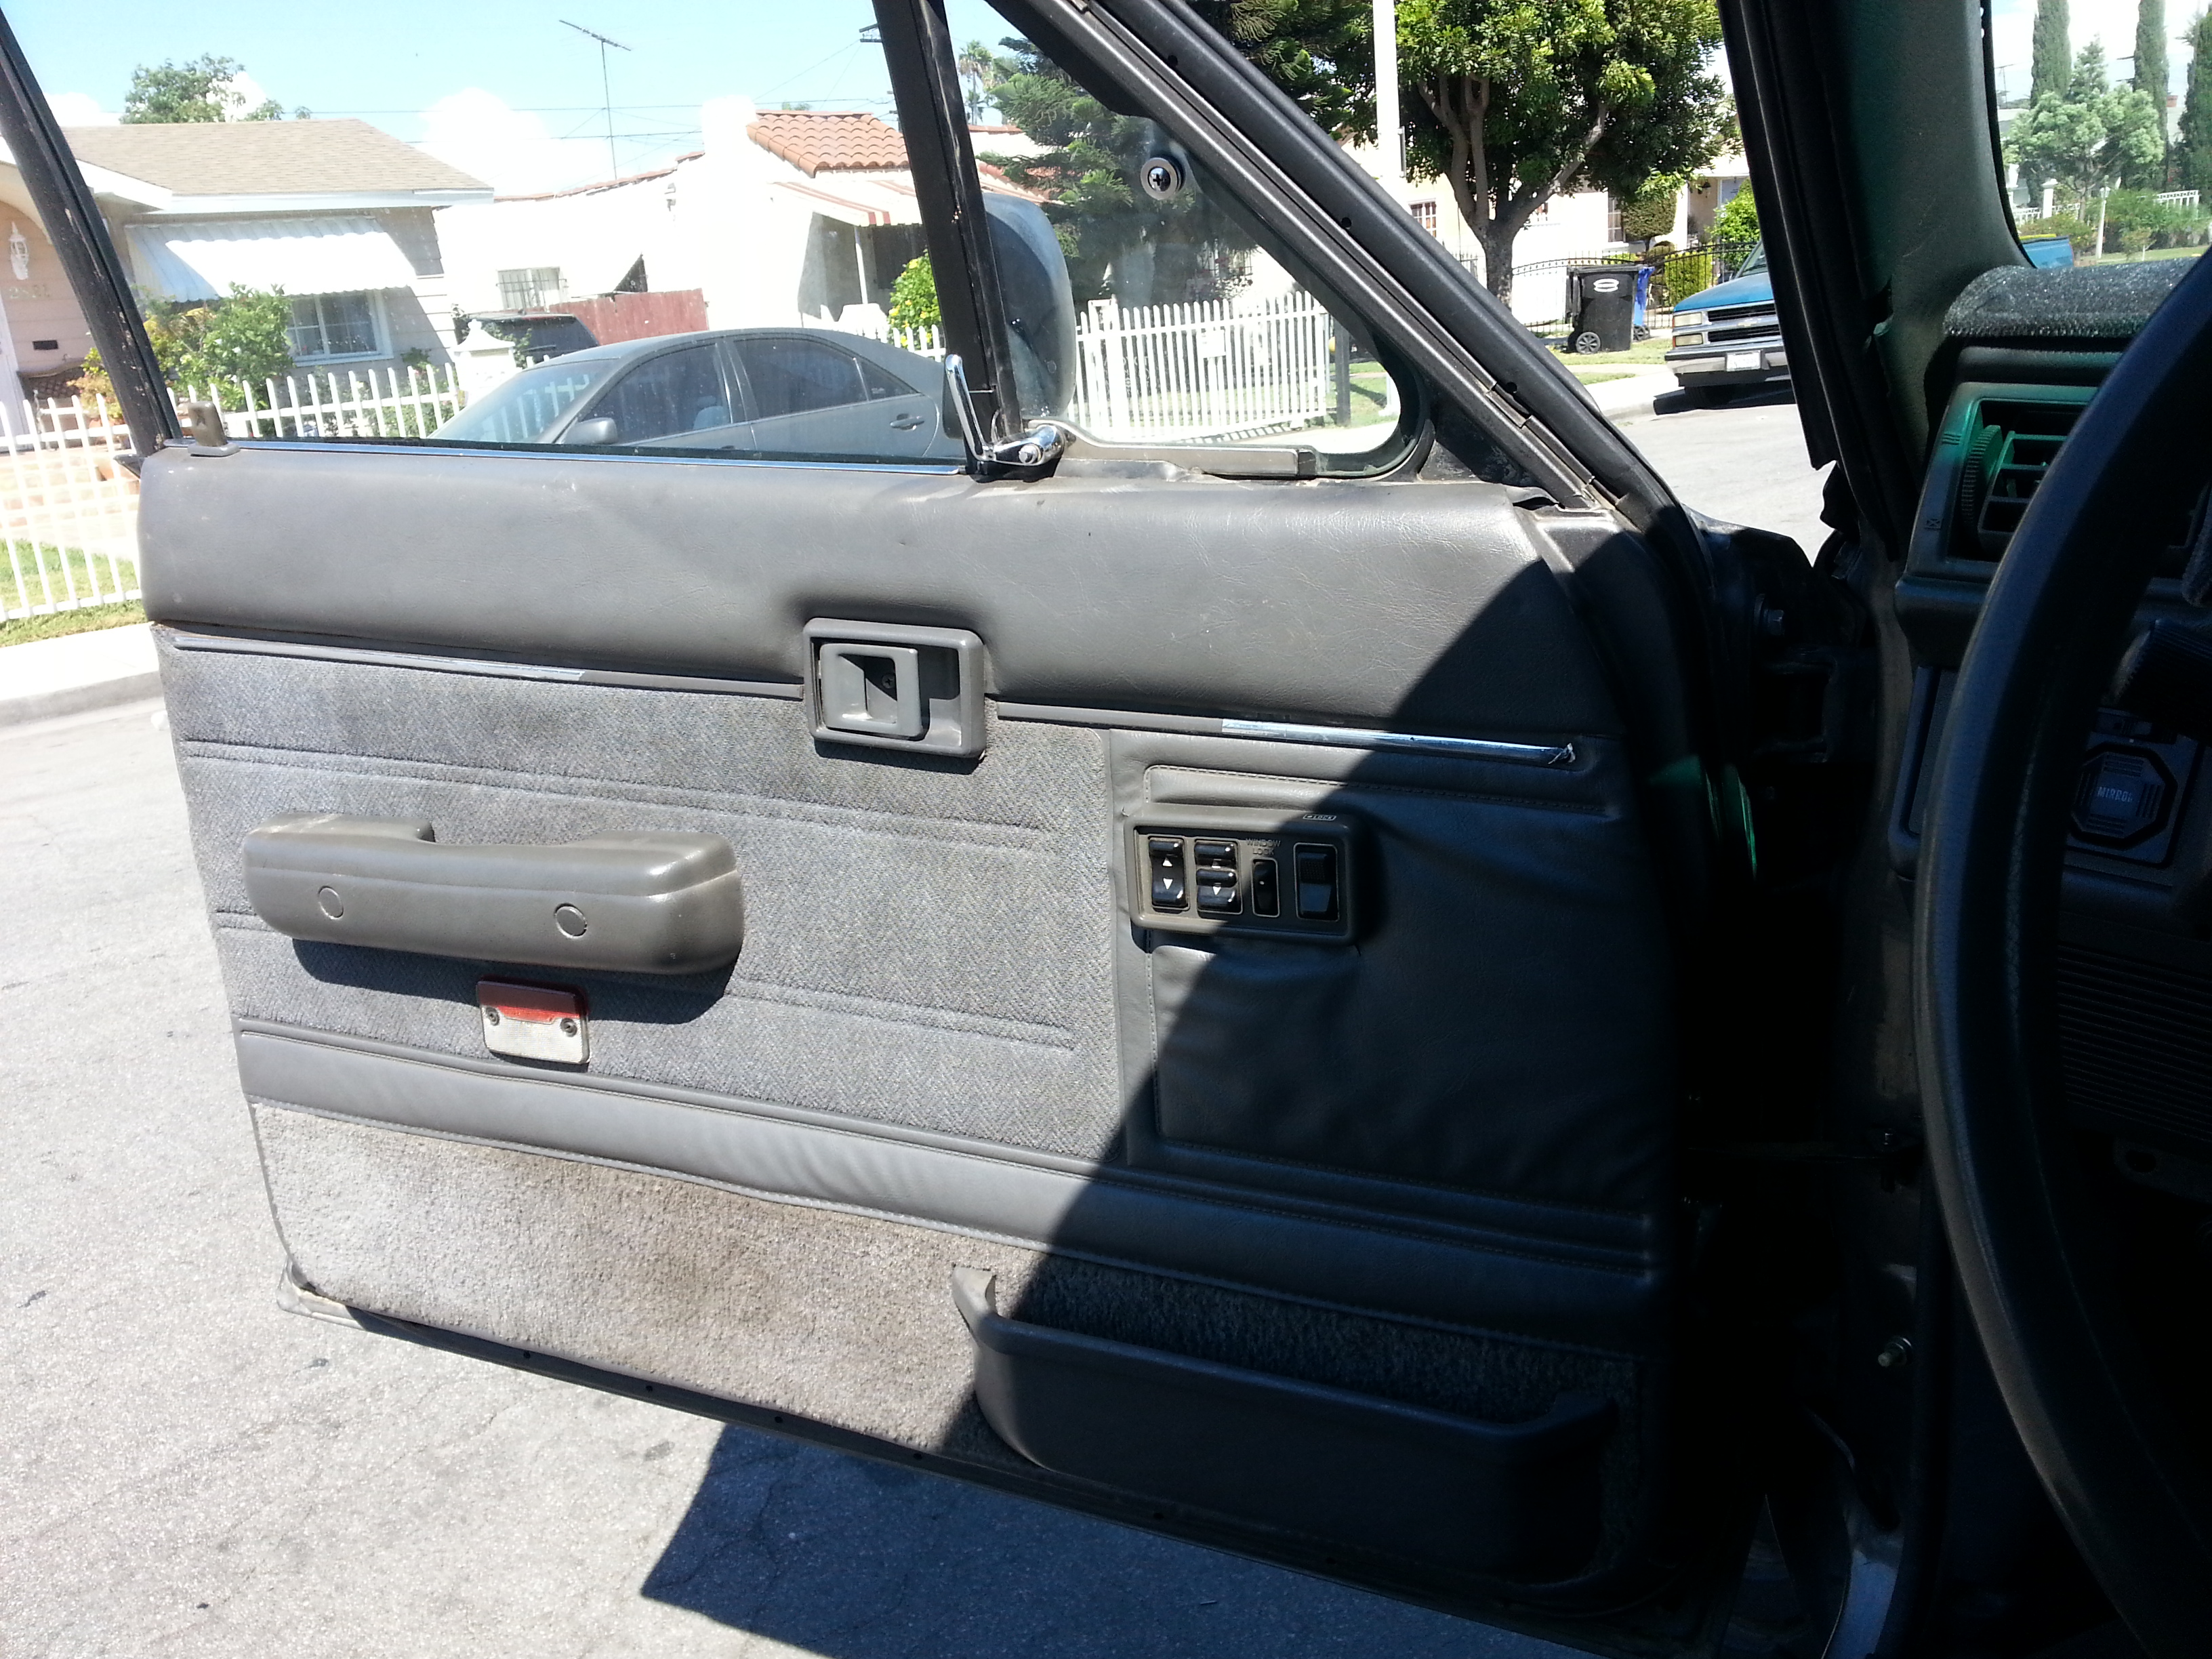
Woot this is gonna come in handy on the trail!
Thanks for keeping up on the thread guys. I'm so happy that i have working windows and mirrors now!
I connected the motors and installed my refurbished door panels. I refurbished these panels a few months ago.

I double checked the power windows and passenger mirror to make sure everything was connected correctly and in working order. After seeing everything worked properly i began putting the whole dash back together
Faby arrived sometime during this time to wash her truck and help me out because the sun was starting to go down. So she held the flashlights and powered lights up for me as the sun was going down.
I finished puttting everything back together at about 09:00pm. Then i go to roll up my Windows so we can put all my tools away and as i press the buttons i had no response!
I double checked my wires and engine bay fuse box where i ran my 12v wire to. everything was connected properly. I had no clue what it was. Well I was so darn frustrated that i just took the door panels off and un clipped the motors. used a wire and connected 12v and ground to the battery and rolled them up manually by touching the contacts like this. I was too frustrated to deal with it. I had already spent 4.5 hours on it. i just left it the way it was till this morning.
--------------------------------------------------------------------------------------
This morning i began taking off the dashboard and i got half way when i wanted to test it out one last time. so i turned the key to the on postion and i noticed that my cigarette lighter light is off. i thought it was odd. so i changed out the fuse and what do you know i blew again... I grabbed my multimeter and pulled off the relay box to my power windows/mirror, andchecked the contacts for the ground and the one of the two power wires and seen that yes there is power. Then when i checked the ignition wire that turns on the power window relay box i seen that i didnt have power going to it.
So i took apart my cigarette lighter and realized that the 2 small washers in there(the white non-conductive washer and the smal metal washer were placed on the inside of the cigarette lighter. So of course my fuse was gonna keep blowing... my 12v and ground were touching. So i put the cigarette lighter back together the correct way. Then i swapped that fuse again. and bam! the light works!
So i took the multimeter and checked the wires again and all was fine. I plugged in that relay box again and tested out all the functions and everything worked properly i even fired up the engine to make sure all was good and it works good now. So i just reassembled the whole dash for the 2nd time.Anyway here are pix of my door panels and dash all put back together. I'll record a video for you guys later.


Woot this is gonna come in handy on the trail!

Thanks for keeping up on the thread guys. I'm so happy that i have working windows and mirrors now!
Last edited by Redeth005; Sep 7, 2013 at 04:03 PM.


