
the dragons 88 runner buildup/rebuild
 Aug 25, 2012 | 10:13 PM
#121
Thread Starter
Registered User
Joined: Jul 2012
Posts: 2,365
Likes: 4
From: Idaho
block stripped of freeze plugs an sensors need to pull the oil galley plugs an such descale the outside so to be ready for boiling to get the green goop out of the passages
need to have the shop check that bolt hole after all the hell i went through to get that stud out! an if the price is reasonable ill have them lightly shave the deck to clean up the surface for best gasket sealing then paint an rebuild (when $ allows)

need to have the shop check that bolt hole after all the hell i went through to get that stud out! an if the price is reasonable ill have them lightly shave the deck to clean up the surface for best gasket sealing then paint an rebuild (when $ allows)
Aug 25, 2012 | 10:38 PM
#122
WOW! You are 'WHUPPIN' arse, sir! LOL. ...... Enjoyed seeing that progress today, and YEAHHHHHHHHHH, BOEEEEEEEEEY!>>> TAKE THAT, DEFEATED SNAPPED OFF HEAD BOLT!!!! hahaha.
Looks to be REALLY nice from the pics! GREAT WORK on that front end, man.. I can't believe it almost. MAN I gotta start taking some brush ups on welding!
Looks to be REALLY nice from the pics! GREAT WORK on that front end, man.. I can't believe it almost. MAN I gotta start taking some brush ups on welding!
Aug 27, 2012 | 11:56 PM
#123
Thread Starter
Registered User
Joined: Jul 2012
Posts: 2,365
Likes: 4
From: Idaho
more rust cooking today power steering lines all crusty an rusted one was nearly impossible to remove due to the rust issues work now nice an clean!, painted the oil pan after major cleaning left it out in the sun to bake good an hard cleaned the water pump an gave it a coat of paint the aluminum wouldnt clean up so it got paint assembled the AC compressor an bracket assembly to keep it all together after serious cleaning of grease an oil took a wire wheel an sand blaster to the fan thermo clutch and an air inlet emissions valve (just left of the ac clutch) as they were badly corroded then shot with some clear to seal the aluminum

Aug 28, 2012 | 12:07 AM
#124
Thread Starter
Registered User
Joined: Jul 2012
Posts: 2,365
Likes: 4
From: Idaho
22RE fuel injector electrical harness/ factory crimp repair
taking note of how often this issue effects the 22RE an the many threads as i told Terry i was going to get it done on mine before it became an issue so i took pictures i hope will help others with this
now to do this an save yourself a lot of issues best thing is to pull the harness off the passenger side of the engine (or if your in a rebuild do it now before putting the engine back in) set your battery (if its still in the stock location) off to the side for work space
now with the harness out over the fender find your 4 injector plugs one will be further down the string by itself this is the leg where i started unwrapping the multiple layers of electrical tape an harness protection
Aug 28, 2012 | 12:12 AM
#125
You know, I had this thing 'heartless' 3 times in 2 years.... I could have and SHOULD HAVE THEN AND THERE ripped that open and just REDONE IT! haha... Sorry, just that the stupid gremlin I'm hunting get's me a lil manic at times hehehe.
GREAT WORK ON THE CLEAN UP! Man, this thing is gonna look factory cherry!!!!!!!!
hehehe. GREAT WORK ON THE CLEAN UP! Man, this thing is gonna look factory cherry!!!!!!!!
Aug 28, 2012 | 12:16 AM
#126
Thread Starter
Registered User
Joined: Jul 2012
Posts: 2,365
Likes: 4
From: Idaho
now chasing down the factory crimp connectors where the root of the problem is i had to unwrap things down to the AC clutch connector seen just past my index finger with a tape flag on it
my thumb an index finger are pointing to the two factory crimp connectors still in factory tape

and there they are revealed for the trouble makers they can be
(these can test fine but still dont let the injectors operate correctly) the white/red + yellow set (1&3) injectors the connector an wire are green with beginning corrosion the Blue set is very clean

my thumb an index finger are pointing to the two factory crimp connectors still in factory tape
and there they are revealed for the trouble makers they can be
(these can test fine but still dont let the injectors operate correctly) the white/red + yellow set (1&3) injectors the connector an wire are green with beginning corrosion the Blue set is very clean
Aug 28, 2012 | 12:30 AM
#127
Thread Starter
Registered User
Joined: Jul 2012
Posts: 2,365
Likes: 4
From: Idaho
now some simple tools you'll need,
soldering iron & soldier (the plumbing flux is because my soldier is old the flux in it degrades over time flux is to help clean the copper an brass an allow the soldier to flow into the strands)
some cutters to remove the crimps and or cut the wire an remove the corrosion,
the sponge is to wipe the irons tip of flux between wires and of course a couple rolls of electrical tape when done to wrap the wires (or liquid electrical tape for the joints an roll tape to wrap)

i went after the corroded trio first corrosion like this is in the strands so best to cut it off an strip insulation an start with fresh wire

corrosion cut out wires stripped back around 1/4 of an inch or less you dont need a lot exposed

soldering iron & soldier (the plumbing flux is because my soldier is old the flux in it degrades over time flux is to help clean the copper an brass an allow the soldier to flow into the strands)
some cutters to remove the crimps and or cut the wire an remove the corrosion,
the sponge is to wipe the irons tip of flux between wires and of course a couple rolls of electrical tape when done to wrap the wires (or liquid electrical tape for the joints an roll tape to wrap)
i went after the corroded trio first corrosion like this is in the strands so best to cut it off an strip insulation an start with fresh wire
corrosion cut out wires stripped back around 1/4 of an inch or less you dont need a lot exposed
Aug 28, 2012 | 12:31 AM
#128
Getting rid of those factory crimps is good preventive maintaince. They gave me heck when I replaced my whole harness. I was just sure I had done something wrong. I am going to remove them on every one of my trucks that I come across.
Aug 28, 2012 | 12:41 AM
#129
Thread Starter
Registered User
Joined: Jul 2012
Posts: 2,365
Likes: 4
From: Idaho
wires are now twisted together tightly (rubbed a tiny bit of flux into the surface fresh soldier this isnt needed as its in the core of the wire) get your iron hot with a "tinned" tip sand the tip with sand paper to bare copper an then melt soldier on it this 'tinned tip" focuses the heat to that area of the iron

melt a bit of soldier on the tip an then put it to the bare wires an hold still the flux will bubble soon as the wires hot begin feeding soldier into the wire **on the other side of he wire from the iron** it will draw the metal into the copper wire solidifying the joint

you want the soldier to be shiny an bright which shows sufficient heat for it to flow an bond to the wire

melt a bit of soldier on the tip an then put it to the bare wires an hold still the flux will bubble soon as the wires hot begin feeding soldier into the wire **on the other side of he wire from the iron** it will draw the metal into the copper wire solidifying the joint
you want the soldier to be shiny an bright which shows sufficient heat for it to flow an bond to the wire
Aug 28, 2012 | 12:48 AM
#130
That is a great idea of showing how to solder. I imagine there are a few that didnt know how and might be afraid to ask. Not hard, just takes a little practice and is something that will last just as long as the wire itself. Great job on explaining it.
Aug 28, 2012 | 01:00 AM
#131
Thread Starter
Registered User
Joined: Jul 2012
Posts: 2,365
Likes: 4
From: Idaho
this is the green line i removed the crimp an slipped the leg wire into the center of the main an wrapped it around no corrosion so cutting wasnt needed some soldier an Vola shiny fix the yellow line is behind it

wrap (or apply heat shrink, liquid electrical tape) to the repairs
then tidy up the harness wrap with electrical tape noting where the #1 injector an TPS, temp sensors turn out of the main line pay attention to joints an run tape out those legs a turn or two then head back out the main line
the #1 & TPS leg has a L shaped plastic insert it should be wrapped back in at that branch
then once out to where the tape once reached reapply the wire loom and protective pads wrap again as before again note i had to unwrap to the AC clutch power wire leg

an heres the harness rewrapped, i hope this helps out others its really an easy repair that can fix some serious headaches

wrap (or apply heat shrink, liquid electrical tape) to the repairs
then tidy up the harness wrap with electrical tape noting where the #1 injector an TPS, temp sensors turn out of the main line pay attention to joints an run tape out those legs a turn or two then head back out the main line
the #1 & TPS leg has a L shaped plastic insert it should be wrapped back in at that branch
then once out to where the tape once reached reapply the wire loom and protective pads wrap again as before again note i had to unwrap to the AC clutch power wire leg
an heres the harness rewrapped, i hope this helps out others its really an easy repair that can fix some serious headaches
Aug 28, 2012 | 01:04 AM
#132
Thread Starter
Registered User
Joined: Jul 2012
Posts: 2,365
Likes: 4
From: Idaho
i didnt show the fact i went after bigger connectors with the larger weller soldiering gun to flow soldier into the crimped connectors also did the other crimped connectors in the harness as well before wrapping it up figured i was in there might as wel;l make sure they arent an issue later
Aug 28, 2012 | 01:57 AM
#133
Thread Starter
Registered User
Joined: Jul 2012
Posts: 2,365
Likes: 4
From: Idaho
You know, I had this thing 'heartless' 3 times in 2 years.... I could have and SHOULD HAVE THEN AND THERE ripped that open and just REDONE IT! haha... Sorry, just that the stupid gremlin I'm hunting get's me a lil manic at times hehehe.
GREAT WORK ON THE CLEAN UP! Man, this thing is gonna look factory cherry!!!!!!!!
hehehe. GREAT WORK ON THE CLEAN UP! Man, this thing is gonna look factory cherry!!!!!!!!
 Aug 29, 2012 | 04:36 PM
#135
Thread Starter
Registered User
Joined: Jul 2012
Posts: 2,365
Likes: 4
From: Idaho
chef have you been spying on my home? our rescued kitten is named gizmo which was a magwai or gremlin.... you cant have our kitten anyhow i was going through the parts that the PO had taken apart an put in the back figuring out which i need to clean up (lower intake timing cover alternator ect ect) an i find a pair of brackets big ones i was scratching my scales wondering waht these came off of
an looked at the radiator

PO had ether popped the side brackets off the core or the bop to the nose did it when it happened suffice to say im glad i can fix copper water lines. sweat soldiering the brackets back on after cleaning will be easy (already done one side, seen here in primer after taking picture)

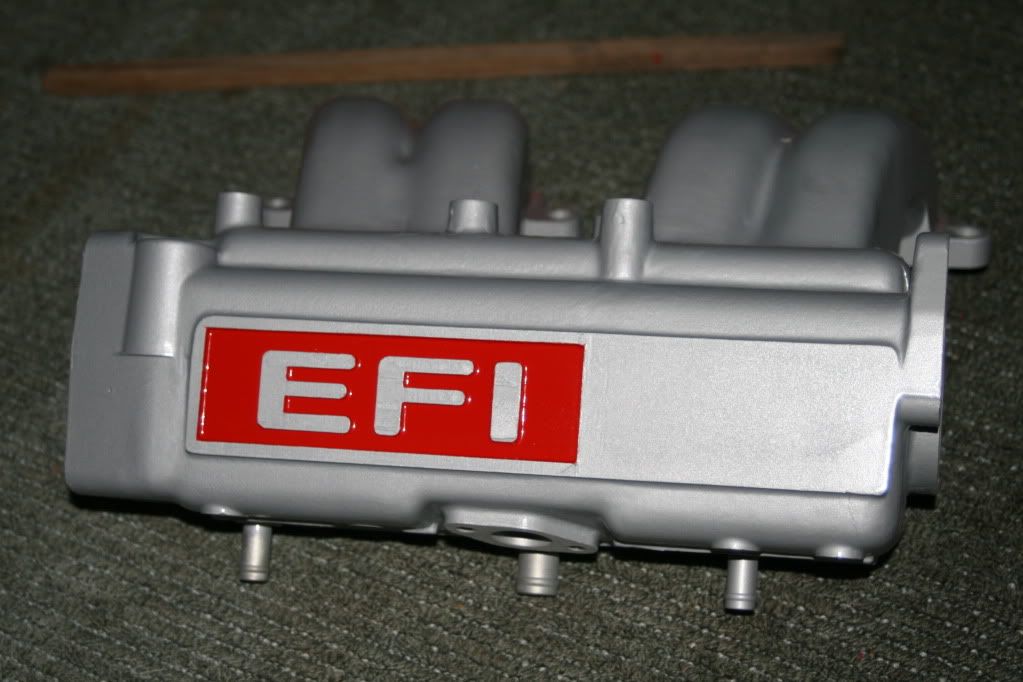
oh an my cleaned an reassembled upper intake (dirty hoses bleh)
yes racing stripes make it faster....


Last edited by Cyberhorn The Dragon; Aug 29, 2012 at 04:41 PM.
Aug 29, 2012 | 08:13 PM
#136
I think I am going with your color pattern on my pickup only blue since it has a blue interior. Will your cooker knock off grease as well? I am going to try and get one going Thursday or Friday. I have been cleaning a few parts and when done I put them in the back of the truck so when I get to it, that project should move alot quicker. Cleaning parts is a pain.
Aug 29, 2012 | 09:40 PM
#137
HEY, hahaha... NOPE, had no clue on the kitty's name... But that's funny! Like it
However, I would ask if you've been spying while MY hood is open... Thought I saw you out there today Hmmmmmmmmmmmm! lol....
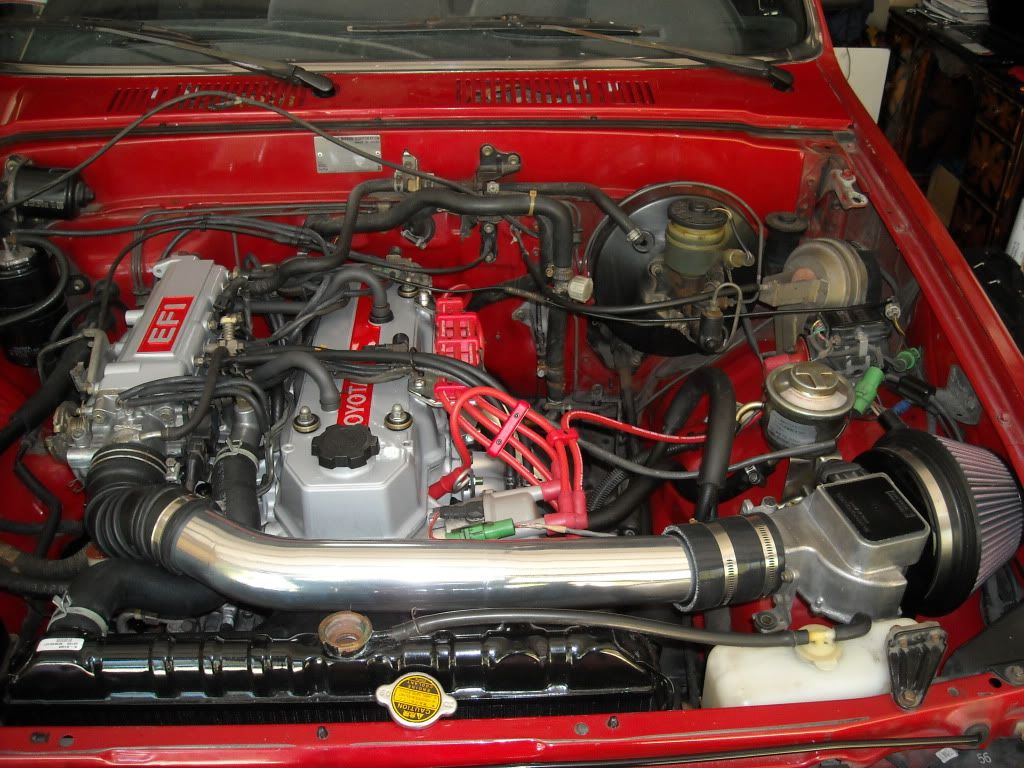
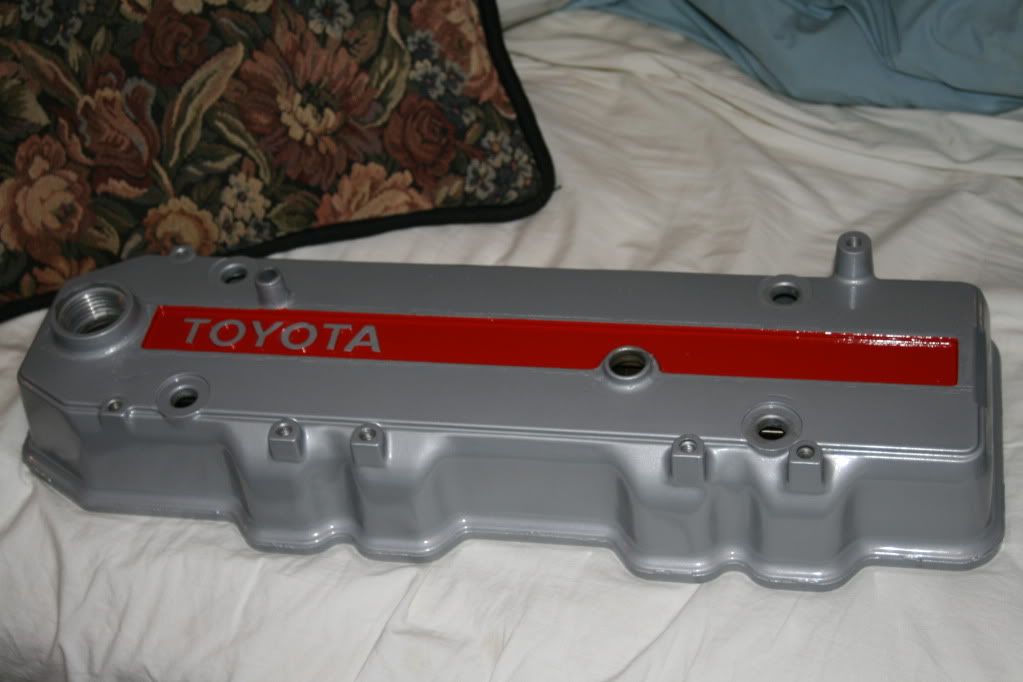
Was fun painting those! lol... took a bit more time as I did it the hard way, taping off the letters after primer and then engine paint alumicote coloring the v-cover and plenum... OBVIOUSLY taping off the EFI was easier, lol... But Grego, a good dude on here had it simpler... "Ground off the EFI once painted and then high heat clear coated the lot of it!" ...... Oh well, live and learn, right? hahaha... >>>>>>


Funny, this just came up again in a thread LONG unposted on til today, lol.....
GREAT WORK, and ...... LOCK UP THE KITTY, CUZ I'M GONNA GET'EM! hahaha.
However, I would ask if you've been spying while MY hood is open... Thought I saw you out there today Hmmmmmmmmmmmm! lol....
Was fun painting those! lol... took a bit more time as I did it the hard way, taping off the letters after primer and then engine paint alumicote coloring the v-cover and plenum... OBVIOUSLY taping off the EFI was easier, lol... But Grego, a good dude on here had it simpler... "Ground off the EFI once painted and then high heat clear coated the lot of it!" ...... Oh well, live and learn, right? hahaha... >>>>>>
Funny, this just came up again in a thread LONG unposted on til today, lol.....
GREAT WORK, and ...... LOCK UP THE KITTY, CUZ I'M GONNA GET'EM! hahaha.
Aug 30, 2012 | 10:52 AM
#138
Thread Starter
Registered User
Joined: Jul 2012
Posts: 2,365
Likes: 4
From: Idaho
I think I am going with your color pattern on my pickup only blue since it has a blue interior. Will your cooker knock off grease as well? I am going to try and get one going Thursday or Friday. I have been cleaning a few parts and when done I put them in the back of the truck so when I get to it, that project should move alot quicker. Cleaning parts is a pain.
its why if you do this to any Ferris metal (iron steel) it will flash rust very quickly so if im painting the item i wash the powdery iron dust off (i keep a bucket of clean water near my setup just for that
give them a quick scrub blow dry with compressed air an spray with primer ASAP
with my oil pan i sprayed some penetrating oil on a cloth an wiped the inside down then primered the outside hit it with 2 coasts of black an let it bake in the sun nice hard paint finish
Aug 30, 2012 | 11:04 AM
#139
Thread Starter
Registered User
Joined: Jul 2012
Posts: 2,365
Likes: 4
From: Idaho
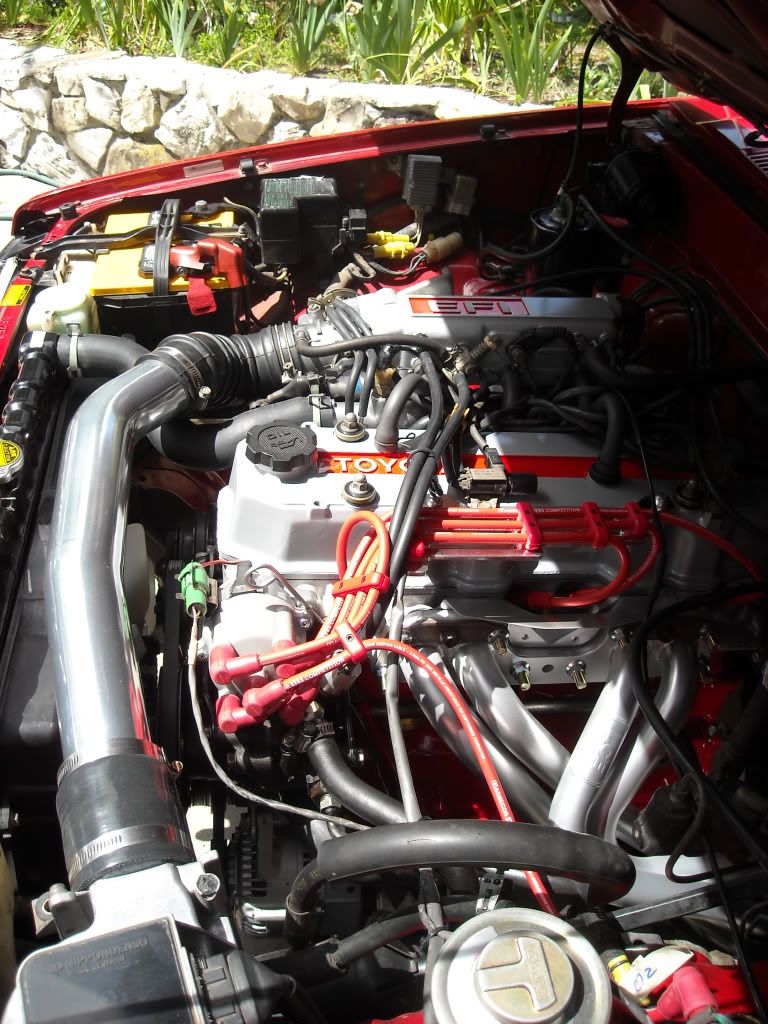
Chef i want that cold air intake lol you painted your aluminum silver i wire wheeled an polished mine up a bit then sealed it with some clear so we separated after the painting of the red LOL
some more of my cleaning results YES i had to wire wheel the tubes to get the shine but i like a bit of sparkle even on emissions related stuff
before

after (clear was sprayed over it to prevent corrosion then left to bake in the sun good an hard)

MY KITTY CHEF pets gizmo who is sleeping on my shoulder right at the moment
some more of my cleaning results YES i had to wire wheel the tubes to get the shine but i like a bit of sparkle even on emissions related stuff
before
after (clear was sprayed over it to prevent corrosion then left to bake in the sun good an hard)
MY KITTY CHEF pets gizmo who is sleeping on my shoulder right at the moment
Aug 30, 2012 | 11:12 AM
#140
Thread Starter
Registered User
Joined: Jul 2012
Posts: 2,365
Likes: 4
From: Idaho
my radiator side fix the other side is still cooking clean at the moment
once ive got it on ill power wash the radiator an then give it a coat of paint

my coil assembly after cleaning an paint

once ive got it on ill power wash the radiator an then give it a coat of paint
my coil assembly after cleaning an paint


