
the dragons 88 runner buildup/rebuild

 Aug 22, 2012 | 06:41 PM
#103
Thread Starter
Registered User
Joined: Jul 2012
Posts: 2,365
Likes: 4
From: Idaho
well tap arrived it works an i still need to do a bit more grinding to get the top of the stud thin enough to remove its broken *%$ out
i was taking it easy today but roommate decided he wanted to work on my runner some moved the truck into the shop an so we got the welding on the fender metal done an finalized the hammer an dolly work on it now its grinding welds an cleaning it up for primer an paint

need to get some paintable sealer for the seams

that corner is now remarkably stronger than it was i jumped on it an it dont flex an move like it was doing
i was taking it easy today but roommate decided he wanted to work on my runner some moved the truck into the shop an so we got the welding on the fender metal done an finalized the hammer an dolly work on it now its grinding welds an cleaning it up for primer an paint
need to get some paintable sealer for the seams
that corner is now remarkably stronger than it was i jumped on it an it dont flex an move like it was doing
Aug 22, 2012 | 06:47 PM
#104
Thread Starter
Registered User
Joined: Jul 2012
Posts: 2,365
Likes: 4
From: Idaho
an heres the front end all up where it belongs we measured from the firewall an its 1/4 of an inch further out than the passenger side but hey considering it got moved over 2 inches forward down near the steering box an up in the corner over 3inches id say we did good for shade tree goof ups LOL

an the front view

 mechanics rock
an the front view
mechanics rock
Aug 22, 2012 | 06:57 PM
#105
Thread Starter
Registered User
Joined: Jul 2012
Posts: 2,365
Likes: 4
From: Idaho
zuk mod candidate please stand.. oh sheeooot you are standing already arent ya.. flat much? no bump stops at all i measured 3 1/2 inches at the tire to wheel well edge

an something else i have to replace the brake backing plates both are rusted but the passenger side is rusted out
adds to list full break work in rear exhaust pipe is gone past the muffler wondering if i shouldn't just fab up new 2.5 in exhaust while im at this

my room mate an friend looking at the frame which is actually in good shape some of the body mounts are rusted bad but the frame is solid an the hole in the passenger side backer plate he's suggesting rolling the rear axle out clean it up paint ect
an something else i have to replace the brake backing plates both are rusted but the passenger side is rusted out
adds to list full break work in rear exhaust pipe is gone past the muffler wondering if i shouldn't just fab up new 2.5 in exhaust while im at this
my room mate an friend looking at the frame which is actually in good shape some of the body mounts are rusted bad but the frame is solid an the hole in the passenger side backer plate he's suggesting rolling the rear axle out clean it up paint ect
Aug 22, 2012 | 11:16 PM
#106
Thread Starter
Registered User
Joined: Jul 2012
Posts: 2,365
Likes: 4
From: Idaho
ok im done for the day collapses in chair oh i caught a rare event around here the RARE and normally hidden KIDius OMGous HELPEDus (shh yes it was past midnight mom dont need to know)

and the results of wire wheeling sanding an quick wipe down for grease an oil **anyone got a source for the hood prop rod rubber grommet? mine crumbled when i tried to remove it **

and my finished power steering assembly much rust removed an things had to be painted or they'd rust again

hmm need to run a red pinstripe around that big pully....
and the results of wire wheeling sanding an quick wipe down for grease an oil **anyone got a source for the hood prop rod rubber grommet? mine crumbled when i tried to remove it **
and my finished power steering assembly much rust removed an things had to be painted or they'd rust again
hmm need to run a red pinstripe around that big pully....
Last edited by Cyberhorn The Dragon; Aug 22, 2012 at 11:33 PM.

 Aug 23, 2012 | 07:13 PM
#108
Registered User
Joined: Aug 2009
Posts: 2,173
Likes: 0
From: hohenwald tn.
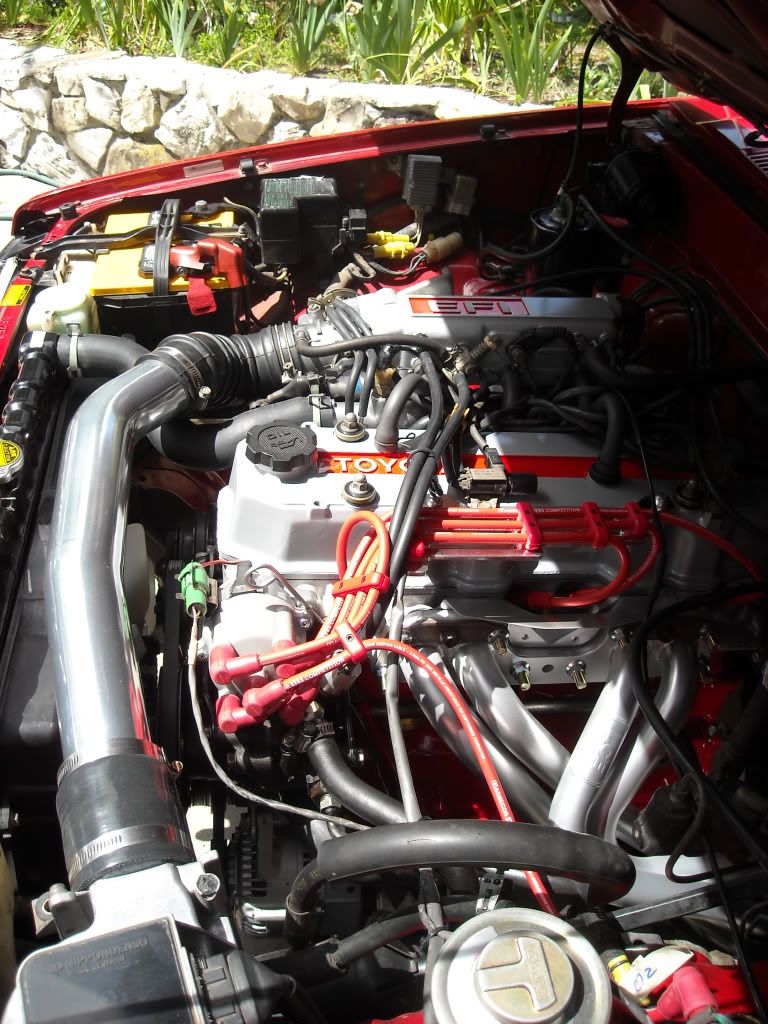
Looks sweet, oh and the valve cover looks good to lol. Glad to see the kiddos spending time with ya on your project which is coming along nicely by the way. Great job on getting things straighten out. Wow you've had a worse rust issue than I've had I guess my engine leaked oil so long it was good rust prevention haha. Just wanted you know I was still following along hope all is well with you and yours.
Aug 24, 2012 | 10:00 AM
#109
Thread Starter
Registered User
Joined: Jul 2012
Posts: 2,365
Likes: 4
From: Idaho
Looks sweet, oh and the valve cover looks good to lol. Glad to see the kiddos spending time with ya on your project which is coming along nicely by the way. Great job on getting things straighten out. Wow you've had a worse rust issue than I've had I guess my engine leaked oil so long it was good rust prevention haha. Just wanted you know I was still following along hope all is well with you and yours.
found some spots i cant really do much with but pack them with duraglass to repair the holes was out last night working with the tweaked an bent drivers fender looks like poo but by god it fits again an the door doesnt bind on it! likely use it till i get a new fender
 Aug 24, 2012 | 12:24 PM
#111
Thread Starter
Registered User
Joined: Jul 2012
Posts: 2,365
Likes: 4
From: Idaho
 Aug 24, 2012 | 04:02 PM
#112
Thread Starter
Registered User
Joined: Jul 2012
Posts: 2,365
Likes: 4
From: Idaho
future reference rebuild thread for the steering box found on RBX runners thread
http://forum.ih8mud.com/80-series-te...x-rebuild.html
http://forum.ih8mud.com/80-series-te...x-rebuild.html
Aug 24, 2012 | 11:39 PM
#113
Its always good to get the kiddos involved. The rust on your core support isnt bad at all. You could probably just do a little patch work on that. Inner fender is looking great. With the round headlight ports, always reminds me of the first gen trucks.
Yours and Chefs engines look great. I have spent hours working on mine and it still looks blah when I get done.
Meant to add, somewhere on one of my threads I found a place that sells the hood prop stowage clip, was wondering if they sell that grommet you are looking for. I didnt have one for the longest time and it has gotten me a few times. If I come across it I will let you know.
Last edited by Terrys87; Aug 25, 2012 at 02:28 AM.
Aug 25, 2012 | 10:08 AM
#114
Thread Starter
Registered User
Joined: Jul 2012
Posts: 2,365
Likes: 4
From: Idaho
Meant to add, somewhere on one of my threads I found a place that sells the hood prop stowage clip, was wondering if they sell that grommet you are looking for. I didnt have one for the longest time and it has gotten me a few times. If I come across it I will let you know.
yeah both the hold down clip was broke an the grommet crumbled
bought my first parts for the Skelrunner as my daughter called it, she said to me its skin is all gone daddy the heart is gone its like a skeleton!
LOL i got the nylon headlight support clips (20 of them for 6 bucks) and the throttle body gasket so i can clean it an then reassemble the upper plenum
so thinking on her name i found a vinyl graphic for once all the body work is fully done (not the whole thing is pictured) which is 22in x 90in long (tail could wrap around the back) but you get the idea have the dino in black on the red body LOL!
 Aug 25, 2012 | 10:21 AM
#115
"SKELRUNNER"!!! That gave me such a grin, man! I MISS those days! SAVOR THEM! hahaha...
Terry, .... NEED THAT CLIP/GROMMET.... waiting and hoping that the Terrypedia will update with that link, eventually haha.
haha.
x2 on the kids involved. My girls helped me in their teens... and now my daughters both will TRY to fix something before paying someone to do it(within reason). LOVE hearing, "Daddy, did my brakes today, thanks for the tip on using only OEM pads My last Duralast ones? You were right... they warped and turned to CRAP, quickly!" Ahhhhh, sigh of joy... just PRICELESS! hahahaha.
Terry, .... NEED THAT CLIP/GROMMET.... waiting and hoping that the Terrypedia will update with that link, eventually
haha. x2 on the kids involved. My girls helped me in their teens... and now my daughters both will TRY to fix something before paying someone to do it(within reason). LOVE hearing, "Daddy, did my brakes today, thanks for the tip on using only OEM pads
My last Duralast ones? You were right... they warped and turned to CRAP, quickly!" Ahhhhh, sigh of joy... just PRICELESS! hahahaha.
Aug 25, 2012 | 10:28 AM
#116
Thread Starter
Registered User
Joined: Jul 2012
Posts: 2,365
Likes: 4
From: Idaho
oh absolutely Chef i want her to be able to look at a mechanic an tell him whats wrong an the only reason she cant do it herself is she just got her nails done an has a party to go to on the weekend
Aug 25, 2012 | 07:35 PM
#117
Thread Starter
Registered User
Joined: Jul 2012
Posts: 2,365
Likes: 4
From: Idaho
well we did some serious rust whuppen today
this was the backside of the passenger core support used the descaller then wire wheels

and after a patch made from a LOL Maytag washer front panel the sheet steel is same thickness the patch for the other side was being welded in


this was the backside of the passenger core support used the descaller then wire wheels
and after a patch made from a LOL Maytag washer front panel the sheet steel is same thickness the patch for the other side was being welded in
Aug 25, 2012 | 07:50 PM
#118
Thread Starter
Registered User
Joined: Jul 2012
Posts: 2,365
Likes: 4
From: Idaho
patching of the front passenger side core

after primer we also removed the AC condenser coils to paint things fittings were really stuck my friend is worried about one said thankfully that end of the system isnt under a lot of pressure but both O rings have to be replaced (we had to heat things to get them loose) an the tub n tile paintable flexible sealing caulk for seam sealer (learned that from a bodyshop its good stuff an stays sealed an flexible in panel joints)

an a few coats of paint to see how things looked the drivers side we still have some welding to do behind the steering box to the body mount an core support (why its still mostly primer)

after primer we also removed the AC condenser coils to paint things fittings were really stuck my friend is worried about one said thankfully that end of the system isnt under a lot of pressure but both O rings have to be replaced (we had to heat things to get them loose) an the tub n tile paintable flexible sealing caulk for seam sealer (learned that from a bodyshop its good stuff an stays sealed an flexible in panel joints)
an a few coats of paint to see how things looked the drivers side we still have some welding to do behind the steering box to the body mount an core support (why its still mostly primer)
Aug 25, 2012 | 08:17 PM
#119
Thread Starter
Registered User
Joined: Jul 2012
Posts: 2,365
Likes: 4
From: Idaho
and there we have the last remaining bits of thread from the broken head stud! YEAH! VICTORY IS MINE! we then completely disassembled the block im gona have it tanked to get the oil/water sludge out it was drooling green slime from the oil filter bolt

Aug 25, 2012 | 10:03 PM
#120
Thread Starter
Registered User
Joined: Jul 2012
Posts: 2,365
Likes: 4
From: Idaho
factory honing marks still in the cylinders

main bearings ONE was staring to take on a tiny shade of copper coloring the thrust bearings had no wear we could see

connecting rod journals and the mains all look really good no real wear on the piston skirts if the head gasket hadnt popped this engine would still have been spinning along quite well

main bearings ONE was staring to take on a tiny shade of copper coloring the thrust bearings had no wear we could see
connecting rod journals and the mains all look really good no real wear on the piston skirts if the head gasket hadnt popped this engine would still have been spinning along quite well


