
coryc85's 1988 4Runner Build-Up Thread
 Mar 19, 2013 | 12:52 PM
#221
Nice work Coryc85, looking good. Also something new that I never knew even back in the early days that you could still get around in front wheel drive... Blows me away how handy these trucks become. In 1988 the first time they stole my 86 4runner they took out the motor and the tranny. I actually laughed and said yabadabadoo you know the flintstones when all they had where feets to run their cars...
Great job on the wiring hope to see more on this.
Great job on the wiring hope to see more on this.
Last edited by junk4u; Mar 19, 2013 at 06:37 PM.
Mar 20, 2013 | 06:15 AM
#222
Thread Starter
Registered User


Joined: May 2005
Posts: 1,977
Likes: 231
From: S. FL
Nice work Coryc85, looking good. Also something new that I never knew even back in the early days that you could still get around in front wheel drive... Blows me away how handy these trucks become. In 1988 the first time they stole my 86 4runner they took out the motor and the tranny. I actually laughed and said yabadabadoo you know the flintstones when all they had where feets to run their cars...
Great job on the wiring hope to see more on this.
Great job on the wiring hope to see more on this.
Pulled the trigger this morning on the solid pinion spacer, plus 2 rear axle service kits with bearings and seals, and some new carrier adjuster lock tabs from Marlin Crawler. Been wanting to change those rear axle bearings for a while, so removing the diff will give me the perfect excuse.
Mar 20, 2013 | 10:43 AM
#224
By the way, I have a feeling that along with my further lift causing some vibration, I'm going to be having to get to my rear axle eventually. It's been serviced once around 100,000 miles... I'm at 270K at this point, and while I maintain it very well, I know it's only a matter of time. Especially with all the popping and such going on back there on top of the vibration. That's just the locker for the most part, I hope! Haha. But, like with most of the things on these rigs, it just keeps rolling and rolling and rolling and rolling and.... Okay, sorry, you get the point! Lol.
Dang this site and its inducing of Toyotaticulitus! HAHAHAHA... I swear, just when I think that I'm good for now, something else causes an itch that I just have to scratch! Heheeheehee.... Do they make a pill for this yet? O.o
Dang this site and its inducing of Toyotaticulitus! HAHAHAHA... I swear, just when I think that I'm good for now, something else causes an itch that I just have to scratch! Heheeheehee.... Do they make a pill for this yet? O.o
Last edited by ChefYota4x4; Mar 20, 2013 at 10:45 AM.
Mar 26, 2013 | 12:47 AM
#225
I need to get to learning the gears. That is a weak area of mine. Will be looking at what you post about that. Glad to see the fuse box works for you.
I have seen a couple of issues on here and a friend of mine as experinced it a couple of times is the terminals get corroded and cause problems. Dont know if it is from a leaky windshield or just humid climates that Florida and here in the midwest experience.
That is one problem that I have never had to deal with is bad connections in the fuse box but have heard of. I would suggest giving them a good cleaning or coating with some sort of protective grease.
I will be getting me a jewlers screwdriver as I have from time to time come across needing to remove a wire from the block. Getting them out is the hard part. Popping them back in is easy. Glad you mentioned the jewelers tool.
Mar 26, 2013 | 07:31 AM
#226
Not to Hi-jack this thread, that I've use for everything in my area is Dielectric grease, a bit expensive for a can, but makes electrical wiring last a life time.
Last edited by junk4u; Mar 26, 2013 at 08:34 AM.
Mar 29, 2013 | 05:47 PM
#227
Thread Starter
Registered User
Joined: May 2005
Posts: 1,977
Likes: 231
From: S. FL
Junk - that's cool, never seen dielectric in a spray, I normally use the tube. But cool, might have to pick one up.
 Mar 29, 2013 | 06:03 PM
#228
Thread Starter
Registered User
Joined: May 2005
Posts: 1,977
Likes: 231
From: S. FL
Alrighty, got my package from Marlin crawler today with my solid spacer, rear axle service kits, and my new carrier adjuster lock tabs. That motivated me to get out there and start tearing into the job. On with the pics...
First of all, here's all my goodies. Axle service kits on the left, Trail Gear 4.88 R&P in the middle and the TG gear setup kit on the right.
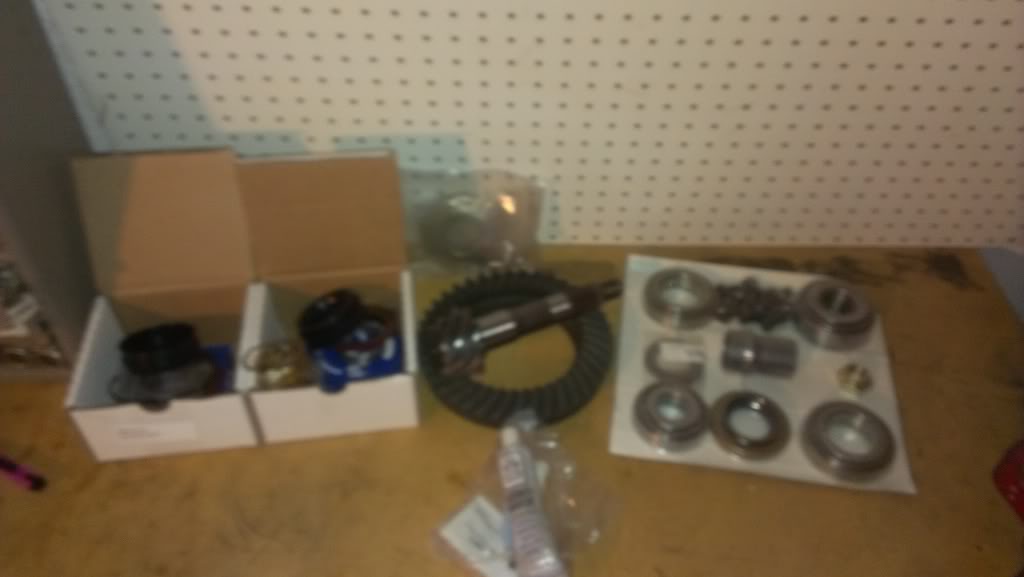
And here is my victim...it's the original diff from my 4Runner, which I swapped out a few years ago.
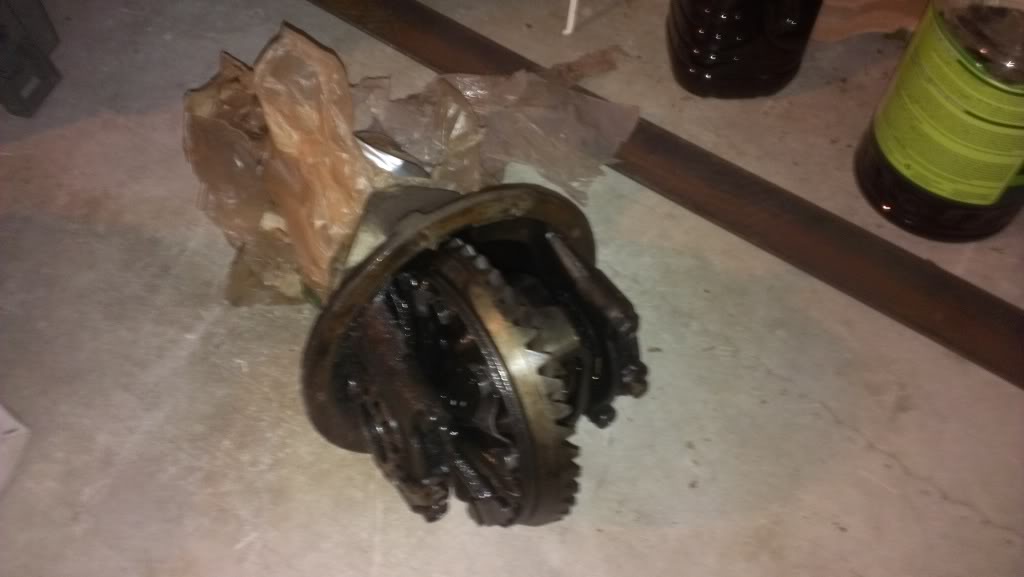
Breaking down the diff was not hard. I just removed the carrier (keeping track of which bearing support goes on which side), removed the pinion nut and the pinion just fell out.
Here's a look at the original 4.10 pinion on the left and the new TG 4.88 pinion on the right.

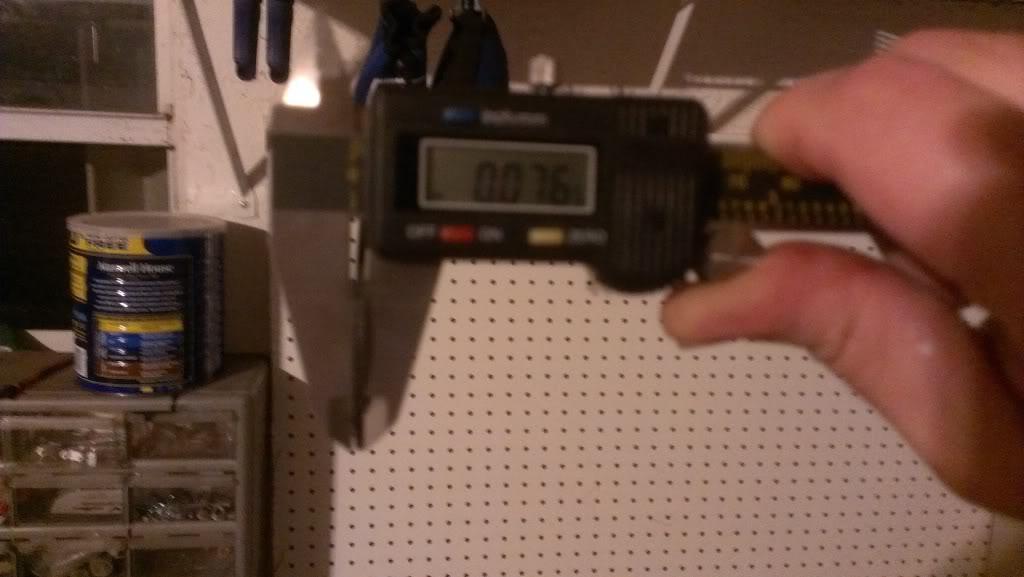
I used my HF bearing splitter and my HF 12 ton press and removed the pinion bearing. I didn't have to do this, but I wanted to measure what the OEM shim was under there. It measured .076.
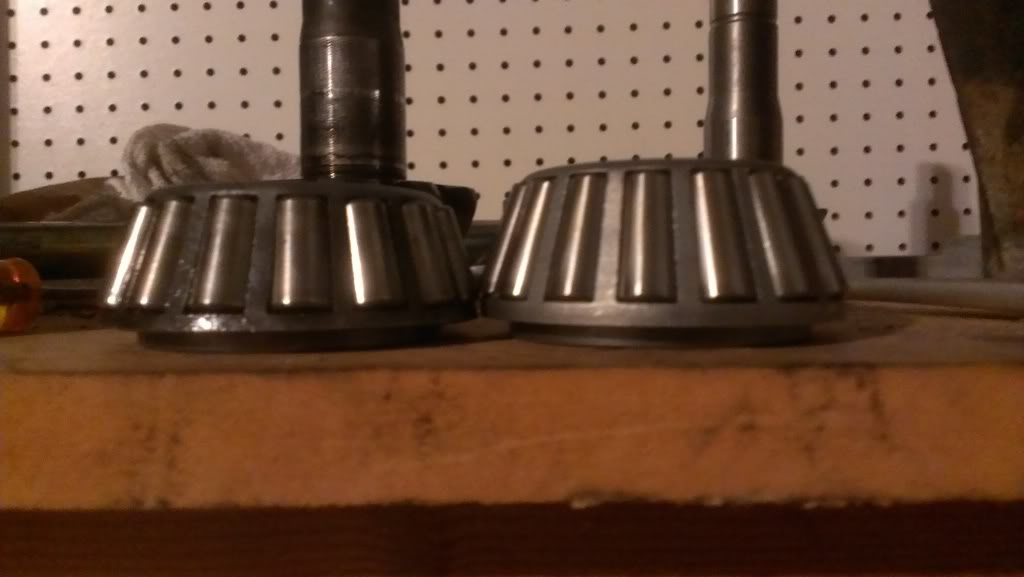
As I was looking at the old and new pinion bearings, I noticed that the new one is thicker than the old one. Old is on the left in the pic.
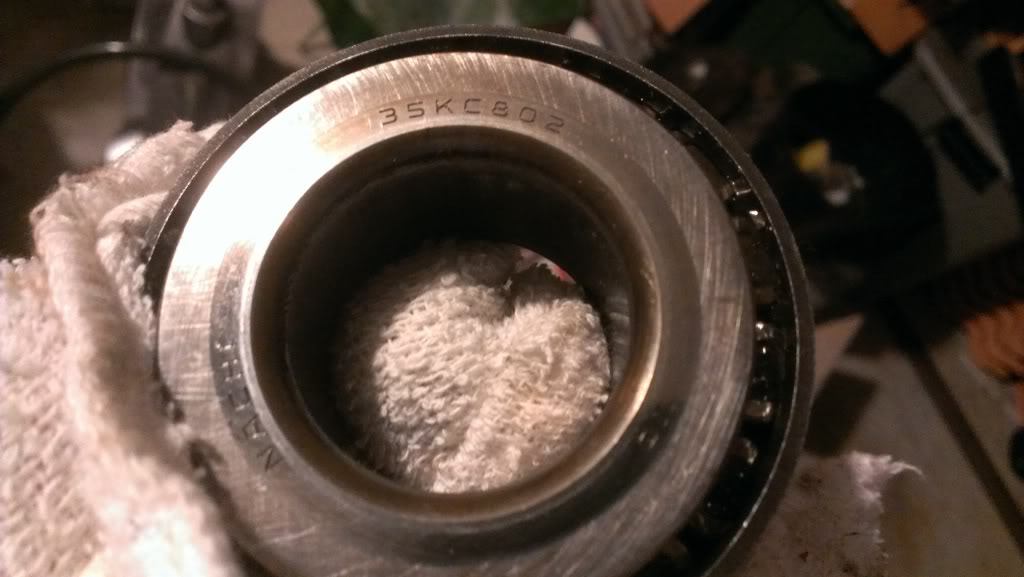
Hmm, the old inner pinion bearing is a NACHI 35KC802.
And the new inner pinion bearing from TG is a NSK 32307C.
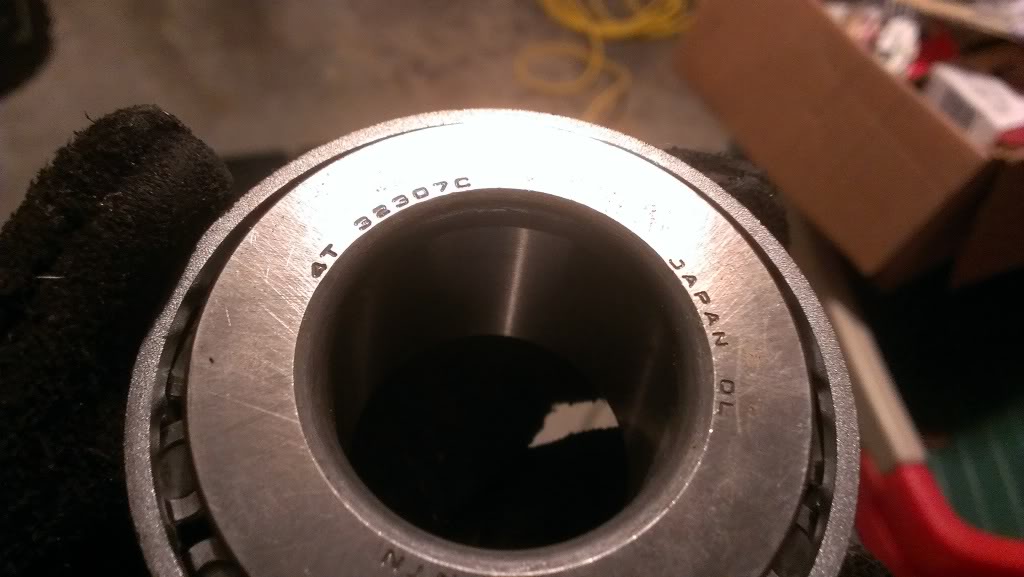
According to ZUKs info page, the 35KC802 is the correct bearing for my 88 4Runner, the only mention of the NSK part number on his site is for 79-85 trucks. I'll email ZUK to see if he thinks there is a problem. Just seems odd to me that the bearings are clearly different thicknesses.
EDIT: Ok, after reading ZUKs page more and more, I went back out and measured the heads of both pinions. The 4.10 head is 1.66" and the new 4.88 head is 1.56". I'm more and more confused. Zuk's page says that the long pinion head is the V6 pinion. So perhaps at some point in the life of this 4Runner, somebody swapped in a V6 pinion. Maybe this is all starting to make sense, Zuk usually seems to use around .092 shim thickness for the 4cyl thirds, and my diff had .076, which seemed awful low to me, but maybe the .076 shim is because this pinion head was longer than it should have been.
First of all, here's all my goodies. Axle service kits on the left, Trail Gear 4.88 R&P in the middle and the TG gear setup kit on the right.
And here is my victim...it's the original diff from my 4Runner, which I swapped out a few years ago.
Breaking down the diff was not hard. I just removed the carrier (keeping track of which bearing support goes on which side), removed the pinion nut and the pinion just fell out.
Here's a look at the original 4.10 pinion on the left and the new TG 4.88 pinion on the right.
I used my HF bearing splitter and my HF 12 ton press and removed the pinion bearing. I didn't have to do this, but I wanted to measure what the OEM shim was under there. It measured .076.
As I was looking at the old and new pinion bearings, I noticed that the new one is thicker than the old one. Old is on the left in the pic.
Hmm, the old inner pinion bearing is a NACHI 35KC802.
And the new inner pinion bearing from TG is a NSK 32307C.
According to ZUKs info page, the 35KC802 is the correct bearing for my 88 4Runner, the only mention of the NSK part number on his site is for 79-85 trucks. I'll email ZUK to see if he thinks there is a problem. Just seems odd to me that the bearings are clearly different thicknesses.
EDIT: Ok, after reading ZUKs page more and more, I went back out and measured the heads of both pinions. The 4.10 head is 1.66" and the new 4.88 head is 1.56". I'm more and more confused. Zuk's page says that the long pinion head is the V6 pinion. So perhaps at some point in the life of this 4Runner, somebody swapped in a V6 pinion. Maybe this is all starting to make sense, Zuk usually seems to use around .092 shim thickness for the 4cyl thirds, and my diff had .076, which seemed awful low to me, but maybe the .076 shim is because this pinion head was longer than it should have been.
Last edited by coryc85; Mar 30, 2013 at 04:15 AM.
Mar 29, 2013 | 08:03 PM
#229
Your good to go. All pickups and Runners in 1986 got "V6" long pinion head ring/pinions. Nothing really to do with V6 power or engine size.....all the 4 cyl and V6's got them. The 79~85's received the short pinion heads....they were all 4 cyl rigs also, by chance.
So, your new 488 gears are the "4 cyl " variety. Just as strong as the V6 gears, by the way. Toyota might have dis-continued the shorties due to stocking problems?.....better to use one part number for ALL trucks?....Just have to use a different bearing. So, your short pinion and long bearing cancel each other out resulting in the same exact pinion placement needed. Try a 080 shim for starters and post some painted pics
ZUK
Mar 29, 2013 | 08:41 PM
#231
Indeed, ... Thus the VERY important question/phrase was born.... "GOT ZUK?" Lol. .. made this a while ago, was grateful for all the help he gave me! ....finally found it again right now. ... Gonna have it turned to a sticker......

Haha....
Kill it, Cory!
Haha....
Kill it, Cory!
Last edited by ChefYota4x4; Mar 29, 2013 at 09:12 PM.
Mar 30, 2013 | 04:22 AM
#232
Thread Starter
Registered User
Joined: May 2005
Posts: 1,977
Likes: 231
From: S. FL
Your good to go. All pickups and Runners in 1986 got "V6" long pinion head ring/pinions. Nothing really to do with V6 power or engine size.....all the 4 cyl and V6's got them. The 79~85's received the short pinion heads....they were all 4 cyl rigs also, by chance.
So, your new 488 gears are the "4 cyl " variety. Just as strong as the V6 gears, by the way. Toyota might have dis-continued the shorties due to stocking problems?.....better to use one part number for ALL trucks?....Just have to use a different bearing. So, your short pinion and long bearing cancel each other out resulting in the same exact pinion placement needed. Try a 080 shim for starters and post some painted pics
ZUK
So, your new 488 gears are the "4 cyl " variety. Just as strong as the V6 gears, by the way. Toyota might have dis-continued the shorties due to stocking problems?.....better to use one part number for ALL trucks?....Just have to use a different bearing. So, your short pinion and long bearing cancel each other out resulting in the same exact pinion placement needed. Try a 080 shim for starters and post some painted pics
ZUK

Next step for me is to tap those old bearing races out of the housing, clean everything, and press the new races in. Then I can put the pinion in there and do a pattern check. Gotta do some painting in the house today, so hopefully tonight or tomorrow I will have time to work on the diff.
Last edited by coryc85; Mar 30, 2013 at 04:56 AM.
Mar 30, 2013 | 10:19 AM
#234
Registered User
Joined: Jul 2012
Posts: 2,365
Likes: 4
From: Idaho
check my thread i got a huge dragon for my rear window from this guy he could do the got zuk up quick in any color
he does custom vinyl stuff
he does custom vinyl stuff
Mar 30, 2013 | 12:17 PM
#235
Wow, ZUK, your knowledge about differentials blows me away. Thank you so much for posting and clearing that up for me. Without your website, I wouldn't even have dared attempt this.
Thanks Cyber and Chef, ZUK really is amazing, I sent him an email last night with my questions and I wake up this morning to a fresh post from him in my thread, what a great morning! If you have those stickers made up Chef, I'll proudly put one on my truck.
Next step for me is to tap those old bearing races out of the housing, clean everything, and press the new races in. Then I can put the pinion in there and do a pattern check. Gotta do some painting in the house today, so hopefully tonight or tomorrow I will have time to work on the diff.
Save some of that paint for the gears. Chef----You kill me with that sticker
 Seeing a sticker like that on a Toyota Truck would totally confuse the Suzuki Sami guys.
Mar 31, 2013 | 06:12 AM
Seeing a sticker like that on a Toyota Truck would totally confuse the Suzuki Sami guys.
Mar 31, 2013 | 06:12 AM
#237
Thread Starter
Registered User
Joined: May 2005
Posts: 1,977
Likes: 231
From: S. FL
 The paint packet they give you in the install kit is so tiny.
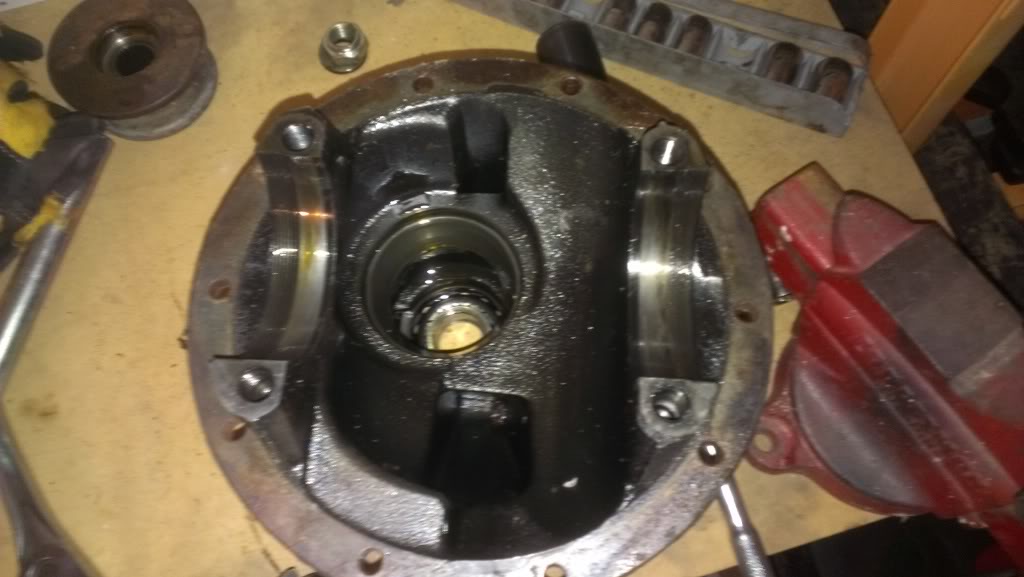
I made a bit of progress last night. Tapped the old races out with a brass drift and pressed the new races in.
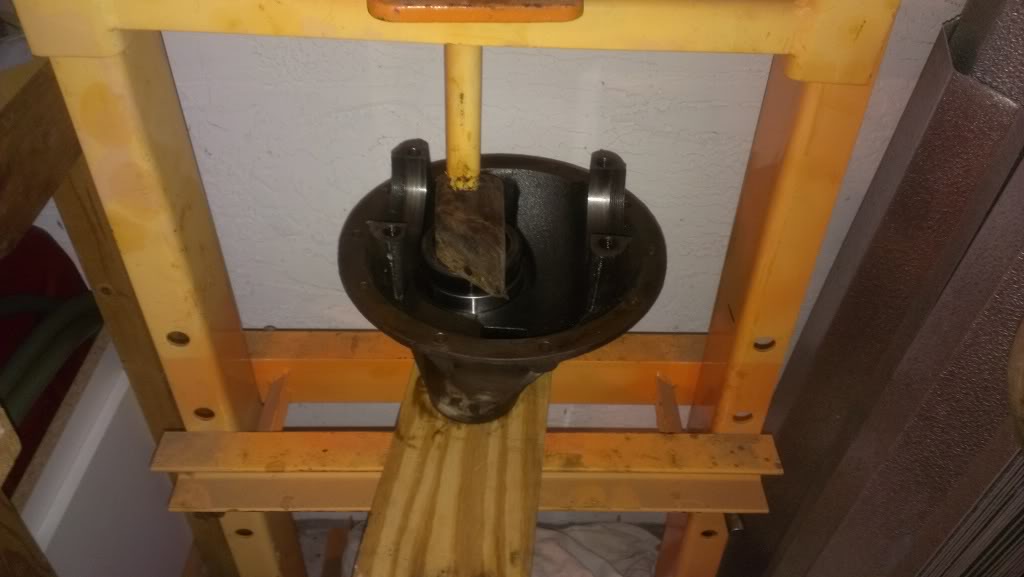
I used the old inner pinion race to press the new one in. It worked great until that last 1/16" or so. The old cup (which is sitting upside down on the new cup) would also get pressed in to the bore a little bit and I could not get it out without flipping the whole housing over and tapping the new race out a bit to knock it loose. My solution was to just flip the old cup over and press down again. It again got stuck, but now I had a lip that I could knock it out of there with. This is probably all hard to picture, but if you put 2 races on top of each other, skinny edges touching, that's the first way I pressed. Then if you flip the top race over, that's the other way. And with that top race flipped over, I could then turn the 3rd member over and use my brass punch to just tap the butt end of that old race out. I then cleaned the inside with brake cleaner and also cleaned the new races with brake cleaner.
That took me longer than it should have, but it's in there. I flipped the 3rd several times during this process to see if the race was fully seated. Then took it out of the press and I just used the brass punch to tap the outer pinion race in (using the old cup as a spacer). I gently tapped around it in a circle over and over and it went down fairly easily.
I'm going to borrow a micrometer from work and do an inventory of the shims that came with the install kit and with the solid spacer.
I also need to check AutoZone to see what kind of loan a tools they have to pull those carrier bearings off. Stay tuned.
Apr 1, 2013 | 07:52 AM
#238
Thread Starter
Registered User
Joined: May 2005
Posts: 1,977
Likes: 231
From: S. FL
Brought all my shims to work with me today to use a buddy's micrometer.
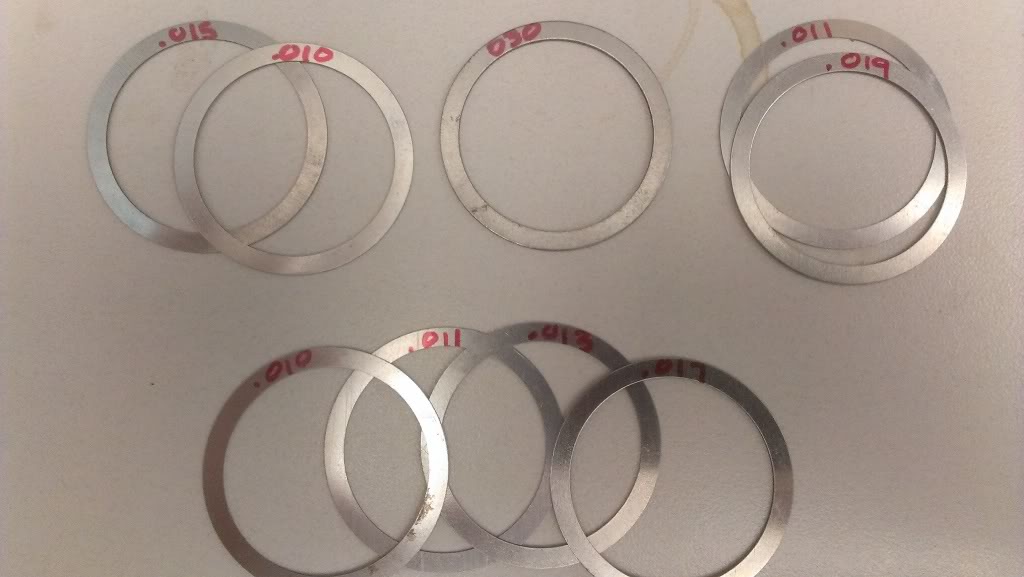
On the left is my selection of shims to make up the .080 that ZUK suggested. 4 .015 shims plus a .020. On the right are the leftover .010 and the original .077.

Also mic'd the solid collar shims from Marlin. It came with 9 shims, even though the website mentions only 5 shims. At first I was confused, but basically I think they give you the 9 shims so that you can combine them to get the 5 values listed on their website. I grouped them together to show how to get the .025, .030, and .040 values, to get the .035 and .045 I'd have to just add the .010s to the .025 stack.
Also swung by Autozone this morning on the way to work. Disappointing selection of bearing pulling devices. I thought they may have something that would work on the carrier bearing, but no, still on the hunt for that.
On the left is my selection of shims to make up the .080 that ZUK suggested. 4 .015 shims plus a .020. On the right are the leftover .010 and the original .077.
Also mic'd the solid collar shims from Marlin. It came with 9 shims, even though the website mentions only 5 shims. At first I was confused, but basically I think they give you the 9 shims so that you can combine them to get the 5 values listed on their website. I grouped them together to show how to get the .025, .030, and .040 values, to get the .035 and .045 I'd have to just add the .010s to the .025 stack.
Also swung by Autozone this morning on the way to work. Disappointing selection of bearing pulling devices. I thought they may have something that would work on the carrier bearing, but no, still on the hunt for that.
Apr 1, 2013 | 11:47 PM
#239
One of these days I would like to learn about setting up gears. That is a little intimidating to me right now. I hear you on part stores selection of tools and Sears doesnt always have some tools that I would consider fairly common. I am the king of Harbor Freight shopping. Luckily they have some tools that arent just available anywhere and are reasonable. Right now I have to rent a valve spring compressor tool. Wouldnt think those would be so hard to find.
I think alot of the newer cars are just to complicated for the average guy and seems that the home mechanic is a dying breed, that the stores just dont provide them as it is really not a common sale.
Hope the gears work out well for you and with Zuk giving some helpful tips, you are going to do fine. Looking forward to your results.
Apr 8, 2013 | 09:33 AM
#240
Thread Starter
Registered User
Joined: May 2005
Posts: 1,977
Likes: 231
From: S. FL
Not really much progress on the gears. I did go ahead and order the OTC 4520 carrier bearing puller from Amazon. I couldn't really find a puller locally that I liked and would fit, so I figure might as well get the proper tool and it's the one ZUK uses, so it must be good. Several years ago I bought the Park Tools in-lb torque wrench, so I've got most of tools needed for this job. The only thing I wish I had is a better bearing separator for the pinion, but I don't wanna spend over $100 on one right now.
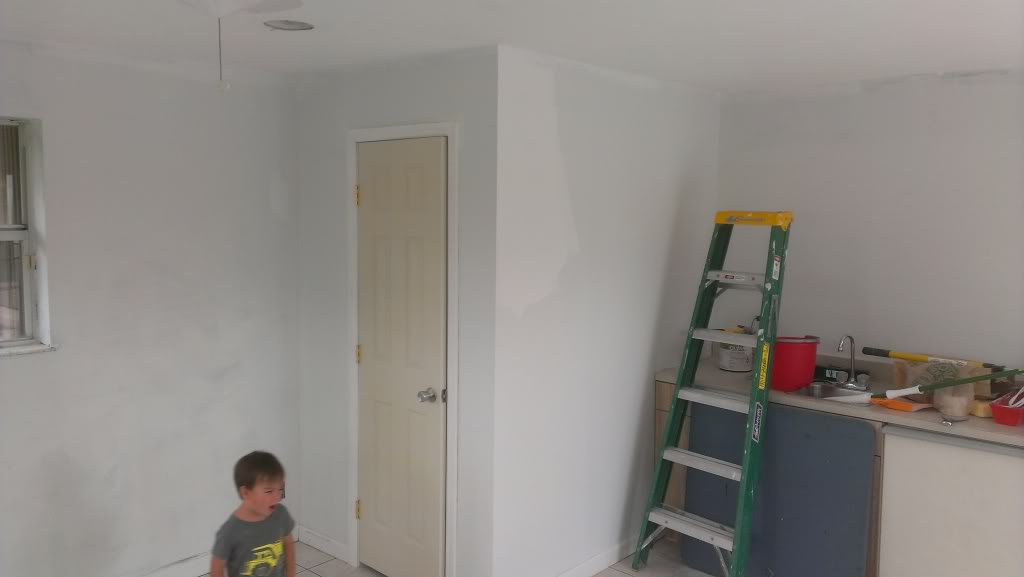
What's really been keeping me busy is we bought a new house back in November, and I've been painting, cleaning, changing every outlet, patching walls, fixing doors, it's just been hectic. Lately I've been building a closet in the playroom, finally got the ceiling painted and walls primed.
Once I'm done with this room, I can really focus on my neglected truck.


