
coryc85's 1988 4Runner Build-Up Thread
 Apr 24, 2013 | 06:20 AM
#261
Thread Starter
Registered User


Joined: May 2005
Posts: 1,979
Likes: 233
From: S. FL
Some progress and a bit of a surprise....
Got the truck up on stands, took off wheels, brake drums, removed brake lines and e-brake pins, 4 nuts and axle pulls right out.

Then slide under the truck, remove like 1000 12mm nuts and washers and the diff is out.

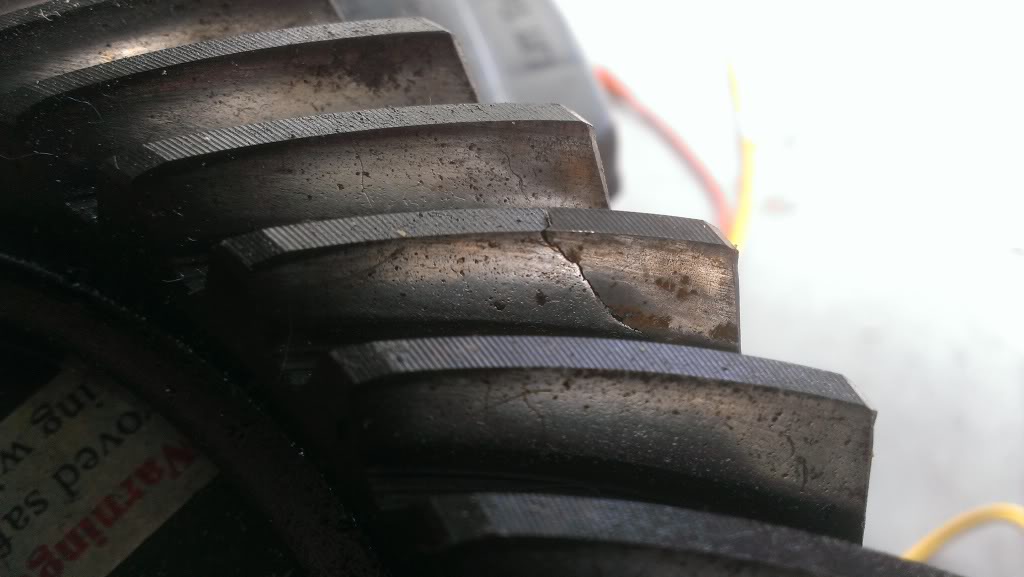
Now the surprise. For those of you who don't remember what has led to me pulling this diff, I changed u-joints not long ago. I was driving on I-95 and I felt a terrible vibration, I started slowing to pull over and WHAM, I knew it was the dshaft and I could hear it dragging. So the broken ujoint beat the heck out of the driveshaft flange, I thought I would drain the oil in the diff just as a precaution to see if there were any shavings since maybe the pinion got beat up. A tooth fell out of the diff...so crud, I must have chipped a ring gear tooth. Oil seemed silvery too, so some shavings were in there. Found a ring and pinion and setup kit and now here we are.
Ok, so the surprise is....no broken teeth on this ring gear, and from what I can see down in there, the pinion is fine too. Where did this tooth come from you might be asking yourself. Well, looking at my old old original 4.10 ring gear, it is missing a piece of tooth. I have drained the diff oil at least 3 times that I can remember since I put this 4.88 diff in, so that tooth must have been stuck up in the axle tube or something. I am still going forward with the new TG gear setup, that way I'll have all new bearings, a solid collar, and I can be sure the pattern is good. I will use the extra setup parts and refresh this extra 4.88 diff and either sell it or keep it as a spare.
Got the truck up on stands, took off wheels, brake drums, removed brake lines and e-brake pins, 4 nuts and axle pulls right out.
Then slide under the truck, remove like 1000 12mm nuts and washers and the diff is out.
Now the surprise. For those of you who don't remember what has led to me pulling this diff, I changed u-joints not long ago. I was driving on I-95 and I felt a terrible vibration, I started slowing to pull over and WHAM, I knew it was the dshaft and I could hear it dragging. So the broken ujoint beat the heck out of the driveshaft flange, I thought I would drain the oil in the diff just as a precaution to see if there were any shavings since maybe the pinion got beat up. A tooth fell out of the diff...so crud, I must have chipped a ring gear tooth. Oil seemed silvery too, so some shavings were in there. Found a ring and pinion and setup kit and now here we are.
Ok, so the surprise is....no broken teeth on this ring gear, and from what I can see down in there, the pinion is fine too. Where did this tooth come from you might be asking yourself. Well, looking at my old old original 4.10 ring gear, it is missing a piece of tooth. I have drained the diff oil at least 3 times that I can remember since I put this 4.88 diff in, so that tooth must have been stuck up in the axle tube or something. I am still going forward with the new TG gear setup, that way I'll have all new bearings, a solid collar, and I can be sure the pattern is good. I will use the extra setup parts and refresh this extra 4.88 diff and either sell it or keep it as a spare.
 Apr 24, 2013 | 08:10 AM
#263
Some progress and a bit of a surprise....
Got the truck up on stands, took off wheels, brake drums, removed brake lines and e-brake pins, 4 nuts and axle pulls right out.
Then slide under the truck, remove like 1000 12mm nuts and washers and the diff is out.
Now the surprise. For those of you who don't remember what has led to me pulling this diff, I changed u-joints not long ago. I was driving on I-95 and I felt a terrible vibration, I started slowing to pull over and WHAM, I knew it was the dshaft and I could hear it dragging. So the broken ujoint beat the heck out of the driveshaft flange, I thought I would drain the oil in the diff just as a precaution to see if there were any shavings since maybe the pinion got beat up. A tooth fell out of the diff...so crud, I must have chipped a ring gear tooth. Oil seemed silvery too, so some shavings were in there. Found a ring and pinion and setup kit and now here we are.
Ok, so the surprise is....no broken teeth on this ring gear, and from what I can see down in there, the pinion is fine too. Where did this tooth come from you might be asking yourself. Well, looking at my old old original 4.10 ring gear, it is missing a piece of tooth. I have drained the diff oil at least 3 times that I can remember since I put this 4.88 diff in, so that tooth must have been stuck up in the axle tube or something. I am still going forward with the new TG gear setup, that way I'll have all new bearings, a solid collar, and I can be sure the pattern is good. I will use the extra setup parts and refresh this extra 4.88 diff and either sell it or keep it as a spare.
Heck of Job... Can't say i would want to tackle that, but one day...
Apr 25, 2013 | 05:06 PM
#265
Your room turned out great. Carpenter skills is something I wish I could do and like to see someone who knows what they are doing and the results they get. Great job.
I dont know gears at all, but the way Toyota has theirs set up is great. The first time I did it, I was really surprised as far as just the 4 bolts, brake lines and the 3rd member. A real nice set up. Runner looks great setting the garage too. Send some of that summer weather up this way. We had snow flurries last nite, but think we are finally out of this winter after tomorrow. ( Or so I hope)
I dont know gears at all, but the way Toyota has theirs set up is great. The first time I did it, I was really surprised as far as just the 4 bolts, brake lines and the 3rd member. A real nice set up. Runner looks great setting the garage too. Send some of that summer weather up this way. We had snow flurries last nite, but think we are finally out of this winter after tomorrow. ( Or so I hope)
Apr 26, 2013 | 07:29 AM
#266
Thread Starter
Registered User
Joined: May 2005
Posts: 1,979
Likes: 233
From: S. FL
Thanks Terry. I've watched so much of the DIY channel, it makes you feel like you can do anything to your house.
So I watched a couple of Youtube videos on changing rear axle bearings, and I know that you have 2 methods of getting the axle out from the backing plate. You can use either the real SST or a homemade one which bolts onto the backing plate and gives you some ears to press against, or you can slam the whole apparatus into a piece of wood on the ground to see if you can pound the backing plate loose. I don't have the SST, although it looks like you can buy it online for about $250 and I'm not too sure I want to slam that axle around. I want to just take the axles to a shop, but I'm wondering if just any shop is going to have the proper tool to bolt to the backing plate. I don't want some shop beating up my axle or backing plate. Anyone taken their shafts to a shop to get the bearings changed?
So I watched a couple of Youtube videos on changing rear axle bearings, and I know that you have 2 methods of getting the axle out from the backing plate. You can use either the real SST or a homemade one which bolts onto the backing plate and gives you some ears to press against, or you can slam the whole apparatus into a piece of wood on the ground to see if you can pound the backing plate loose. I don't have the SST, although it looks like you can buy it online for about $250 and I'm not too sure I want to slam that axle around. I want to just take the axles to a shop, but I'm wondering if just any shop is going to have the proper tool to bolt to the backing plate. I don't want some shop beating up my axle or backing plate. Anyone taken their shafts to a shop to get the bearings changed?
Apr 26, 2013 | 11:36 AM
#267
Registered User
Joined: Jul 2012
Posts: 2,365
Likes: 4
From: Idaho
um we took the 90's axle which had lost a wheel going down a 6% grade grinding 1/5th of the backing plate off to a semi truck shop their press popped it off in a second they then were awesome an pressed the new on for free but we got um 40 in beer as a thank you
Apr 29, 2013 | 05:45 AM
#268
Thread Starter
Registered User
Joined: May 2005
Posts: 1,979
Likes: 233
From: S. FL
um we took the 90's axle which had lost a wheel going down a 6% grade grinding 1/5th of the backing plate off to a semi truck shop their press popped it off in a second they then were awesome an pressed the new on for free but we got um 40 in beer as a thank you
I was cleaning up the garage a bit and I found that little piece of tooth...so I sat it on the factory 4.10 ring gear from this truck and guess what? ....Perfect match, so that chunk has been floating around a long time in there.
Since I now had the diff with my Aussie removed from the truck, I put the new TG 4.88 ring gear onto the carrier. A little blue loctite and torque'd to 75 ft-lbs.
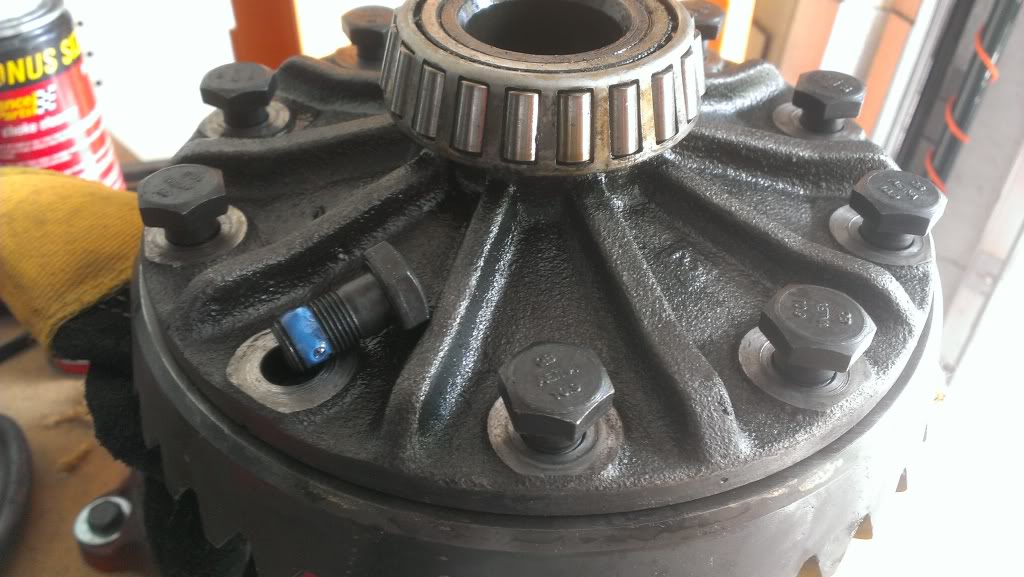
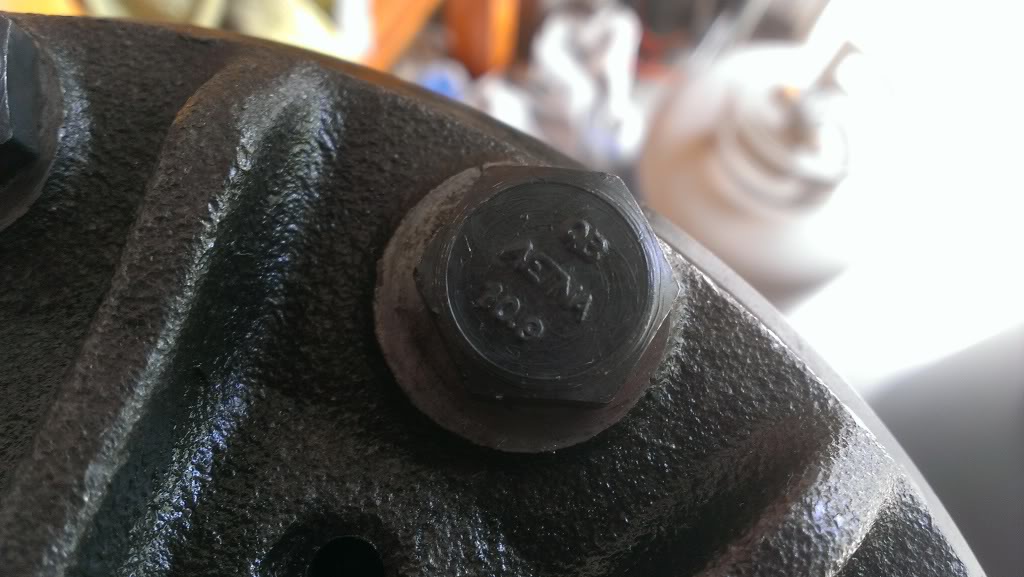
Zuk would be happy, the TG supplied ring gear bolts are the 10.9 type.
A few notes for anybody planning to do this.
- I had to lightly sand the inside surface of the ring gear so that it would fit onto the carrier. After sanding, I cleaned it and tapped it on with a board.
- Clean the bolt holes on the ring gear BEFORE putting it onto the carrier. There is crud in those threads. I did not do this, so I had to tap the ring back off the carrier to do it, save yourself some time and clean those threads first. While it is off, run a bolt into each hole all the way to make sure the threads are clear.
- Also clean the threads on the bolts, clean and file the carrier and ring gear mating surfaces.
Apr 30, 2013 | 09:53 AM
#270
Thread Starter
Registered User
Joined: May 2005
Posts: 1,979
Likes: 233
From: S. FL
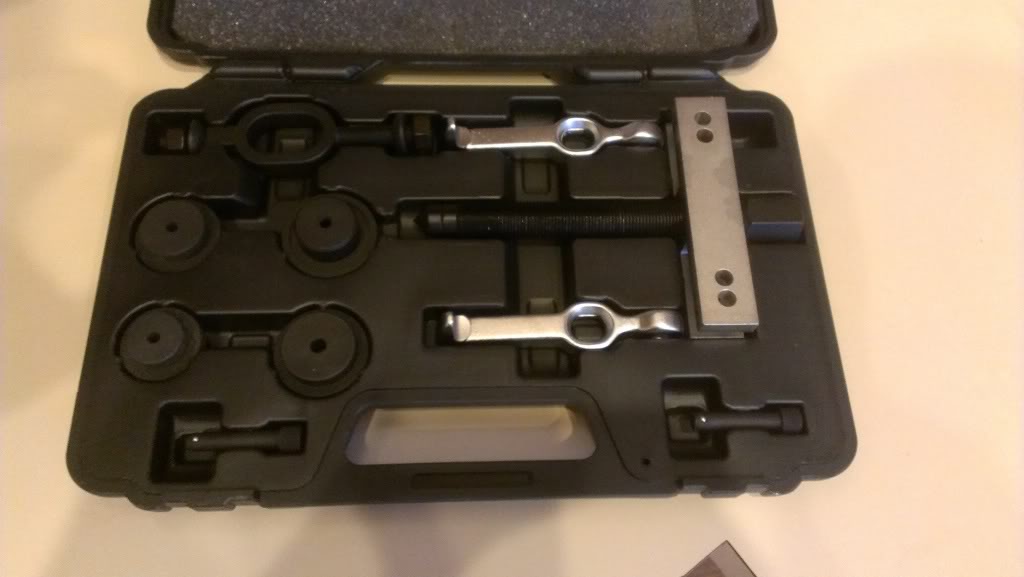
Thought I would share a pic of the OTC carrier bearing puller. Zuk recommends this tool, and I couldn't find anything locally that had slim jaws to get between the bearing and the housing, so I ordered this from Amazon. Looking to yank those old carrier bearings in the next few days and put my new ones on.
Also, the shop that I spoke to about the axle bearings gave me a price of $75 per axle on Friday. I got to wondering if per axle meant $75 per side or $75 for the whole rear axle. Much to my dismay, I called them back and found out $75 per side. So it's going to cost $150 to get the old bearings pressed off and new ones on. I want it done right, and they seem to know what they are talking about...just seems like a lot of money to me.
Also, the shop that I spoke to about the axle bearings gave me a price of $75 per axle on Friday. I got to wondering if per axle meant $75 per side or $75 for the whole rear axle. Much to my dismay, I called them back and found out $75 per side. So it's going to cost $150 to get the old bearings pressed off and new ones on. I want it done right, and they seem to know what they are talking about...just seems like a lot of money to me.
Apr 30, 2013 | 09:59 AM
#271
Thought I would share a pic of the OTC carrier bearing puller. Zuk recommends this tool, and I couldn't find anything locally that had slim jaws to get between the bearing and the housing, so I ordered this from Amazon. Looking to yank those old carrier bearings in the next few days and put my new ones on.

Also, the shop that I spoke to about the axle bearings gave me a price of $75 per axle on Friday. I got to wondering if per axle meant $75 per side or $75 for the whole rear axle. Much to my dismay, I called them back and found out $75 per side. So it's going to cost $150 to get the old bearings pressed off and new ones on. I want it done right, and they seem to know what they are talking about...just seems like a lot of money to me.
Also, the shop that I spoke to about the axle bearings gave me a price of $75 per axle on Friday. I got to wondering if per axle meant $75 per side or $75 for the whole rear axle. Much to my dismay, I called them back and found out $75 per side. So it's going to cost $150 to get the old bearings pressed off and new ones on. I want it done right, and they seem to know what they are talking about...just seems like a lot of money to me.
Nice set of tools, I hate getting some of these tools because you end up using it once and a blue moon, but like I was told more like once an eclipse.
As for the shop and the cost, If you think they seem to know what they are talking about you may want to give them a try. I would call around a bit more or even the dealer, sometime they are helpful and tell you where to go if they outsource their work. Call around and ask for some pricing to see if they are in range, but just don't call one call a few.
 May 1, 2013 | 08:52 AM
#274
Thread Starter
Registered User
Joined: May 2005
Posts: 1,979
Likes: 233
From: S. FL
Thanks kornhusker, it's getting there. I should get everything I want done on this truck finished just in time to start over!
EDIT: Just spoke to another powertrain shop, the guy did seem to know what he was doing, but he quoted $150 per side. He also said it was a difficult job and it requires a special tool, which obviously I know. At this point I am seriously considering buying this tool from eBay.http://www.ebay.com/itm/261160472839?item=261160472839&viewitem=&vxp=mtr
It will cost me $150 with shipping, but I'll have the tool.
Last edited by coryc85; May 1, 2013 at 09:14 AM.
May 1, 2013 | 11:46 AM
#275
Hey Cory,
Have you thought of trying to make your own SST tool? Check out this posting over at 4x4wire:
http://www.4x4wire.com/toyota/mainte...wheel_bearing/
Let me know what you think about it. Would be interesting to do, but I know at the same time you are in a rush to get back on the road again.
Have you thought of trying to make your own SST tool? Check out this posting over at 4x4wire:
http://www.4x4wire.com/toyota/mainte...wheel_bearing/
Let me know what you think about it. Would be interesting to do, but I know at the same time you are in a rush to get back on the road again.
May 1, 2013 | 12:09 PM
#276
Thread Starter
Registered User
Joined: May 2005
Posts: 1,979
Likes: 233
From: S. FL
Junk - that would be interesting to make. I'm not sure my skills are up to it, plus I think I'd need an old axle tube to start with. It is tempting to try and make something. Maybe....some 1.5 ID pipe, some thick plate for the flange. I don't know though, it would probably cost me $50 just in materials and then all the cutting, drilling and welding, might be nice just to buy it premade.
May 1, 2013 | 12:41 PM
#277
Your'e probably right, cheaper to buy it. If we had a place to get some scrap left over toyota axle, then all we would have to do is cut then weld a flange to the cut end. The other end would already have the holes set already. Just a thought.
Just got home, weather really sucks right now. Just had a heavy storm come down this way, road were flooded. Looks like its clearing up for a little for me, but I'm sure it will start up again.
Just got home, weather really sucks right now. Just had a heavy storm come down this way, road were flooded. Looks like its clearing up for a little for me, but I'm sure it will start up again.
May 1, 2013 | 06:39 PM
#278
Thread Starter
Registered User
Joined: May 2005
Posts: 1,979
Likes: 233
From: S. FL
Made some progress this evening on the diff.
Took the pinion out of the 4.88 diff that was in the truck. Pressed the inner bearing off to see what shim was on there. It was .081, which is close enough to .080 and I wanted to use it instead of a stack of shims.
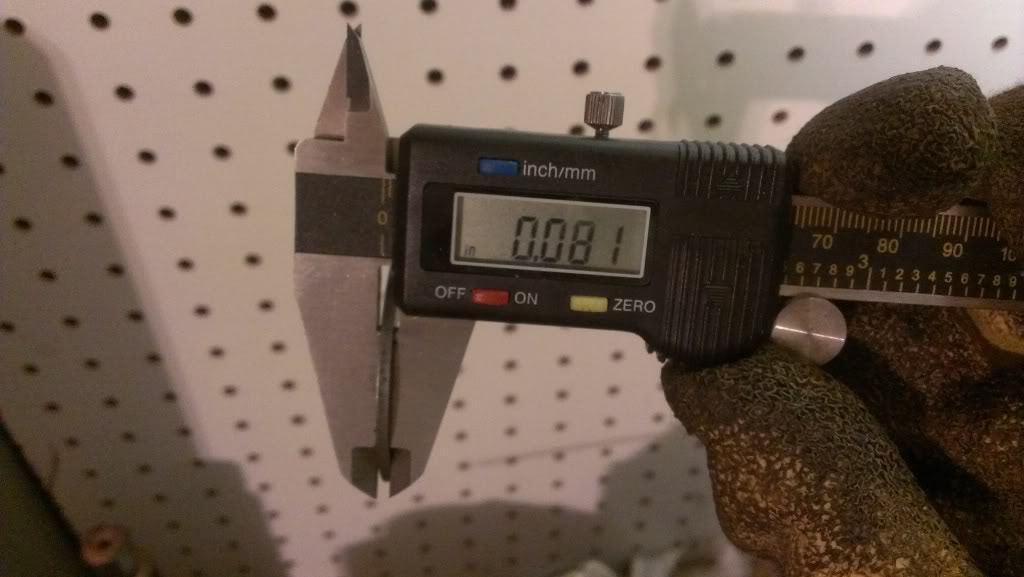
So I cleaned the new TG pinion with brake cleaner, cleaned the inner bearing, dropped the .081 shim on there and loaded it into the press.
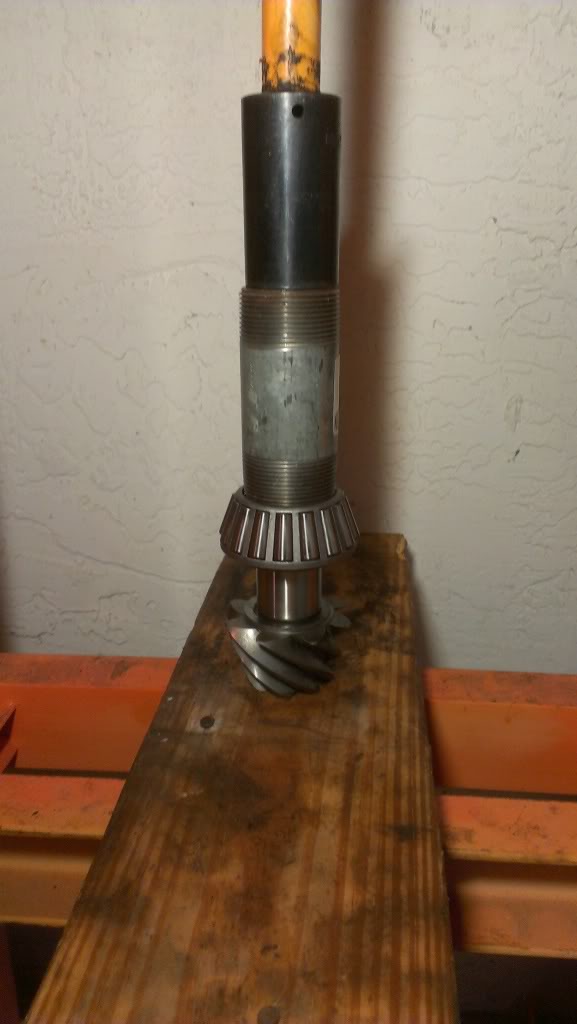
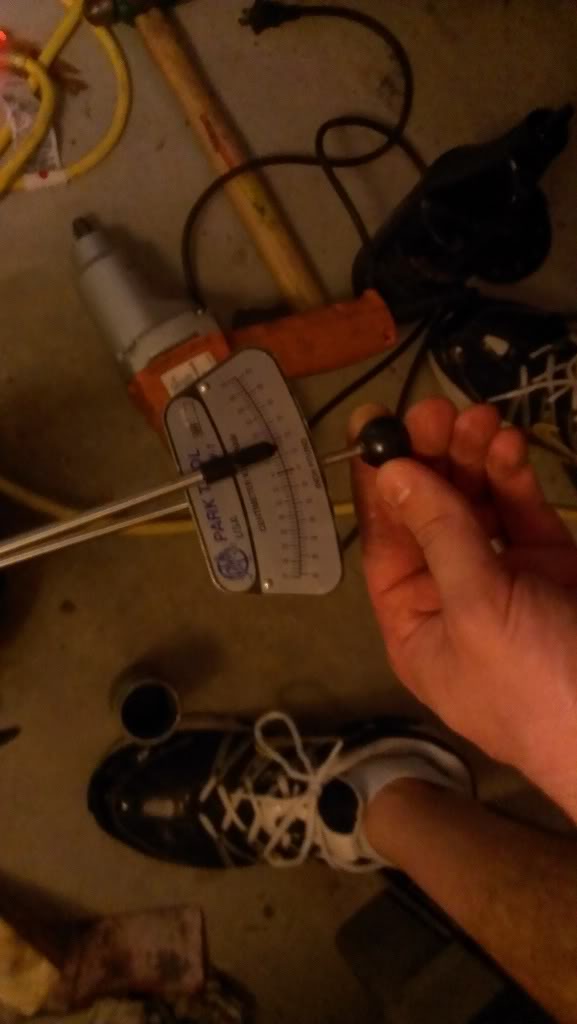
So now that the pinion was ready to go, I sat the pinion on 2 2x4s, sat the diff on it and tapped the outer pinion bearing down onto the pinion with a short piece of 1.5" pipe. Oops, forgot to put the solid spacer in. So I pressed the pinion out, measured the spacer at 2.372". Zuk says solid spacer final length should be 2.389, and luckily the spacer came with a .017 shim. So now I put the pinion back in as before, dropped the spacer in there, then the shim, the the outer pinion bearing and tapped it back on. I put the flange on and tightened the nut a little bit, then oiled both bearings pretty good, spun the flange several times to spread the oil. Finally I used the impact (which probably is not a good idea) to slowly tighten the pinion nut while checking the preload with my Park in-lb wrench. This took several iterations of loosening and then tightening for me to get right, next time won't use the impact for this part. EDIT: Exact pre-load probably not that important here for the pattern check anyway.
Anyway, got it to around 15 in-lbs and said DONE.
Tomorrow I plan to put the carrier back in and do a pattern check. Gettin there guys, gettin there.
Took the pinion out of the 4.88 diff that was in the truck. Pressed the inner bearing off to see what shim was on there. It was .081, which is close enough to .080 and I wanted to use it instead of a stack of shims.
So I cleaned the new TG pinion with brake cleaner, cleaned the inner bearing, dropped the .081 shim on there and loaded it into the press.
So now that the pinion was ready to go, I sat the pinion on 2 2x4s, sat the diff on it and tapped the outer pinion bearing down onto the pinion with a short piece of 1.5" pipe. Oops, forgot to put the solid spacer in. So I pressed the pinion out, measured the spacer at 2.372". Zuk says solid spacer final length should be 2.389, and luckily the spacer came with a .017 shim. So now I put the pinion back in as before, dropped the spacer in there, then the shim, the the outer pinion bearing and tapped it back on. I put the flange on and tightened the nut a little bit, then oiled both bearings pretty good, spun the flange several times to spread the oil. Finally I used the impact (which probably is not a good idea) to slowly tighten the pinion nut while checking the preload with my Park in-lb wrench. This took several iterations of loosening and then tightening for me to get right, next time won't use the impact for this part. EDIT: Exact pre-load probably not that important here for the pattern check anyway.
Anyway, got it to around 15 in-lbs and said DONE.
Tomorrow I plan to put the carrier back in and do a pattern check. Gettin there guys, gettin there.
Last edited by coryc85; May 2, 2013 at 05:08 AM.


