
1986 4runner build up sas/chevy spring swap
 Feb 28, 2012 | 04:08 PM
#61

Thread Starter
Registered User
Joined: Sep 2011
Posts: 102
Likes: 0
From: midlothian
By the end of this weekend the stock leaf packs will be going to dump and 63" chevies will be going in storage until someone wants to buy them. Will let them go for cheap, practcially new and were only used on a chevy 2500 for about 3 months before I bought them
Mar 1, 2012 | 12:00 PM
#62
Thread Starter
Registered User
Joined: Sep 2011
Posts: 102
Likes: 0
From: midlothian
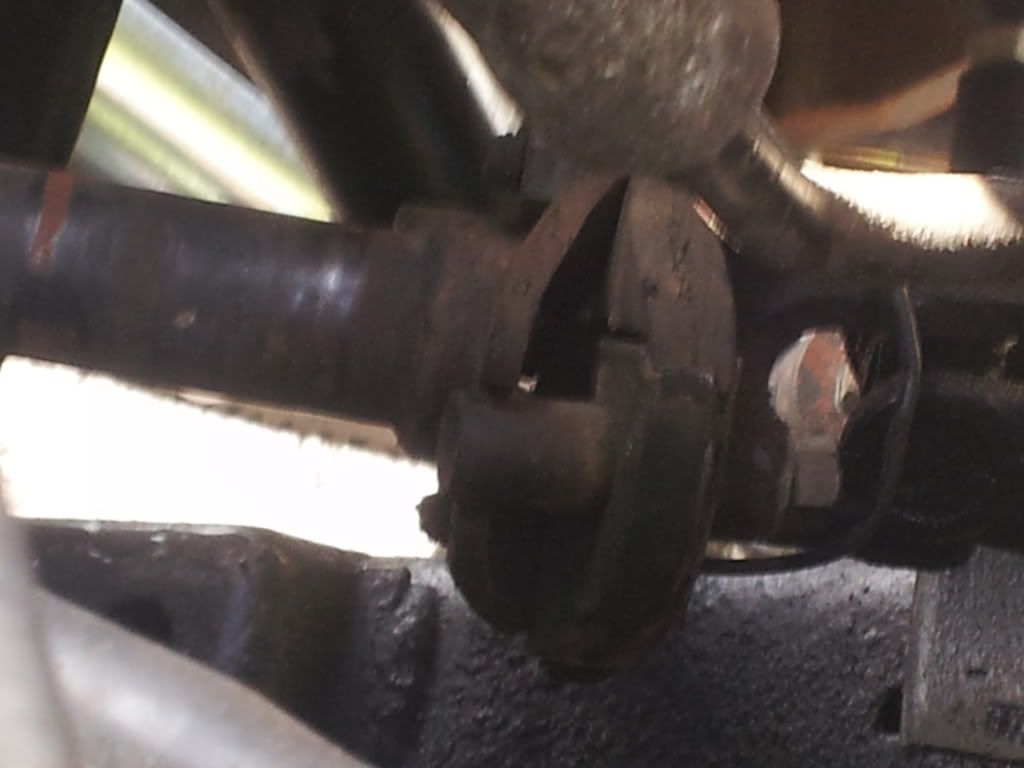
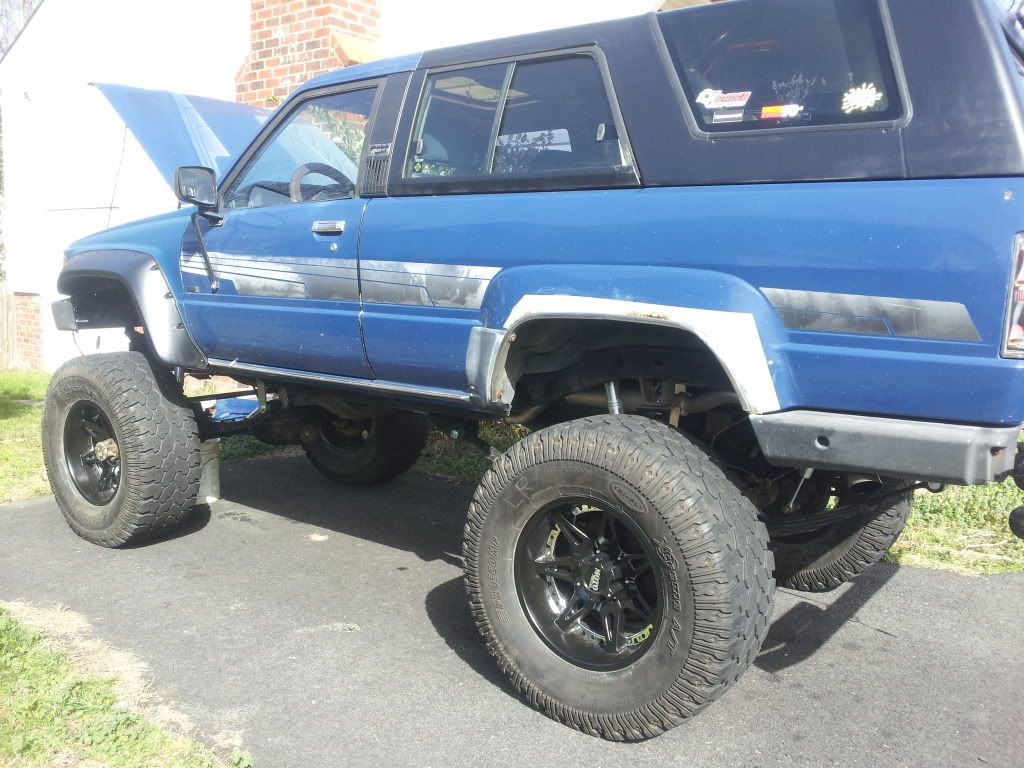
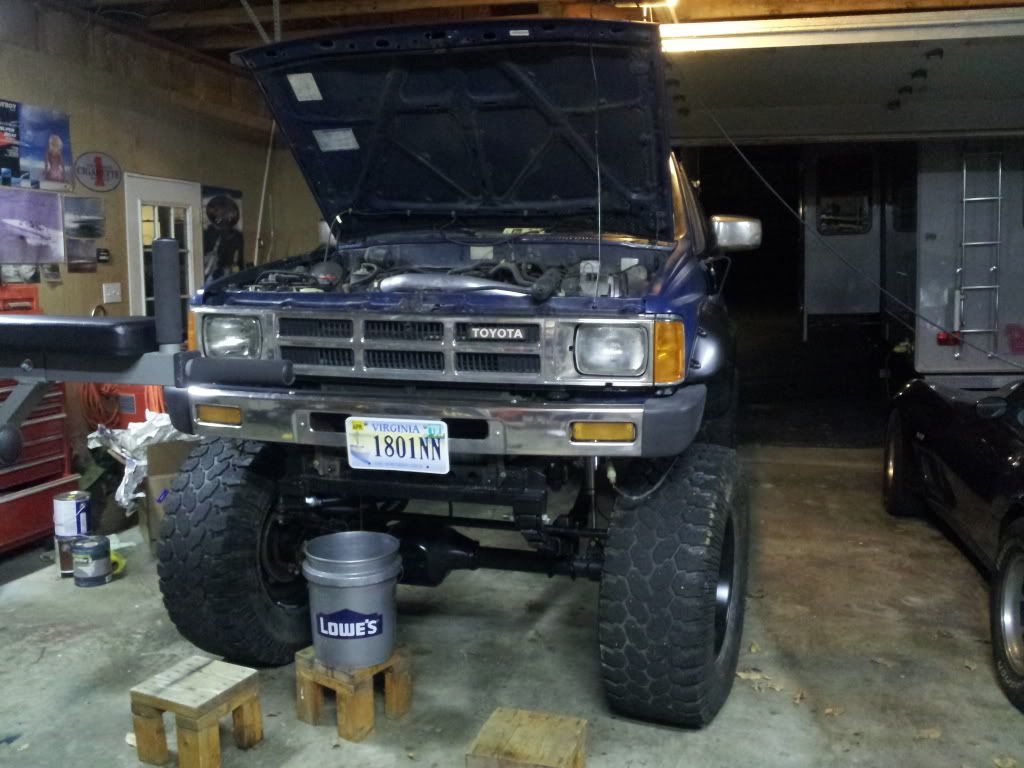
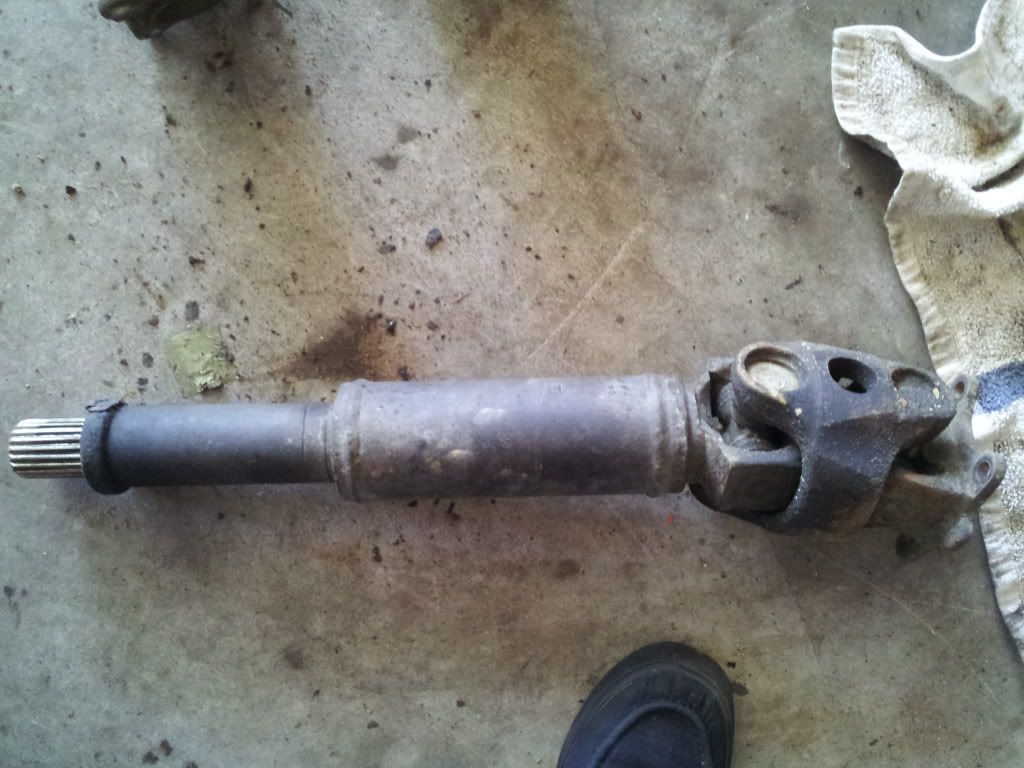
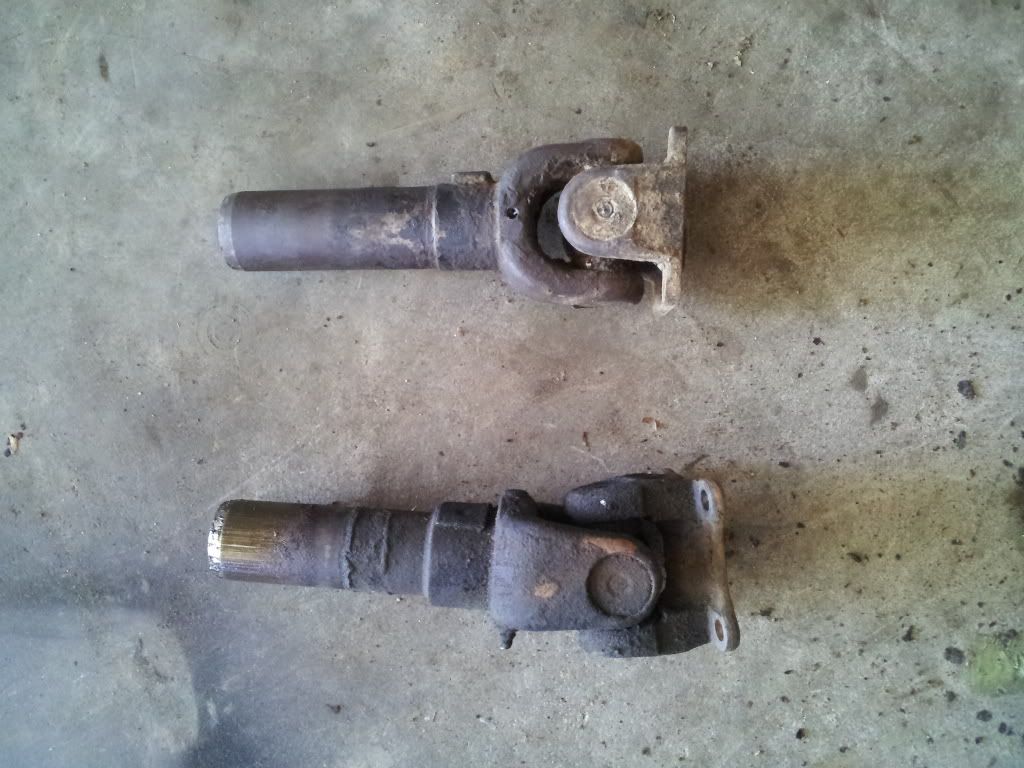
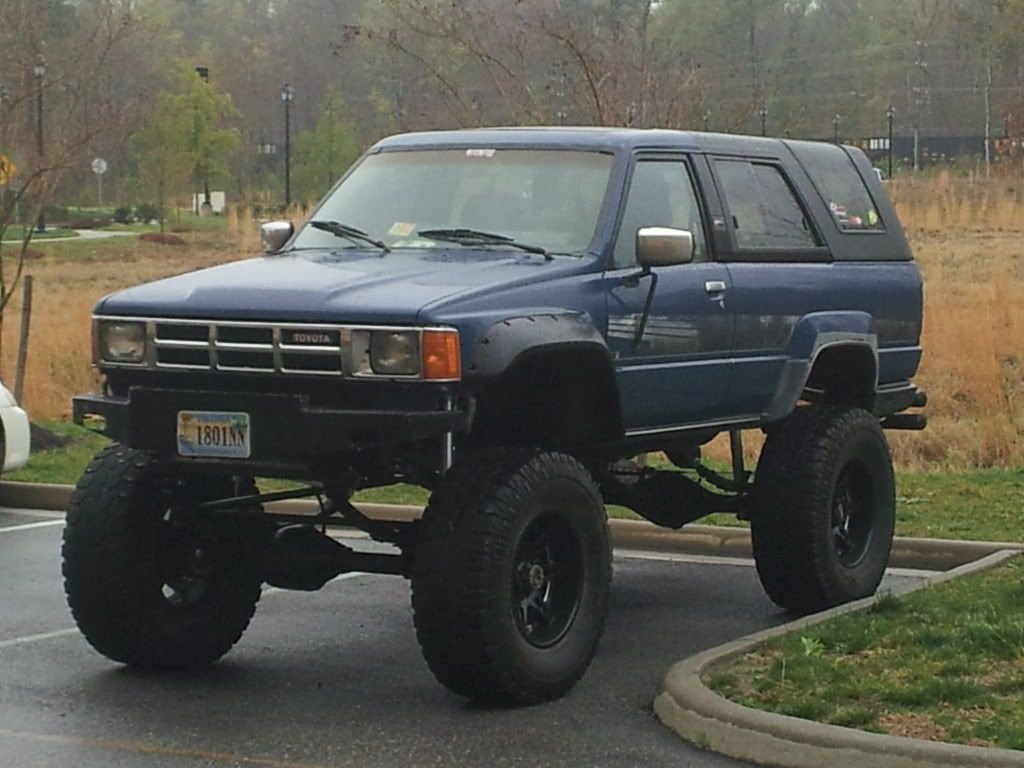
Just got back in town to my truck. A new updated pic of the the new height with the chopped bodylift. Also some photos of my steering yolk, don't think it is supposed to look like this, but any help on this is greatly appreciated. Going to look into purchasing a new steering yolk anyway.
Also got my new radiator hose kit in today from Putney's and new radiator should be in tomorrow!
Also got my new radiator hose kit in today from Putney's and new radiator should be in tomorrow!
Mar 3, 2012 | 08:23 PM
#63
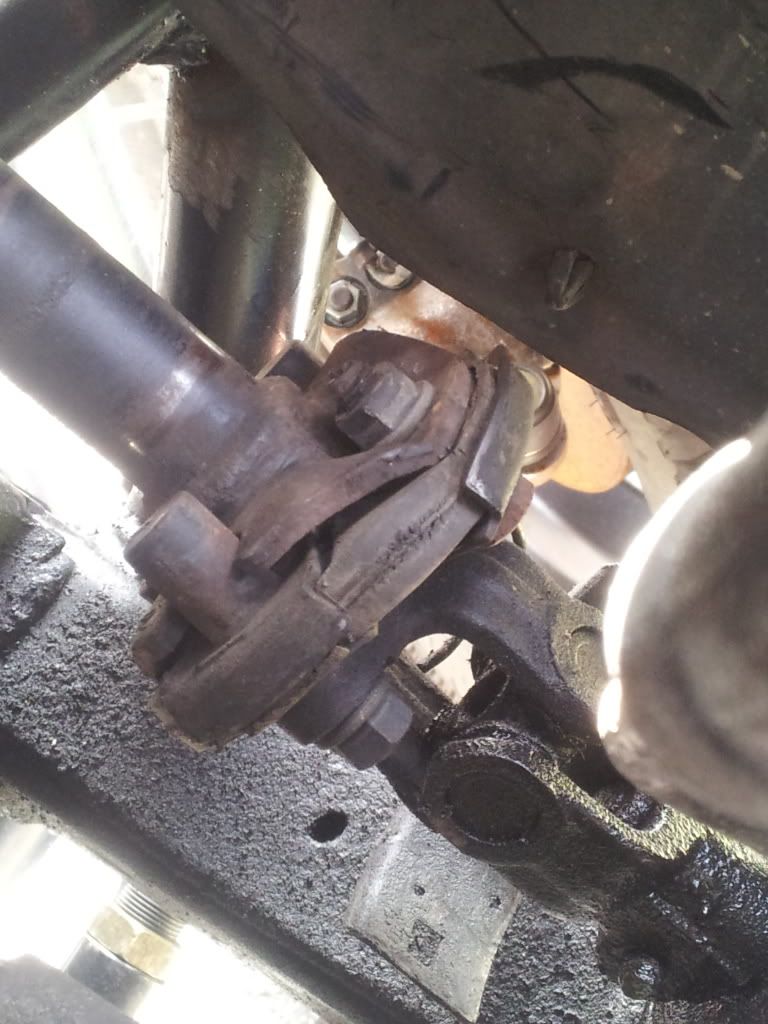
^ That steering shaft looks stock to me. That's how mine looks; it's like a rubber spacer intended to reduce vibration. But, when you reduced the body lift did you loosen up the yoke thats close to the firewall?
Last edited by streetlancer; Mar 3, 2012 at 08:27 PM.
Mar 11, 2012 | 07:39 AM
#64
Thread Starter
Registered User
Joined: Sep 2011
Posts: 102
Likes: 0
From: midlothian
I did loosen up the clamp after the fact that I had chopped the BL, but now there is some sort of rubbing sound. I am going to puchase a new rubber gromet to put in the coupling assembly, Low Range sells them for $16. Probably going to get a new steering box or rebuild kit in the near future as well, has been leaking since I bought the truck...not a big leak, but a drip or so every day and the front crossmember is covered in liquid residue.
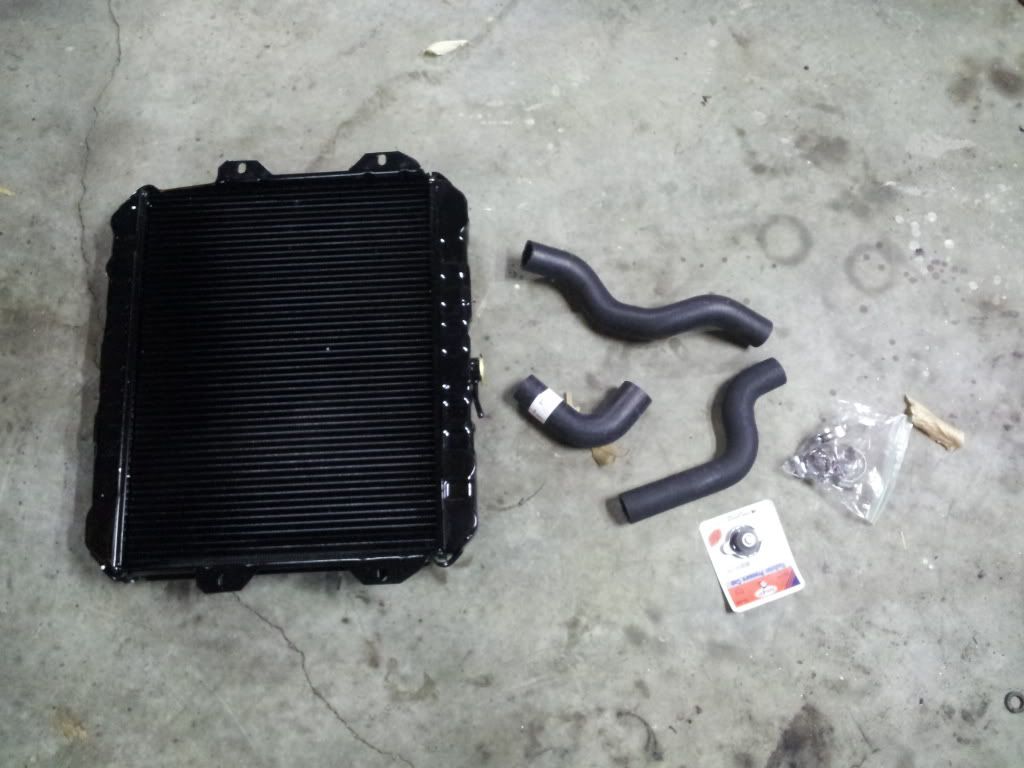
Got some new pics up of the radiator and new hose kit from Putney's. The radiator was all I needed to drive it until I get the time to put the engine in when it gets here. Also am posting up some pics of parts that I NO LONGER NEED. Would prefer not to ship anything but if you're interested we can talk. So if you are located in va, that would help if you'd like to pick them up.
New hose kit and radiator
draining the fluid
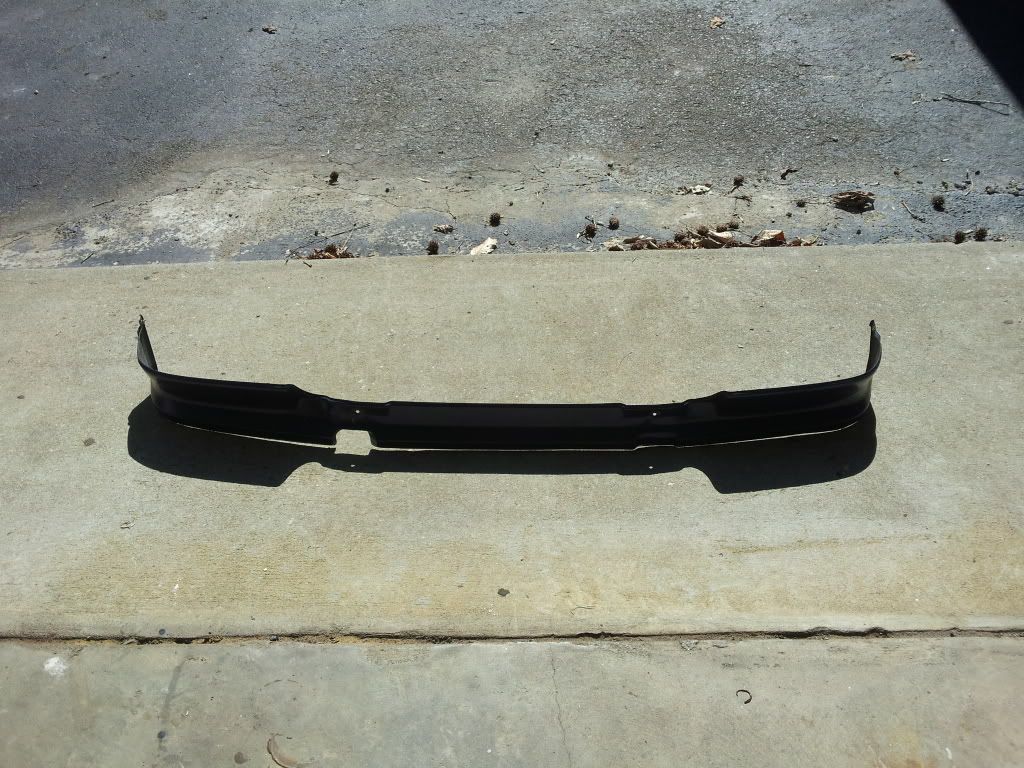
air dam I no longer need...up for grabs
v6 lockright locker for the stock 4.88 third member. $250 new....let go for 200
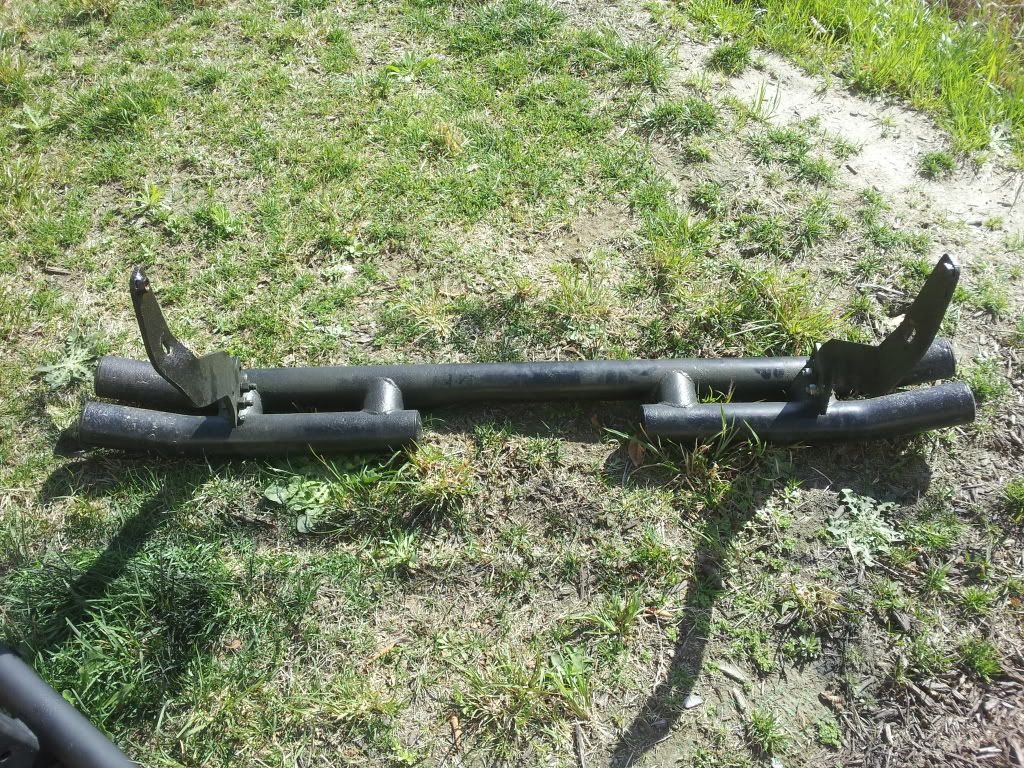
budbuilt rear shock mount that uses the exhaust clamps to mount to the rear crossmember under the frame....$40
u bolt flip kit...$30


stuffed in the ditch
still trying to figure out whether or not I wanna keep the stock front driveshaft
Got some new pics up of the radiator and new hose kit from Putney's. The radiator was all I needed to drive it until I get the time to put the engine in when it gets here. Also am posting up some pics of parts that I NO LONGER NEED. Would prefer not to ship anything but if you're interested we can talk. So if you are located in va, that would help if you'd like to pick them up.
New hose kit and radiator
draining the fluid
air dam I no longer need...up for grabs
v6 lockright locker for the stock 4.88 third member. $250 new....let go for 200
budbuilt rear shock mount that uses the exhaust clamps to mount to the rear crossmember under the frame....$40
u bolt flip kit...$30
stuffed in the ditch
still trying to figure out whether or not I wanna keep the stock front driveshaft
Mar 11, 2012 | 04:21 PM
#65
Thread Starter
Registered User
Joined: Sep 2011
Posts: 102
Likes: 0
From: midlothian
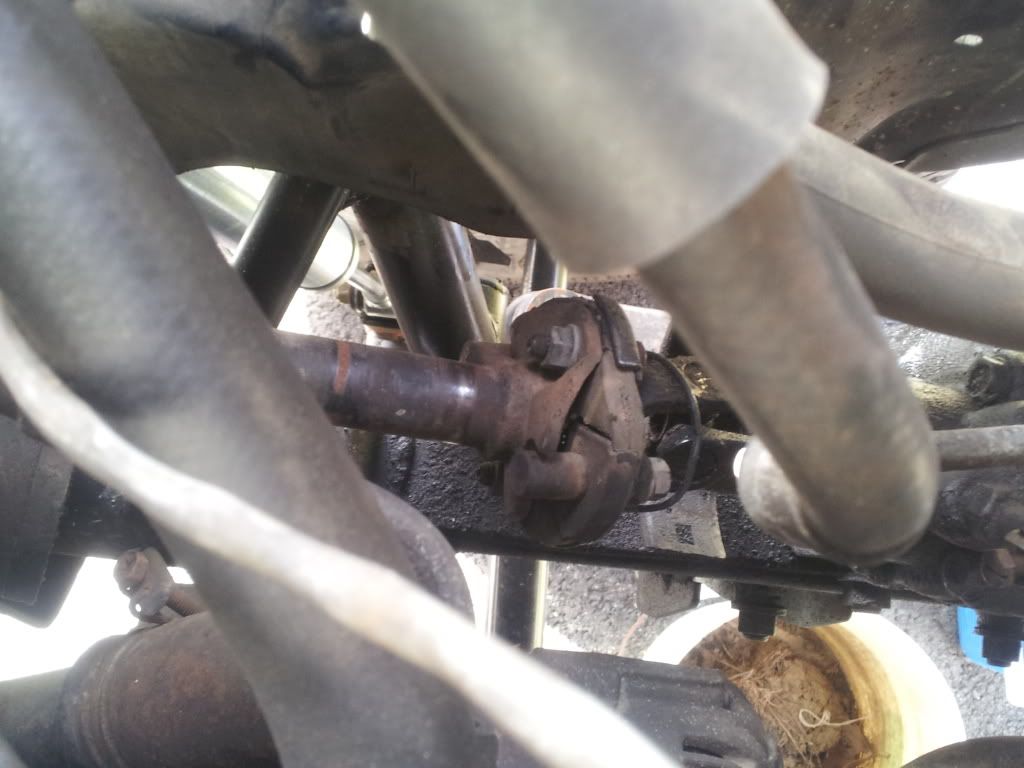
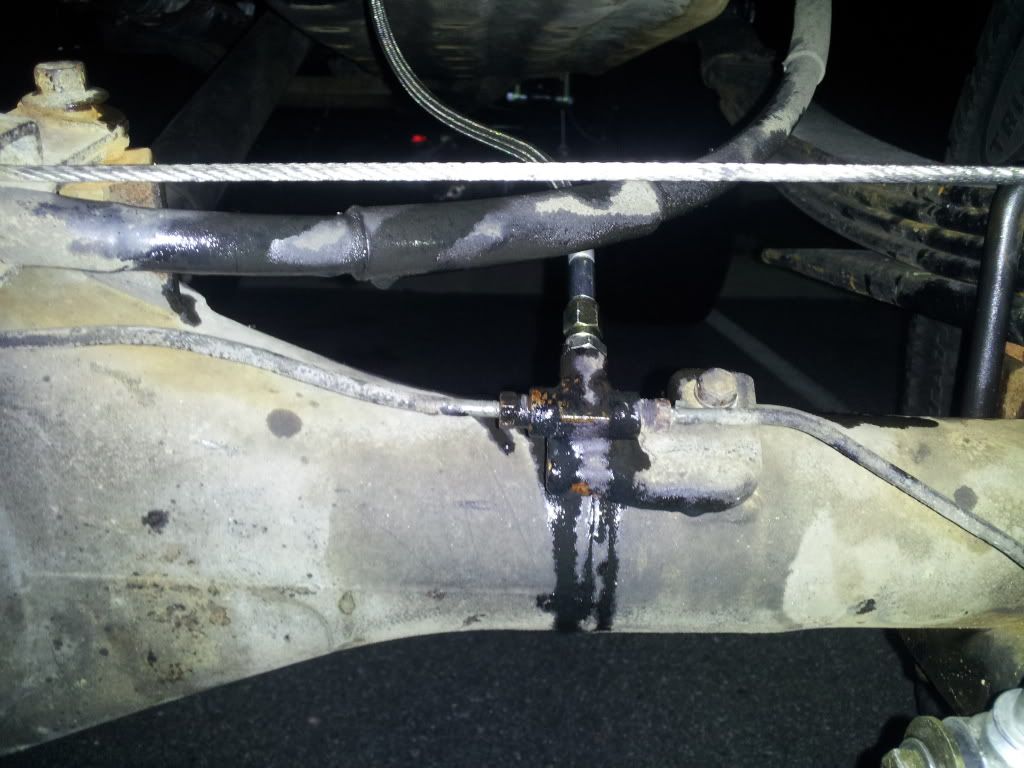
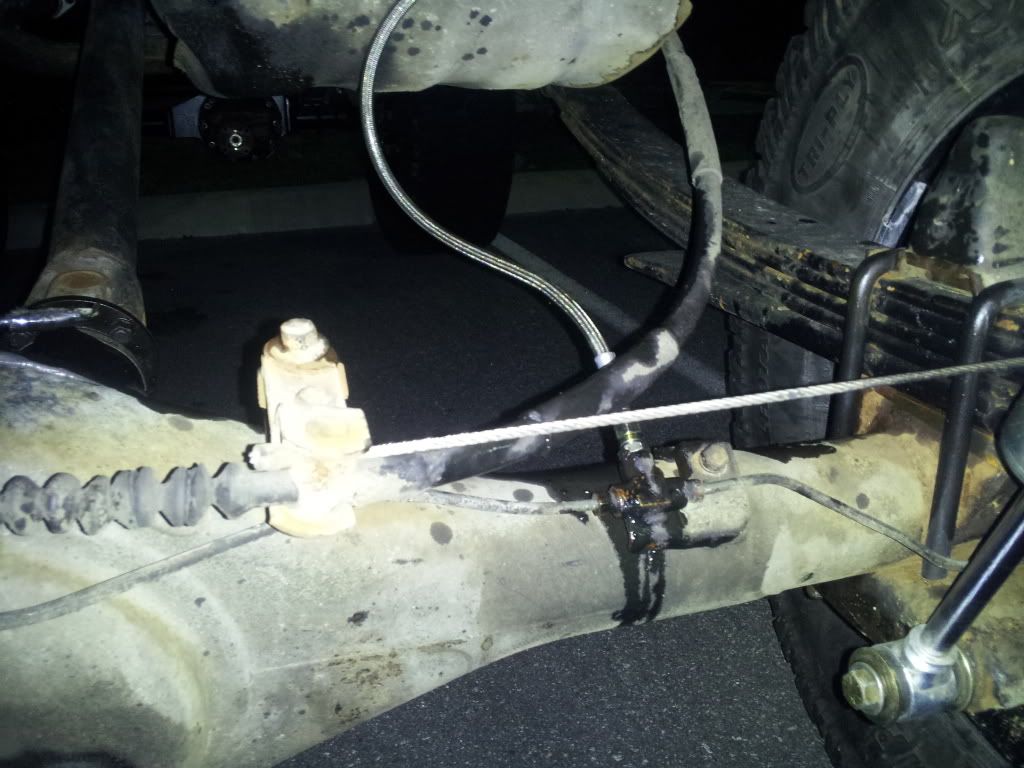
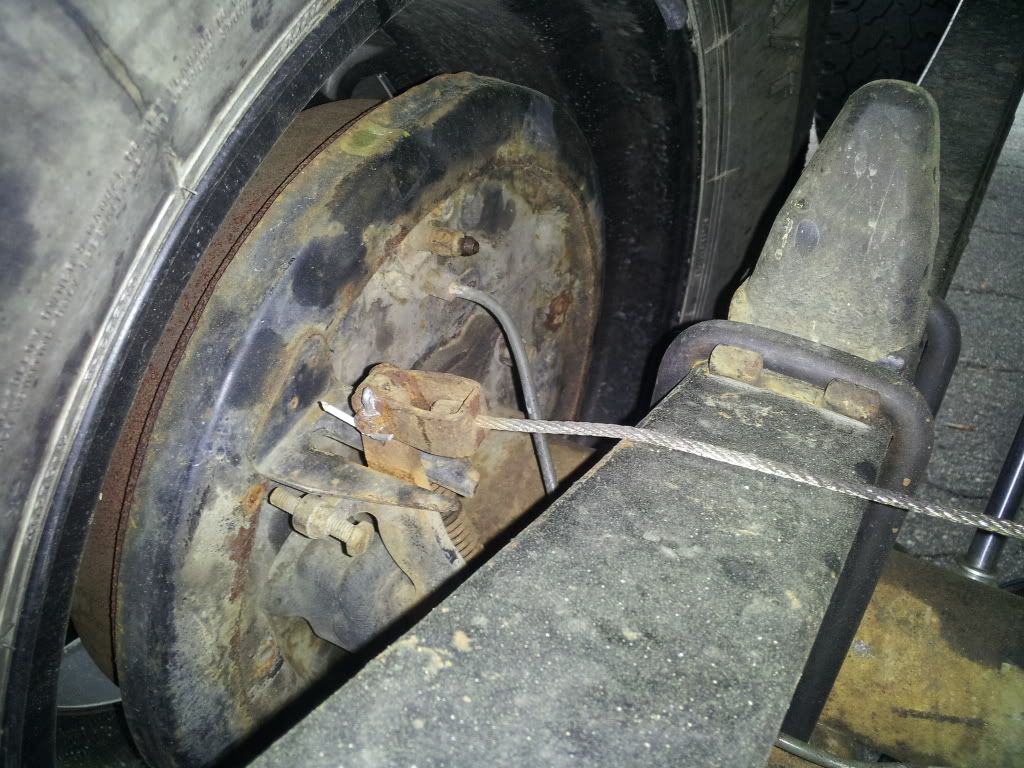
So i drove the truck down to where I work tonight, about a 2.5 hour trip in the truck, but normally half that time in my other car. Anywho, when I finally got to my hotel, I discovered this on my brake lines, looks like normal leakage, but now I just need to figure out what it's from and how to fix it. Anyone have the disc brake conversion in the rear on their yota? If so, any help on this would be great.
Mar 13, 2012 | 05:00 AM
#66
Thread Starter
Registered User
Joined: Sep 2011
Posts: 102
Likes: 0
From: midlothian
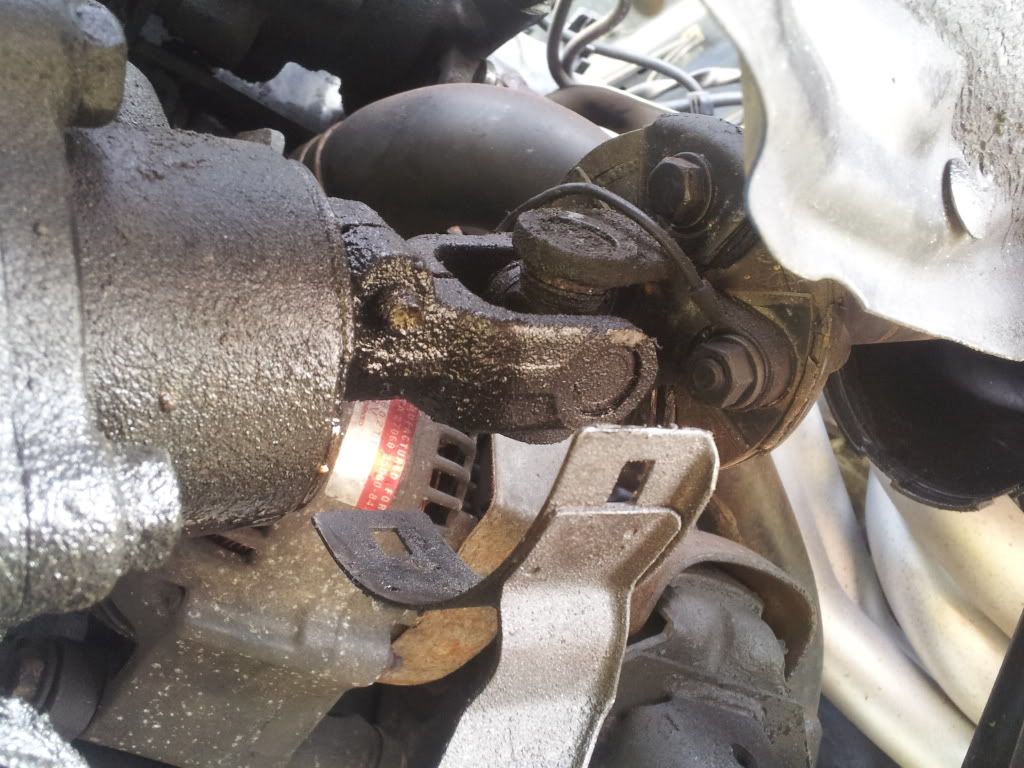
So I discovered that the leak was not from my brakes, it is a bad pinion seal in my third member and my truck is a month overdue inspection and will not pass with the bad seal and the leak....so yesterday ordered a brand new v6 third member open diff with 5.29 from Davez Performance...getting rid of the 4.88s!
Mar 15, 2012 | 11:00 AM
#68
Thread Starter
Registered User
Joined: Sep 2011
Posts: 102
Likes: 0
From: midlothian
For right now, I am only replacing the rear and I have to send that v6 core back to them, however that does leave the front v6 third member up for grabs when I do end up replacing that, but that third member is going to cost what I originally paid for the truck in order to get a high pinion with a locker in it =/ so it might be a while before I take it out if you are willing to wait.
Mar 15, 2012 | 06:40 PM
#69
Fronts got a locker? I was looking for an open third but ill think about it; sure i can wait, i've just spent some $$$ on the truck, lol. BUT, Ill take that air-dam off your hands NOW. What condition is it in? Any dents or bends? Let me know through pm so as not to clutter up your build.
Mar 25, 2012 | 04:02 PM
#70
Thread Starter
Registered User
Joined: Sep 2011
Posts: 102
Likes: 0
From: midlothian
Have some more recent updates on the build...
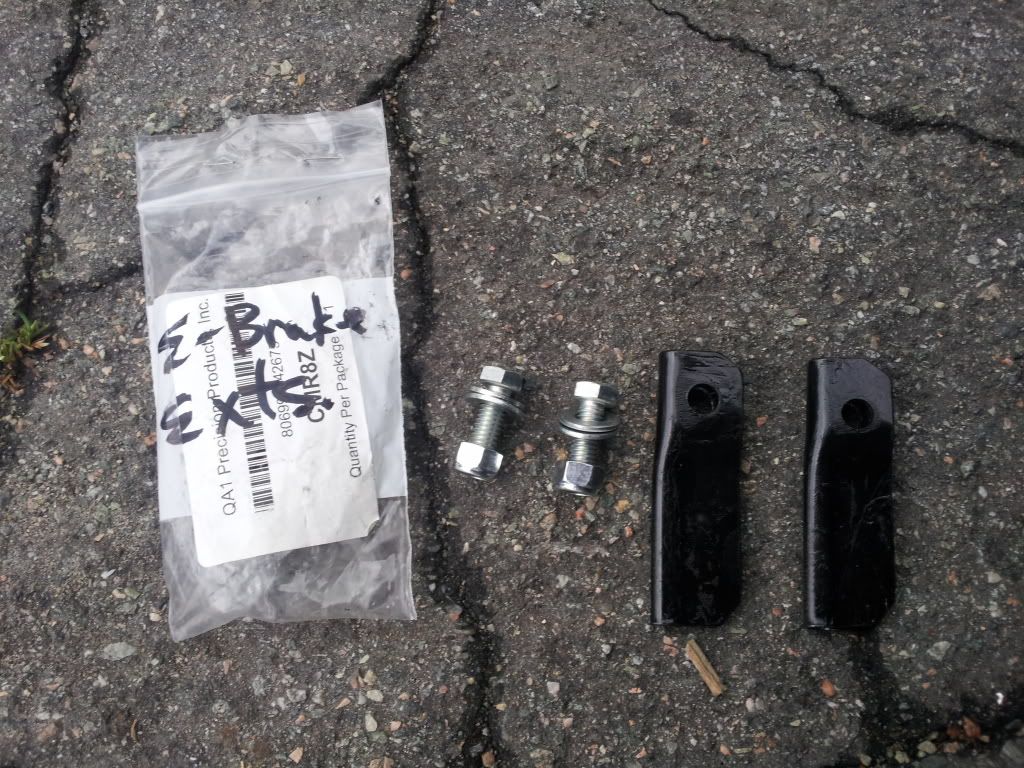
Here is a picture of my e-brake cable rubbing on my spring pack so bought these e-brake extensions from 4crawler.com, $15. Will post an installed image later once they are on.
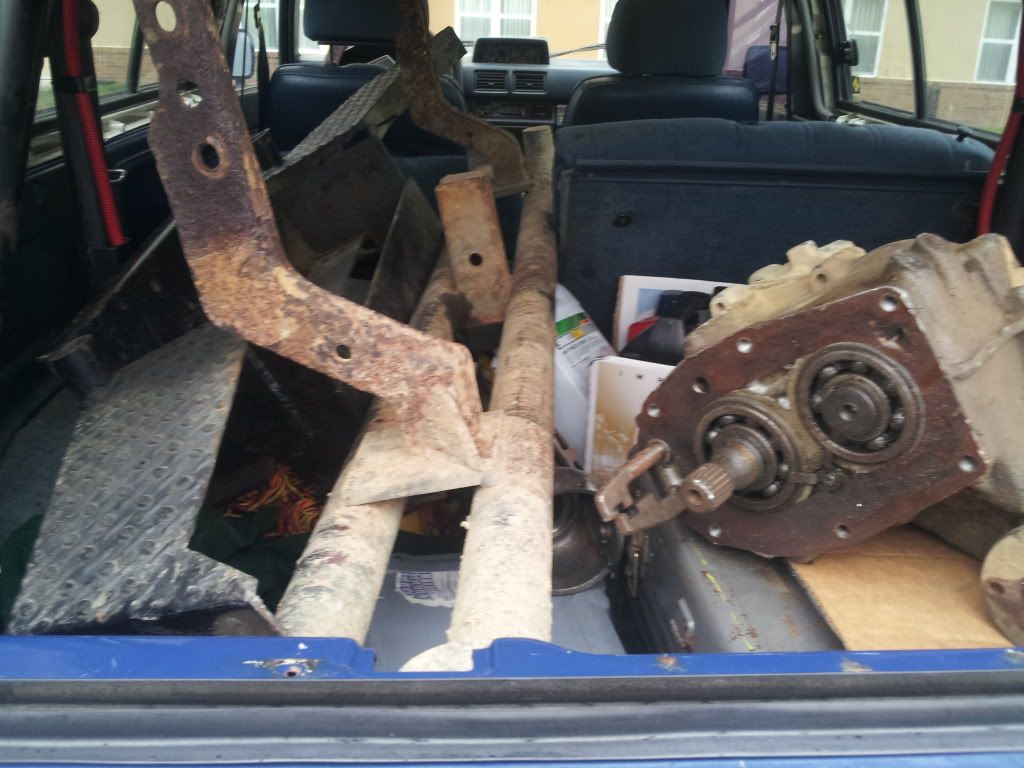
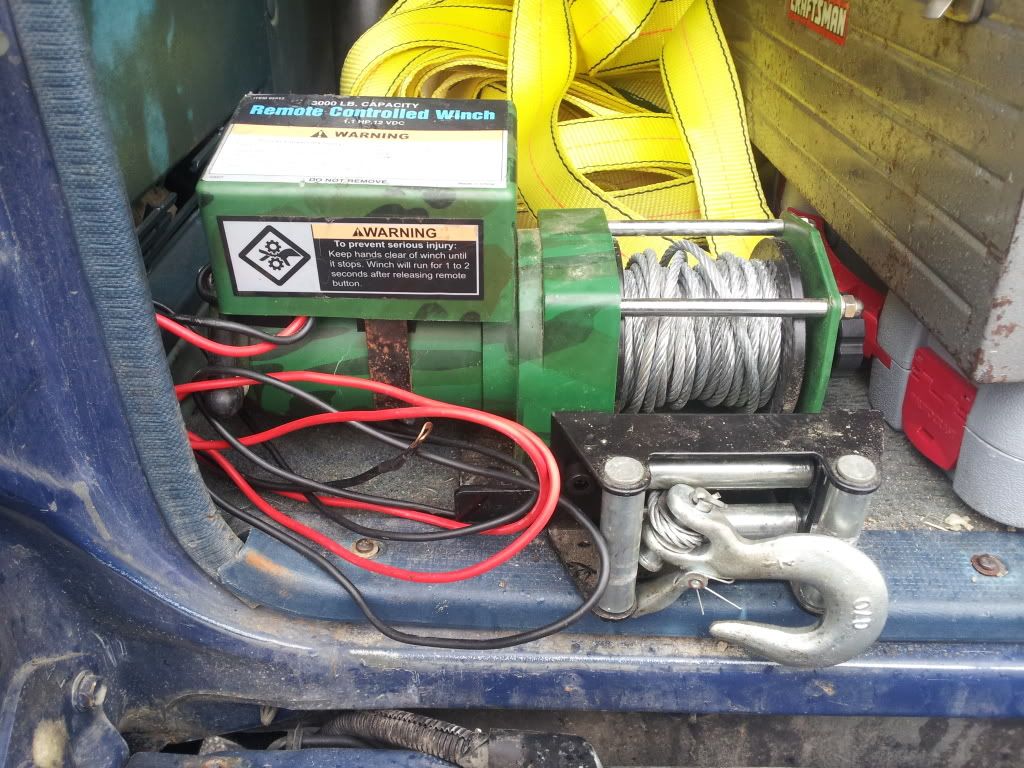
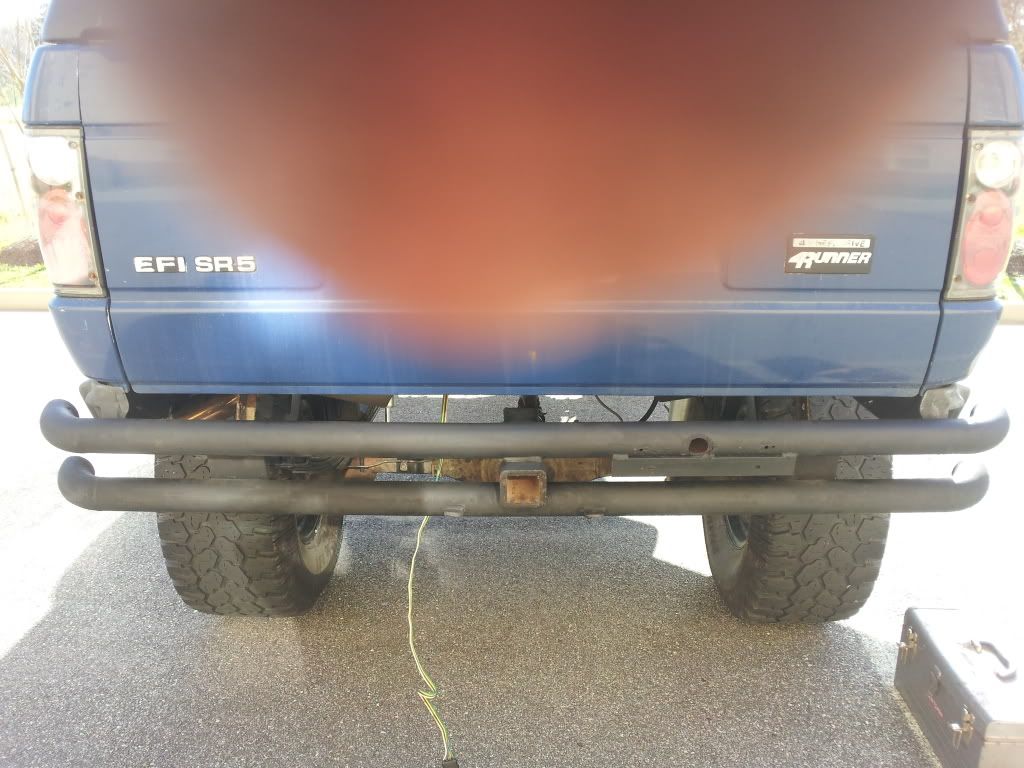
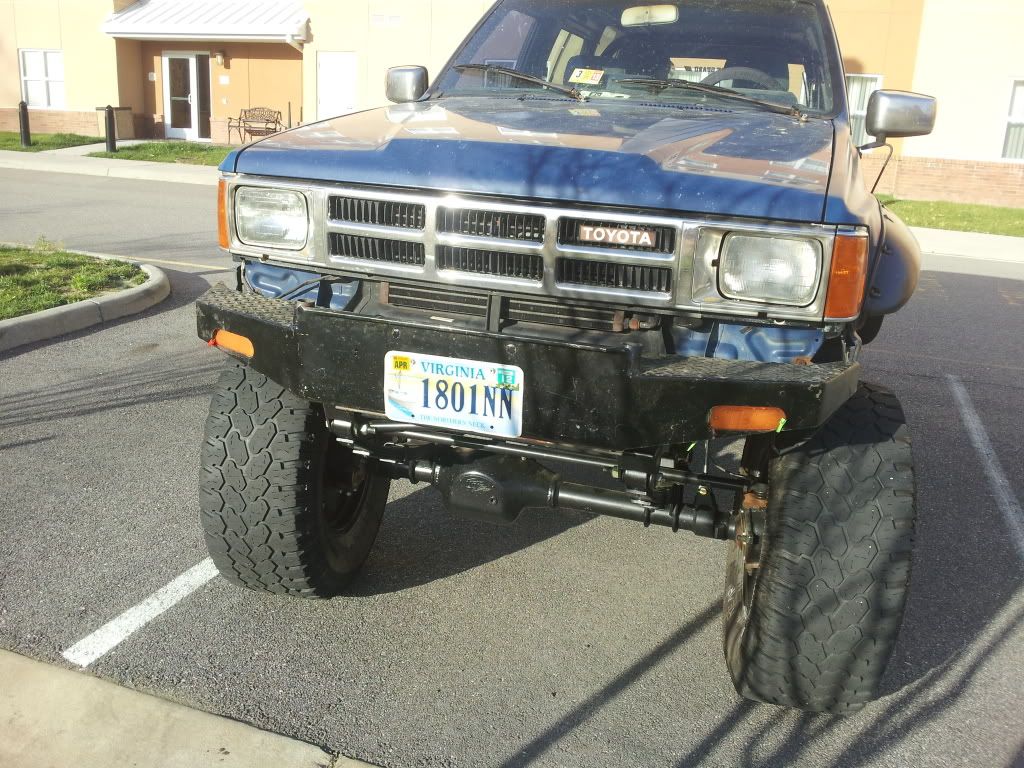
Met up with a guy on craigslist and traded a bunch of parts I didn't need anymore: lockright locker, u bolt flip kit, wheel spacers, and a drop hitch. In return I got another transfer case (stock 2.8 i believe), rear bumper WITH HITCH RECIEVER, a custom front bumper, and a 3000 lb winch. I installed the front bumper when I got to the marriott this afternoon. was too excited and it was raining so had to do it anyway. It won't have turn signals until I get some zip ties tomorrow.
The winch looks like it is for an ATV but the guy said it pulled his yota out with a trailer behind it and the winch is remote activated so took that off his hands too.
My truck after picking everything up:
front bumper installed
cute little atv winch
going to move the bumper up to the next holes tomorrow
Here is a picture of my e-brake cable rubbing on my spring pack so bought these e-brake extensions from 4crawler.com, $15. Will post an installed image later once they are on.
Met up with a guy on craigslist and traded a bunch of parts I didn't need anymore: lockright locker, u bolt flip kit, wheel spacers, and a drop hitch. In return I got another transfer case (stock 2.8 i believe), rear bumper WITH HITCH RECIEVER, a custom front bumper, and a 3000 lb winch. I installed the front bumper when I got to the marriott this afternoon. was too excited and it was raining so had to do it anyway. It won't have turn signals until I get some zip ties tomorrow.
The winch looks like it is for an ATV but the guy said it pulled his yota out with a trailer behind it and the winch is remote activated so took that off his hands too.
My truck after picking everything up:
front bumper installed
cute little atv winch
going to move the bumper up to the next holes tomorrow
Mar 25, 2012 | 06:18 PM
#71
Thread Starter
Registered User
Joined: Sep 2011
Posts: 102
Likes: 0
From: midlothian
quick question...I am planning on replacing my rear third member next weekend. I have a 5.29 open v6 diff being sent from Davez offroad, however the front is STILL 4.88 BUT NO front DRIVESHAFT.
Will I have any problems driving it around with different gear ratios front and rear in 2WD?
I will be getting a high pinion 5.29 next go round, then doing the dual cases after that in order to get my front driveshaft to get this thing back in 4WD
Will I have any problems driving it around with different gear ratios front and rear in 2WD?
I will be getting a high pinion 5.29 next go round, then doing the dual cases after that in order to get my front driveshaft to get this thing back in 4WD
Mar 25, 2012 | 06:33 PM
#72
^ As long as your manual hubs are set to free you are good to go! I'm in the same boat; iv'e got 4:88s out back & 4:10s up front.
Bumper looks good! Just throw a new coat of paint on that. I'm guessing your old bumper is up for sale?
Bumper looks good! Just throw a new coat of paint on that. I'm guessing your old bumper is up for sale?
Mar 26, 2012 | 04:48 PM
#74
Thread Starter
Registered User
Joined: Sep 2011
Posts: 102
Likes: 0
From: midlothian
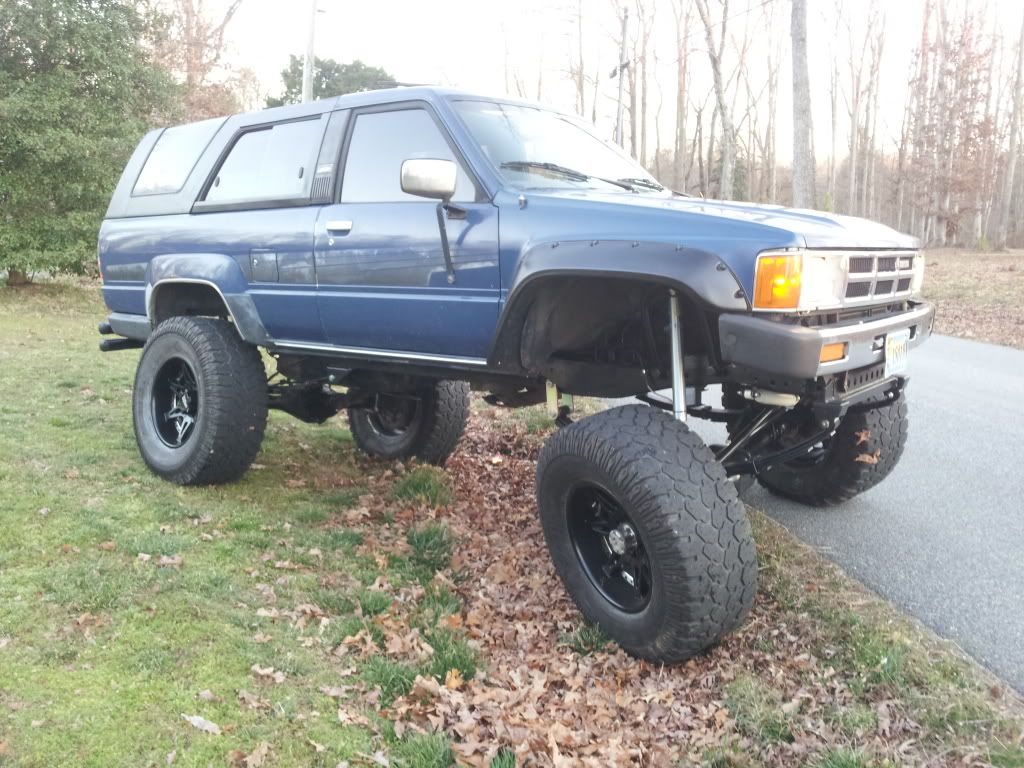
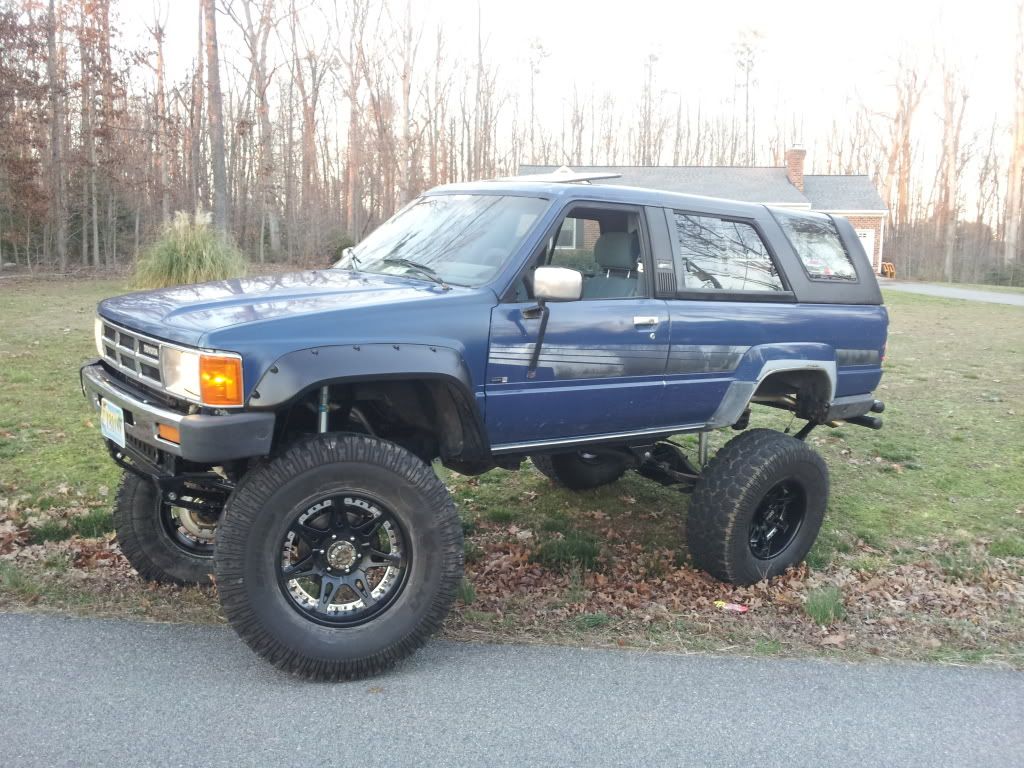
Again I was at work in the Marriott parking lot putting on my new bumpers, etc. Here are some pictures.
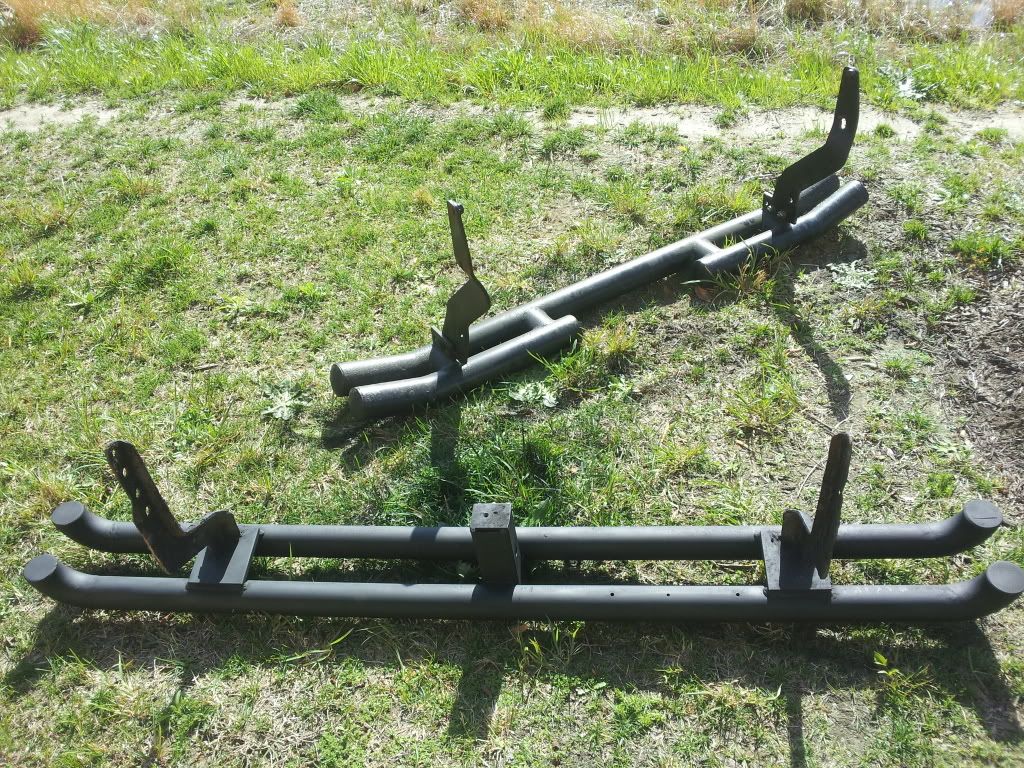
The old smittybilt up top and the new one is the bottom one.
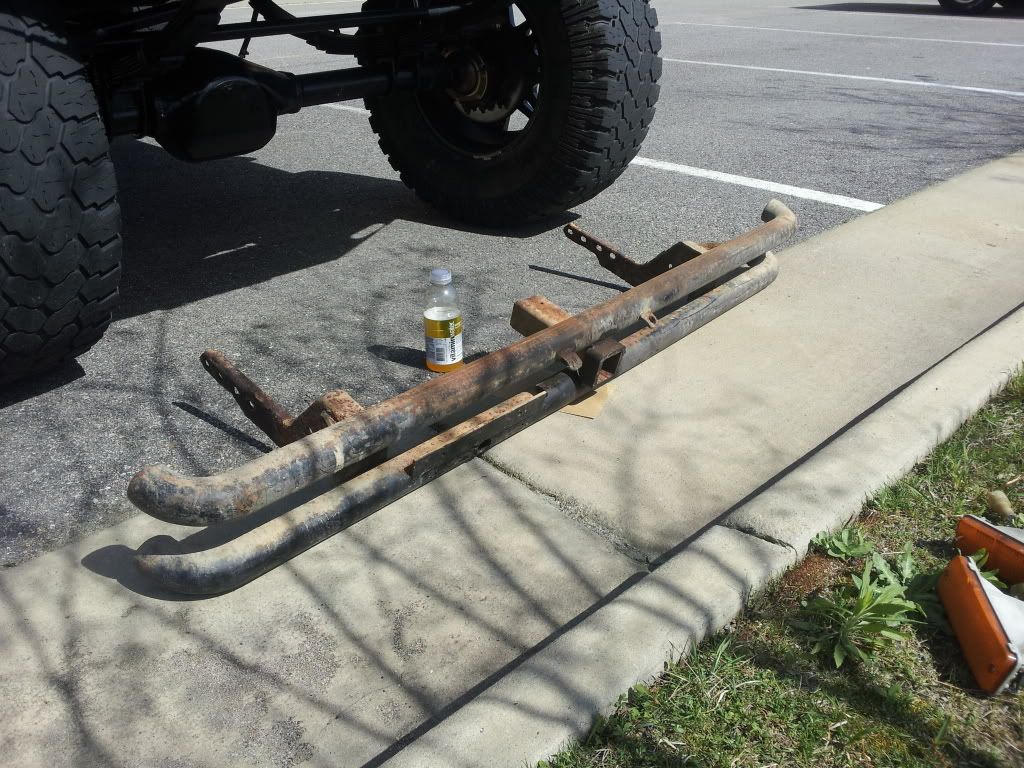
The "new" bumper before I took some sandpaper to it and some Krylon flat black rattle can spray
The old smittybilt bumper. The reason i switched bumpers is because this one has a trailer hitch built into it.
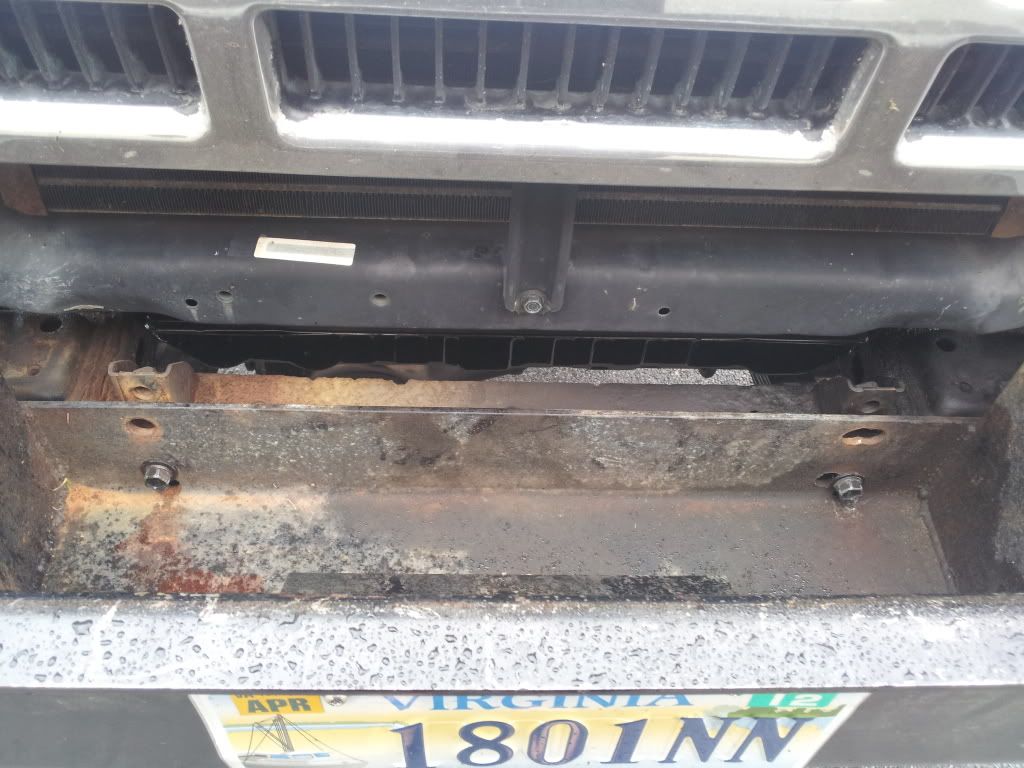
The new bumper mounted up. A few problems when this came up, the second hole in the frame to mount the last hole of the bumper DID NOT MATCH UP. So now it is only riding around with one bolt in. If and when the second hole is matched up, the bumper still sits high enough to hit the tailgate when it's down. I really hate to tear apart the smittybilt and use its brackets, but I may just use it's brackets as a stencil to get some made because they fit perfectly. Anyone have experience with custom made bumper parts to do your own? I have no idea how to weld but I figured never a better time to learn than on some old beat up bumpers!
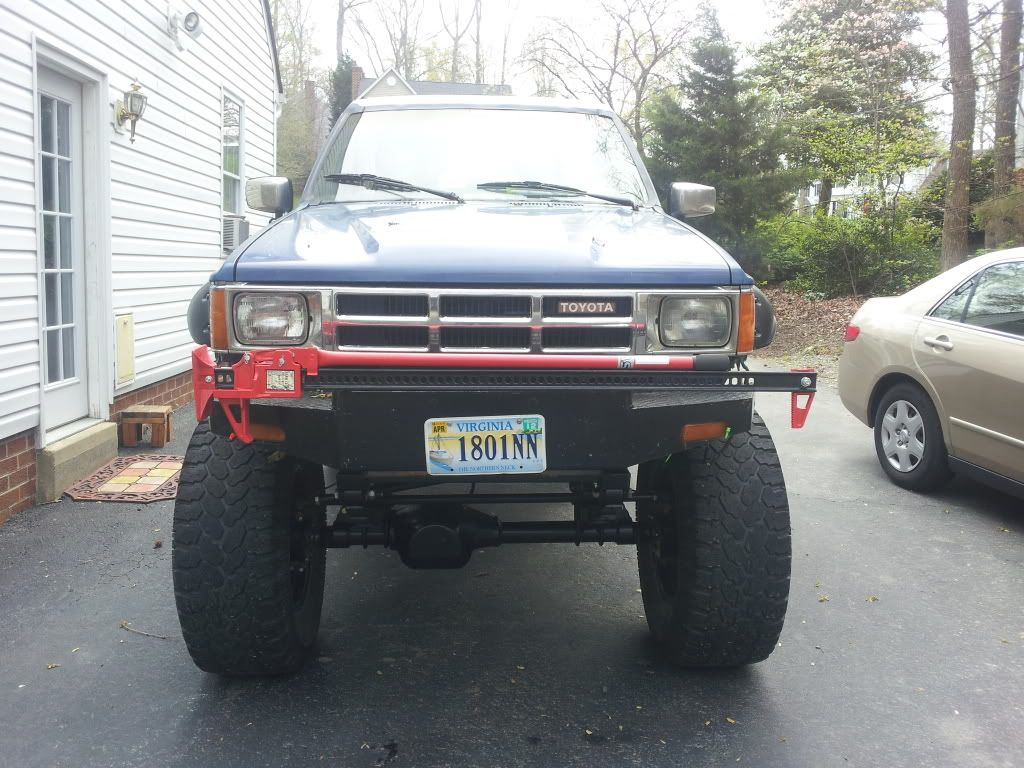
My front bumper with the red and green zip ties on my blinkers (until I can weld some tabs on or something of the sort). Also may need to fab the front bumper as well because the moron who made it drilled the bottom holes for the bolt to mount to the frame right on the crease of the bottom of the bumper so now it is only bolted to the second to last hole from the bottom so there is no top bolt , only one bolt on each side.

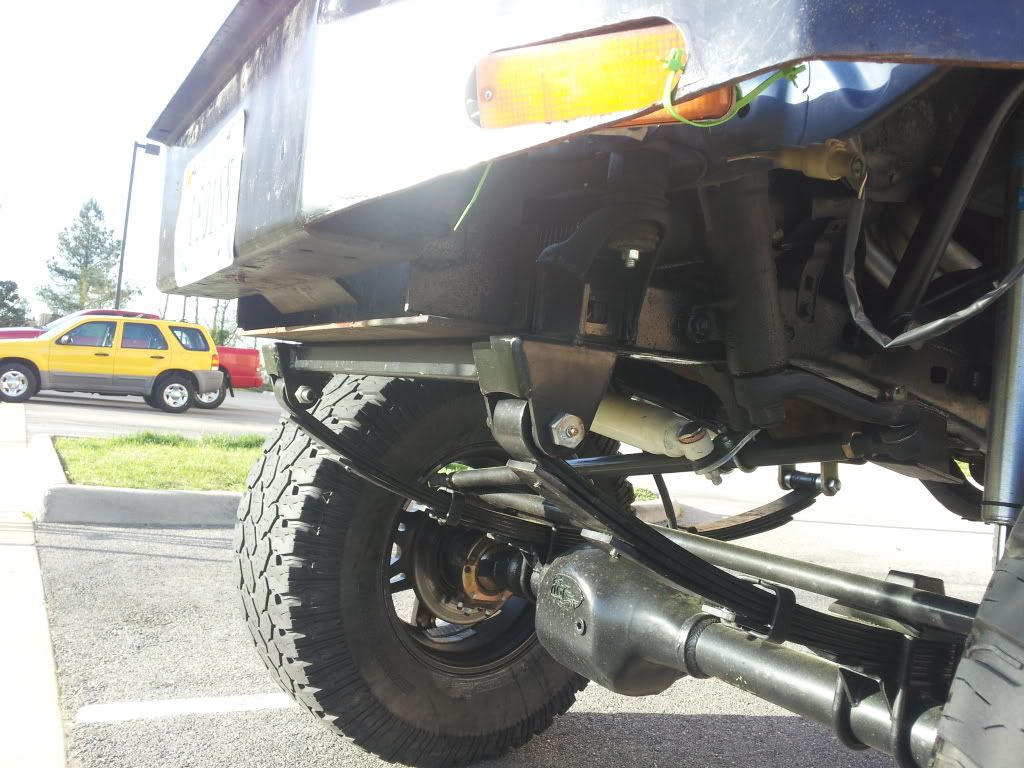
The bottom of the front bumper rests almost directly right on/above the front spring hanger but not all the weight is on it. Does this look alright?
Overall....not impressed at all with the work on the bumpers but they are a start to another project and a learning experience and saved a ton of money doing the trade in the long run
The old smittybilt up top and the new one is the bottom one.
The "new" bumper before I took some sandpaper to it and some Krylon flat black rattle can spray
The old smittybilt bumper. The reason i switched bumpers is because this one has a trailer hitch built into it.
The new bumper mounted up. A few problems when this came up, the second hole in the frame to mount the last hole of the bumper DID NOT MATCH UP. So now it is only riding around with one bolt in. If and when the second hole is matched up, the bumper still sits high enough to hit the tailgate when it's down. I really hate to tear apart the smittybilt and use its brackets, but I may just use it's brackets as a stencil to get some made because they fit perfectly. Anyone have experience with custom made bumper parts to do your own? I have no idea how to weld but I figured never a better time to learn than on some old beat up bumpers!
My front bumper with the red and green zip ties on my blinkers (until I can weld some tabs on or something of the sort). Also may need to fab the front bumper as well because the moron who made it drilled the bottom holes for the bolt to mount to the frame right on the crease of the bottom of the bumper so now it is only bolted to the second to last hole from the bottom so there is no top bolt , only one bolt on each side.
The bottom of the front bumper rests almost directly right on/above the front spring hanger but not all the weight is on it. Does this look alright?
Overall....not impressed at all with the work on the bumpers but they are a start to another project and a learning experience and saved a ton of money doing the trade in the long run
Mar 30, 2012 | 06:42 AM
#75
Thread Starter
Registered User
Joined: Sep 2011
Posts: 102
Likes: 0
From: midlothian
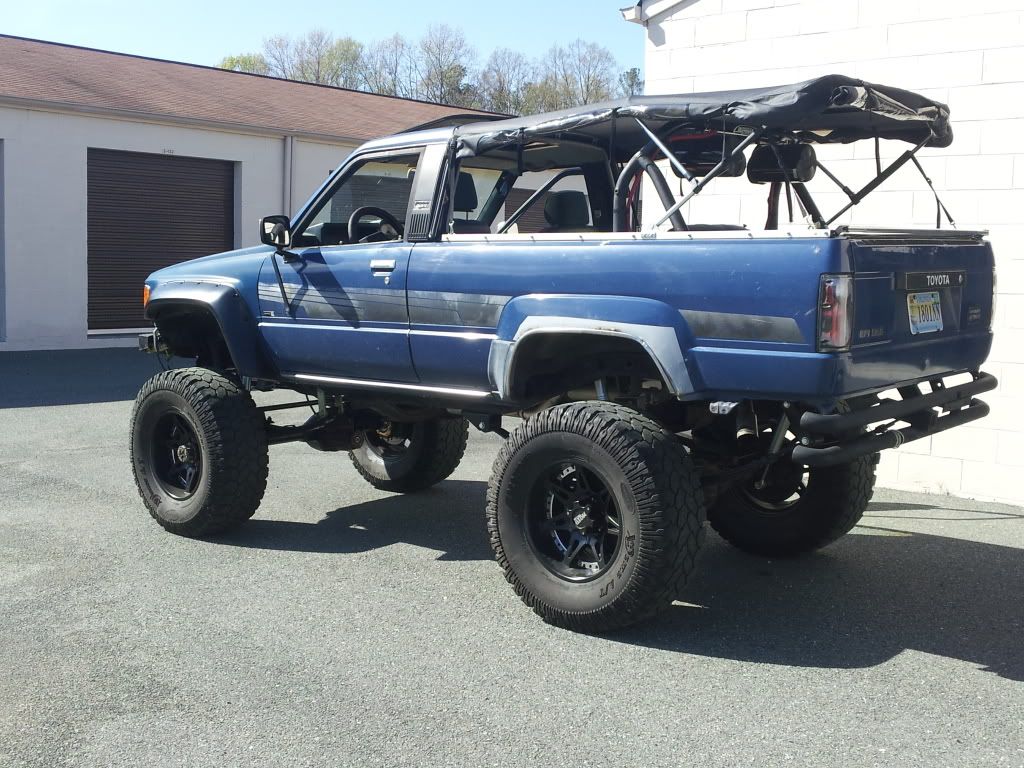
got the summertime itch yesterday to put back on the softop for the season.

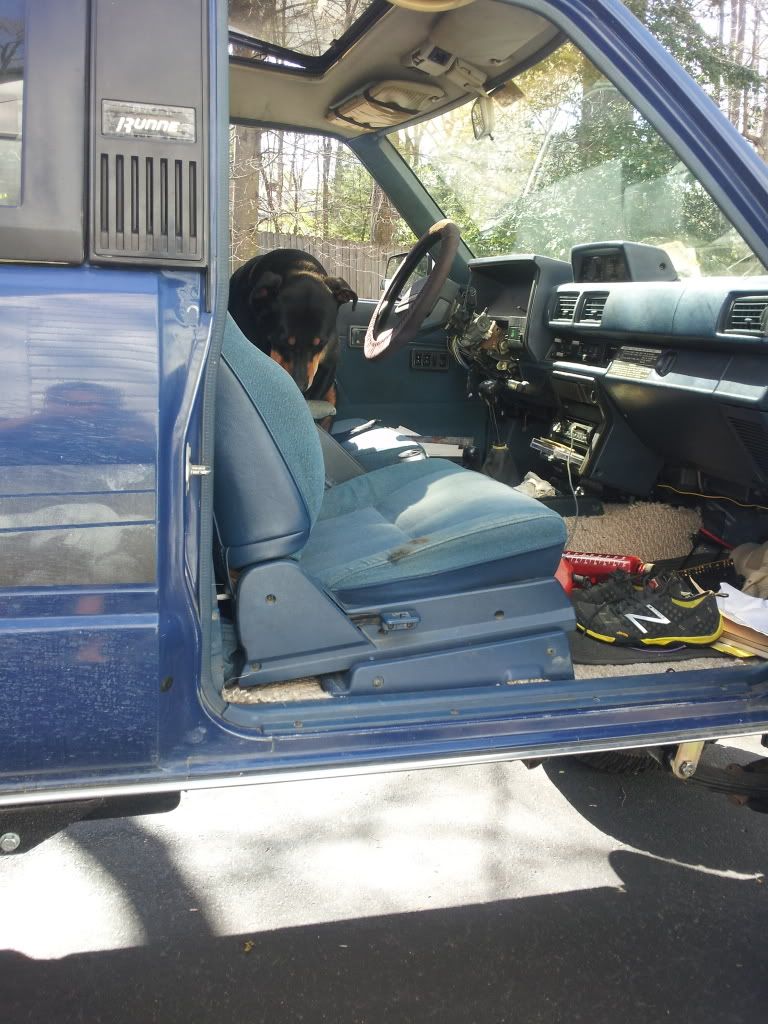
My parents dog was stubborn jumping out of my truck...when she finally came to I think the hurt her leg
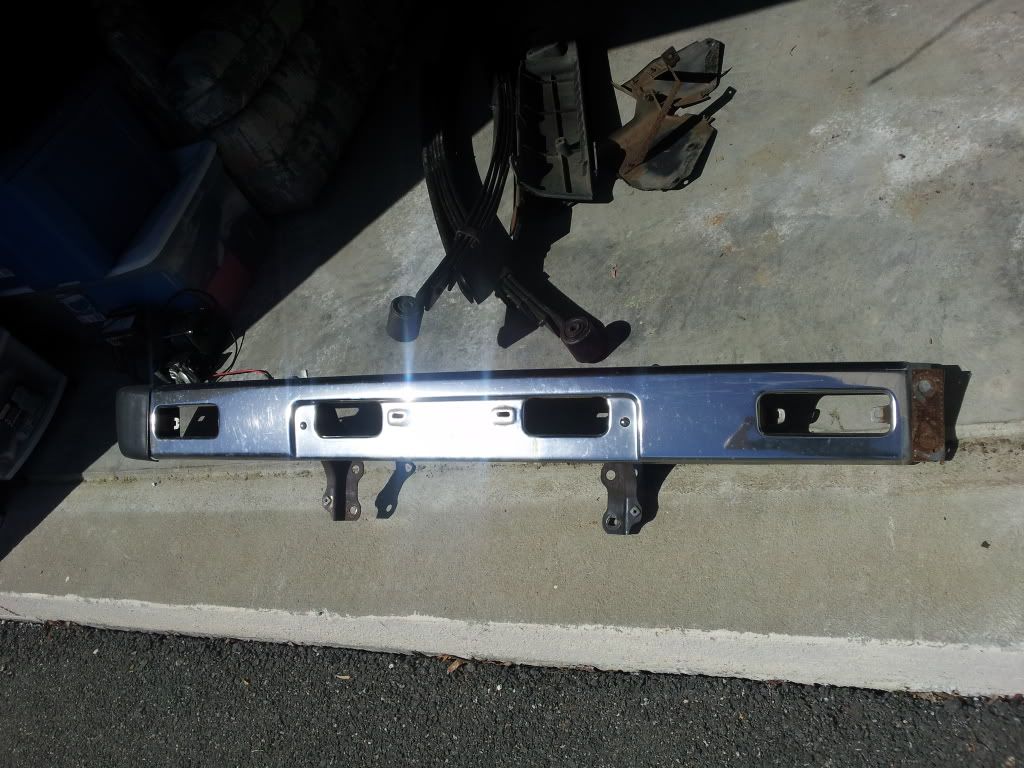
This is my front metal bumper that I took off to put on the new one....up for grabs. one of the pastic pieces on the side was broken off
Today's project: tear into the t-case I got in the part swap to start seeing what I need to put together dual cases. Never done it before, but sounds pretty self-explanatory if you follow directions. Any useful tips on this?
Question: has anyone ever tried using 83 style fenders on the front end? what kind of mods are required for this, etc.?
My parents dog was stubborn jumping out of my truck...when she finally came to I think the hurt her leg
This is my front metal bumper that I took off to put on the new one....up for grabs. one of the pastic pieces on the side was broken off
Today's project: tear into the t-case I got in the part swap to start seeing what I need to put together dual cases. Never done it before, but sounds pretty self-explanatory if you follow directions. Any useful tips on this?
Question: has anyone ever tried using 83 style fenders on the front end? what kind of mods are required for this, etc.?
Apr 4, 2012 | 02:05 PM
#76
Thread Starter
Registered User
Joined: Sep 2011
Posts: 102
Likes: 0
From: midlothian
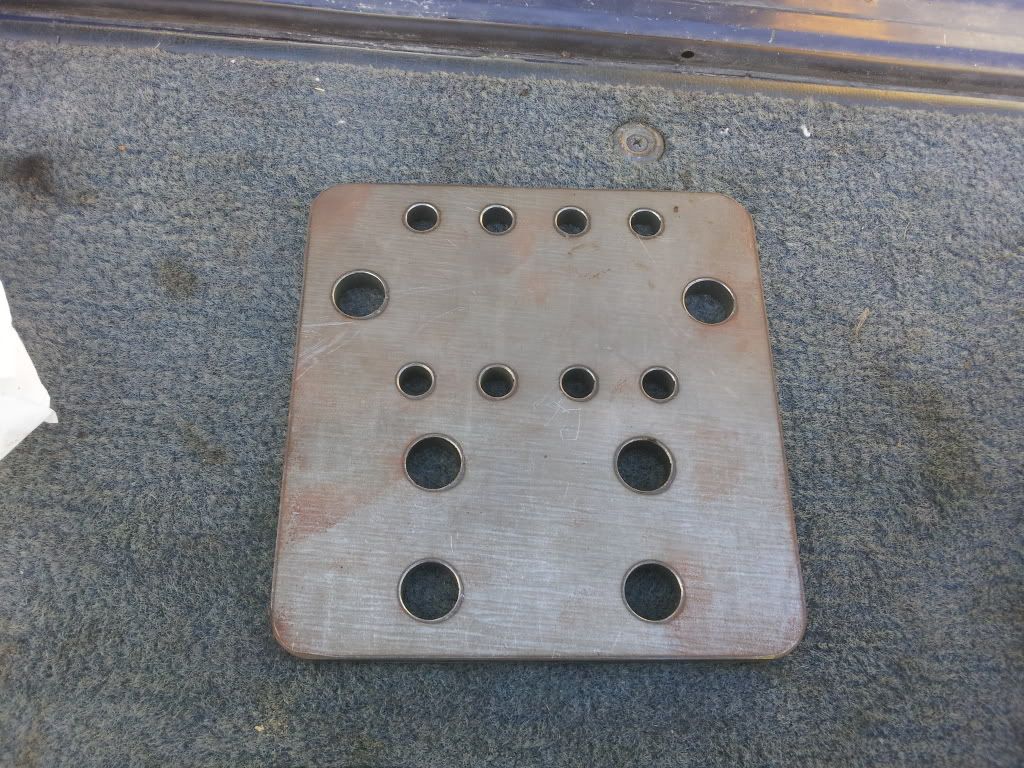
the placement of my 60" hi jack lift on top of the bumper. fits perfectly, just got the mounts and a neoprene cover from low range offroad and should be in on the 10th. will put up some pics then. v6 with the 5.29 should be showing up this week. davez offroad is taking forever on this one. the new engine on putneys is being shipped next week
 Apr 9, 2012 | 02:52 AM
#78
Thread Starter
Registered User
Joined: Sep 2011
Posts: 102
Likes: 0
From: midlothian
Hey thanks man, the lights came on the truck when I bought it, but you should be able to find them if you search "altezza tail lights" for the 1st gen 4runner. I know eBay is known for having them.
Apr 12, 2012 | 05:22 AM
#79
Thread Starter
Registered User
Joined: Sep 2011
Posts: 102
Likes: 0
From: midlothian
Got some good news from putney's about my engine being shipped midway through next week and should be here the following monday or tues. I have a list of parts that I am replacing with the engine install that I also ordered from Putney's.
Air intake boot
New belts
distributor cap/rotor
PCV valve and grommet
by pass hose
water temp sender
clutch kit
exhaust manifold stud and nut kit
fuel filter
injector set
oil pressure sensor
radiator (2 row)
radiator hose kit
thermostat
water pump (installed)
radiator cap
balance rotating assembly
spark plugs and wire set
All of these parts + core charge of 270 and shipping (210) came out to $3900.
Like snobdds said...a little pricey but cheaper in the long run. And if you're going to do it right, DO IT RIGHT THE FIRST TIME. I'd like this truck to last another 300,000 miles...
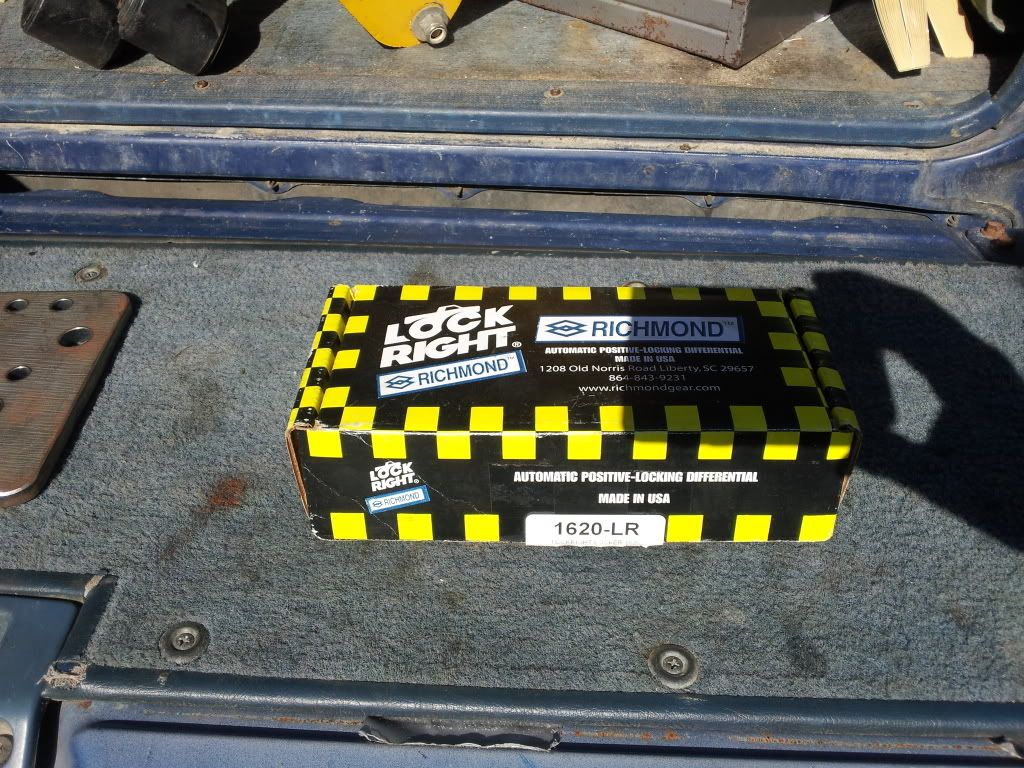
The new third member and hi-jack accessories arrived this week so pics will be up after the weekend.
Air intake boot
New belts
distributor cap/rotor
PCV valve and grommet
by pass hose
water temp sender
clutch kit
exhaust manifold stud and nut kit
fuel filter
injector set
oil pressure sensor
radiator (2 row)
radiator hose kit
thermostat
water pump (installed)
radiator cap
balance rotating assembly
spark plugs and wire set
All of these parts + core charge of 270 and shipping (210) came out to $3900.
Like snobdds said...a little pricey but cheaper in the long run. And if you're going to do it right, DO IT RIGHT THE FIRST TIME. I'd like this truck to last another 300,000 miles...
The new third member and hi-jack accessories arrived this week so pics will be up after the weekend.
Apr 12, 2012 | 12:54 PM
#80
Got some good news from putney's about my engine being shipped midway through next week and should be here the following monday or tues. I have a list of parts that I am replacing with the engine install that I also ordered from Putney's.
Air intake boot
New belts
distributor cap/rotor
PCV valve and grommet
by pass hose
water temp sender
clutch kit
exhaust manifold stud and nut kit
fuel filter
injector set
oil pressure sensor
radiator (2 row)
radiator hose kit
thermostat
water pump (installed)
radiator cap
balance rotating assembly
spark plugs and wire set
All of these parts + core charge of 270 and shipping (210) came out to $3900.
Like snobdds said...a little pricey but cheaper in the long run. And if you're going to do it right, DO IT RIGHT THE FIRST TIME. I'd like this truck to last another 300,000 miles...
The new third member and hi-jack accessories arrived this week so pics will be up after the weekend.
P.S I like your front bumper with the hilift mount!
Last edited by rustED; Apr 12, 2012 at 12:55 PM.


