
1986 4runner build up sas/chevy spring swap
 Jul 13, 2012 | 10:47 AM
#101
Looks like you got quite the setup for camping, dual fans and everything! Id love to find a soft top for my runner, I've never been able to find a used one around my area, or on CL. I'd at least like to get a bikini top for the summer! Hows the room in the back for sleeping, I haven't tried mine yet (plus I have the wrong rear seats in from PO and they don't lay flat) I'm 6'-1" and was just wondering how comfortable it is to sleep in, thanks, always like checking in on your build to see what's new!
Jul 16, 2012 | 10:03 AM
#103

Thread Starter
Registered User
Joined: Sep 2011
Posts: 102
Likes: 0
From: midlothian
Got the new high pinion with 5.29s for the front last week from Dave's off road performance. Very fast building and shipping!

I think one of my best purchases so far for my runner was the soft top from softtopper.com. This thing has come in so handy and looks and rides awesome down the road. Very easy to use when loading and unloading stuff as well as for camping. Me and my girlfriend fit back there very comfortably with room to spare. I am 5'7" and she is pretty short. Some night we would even leave the tailgate down and then let the screen window in the back just hang down and would be an awesome breeze coming through there especially with the fan is on. At some point in the near future I will be ordering the rack system from softtopper with a basket just because the make such quality products that can already accommodate the soft top I bought from them. Well worth the money! Might have to get the right back seats to fold down right but the only thing I would change is a softer pad to sleep on so you're not sleeping on the creases from the seats or strap hooks in the floor. I will definitely be camping in the back of it again soon.
I think one of my best purchases so far for my runner was the soft top from softtopper.com. This thing has come in so handy and looks and rides awesome down the road. Very easy to use when loading and unloading stuff as well as for camping. Me and my girlfriend fit back there very comfortably with room to spare. I am 5'7" and she is pretty short. Some night we would even leave the tailgate down and then let the screen window in the back just hang down and would be an awesome breeze coming through there especially with the fan is on. At some point in the near future I will be ordering the rack system from softtopper with a basket just because the make such quality products that can already accommodate the soft top I bought from them. Well worth the money! Might have to get the right back seats to fold down right but the only thing I would change is a softer pad to sleep on so you're not sleeping on the creases from the seats or strap hooks in the floor. I will definitely be camping in the back of it again soon.
Jul 16, 2012 | 10:28 AM
#104
Thanks for the info on the softtopper, I was just checking out their site, looks like a high quality top, and half the price of a Canback top! It would be quite an investment for me down the road, but i think it would be worth it! The high pinion looks sweet, your build has really came along way, I'm jealous, lol, nice work!
Jul 21, 2012 | 07:03 AM
#105
Thread Starter
Registered User
Joined: Sep 2011
Posts: 102
Likes: 0
From: midlothian
Have some new pics to put up before my build (starting the engine tomorrow night so stay tuned). Traded in my old Honda the other day and bought an 08 wrx. If anyone has any experience with these, let me know your thoughts! Don't worry, still got the 4runner

I was able to press the clutch release bearing on with the handle of a hammer and some lubrication
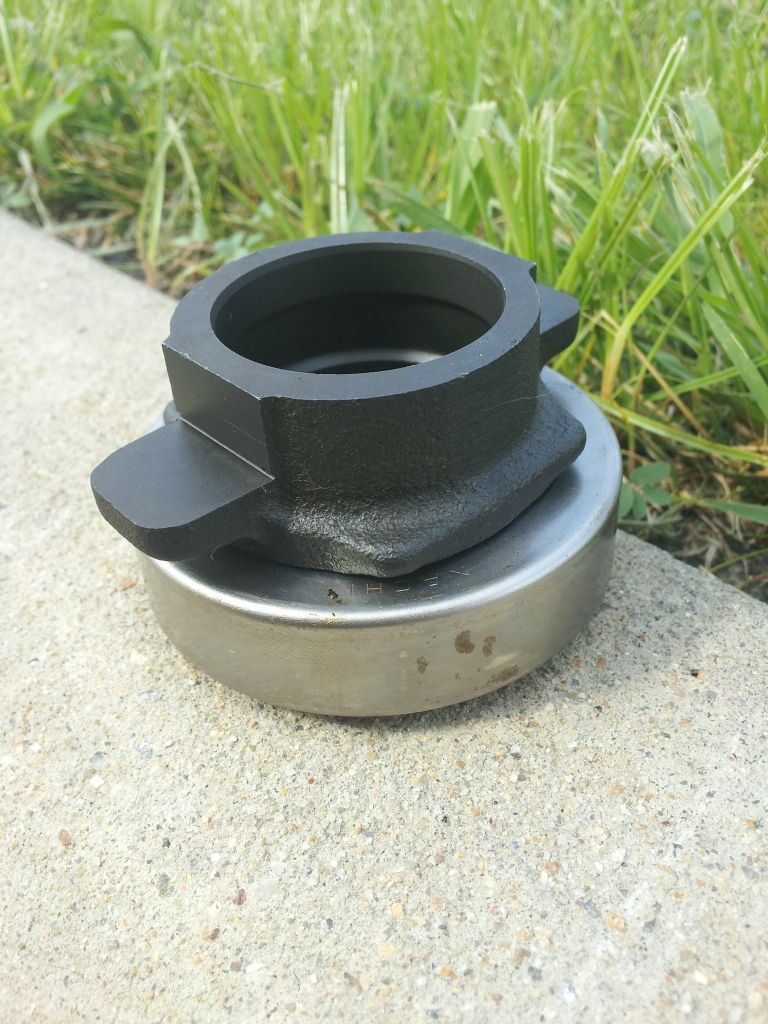

I was able to press the clutch release bearing on with the handle of a hammer and some lubrication
Jul 23, 2012 | 02:53 AM
#106
Thread Starter
Registered User
Joined: Sep 2011
Posts: 102
Likes: 0
From: midlothian


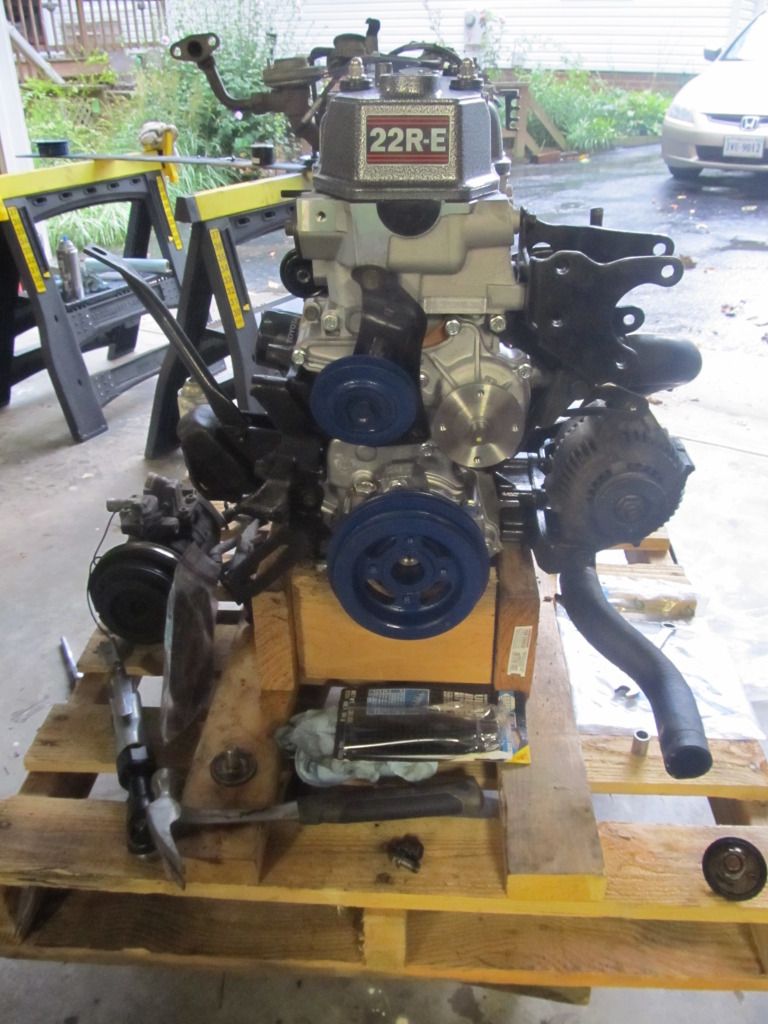
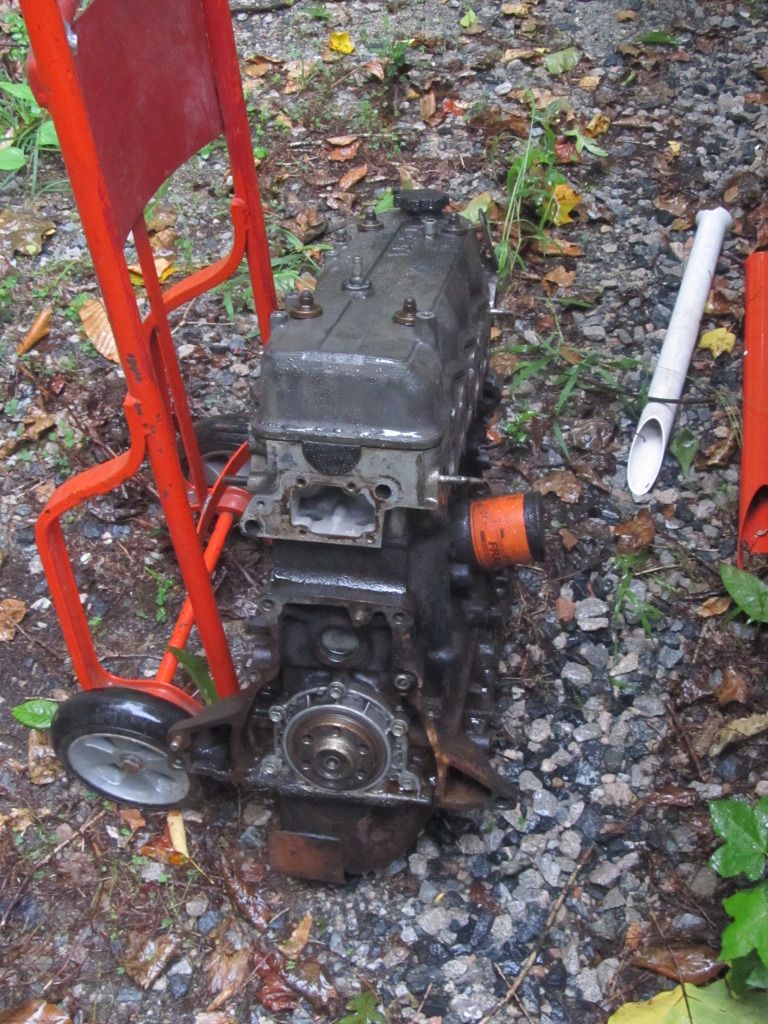
Got started on the engine last night, goal was to do all the prep work last night, but we got way farther than I thought. Me and my dad worked on it from about 630-9pm and got the following done:
-removed the hood
-removed the intake and assembly
-drained the radiator
-removed the bolts for the header (header may give us some issues because it is fully welded ALL the way back to the muffler)
-removed the fan shroud and radiator w/ hoses
-removed the distributor (ridiculously dirty)
-removed hoses to AC pulley and unit
-removed hoses to power steering fluid
-removed other hoses that we saw were connected the engine that came from the body.
Today going to finish unbolting and removing hoses and wil hopefully have the engine out by noon.
**Some things we discovered that we needed new of were header bolts and distributor cap and very thankful I ordered this ahead of time from Putney's because it saves me a trip to napa or other auto parts store. buy the parts ahead of time!!
Jul 24, 2012 | 04:55 PM
#108
Thread Starter
Registered User
Joined: Sep 2011
Posts: 102
Likes: 0
From: midlothian
Which old bearing? Clutch release? It is right at the end of the tranny once it is separated from the engine


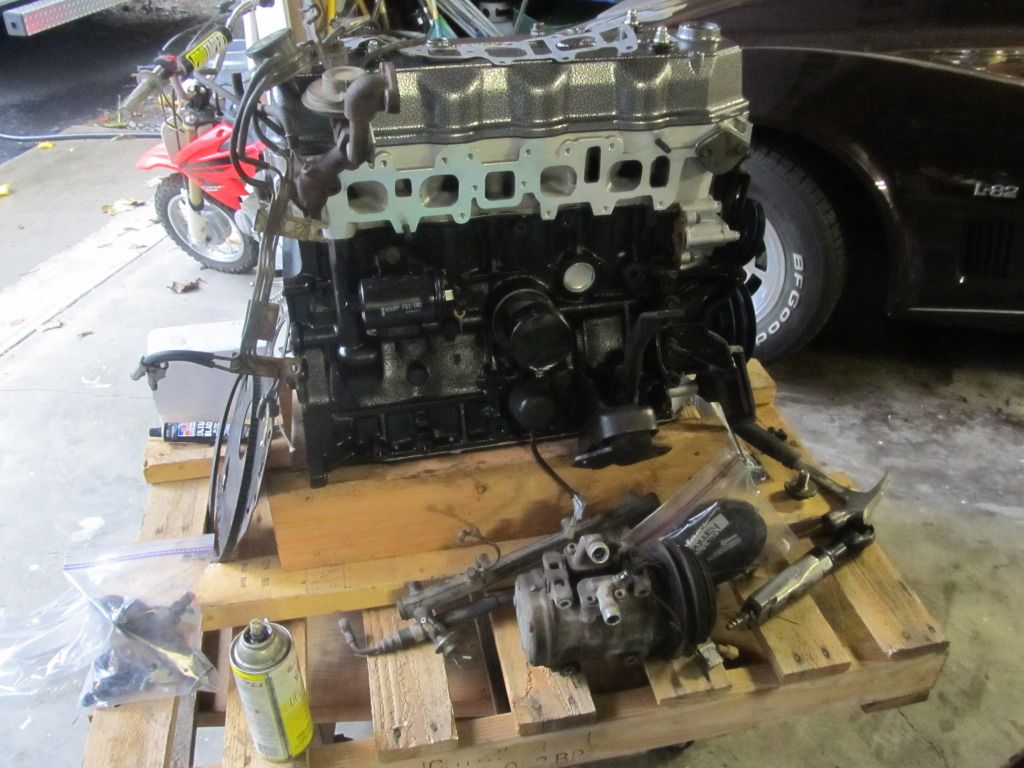
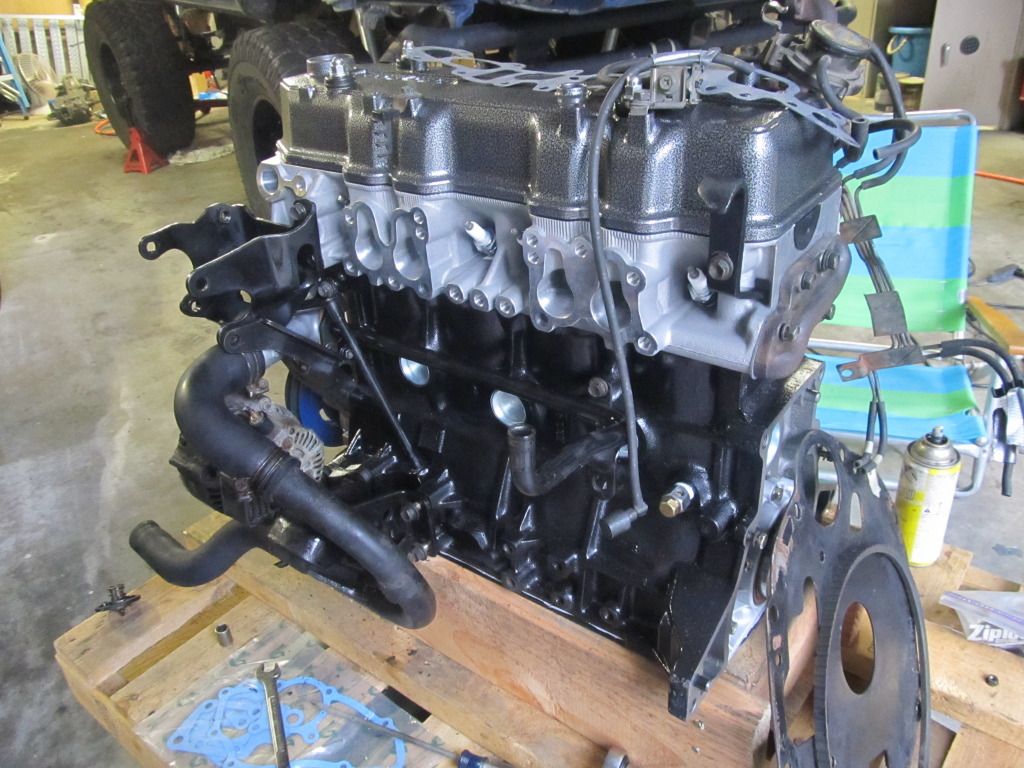
Got a lot done today. These photos are from yesterday. Today we transferred a lot of the old parts over to the new one and hopefully should be ready to go back in tomorrow.
A lot of time was spent cleaning up and painting the old brackets and one major speed bump we ran into was the main drive pulley connected to the crankshaft. We tried to get the bolt off for a good 2-3hours and attempted at 3 different airguns nd other techniques including heating up with a torch and a few other things. Once all the parts were off the left side of the motor, we laid the motor on its side and used a normal wrench with a huge pipe on the end for leverage and then stood on it and there was much rejoicing once we got it loose. I'm sure if it was on a stand it would have been good too. The bolts that napa provided me were too short to put it on a stand. The size is m12 .125 I think if you need bolts. Overall, once the old engine is out and all the old pieces are removed it seems like it gets way easier from there. Everything is fitting great so far
Jul 24, 2012 | 05:50 PM
#109
Thread Starter
Registered User
Joined: Sep 2011
Posts: 102
Likes: 0
From: midlothian
From my experience with digging through threads, the more pictures the better!!! Decided to upload the photos from today as well so here they are.
Putting the engine together...end of Day 3. started sunday night and this is end of tuesday...

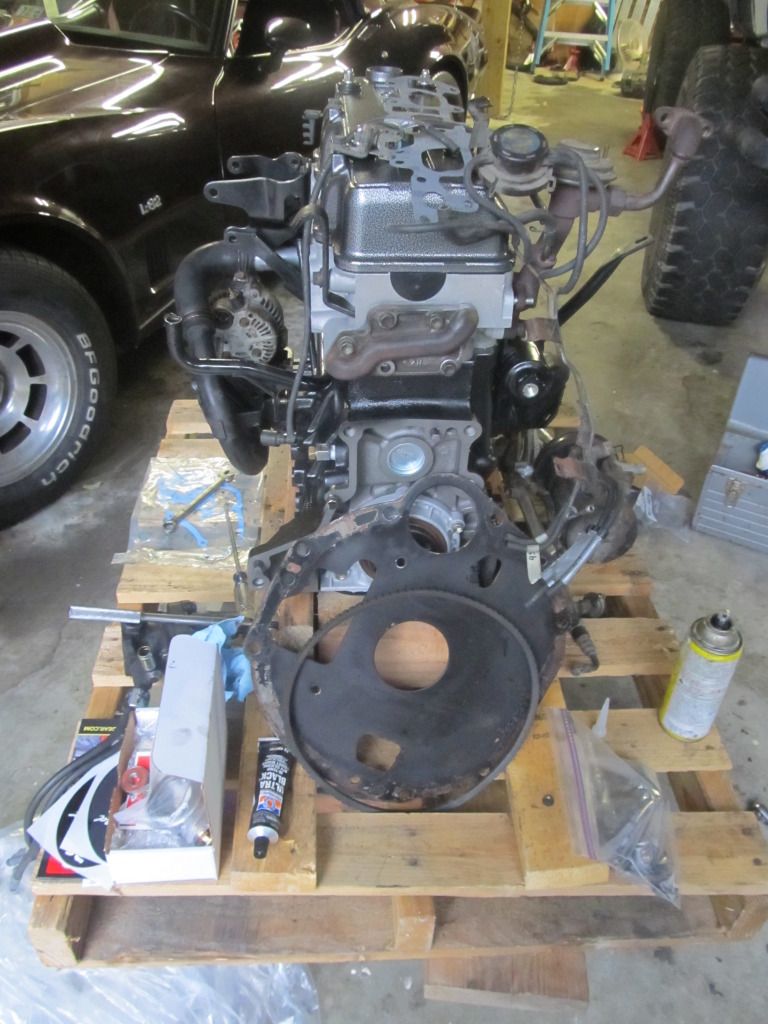
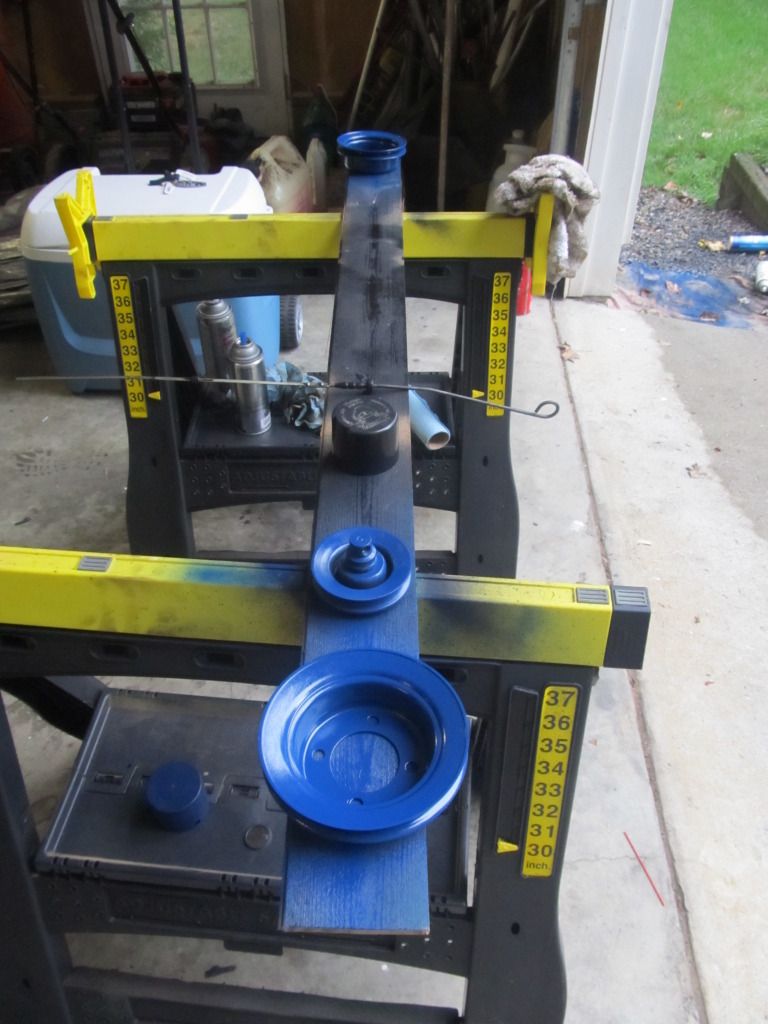
Painting the pulleys blue
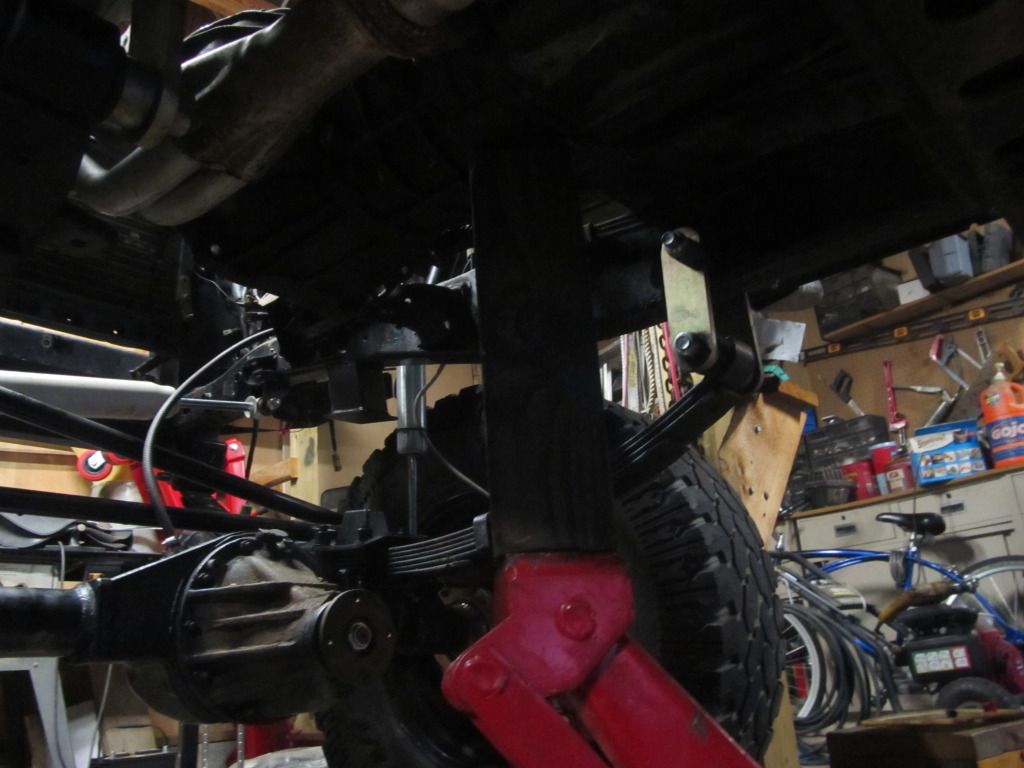
whats holding the transmission up...
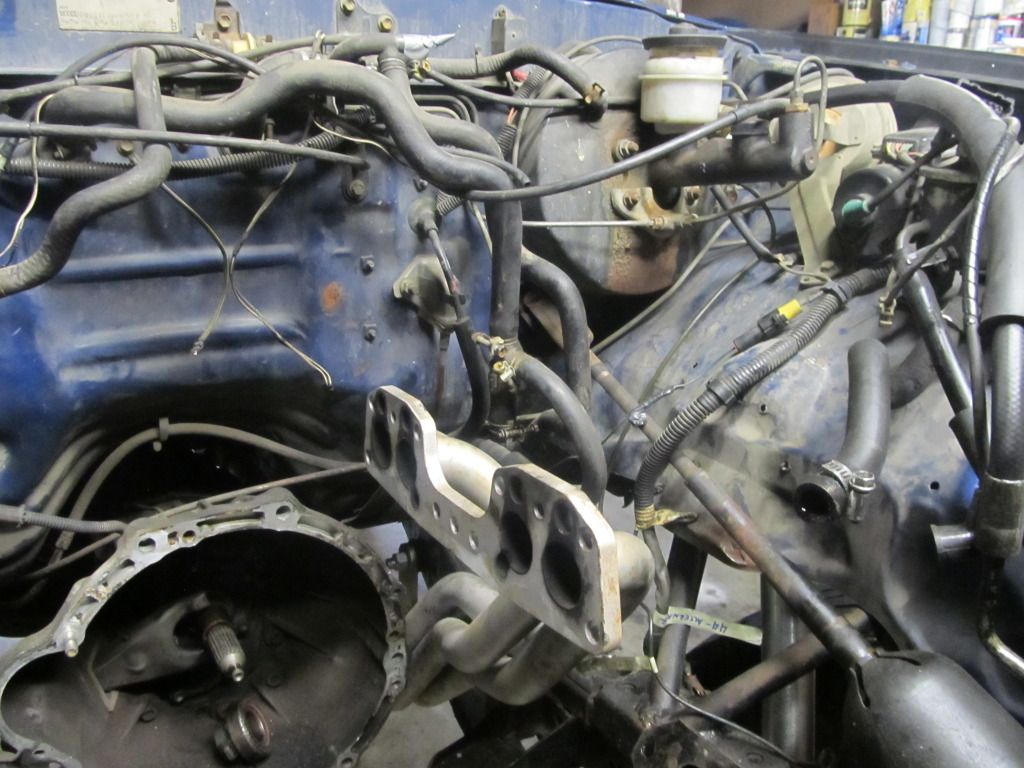
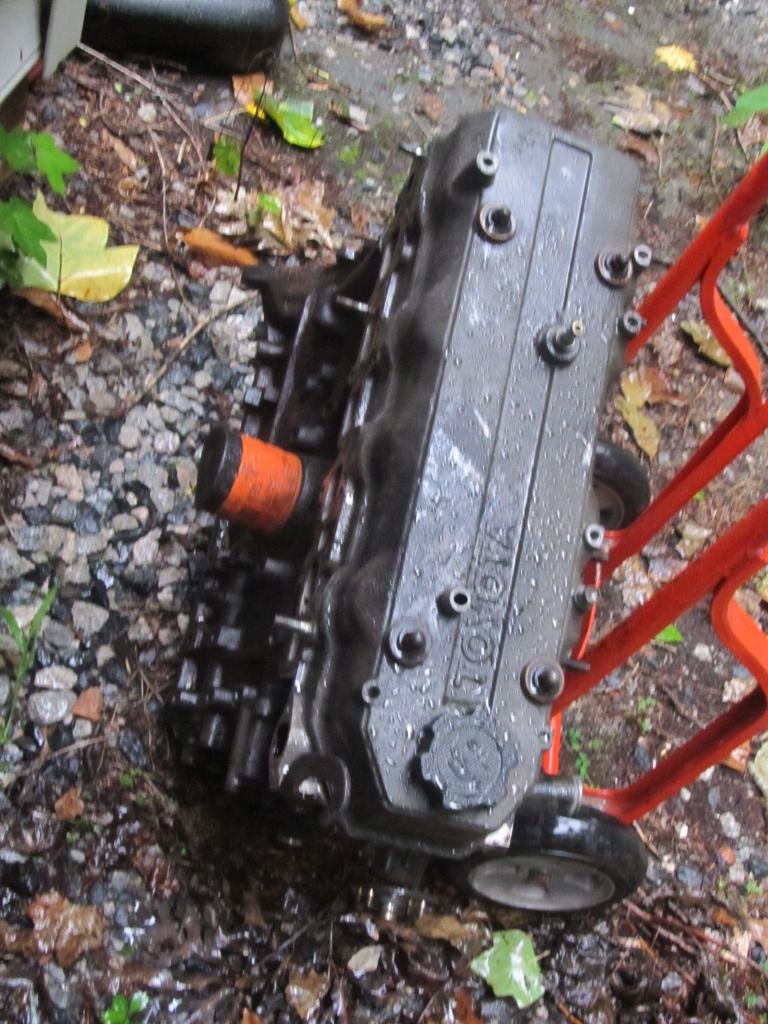
Did not take out the header on the engine because it is welded all the way back to the muffler and it actually was not difficult to deal with at all
Unfortunately, as soon as we get the engine outside the garage it starts to rain...
**1986 22re for sale: local pickup only $400 :-)
Putting the engine together...end of Day 3. started sunday night and this is end of tuesday...
Painting the pulleys blue
whats holding the transmission up...
Did not take out the header on the engine because it is welded all the way back to the muffler and it actually was not difficult to deal with at all
Unfortunately, as soon as we get the engine outside the garage it starts to rain...
**1986 22re for sale: local pickup only $400 :-)
Jul 26, 2012 | 04:29 PM
#111
Thread Starter
Registered User
Joined: Sep 2011
Posts: 102
Likes: 0
From: midlothian


The engine is finally in and running. Had a couple problems at first with loose lines and whatnot. Just need to get the timing right and there is a knocking in one of the pulleys so just need to tighten that down. Bad news...put the clutch bearing release clips on backwards so I have to drop the tranny tomorrow. The Haynes manual shows the right way to do it and if I remember I will snap a photo of it.
Jul 26, 2012 | 04:47 PM
#112
Registered User
iTrader: (2)
Joined: Dec 2009
Posts: 2,159
Likes: 7
From: Pleasanton, CA - SF Bay Area
Sucks about those clips, sorry! Don't forget to lightly grease the ears on the throwout bearing retainer, which the clips mount to...and the pivot point on the clutch fork.
Looking good!
Looking good!
Jul 31, 2012 | 02:22 PM
#114
Thread Starter
Registered User
Joined: Sep 2011
Posts: 102
Likes: 0
From: midlothian
Thanks for the tip on the clips! Was able to get the tranny dropped by noon and flip the clips around. I made it a point to take a picture so future folks will know.

I have finally had some time to do a follow up on the engine swap. For the first time I have ever done an engine swap...SO EASY. All it is is swapping over parts and making sure you have everything labelled. My timeline was to have this done in a week. I started Sunday night and finished the next Friday. I was pulling 10-12 hour days in the garage but this also includes me having to drop the tranny to switch the clips around on the bearing. I am extremely pleased with the way putneys engine turned out and CE apply I chose them. When we were swapping parts, I was more than pleased that I purchased the majority of the parts from his shop with the engine, although it was a little pricey it was so worth it. There were a few Hiccups when putting in the engine and here are some tips:
There are 2 VSV sensors on the valve cover...DON'T BREAK them. I broke a spout on each. Although they are not too important, they are over 100 bucks each from the dealership (I didn't replace them)
Make sure your antifreeze hoses are clamped tight
My number 1 cylinder wasn't firing at first and we found out that the wire to the number 1 fuel injector clip had come out through the back of the clip from being so old. Once we got it fixed, it runs like a champ
Buy new parts way ahead of time...new vacuum hoses, gasket kit, etc. putneys has most of them.
The lines going to the fuel filter need to be extremely tight in order to not leak
Watch putneys install videos
Duct tape does not work for labeling....it smears. Use masking tape
An air compressor impact wrench will cut your time in half
Lower the entire drivetrain in order to remove the upper tranny bolts
If there's anything else that I can remember I will post it. Putneys is very helpful with being able to pay off the engine in payments at a time rather than all at once if it works for you. Before, my engine was screaming down the highway on the 37s with 5.29 maxing out at 55mph. I took it on the highway not even 2 days after it was finished and hit 65 with ease. Jim putney said it could scream a 80 @4000rpm all day long.
Hope this helps for those in the future. Will have a video of it running up soon. Next step on the build...replace front third member with my new high pinion and then making a crown royal shift boot!!!
Aug 8, 2012 | 11:48 AM
#116
Registered User
iTrader: (2)
Joined: Dec 2009
Posts: 2,159
Likes: 7
From: Pleasanton, CA - SF Bay Area
Thanks for the tip on the clips! Was able to get the tranny dropped by noon and flip the clips around. I made it a point to take a picture so future folks will know.
I have finally had some time to do a follow up on the engine swap. For the first time I have ever done an engine swap...SO EASY. All it is is swapping over parts and making sure you have everything labelled. My timeline was to have this done in a week. I started Sunday night and finished the next Friday. I was pulling 10-12 hour days in the garage but this also includes me having to drop the tranny to switch the clips around on the bearing. I am extremely pleased with the way putneys engine turned out and CE apply I chose them. When we were swapping parts, I was more than pleased that I purchased the majority of the parts from his shop with the engine, although it was a little pricey it was so worth it. There were a few Hiccups when putting in the engine and here are some tips:
There are 2 VSV sensors on the valve cover...DON'T BREAK them. I broke a spout on each. Although they are not too important, they are over 100 bucks each from the dealership (I didn't replace them)
Make sure your antifreeze hoses are clamped tight
My number 1 cylinder wasn't firing at first and we found out that the wire to the number 1 fuel injector clip had come out through the back of the clip from being so old. Once we got it fixed, it runs like a champ
Buy new parts way ahead of time...new vacuum hoses, gasket kit, etc. putneys has most of them.
The lines going to the fuel filter need to be extremely tight in order to not leak
Watch putneys install videos
Duct tape does not work for labeling....it smears. Use masking tape
An air compressor impact wrench will cut your time in half
Lower the entire drivetrain in order to remove the upper tranny bolts
If there's anything else that I can remember I will post it. Putneys is very helpful with being able to pay off the engine in payments at a time rather than all at once if it works for you. Before, my engine was screaming down the highway on the 37s with 5.29 maxing out at 55mph. I took it on the highway not even 2 days after it was finished and hit 65 with ease. Jim putney said it could scream a 80 @4000rpm all day long.
Hope this helps for those in the future. Will have a video of it running up soon. Next step on the build...replace front third member with my new high pinion and then making a crown royal shift boot!!!
Great work - glad the greasing tips helped

Some things to add:
- Painters tape is great for labeling too - very similar to masking but larger.
- For the top two bellhousing bolts, I ended up using several ratchet extensions together and snaking it up and over the crossmember/tranny, while sitting behind the output flange of the T case...it kind of bowed with the weight of it all and I was able to get it on the bolts and loosen/tighten as needed. Still good to have a buddy to help snug it up and keep it there though.
How did you lower the whole drivetrain (engine and tranny together) to get to those top 2 bolts instead??? I can't picture that in my head
Aug 14, 2012 | 06:54 PM
#118
Thread Starter
Registered User
Joined: Sep 2011
Posts: 102
Likes: 0
From: midlothian
In order to get to the top two bellhousing bolts, we loosened up the motor mounts and then unbolted the tcase mount and then placed the t case mount on a jack and lowered it all as far as we were able. from there we unbolted them with many extensions and then pulled it apart. this whole time we were keeping the engine fully supported with our engine lift so nothing would move sporadically. once we did it the first time, it was very easy to do it again when I had to flip the clips around.
The engine is running awesome! It was very much so worth the money. It has about 66 miles on it so far being that I am military and am out of town quite a bit. I was luckily able to take a week off to accomplish the engine swap. Next week i have some time off so I'll be putting in the high pinion and ordering a driveshaft so I can hopefuly make a beach trip before the season ends. The engine is running awesome though...what a difference!!!
The engine is running awesome! It was very much so worth the money. It has about 66 miles on it so far being that I am military and am out of town quite a bit. I was luckily able to take a week off to accomplish the engine swap. Next week i have some time off so I'll be putting in the high pinion and ordering a driveshaft so I can hopefuly make a beach trip before the season ends. The engine is running awesome though...what a difference!!!
Sep 7, 2012 | 03:37 PM
#119
Thread Starter
Registered User
Joined: Sep 2011
Posts: 102
Likes: 0
From: midlothian
I was able to put in my high pinion third member yesterday but did happen to run into a few obstacles. For one, the third member was a little tight fitting in the trail gear rock assault housing but with a little trimming and some kicking it went right in. My next problem was fitting the passenger side hub on. The hub fits so tight around the axleshaft that it kept pushing it in so I couldn't get the front clip on. Any ideas on how to keep the axleshaft from moving at all? Was getting pretty pissed cuz this is the last thing that needs to happen. Then I tried taking the hub apart in order to get the clip on and then ended up expanding the hub clip on the back to far so it now it doesn't fit right. Going to attack it again on Monday, but any help is greatly appreciated!


Sep 14, 2012 | 05:56 AM
#120
Thread Starter
Registered User
Joined: Sep 2011
Posts: 102
Likes: 0
From: midlothian
Just thought I'd post some updates on here. Took a chance with the new motor and drove it down to the beach (2 hours) and ran like a dream the whole way and drove it back the next day without any issues. Took a pic of the dash so yall could see what I was running as far RPMs good, and I still had room to spare. Engine only had 200 miles when I started the trip and now its time for its first oil change at 500 mi.

My new crown royal shift boots...and they inflate when you drive!

Got my front driveshaft lenthened from stock from when the IFS was on. Place charged me 200 bucks, which I thought was decent to reweld and replace the joints and whatnot. HOWEVER, when i bolted it up with the universal joint at the t case, it did not fit. But when I put the CV joint at the t case, it fits right with no flexing issues. Has anyone else had to do this? I haven't bolted it up this way yet to test but I'm just curious as to why it fits this way and not the other and just to see if other people have had to do this? Any comments or help on this is greatly appreciated...

The angle of driveshaft with new high pinion third member

**FOR SALE*** v6 4.88 ring and pinion third member

My new crown royal shift boots...and they inflate when you drive!
Got my front driveshaft lenthened from stock from when the IFS was on. Place charged me 200 bucks, which I thought was decent to reweld and replace the joints and whatnot. HOWEVER, when i bolted it up with the universal joint at the t case, it did not fit. But when I put the CV joint at the t case, it fits right with no flexing issues. Has anyone else had to do this? I haven't bolted it up this way yet to test but I'm just curious as to why it fits this way and not the other and just to see if other people have had to do this? Any comments or help on this is greatly appreciated...
The angle of driveshaft with new high pinion third member
**FOR SALE*** v6 4.88 ring and pinion third member


