1986 4runner build up sas/chevy spring swap
 11-20-2011, 10:06 AM
#1
Registered User
Thread Starter

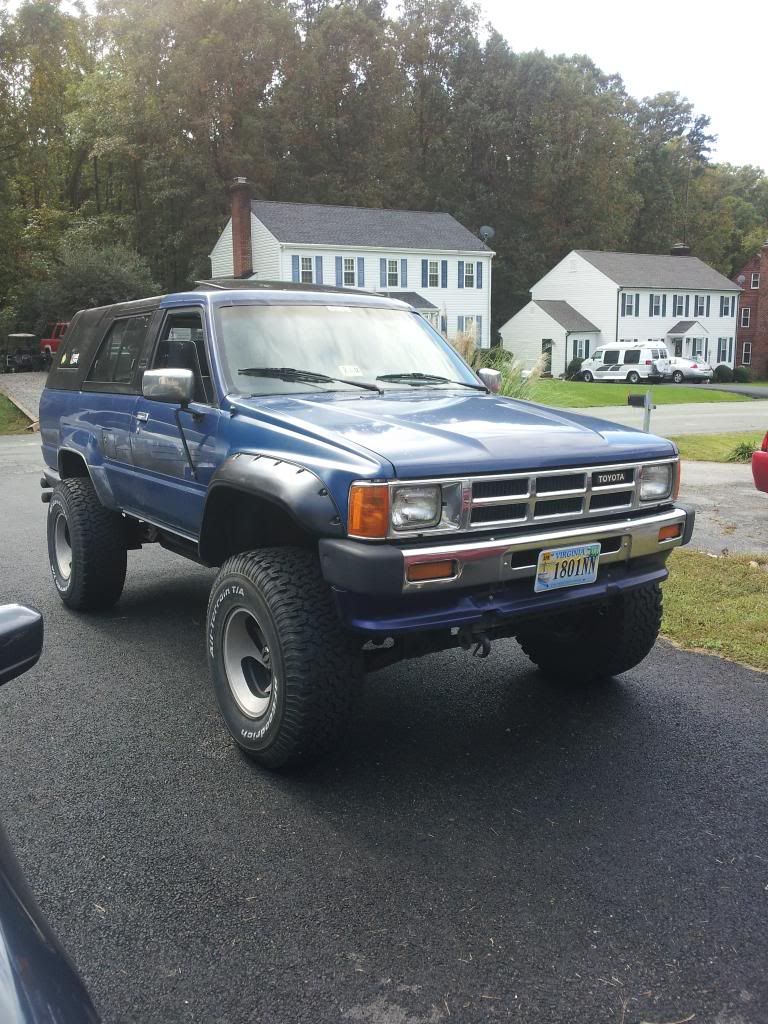
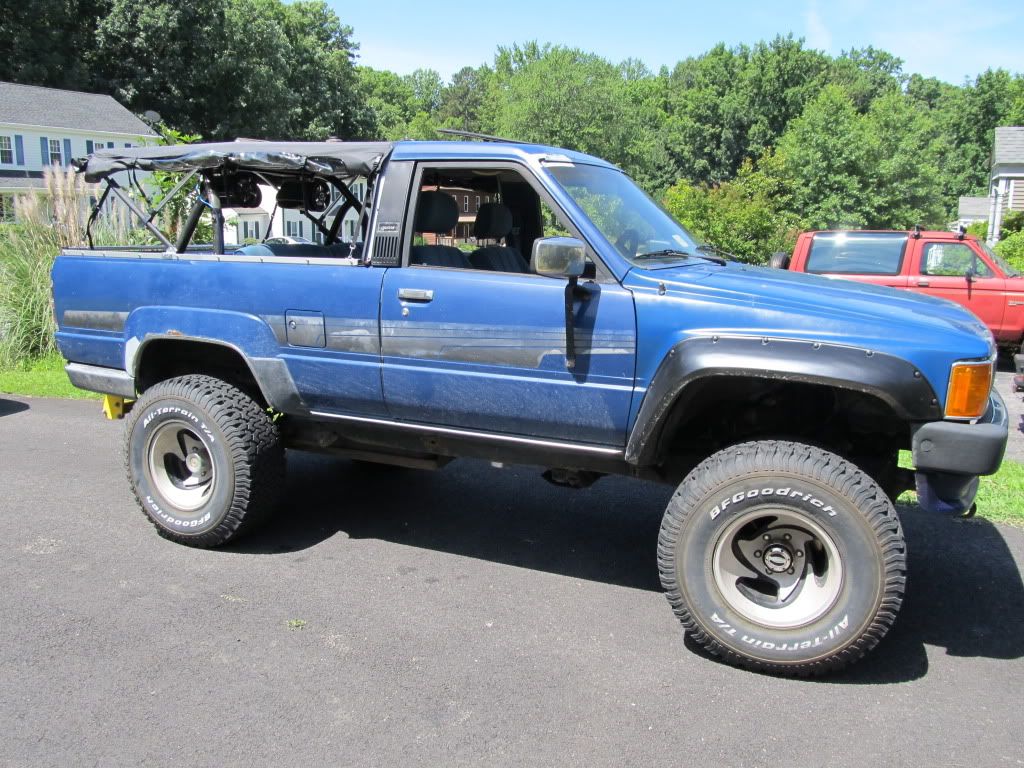
I've been searching this site for tons of info since i bought my 4runner last april and has gotten me to where I am now. Here is a picture of how it sits as of now. As of right now, planning on taking the truck to have all the fab done because I've never welded before. As of right now, this is whats sitting in the garage waiting to be put on...
(2) v6 4.88 third members
Trail Gear 5" HD sas kit
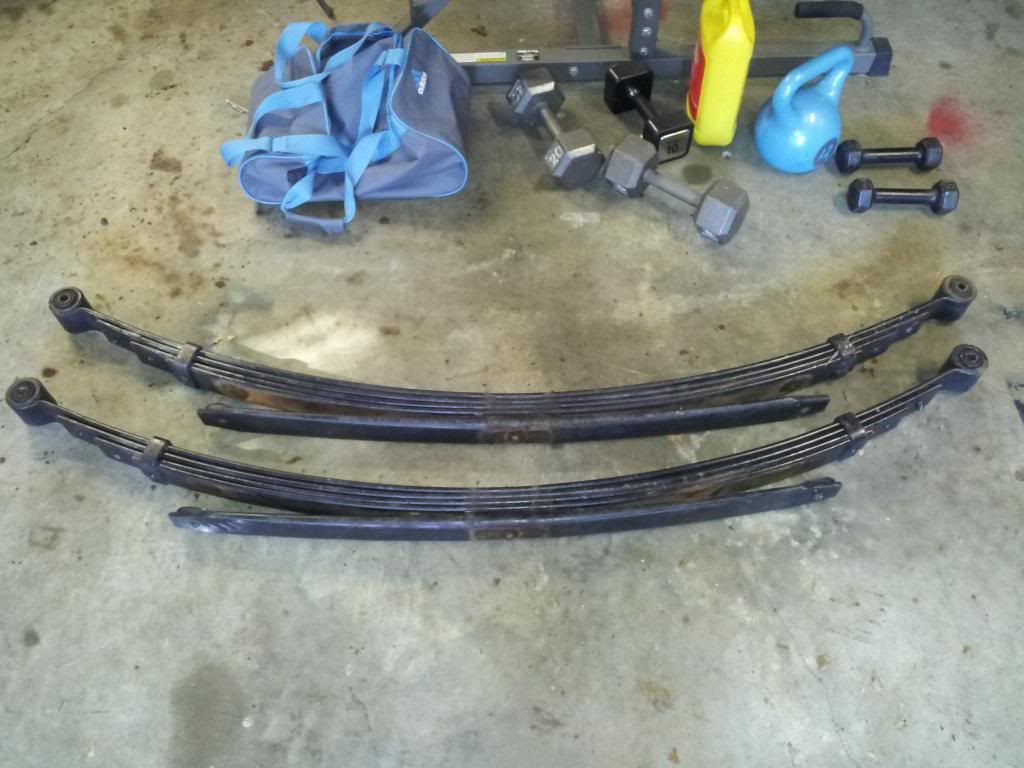
63" chevy springs from a Chevrolet 2500, 4 pack + overload spring
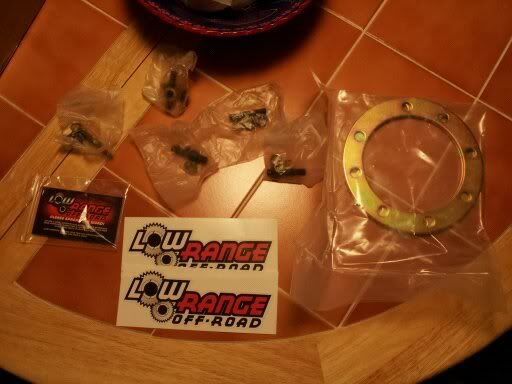
Chevy spring mount kit from low range off road
U bolt flip kit for the rear. Probably will not end up using it because I am going to use the stock shock mounts
6* pinion shims
In case I decide to remount the shocks in the future, I ordered the budbuilt upper shock mount and lower shock mounts as well
I have ordered the dirty 30s from low range to prevent from having to rip the knuckle apart in the future in case of breakage
Have a Lockright for the front but not sure if I am going to use it yet.
14" blistein 5125s for the chevy spring swap in the rear
In order to help the rear match the front, I'm going to order a 2" lift blocks and an add-a-leaf so it should sit with about a 6 + a 3" BL which is on it now.
How it sits now:
33 BFG A/T
stock 4.11 on IFS up front
3" BL
I've been told it has 6" of lift but the other 3" are unknown as far as I'm concerned. Maybe up front it has the torsion bars and rear has shackles?
Smittybilt tube bumper in the rear
K&N intake from LCE
header from LCE
Cat and muffler setup from LCE
Header, cat, and exhaust added to over $900
soft top from softopper
Bazooka tubies on roll bar in the rear, sound great
Bushwacker fender flares up front
(2) v6 4.88 third members
Trail Gear 5" HD sas kit
63" chevy springs from a Chevrolet 2500, 4 pack + overload spring
Chevy spring mount kit from low range off road
U bolt flip kit for the rear. Probably will not end up using it because I am going to use the stock shock mounts
6* pinion shims
In case I decide to remount the shocks in the future, I ordered the budbuilt upper shock mount and lower shock mounts as well
I have ordered the dirty 30s from low range to prevent from having to rip the knuckle apart in the future in case of breakage
Have a Lockright for the front but not sure if I am going to use it yet.
14" blistein 5125s for the chevy spring swap in the rear
In order to help the rear match the front, I'm going to order a 2" lift blocks and an add-a-leaf so it should sit with about a 6 + a 3" BL which is on it now.
How it sits now:
33 BFG A/T
stock 4.11 on IFS up front
3" BL
I've been told it has 6" of lift but the other 3" are unknown as far as I'm concerned. Maybe up front it has the torsion bars and rear has shackles?
Smittybilt tube bumper in the rear
K&N intake from LCE
header from LCE
Cat and muffler setup from LCE
Header, cat, and exhaust added to over $900
soft top from softopper
Bazooka tubies on roll bar in the rear, sound great
Bushwacker fender flares up front
 11-21-2011, 12:22 PM
#2
Registered User
Thread Starter
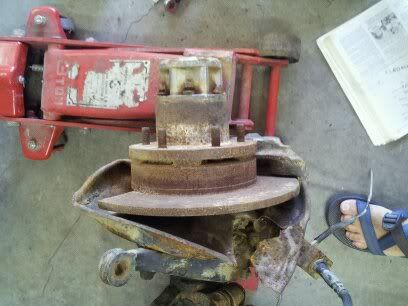
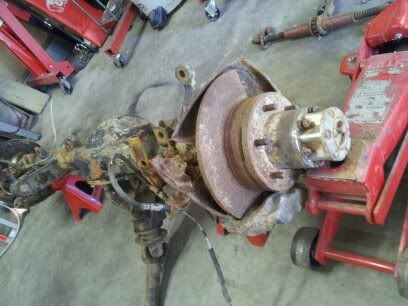
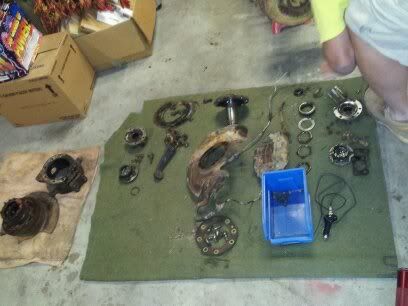
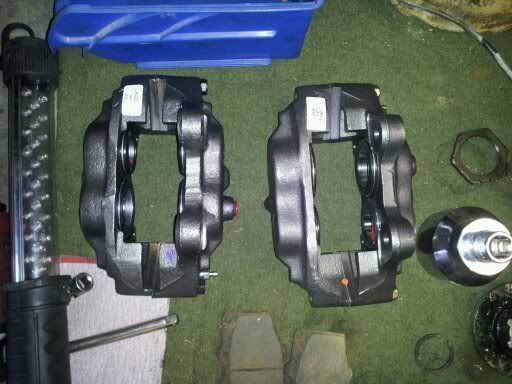
So I take all of my front axle parts, including the housing to get rebuilt today (I'm getting deployed so no time to put together myself) and what do I find out....the housing is slightly bent. Another purchase to Low Range Off Road for a Rock Assault front housing. And with the front housing requires new high steer links and new inner axleshafts and birfields, but luckily all I have to do is send them back and they will switch them out and they are cheaper and they have a lifetime warranty with the rock assault housing in case any of it decides to break
11-21-2011, 12:27 PM
#3
Registered User
Thread Starter
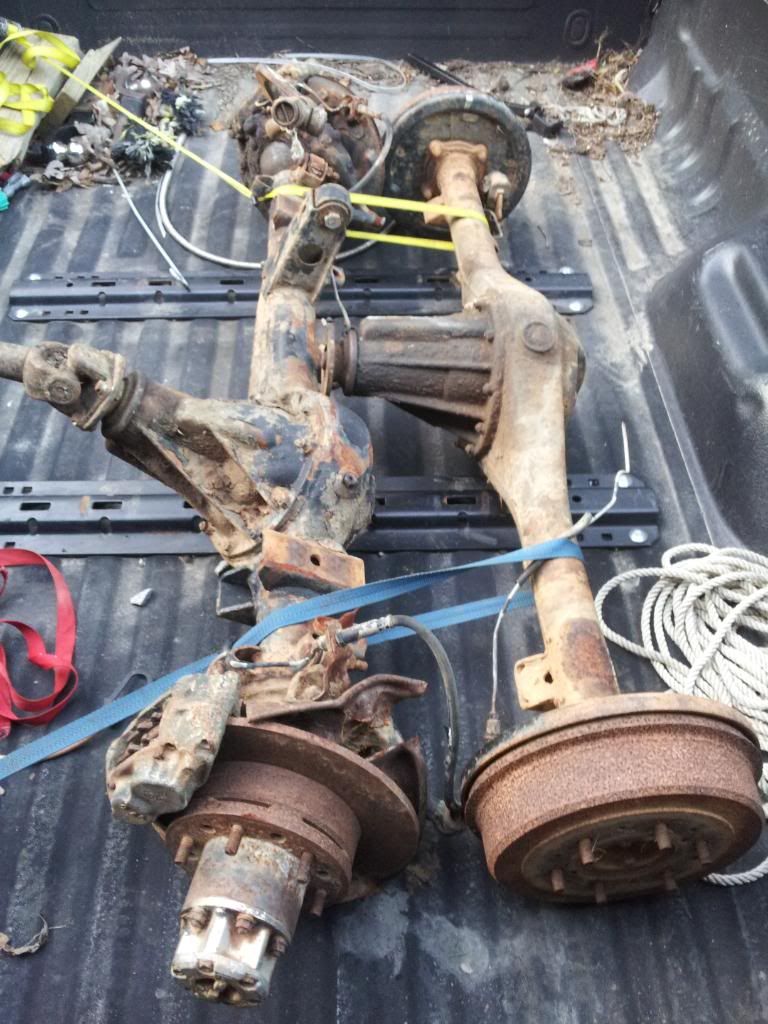
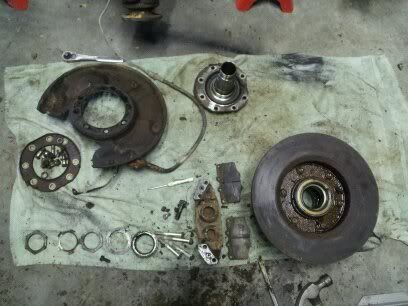
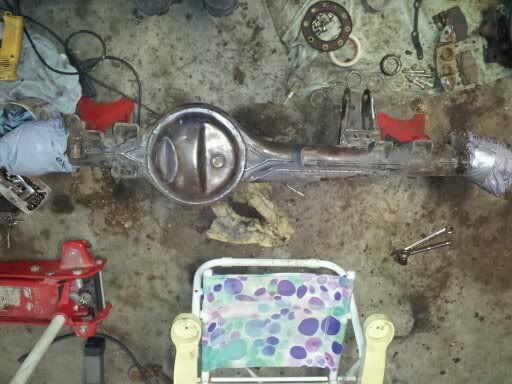
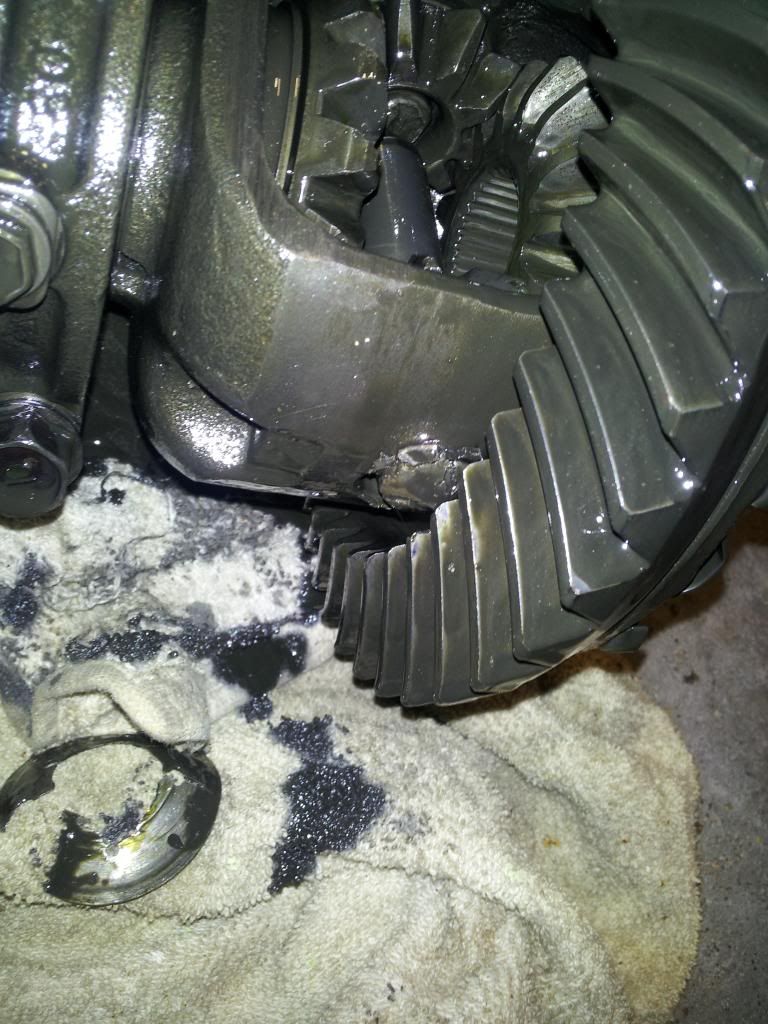
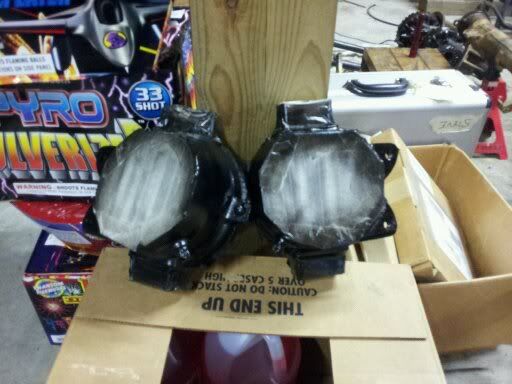
here are some pictures of the pieces of the build. 63" chevy springs from a chevy 2500, a picture of my bazooka tubies, and the day I picked up the axles, which I guess now was a waste of time being that I dont need either of them. The rear axle housing and shafts are for grabs btw if anyone needs them...
Last edited by pitfallguy72; 11-21-2011 at 12:30 PM.
11-21-2011, 12:45 PM
#5
Registered User
iTrader: (2)
Join Date: Dec 2009
Location: Pleasanton, CA - SF Bay Area
Posts: 2,159
Likes: 0
Received 7 Likes
on
5 Posts
Subscribed!
I have a pair of these springs in my garage and plan to install them early next year.
Do you know how to determine the degree of shim you need, once installed?
Good luck - looking forward to seeing this play out!
I have a pair of these springs in my garage and plan to install them early next year.
Do you know how to determine the degree of shim you need, once installed?
Good luck - looking forward to seeing this play out!
11-23-2011, 04:15 PM
#7
Registered User
Thread Starter
Thanks,
I figured for the amount of shim needed, I needed one degree for every inch of lift from the research I got off yotatech. So right now with the 5" sas eliminator kit going on soon, I wanted at least 6" of lift in the rear, therefore I got a 6* shim that will be put on.
The chevy springs I bought from a guy came off a chevy 2500 and he only used them for about 3-4 months so they don't have much use on them and may provide more lift than other springs I have seen and read about. Whatever I don't achieve with the springs I will do an add-a-leaf and possibly lift blocks (as much as I dont wanna use them). For the chevy spring swap kit, I got it from Low Range offroad for about $129 and they came with 6" shackles (eye to eye) so that will add some more lift as well. I'm expecting 5" at most with the chevy springs.
As far as future powering options. I would like to remain it be powered by toyota, I've looked at the Supra motor swap, and have also looked at purchasing a brand new 22RE engine from LCEngineering. I've also been interested in a 22RTE if I can find one. I've put a few mods on my 22RE and would like to keep those. Altogether, I have over a grand in mods from an intake to the header all the way back to the muffler. I'm putting the v6 thirds on it just incase I decide to go to a v6 at some point.
Trending Topics
11-23-2011, 06:36 PM
#8
Registered User
Thread Starter
Monday I bring my solid front axle to the shop to get rebuilt(getting deployed and dont have time to put back together). After I drop it off, they ask me to come back up to talk to me about something. They first ask me where I got my solid front axle. I tell them....craigslist....they proceed to hold the level up to it and sure enough....the drivers side is bent by like 3-4 degrees. I ask around to machine shops and no one but one place can bend it back. The one place that said it can said it had to be rebuilt and put back together in order for it to happen. With that being said, I've read that the yota axles are really soft and the geometry needs to be exact once straightened back again (AS with any axle). So at this point, I figured my best bet would be to purchase another housing. I immediately called LRO and purchased the Rock Assault front axle housing. Once i ordered it, I was told I needed to return the high steer rods from my IFS eliminator kit for longer ones to be used with the new housing being 3" longer (no need for wheel spacers) as well as the dirty 30s. They are replacing my brand new 30 spline axleshafts and birfields with ones that can be used with the rock assault housing that hold a lifetime warranty. Basicly, TG products need to be used with TG products in order to have a warranty.
I ended up spending more $$ than I intended but in the long run it'll be worth it. If your going to do it right....do it right the first time.
I ended up spending more $$ than I intended but in the long run it'll be worth it. If your going to do it right....do it right the first time.
11-23-2011, 06:44 PM
#9
Registered User
Thread Starter
I ahve posted on this site a time or two that I ahve had starting problems for a while now and have been told the hot shot relay kit was the way to go. Sure enough, I purchased the kit, but hadnt installed it yet and then got stranded on the beach yesterday and spent all of an hour installing it.
The installation went as follows:
The relay comes with 4 wires: large purple, small purple, large red, and ground wire.
I attached the ground wire to the mounting screw to the original stock relay
I attached the large red to the starter where the original battery wire is located (piggy back off the other one so both are on the starter)
I unclipped the other starter wire (starter activation). I cut this wire about 6 inches from the end. I connected the shorter end with the clip to the large purple wire. The rest of the activation wire I attached the smaller gauge purple wire....no more starer problems. Hope this helps for others with this installation because other sites don't specify which wires are which as far as activation and ignition wires are concerned.
11-23-2011, 11:04 PM
#11
Registered User
Join Date: Mar 2009
Location: (LSD) Lower Slower Delaware
Posts: 1,169
Likes: 0
Received 0 Likes
on
0 Posts
sorry to hear above the front axle, Had a few Chevy and still got my 83 suburban 3/4 ton no problems with bent axles. Put your pictures on photobucket than insert image to your message, you pictures will display full size, Happy Thanksgiving
 [/IMG]
11-24-2011, 08:50 AM
[/IMG]
11-24-2011, 08:50 AM
#15
Registered User
Thread Starter
Thats an awesome looking 4runner! I wanna do mine all black and blue just like that. Are those 35s? You're located in Va?
Here's some pics of me installing the Painless Hot Shot Relay while I was stranded on the beach in obx 2 days ago for tgiving....gf is taking pictures. I ordered the relay a couple months ago when the problem started and problem has been on and off for a while now and once we got stuck on the beach with the continuous "death click" I decided it was about time to install it before the tide came in and took my baby away
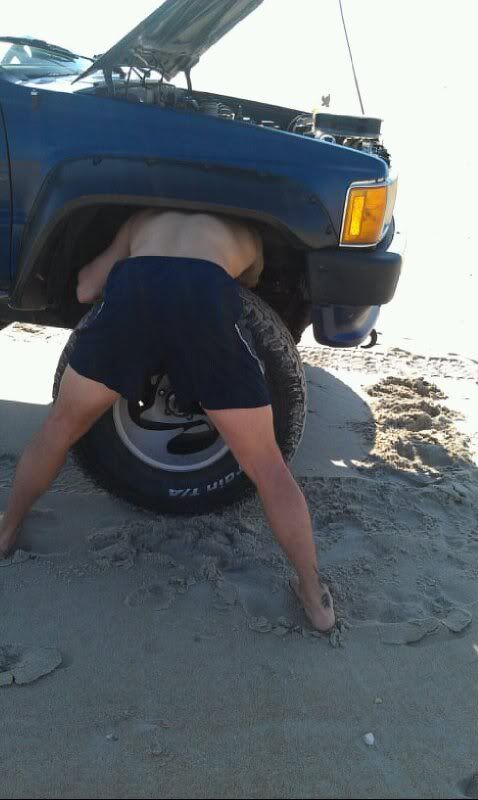
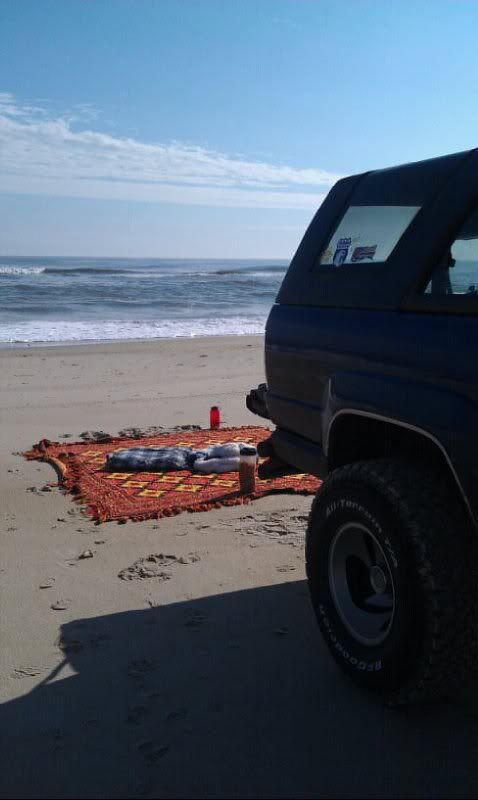
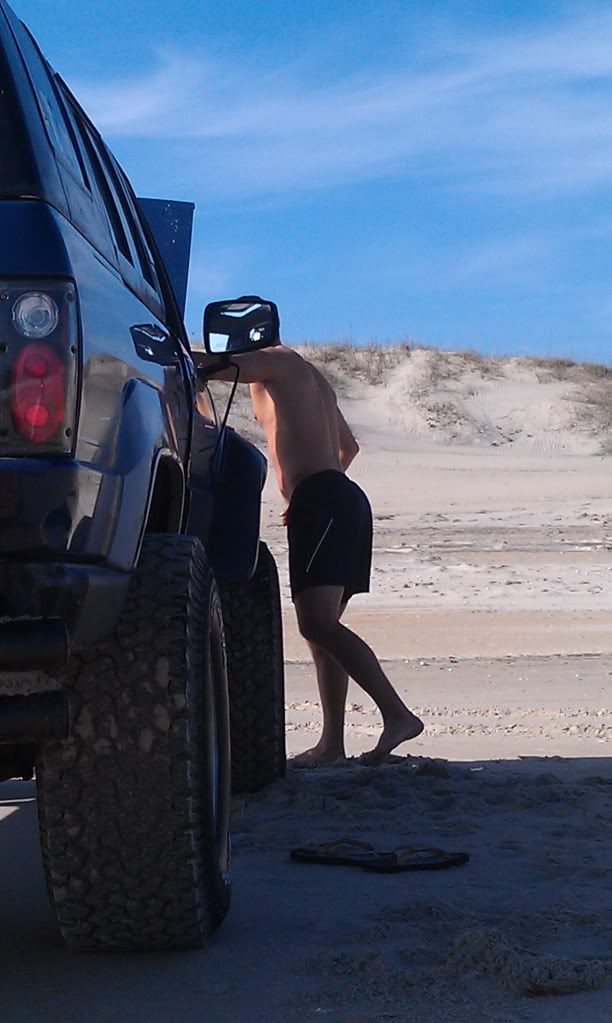
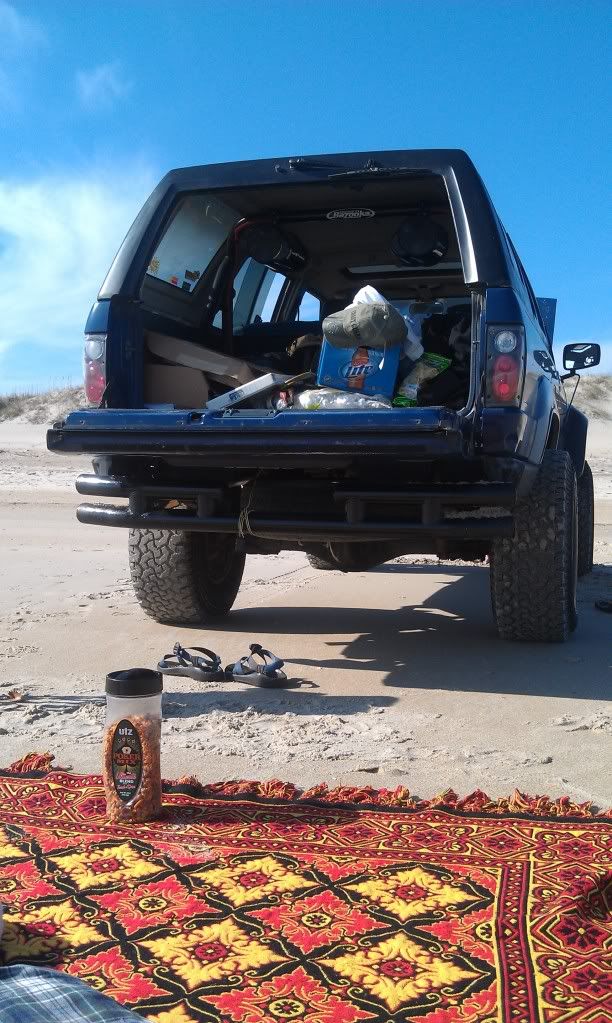

Here's some pics of me installing the Painless Hot Shot Relay while I was stranded on the beach in obx 2 days ago for tgiving....gf is taking pictures. I ordered the relay a couple months ago when the problem started and problem has been on and off for a while now and once we got stuck on the beach with the continuous "death click" I decided it was about time to install it before the tide came in and took my baby away
11-24-2011, 10:05 AM
#16
Registered User
Thread Starter
Erik Hinch,
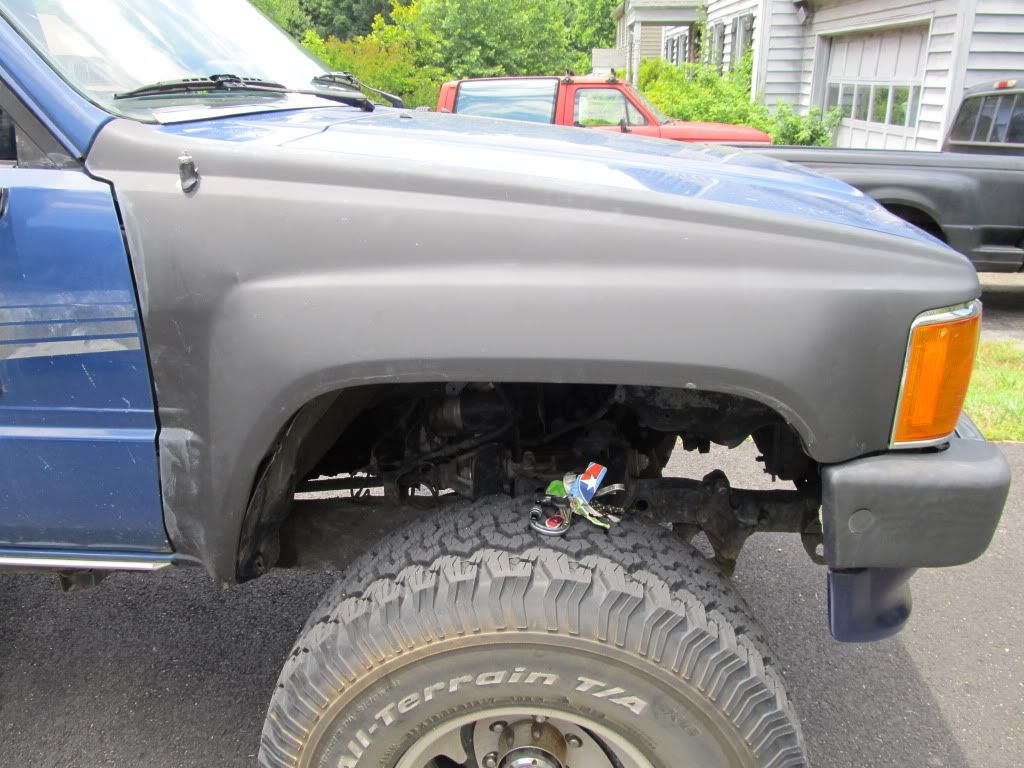
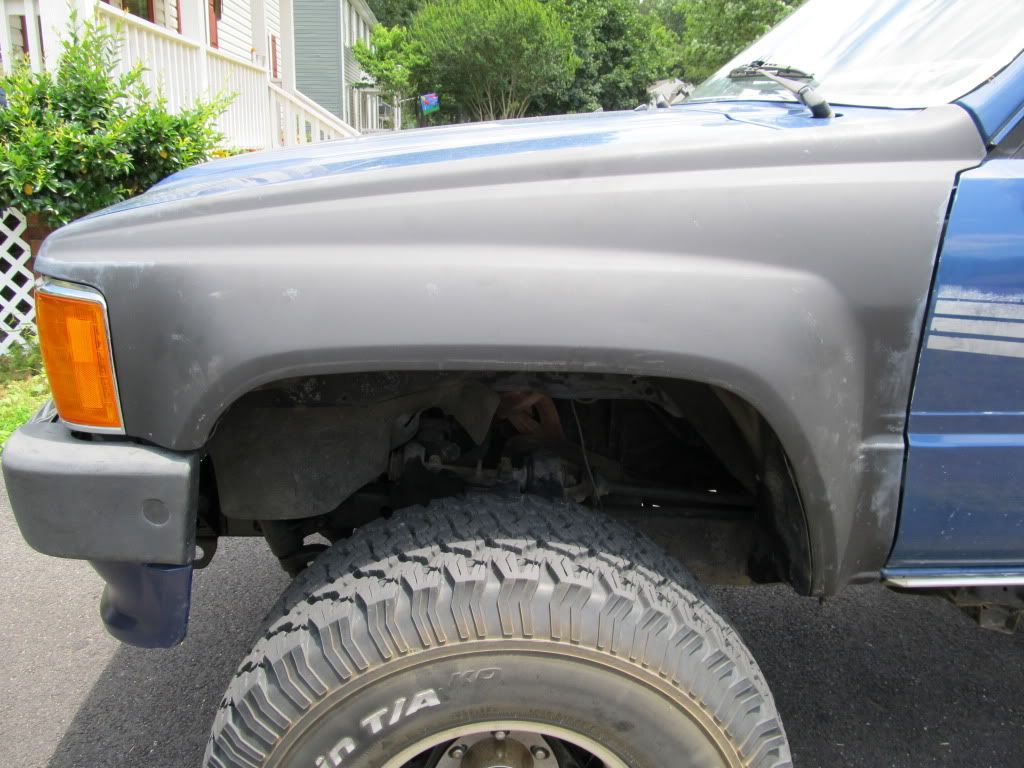
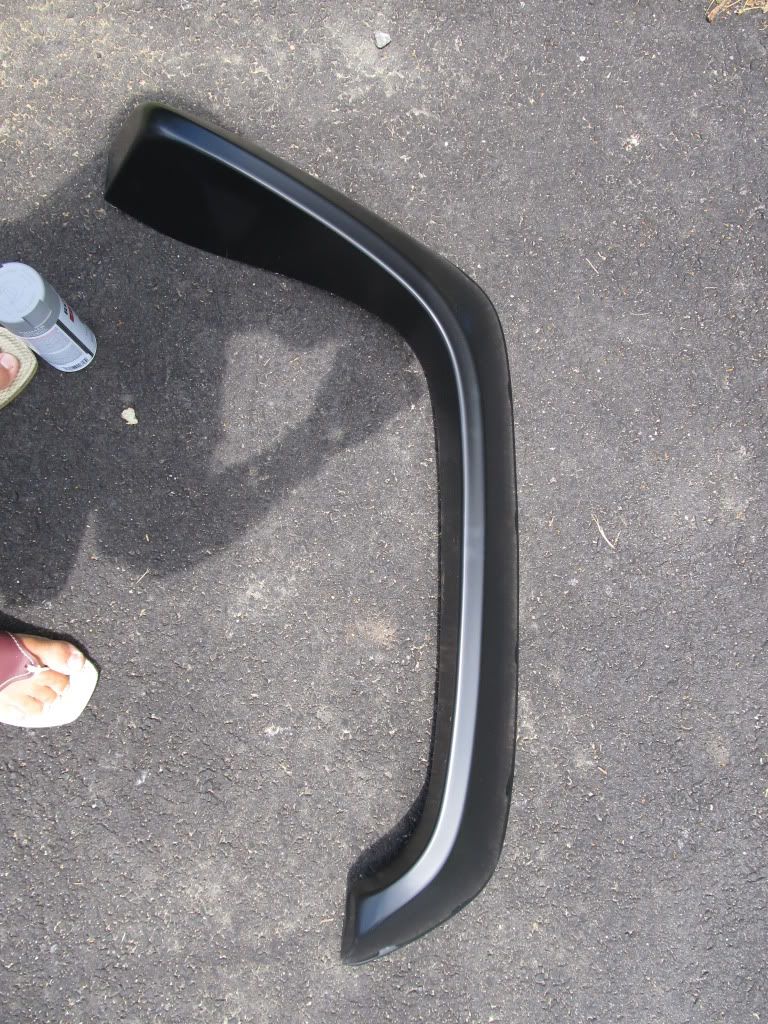
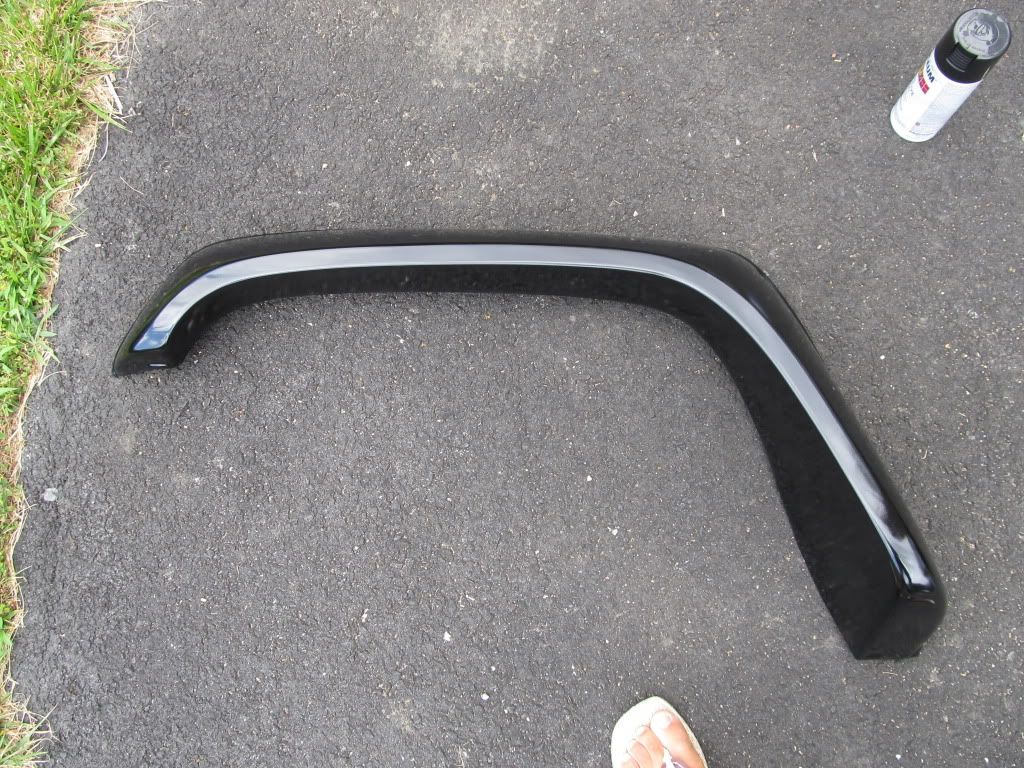
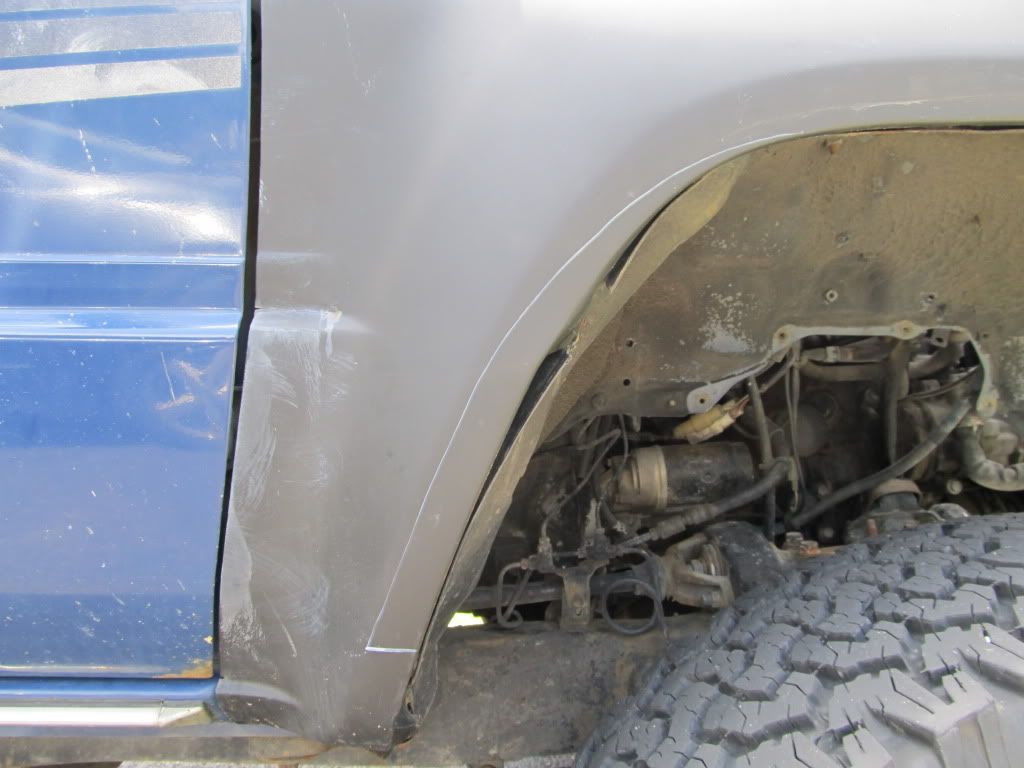
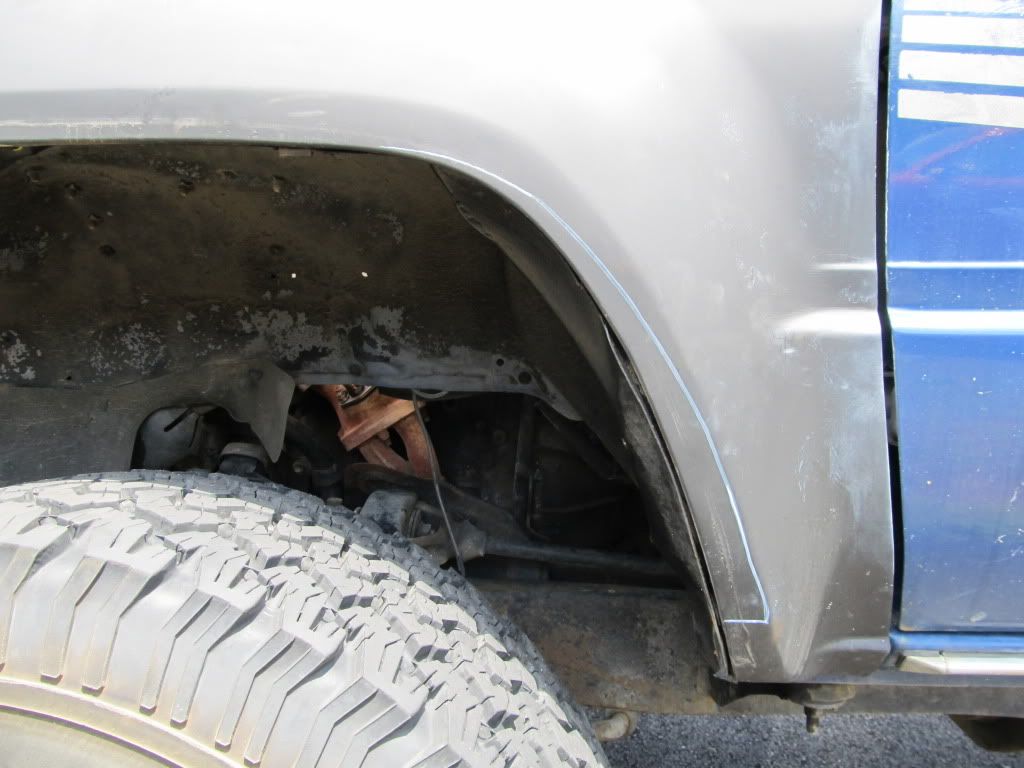
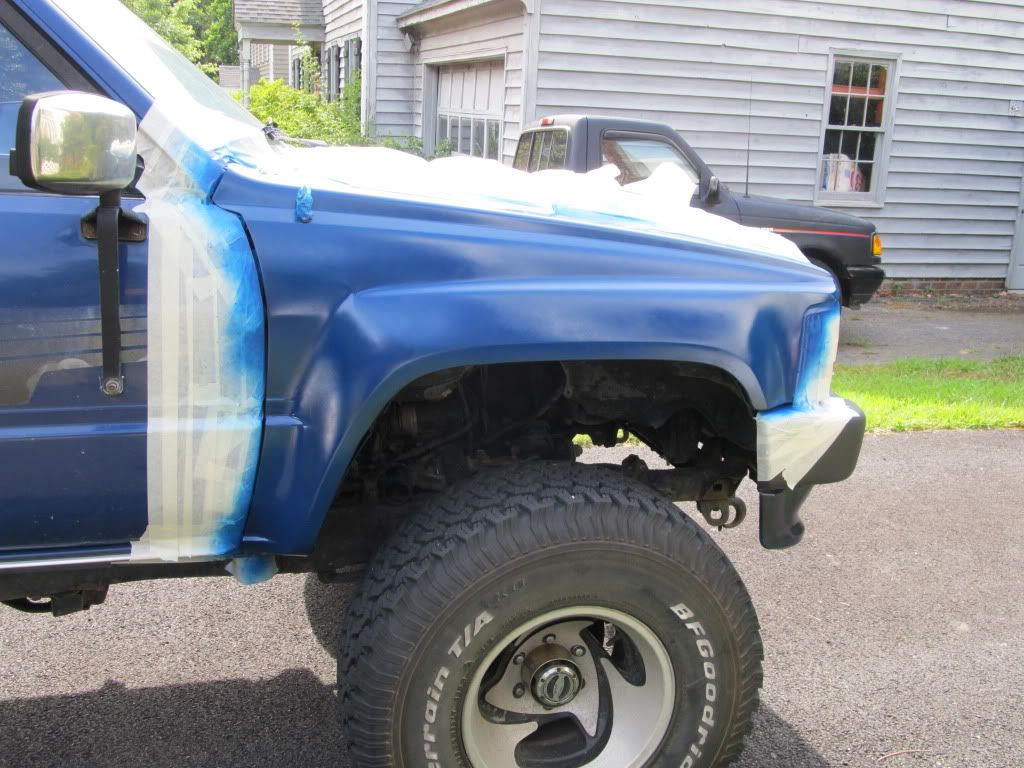
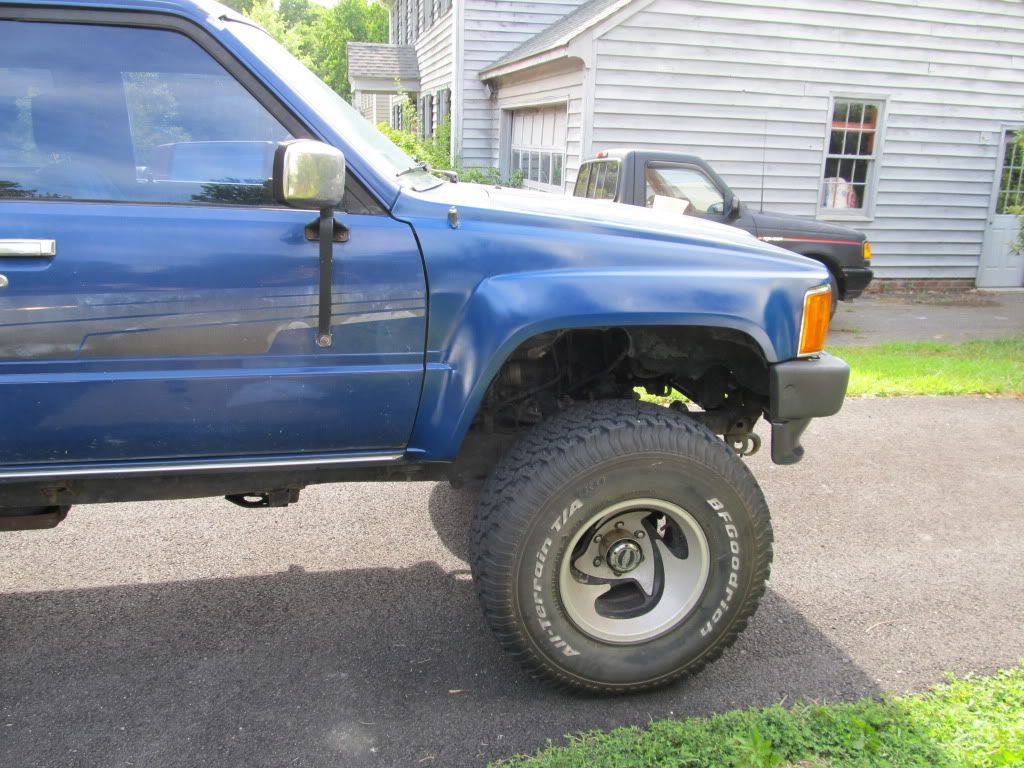
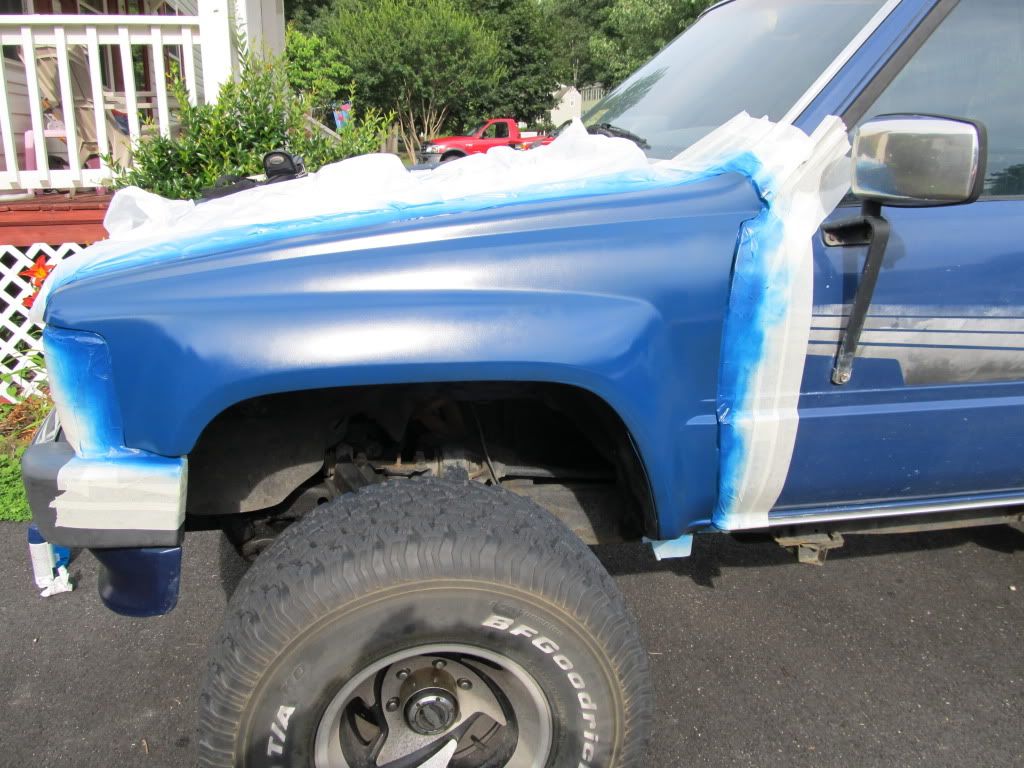
where about did you get your bakini top? nice look with the extra window in it. Love the look of the high-clearance fenders, going to look into purchasing some. Here are some pics of my bushwacker fender flare installation on the front.
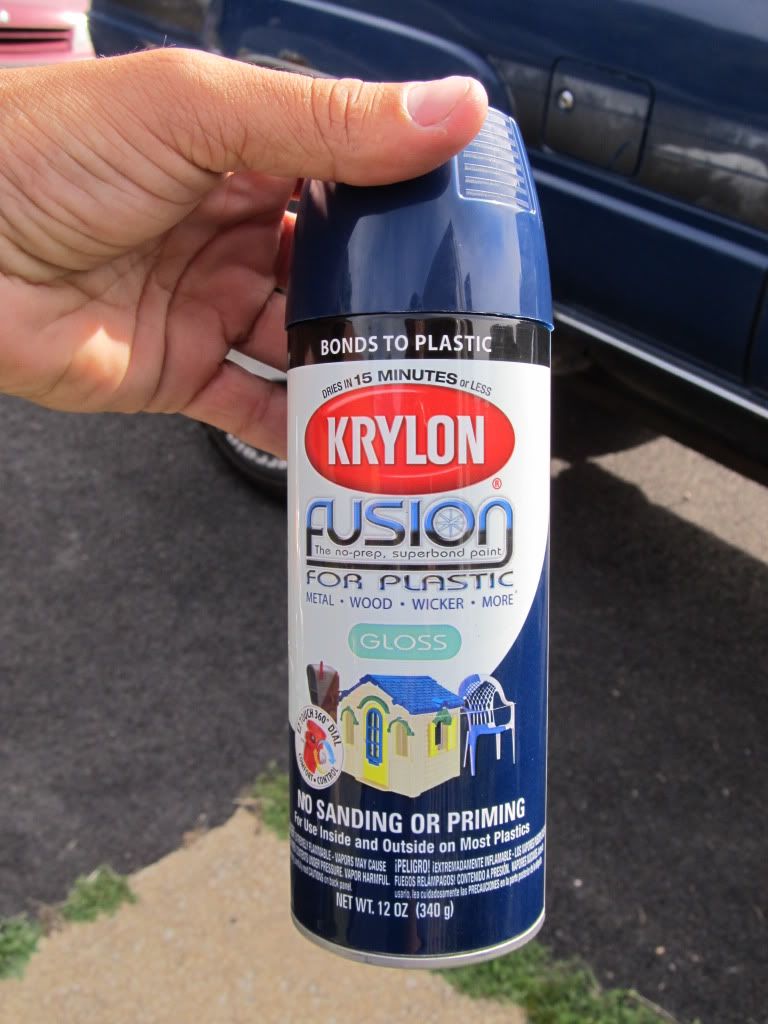
When I first got it, the front fenders were all rusted up and nasty so bought some fenders off a parts 4runner not too far away for 20 bucks for both. sanded down, primered, then wet sanded and primered again then eventually painted blue with the krylon you'll see in the picture which was a pretty close match to the original paint. The flares came black already, so then primered gray and repainted black rattle-can style.
Also below is a pic of my soft top from softopper. Spent about $700 for it with the extra mesh screen in the back and love every minute of it...no regrets, no leaks, easy install. All bolt-on

where about did you get your bakini top? nice look with the extra window in it. Love the look of the high-clearance fenders, going to look into purchasing some. Here are some pics of my bushwacker fender flare installation on the front.
When I first got it, the front fenders were all rusted up and nasty so bought some fenders off a parts 4runner not too far away for 20 bucks for both. sanded down, primered, then wet sanded and primered again then eventually painted blue with the krylon you'll see in the picture which was a pretty close match to the original paint. The flares came black already, so then primered gray and repainted black rattle-can style.
Also below is a pic of my soft top from softopper. Spent about $700 for it with the extra mesh screen in the back and love every minute of it...no regrets, no leaks, easy install. All bolt-on
11-24-2011, 11:58 AM
#17
Registered User
Join Date: Mar 2009
Location: (LSD) Lower Slower Delaware
Posts: 1,169
Likes: 0
Received 0 Likes
on
0 Posts
wow great pictures, and large. That paint looks good from a can. I got a rust free tailgate and fender that will need paint to match the pickup, Krylon got me thinking.
Are you going to clear coat it?
Are you going to clear coat it?
11-24-2011, 03:01 PM
#19
Registered User
Thread Starter
rustEDyota, no clue whatsoever, they came on it when I bought it. I figure just look for altezza tailights, cant be too hard to find.
The paint looks awesome from the can and no, wasnt planning on clearcoating the fenders. For now, or until I get way older, I've considered a few things. I really like what Erik Hinch did above with his. Going to plan on getting rid of the stripes in the future, really like the high clearance rear quarters from toyotafiberglass.com. Long term- a gun metal gray all over once restored. For now-really like a black and blue truck
The paint looks awesome from the can and no, wasnt planning on clearcoating the fenders. For now, or until I get way older, I've considered a few things. I really like what Erik Hinch did above with his. Going to plan on getting rid of the stripes in the future, really like the high clearance rear quarters from toyotafiberglass.com. Long term- a gun metal gray all over once restored. For now-really like a black and blue truck
11-24-2011, 10:58 PM
#20
Registered User
iTrader: (3)
Join Date: Feb 2008
Location: Virginia
Posts: 314
Likes: 0
Received 0 Likes
on
0 Posts
Thanks for the compliment. I got my top from the previous owner. It is a kayline top. I picked up another one this summer for a super deal. The body on my runner is all fiberglass except the roof hood and doors. Got the fenders quarters tailgate and cowl from toyotafiberglass.com. Currently running 35's on it. I live in Abingdon near Bristol motor speedway. Your fenders look great for rattle canning. Your would look good black. I started to paint mine black but a friends dad reminded me that the factory blue is becoming rare, so i went back with the original color.


