
Gizler00's 85 4Runner Build Thread
 Nov 12, 2015 | 09:29 AM
#901
Thread Starter


Joined: Aug 2007
Posts: 3,276
Likes: 7
From: Pennsylvania
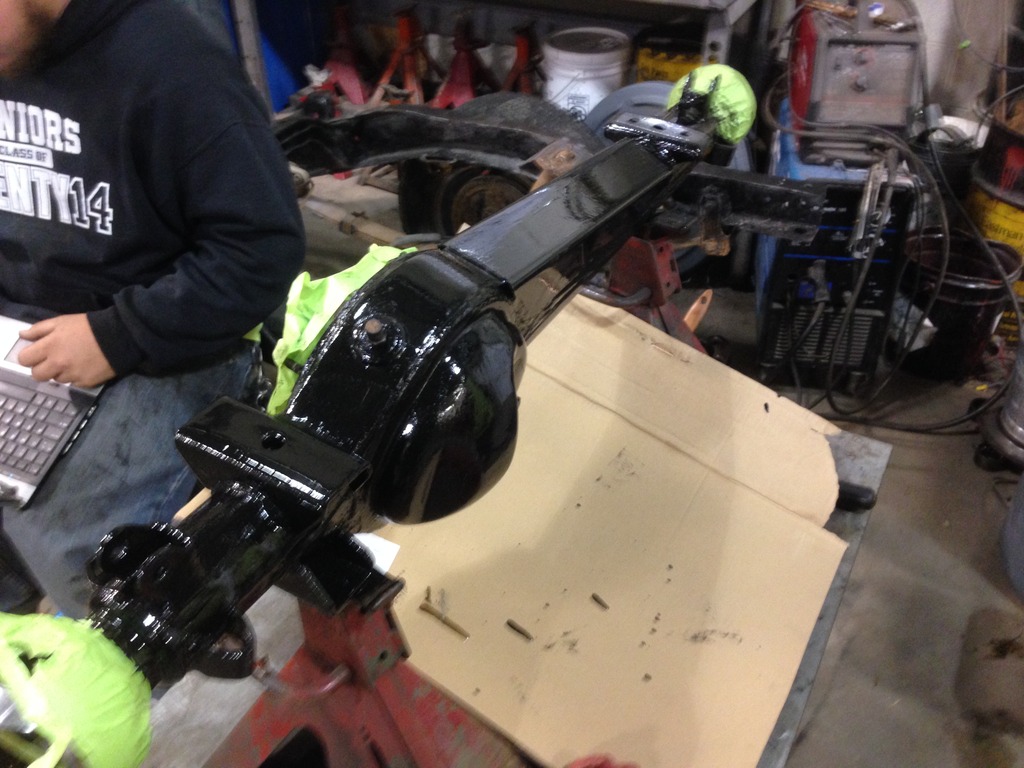
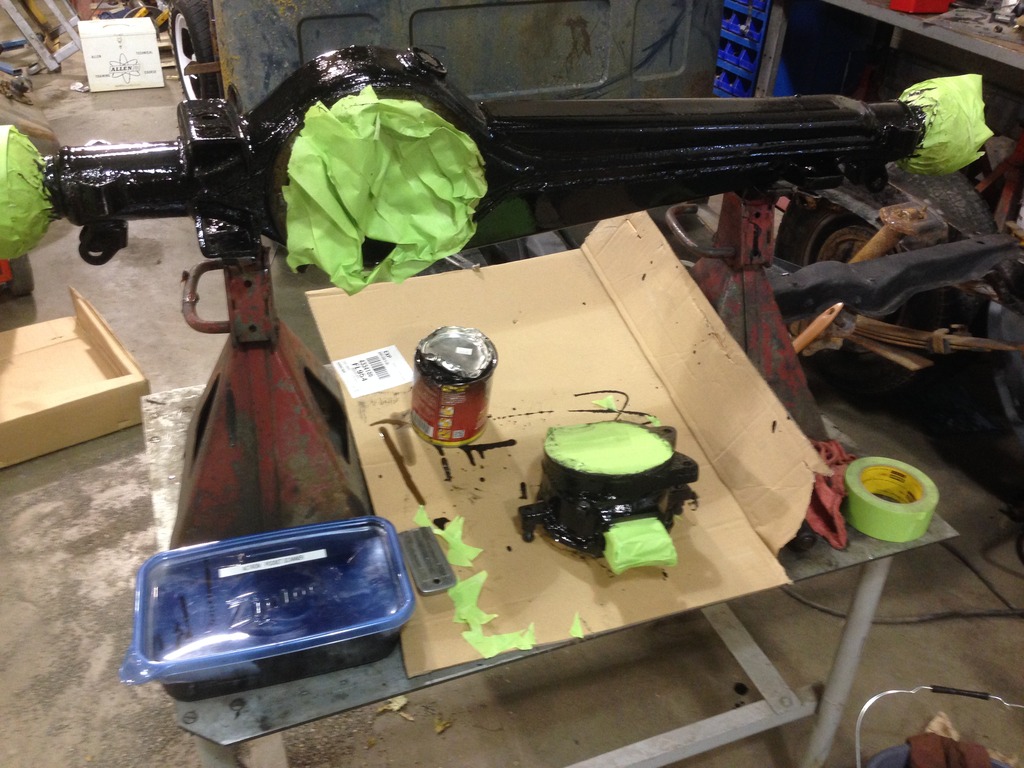
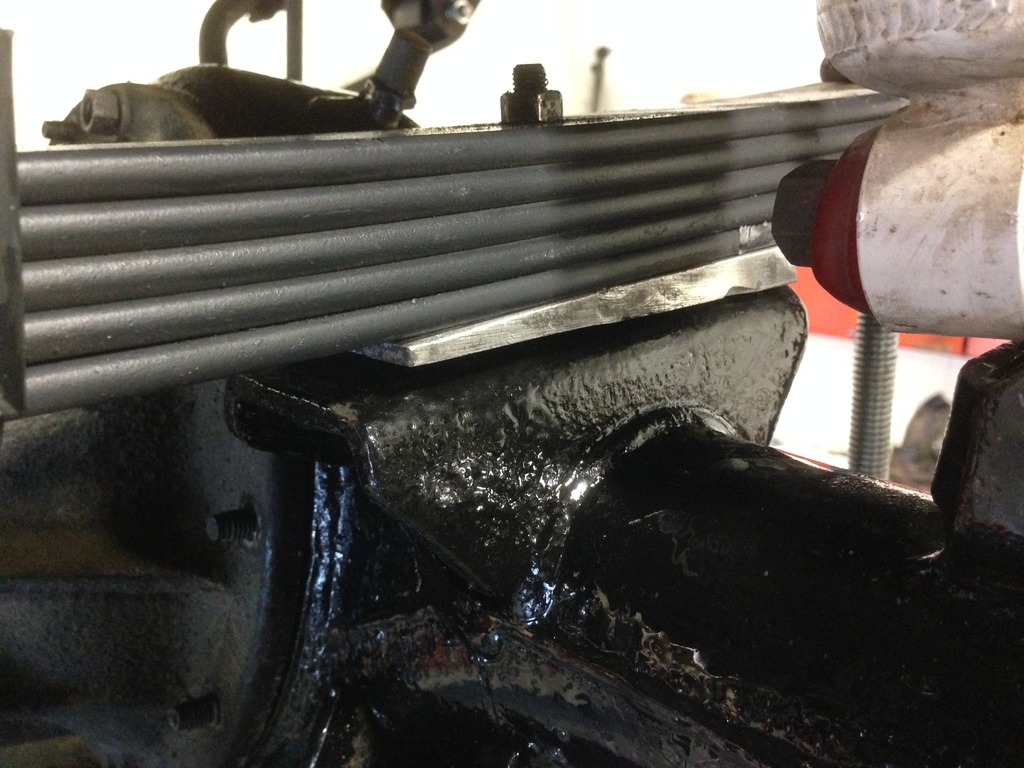
Got the Gusset welded on.
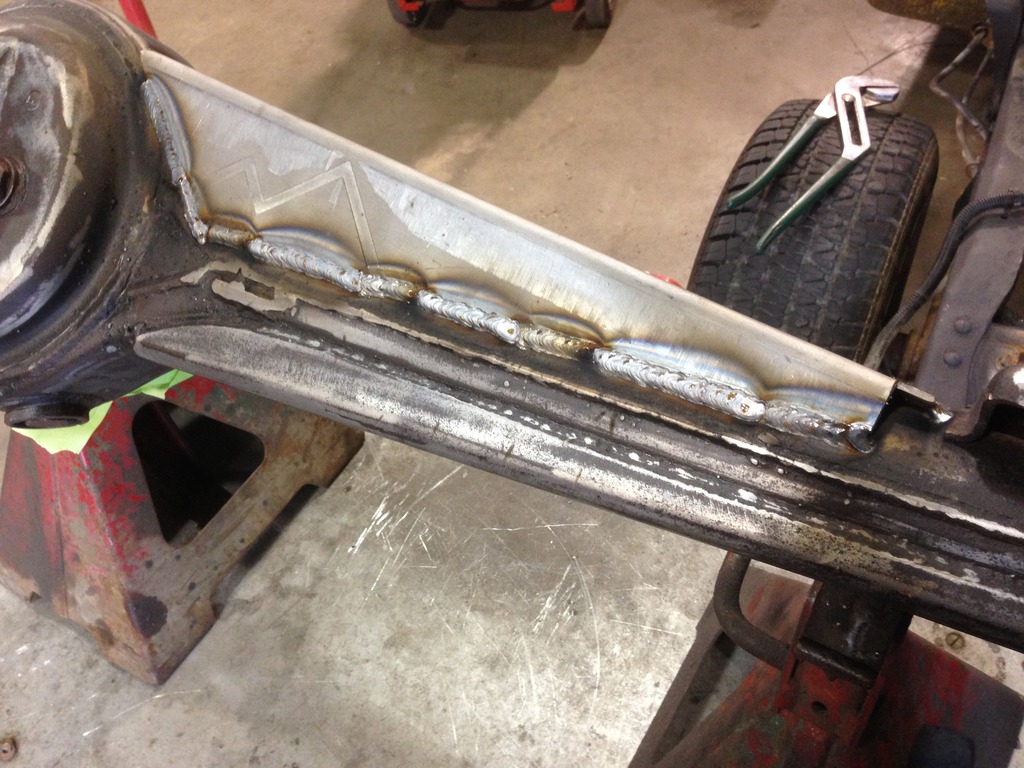
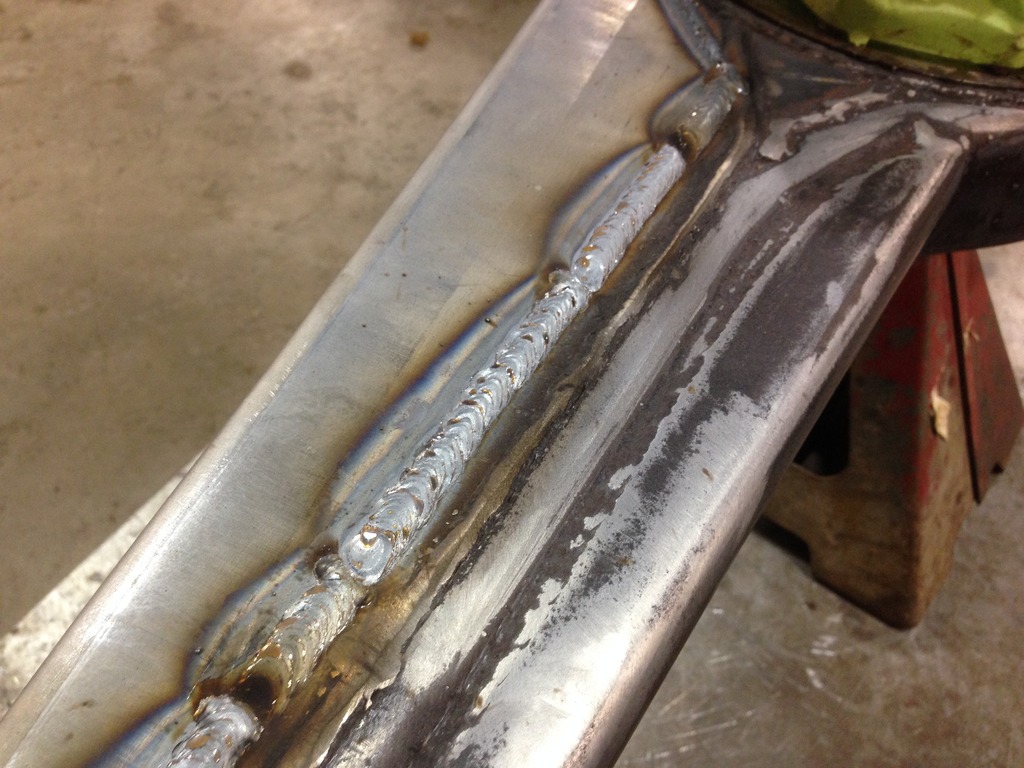
I went slow and stitched a few sections at a time. Alternating side to side and front to back. I was paranoid that it warped, so I went back to the shop last night to check the Fitment of the axles and was able to get them in pretty easy.
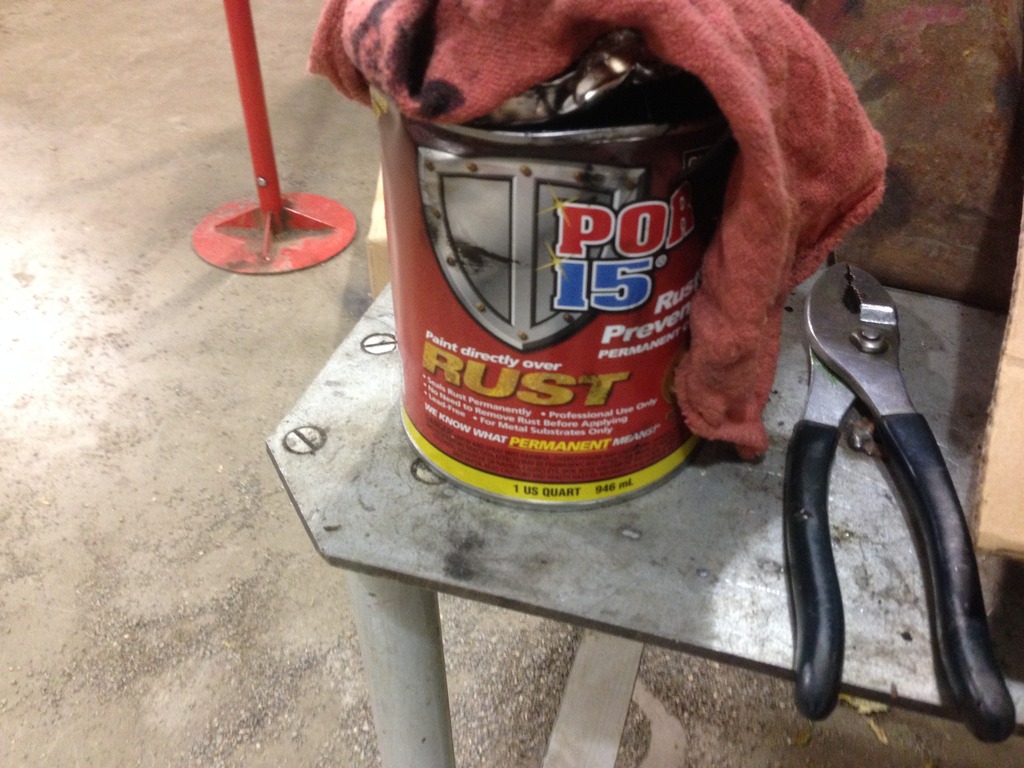
I decided to throw Two coats of POR-15 on the axle and the Knuckles. I still think that I might put some good oil based paint over them as well. I just need to find out if thats a possibility without a reaction.
I Hate wire wheeling grime off!!!
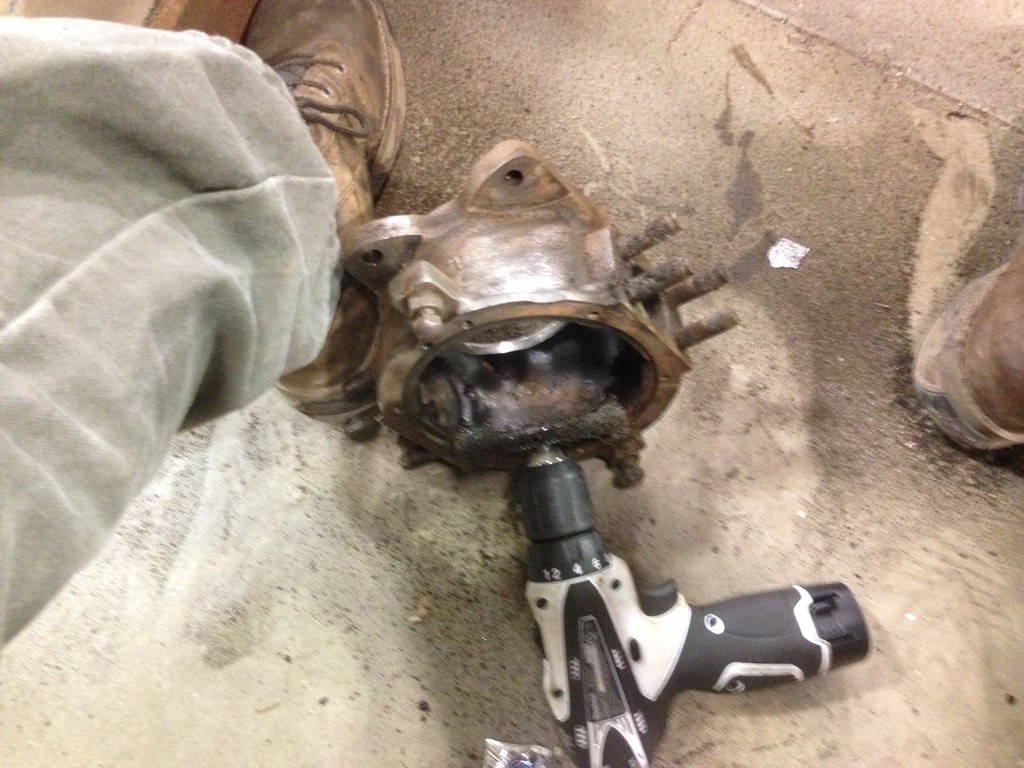
I busted open the High Steer Box. I really cannot get over how beefy these parts are over the stock setup!!


I went slow and stitched a few sections at a time. Alternating side to side and front to back. I was paranoid that it warped, so I went back to the shop last night to check the Fitment of the axles and was able to get them in pretty easy.


I decided to throw Two coats of POR-15 on the axle and the Knuckles. I still think that I might put some good oil based paint over them as well. I just need to find out if thats a possibility without a reaction.


I Hate wire wheeling grime off!!!

I busted open the High Steer Box. I really cannot get over how beefy these parts are over the stock setup!!
 Nov 13, 2015 | 12:22 AM
#902
Nice work on the axel, looks great! I need to get some POR15!
The first time I installed High steer I was amazed at how beefy the steering arms were, also makes you wonder what toyota engineers were thinking when the designed the push/pull steering with those crazy J-arms, lol.
The first time I installed High steer I was amazed at how beefy the steering arms were, also makes you wonder what toyota engineers were thinking when the designed the push/pull steering with those crazy J-arms, lol.
Last edited by rustED; Nov 13, 2015 at 12:23 AM.
Nov 15, 2015 | 05:31 PM
#904
Registered User
Joined: Feb 2007
Posts: 521
Likes: 0
From: North Carolina
You weren't kidding on the rusty floor pan. I have a piece of sheet metal welded in already but not 100% happy with it. Im kinda scared to tackle replacing the inner rocker. I just painted my 4runner.
Nov 16, 2015 | 11:14 AM
#905
Thread Starter
Joined: Aug 2007
Posts: 3,276
Likes: 7
From: Pennsylvania
Nice work on the axel, looks great! I need to get some POR15!
The first time I installed High steer I was amazed at how beefy the steering arms were, also makes you wonder what toyota engineers were thinking when the designed the push/pull steering with those crazy J-arms, lol.
The first time I installed High steer I was amazed at how beefy the steering arms were, also makes you wonder what toyota engineers were thinking when the designed the push/pull steering with those crazy J-arms, lol.
Just found out my Springs shipped out today. Only thing Im waiting on after they arrive are the Greaseable Front pin Kit
Nov 16, 2015 | 11:16 AM
#906
Thread Starter
Joined: Aug 2007
Posts: 3,276
Likes: 7
From: Pennsylvania
Oh yeah man! It was a rusty Mess.
The inner rocker isnt that hard to deal with. I found the easiest way to work with that part of the vehicle was to use a spot weld cutter and take apart the factory panel the best I could then fit the exact piece in that I needed.
Check out my build for Buddy thread. We had to do some major floor pan repairs on both sides of that truck.
Nov 16, 2015 | 05:54 PM
#909
Thread Starter
Joined: Aug 2007
Posts: 3,276
Likes: 7
From: Pennsylvania
Thanks Rich! How have you been? I havent talked to you in a while. I have not been on here much and I also have not been on IG much either.
Hope all is well.
Thanks Man. I wish I had the money to get some OME ones, BUt I will be running the Doestch Tech's I have on there for now.
Im also having a hard time trying to gauge what the height will be like after I get the springs and shackles on.
I decided to go with the 6" TG greaseable to match the length I had on there.
Hope all is well.
Im also having a hard time trying to gauge what the height will be like after I get the springs and shackles on.
I decided to go with the 6" TG greaseable to match the length I had on there.
Nov 18, 2015 | 04:24 AM
#910
Thread Starter
Joined: Aug 2007
Posts: 3,276
Likes: 7
From: Pennsylvania
Well, I managed to scrounge up enough to get the Rear setup ordered through Lowrange.
When I checked yesterday, everything on their site was on sale!!!!! I was able to Get OME rear springs, bushings, and 6" TG greasable shackles for 340$ shipped!! I really wanted to order the U-bolt flip kit for the rear like I have for the front, but that will have to wait.
Looks like the Front springs are due to arrive this Friday! I cant wait. Too bad im out of town until Saturday.....
Hopefully I will be able to get the front together next Monday and Tuesday!
Man I am so excited!! I have been wanting to redo the steering and suspension for so long now!
Nov 18, 2015 | 07:25 AM
#912
Thread Starter
Joined: Aug 2007
Posts: 3,276
Likes: 7
From: Pennsylvania
Nov 18, 2015 | 06:50 PM
#914
Registered User
Joined: Apr 2012
Posts: 2,817
Likes: 2
From: Los Angeles CA
So far all i have been up to is work work work. And most of my free time these past few weeks have gone to my new project. I'm building a Overland Camping trailer with an on board heated shower and forced air heater for the roof top tent i plan to get and a lot of other cool stuff. If you haven't checked it out yet here is my trailer build:
https://www.yotatech.com/forums/f88/...-build-291091/
But yea i have been really busy trying my best to get the bulk of this build finished quick because once i start taking "call" at the hospital i will no longer have a life lol and i wont have time to get those harder things to build out of the way.
And yea i see that yotatech isn't as busy as it used to be. you're not the only one.
@chefyota4x4 (mark) is usuing Old man Emu springs i believe in the rear and he uses trailgear ubolts with plate. i think RBX is right on stock ones not fitting.
Last edited by Redeth005; Nov 18, 2015 at 06:52 PM.
Nov 22, 2015 | 06:27 PM
#916
Thread Starter
Joined: Aug 2007
Posts: 3,276
Likes: 7
From: Pennsylvania
Thanks for the Info. I might Have some of those.
Glad you are doing good rich. I will have to check out the Trailer build. Sounds like something I need to start making also.
Thanks bud!!
All is well. I am finally finished with school. I work at UCLA hosptial now doing surgeries working with surgeons every day. Its freekin amazing, i love my job.
So far all i have been up to is work work work. And most of my free time these past few weeks have gone to my new project. I'm building a Overland Camping trailer with an on board heated shower and forced air heater for the roof top tent i plan to get and a lot of other cool stuff. If you haven't checked it out yet here is my trailer build:
https://www.yotatech.com/forums/f88/...-build-291091/
But yea i have been really busy trying my best to get the bulk of this build finished quick because once i start taking "call" at the hospital i will no longer have a life lol and i wont have time to get those harder things to build out of the way.
And yea i see that yotatech isn't as busy as it used to be. you're not the only one.
@chefyota4x4 (mark) is usuing Old man Emu springs i believe in the rear and he uses trailgear ubolts with plate. i think RBX is right on stock ones not fitting.
Thanks bud!!
Nov 22, 2015 | 06:36 PM
#917
Thread Starter
Joined: Aug 2007
Posts: 3,276
Likes: 7
From: Pennsylvania
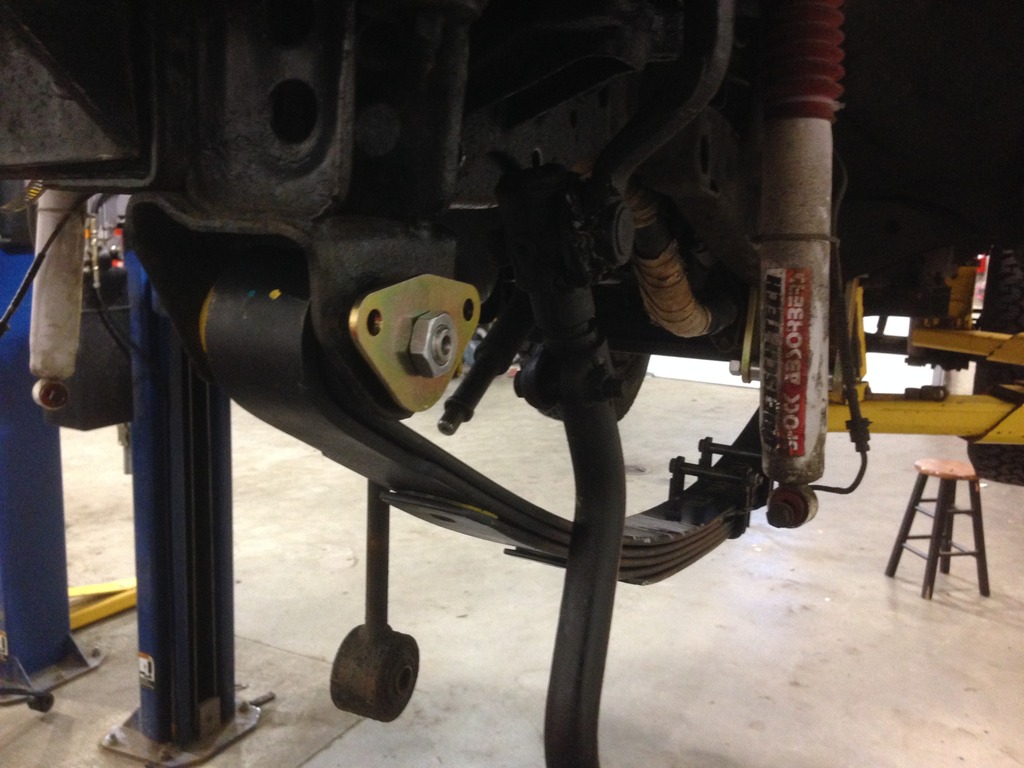
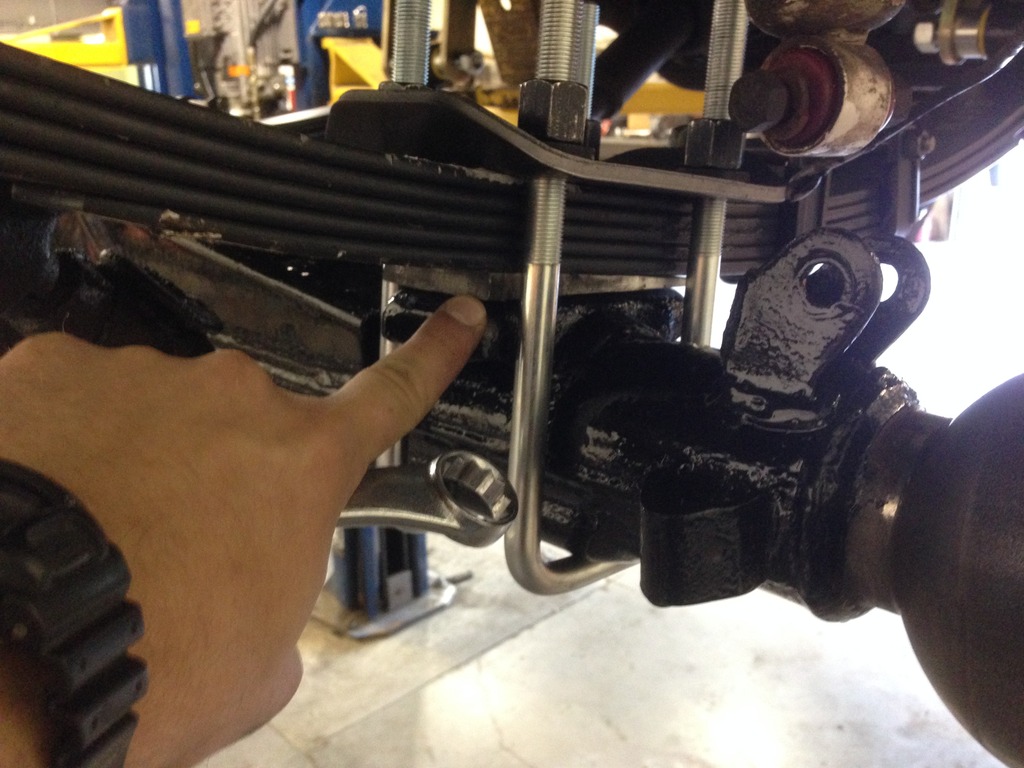
So Everything for the Front Showed up today.
I have a few questions.
My other springs have the tapered spacers under them. I think that they are bolted on Via the center pin bolt, but I have yet to look really close.
My question is........do I need the spacers with the OME springs or no?? I have been looking around to try and find some threads but have not had any luck.
I am heading to work tomorrow and hopefully getting the springs in, and mostly finishing up the front axle.
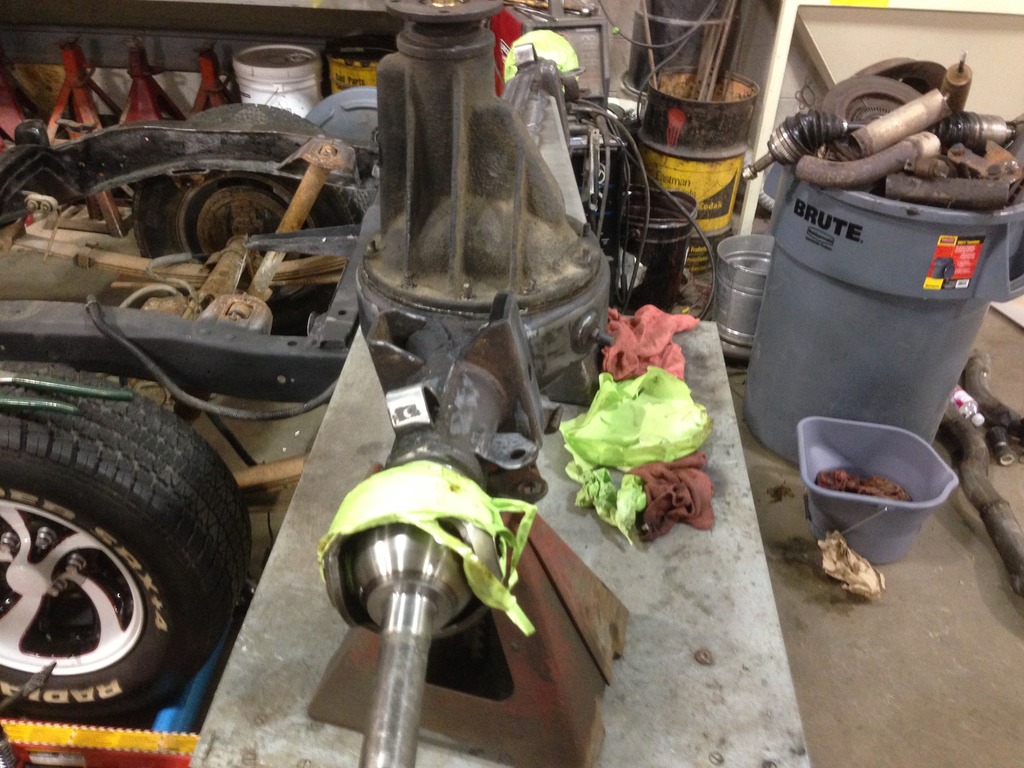
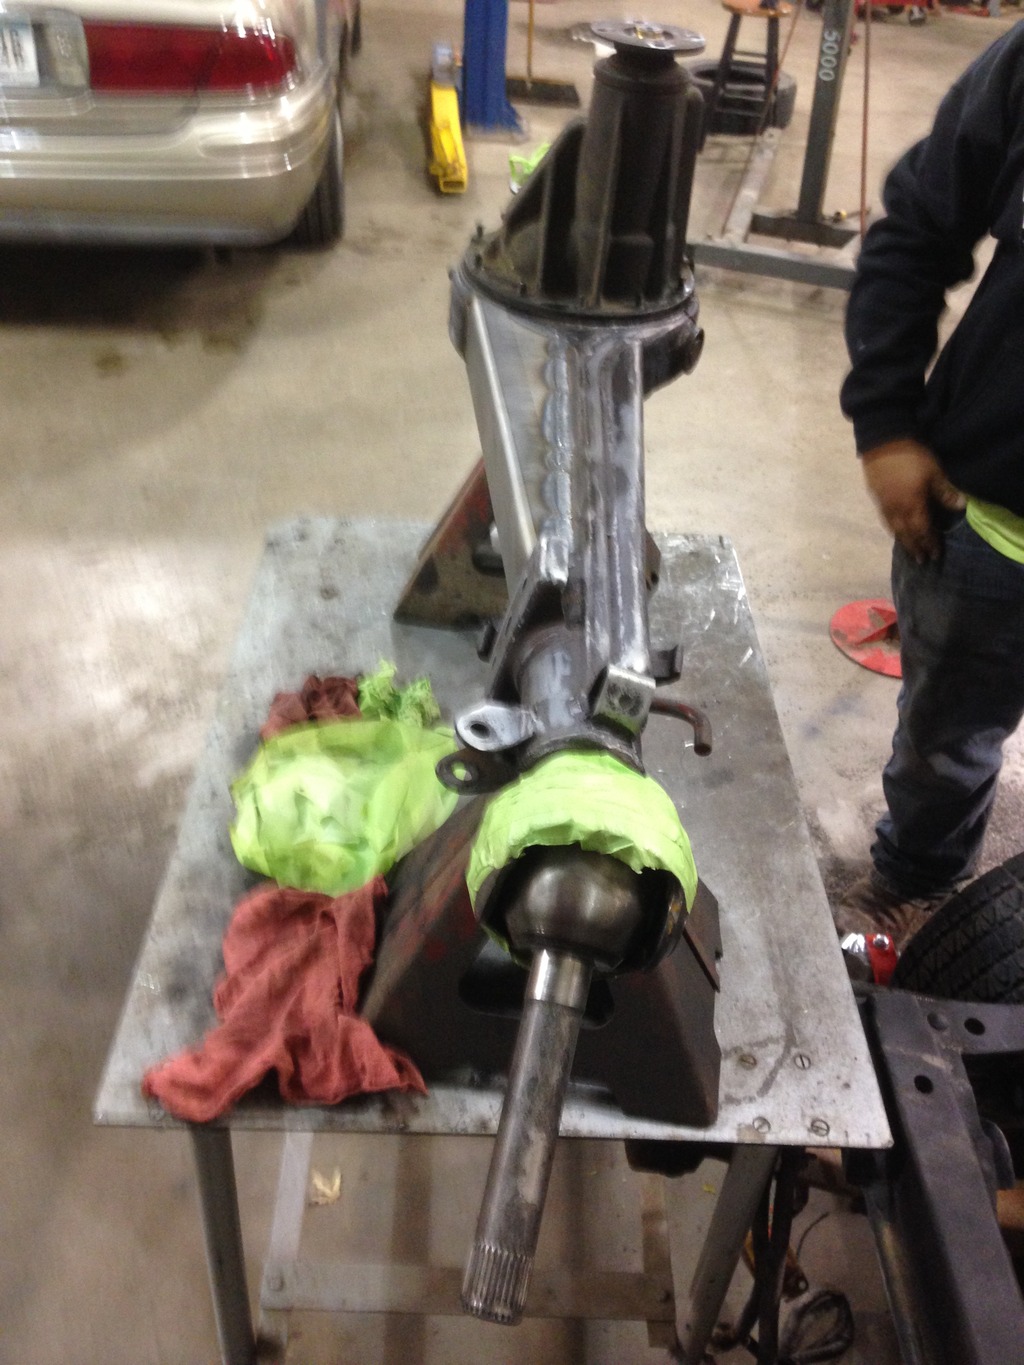
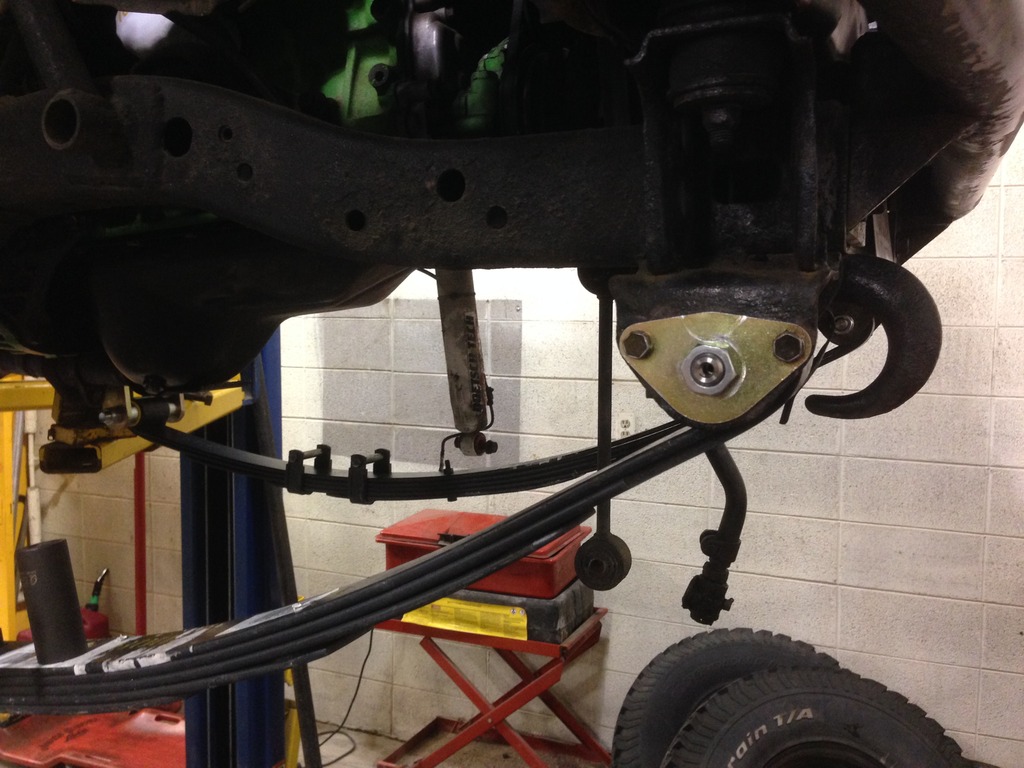
Here are a few pics of the progress I made last Wednesday.
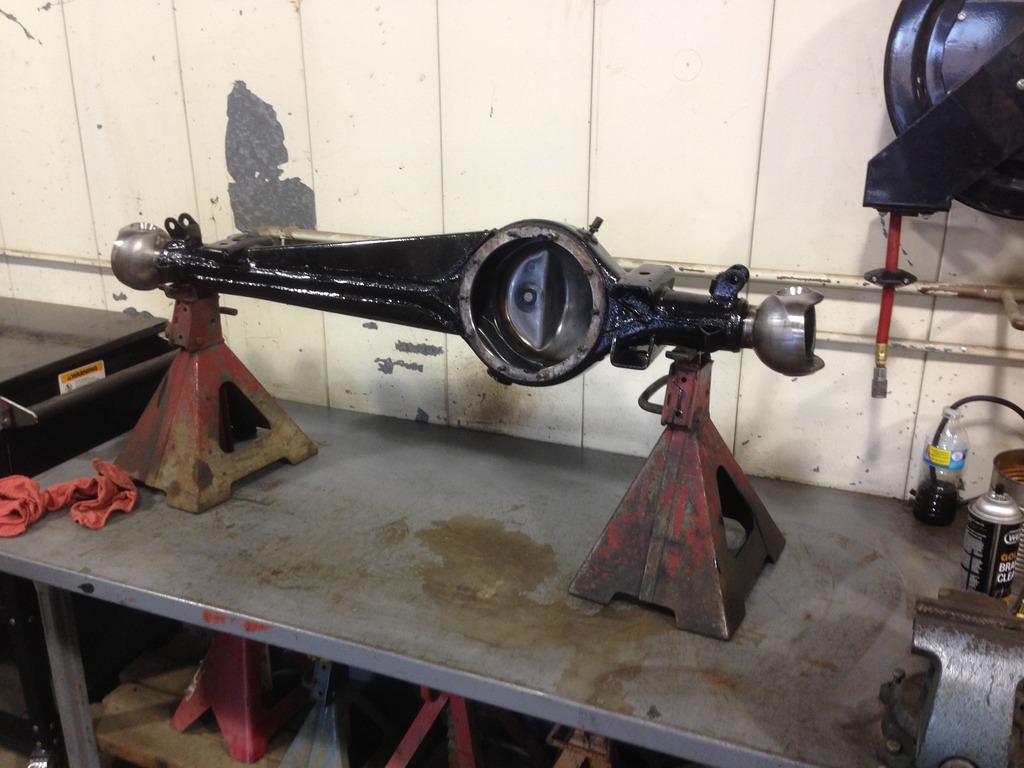
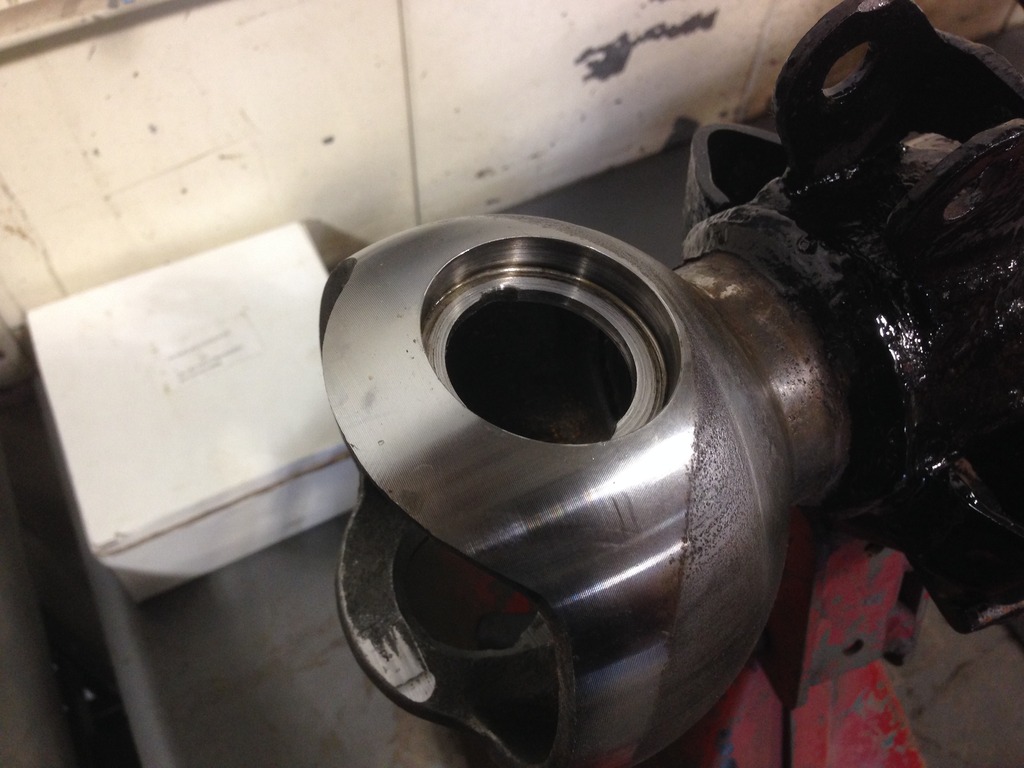
Got the axle moved over and ready for assembly.
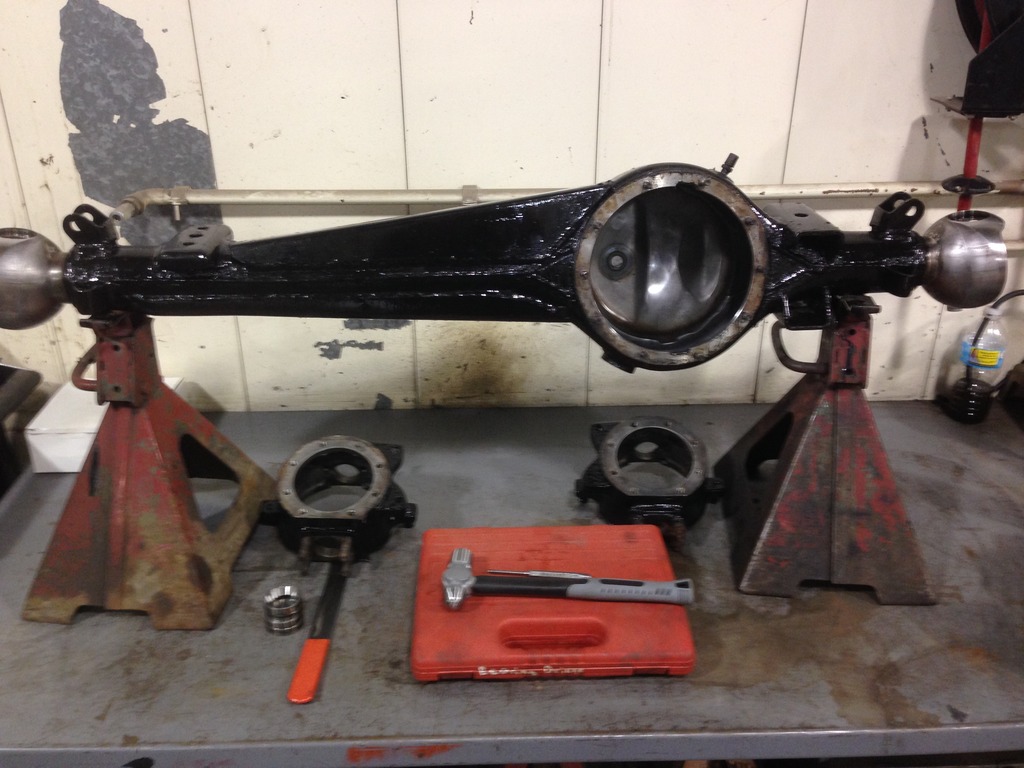
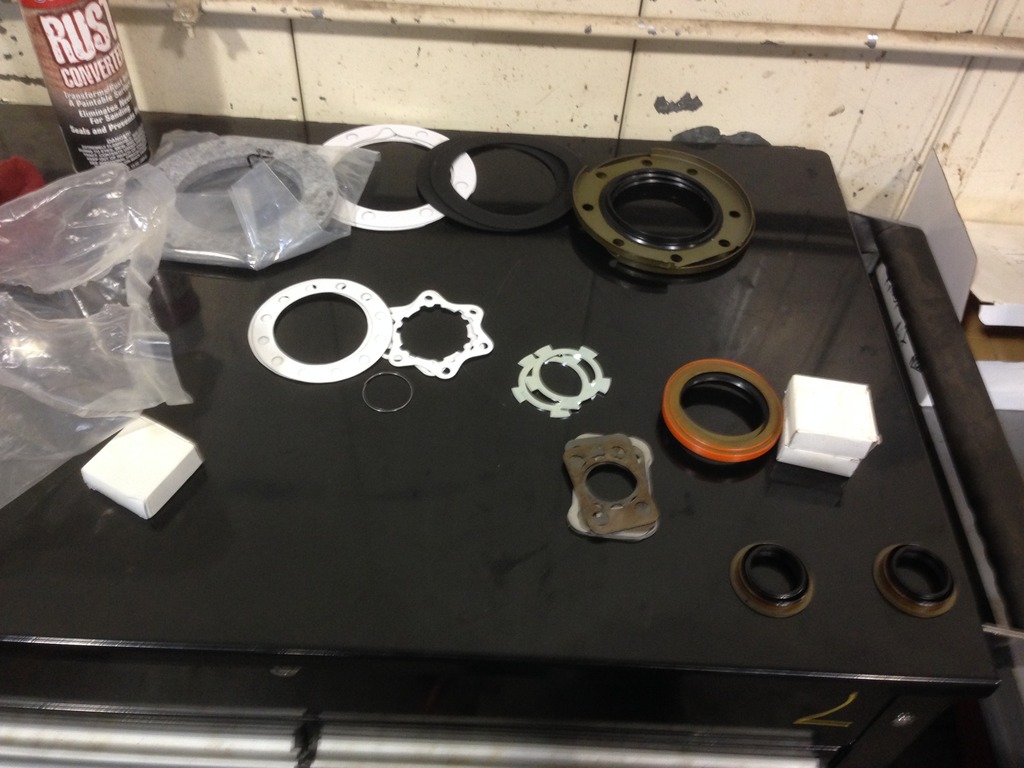
Laid the kit out and installed the new Marlin eco seals.
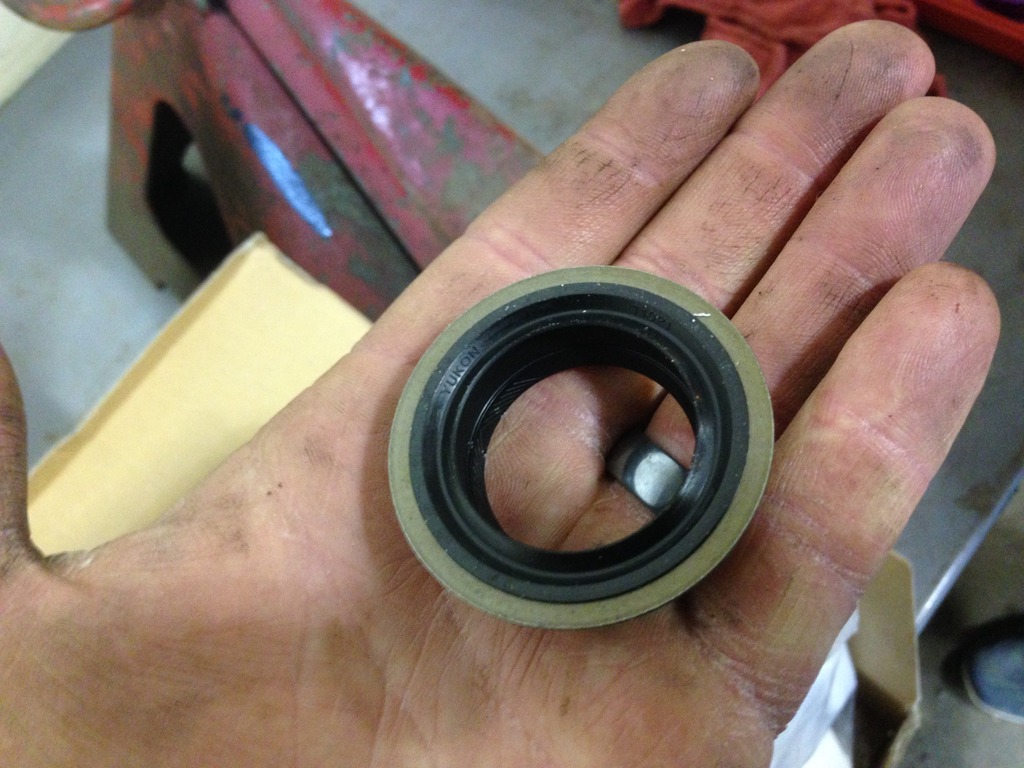
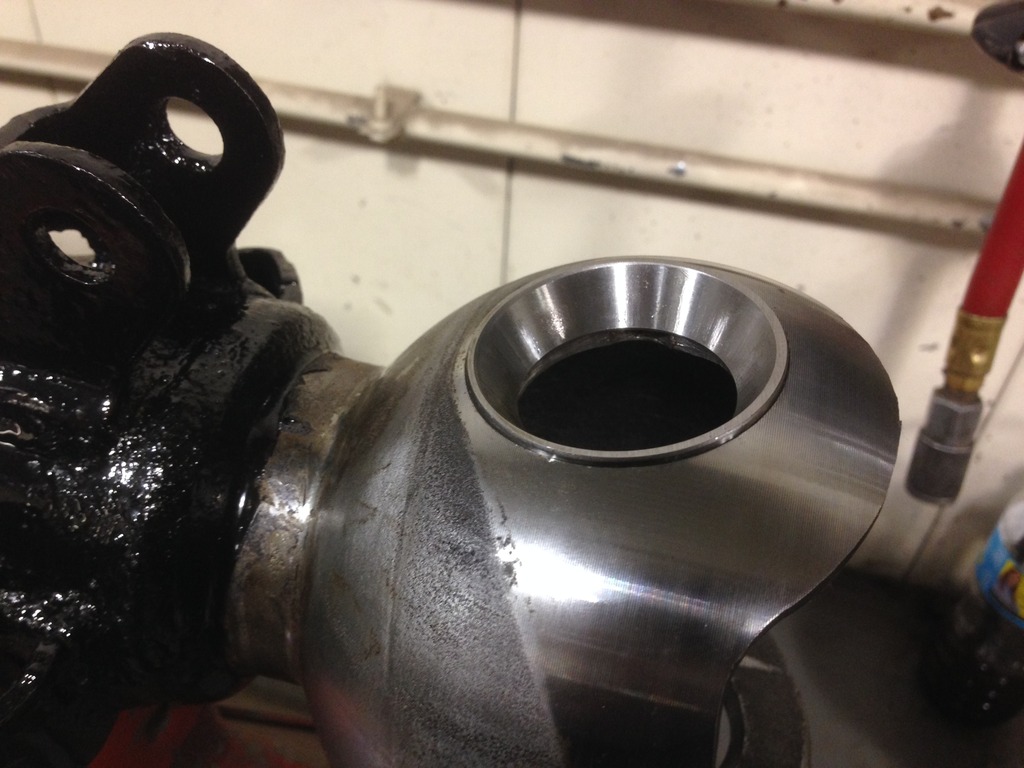
Go the old Trunnion races pounded out and the new races in.
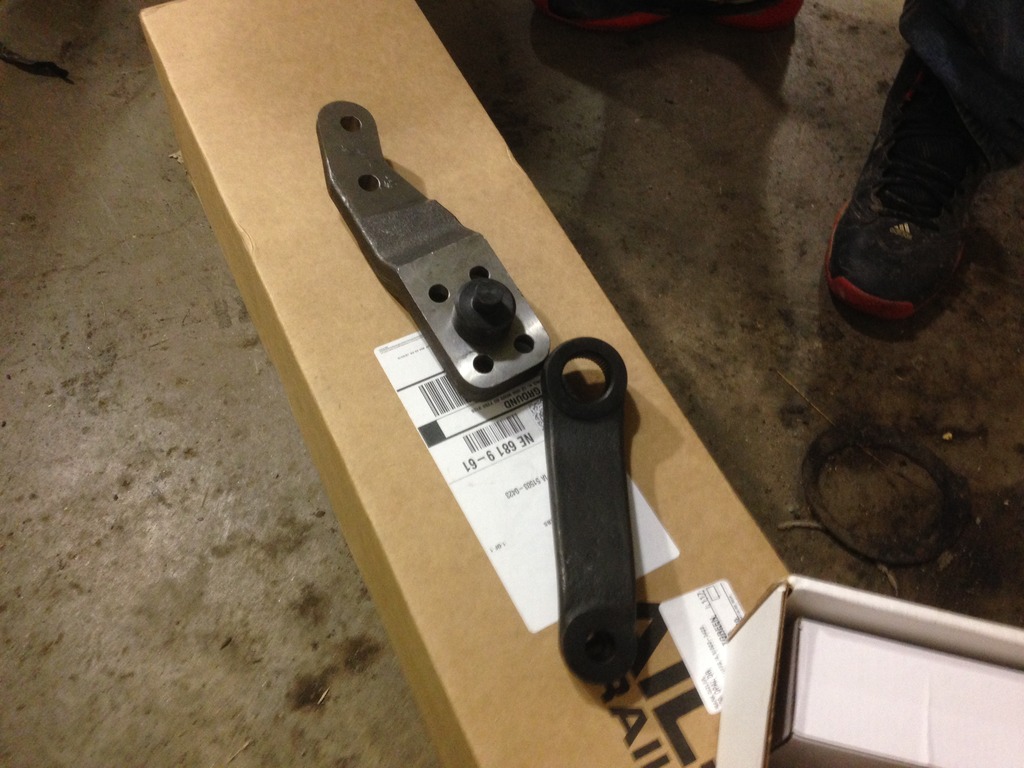
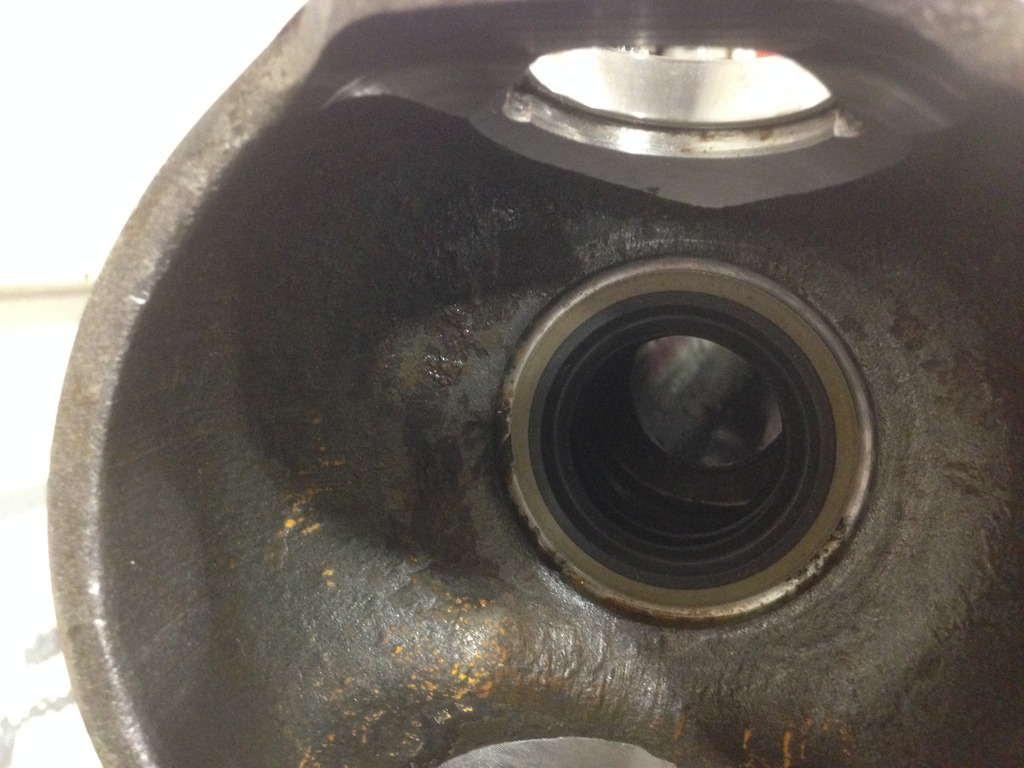
Started cleaning up the rings that go on the outside of the knuckle. I almost tossed these, as I thought they came new in the marlin Kit. Good thing I didnt.
Im hoping to get more done tomorrow.
I have a few questions.
My other springs have the tapered spacers under them. I think that they are bolted on Via the center pin bolt, but I have yet to look really close.
My question is........do I need the spacers with the OME springs or no?? I have been looking around to try and find some threads but have not had any luck.
I am heading to work tomorrow and hopefully getting the springs in, and mostly finishing up the front axle.
Here are a few pics of the progress I made last Wednesday.
Got the axle moved over and ready for assembly.


Laid the kit out and installed the new Marlin eco seals.


Go the old Trunnion races pounded out and the new races in.


Started cleaning up the rings that go on the outside of the knuckle. I almost tossed these, as I thought they came new in the marlin Kit. Good thing I didnt.
Im hoping to get more done tomorrow.
Nov 22, 2015 | 10:50 PM
#918
What spacers are you talking about? I can look on my truck and see if I have them or not. Tell me where you would like a picture on my truck and I will see if I can get one that will help.
Those Marlin ECO seals is the replacement for Toyotas factory seal and supposed to be much better quality. That one seal is the biggest reason for the build up that you find on these axles. Not much that really comes in the kit but supposed to last a long time.
Those Marlin ECO seals is the replacement for Toyotas factory seal and supposed to be much better quality. That one seal is the biggest reason for the build up that you find on these axles. Not much that really comes in the kit but supposed to last a long time.
Nov 23, 2015 | 05:33 AM
#919
Thread Starter
Joined: Aug 2007
Posts: 3,276
Likes: 7
From: Pennsylvania
What spacers are you talking about? I can look on my truck and see if I have them or not. Tell me where you would like a picture on my truck and I will see if I can get one that will help.
Those Marlin ECO seals is the replacement for Toyotas factory seal and supposed to be much better quality. That one seal is the biggest reason for the build up that you find on these axles. Not much that really comes in the kit but supposed to last a long time.
Those Marlin ECO seals is the replacement for Toyotas factory seal and supposed to be much better quality. That one seal is the biggest reason for the build up that you find on these axles. Not much that really comes in the kit but supposed to last a long time.
I guess I should have referred to them as the Shims to correct the angle of the Diff when everything is bolted together.
My other springs had them on the bottoms.
I will try to get a picture.
Nov 23, 2015 | 04:12 PM
#920
Thread Starter
Joined: Aug 2007
Posts: 3,276
Likes: 7
From: Pennsylvania
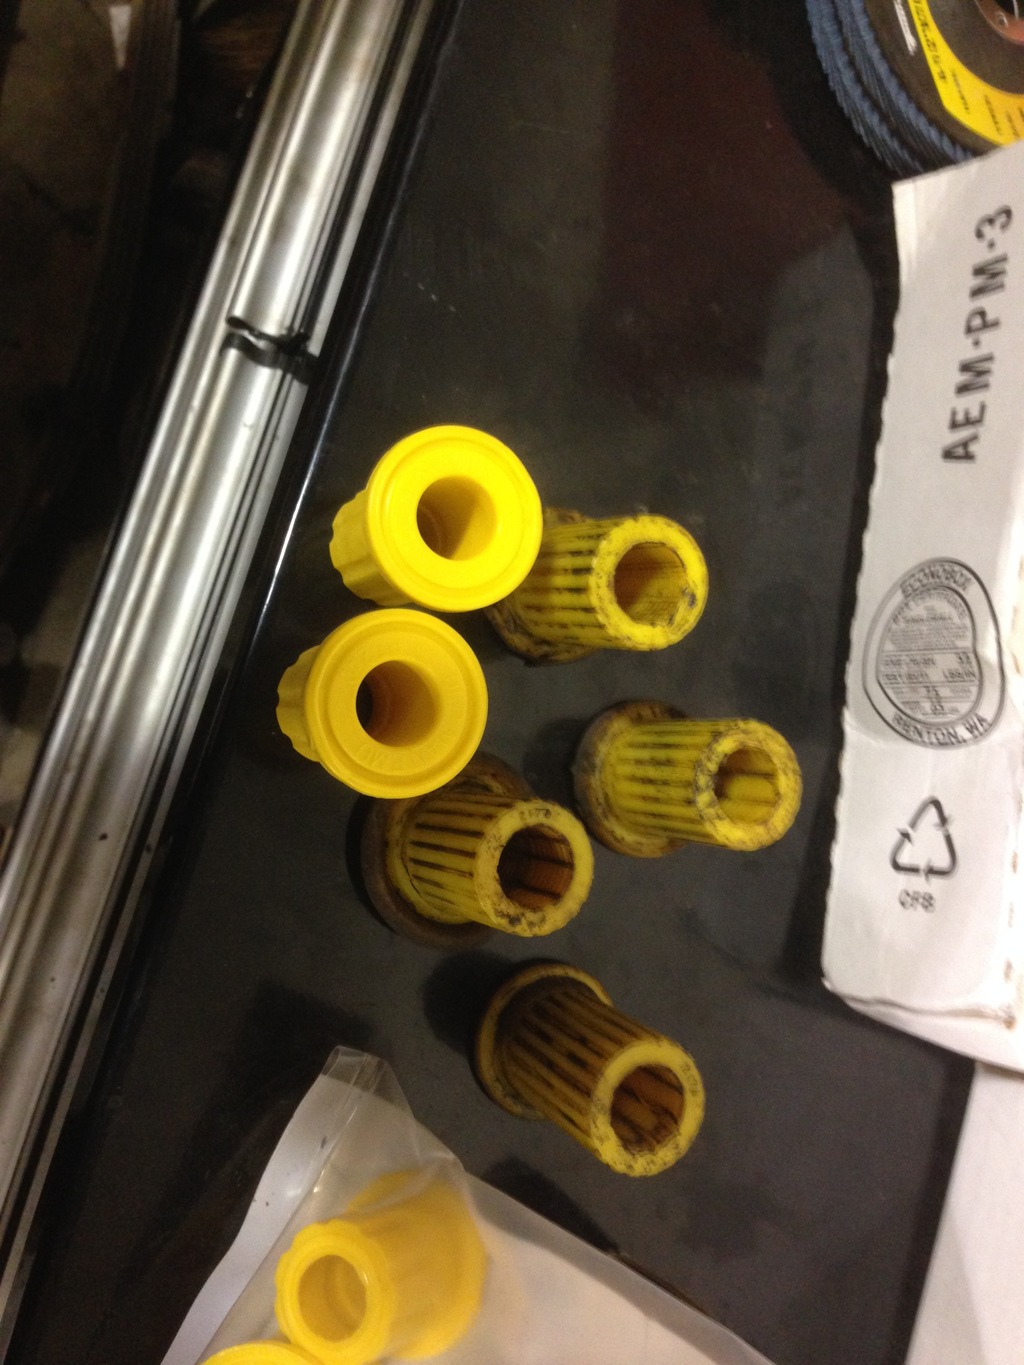
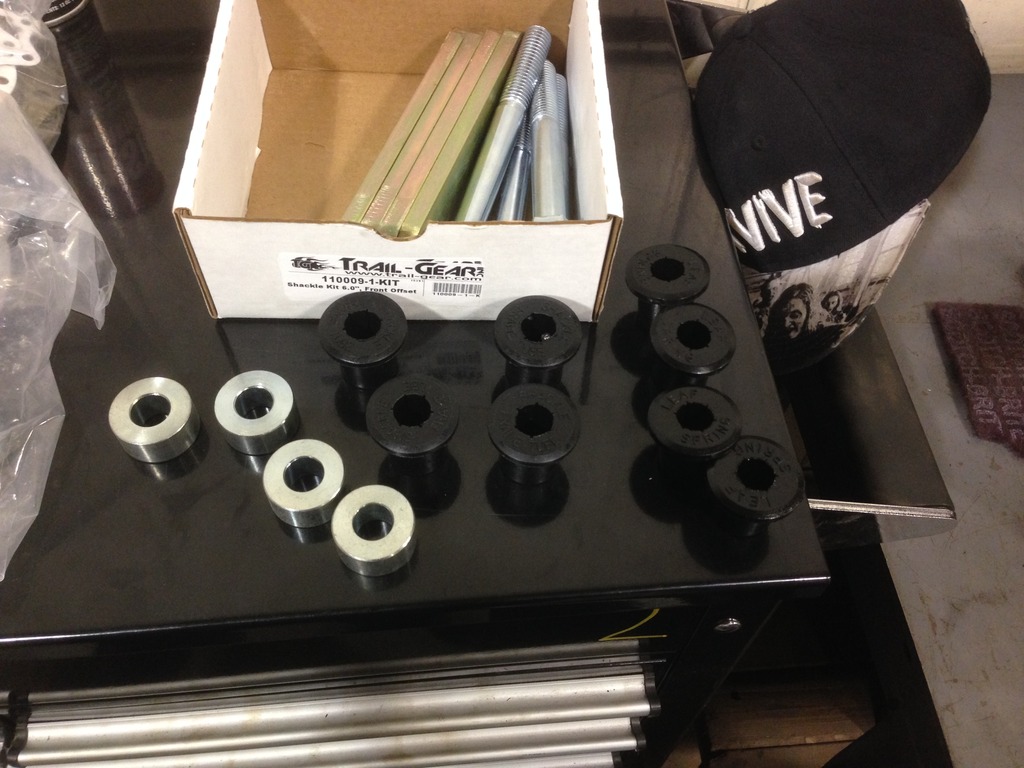
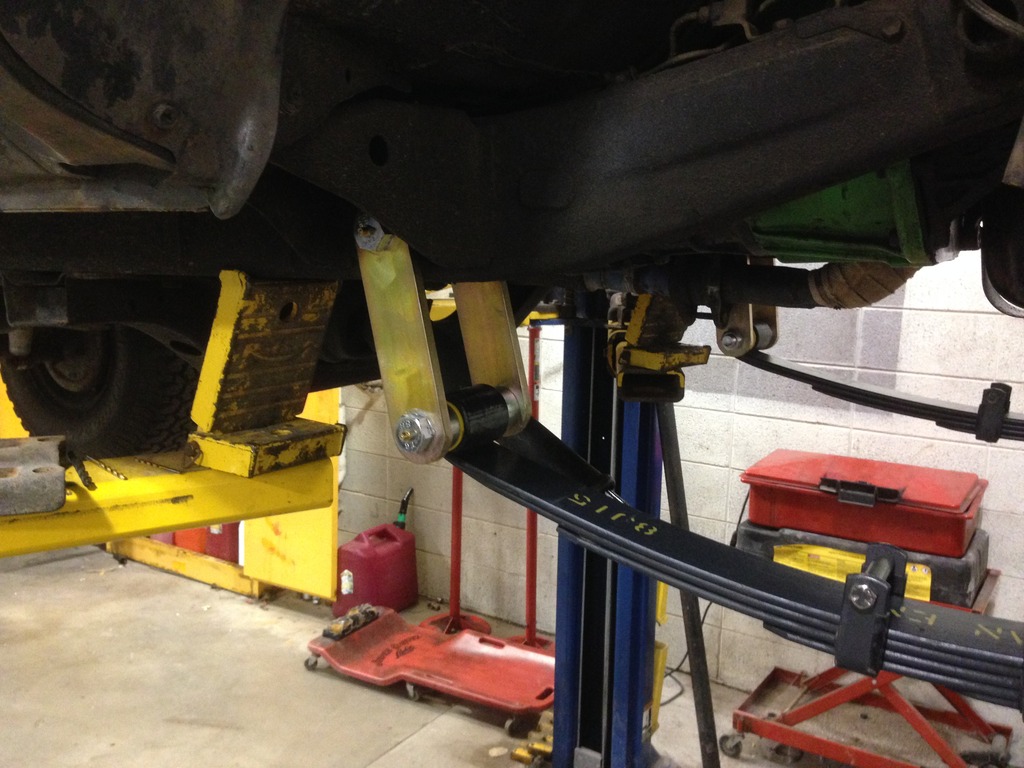
Getting everything set out this morning and comparing bushings. The TG shackles came with its own bushings, but I used the OME ones that I bought with the springs.
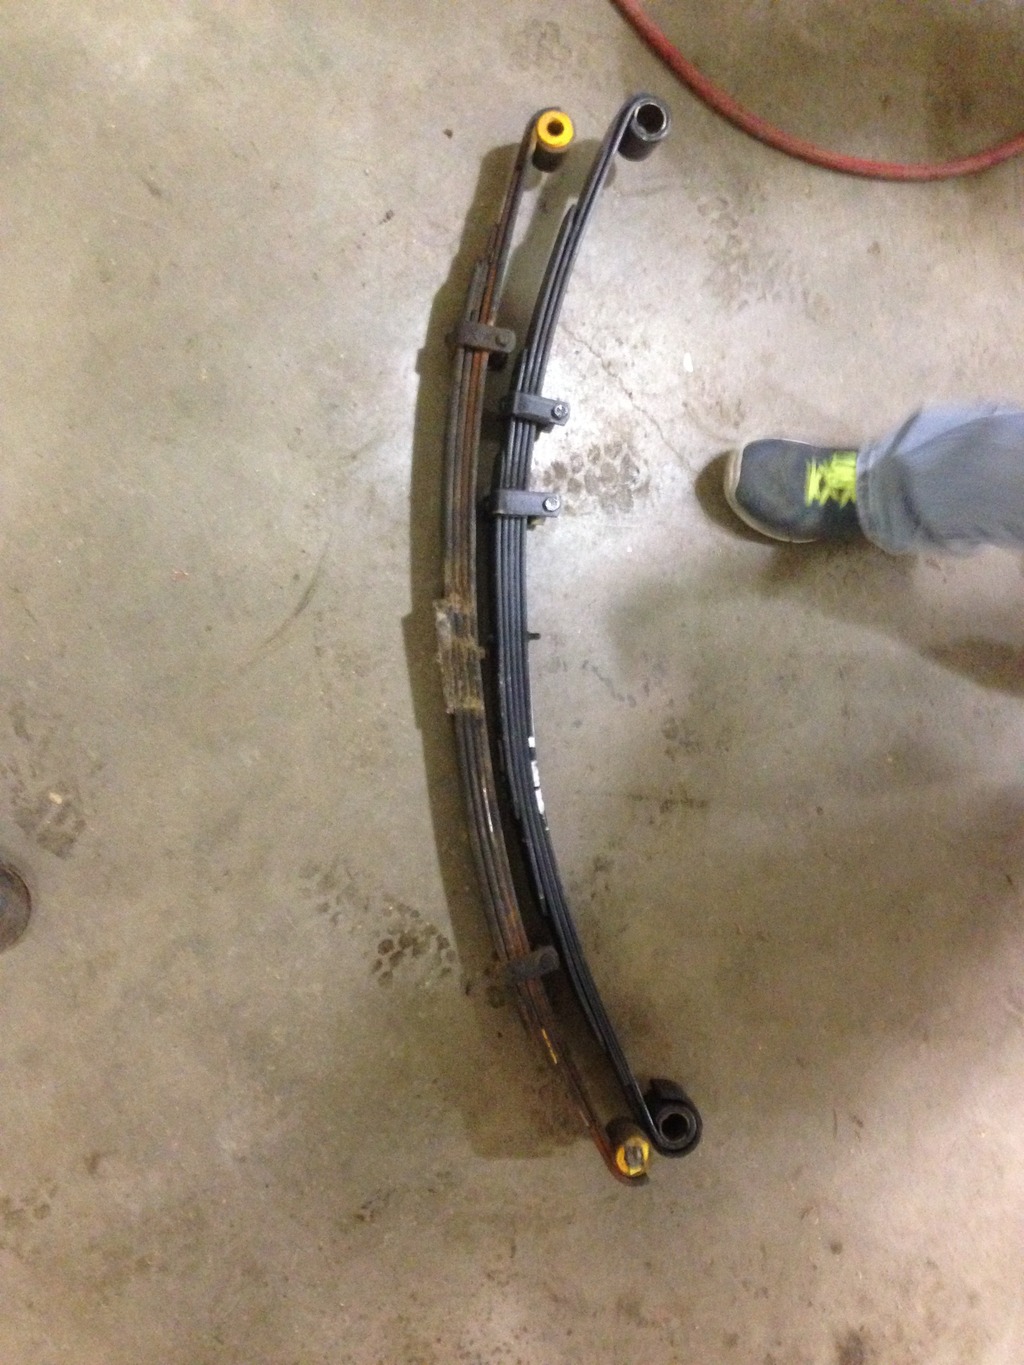
New springs against old.
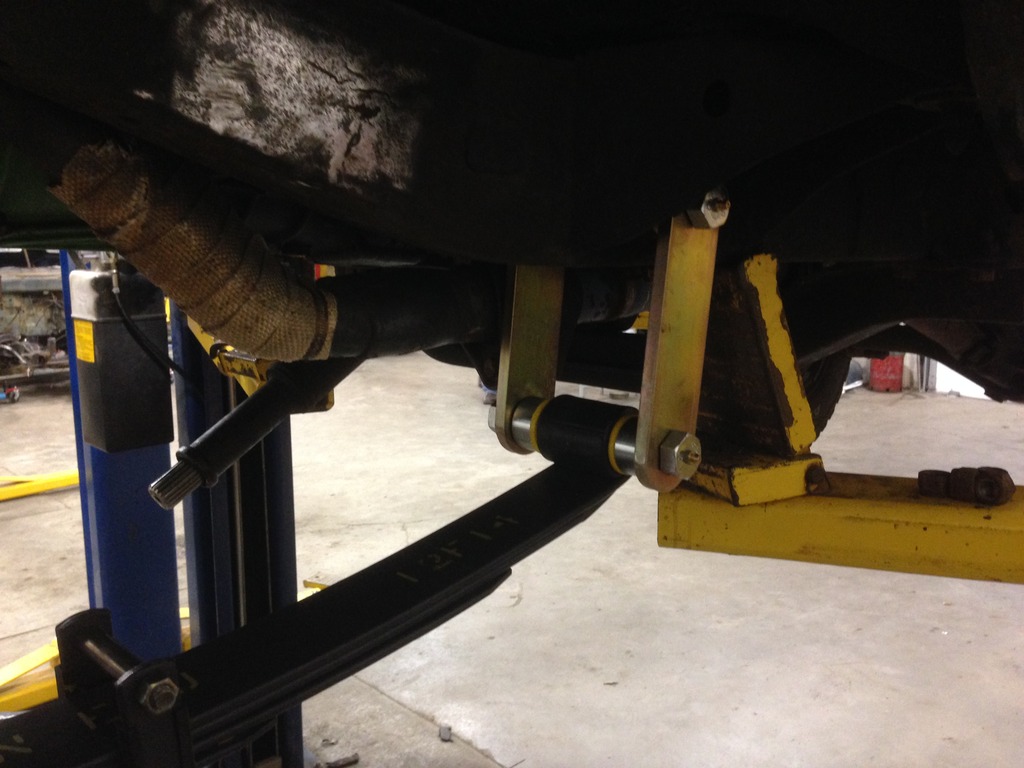
Got everything Hung from the truck.
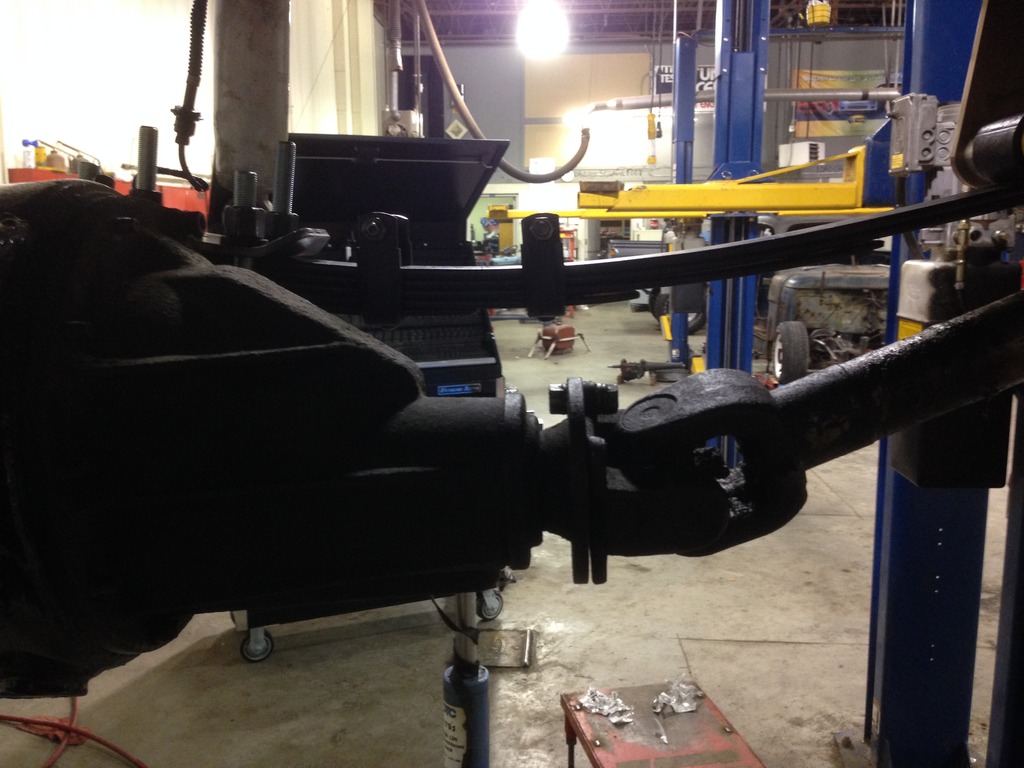
I was not sure if I needed to use the Shims I had on my other springs, so I assembled the axle onto the Leafs with the Diff in to check the pinion angle.
It was so steep that I could not keep the Slip yoke on. It fell out right after these pics.
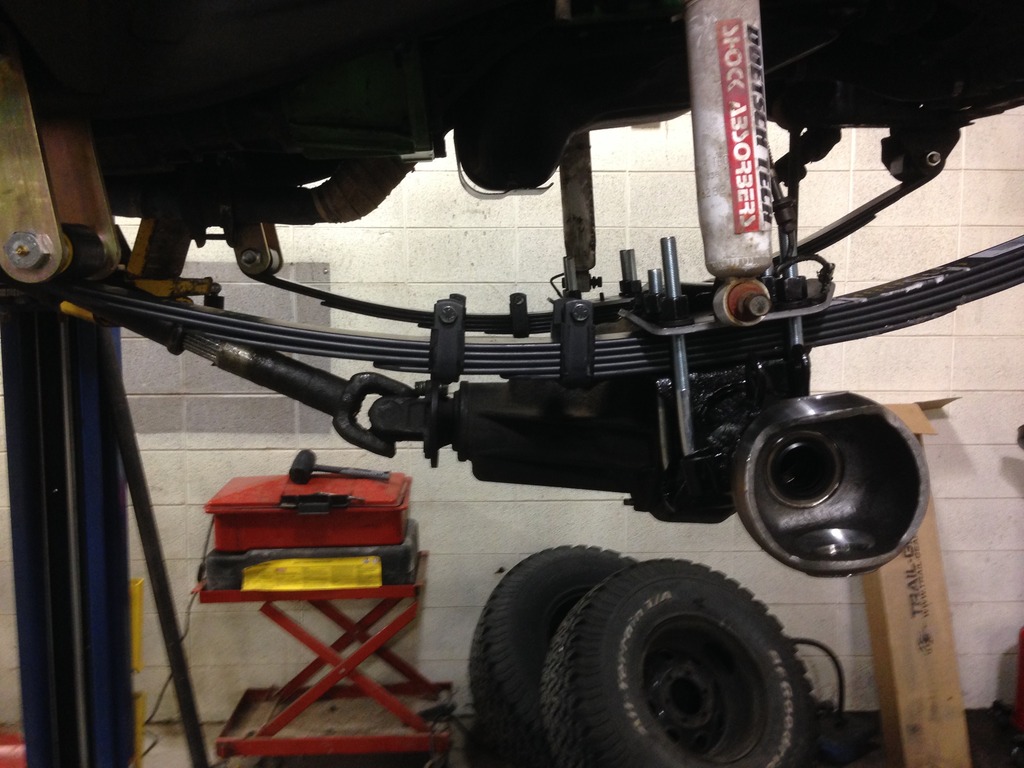
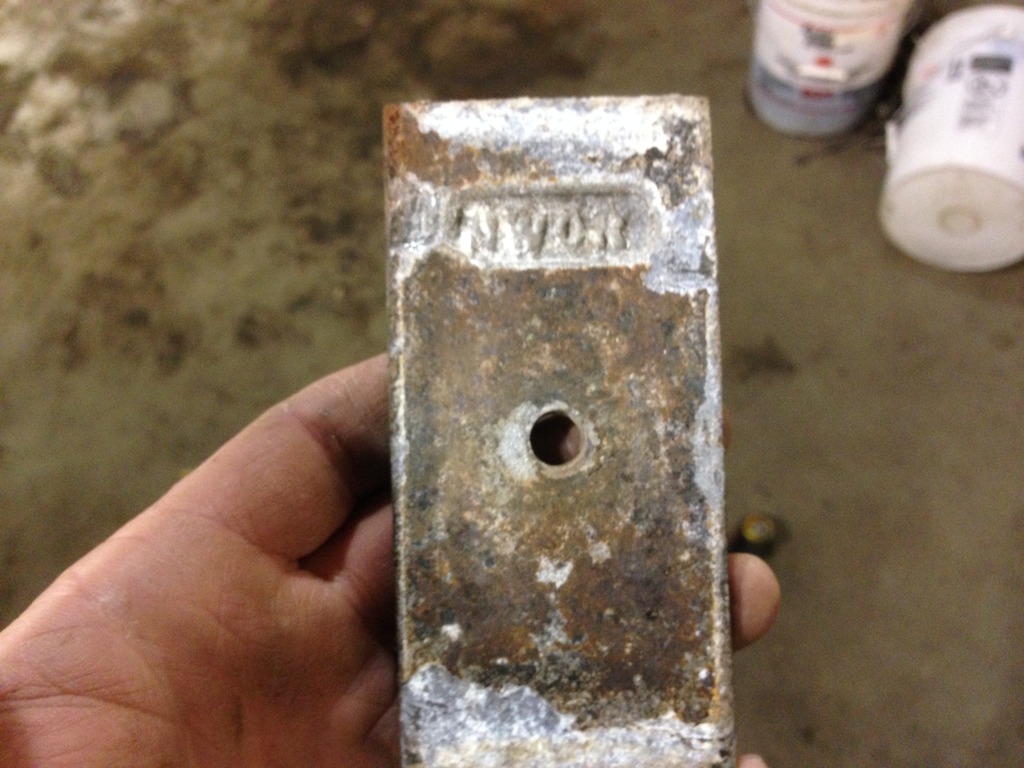
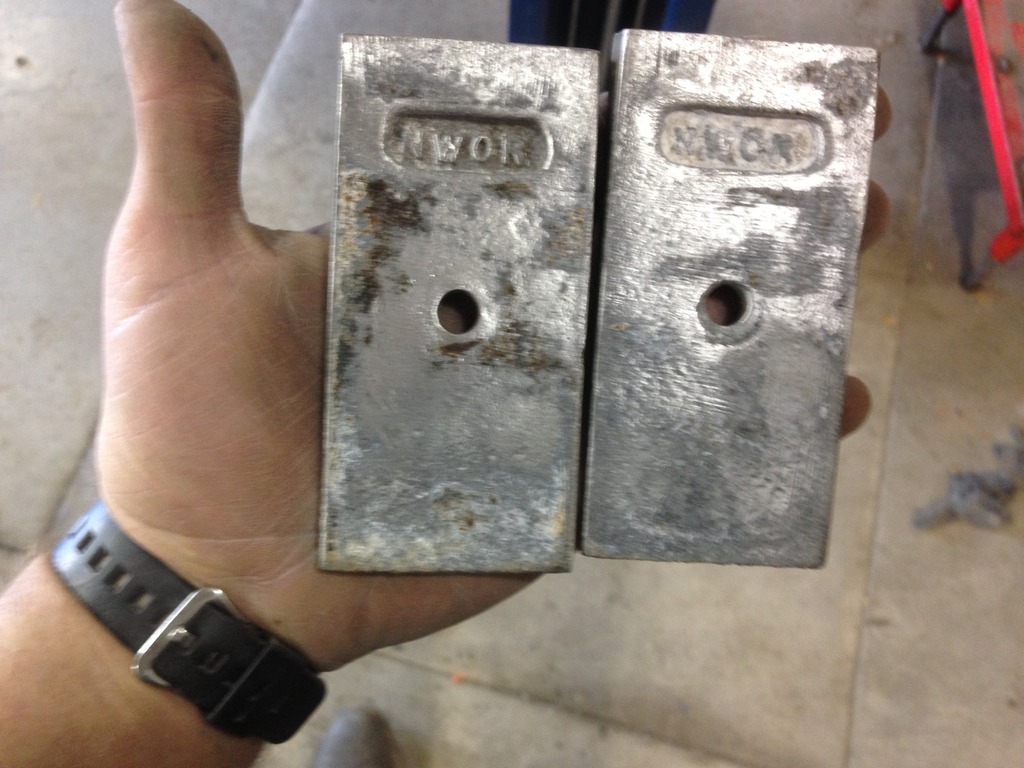
I decided to remove the Shims from the other Packs, and My suspicions were right about the old springs being NWOR. Check the name on the shims.
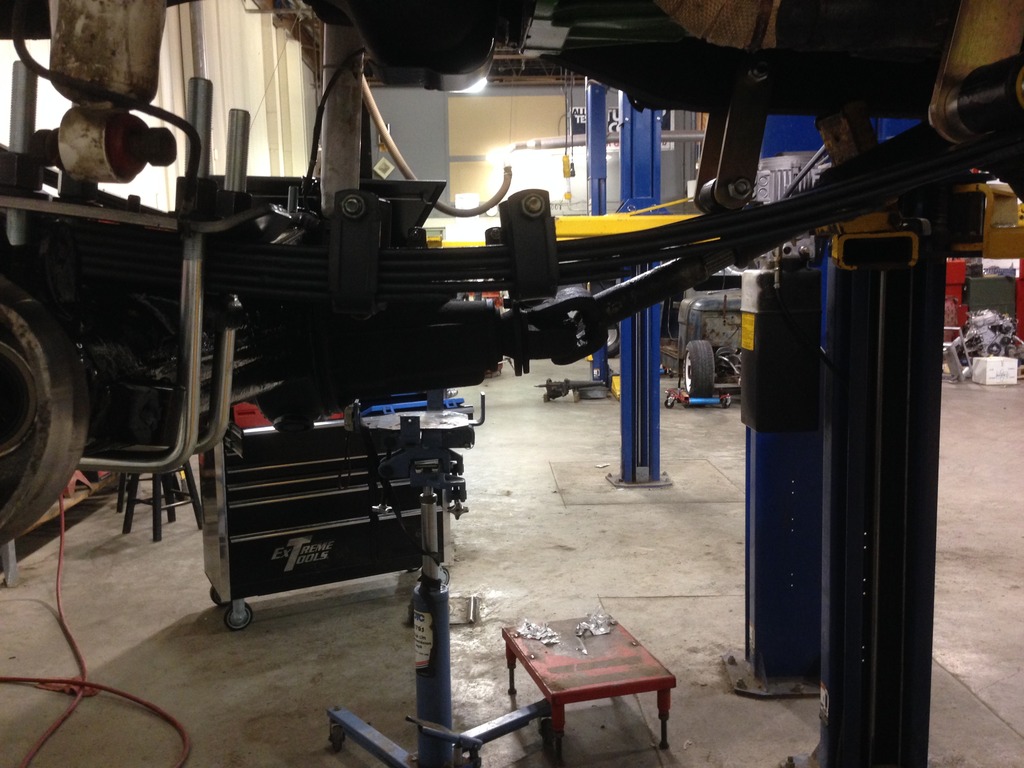
Its really hard to see the difference but the slip yoke is on farther and the angle is really changed. I tried to represent it with the "same" picture as before but it did not come out like I wanted.


New springs against old.

Got everything Hung from the truck.


I was not sure if I needed to use the Shims I had on my other springs, so I assembled the axle onto the Leafs with the Diff in to check the pinion angle.
It was so steep that I could not keep the Slip yoke on. It fell out right after these pics.


I decided to remove the Shims from the other Packs, and My suspicions were right about the old springs being NWOR. Check the name on the shims.


Its really hard to see the difference but the slip yoke is on farther and the angle is really changed. I tried to represent it with the "same" picture as before but it did not come out like I wanted.


