
KawaZX636's 1983 Toyota Pickup Restoration
 Dec 6, 2013 | 06:10 PM
#441
Thread Starter
Super Moderator
iTrader: (3)
Joined: Jan 2012
Posts: 3,218
Likes: 26
From: Salisbury, MD
Thanks for the verification on the seam sealer, That's what all the hot rod guys do around here so I'm on the right trail.
Bed "parts" huh? SWEET!!! Still expecting an April/May completion date? Looks like That should be perfect timing to make your product the final cherry with sprinkles on top of my build. Feel free to post some pictures of the progress for everyone's viewing pleasure and jealousy. With all the moisture in the air around here, it might be a while before I can get dry enough weather to get the sandblasting and sealer done so I don't have a freshly blasted cab covered with surface rust.
Bed "parts" huh? SWEET!!! Still expecting an April/May completion date? Looks like That should be perfect timing to make your product the final cherry with sprinkles on top of my build. Feel free to post some pictures of the progress for everyone's viewing pleasure and jealousy. With all the moisture in the air around here, it might be a while before I can get dry enough weather to get the sandblasting and sealer done so I don't have a freshly blasted cab covered with surface rust.
Dec 10, 2013 | 08:58 PM
#442
Thread Starter
Super Moderator
iTrader: (3)
Joined: Jan 2012
Posts: 3,218
Likes: 26
From: Salisbury, MD
Not much going on lately since my wife was in NYC for a few days and I got to have some good father and son time with my boy. Plus we've been whacked with all of this cold weather that the nation has been seeing so working in a non heated garage isn't much fun.
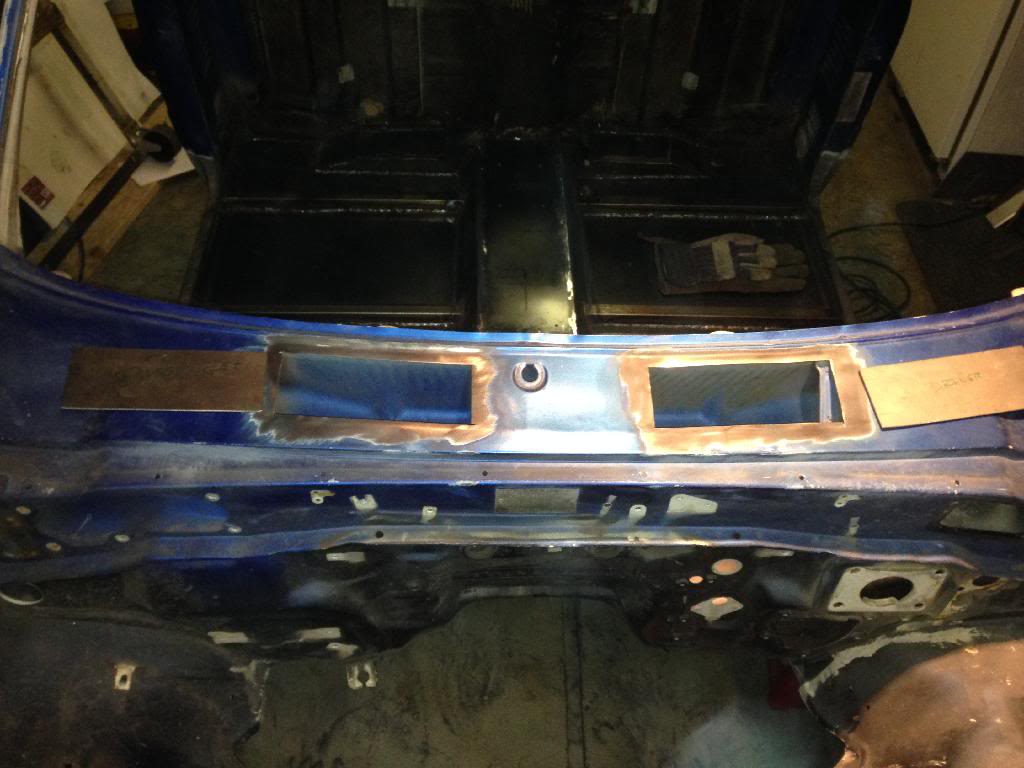
Tonight I did manage to scratch a few things off the to do list. I cut and welded in the patches for the kick panels and started dressing some of the welds. I put the cab on some high jack stands so that I can finish trimming the tunnel where it runs through the rear cab wall and so I can finish welding and smoothing the sheet metal that I replaced on the rear cab wall a while back.
Before I shut it down for the night I mocked up everything for the smoothie cowl. No more draining water into the kick panels and rocker panels for this guy!!! (I still can't believe that it was designed that way) I have to go grab a small sheet of 16ga steel tomorrow and i should be able to get the smoothie cowl all buttoned up tomorrow night. Then all of the fabrication on the cab should be done! Woot woot!
In other news, I was out on a site visit for work today and came across this little gem:
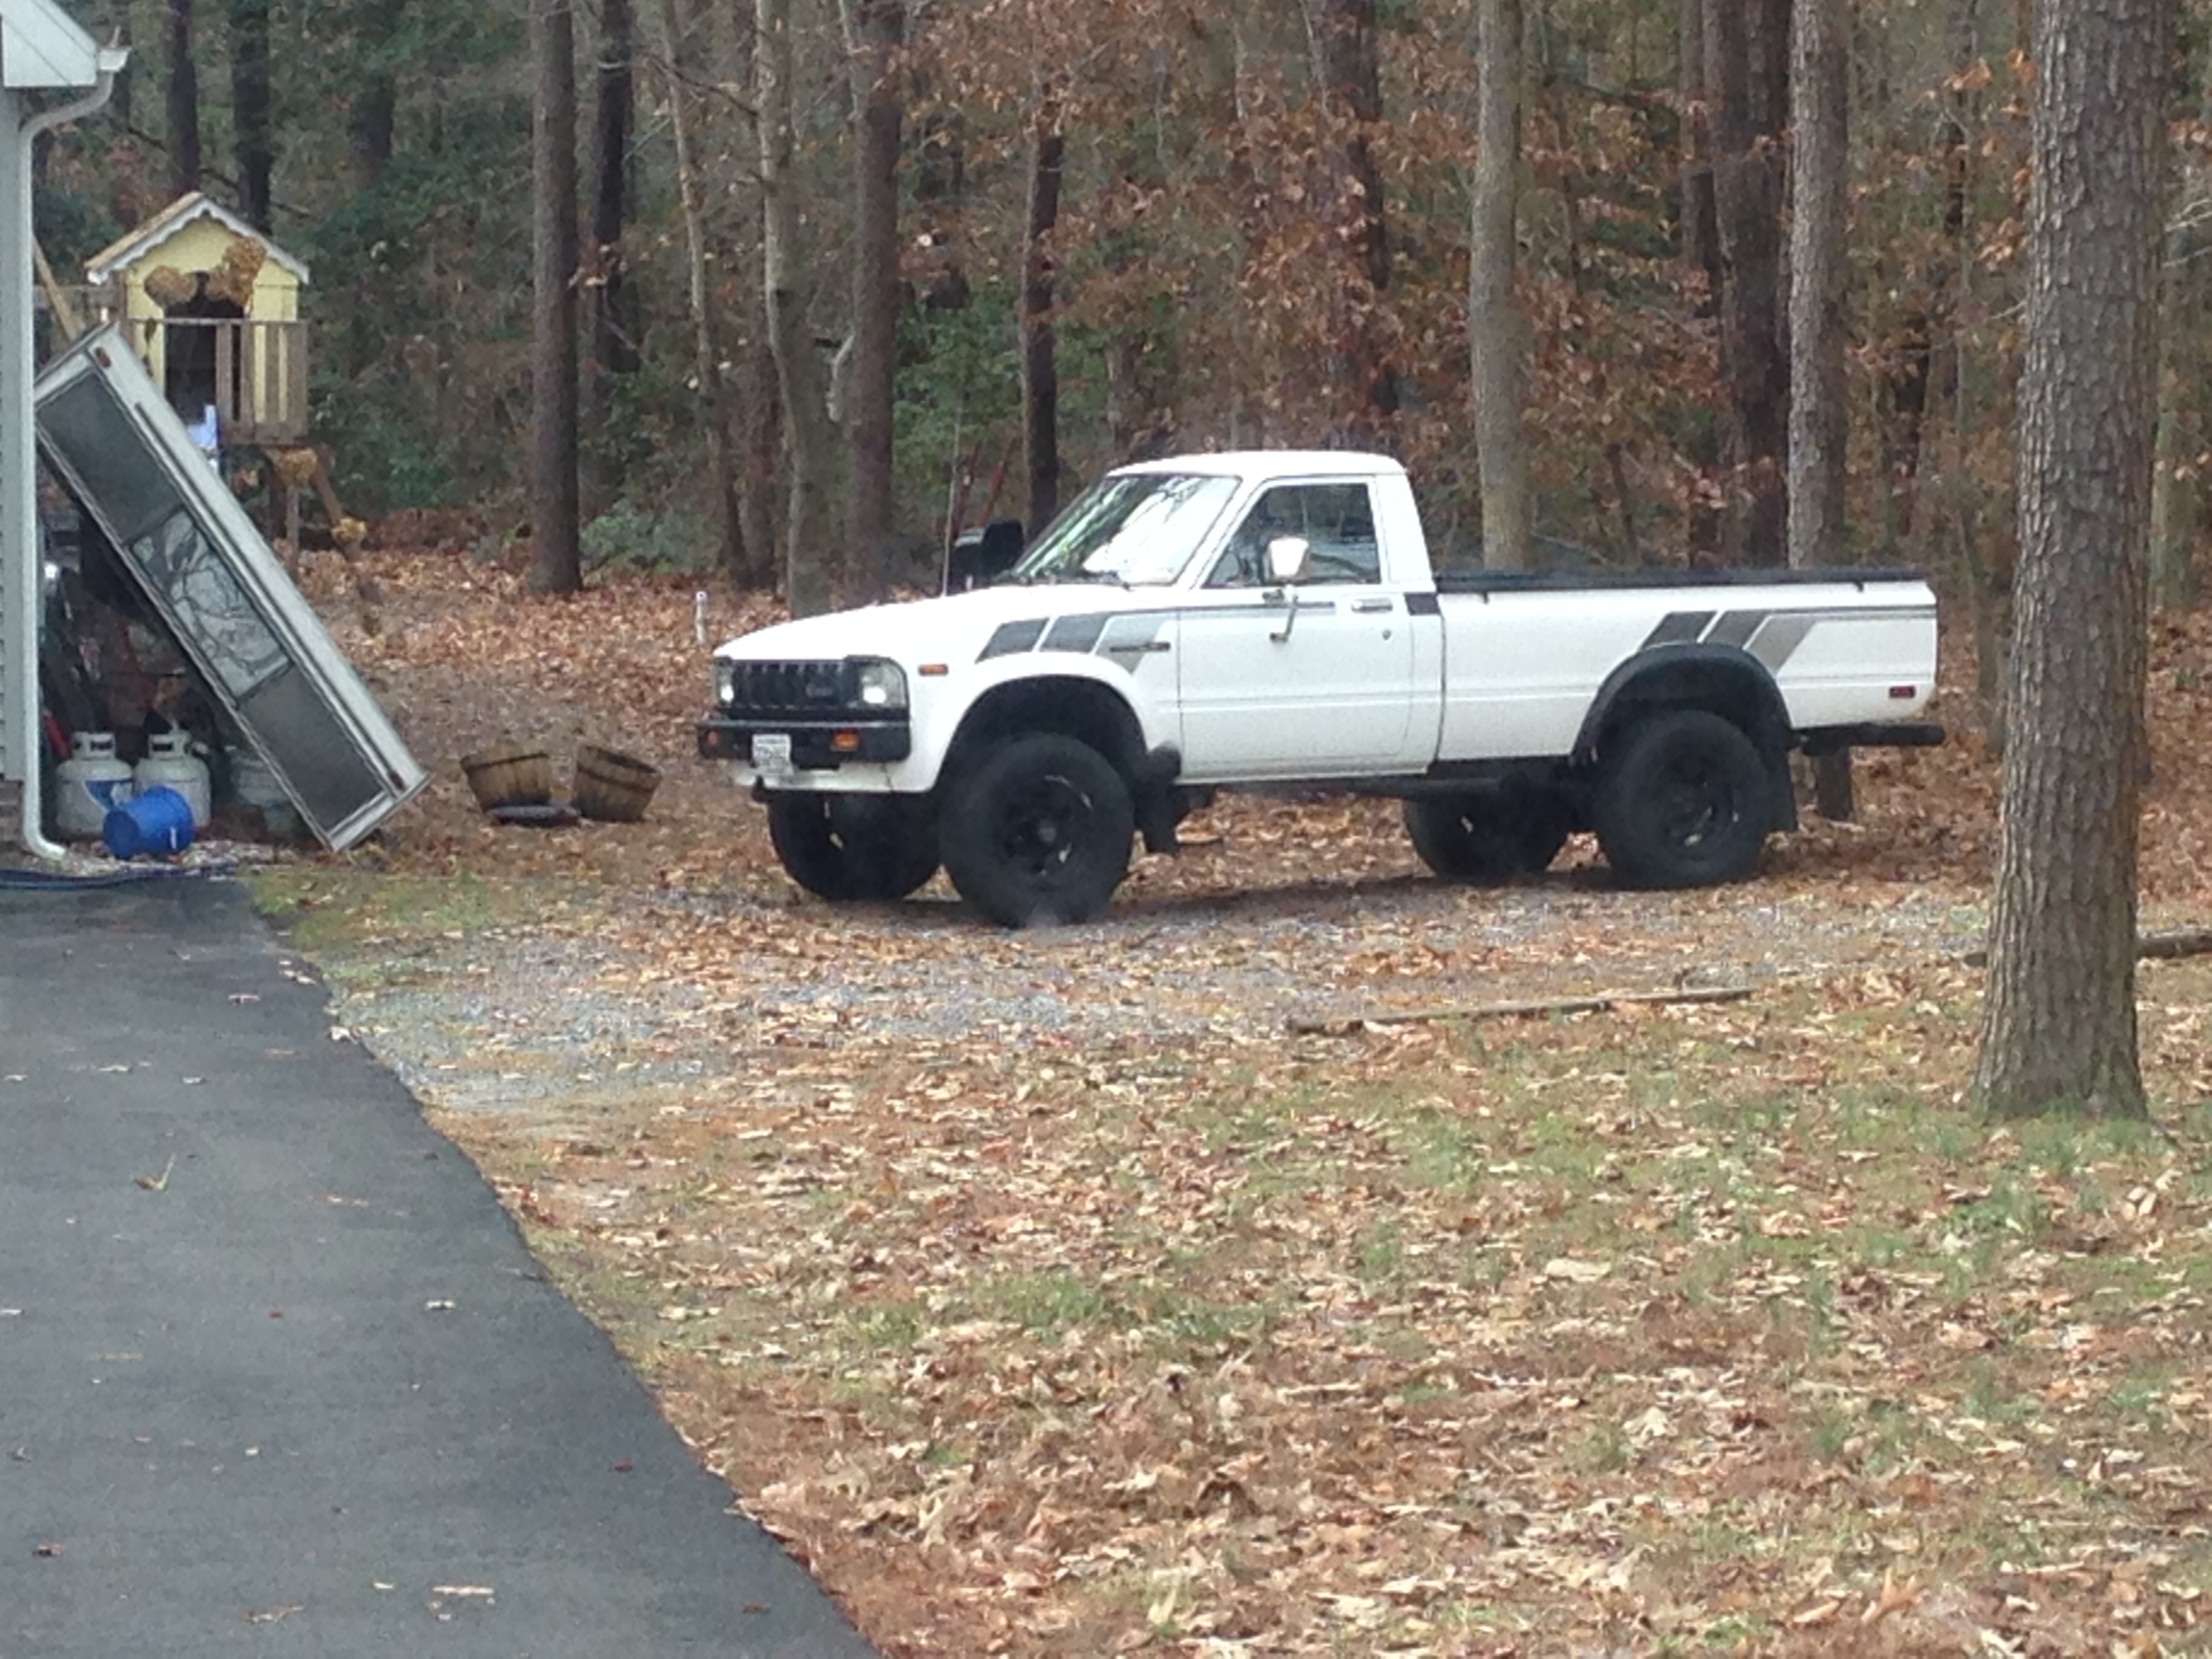
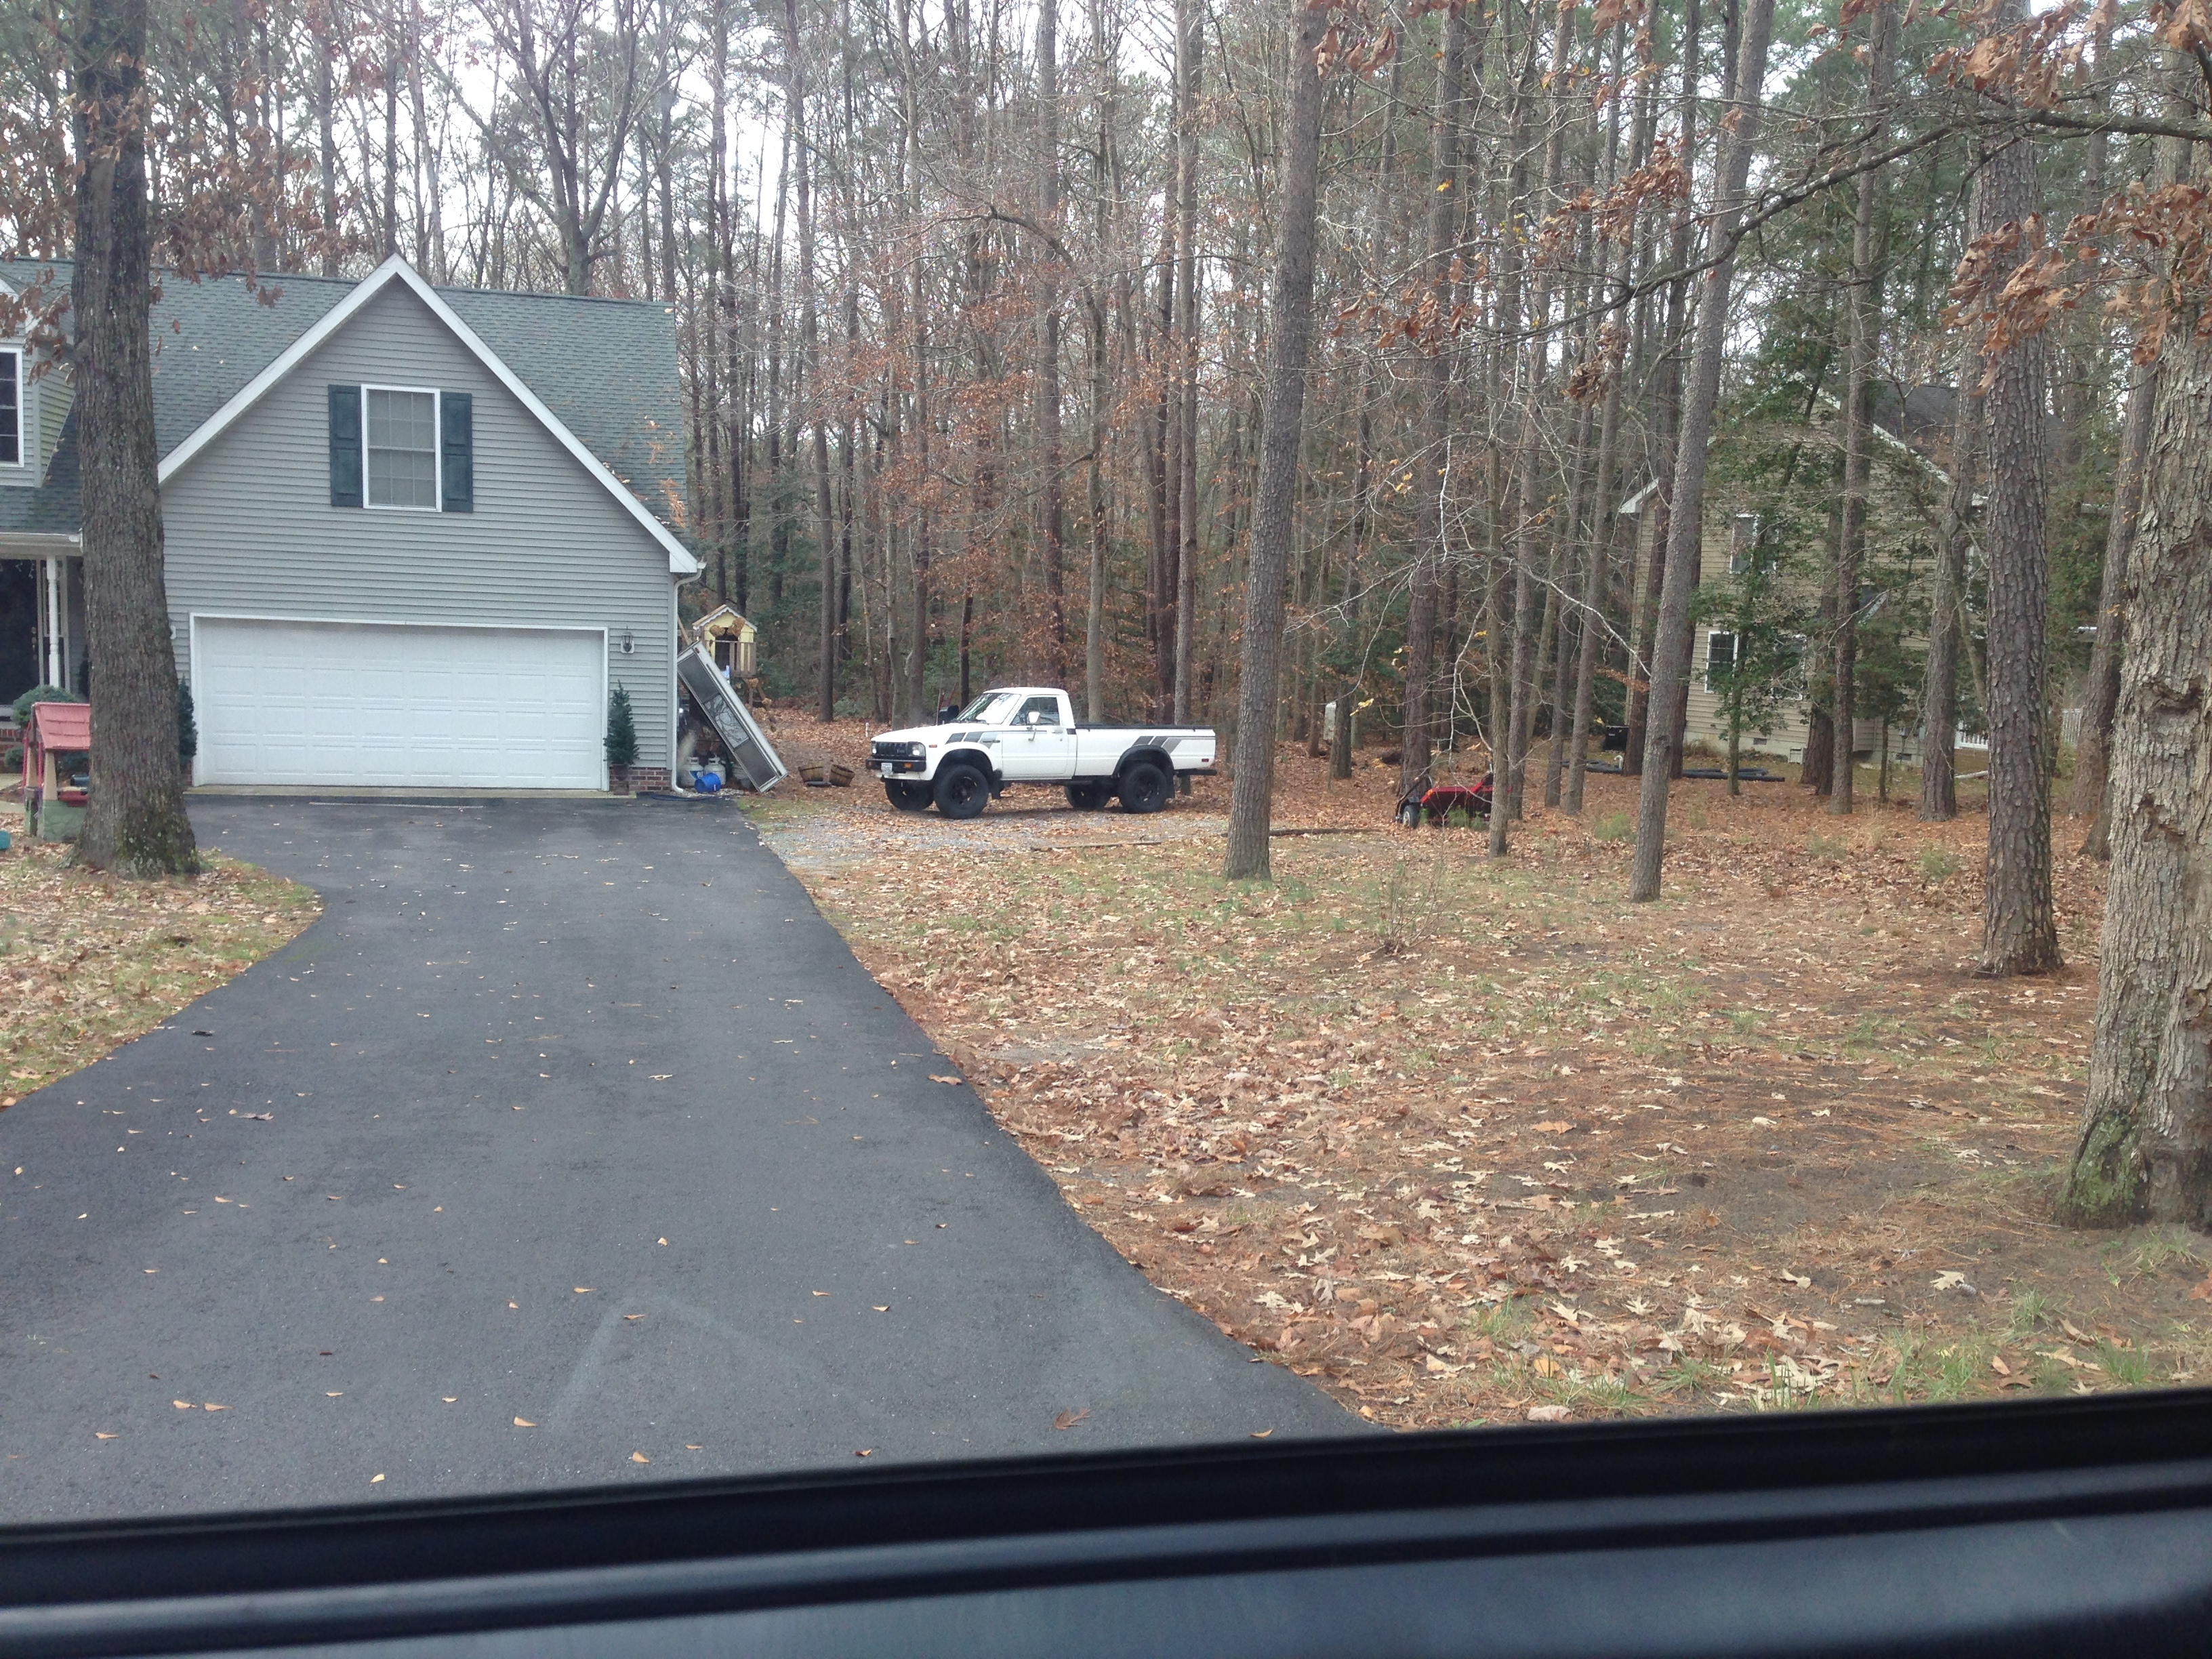
I'm going to stop by there later to take a closer look, but it appears to be in great shape! May make an offer to see if I can snag another project up for later on in life.
Tonight I did manage to scratch a few things off the to do list. I cut and welded in the patches for the kick panels and started dressing some of the welds. I put the cab on some high jack stands so that I can finish trimming the tunnel where it runs through the rear cab wall and so I can finish welding and smoothing the sheet metal that I replaced on the rear cab wall a while back.
Before I shut it down for the night I mocked up everything for the smoothie cowl. No more draining water into the kick panels and rocker panels for this guy!!! (I still can't believe that it was designed that way) I have to go grab a small sheet of 16ga steel tomorrow and i should be able to get the smoothie cowl all buttoned up tomorrow night. Then all of the fabrication on the cab should be done! Woot woot!
In other news, I was out on a site visit for work today and came across this little gem:
I'm going to stop by there later to take a closer look, but it appears to be in great shape! May make an offer to see if I can snag another project up for later on in life.
Last edited by kawazx636; Dec 10, 2013 at 09:00 PM.
Dec 11, 2013 | 09:08 PM
#443
Thread Starter
Super Moderator
iTrader: (3)
Joined: Jan 2012
Posts: 3,218
Likes: 26
From: Salisbury, MD
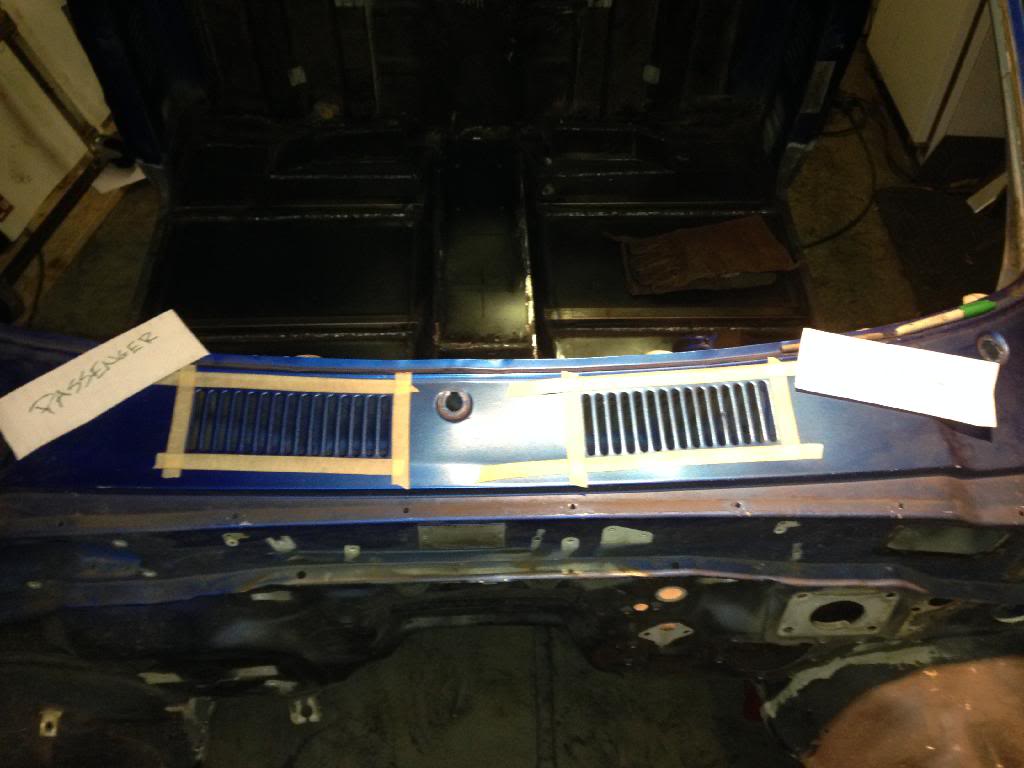
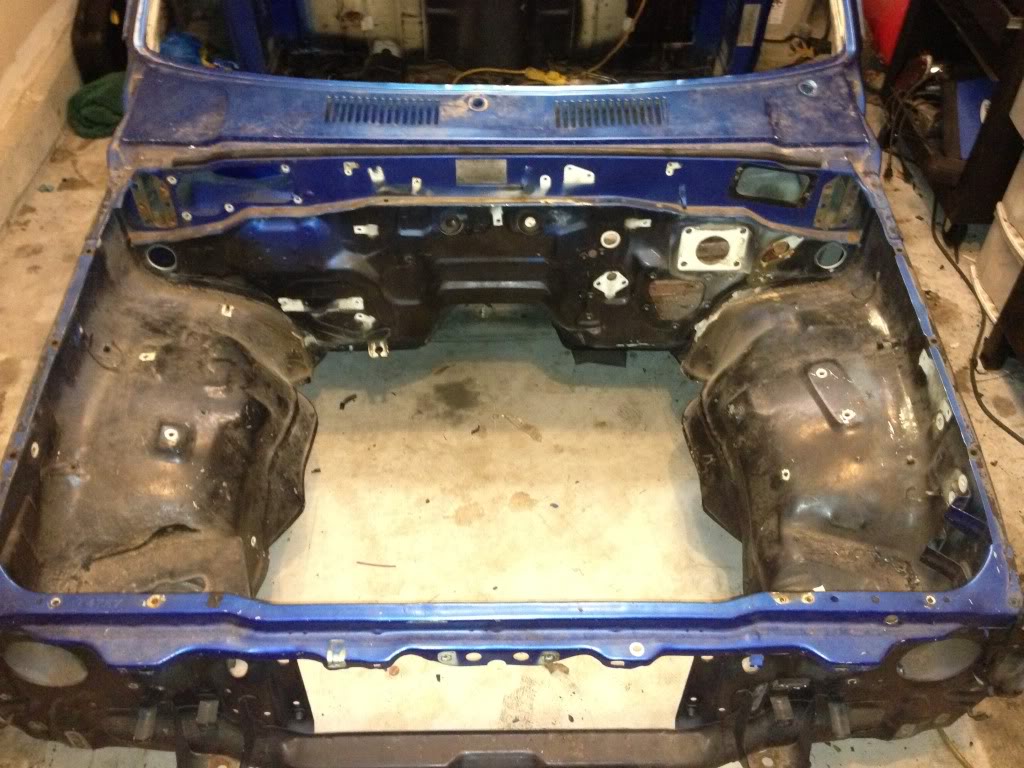
Got the smoothie cowl almost completed tonight.
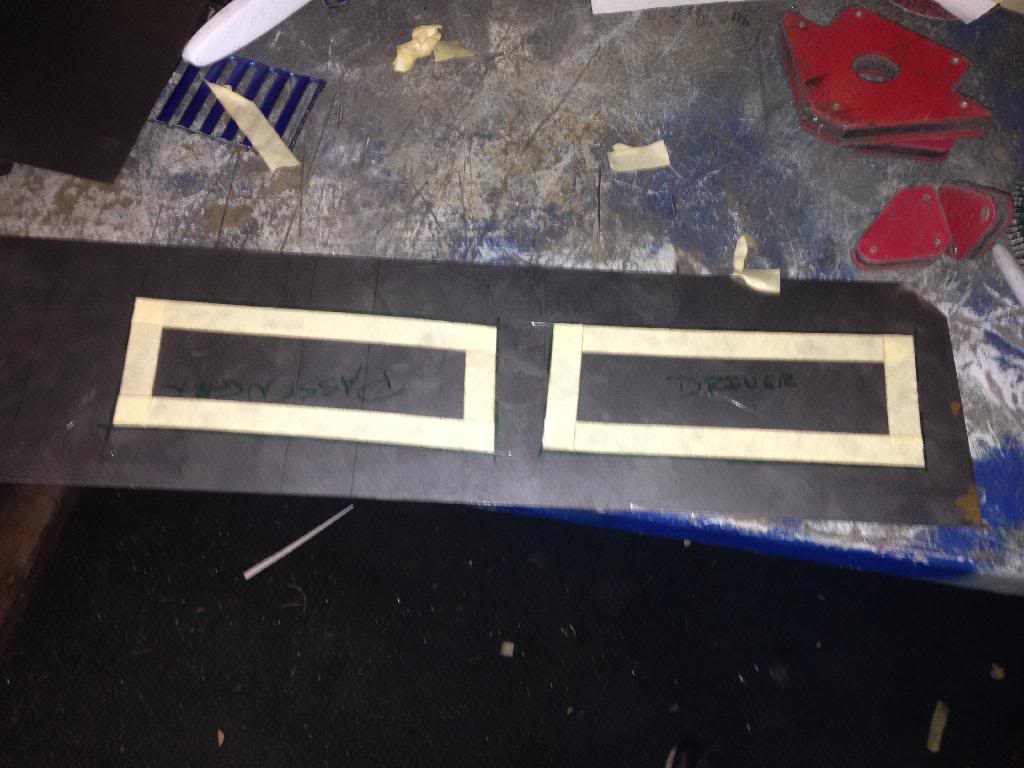
Cut the patches out of 18ga steel (I like using masking tape as a guide):
Then the point of no return, I cut out the cowl vents:
Tacked in the patches:
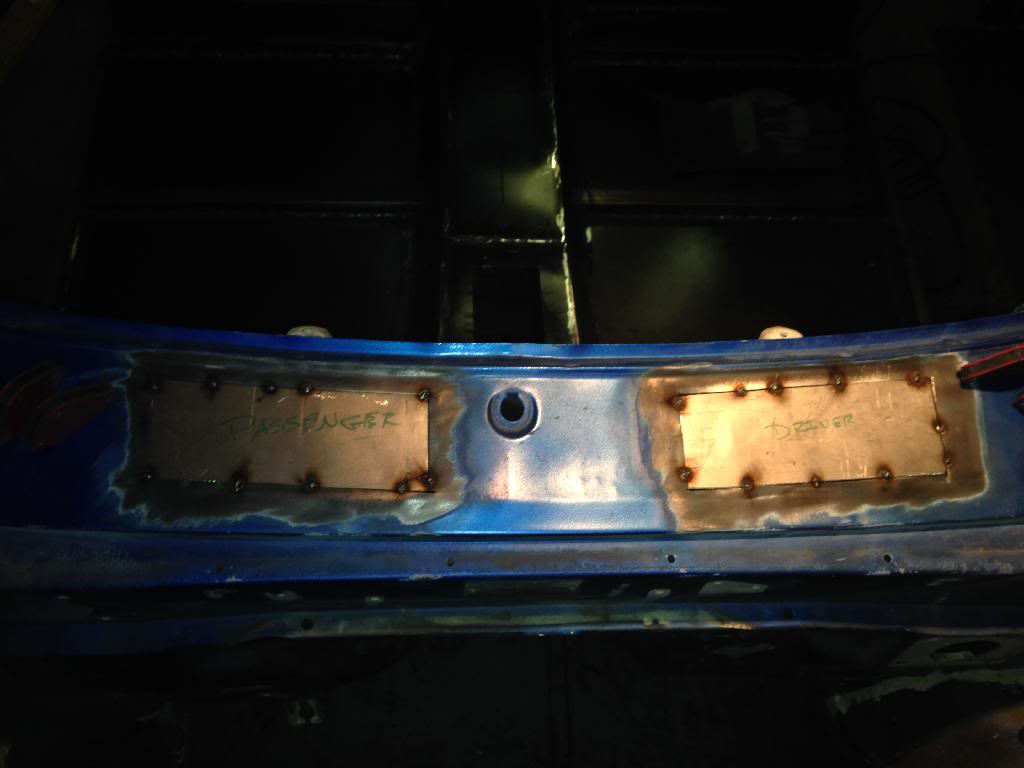
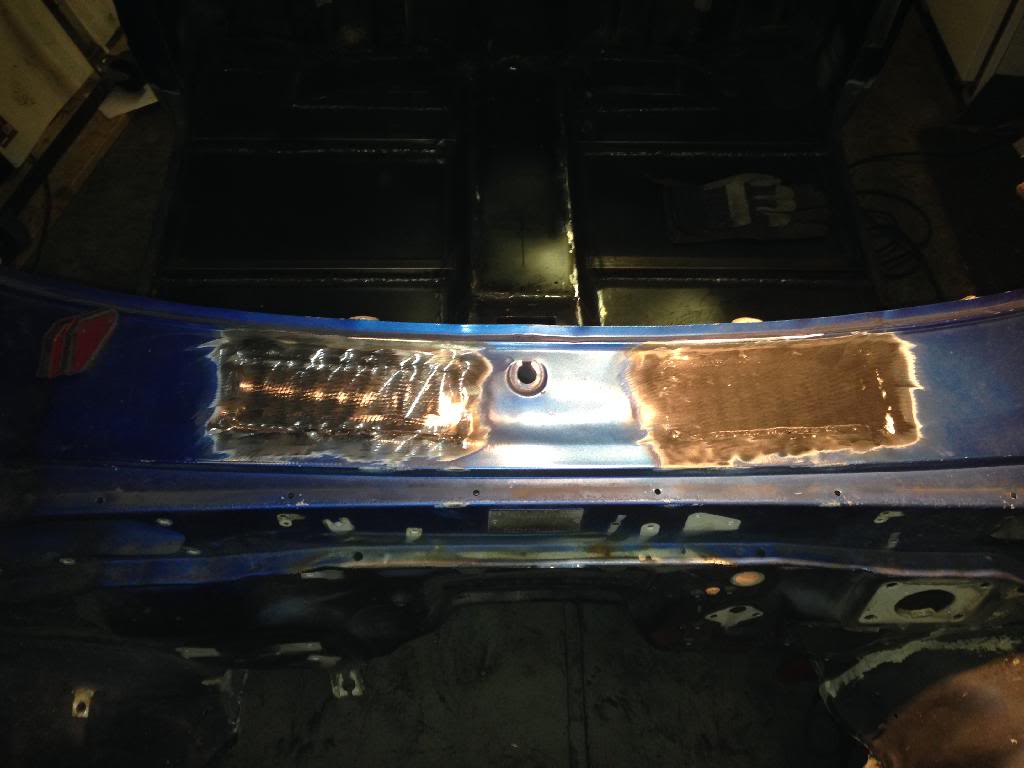
Then welded the perimeter. This was a little bit of a pain... I only had .030 wire so i had to use a series of small spot welds to keep it from burning through - the body steel on these trucks blows through so easily. I still ended up with a decent amount of shrinkage, but nothing that can't be fixed with a little filler.
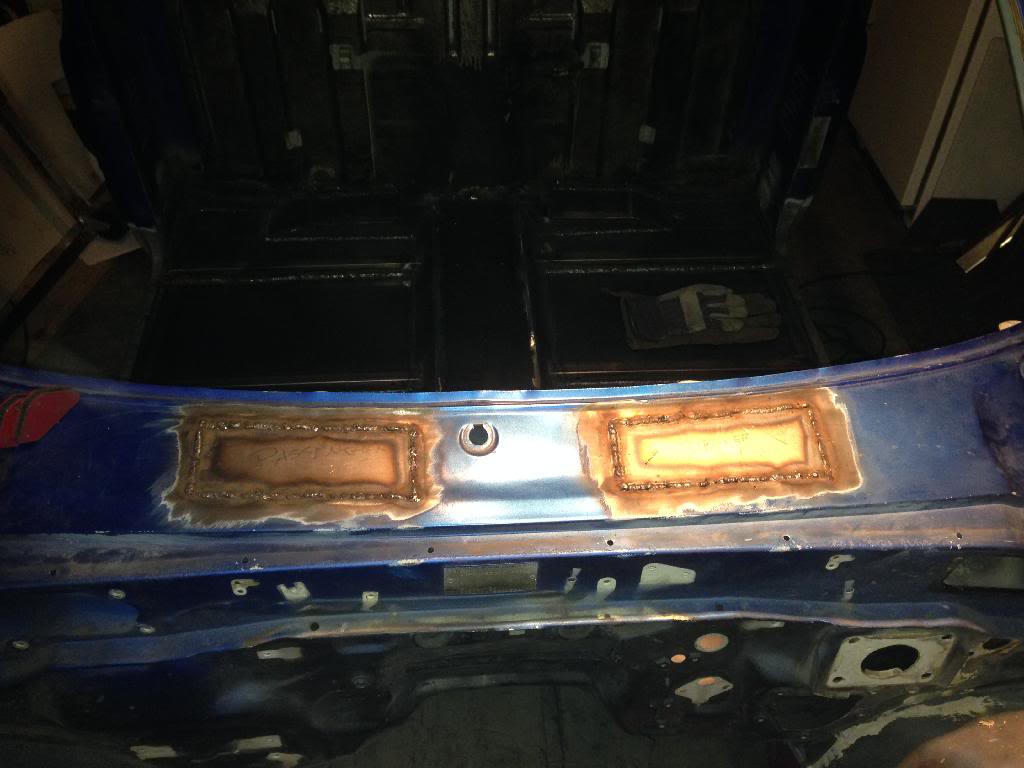
Then dressed the welds a little bit. The pictures all look a little yellow, but it is cleaned steel. i still have a little bit more to knock down, but this will do for now
Special thanks to Corey for providing me with the idea via his Trekker build. It is an excellent solution to one of the biggest problems with these trucks - the rusted kick panels and rocker panels!
Cut the patches out of 18ga steel (I like using masking tape as a guide):
Then the point of no return, I cut out the cowl vents:
Tacked in the patches:
Then welded the perimeter. This was a little bit of a pain... I only had .030 wire so i had to use a series of small spot welds to keep it from burning through - the body steel on these trucks blows through so easily. I still ended up with a decent amount of shrinkage, but nothing that can't be fixed with a little filler.
Then dressed the welds a little bit. The pictures all look a little yellow, but it is cleaned steel. i still have a little bit more to knock down, but this will do for now
Special thanks to Corey for providing me with the idea via his Trekker build. It is an excellent solution to one of the biggest problems with these trucks - the rusted kick panels and rocker panels!

 Dec 12, 2013 | 12:03 PM
#446

Have you thought about transplanting those vents somehwhere else on the truck? like for example the hood? I think it would look pretty good, like it came stock that way. keep it up I always enjoy seeing the updates, I have a bunch of updates myself but my computer is broken for now...
Dec 12, 2013 | 12:04 PM
#447
 Dec 12, 2013 | 05:28 PM
#448


thank you for the mention .
build is lookin' GREAT
.
Dec 13, 2013 | 12:00 PM
#449
Thread Starter
Super Moderator
iTrader: (3)
Joined: Jan 2012
Posts: 3,218
Likes: 26
From: Salisbury, MD
Nah, to keep the geometry of the metal around the vents, I had to cut them pretty tight so they are pretty much useless now. Besides, I'd rather not have a steady source of water flowing into my engine compartment when it rains. And the metal on these trucks is rather thin and burns through fairly easily even on low current settings, so it isn't the most ideal metal to weld together.
Dec 13, 2013 | 02:21 PM
#450
Glad you showed how you did your vents, as I'm going to do the same with mine. Mine are all beat up from a hail storm back '95 and never could get them straighten. Did you have to put a slight contour in yours, front to back, or just install a straight flat panel? I don't have any reference on what the stock contour should be.
After the mod, I assume the only air intake for the heater plenum is from the little vents at the rear of the wheel well.
After the mod, I assume the only air intake for the heater plenum is from the little vents at the rear of the wheel well.
Dec 17, 2013 | 09:23 AM
#452

Registered User
Joined: May 2005
Posts: 2
Likes: 0
From: Eastern Shore Va
This is gonna be a cool little rig when you get done with it. Let me know if ya need a hand or any parts when you are putting it back together. Ive got a random bunch of junk laying around and only live about 45 minutes south of ya.
Dec 17, 2013 | 12:13 PM
#453
Thread Starter
Super Moderator
iTrader: (3)
Joined: Jan 2012
Posts: 3,218
Likes: 26
From: Salisbury, MD
jhama78, thanks for the offer. I'm definitely interested in what you may have. Here's what I am specifically looking for at the moment:
*Trim around the heater controls/radio
*Windshield defrost vents
*Spare doors (I want to make a set of summer half doors)
*Tail lights
*Front and rear corner markers
*Headlight doors/bezels
*Rear fender flares
*Wiper arms
*Headlight combination switch (for tilt wheel)
That's all that I can think of right now, but I'm sure I'll need more.
Are you working on anything down there too? What part of VA are you in? Let me know if you need any help too and we'll get together.
Dec 17, 2013 | 01:05 PM
#454
Registered User
Joined: May 2005
Posts: 2
Likes: 0
From: Eastern Shore Va
I'll see what I can dig up, my first gen parts have dwindled over the years.
I'm down in Temperanceville, just south of the turn for chincoteague.
My last big project was my 85 crawler, I've parted out some of the big ticket items but its still mobile with gears, lockers, and longfields. I've gotta put the rear drive line back in it and other than that its a set of tires away from being wheelable. Here's a build thread for it.
http://www.pirate4x4.com/forum/toyot...ail-roach.html
Other than that I've been tinkering with my 88 runner, fixing up a few loose ends on that.
Last edited by jhama78; Dec 17, 2013 at 06:46 PM.
Dec 17, 2013 | 02:48 PM
#455
Registered User
Joined: Sep 2013
Posts: 69
Likes: 0
Awesome! Your thread is definitely a reference point for my build when the time comes. A couple questions.
1) just below the cowl on that lip with the uniform holes. Is a seal supposed to sit there to keep water from running under the hood and down the engine compartment side of the firewall?
2). I have patched up all possible water entry points above my windshield that I can find and I still get quite a bit of water making its way into my cab. It comes out at the left and right bottom corners of the windshield, right over the inner trim. Is there any way water from the cowl vent can end up coming thru my windshield? Or any other points of entry I should look at. I'm gonna pull the windshield soon but just curious because every time I think I stopped it , I didn't. Hahahaha
Dec 18, 2013 | 07:21 PM
#456
Thread Starter
Super Moderator
iTrader: (3)
Joined: Jan 2012
Posts: 3,218
Likes: 26
From: Salisbury, MD
Awesome! Your thread is definitely a reference point for my build when the time comes. A couple questions.
1) just below the cowl on that lip with the uniform holes. Is a seal supposed to sit there to keep water from running under the hood and down the engine compartment side of the firewall?
2). I have patched up all possible water entry points above my windshield that I can find and I still get quite a bit of water making its way into my cab. It comes out at the left and right bottom corners of the windshield, right over the inner trim. Is there any way water from the cowl vent can end up coming thru my windshield? Or any other points of entry I should look at. I'm gonna pull the windshield soon but just curious because every time I think I stopped it , I didn't. Hahahaha
1) just below the cowl on that lip with the uniform holes. Is a seal supposed to sit there to keep water from running under the hood and down the engine compartment side of the firewall?
2). I have patched up all possible water entry points above my windshield that I can find and I still get quite a bit of water making its way into my cab. It comes out at the left and right bottom corners of the windshield, right over the inner trim. Is there any way water from the cowl vent can end up coming thru my windshield? Or any other points of entry I should look at. I'm gonna pull the windshield soon but just curious because every time I think I stopped it , I didn't. Hahahaha
2) I have learned over the years of working on cars and construction that water does amazing things. It is possible that it could be coming from the cowl area, but I think that I would remove the windshield first and see what is under that seal. You may have a bad seal, or worse... Rusted windshield frame. The seals are available (there is a guy on ebay sealing OEM Toyota seals for a decent price) and they are easy to install (just google the soapy rope trick).
Dec 18, 2013 | 08:59 PM
#457
Registered User
Joined: Sep 2013
Posts: 69
Likes: 0
Ahhhh! I need one of those. Know where that hood seal can be purchased? My windshield seal is definitely rotten, so is the black trim. Is the new seal adequate or would you add silicone also? I went to town on my cracked windshield seal with silicone but it didn't do anything with the water problem.
Dec 19, 2013 | 09:57 AM
#458
Thread Starter
Super Moderator
iTrader: (3)
Joined: Jan 2012
Posts: 3,218
Likes: 26
From: Salisbury, MD
If you get a new seal, you won't need silicone at all. As for the trim, I'd ask around in the classified section to see if anybody has one on a part out. Dealership MIGHT be able to get it, but other than that it's a junk yard find...which is a problem for you in Hawaii.
BUTTTT, if you want to make a deal, I'll trade you my hood seal for those fender flares... ;o)
BUTTTT, if you want to make a deal, I'll trade you my hood seal for those fender flares... ;o)
Dec 19, 2013 | 02:19 PM
#459
Registered User
Joined: Sep 2013
Posts: 69
Likes: 0
Lol! You know I am seriously debating on selling em to you so I can address more important issues like my windshield and a new rad. I'll let you know! I need em to pass our recon safety law here. Straight bs! I ordered the seal from Route 66 on eBay. Great price. I figured you didn't make it over last month with the new baby coming.
I found a guy parting out his 88. Will that hood seal fit the 83?
I found a guy parting out his 88. Will that hood seal fit the 83?


