
Dropzone's 1981 Trekker Build-Up Thread
 Jun 16, 2008 | 04:15 PM
#121
Registered User
Joined: Jan 2008
Posts: 562
Likes: 1
From: Sacramento Valley, Ca
Sorry to hear about your E-bay purchase. When you said it didn't fit, that was my first thought. Second Gen? lol That sucks! But that's the issue with e-bay.
Keep up the good work! It lookes great!! Someday I want to go dual also! Plus ARB's! lol
Grant
Keep up the good work! It lookes great!! Someday I want to go dual also! Plus ARB's! lol
Grant
Jun 17, 2008 | 11:43 AM
#124


Might have a way out of it. Sky's Off Road makes a bracket that I might be able to use. Though I would rather use the stock bracket, less welding. I am dependent upon friends and my Brother in law because my welds look like a nose full of boogers exploded every where

Clearing out the garage now so hopefully I can tear down the rear end to put in the Aussie Locker that like everything for this build has been sitting on a shelf for way too long
Jun 23, 2008 | 04:28 PM
#125
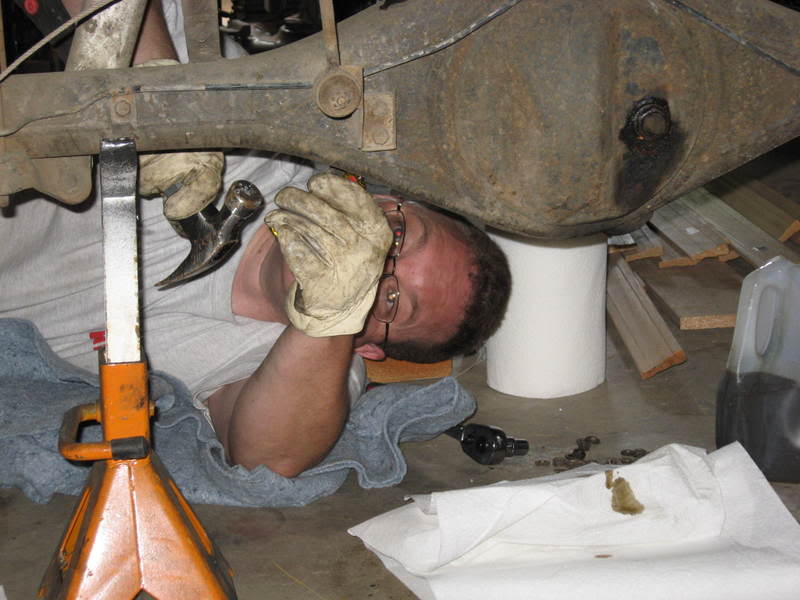
I had an hour to kill today before heading out to the Church's fireworks stand for my evening shift so I thought that I would bust out the 10mm,12mm, 14mm wrenches, the 24MM socket and a screwdriver.
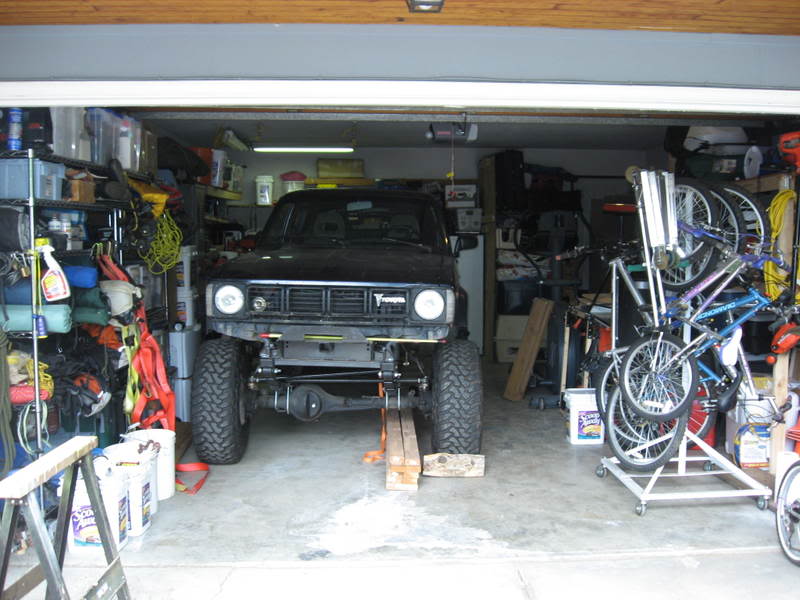
Pushed the '81 back in the garage:
Found the jackstands:
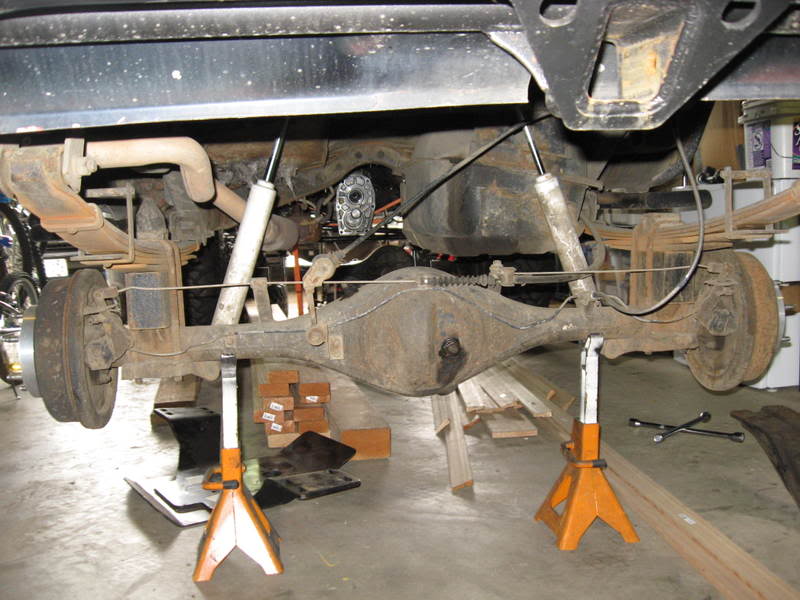
pulled these things out:
Some people thing they save sometime by letting the axles rest on these but from past experience I know that I end up doing a seal a few months later so so forget that. I will deal with having to bleed the brakes :
:
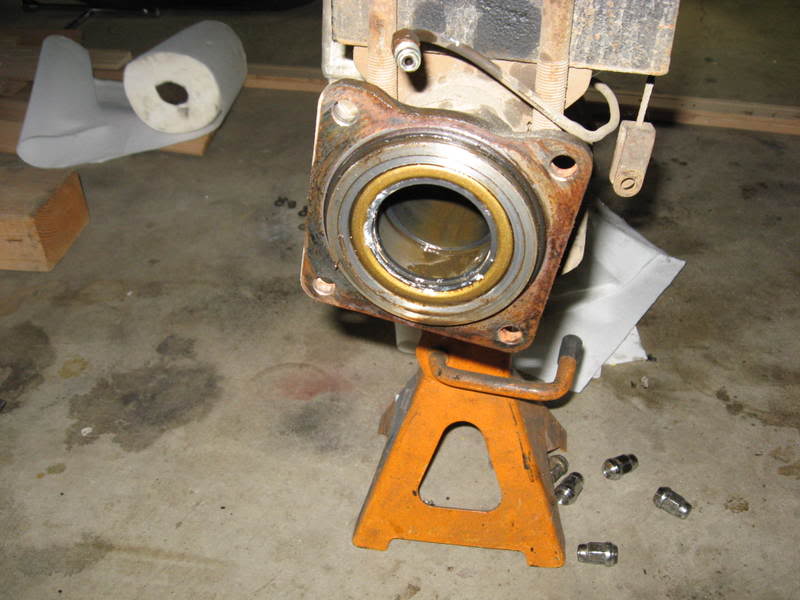
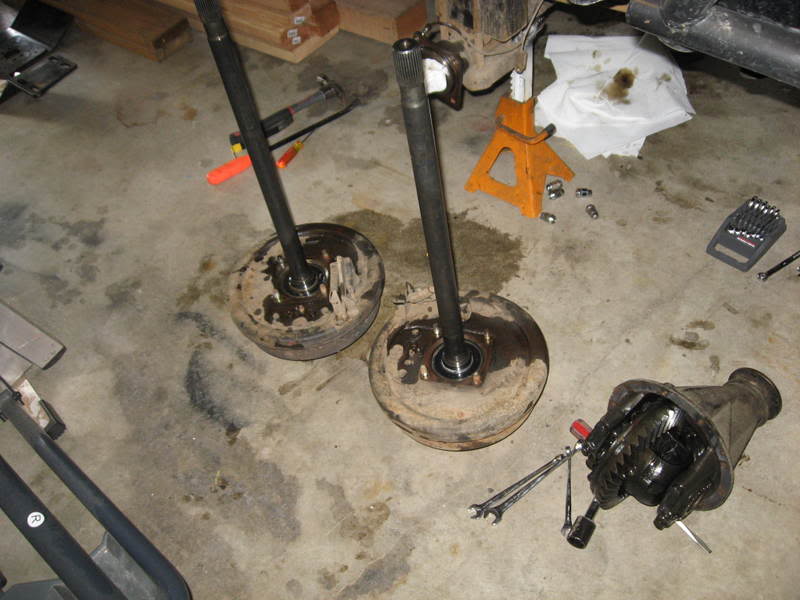
axles shafts and differential all seem to be in great shape:
A magnet tool works great for retrieving drain plugs when they fall into the oil:

It sucks, I counted the teeth on the ring gear. My thirds are the stock 3.90's that came with the '81. No money for 5.29's at this time, hopefully next spring...
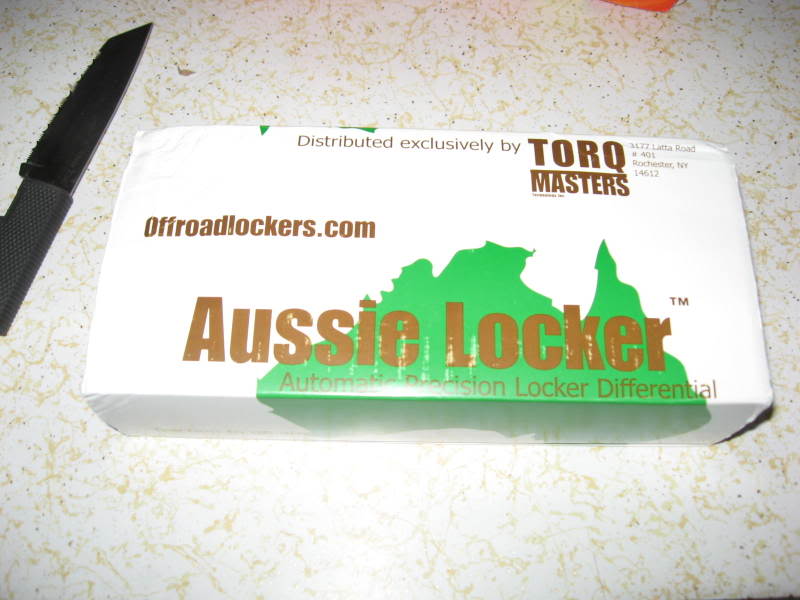
but this should be in tomorrow:
Pushed the '81 back in the garage:
Found the jackstands:
pulled these things out:
Some people thing they save sometime by letting the axles rest on these but from past experience I know that I end up doing a seal a few months later so so forget that. I will deal with having to bleed the brakes
:axles shafts and differential all seem to be in great shape:
A magnet tool works great for retrieving drain plugs when they fall into the oil:
It sucks, I counted the teeth on the ring gear. My thirds are the stock 3.90's that came with the '81. No money for 5.29's at this time, hopefully next spring...
but this should be in tomorrow:
Jun 24, 2008 | 04:30 PM
#126
got a little side tracked on my locker project when I found this 4Runner mirror I had bought a few months ago. It was buried on the workbench so i thought it would only take a little while to put in.
Don't bother buying the 'stock replacement' mirrors on ebay. They are your basic piece of crap waste of money. No adjustment or tightening that I did on this junk every worked (yes i need some new visors):

The 4Runner mirror:

I made a cardboard template and used some 1/8" Aluminum diamond plate I had:

I tested the lights, they work. I just need to fix the door switch. It will be nice having working map lights.
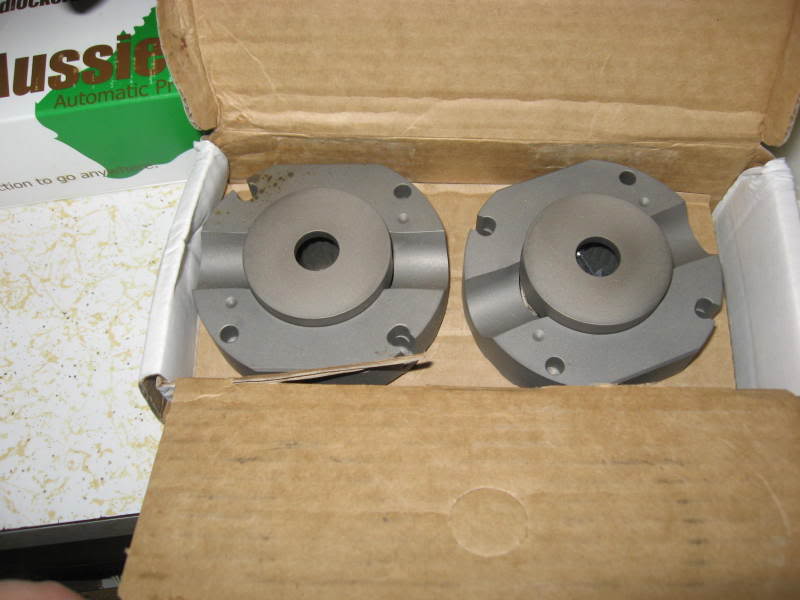
I don't have some of the cool stuff that Zuk at http://gearinstalls.com/ has. I will be following his write up for the install of my Aussie Locker: http://gearinstalls.com/bill.htm
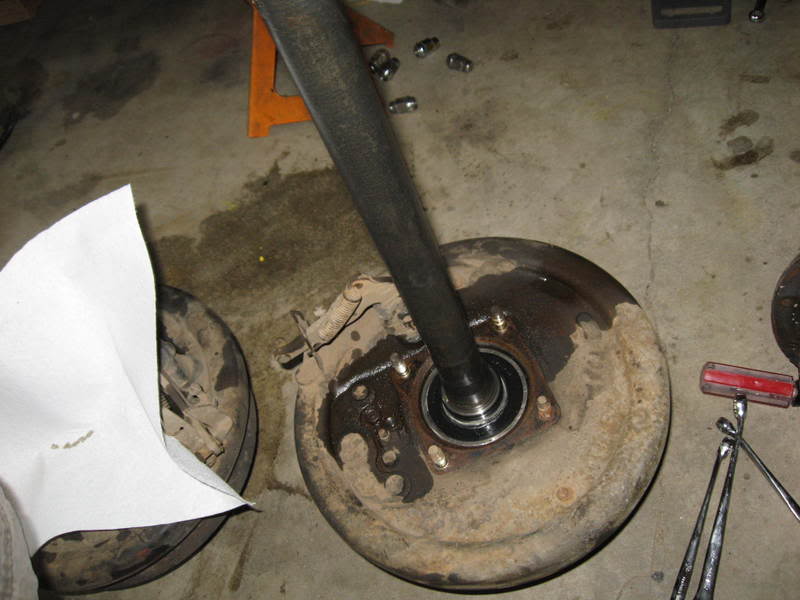
This is as far as I got on the differential:
Used a piece of 1/4" strap as a cheater bar.
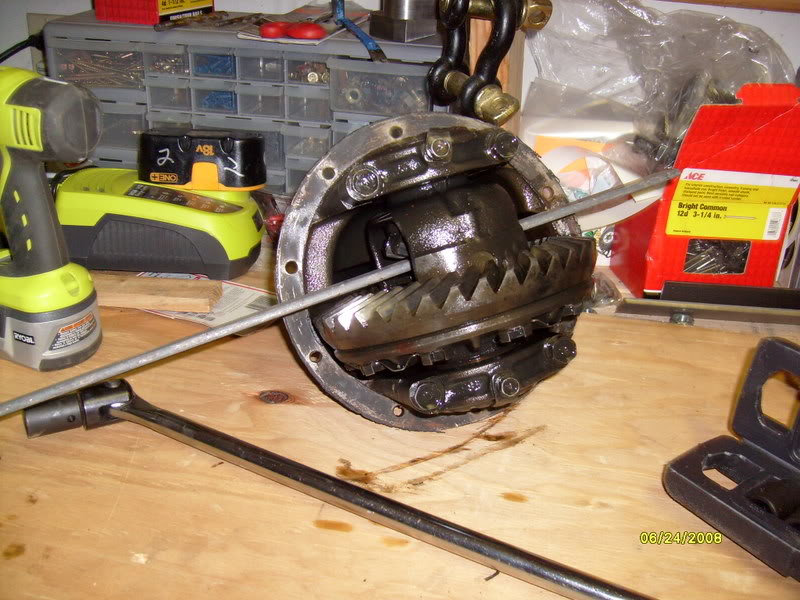
For an almost 28 year old third it all appears to be in good shape:
Even has what I believe to be the stock toyota Ring gear retaining clips still install, they appear not to be been touched:
Don't bother buying the 'stock replacement' mirrors on ebay. They are your basic piece of crap waste of money. No adjustment or tightening that I did on this junk every worked (yes i need some new visors):
The 4Runner mirror:
I made a cardboard template and used some 1/8" Aluminum diamond plate I had:
I tested the lights, they work. I just need to fix the door switch. It will be nice having working map lights.
I don't have some of the cool stuff that Zuk at http://gearinstalls.com/ has. I will be following his write up for the install of my Aussie Locker: http://gearinstalls.com/bill.htm
This is as far as I got on the differential:
Used a piece of 1/4" strap as a cheater bar.
For an almost 28 year old third it all appears to be in good shape:
Even has what I believe to be the stock toyota Ring gear retaining clips still install, they appear not to be been touched:

 Jun 30, 2008 | 04:21 PM
#128
got some of the right stuff
Thanks Brian
sucked it up and ordered the correct crossmember from BudBuilt.com. Got to hand it to Bud and his Crew. Had the thing with in 5 days. I think that is great service on something that weighs over 40 lbs. I have a guy that will buy the other crossmember so that will help me recoup quite a bit of my cost.
Comparison of my original/first incorrect budbuilt/ new one:
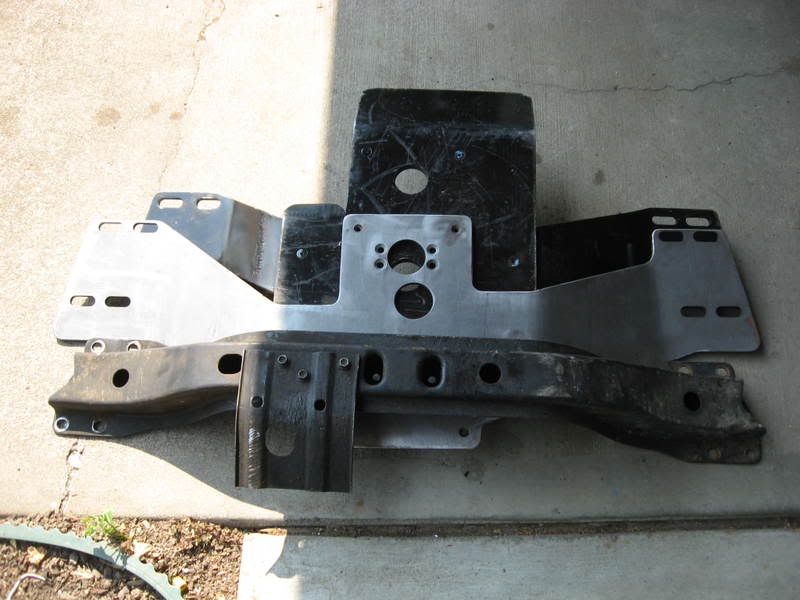
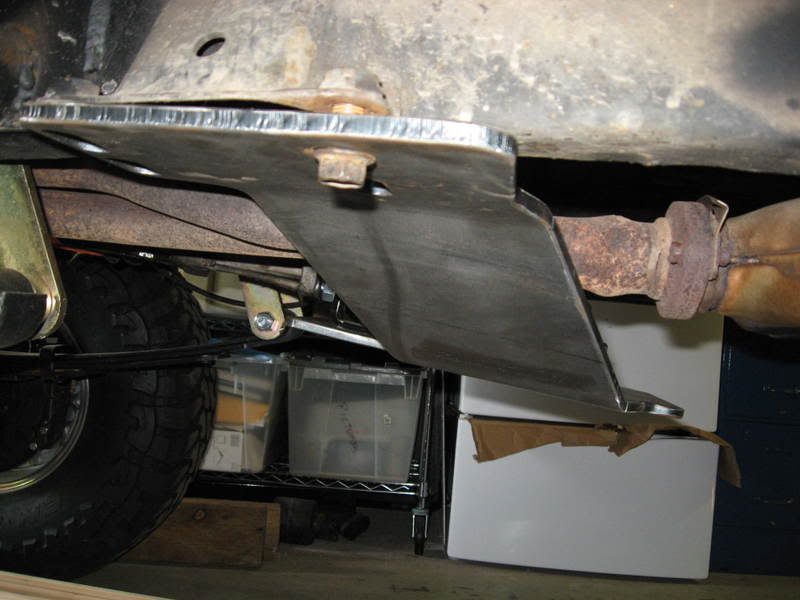
Stock Crossmember VS. BudBuilt...nice when all the holes match up..imagine that:
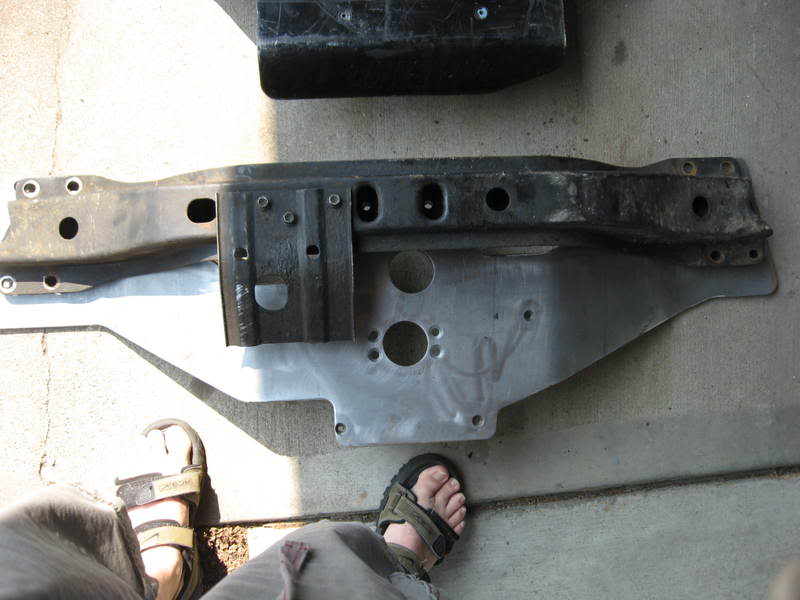
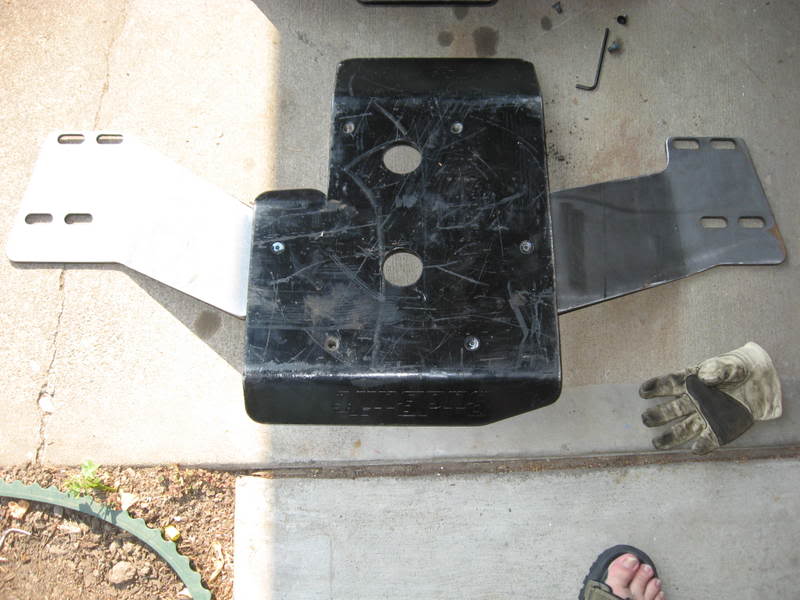
i was able to save a bit of money by using the existing skid plate with the new crossmember:
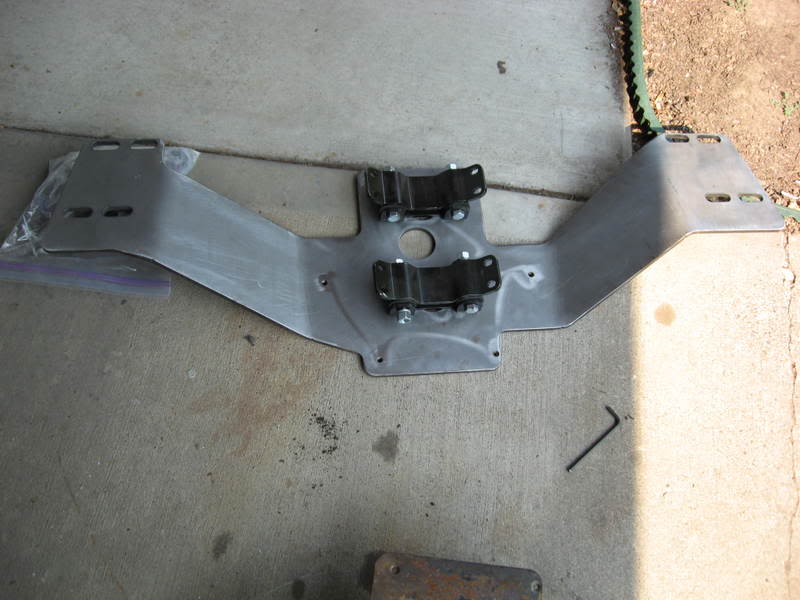
Test Fit of the 4Xinnovations transfercase mounts...everything lines up great. I like it when that happens:
And the fit test. both sides line up with the factory crossmember bolt holes...
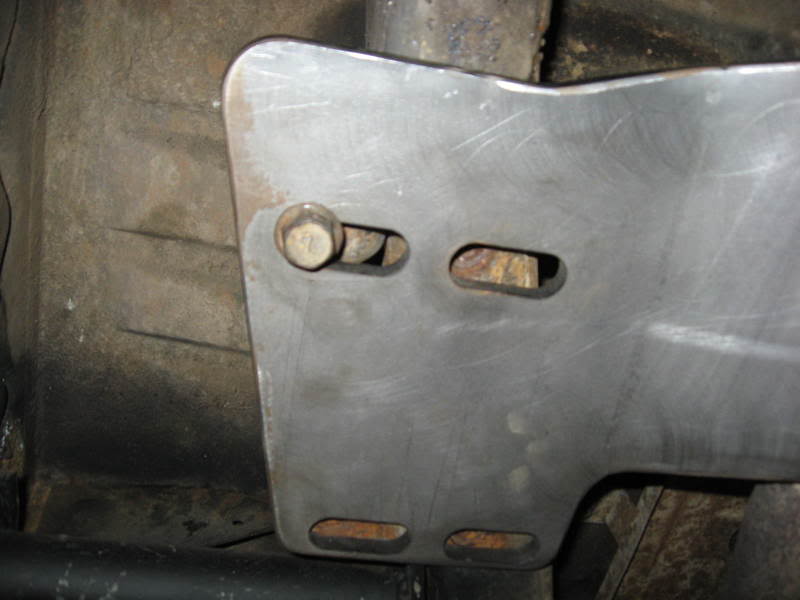
Quick measurement nets me 21" of ground clearance beneath the crossmember!!
Got side tracked on the project. My wife and I dumped the kids off at Grandma's for the weekend and headed down to the coast. Hopefully (said that before) I will have the cases together and mounts and get the aussie in the third member and get the rear end put back together...
sucked it up and ordered the correct crossmember from BudBuilt.com. Got to hand it to Bud and his Crew. Had the thing with in 5 days. I think that is great service on something that weighs over 40 lbs. I have a guy that will buy the other crossmember so that will help me recoup quite a bit of my cost.
Comparison of my original/first incorrect budbuilt/ new one:
Stock Crossmember VS. BudBuilt...nice when all the holes match up..imagine that:
i was able to save a bit of money by using the existing skid plate with the new crossmember:
Test Fit of the 4Xinnovations transfercase mounts...everything lines up great. I like it when that happens:
And the fit test. both sides line up with the factory crossmember bolt holes...
Quick measurement nets me 21" of ground clearance beneath the crossmember!!
Got side tracked on the project. My wife and I dumped the kids off at Grandma's for the weekend and headed down to the coast. Hopefully (said that before) I will have the cases together and mounts and get the aussie in the third member and get the rear end put back together...
 Jun 30, 2008 | 05:23 PM
#130
Registered User
Joined: Aug 2006
Posts: 318
Likes: 0
From: Petersburg va.
What a sweet looking rig!! I have never even seen one of those in the flesh. Really neat. Iv'e a little tip for ya. Before you put the trick new turn signals back in if it aint to late. Clean the inside up, tape off the sockets and paint em with some fake chrome rattle can paint. Really brightens em up at night.
Keep up the pretty work.
Jim
Keep up the pretty work.
Jim
Jul 22, 2008 | 12:58 PM
#131
My locker install has not exactly been going as fast as I was hoping. Something about finishing other projects first
Anyway had some time today so got back to work on it, I was following Zuk's write up at gearinstalls.com it is so much better than the install instructions from aussie locker.
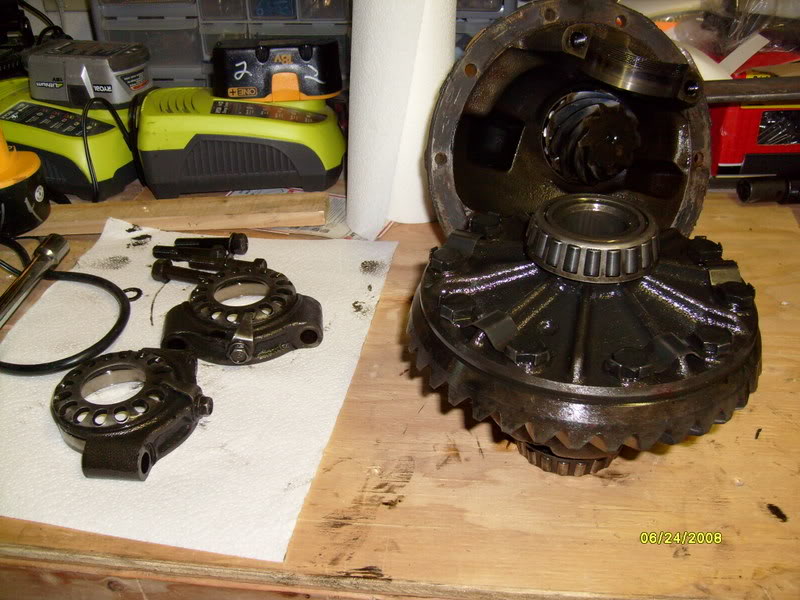
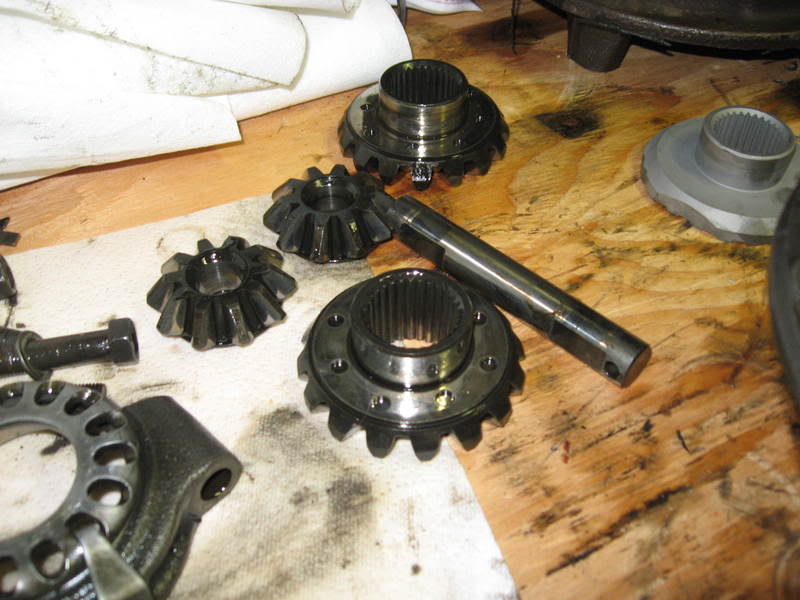
Finally got a 3/16" punch so I could drop the diff shaft and get out the spider gears:
Rear install the thrust washers, evidently some people forget them and the locker won't work right:
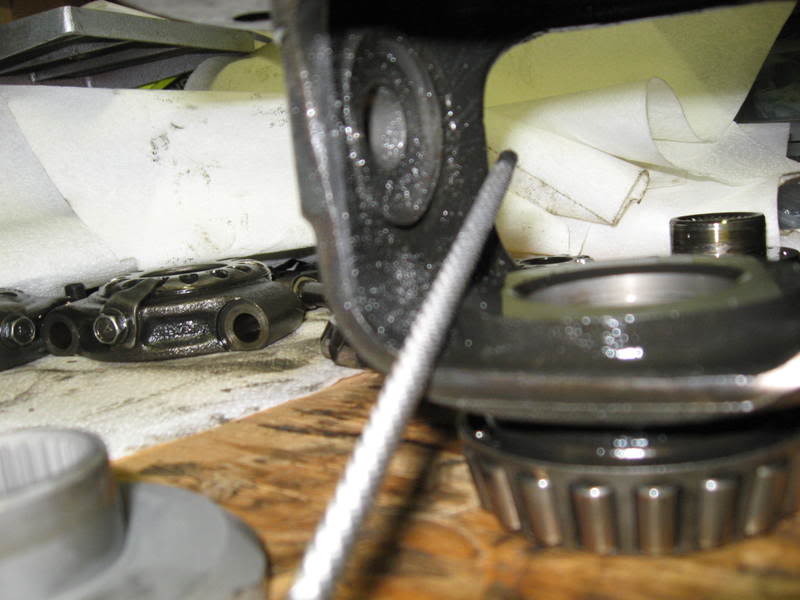
Just like Zuk has found on his aussie installs I had to take some material off the housing to get the parts to drop in:
Checked the clearance between the shaft, I got 0.007", spec says 0.006-.016:
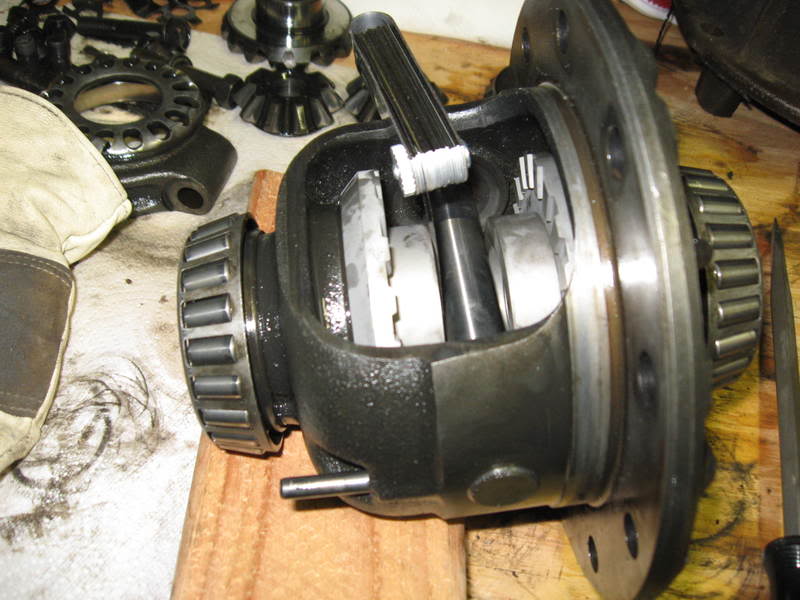
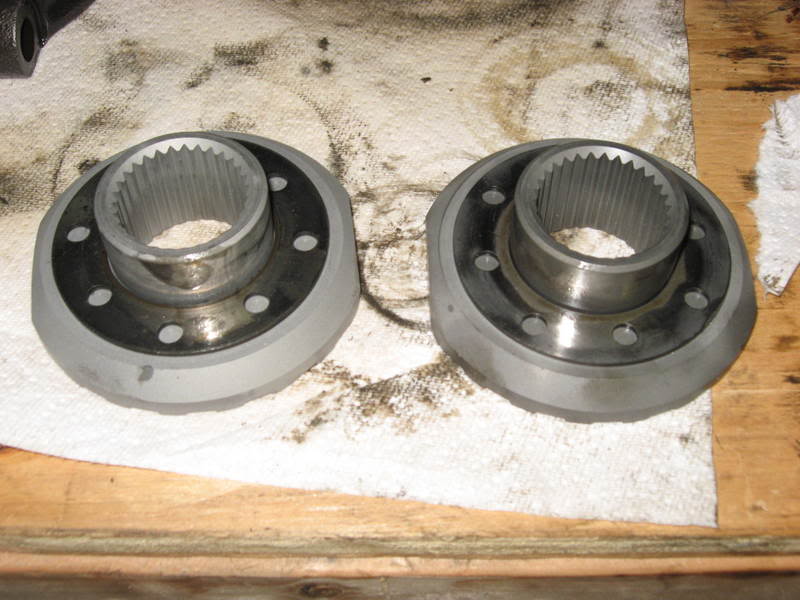
Got all the couplers in after doing the little clearance job mentioned about, a few minutes with a file was all it took:
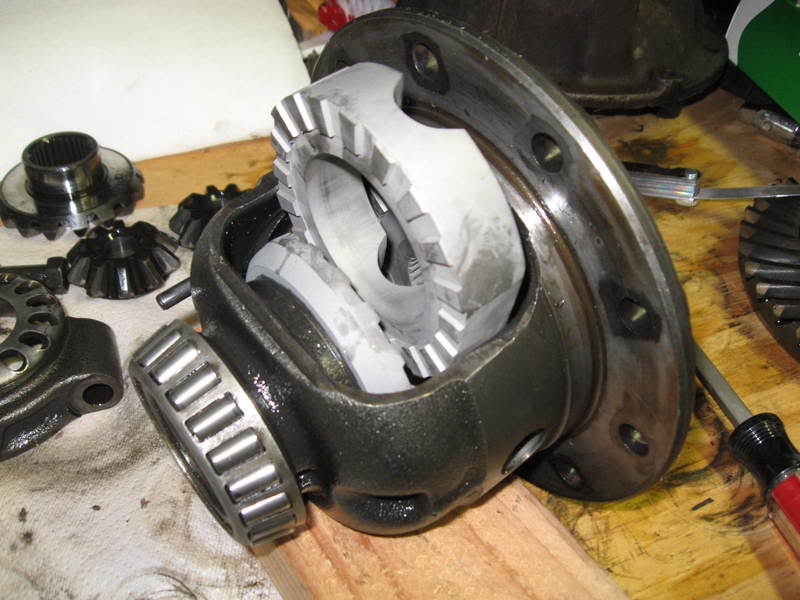
Next step was to line up the couplers and insert the 4 pins, make sure to install the spring nipple up, it helps to retain the spring:
Springs installed, take your time with this, those little buggers can fly, using a couple of small screwdrivers did the trick:

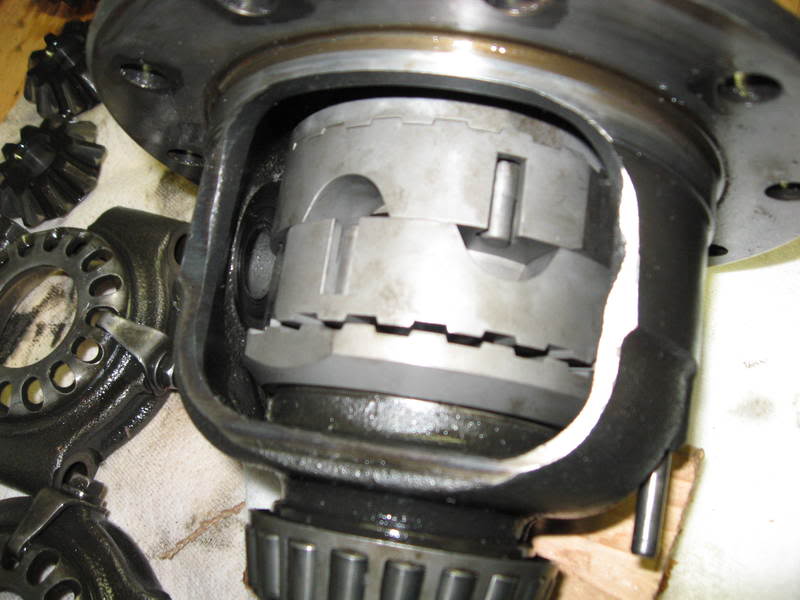
all 4 springs installed:
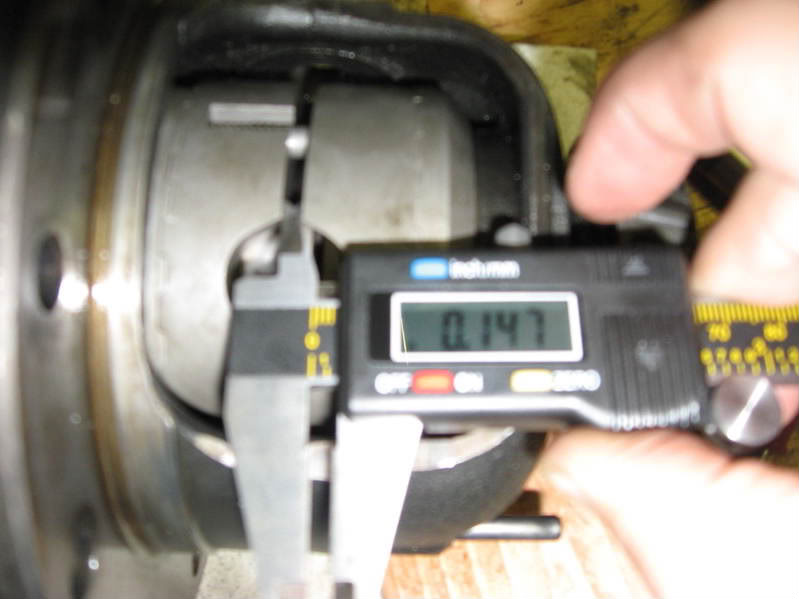
Need to check the gap between the couplers after it is all together, I had 0.147", for the aussie warranty you need 0.145"-0.178" on the center gap:
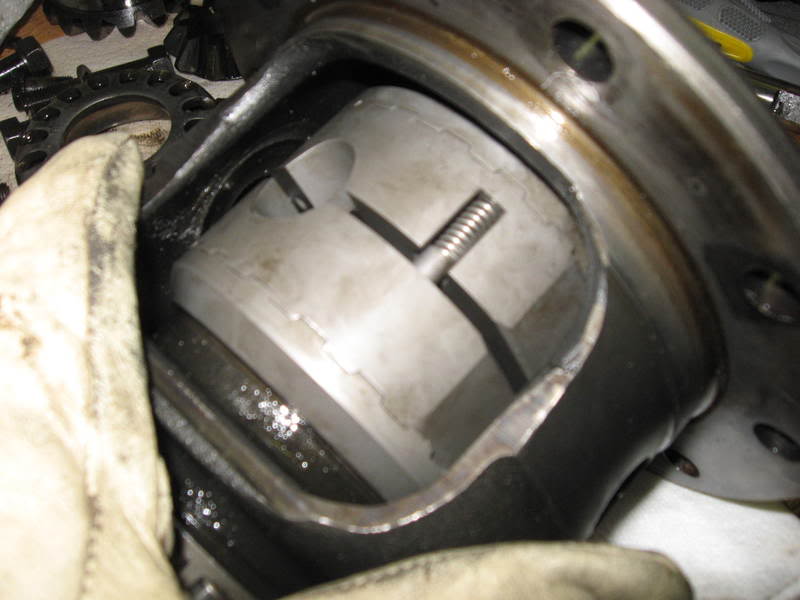
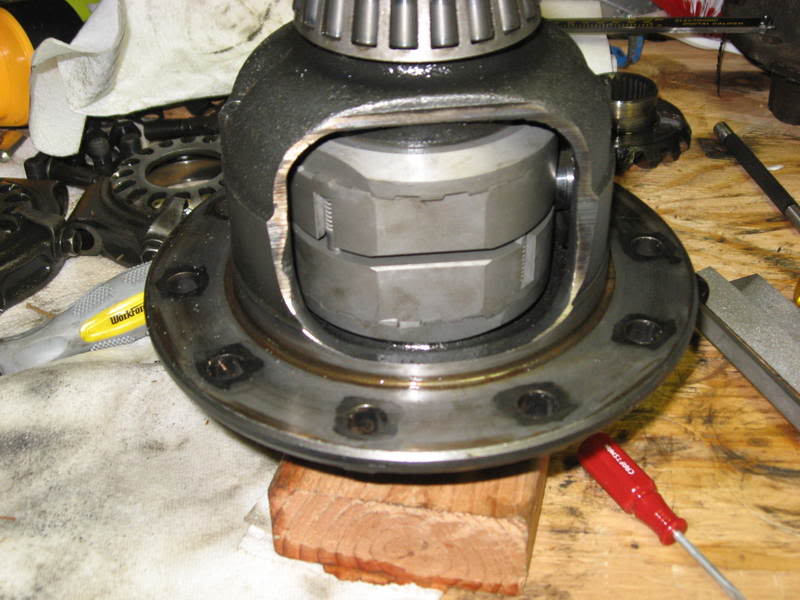
Main shaft and retaining pin back in:

aussie locker in the carrier:
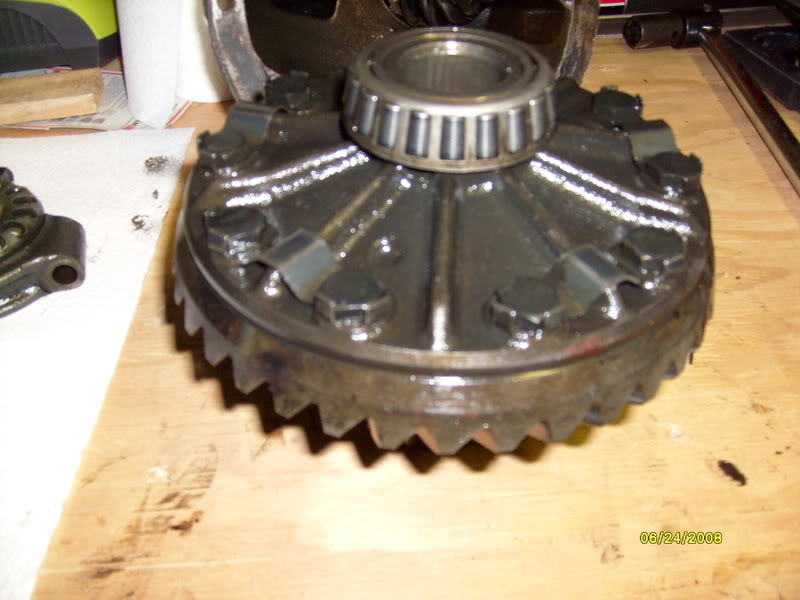
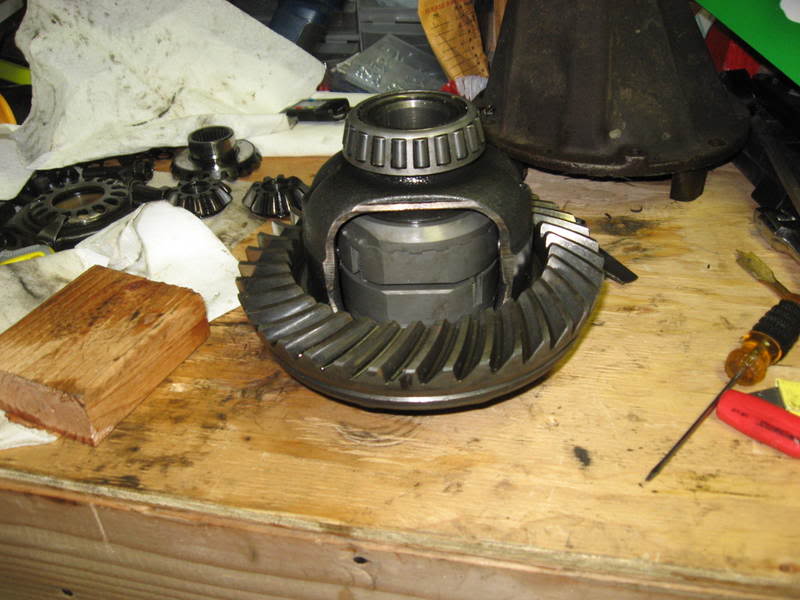
I went to put the ring gear back on and it did not want to drop down all the way so I did something my wife will hate me for:

After 15-20 minutes at 225* the ring gear dropped right down
Have to run the kids to the dentist, hopefully will be able to get the third back together and put back in the truck tonight...before it goes back in it will get a good dousing of solvent to clear out any debris...
Anyway had some time today so got back to work on it, I was following Zuk's write up at gearinstalls.com it is so much better than the install instructions from aussie locker.
Finally got a 3/16" punch so I could drop the diff shaft and get out the spider gears:
Rear install the thrust washers, evidently some people forget them and the locker won't work right:
Just like Zuk has found on his aussie installs I had to take some material off the housing to get the parts to drop in:
Checked the clearance between the shaft, I got 0.007", spec says 0.006-.016:
Got all the couplers in after doing the little clearance job mentioned about, a few minutes with a file was all it took:
Next step was to line up the couplers and insert the 4 pins, make sure to install the spring nipple up, it helps to retain the spring:
Springs installed, take your time with this, those little buggers can fly, using a couple of small screwdrivers did the trick:
all 4 springs installed:
Need to check the gap between the couplers after it is all together, I had 0.147", for the aussie warranty you need 0.145"-0.178" on the center gap:
Main shaft and retaining pin back in:
aussie locker in the carrier:
I went to put the ring gear back on and it did not want to drop down all the way so I did something my wife will hate me for:
After 15-20 minutes at 225* the ring gear dropped right down
Have to run the kids to the dentist, hopefully will be able to get the third back together and put back in the truck tonight...before it goes back in it will get a good dousing of solvent to clear out any debris...
Last edited by dropzone; Jul 22, 2008 at 01:00 PM.

 Jul 30, 2008 | 06:32 PM
#135
Registered User
Joined: Aug 2007
Posts: 3,371
Likes: 3
From: Here in the PNW
from the outside it looks like a pickup with a shell but its still pretty awesome. you will love that mc rear bumper its my favorite piece of armor. nice build
mmm i wish i could cook like that :d i actually did a dirt bike tire once
mmm i wish i could cook like that :d i actually did a dirt bike tire once
Last edited by algranger; Jul 30, 2008 at 06:40 PM.
Jul 31, 2008 | 02:04 PM
#136
UPS just dropped this off, Front Range Off Road Twin stick, should make turning a little easier with the front locker. I like their design and workmanship better than some of the others on the market, plus the shift boot comes with the kit, not an add on like some on the market...
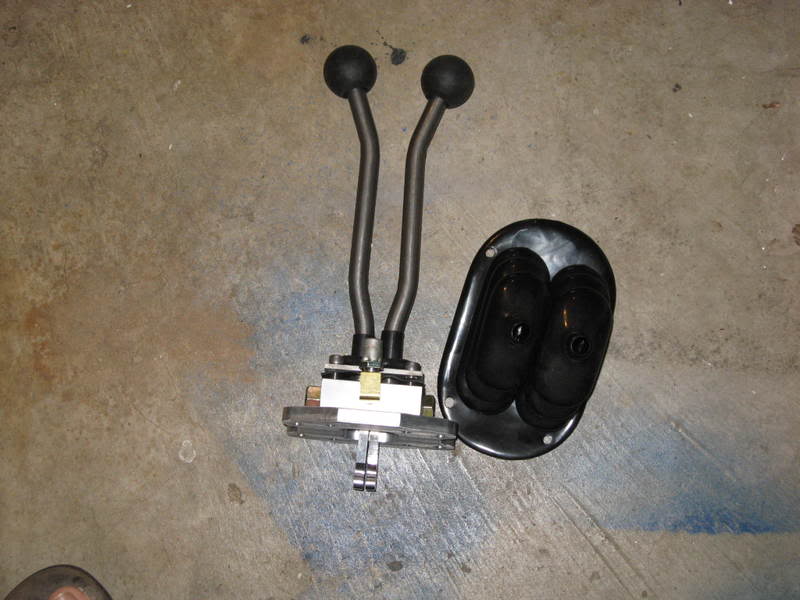
Now I just need time to get all the pieces that have been collecting dust for months back together..
Now I just need time to get all the pieces that have been collecting dust for months back together..


