
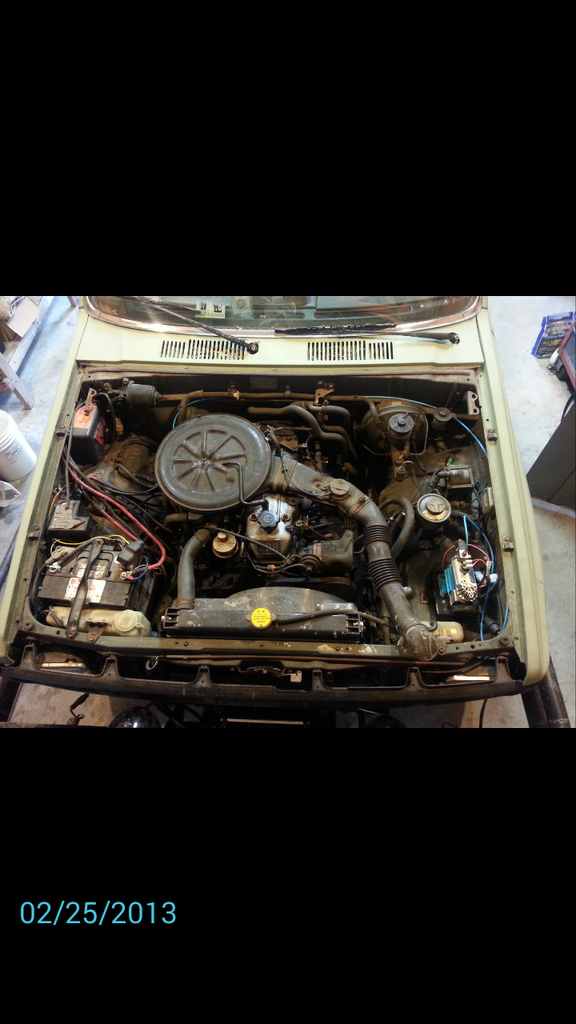
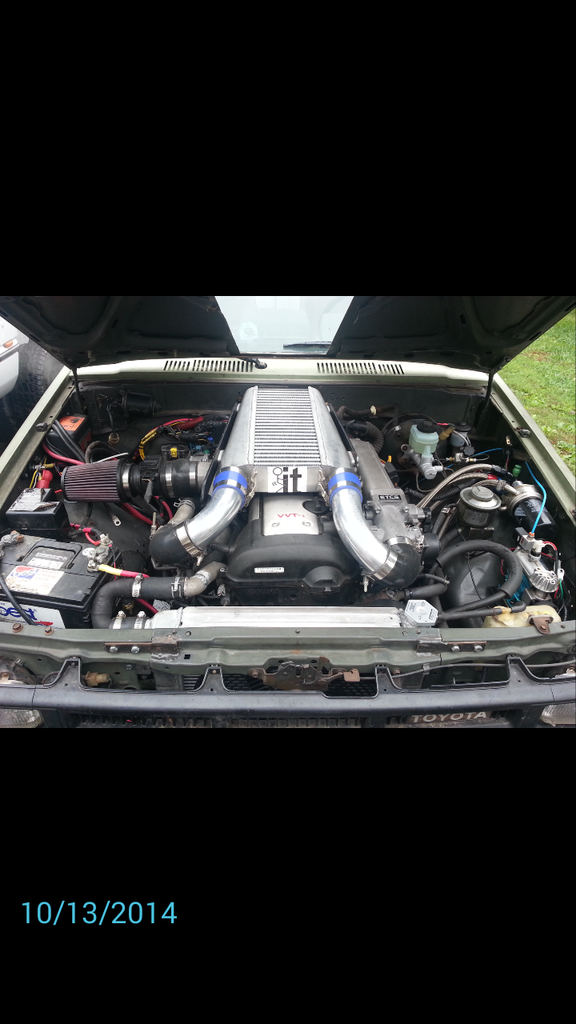
1JZ GTE VVT-i into 22R 84 Runner
 Apr 2, 2015 | 05:49 PM
#201
Thread Starter
Registered User


Joined: May 2010
Posts: 415
Likes: 6
From: Anne Arundel,MD
Put a picture up, id like to see how that looks.
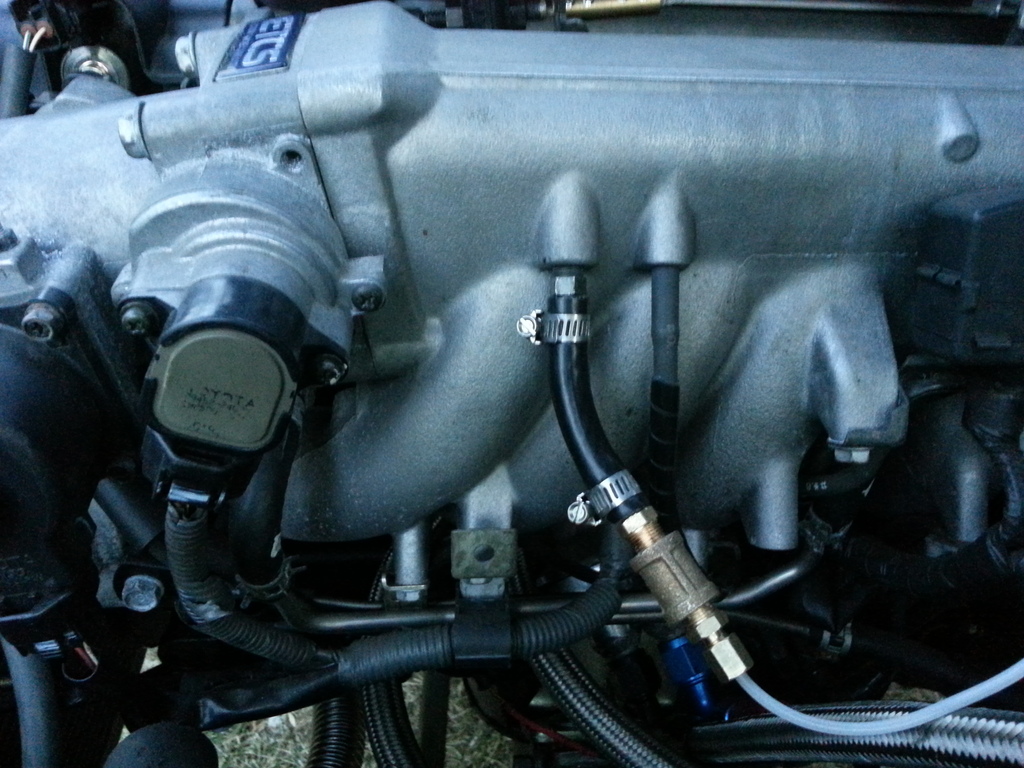
Here is mine, there was a spare nipple that I capped off when I did the swap.
Lol PLEASE do not judge me on my hookup for the airline. Hardware store was slacking in the fitting I wanted so I had to use what I could to make it work.
At idle I have about -22 in a vacum. On the street I get about 11 maybe 12 pounds of boost.

 Apr 3, 2015 | 06:07 PM
#202
Registered User
Joined: Oct 2011
Posts: 117
Likes: 0
From: San Diego County
Looks like we plumbed it in similar locations. And we're making similar boost. I won't poke fun at your fitting, so long as you don't poke fun at me using 2 different gauges... (soon to be fixed)
here is the interior, you can see the ash tray bezel
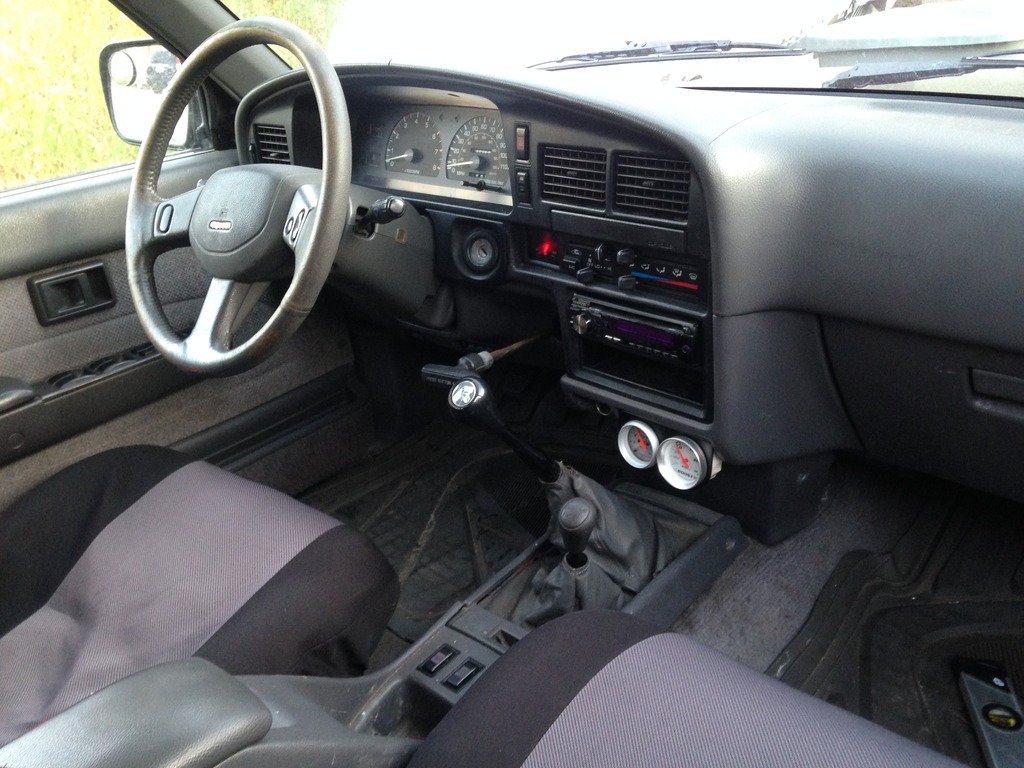
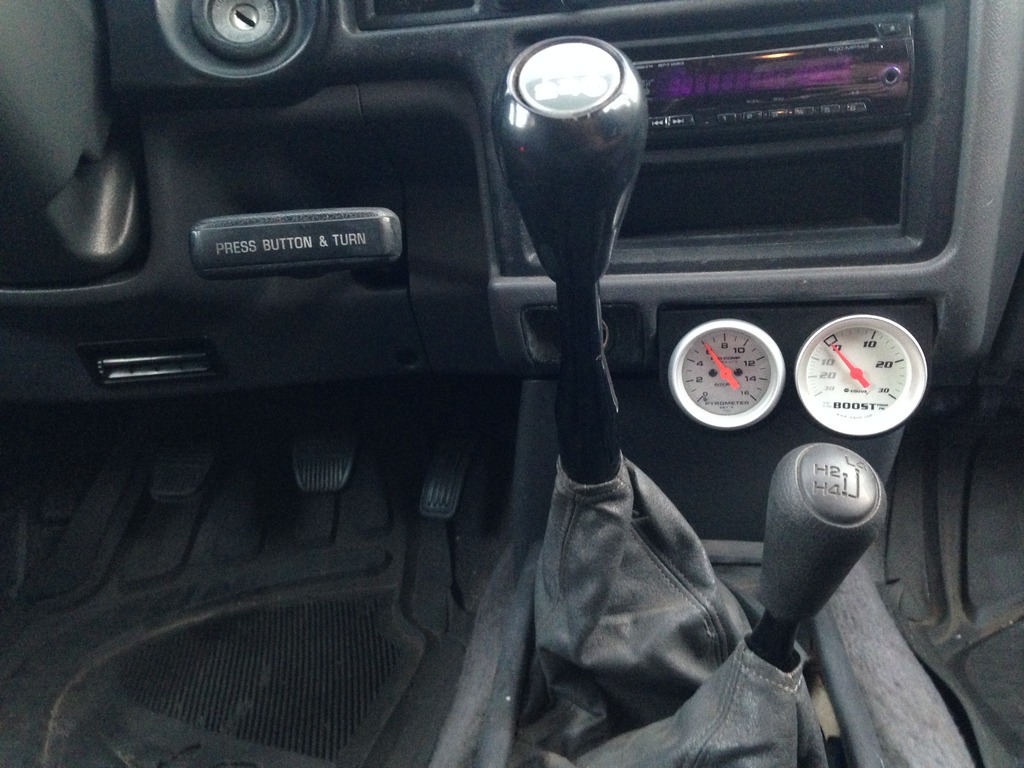
and here is where the boost is plugged in

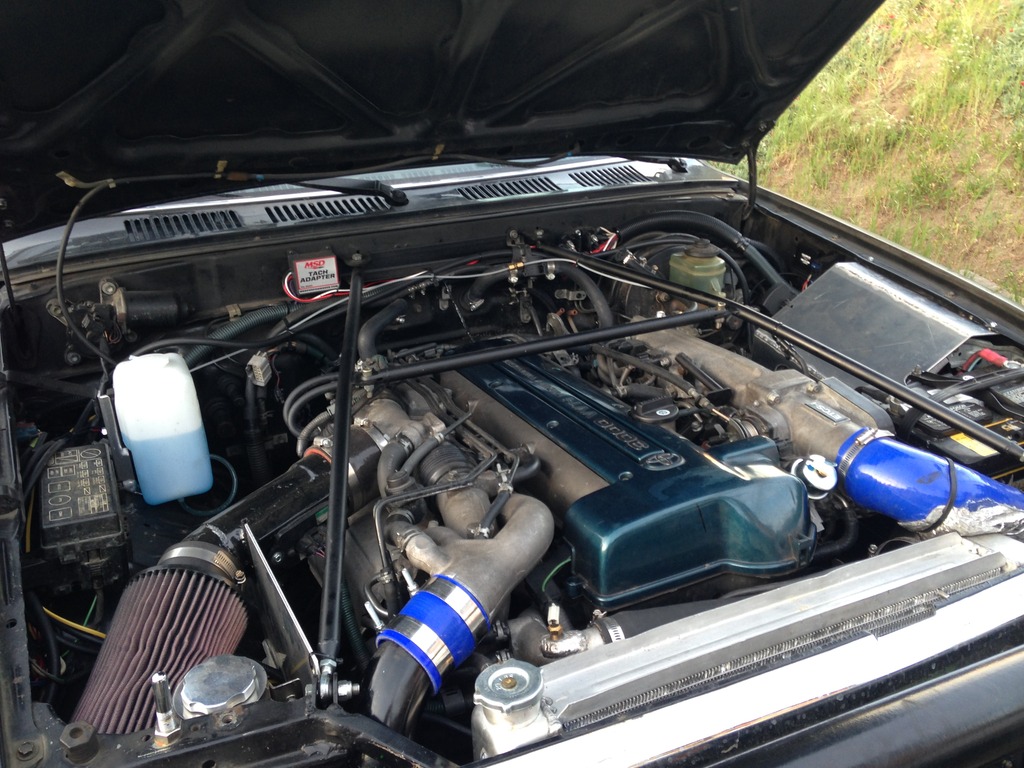
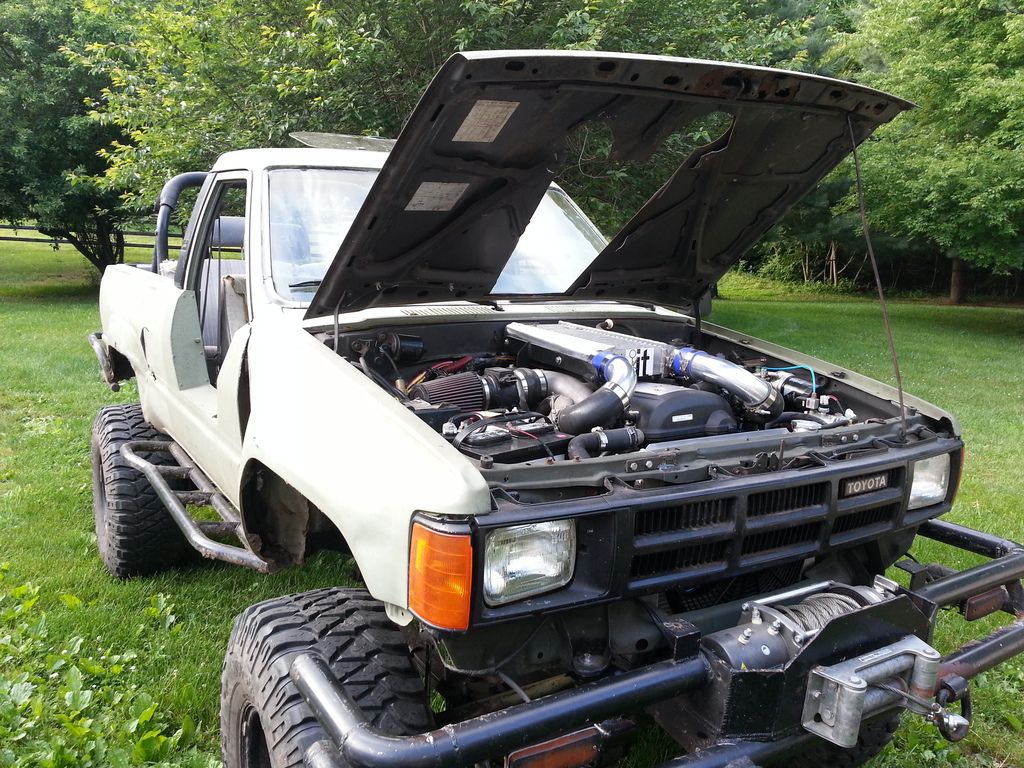
And here's the latest engine bay shot... on the left - have the custom air box, you can see the tower bracing we added from cutting out the stock front bracing to make room for the radiator. which also means no more hood latch, converted to pins. On the right the aluminum box houses the ECU.
here is the interior, you can see the ash tray bezel
and here is where the boost is plugged in
And here's the latest engine bay shot... on the left - have the custom air box, you can see the tower bracing we added from cutting out the stock front bracing to make room for the radiator. which also means no more hood latch, converted to pins. On the right the aluminum box houses the ECU.
Apr 3, 2015 | 11:03 PM
#203
Thread Starter
Registered User
Joined: May 2010
Posts: 415
Likes: 6
From: Anne Arundel,MD
Captainslow, that looks really really good. Good job man lol im actually a little jealous of how clean your engine bay is.
That is a good idea on building a box to house the ecu. If your cool with it ill pm you tomorrow so I can keep your contact email. My next build which will be this year will be a 2j just not sure if im a do a older 2wd pickup (if I can find one) or a Tacoma. I may ask for your assistance in what you did for wiring when it comes time.
That is a good idea on building a box to house the ecu. If your cool with it ill pm you tomorrow so I can keep your contact email. My next build which will be this year will be a 2j just not sure if im a do a older 2wd pickup (if I can find one) or a Tacoma. I may ask for your assistance in what you did for wiring when it comes time.
 Apr 8, 2015 | 07:31 PM
#205
Registered User
Joined: Oct 2011
Posts: 117
Likes: 0
From: San Diego County
Captainslow, that looks really really good. Good job man lol im actually a little jealous of how clean your engine bay is.
That is a good idea on building a box to house the ecu. If your cool with it ill pm you tomorrow so I can keep your contact email. My next build which will be this year will be a 2j just not sure if im a do a older 2wd pickup (if I can find one) or a Tacoma. I may ask for your assistance in what you did for wiring when it comes time.
That is a good idea on building a box to house the ecu. If your cool with it ill pm you tomorrow so I can keep your contact email. My next build which will be this year will be a 2j just not sure if im a do a older 2wd pickup (if I can find one) or a Tacoma. I may ask for your assistance in what you did for wiring when it comes time.
If you weren't 4,500 miles away I'd help in person
Apr 9, 2015 | 05:21 PM
#206
Thread Starter
Registered User
Joined: May 2010
Posts: 415
Likes: 6
From: Anne Arundel,MD
That depends on what I find when I'm ready to do it. If by chance I do find a an older 2wd it'll be non vvti just cause it would be easier to build up. How easy it would be compared to what I did to my runner makes me want to do it even more. Although what you have would be a pretty sweet daily driver to build as well
May 1, 2015 | 12:40 AM
#208
Thread Starter
Registered User
Joined: May 2010
Posts: 415
Likes: 6
From: Anne Arundel,MD
If I had to gues I think I would be somewhere around 15-16 maybe 17. I put my fpr a few pounds above stock fuel pressure while I try and dial it in. I figure a little to rich is a little better than to lean.
I'm running 5:29's wth 35's. Which by the way puts my speedometer only like 2mph off at 60.
May 9, 2015 | 05:05 AM
#209
Thread Starter
Registered User
Joined: May 2010
Posts: 415
Likes: 6
From: Anne Arundel,MD
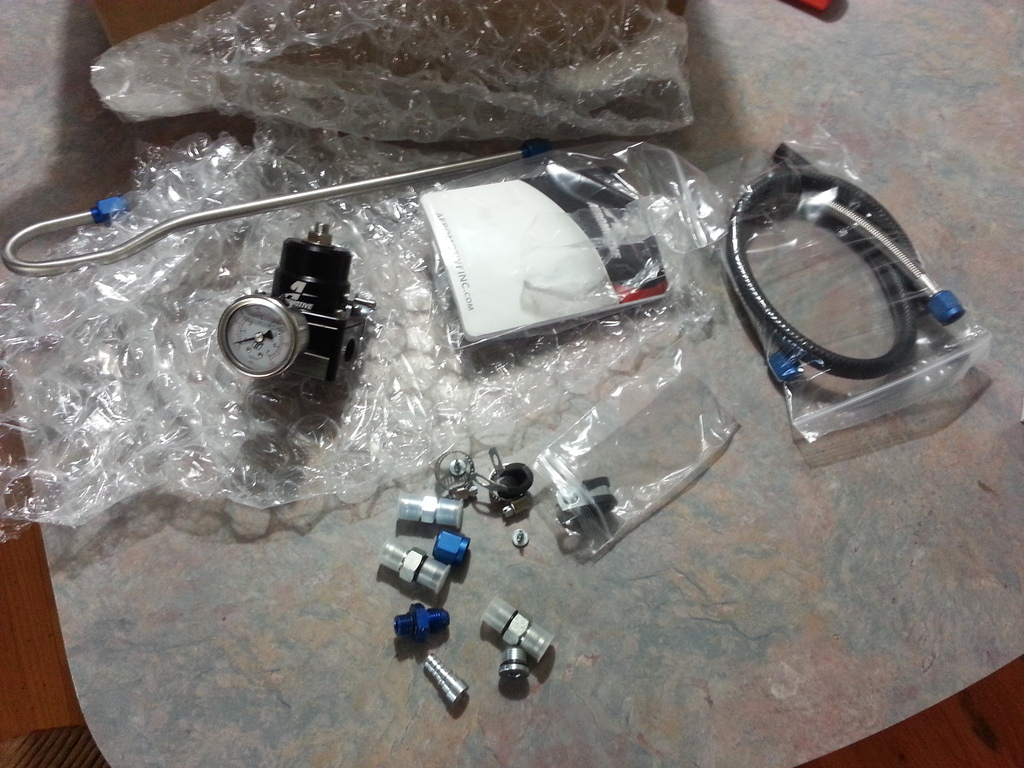
this is the Aeromotive fuel pressure I installed. I had ordered the whole kit from Driftmotion.com. It was listed for the 1jz gte but did not say if it did or did not work with the vvti. We'll is certainly Does Not. The prebent hard line they send to run towards the back of the motor tucked in by the intake manifold doesn't fit close to the way it should. Not really big deal just mean I spent more money then needed and had to make my own line to go from the fuel rail to my Regulator. All that's left is to weld a small bracket of Aluminum to the intake manifold to bolt the regulator to. Had to remove the throttle body to get the stock regulator and install the fitting needed to go from 12mm threads to AN6 hose.
Once installed with just the fuel pump running and no vac line connected I turned it down to 38-39 psi. Connected the vac/boost line started the motor and brought me down to about 34psi. what an UNBELIEVABLE difference it made. Instantly it idled smoother, throttle response was much snappier and really feels like I picked up some more torque on the low end. It's no longer getting double the amount of fuel it wants and can actually burn everything being fed to it.

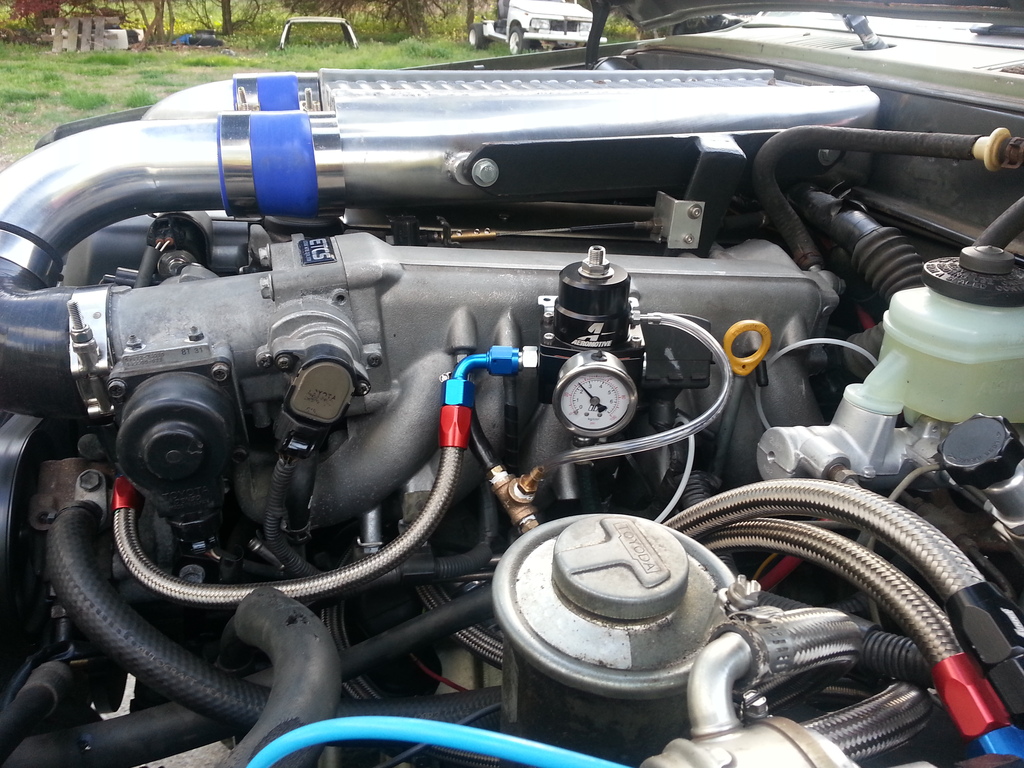
Once installed with just the fuel pump running and no vac line connected I turned it down to 38-39 psi. Connected the vac/boost line started the motor and brought me down to about 34psi. what an UNBELIEVABLE difference it made. Instantly it idled smoother, throttle response was much snappier and really feels like I picked up some more torque on the low end. It's no longer getting double the amount of fuel it wants and can actually burn everything being fed to it.
 Jun 4, 2015 | 08:18 AM
#212
Thread Starter
Registered User
Joined: May 2010
Posts: 415
Likes: 6
From: Anne Arundel,MD
I turned my fpr down just 2 more pounds to 32psi at idle. Very responsive reaches red line much quicker when I rev 1st and 2nd gear. I don't wanna lean it anymore with out adding a air/fuel ratio monitor which I do not plan on spending the money for anytime soon. I'll be pulling the trans out this weekend to replace a bad bearing that I'm tired of listening to going down the road
Jul 25, 2015 | 04:02 AM
#215
Thread Starter
Registered User
Joined: May 2010
Posts: 415
Likes: 6
From: Anne Arundel,MD
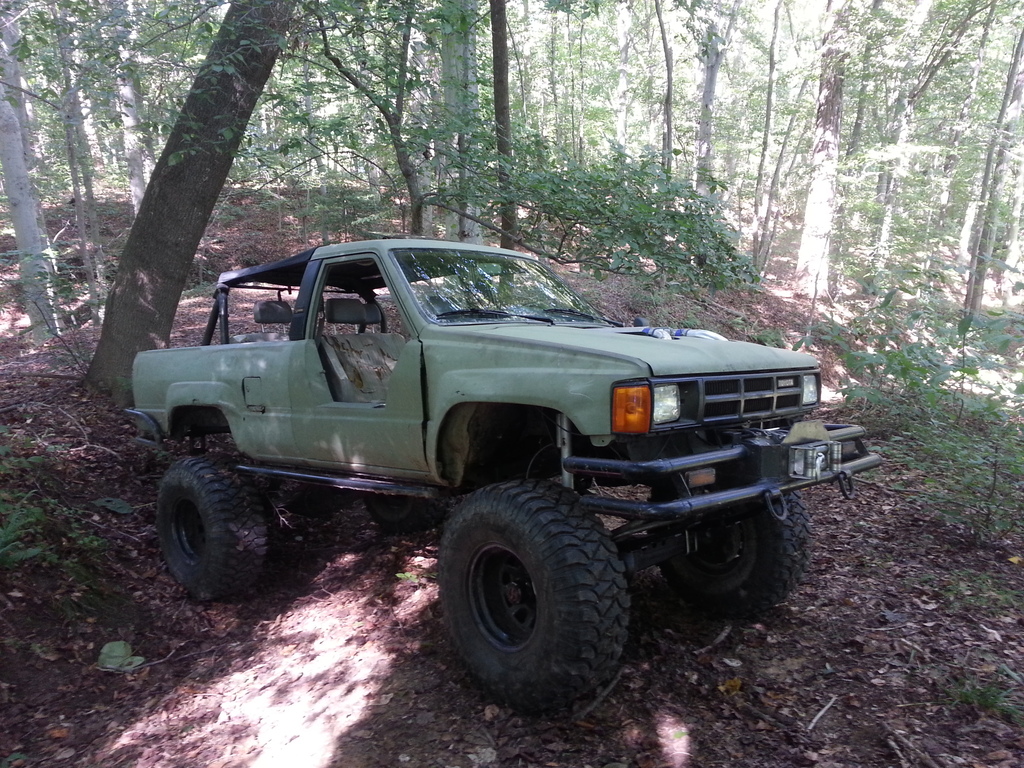
Yeah it's actually not even in this thread. I put them on years ago when I built it the first time. I bought the sliders and my tube doors together from "4xinnovations". Really an awesome company in my opinion. When I bought from him he was starting out but he's def upgraded his website and line of products since then.
Jul 25, 2015 | 04:42 AM
#216
Thread Starter
Registered User
Joined: May 2010
Posts: 415
Likes: 6
From: Anne Arundel,MD
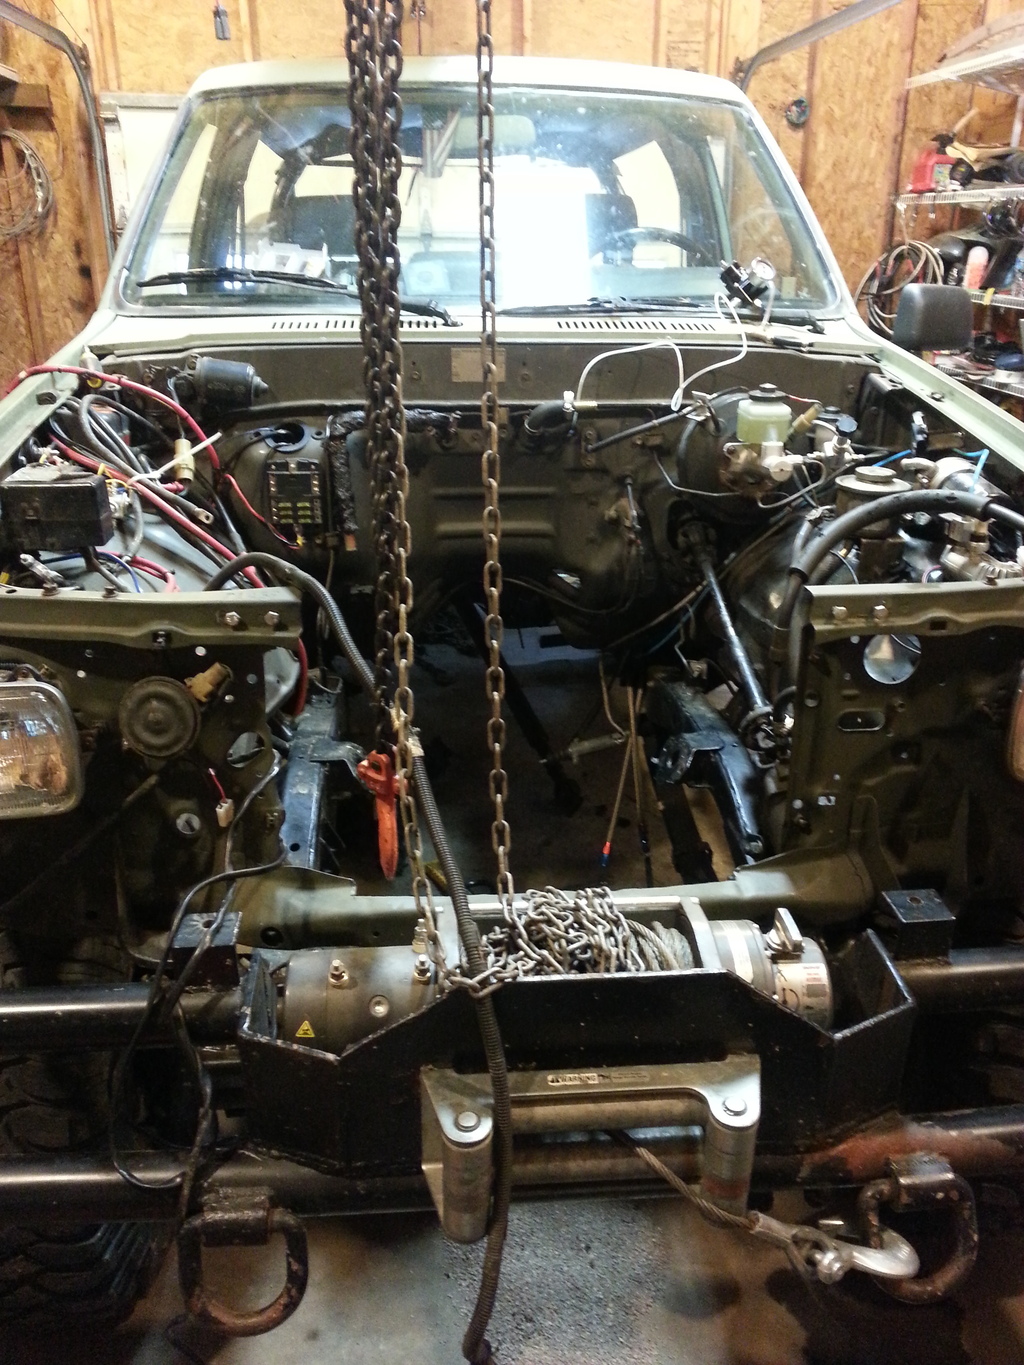
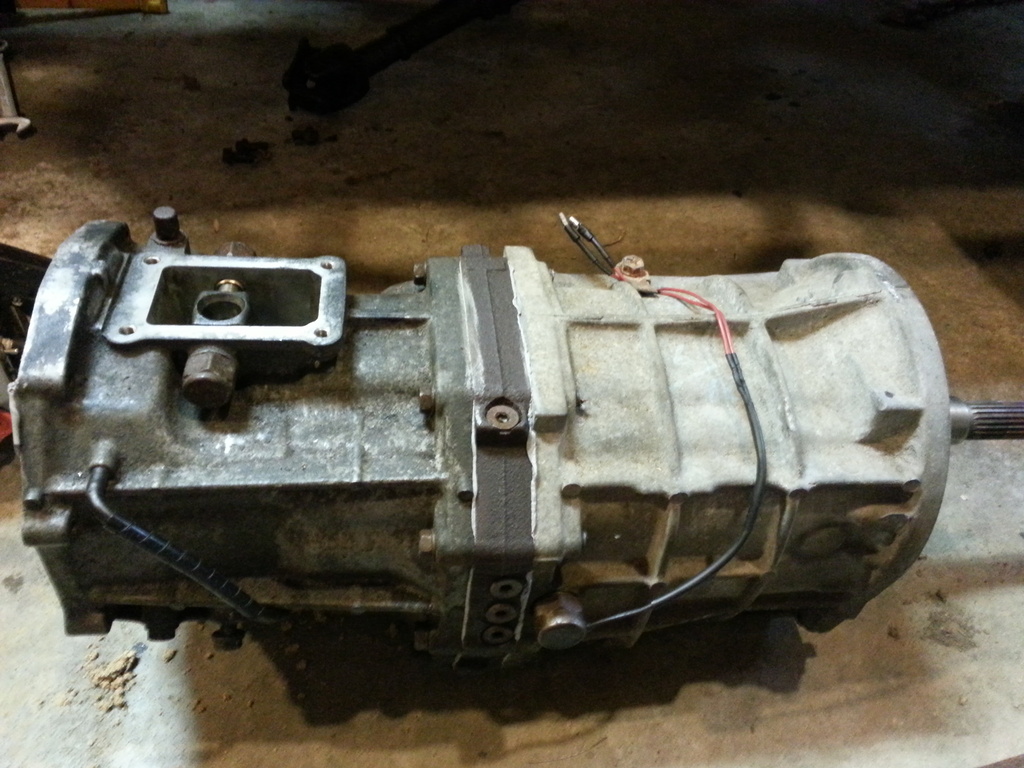
On a side note. This is the current state of my Runner. The main input bearing finally got bad enough and too loud that I finally had to pull the trans out. Trans guy said he could not break it down due to the rust that had siezed some components from when it sat in the junkyard full of rain water.
Luckily enough I found another one out of a running truck that rusted out at 120,000 miles.
It's such a tight fit in the Runner I had to pull the whole motor and drivtrain assembly to get it.
Luckily enough I found another one out of a running truck that rusted out at 120,000 miles.
It's such a tight fit in the Runner I had to pull the whole motor and drivtrain assembly to get it.
Sep 12, 2015 | 07:00 AM
#217
Thread Starter
Registered User
Joined: May 2010
Posts: 415
Likes: 6
From: Anne Arundel,MD
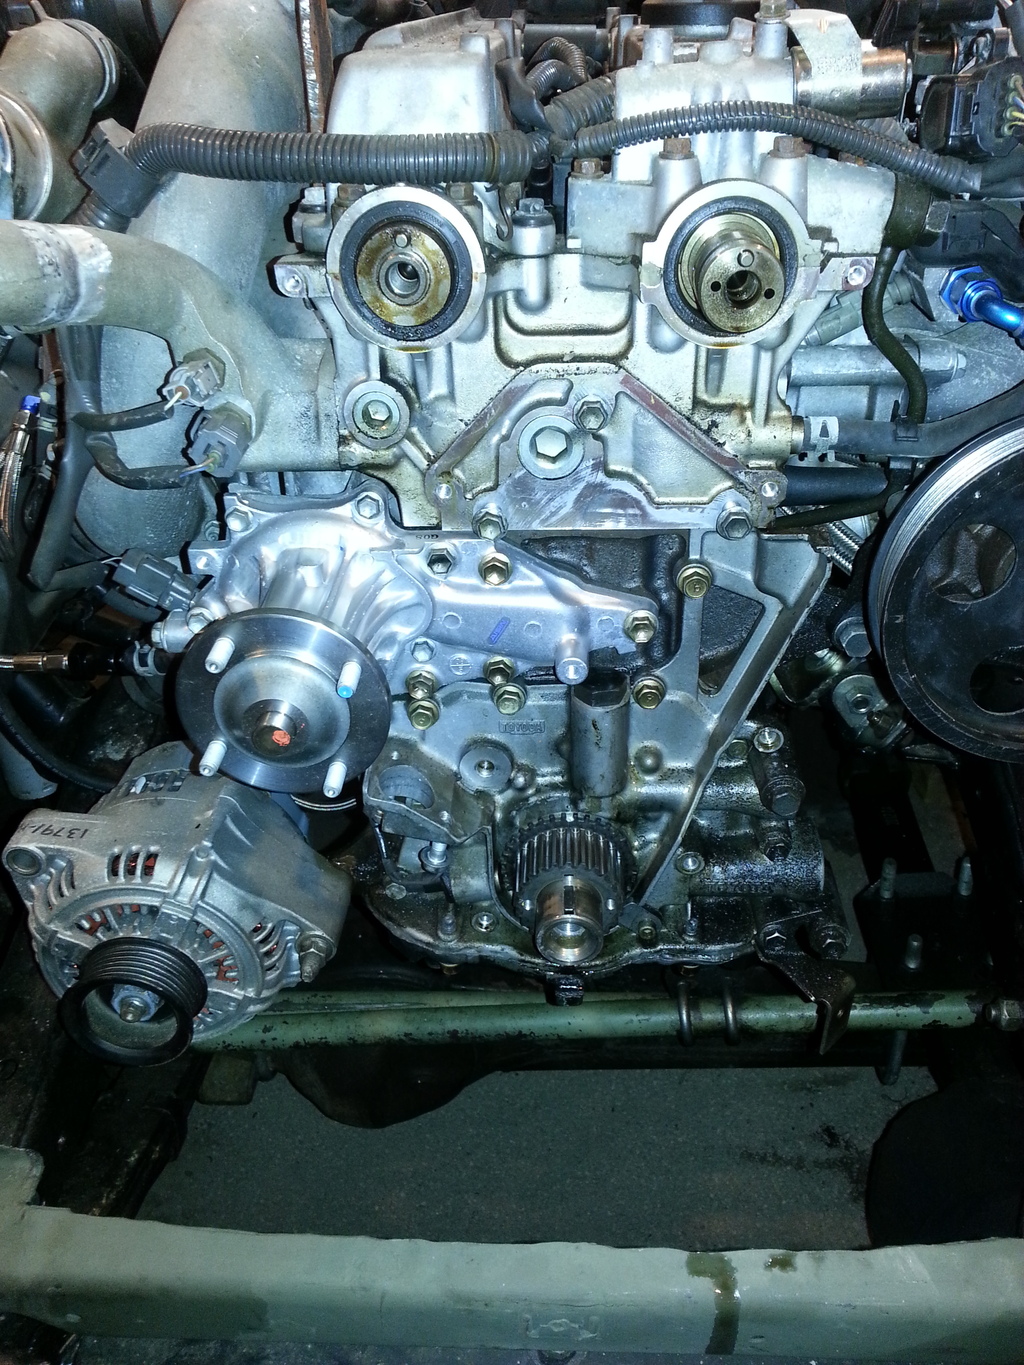
So it has been awhile. Everything is back together been driving for a few weeks now. Just some updates, for the motor I did. When the motor was in prior to taking apart I noticed an oil leak. I thought it was just the lower oil pan gasket. But once the motor was out and got a better look and doing some reading on forums I realized I had a much bigger problem. A lot of people it seems with the JZ motors have a problem with the oil pressure relief plug and seal on the top side of the oil pump. 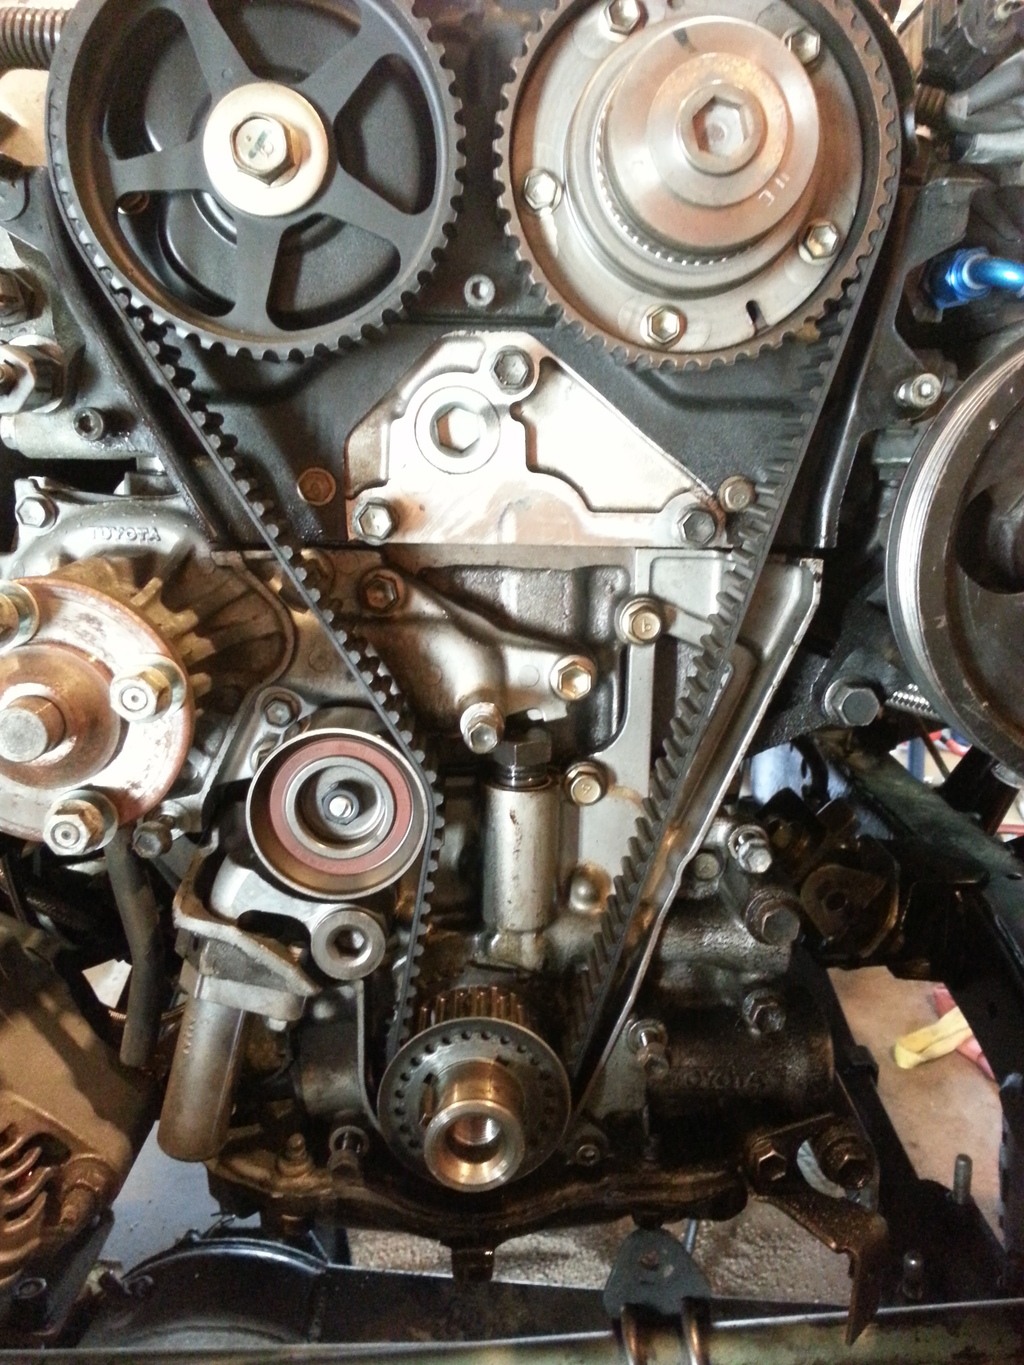 People who use generic Orings around the plug seem to have the leak return so I found a genuine Toyota part to replace it. Once I realized what all has to be done just to get the plug out. I decided to to do a full front end 100k service on the motor. The bag in the top of the picture is the part number for the Oring. Bag on the right is the plug
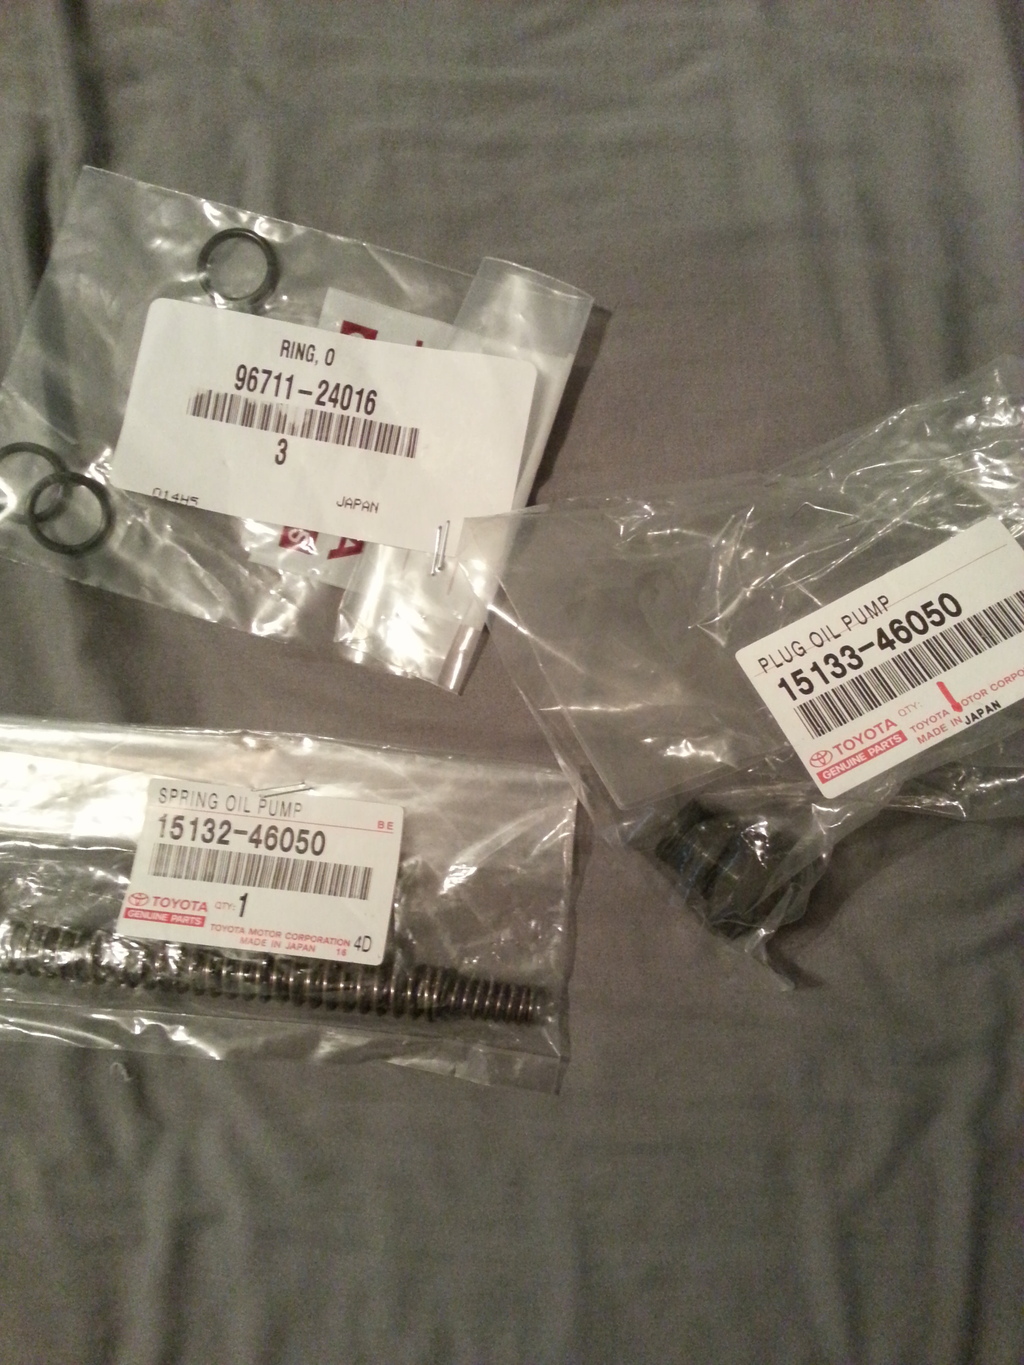
Also torque when reinstalling the new plug I belive was 20 or 22ft LBS.
People who use generic Orings around the plug seem to have the leak return so I found a genuine Toyota part to replace it. Once I realized what all has to be done just to get the plug out. I decided to to do a full front end 100k service on the motor. The bag in the top of the picture is the part number for the Oring. Bag on the right is the plug Also torque when reinstalling the new plug I belive was 20 or 22ft LBS.
Last edited by 8784 runner; Sep 12, 2015 at 07:26 AM.
Sep 12, 2015 | 07:25 AM
#218
Thread Starter
Registered User
Joined: May 2010
Posts: 415
Likes: 6
From: Anne Arundel,MD
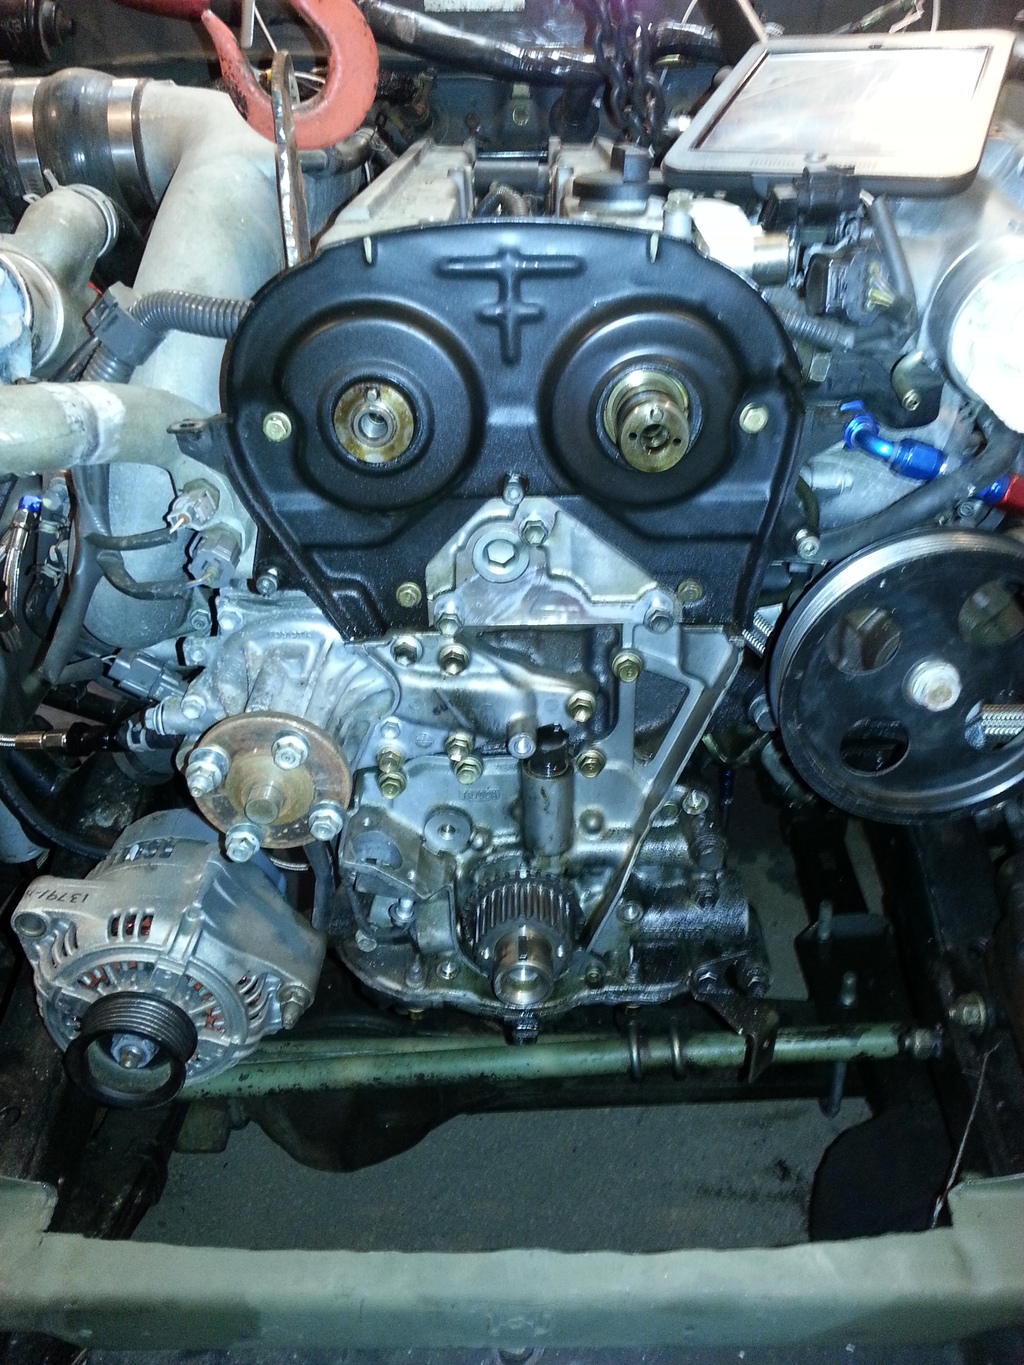
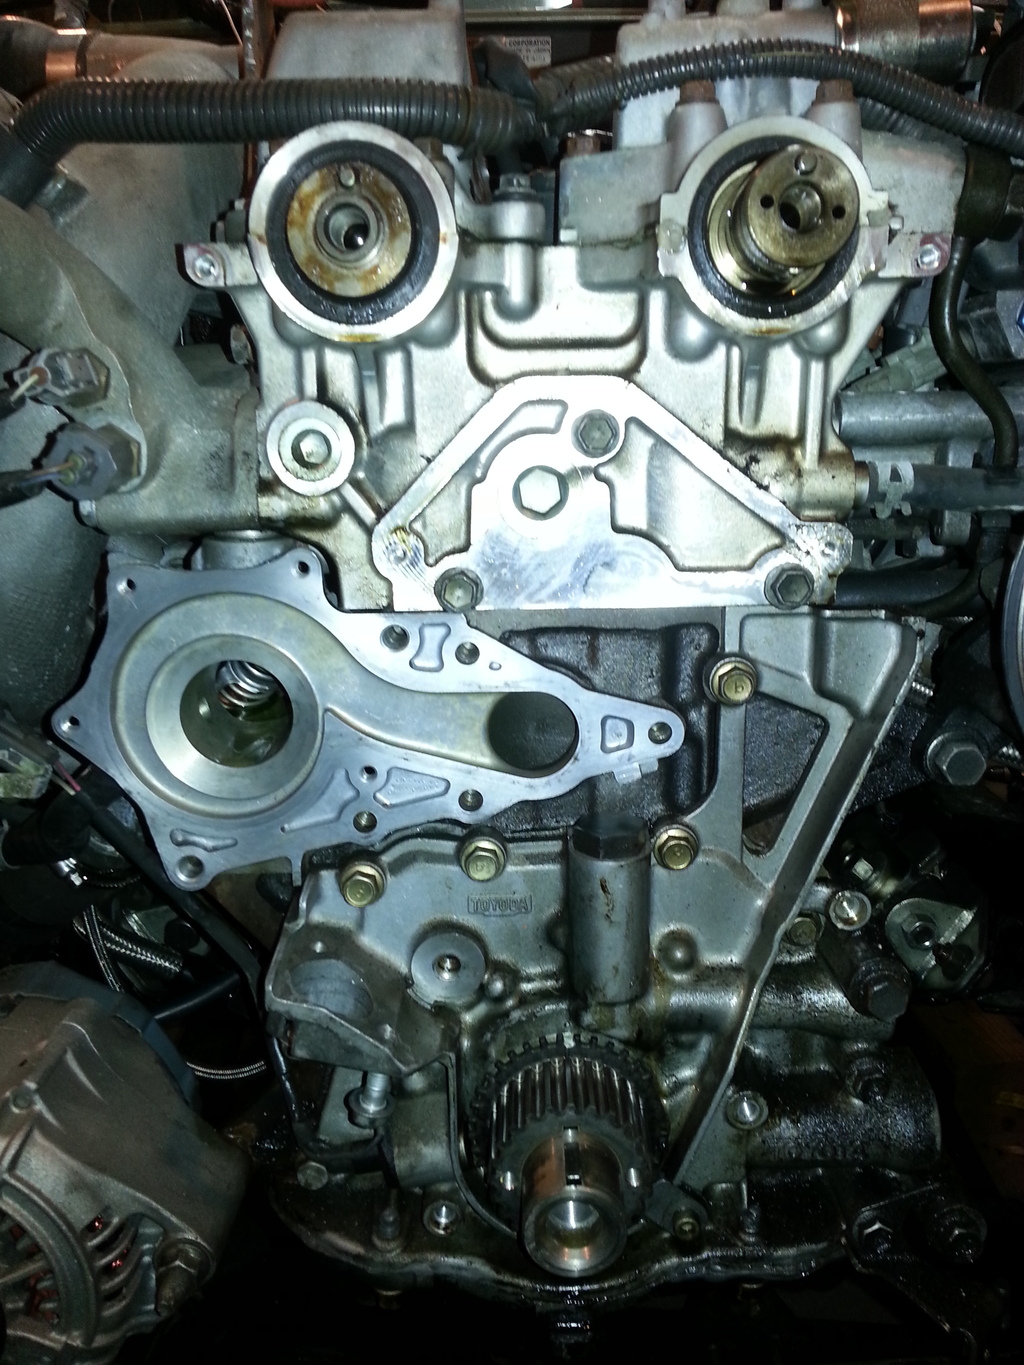
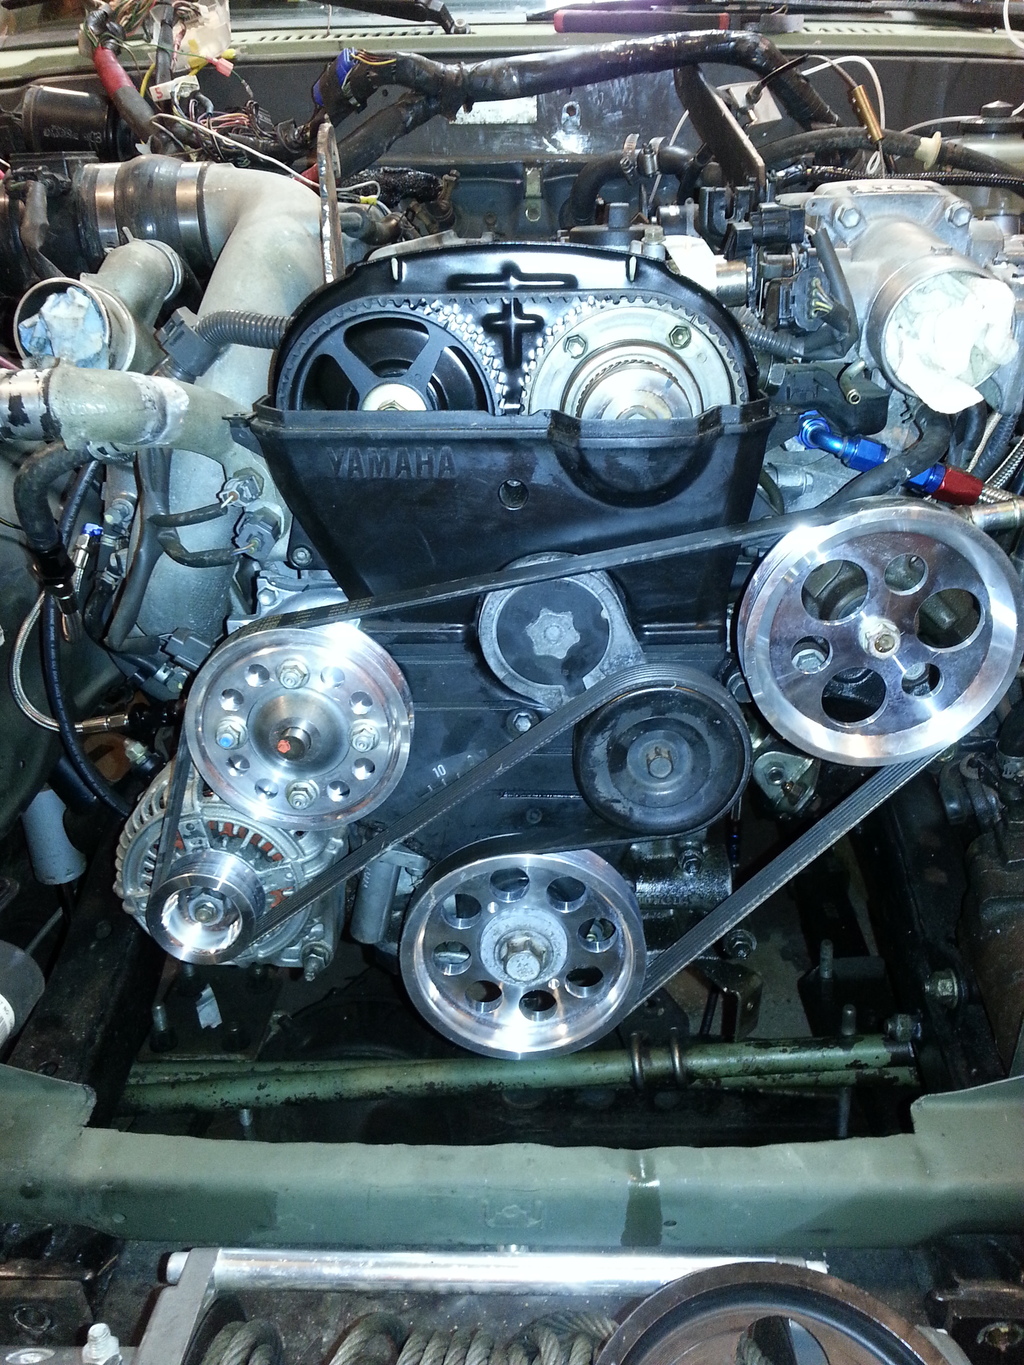
For the motor I did, New water pump Timing belt and timing belt idler pulley assembly with new bearing. I did not replace the tensioner New front main seal and front cam seal for intake and exhaust Aluminum pulley set The water pump for 1jzgte vvti was extremely hard to find in the states. They were on ebay out of Austraila but that all I could find. So while reading on forums I had read some dispute about a 2jz Supra water pump working. So to decide I just went and bought on from Autozone and it is an identical match. Except! The pulley bolt pattern is different so you will need a 2jz water pump pulley. All I replaced was the front pump not the entire housing. The seals are realitively simple just take time to do your timing correct in setting the cam gear marks to TDC when you take the cam pulleys off. 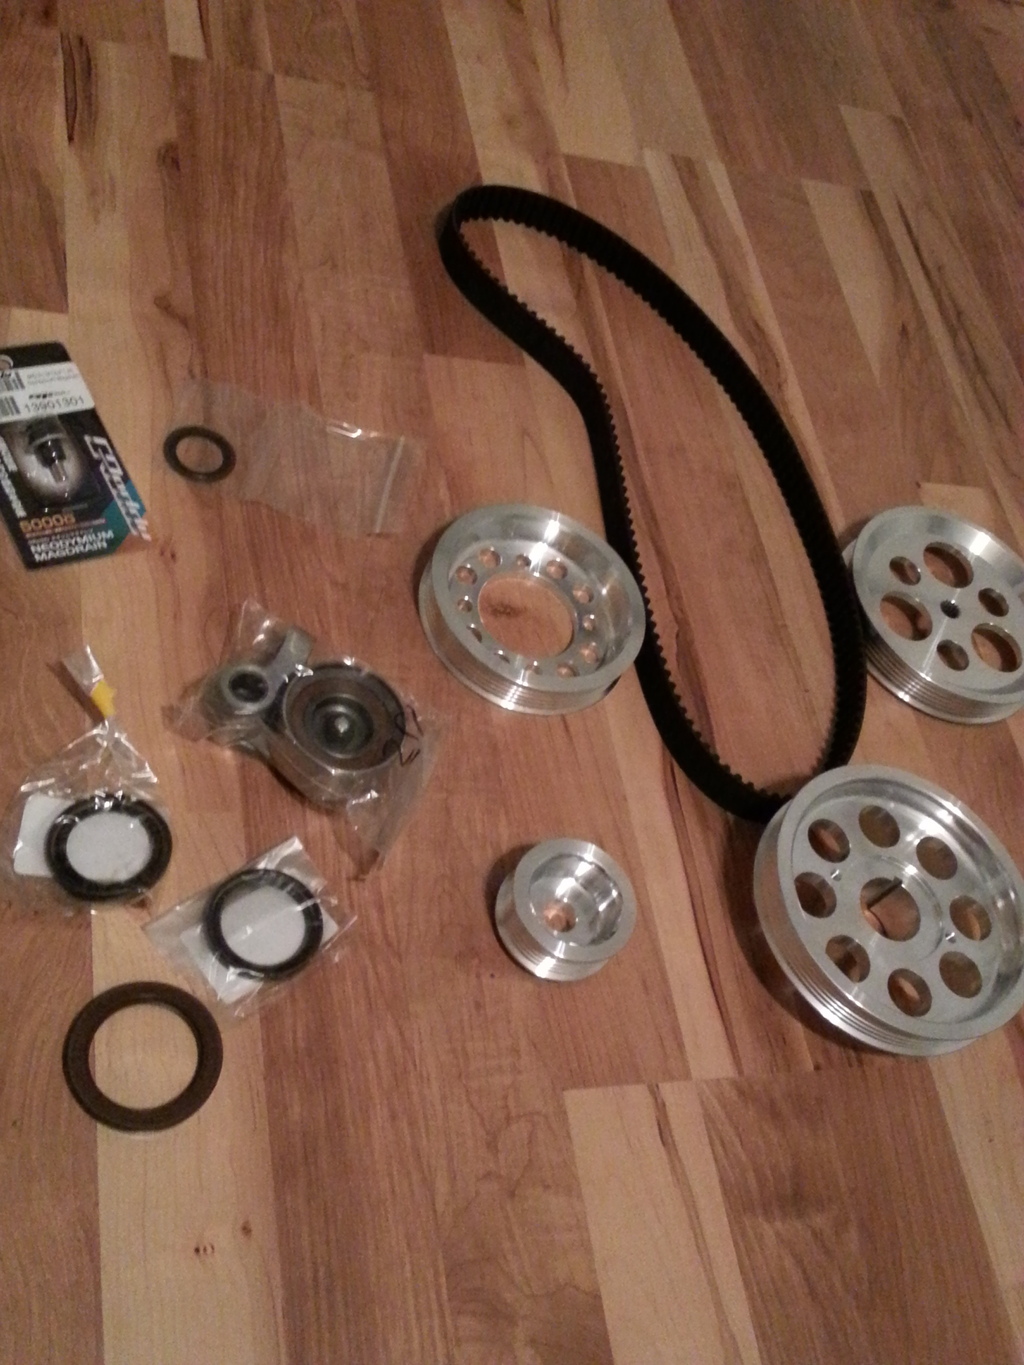

Last edited by 8784 runner; Sep 12, 2015 at 10:36 AM.
 May 13, 2016 | 03:12 AM
#220
Thread Starter
Registered User
Joined: May 2010
Posts: 415
Likes: 6
From: Anne Arundel,MD
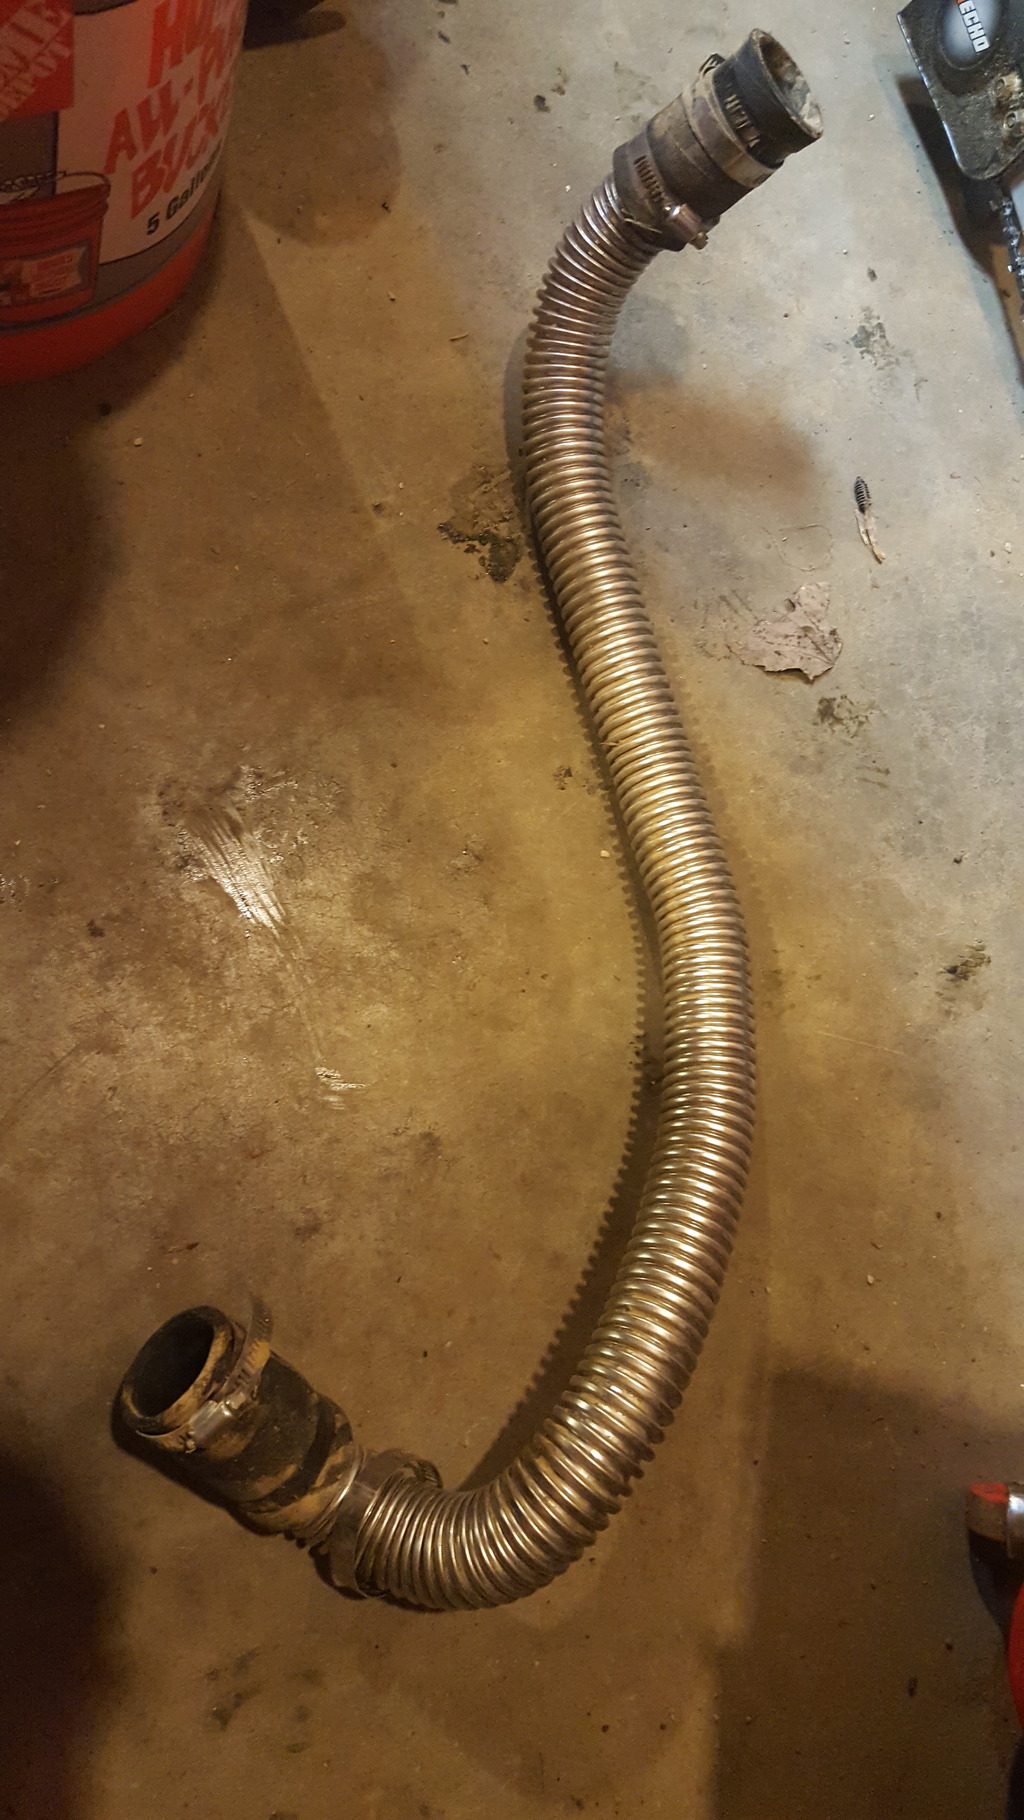
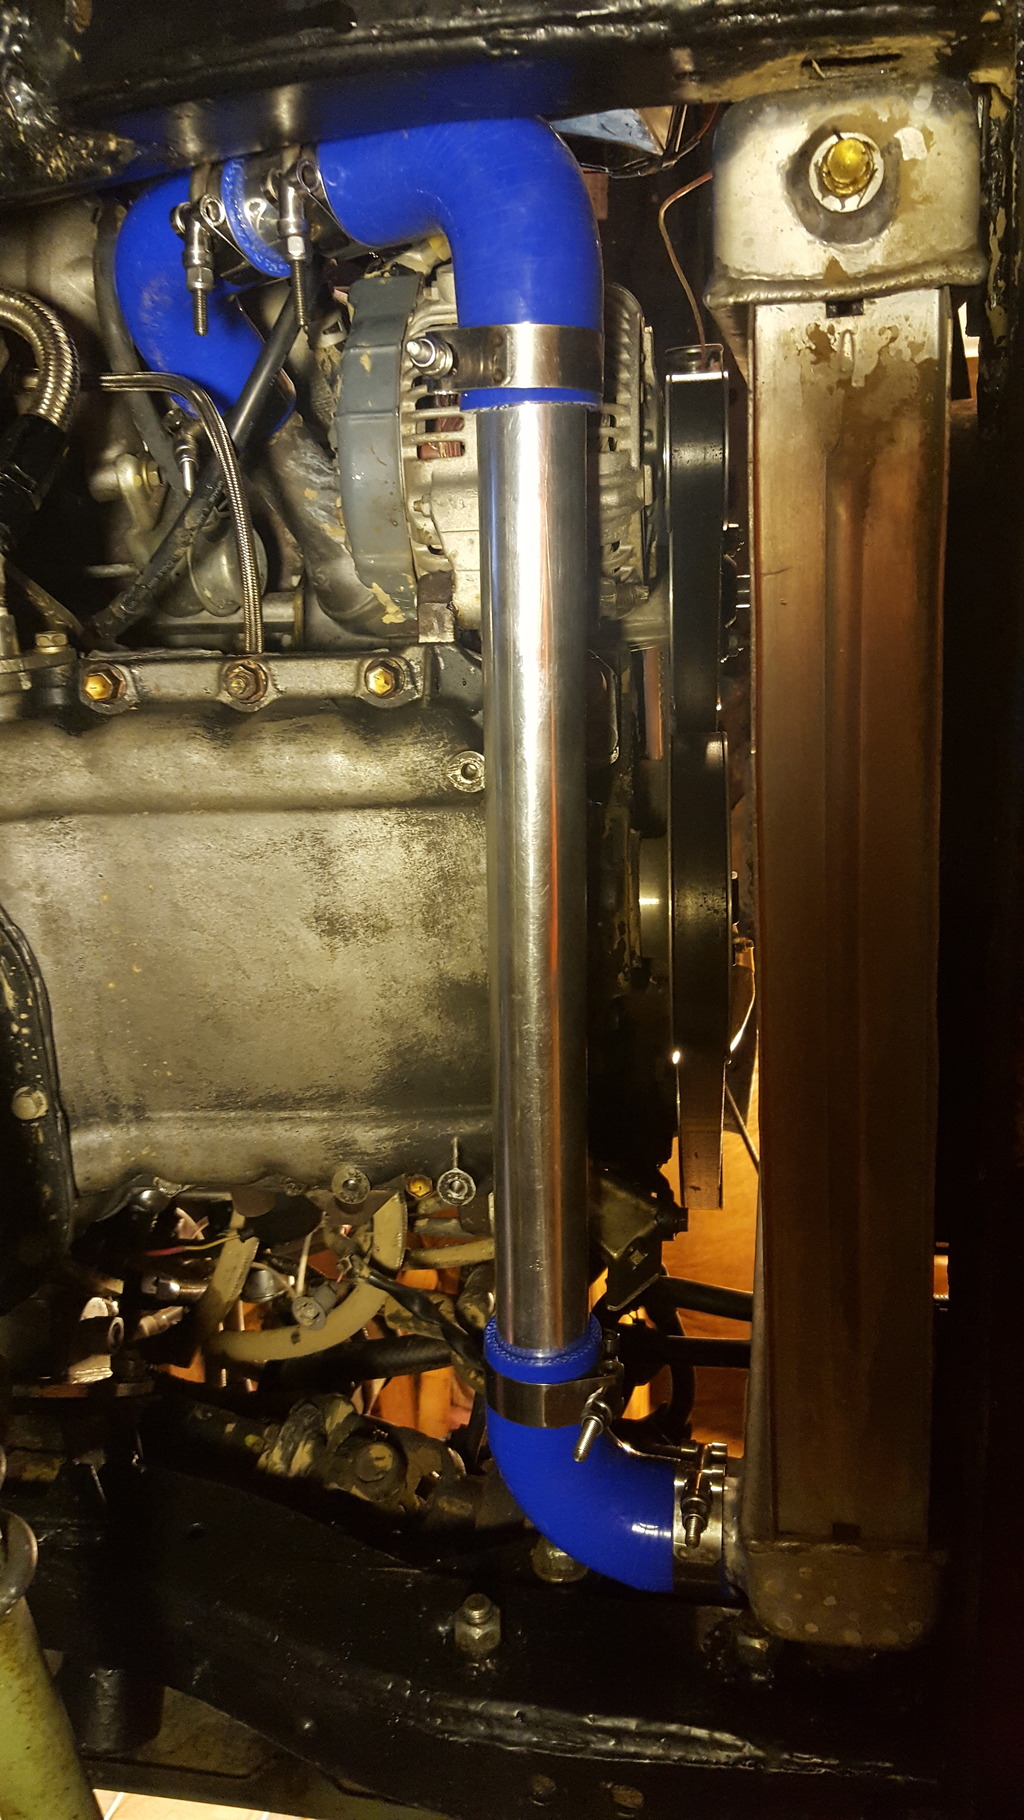
We'll since I had this on the road my coolant has been the stainless flex line with Rubber couplings which I did not really like or trust since it always leaked no matter what I did but at the time it was quick,cheap and easy. So I finally ordered some fittings and pipe and replaced it with a much more reliable setup. Some 1 1/2" 90's and 2ft of aluminum pipe with stainless steel clamps. I doesn't half to worry about this blowing out on me going down the road. I'll be posting some pics soon and posts soon. Recently had to tear the transfer case out and some minor tabs and perches came so I can roll my pi�on angle in the rear and build my own trac bar!!
Last edited by 8784 runner; May 13, 2016 at 03:13 AM.


