Replacing 1989 22re Headgasket
 Nov 11, 2011 | 08:55 PM
#41

Registered User
Joined: Nov 2006
Posts: 730
Likes: 2
From: Indiana
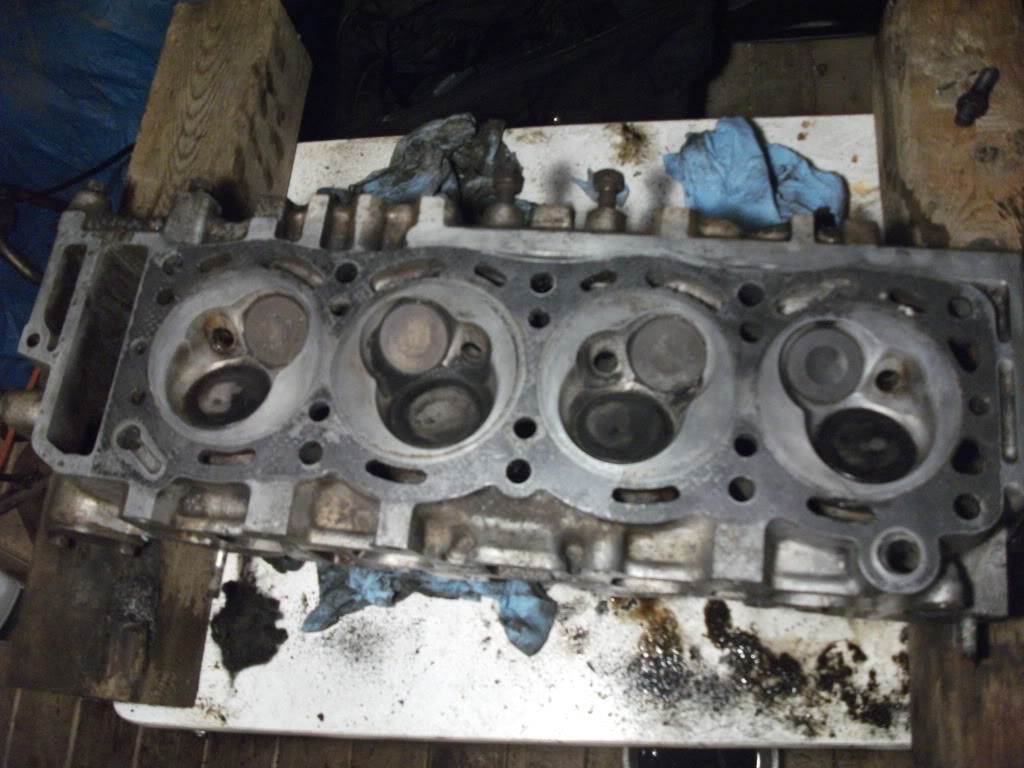
That's the coating that was on the head gasket it looks like, just get a razor blade scraper and scrap it off, but don't put any gouges in the aluminum, go slow and scrap flat and evenly, it looks like coating they apply to the the inner metal core of the old head gasket to aid in sealing...
Last edited by john4wd; Nov 11, 2011 at 09:04 PM.
Nov 11, 2011 | 09:23 PM
#42

Thread Starter
Registered User
Joined: Jul 2011
Posts: 108
Likes: 0
From: Atlantic Canada
Alrighty, I'll try a razor blade tomorrow. Yeah I plan to clean the block as well. How well its cleaned all depends on how cold it is, lol. I'll stuff the rags and check the flatness. You're right, the manual was very helpful. Yes it will be much easier, doing things for the second time come spring! I'll be getting the OEM HG and I'll look into what gaskets, etc are recommended for certain things and such. Your helps much appreciated 
Getting the head off gave me a good confidence boost, not sure I could have done it without you guys
Getting the head off gave me a good confidence boost, not sure I could have done it without you guys
Nov 11, 2011 | 10:01 PM
#43
Registered User
Joined: Nov 2006
Posts: 730
Likes: 2
From: Indiana
My head was new from engnbldr and my block was scraped clean but sill has some stains and I too used scotch brite pads to clean it also but it had stains/discoloration I could not remove, so I used brake cleaner since it down't leave residue and got it as clean as possible then straight edge the block and got lucky and it was almost perfectly flat. so I put dabs of sealant on top of seam where TC cover meet the block, put the gasket on, I used a trick and cut heads off 2 old head bolts and used them as guides to position the head gasket and the head, and removed those old headless headbolts after I put 2 new head bolts I got from Engnbldr in and threaded all the way but not tight and put the rest of the new engnbldr headbolts so all new head bolts to the bottom of the heads and torqued them down in the sequence in 20 lbs. incriments till they all were 60 lbs and then put in the bolts that attaches head to TC and that was it for that day, next day started to put everything together, I left valve cover off till almost last and just put plastic over it and the rocker assembly to keep junk out, and be sure to used assembly lube liberally on the cam lobes for engine start up...
Last edited by john4wd; Nov 13, 2011 at 02:01 PM.
Nov 12, 2011 | 03:31 AM
#44
YotaTech Milestone-Two Millionth Post
Joined: Jan 2009
Posts: 12,009
Likes: 122
From: Northeast Pennsylvania
hiya....looks like a good time.
I made a pretty good write-up about my rebuild (THREAD B in my sig).
so I will be subscribing as well in case there's anything I can add.
Nothing quite like doing this kinda job yourself. I say this from experience.
also...if you have time as a luxury....slow down and be precise. read, ask and ask 10 more times. I did. I was shakey darts on everything I did becasue I honestly had no clue what I was doing.
post lots and lots of pics.
Nov 12, 2011 | 04:40 AM
#45
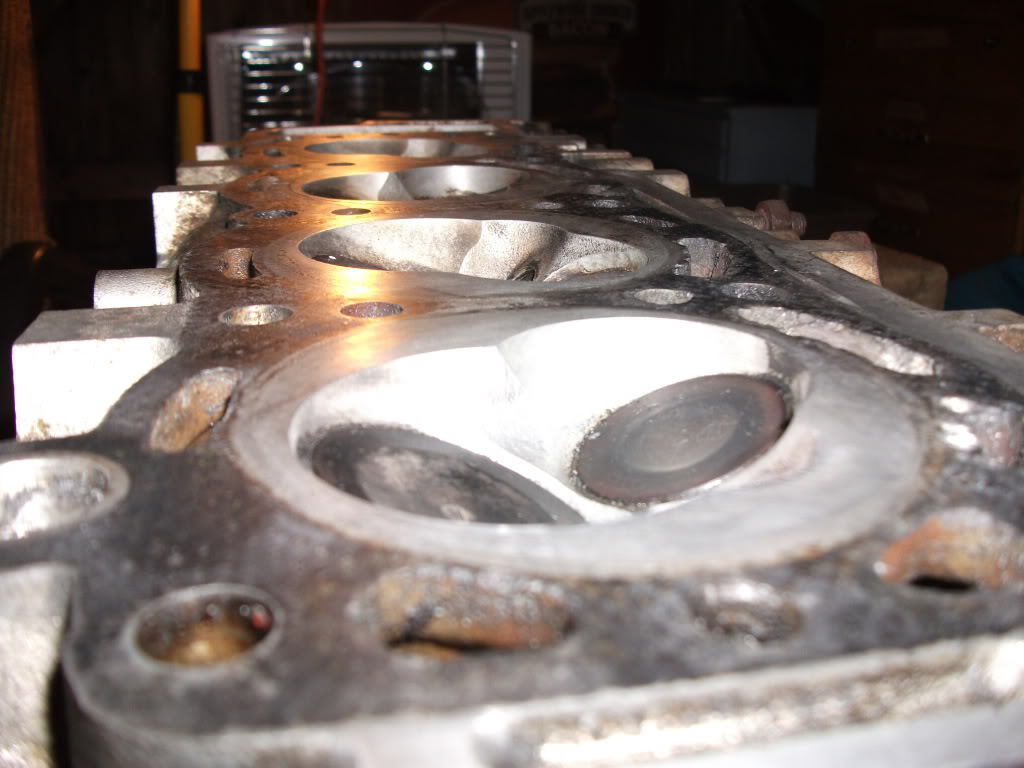
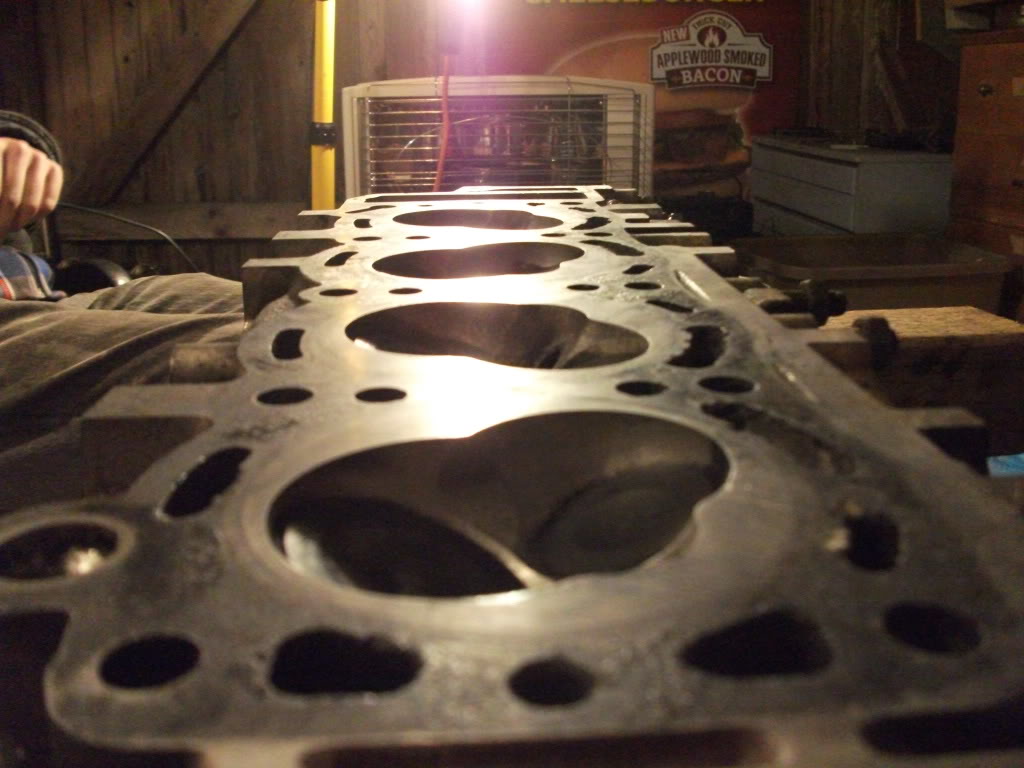
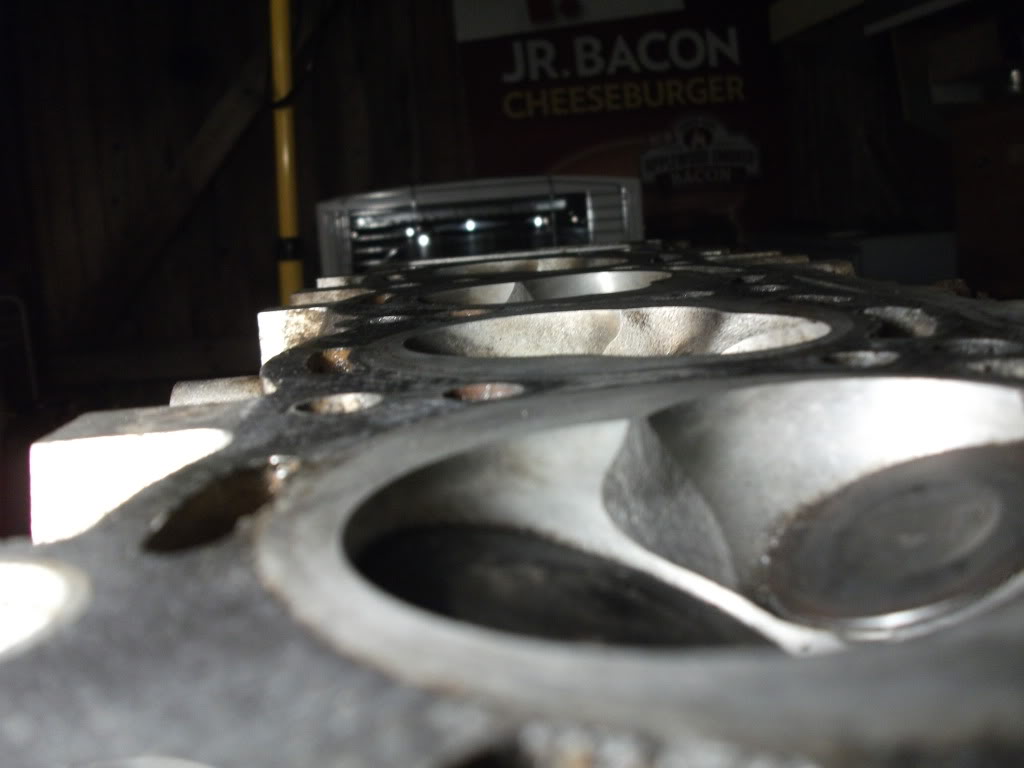
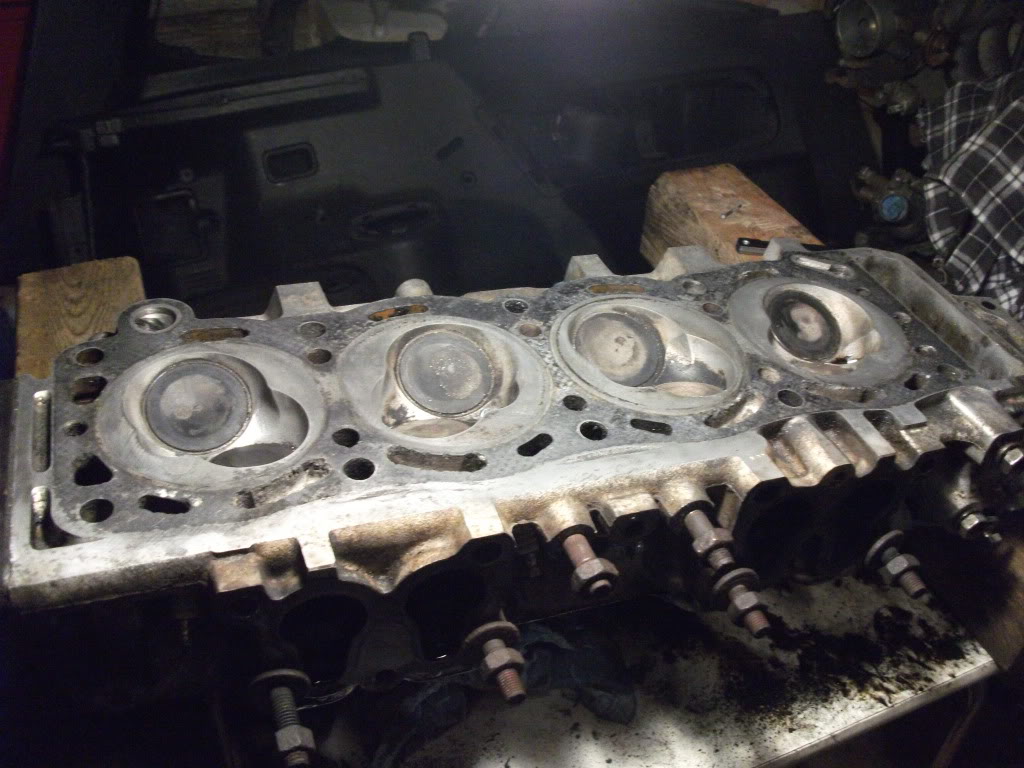
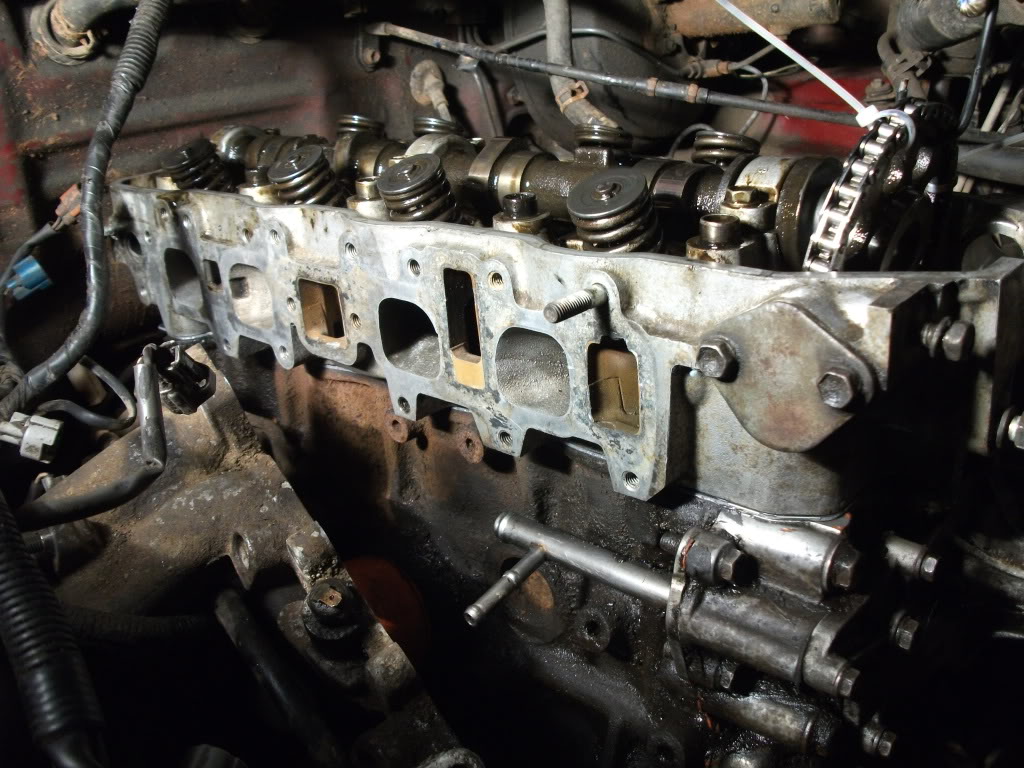
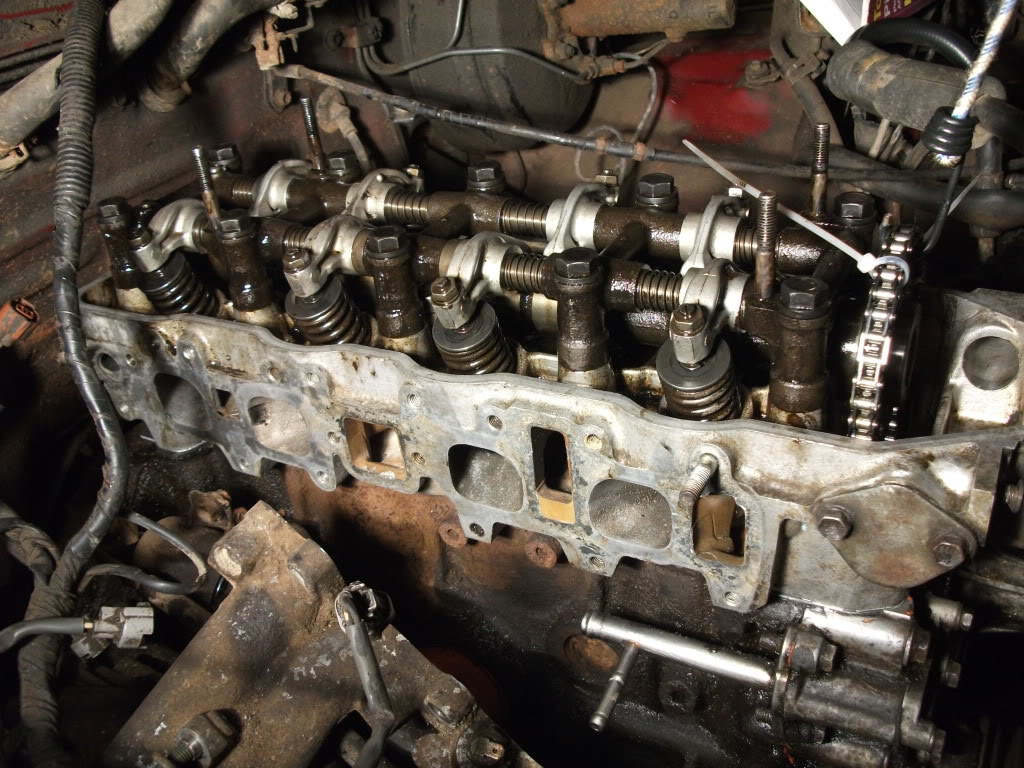
That head concerns me. Those spots where it looks like its "chipping" are where i'm most concerned. It looks like the compression ring of the head gasket will fail at the water jacket. Also bosch plugs are garbage. Stick to denso or ngk. Send the head out to a machine shop, they should be able to tell you if its usable or not. Its hard to say because your close up pictures aren't very detailed, but I don't know if i'd run that head.
Nov 12, 2011 | 06:15 AM
#46
Registered User

Joined: Oct 2011
Posts: 258
Likes: 1
From: socal
I may have missed this but have you pulled the radiator yet or did you not bother? I'm running outside right now to get started on mine!
EDIT: Disregard! That's the very first thing you did! DUH
EDIT: Disregard! That's the very first thing you did! DUH
Last edited by thedrewski86; Nov 12, 2011 at 06:16 AM.
Nov 12, 2011 | 08:32 AM
#47


That head concerns me. Those spots where it looks like its "chipping" are where i'm most concerned. It looks like the compression ring of the head gasket will fail at the water jacket. Also bosch plugs are garbage. Stick to denso or ngk. Send the head out to a machine shop, they should be able to tell you if its usable or not. Its hard to say because your close up pictures aren't very detailed, but I don't know if i'd run that head.
 +1
Nov 12, 2011 | 10:07 AM
+1
Nov 12, 2011 | 10:07 AM
#48
Thread Starter
Registered User
Joined: Jul 2011
Posts: 108
Likes: 0
From: Atlantic Canada
Alright John, thats good to know
92 TOY, yeah I read through your threads for quite a while, helped a lot in convincing me I could do this Unfortunately time isn't really a luxury right now, I'm going to school full-time and will be working part time too soon.. Also need my car stored for winter, wanted it to be stored already, drove it through the last snow storm and salt..
  But I'm definitely asking plenty questions and taking pics.
vital22re and Ian, thats what I was worried about. I tried getting my camera to focus, but it wouldn't anymore, it sucks, lol.. even tried positioning my light differently. I do plan to tear down everything again after winter, so replacing the HG again anyway. Maybe it'd be fine til then? I could send the head away to a shop I know about out of town then and get everything done well. For now I'm going to clean the surfaces more and check for flatness
thedrewski86, yeah it was the first thing I did replacing it anyway so didn't even consider leaving it in.
92 TOY, yeah I read through your threads for quite a while, helped a lot in convincing me I could do this
Unfortunately time isn't really a luxury right now, I'm going to school full-time and will be working part time too soon.. Also need my car stored for winter, wanted it to be stored already, drove it through the last snow storm and salt.. But I'm definitely asking plenty questions and taking pics.vital22re and Ian, thats what I was worried about. I tried getting my camera to focus, but it wouldn't anymore, it sucks, lol.. even tried positioning my light differently. I do plan to tear down everything again after winter, so replacing the HG again anyway. Maybe it'd be fine til then? I could send the head away to a shop I know about out of town then and get everything done well. For now I'm going to clean the surfaces more and check for flatness
thedrewski86, yeah it was the first thing I did
replacing it anyway so didn't even consider leaving it in.
Nov 12, 2011 | 10:50 AM
#50
vital22re and Ian, thats what I was worried about. I tried getting my camera to focus, but it wouldn't anymore, it sucks, lol.. even tried positioning my light differently. I do plan to tear down everything again after winter, so replacing the HG again anyway. Maybe it'd be fine til then? I could send the head away to a shop I know about out of town then and get everything done well. For now I'm going to clean the surfaces more and check for flatness
Nov 12, 2011 | 11:30 AM
#51
Registered User
Joined: May 2011
Posts: 1,751
Likes: 0
From: pensacola FL
just a question, why would you tear it down again after winter? why not just do the major stuff, i.e timing chain, oil pump, headgasket and all that and just drive it till it needs it again? thats just my .02 cents
Nov 12, 2011 | 12:24 PM
#52
Thread Starter
Registered User
Joined: Jul 2011
Posts: 108
Likes: 0
From: Atlantic Canada
Well, I'm pretty sure the the previous owner replaced the water pump last year already. I'd need to take apart the timing chain cover to replace the chain and oil pump, would I? I think I'm avoiding that by suspending the Timing chain and sprocket in the air while I'm just replacing the head gasket. I just need it reliable for the winters, so thought maybe during the summer while I have a second vehicle, I could replace all the gaskets and things like water pump, etc.. but yeah I've been thinking of that, maybe I won't tear it back down until it needs it. Also I'm a little strained for time, and working in my driveway, not familiar with timing the engine with a new chain, and also short on more funds.
Nov 12, 2011 | 03:28 PM
#55
YotaTech Milestone-Two Millionth Post
Joined: Jan 2009
Posts: 12,009
Likes: 122
From: Northeast Pennsylvania
Nov 12, 2011 | 04:42 PM
#56
Thread Starter
Registered User
Joined: Jul 2011
Posts: 108
Likes: 0
From: Atlantic Canada
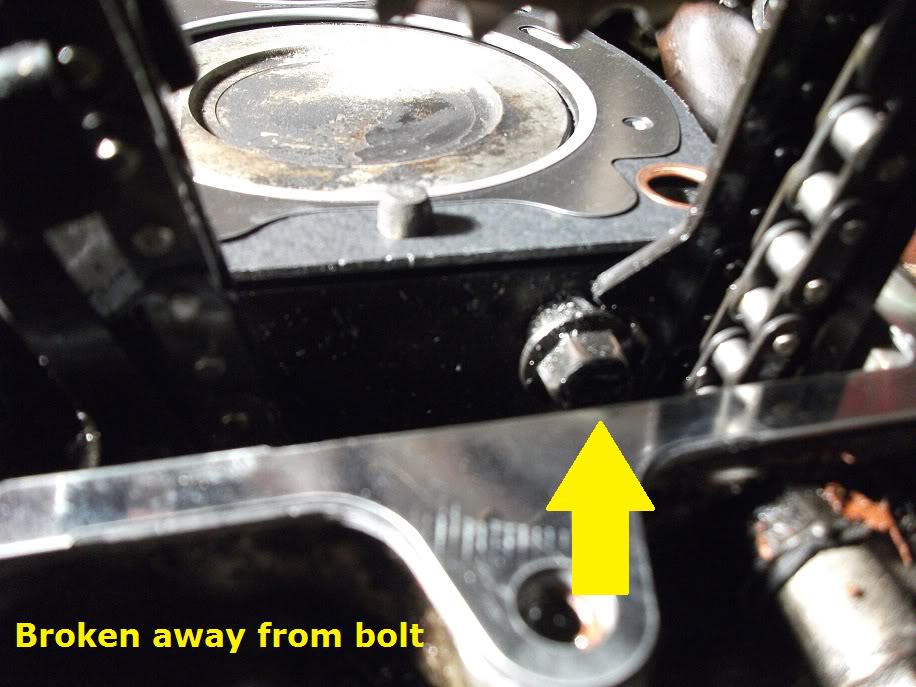
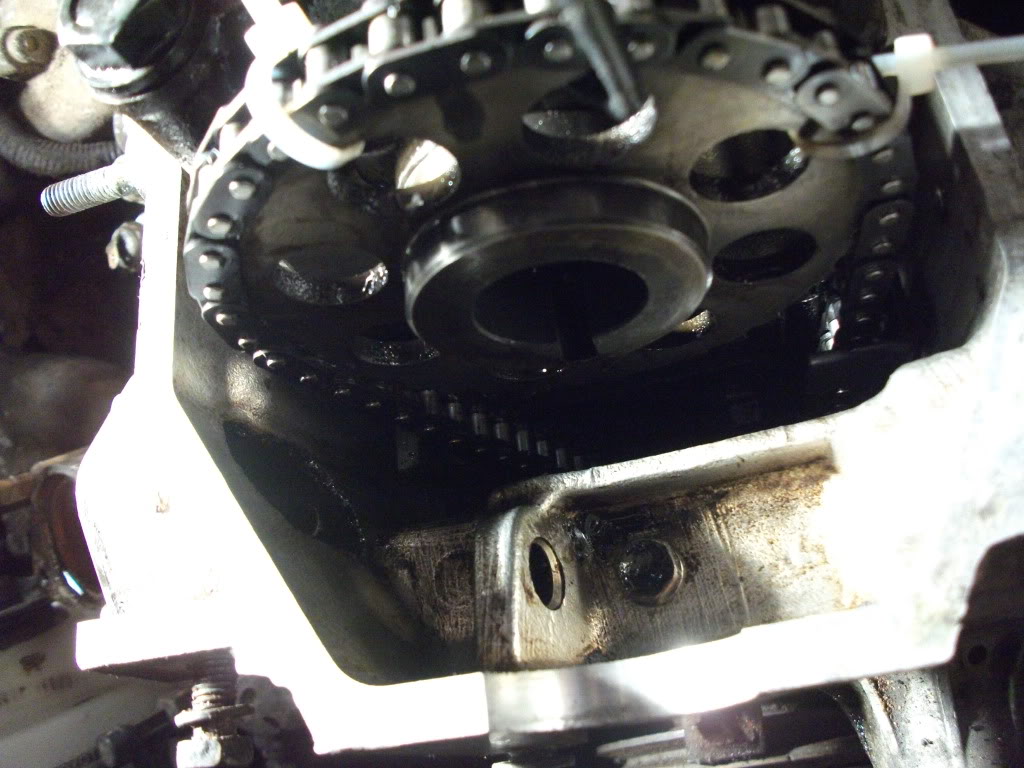
My guides are still all intact, you can see in one of the first pics i posted. just where the top bolt, holds the guide onto the head, its broke off there. so it hinges off the lower guide bolt. I had no milkshake, no fragments anywhere. drained oil, was free of fragments. I'm pretty sure only my head gasket is the problem right now..
Nov 12, 2011 | 04:44 PM
#57
Thread Starter
Registered User
Joined: Jul 2011
Posts: 108
Likes: 0
From: Atlantic Canada
I've got the head back on, with the sprocket in place (not bolted yet) with the head bolts torqued down. I just put in the Timing chain cover to head bolt, the hidden one that sits under the oil puddle. My manual says the torque reading on it should be 9 for 8mm T-cover bolts, and like, 30 for 10mm. But my bolt is 12mm? how much do I torque this bolt? EDIT: nvm found it, 7-11 ft lbs.
Last edited by 22r2tuff; Nov 12, 2011 at 06:00 PM.
Nov 13, 2011 | 12:15 PM
#58
Thread Starter
Registered User
Joined: Jul 2011
Posts: 108
Likes: 0
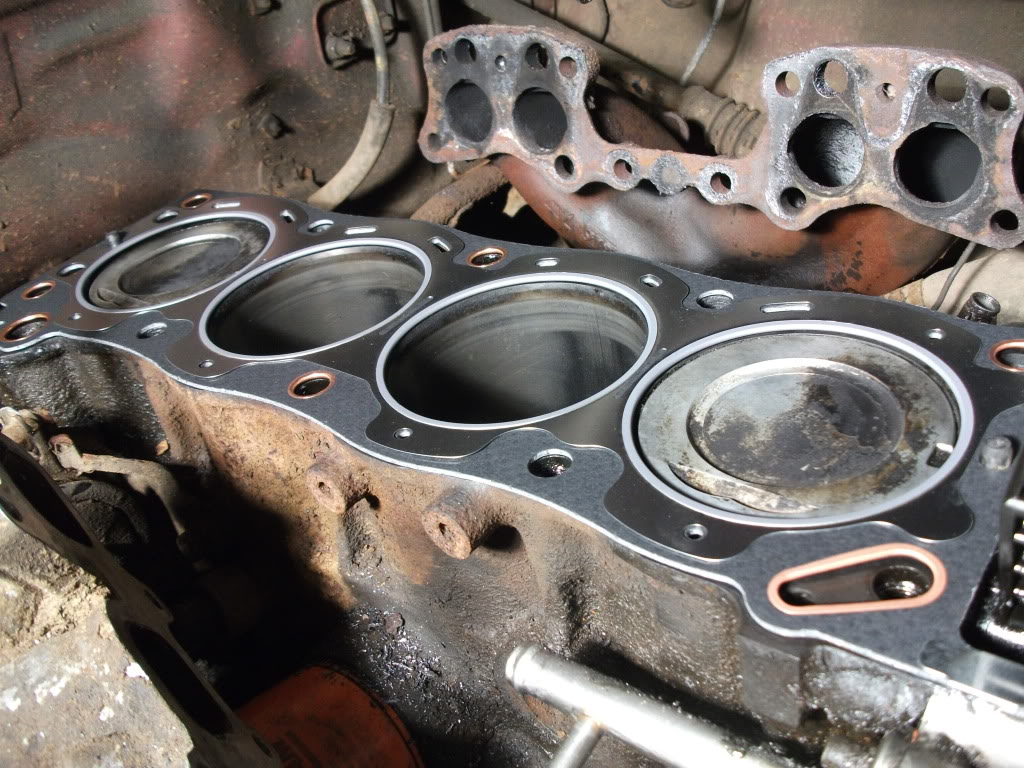
From: Atlantic Canada
update.. pics from last night. got the head on and rocker arm assembly thing on, power steering bolted back on. trying to put on the air tubes from behind the head now.. having a really hard time. forgot to take a picture of the block surface before the new HG was set on.. it looked much better than the head surface after scraping and cleaning.. used a shop vac on it as well. I torqued the head bolts to 58ft lbs. Put in new NGK spark plugs.. scraped intake and exhaust manifold surfaces.. i think thats about it.